![[Official FaceRig Guide] Export Movie From Performance Tutorial for FaceRig](https://steamsolo.com/wp-content/uploads/2021/07/official-facerig-guide-export-movie-from-performance-tutorial-facerig.jpg)
Overview
This guide describes the steps for exporting a movie from FaceRig.
Introduction
FaceRig uses a proprietary file format (.rpl) for recorded performances. These files can only be replayed in FaceRig. The purpose of these files is replaying a performance with a different setup than it was recorded and visualizing the performance in real-time with any mix of avatars, props, backgrounds, light tuning, post process effects, etc.
After you have chosen your setup on a recorded performance, you can export it into a .webm video file or a different format (by selecting a different encoder), which can be played in any video player having the necessary codecs installed.
Steps
1. Switch to Advanced Ui then Click Record Performance button.

2. Perform, play with the avatar, be a star! 🙂
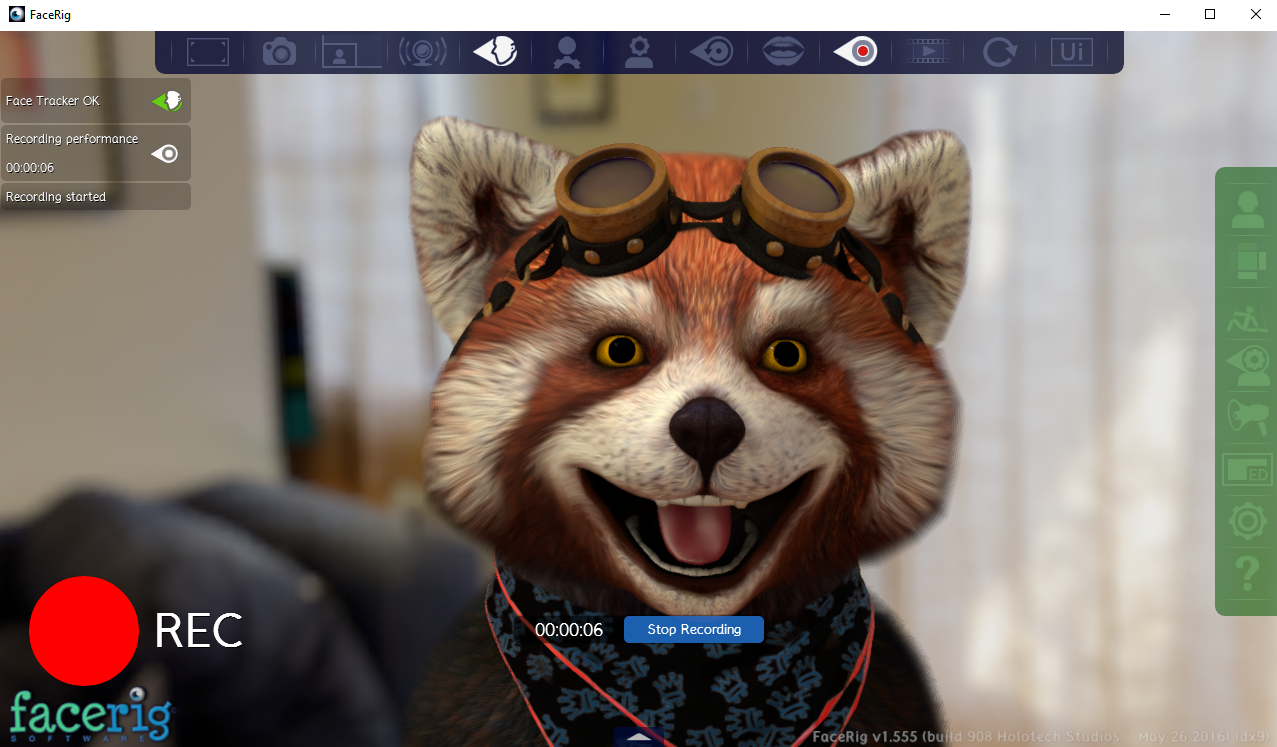
3. Click the Stop Recording button when you want to end the recording.
4. You will be asked where to save your performance as a .rpl file
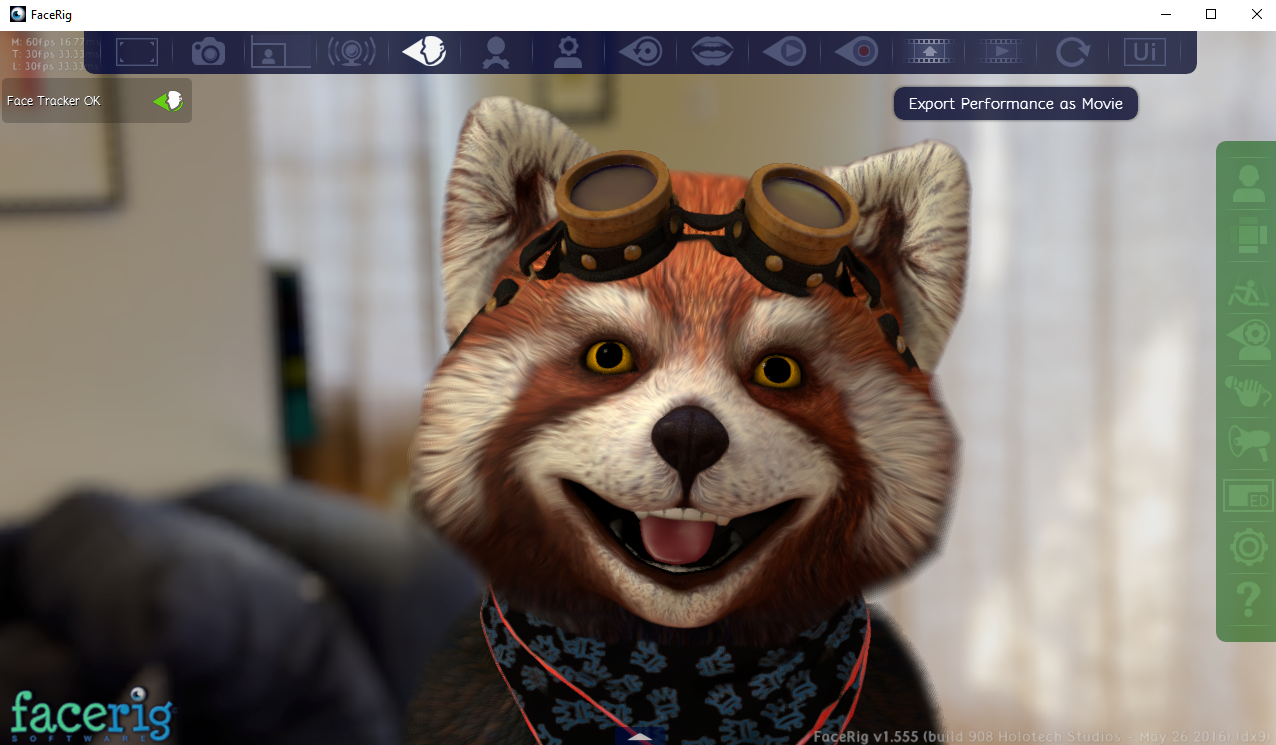
5. Click on Play Performance button and choose your video and If you are satisfied with your recording on your desired avatar and background go to step 6. If not, don’t worry practice makes better, go to step 1.

6. Click the Export Performance as Movie Button, from the upper menu

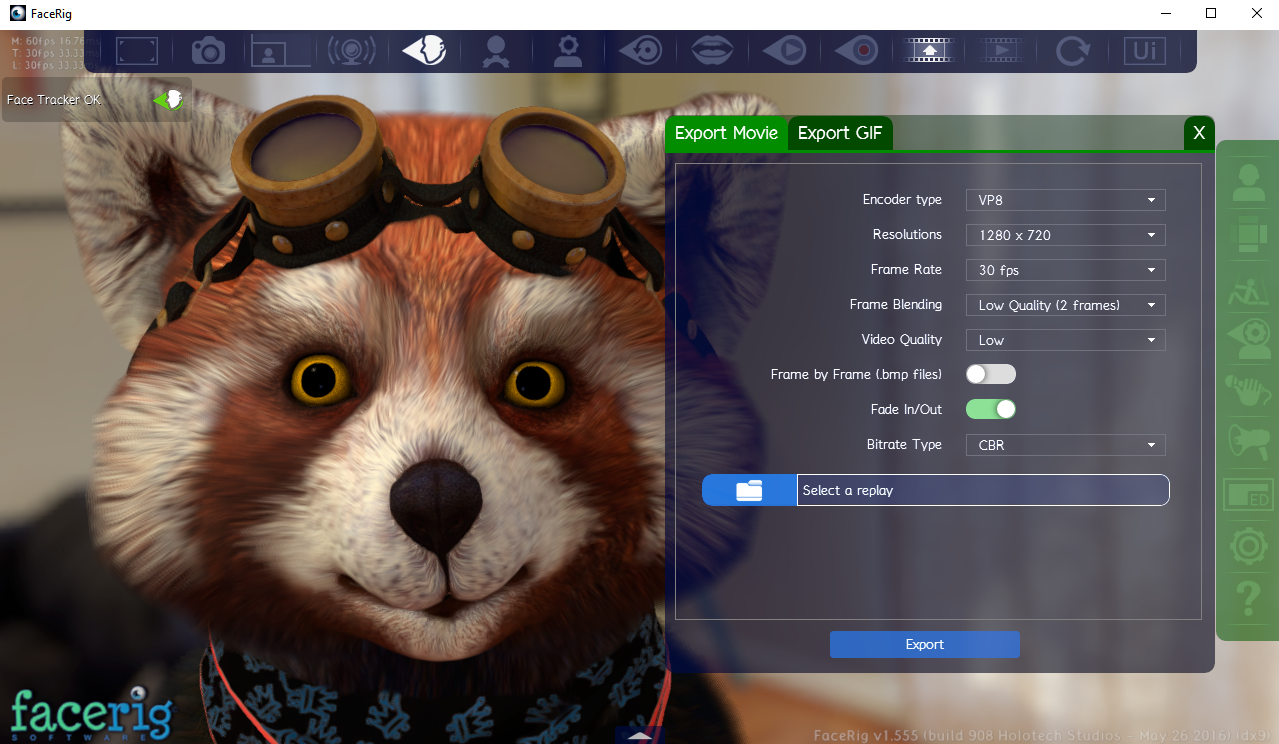
7. Select your .rpl file in the Export Movie Window. You can set your export preferences too.
8. If an error window pops , please install the prerequisites mentioned and go back to step 6. If everything it’s ok, it will start the export.

9. Please wait.. this may take a while.
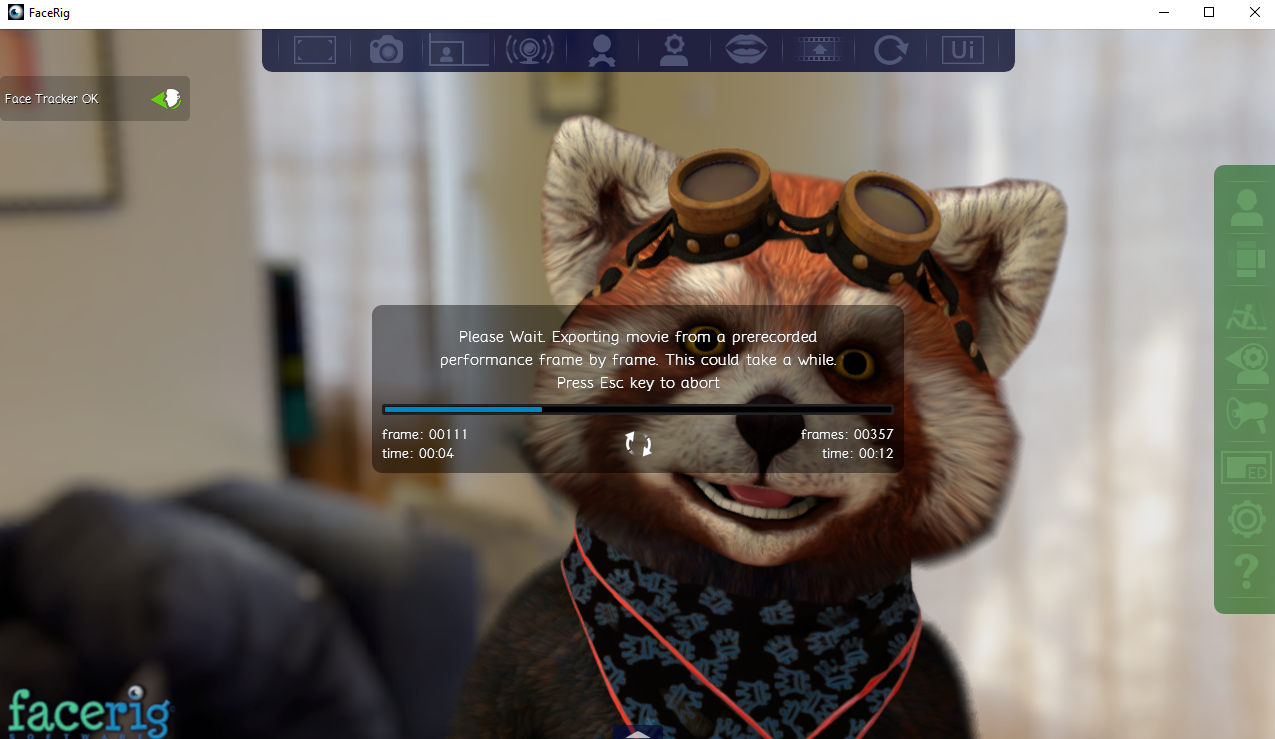
10. The video file is exported in the same folder with the .rpl file.
11. You can also record and export your performance in one go, by switching to the Basic UI and click on Record a Performance and then export it as a video.
