Overview
Provide a quick reference of best efficiency of every food production facilities in Banished.提供Banished裡面所有食物生產設施最有效率的配置與說明參考。
Abstract – 概要
Productions are crucial in Banished, and food is essential for villagers to survive. Banished Wiki[banished-wiki.com] has several tables talking about production efficiency. For easily and quick reference, I created this guide which contains all the production efficiency tables. This guide will show you how big the field size is optimal and how many workers should be assigned to fields to maximize the production.
生產在Banished裡面是非常重要的,生產提供的食物是村民存活的關鍵,在Banished Wiki[banished-wiki.com]上面有許多表格談論生產效率的問題。我編寫這篇攻略,其中將包含所有生產類型的效率表格,方便玩家快速查詢,這篇攻略將會告訴你生產設施應該要蓋多大會最有效率、以及該派多少工人去工作才能達到最有效率的產出。
Introduction – 簡介
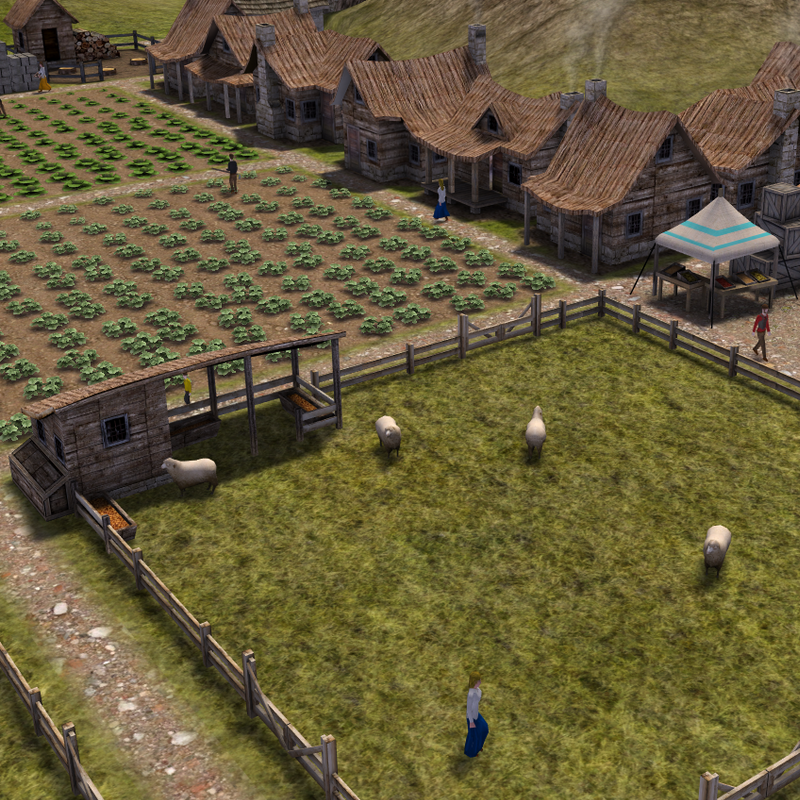
There are 6 kinds of food production facility in Banished. And they can be divided into 2 types:
在Banished中共有六種食物生產設施,他們又可以分為兩大類:
- Crop Field – 農田
- Orchard – 果園
- Pasture – 牧場
- Fishing Dock – 漁港
- Hunting Cabin – 狩獵小屋
- Gatherer’s Hut – 採集小屋
Scalable Field facilities will produce food periodically. The limit of production is basically based on the size of the facility. No worries about the environment around. But you have to acquired the seeds or the livestocks from certain merchants before you can begin those kind of food production.
自訂範圍農場會定期的生產食物,而食物產量的限制主要只有農地大小而已,農地周遭環境對生產完全沒有影響,但是在建造這類生產設施前必須要先取得種子或牲畜,才能開始進行生產。
Notice – 註
Easy difficulty will provide seeds and livestock at the beginning. Normal will only provide seeds. And Hard will provide nothing. You have to trade them by yourself.
簡單難度的遊戲在一開始就會提供種子和牲畜,而正常難度只提供種子,困難的難度就什麼都沒有,你必須要自行與商人交易來獲得。
On the other hand, Ranged Gathering facilities do not need any prerequisite. Just build the facilities, assign workers, and they will handle the rest. This kind of facility is vital in the early game before the player has acquired seeds for farming. They don’t need anything besides workers for food supply. But there is finite resources in the environment. Gathering faster than resources reproduce or facilities overlapping will lower the production and cause starving.
而另一種固定範圍採集則不需要任何準備,只要建造設施、安排工人,他們就會自己進行生產,這類型的設施只要工人就能自行生產,在早期遊戲非常重要,尤其是早期玩家並沒有種子可以自行耕田。但是環境中的資源數量是有限的,因此如果採集比環境資源重生速度還快、或是設施採集範圍重疊的話,都會降低生產效率造成食物短缺。
Optimal Production Efficiency – 最佳生產效率
All these tables original from Banished Wiki[banished-wiki.com]. I just collect them for easy and quick reference.
以下所有表格都是出自Banished Wiki[banished-wiki.com],我只是將他們整理在這裡方便快速參考。
大小
長寬
農民
單位農民產量
大小
長寬
農民
單位農民產量
大小
長寬
牧人
牛
羊
雞
註記
最佳牛/羊圈
Fishing Dock, Hunting Cabin, Gatherer’s Hut are not scalable field facilities so there’s no table for them. Just remember don’t overlap the facilities and everything should be fine.
漁港、狩獵小屋、採集小屋屬於固定範圍採集,因此不需要參照表格,只要記得建造的時候採集範圍不要重複即可。
Conclusion – 結語
For Scalable Field, tables show the optimal size and workers to maximize the production. And for Ranged Gathering, overlapping and over-gathering are 2 important things we should know. Hope this guide helps when you wanna check those tables with Steam in-game overlay.
對於自訂範圍農場,表格顯示了最大生產量所需的最佳大小以及最適工人數,而固定範圍採集則需注意相同建築重疊以及過度採集等問題。希望這個攻略能幫助你在遊戲中使用Steam Overlay快速查詢表格。