![[OUTDATED] How to make ANY gamepad working - x360ce for BeamNG.drive](https://steamsolo.com/wp-content/uploads/2021/07/outdated-how-to-make-any-gamepad-working-x360ce-beamng-drive.jpg)
Overview
Updated from 0.3.4 and found your gamepad not working, even when config files are correct? Input menu shows your joystick, but ingame it makes no effect? It’s named “unknown-with-a-number”? That’s what happened to me. And now I’ll tell you how to fix it.
Getting x360ce from code.google.com
1. Open [link] , click on “Downloads” up there.
2. Download “x360ce.App-2.1.2.191.zip” – main program executable with old libraries.
3. Download “x360ce_lib32_r848_VS2010.zip” – newer libraries 32-bit.
4. Extract all archives in the same folder. Basically, you’ll need only 4 files in it:
“x360ce.exe” – main executable, you’ll get it from the first archive;
“x360ce.ini” – configuration file, is created automatically;
“x360ce.gdb” – database file, you’ll get it from the second archive;
“xinput1_3.dll” – library file, used to get the joystick working, grab it from the second archive.
Later, when we’ll start, this file will be no longer needed, cause we’ll use new generated “xinput9_1_0.dll”.
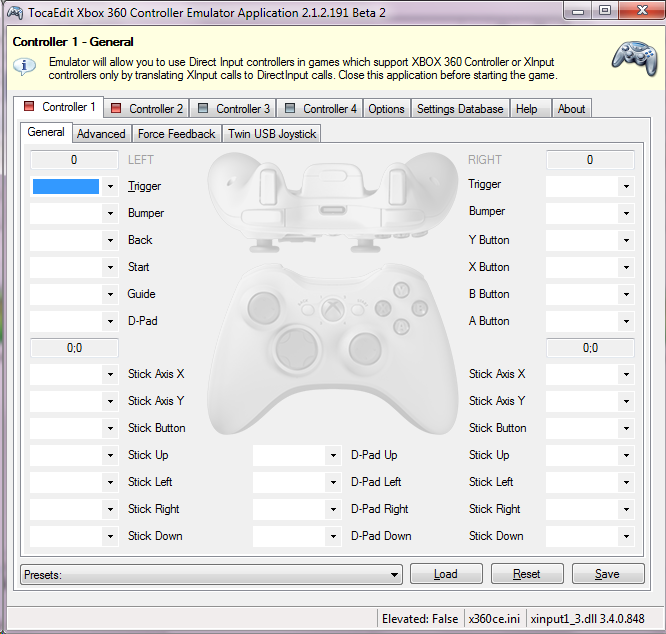
Configuring your gamepad in x360ce
- Connect your joystick to PC and launch “x360ce.exe”. Looks nice and clean, doesn’t it?
When you launch it first time, it’ll ask you to search from internet database for a configure file. You’d better click “Next” and wait for a bit. If config is found, go to 4.
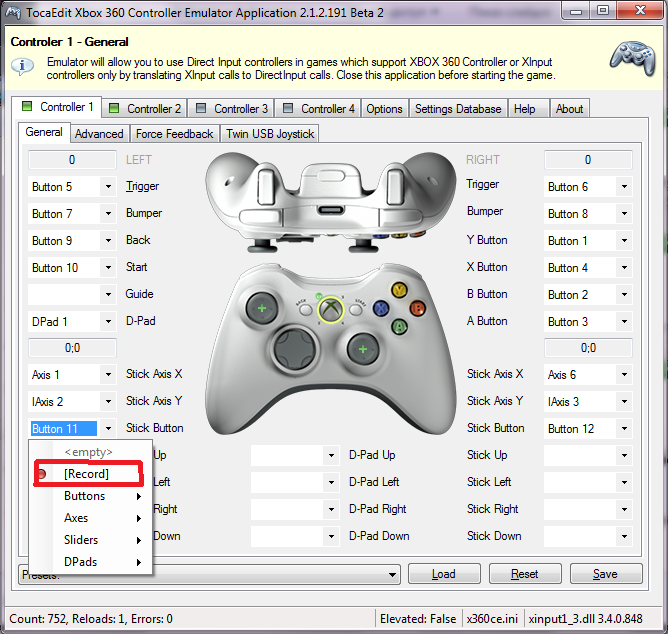
- Here goes the hard work. You’ll need to set up every button on your gamepad in x360ce.
Basically, you’ll just click on everything, click “Record” and press same button on the controller.
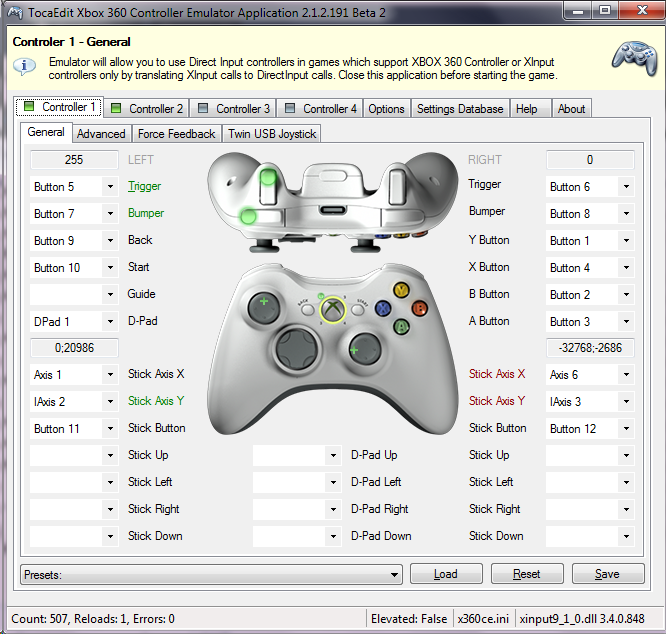
- When all buttons will be assigned, you shall see green square appear on the top tab. Now, if you click any button on your gamepad, you’ll see it showing on the center picture.
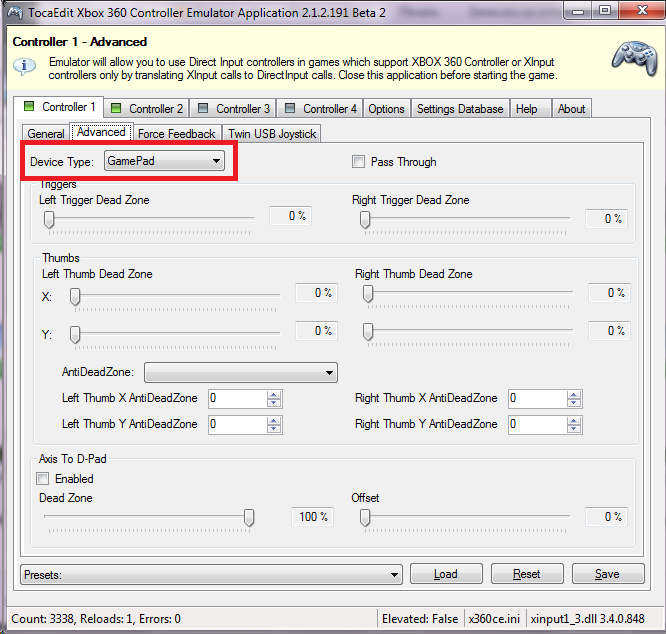
- Click “Advanced” tab and make sure the device type is “Gamepad”.
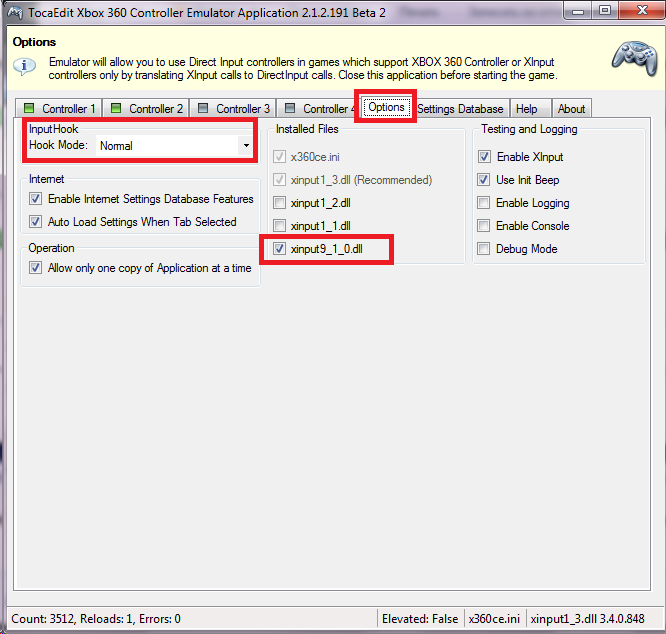
- Click “Options” tab and set those things as on my screenshot.

Configuring your gamepad in game.
- Copy “x360ce.exe”, “x360ce.ini”, “x360ce.gdb” and “xinput9_1_0.dll” to the “Bin32” folder of the game. Launch the game. Heard the “Blip” sound? The game now thinks you have the original x360 controller, and you can use your joystick now. Seriously.
- Now for those, who dont like default bindings in game, we’ll configure it for ourselves!
Open “BeamNG.drivescriptsclientinputmapsxi_gamepad.inputmap.cs” with your preferred text editor (I’m using Notepad++). Now you can change everything as you like.
For those who doesn’t know what button is what – here is my configuration file with comments:
[link]
The “two_axis” function is used to get both “accelerate” and “break” to work on the same axis. It’s really useful while flying planes and helis.Basically, the guide “How to set up your controls” is here: [link]
That’s all, folks!
Yeah, that’s it. The controller is working, you can now drive/fly/swim/whatever using your preferred controller! Yay~~