Overview
Explanation about every single Achievement with images,videos and walkthrough of how to earn it:✔All Documents✔All Recordings✔Insane mode✔DLC documents✔DLC recordings✔DLC Insane mode
Global Achievements
This is the list of every single achievement in Outlast and the global stats of most of the people that played the game.
This is my channel with all the stuff that I just wrote here in Video Guides


ILLUMINATED

You will need to venture down into the basement via the stairs near the elevator after leaving the Security Room.
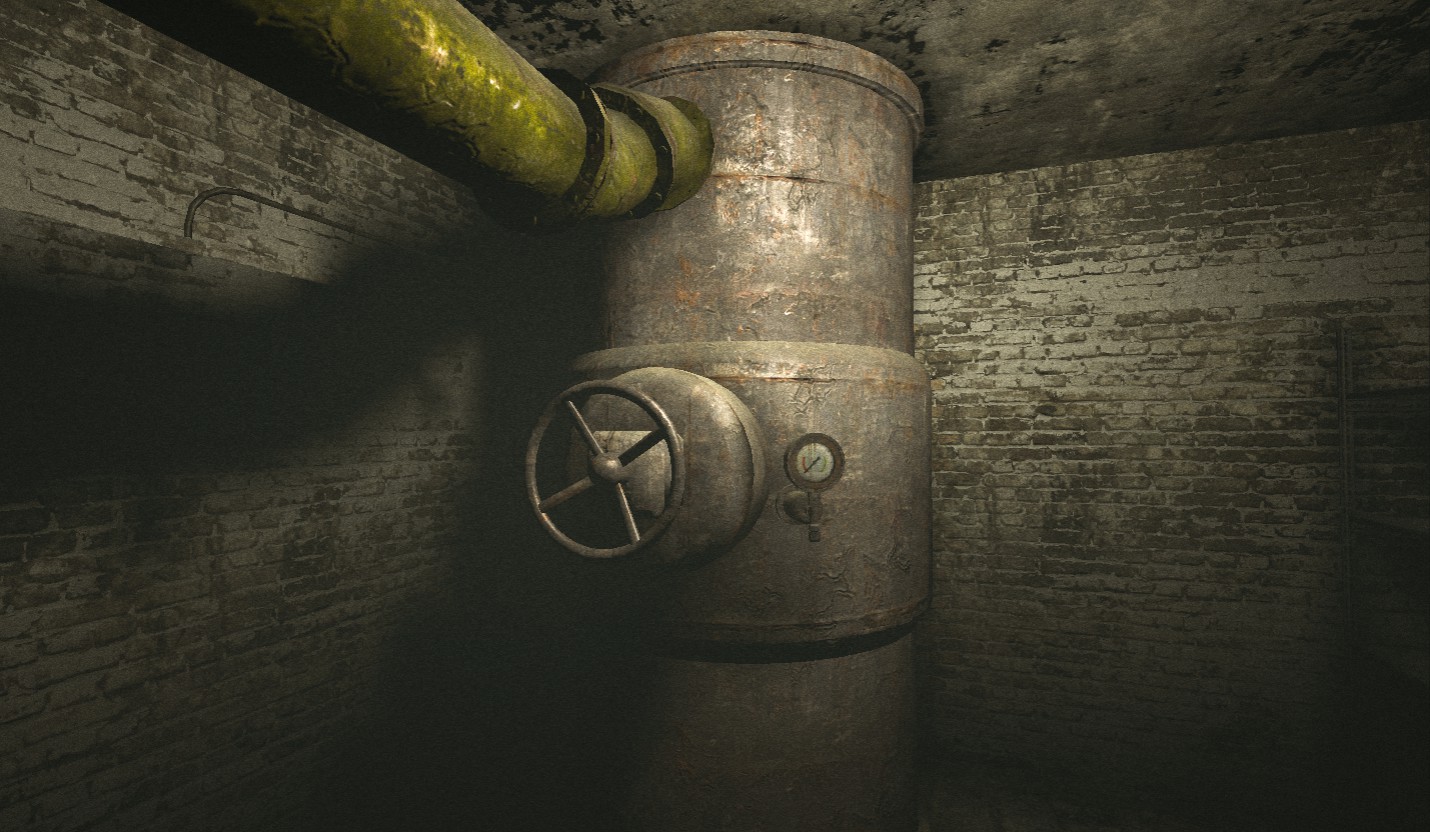
Once in the Basement you will need to Activate the 2 pumps which are in 2 of the rooms around the main control you then need to locate the electrics room which is through the door which is originally locked when you enter the Basement you then throw the breaker and finally turn the power back on with the main control at the beginning. There is a guard patrolling the Basement so you’ll need to watch your step.
Electric room & main control button


FLUSHED

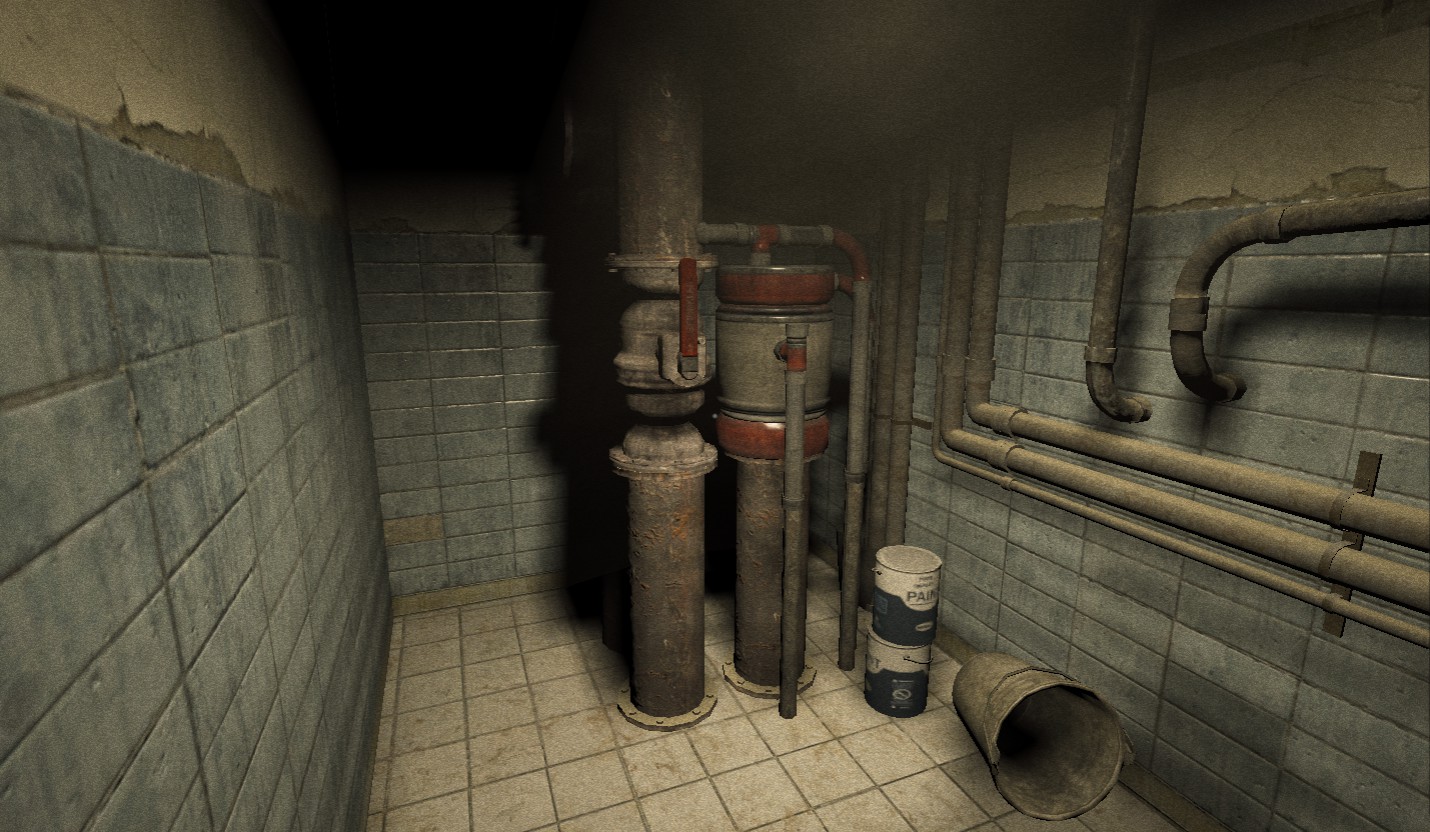
After you escape the cell block, you head downwards into the sewers beneath the Asylum. You are brought to a maze of tunnels and gates that make up long corridors. The only way to escape this area is by going down a manhole even further downwards. To do this you need to empty the water in the manhole tunnel by turning two water valves off. One is to the right of the area and is fairly straight forward to reach. It’s behind a green door.

The other valve is opposite of the other one of the main chamber. You have to trek down a few tunnels to find it but watch out as Walker is patrolling the perimeter. Once you turn the valve the achievement unlocks.
SOAKED

To activate the sprinklers you must first find 2 pumps and turn them on. Since there is no map in this game whatsoever it is hard to explain, where exactly the sprinklers are.From the location in which you see the guy chasing you for the first time the first sprinkler is in the room on the far right side of this bigger room you are in at this point of the game.
This room to the right is conected to another room, which is connected to a third room itself. In this room you will find your valve.The second pump is (again from the point in which you see the big guy for the first time) in the left corner.
Once you are done with the pumps you must go back to the coridor from where you came.There will be a room with a button where you have to push it and the sprinklers will be activated.
First pump

Second pump


EMANCIPATED

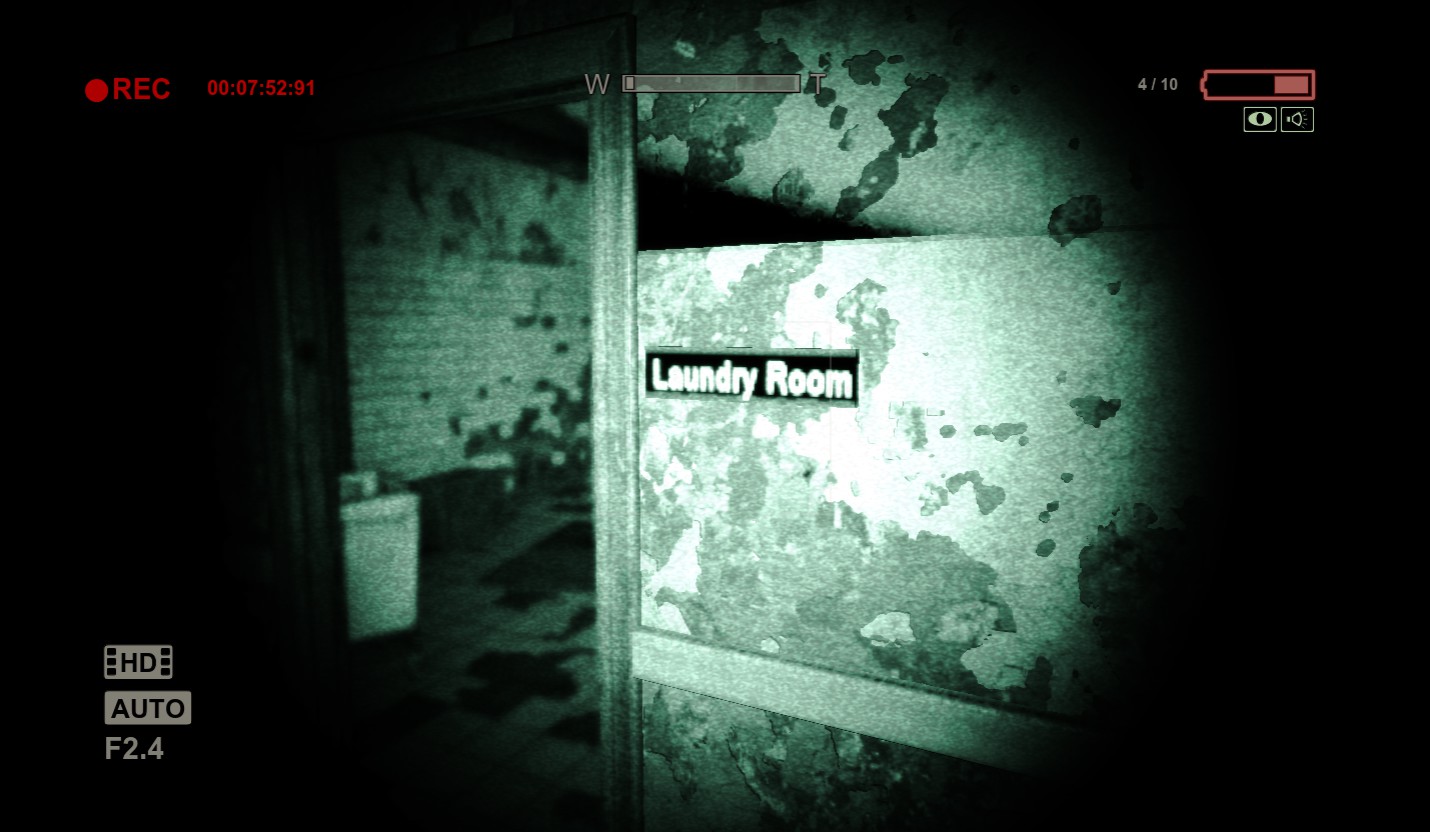
Initially, make your way through the level finding a route up the stairs, into a room with a wheelchair on its side, up the stairs to the left and through a serving hatch until you reach the main chapter objective, to find three fuses to get the key from the laundry hatch. Behind you is a door and thankfully all three fuses are close by and moderately ok to find – they are all in separate rooms with enemies in! There is nowhere really to hide so I recommend you get familiar with the route back to the fuse room, enter one of the rooms, grab the fuse and run back, and jump over the counter if they follow.
When you put the fuses in and push the button the key drops down the chute,you need to go back downstairs and follow the signs for laundry and the key is in the laundry hatch.Pick it up and achievement will be unlocked
Main room for the fuses

First Fuse
Second Fuse

Last Fuse

Laundry Room

PUNISHED

To achieve it,you must finish the game on any difficulty.
There is a huge skip at the begining of the game.If you want to speedrun it.The record is 8m12s
Ending view


GAS LEAKER

There will be a passage in which you will be hunted by the guy with the electric saw again. You will find yourself in a rather big room with doors to the left and the right. I took the right door, sneaked along the hallway and turned left. After that you will find another hallway to your right take it and follow till it ends. Right there you can climb over the wall.After you hopped over this obsticle the guy with the saw can’t reach you and you can just follow the hallway to the gas valve.
The big room with many doors

The wall that you must climb in order to escape

Your room with the valve

SHOCKER

Around the middle of the game you’ll make your way outside and you’ll come across an electric fence.

To turn off the power and continue past the fence you must go down into a small underground hallway and flip a switch.

When you head back up to the fence, one of the variants will turn the power back on, so you’ve got to go down and flip the switch once again. However the achievement will unlock the first time you flip the switch.
WHISTLEBLOWER

To achieve it,you must finish the game on any difficulty.
Ending view


LUNATIC

To achieve it,you must finish the game in Insane mode.
Insane mode is the Ultimate Heart-attack experience.There will be no checkpoints and if you die,all progress is lost and you start over at the beginning.
Pst:I wont post any guides about it,but i uploaded a Walkthrough of full speedrun of the game
BOWELWHISTLER

It is the same as LUNATIC(Finish the game in Insane mode).There will be no checkpoints and if you die you will lose all of your progress.
Pst:I wont post any guides about it,but i uploaded a Walkthrough of full speedrun of the game
EDUCATED and PULITZER-Part 1(Administration,Prison,Sewers)
This is probably the hardest one,where most of you would stop to check out.Full overview of every single note and document(62 overall) with Description and Image of where you can find them.
Documents are blue folders with the word Confidential and notes are recorded using your camera.
Objectives are updated in your Reporter’s Notebook,containing your Notes and picked up Documents
Pst:If the images are not enough,there will be Video at the bottom of this guide.

And

Document 1:The Whistleblower:You will get that automatically inside the car,before to start the game.


Note 1:Mount Massive Asylum:Once you enter through the front gate,point the camera at the building.


Document 2:Project Walrider Patient Status Report For William Hope:When you squeez through the gap in the corridor,look on the desk in the second office on the left with number A214.


Note 2:I’m Inside:There will be a guy stuck on a spike who is about to die.Film his speech.


Document 4:Project Walrider Patient Status Report For Chris Walker:Through a computer office you will enter a document storage room,look on the desk in the corner to your right.


Note 3 Broken Men And Dead Television:After you go Through the storage room,there will be a room with Men watching static TV.Just record them.
Note 4:The Witness:Go to the bathroom at the left side before the Security Room,open the middle stall and film the corpse.
Document 5:Project Walrider Profitability Report:In the office A126,down the corridor after you pass the Security Room.


Note 5:Big F-ing Guy:After the lights turn off and you are forced to hide in a locker,film the big guy.
Document 6:MKULTRA CIA Hypnotic Suicide:As soon as you escape through the stairs and squeeze through the initial gap in the wall in the basement, turn right and check the desk.


Note 6:Father Martin’s Cell:Inside the cell,record anywhere on the wall.
Note 7:Necromantic:After leaving the first prison section,through a wall and climb,there will be some disturbing guys.Record them.
Document 7:Father Martin, Finger Painter:While following the trail of blood and going through stairs,find a guy looking at the bloody writing.The document is to his left on a desk.
Document 8:Purge Gate Maintenance Memo:After passing the two guys by climbing out of the window,there will be office with broken window at the left side with document in the Desk.
Note 8:Total Security:When going down the corridor to collect the keycard for the showers, look down and left and record the big guy.
Document 9:Dr. Wernicke Death Certificate:After exiting the showers, go right then left to enter a room with a torture chair in the middle, check the desk on your right.


Document 10:Dr. Wernicke Obituary:After jumping to the second floor ledge and climb, look in the first cell on your left.
Note 09:Walrider:After dropping through the hole in the floor and heading down the stairs, point your camera to record at the bloody writing on the wall and lockers.


Document 11:The Gospel Of Sand:After entering the sewer and following it round to the left, look on the left hand side by a broken ladder.
Note 10:The Doctor Is Dead:After flushing the water, passing through the lower sewer and climbing up the ladder on the other side, head down the long corridor then enter the room on the left and record the speech in the corner.
Document 12:Still Bleeding:In the sewers there is flooded area and you’re going to climb up a ladder and you’re going to circle around the catwalk to the right and then you’re going to drop back down into the water.Your exit is going to be straight ahead of you,there you’re going to see a thing drop into the water,from that side you will be able to climb and take another catwalk to a secret room with corpse.


EDUCATED and PULITZER-Part 2(Male Ward,Countryard,Female Ward)
Note 11:A Feast For Flies:After making your way through the blood-filled sewers you’ll squeeze through a gap and see stairs to your right leading up to the Male Ward. Instead of going up, continue forwards and use your camera to record the window of the door full of bodies.
Note 12:Organized Torture:After crawling through the vent into the room with chivied person in a chained in chair,exit and go left to enter another dark room.Put on the light of the camera and record the writings on the wall.
Document 13:Project Walrider Cost Report:After you enter the medical bay before you climb up in the vent,there will be a document at the end of the room on the right side.
Note 13:Dr.Rick Trager:After you get tortune and exit the room,move on to find a torture victim chained to a bed.Hide under a nearby bed,then use your camera to record Trager killing him.
Pst:Sometimes you have to wait longer until you get the record done.
Document 14:Request for Reassignment:After dropping out of the second vent,go into the bathroom in front of you and check for a document in the right cubicle.
Note 14:Death Of Trager:Once you kill Trager at the elevator,go outside and record at the other side.


Document 15:Persecutorial Delusions:After speaking to Father Martin, go down the dark corridor on your left then take the first right. Through the door at the end you’ll find a locker room, and the document is at the far end near a bench.


Note 15:Let It Burn:After climbing through the window into the burning cafeteria, use your camera to record the guy that explains why he set this place on fire.


Document 16:Psychopathological Proximity Stress Disorder Pamphlet:After you exit the cafeteria, before squeezing through the gap ahead go down the corridor to your right, then in the room at the far end look on the desk in the corner.
Note 16:Fingers:After turning on the sprinklers and going back through the cafeteria, you’ll be knocked down by an inmate when entering the kitchen. Look around the counter to your left to find a side room, then record the bowl of fingers at the table.


Document 17:MKULTRA Program Excerpt:Before going through the exit, head into the office to the right of the exit and look on the desk at the far end.
Document 18:Our Own Personal Cavalry:After leaving the building, walking through the fountain in front it will be stairs leading up to some writing on the wall. The document is on the floor here.
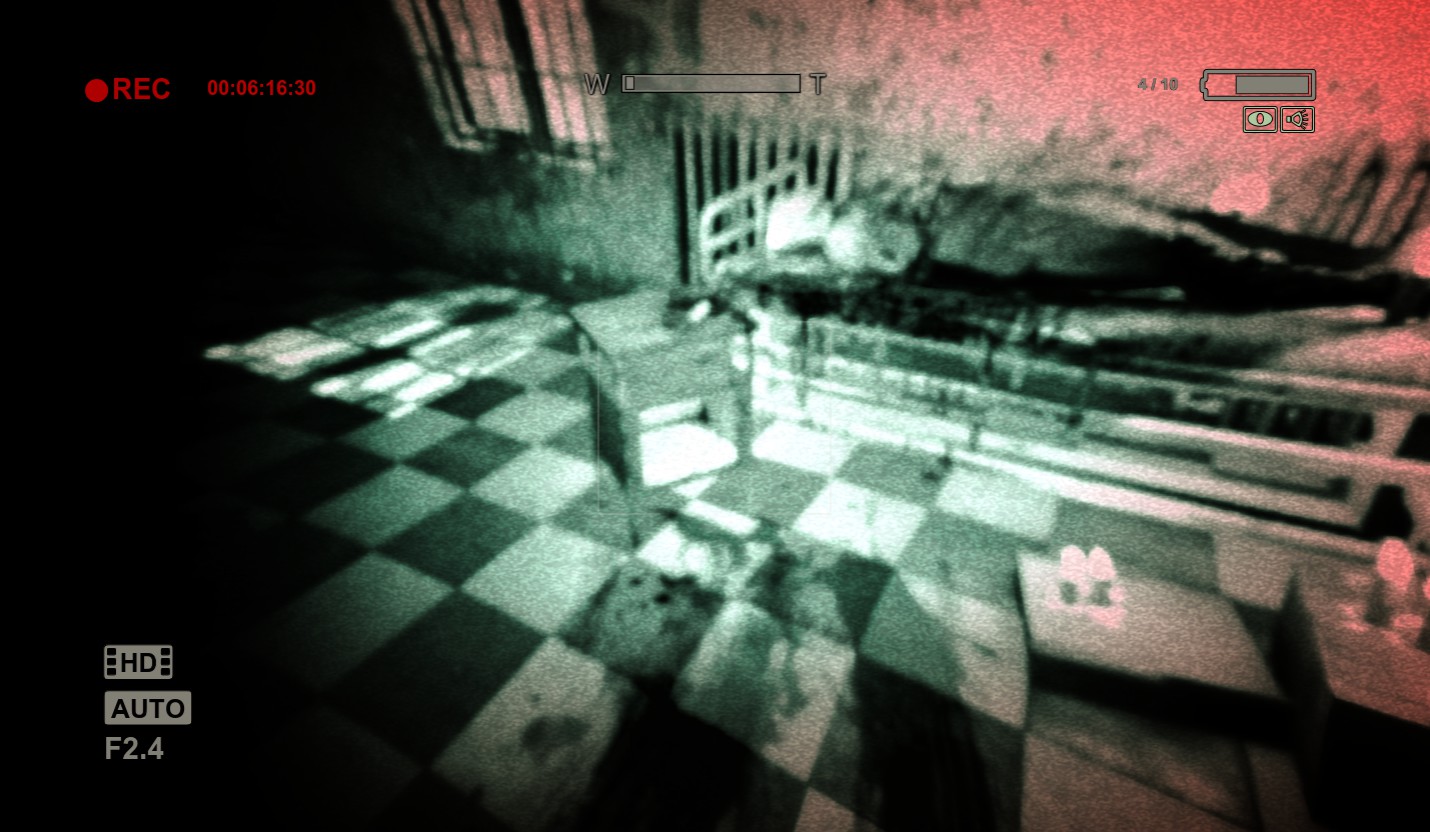
Note 17:The Thing In The Dark:After collecting the key and unlocking the door, head down the corridor with your camera up and set to night vision mode to film the ghost that appears after you open the second door in front of you.
Note 18:Don’t Drink The Water:After escaping from the big guy you’ll crawl into a tunnel. On the other side, record the fountain full of blood and corpses.


Note 19:The Sound In The Machine:After climbing into the Female Ward and heading down the corridors, you’ll need to squeeze through a gap then hop through a window. Use you camera to record the noisy machine here.
Document 19:Walrider And Nightmares:After leaving the same area through a lit room, turn right when you reach the corridor and go all the way to the end to find the document under the broken stairs.
Note 20:No Safe Place:When you arrive in the area with the stairs and a wheelchair in the middle, point your camera at the body bellow elevator lift.
Document 20:Project Paperclip Excerpt:To the right of the lift,you will see stairs leading to dark room.You will see desk in the middle with document.
Document 21:You Promised Me A Rose Garden:After falling through the floor and climbing back up again, go through the door into the next room then look on the bed in the far corner.
Note 21:Lies:When you see the Walrider,follow him down the corridor,then right side enter a room with candlelit and record the bloody writing on the wall.


PULITZER-Part 3(Return to the Administration Block,Underground Lab)
Document 22:Billy’s Dreams:After escaping from the big guy through the air vent in a room on the left of the corridor,inside the vent go to the right side and you will see hidden path,then drop into the office to recover the document from the desk.


Document 23:The Spirit Breach:After pushing the body out of the air vent and dropping into the main corridor,instead of going right side,enter the library to your left and look on one of the desk for the document.


Note 22:The Wernicke Exit Interview:When you arrive in the theatre a film will play on the screen. Aim your camera at it and record for a while until the note appears–this does take some time so don’t move away until you see the notification.


Document 24:Necrotizing Fasciitis:Heading down a dark corridor,instead of taking the stairs to the second floor,keep moving straight,the document is on top of some boxes in the lit room at the end.
Note 23:Static Prayer:After you reach a large hall with a guy staring out of the window and alot of Storming lights,in the corridor beyond this is a recreation room on the right side, where you need to record the inmate praying in front of the static television.
Document 25:The Gospel Of Judas:After squeezing through the wall into the corridor full of rooms with people praying, find room B329 and look on the desk inside.
Note 24:The Passion Of Father Martin:Use your camera to film Father Martin being burned on the cross in the church until the end.


Note 25:Under The Mountain:After yout entered the underground lab, use your camera to record the first room that you enter in front of the desk.
Document 26:The Pride Of Wisdom:In the same desk that you just recorded,there is document.


Document 27:Variant Postmortem:After entering a new corridor, go into the second lab on your left and look on the table.


Note 26:Morphogenic Formula:Further down the corridor opposite a window showing trucks outside, go through the green ligthing door into the lab and record the writing on the whiteboard.


Note 27:Death Of The Soldier:Unlocks automatically after the Walrider appears and kills the big guy.
Document 28:Gods And Monsters:After escaping from the ghost through the decontamination room upstairs,enter the next room and before to enter the huge wall check the desk to your right with a guard corpse.
Note 28:Wernicke’s Machine:After going through the tunnel to enter lab full of machinery,record the giat sphere in front of you.
Document 29:Morphogenic Engine Chamber Precautions:Underneath the giant sphere take a look in the computer and the keyboard.


Note 29:Billy Hope:Right next to the document,point your camera to your left at the guy inside the glass pod.
Note 30:Life Support:Once you enter the Fluid Reservoir room,record the large tanks that are in front of you.
Document 30:The Modern Prometheus:In the same area head up the stairs and look on the desk in the control room.
Document 31:Permission To Proceed:After escaping from the Walrider through the decontamination room, go up the stairs and look on the desk to your left as you enter.
Note 31:Death Of Hope:After you disable the Life Pod and you get attacked by the Walrider,get up and record blood-filled pod.


ARCHIVIST and LEGACY-Part 1(Hospital,Recreation Area,Prison,Dying Ground)
This is the same like EDUCATED and PULITZER,but for that you must own Outlast DLC-Whistleblower.Full overview of every single note and document(31 overall) with Description and Image of where you can find them.
Documents and notes are the same blue folders with the word Confidential and notes are recorded using your camera.
Objectives are updated in your Reporter’s Notebook,containing your Notes and picked up Documents

And

Note 1:If i Die:It is automatically added once you start the game,after taking the camcorder.
Note 2:A Radio in the prison:After escaping and climbing through the first vent,record the conversation between two guards.
Note 3:The Doctors are sick:When you find a doctor locked in a chamber behind glass make sure to keep the camera out after pressing the glowing button. Record the killer patient until it is over.
Document 1:Resignation of Waylon Park:In the coridor where doctors will run by to the exit, Instead of continuing forward, turn right and enter a side room covered with dead bodies. Turn right and enter the door to find the first document on the ground.


Note 4:In the Cannibal’s Kitchen:Record the crazy psychopath tearing a body behind the glass in the cafeteria.
Document 2:Gender Selection in Mount Massive Contractors:After collecting a key from a dead body at the next room,the document is sitting on a medical cart between two computers.


Document 3:God and Family:After breaking through the brick wall to escape the fire, turn right and enter the open doorway. Look behind the altar at the back of the room.


Note 5:Varying Effects:After you reach a spinning red light in the hallway. Take a turn left through an open door, then another left to find bathroom stalls. Record what’s inside the middle closed stall.
Document 4:Lesser Known Ecologicla Aspects of Humanity:Once you jump through the broken Window,enter the dark hall across from the window.Make sure to turn on the lights cuz its very dark.
Document 5:Project Walrider Patient Status Report for Frank Manera:Inside a small lab through double metal doors at the desk to the right,the document is just in the corner,next to the chrome machines.


Note 6:Satisfaction:After escaping outside and going down through the stairs,turn right to find a fence gate with a door.Go Through and look up at the building,there will be a window.Record it.
Note 7:This is what the game is:Whem you reach the stone stairs with a landing. Take the left way and go through the open fence. Down the alley, turn right until you see a door fence where a guy is playing basketball.Record him.


Document 6:The Walrider Delusion:After you pass the basketball court and you go through a ladder on the other far side.Circle over the tower,jump over the junk and the document will be inside.


Note 8:Down,Down,Down:After escaping Walker, continue down the dark hall to find a grated door where a patient is writing messages in blood down the hallway.Record him.


Document 7:Miscarried Profits:Drop into the hole where you recorded your last note.Continue through the door into a room with computer.The document is on the desk to the right.


Document 8:The Groom:After you jumped out of the window, turn around to find a set of double doors. Go through the windows to the left of the doors to find the document in the corner to your left with 1 guy siting there.


Document 9:Kill Us:After you climb up the stairs you will reach electrical fence.Instead of going toward the fence,continue into the dark house ahead.There is a closed doors with stairs near and next to them is the document.
Note 9:Burning Lights:After shutting off the power near the electrical fence, a patient will be turning the power back on. You must have your camera ready and watch the power grid above the fence to capture and record the scene.


Note 10:An Easy way out:After climbing a ladder out of the pond,look right for a hole in the door.Make sure that you have the camera on and watch the lit door as you crawl under the fence.A corpse will fall in front of the door and you must record it.


ARCHIVIST and LEGACY-Part 2(Vocational Block,Exit)
Note 11:Wise Man:After the fall and making through the vocational block’s attic,record the hanging corpse that will show in your path.
Document 10:Patient Dennis:Once you pass the hanging body,you will reach a doorway that is blocked by a red tool cart.Instead of continueing there,go into the darkness to the left.There will be your next document.


Note 12:What fresh hell:This is imposible to miss.Its kinda disgusting but you must record it.


Note 13:-An unwilling bride:After escaping the torture,turn back and record the saw-blade.
Document 11:Project Walrider Patient Status Report of Eddie Gluskin:After you escape and jump through a window.In the countryard with the stone fountain,look right at the ground will be your document.


Note 14:Blue Beard’s Wives:Climbing through the vent,you will drop down inside a gymnasium.Record the ceiling with all the dead bodys.
Note 15:A Widower:After you survive another torture and the crazy guy dies,you can record him for the note.


Note 16:A Burning Church:Once you start the next chapter after you get the loading,there will be window where you can see in the distance burning church.Record it.
Note 17:Serve and Protect:Continue down the hallway to find a locked door blocking a lit room.Look inside to the soldiers surrounding a dead body in the center of the room and record it.


Document 12:Beyond Hope:Enter the hallway where you’ll hear gunfire in the distance. Ahead, there’s an office to the left. Go inside to grab the document on the desk.


Document 13:Three Blind Dreamers:Entering the room with a TV on the wall, leave through the door and enter the open doorway to the right ahead. In the dark room, there’s a table with a document.


Note 18:Jeremy Blaire:Next to the exit and the end of game will be standing at the floor a man.Record him before to go through him.


Some extra information
That was all from me.If you did absolutely everything, you should have 100 percent of all achievements.Things are easy as long as you know where to find them and if we exclude Insane
mode,because it took me alot of time and praktice until i speedrun and pass it pass it.
I hope I helped with everything in this game ^ _ ^