Overview
A complete in-depth walkthrough of Outlast 2 from start to finish, written by Josh Hawkins for Prima Games[www.primagames.com]
Introduction
[link]Outlast 2 has finally arrived and players can step into the shoes of Blake Langermann and experience the horrors of the Arizona desert in a brand-new way. After their chopper crashes near a village of cultists, Blake and Lynn Langermann must try to escape the nightmare with their lives.
Learn how to survive the nightmare of Outlast 2 with this in-depth guide.
Note: This guide contain several spoilers! Beware!
- Achievements
- Recordings and Document Locations
Tips 1 – How to Hide, Survive, and Make it Out Alive
Here you’ll find simple how-tos to help you along your journey.
Outlast 2 is a terrifying new experience from Red Barrels, the creators of 2013’s hit horror game. Thrust behind the camera of investigative journalists once more, players must sneak, hide, and slip their way through a cultist filled town in the Arizona desert. This guide will offer several Outlast 2 tips, tricks, and pointers to help you find the best hiding places, keep an eye on your enemies, and make it out alive.
If you want to survive in Outlast 2, you’re going to need to use your wits and your skills in stealth to survive the nightmare and rescue your wife.
Hiding isn’t an instant win for Blake. If an enemy sees you run off into the water, or into a patch of grass, or if they even managed to somehow see you ducking into a barrel, they will find you. Because of this, you’ll want to hide when you’re sure that nobody is looking for you. It should also be mentioned that hiding doesn’t guarantee you won’t be found. In fact, some enemies go out of their way to check hiding spots like barrels, streams, and even under beds and carts. Make sure you always have a backup hiding place, and you should be able to make it out with all your fingers attached.
It can be tempting to run around with Night Vision and Sound Tracking on all the time, but don’t fall for this ploy. Instead, don’t be afraid to let the darkness in a little bit. It will save your batteries, and allow you to use your camera longer when you really need it. Trust us, there’s nothing worse than running out of batteries when a really dark hallway is waiting around the corner. It’s not a fun experience.
It may be tempting to just run through the game and ignore the plethora of buildings waiting to be explored. Don’t do that. Instead, crouch and sneak your way through the game. This will keep enemies from spotting you as easily, and also allow you to search nearby buildings and houses for much needed items like bandages, batteries, and even documents or recordings. Yes, it is dangerous, and it can absolutely lead to you being gutted by a rusty machete. But, at the end of the day, this is the only way you’re going to find any items worth finding.
You don’t have to keep your camera up all the time to spot documents and recordings. In fact, when you’re looking at recordings you will actually receive a notification in the middle of your screen. This notification, which looks like a camera, is easy to miss during intense moments, so keep an eye out and it will warn you of a nearby recordings that you can capture.
You should also pay attention for any enemy movements like flashlight beams, glowing eyes, and other telltale signs that a cultist might be nearby.
Tips 2 – How to Find Batteries, Find Bandages and Heal
Outlast 2 is a very dark game, and I don’t just mean in terms of creepy dark. Many of the areas that you traverse are clothed in shadows, and sometimes it can be hard to see. If you want to survive the night, and escape the madness of Temple Gate, then you’re going to have to know how to find batteries in the wild. In this guide I’ll teach you a few helpful ways to find batteries in Outlast 2.
Batteries are scattered throughout the game world in Outlast 2, and players will have to keep their eyes open if they want to spot them and add them to their collection. These items are extremely important, as they allow you to power your camcorder’s night vision and sound tracking.
The easiest way to find batteries is to look for glowing white items on the ground or tables. Many times I’ve found batteries on tables inside of houses, barns, and even under old broken down sheds that are missing some of their walls. This means you’ll need to explore, if you want to stay powered up, and even if you manage to find a few batteries along the way, you should be sure to make careful use of your camcorder so that you don’t run your batteries down.
In order to make batteries last longer, you should prioritize use of your camcorder’s night vision and sound tracking only when absolutely needed. If you can see well enough when traveling through areas, make sure you aren’t wasting batteries by having night vision turned on. Likewise, make sure you don’t run around the entire game with your sound tracking on. This runs the battery down much quicker than the night vision does, which can leave you halfway through the game with no batteries to power your camcorder.
Thankfully there are several light sources like fires and torches set up around the game world, as the villagers themselves need to see as well. Some of these villagers will even carry flashlights, and sometimes you can make use of their light beams to see inside houses and other darker areas. If all else fails, though, be sure to activate your night vision to make sure you aren’t walking directly into a trap.
It should also be noted that enemies cannot see the light from your night vision, so you’re free to use that at any juncture of the game. Just remember to keep track of how many batteries you have, and how much juice the current battery has, and always be on the lookout for the glowing telltale signs of more batteries.
Walkthrough Part 1 – Find Lynn and The Prison Key
This guide will serve as complete and in-depth coverage of the first several minutes of gameplay in Outlast 2. In this first area you will have to traverse through the outskirts of the cultist’s village, locate the prison key, and then find Lynn.
After the opening intro, you awaken to find yourself inside of a school hallway, with a crucifix on the wall ahead. Move forward, and a locker to your left will open. There isn’t much to see here, aside from a few photos, so keep moving towards the crucifix on the wall.
As you near the corner, you’ll hear the sound of something hitting the floor. Turn the corner to spot a man in a blue suit walking away from you. Follow after him until the sequence ends and you awaken above the wreck of the helicopter.
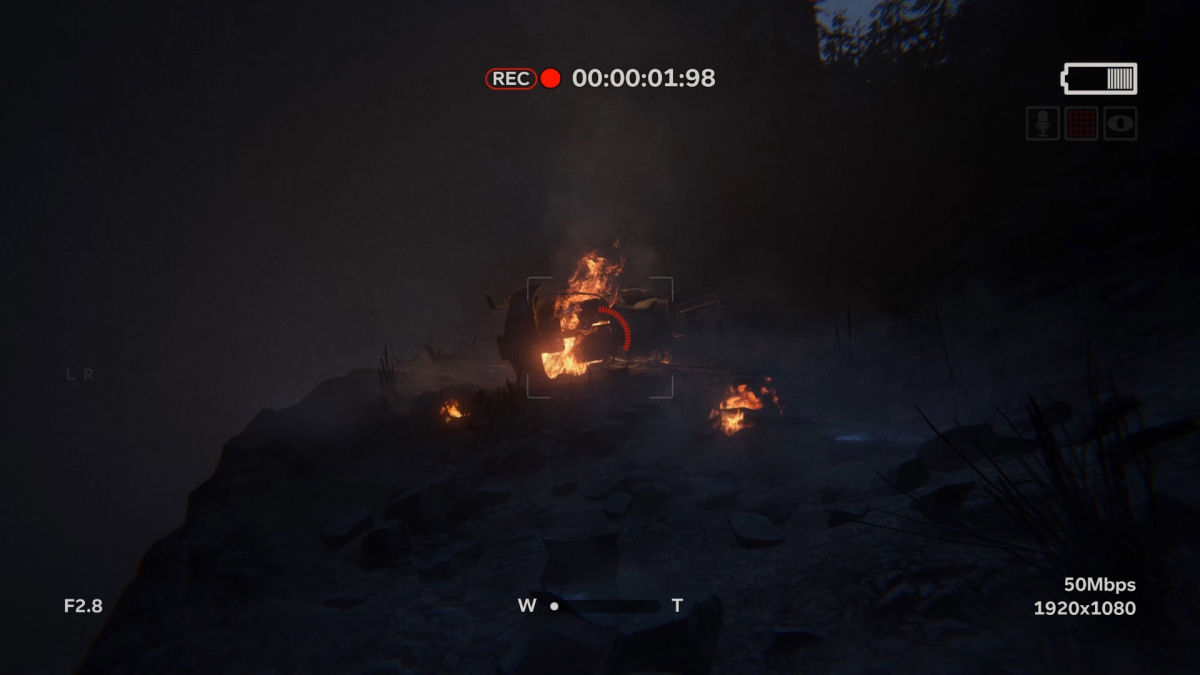
After you regain control of Blake and pick up the camera, head down the rocks to the left to reach the helicopter crash. Here you’ll learn about one of the game’s key mechanics, recording. Pull out the camcorder and focus it on the helicopter crash until the red circle in the center of the screen fills up. You can then press Tab, or whatever the default button to check your objective is, to open up the camcorder and watch the recording. Blake will make a few remarks, but then it’s time to move on.
Head around the helicopter crash and make sure to pick up the bandage in the open box to the left of the crash site. You’ll also learn how to use Night Vision mode on the camcorder, which is extremely useful throughout the game. Just don’t use it too much, as you’ll run the batteries down.
Continue moving forward until you spot a body tied to a tree. You can also record this event, which will cause Blake to make a few new remarks about the situation.
Turn your Night Vision back on, and continue forward, moving into a canyon. Eventually the canyon will open up to reveal the outline of a village in the distance.
Continue down the hill until you reach a set of buildings and hop over the fence. You can knock on the door of a building on the left, but nobody will answer your calls. Ignore the building and continue moving forward, towards the light of a fire down the hill.
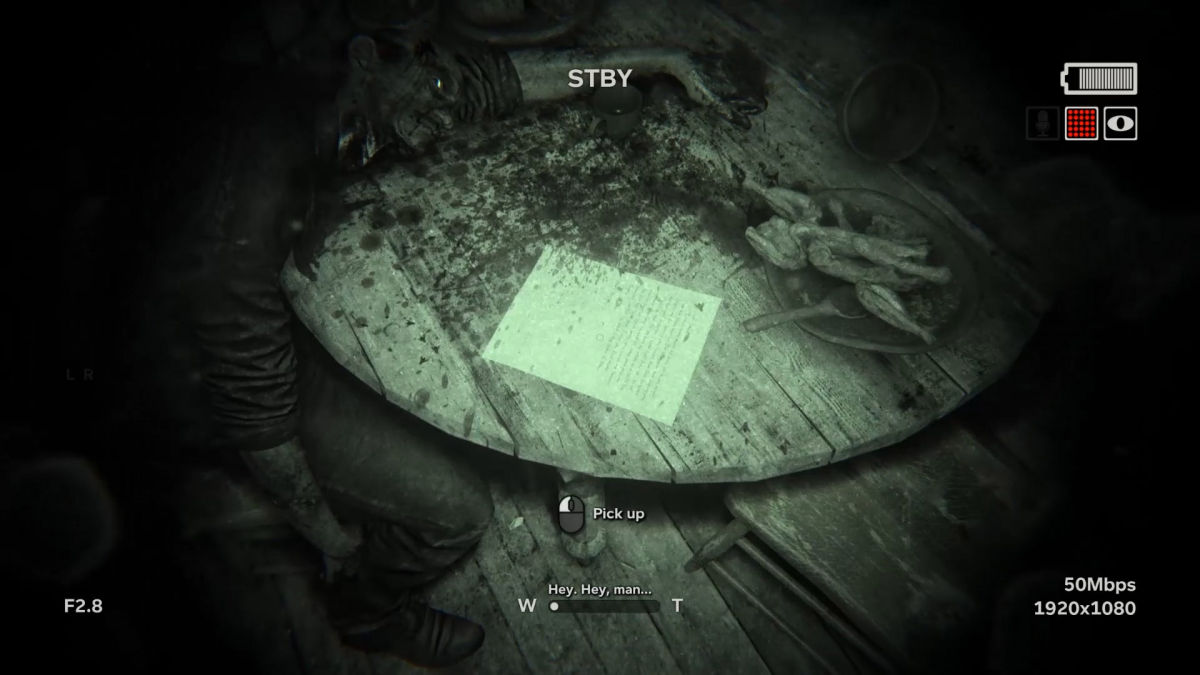
This will lead you to a small village. Use your Night Vision and enter the screen door on the right. You’ll find a battery inside that you can use to reload your camcorder. There’s also a document in this same room, next to a corpse at the table.
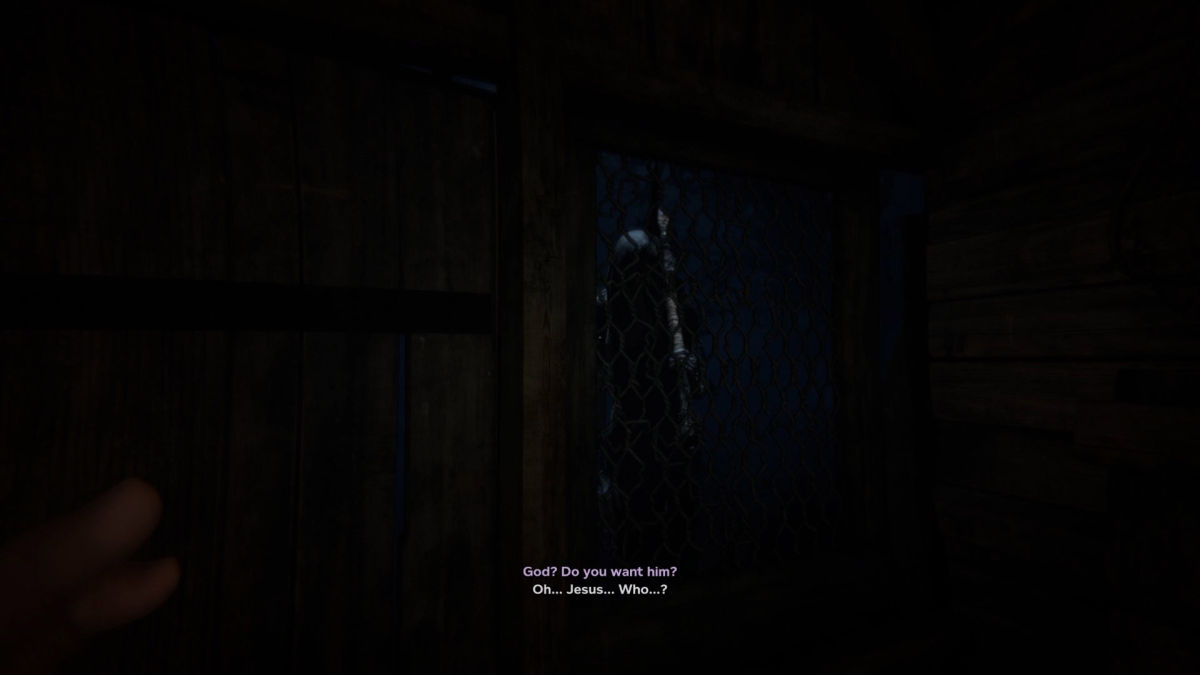
With the battery in hand, and the document recorded, head back out into the village and move forward. Keep moving towards the tricycle, and peek around the corner to the left to spot a villager with a machete in his hand. After he backs away, move forward and follow the same direction that he went.
There are several barrels you can hide in around the area, but they aren’t really needed right now. Instead, continue moving towards the screaming of the villagers further in the small town. Head around the left side of the building ahead and make sure you record the tragedy wall directly outside the house.
Your way into the next house is through the window to the right. Open it up, and then climb inside. Head through the house and open up the deadbolt to unlock the door.
Pass through the door and then crouch through the hole in the fence. This will lead you down a path with several crosses on either side.

Keep moving forward until you reach a crypt-like building with a staircase leading down. Head down into the tunnel and make sure to record the document on the table ahead.
Continue around the bloody manger, and into the dark tunnel on the other side of the room. Follow the bloody drag marks to a dump site for bodies, and then skim around the edges to locate another way out of the tomb.
Head out of the tunnel and follow the path beyond some old swings and a rocking horse to find a gate with a hole big enough for you to crawl through underneath it. Crawl through, then head down the path towards another building on the left. You’re about to encounter several more villagers, so pull out your Night Vision camcorder and move forward. There’s a battery on the table inside the broken down shed, so grab it before you move on.
Keep pushing forward until you spot a tall figure walking towards you. Run back from it, and circle around the shed to lose it. Once the music fades, continue forward and around the corner. The way should now be clear. Look for a hole in the ground that will allow you to crawl into a barn.
As you crawl through the hole, you should start to hear screaming nearby. Turn on Night Vision and make your way over the two fences in your way. In the very last stall, use the cart and position it right under the broken ladder. Now, jump up onto the ladder to gain access to the second story of the barn. Head down the center path, and wait until you are dropped back down onto the first floor.
Ignore the creepy fellow hanging out outside the window at the front of the barn, and head through the doorway to the right. Turn to your right, and hop out the open window to gain access to the outside. Make sure you grab the battery off the shelf at the end of the hallway before heading outside.
Now it’s time to head through the last leg of the first part of your journey and find your wife. After leaving the barn, head through the next open window you spot and enter another small house. Here you’ll learn about noise tracking, which can be utilized to hear enemies moving around outside. Wait until the way is clear, then head out the window on the opposite side of where you entered the small house.
There are several people here, so sneak your way along the right side. Chances are you’ll be spotted, and if you are, just run up the path until a white light triggers. This will cause any villagers chasing you to be incapacitated, allowing you to continue without any trouble.
Head up the path, making sure to the grab the document on the ground in the canyon, and then head up the path that leads to the massive church at the top of the hill. The gate is closed, but you can enter the yard through a hole in the fence on the left side of the fence. Crawl through, and then aim your camcorder at the top of the church to grab a recording.

Once you have the recording, head inside the building and take a right near the door with the light. Grab the document off the table on the right side of the hall, then unlock the door at the end of the hall and head down the stairs into the church’s prison.
You can find another document in the hole in the middle of the prison. Capture it, then climb back up and grab the Prison Key off the crucifix in the corner.
Head back into the prison area and grab a battery from the back of the cage area. Now crawl between the cages on the left side of the area to find a door. Use the key on the door to unlock it and move into the next room.
Grab the bandage off of the table on the left, and continue up the ladder to reach the first floor again. Grab the battery on the table by the radio, then head up the steps to the second floor. There’s a document on the desk in this room, so grab it and capture it before moving through the locked door. This will lead you to a hallway.
Continue after Lynn until you are attacked by another group and she is taken once more.
Walkthrough Part 2 – Escape the Cornfield
After reuniting with Lynn, you find yourself alone again. This guide will walk you through the next couple of areas, which force you to sneak through a river, crawl under a fence, and then escape through a cornfield, all while trying to avoid several cultists with flashlights. I’ll also detail the locations of any batteries and other useful items along the way.
After Lynn has been taken again, you awaken in a canyon. Now it’s time to find a way out of the canyon and make your way forward. Head down the path until you head into some water, close to a village built along the river.
There are enemies patrolling here, so be sure to traverse the area slowly, and crouch under the water to hide from the prying beams of the villager’s flashlights.

Make your way along the right-hand edge of the river and enter the first building. The front door is opened slightly, so beware of the villager patrolling outside. Once he moves away, head out the door, and across the clearing to the next building.
Move into the building with all the lights on by heading up the front dock and into the front door. Once inside a bright white light will hit again, and when it clears, you’ll be in the catholic school once more.

Continue into the next room and grab the recording of the billboard on the left-hand wall. You can try to rewatch it to find that you’re not actually recording anything. If you walk up to the billboard you can read it out loud. You must read it to be able to leave the room.

You should also check the photo on the teacher’s desk in the front of the room. Now, head to the far back door and open it up to gain entry to the hallway. Look to the right and head down the dark hallway. A man will walk into the hallway at the end. Continue towards him and you’ll be pushed back to the end where you enter. Take off running towards the bright exit sign and head out the door and into the snowy air.

Follow the path of dirt within the snow to reach the front gate of the school, and exit out of the single person gate on the right-hand side. You’ll fall through the ground and be back in the real world.
At this point a villager will arrive and take you to his house. He’ll put you down into the root cellar, where he has a bed stashed. Lay down on the bed to continue.
You’re awakened a short time later by a crash above the root cellar. A woman of some sort has arrived and is questioning Ethan about you. Listen to the events above, and then once the woman leaves, break through the cracked planks and climb back into the main room. Use your camera to record Ethan’s body, and then listen to the playback for some insight from Blake.
With the recording captured, head out of the house and through the open gate to the right. Follow the path down to the left, and into the water. Move along to the right until you spot an old building ahead of you on the left. Watch out, as a villager comes out onto the deck and preaches for several moments. You can hide in the water when she does, and then continue on after she moves away.

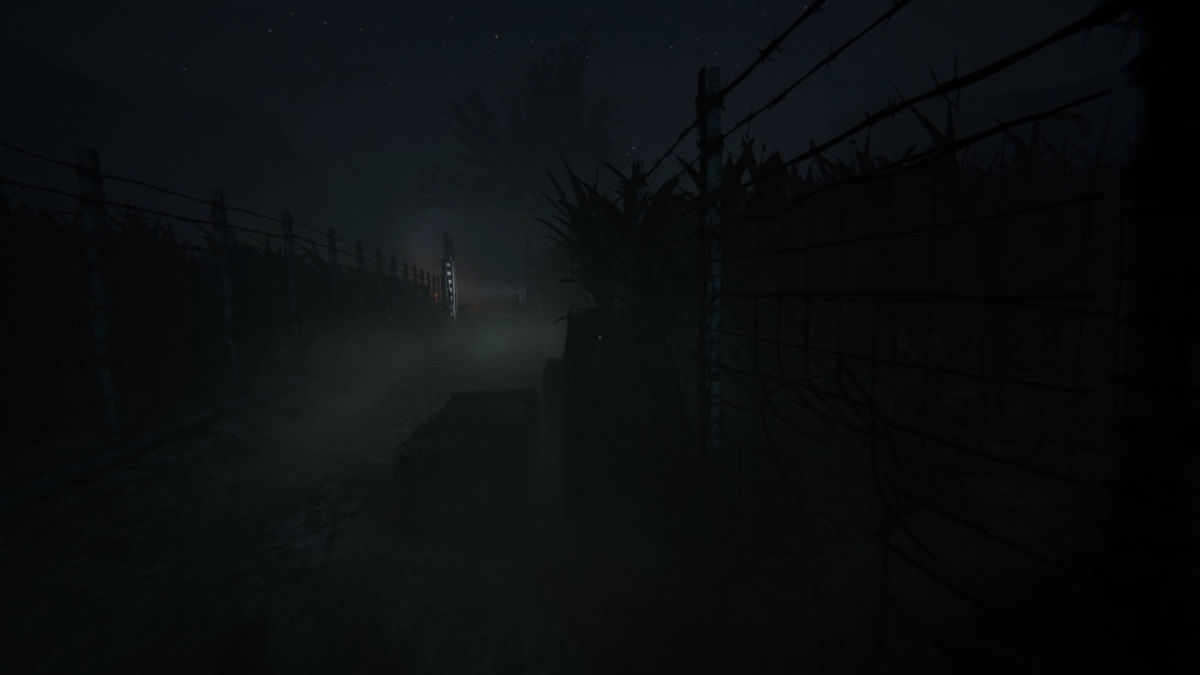
Head up the bank of the river to the right, and then move across the bridge towards a burning body. You can record this, so pull out your camera and do so. There’s also a document nearby, in the building where the preaching woman came from. Make sure to grab it before continuing between the two fenced in cornfields.
Move down the pathway between the fences and keep an eye out for a woman with a pickaxe behind the gate. You can record her, as she moves across the path, but you only have a moment so make sure to grab it quickly. Look for a group of crates on the left-hand side of the fencing, as there is a hole you can crawl through here. Head through it before the men who have appeared behind you can spot you.
The exit to the cornfield is on the right-hand side from where you enter. You could run directly forward, but there are villagers patrolling the field, so you’ll need to be careful. Sneak your way through the field, careful not to draw too much attention, and make your way towards a lit-up gate on the right-hand side of the area.
There are several boxes that you can climb atop here. Climb onto them and jump over the gate and escape the cornfield.
Walkthrough Part 3 – Find a Way Through the Barn, Find the Town
Once you have made your way through the cornfield, and survived your first few encounters with the cultists, it’s time to continue pushing forward and locate your wife once more. This time you need to make your way through a barn, but it’s crawling with cultists. In this guide I’ll show you how to enter the barn, and how to avoid the cultists inside and make it out alive.
After you escape the cornfield you arrive in a small farmhouse area. The way forward is through an old barn on the other side of the area, so start sneaking towards it. There are several enemies in the area, behind the gates (they can still see you), and even one on a porch just before the barn. You can grab a battery beside the gate at the end of the path between the barn and the farmhouse, and a document can be found pushed halfway under the door of the old farmhouse.
Crouch and sneak your way in front of the barn and the building attached to it. A villager is sitting in a chair on the porch, but he shouldn’t see you if you stick to the shadows. Make your way to the door of the barn, and interact with it to push it open.
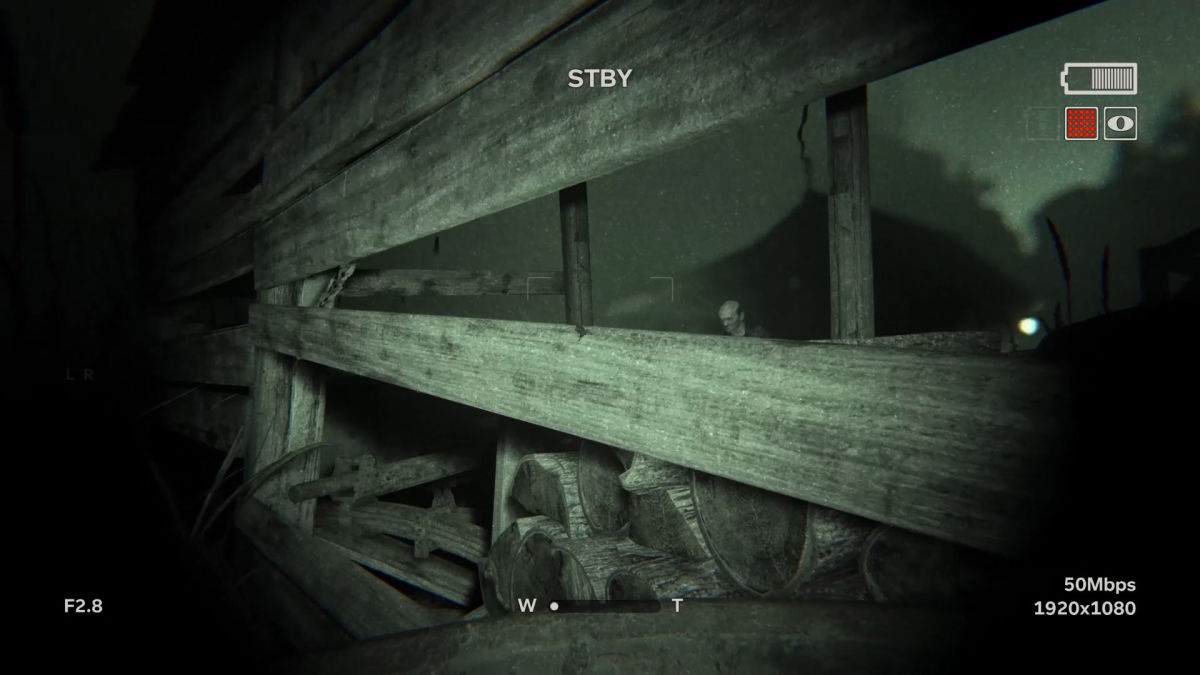
Once the barn opens, two villagers will enter from the back. Immediately crouch and head into the left-hand corner of the barn. There’s a barrel here that you can hide in. Hide and wait for the villager with the flashlight to leave the barn and search outside.
Now, crouch-walk over to the right-side of the building, and make sure that the other villager isn’t waiting around nearby. Once you are sure the way is clear, head down the center and grab the cart that you can interact with. Move it under the broken ladder, and then climb onto it and jump up onto the ladder.
Once on the second floor, climb up onto the rafters to the right of the way you entered. Move towards the front of the barn, and slip through a small section. There’s a document beside the candle on the crate near the front. Now, grab the chain and pull it to open a door and clear the way forward. Head out across the plank, and you’ll be knocked out the barn and onto the ground. Now it’s time to move.
Head through the fence and follow the path to the right, and down into a canyon. Grab the document in front of the statue at the bottom, and them move forward into the darkness, making use of your night vision camera when needed. Another bright flash of light will happen, and you’ll come to a bridge that’s been destroyed.
Head back from the bridge and down the path to the left. This will take you down towards a deeper canyon. Check for a battery on the dead body at the end of the canyon, and then look for some rocks with bloody, red handprints on them to signal that you can climb up it. Climb up the rock, then shimmy along the narrow edge to reach the next rock area. Climb up it, and then jump across to the platform with the broken ladder.
Jump up the ladder, and move into the cave beyond the candle. Slide down the hill, and keep moving forward until you come out to a weird temple type thing. You can record this, so focus in on the massive statue, and then watch the playback. Head down the stairs and jump over to the platform on the other side. Be sure to grab the battery next to the dead body.
Once on the other side of the room, head through the cave further, beyond the creepy wall fixtures. Follow the tunnel until it exits into a canyon with a light at the bottom. I won’t spoil everything that happens in between.
After you reach the canyon, use your camera to record the town, and then look for a path down to the left. This will lead you to the bed of the river below, which will in turn give you access to the lighted path at the bottom. Move into the old tunnel, and continue beyond the cages and broken down buckets you find there. You’ll enter into a basement. Crawl under the broken staircase, and grab the document off the desk inside.
Once the document is captured, head through the door to the left, being sure to unlock it first. This will open on a set of stairs that will lead you up to the first floor. Carefully move through the area, and keep an eye out for batteries or bandages. Head up the stairs to the second story, where you’ll find a bookcase pushed in front of a door. Push it out of the way, and then grab the document off the desk in the back corner.
With the bookcase moved, head outside onto the balcony beyond.
Walkthrough Part 4 – Find the Generator, Use the Elevator
Here you’ll find an elevator with no power. In order to move on to the next portion of the game, you will need to locate and restart a nearby generator. I’ll also detail the locations of any useful items along the way, and point out any enemies that you should keep an eye on.
After escaping the cornfield and finding the edge of town, you’ll come to an elevator. The chapel, the next goal on your list, is in the upper section of town, so you’re going to need to use the elevator to reach it. Unfortunately, the power is turned off, so you’re going to need to find and activate the generator before you can use the elevator. This guide will teach you everything you need to know to find the generator, activate it, and then make it back to the elevator in one piece.
The elevator is just ahead of you when you drop out of the building that you came through to enter town. You can try to use it, but the power is off, so your objective will update, and you’ll need to find the generator that powers it. Head down the hill and into the outskirts of the village.
There are several enemies that patrol this area, so be careful as you move through it. There are several batteries in the buildings in this area, so be sure to check them carefully before you continue on your way. I know for sure that there are batteries in the first building on the right, which holds a villager, as well as the last building on the left, which also holds a villager.
You can sneak around the first building by heading around the right side. There is a fence you can jump over, and then another you can crawl under. This will lead you to an open window, which you can climb into to enter a back bedroom. Grab the battery and then head back out the window to avoid the villager inside.
There’s also a villager woman who constantly preaches in this area. You can ignore her for the most part. She won’t alert others to your presence, but she will hurt you if you get close to her. Avoid her by walking up the side porches.
When you reach the last house on the right, a villager will begin patrolling the area and searching for you with a flashlight. You can avoid him using tall grass or barrels, but wait for him to leave, and then continue up the hill beyond the open gate.
This will lead you to the barn with the generator. The generator itself is all the way at the top of the barn. Once you find it, pull the starter to reboot the generator and get the power running again.
At this point the woman from below will arrive outside the door to the generator room. Don’t try to move past her, as she’ll just attack you. Instead, wait for her to head down a level. Now, head outside and make your way down the stairs to the bottom of the barn. If you carefully move past the woman she shouldn’t attack you.
Once you’re clear of the woman, continue back down into the village. The patrolling villagers are gone now, though, but another threat has arrived. Head back down towards the path where you entered and the woman you saw with the pickaxe, the woman who killed Ethan, will arrive, and she’s on the hunt. You want to avoid her at all costs, as one hit from her pickaxe will kill you and force you to restart.
The easiest way to avoid her is to hide in tall grass. Once the way is clear, though, you can sprint up the hill to the elevator, and pull the lever before she reaches you.
Walkthrough Part 5 – Escape Temple Gate, Reach the Chapel
After getting power back to the elevator and riding it up, you arrive in Temple Gate proper. In this area you’ll have to escape several cultists and make your way up to the chapel, where you can learn more about the people who have taken Lynn, and how you can find her. This guide will detail everything you need to know to survive your encounter with the cultists, escape Temple Gate, and make it to the Chapel.
After you exit the elevator, pull up your camera and focus on the sign just ahead of you. This will allow you to nab a recording, which you can view to learn more about the city that you’ve found yourself in, Temple Gate.
After watching the recording, head forward towards the well in the center of two buildings. Peer into the well to be pulled back into the catholic school.
Now that you’re back in the school, move forward through the vents until they break and you land inside of a classroom. There’s nothing in the first room, so head out the door on the left-hand wall. The door across the hall is jammed, to turn to the left and move down the hall.
Move past the first set of lockers and continue until a locker swings open, revealing a note and a music box. Crank the music box and read the note before continuing down the hall and grabbing the battery on the step stool. The way forward is blocked, so head back down the hall where you came from and try to enter the double doors.
They’re locked too, so head back towards the locker and Jessica will run through a door that is now open. Follow her through the room and out into the next hall. Capture the recording of the girl hanging from the ceiling, and then move down the hall towards it, and head through the door on the left-hand side of the hallway, just beyond the vents where the girl vanished.
You’ll be back in Temple Gate, in a fight with a cultist. After he knocks you down, head out the house through the front door. Continue into the next building and into the back door. Be sure to lock the door behind you.
The way out is hidden in the floor. Head around the counter to the corner to find a set of smashed boards you can crawl under. Head under the house and keep pushing forward until you crawl back out between the buildings.
Now it’s time to look for a lit-up doorway that you can run through. Head inside, careful to avoid any cultists nearby, and close the door behind you. Lock it, then head beneath the rubble into a children’s dorm room. Head around the corner, and when the cultist begins to knock against the door, hide under the bed closest to the door.
After the door is knocked down, and the cultist enters, sneak out, and make your way down into the basement. There’s another cultist down here, so you may want to hide off in another room until it is safe to head down.
When the way is clear, head into the basement and through the first room to a second room. Close and lock the door. At this point, you could try to push the bookshelf out of the way and continue forward. Instead, it’s best to hide under the bed and let them break down the door. Wait for them to leave, and then sneak over to the bookshelf and push it out of the way.
Make your way down the stairs and into the tunnels. Keep pushing forward until you reach a room with a woman on a bed. Record her with your camera, then push the rolling cart of wood out of your way and move forward.
Shimmy along the side of the tunnel, being mindful of the hole below. Once on the other side, grab the document, and then head down the tunnel some more. This will lead you to another basement. Grab the battery out of the back corner, then move up the stairs to the first floor. Be prepared to run as you near the next door, and then push through it.
At this point you’ll be spotted, so take off running up the stairs to the second floor. Crouch and move out onto the balcony, then drop to the ground below. Keep running forward, over the fence, and then turn left. Follow the path down to a house, which you can crawl under through a hole in the siding. Keep pushing forward until you reach the other side.
Once you are out from under the house, take off running, and jump up through the open window into a small shed. Tap the interact button when notified to break open the floor, opening another crawlspace. Keep pushing forward and out of the crawlspace. Move up the hill, and through the small window into another building’s basement.
Open up the door to the next room, and grab the bandage off the table in the corner. Follow the room around to a set of stairs, and make your way up to the first floor, and through the double doors. This leads you to the old schoolhouse. Record the dead woman and the message on the chalkboard, then head through the cracked door at the front of the room.
Move up the steps to the second floor, and then look for a document on the desk by the bed. Grab it, and then head out the open window on the side to drop off the roof onto the ground. Look for a document in the far corner of the schoolyard, and then interact with the cart and push it to the gate.
Hop over the gate and into the streets beyond. You’re almost out of Temple Gate, so make your way around until you spot another cart. At this point Martha, the woman with the pickaxe, arrives. Hide from her by heading through the small hole in the fence next to the cart. Make your way around, diverting her from the area, and then once it is clear, head back and push the cart against the gate.
Climb over the gate to trigger a cutscene, and when you regain control, take off running up the stairs and follow the path. This path will lead you to the chapel, where you will learn more about Knoth and his followers.
Walkthrough Part 6 – How to Find Crank, Escape Water Mill
After escaping Temple Gate and making it to the chapel, players will move on to the next part of Outlast 2’s story. Following some revelations while listening to Knoth and his crew beat up a heretic, Blake learns that Lynn is being held in the mines. This guide will walk you through the next section of Outlast 2, which forces you to find a crank, stop a water wheel, and escape a mill.
After arriving at the Chapel, grab the document on the table inside the entrance and then head to the front of the room. A man will beg you to kill him. Ignore him, and instead hide in the confessional booth on the right side of the room. Knoth and his men will arrive, at which point they’ll interrogate the man and learn that Lynn is being kept in the mines with the heretics.
Wait for the encounter to finish, and then move slowly out of the confessional booth and record the tortured man with your camera. Now, head out the front doors of the chapel and down the path. Keep running and look for a barn at the bottom of the path. The barn door can be pushed open, allowing you to enter.
Head into the barn, out the screen door on the back wall, and up the stairs to the watchtower above. Grab the battery off the chair to the right, then hop over the railing and into the long grass below. Use your Night Vision to locate a hole in the fence. Crawl through and then make your way inside the building across the dirt road. Continue through, ignoring the woman crying over her babies. She won’t hurt you.
Head out the room with the babies, grab the bandage on the table by the door, and then grab the document off the table in the back corner. You’ll need to climb out the window in this room and into a cornfield.
Make your way through the cornfield to a water mill, with a massive water wheel on the side. Head inside, lock the door behind you, and then make your way into the next room. Look for a set of double doors on the left side of the room, and grab the crank inside.
With the crank in hand, head out the back door and up the stairs to a pulley control. Interact with it to attach the crank, then turn it until the water wheel stops moving. Now, head back inside the water mill and through the hole where the dead body is. This will lead you out the water mill, and down a path that drops you into the next area.
Walkthrough Part 7 – Find the Hook, Solve the Hangman Puzzle
After escaping the water mill, Blake Langermann is pursued into Marta’s piece, a plot of land owned by Marta, the creepy woman who carries around a pickaxe. In this guide I’ll show you how to find the hook and escape Marta in Outlast 2, which will allow you to continue your journey through the game.
Make your way deeper into Marta’s place and watch out for her, as she walks out to the left, beyond some corpses. Head down the right side of the area, and look for a barn door that you can slip inside of. Continue inside, and make your way to the end of the area to discover that you need a hook to continue.
Make you way back out of the barn and around towards where you spotted Marta earlier. Continue pushing forward, into the area that she walked out of, and be careful as you move through, and crawl through a hole in the fence.
Turn to your left, and make your way towards another pile of corpses, and a lit up barn. Head through the double doors into the barn, and make your way down the path of blood and bodies. Record the human bodies hanging from the hooks for your records.
Head up the opposite side of the gory path, and turn to the left. This will lead you to a back area, where you can pull a chain and grab the hook.
Now that you have the hook, double back towards the doors to this barn, and Marta will close them. Don’t worry, though. Keep pushing up to them, and look for a hole big enough to slip through on the right of the entry area.
Crawl through the area, and then make your way back towards the place where you saw Marta when you first entered the area. The way should be clear, but move carefully, and keep an eye out for her as you press forward.
As you round the barn, towards the place where you needed the hook, Marta will spring, breaking through a door on your left. The only way to survive this encounter is to run past her and sprint to the barn door.
Once back inside the barn, use the hook on the gate, and then pull on the chain to open the gate. Do not waste time here, as Marta will catch up to you and kill you. If you time it correctly, you should be able to slip into the gate and narrowly escape Marta’s clutches.
From here, keep moving forward and make your way up the path until you reach a set of stairs leading to an old building. Grab the document off the altar at the bottom, then head up into the building to reach and old chapel. Climb through the hole in the door, and you’ll be back inside the school.
Record the hanging man on the wall, and then head out the doors to the right. Look for the first hallway on the right, then head down it and into the classroom door on the left. Move through the room and out the other side, and look for a half-opened door with a projector on inside.
Move the projector to line up with the game of hangman at the front of the room. You’re missing some letters on the game, so you’ll need to solve it by finding the transparent that goes along with it.
Head back down the hall to where you started, and then move through the set of double doors on the other side. Look for the second classroom door, and head inside. The transparent can be found on a desk in the back of the game.
With the transparent in hand, head back to the room with the projector and place it on the projector to solve the puzzle.
Make your way back to the room where you entered the school, and the hangman on the wall will be gone, replaced by two blue double doors. Head through these doors, and make your way down the hall towards the exit at the end. Some creepy stuff will happen, let it play out, and then once you’re thrown back to the end of the hall, head through the door on the right and use the cart to reach the hole in the ceiling.
Keep crawling through until something weird happens and you’re crawling back through the woods. Make your way out of the hole and push forward down the hill to reach a bridge that you can record with your camera.
Follow the path around until you can head out onto the old railroad bridge, and start making your way across. As you reach the end, something weird happens, and Blake falls from the bridge.
Walkthrough Part 8 – Escape the Scalled, Find a Way Back to the Mines
After you fall from the railroad bridge, you awaken hanging from a tree. In this section of Outlast 2 you’ll have to avoid several enemies from a new faction, the Scalled, while also looking for a way back up to the path that leads toward the mines. This area can be very confusing, so I’ll do my best to walk you through this portion of the game and help you outrun the newest threat you’re introduced to.
After you awaken and find yourself hanging upside down, wait for a massive creature to pass in front of you. Once it’s passed, you should get a quicktime event that will let you free yourself.
Once you have regained control, pop on your Night Vision if you need it, and make your way forward through the woods. Look for a stream that you can follow off to the left of where you landed. This should lead you forward in the direction that you need to go.
Make your way down the stream, through some bushes, and look for a document next to a dead body. Continue forward and you should spot a tree trunk that you can walk up to pass over several rocks blocking the path.
Keep pressing forward and follow the stream until you have to crawl under a set of logs blocking the path. Now, look for a log that you can climb through. Crawl through it, and out the other side. Continue following the stream forward, and around a short curve to a fence. Record the fence, then turn off to the left and make your way down the various jumps and into a canyon.
Push forward, around the canyon turns and grab any documents that you see along the way. You should reach another stream, which leads to a rock that you can crawl under. Crawl under the rock, and make your way through the camp with the fire in the center of it.
Keep pushing forward, and head inside the nearby building to find a hole that you can crawl through. Head outside, and make your way down the stream. A document can be found at the end of the stream, inside a cave with several Scalled.
Once you have the document, head back out the cave and take a right, moving towards a campfire in another camp. Proceed past it, and watch out for the Scalled with the machete up the hill. Run past him, and up the path to the right. Keep running up the hill, past the various camps that have been setup.
At this point you get another good look at the creature you saw at the start of this section. Record it through the fencing, and then head up the hill to the left. Continue up the path until you spot a rock with bloody handprints on it. Climb up here, and then shimmy along the ledge to reach another set of rocks that you can climb up. Keep climbing until you are knocked back down.
At this point the creature you saw near the start of this section begins to pursue you. Run past where it enters the area, and head through the pushes. There’s only one real way forward, so go until you reach a campfire and shimmy through a small area into a house.
You’ll suddenly be inside of a locker, back in the catholic school. At this point, wait for the man outside to leave, then head out the locker and chase after Jessica. Eventually she leads you to a room with a computer that you can interact with and read an email on. Read the email, then head back out of the room and into the hallway once more. Turn to your left, and head down the hall towards a bathroom, and then take a right. Something weird will happen, record it with your camera, then take off down the hall after Jessica.
Turn to the right, and run to the end of the hall, where you hear singing. You should be able to see the hangman mural on a wall through the window on the door. Use the step stool in front of the door to reach a set of vents, that you can climb through.
Now you’re back in the real world, crawling through a log. Crawl to the end to trigger a long cutscene, which ends with Blake in a fairly distressing position. This is also the first time that you’re formally introduced to Laird and Nick, the deformed creature that you just ran away from.
Walkthrough Part 9 – Free Yourself from the Crucifixion, Head for the Mines
After finding yourself nailed to a cross, it’s time to free yourself and escape the Scalled once and for all. Nick and Laird won’t be too happy with the change of plans, though, so you’re going to need to avoid them at all costs. In this article I’ll show you how to get around them and make your way towards the mines once more.
Your first step is to free yourself from the cross that Nick and Laird have nailed you to. This can be accomplished by repeatedly pressing the button marked on your screen. Once you’ve freed your right hand, turn over and free your left hand.
Now that you’re free, it’s time to find some bandages for the new wounds on your hands. Head forward from the cross and take a left, through a small canyon towards a campfire. There are several enemies patrolling around here, so be careful and grab a bandage out of one of the tents nearby.
Once you’re bandages, it’s time to escape this area of the Scalled’s land. Take a right from the campfire, and look for a tent that you can crawl through. Head through it by crouching, and then look for a set of rocks you can jump up. Climb to the top and continue following the path forward until you read a drop into the next area.
Drop down into the small canyon, and move forward, near another campfire. Avoid the Scalled with flashlights, and grab the bandages and batteries in the nearby camp. Now, hear towards the lights, and look for a lit-up path that leads down a hill to the right. Follow it down and look for some red prints on a rock that you can climb up.
If you want to survive the Scalled lands, you’ll have to be sneaky. Drop down off the next rock, and immediately hide in the grass to avoid Laird and Nick, who appear quite frequently throughout this area. You can follow them here, just be careful not to draw their attention. Follow them until you spot a limb you can walk up to reach another set of rocks.
Keep pushing forward until you reach another drop that leads to a small pond of water. At this point, be careful and duck in the water to hide from Nick and Laird’s light. Once the way is clear, move to the shore and head forward. After leaving the water, follow the path away from the pond and look out for an old house that you can enter. Head inside and make your way through, grabbing the bandages to the left. Move through the ragged old clothe over the door and pick up your camera.
You’ll now be back inside the school. This time you’re in the cafeteria. Look for an open set of doors and head out through them into a hallway. Head down the left hall at the junction and look down the hall to the right. Ignore the doorway on the left, and instead head down towards a blue door at the end. You should hear a phone off to the right.
Head down the hallway, and something will slam into the ground, and begin to walk out of the room where the phone is. Backpedal immediately and run back to the bathroom and hide inside. Wait a few seconds, and then exit the bathroom and make your way back down the hallway. The thing should be gone now. Move into the room with the ringing phone and answer it.
After the phone call ends, head out of the room and make a break for it. Run down the hall, to the left after you exit, and keep moving until you see Jessica run away through a door. The door is gone when you get there, so turn and hide in a locker.
At this point the locker turns into a wardrobe, and you can exit it to find yourself in a building back in the Scalled lands. Nick and Laird have found you again, so it’s time to avoid them once more.
At this point you’re in a wooded area once again, so use the trees to your advantage. If Nick and Laird spot you, they will open fire with arrows, so try to avoid them at all costs. Your way out can be spotted off in the distance as a small lantern near a cliffside.
Head to the lantern, and then make your way around the edge and keep pushing forward. Be careful, as Nick and Laird will continue to pursue and shoot arrows at you. Follow the path across a tree that spans the canyon, and turn left, following the edge of the canyon to a small Scalled camp. Be careful of the Scalled on the ground, as it will attack, and continue past the area. Jump onto a rock nearby, and take cover behind another boulder ahead to avoid Nick and Laird’s arrows.
At this point all you can do is continue pushing forward until you reach a hill and slide down into a group of barbed wire. Nick and Laird will capture you once more, this time burying you alive. Wait for the cutscene to play out…
Walkthrough Part 10 – Escape the Casket, Find the Rope
After finding yourself buried alive, it’s time to escape Nick and Laird’s twisted fate once more, and try to push on towards the mines. This article will feature an in-depth break down of everything you need to know to escape the casket, make your way forward, and find the rope that leads down towards the mines. I’ll also show you how to escape the monster in the school, which is something you’ll have to do quite frequently throughout the game from her on out.
After the cutscene completes and you regain control of Blake, force your way out of the casket and into open air once more. There are several enemies around, so be wary as you push forward and try to find a way out. We’d suggest using Night Vision here, as the forest area can be confusing and hard to navigate. Basically, look for a lit-up fence that will allow you to crawl out and into the next area, where a Scalled camp can be found.
Check the camp for batteries and bandages, and then continue moving forward, along the path. There’s a recording at the fence ahead, where you can see a hanged man and several Scalled below him. Capture the recording, then turn to the left and head up the hill to climb some rocks to the next part of the path.
Keep pushing forward and up the hill. This will lead you to a canyon that you can drop down into. Once in the canyon, you’ll get your first view of a dock at the bottom. Look to the right and you’ll see a building on the side of the cliff that you can jump to. Jump over to the open window and read the document inside to find that the rope for the crank in the corner has been taken by a Scalled.
Finding the rope is actually quite easy in this section, so long as you play things close to the chest and move through the area as silently as possible. Try not to start a foot chase, as there aren’t many areas that you can use to avoid enemies.
Head out the door of the building with the crank by jumping through the window at the top. Be wary of the patrolling Scalled, and make your way up the stairs to a path that leads you to a small village. Follow the left side of the village, and move around it to spot another house further up. Stick to the left side once more, and you should be able to avoid most of the enemies in the area. You should eventually reach a rock face with a path that leads up to a stack of logs. Interact with the rope to free it, then head back down the path and around to the left to find the man who had hanged himself with it.
At this point Nick and Laird show up once more. Use the same houses to hide out of their view (the ones on your right as you head back to the building with the crank), and make your way back down. Attach the rope, and then start climbing down. A cutscene will trigger that ends with you at the bottom of the gorge, crawling through a bunch of rubble.
As you crawl through the rubble, you reach a small door that you can head through to get out of the debris. Climb up it, and the world will transition back to the school, where you are now on the rooftop.
Head forward and make your way around the rooftop to a fenced in area that you can climb over a railing and head down a set of stairs on the other side. Keep pushing forward until you spot a fence on the left, which has a hole that you can crawl through to proceed.
This will lead you to a door that leads down to a staircase inside the school. Make your way down the staircase until the monster appears, and then head back up the staircase. You can drop over the railing to avoid it, as it appears at the top of the stairs when you try to back track.
Once you’ve dropped down, run down the stairs and around the corner to find a door that leads out into the courtyard. Head outside into the snow and keep an eye out for a hatch in the ground that you can enter. There are actually two hatches that you can enter, one has a battery and a blocked door. The second hatch will allow you to move inside, which will trigger the monster to spawn once more, forcing you to push forward.
Climb up the ladder and out of the hatch to enter the kitchen area of the school. Move outside of the kitchen and into the cafeteria, and then focus your camera on the mural at the back of the room. Things will go crazy, and then you’ll have to follow Jessica.
Unfortunately, there isn’t really any way to accurately portray this in text, so just make use of your camera’s sound tracking to follow her. At the end you’ll catch up to her, and then you’ll be back in the real world. Move forward and out the tunnel that leads from the cave you are inside.
You’ll slide down a hill, and at the bottom you’ll find an old set of stairs that lead down to the shore of the lake.
Walkthrough Part 11 – Find the Raft, Enter the Mines
After your last encounter with Jessica in the school, head down the stairs and then look out for a path that you can loosely follow down to the lake side. Once you reach the water, head to the right, keeping the lake on your left. Look for a house that you can move through, which will lead you to another path up.
Keep following the path until you reach the top of a cliff and then look for another path that leads down to a small jump across the canyon. At this point, just keeping following the path down to a set of houses, where you’ll find the raft on the edge of the lake. Hop onto the raft and head out into the lake.
All that’s left to do here is keep moving forward across the Lake. Some crazy things will happen around you, but ignore them until you reach the river. Continue down the river. You’ll hit a rock at one point, slam the paddle into it to break loose.
When you finally manage to break the raft loose, head down the river more, careful to avoid the walls and rocks in the water. Keep going until you reach a point where Blake is thrown off the raft, and he must find his way back to it.
After Blake is knocked from the raft, follow the only path forward. It’s pretty much impossible to go any other way, so you shouldn’t have to worry too much about getting lost. Keep moving along the path until you reach a place that you can shimmy across.
Follow the ledge to reach the next portion of the path, and then keep moving around. Be careful of any enemies in the area, but you should be okay for now. Interact with the tree at the edge of a firelit area to create a bridge to the other side. It shouldn’t take you too long to reach the raft and continue on your journey.
Reunited with the raft, head down the river, careful to avoid any other rocks or boulders in your way. Keep moving until you reach a point where the raft breaks and you spot the mine in the distance. Keep moving forward, and after a few moments you’ll be knocked from the raft again, and attacked by several enemies. Swim away from them, until you are attacked and pulled underwater.
At this point you’re inside the school again. This time, however, you’re in the school’s swimming pool. Make your way to the edge and climb out. Head inside the women’s locker room to spot a shower spewing blood from the showerhead. Use your camera to record it. You should also have spotted a stall door banging next to you. Move toward the door and open it. Blood will bubble from the toilet.
From here, head back out into the pool area and then into the men’s locker room. Follow the room through to reach a hallway, and then head up the stairs to the left. It’s time to run from the monster again, so take off in the opposite direction until you’re thrown backwards and a door opens near you.
Head inside the room where the door opened, and grab the battery off the cart at the end of the first row of computers. Move back into the hallway and head back the way you came, which should lead you to another hallway. Start running down the hallway when the sprinklers activate, and continue on until you reach a door on the left at the end of the halls. Head inside the room and climb up the ladder in the back corner to reach the real world once more.
Head out into the blood rain and record it with your camera. Then, follow the steps up until you reach the old railroad bridge that leads to the mine. Keep moving up the stairs until you reach the mine itself, where you’ll need to follow the tracks until you reach a fence with a hole in the right side. Crawl through, then look for some stars to lead to a small room. Head through the room, and out the door.
There’s only one way forward, so just keep moving up the stairs and in the only direction that you can. Feel free to explore the area for documents or other knickknacks, and at one point you’ll reach a room and by inside the library, back at the school.
There are batteries strewn throughout the various study rooms on each side of the library, so pick up any spares you might need. Then, head out the open door by the light, and make your way into the computer lab. Look for a computer with a lit-up screen in the third to last row at the back of the room, and interact with it to zoom in and read a chat window.
Now, turn around from that computer and look for another lit-up computer on the back row. Interact with it to read the continued chat history. Make sure to record the scene when the computer screens start going crazy. After recording the computers, head down the hall through the now open door.
Keep moving around, and ignore the whispers follow you. Head down the hall and look for a door propped open by a trash can. Run to the other side and down the stairs. This leads back down towards the pool area. The monster will appear in front of you. Take off running and head out the right-hand door at the top of the stairs. Follow the hallway around until a tongue slams through the window and pulls you back into the water.
At this point you arrive back in the real world. Climb out of the water and look for a half-closed door that you can climb through. There are a lot of chase sequences through this area, so simply keep moving forward the only way that you can. There’s really no easy way to describe this next section, but you shouldn’t have too much trouble completing it. If you have trouble finding the way forward, then simply look for places you can crawl through, or shimmy through.
At About halfway through the chase sequence you will climb through a window and suddenly be back at the school. From here, move across the window sill, and make your way to an open window a little way down. Climb inside the window to reach a classroom.
From the classroom, head out the open door on the right. Record the scene of hanging people through the window, then head down the hall through the open doors until you reach a dead end. From there, move through the open door to the right, and then out into the hallway. The closed door at the end should open automatically, so continue through and back into the library. The Monster appears some here, so be careful as you look around.
The way out is on the other side, near a lit-up stack of books. Back up whenever you see the monster, and then make a break for it and climb over the stack when you can. Look for the light at the end on the right, and then make a break for it. The monster appears again, at this point, turn around and make another break for it. Look for a set of bookshelves that you can shimmy through, which will put you back in the real world.
Walkthrough Part 12 – Find the Power Switches, Escape the Mine
After escaping the monster in the last hallucination, you find yourself in a locked room. You can use the cart in the room to climb over the hole in the top, above the door. Once you’re in the next room, look for the bandage on the table, and then head down the stairs and through the crawl area at the bottom. Another chase sequence triggers here, so keep pushing forward, using any means you can to progress onward.
After you crawl and shimmy through a couple of areas, look for a metal door that you can slide open, and then use the cart inside to reach a ledge above you. Don’t worry too much about the noises around you, as it’s all just for atmosphere. One you crawl through the hole using the cart, take off running up the stairs to the left, then head down the ramp, and then back up the stairs. This may sound confusing in text, but there’s only one way forward, so don’t stress too much about getting lost.
Your overall goal in this sequence is to make it upstairs, so keep doing this until you fall down and are back in the school.
After dropping Jessica’s body, take off running and look for an open bathroom. Hide in the stall, and then wait for a few seconds before the monster appears. At this point, just run down the hall, away from the monster, and back up the stairs where you found Jessica. There’s a door at the top that you can enter, so head through it and keep looking for open doors that you can leave through.
Eventually you’ll reach a classroom with a hangman game on a desk in the center. Climb out the window and you’ll be back in the real world.
Shimmy around the ledge until you can drop onto a boardwalk. Follow the walkway along, and jump over to another one, which leads you to another window that you can climb into. Head inside, and then look for a minecart that you can push out of the way.
Grab the battery in this area, then slide down the shaft that you just opened up. Some enemies will drop down near you, so head up the stone ramp and make your way up until you reach a ledge you can jump up to. Keep pushing forward, up towards the roof of the mines., like the previous areas, your main goal is to go up.
At the top you’ll slam the door down and lock it. Activate the elevator at the end of the track, and wait for it to arrive. Several enemies will be on it and another chase sequence triggers. Head back away from the elevator and make your way through the barriers and stairways you find. Then, head back over to the elevator and activate it to continue down safely.
You’re safe from the creatures for the time being, but the elevator isn’t that stable, and it collapses. At the bottom, head out of the doorway, and shimmy around the elevator to reach the mines themselves.
Now that you’re in the mines, it’s time to find Lynn and escape this nightmare once and for all. This area is pretty self-explanatory, as there is only really one way to go forward, so just follow the tracks and explore any nooks you find for additional batteries, documents, and bandages.
Aside from exploring, keep following the tracks until you find a dead end with rubble blocking the way. There’s a ladder you can crawl down to go deeper, so head down it, and then follow the tunnel with branches along its side. Rubble will fall to block your way, so just continue down the tunnel to the right, and keep moving forward until you reach a lit-up area on the left. There’s a crawl area here that you can explore for a battery, and then jump up onto a rock overhead to make it into another section of the mines.
Keep moving forward through the tunnels until you reach a locked door. Unlock it, and then look to the right to see an enemy drop down in front of you. There’s a crawl area you can head through to the right, so use it to avoid the enemy and make it through to another tunnel beyond that area. Head to the left from here, and move down the tunnel to another door. Open it up, and then follow the tracks on the right, as they will lead you down further into the mines.
Make a break for it from here, and keep following the tracks until you reach a tunnel with several bodies strewn along the walls. Record this, then watch out for the enemies that jump out just up the tunnel. Take off running back the way you came, and head through the door on the right. Use the hiding areas and other things to move past the enemies, and when the way is clear, run back down the path to where you found the.
At a divide in the tracks, head to the right and hide in the room at the bottom if you need to. Otherwise, pull the cart on the left track back, and then activate the lever on your right to allow you to push it down the right track and open up the way forward. Crawl under the debris blocking the track, and then keep following the track to a dead end. Look down on the left and you’ll spot an area that you can crawl through.
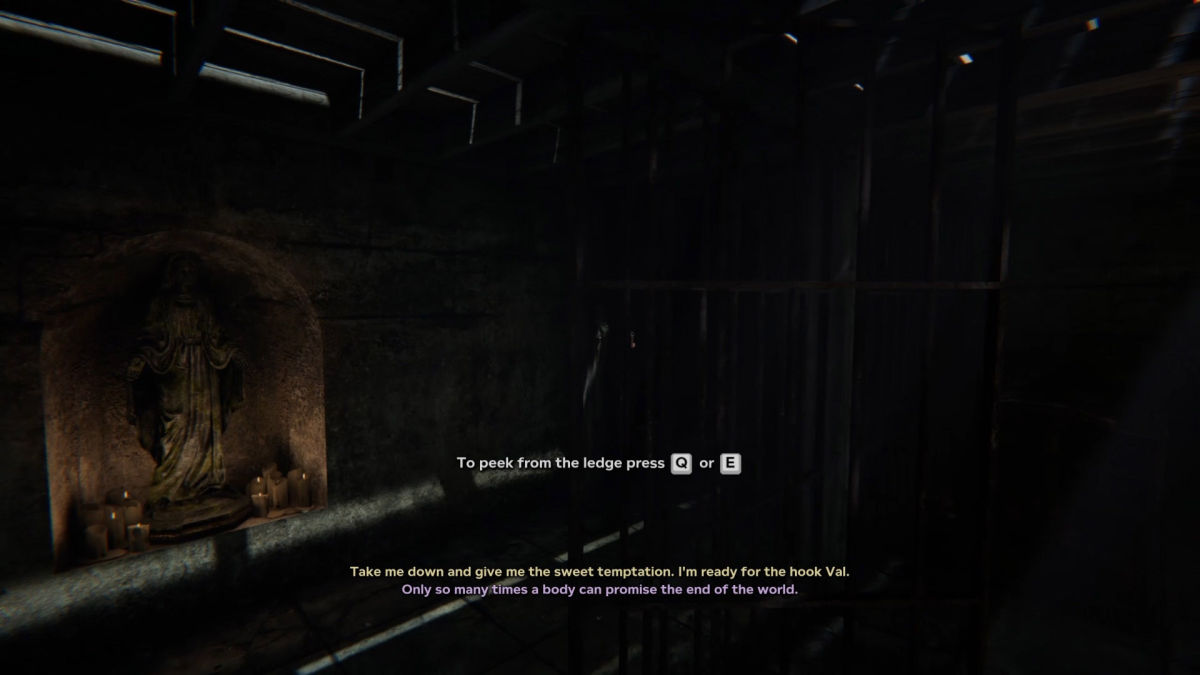
Crawl through the small space and out to the other side. Once there, head down the steps to the bottom where you’ll find a statue that you can record with your camera. Capture it, then head around it and continue down the path. Take the tunnel on the left, and shimmy through the rocks, then drop down to the next area. At this point you’ll be taken by the others, and brought to Val.
After a bit of dialogue, you regain control of Blake. Head up the rocks into a tunnel full of light, and keep following it. Eventually it will lead you to a dead end of rubble, and you’ll need to shimmy through a small area to continue. Do so, then keep moving forward. There’s really only way that you can progress, so just keep moving, and back track if you run into a dead end. The easiest thing to do is follow the light around.
AT one point, Val will start to look for you. Hide, and use the area that she comes into to stay out of sight. The way forward can only be opened by deactivating several power switches in the immediate area. Follow the lines on the ceiling to locate them.
The first switch is found directly across from where Val enters the area. The second switch is found through the tunnel that Val enters from. Head inside and look for some wooden planks enclosing a small area. The switch is inside this area. Once both switches are turned off, head through the area that was blocked and make your way through the tunnel.
Eventually you should run into a minecart that you can push out of the way. Push it just enough to get by it, then head down and activate the track change lever at a track divide. Now, pull the cart back some and get then get it going really fast and let it go. This will cause it to break through some debris blocking your way forward.
From here, just keep moving forward to find a ladder that you can climb down. Head to the bottom and you’ll fall off. Follow the tunnel, and Val will jump down again. Crawl through a small area of rock to escape her, and then keep running and crawling away from her. This will eventually lead you through to another tunnel.
Take off down the tunnel and follow it along, using any means necessary to get through any debris you reach. After a little bit you’ll fall through a hole, as the plank under you will snap. Head through the water, and enemies will give chase. Just keep moving forward, towards a fire that will lead you to a path up the side of the area. Continue following it along to reach another pool of water with a ladder.
Follow the ladder to the top, and ten make your way down another tunnel. You’ll reach another set of ladders, which you can use to move higher in the mines. Drop onto a beam, and balance your way across it until you reach a ledge you can climb onto. From here, just to the next ledge above you, and climb back up.
Follow the tracks to a pile of rubble, and head up the rubble and down a natural tunnel until you reach a hill that you can slide down.
Ending Explained by Josh Hawkins
Not sure what the ending of Outlast 2 is all about? Here’s what Josh Hawkins think.
One of the greatest parts of Outlast 2 is the way that the developers have left the story open to interpretation by every player who completes it. No matter what you think of the horror tropes used, or the lack of narrative, the game itself has a deeply embedded story hidden throughout the various documents and recordings in the game. One question I’ve seen being asked quite a bit, though, is “what does the ending mean”. To help you out I’ve put together a detailed explanation of what I believe the Outlast 2 ending means.
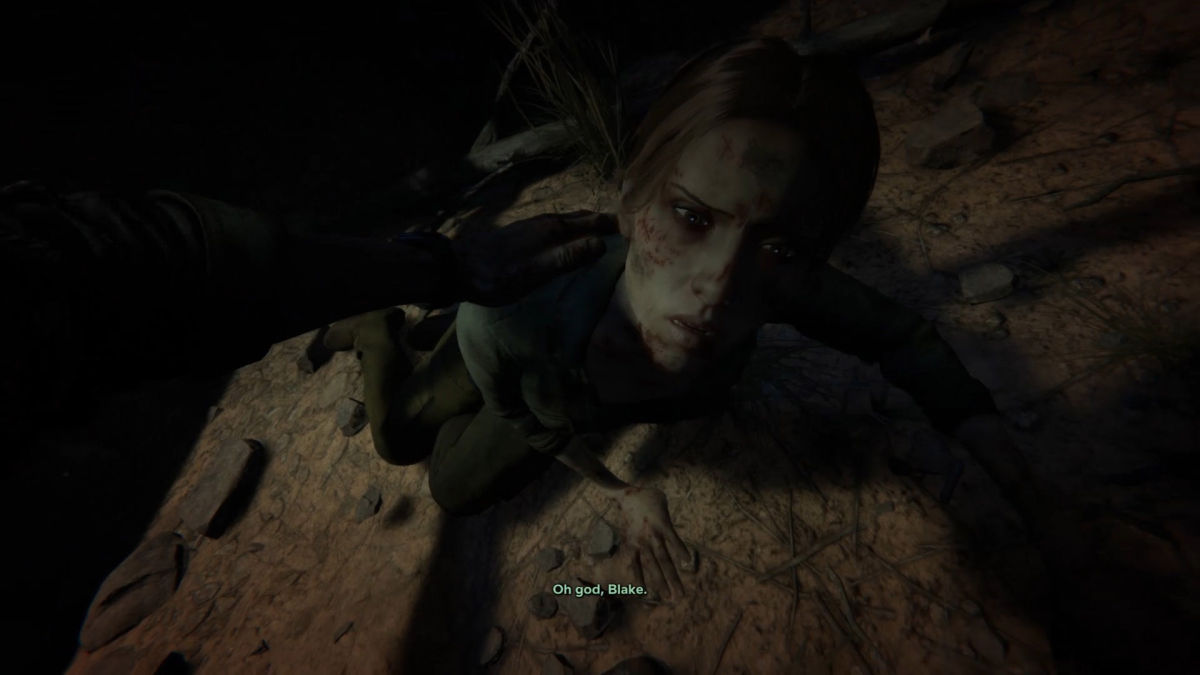
After you survive the onslaught of crazy cultists, and even survive being crucified and buried alive, you find your wife Lynn, at the edge of the mines. Together you escape, and she has the baby while a storm rages outside the old chapel in Temple Gate. After having the baby, Lynn says three final words to Ethan before dying, “there’s nothing there”.
These final words have left a proverbial wrench in the gears of the story, and a lot of players are scratching their heads right now, wondering what the heck this ending means. Of course, everything I’ve included below is merely my interpretation of the information provided by the game, so if your opinion is different, be sure to let me know.
As Blake walks away from Knoth and Lynn’s bodies, the world around him changes back to the school, and Jessica—with rope burns around her neck—leads him into the back room of the kitchen, where they used to fool around when they were kids. Together, Blake and Jessica kneel, and Jessica says a short prayer, and the credits roll.
Based on everything I’ve seen in Outlast 2, it would appear that Blake finally loses his mind and succumbs to the madness that has been eating away at him. His part in Jessica’s suicide (the fact that he did not stay with her when she begged him to) has left him ridden with guilt for many years, and the microwave signals from the tower set up to control the minds of the people in Temple Gate have finally broken him.
It’s unclear what happens to the baby, if the baby was even real, or if it was just an illusion caused by the signals playing tricks on Blake’s mind. As I mentioned above, Lynn says “there’s nothing there” just before she dies, which leads many to believe that she was talking about the baby that Blake believe he had just delivered. It’s possible that Lynn was in a much stronger mental state, as she was several hundred feet below ground, which would have kept the microwave signals from reaching her as much.
Of course, as I mentioned in my explanation of the story, Knoth also saw the baby, but this could easily have been a shared hallucination due to prolonged exposure to the mind-altering waves of the radio tower that was supposedly setup by Murkoff Corp. This theory is possible because over time Blake’s mind has grown weaker, with hallucinations becoming more and more frequent throughout. What began as a simple nightmare has at this point evolved into a new reality for Blake, a reality that he eventually gives into completely.
There are still a lot of questions left unanswered, and collecting every document and recording in the game won’t even paint a perfect picture. The developers have left the interpretation of the events in Outlast 2 up to the audience, and this is just what I believe based on the information I’ve found in the game.
Source: [link]
Additional content
Feel free to check all the Prima Games guides and walkthroughs here[www.primagames.com]
Story Explained
Like the first Outlast game, Outlast 2’s story is mostly told through the use of documents and recordings. For the most part, the story is left up to the player to interpret in their own way, giving each player a different meaning for the events that take place. In this session I’ll discuss and explain the Outlast story, what is happening throughout the game, and even discuss why everyone seems to be losing their minds, including Blake.
Obviously, spoilers will abound in the text below!

There are a lot of crazy things happening in Temple Gate, and as you make your way through Outlast 2, you’ve probably found yourself scratching your head at least once or twice—probably even more times than that. What is happening in this backwoods town? Why is everyone so intent on killing Lynn’s baby, and why is Blake having all these weird hallucinations about his time back in grade-school?
Before I dive into all those questions, let’s start at the beginning.
None of the answers we’re going to provide today are really cut and dry. Depending on who plays through the game, they may interpret these things differently.
First let’s take a look at how the first and second Outlast games are connected. The developers themselves have stated multiple times that the games aren’t connected in a big way, but a document that you find during your travels suggests that the games are more connected than I first thought.
According to a document called “Old Traveler”, the valley that surrounds Temple Gate is part of an experiment that uses strong microwave signals to control people’s minds. In fact, the document even mentions Jenny Roland, or Jennifer Roland (as Outlast fans will know her), who was Murkoff Corp’s pathologist in the first game.
For those who don’t remember, Murkoff Corp is the company responsible for re-opening Mount Massive Asylum and experimenting on humans in the first game. While this isn’t a massive connection line, it does draw some red flags that seem to indicate that Murkoff is somehow connected to the radio tower emitting the strong microwave signals to try to control people’s minds.
At the very start of the game Blake is awakened from a nightmare about Jessica Gray, a girl that both her and Lynn knew in fourth grade at their catholic school. After the bright white light causes the helicopter’s engines to fail, and the helicopter crashes, Blake begins to experience hallucinations surrounding Jessica and the events that led to her suicide. I believe, based on the documentation of the “Old Traveler” document, and others I’ve found, that this white light is the strong microwave signals mentioned in the document.
I believe that these signals broke something inside of Blake’s mind, which in turn forced him to begin seeing things. This also explains why the people of Temple Gate have become so violent, and why they’ve all gathered around their own religion of sorts.
As Blake continues deeper into the valley that contains Temple Gate, he begins to experience more vivid hallucinations, including the appearance of a demonic like creature. I believe that this is Father Loutermilch, a teacher that is later revealed to have assaulted Jessica at school. It makes sense in Blake’s mind for Loutermilch to be a demonic form, because he is the bad guy of Blake and Jessica’s story. The ending of the game, which results in all of the villagers rallying against each other and murdering each other also feeds into the information provided in the “Old Traveler” document, which mentions a feedback loop that can cause people to do crazy things.
This is one of the biggest questions that I’ve seen from players who have finished Outlast 2, as Lynn appears to become 9 months pregnant throughout the course of a single night. It’s really unclear how that happened, or if the baby is real, and Lynn’s final words to Blake are “there’s nothing there”, which would suggest that she is either talking about the afterlife (they grew up catholic, so they would believe in an afterlife) or she is talking about the baby that Blake believes he is holding in his arms.
Of course, the “baby isn’t real” theory becomes harder to prove when you consider the fact that Knoth arrives after Blake passes out, and he appears to be able to see the baby. Of course, since both Knoth and Blake had been affected by the microwave signals, it is possible that they were both hallucinating the same thing, and that Blake merely bought into the idea as he made his way through Temple Gate to try to save his wife.
There are still a lot of unsolved mysteries when it comes to Outlast 2, and I believe that this was intentional by the developers.
Special thanks

Don’t forget to check the original walkthrough and guide[www.primagames.com] written by Josh Hawking[www.primagames.com]
Guide icon by Crussong[crussong.deviantart.com]
I hope that has helped you, leave a comment below if you have any suggestions, thanks!