
Overview
This guide provides a user-friendly explanation of how to patch your TyranoBuilder game, either to fix issues or add content (for episodic releases, for instance).
Overview of Patching
So you’re thinking of making a game with TyranoBuilder and, because you’re a responsible aspiring game developer, you’re planning for the future.
“What if I release the game and something is broken?”
“What if I want to make an episodic game?”
“What if I want the demo people download to be converted into a full title, while preserving their save game?”
All good questions, all resolved by one process: patching. Patching in TyranoBuilder is fairly simple, but it has never been explained clearly in English. This guide will try to change that (at least until the developers offer some translated documentation). You’ll find step-by-step instructions on how to prepare, install and distribute a patch file.
Word of warning: Because the patching documentation and accompanying patch program have not been translated, you’ll be interfacing with Japanese text. But the guide should provide sufficient explanation to bypass this issue.
With that, let’s patch!
Step 1: Make Your Base Game
First you’ll need a game to actually patch, which may mean weeks, months or years of likely unpaid, certainly thankless labor. God speed. When you have a file to work with, head to Step 2.
Step 2: Download the TyranoBuilder Rider Program
Thankfully, the developers of TyranoBuilder have already built a small debugging program that will compile your patch for you. You can download the Windows or Mac version from their Japanese site: [link] (you may want to use Google Chrome in order to readily translate the page).

Step 3: Prepare Your Patch Files
Before you use the Rider program, get all your files together that you want to patch into the game. Remember that the structure of the folders and files should exactly match how they are in your TyranoBuilder project folder.
1) Create a separate folder on your computer for patch creation. We’ll call this “patch1.0”. You’ll want to put it in an accessible location so that it’s easier to find when uploading into the Rider program.
2) Create sub-folders that match your project folder. Note that you only need to include as many sub-folders as you’re updating. For example, if you’re only adding a new scenario file and some new character expressions, you would only need these folders/files:

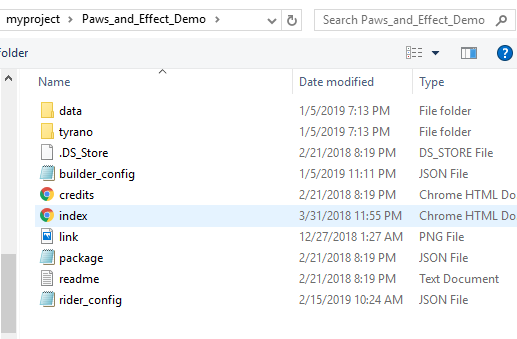
You’ll probably want to take those files from your full TyranoBuilder project folder, which you can access quickly by the main menu:
Once your files are ready, proceed to Step 4.

Step 4: Import Your Game File into Rider Program
With your patch files collected and your game ready to be patched, open the Rider program you downloaded. You’ll need to extract it to a desired location on your computer.
NOTE TO WINDOWS USERS: If you’re running Windows 10, you may be prompted with a message from your in-built Windows Defender anti-virus system that the application’s opening has been blocked. To bypass this, click “More Info” > “Run anyway”.
1) Once you’ve opened the program, click the button on the top-left to open the “index” file of your game inside of its main project folder.

2) Next, go to the “Patch” tab on the right.

3) Use the first button to upload the patch1.0 folder you created. Click “OK”.
4) Click the checkbox only if you want to make a web patch that will be stored on a server somewhere, so that the game can automatically detect an update when booted. If you use this feature, make sure to assign a new version number to the game and insert the projectID exactly as it appears in your Config file (your Tyrano project folder > data > system > Config > open with something like Notepad) Otherwise, if you’re just making a local patch, you can leave this alone (see Bonus Step on web patches for more details).
5) Hit the “Create” button and you’ll be presented with your “tpatch” file (and a JSON file if you made one).
Phew! Your patch is complete! On to the next step to finalize!
Step 5: Test Your Patch & Distribute
Now that you have a patch, test it out! Export a copy of your game for Windows or Mac, and then just place the tpatch file in the main directory.
NOTE FOR MAC USERS: The Japanese guide (https://tyrano.jp/usage/advance/patch) mentions that you may need to create a “_TyranoGameData” folder in the game project’s exported folder and place the patch inside of that folder.
TyranoBuilder should automatically detect and apply the patch (to ensure this is the case, check that the Config file has the line “patch_apply_auto=true” at the end of it before exporting). Start your game and see that the new content is available and nothing has broken. You can remove the tpatch file to revert back to the original state.

Assuming that everything is good to go, all you need to do now is find a platform to distribute the patch file and tell your players to place it in the main directory. This should be fairly simple through sites like Steam, Itch.io, GameJolt, or even your own website/blog.
Congratulations! You’re all patched up!
Bonus: Web Patching (for Automatic Updates)
If you don’t want players to have to think about downloading and applying a patch, you can store the patch file on a server somewhere and direct your game to automatically search for the file when it boots up. All you need to do is:
1) Get server space (there are free and paid options) where you can store the files via FTP (use a free one like FileZilla). You’ll also need a web domain to link your FTP to.
2) Login to your server via FTP and create a folder for your game within the “public_html” folder. Place the tpatch file and JSON file that you received from the Rider in this folder.
3) At the desired point in your game where you want it to check for the patch (e.g., the very beginning of “title_screen.ks”), place a TyranoScript component that features this code:
[check_web_patch url=”[link]]

When a patch file is present, the game will ask the player if they want to download it. They can choose Cancel or OK. If they choose OK, the game will close, the patch file will be downloaded into the folder and the player will need to re-open the game. If they choose Cancel, the game will proceed normally.
IMPORTANT: If this tag exists in the game, but there is no JSON file on your server, the game will get confused and break. This seems like a technical issue that the developer needs to resolve. To resolve it in the interim, you might consider sending the game out into the world with a JSON file and a “placeholder” patch (i.e., with nothing or some minor element included) on your server so that nothing breaks. You can always replace those two files later with new patch versions.

Changing the Japanese Text to Another Language
Thanks to the TyranoBuilder developer for clarity on this process. Here are the steps to change the text for the web patch alert to your desired language:
1) Find the file “kag.tag_system.js” in tyrano/plugins/kag/
2) Drag-and-drop that file into the “Pre-conversion code” section of this website[lab.syncer.jp]
3) Find the “patch” portion of the file in the “converted code” section (you can search for “sf._patch” if you’re having trouble finding it)
4) There’s three important lines of Japanese to change (I’ve included rough translations):
新しいアップデートが見つかりました。: A new update has been found
アップデートを行いますか? : Do you want to update?
alert(“アップデートを行います。完了後、自動的にゲームは終了します。”) : Update. After completion, the game will end automatically.
You can tweak the language to be whatever you want, but as long as you do it right, it should come out like this:
5) Once you’ve changed the text, copy the whole “converted code” section and re-paste it into the original kag.tag_system.js file (make a backup for yourself first to be safe) using a program like Notepad. Just save that and close, and then export your game with the [check_web_patch] tag setup where you want it. If you’re using web patching, your alerts should now be in your preferred language.

That’s it! Happy patching! Please reach out to us at [email protected] if you have questions or feedback!
Question & Answers
Q: So how would I turn a demo into a full game?
A: Easy. So let’s say you have your full game project. And then you make a copy of it that serves as the demo. In your Config file, you can change the “System Title” to “My Game (Demo Version)” while keeping the projectID the game as the full game. This way, you can apply the patch to that gameID and it will still work. You’ll just want to patch in a new Config file that features an updated System Title (e.g., “My Game”).
Q: Do I need to patch a browser game?
A: The patching process doesn’t seem to work with browser or mobile games. For browser games (say, stored on your server), you would basically just export a new version of your game, keep the file name the same, and upload it to your server or platform of choice. It will just replace the old version; no need to patch.
Q: So I can use this to make episodic content?
A: In the immortal words of Arthur Morgan, shoah. Just release your first episode, and then make a new patch with the new files related to each new episode. Remember to have all content from a previous patch included in the new patch. Release an updated patch at the appropriate time via your platform of choice. This way, people can retain their save files while receiving new content. Just ensure that the projectID is always the same with each patch.
If you have any other questions that would be useful to answer here, please let us know!