Playgu's World Builder Guide
Basics
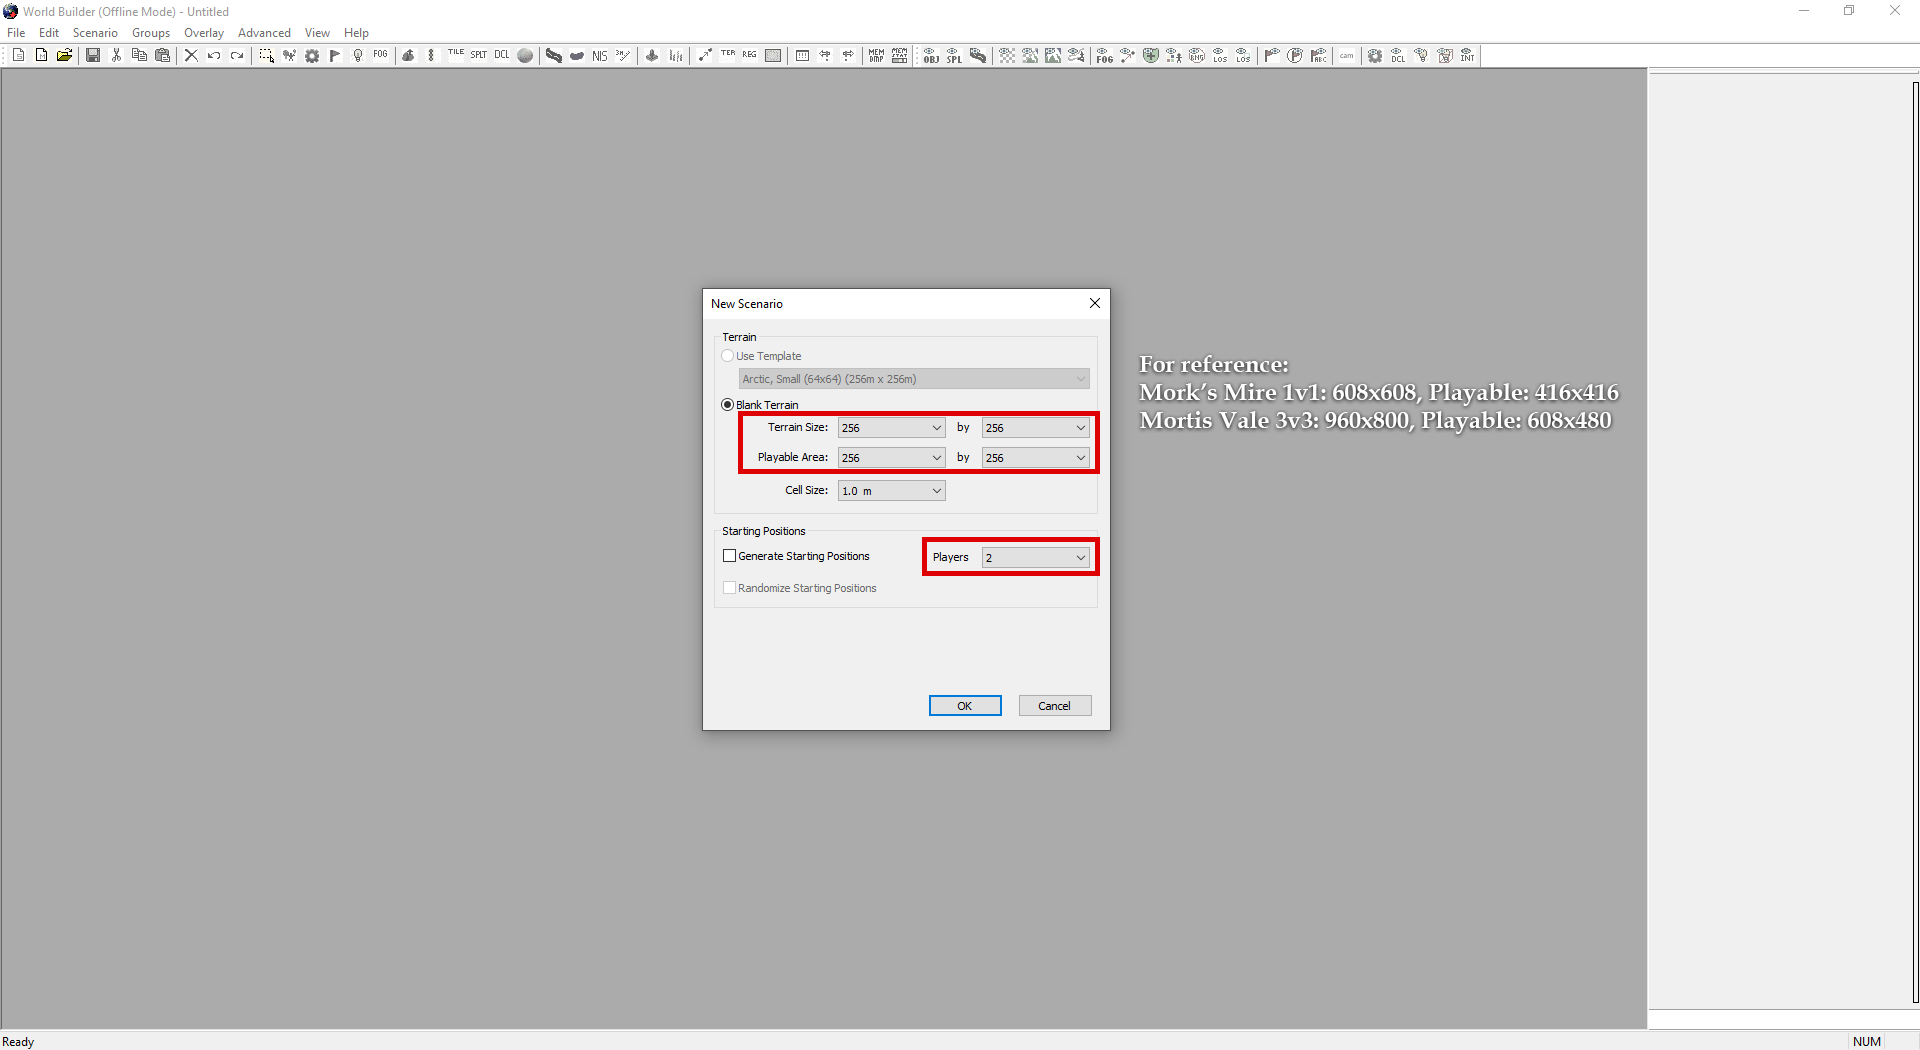
Creating a map
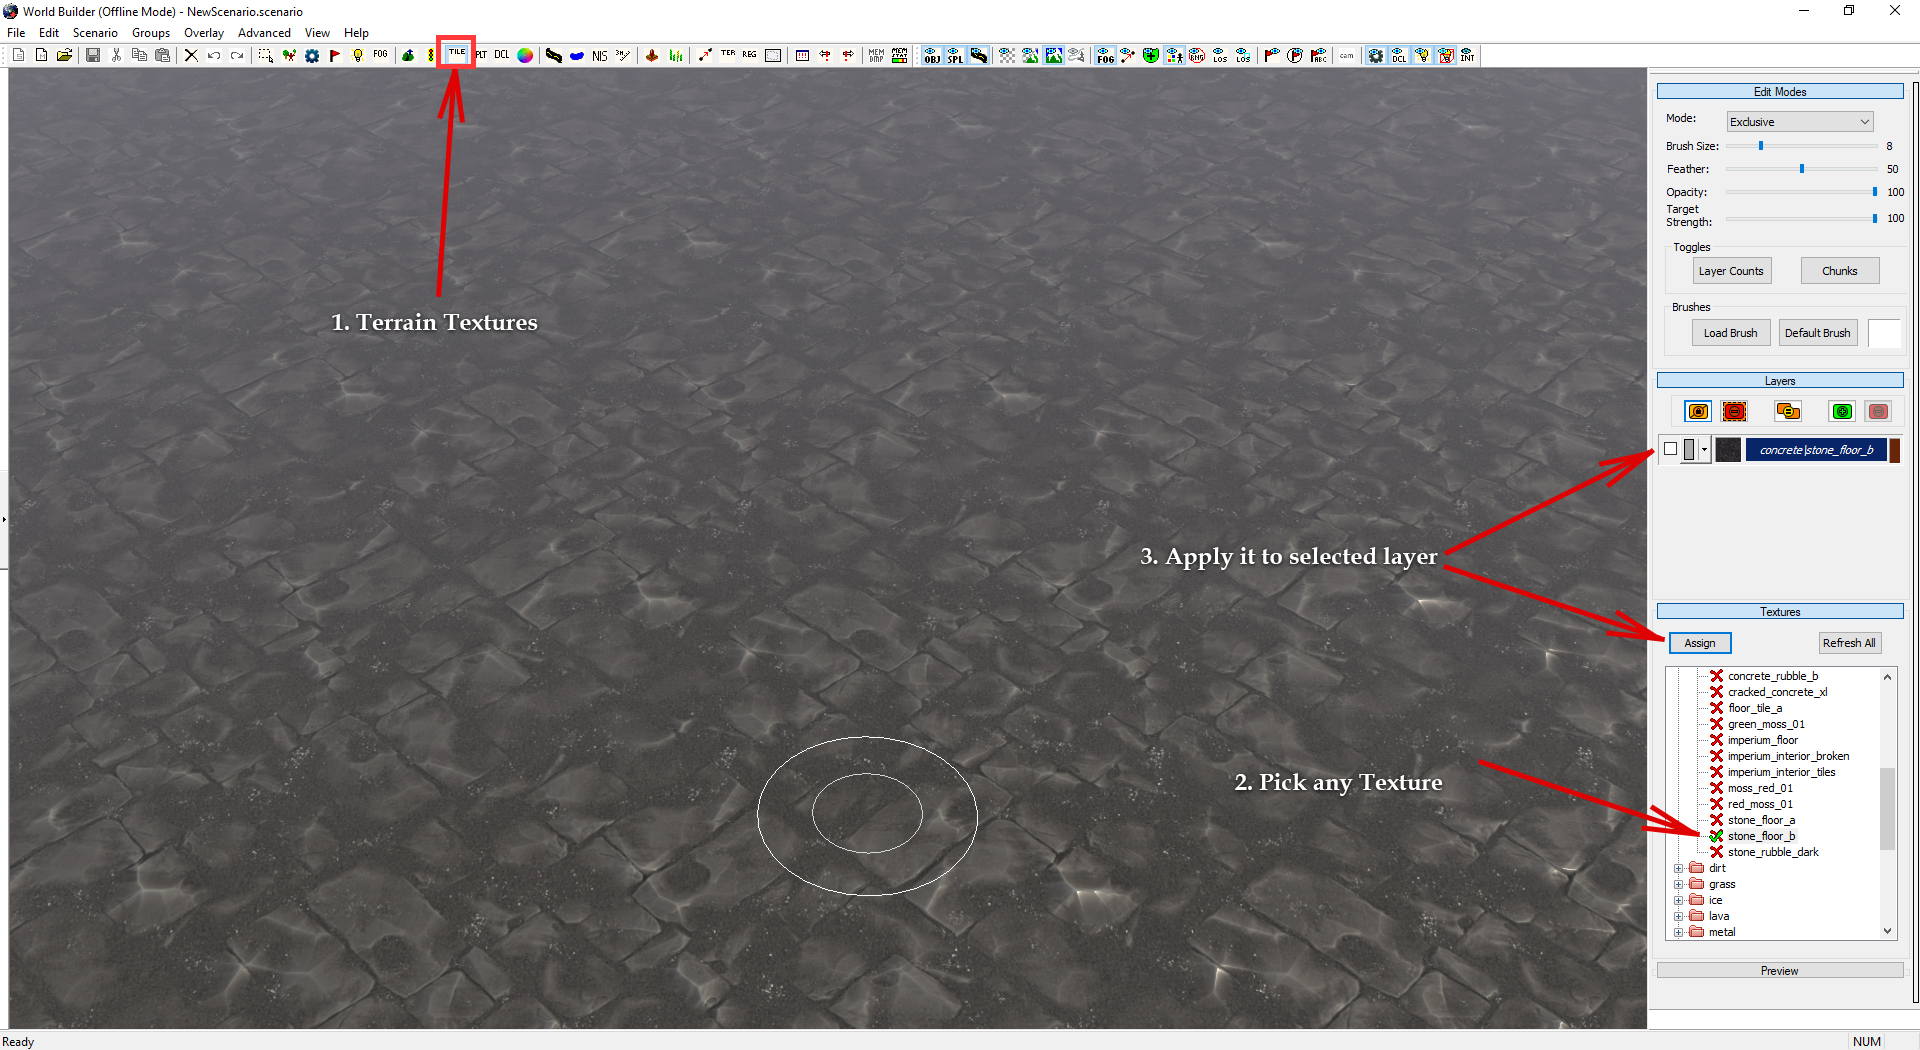
Applying basic texture
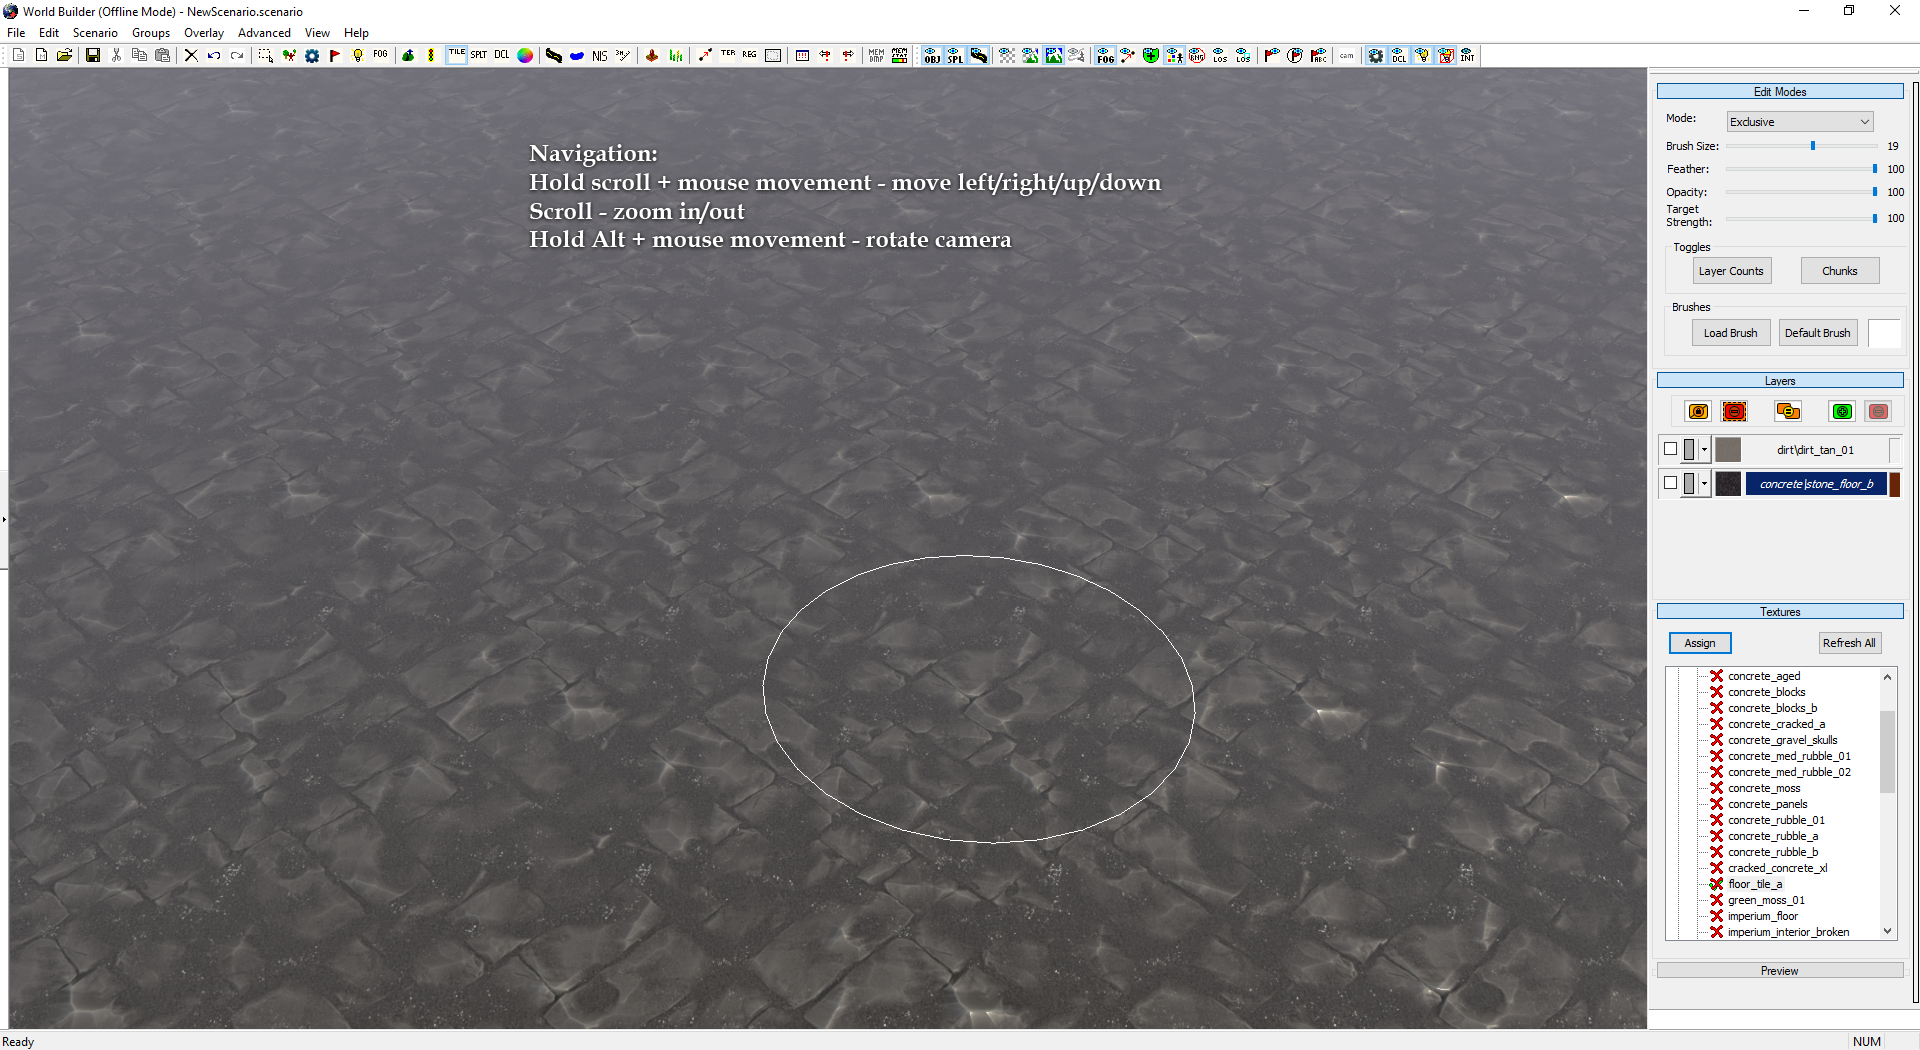
Navigation
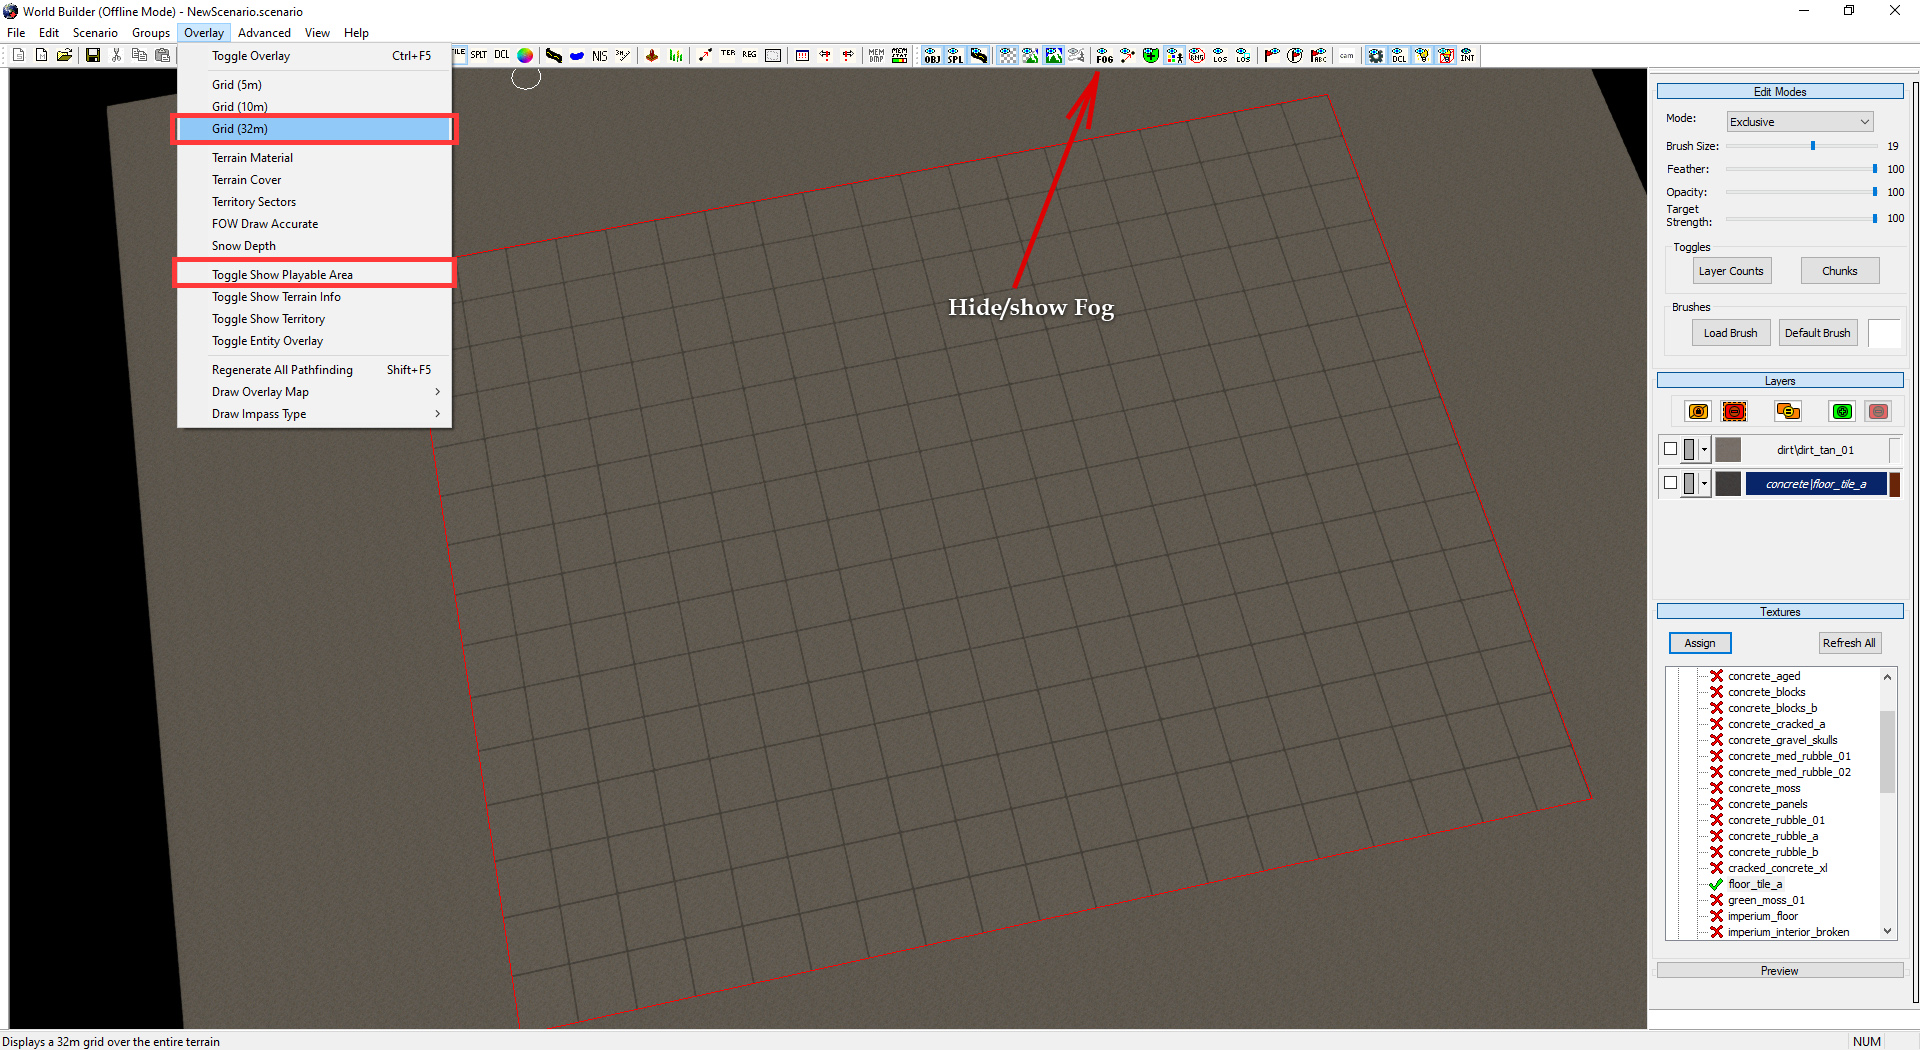
Enabling grid
Setting map for various game modes
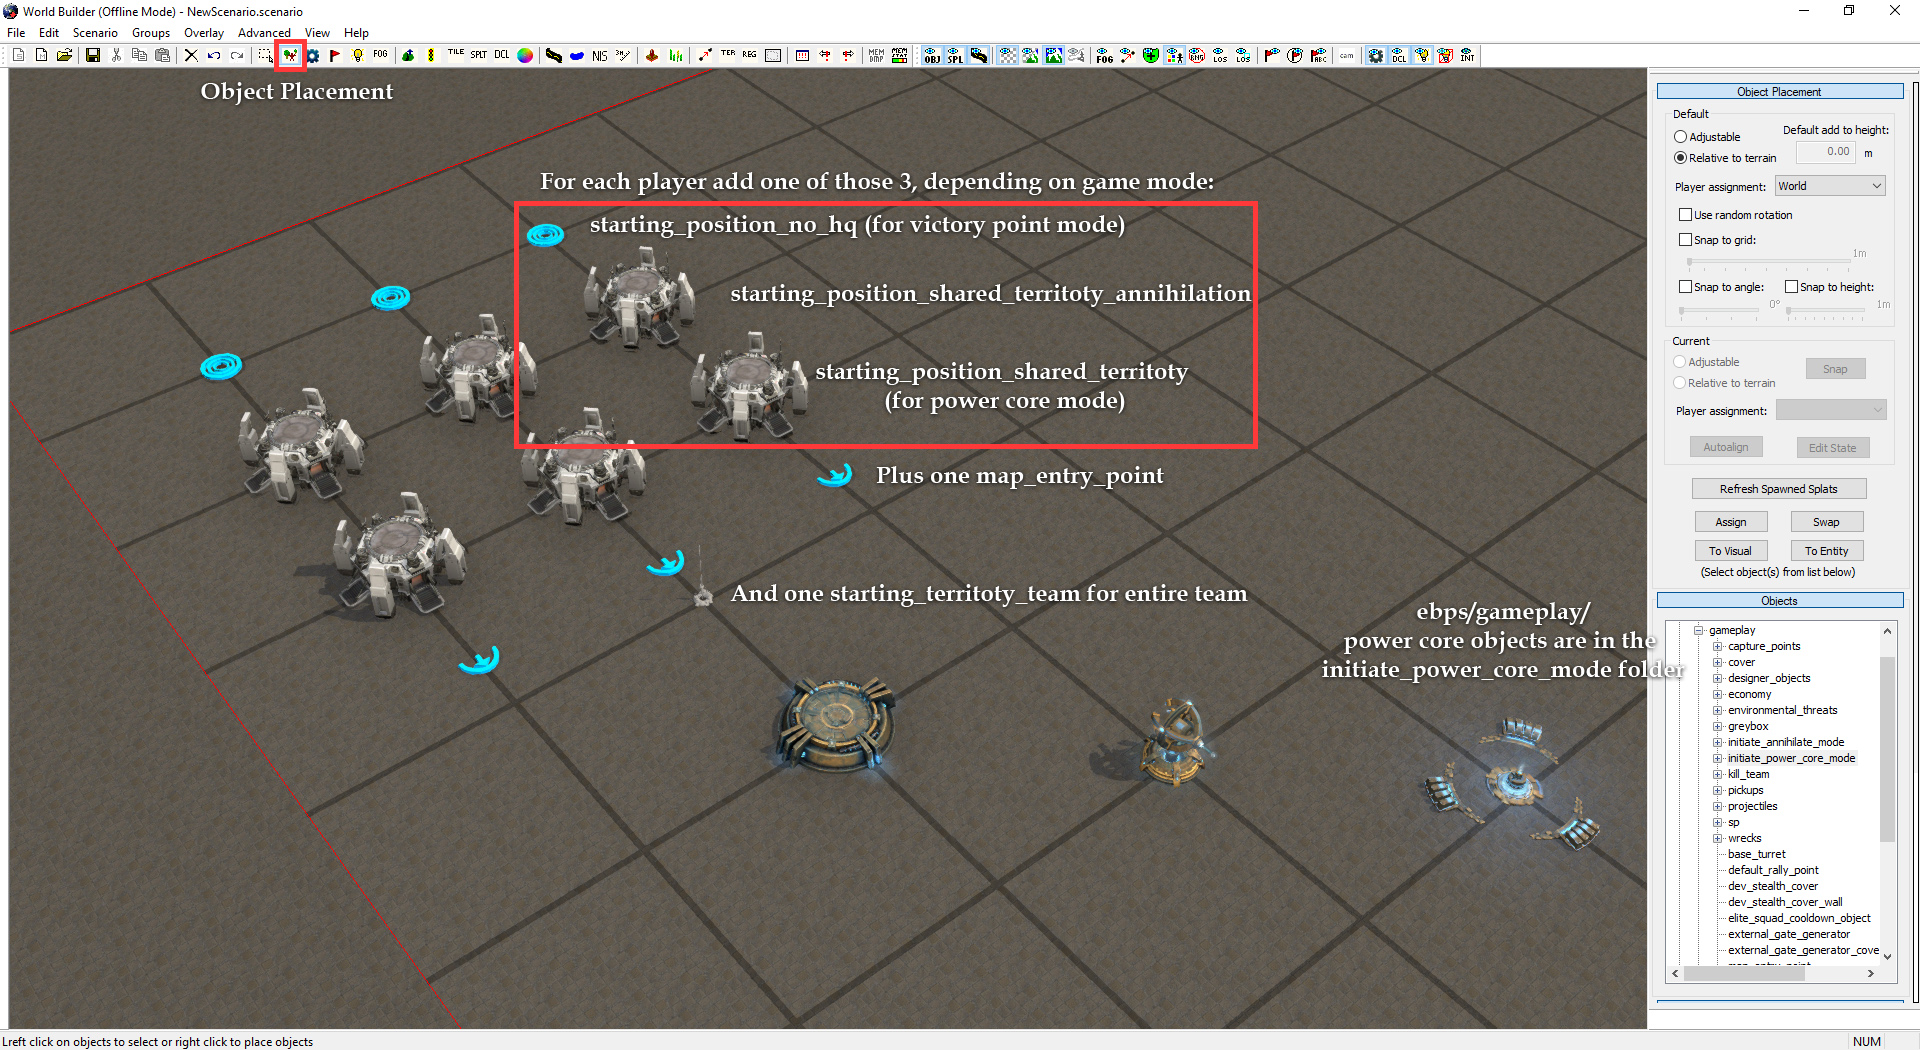
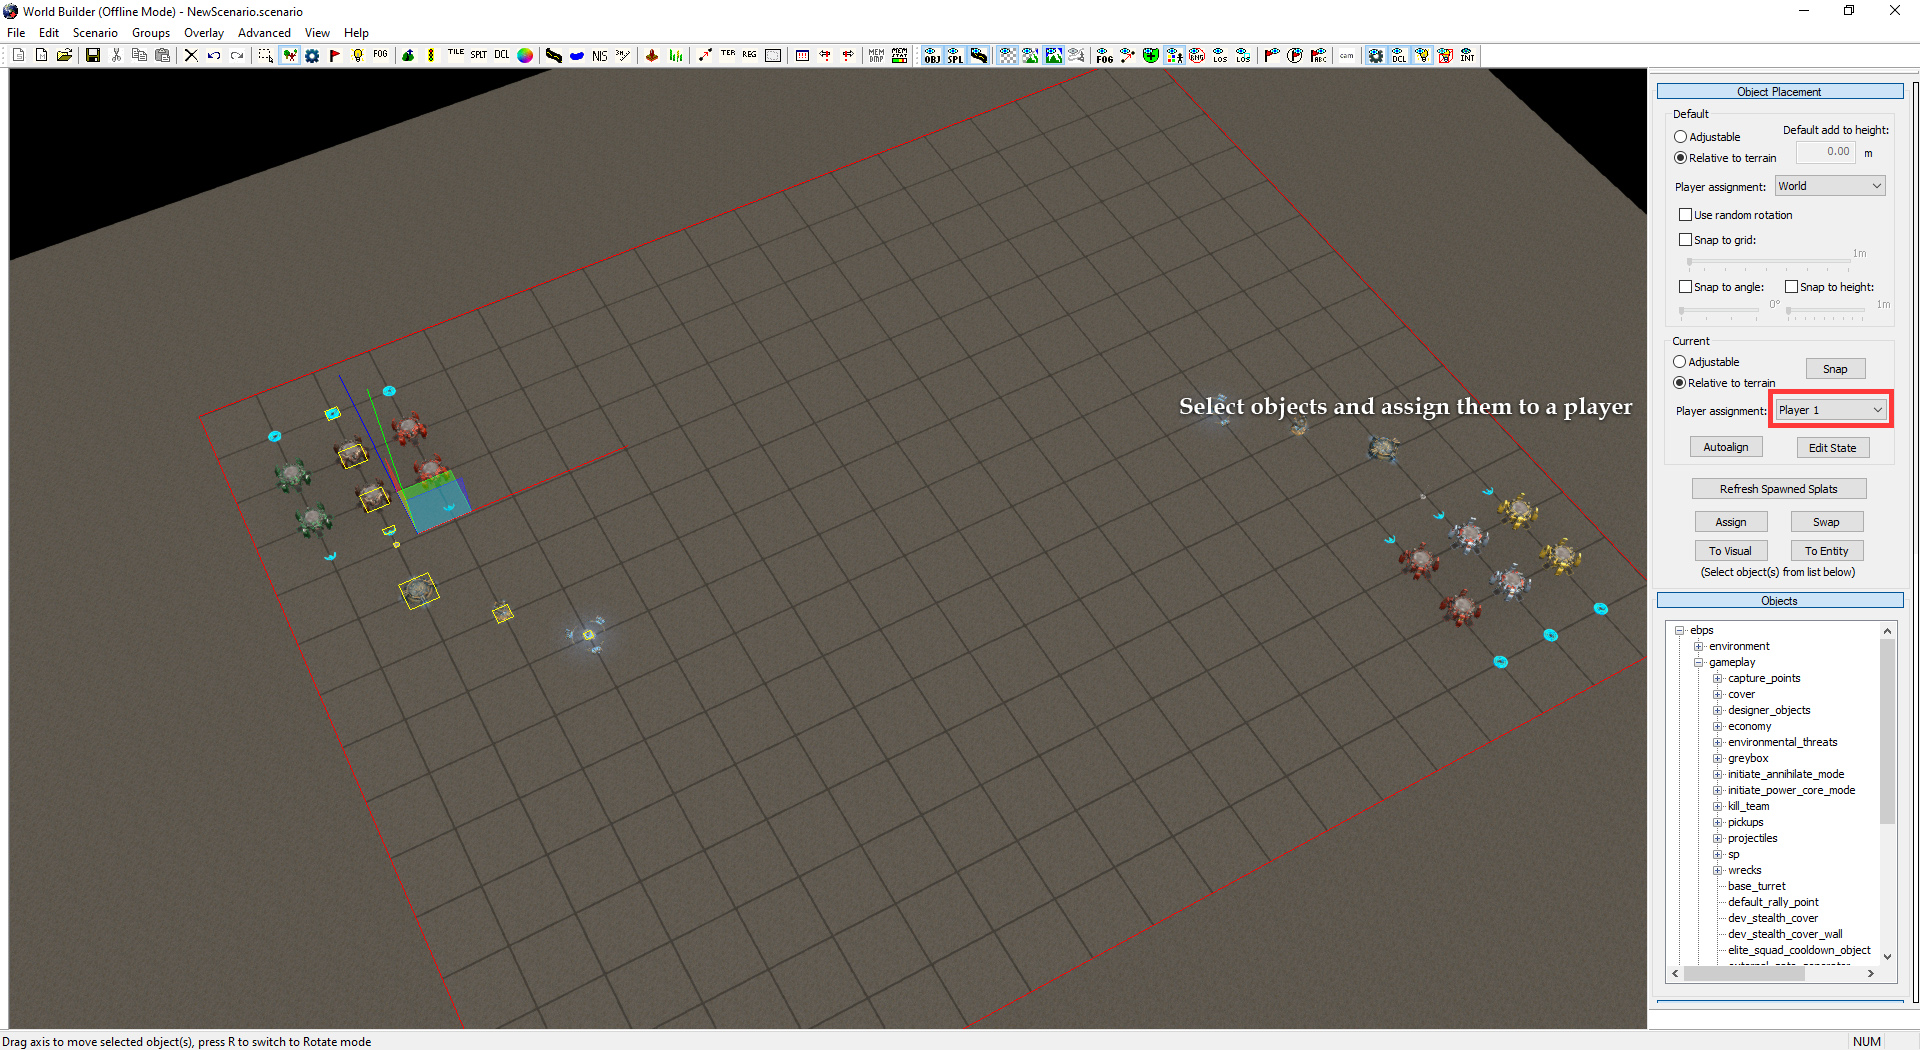
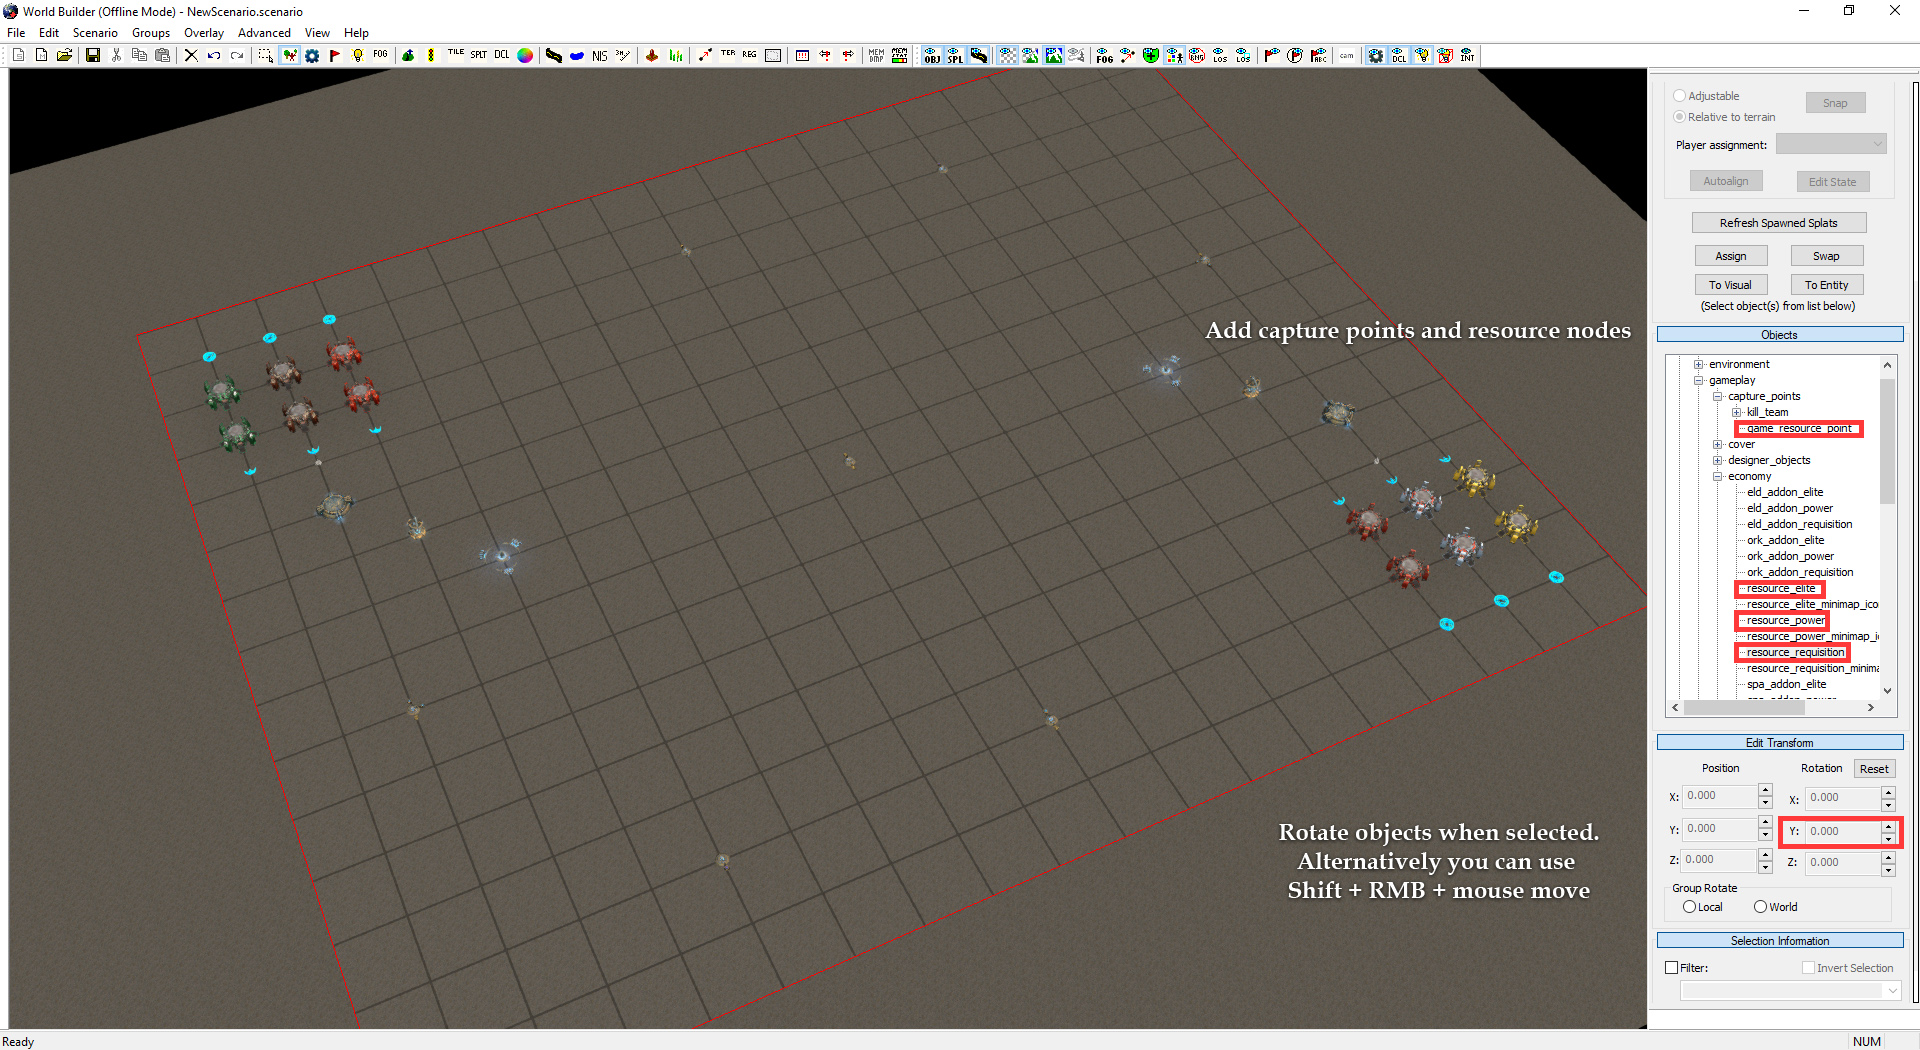
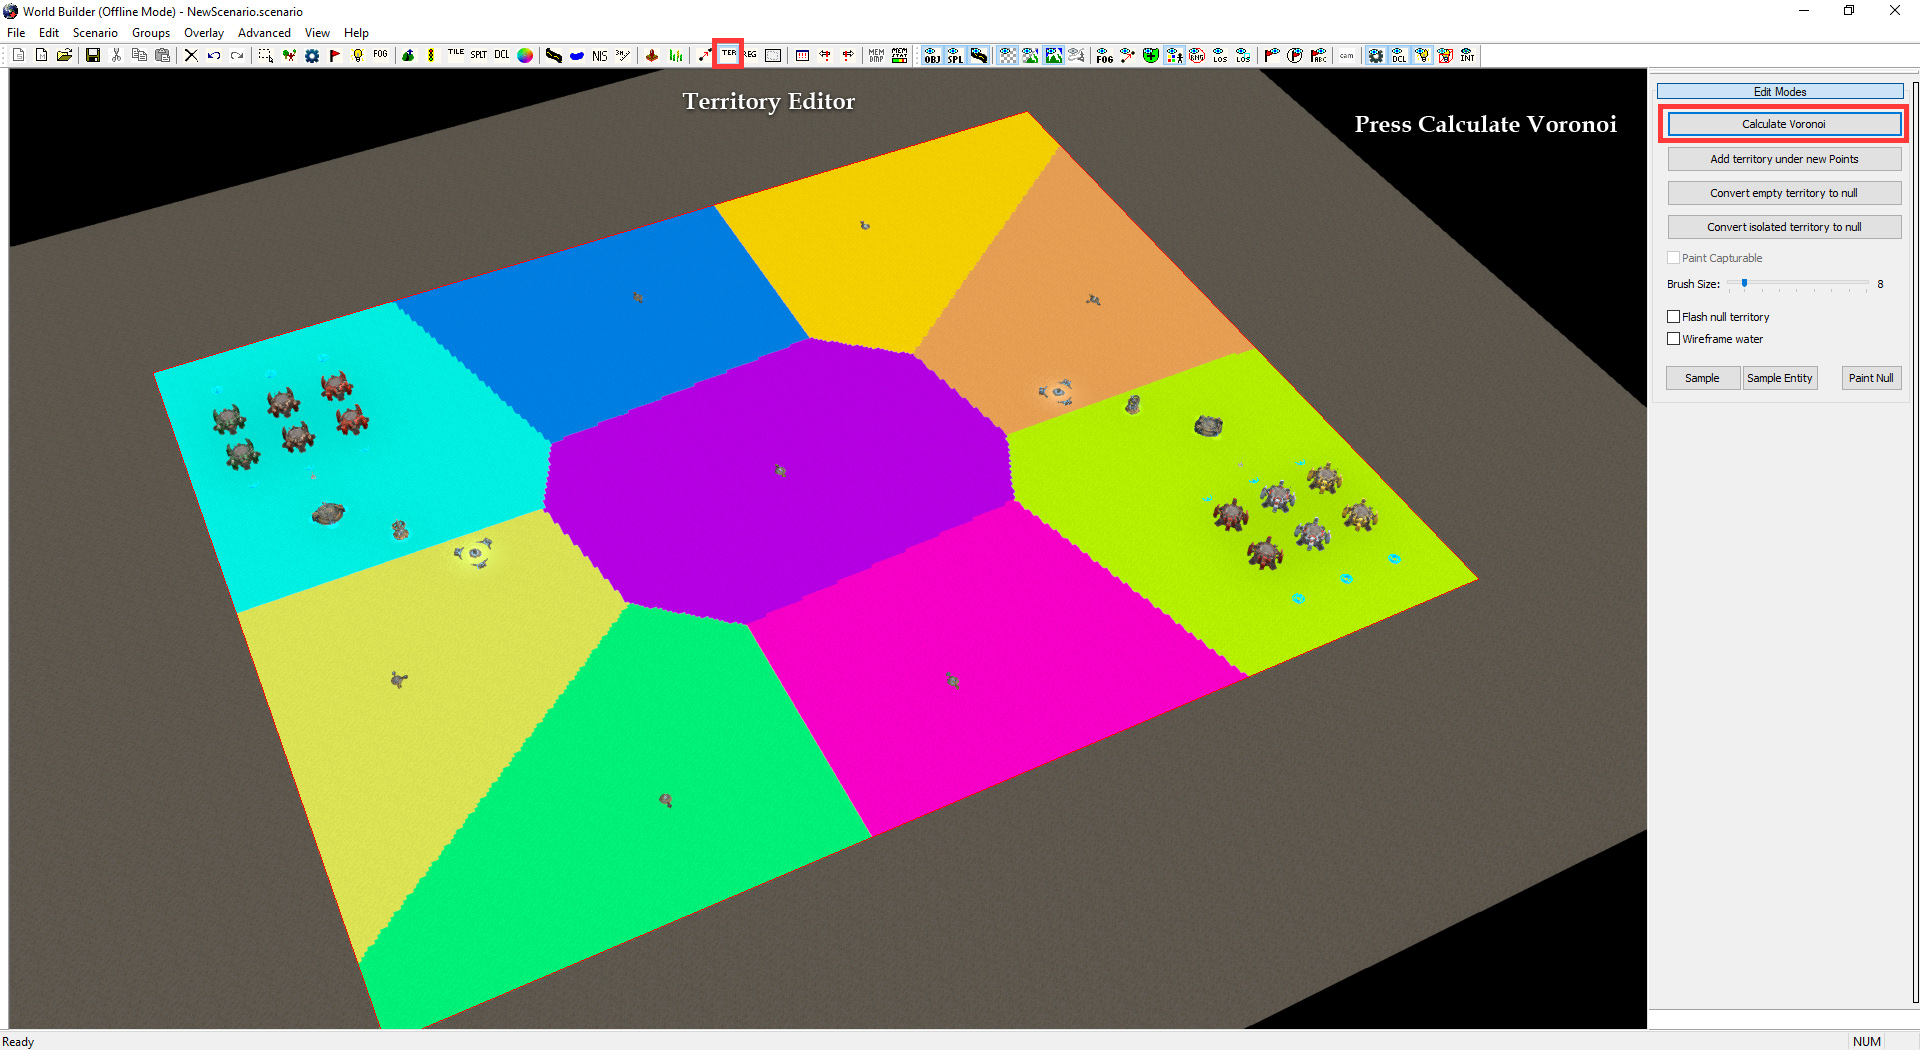 To toggle off Territory or Grid go to Overlay > Toggle Overlay or press Ctrl + F5
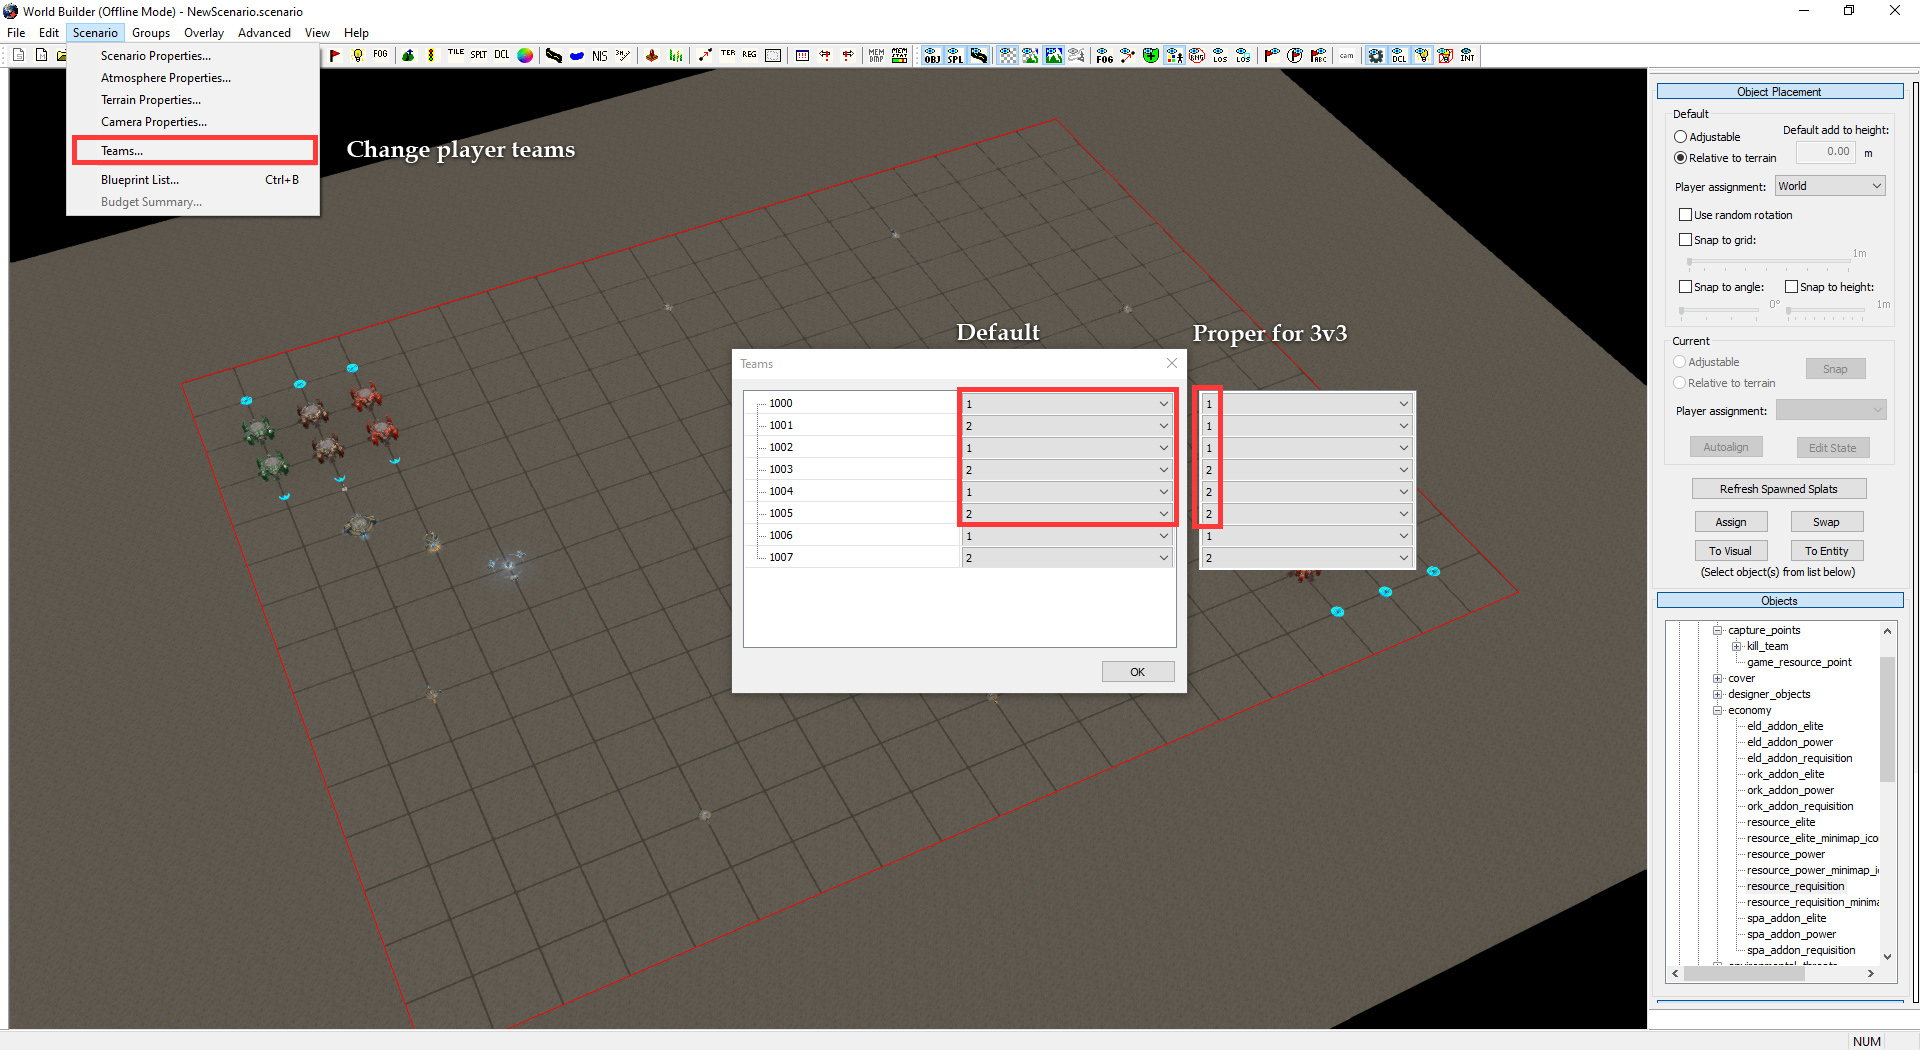
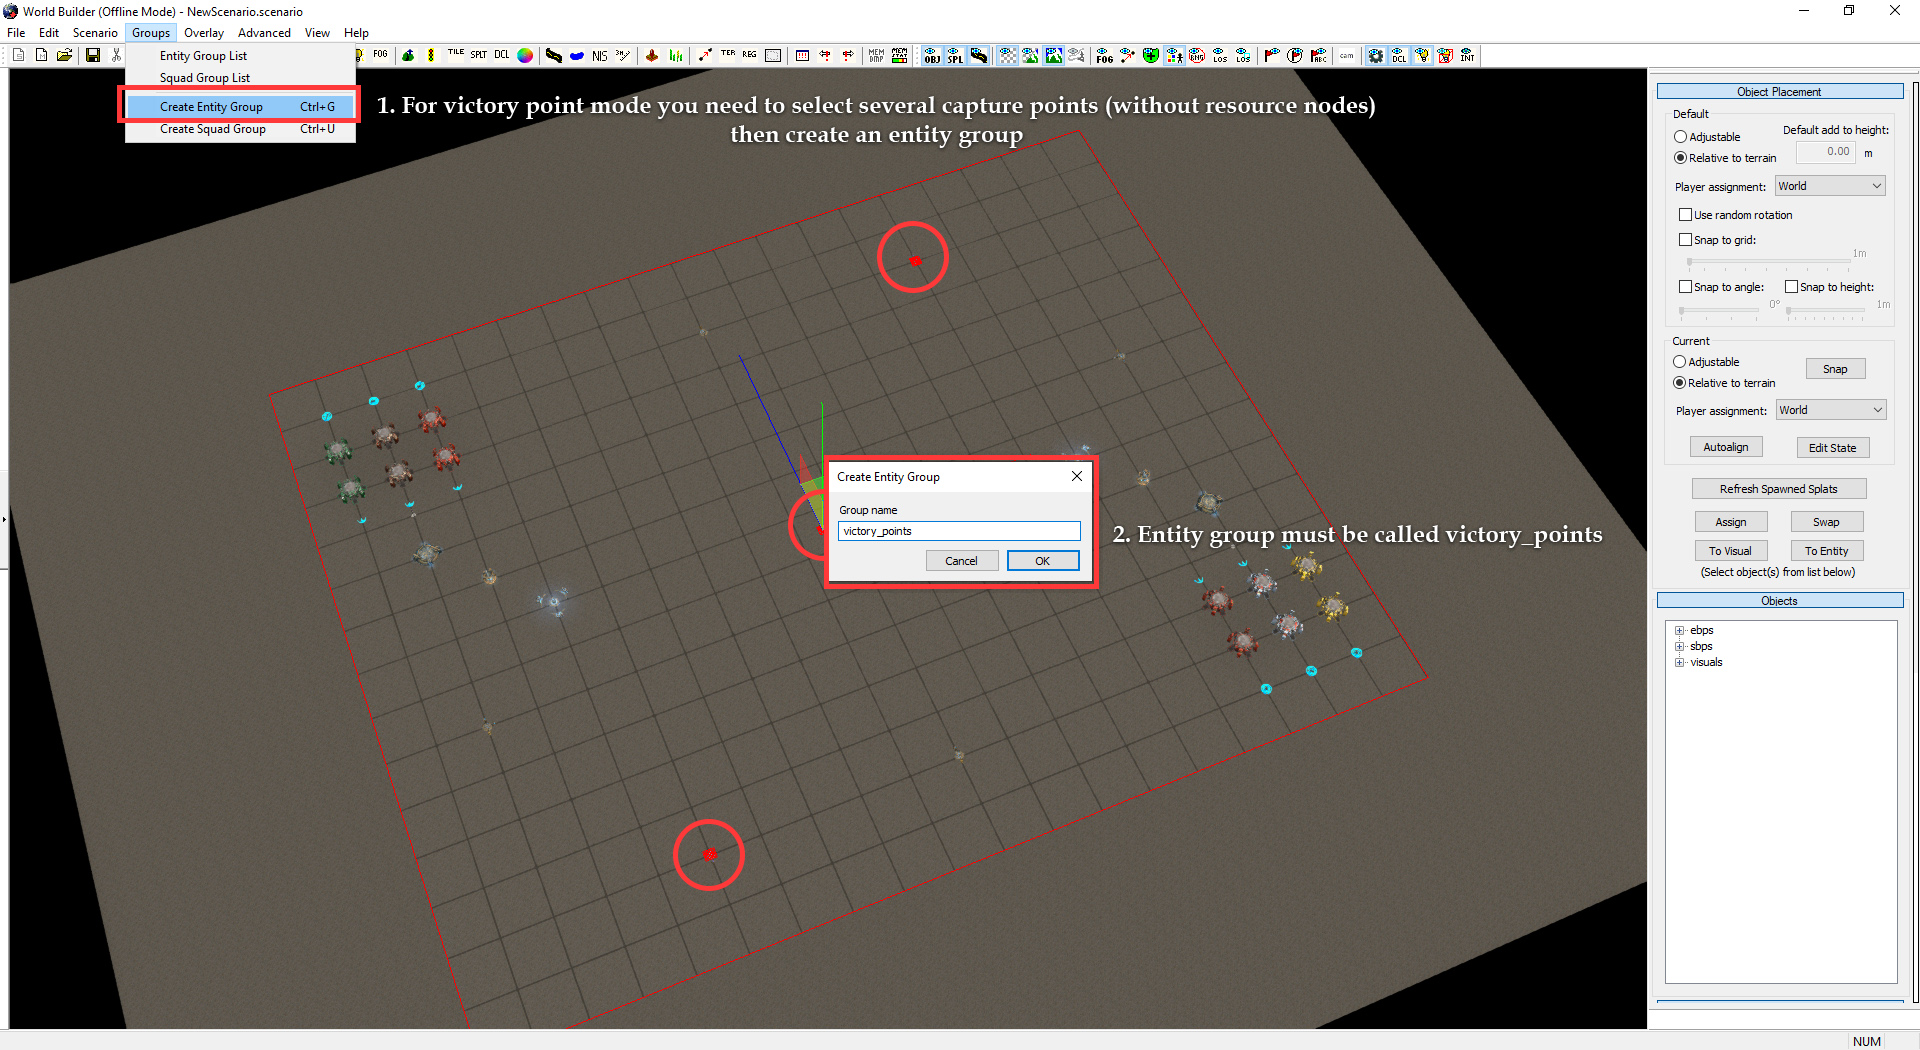
Setting map for Victory point mode
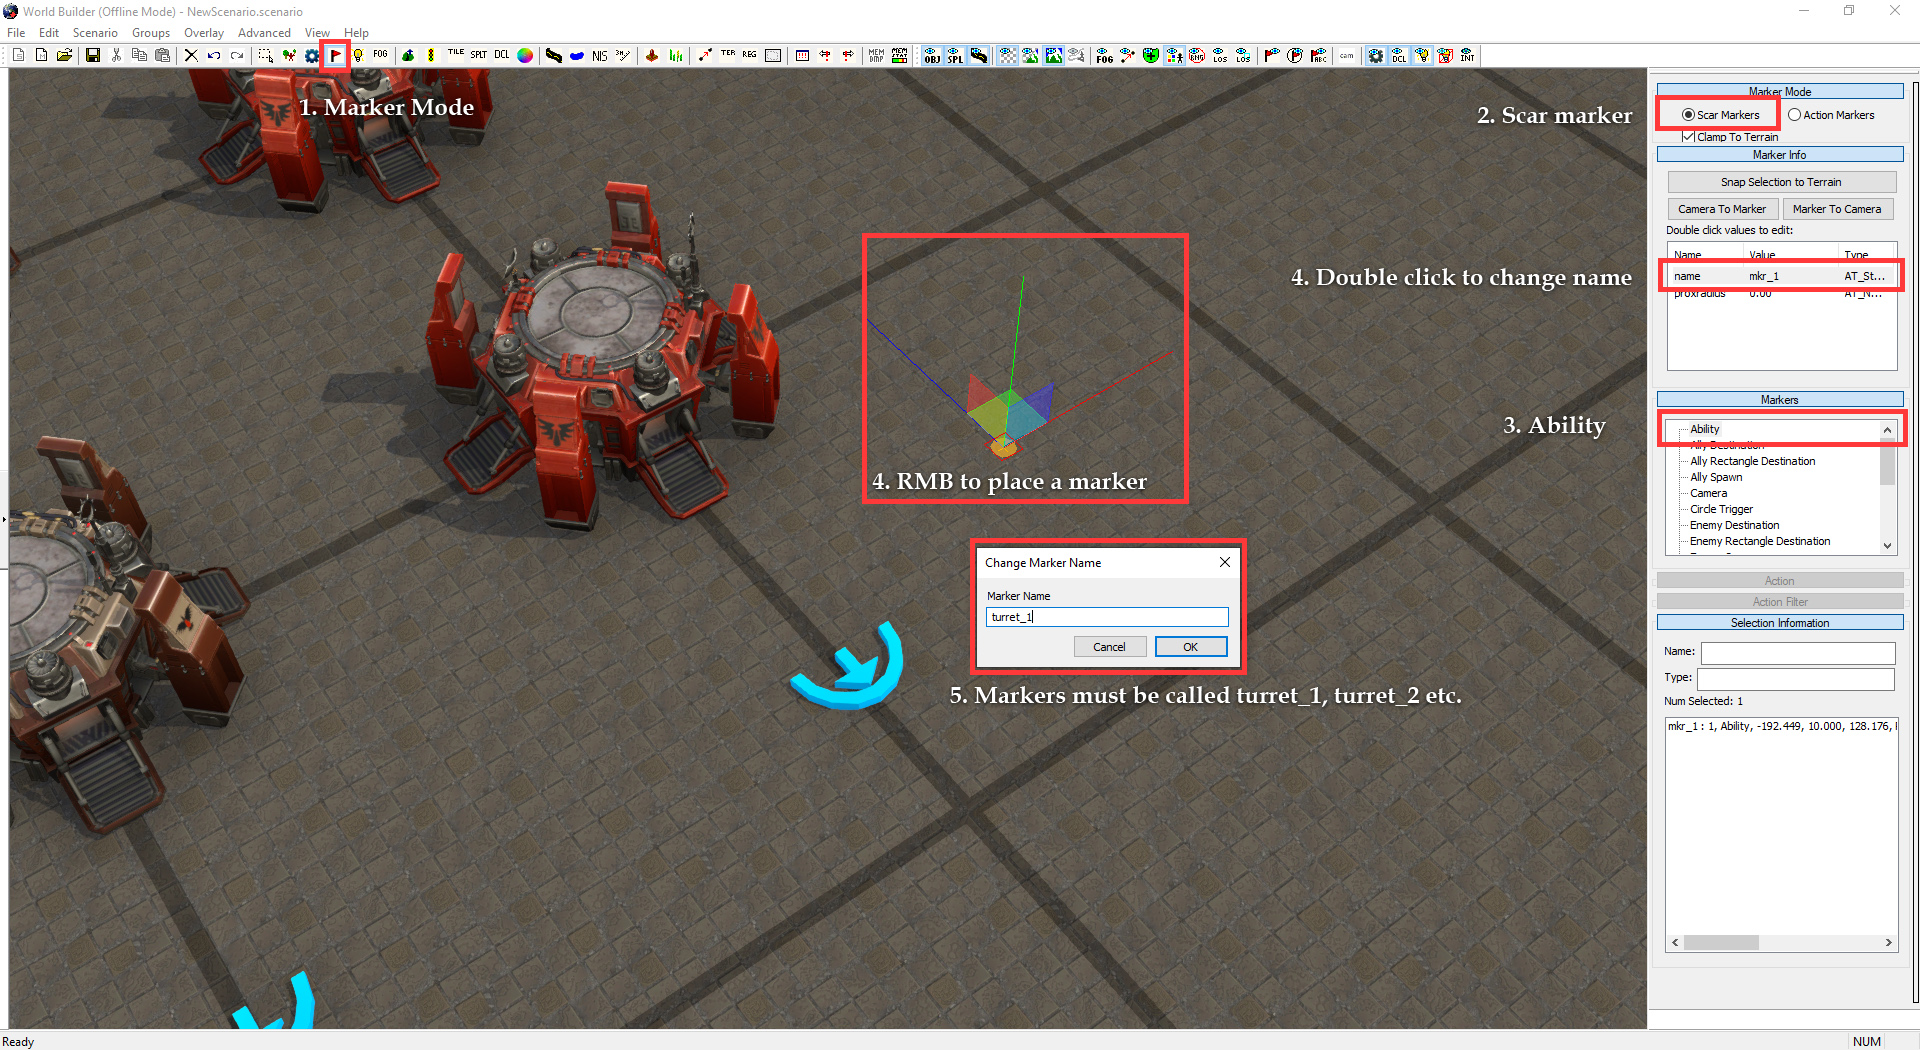
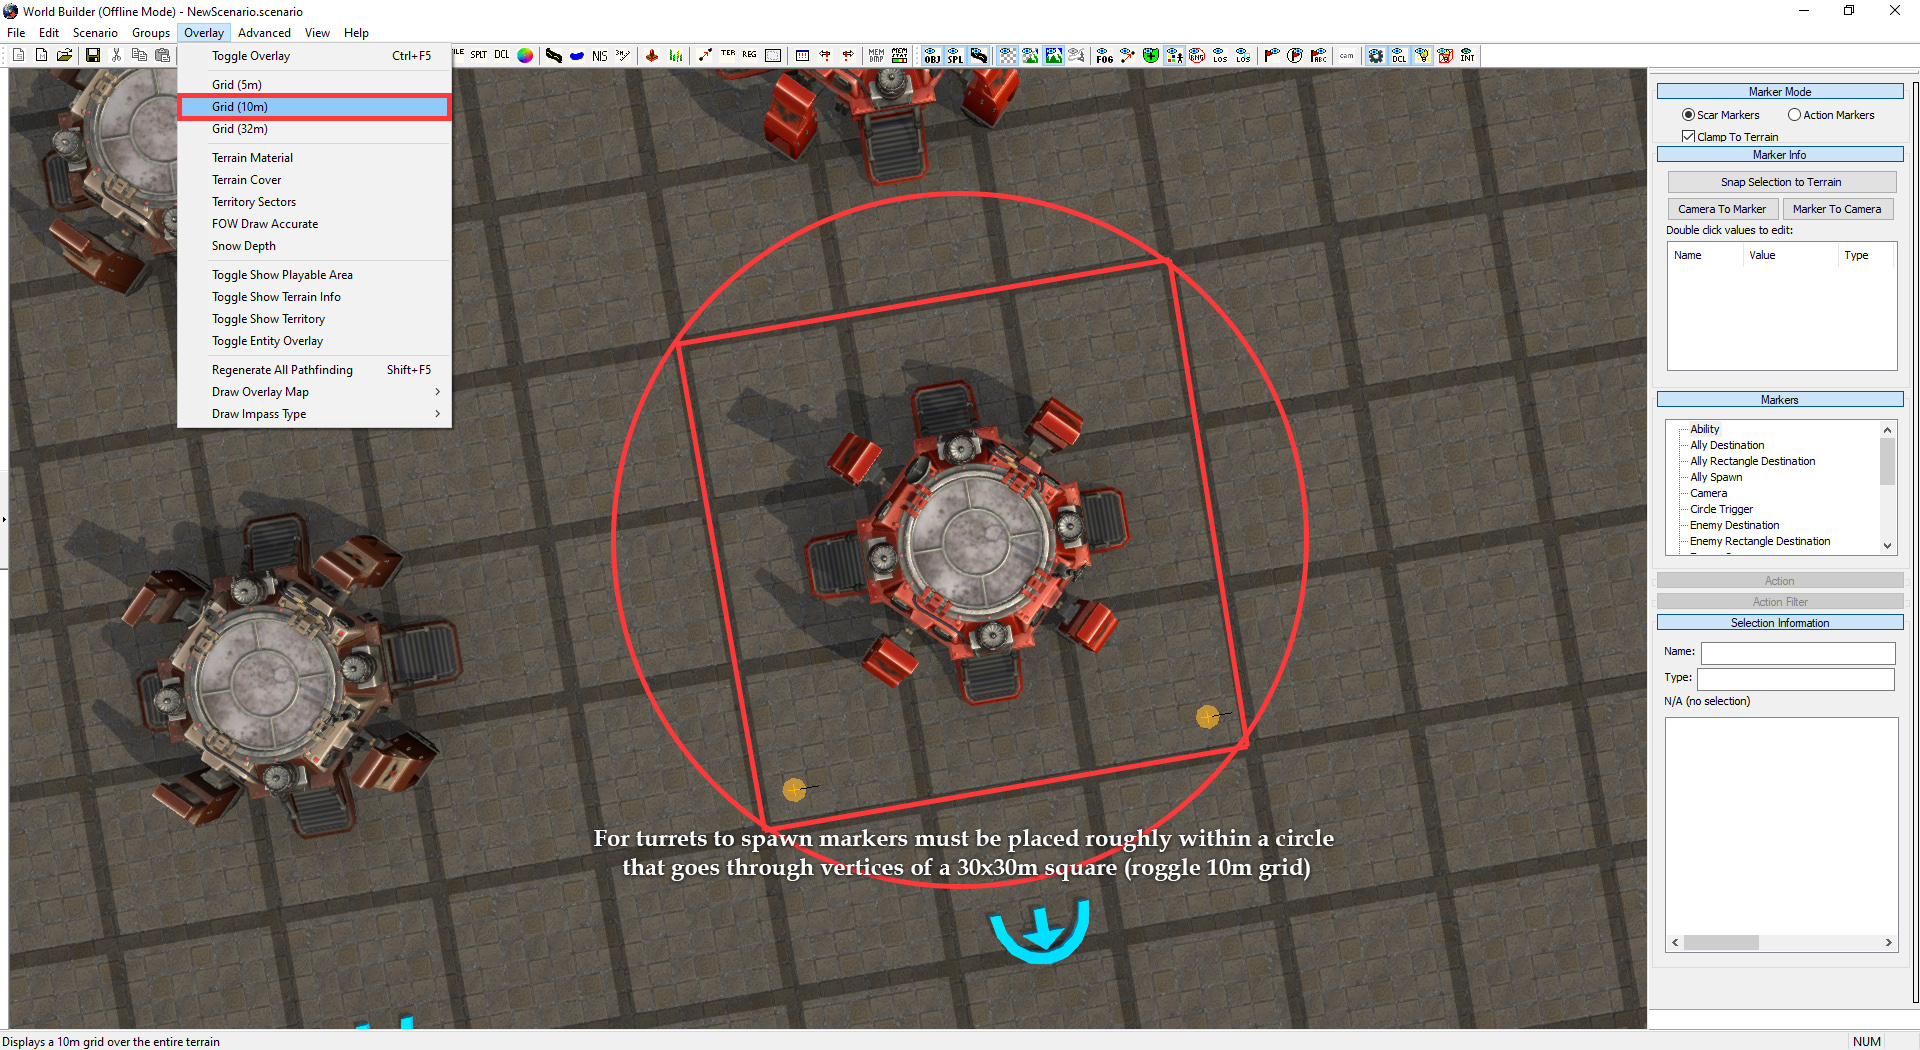
Setting up turrets
Saving map
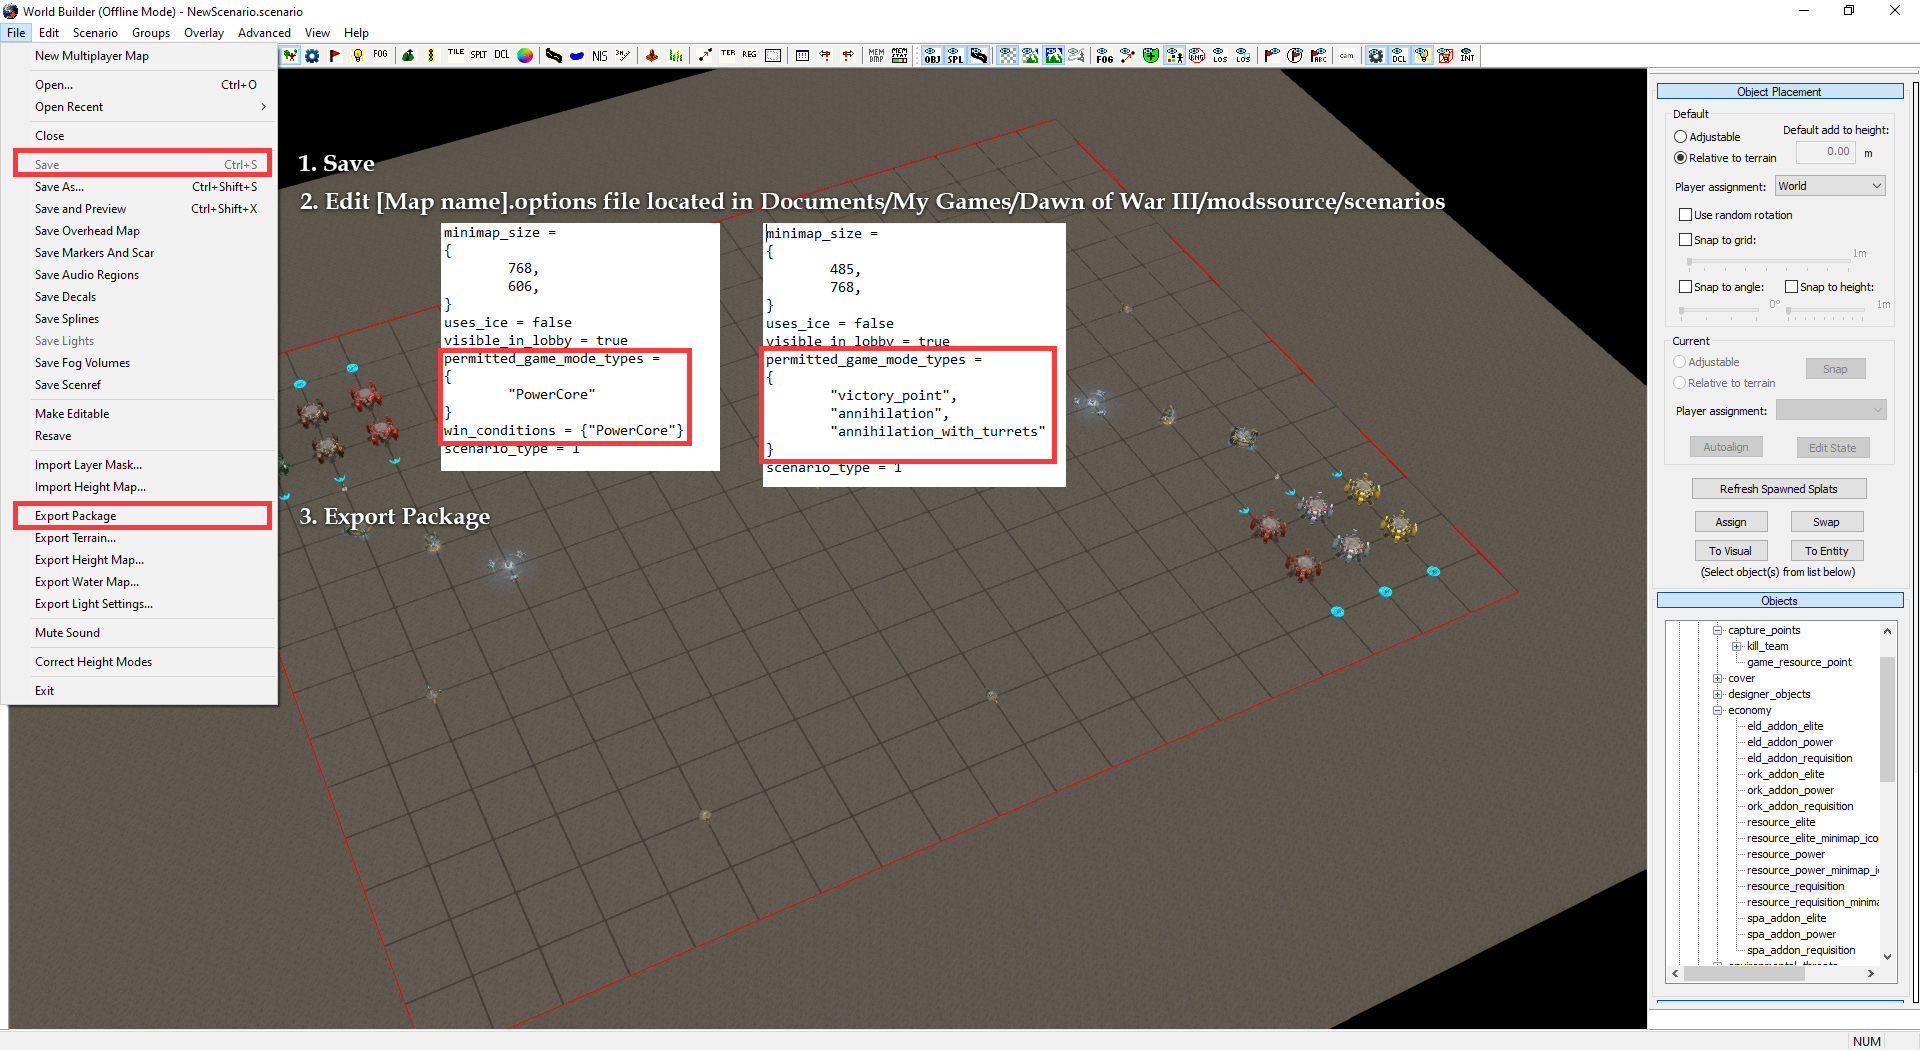
Now map can be played and even published from the community tab in game.
Applying basic texture
Navigation
Enabling grid
Setting map for various game modes
To toggle off Territory or Grid go to Overlay > Toggle Overlay or press Ctrl + F5Setting map for Victory point mode
Setting up turrets
Saving map
Now map can be played and even published from the community tab in game.
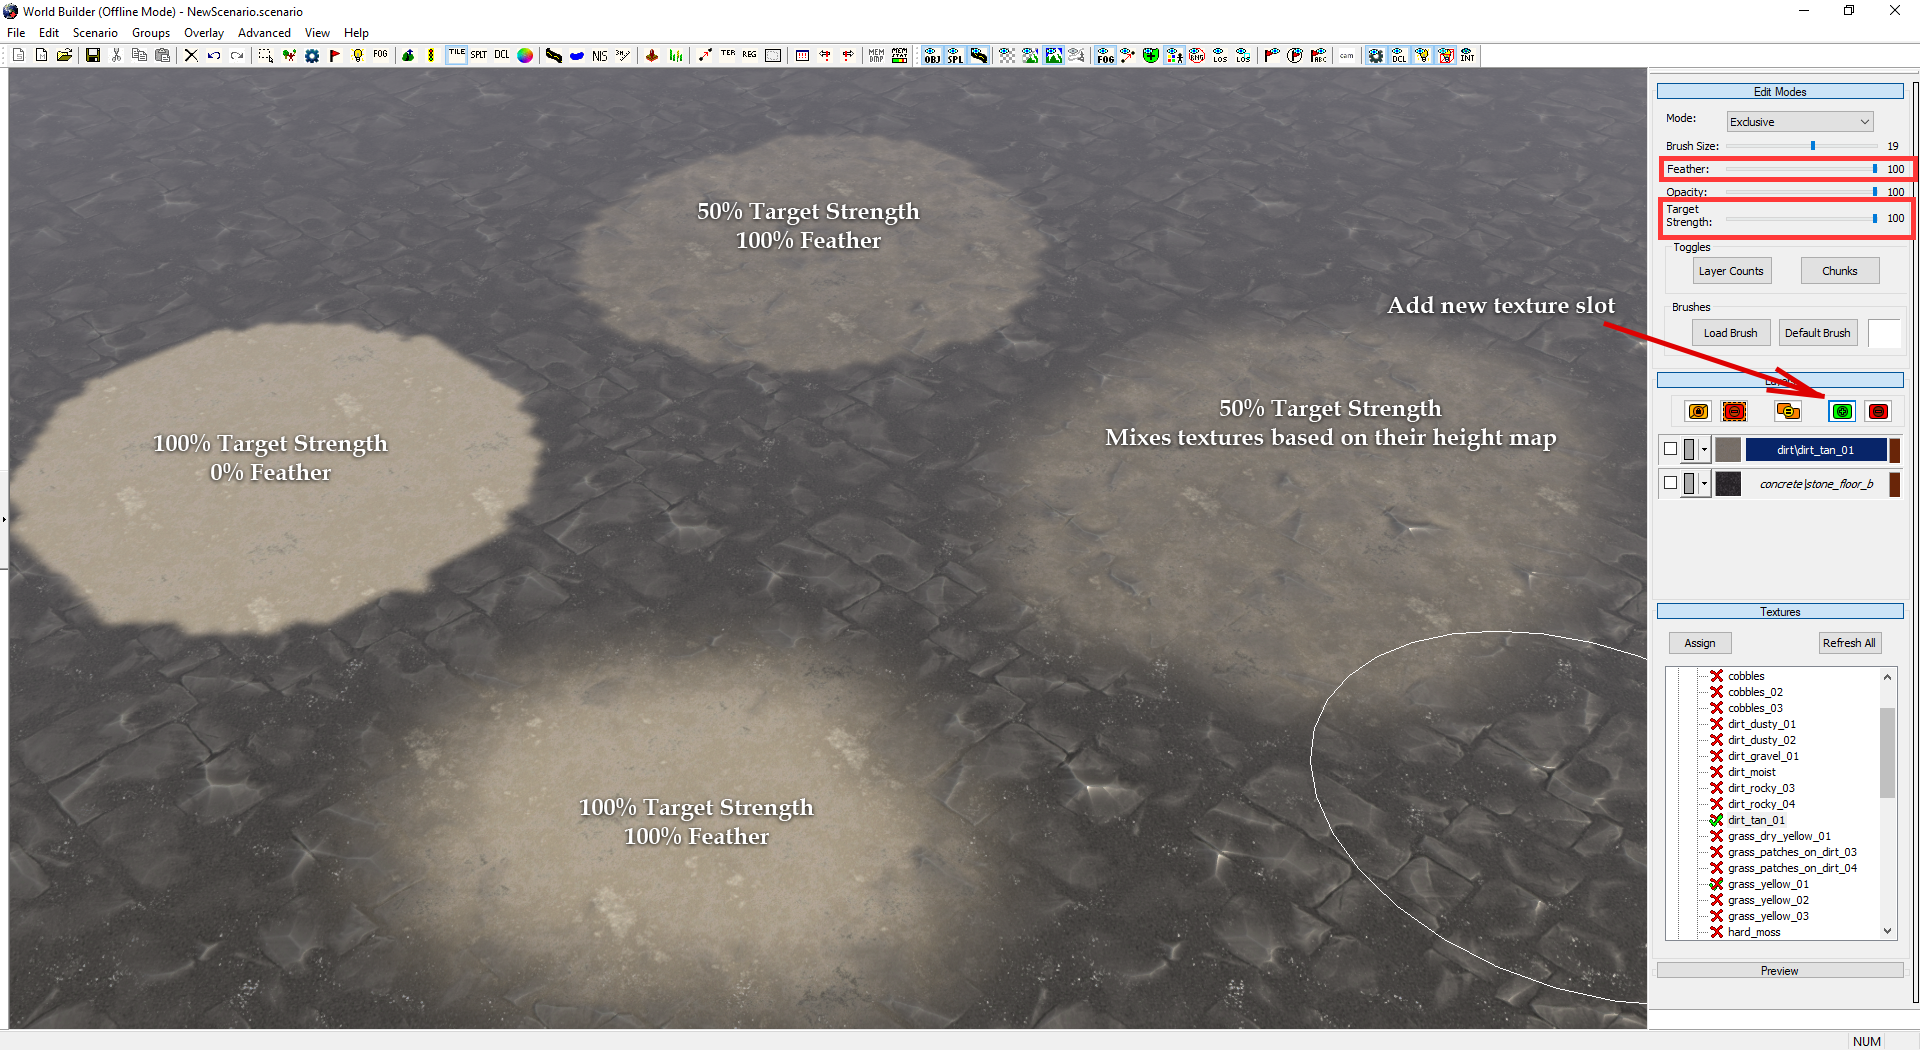
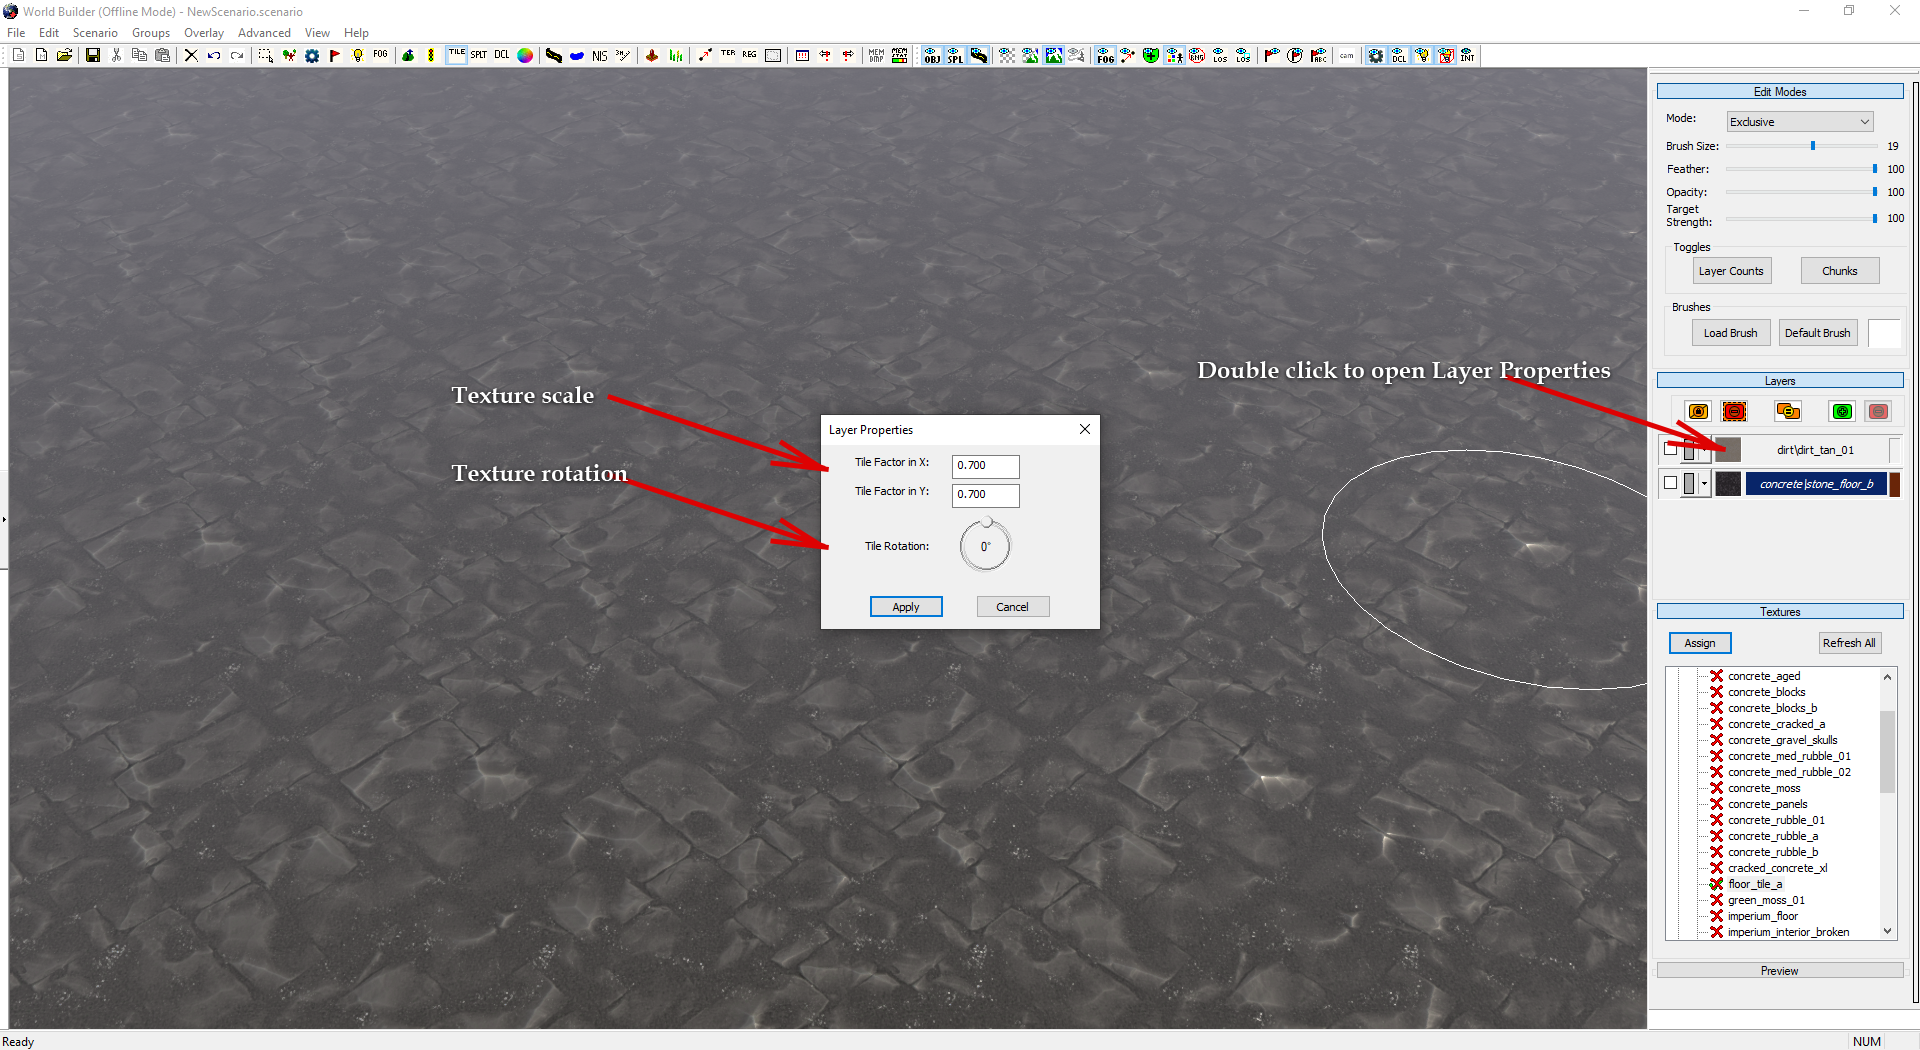
Texture Editor
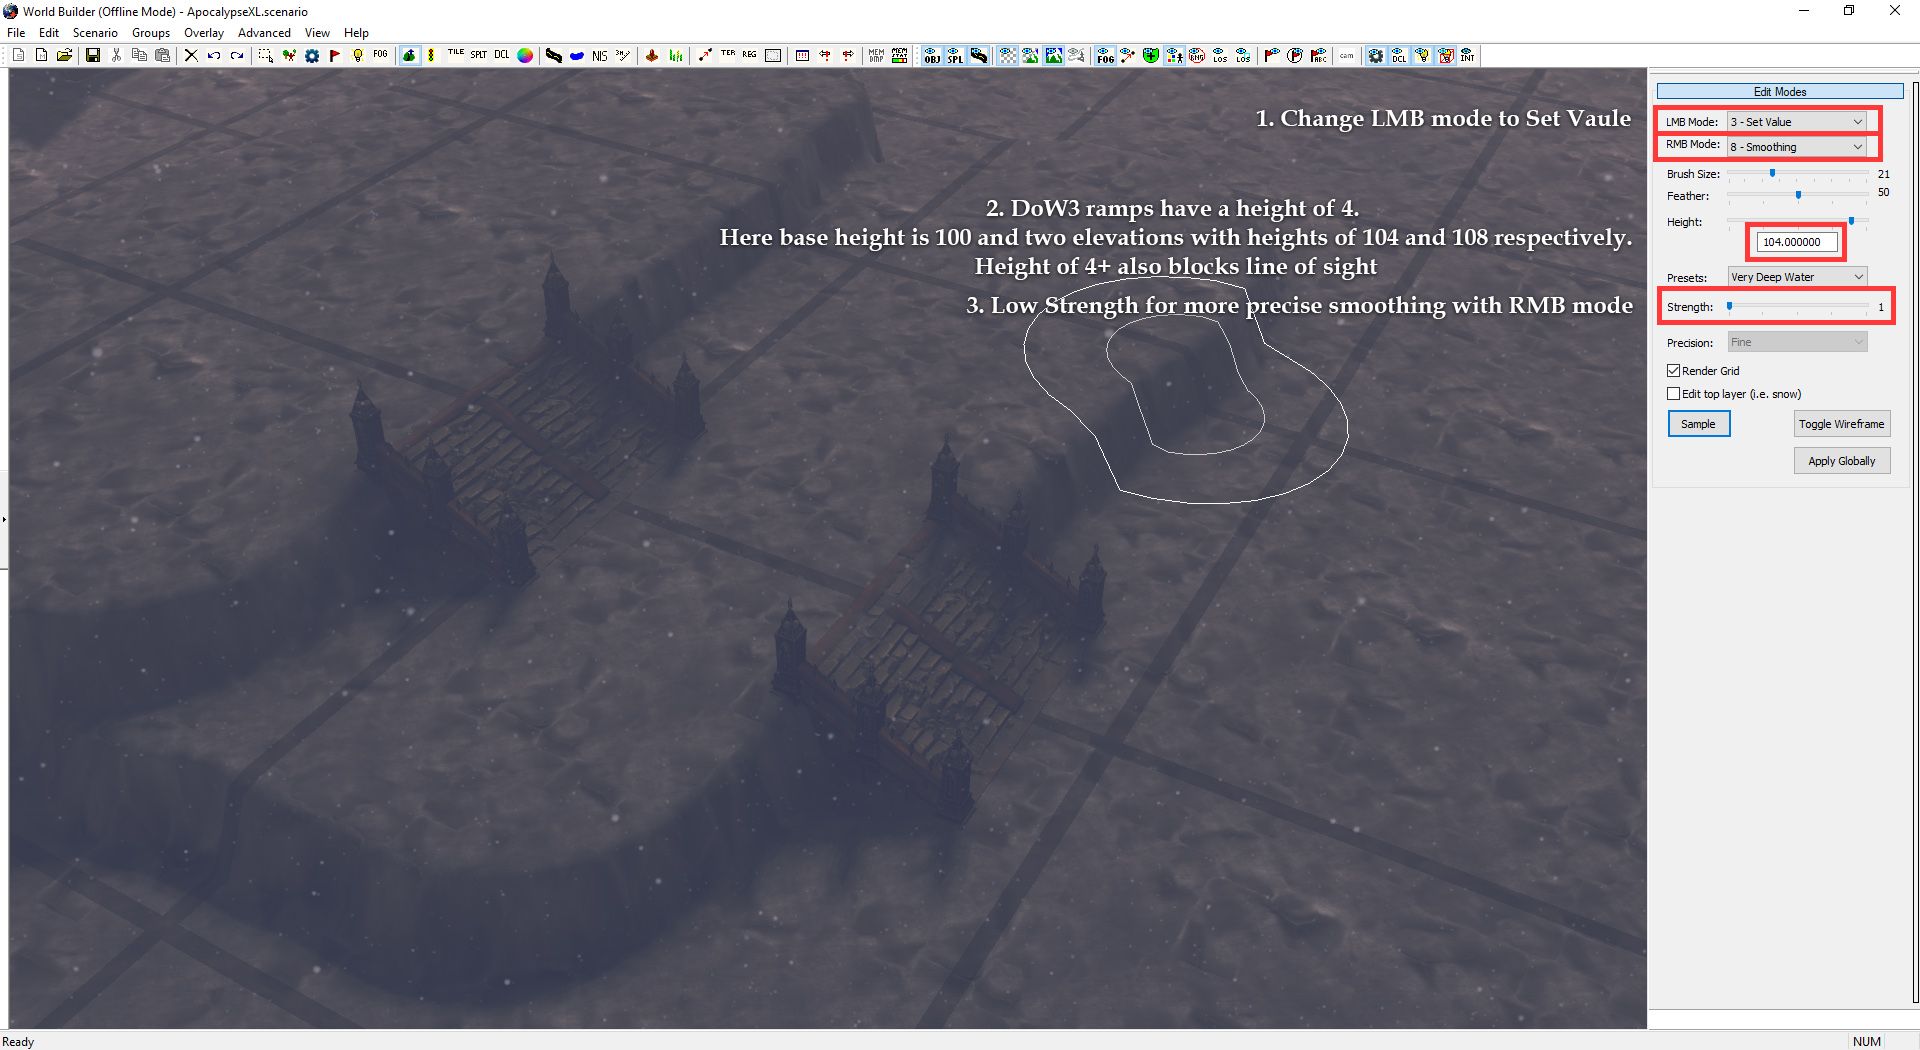
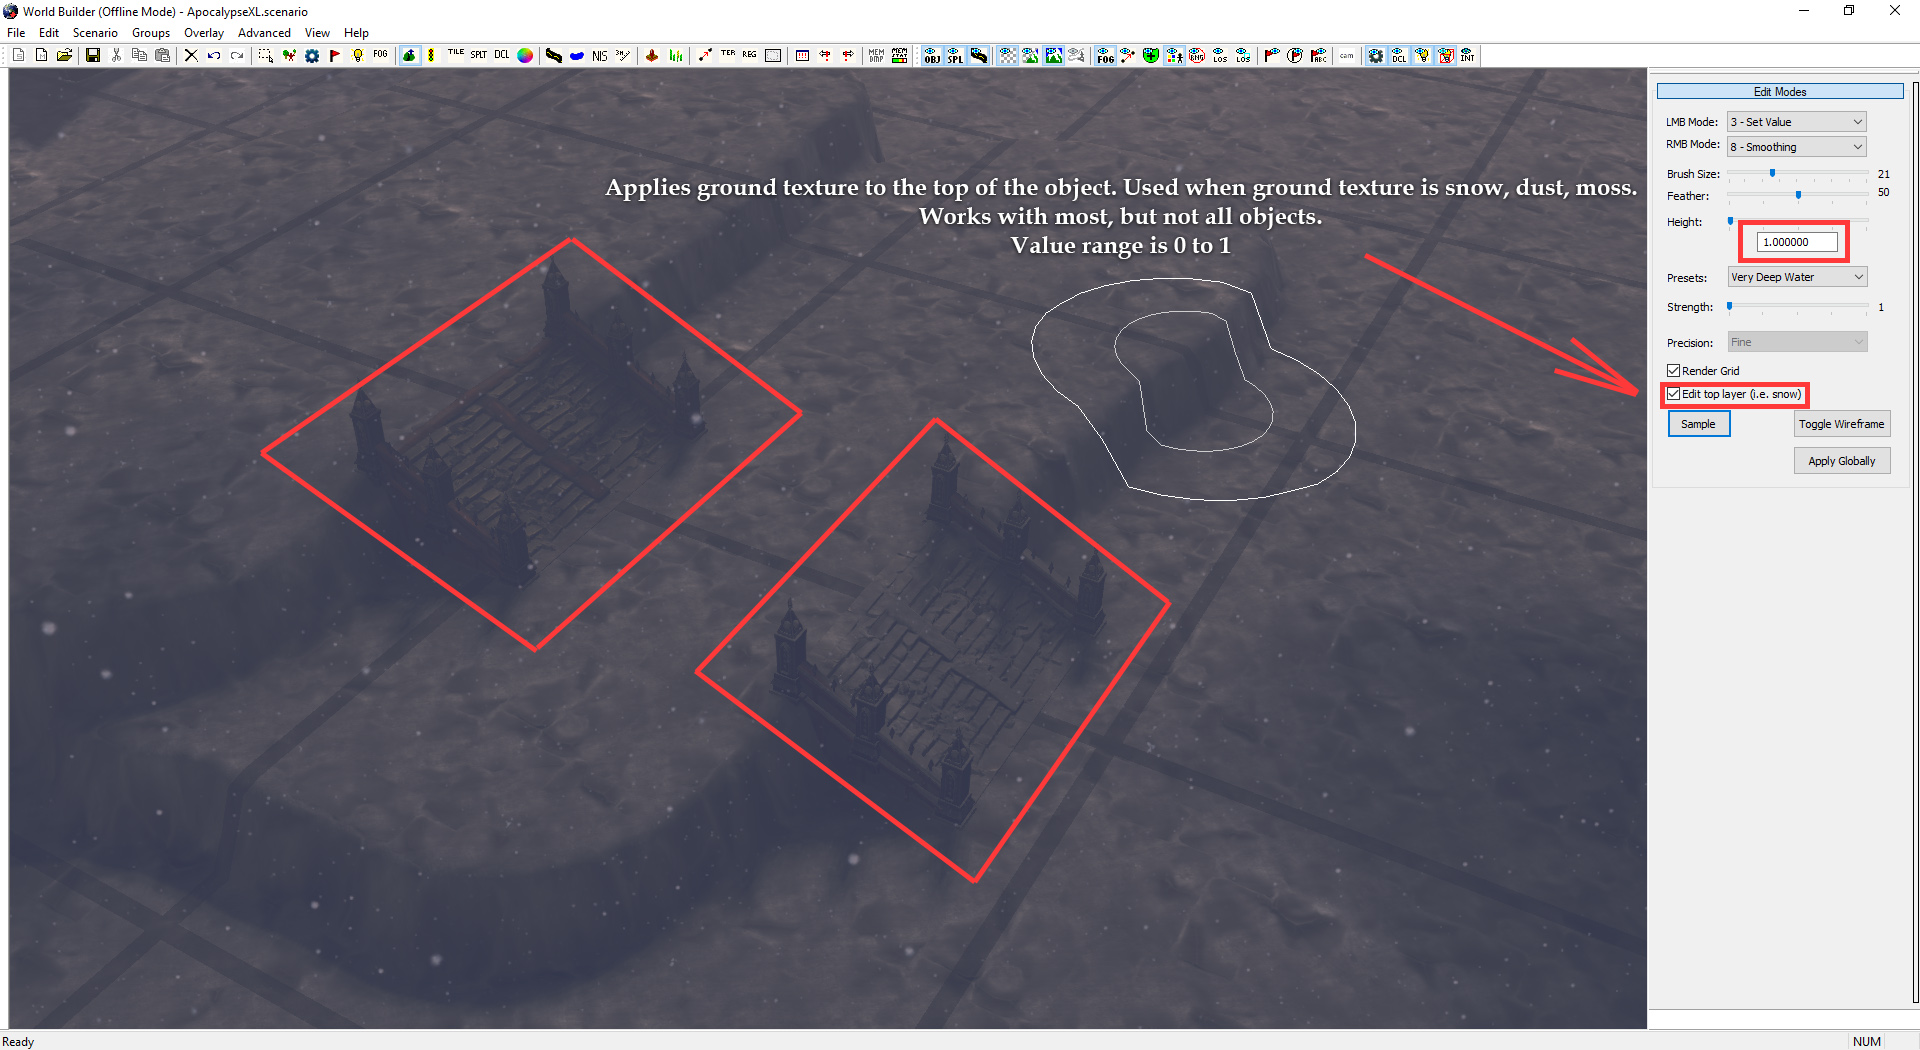
Height Editor
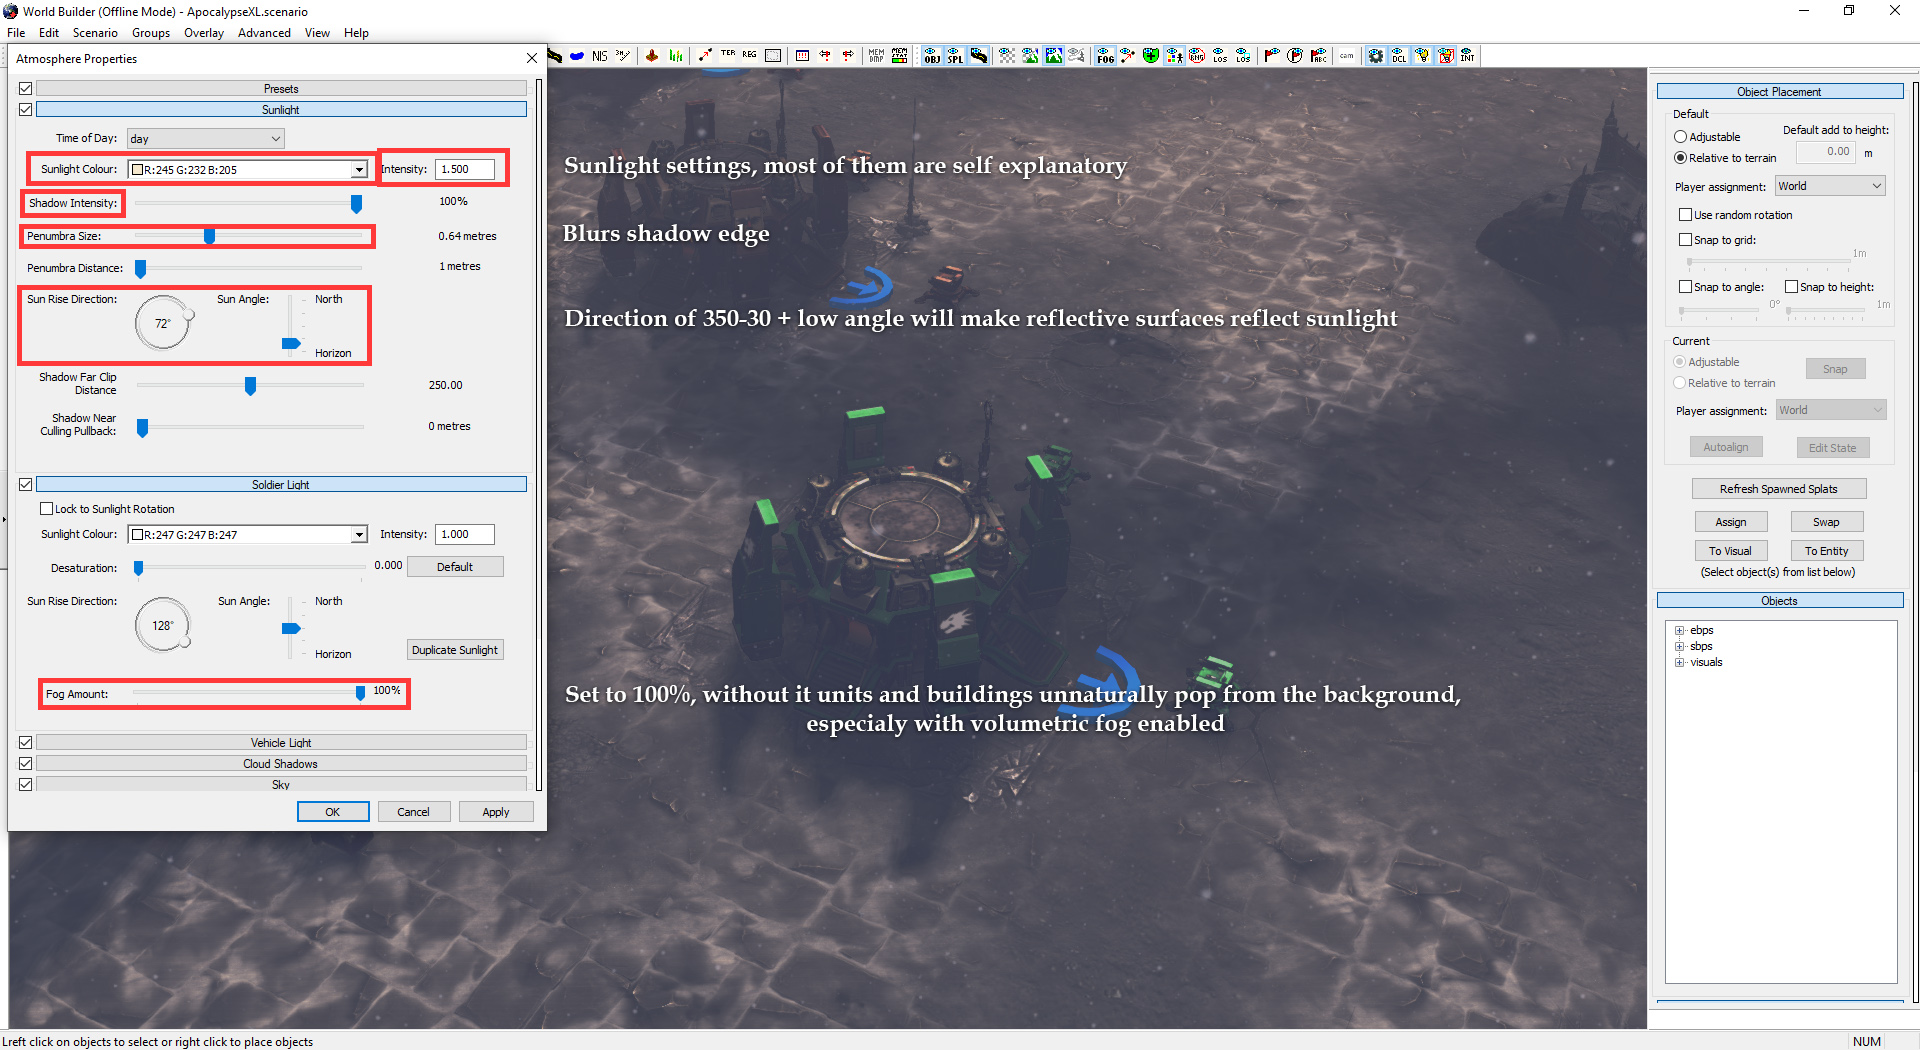
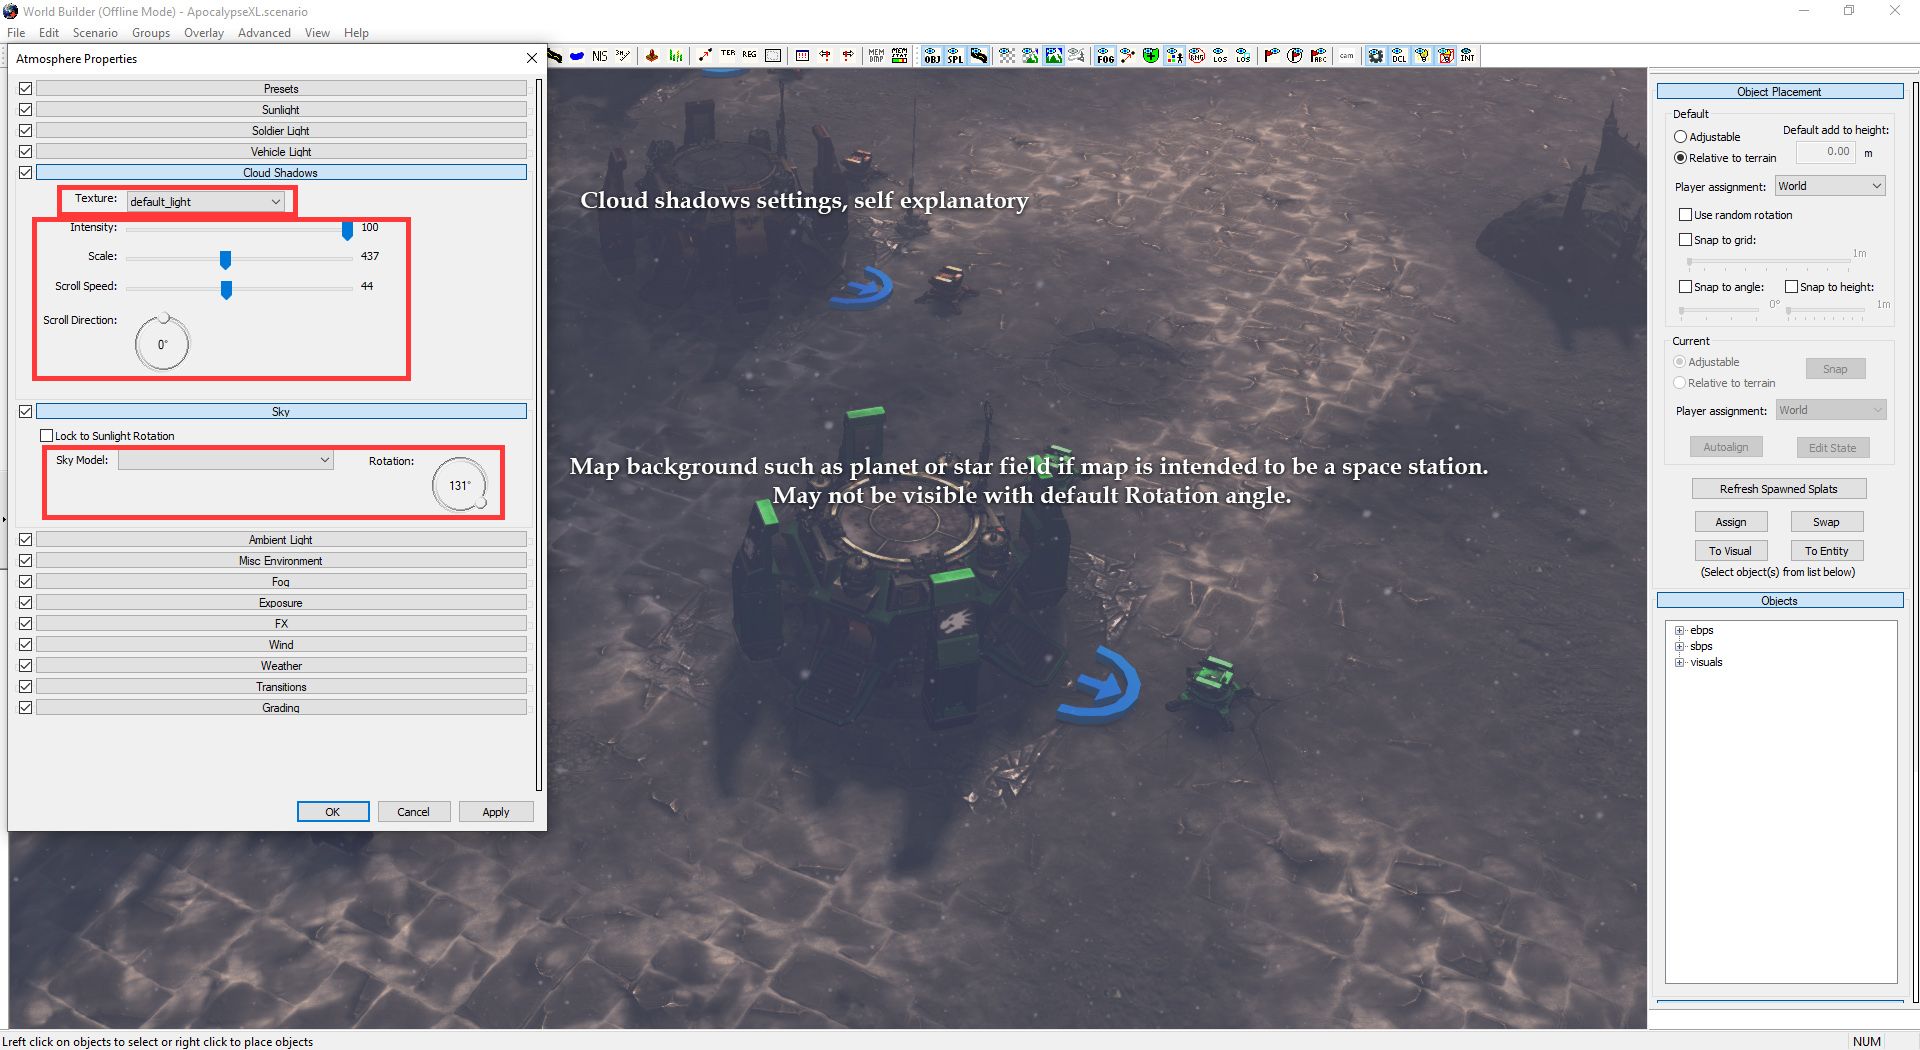
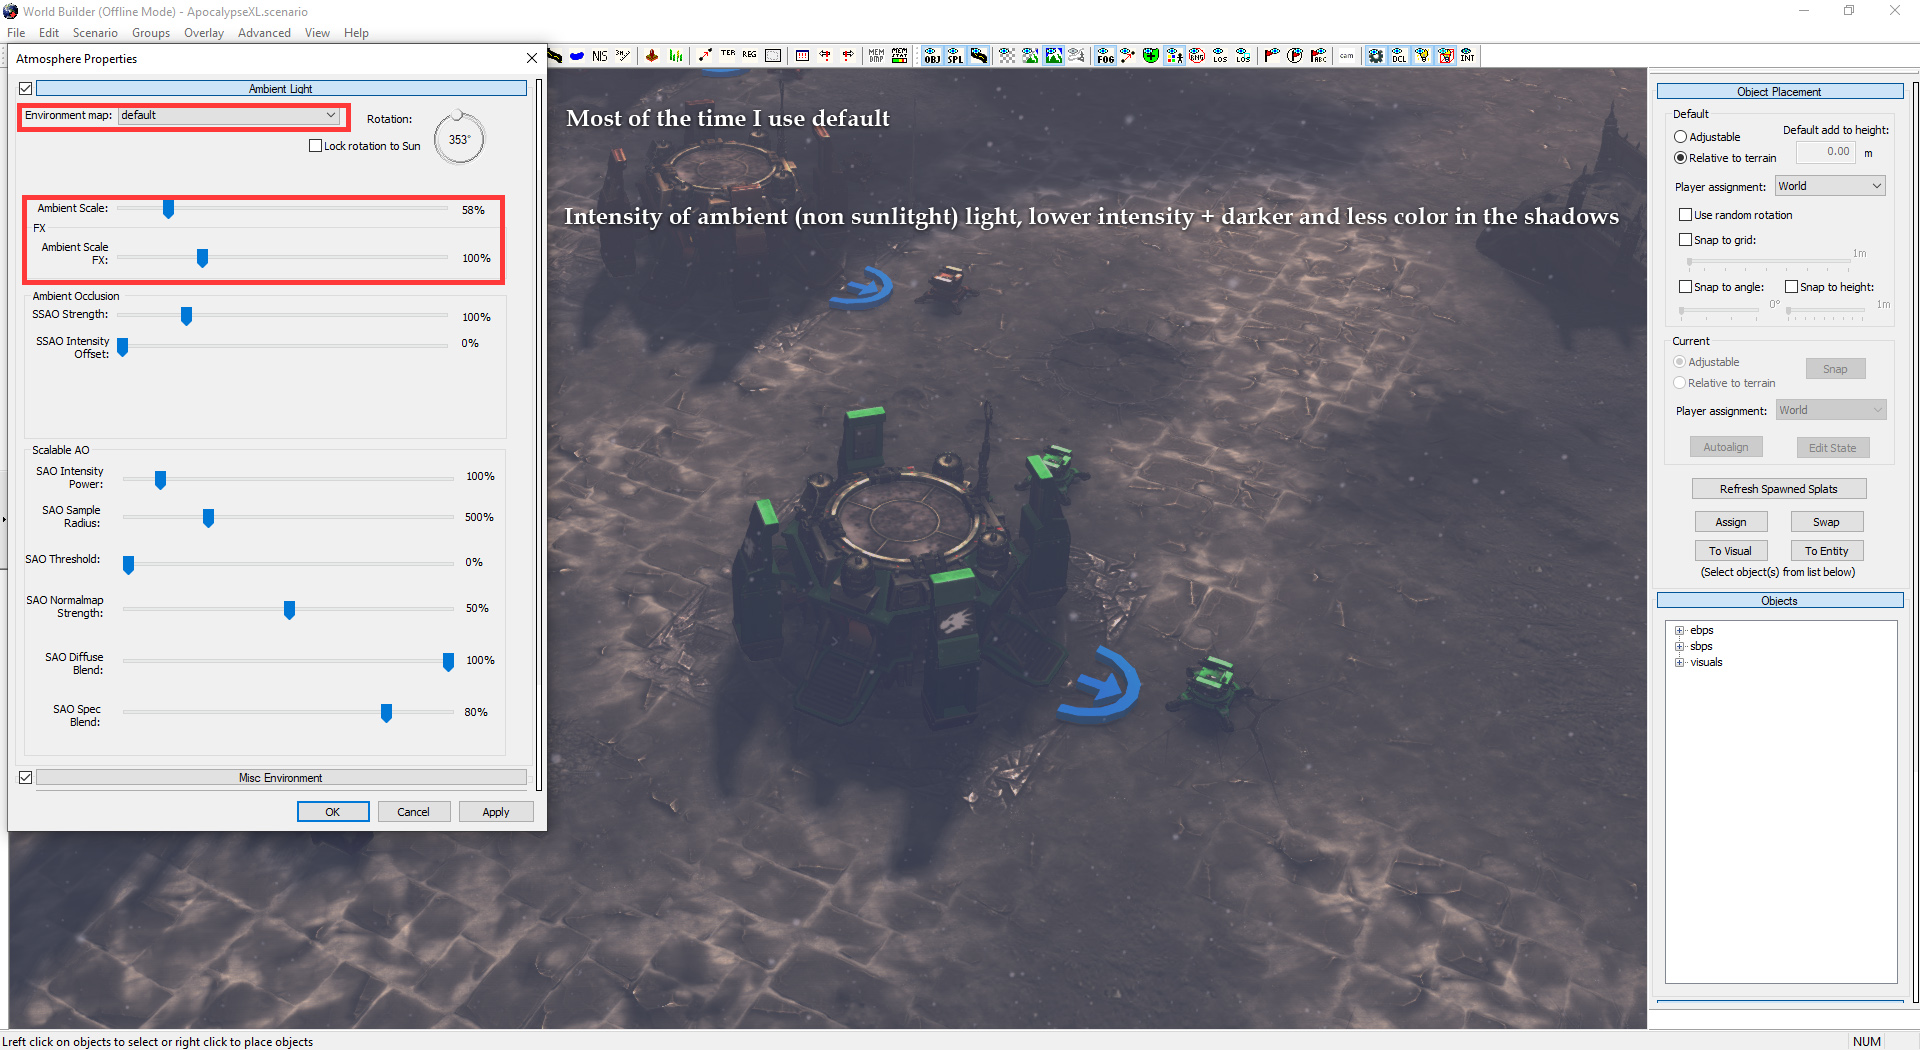
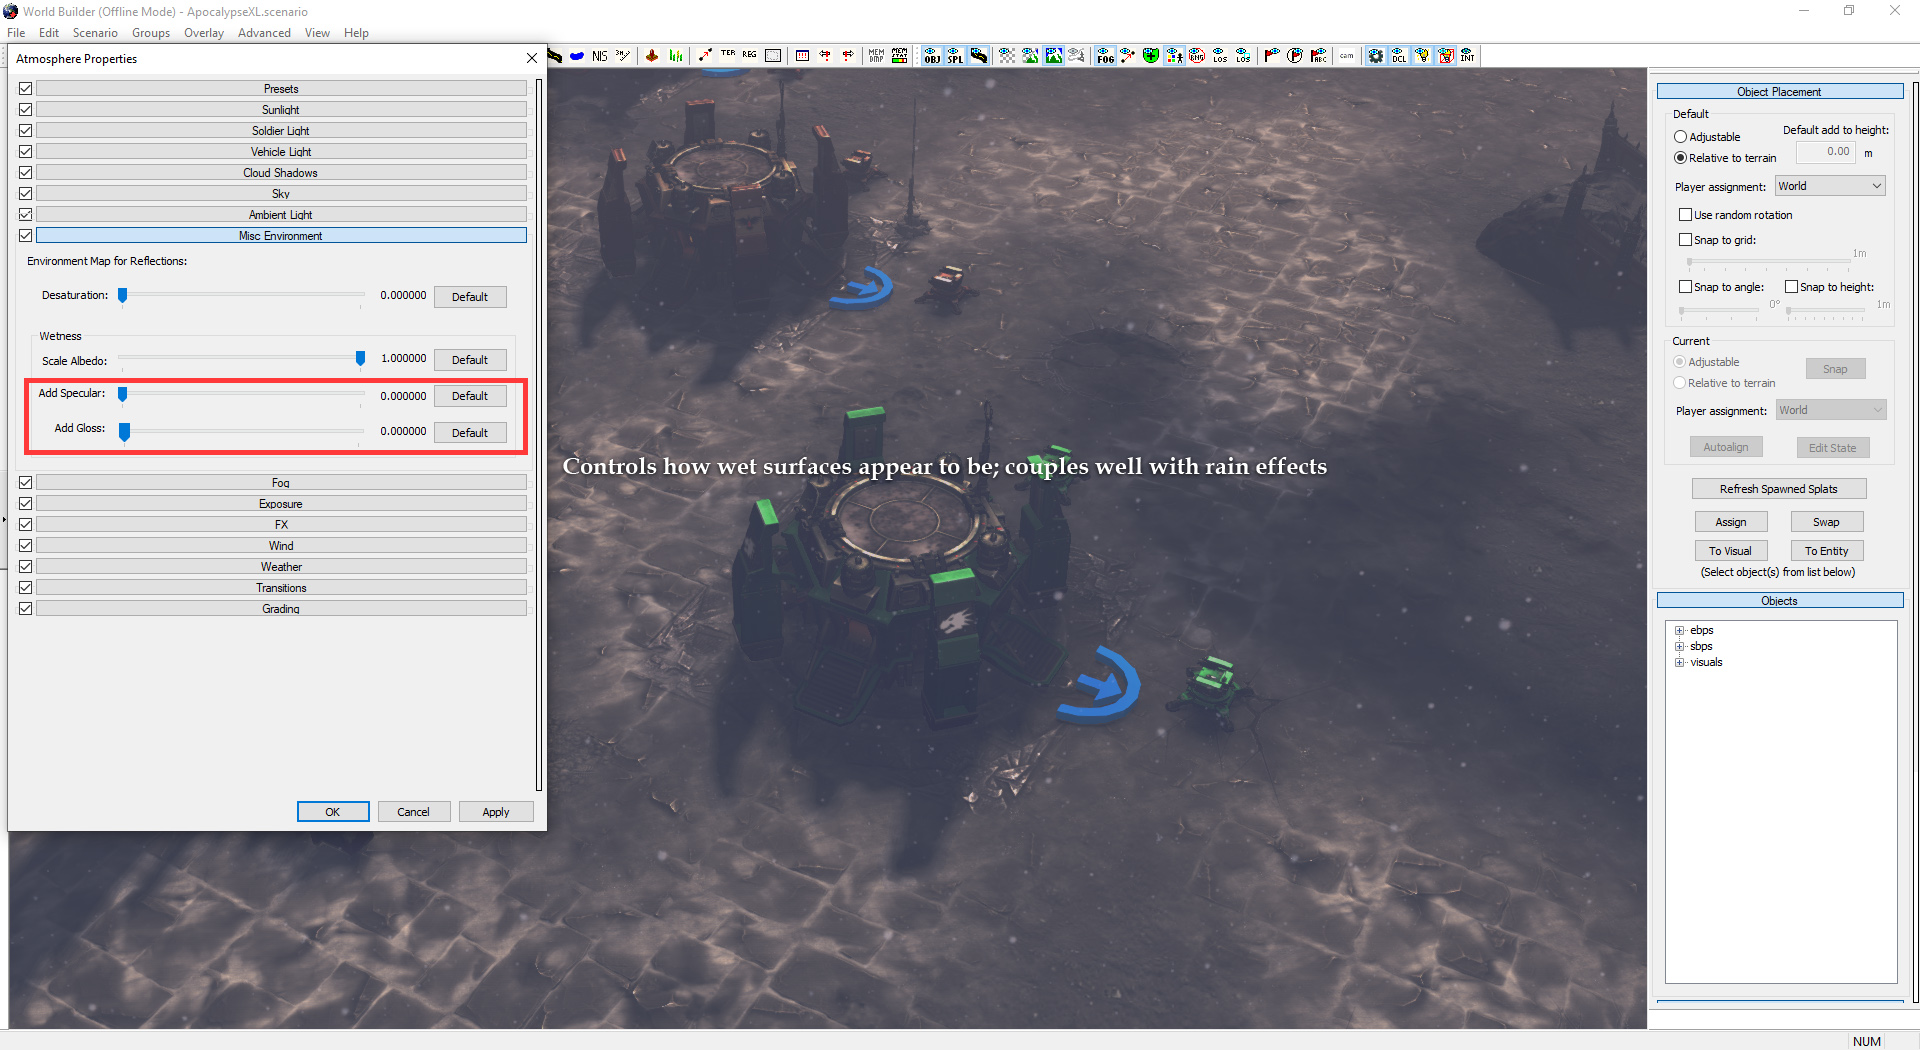
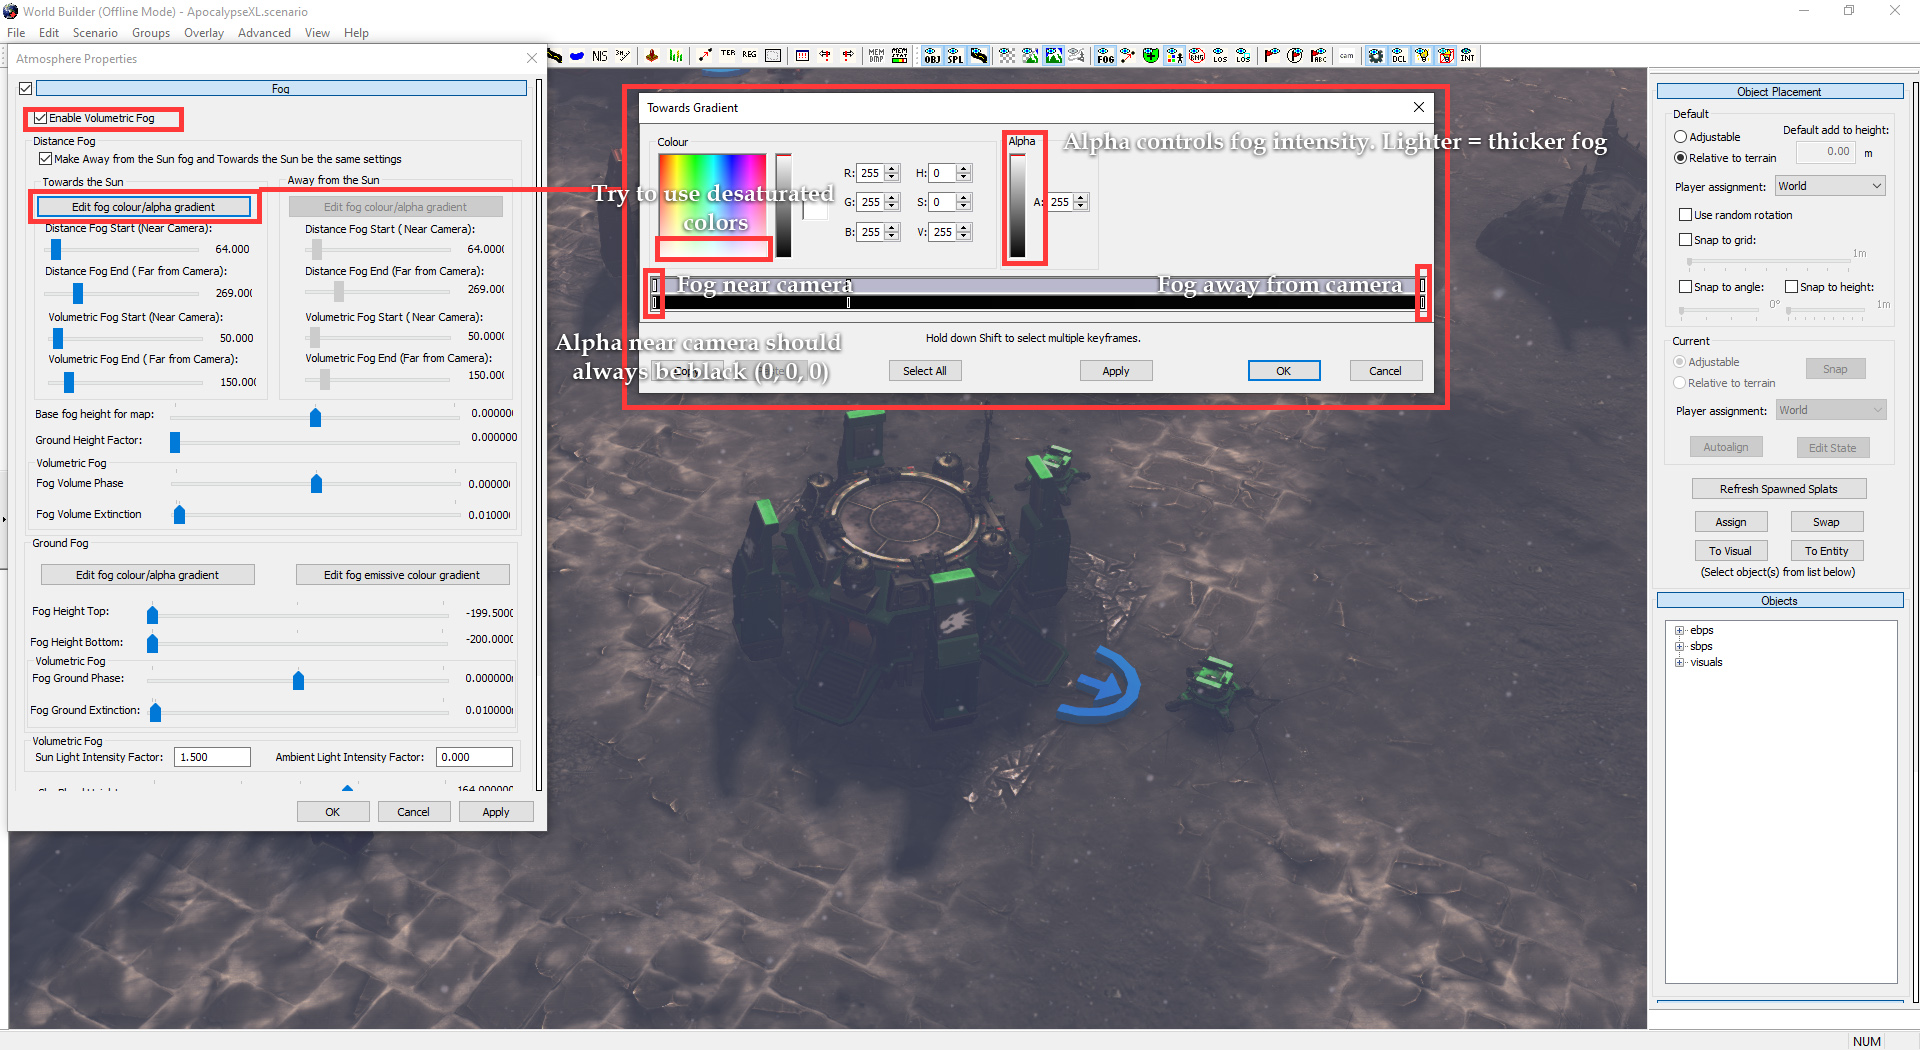
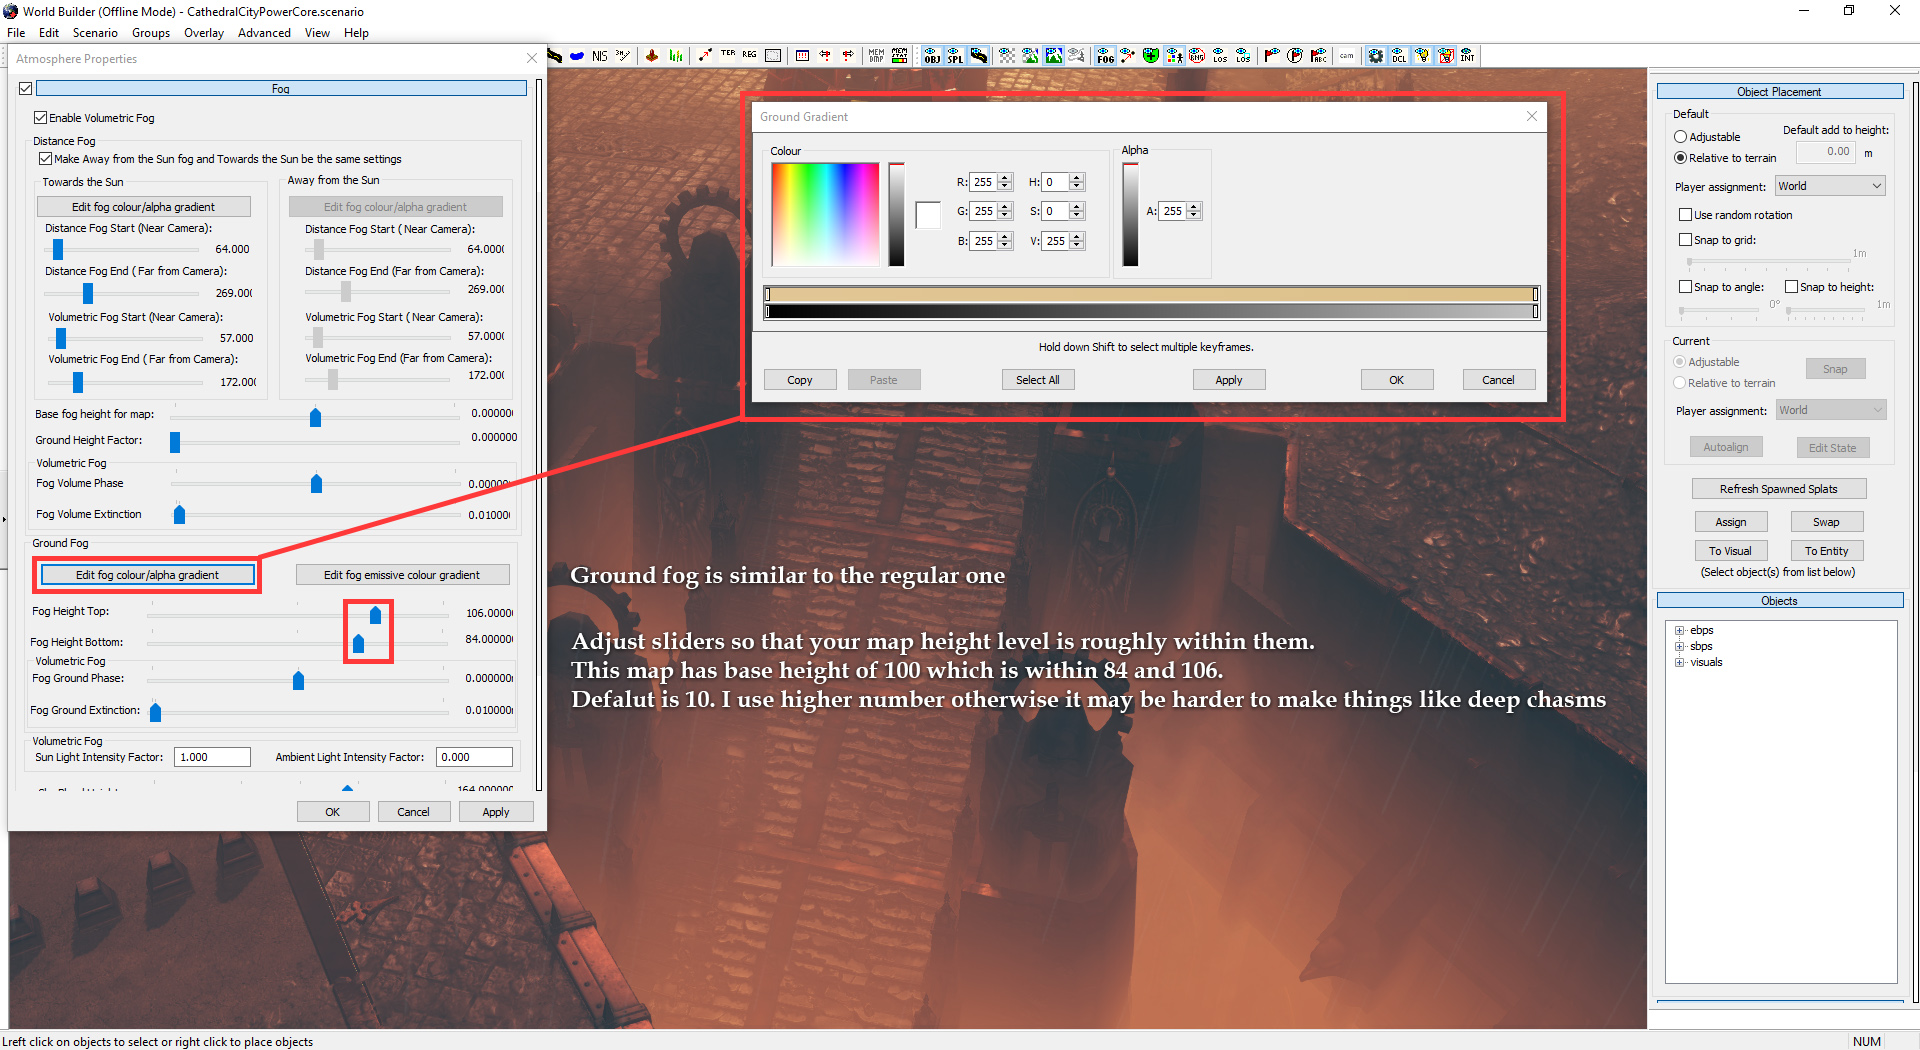
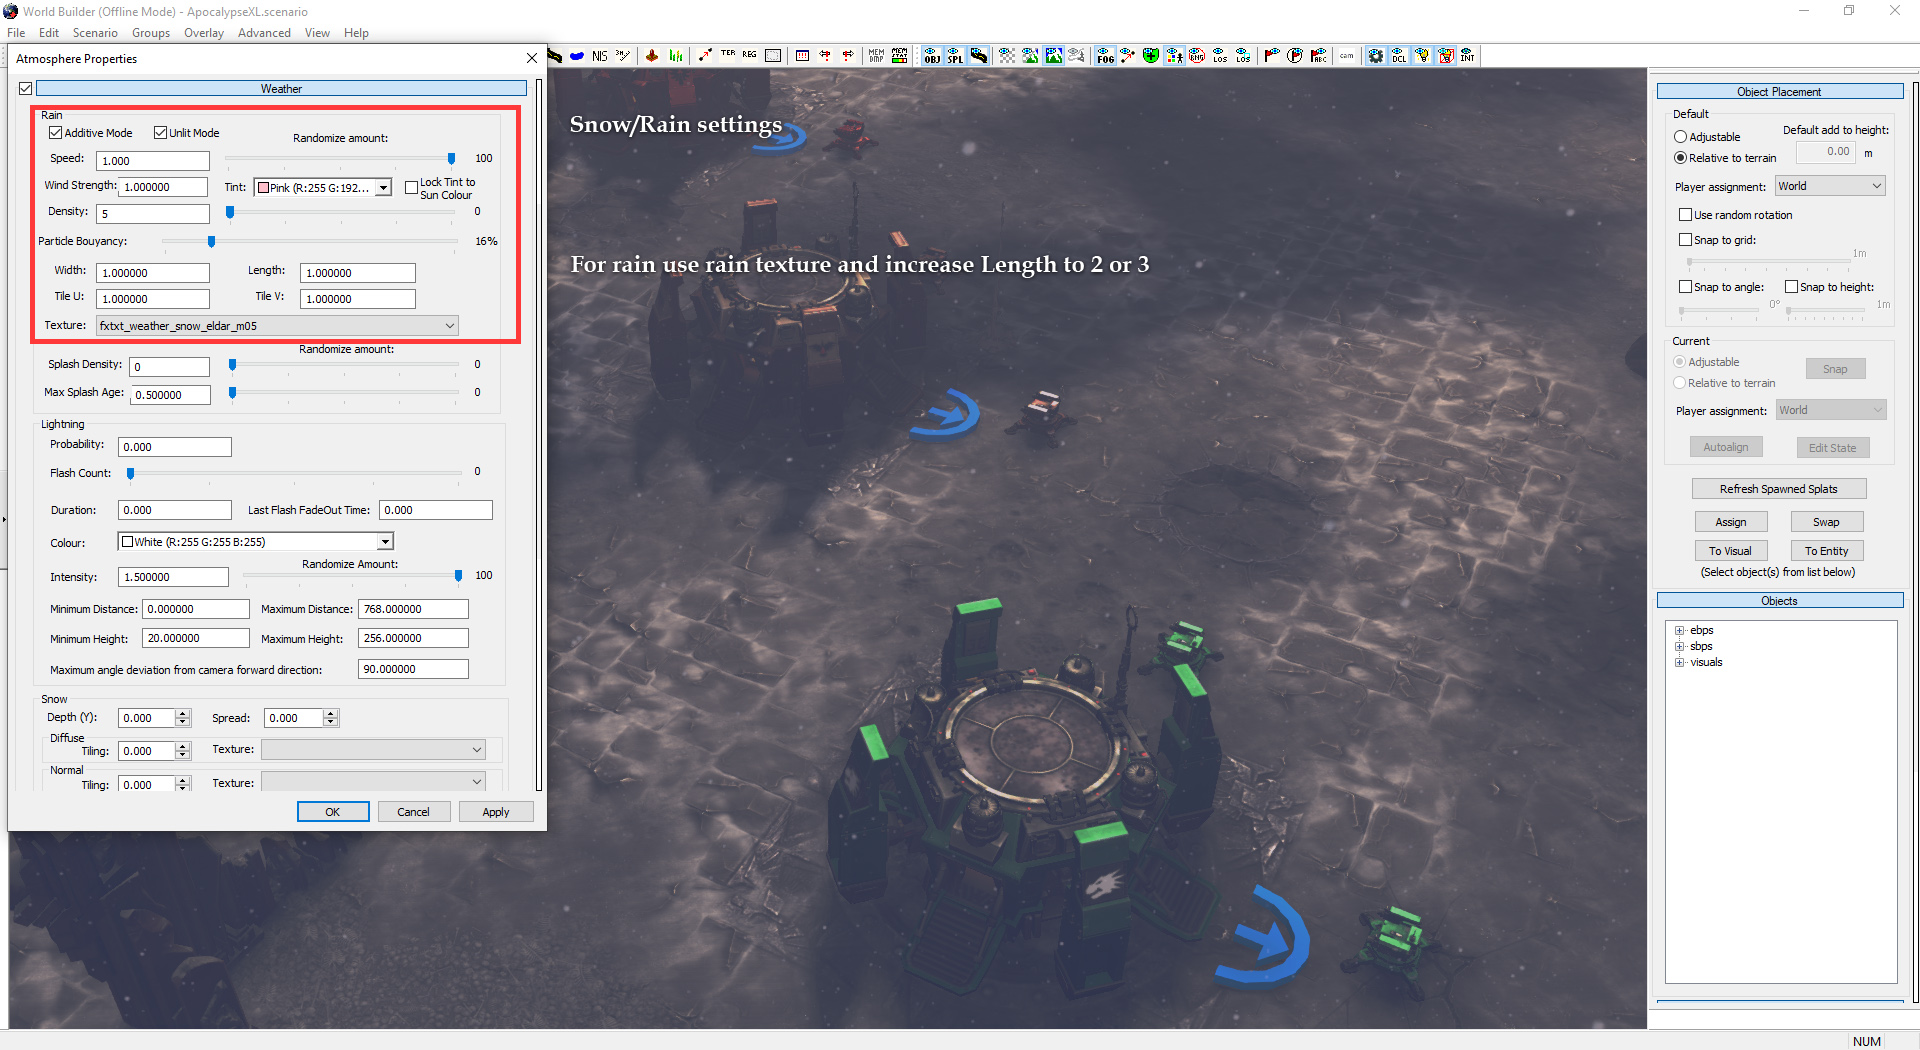
Atmosphere Settings
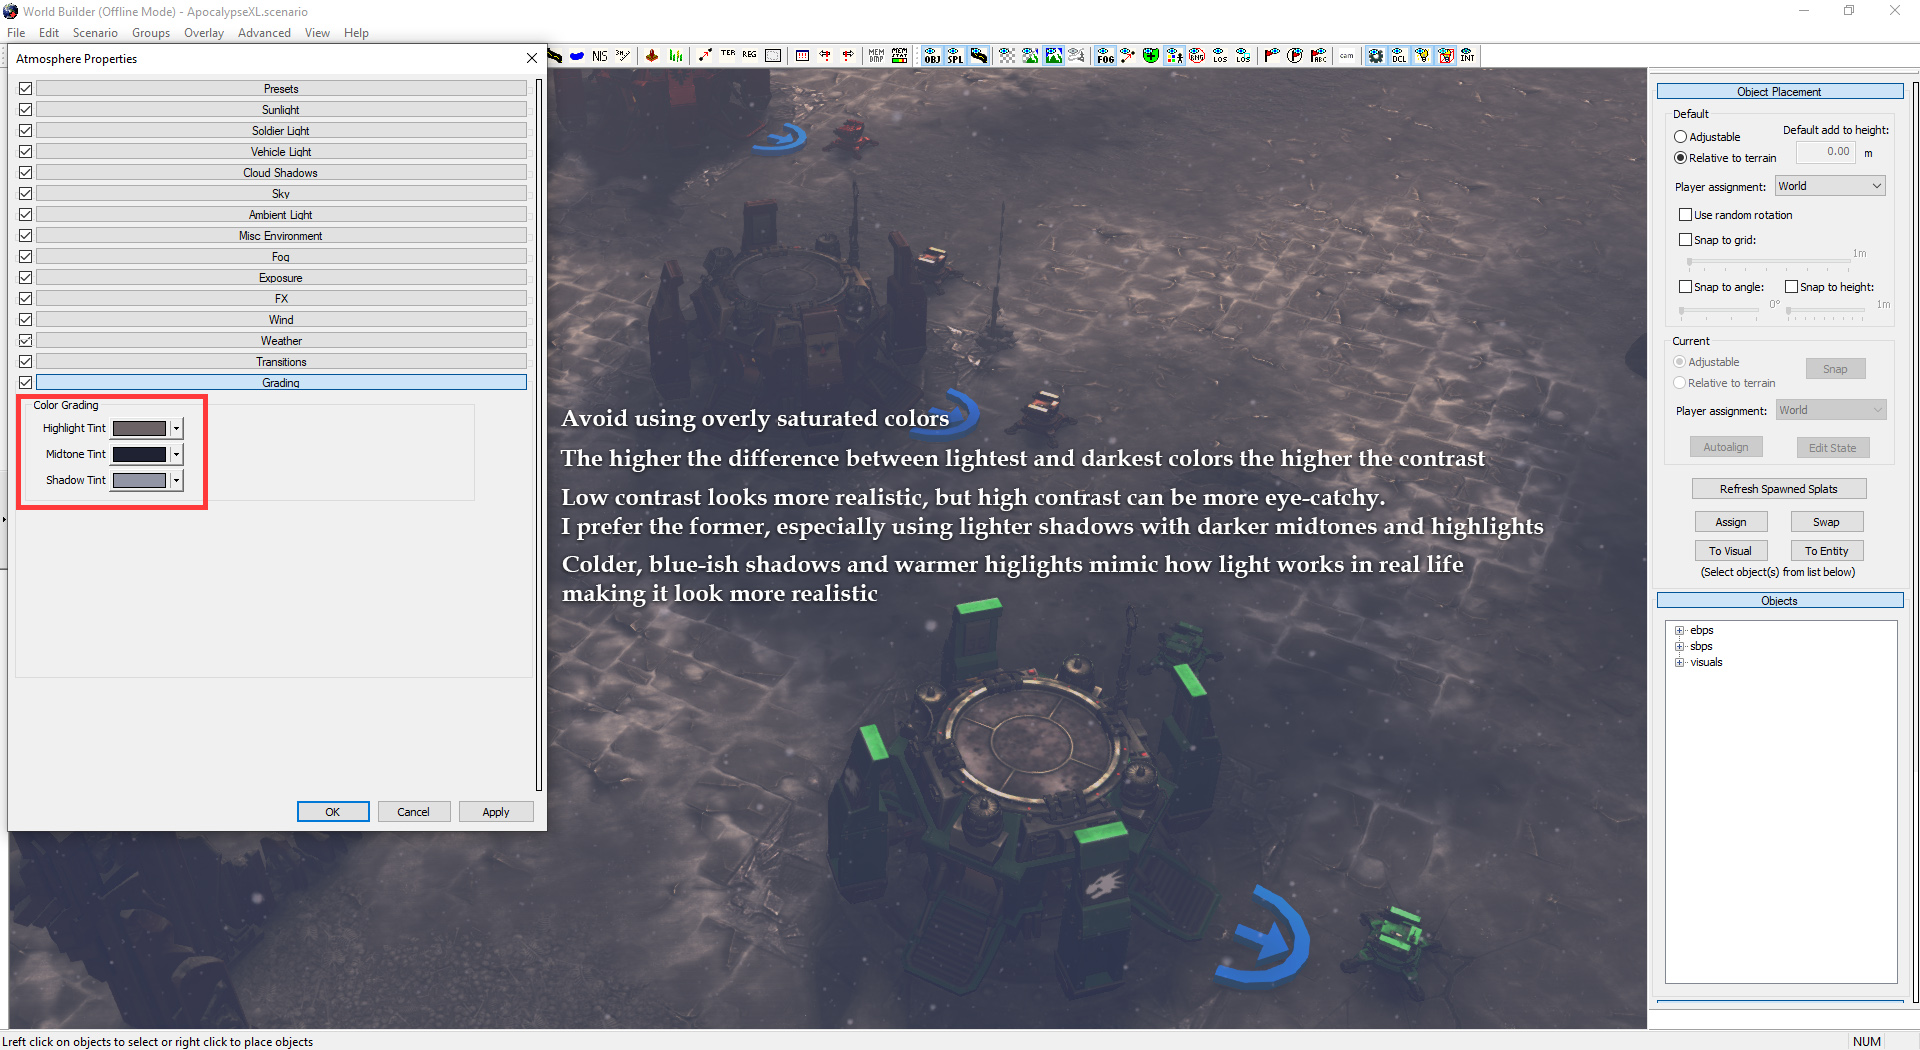
Scenario > Atmosphere Properties
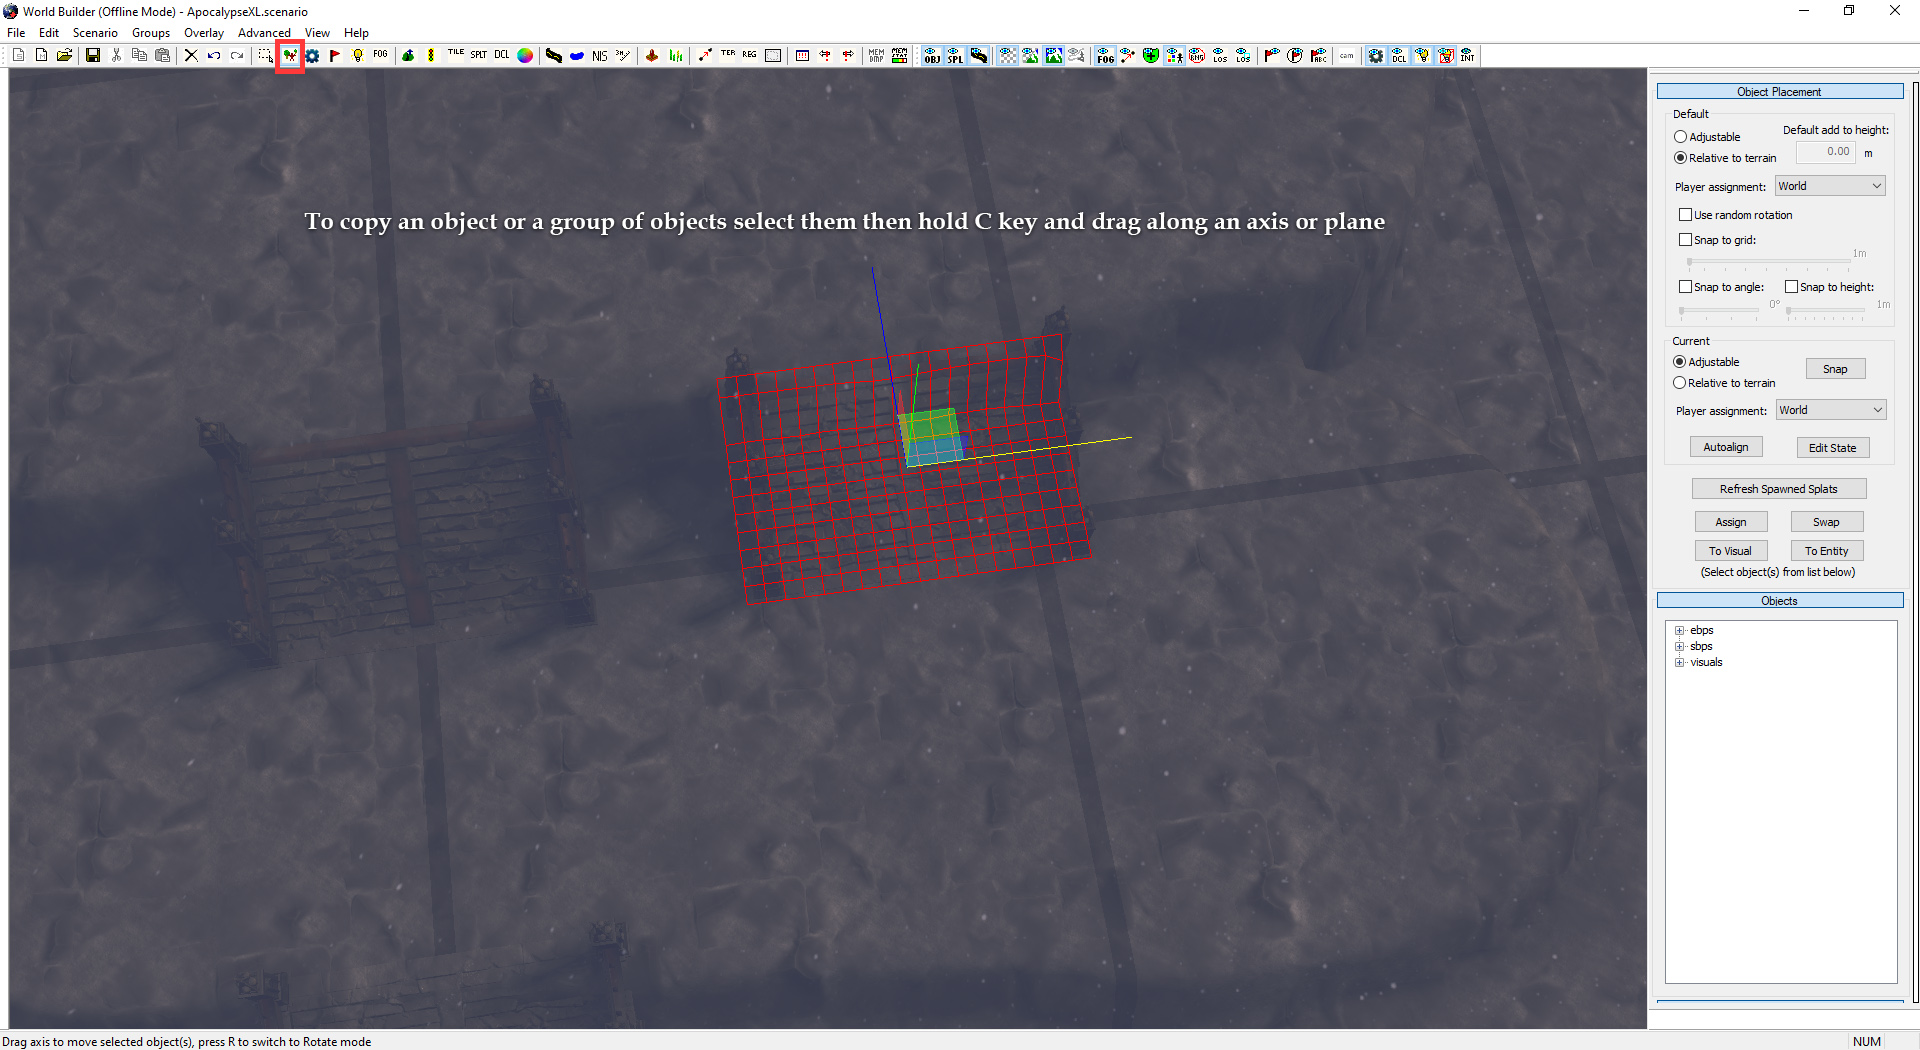
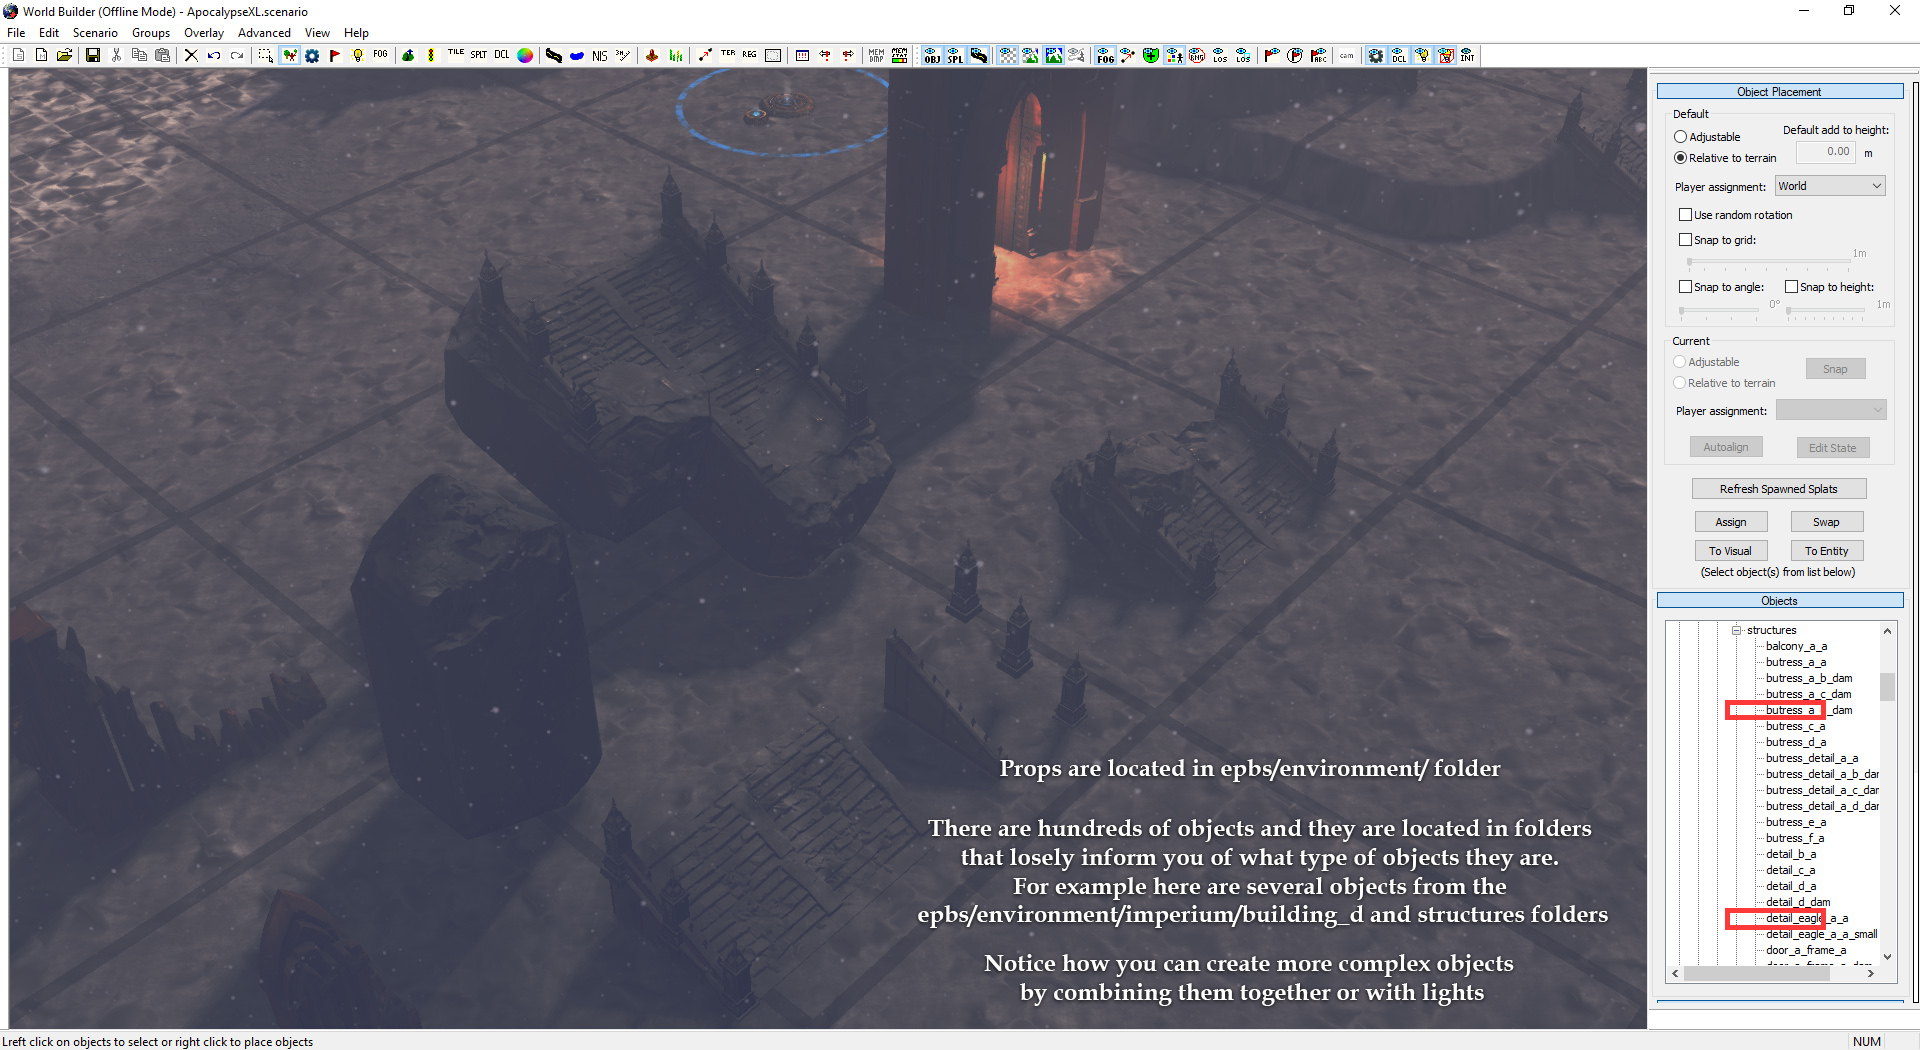
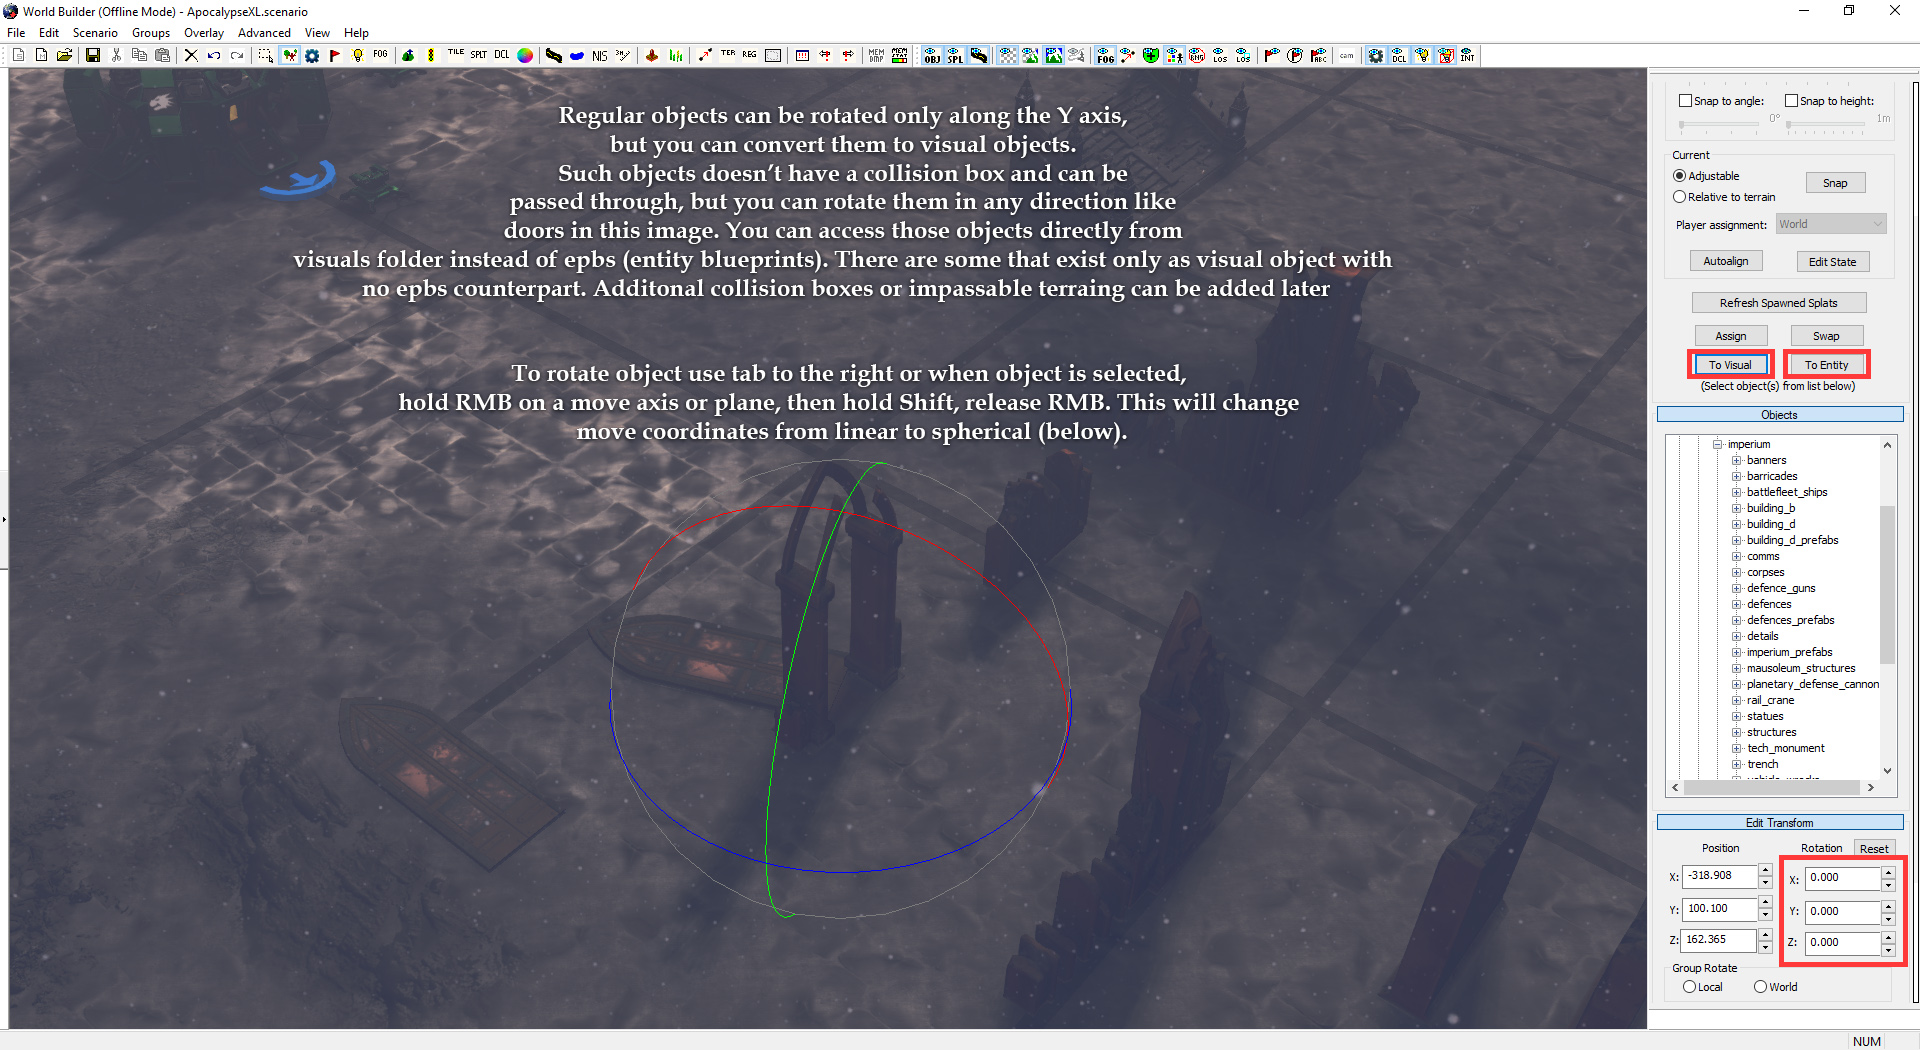
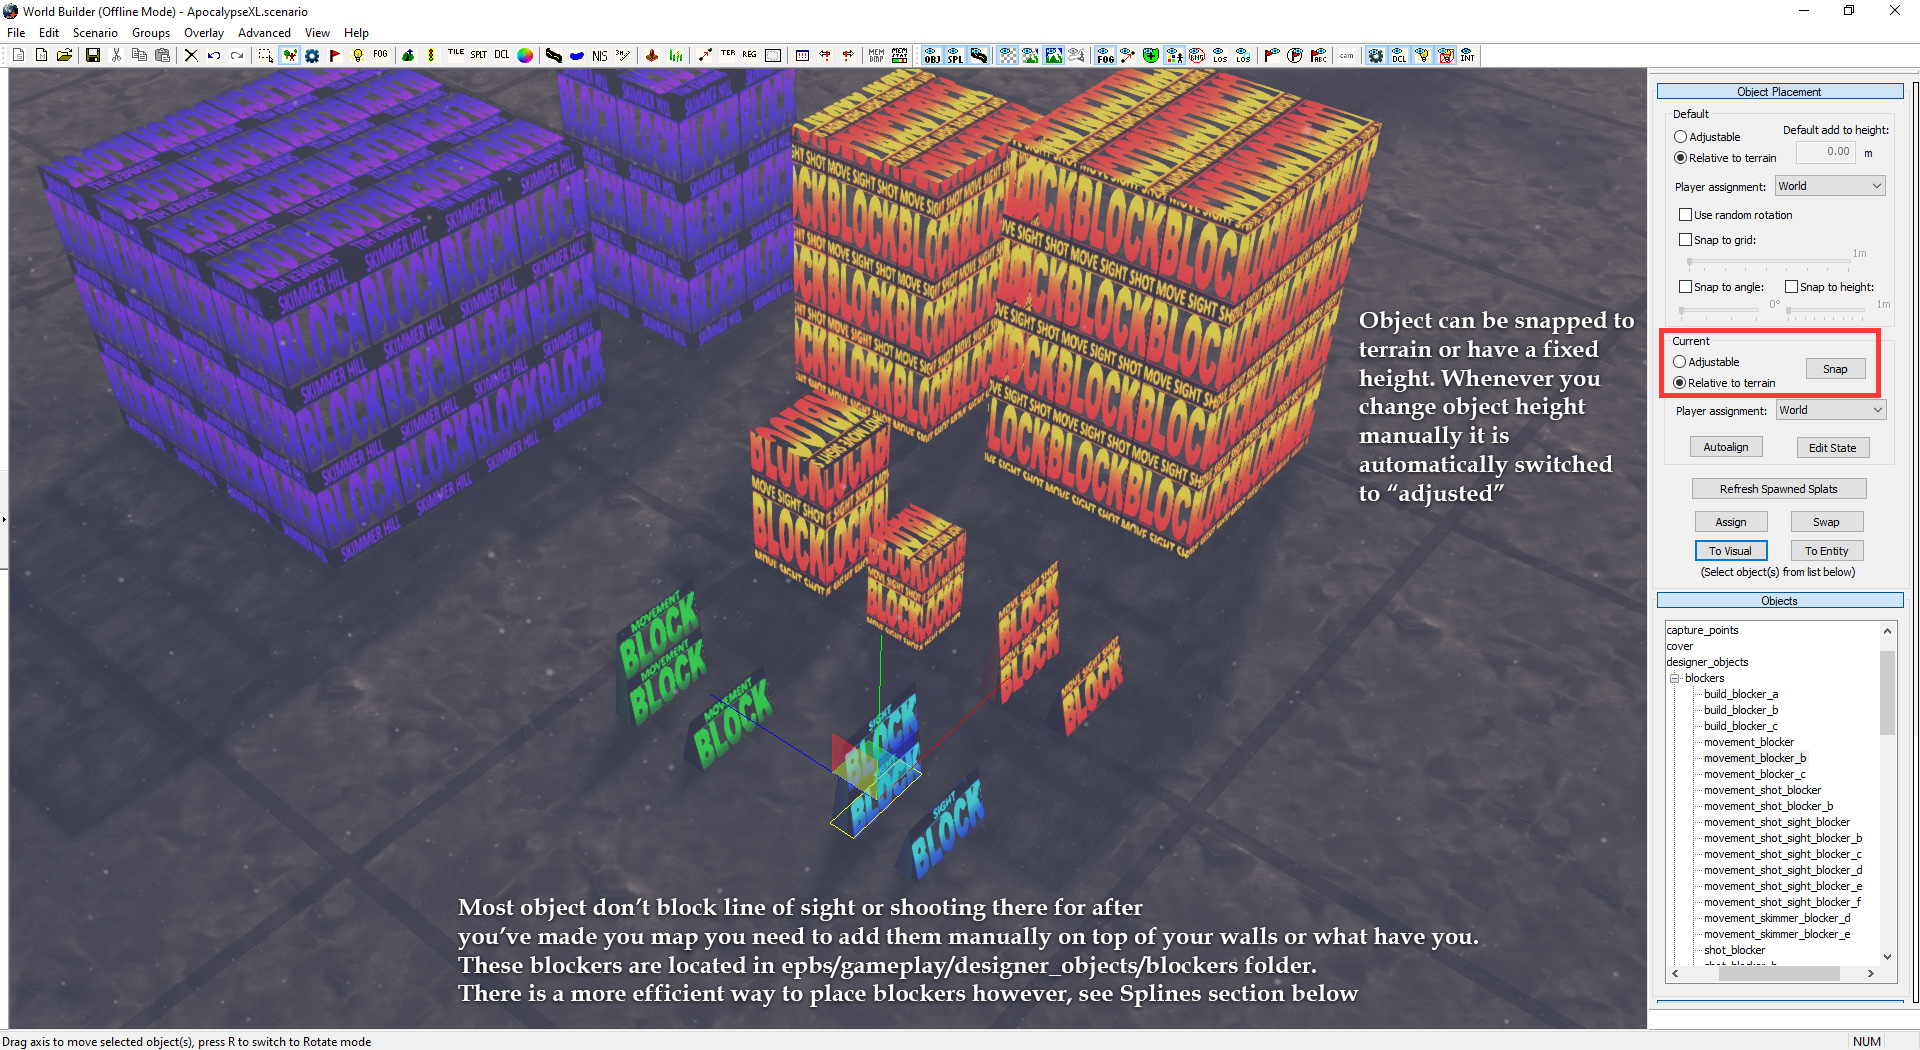
Object Editor
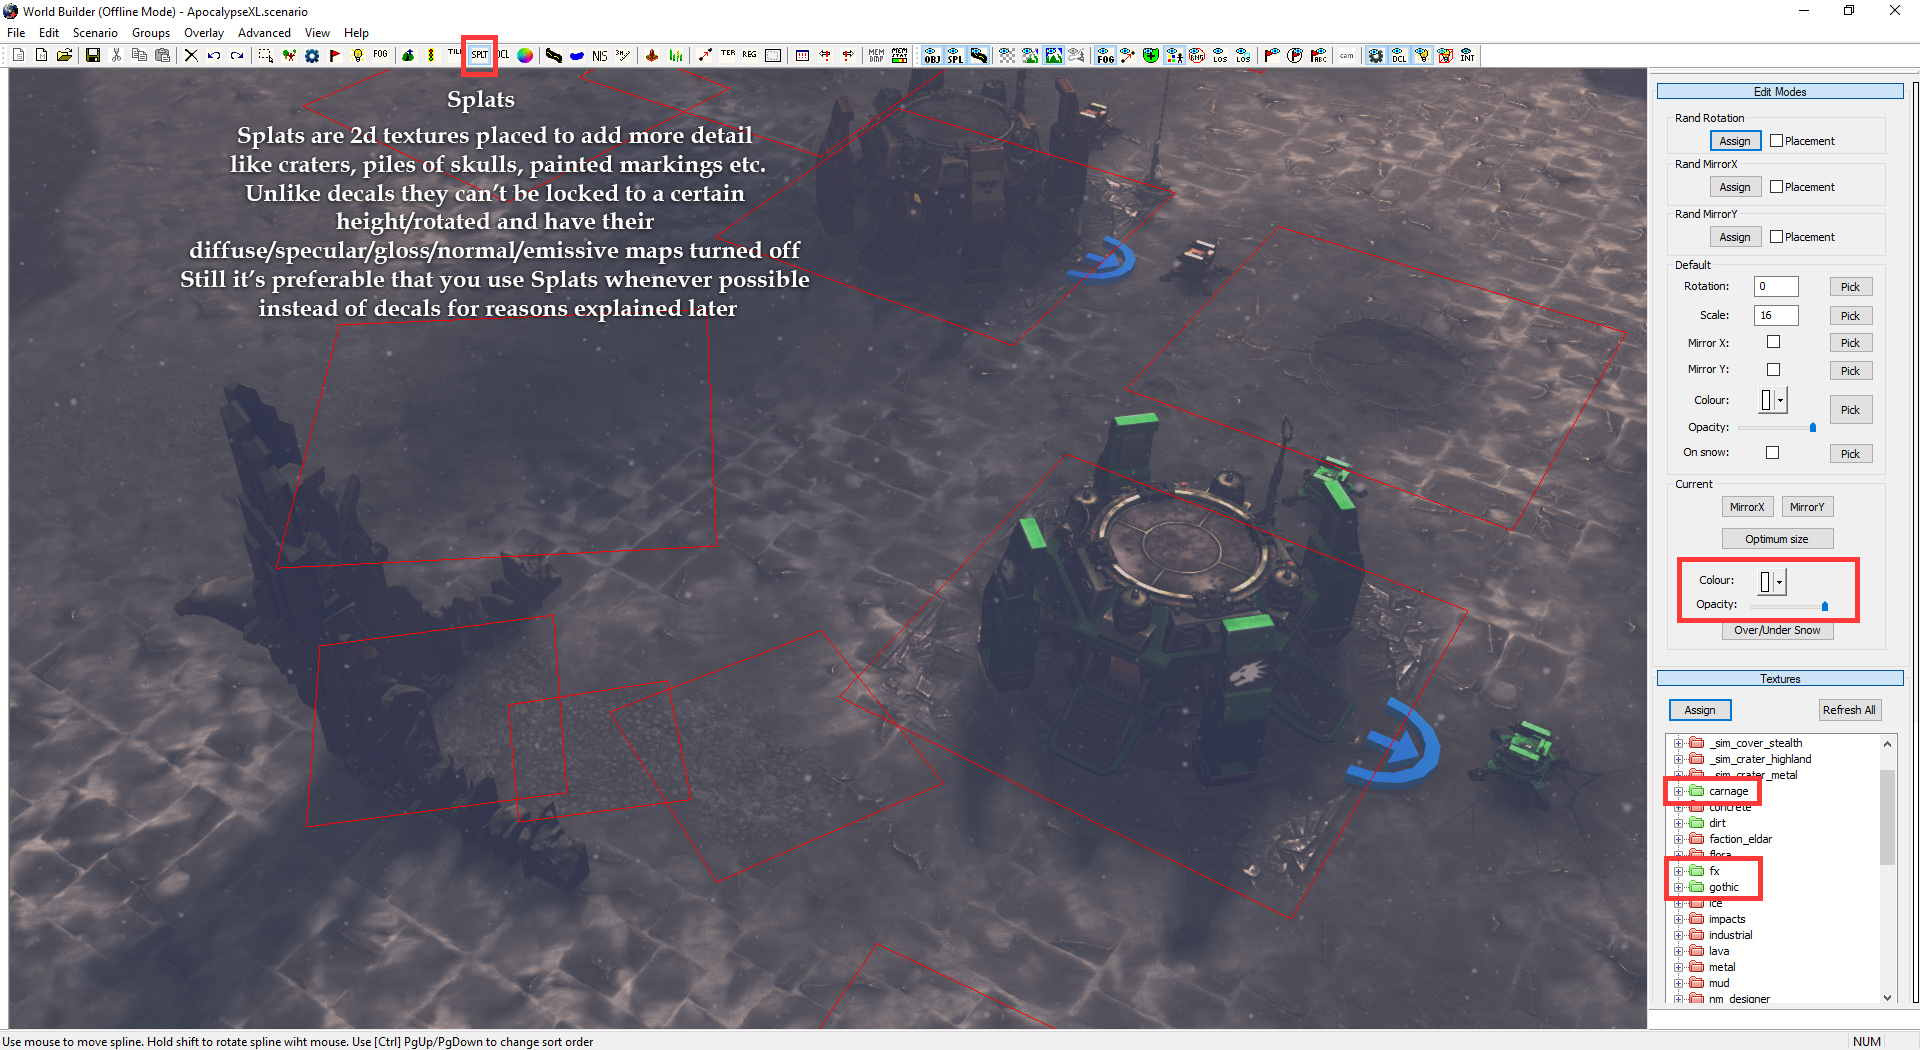
Splats
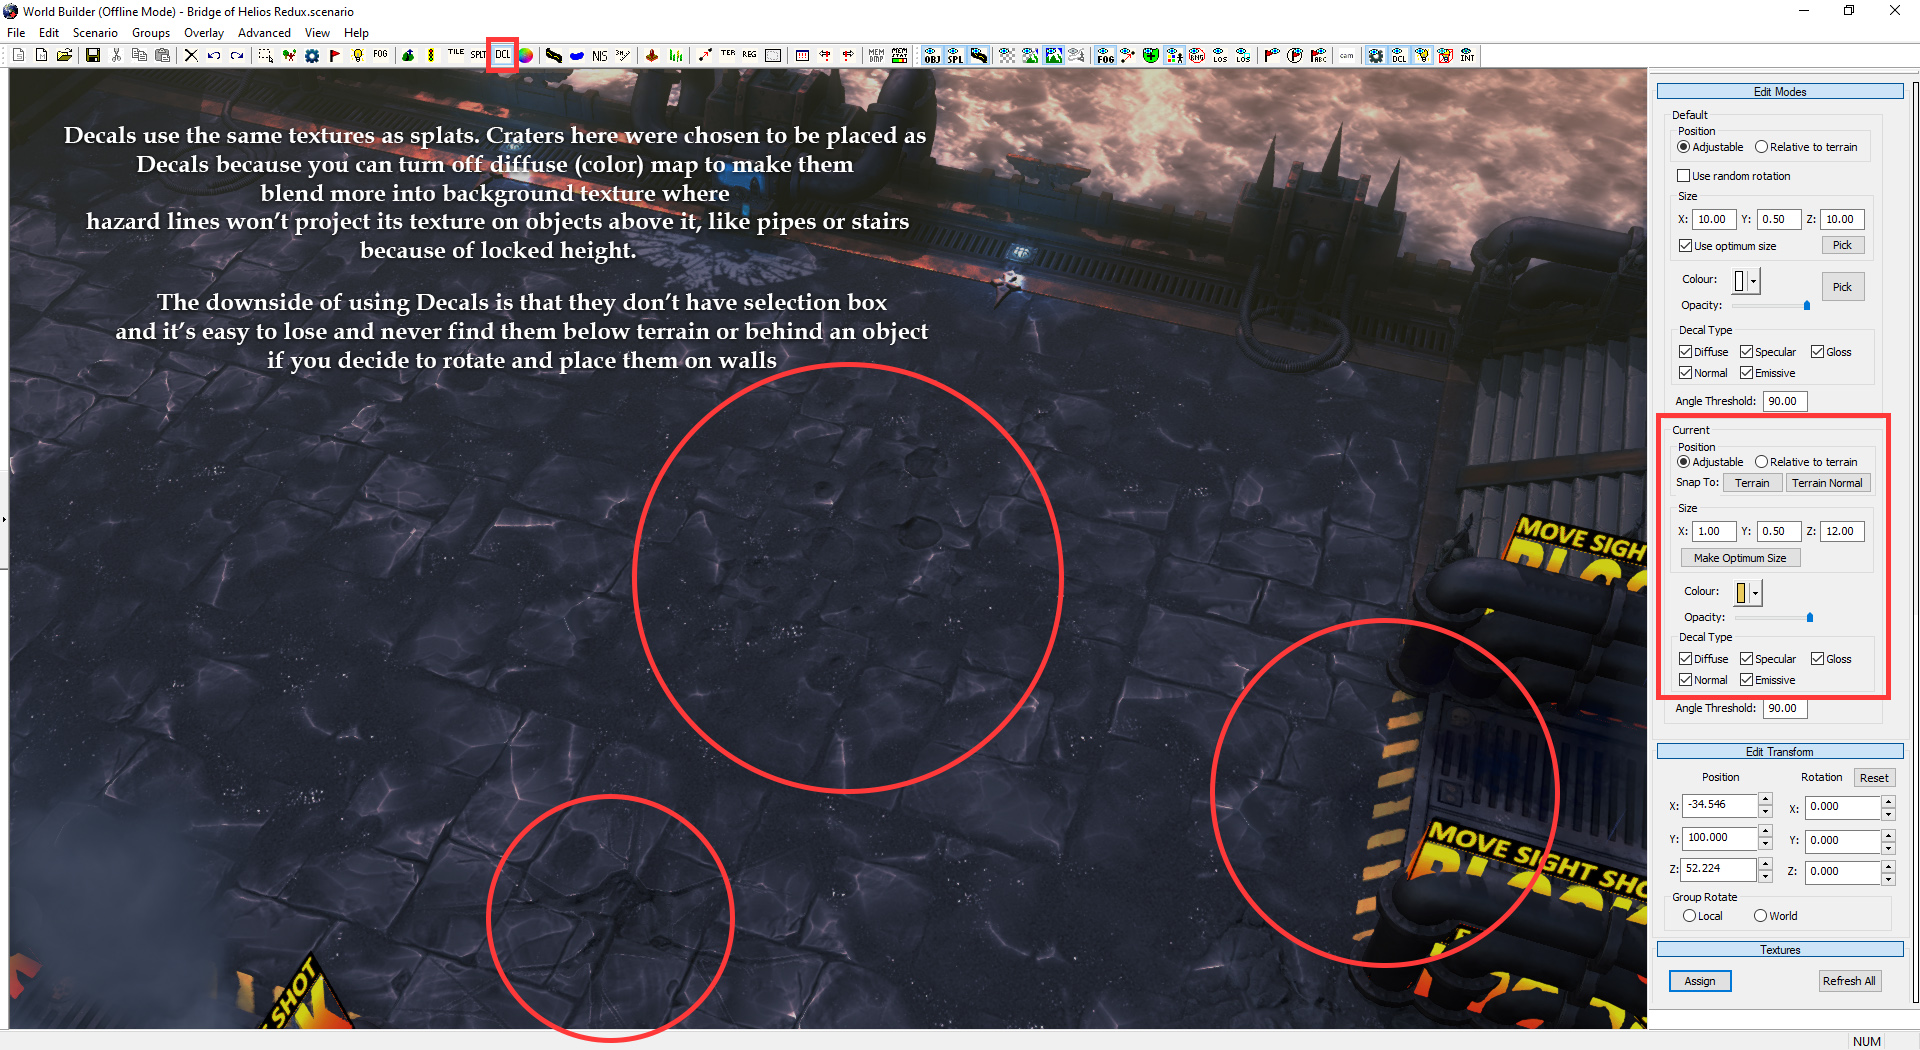
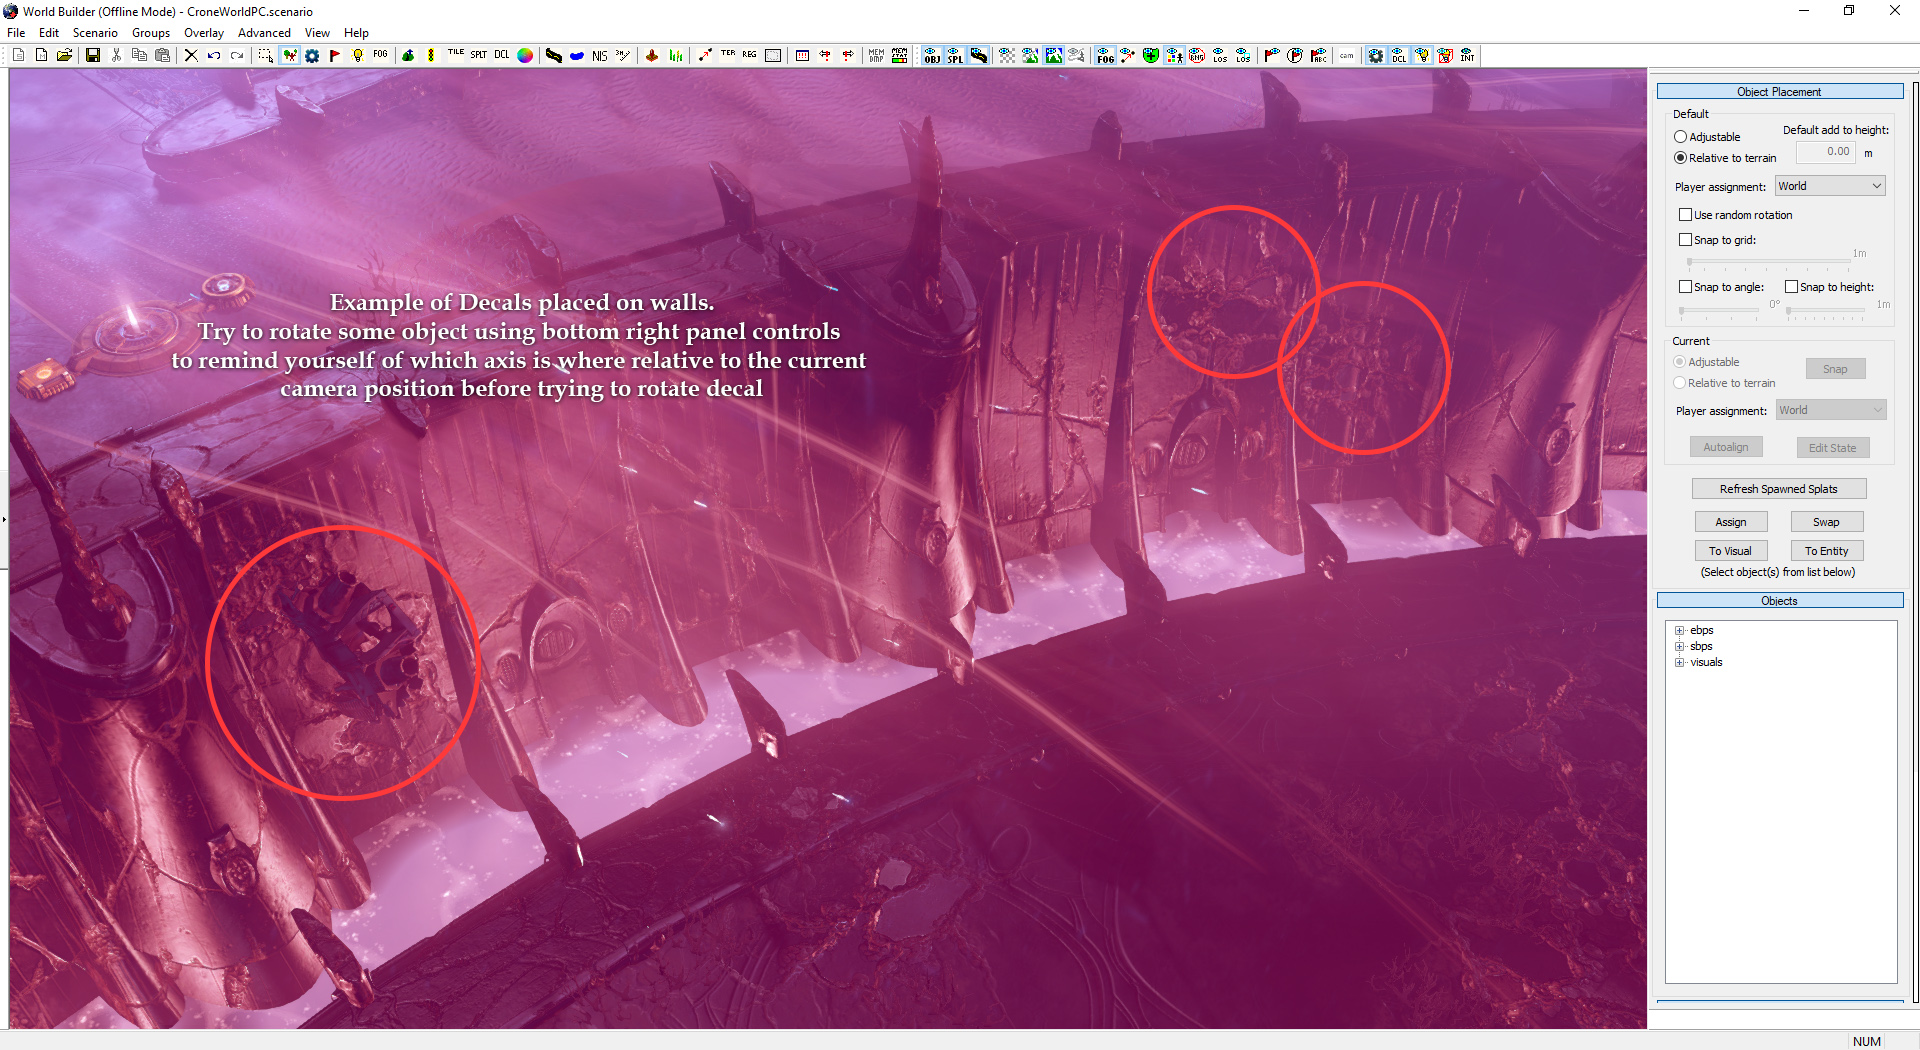
Decals
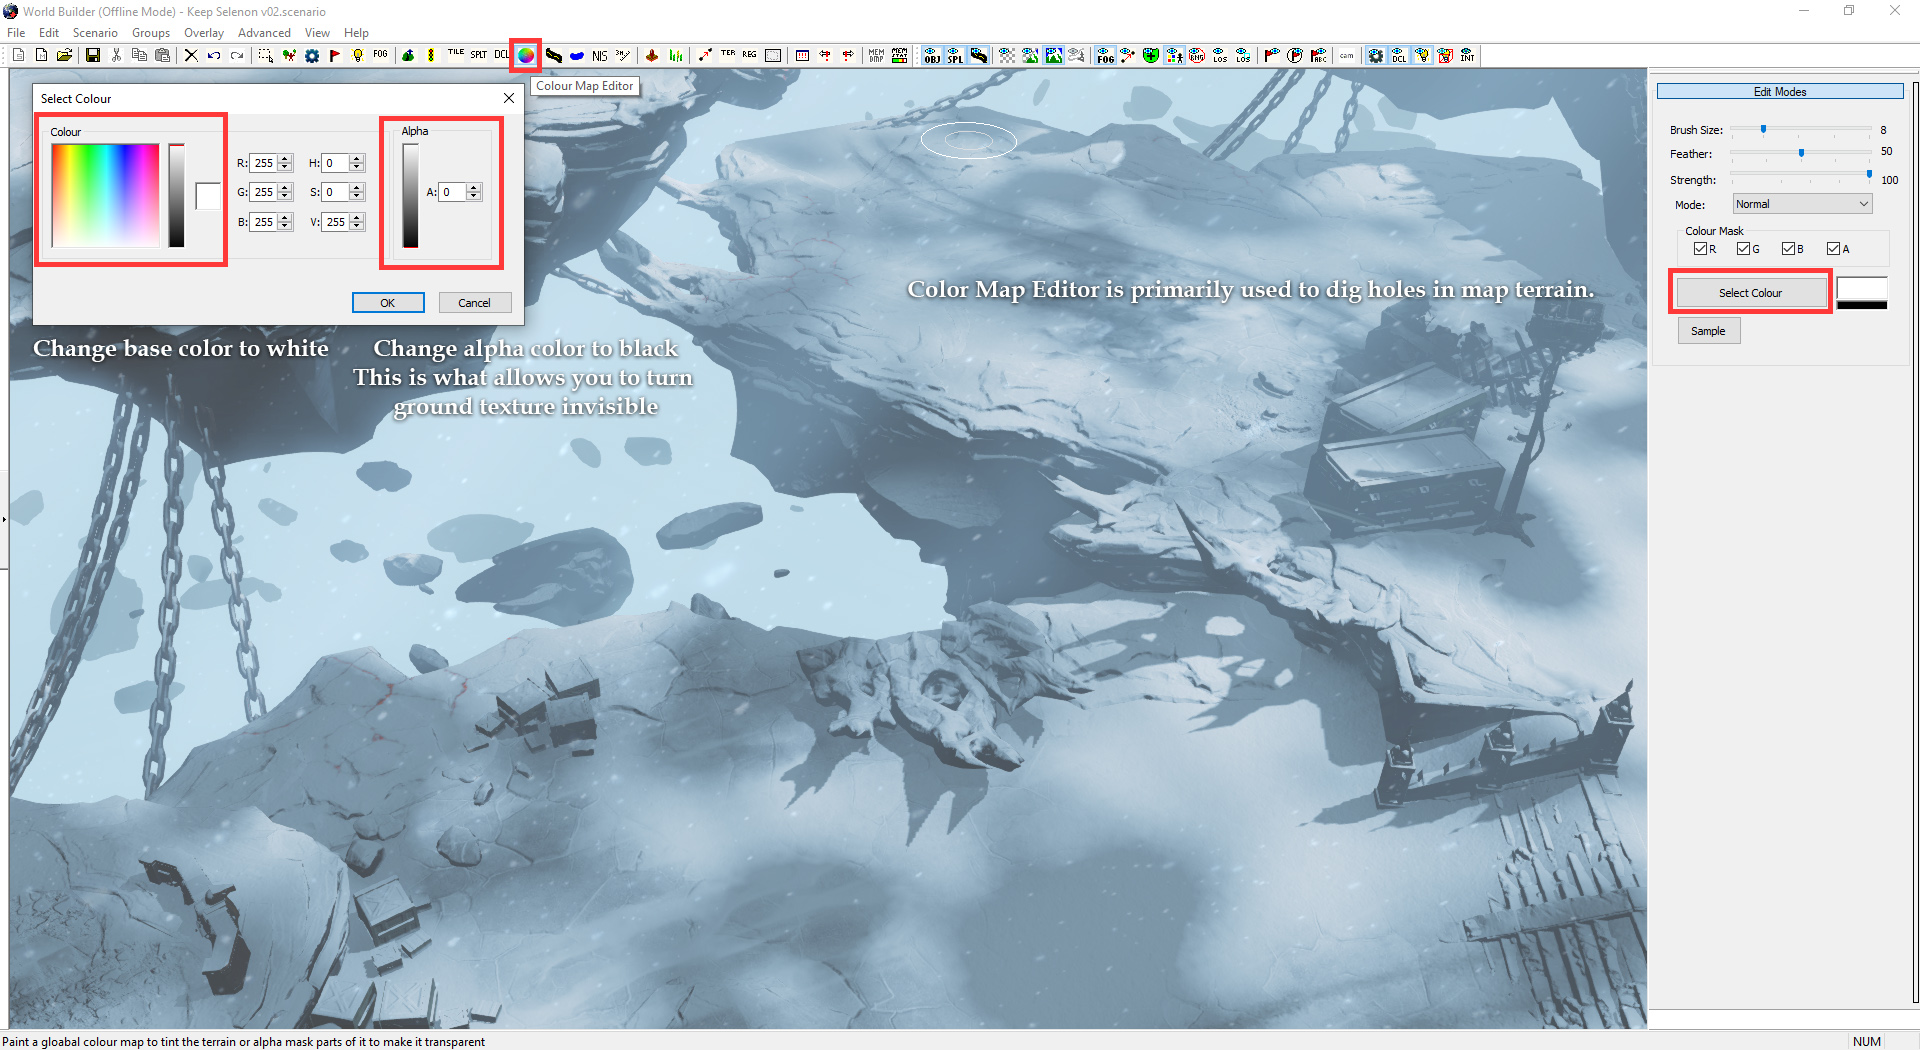
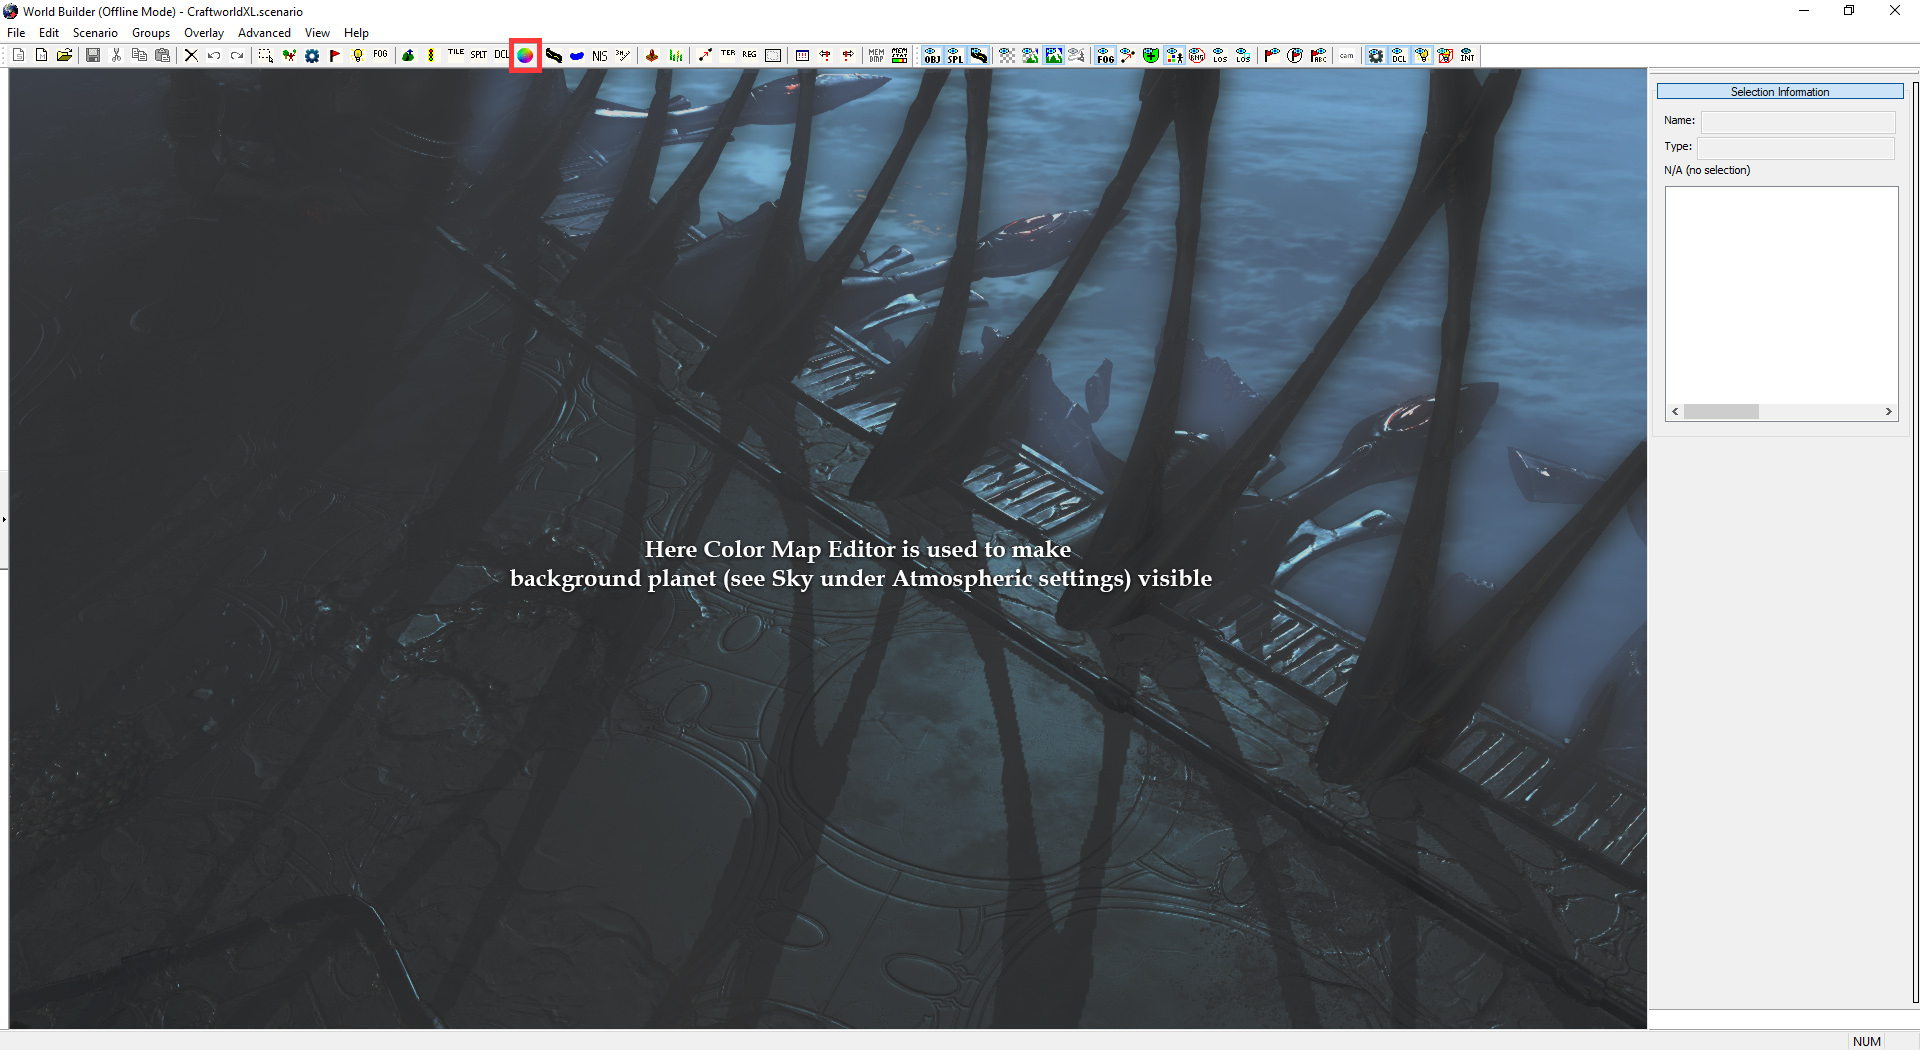
Color Map Editor
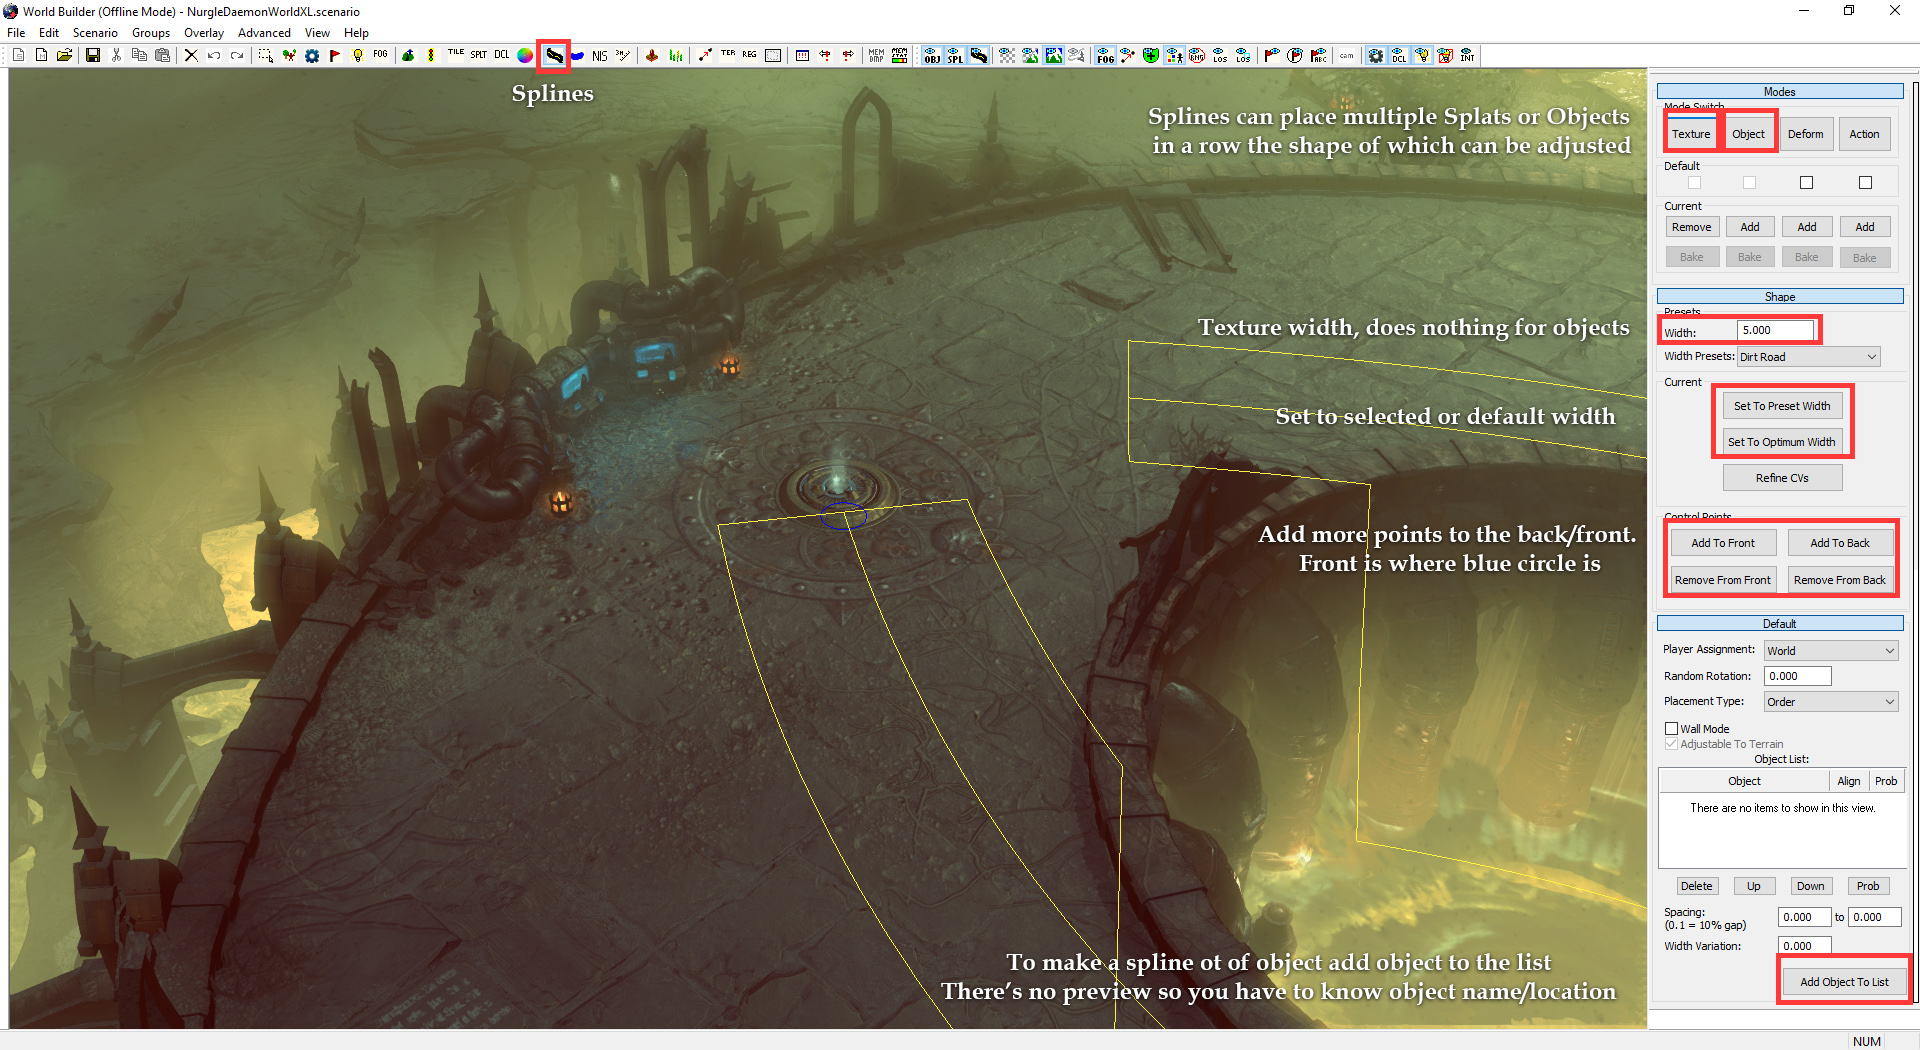
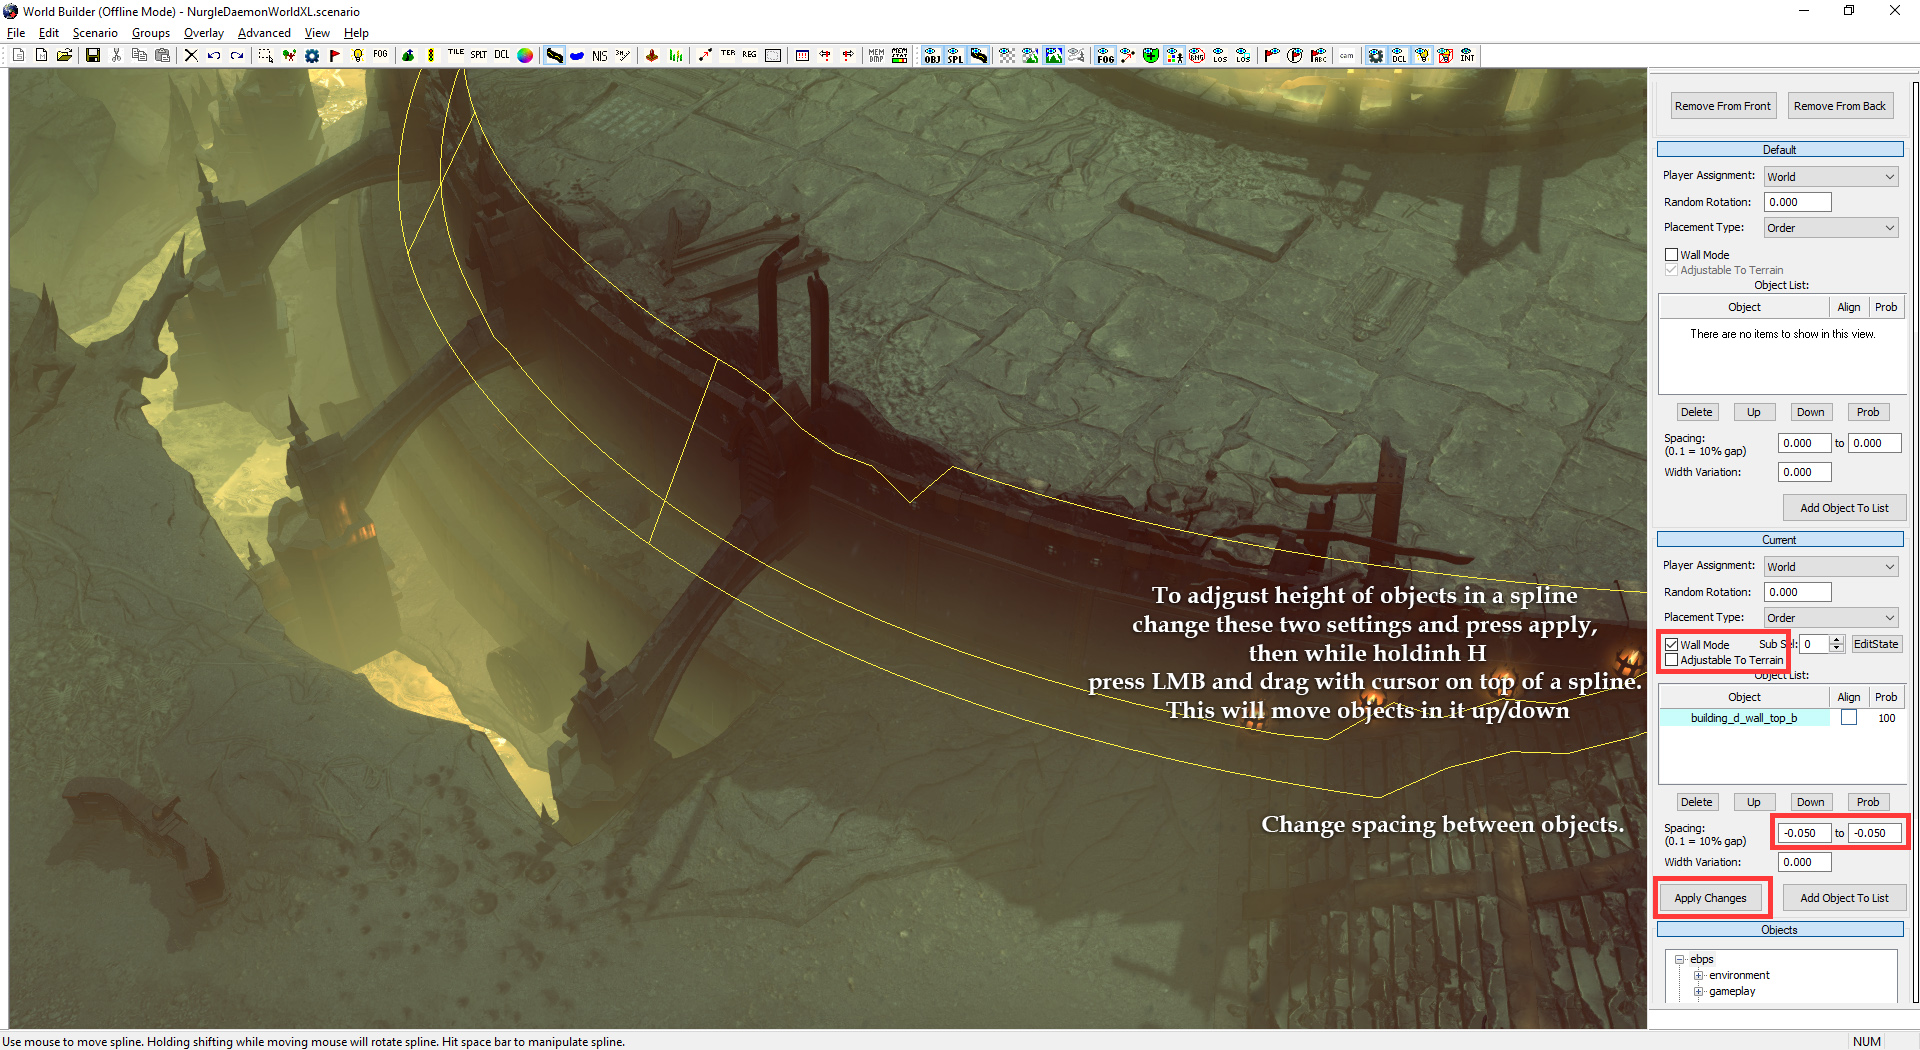
Splats
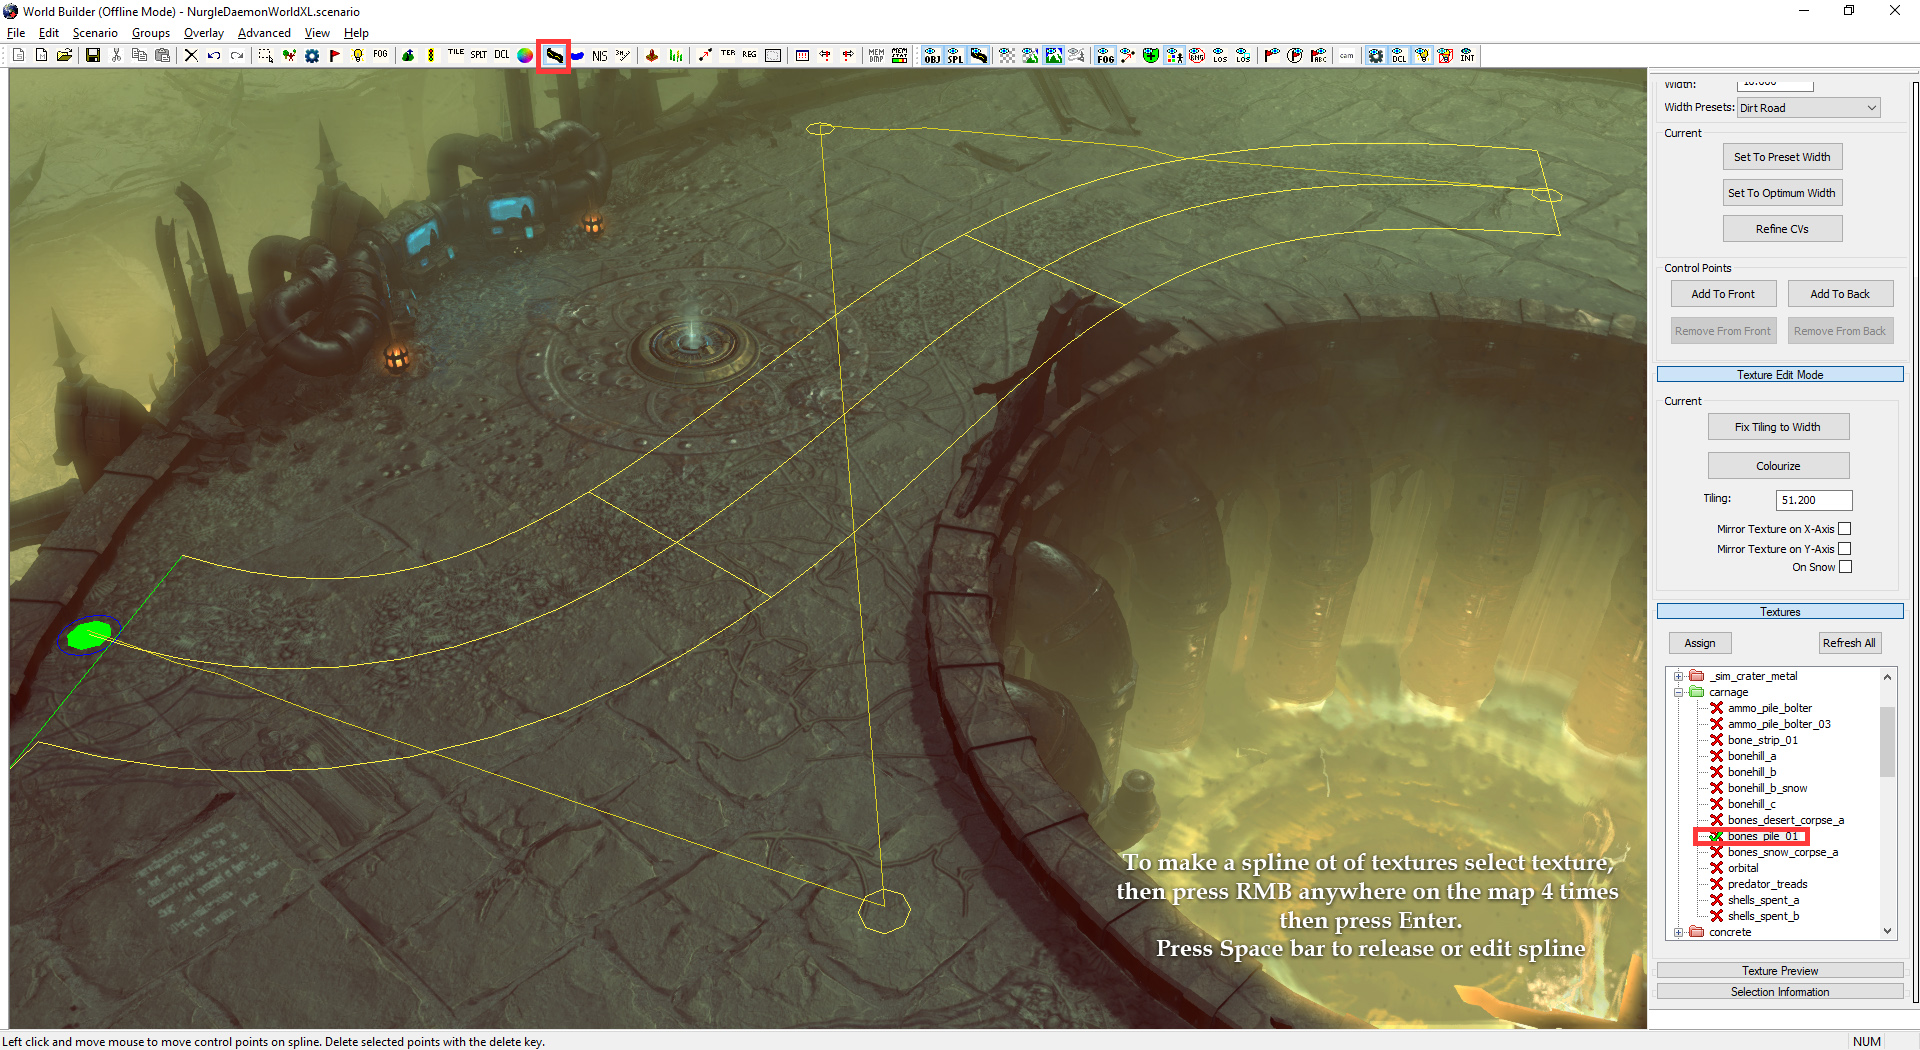
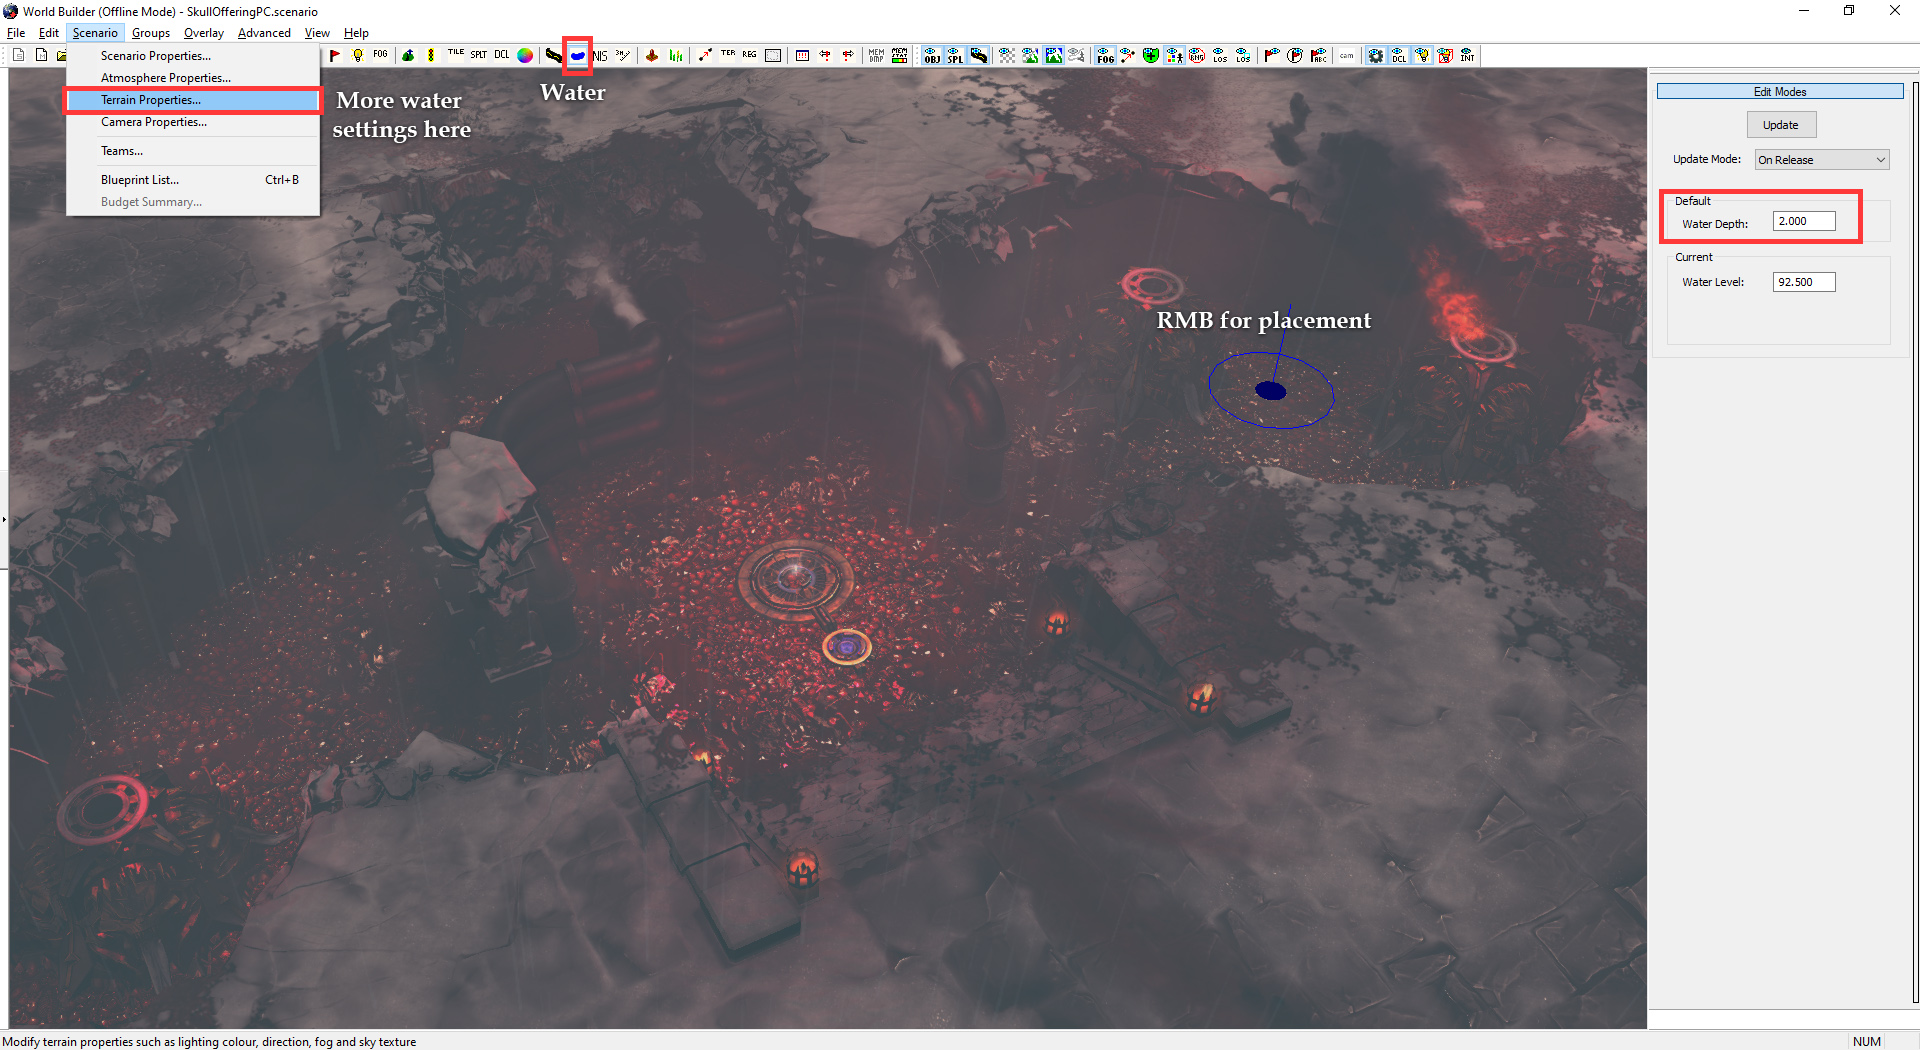
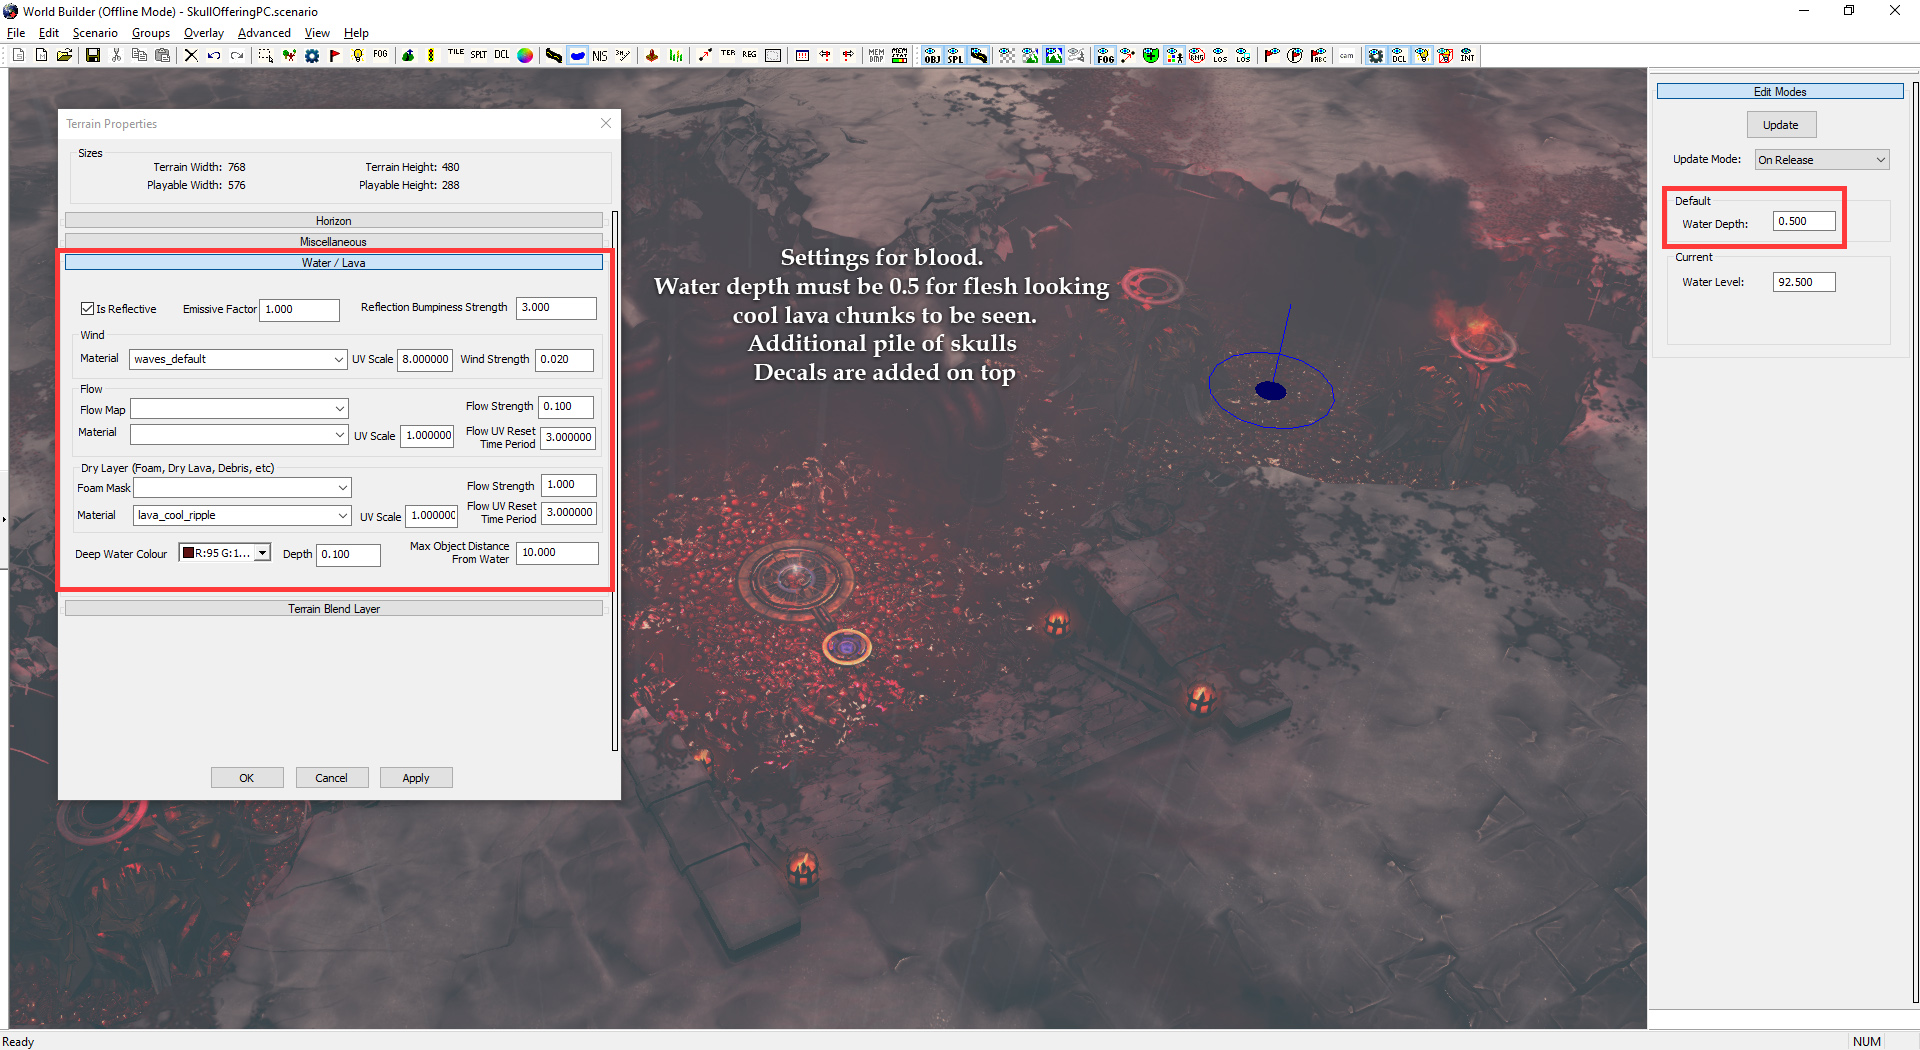
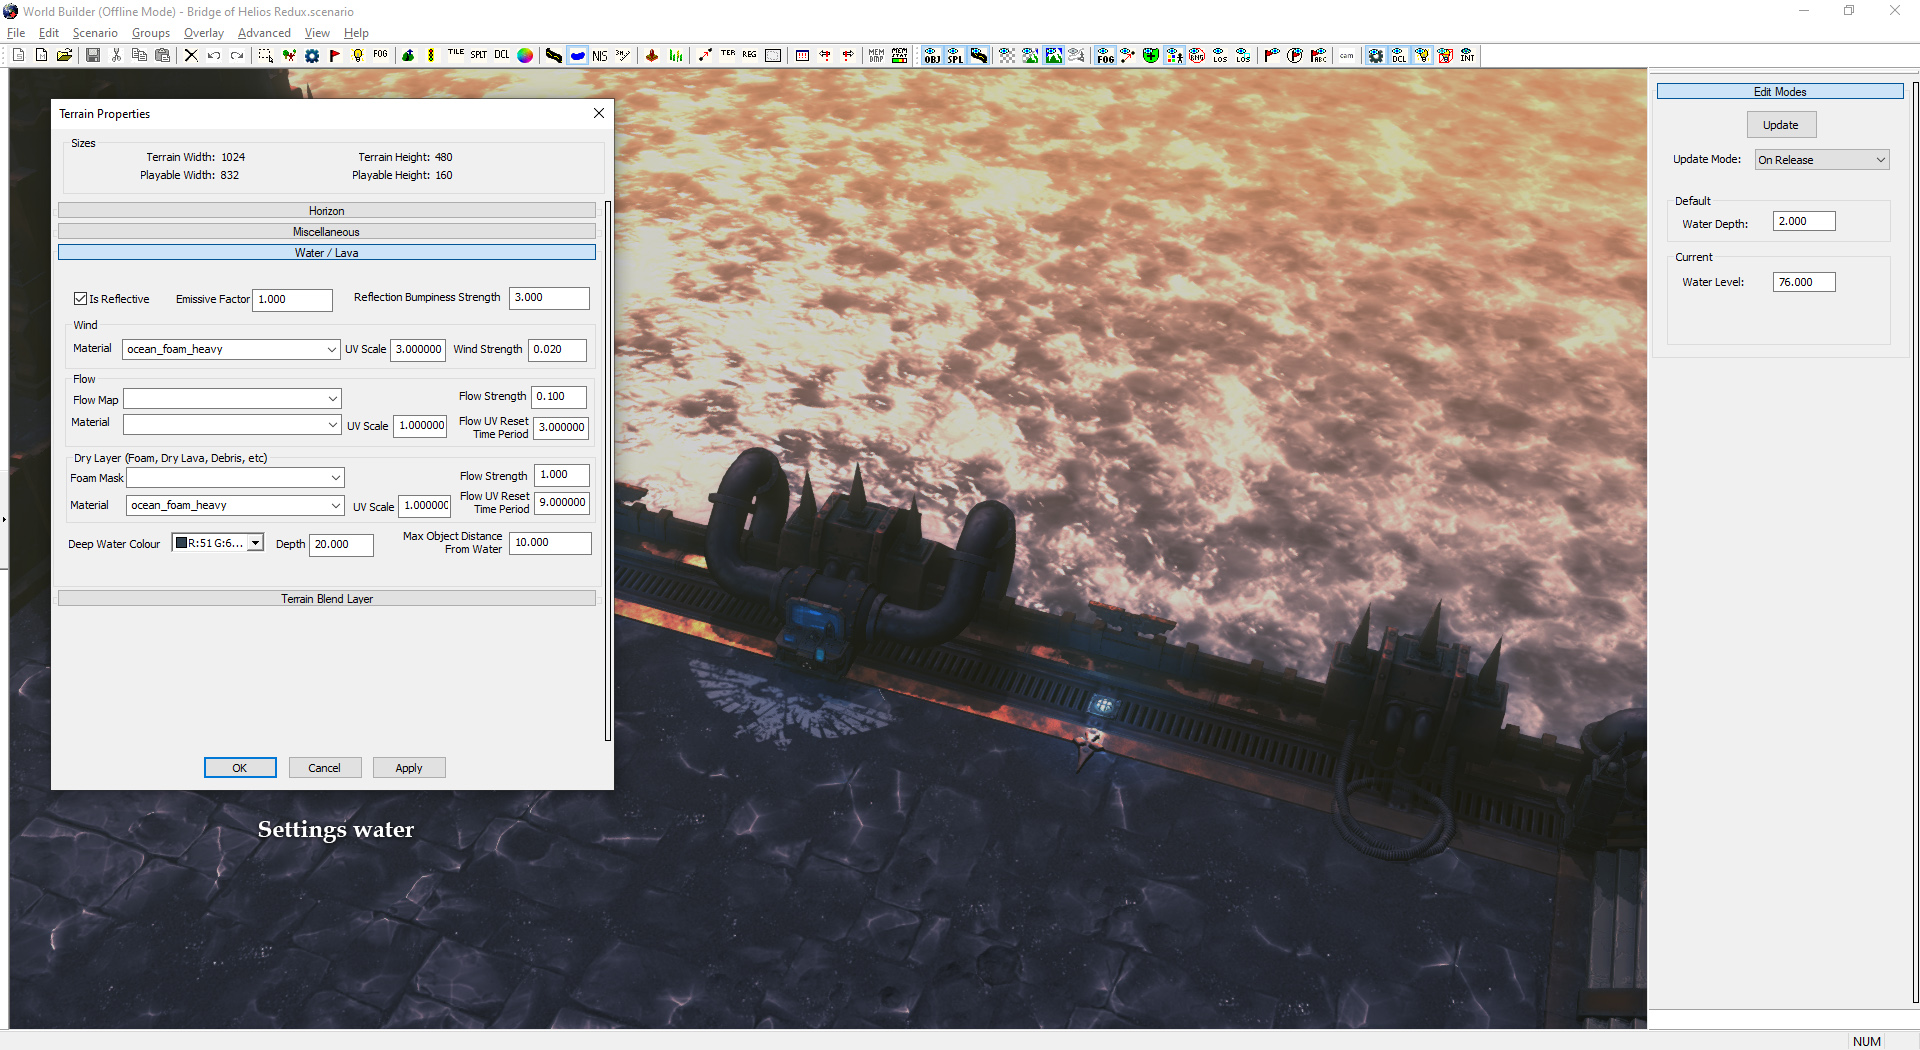
Water/Lava
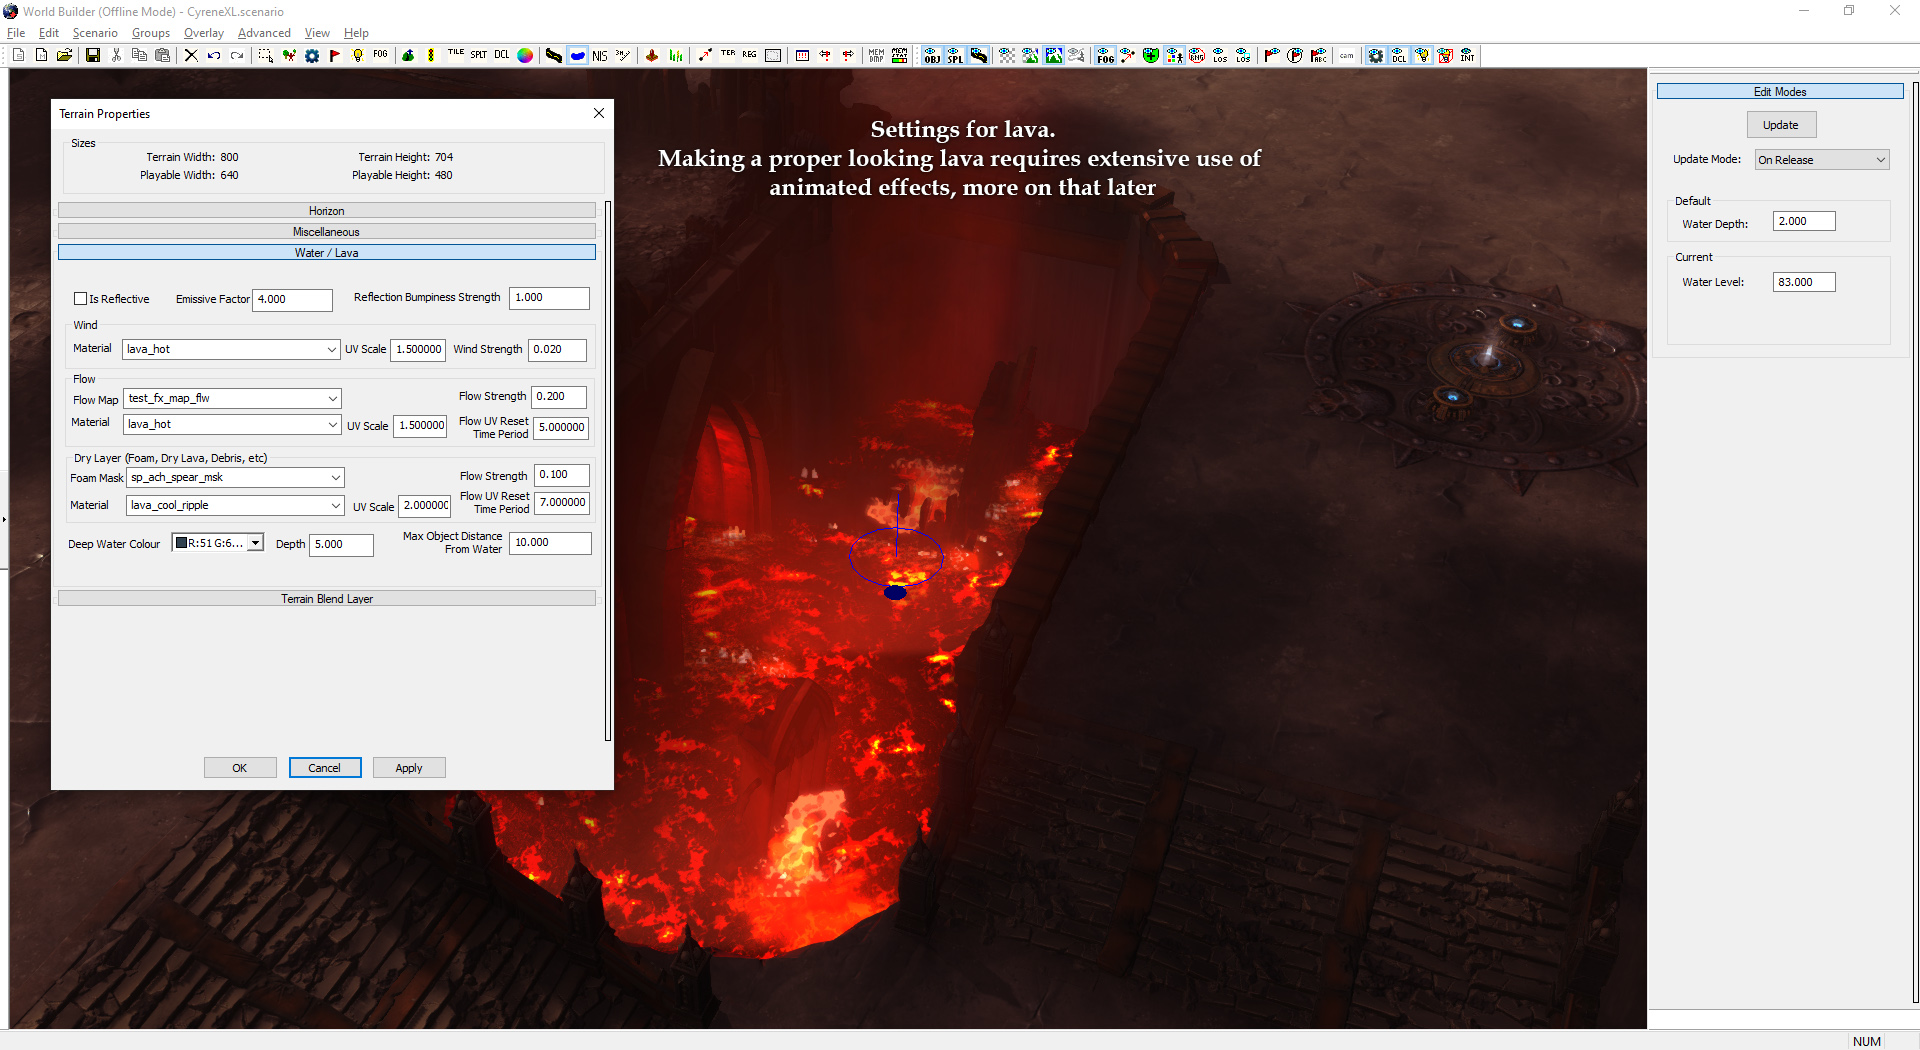
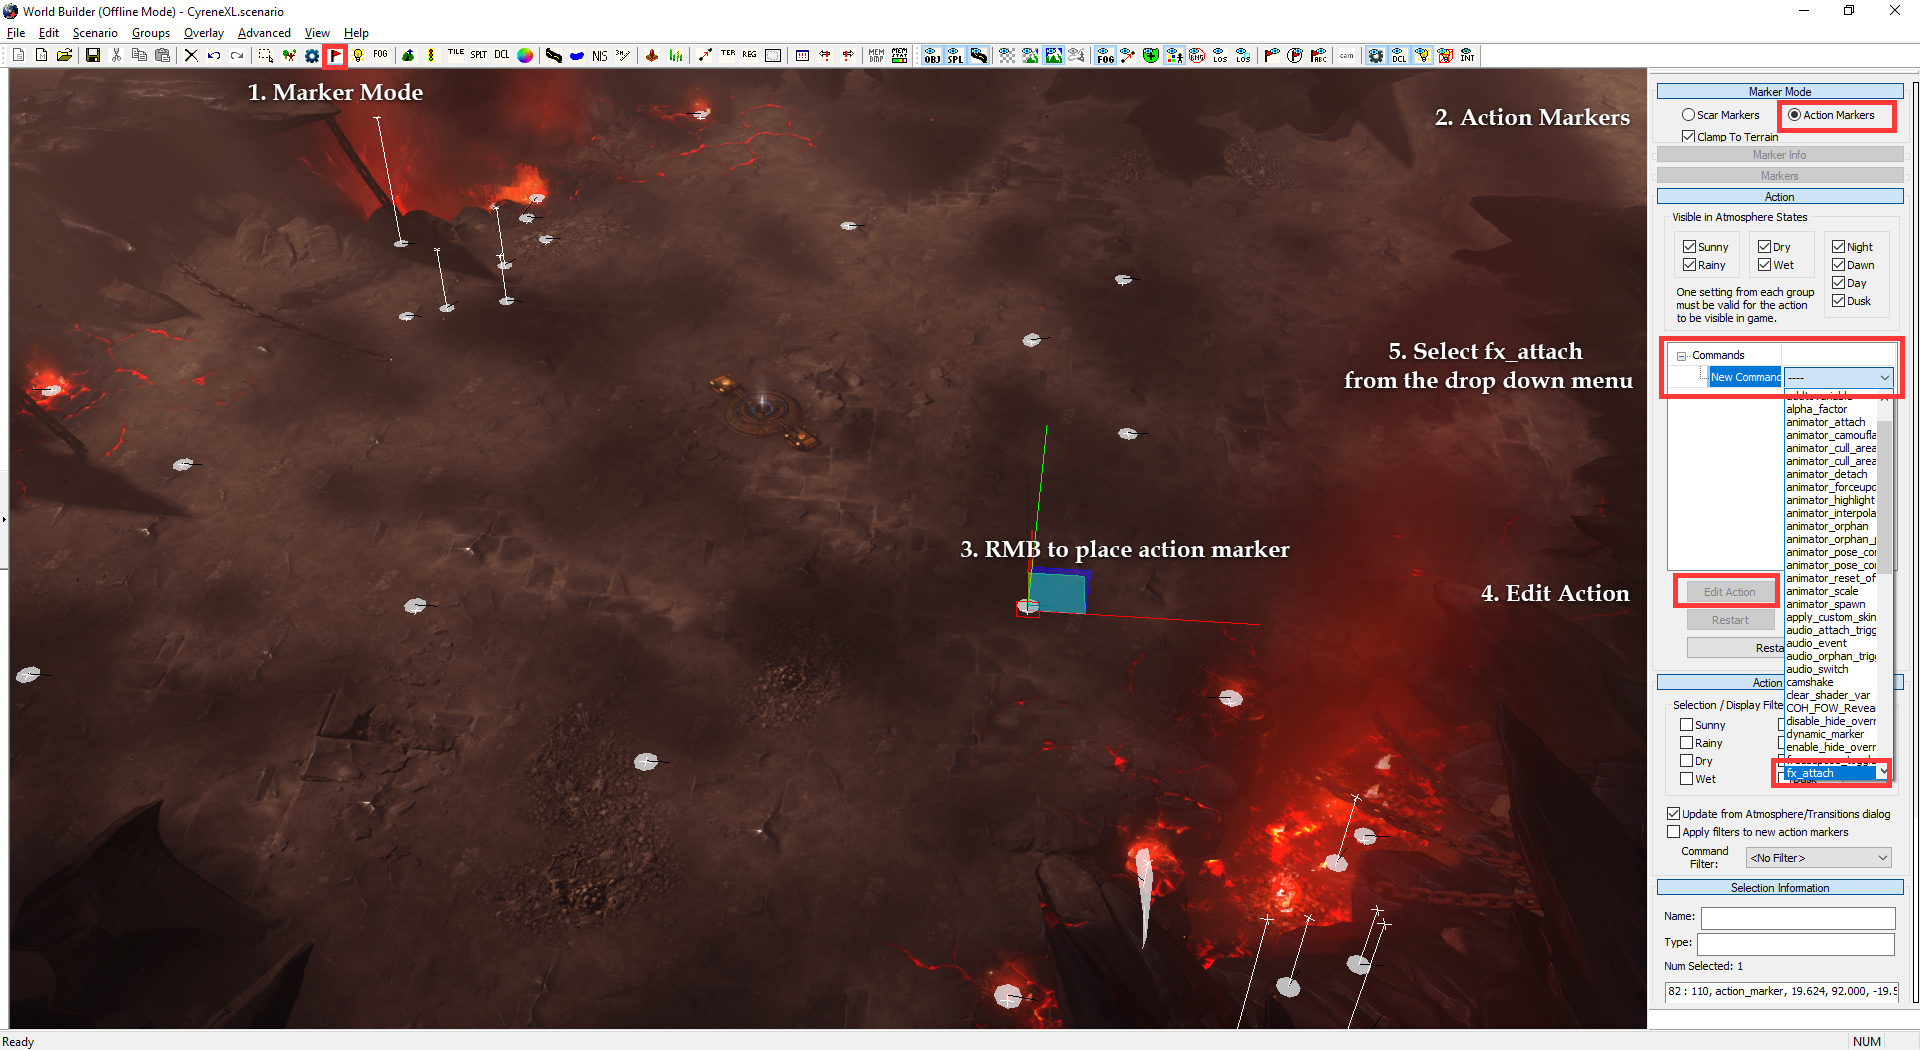
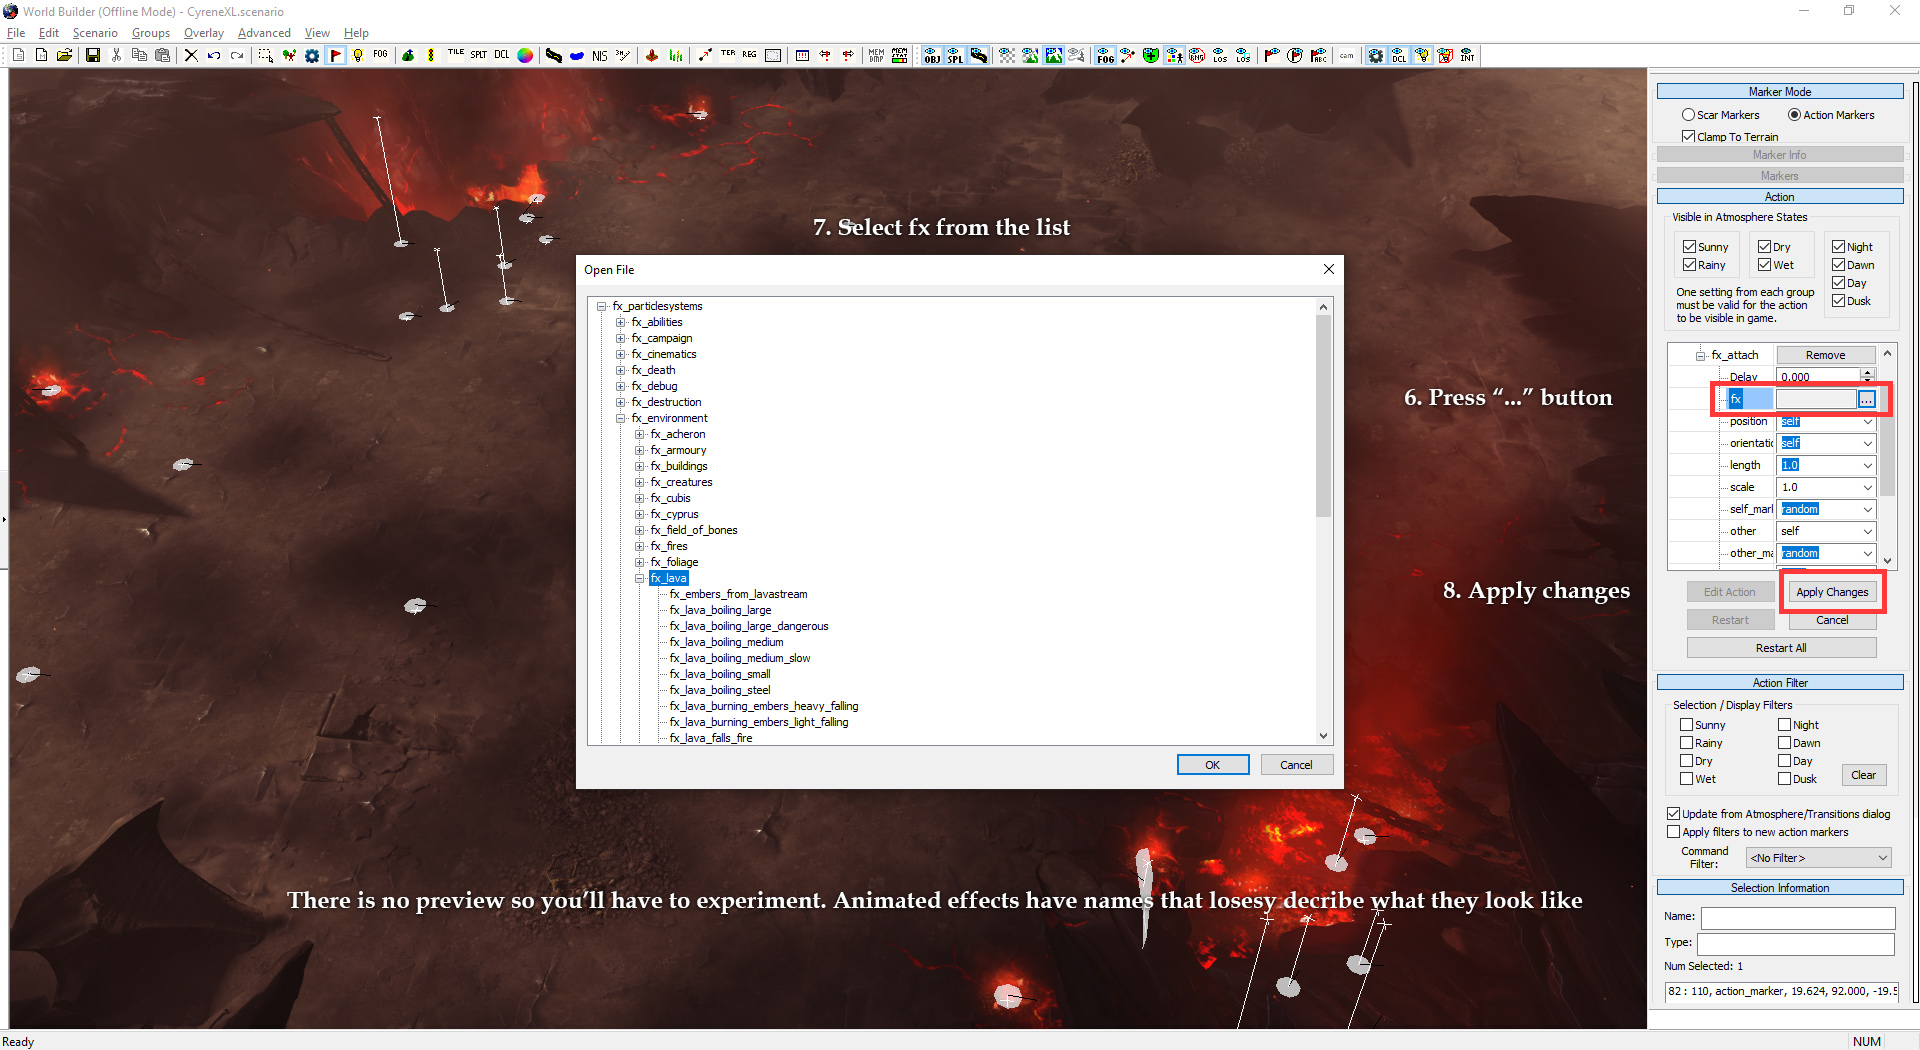
Animated Effects
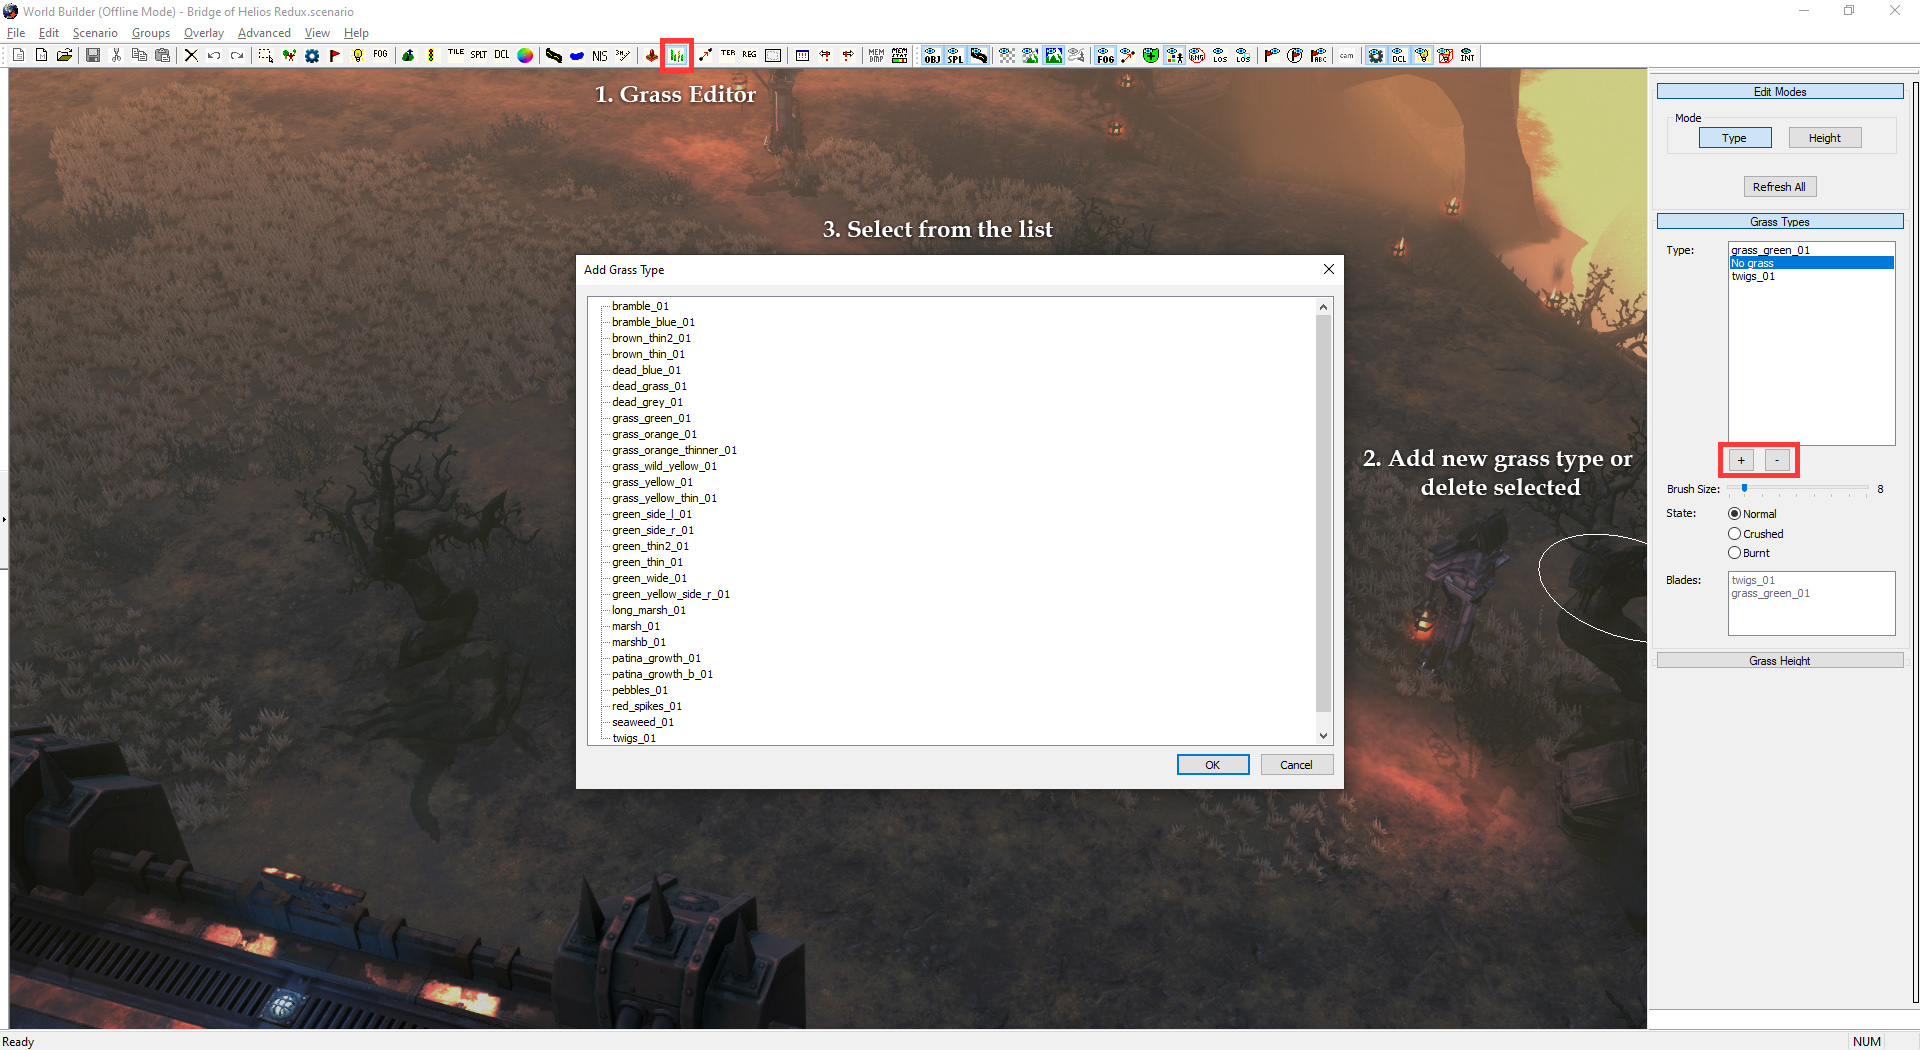
Grass Editor
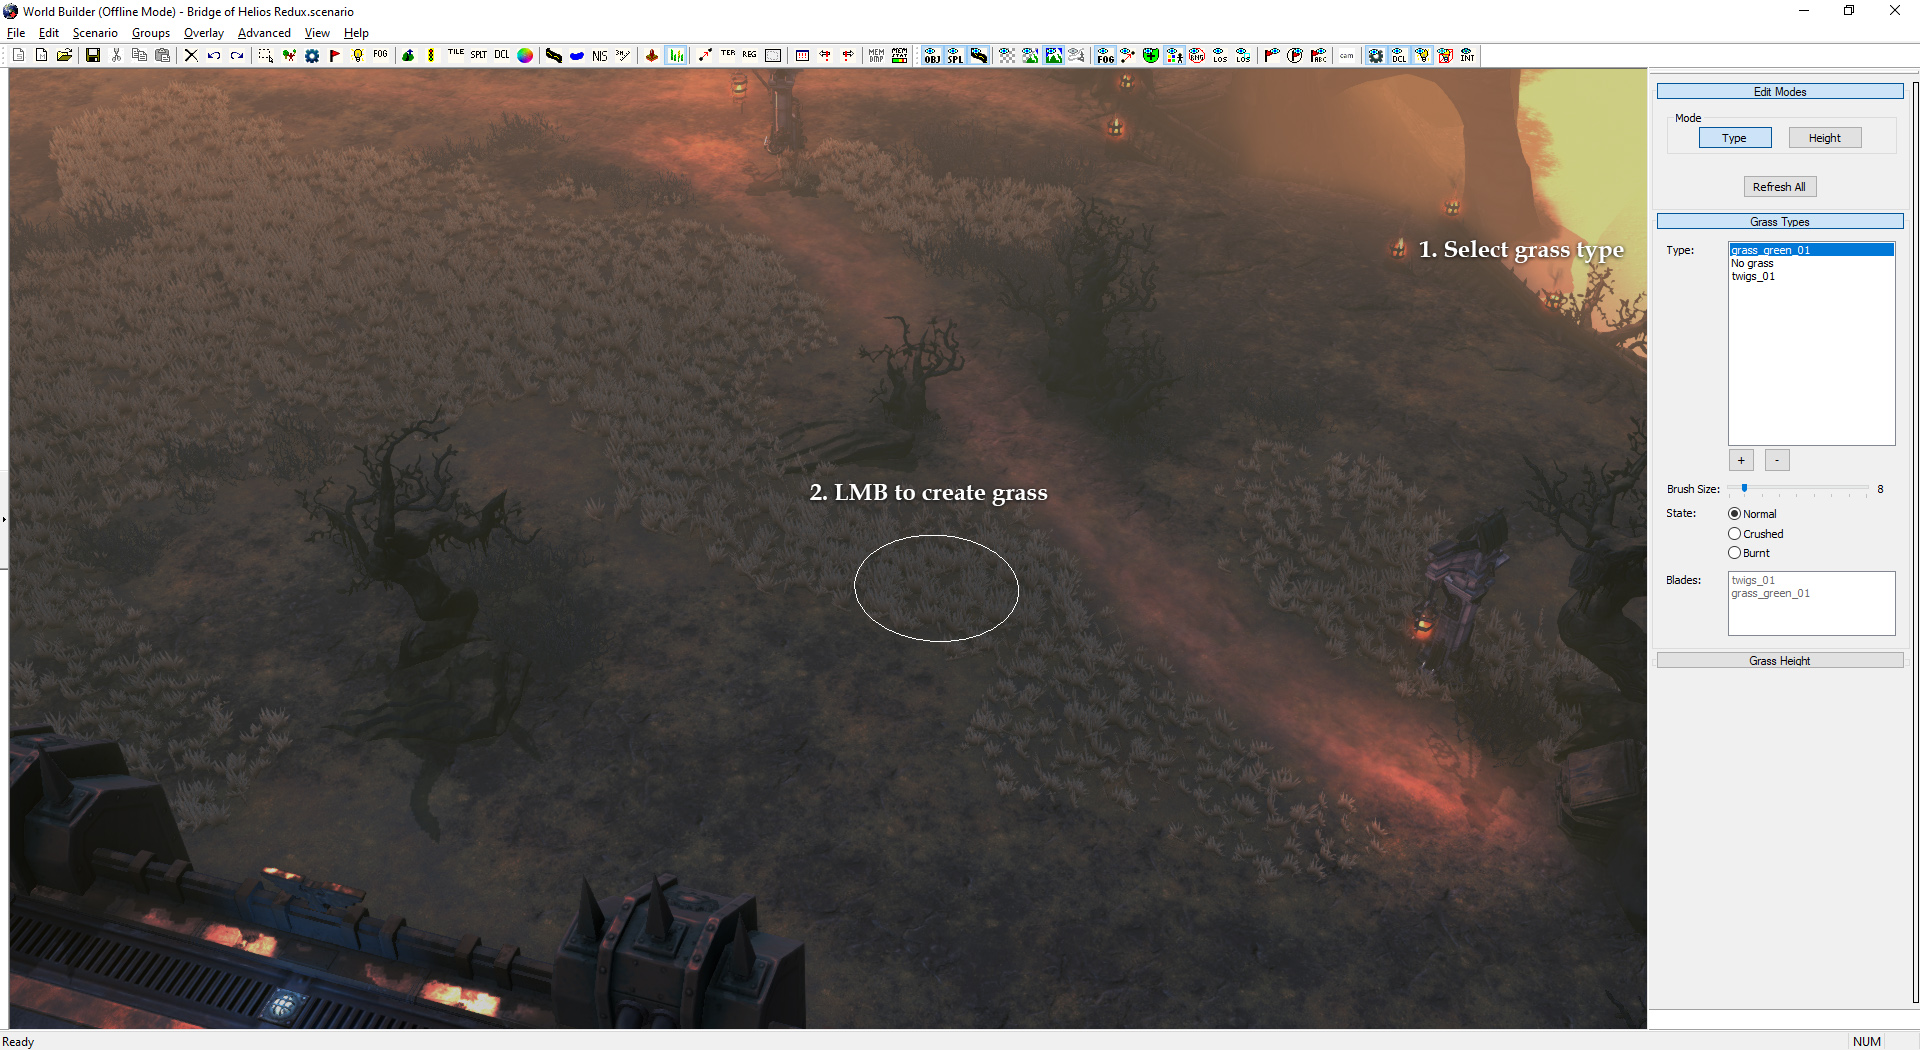
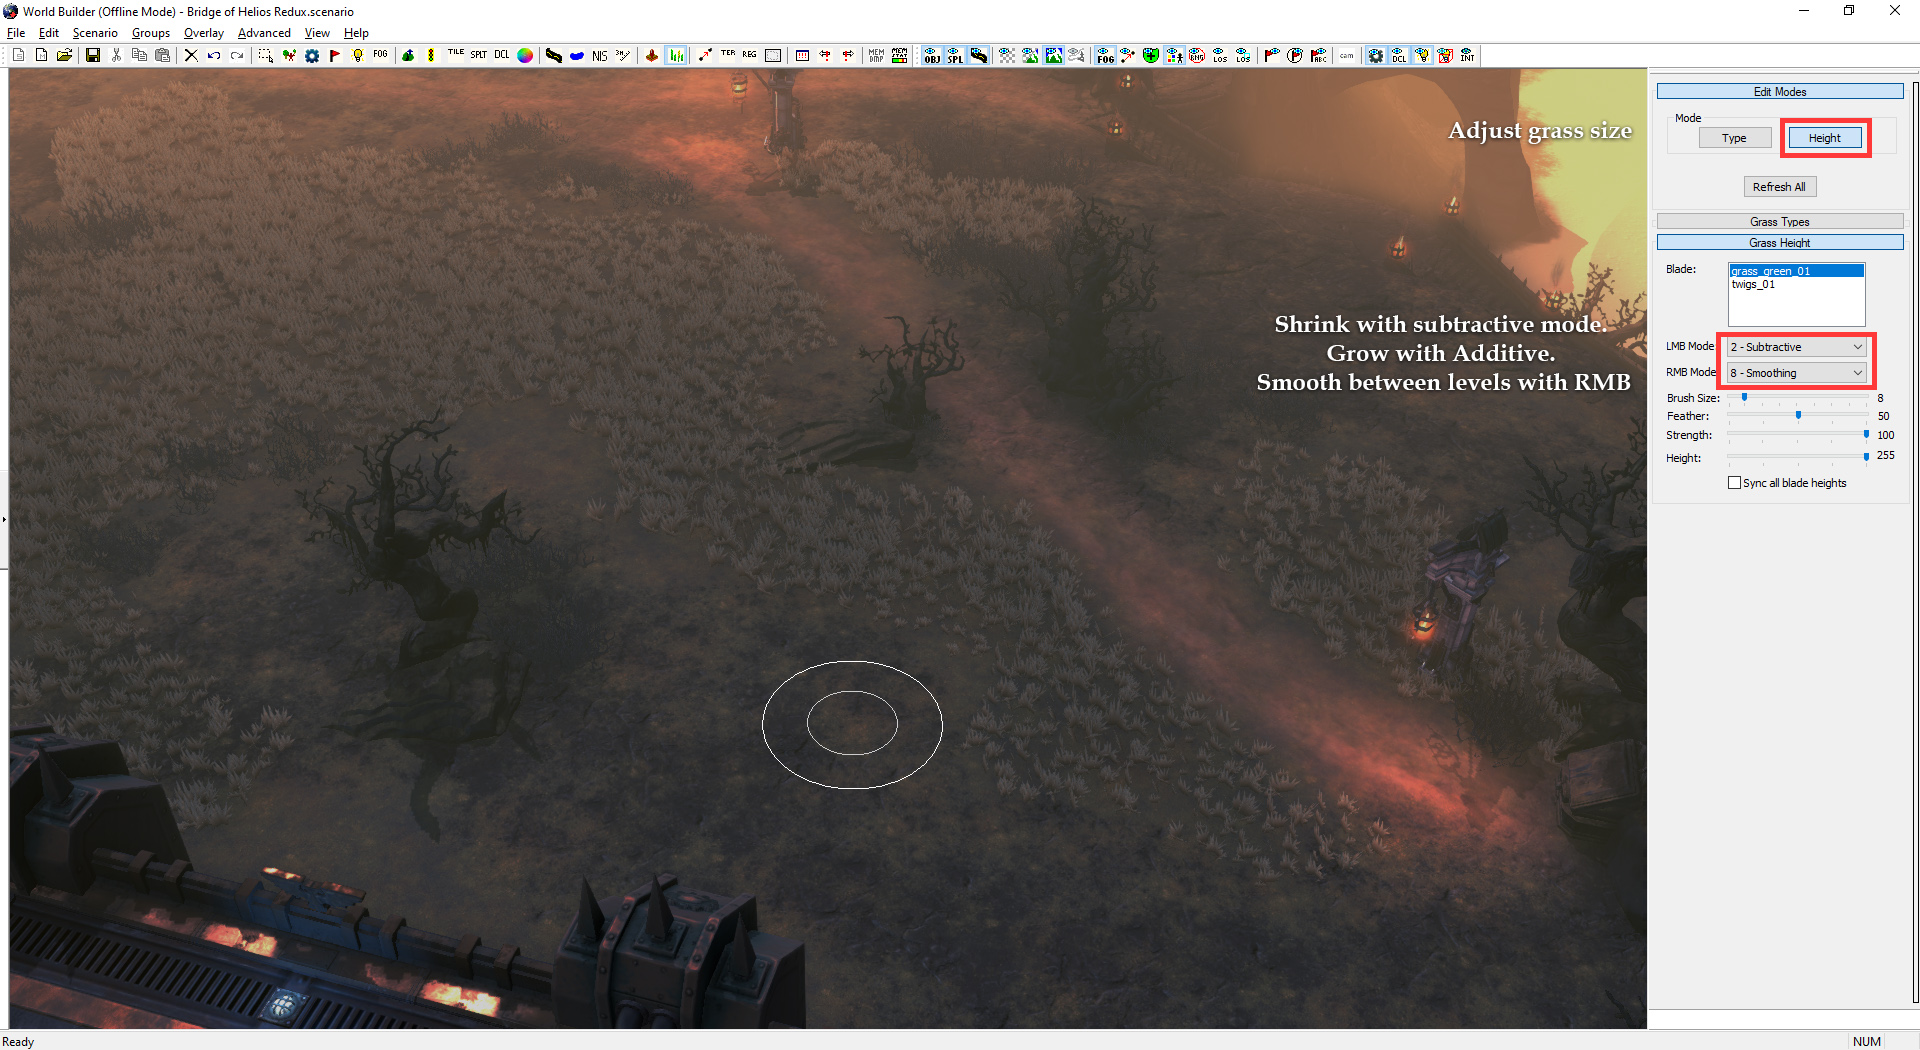
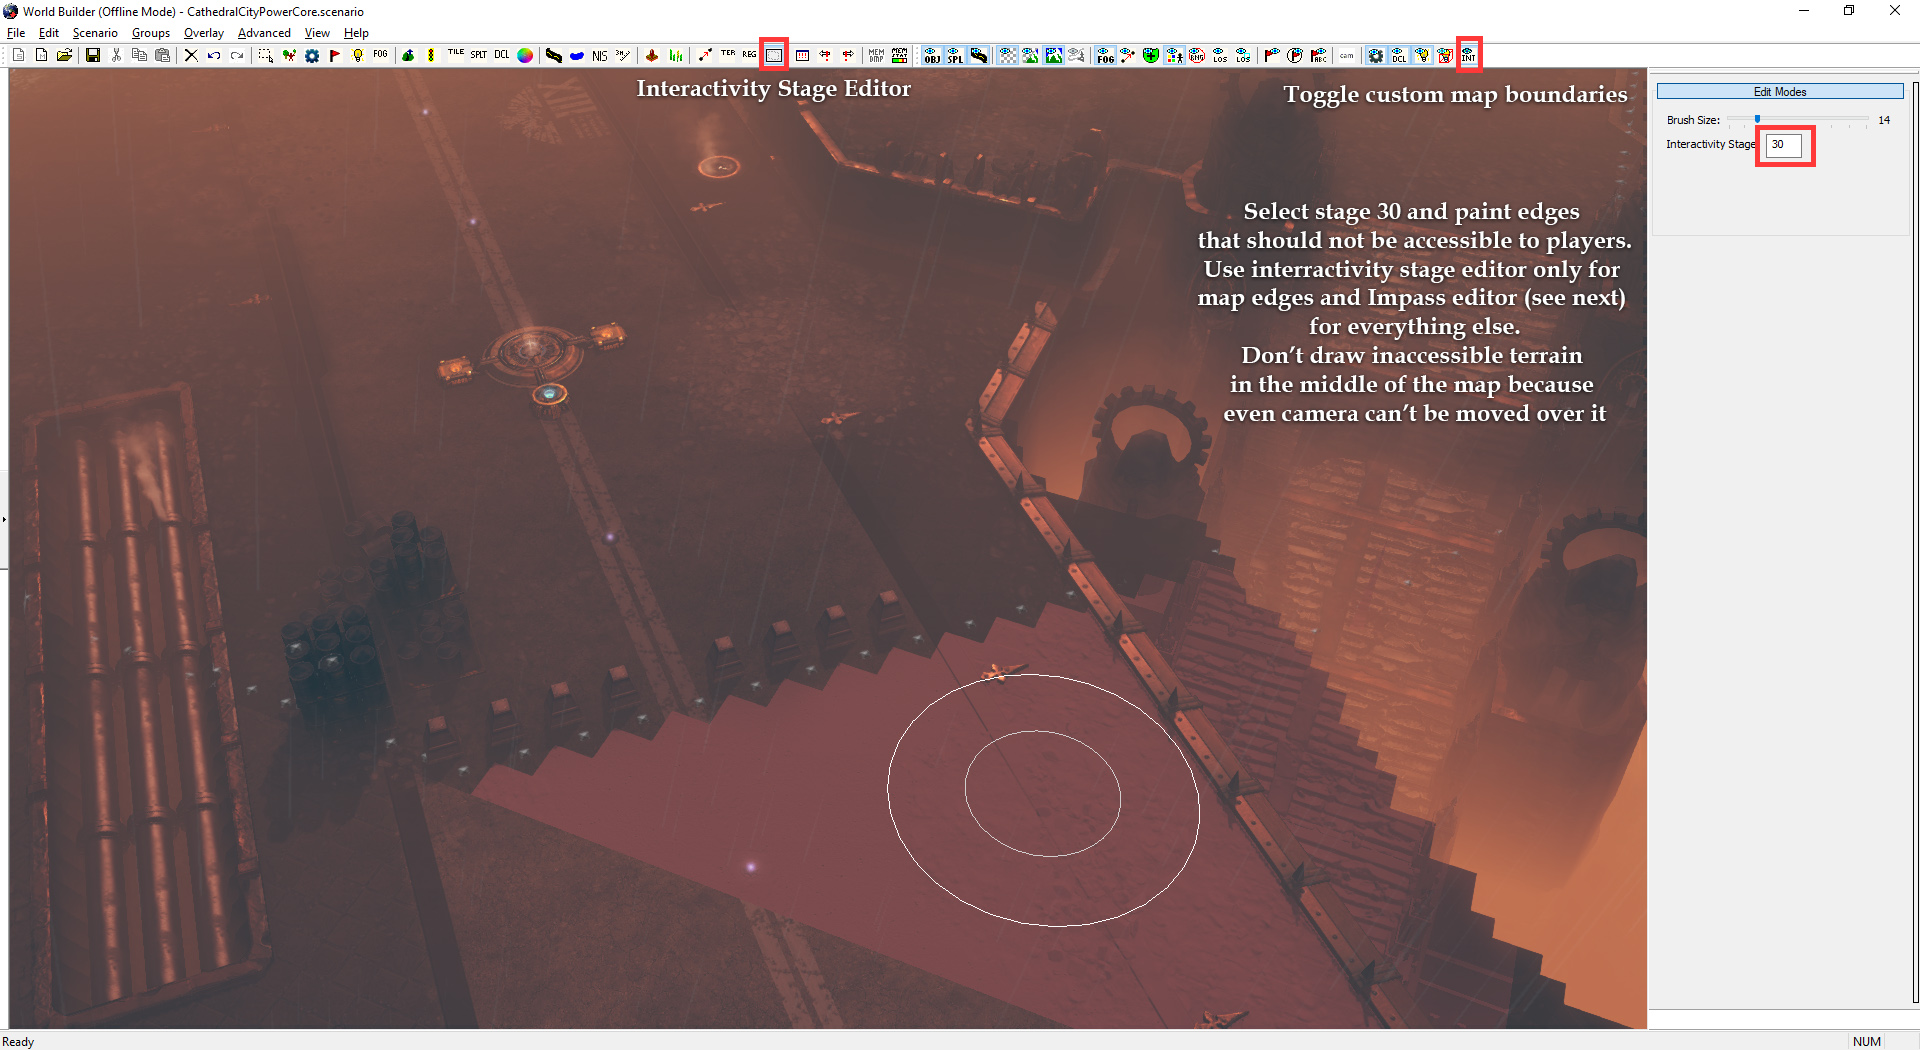
Interactivity Stage Editor
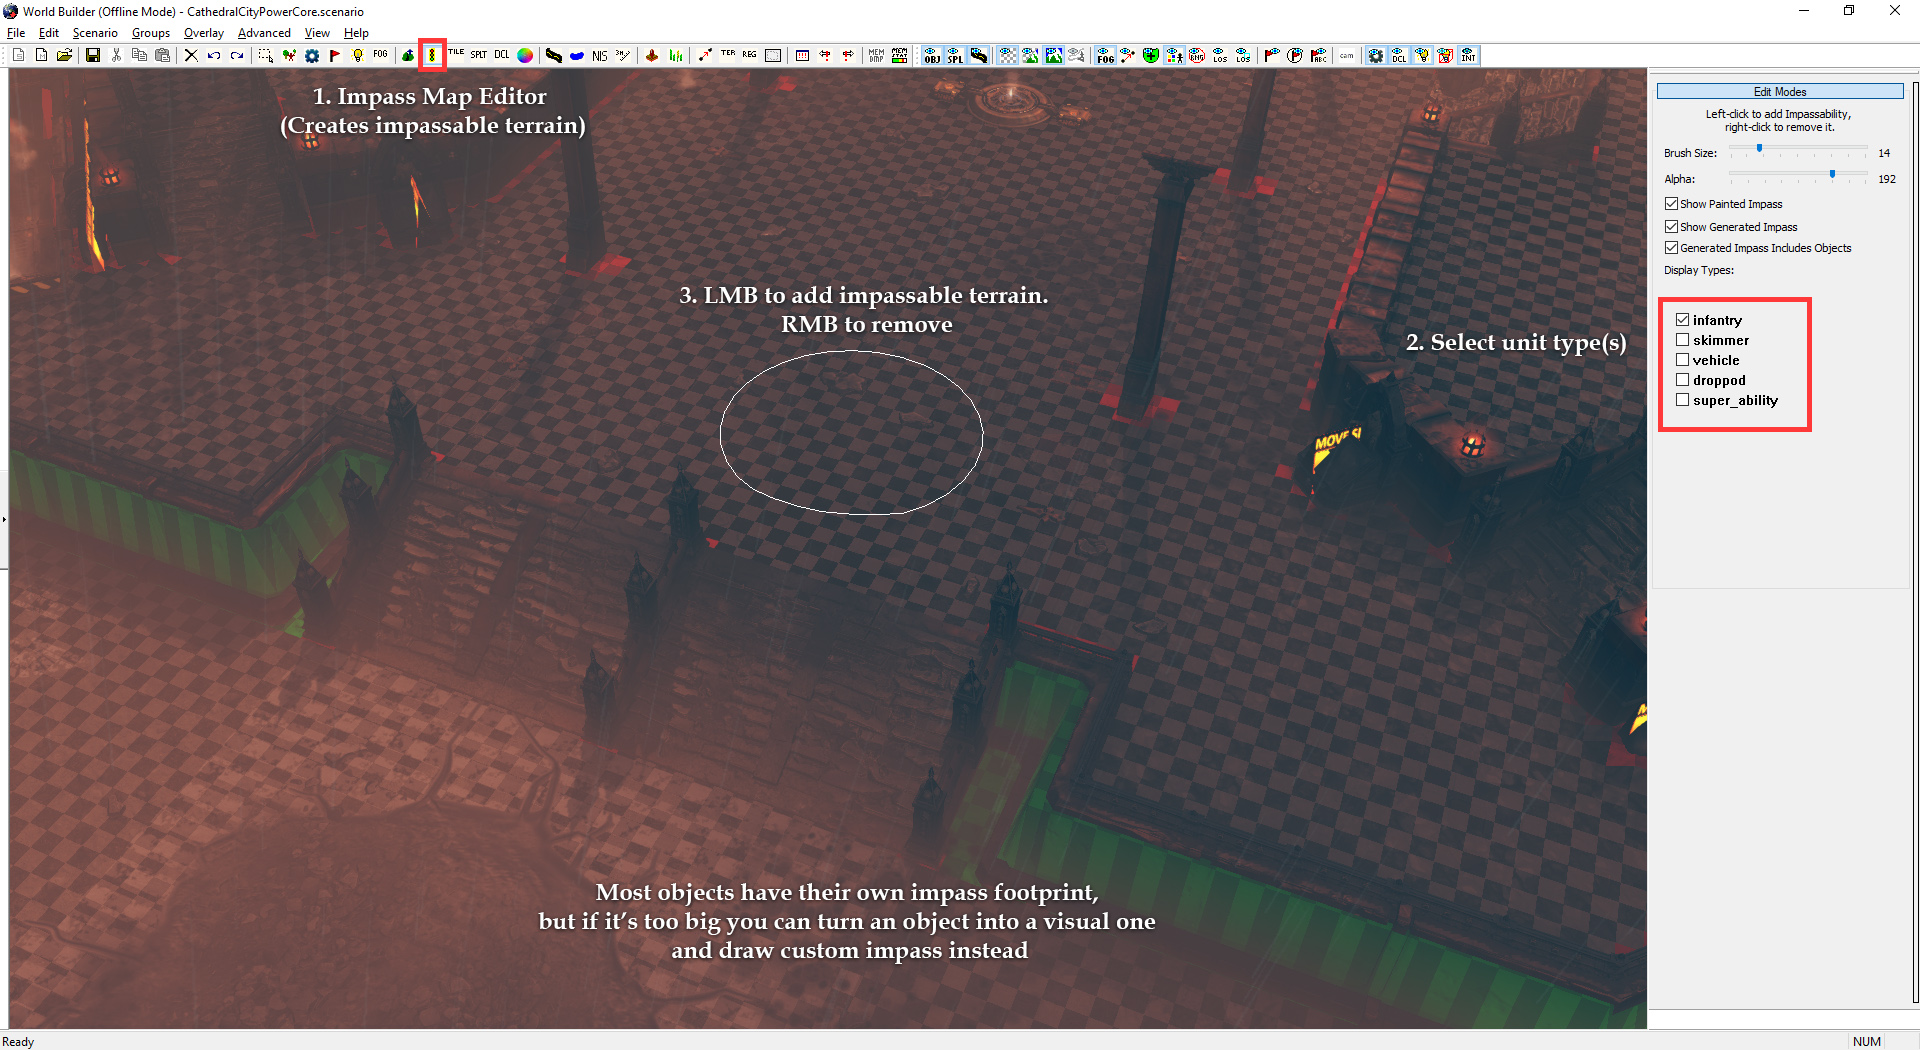
Impass Map Editor
Custom mini-map and loading screen
To make custom minimap you need to have Photoshop or any other image editor that can work with .tga files.
Open [your map name]_mm_generated file located in Documents/My Games/Dawn of War III/modssource/scenarios/
To create custom loading screens make a screenshot for your map in World Builder. Showcase it from the best angle possible. Save it as multiple .tga files each with the following name depending on game mode:
Open [your map name]_mm_generated file located in Documents/My Games/Dawn of War III/modssource/scenarios/
- Laso out impassable terrain, add a new layer and fill selection with one color. Fill background with another.
- You can use colors and layer style effects like inner/outer glow to match Relic's mini-map style
- Edit alpha channel to make custom borders.
- Save it as .tga file under "[your map name without brackets]_mm_handmade" name
To create custom loading screens make a screenshot for your map in World Builder. Showcase it from the best angle possible. Save it as multiple .tga files each with the following name depending on game mode:
- "[your map name without brackets]_loading_background_powercore" and "[your map name without brackets]_unloading_background_powercore" for power core mode
- "[your map name without brackets]_loading_background" and "[your map name without brackets]_unloading_background" for victory point mode
- "[your map name without brackets]_loading_background_annihilation" and "[your map name without brackets]_unloading_background_annihilation" for annihilation mode
- "[your map name without brackets]_loading_background_annihilation_with_turrets" and "[your map name without brackets]_unloading_background_annihilation_with_turrets" for annihilation with turrets mode
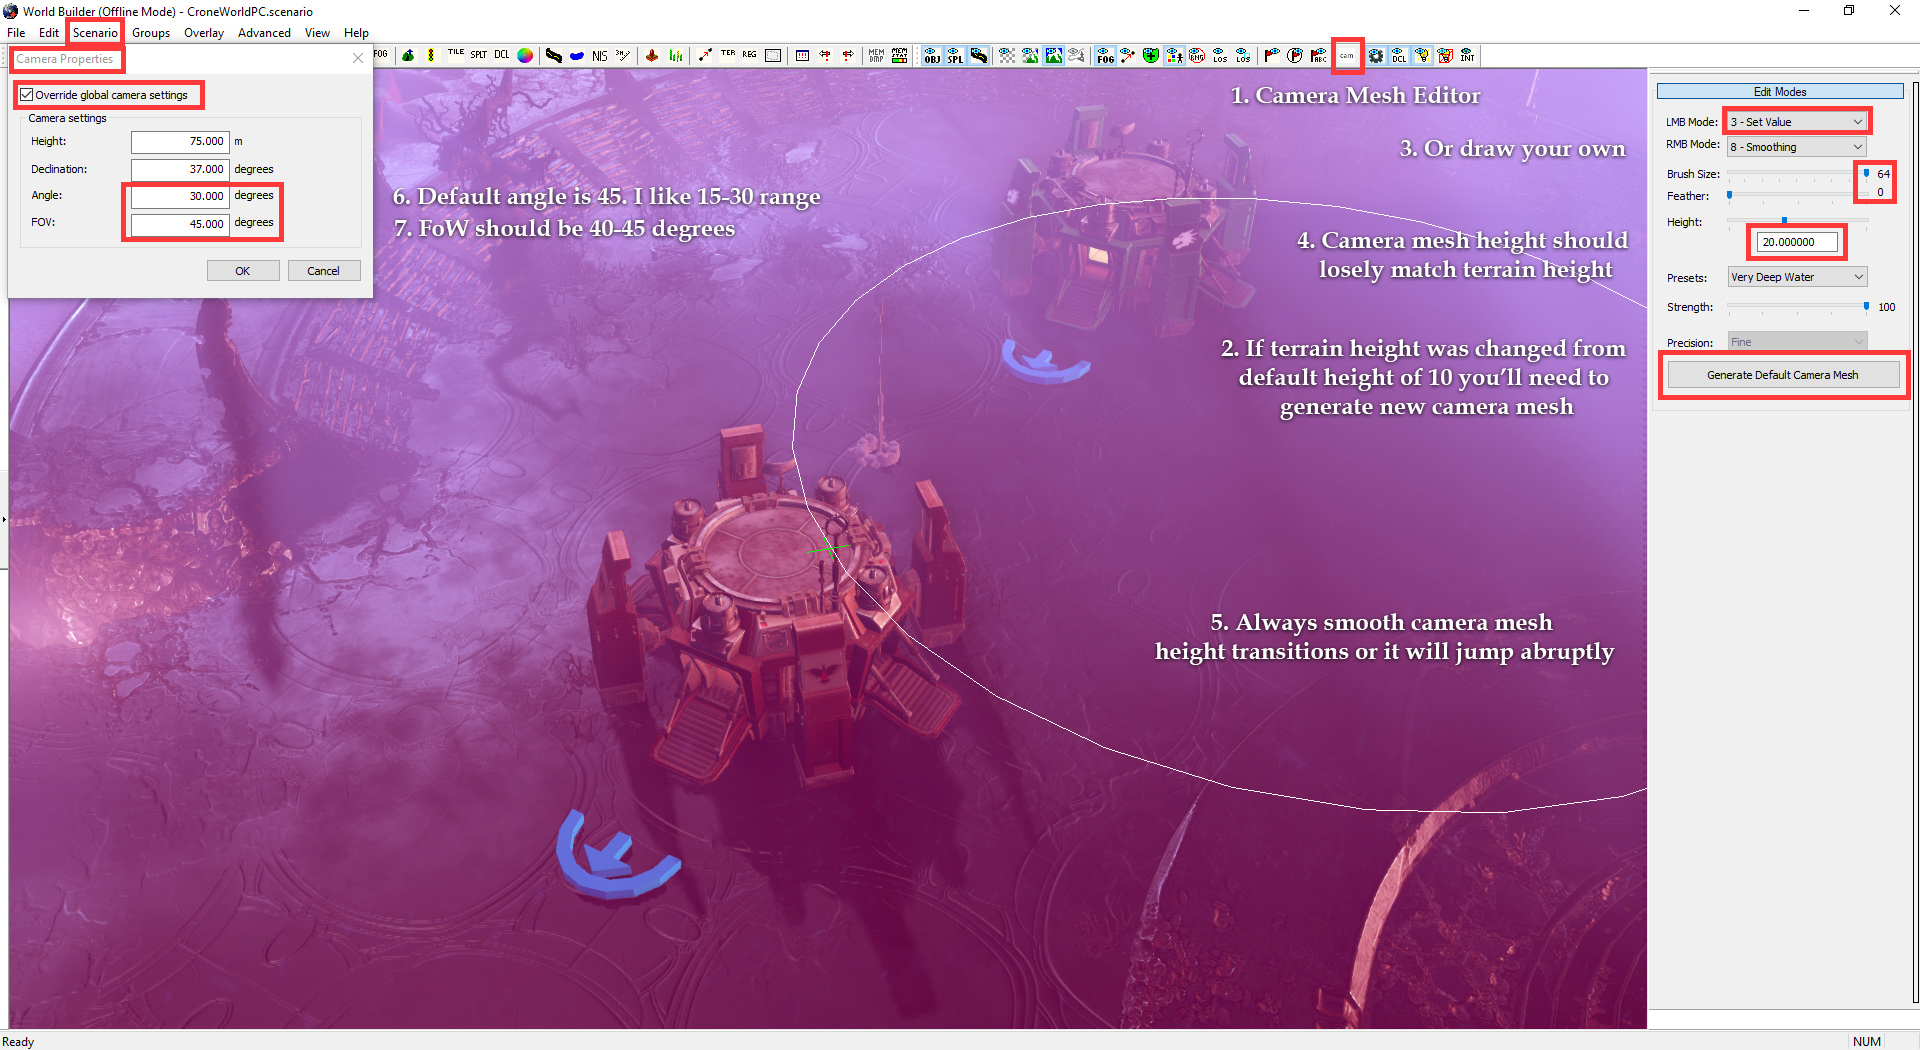
Camera settings
Level Design
Techincally this step should happen right after you've placed basic gameplay objects before any detailing work, but I decided to explain how basic World Builder tools work first and showcase what can be achieved with them.
Level design is by far the most important part of making a good map. I'm no gameplay designer so I had to learn everything through trial and error. It doesn't matter how pretty you map is, if it gives unfair advantage to one player and is not balanced then whoever plays it won't have a good time doing it. It is also important to note that detailing work takes a lot of time. Skipping level design step may lead to a lot of such work being wasted. Try to spend as much time as you can to make your map layout as balanced and well thought out as possible.
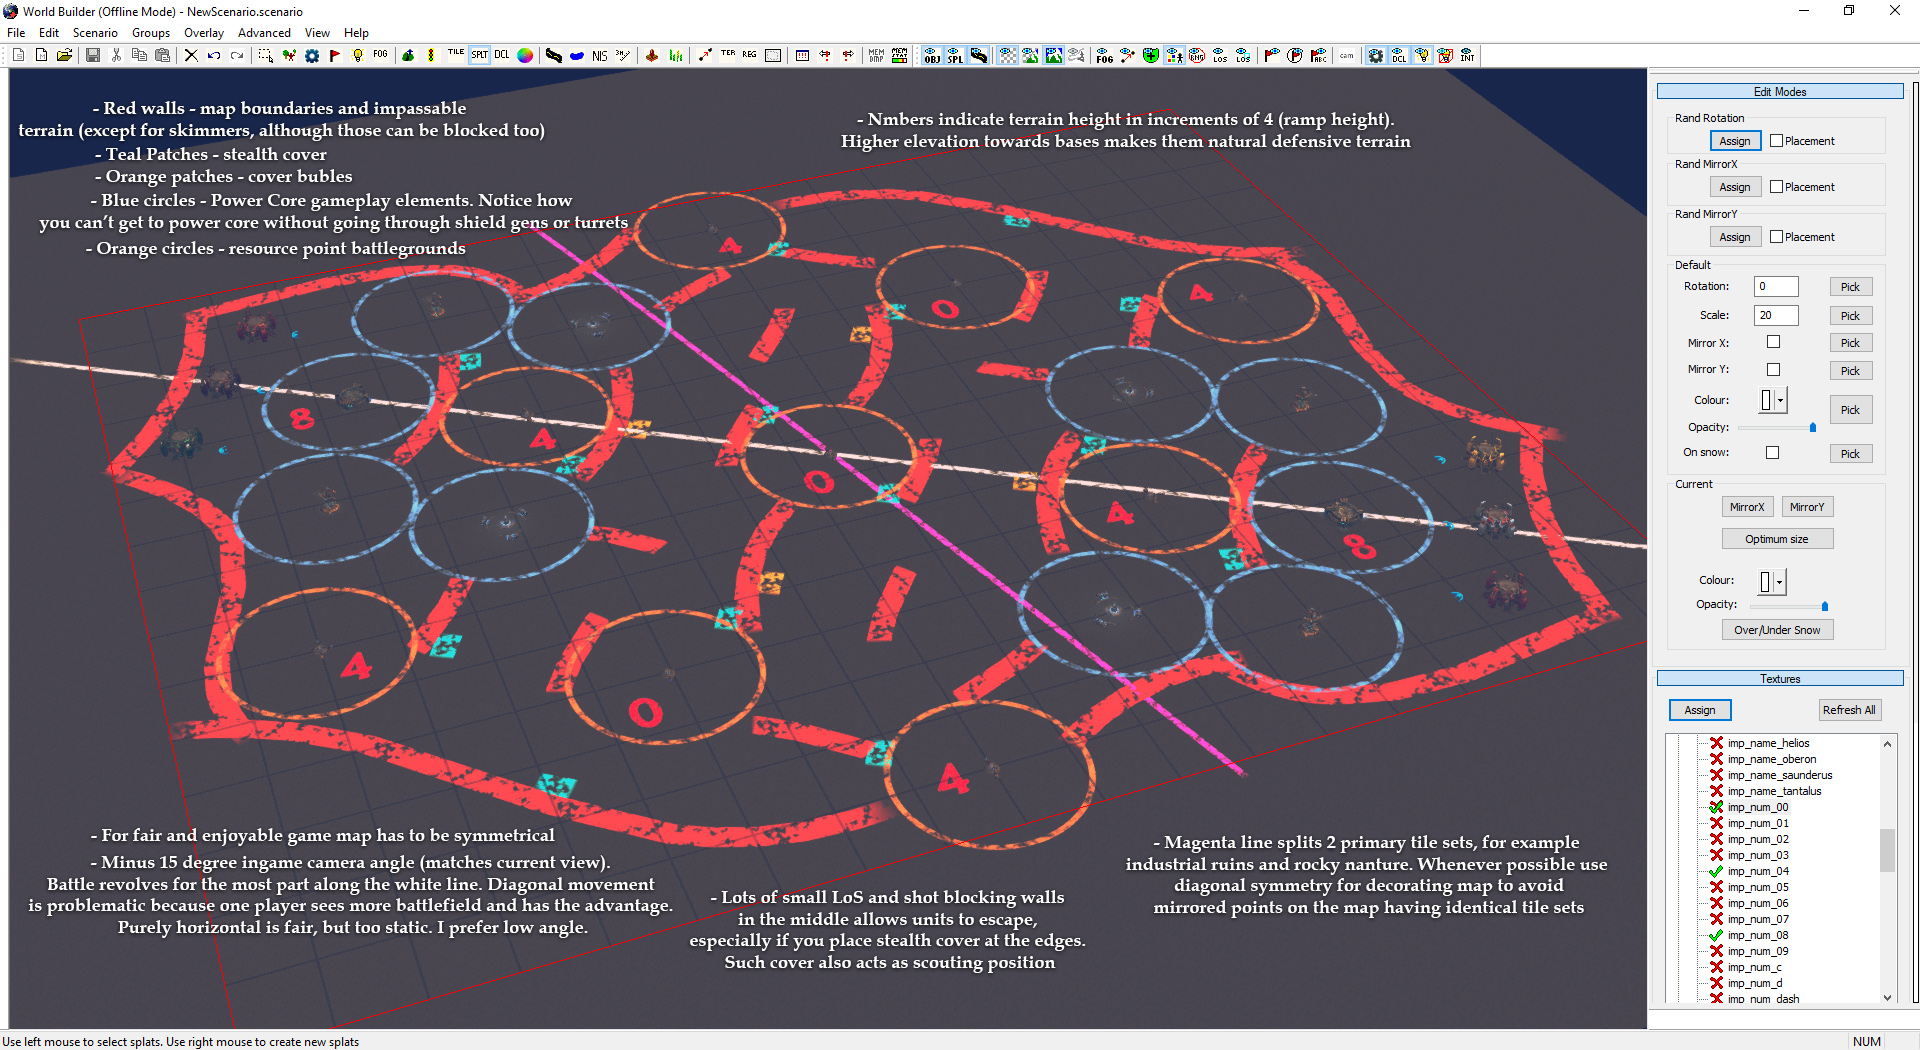
Circles and numbers are copy pasted Splats. Walls are splines made out of solid line splat. All of this is temporary and serves as an aid for making level/gameplay design decisions.
Level design is by far the most important part of making a good map. I'm no gameplay designer so I had to learn everything through trial and error. It doesn't matter how pretty you map is, if it gives unfair advantage to one player and is not balanced then whoever plays it won't have a good time doing it. It is also important to note that detailing work takes a lot of time. Skipping level design step may lead to a lot of such work being wasted. Try to spend as much time as you can to make your map layout as balanced and well thought out as possible.
Circles and numbers are copy pasted Splats. Walls are splines made out of solid line splat. All of this is temporary and serves as an aid for making level/gameplay design decisions.
More Warhammer 40,000: Dawn of War III guides
- Things you should know about Dawn of War III!★ 4 (225)22k views103 ♥10 minUpdated Sep 17, 2023
- How To Farm Experience Points★ 4 (127)11k views186 ♥4 minUpdated Feb 14, 2018
- [Hard] How to beat final boss || [Тяжело] Как победить финального босса★ 4 (100)8k views59 ♥12 minUpdated May 2, 2017
- Space Marine Late game build★ 4 (45)6.7k views57 ♥6 minUpdated May 7, 2017
- how to skip intro and boost fps★ 4 (44)4.6k views35 ♥1 min
- Modding Post-Release Elite Units and Abilities★ 4 (37)3.2k views35 ♥3 min




This guide was created by its original author on the Steam Community. Are you the author and want it removed? Request removal.