
Overview
Projects from each bridge from Poly Bridge, all respecting the limits of resources and money. Game version used 1.0.5
Notes
If you have any questions, if any point project to too complicated to understand or have any correction to make a comment.
Don’t forget to press RATE and FAVORITE :]

Subtitle


The measurements appear in meters (m) and PolyNetrons (PN).
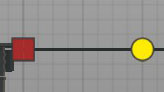
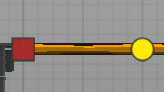
Provides a surface for vehicles to pass. Represented in black design.

- Resistance: 900PN, +300 if reinforced with wood, +600 if reinforced with steel beams
- Maximum lenght: 2m
- Price: $200/m
Cheaper building material. Represented in design in yellow.
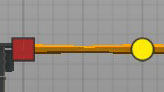
- Resistance: 800PN
- Maximum lenght: 2m
- Price: $180/m
Tougher and longer than wood. Represented in design in red.

- Resistance: 200PN
- Maximum lenght: 4m
- Price: $450/m
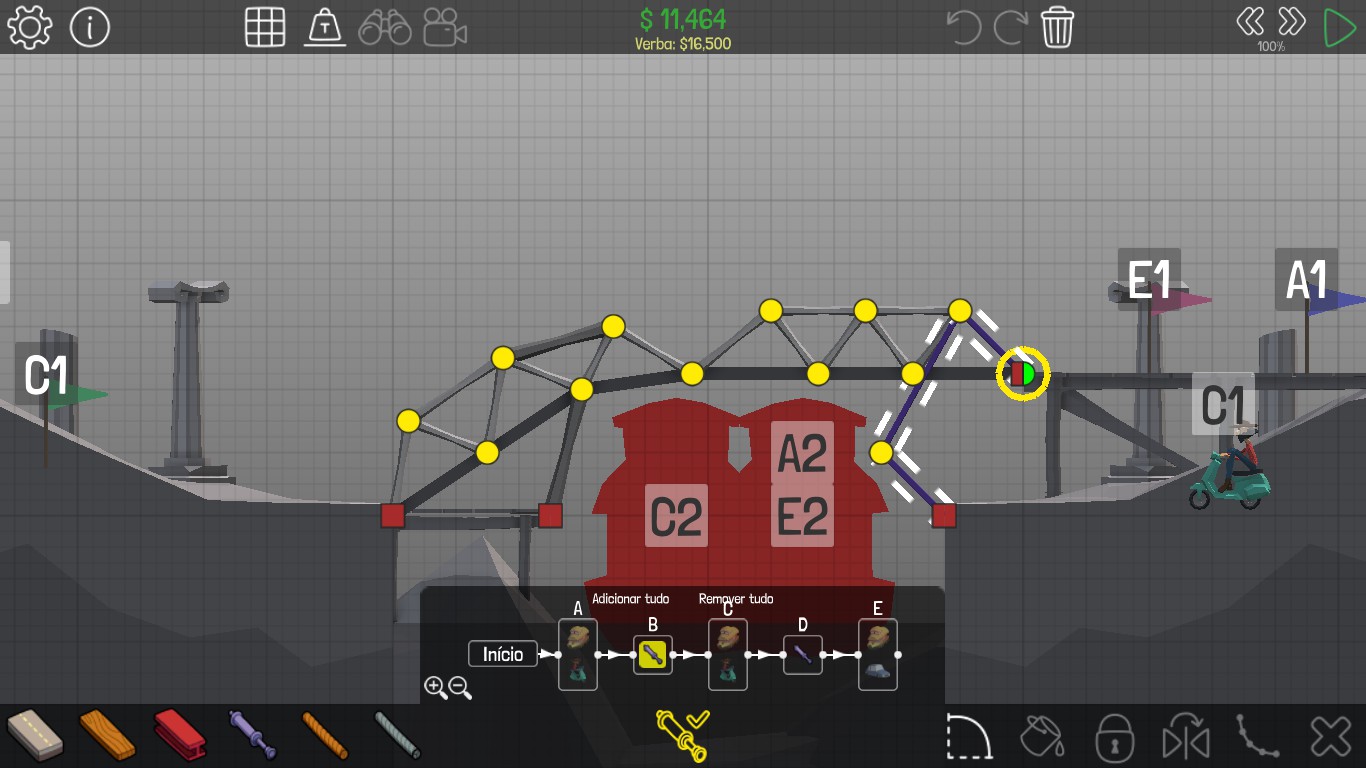
Used for drawbridges and other movable structures. Expands or contracts for a specific length.

- Resistance:1800PN
- Maximum lenght: 4m
- Price: $450/m
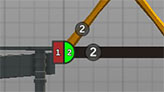
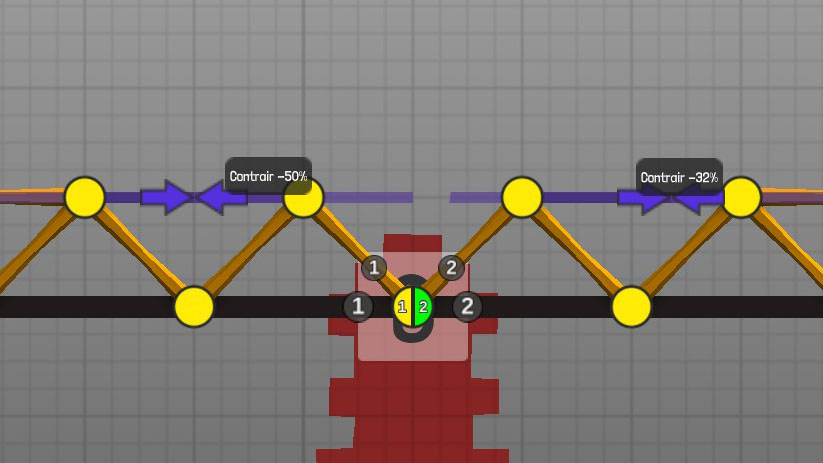
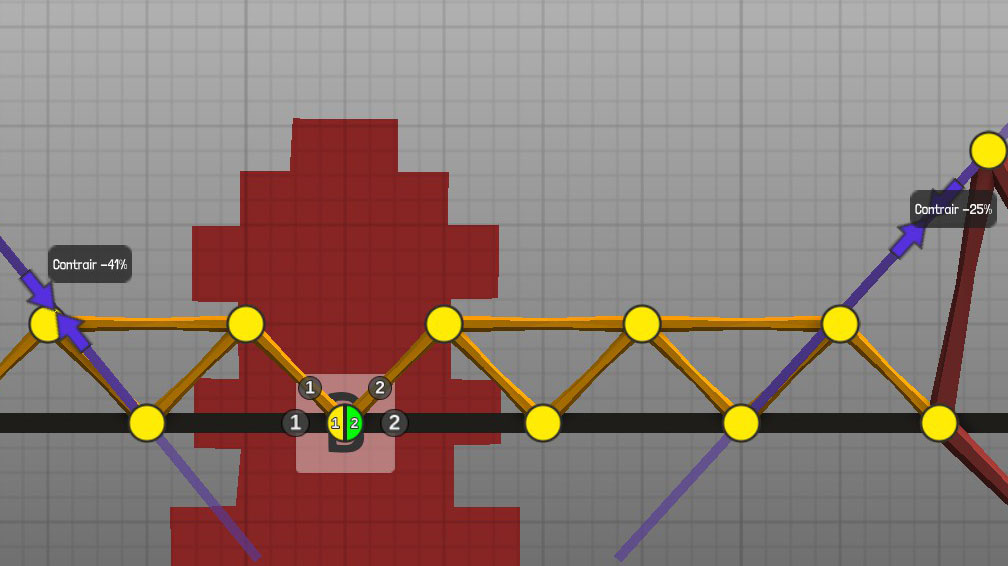
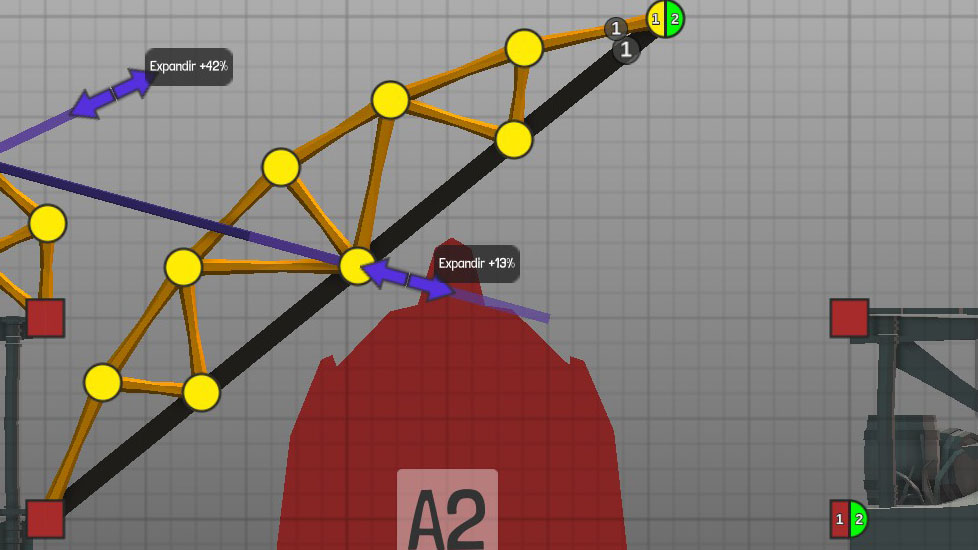
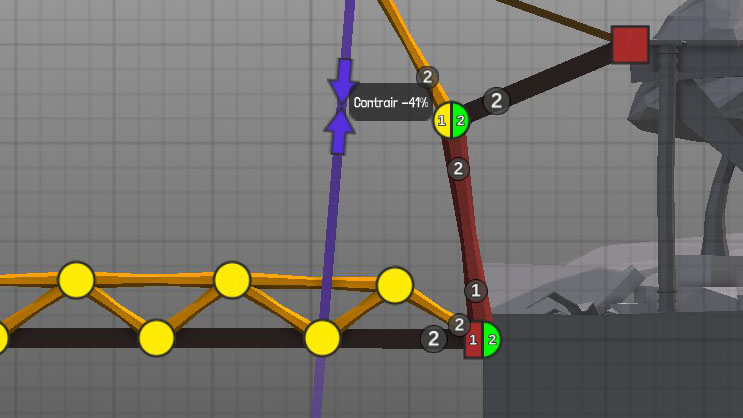
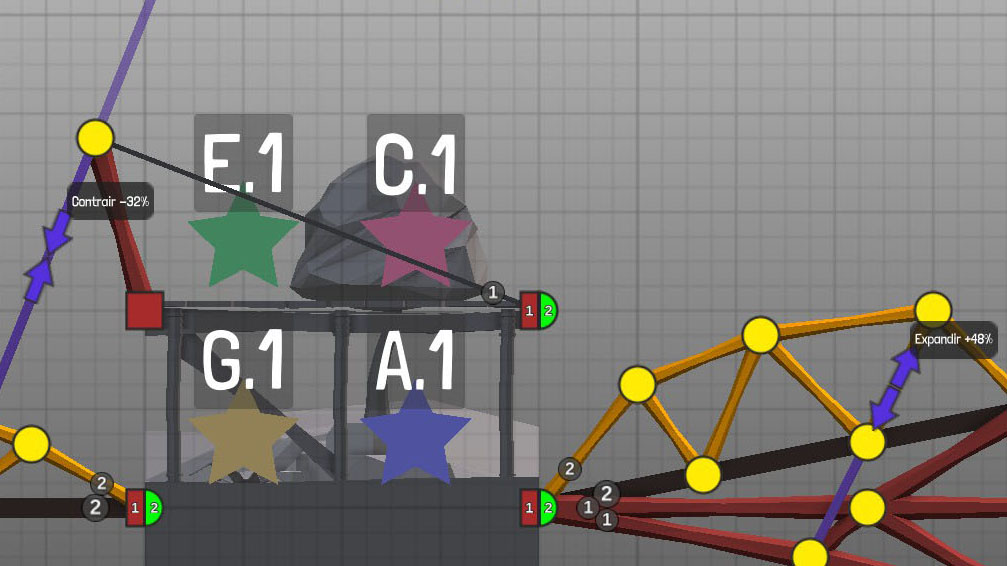
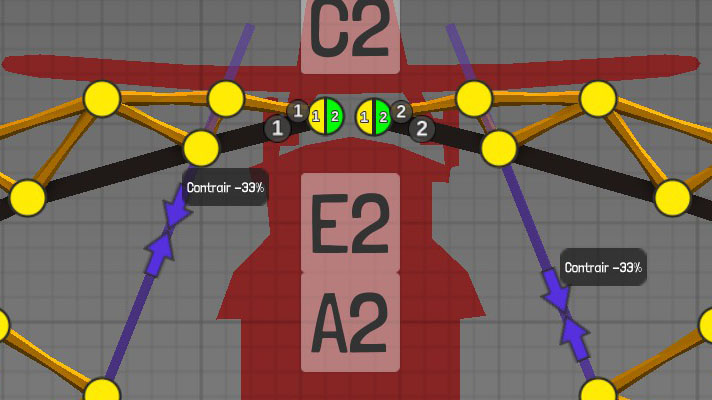
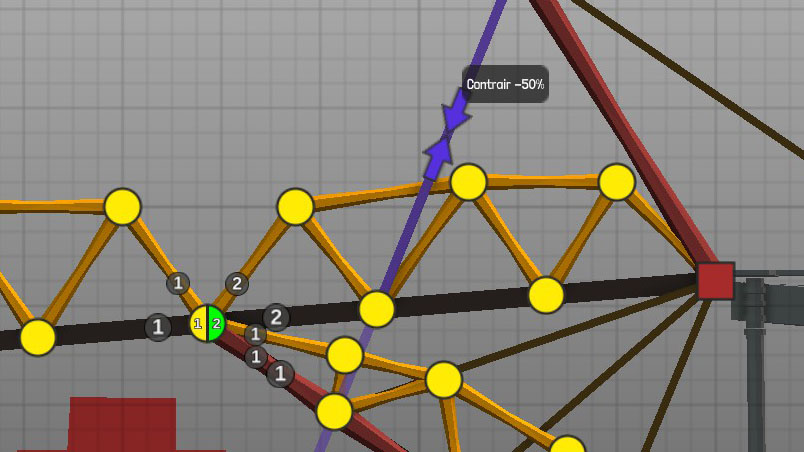
Hydraulic control allows you to determine whether separate hydraulic systems or joints will activate during the hydraulic stages.


Strings have no resistance of understanding, only of tension. Depicted in design in brown.

- Resistance: 1200PN
- Maximum lenght: Unlimited
- Price: $220/m
Steel cables have no tensile strength, only tension. Represented in gray design.
- Resistance: 2200PN
- Maximum lenght: Unlimited
- Price: $400/m
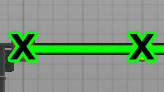
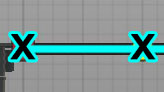
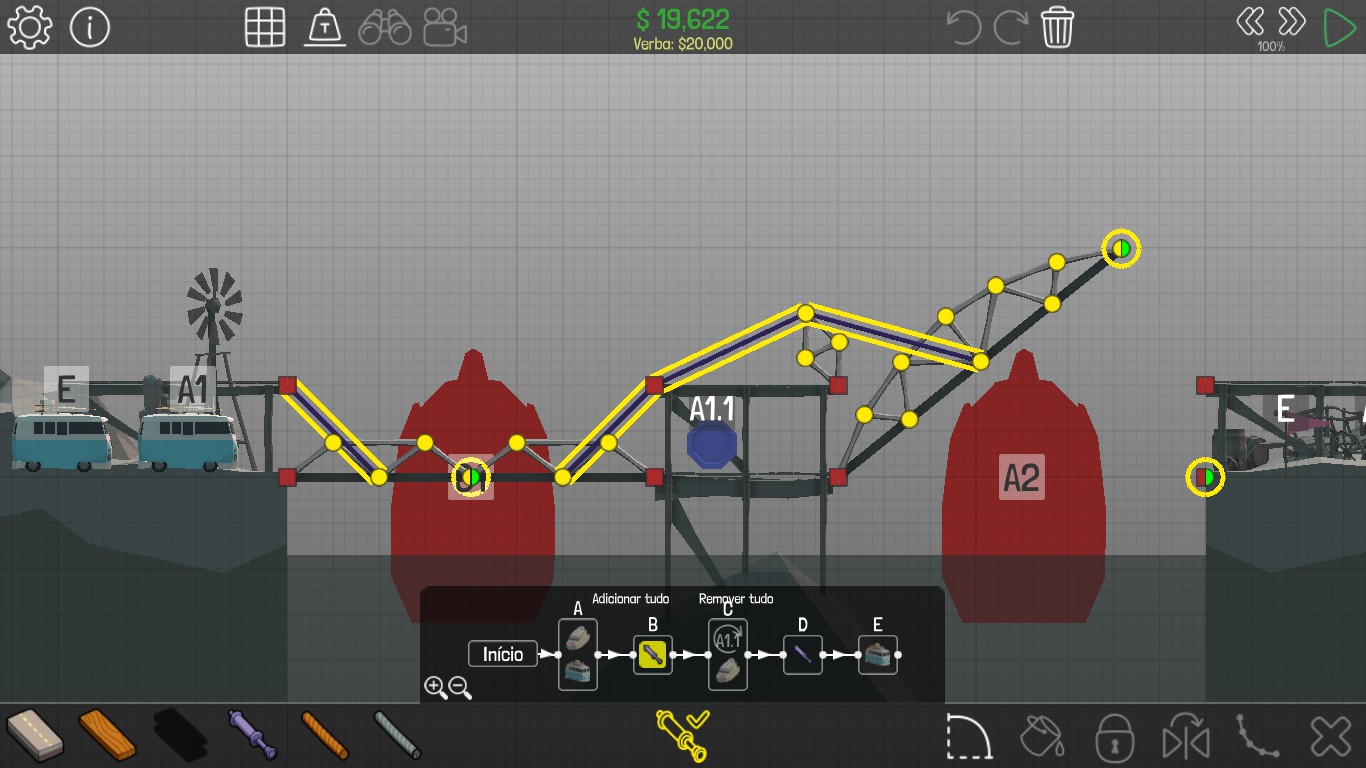
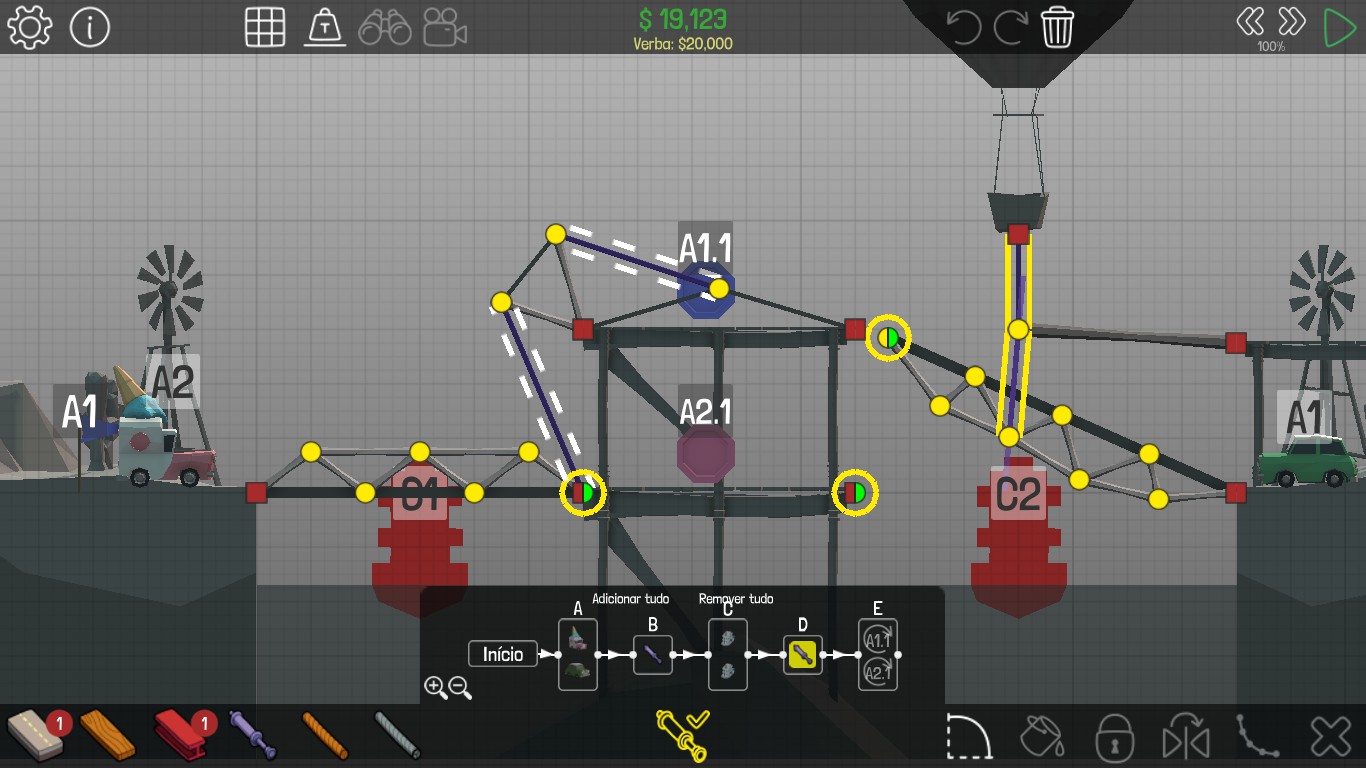
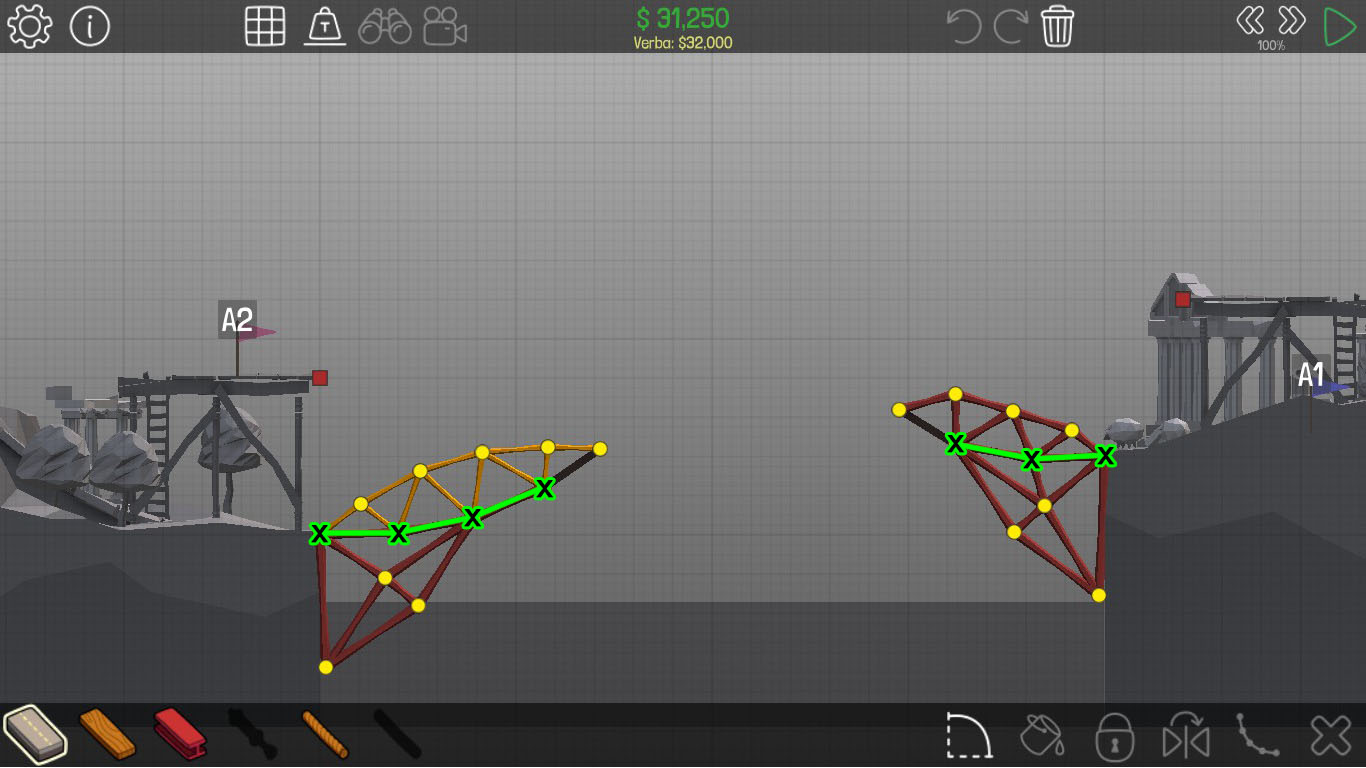
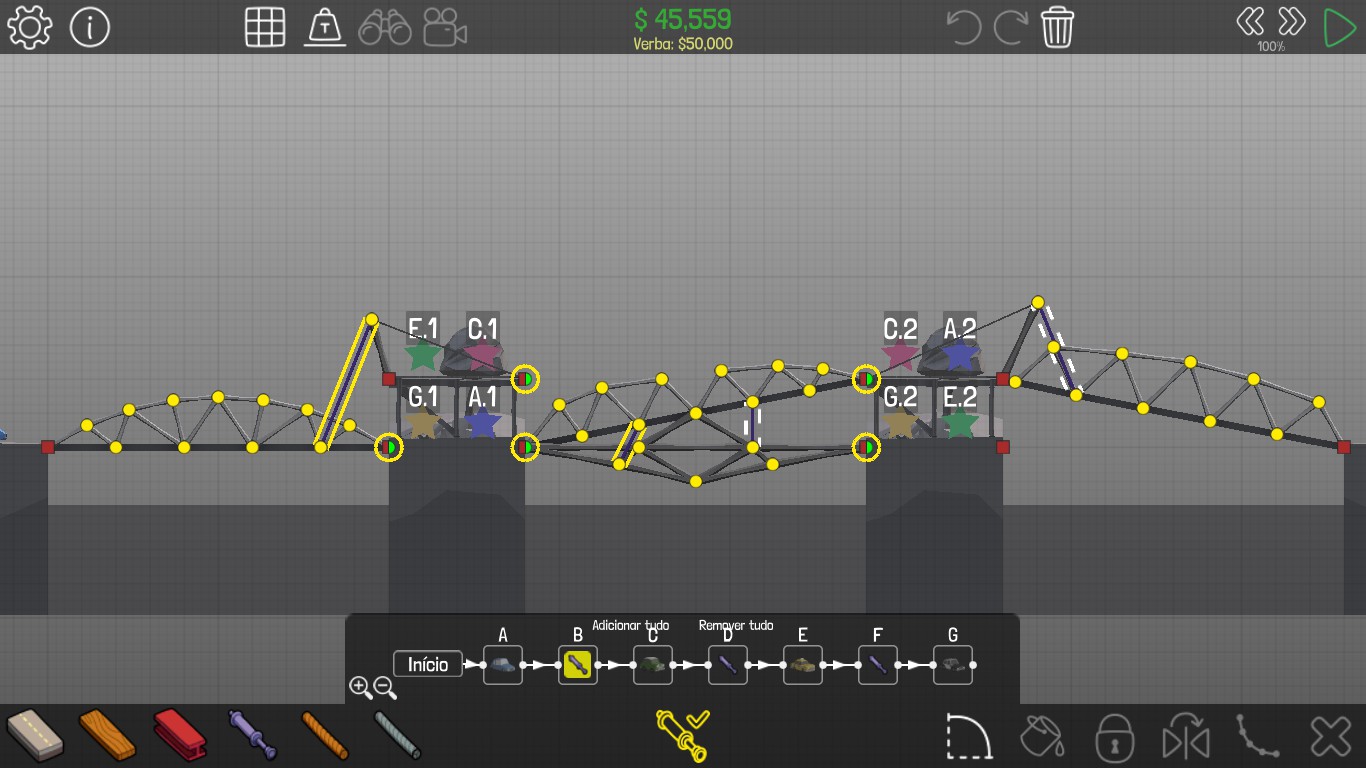
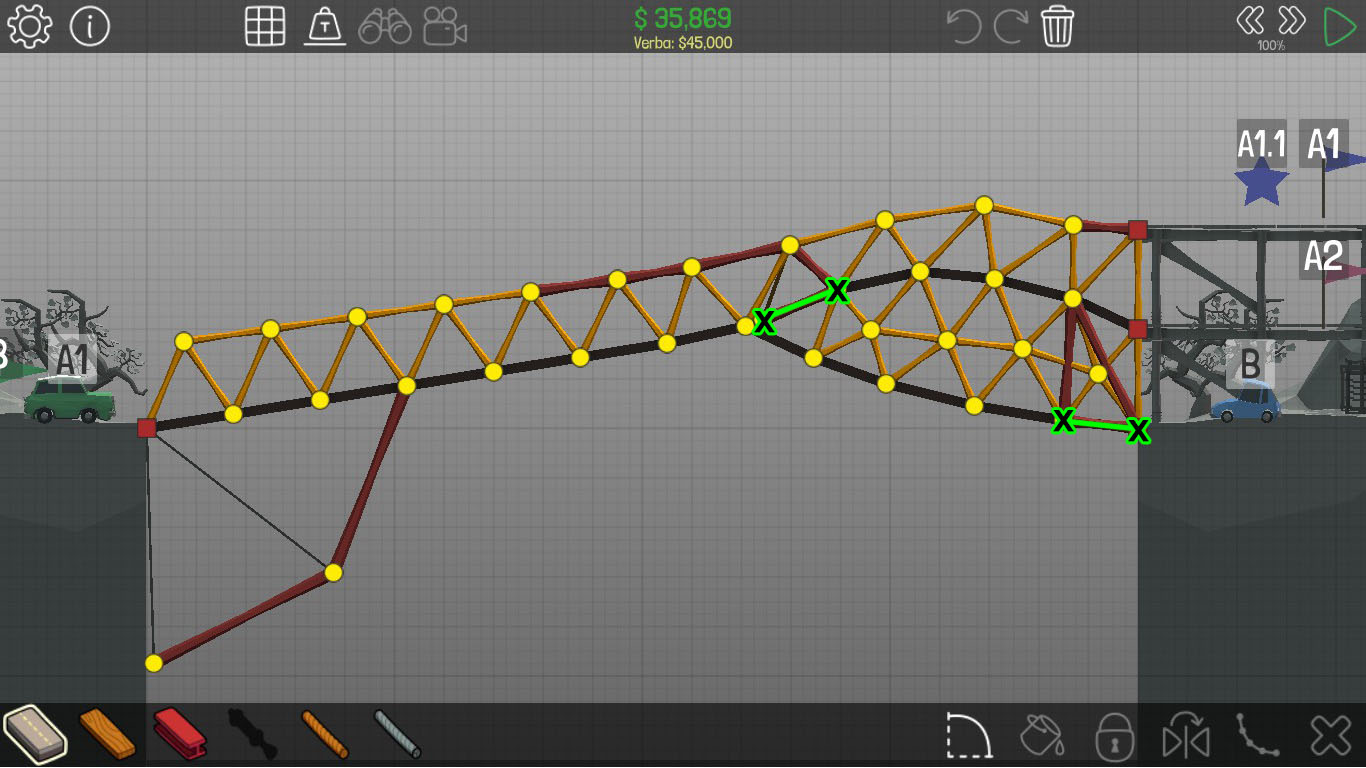
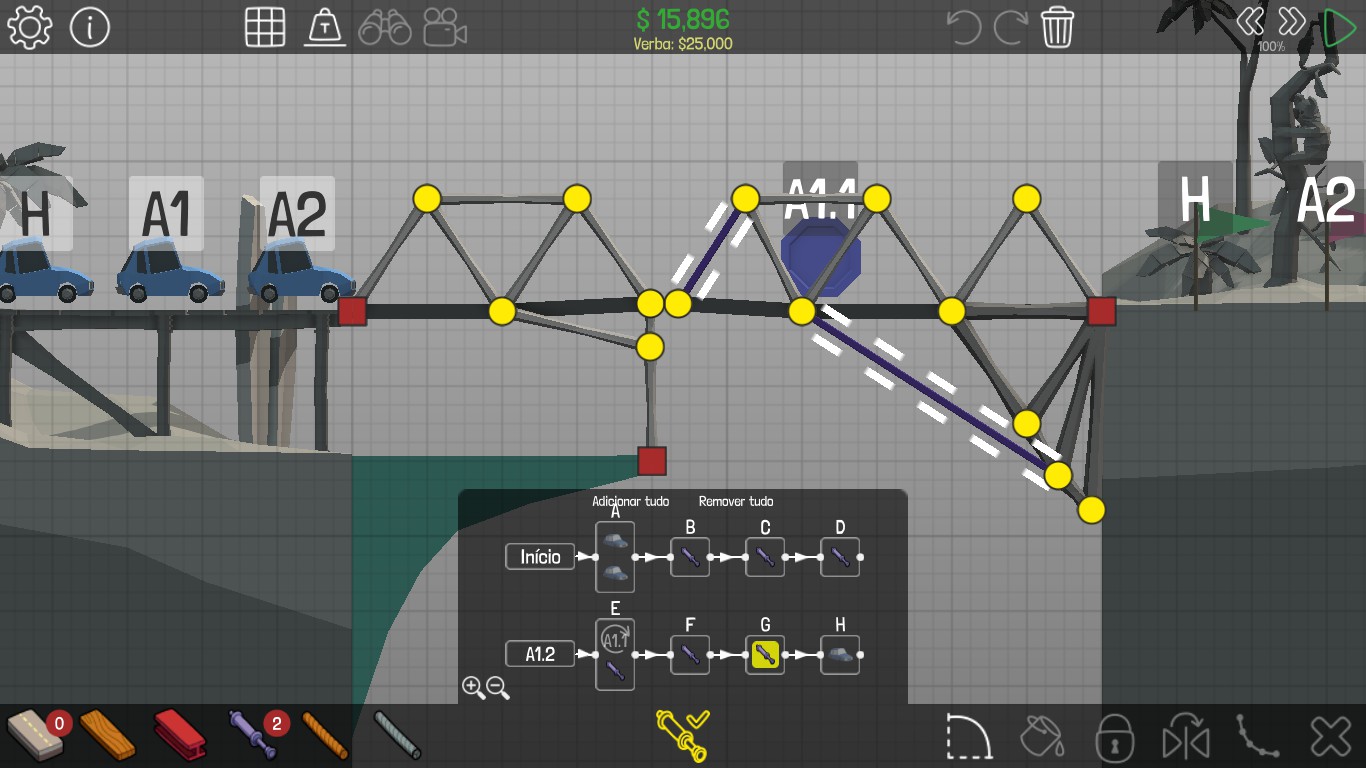
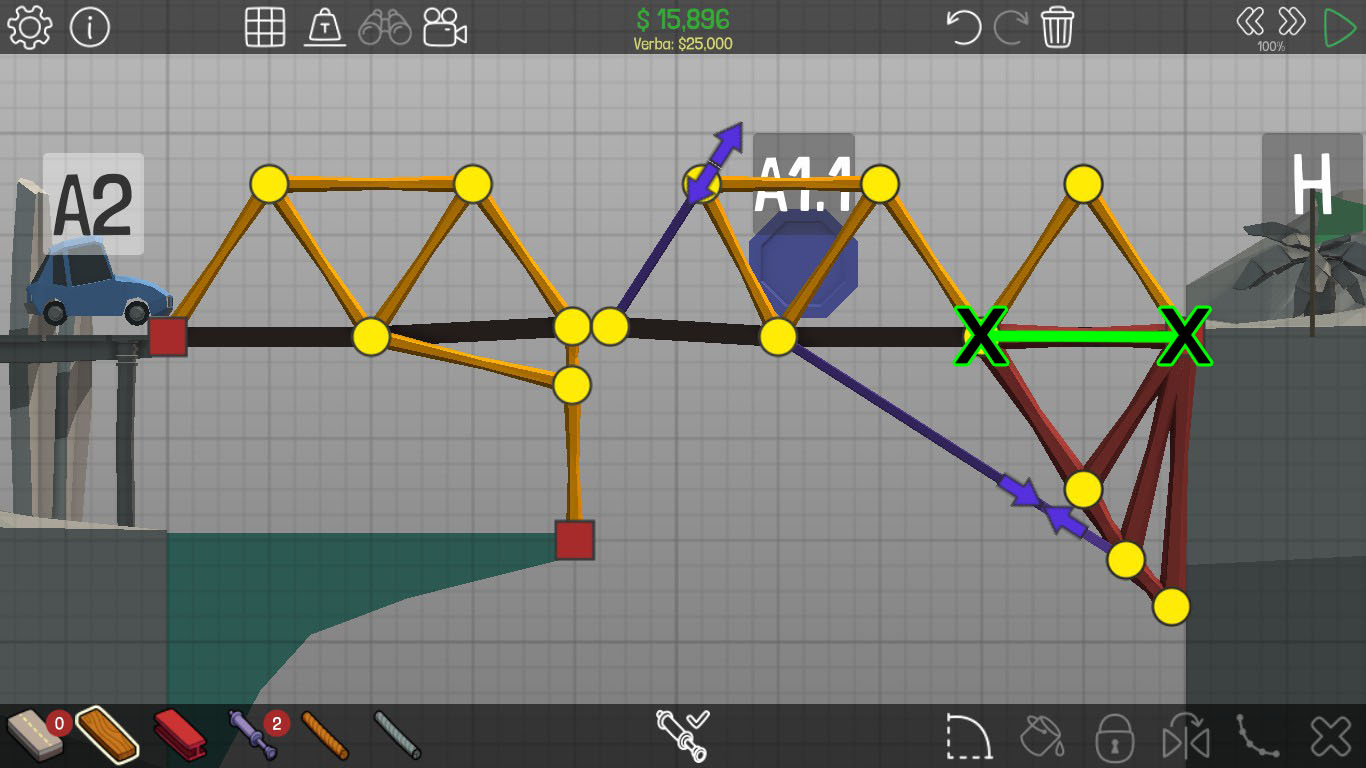
You can draw a material over the road to reinforce it with wood and steel beams. Here’s how they are represented in the project:
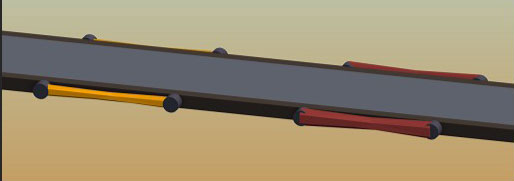


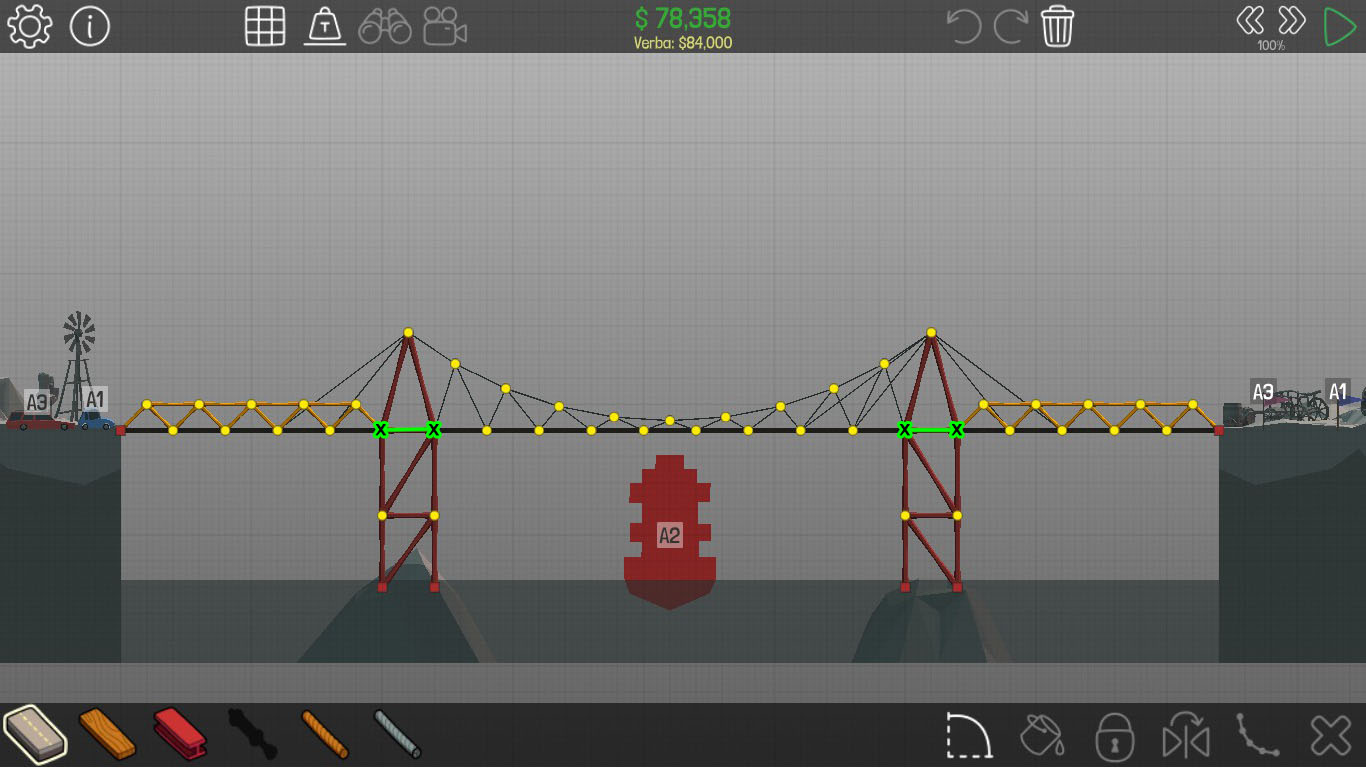
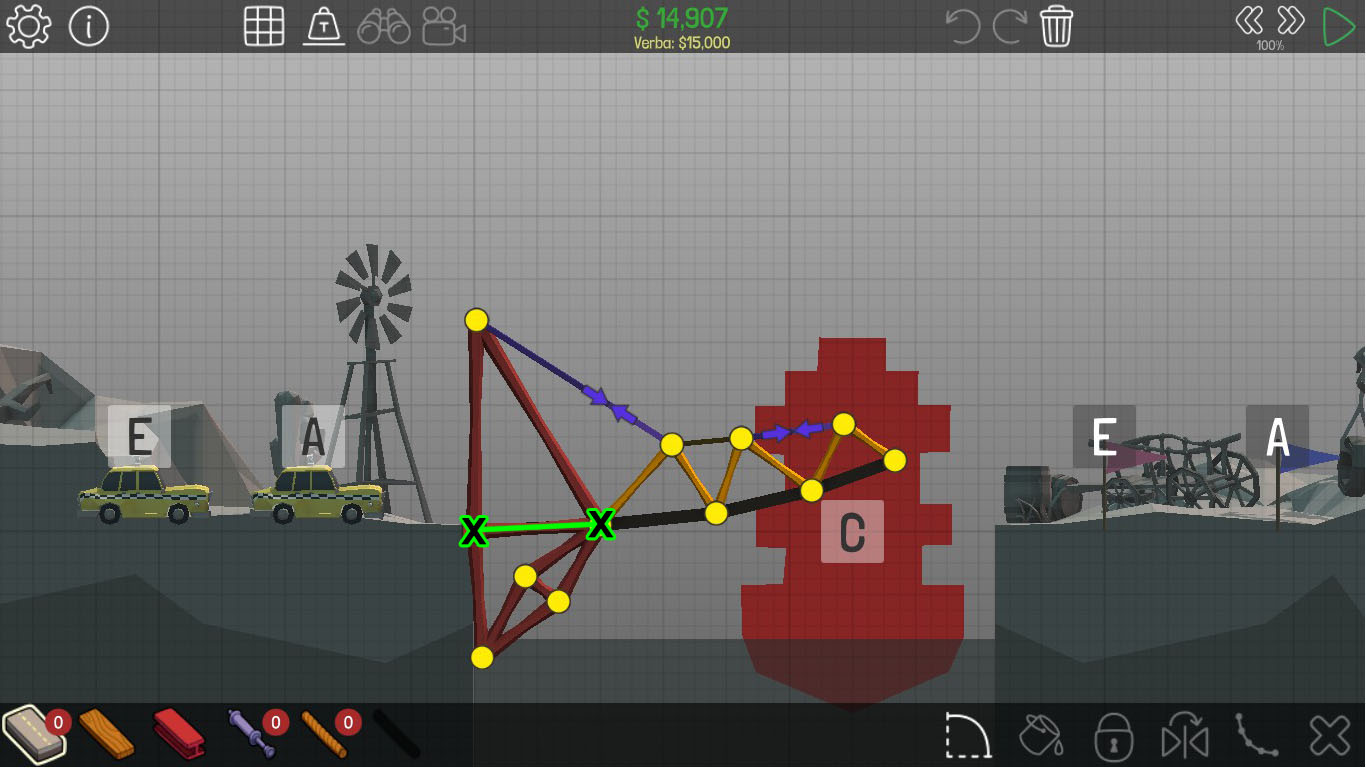
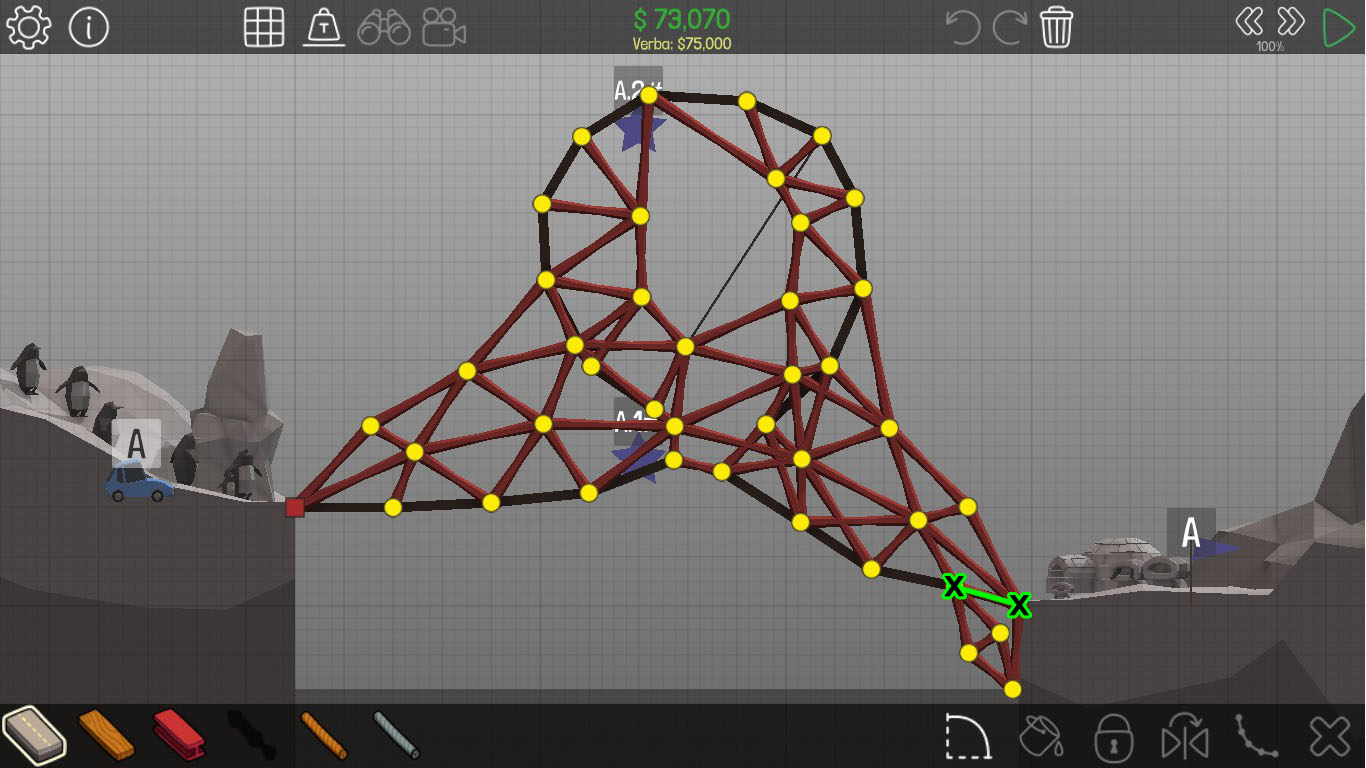
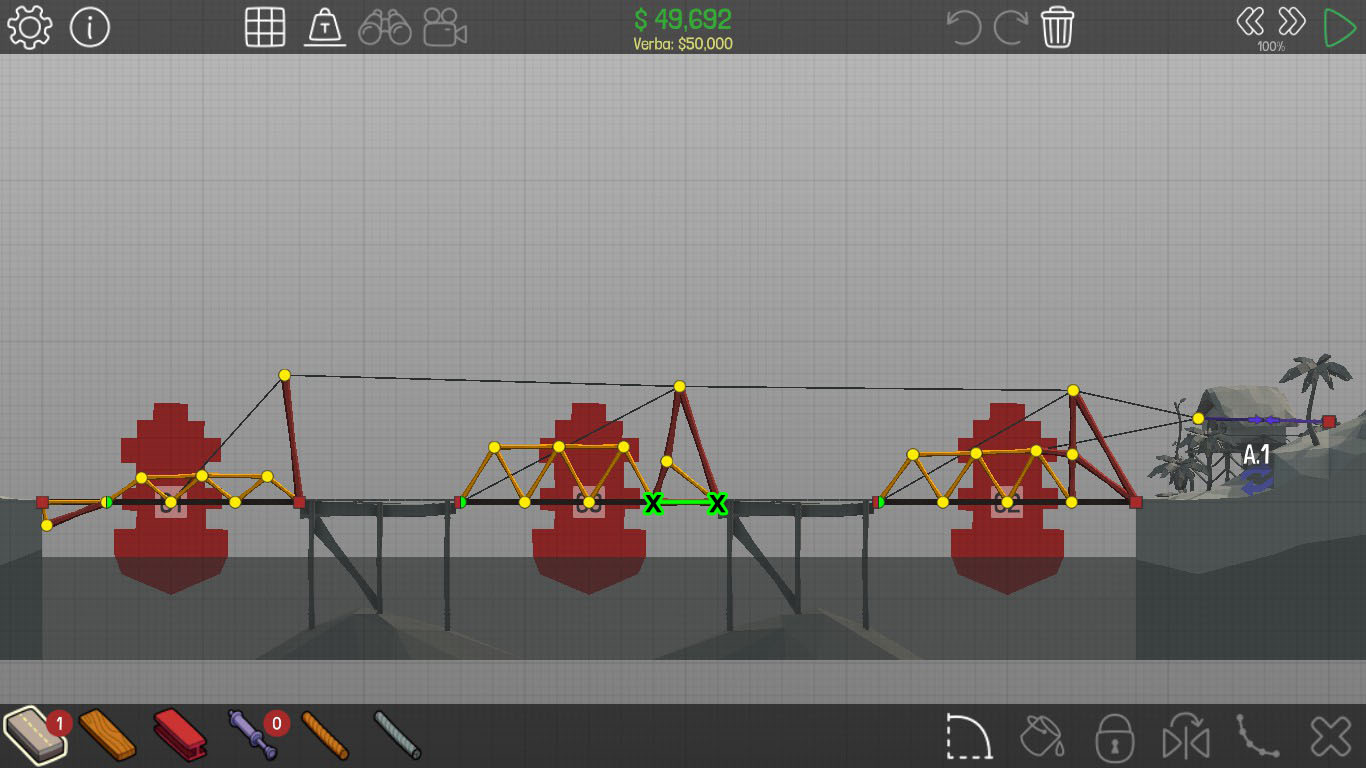
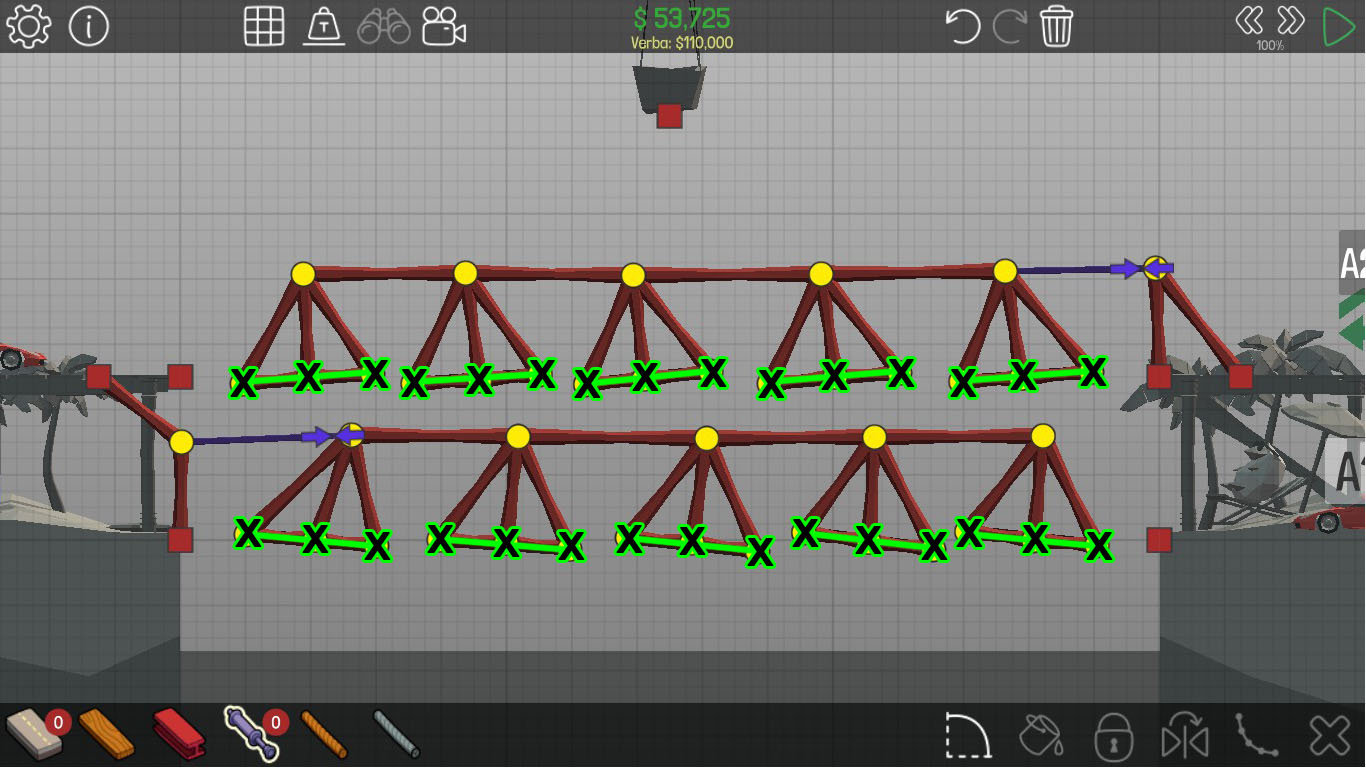
For a better visualization of the reinforced road, I made markings with the corresponding colors. X marks the place of the joints.

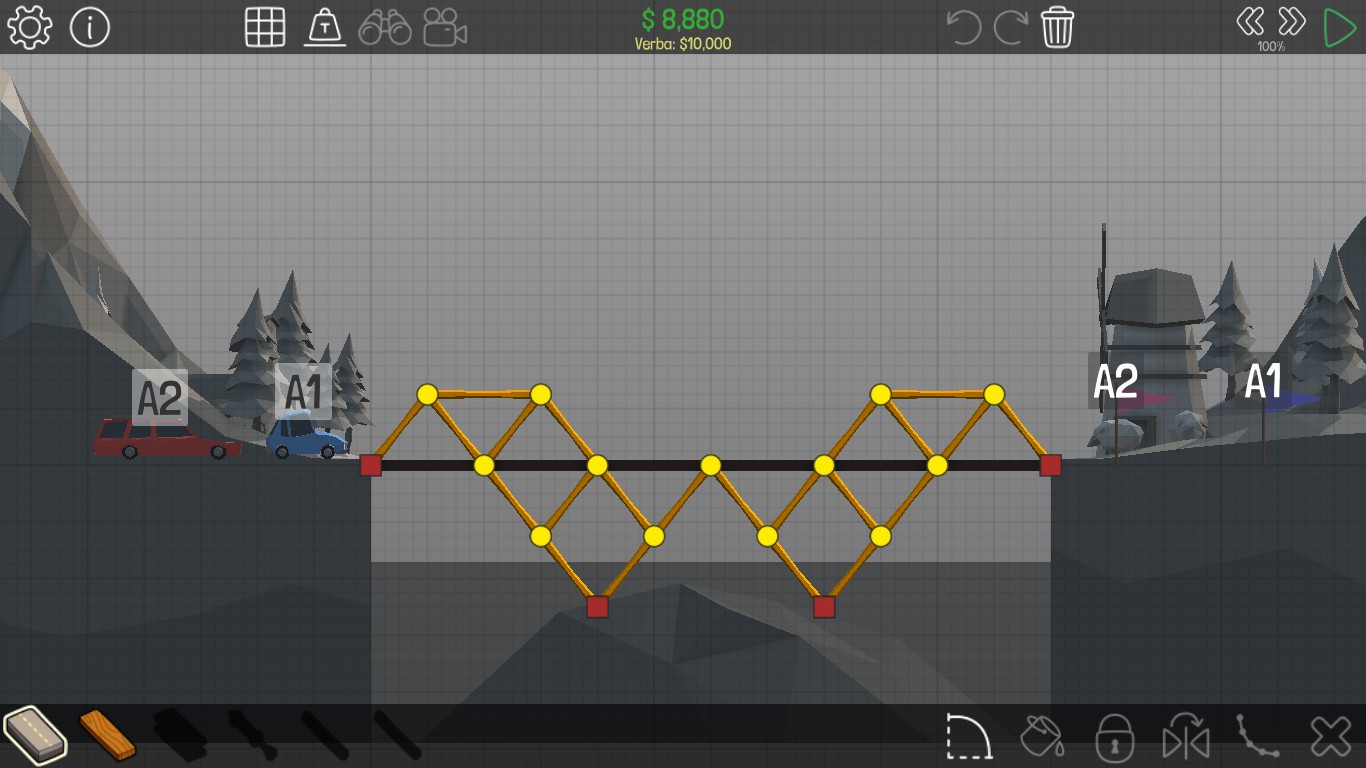
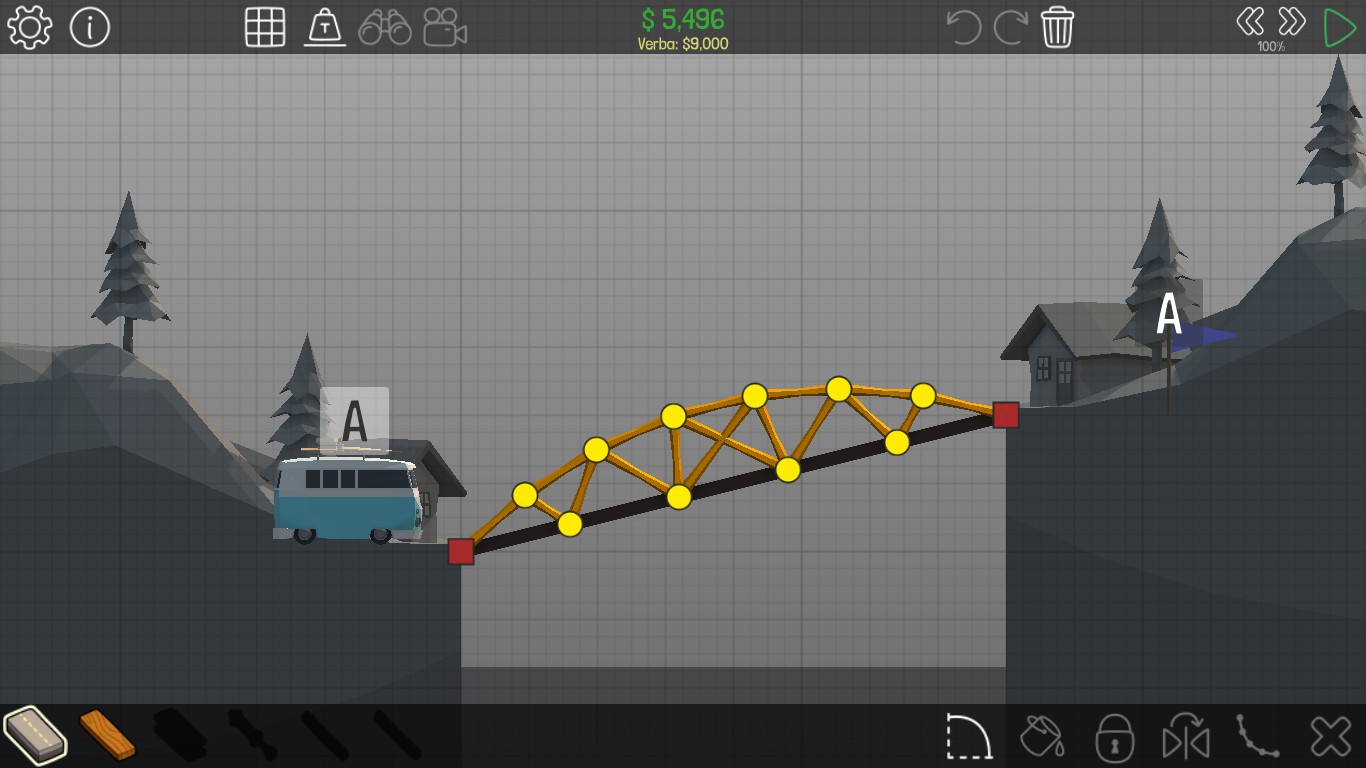
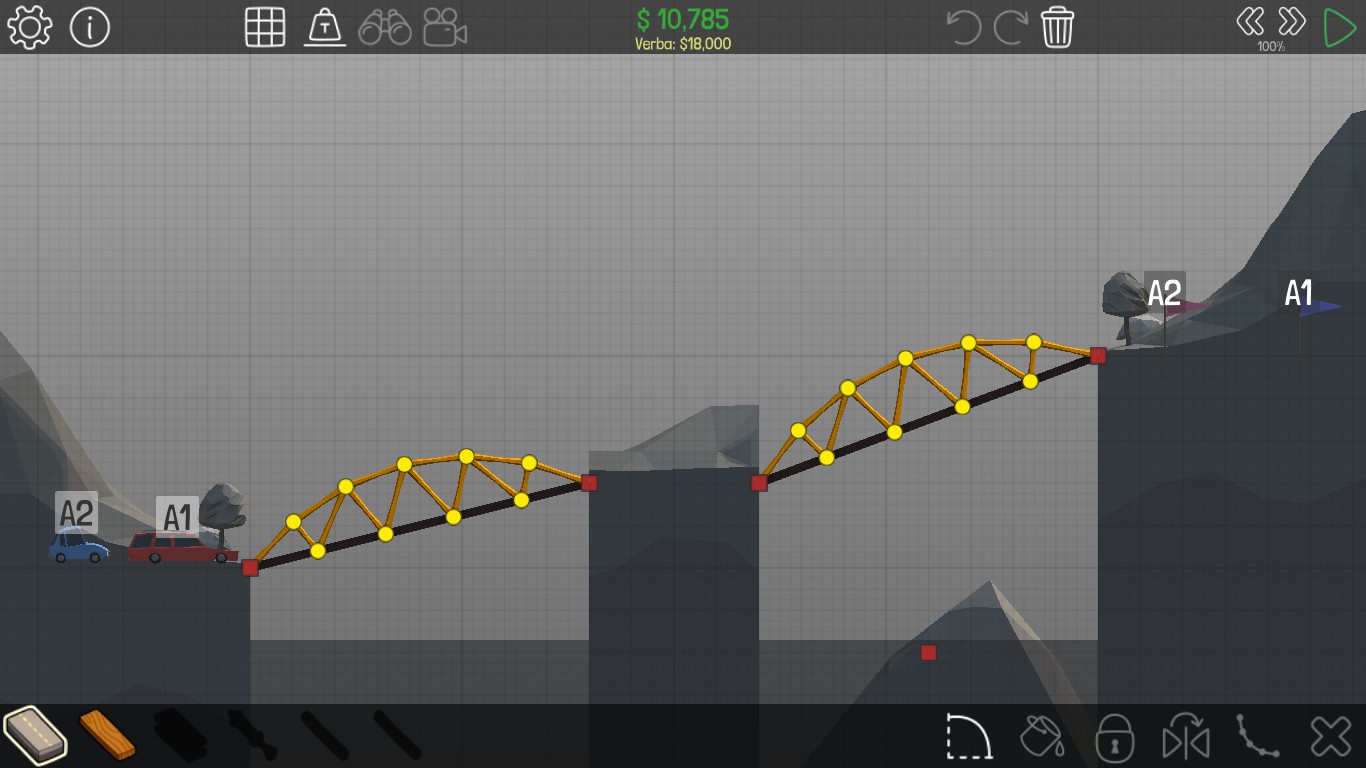
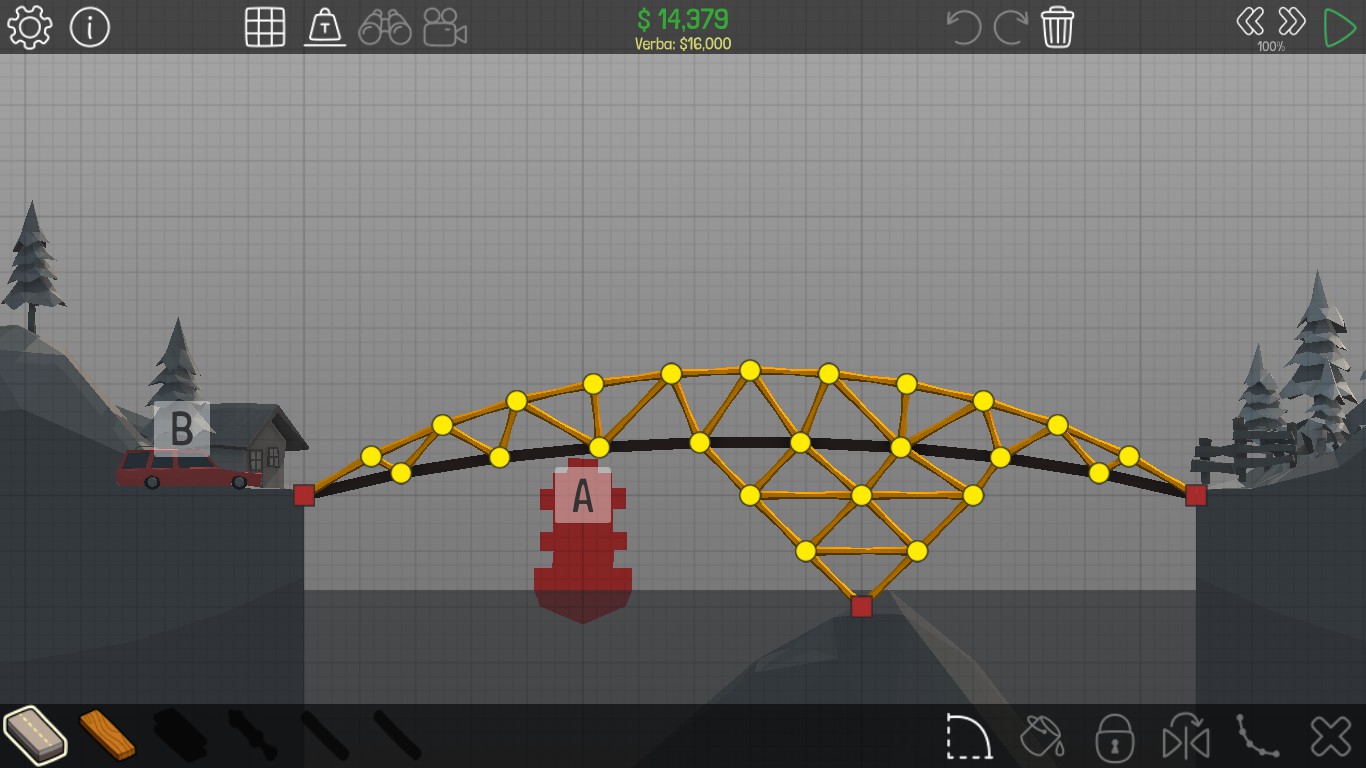
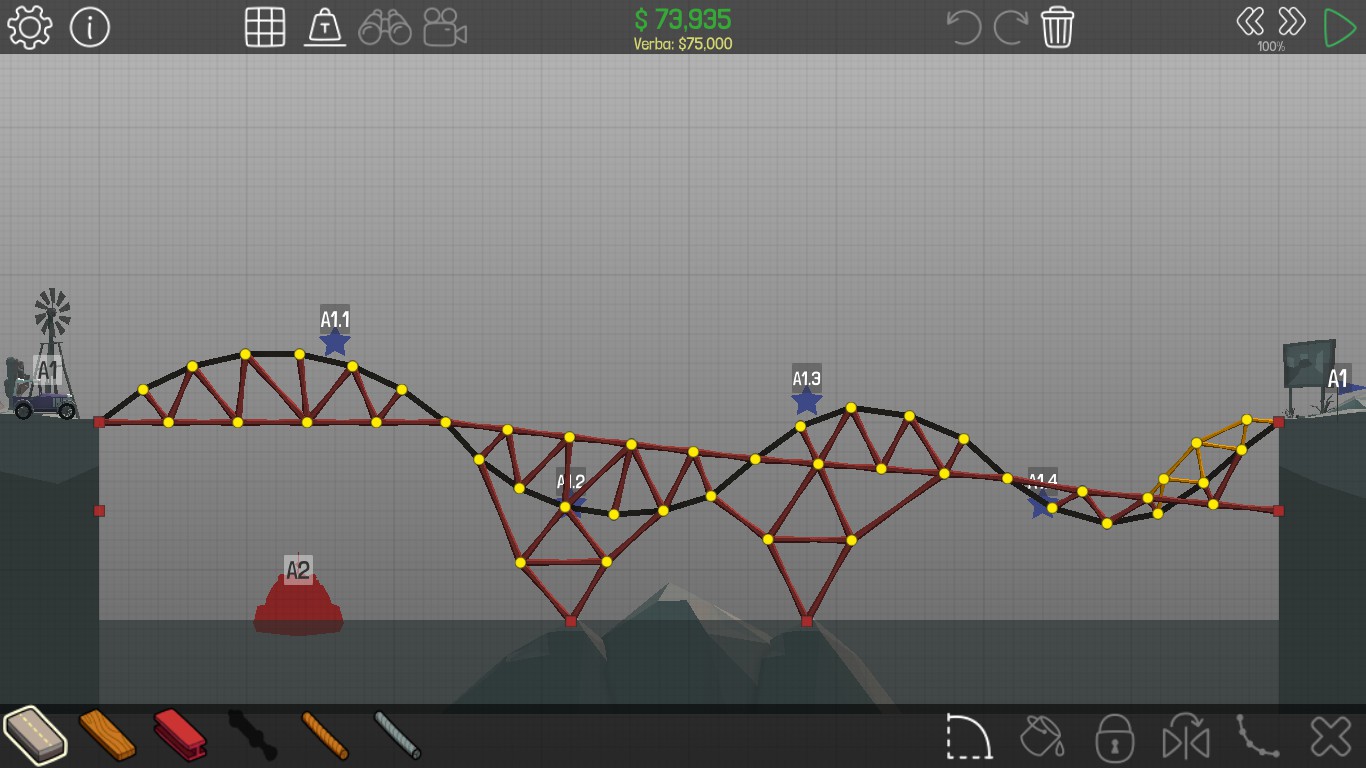
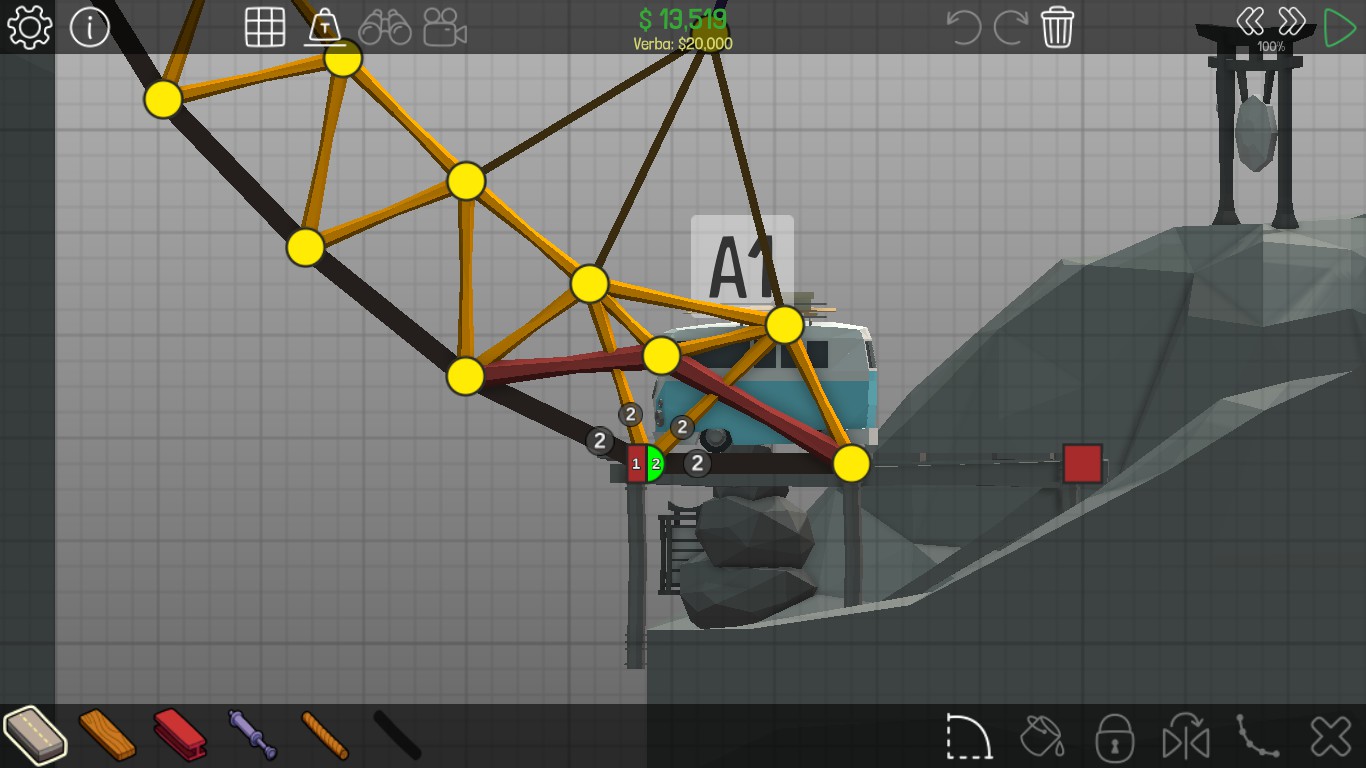
1 – Alpine Meadows, step by step 100%

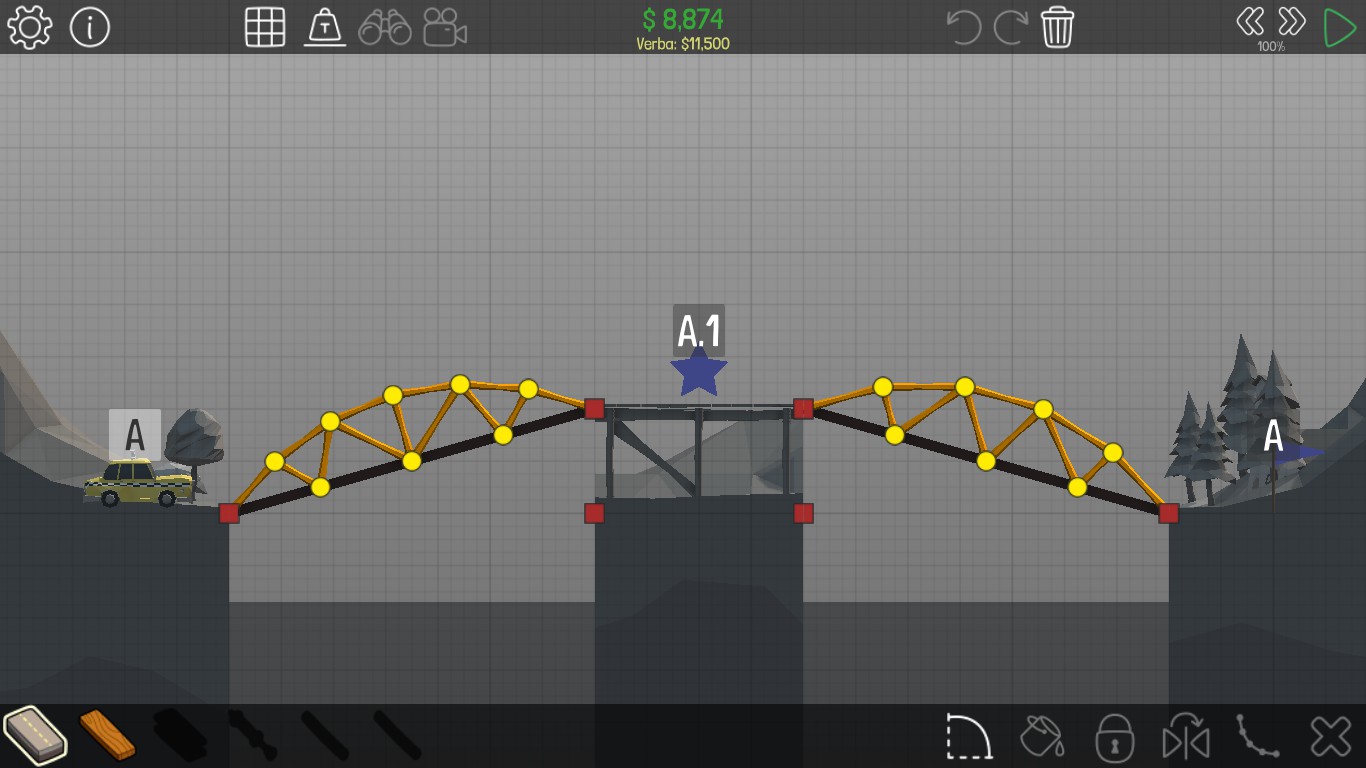
Bridge 1-1
Bridge 1-2

Bridge 1-3
Bridge 1-4
Bridge 1-5
Bridge 1-6
Bridge 1-7
Bridge 1-8
Bridge 1-9
Bridge 1-10
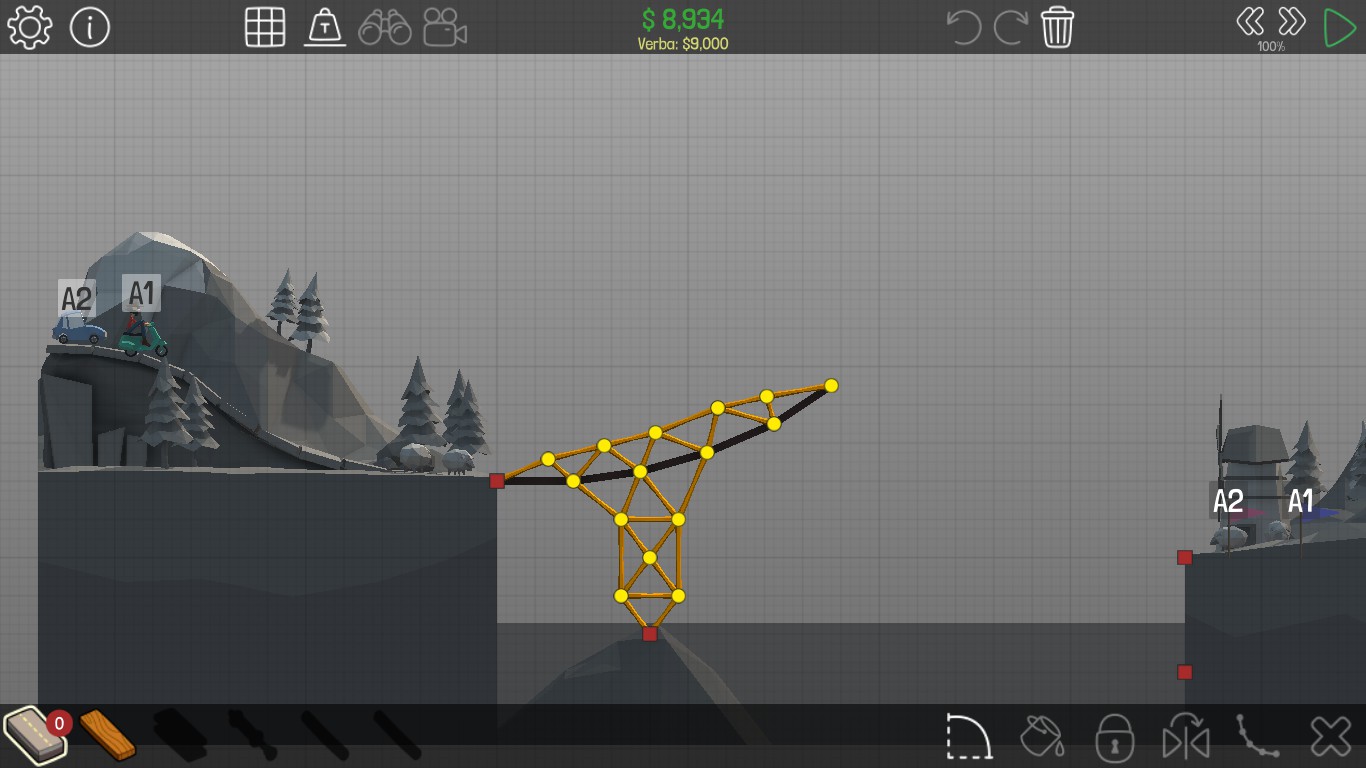
Bridge 1-11

Bridge 1-12
Bridge 1-13
Bridge 1-14

Bridge 1-15

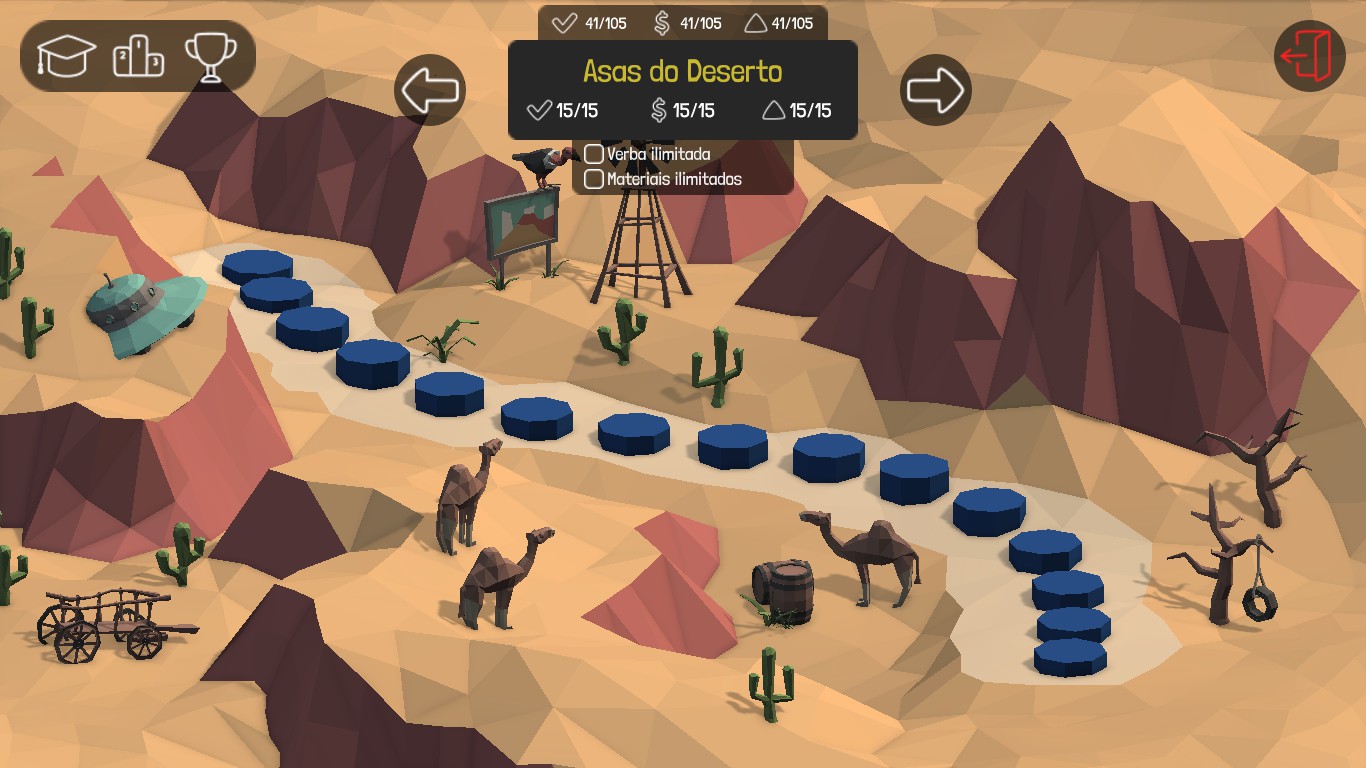
2 – Desert Winds, step by step 100%
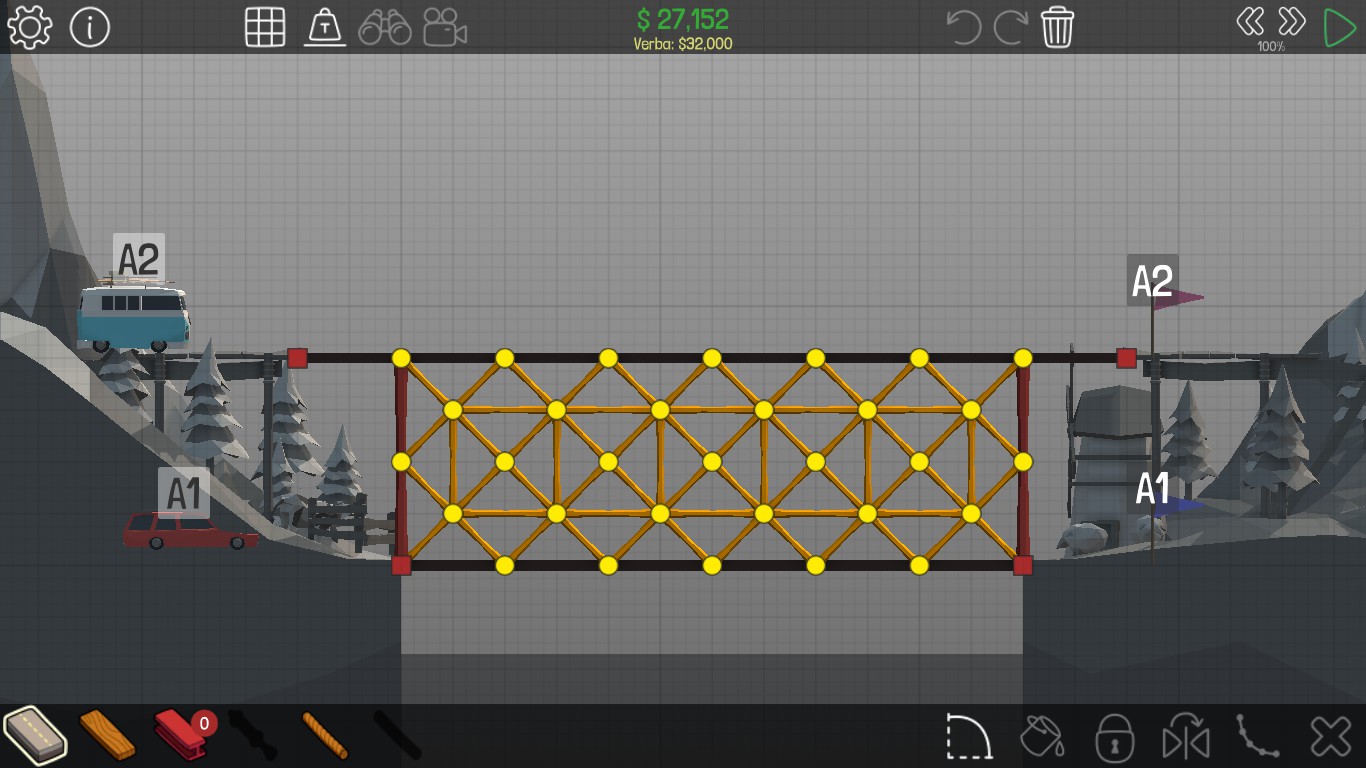
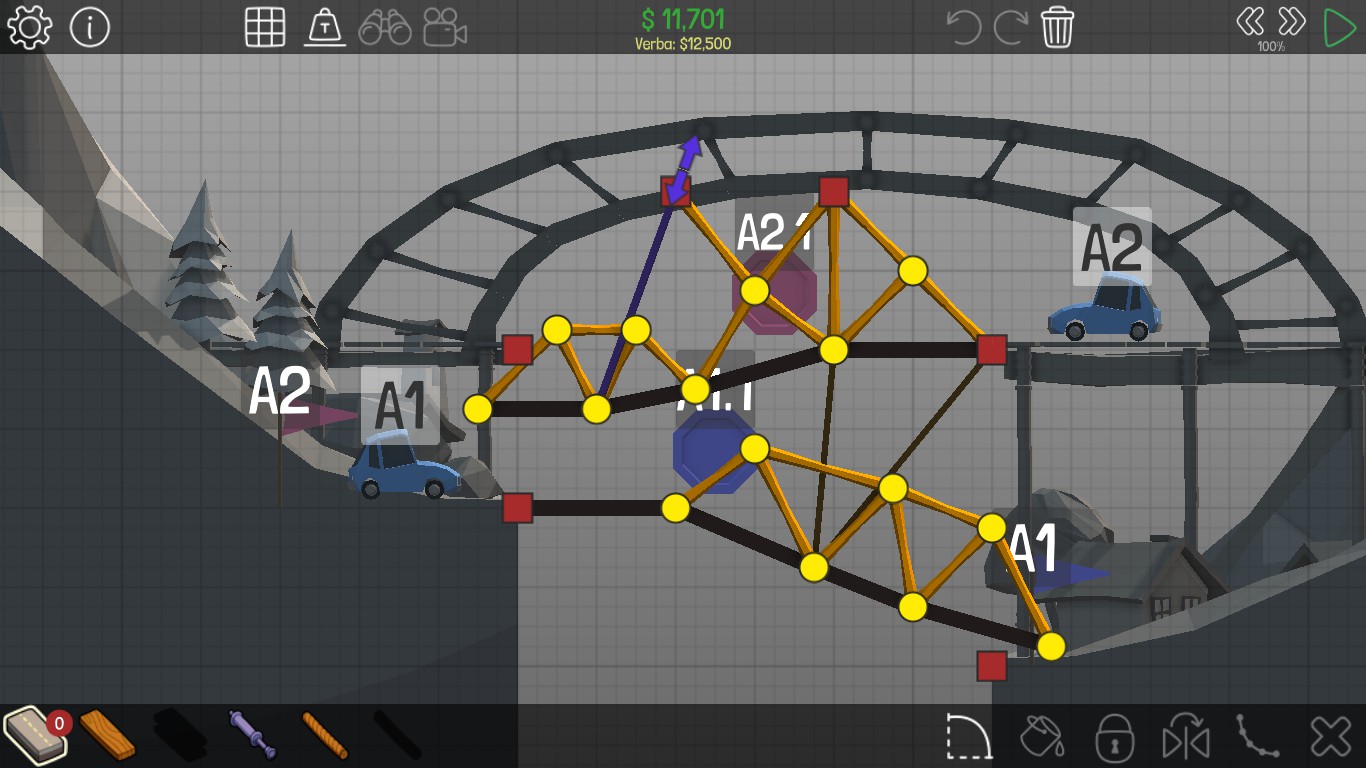
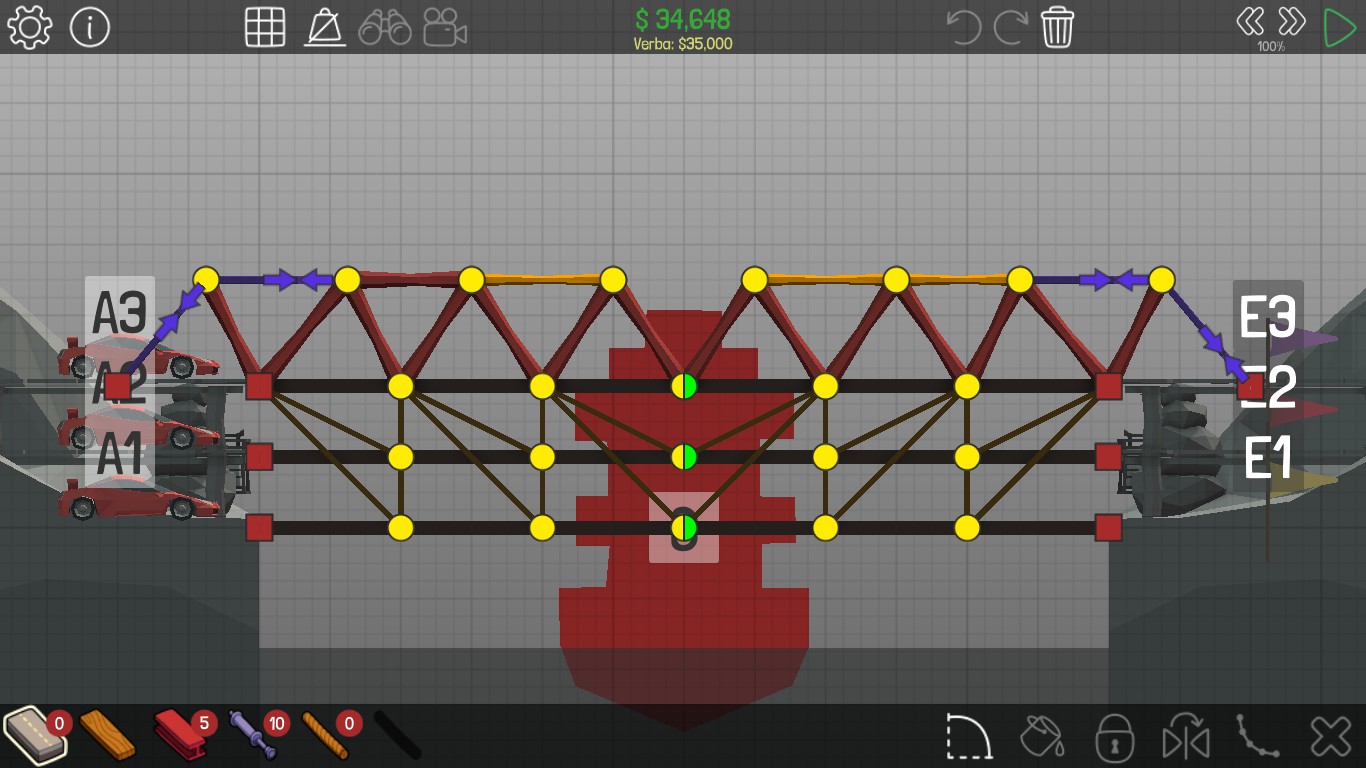
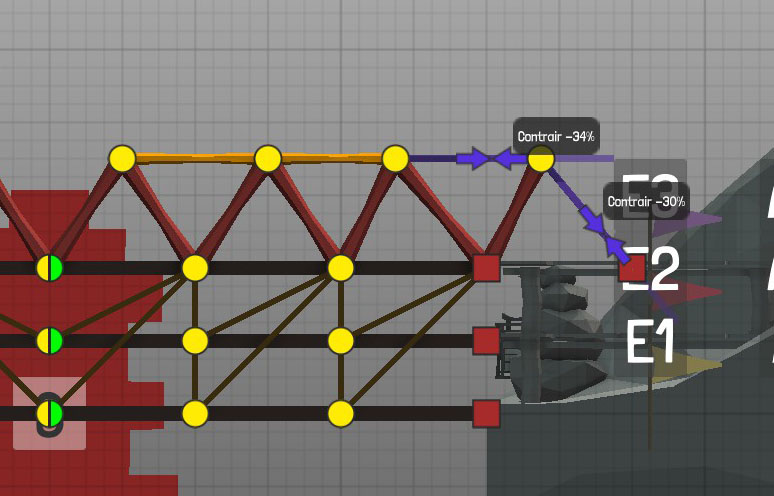
Bridge 2-1
Bridge 2-2
Bridge 2-3
Bridge 2-4


Bridge 2-5

Bridge 2-6
Bridge 2-7
Bridge 2-8

Bridge 2-9
Bridge 2-10
Bridge 2-11

Bridge 2-12


Bridge 2-13


Bridge 2-14
Bridge 2-15


3 – Skidding in the Snow, step by step 100%

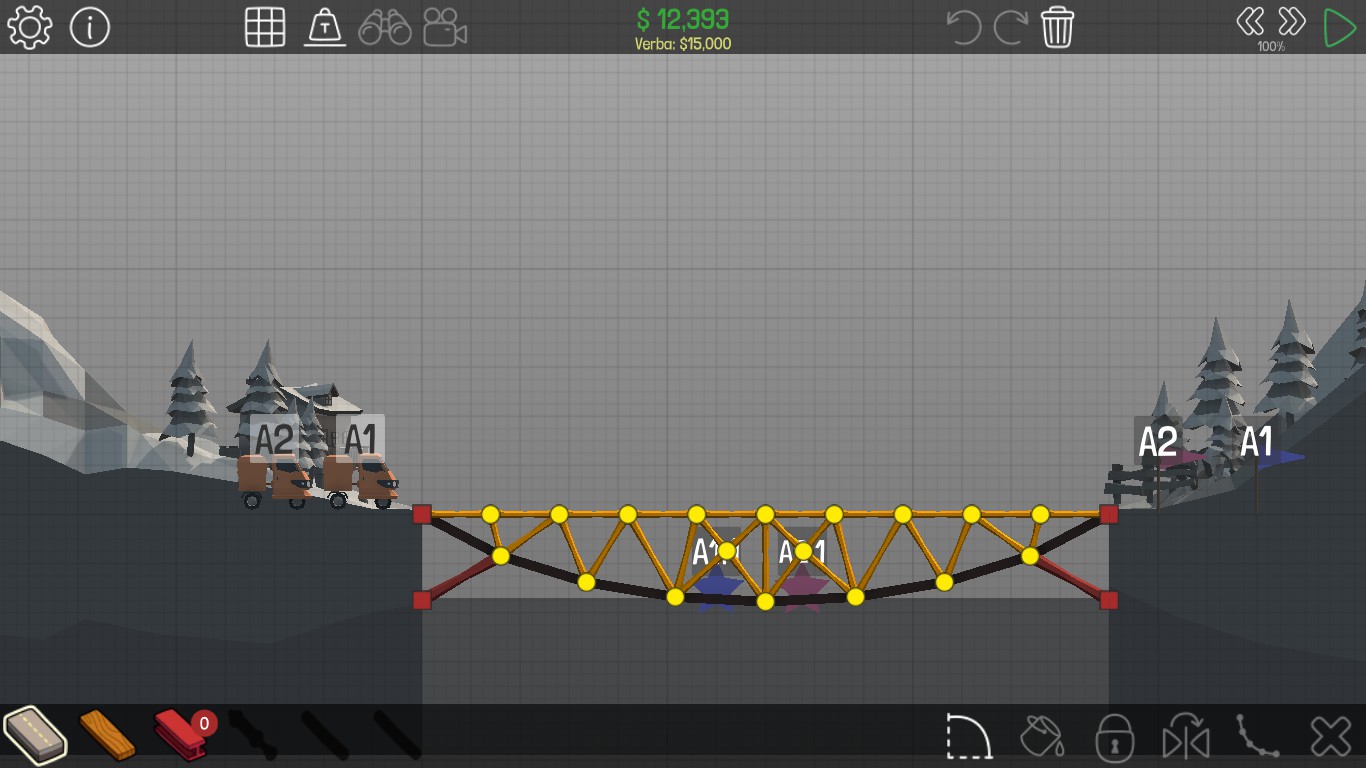
Bridge 3-1

Bridge 3-2
Bridge 3-3

Bridge 3-4

Bridge 3-5
Bridge 3-6

Bridge 3-7
Bridge 3-8

Bridge 3-9


Bridge 3-10

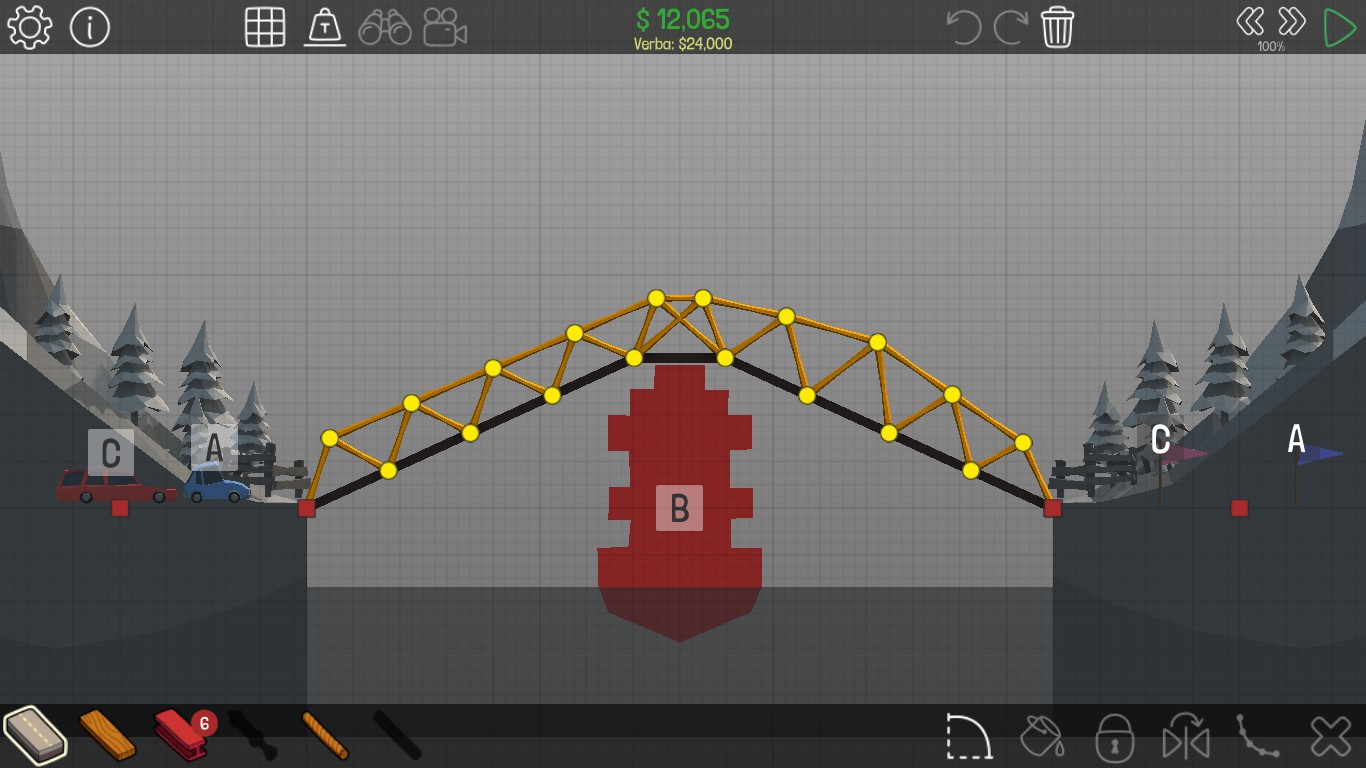
Bridge 3-11

Bridge 3-12


Bridge 3-13


Bridge 3-14


Bridge 3-15


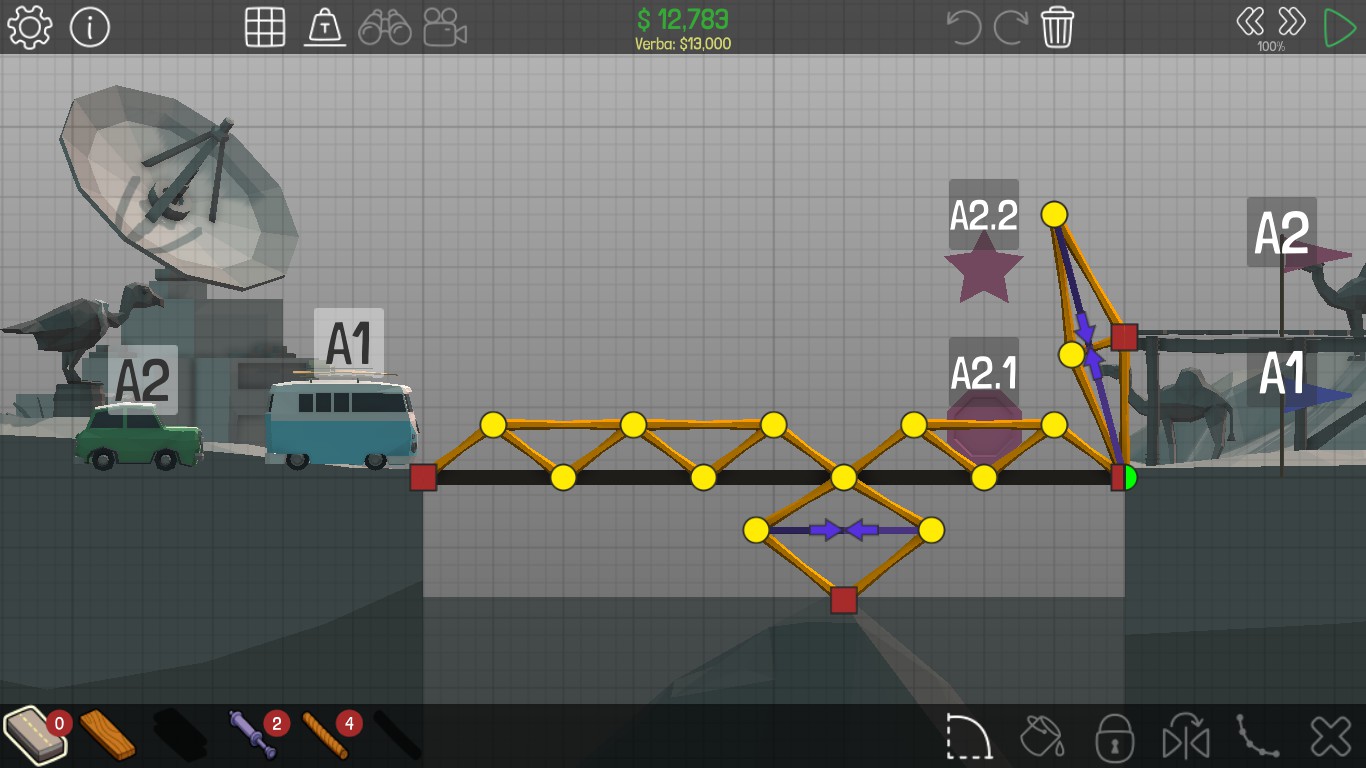
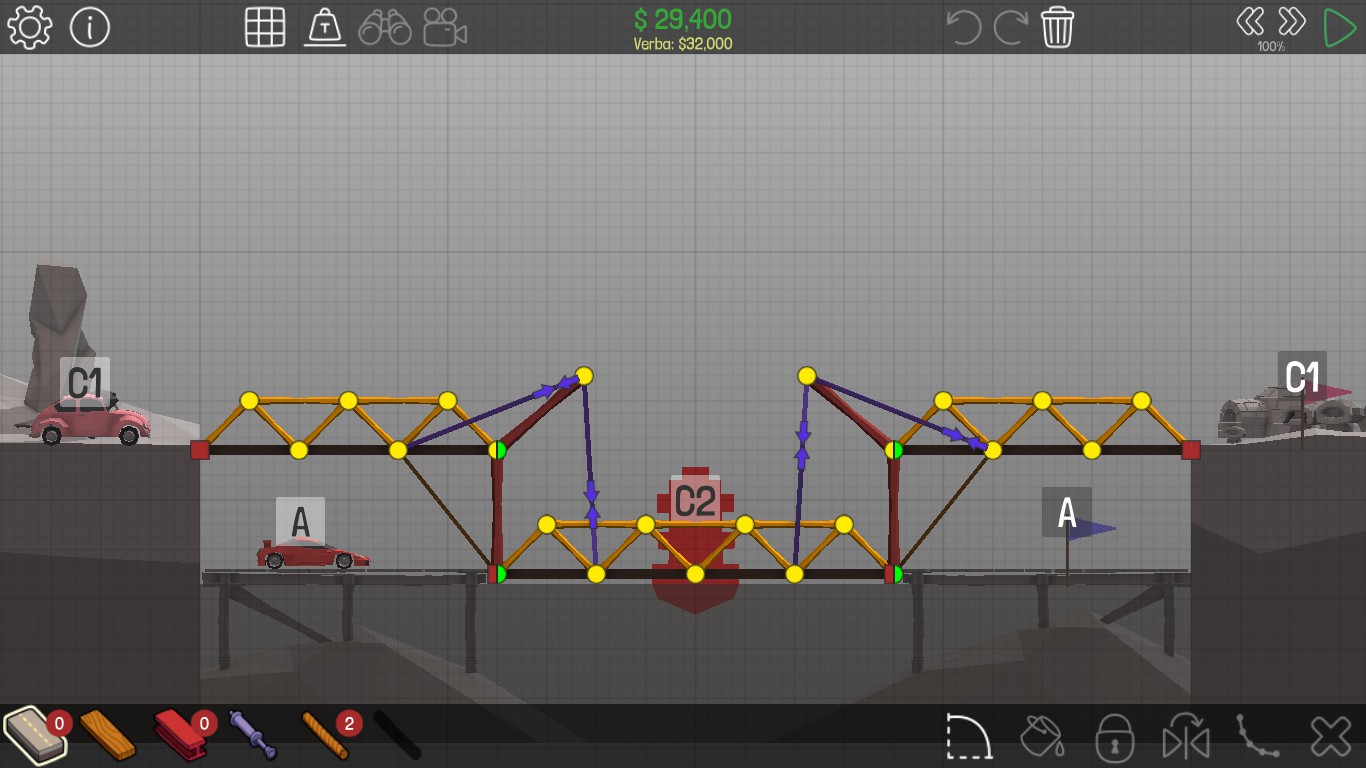
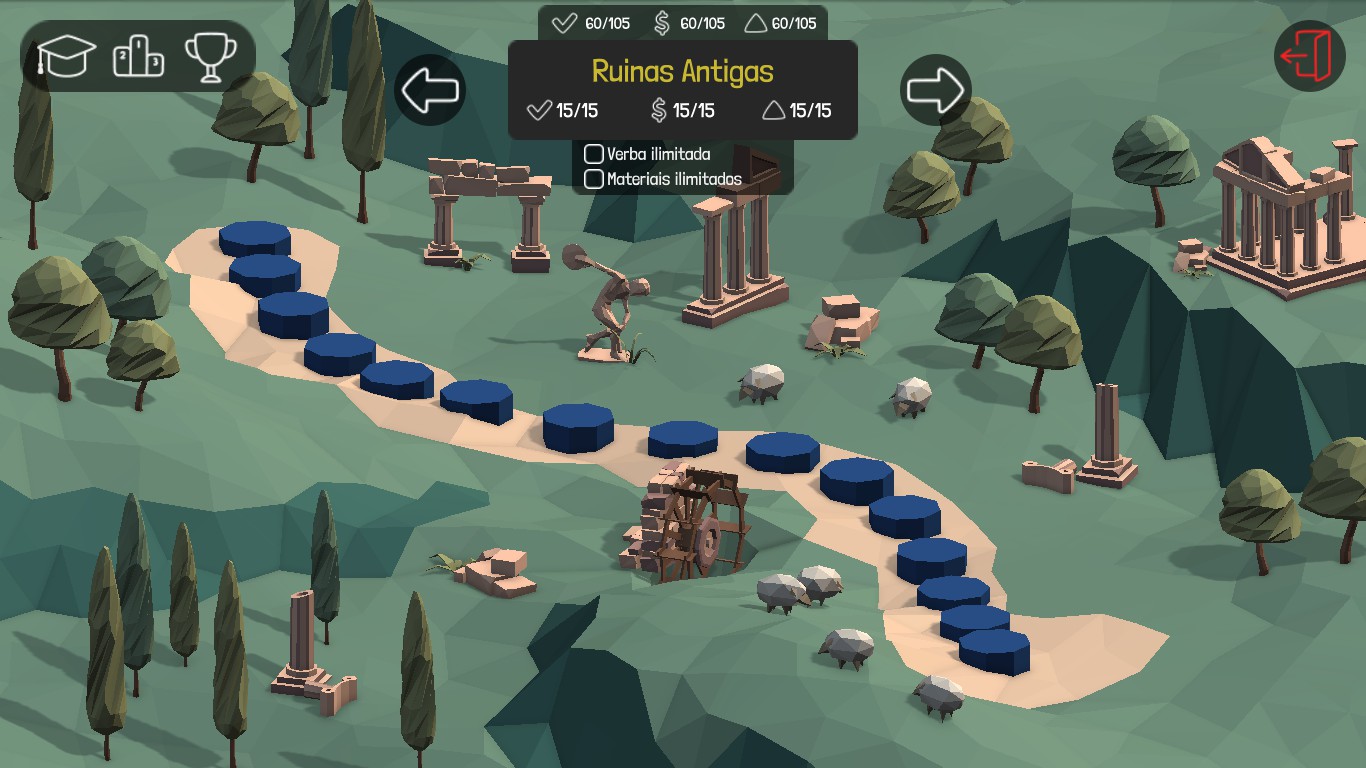
4 – Ancient Ruins, step by step 100%
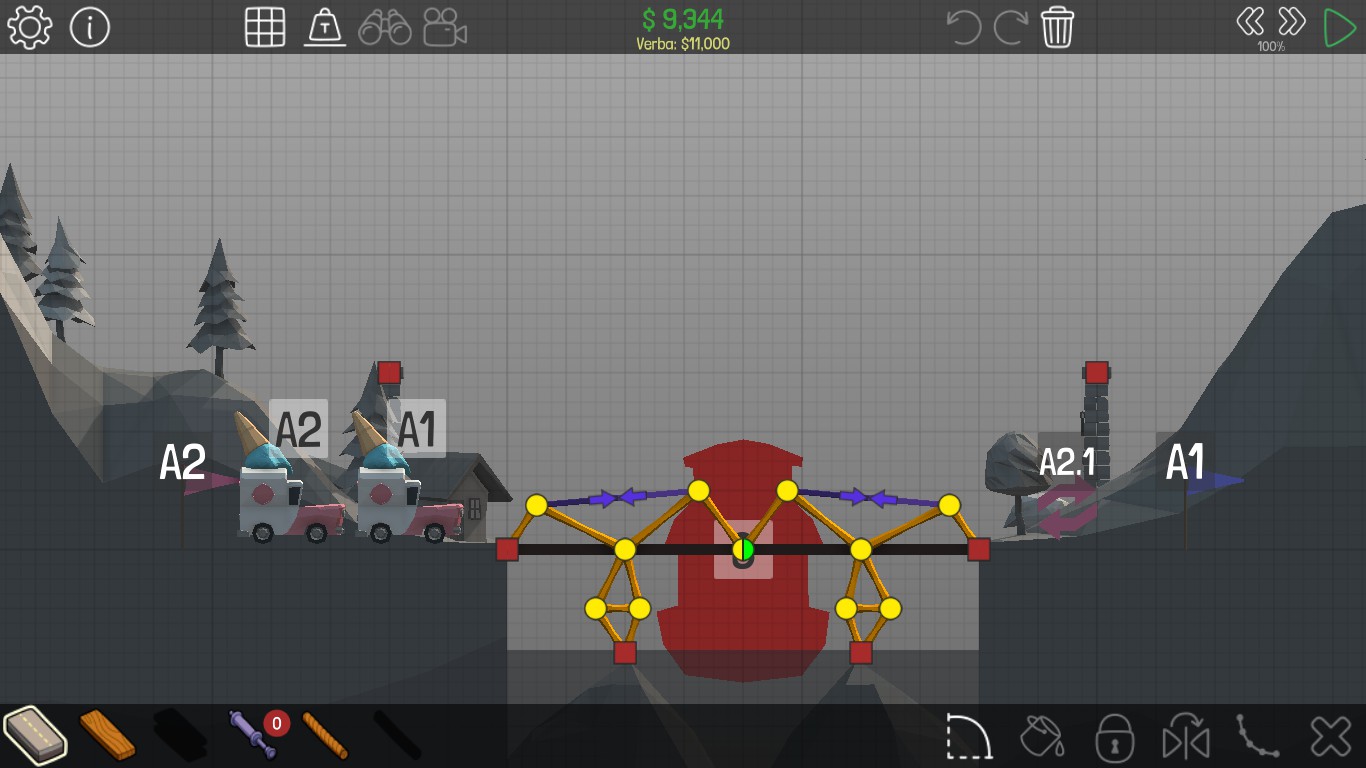
Bridge 4-1

Bridge 4-2

Bridge 4-3

Bridge 4-4


Bridge 4-5

Bridge 4-6

Bridge 4-7

Bridge 4-8

Bridge 4-9

Bridge 4-10


Bridge 4-11

Bridge 4-12

Bridge 4-13

Bridge 4-14

Bridge 4-15


5 – Land of the Golden Years, step by step 100%

Bridge 5-1


Bridge 5-2


Bridge 5-3

Bridge 5-4


Bridge 5-5

Bridge 5-6


Bridge 5-7

Bridge 5-8


Bridge 5-9


Bridge 5-10

Bridge 5-11

Bridge 5-12

Bridge 5-13


Bridge 5-14

Bridge 5-15


6 – Zen Gardens, step by step 100%

Bridge 6-1

Bridge 6-2


Bridge 6-3


Bridge 6-4


Bridge 6-5

Bridge 6-6


Bridge 6-7

Bridge 6-8


Bridge 6-9


Bridge 6-10


Bridge 6-11

Bridge 6-12


Bridge 6-13


Bridge 6-14


Bridge 6-15


7 – Tropical Paradise, step by step 100%

Bridge 7-1


Bridge 7-2


Bridge 7-3


Bridge 7-4

Bridge 7-5


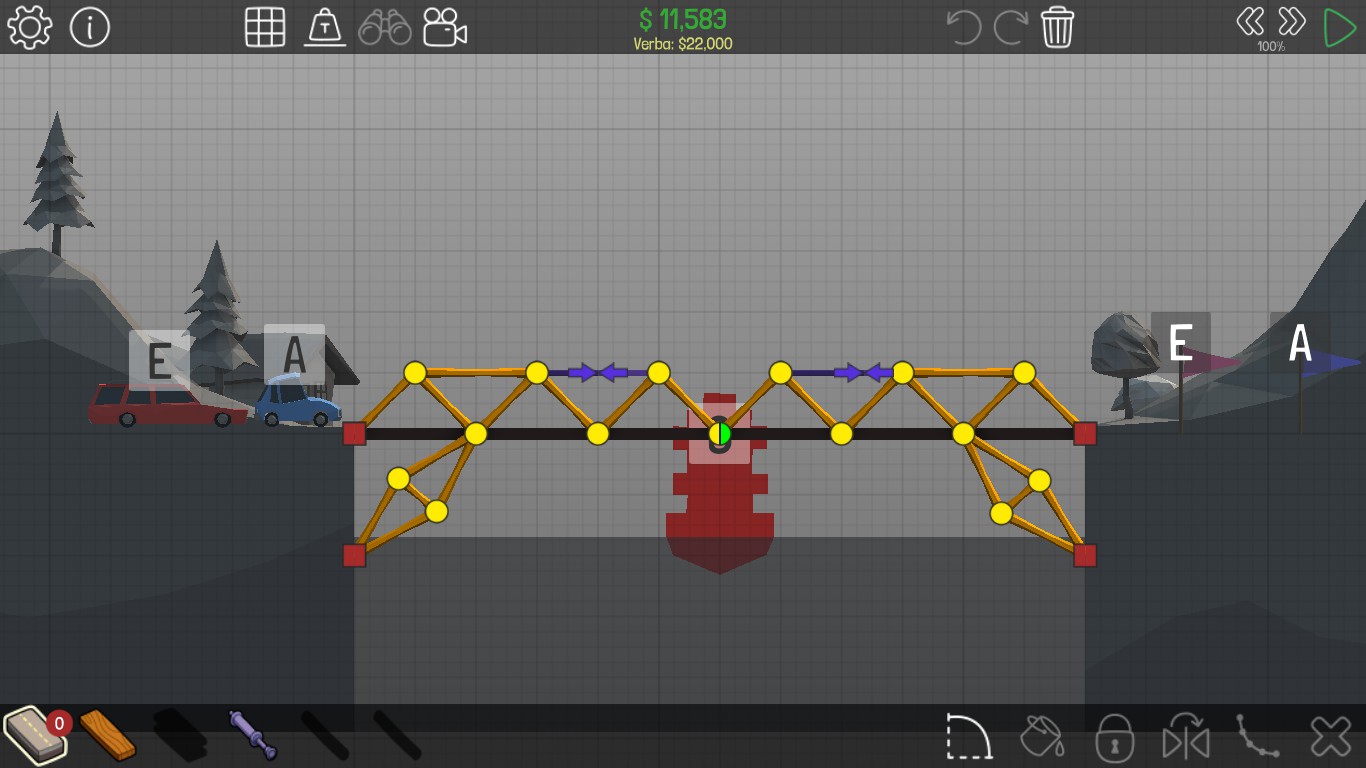
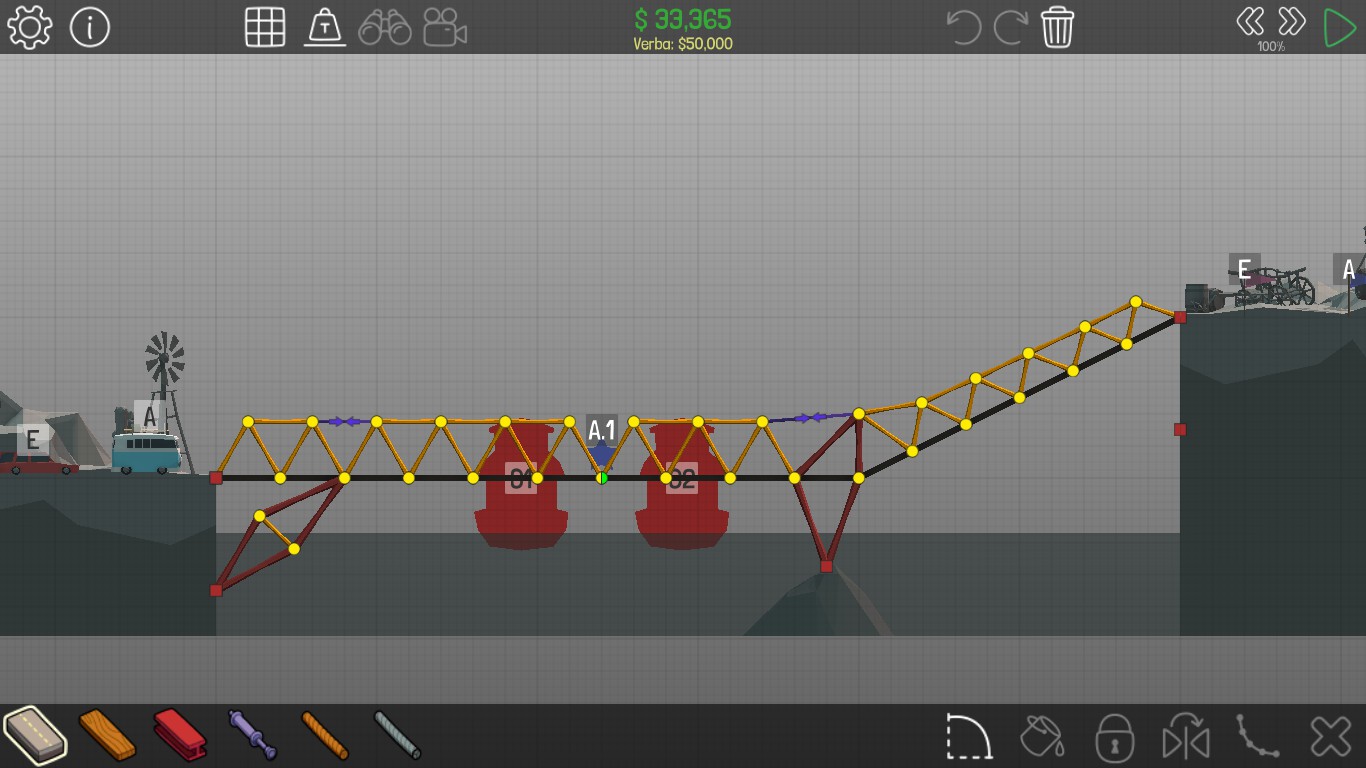
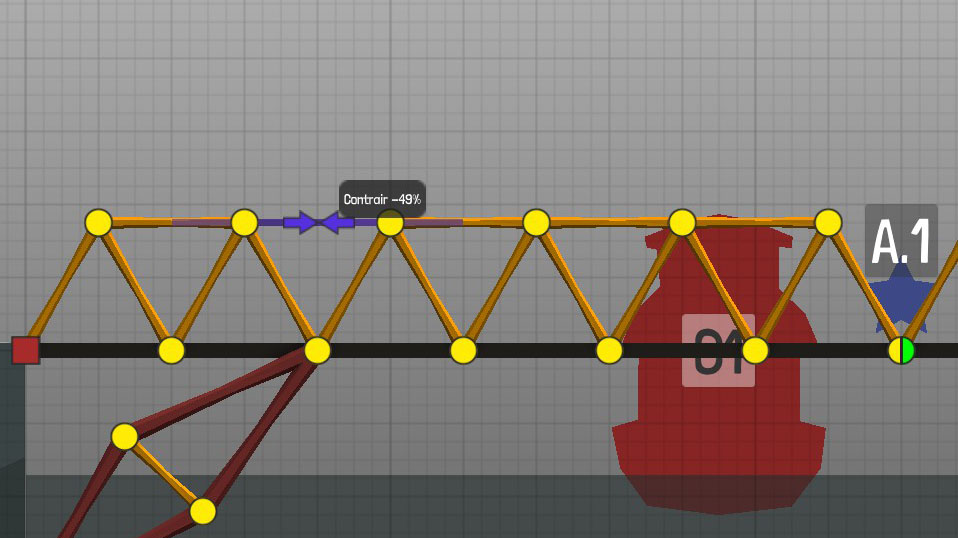
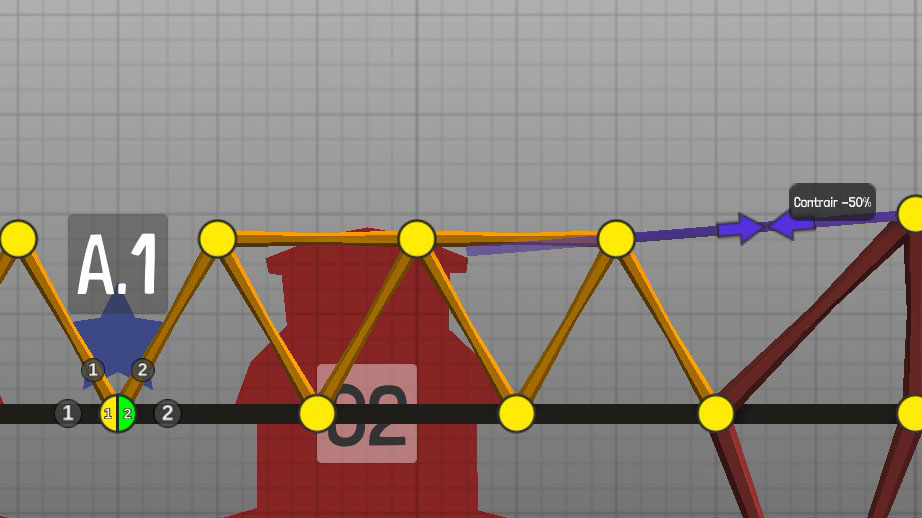
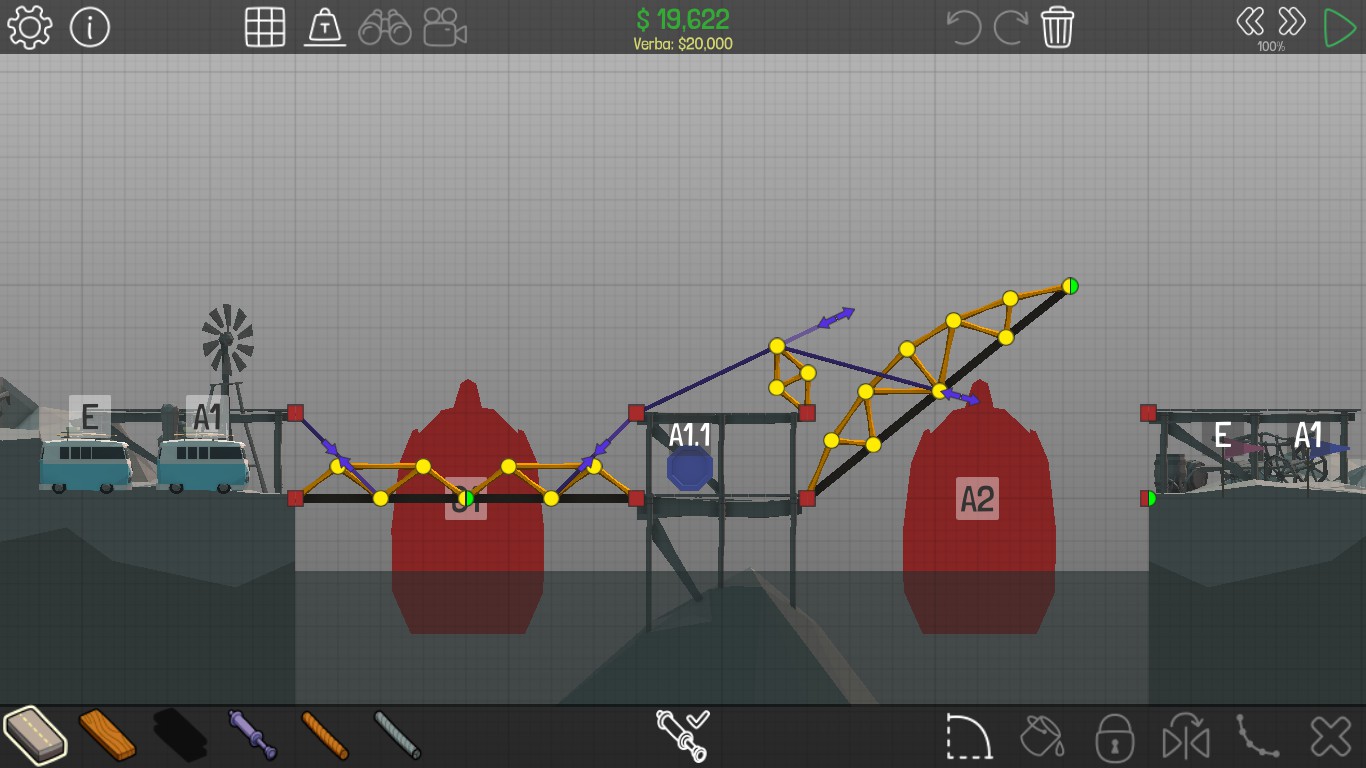
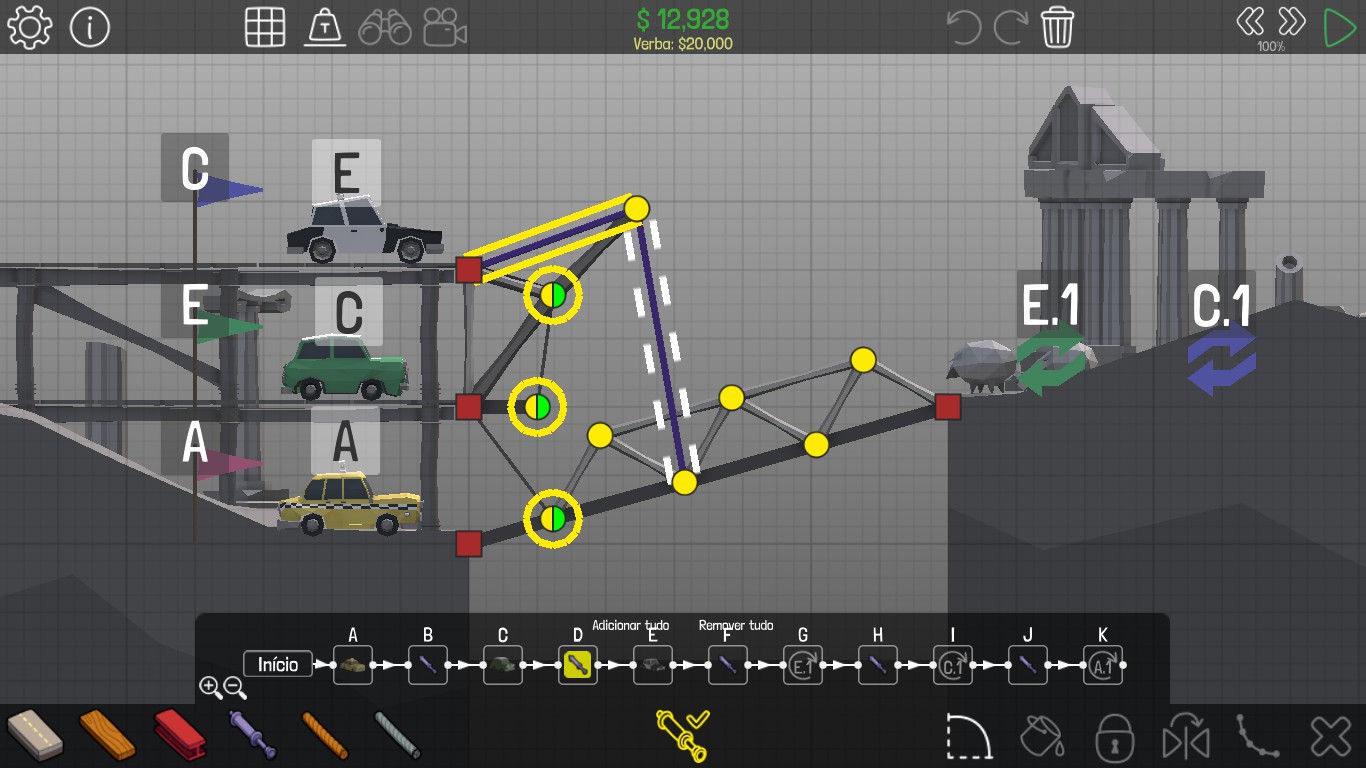
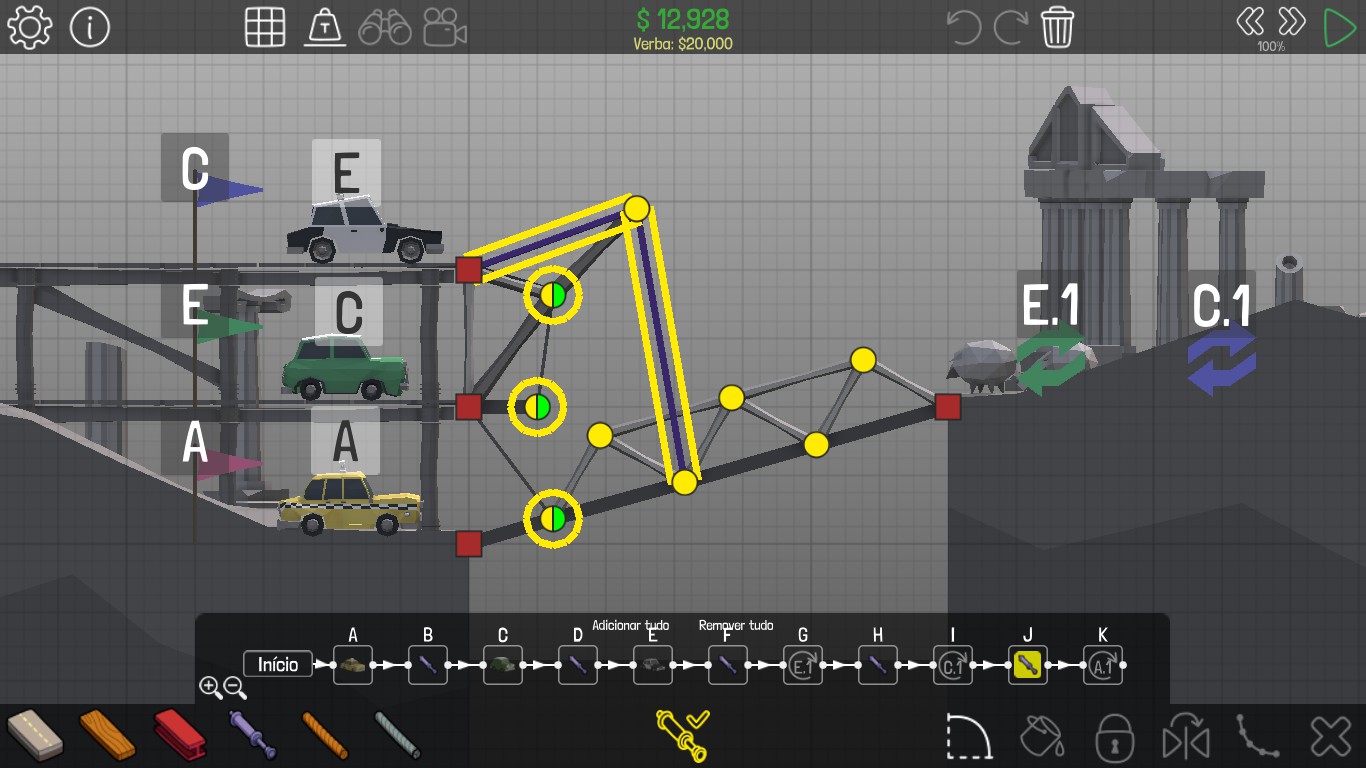
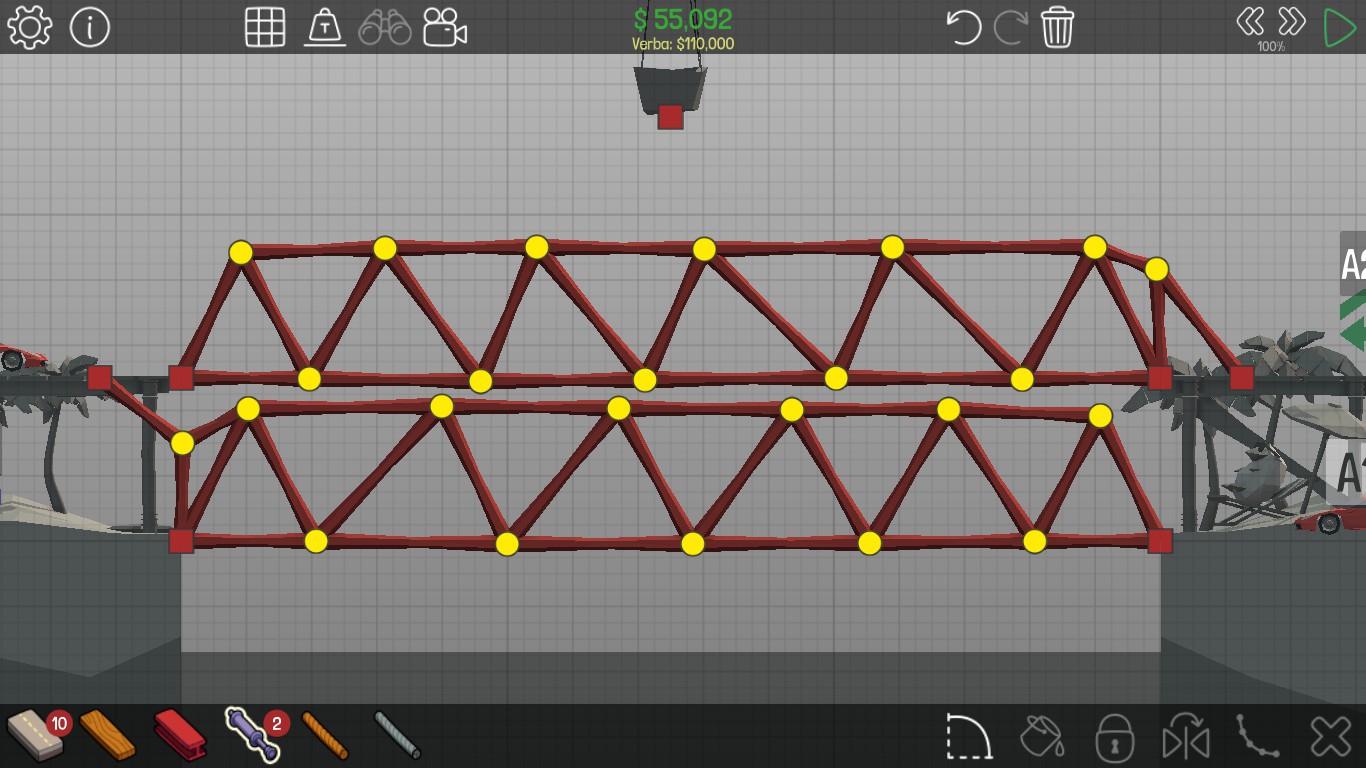
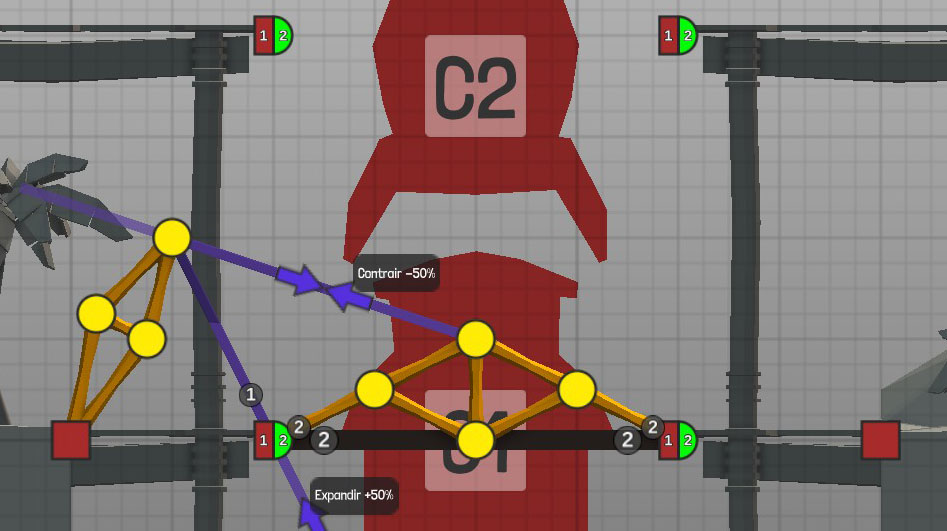
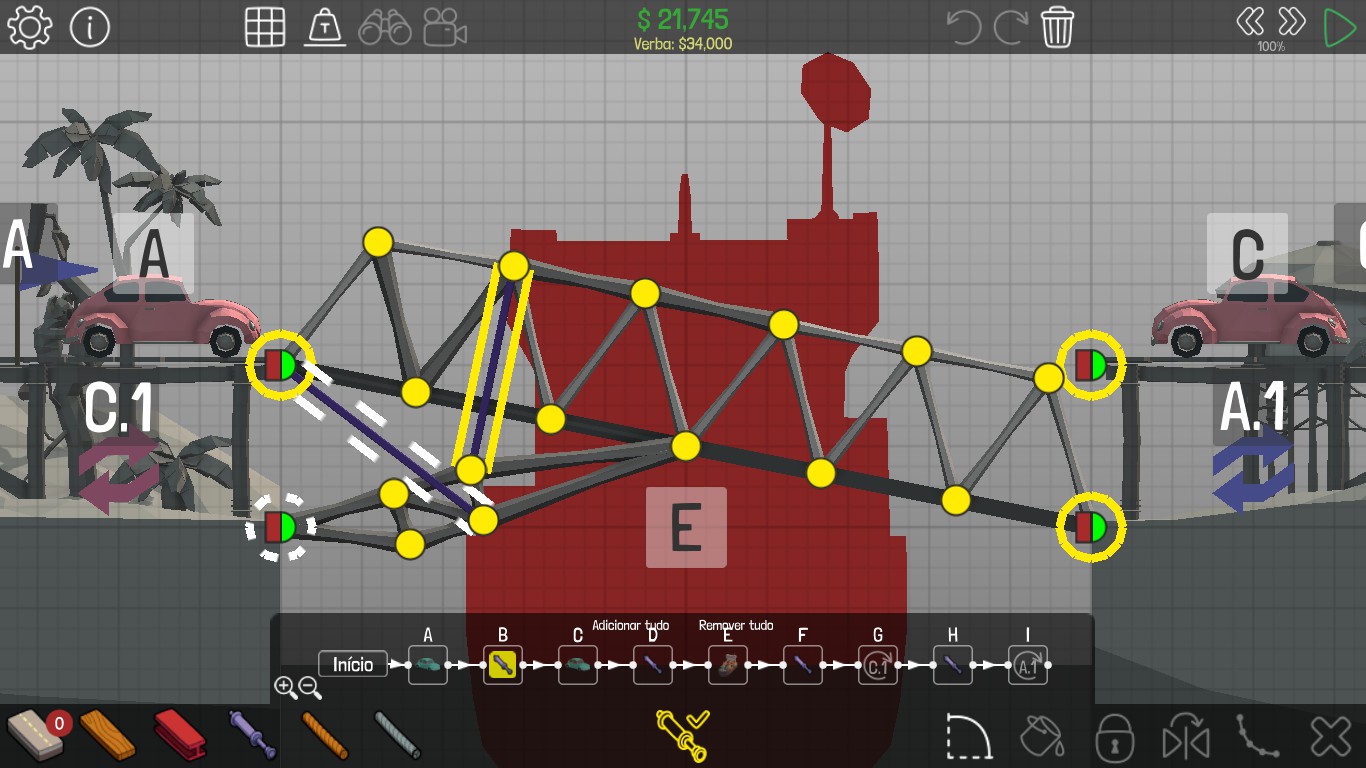
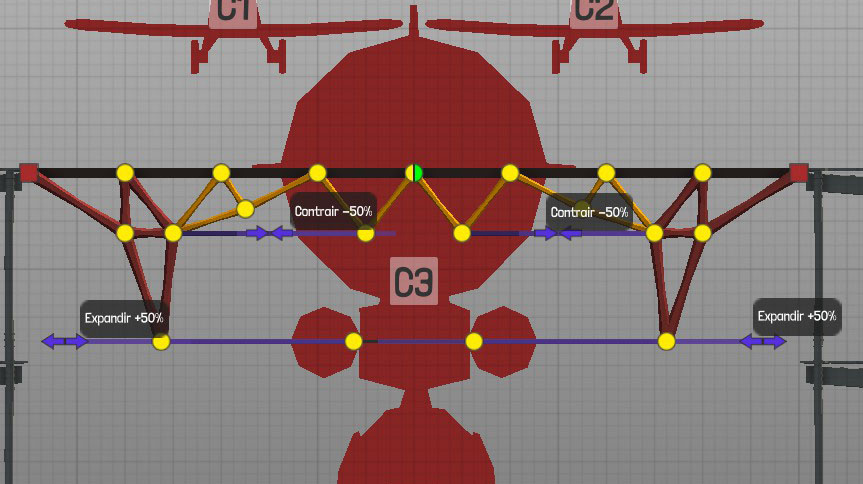
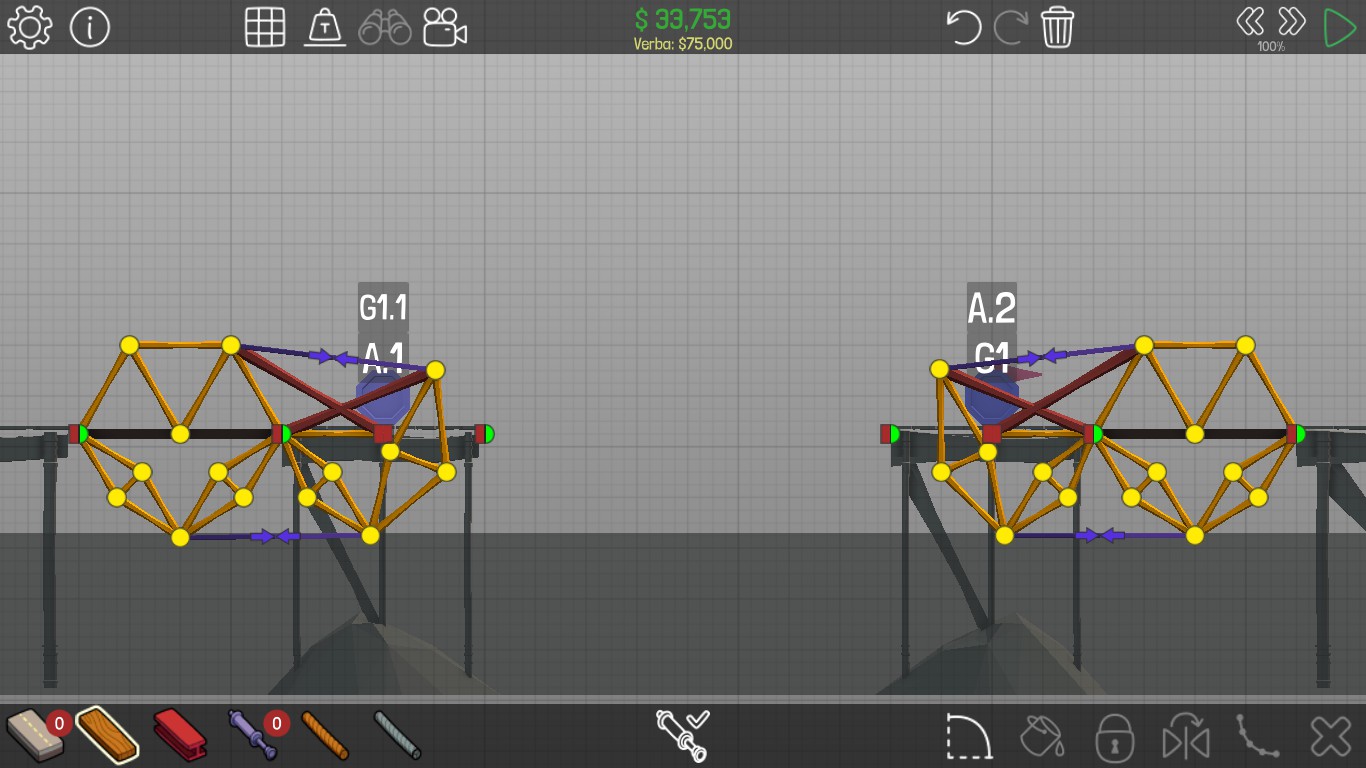
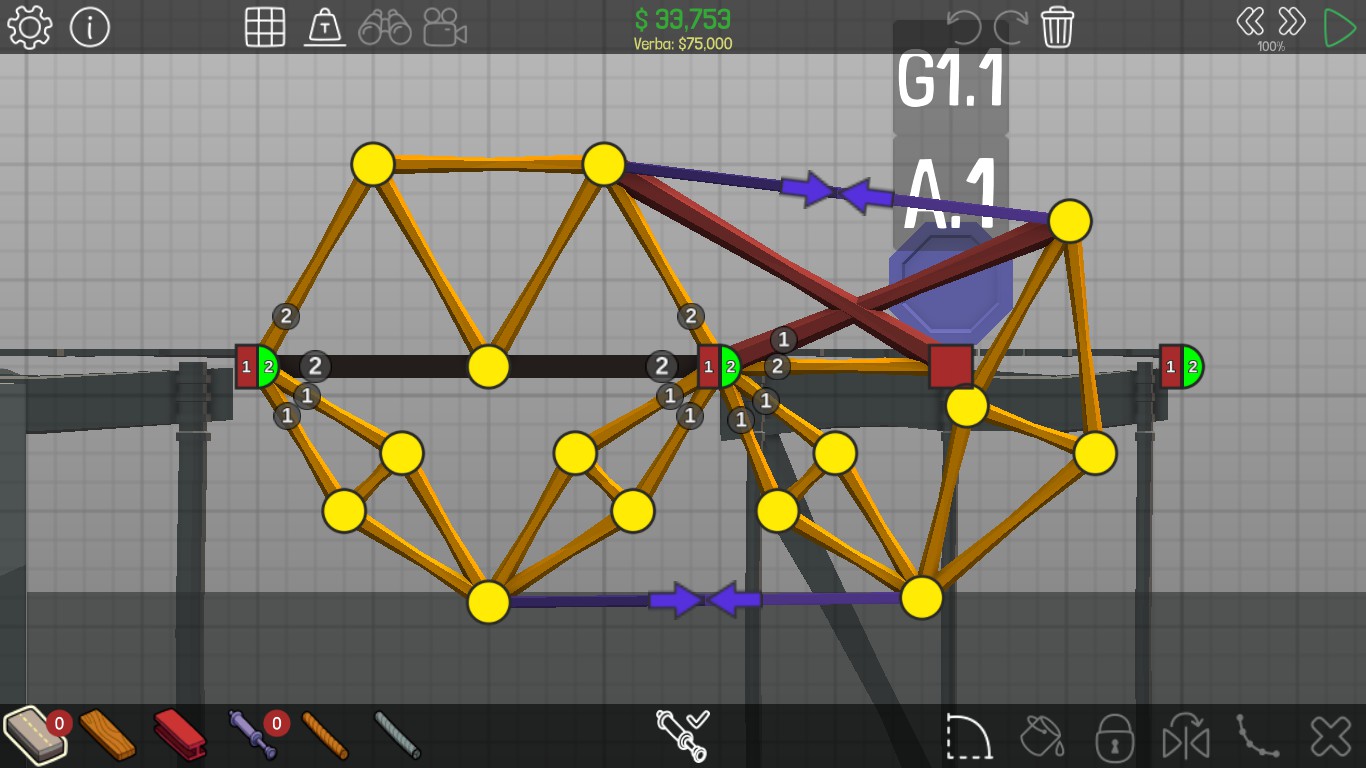
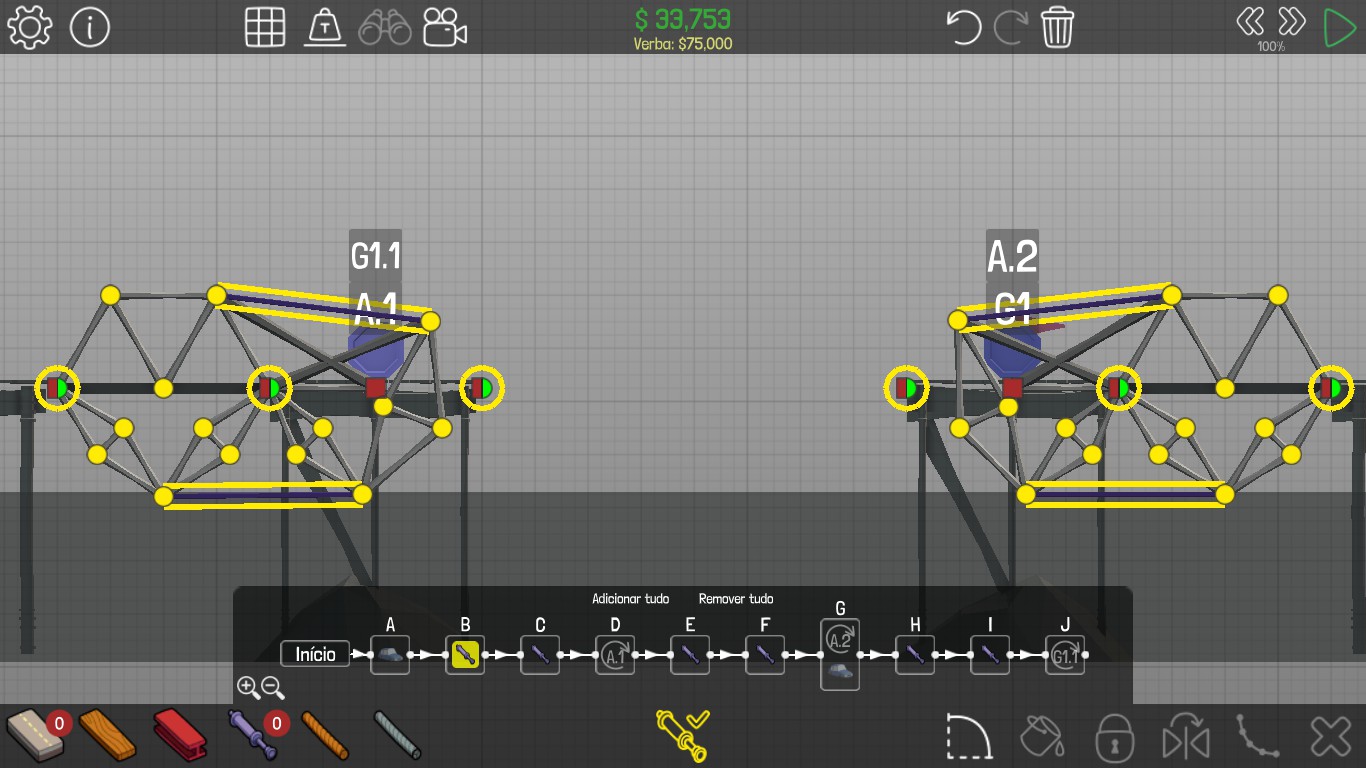
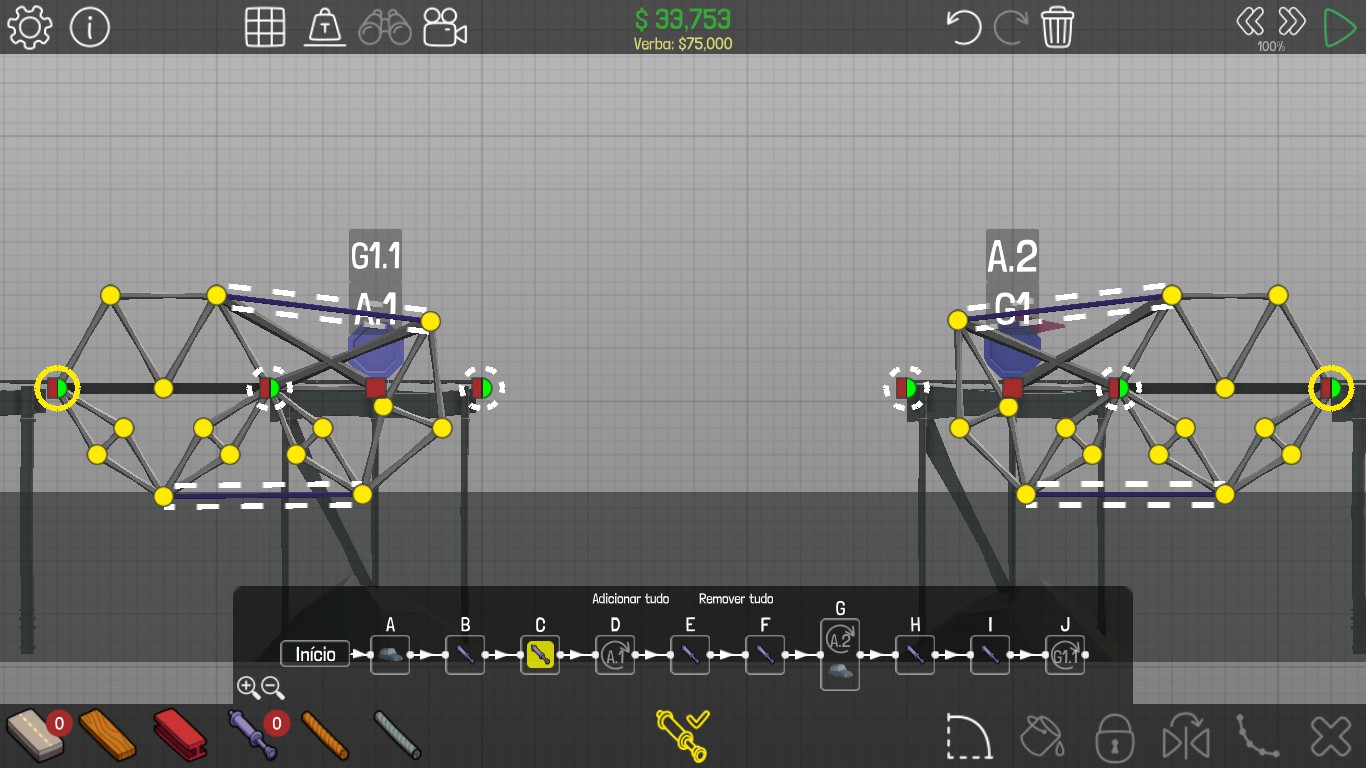
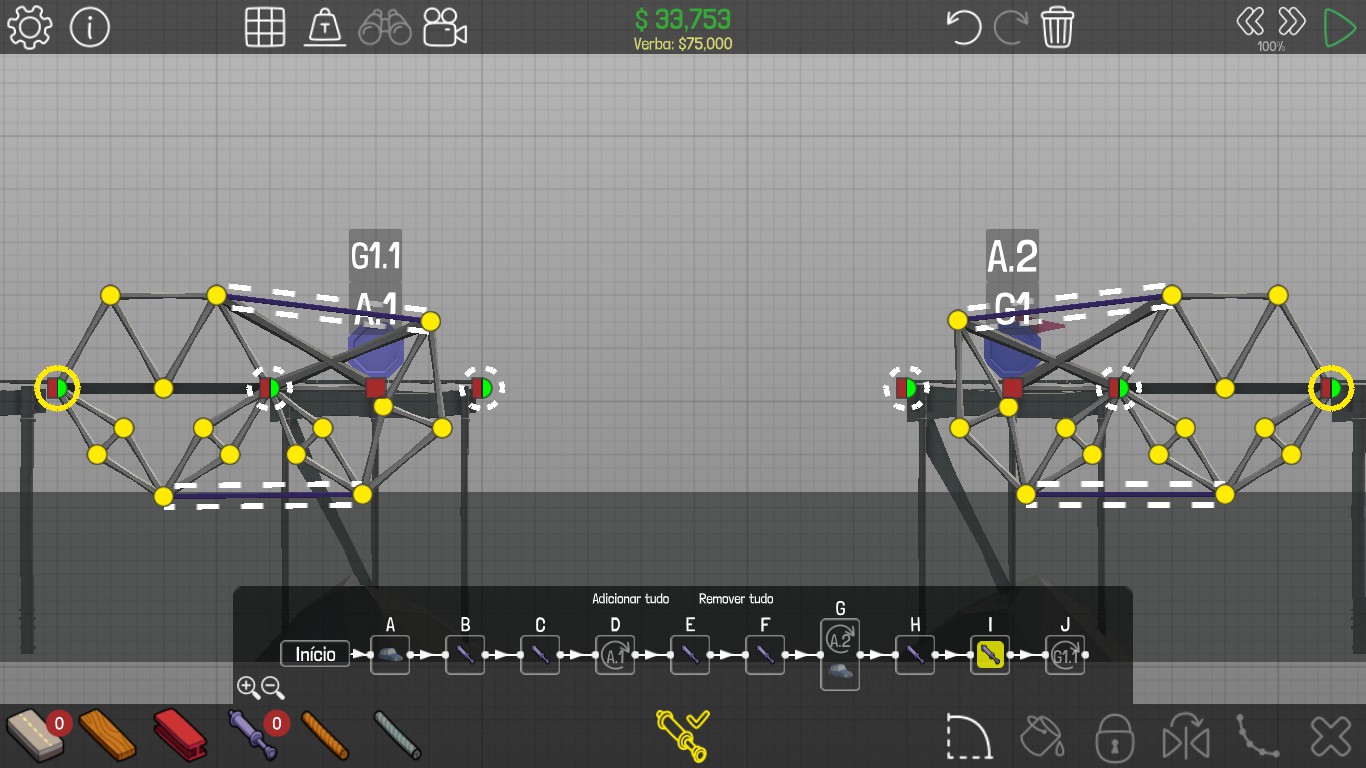
Bridge support structure:
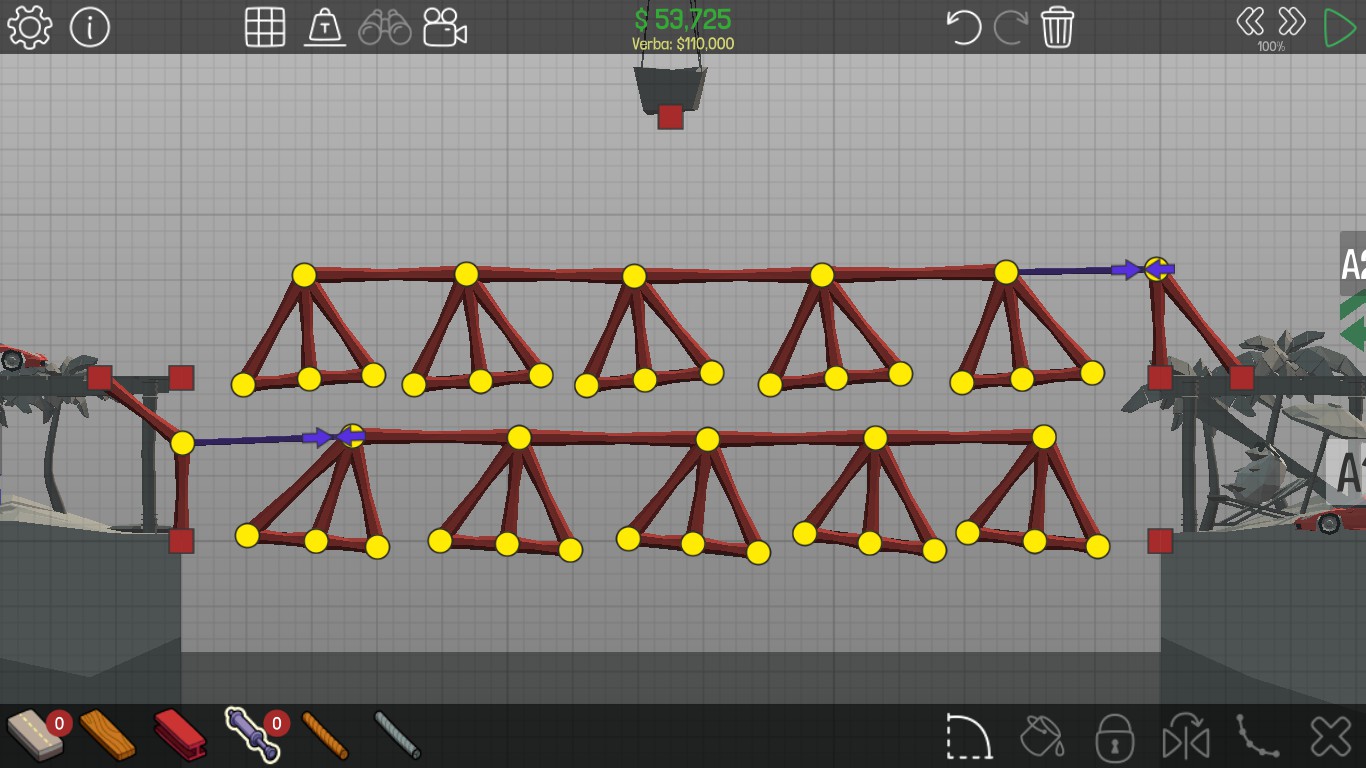
Moving part of the bridge:

Bridge 7-6


Bridge 7-7


Bridge 7-8

Bridge 7-9


Bridge 7-10


Bridge 7-11

Bridge 7-12

Bridge 7-13


Bridge 7-14


Bridge 7-15


References
Narsone. (2017). 3-5 Poly Bridge solución. Available in [link]. [consulted in December 21, 2017]
Zetta Byte. (2015). Poly Bridge Snow Drift 3-8 Swing Jumps. Available in . [consulted in December 21, 2017]
Basement Of Operations. (2017). Poly Bridge 3-11 Tall Bridge. Available in . [consulted in December 21, 2017]
Zautos Gaming. (2015). Poly Bridge Solution [42m Balloon Jump 4-1]. Available in . [consulted in December 24, 2017]
Zetta Byte. (2017). Poly Bridge Ancient Ruins 4-7 Fork Jump April 2017. Available in . [consulted in December 24, 2017]
Narsone. (2017). 4-8 Poly Bridge solución. Available in . [consulted in December 24, 2017]
Zetta Byte. (2016). Poly Bridge Ancient Ruins 4-9 Falling Tower. Available in . [consulted in December 24, 2017]
GettingRekt. (2016). Poly Bridge – Level 4-10. Available in . [consulted in December 24, 2017]
Zetta Byte. (2016). Poly Bridge 80s Fun Land 5-5 Low Budget Overpass. Available in . [consulted in December 25, 2017]
Zetta Byte. (2015). Poly Bridge Fun Land 5-7 14m Double Jump. Available in . [consulted in December 25, 2017]
Basement Of Operations. (2017). Poly Bridge 5-7 Double Jump. Available in . [consulted in December 25, 2017]
BasiBas. (2016). Poly Bridge 5-8: Reverse Criss Cross. Available in . [consulted in December 26, 2017]
BasiBas. (2016). Poly Bridge 5-9: Double Deck Lift. Available in https://www.youtube.com/watch?v=rbbcXRVBQVc. [consulted in December 26, 2017]
Zetta Byte. (2015). Poly Bridge Fun Land 5-10 24m Double Drawbridge. Available in . [consulted in December 26, 2017]
Zetta Byte. (2016). Poly Bridge 80s Fun Land 5-15 Collision Course. Available in . [consulted in December 26, 2017]
NAG. (2016). Poly Bridge 6-3: Triple Dump. Available in . [consulted in December 27, 2017]
Basement Of Operations. (2017). Poly Bridge 6-4 Two by Two. Available in . [consulted in December 27, 2017]
jazevo93. (2017). Poly Bridge 6-7 (38k). Available in . [consulted in December 28, 2017]
Basement Of Operations. (2017). Poly Bridge 6-9 Elevator. Available in . [consulted in December 28, 2017]
Zautos Gaming. (2016). Poly Bridge 3 Solutions [A Place For Everything 6-9]. Available in . [consulted in December 28, 2017]
이호근. (2017). Poly Bridge 6-12. Available in . [consulted in December 28, 2017]
Zetta Byte. (2017). Poly Bridge Zen Gardens 6-13 Six Pack April 2017. Available in . [consulted in December 28, 2017]
Zetta Byte. (2017). Poly Bridge Zen Gardens 6-14 Criss Cross Chaos April 2017. Available in . [consulted in December 28, 2017]
Narsone. (2017). 7-1 Poly Bridge solución. Available in . [consulted in January 3, 2018]
Zetta Byte. (2016). Poly Bridge Tropical Paradise 7-2 Three Boats One Stone. Available in . [consulted in January 4, 2018]
Zetta Byte. (2016). Poly Bridge Tropical Paradise 7-3 Plough Ahead. Available in . [consulted in January 4, 2018]
Narsone. (2017). 7-4 Poly Bridge solución. Available in . [consulted in January 5, 2018]
Narsone. (2017). 7-5 Poly Bridge solución. Available in . [consulted in January 5, 2018]
Zautos Gaming. (2016). Poly Bridge 3 Solutions [Tight Fit 7-6]. Available in . [consulted in January 6, 2018]
Zautos Gaming. (2016). Poly Bridge 3 Solutions [Return of the Bridge 7-7]. Available in . [consulted in January 6, 2018]
Petr Večeřa. (2016). Poly Bridge – Suspended Bridge [ 7 – 8 ]. Available in . [consulted in January 6, 2018]
Narsone. (2017). 7-9 Poly Bridge solución. Available in . [consulted in January 7, 2018]
Fishezzz~. (2016). Poly Bridge | 7-10: Flip Two. Available in . [consulted in January 7, 2018]
gallery drycactus. (2016). 7-11: Swing, Swing a Bridge. Available in [link]. [consulted in January 7, 2018]
Zautos Gaming. (2017). Poly Bridge 3 Solutions [Followship of the jump 7-12]. Available in . [consulted in January 8, 2018]
Narsone. (2017). 7-13 Poly Bridge solución. Available in . [consulted in January 8, 2018]
Zautos Gaming. (2016). Poly Bridge 3 Solutions [The Two Towers 7-15]. Available in . [consulted in January 9, 2018]