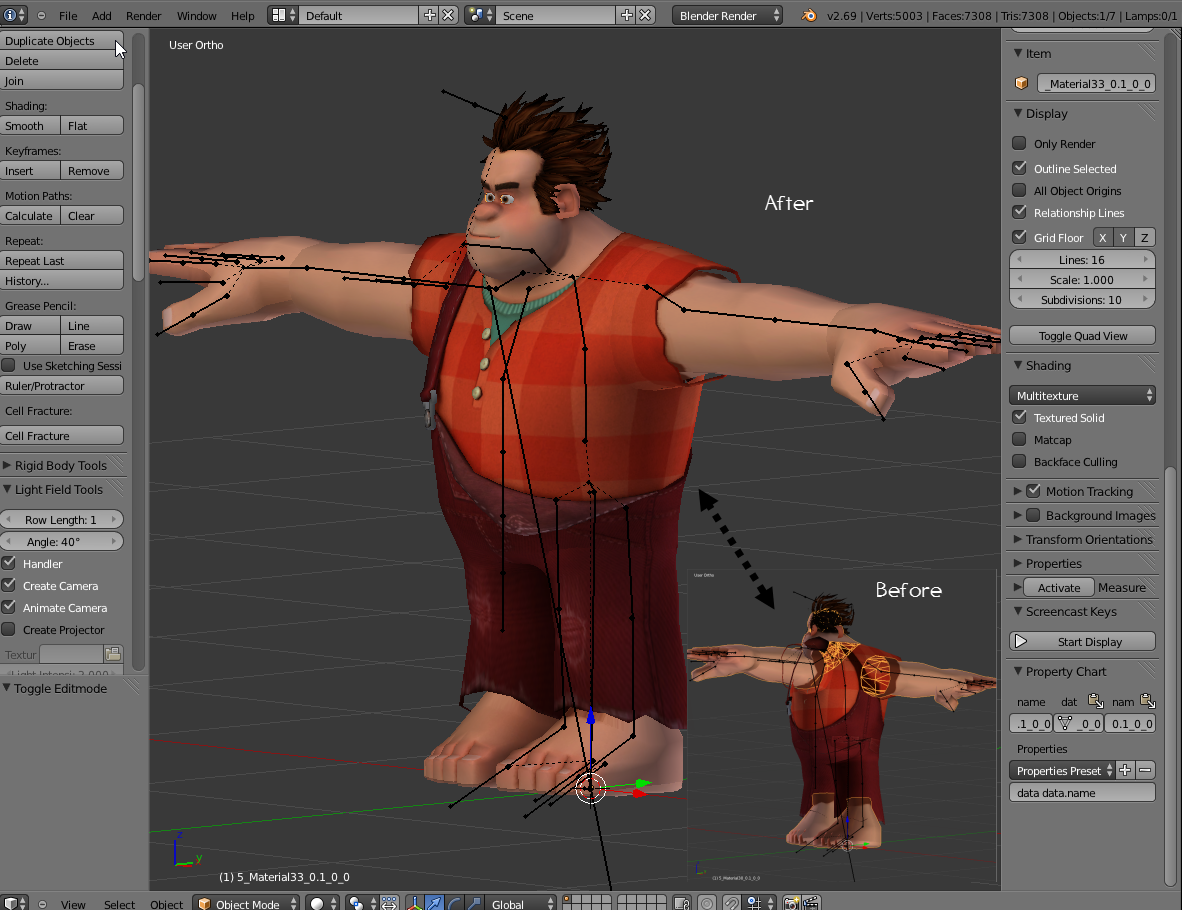
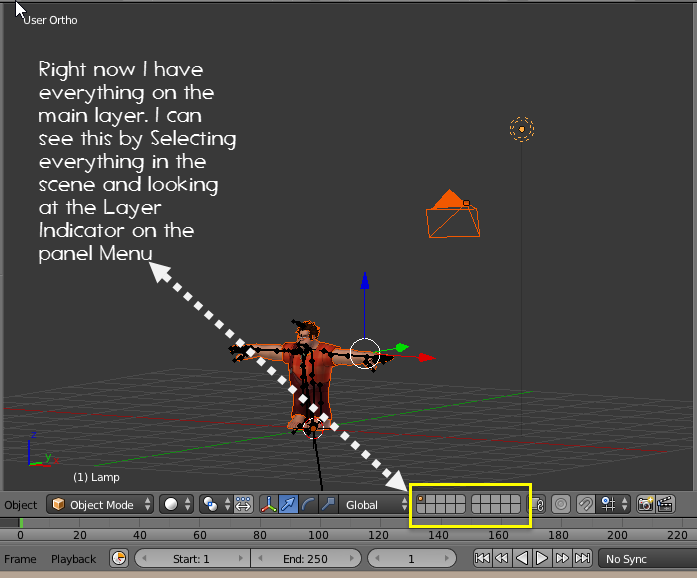
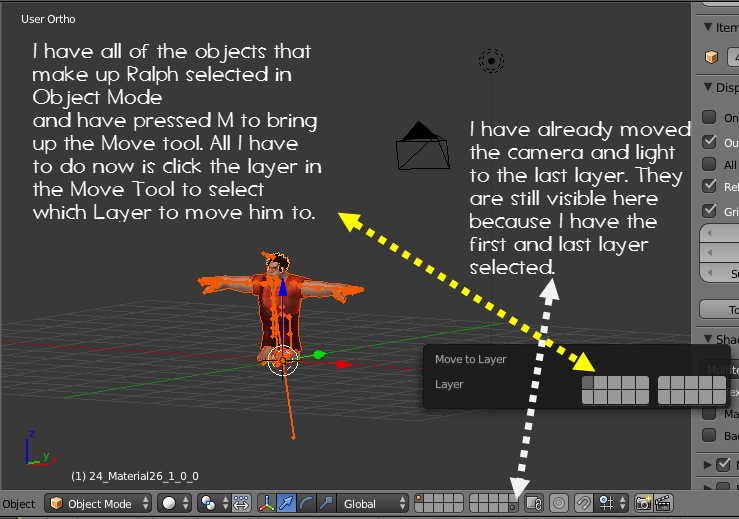
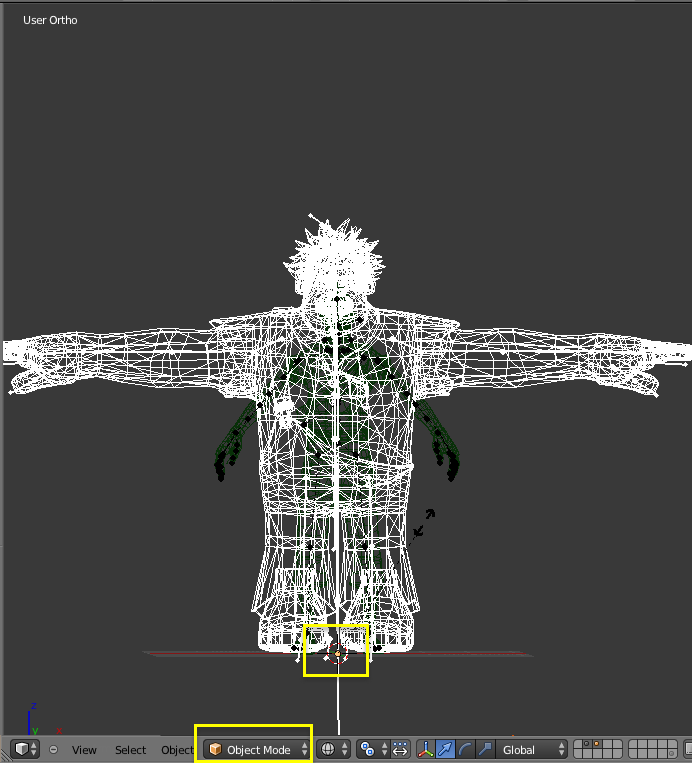
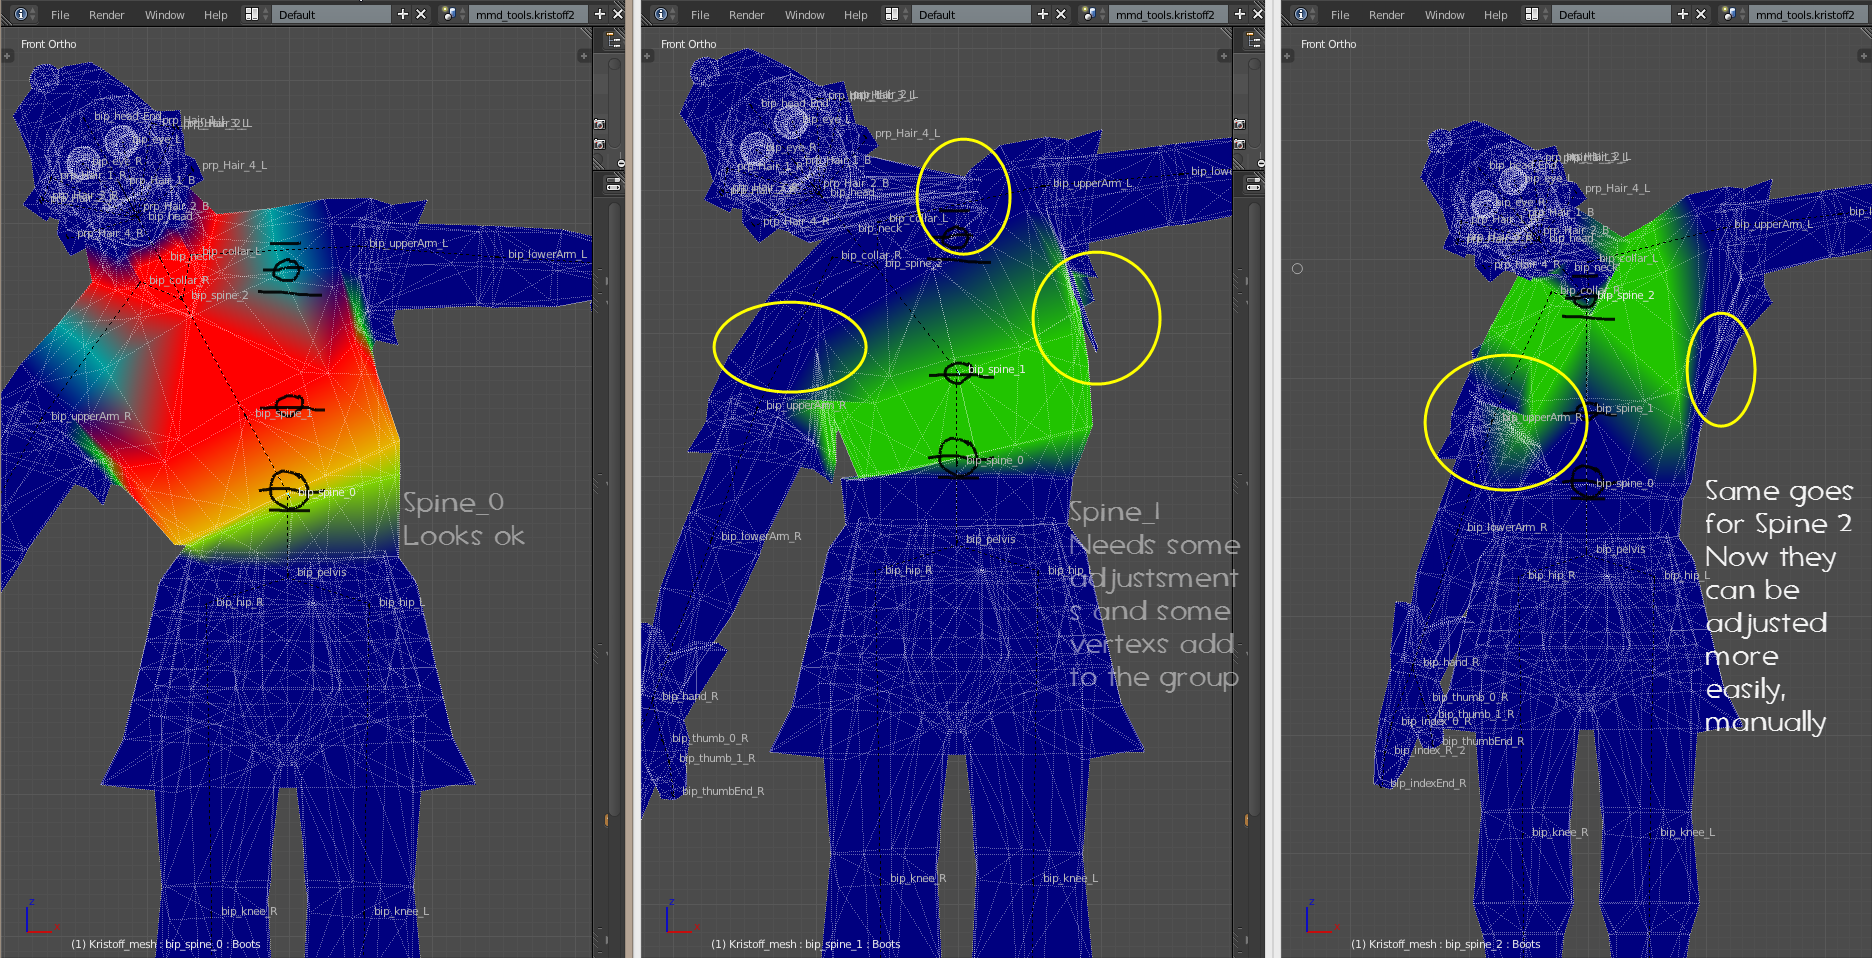
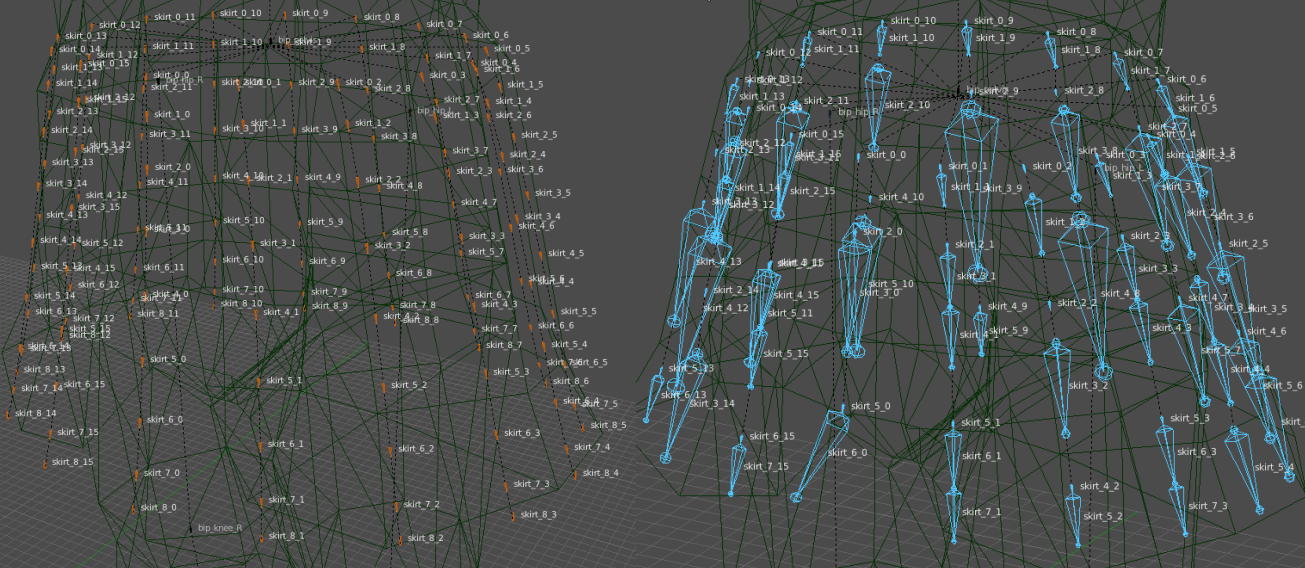
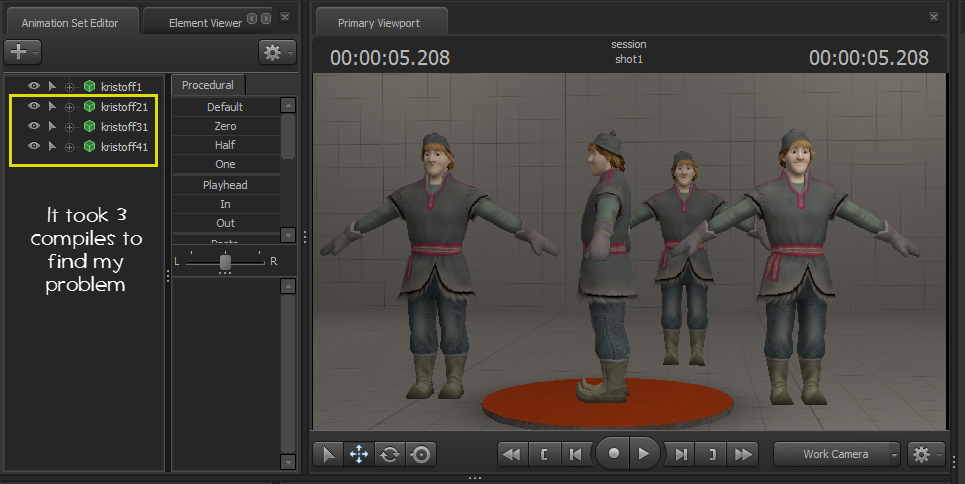
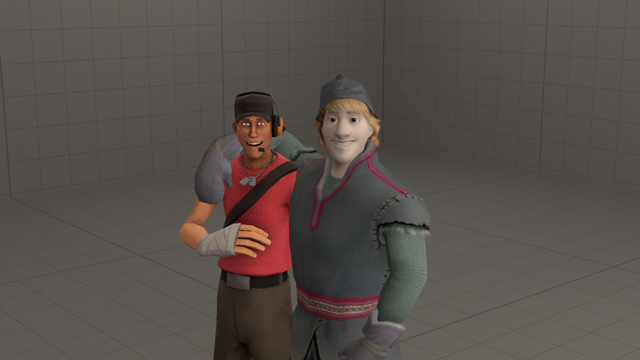
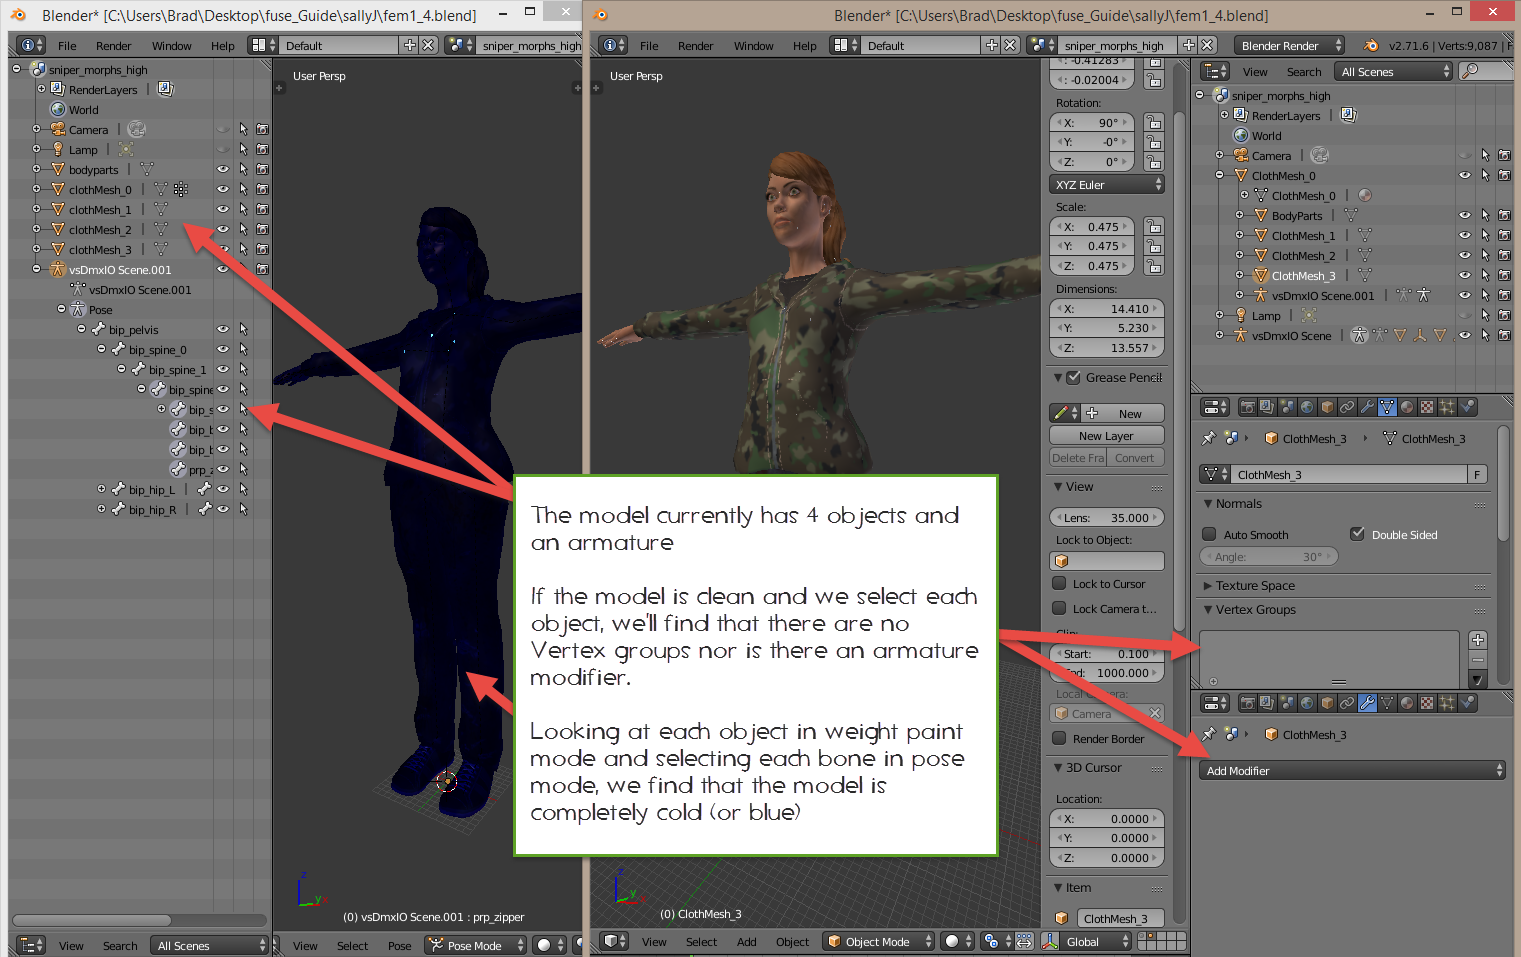
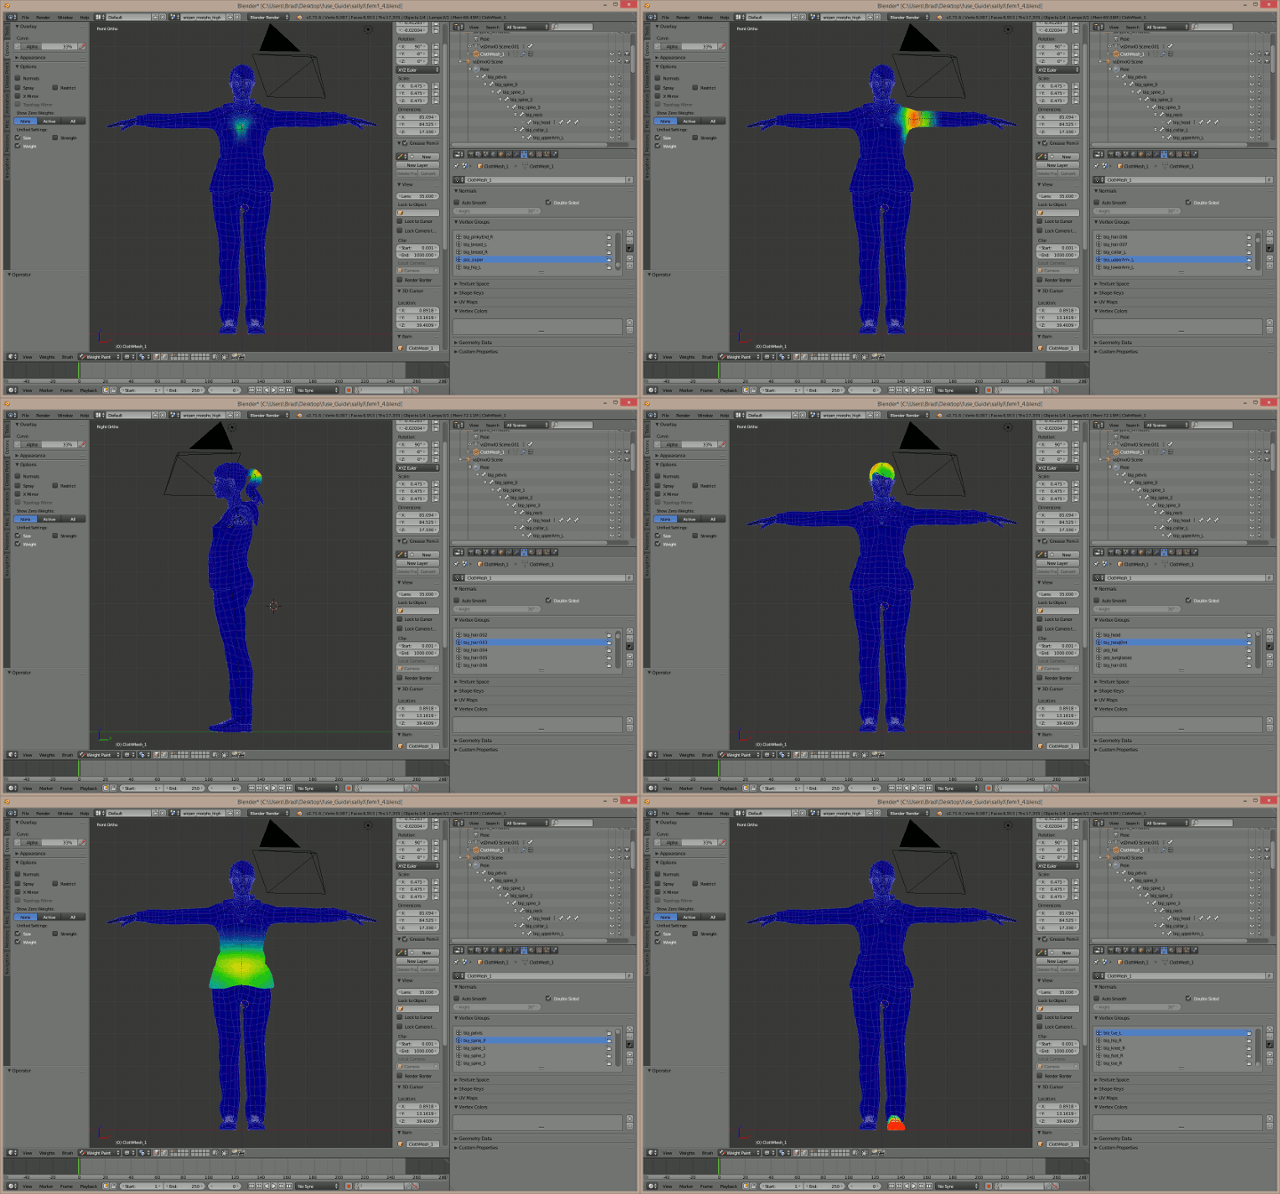
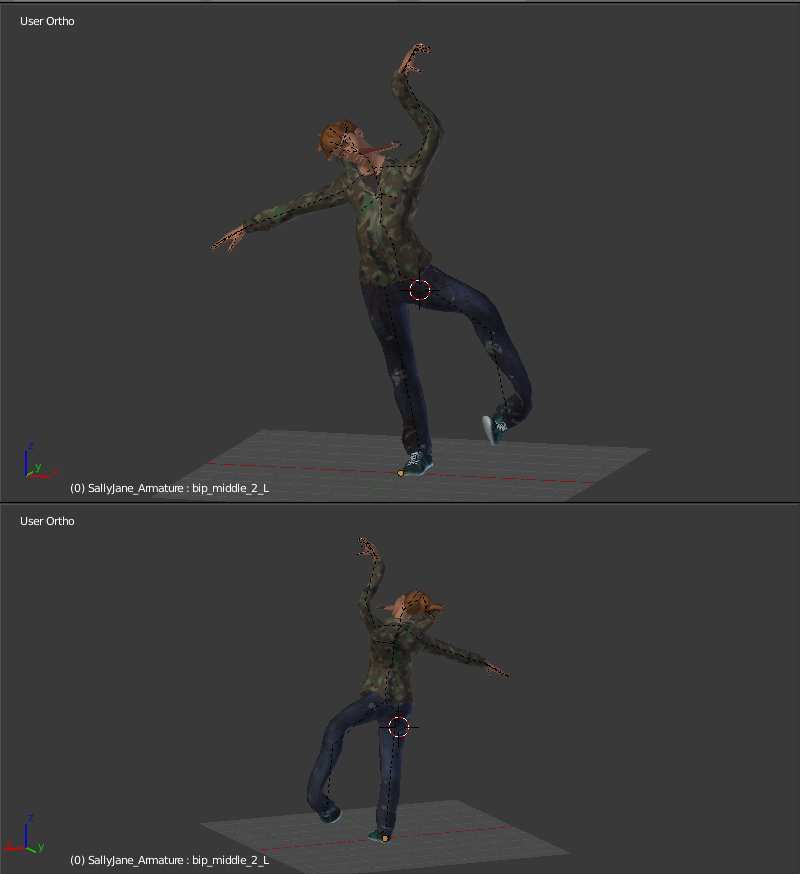
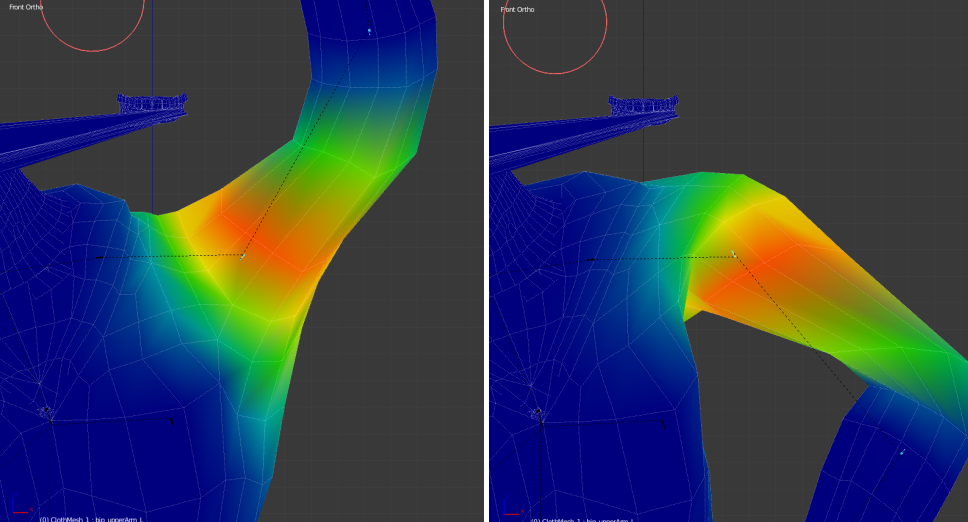
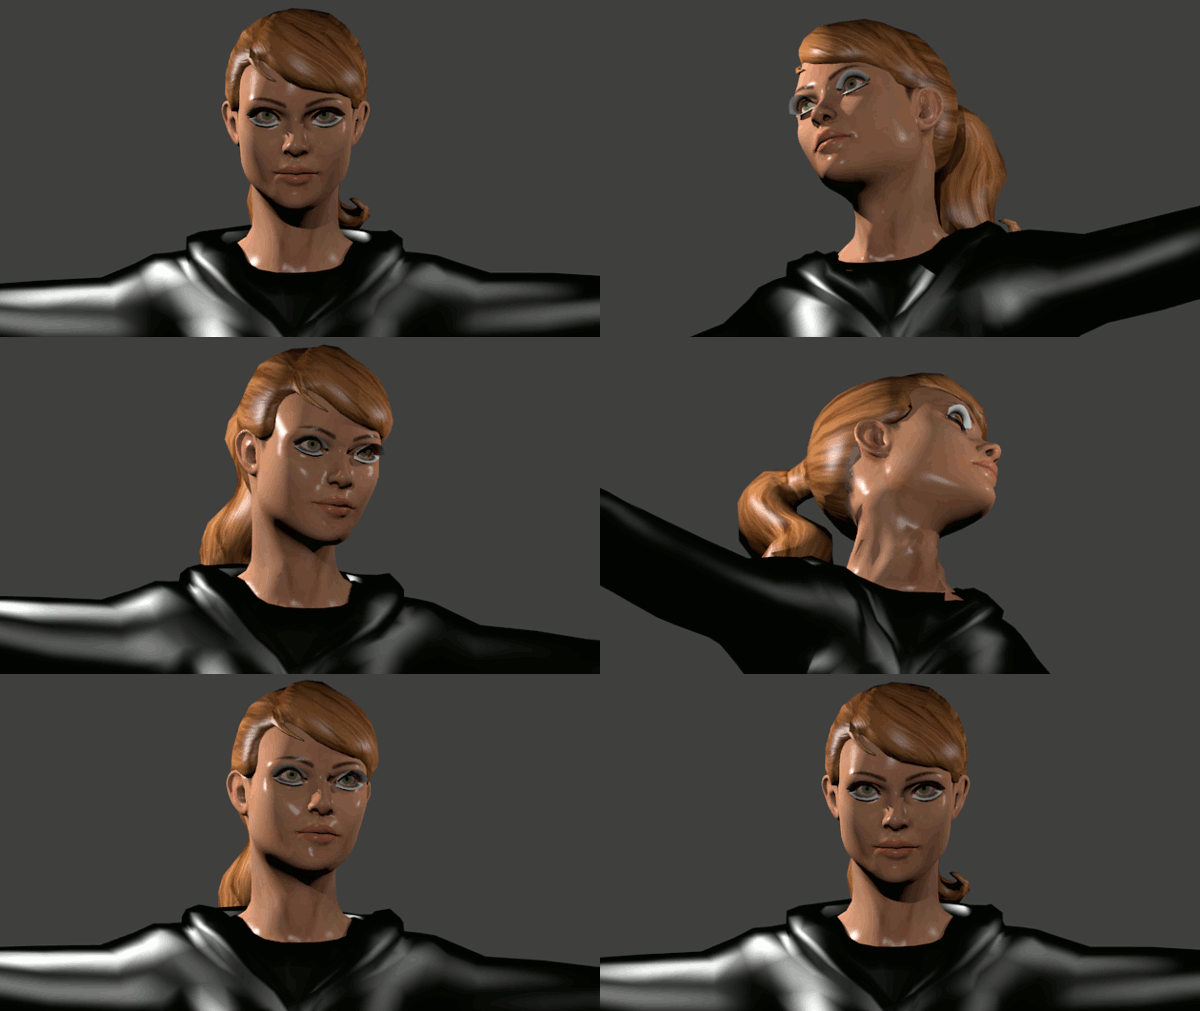
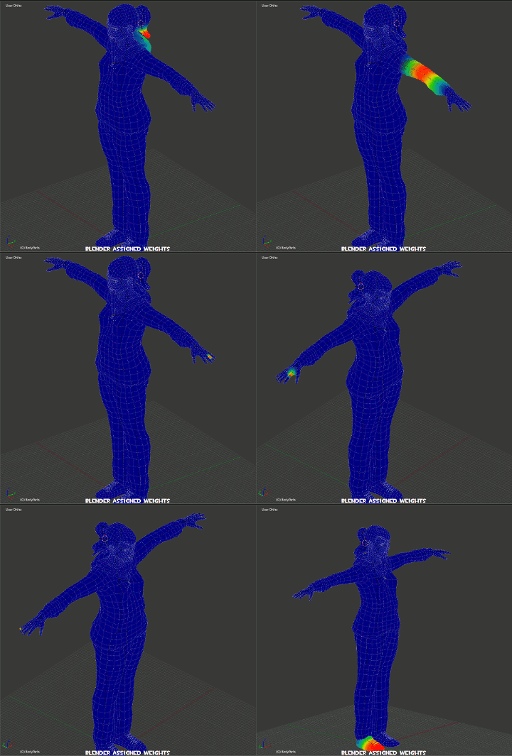
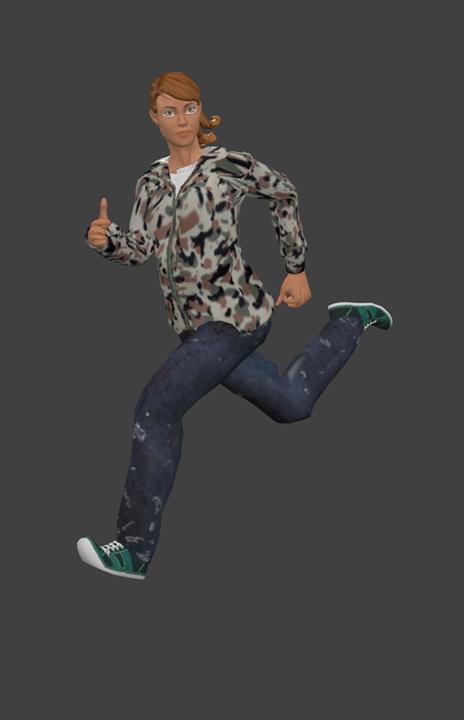
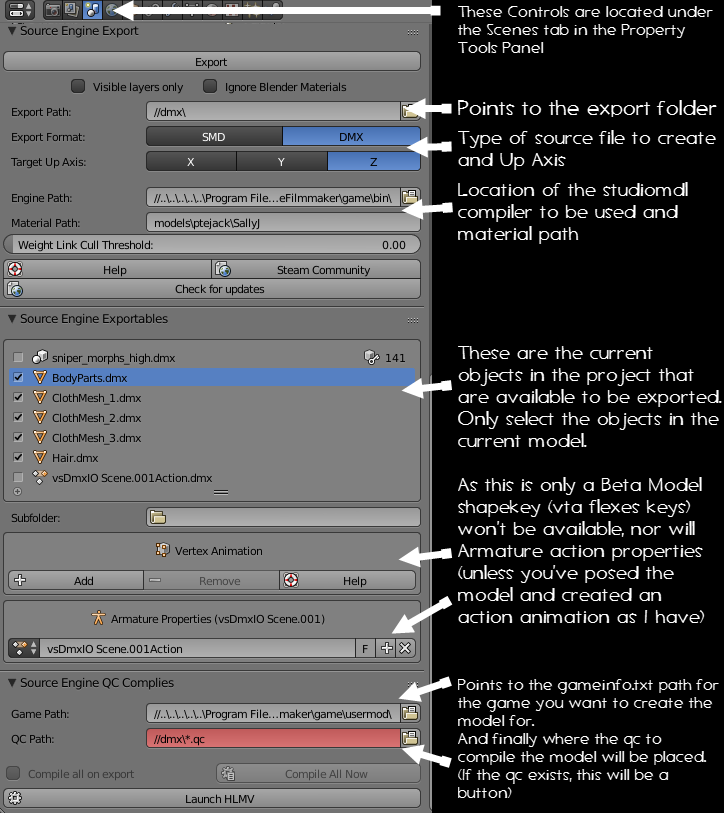
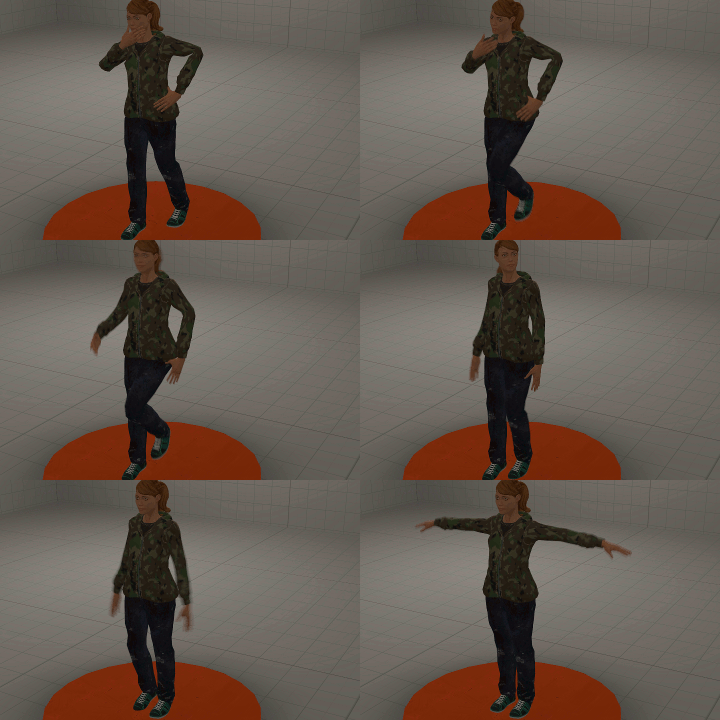
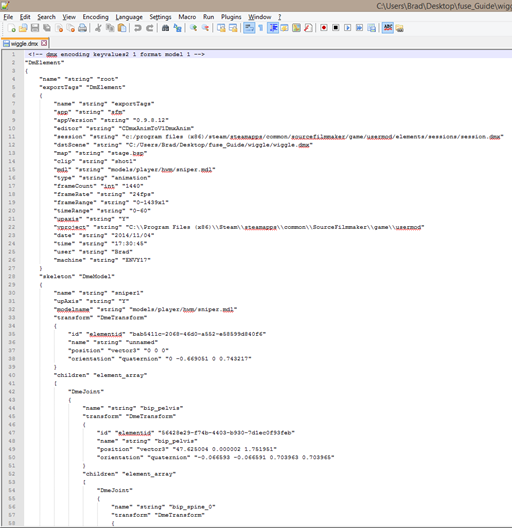
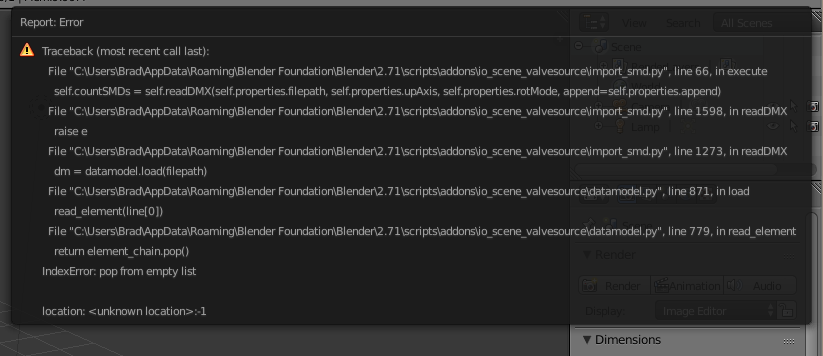
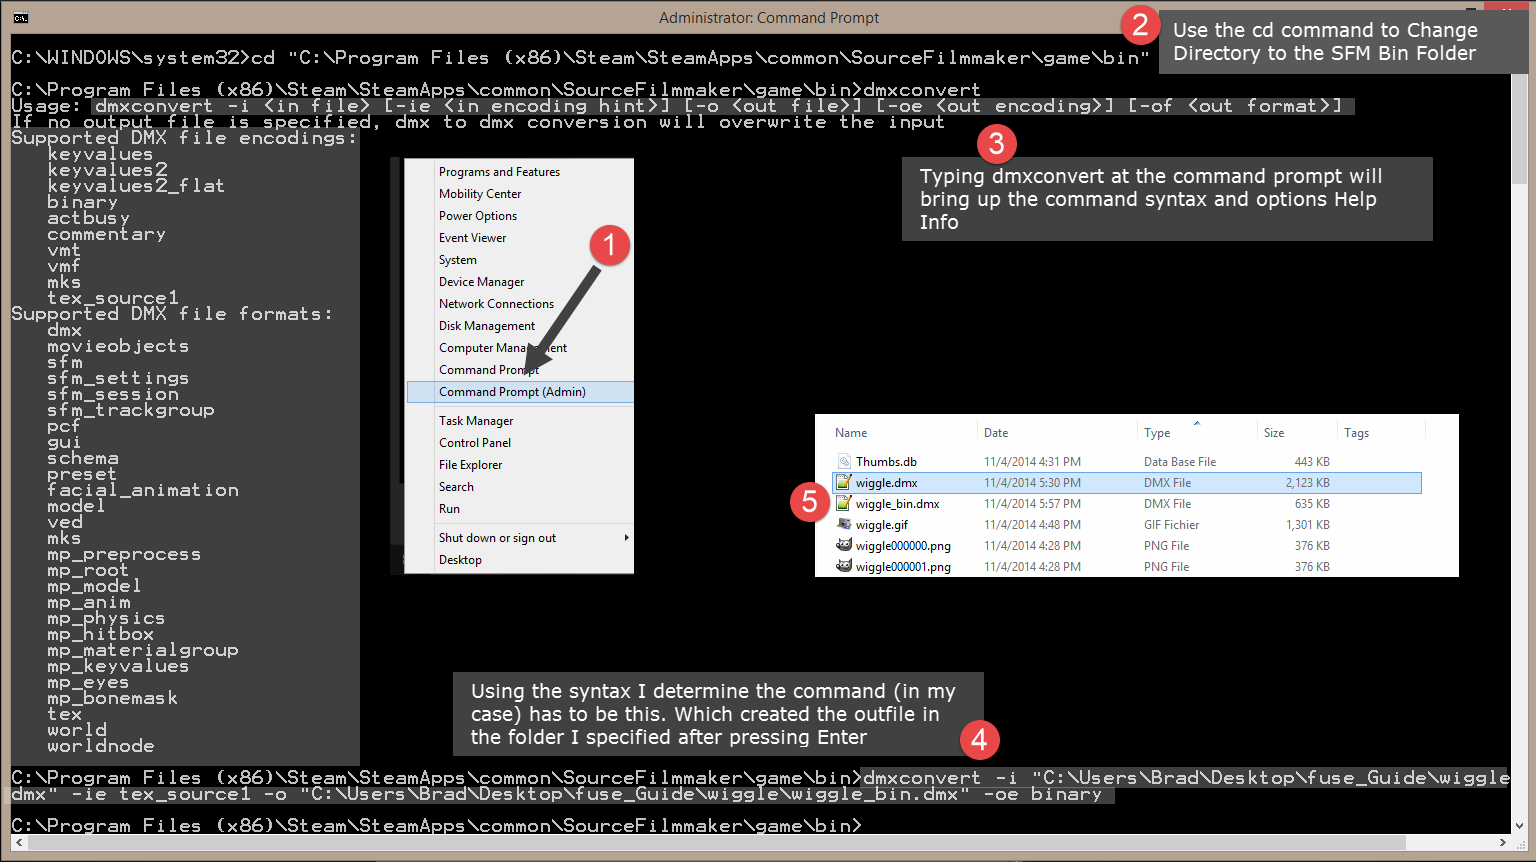
Overview
Last update – 22 March 2018 14:24(pm) – added link to Shapekey tutorial in the Shapekeys sectionREMEMBER this as you work through the guide. The pictures are fairly hi-res. You can click on them to blow them up to give you a better viewThe reason why I’ve released it in this state is that things are changing faster than I can write this guide. Blender has updated multiple times since I started for one thing as have Blender Source Tools and Crowbar. However the changes have not been that significant that it requres a complete rewrite (Yet, lol!) NOW!!!, Before we start, let’s lower some of the expectations of what I hope to accomplish with this guide.I am NOT an expert (never claimed to be) and I am not a modeler (yet anyway). I’m a tinkler and like most of you a hobbyist. These are simply tips and tricks that I have learned bopping around with this stuff. Mostly through trial and error and a LOT of research. Some of the techniques here may be far from the proper way to do something, Some may seem totally out to lunch if you are an experienced modeler, but they work for me and I’m still learning. Besides, I have always been of the opinion that it is better to do something the hardway first, then learn and apply shortcuts later (as some shortcuts tend to just go away.) I am not going to teach you how to use the tools (ie Blender) here, I am going to show you what needs to be done to get your model from Blender into SFM. If you don’t know “how to do something”, you are going to have to research your problem yourself. Porting models to Source Filmmaker from a format that can be imported to Blender has never been easier. This is going to be a guide on how to get a model from a program such as FUSE, decompiled from a Valve model, found on the internet or even your own creation using a tool like Blender (in fact any model that is importable to Blender) into Source Filmmaker using the Blender Plugin called Bender Source Tools. Blender Source Tools is an all-in-one Blender Plugin that will create the require model Source SMD or DMX files. If you elect to use the DMX format, it will actually create flex controls for mesh flexes created using ShapeKeys, and will provide the ability to compile your model straight from Blender itself. It is also the tool required for you to be able to import Valve models that have been decompiled into Blender.I will also “touch” on various aspects of the modeling process and expose you to other tools such as FUSE (a model creation tool developed by Mixamo and available through the Steam Store), GIMP (an GNU Image Manipulating tool), VTFEdit (Manipulates Valve Formatted Textures and assists in creating basic VMT files to call them), Notepad ++ (Text Editor for creating QC files). Heck, I am even going to introduce you to the newest Valve Model Decompiler/Recompiler called Crowbar (Developed by ZeqMacaw and his dedicated team). As mentioned, this is a work in progress. As I write this and work through the process, I’m learning the various steps myself. Yes, I’m a noobie to most of the tools here so, there may be quicker and easier ways to do something, I just don’t know about them yet. But this will be a live and growing document, with new stuff added and old stuff changed as we go along and learn more.Feel free to leave “constructive” comments or share pointers and shortcuts that you have discovered using the tools. I call it the “Hard Way” Course because the primary model I will be using will not have a skeleton (bones). With that let’s get started.
Tools Required and Where to Get Them
The tutorial will not teach you how to use the programs and plugins required, it is for those who have a basic understanding of these programs. If you find that you are having problems following the instructions, you need to learn more on the program you’re having problems with. I will try to keep it as simple as possible, but some things you are going to have to research and discover on your own. There is no way I can instruct you on how to use these things in a tutorial like this.
Ok that said, in order to continue you’re going to require the tools to work with so here is a basic list.
Many people have asked me just what Blender is, The best thing I can say is that it is a Free, Open Source 3D Editing tool but a heck of a lot more. It has its own Game engine, it can be used to create 3D Character Movies (much like SFM. In fact there have been many full length films created using Blender), It is a picture compositor and the list goes on. Best thing I can do provide a link to the features page and let you look.
[link]As it is Open Source it is ever expanding, the current version at the time of this guide was 2.70.
Blender (and it previous versions) are available here… [link]
There is a direct link on the main Website page to the most current release at [link]
———-
Its another Free and openly available powerhouse.
GIMP is an acronym for GNU Image Manipulation Program. It is a freely distributed program for such tasks as photo retouching, image composition and image authoring.
It has many capabilities. It can be used as a simple paint program, an expert quality photo retouching program, an online batch processing system, a mass production image renderer, an image format converter, etc. Check out more info here… [link]
The current version of GIMP was 2.8 and This link [link] should take you to the most current version download area. The GIMP’s home website is [link]
The only drawback to the GIMP that I have found is that it can be very finicky and has a steep learning curve if you intend to use it for more.
———-
You can use any text editor such as the Microsoft Notepad that comes with Windows, but doing so could lead to problems, Line numbers aren’t identified, and it is not really a pure text editor. It defaults to a txt extension if you don’t set it properly which can be a pain.
Notepad ++ however is a pure text editor, it doesn’t bury international codes in to your file unless told to. It offers the ability to display line number so you can find problems quickly. Not only is it a pure text editor, it is a programmer’s dream for writing code such as C, C++, LUA and Perl to name a few. It can identify code contained between delimiters.
Again this is a free and openly available program. The current version at this writing was 6.5.5 and the main link to the website is [link]
———-
PLUGINS – Adding to functionality
The programs listed above have numerous plugins available to increase functionality and productivity. We are interested in the following plugins…
This is the plug in that will be demonstrated in this series for Blender. It is required for importing and exporting Valve Model Source Files. This will import and export SMD, DMX, VTA and will process the qc files to import a model based on the source qc and process the compile of a model from the qc. More on this in the appropriate section. The tool also provides a “check for update” button within Blender itself, so keeping the tool up to date is a snap.
This tool only works with Blender version 2.66 or greater. If your Blender version is less than that, grab a newer copy.
The Current version of the Blender Source Tools was 2.0.3 at the time of wtiting and the plug in is available at [link]
This plugin for GIMP allows you to save materials directly from GIMP in VTF format. There isn’t a requirement any longer to save in one format, import that to VTFEdit and save as a a VTF file. The plugin uses Nem’s and Wunderboy’s VFTLib dll, so you may have to install that as well.
The GIMP-VTF project can be found at [link] . The current version was 1.2.1 and is available in both 32 and 64bit variants. Ensure you get the proper one for your OS.
This tool is a classic and must for the budding modeler. It is used to convert jpg, png, and tga images into VTF (Valve Texture Format) files or from VTF to jpg, png and tga formats for editing in an image editor. It is also used to create and edit VMT files. The VMT Creator allows you to create basic VMT files, allowing you to get display materials on your Valve model and the vmt Editor allows you to open and enhance your vmt files.
Unfortunately the Nems’s Tools Website has been closed down but you can still get all the content that was on the old site here in a Archive RAR File.
[link]The Nem’s Tools Archive RAR file will also include a copy of VTFLib and GCFScape as well.
———-
Optional Programs – The following programs are optional, but can be a real time saver. But any model that can be brought into Blender CAN be process through to SFM. So if you are a modeller, follow the process and GO NUTS!!!
———-
The next program I’m going to discuss is FUSE from Mixamo. This is a Commerical program which allows you to build models from prefab parts. It also allows you to cloth and texture the created model to suite your purposes. The models you create may be used royalty free (with exception of the TF2 models included in the FUSE Package which fall under the standard Valve usage licenses) but read the Terms of Use and fully understand them. Registered users of FUSE are also allowed the auto rigging of 2 models per week, which saves a ton of work. The Standard price of the program was $99.00 US at the time of this writing and Version 1.0 had just been released. I believe the standard cost for Rigging a model was 79 credits through the Mixamo AutoRig service, so rigging just one model practically pays for the cost of the program.
This tool is activly being delveloped and newer content and functionality is being added regularly.
I have seen this program available for $59.00US during Sales events on Steam.
———-
———-
This is the XNA Lara mesh importer, there are other elements required to make this program work. The best resource for this is to look XNA up in the Deviantarts Forums. This program is constantly changing and there are a few different flavours of it. Posting links to it here would be fruitless.
———-
Model Sources
There are many places on the web for gathering a model repository. Here are a few.
There are free sites where modelers will deposit their creations under various licenses, such as Blender Swap, TF3DM, Archive3D, 3DModelFree to name a few. (Props, characters, weapons, vehicles, etc… But these normally don’t contain skeletons)
There are a huge communities on Deviantart covering various topics who are producing XNA poser and MMD (mikuMikuDance) models that can be converted. (Most contain bones and some facial flexes, but need to be reworked and rescales for SFM)
There are others such as TurboSquid (the first one that comes to mind) which allow modelers to sell their creations. (Some are quite expensive)
Sources for Valve Community models range from Gamebanana, the various Valve workshops, Garry’s Mod, the various Valve game cache files. (Self-explanatory)
Other game engines. If you want content from other game engines, you have to find an “Extractor” that will pull the model content from the game you want. If the extractor doesn’t produce a format that can be imported to Blender, then you have to find a “Convertor” that will convert the extracted format to a recognizable format.
Your imagination, a 3D Editor and a graphics tool to bring your work to life… (The world is your oyster)
So as I said, do your homework, use the search engines on the sites and grab content that you can import to Blender, BUT…
ALWAYS give credit where credit is due!!!
Introducing Crowbar the NEWEST AND BEST Valve Model Decompiler/Recompiler Ever! – Making this an All-In-One Tutorial
Let’s combine this to include other Valve Game assets as well, after all, a model is a model as far as Blender is concerned and it will save me from having to write another tutorial on getting Valve assets into SFM.
In most of my previous tutorial, I used the old favourite decompilers to extract the SMD files from Valve models. The old tools did not work on the newer models such as L4D, L4D2 and Portal2. The model format changed and no one picked up the ball to fixed them. There was a gigantic hole as far as decompiling models was concerned.
That was until ZeqMacaw came along…
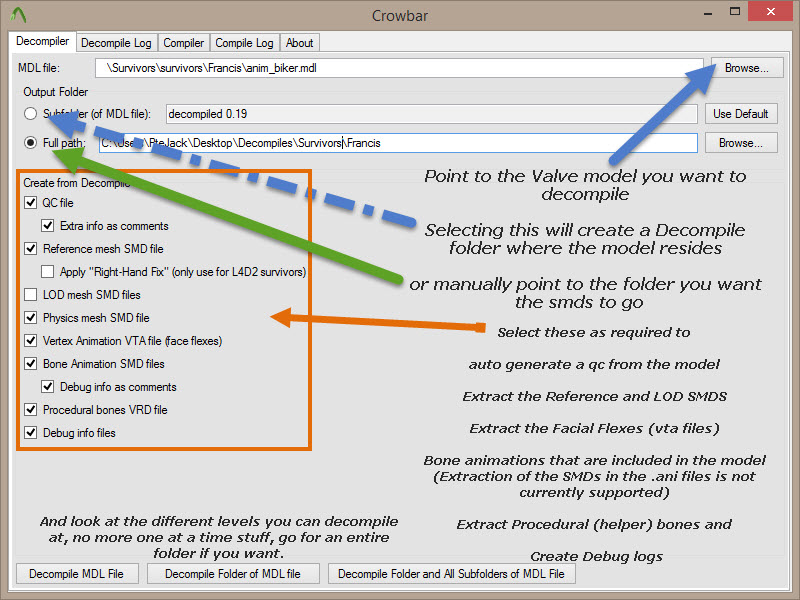
Let me introduce you to Crowbar… The Newest and Greatest Decompiler and Recompiler to come along since Hooch’s Fix to the CannonFodder Decompiler. This thing does ALMOST everything, and it is actively being developed. Not only is is being developed, Zeq has been kind enough to provide his Source Code for the tool.
Released as version 0.9 in May 2013, the most current version is Version 0.19 released Feb 2014.
Unfortuately as I said, the tools has limitations and still does not decompile the Valve .ani files, especially blended animation SMDs (the animation files for a model) but ZeqMacaw and his band of testers are diligently working on that and hopefully they’ll have that shortcoming fixed eventually. But for decompiling Models… this tool is the cat’s meow!!!
ZeqMacaw has a has a Steam Group devoted to the tool, he is accepting bug reports and provides links to where you can download the latest version. He also uses this Group to inform users of any changes and updates.
You can find his Group here… [link]
and His Crowbar webpage can be found here… [link]
So, what does the tool look like…
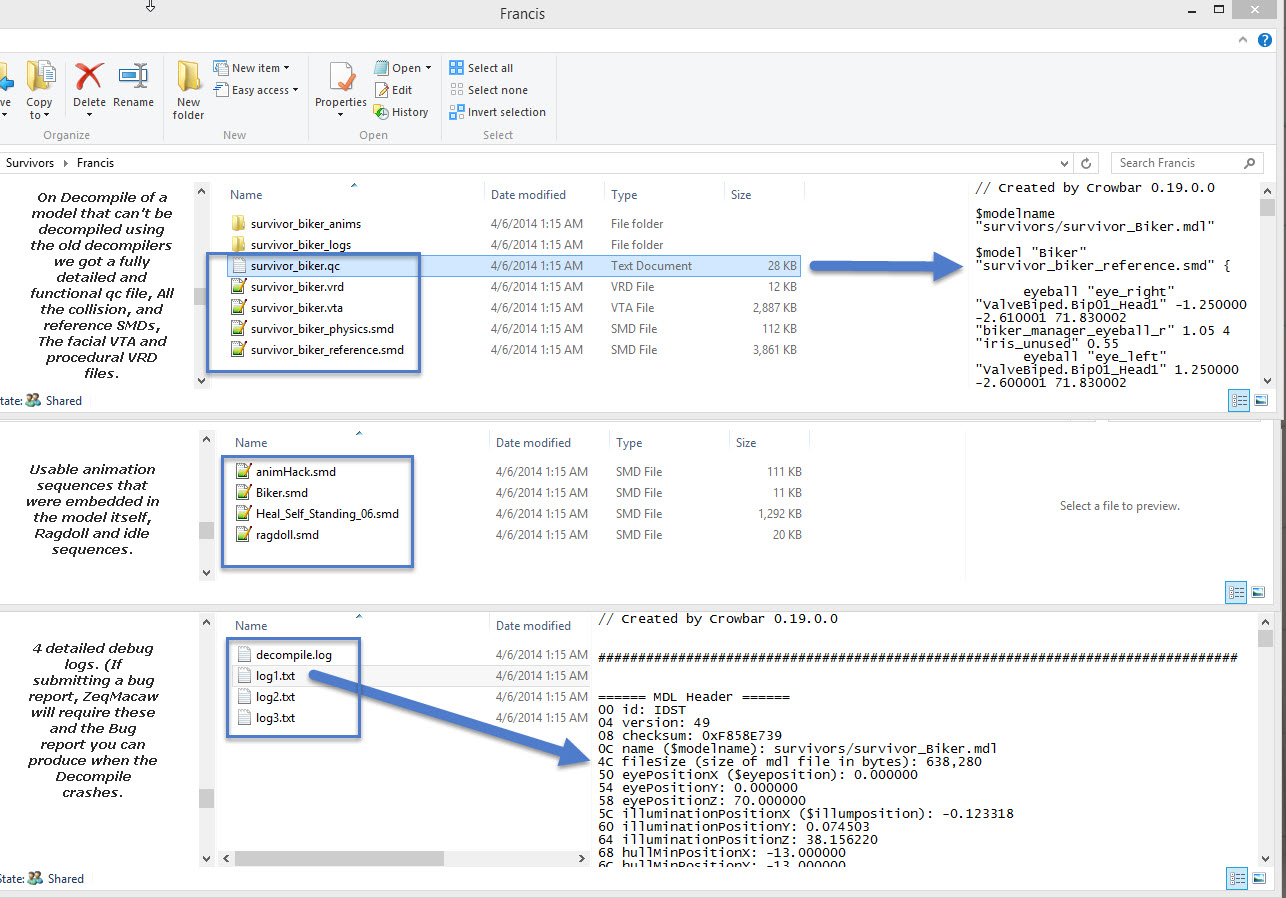
I decompiled the L4D Francis model. This model will not decompile using the old CannonFodder type Decompilers.
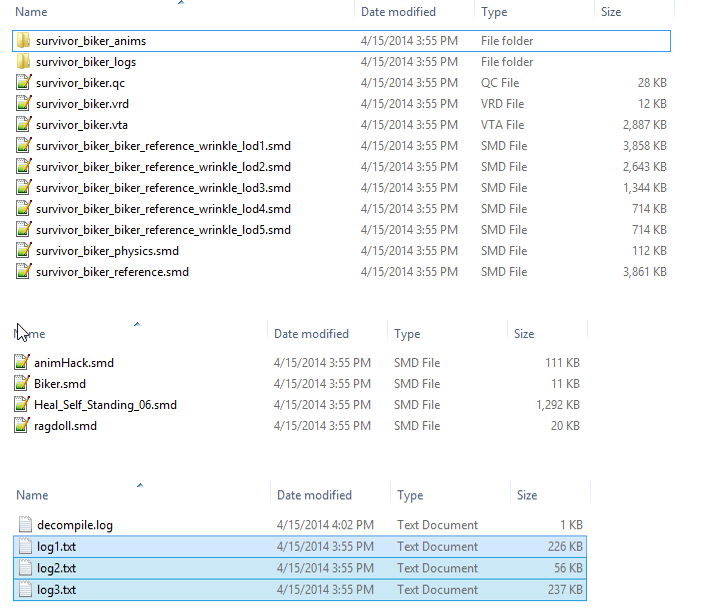
So, what did we get…
I will be including an actual video demo of the tool later.
Setting up Programs and Folders – PreProcess
Ok, with the addition of the Crowbar section, there is no reason for you not to have some sort of model to carry on.
Note: I will be including videos of these process at a later date
Before we dive into Blender, let’s set up a few folders and install the programs.
- Get VTFEdit and install it. The most recent version is 1.3.3 This should install the VTFLib.dll required by the GIMP Plugin as well.
- Download Blender and install it. (I usually grab the newest Zip version and extract it to a folder on my Desktop)
- Grab a copy of Blender Source Tools, The install instructions included are very straight forward.
- Install GIMP, Ensure you get the correct version for your operating system
- Get a copy of the VTF Plugin for GIMP. Again the install instructions are straight forward. If you find that the plugin errors out you may have to go back to the Nem’s Tools site and find the VTFLib program and install that as well.
- (Optional but Highly Recommended) Get and install Notepad++
Decide what you are going to call your model…
There are settings that we’ll be making in Blender and the Game Configuration variables will affect where folders will have to be set up the the compiled model.
As we are going to be compiling for use in SFM, then your Game Configuration should be set for SFM and the Usermod folder is going to be used.
Set up the following folders:
I usually set up a model source folder to keep the models I’m working on together and make them easier to find. So I have a repository with a folder structure like this
- Projects{modelname}ModelSrc (this is where I keep OBJ/MTL files)
- Projects{modelname}ModelSrcDecompile (this is where I will put decompiled files when working with decompiled Valve Models (ie crowbar))
- Projects{modelname}ModelSrcMaterials (This is where I keep the tga/png/jpg skin images)
- Projects{modelname}ModelSrcBlend (and my Blender file)
- Projects{modelname}ModelSrcDMX (This is the folder I tell Blender to put the primary DMX/SMD it creates. It is also where I will put the QC I use to compile the model.)
Set up folders for SFM
- Valve Materials – SteamSteamAppscommonSourceFilmmakergameusermodmaterialsmodels{YourUsername}{modelName} (this is where your vmt and vtf files will go)
- Valve Models – SteamSteamAppscommonSourceFilmmakergameusermodmodels{YourUsername}{modelName} (and this is where the mdl, vtx and vvd files will end up after the compile)
Note: So For my SallyJ model example my materals folder would be SteamSteamAppscommonSourceFilmmakergameusermodmaterialsmodelsptejacksallyj
and my models folder SteamSteamAppscommonSourceFilmmakergameusermodmodelsptejacksallyj
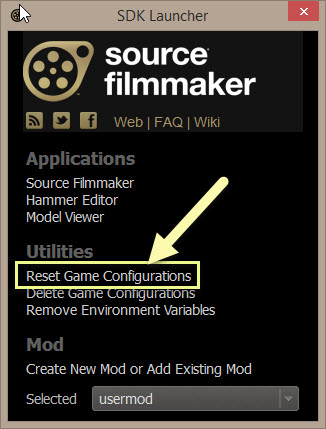
Start SourceFilmmaker, but Launch the SDK
Click Reset Game Configurations
Say OK to the Confirmation Prompt,
then say OK to the next popup.
You should now be ready to start working the model in Blender.
The Model Source Files
In this section we’re going to discuss the creation of models for import into Blender.
Models can be anything made from any 3D creator or gathered from the net (as we discussed in the Model Source Section of the Guide), as long as they are in a format that is importable in to Blender.
That is really all you need to know about model creation. Once you have a model in Blender, the process is the same.
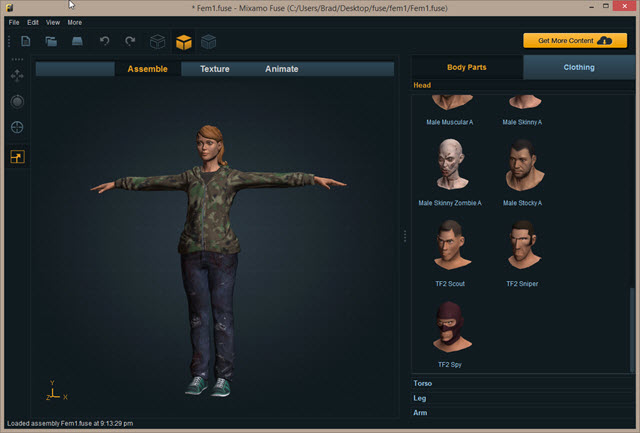
BUT, that being said, I’ve seen a lot of “Is FUSE Worth it” posts and as I own FUSE, I thought I’d show the benefit of the tool.
At the writing of this guide, FUSE Version 1.0 had just been released. In that state there were 21 heads and the various body parts available to create models. With the version there were a slew of various outfits to dress the models in and the ability to change the texture and colours of not only the clothing, but the body parts as well. There was also the ability to import your own models, clothing and textures, but they had to meet certain standards. (I had not had the chance to play with the new features yet but will add to the document as I explore them).
There were 3 TF2 character included at that time as well, the Sniper (yes!!), Spy and Scout. (The TF2 models are subject to usage restrictions. Ensure you understand what they are before you use them.)
The program did not include the ability to add flexes (otherwise known as Blend Shapes) nor a skeletal rig, however I can say that FUSE is still under development and Blendshapes are on the planning board in future updates.
For the purpose of this tutorial I have created a female model, let’s call her SallyJ.
Say Hello to SallyJ

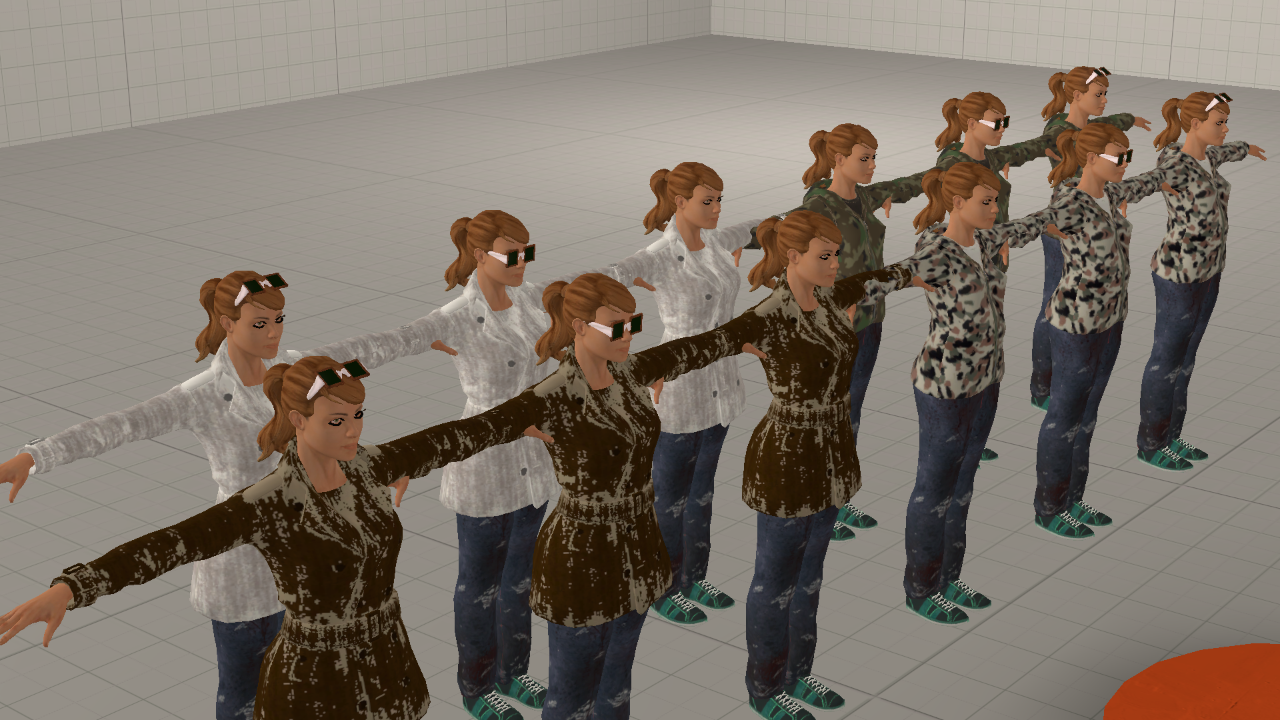
The thing I like about FUSE is that I can re-texture the clothing she has on now and create multiple skins for this model. Because the body is built up of various parts (ie Head, Shirt, Bottoms, Shoes, and Attachments) I can create variants of clothing for her and apply them as bodygroups as well. With just one model and the variations available in FUSE, I could spend a couple of weeks outfitting variants. For the first part of this tutorial we are just going to keep her as is with maybe one skin variant of the hoodie so I can demonstrate texture families in the qc later.
FUSE allows registered users to AUTORIG 2 models a week using the service on Mixamo. What this means is that I could take this model and upload it to Mixamo and use the service to create a skeleton for it. The process would take care of putting the bones into the model, apply the appropriate weights to the mesh and give you back a working model.
BUT I called this Tutorial “To SFM The Hard Way”. Not everyone is going to have access to the service, so we are going to export this model to our hard drive as an OBJ file (as if we created it ourselves or someone gave us a model to work with, without a skeleton.)
If you’re using FUSE, when your model is complete to the way you want it, choose File Export and save it as an OBJ. This process will also export diffuse, normal and specular material files in png format.
Note: The only way to export different skins from FUSE at the moment is to export the entire model, if you export a different skin to the same folder you save the original export to all the files will be overwritten unless you give the model a different name.
BLENDER!!! (2.69 not 2.70) – Importable Formats
Note: Blender just went through another update to version 2.70 and the User interface has changed a bit. I haven’t had a chance to learn the new lay out yet. Rather than hold this document back, I will use 2.69, something I’m a little more familiar with. The change isn’t drastic, it’s just that the tools layout has changed and I’m not sure where to look for them in the new layout.
That being said, once you get the hang of the version you’re using, the process is practically the same.
In this Guide I’m going to use 3 or 4 different types of models, just to show you that the process is the same.
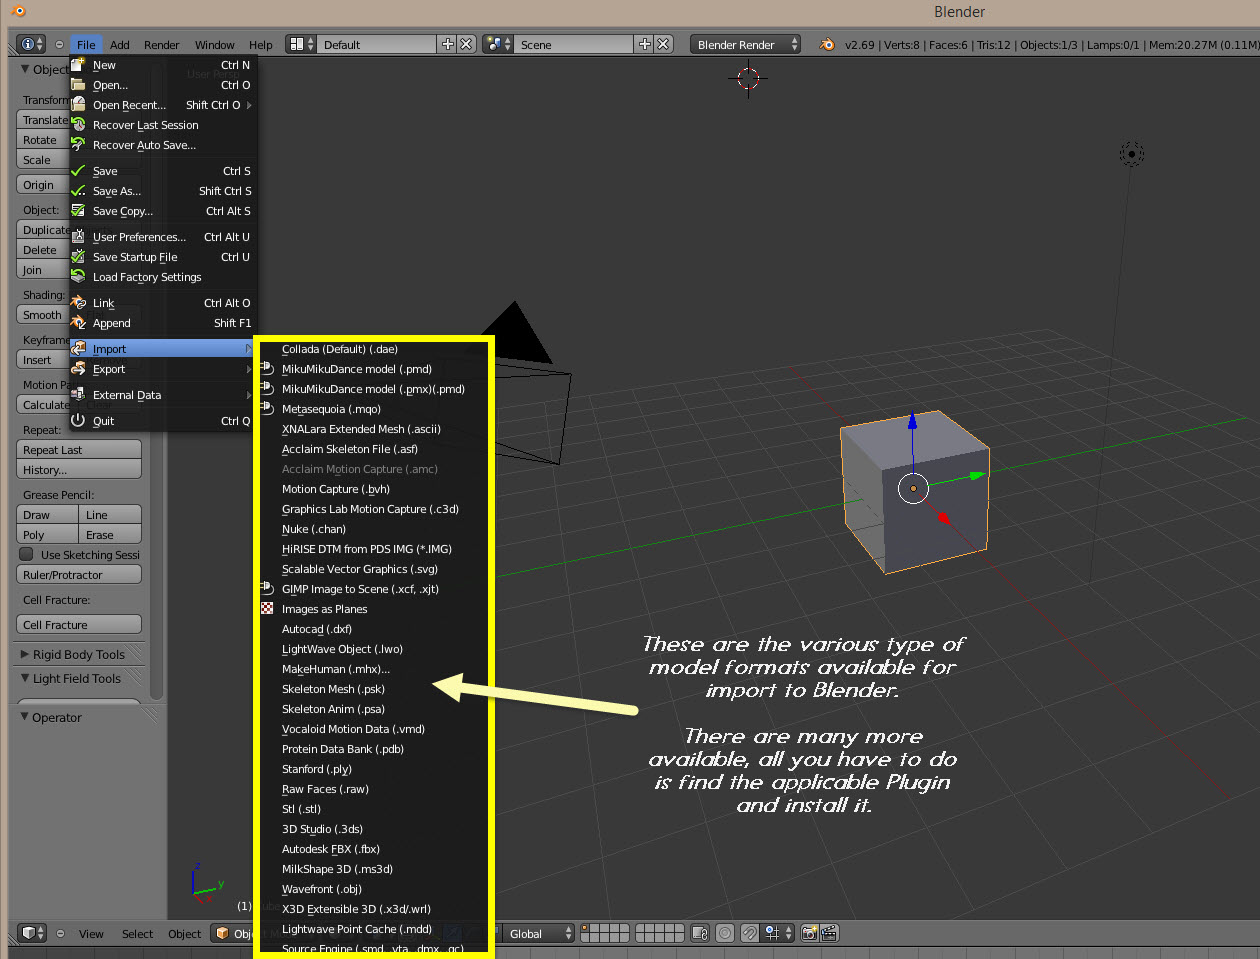
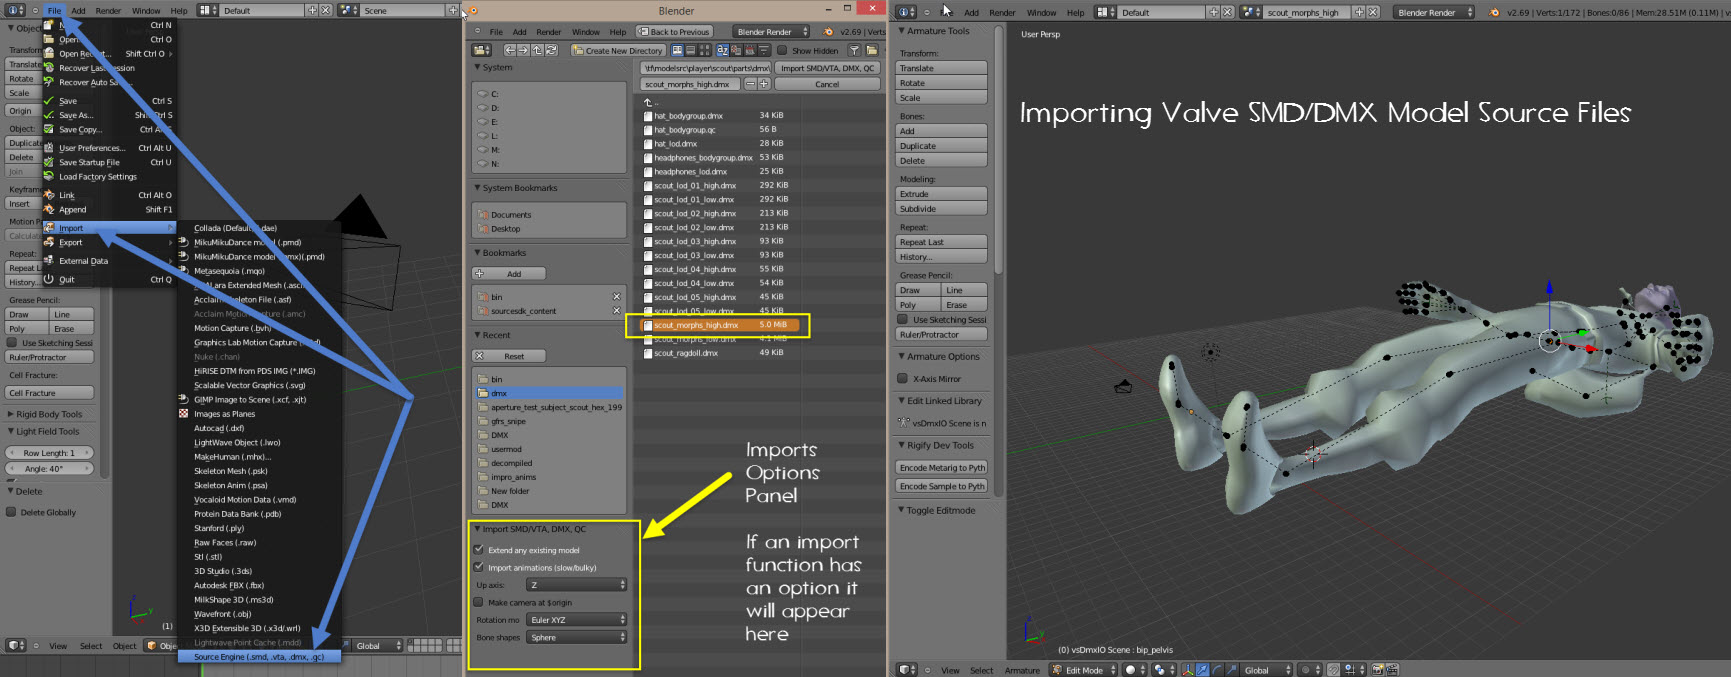
open Blender, click File Import…
If your Model Source is any of the formats listed here, then it can be converted for use in SFM with some work.
Valve Models – Additional Content (other than SFM Default…)
I’ve already mentioned Crowbar. For those that don’t know how to get Valve assets from a game cache file or what a decompiler is, this section will show you how to extract Valve resources and how to get a those resources into a format that is known to Blender.
SFM is basically running an older version of the TF2 Game Engine, as such, at the time of this writing, the only mod that can/could be run in game mode is TF2. Game mode is a great tool for recording things like a model going ragdoll, kill shots, and other game related animations that can take a lot of time to pose to pose animate and get them into SFM. Some of the newer shaders of the newer games or new mods were not available, whether or not this will change in the future, only Valve knows.
The initial install of SFM is an 8 gigabyte download, and it unpacks with some model resources and game assets, HL2 and TF2 being the primary with limited L4D2 and HWM models for TF2 being added. You have the option of adding the DOD DLC (Day Of Defeat Downloadable Content) package which will download the assets for DOD and install them to SFM even if you don’t own the game. You can activate this content right in SFM by choosing File and selecting Downloadable Content.
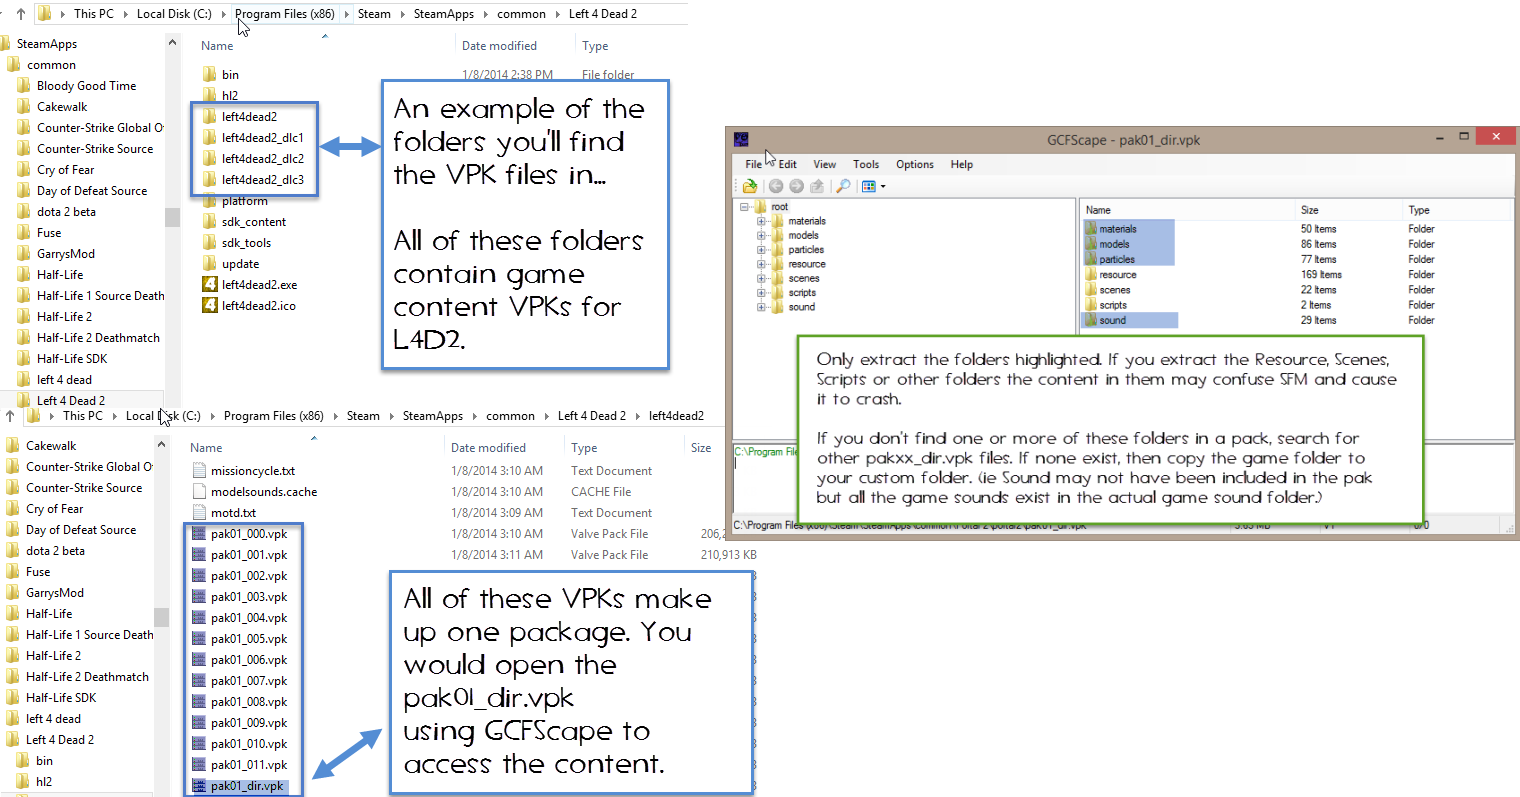
For those of us how want resources from other Valve games such as Portal2, L4D, L4D2, CS Source and GO, Black Mesa, Pirates Verus VikingsII, Garry’s Mod, etc, etc, etc… or to pull the new content out of game packs as mods are updated with new content… Well, first you have to own the game and have it installed.
Buried inside the game folder of the installed game you’ll find a folder which is usually named the game name or the initials of the game. Inside this folder you’ll find files with file extension (or file Type) .VPK. This is the new format for the Game Cache file. It is like an extended Zip or RAR file which compresses folders and content across multiple files. The primary file for a VPK pack will be identified like this {file}_dir.vpk. The _dir.vpk file is the file that has to be accessed in order to see the entire contents of the VPK pack. With some games, all the content will be compressed into one VPK package, others, such as TF2, will be packed into multiple packages.
The VPK will not open with WinZip, WinRar or any other standard file compression tool. You require a program called GCFScape to access a VPK File. The version of GCFScape must be greater than 1.8.4 in order to open the new format of VPK. The current verison was 1.8.5 at the time of this writing.
The Nem’s Tools website has been Closed, however to can still get the tools that were on the ols site here in an Archive file.
[link]
Extracting content with GCFScape is practically the same as opening a Zip/Rar or 7z file. Launch GFCScape, point to the VPK you want to extract from, select the content you want to extract, and extract it. That’s it. You can extract single files, individual or multiple folders or whole packs.
When adding content from the VPKs to SFM, I recommend that people add new content folders to the SFMGame folder then add the new folder to their usermodgameinfo.txt file. When extracting content I recommend only extracting the Models, Materials, Particles and Sound folders from a pack. Extracting others such as Scripts, LUA and Platforms folders can cause SFM to become confused and crash.
When adding content folders to the gameinfo.txt file, the follow the format under the SearchPaths section of the file. The higher up the list of games in that section the higher the priority that content gets. So if you have models that use the same names, ie
If CS Source has a model called terrorist.mdl and
CS:GO has a different model called terrorist.mdl
If CS:GO reference is higher in the SearchPaths list than the CSSource reference, then the CS:GO model will be used. The CSSource model won’t even be available in the SFM Model Browser.
A lot of people have problems like this using the various player skins available from sites like Gamebanana and Garry’s Mod. They want to use the regular skins of a character/prop or use a regular character/prop AND the reskin they downloaded. Because the models use the same name or the Skins replace the normal skins of the regular player/prop, one of the models disappear and appear not to be available in SFM. The only way around this is to decompile one of the models, load the model into Blender, rename the materials and export it, then write a new qc and recompile the model. Which model is display depends on order in the SearchPaths and USERMOD models have the highest priority.
The main reasons for using custom content folders is organization and debugging. If you load all your custom content into the UserMod Models folder, you are going to end up with conflicts. Conflicts are bad!! for SFM. It is usually the addition of custom content that will cause SFM to crash on loading. For example, you’ve downloaded a 3 pyro reskins, you’ve loaded unpacked the skins into your usermod/materials folder. because usermod has the highest priority in the hierarchy of the gameinfo.txt file and when loading SFM it does a precache of resources, it searches folders for stuff it can precache. It hits the 3 different skins for the pyro and can decide which to use, they all have the same priority, so it says, nope and crashes.
By having these reskins in their own folders, you can give the skins an order of priority and SFM will be happy to oblige with loading the skin in the highest priority folder outlined in the gameinfo.txt SearchPaths. Also you can quickly switch between skins for your project by renaming a folder or commenting out a folder in the gameinfo.txt file. Just remember that if you have resource that use the same name, you can’t use the different model/props that share names in the same project without modifying the actual model.
Valve Models – Decompiling
I’ve already touched on this previously, but in this section I’ll actually walk through an example.
The old standard decompilers of the Cannonfoddder variety still work on some of the older models and are still great tools. However, if you find that the Cannonfodder decompiler doesn’t work or crashes during an operation, then grab a Crowbar to pry that model apart (read the section on Crowbar above to discover where to get a copy.)
The tool (developed by ZeqMacaw and his band of testers) has a pretty straight forward GUI. With the click of a few buttons you can decompile models from everything from the original Halflife/TFC through Alien Swarm to Dota2.
Basic GUI (Graphic User Interface)
It’s pretty sel explanatory…

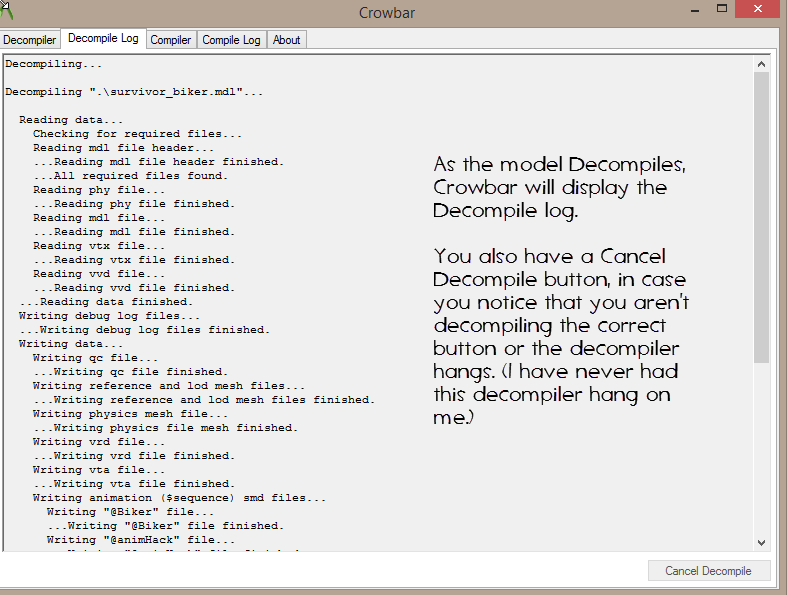
Keeping with the Francis model, let’s look at the folders and files produced and what they are.
The process will create 3 Folders, the Main folder (this folder will contain the main models source files) and 2 SubFolders for this particular (and for most Valve Models), a {modelname}_anims (this folder will contain any animation or sequence SMD files) and a {modelname}_logs Folder (this is the folder your Decompile logs will end up in.)
If you decompile multiple models the main Model files will end up in the same Main Folder, but each model will create its own animation and logs folder.
In the Main folder you will find these types of files: SMD, VRD, VTA and QC depending on the options selected in Crowbar.
What they are:
- SMD – StudioMdl Data File – The Studiomdl Data file format stores 3D models in ASCII for analysis and compilation by studiomdl. SMD files are usually generated by an SMD export plug-in for a given model editor package. In other words this file stores the model’s mesh and bone structure information.
Aside from Source and GoldSrc, SMD is known to be used by Sauerbraten and third party tools for The Sims and Mount & Blade.
For a more detailed breakdown, see [link] (which is where I took the definition from)
- {modelname_LODx}.SMD – Level of Detail File – These files are more important if you are producing a model for a game (I normally don’t produce them). What they are used for is to lower the level of detail on a model based on distance from the camera, for example, a character’s eyes, fingers, nose, mouth, hat detail, etc. A character up close needs all of these assets, so the main character model is used. As he moves away from the camera, the bone structure and poly count of a model can be reduced. So 3 finger joints can be reduce or 2, then to 1, then to just a hand… etc, the hat goes from 100 polys, to 50, to 25, to just a cube… These are individual models based on the models original highest poly count model. The models are changed out and replaced based on the information given built into the model via the qc that is used to compile it.
This cuts down on CPU/GPU resources being used up to render models during gameplay and reduces lag. As we aren’t concerned with this in Film Making and want to include as much detail as we can to the camera, we don’t have to worry about these when we compile models for SFM.
More info on LOD can be found here… [link] . Only produced if requested at Decompile time. - VRD – This file contain infomation for Procedural (or Helper Bones) Bones. These are talked about but not really covered in this guide. You can find more information on this at https://developer.valvesoftware.com/wiki/$proceduralbones . This file will only be produced if requested at Decompile time.
- VTA – VerTex Animation File – This file contains the information for various the morph targets used in Flex animations within your model. The actual detail on VertexAnimations is found at the bottom of the SMD reference on the Valve Developer site. This file is only produced if requested at decompile time and if Vertex Animation is present in the object being decompiled.
- QC – The Quake C file – This is a text type file that passes the commands to the StudioMDL compiler. It instructs the compiler on the various things to put into the model as it compiles the binary .MDL file that can be used in the the Steam Engine. It will be produced by Crowbar if request the model decompiles. It is a reference type document though. Certain commands in a model can’t be seen by Crowbar because they are “baked” into a model, but Crowbar does its best to include something on everything it finds. Some commands may be darn right wrong, so each QC should be reviewed and edited before trying to use it to compile a model.
More info on the QC file can be found here… [link]
SMD and VTA files have been superceded by the new (to Valve) DMX format. We’ll look at this file type at compile time. Unfortunately, there aren’t any decompilers that extract model files to this format (at least that I know of) at this time.
The files that are placed in the {modelname}_Anims folder are SMD type files as well, these files contain animation information for bone and some mesh positions based on keyframe time segments.
If you import these to you model in Blender, you may find that your model will warp badly out of shape. This is caused of the the position/rotation of your main model and the position/rotation the animation was created in. (Ever wonder why your model falls to the floor when an animation starts in SFM??? This is one of the reasons.)
In the {Modelname}_Logs your find the log files of the decompile. These are quite detailed and contain all kinds of information. If you have a problem with Crowbar that causes it to crash, you’ll be presented with a Debug Report Form. Save the form and open it in a text editor, fill it out and submit it to Zeq. Include all of these files log files with your report.
As discussed earlier, the current version of Crowbar will not extract animation.mdl and gesture.mdl files. There are currently too many issues with the way the animation files are designed for them to be decompiled at this time. Zeq and his team are working on this and hope to have something to update Crowbar with soon.
After decompiling, you have the model resources that you can import into Blender.
Blender!!! Import the Model
Now that you have installed the plugins required, you have the model in a format that is recognized by Blender and also have it and its materials tucked away in your Source folders, import it in to Blender.
- Open Blender and Delete the Default Cube. If you’ve moved the 3D Cursor, use Shift-S and set it back to the center.
- Select File – Import and find the Format the model’s Source is in
- Check the Tool Shelf (the menus on the left side of the 3D Work Area (if not visible cancel the import and press T to make it visible)) for any import options, ensure they are set properly for what you want to do)
- An example of this would be importing a second Valve character into a scene that already has a Valve character model loaded. In the panel you’ll see options for the model type, one being that you can extend the existing model. This means that if you have a scout model with armature loaded and want to add a spy to the scene, if you leave this checked, the spy will assume the existing scout’s bone structure… not a good thing to do. By checking this off (unchecked) and the spy would be imported with its own skeleton. You can also set Up axis and other options for this model type.
- An example of this would be importing a second Valve character into a scene that already has a Valve character model loaded. In the panel you’ll see options for the model type, one being that you can extend the existing model. This means that if you have a scout model with armature loaded and want to add a spy to the scene, if you leave this checked, the spy will assume the existing scout’s bone structure… not a good thing to do. By checking this off (unchecked) and the spy would be imported with its own skeleton. You can also set Up axis and other options for this model type.
- point the browse to the model and select Import…
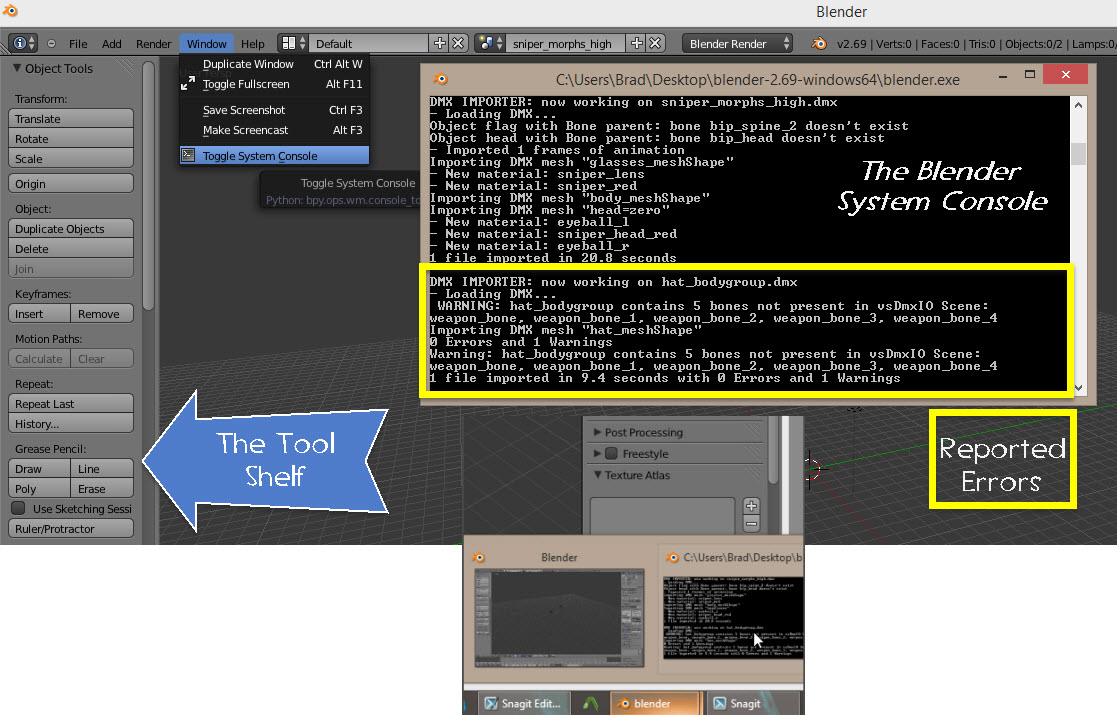
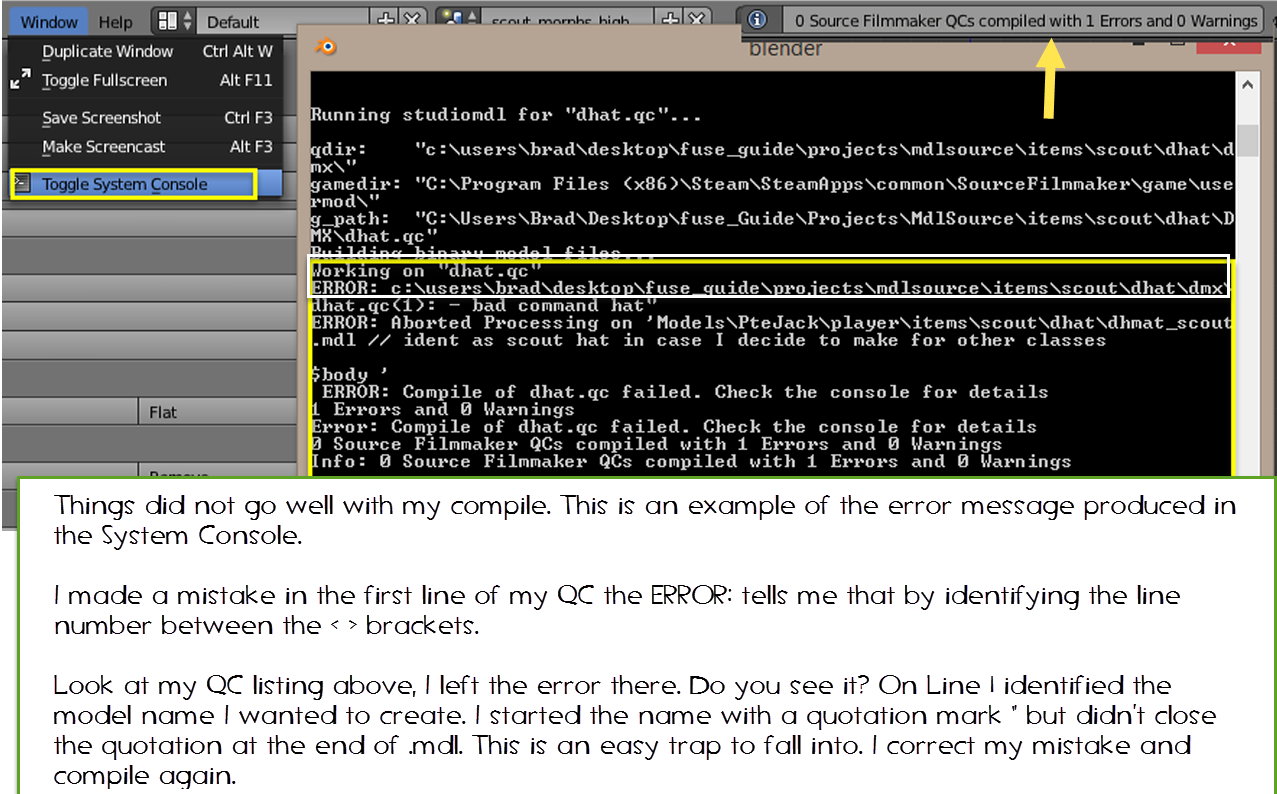
Your model will appear in the 3D work area. If is doesn’t, there may be something wrong with the model file. Check the System Console for any error messages.
The System Console window is a Command Shell type window that will reside on the taskbar is it is visible. If it isn’t visible, select Window – Toggle System Console. Then check the Taskbar for a second instance of the Blender Icon and expand the Console.
These are the models I will cover in the Guide:
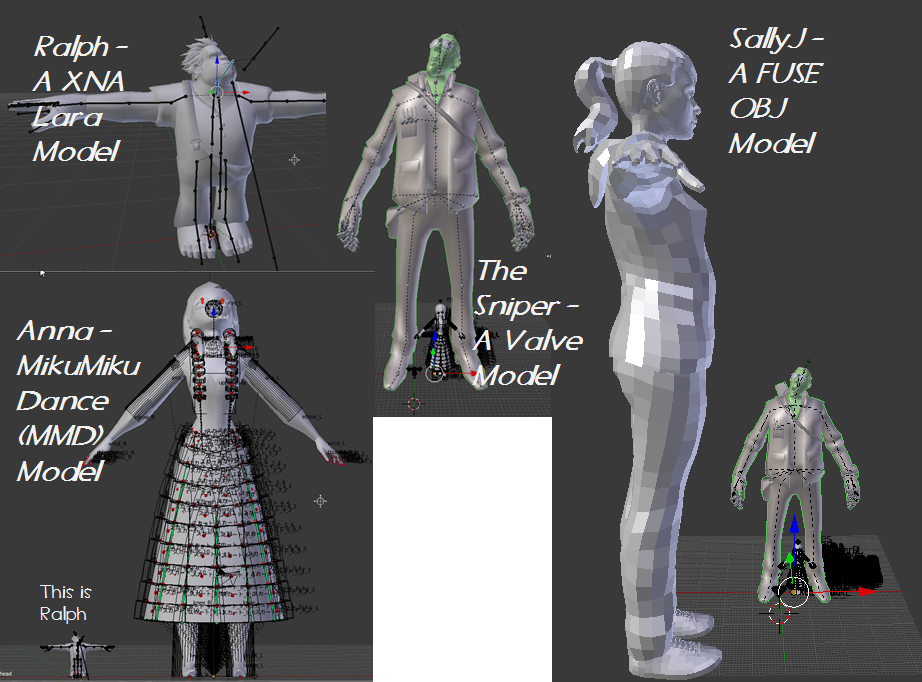
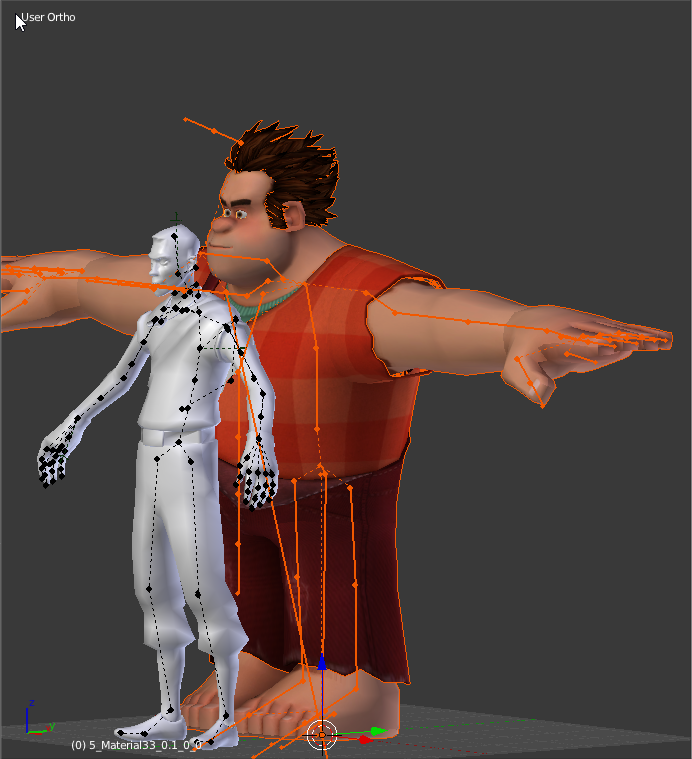
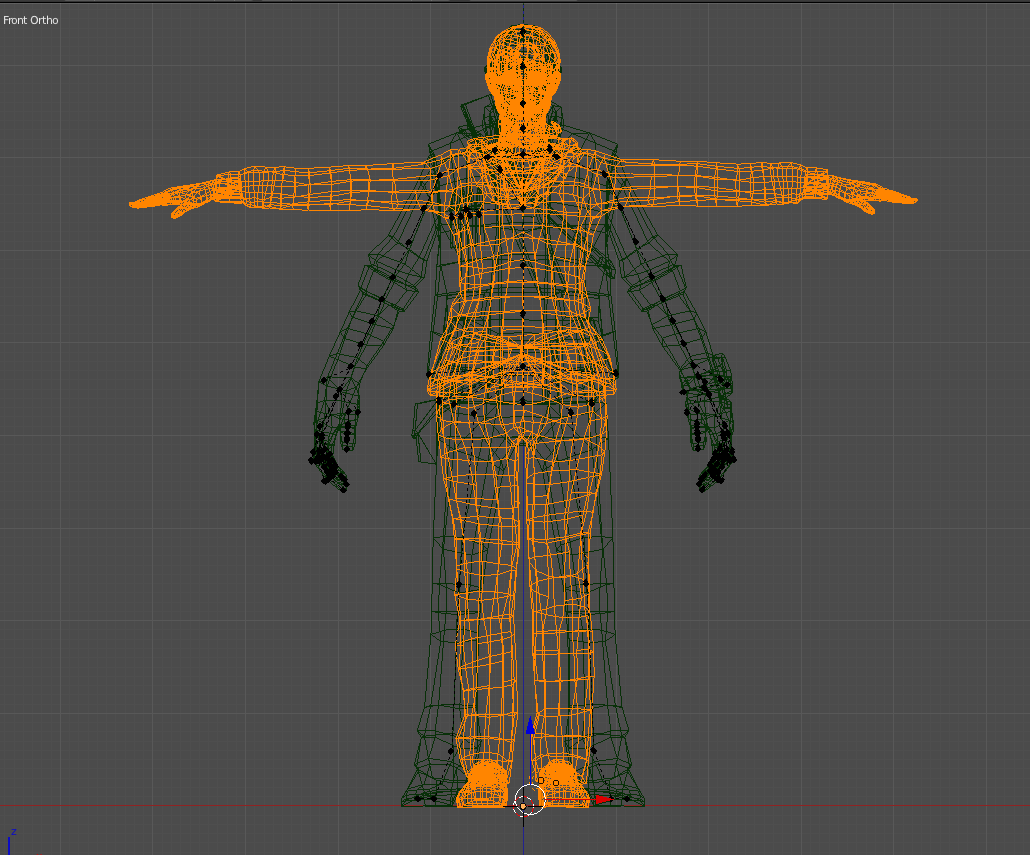
As you can see right off the bat, there are scaling issues. On top of that, there are bone problems (um, Sally doesn’t have any and Anna has over 200), almost everything in a MMD model is programmed in Japanese.
Well, I’ve been asked to do a tutorial on how to import models into SFM…
So, here we go and we’re going to be doing this the “Hard Way”!!!
Materials – UVMaps and Painting the model in Blender
Now that we have a model in Blender, it looks pretty bland as a Clay model. The reason I start with materials is that there is no sense spending hours rigging a model only to find out the model isn’t painted properly.
If you downloaded a model that has materials, there is a good change it has already been sliced up in to UVMaps for its materials and all you have to do is reassign them. If it doesn’t have materials, then you are going to have to paint it yourself, maybe even have to “Seam” the model to create UVMaps.
Seaming is beyond the scope of this guide. Something you’ll have to discover on your own. The 4 models I’m using here are already pre-seamed and have UVMaps.
There is a quick way to see if your model is already set up or if you’re going to have to assign textures to maps.
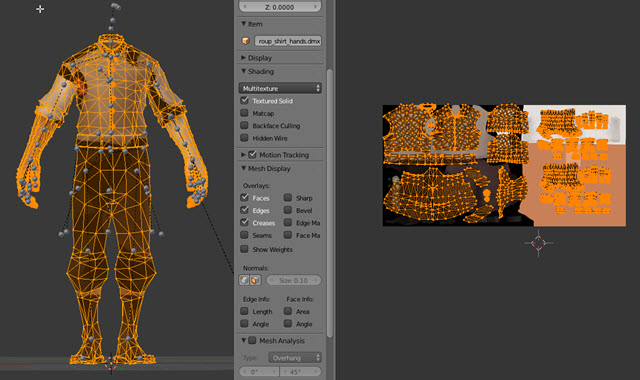
On the Right side of the 3D viewer in Blender there is a Properties Panel for the viewer. If it isn’t visible hover your mouse in the Viewer (where your model is displayed) and Press N
Scroll through the properties panel and find Shading and expand it. Change the mode to Multitexture and select the Textured Solids checkbox. If the UVMaps and Materials are set up your model will become textured.
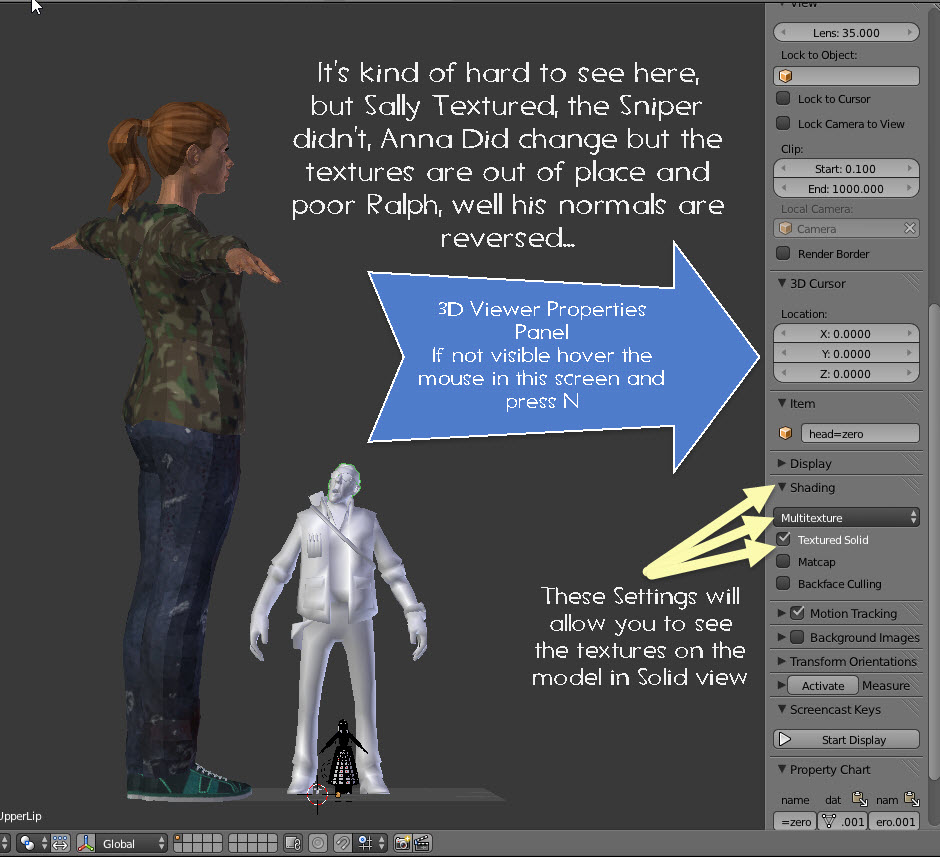
The Sniper is the model I will work with in this section. His Materials didn’t show up because I didn’t convert his Valve Materials to Tga, Png or Jpg images and put them in a folder that Blender knows to look for them.
I am not going to explain the process of converting images here, but will add a video on it later. I will use the VTF Plugin in GIMP to do it though.
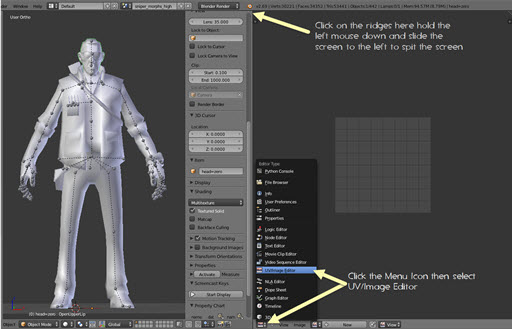
I am going to split my work area screen in half and load Blender’s UV/Image Editor in to one of them and hide the other models.
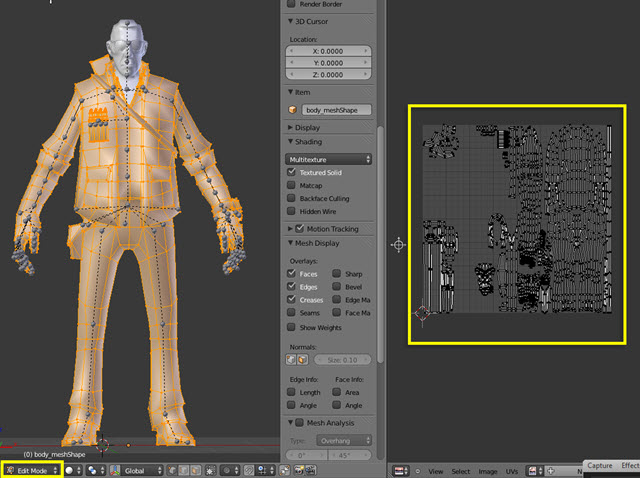
If the UVMap shows up and it is just one big box, and not separated into “Islands” then the model has not been “Seamed”. Good Luck, you’re on your own. You have to Seam the character up and unwrap it. (Start your research now!)
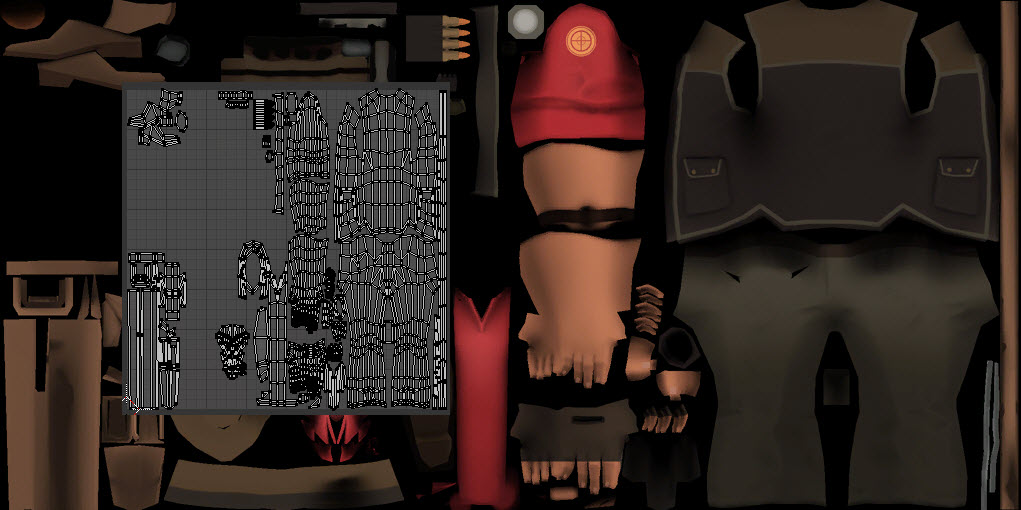

The 2 buttons boxed in yellow in the picture are the Materials and Textures buttons, click the first one (Looks like a disc). Here we can see all the materials assigned to the object selected in the 3D viewer (In this case one called sniper_red).
Click the Deselect button and the islands will disappear, click the Select and they come back. That means that these vertices have been “Assigned” to that material. (More on this when we work with the other models.)
Now select the other button (Looks like a red and white checkerboard). This will take you to the Textures Panel and it’s pretty intense with what you can do there. Right now, all you should see is a blank box. Click New.
All of the settings in these 2 areas will affect the way a model is rendered if we were using Blender for our movie. They have no bearing on how they will look in SFM, so all we want is to be able to see the model textured here to ensure the UVs are set properly and give us some idea of how it will look.
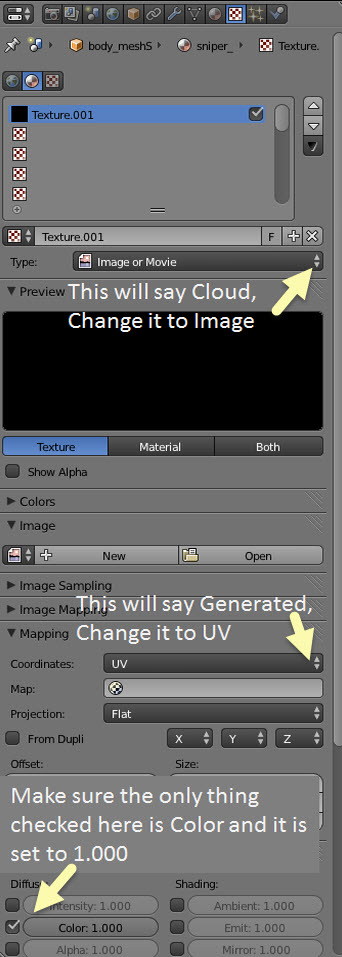
After changing the settings as shown in the picture, click Open and point the browser to the location of your texture file and select it.
If you haven’t got a skin, then you will have to paint your model.
There are programs such as 3D-Coat and ZBrush that are available commercially to assist you with this task.
Or you can actually “Bake” UV maps from Blender and paint them yourself using programs like GIMP, Photoshop or Paint.
Blender also has a paint function that you can use to paint directly on to your model or you can paint on the UV maps to paint your model (Great for touch ups). One thing though, if you paint in Blender, be sure to save the image when you are done. If you don’t, the changes will be lost if you move onto another material.
Once the Texture is loaded, go back to the UV Editor. Nothing will have changed there because we have to tell Blender which texture to use for the map. Click the picture below.

Make any adjustments required by moving the Islands or individual vertexes on the UVMap.
This process should be performed on every object of a model. It will allow you to see if UV are out of alignment, If normals are reversed or if something has been added to a model after the uv applied and not properly seamed into the UVMap. (We’ll look at Ralph for an example of reversed normals later.)
Now this is a really cool tip!!!
I wanted to change this material to add an Australian Flag to the back of the Snipers Vest. But seeing that the materials are pretty flat and I could do it freehand in a paint program, let’s change that to a kangaroo under the sniper patch on the left sleeve. Painting something on a curved surface can be really difficult, especially if it is a small, confined or bunched up area on a UVMap.
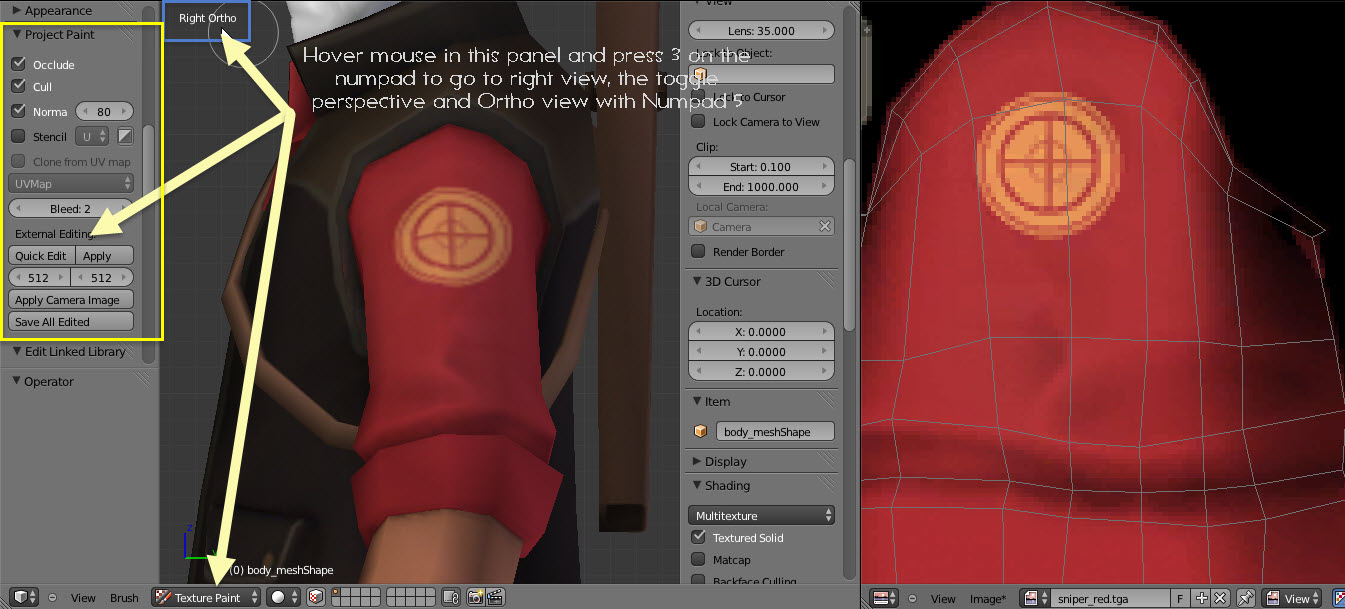
In the paint program I edit the logo texture I want to add and alpha out the stuff I don’t want. I apply the logo image to the image passed from Blender as a layer and position it. I turn off the Blender image so I will only save the logo then export it back to Blender by overwriting the original file passed from Blender.
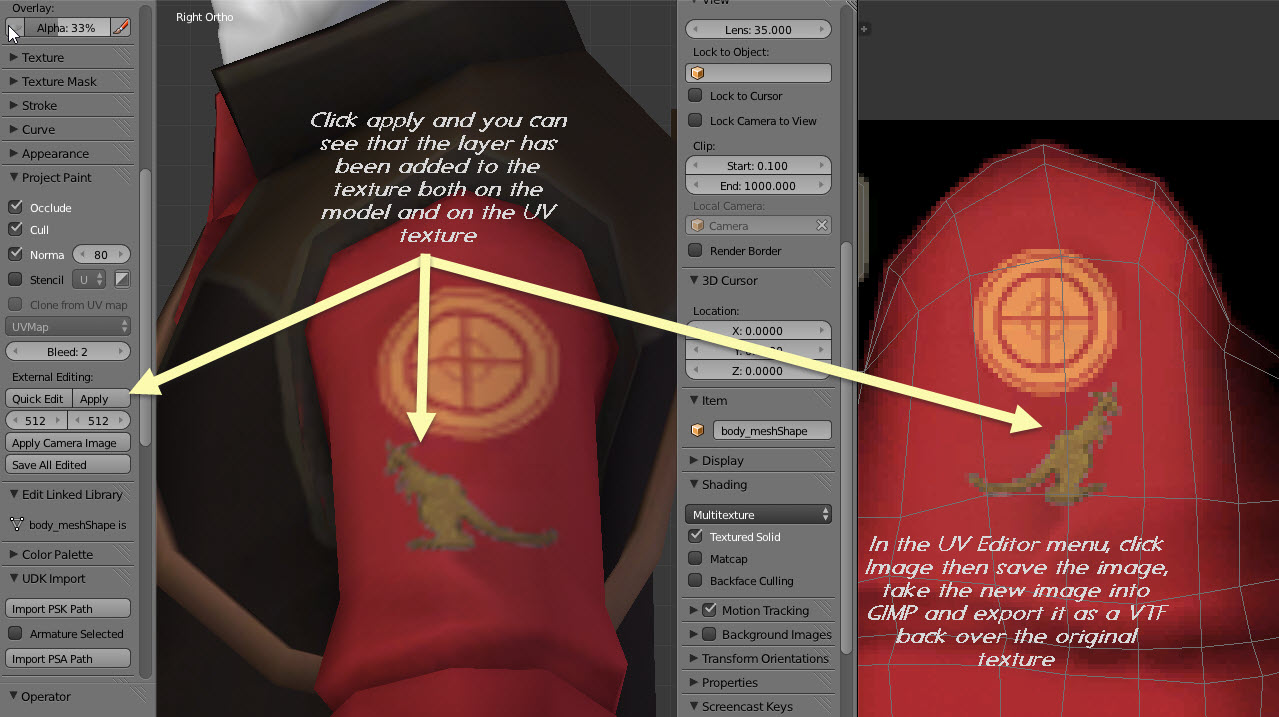
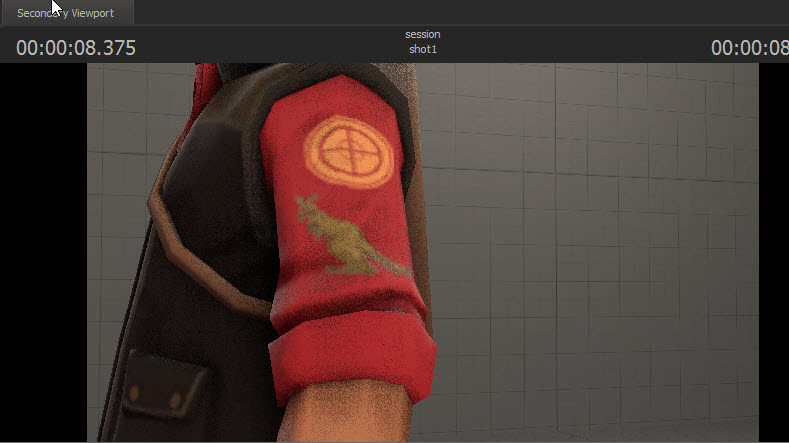
And here is the changed texture in SFM.
Materials Part 2 – Multiple Materials for the Same Object
If you remember the Fuse Picture of SallyJ, I embedded a picture of a second skin with her. Let’s look at her now.
First, as with most OBJ model brought into Blender, they will look blocky, as if they were made up of blocks. This is normal; they have to have a smooth shader add to them.
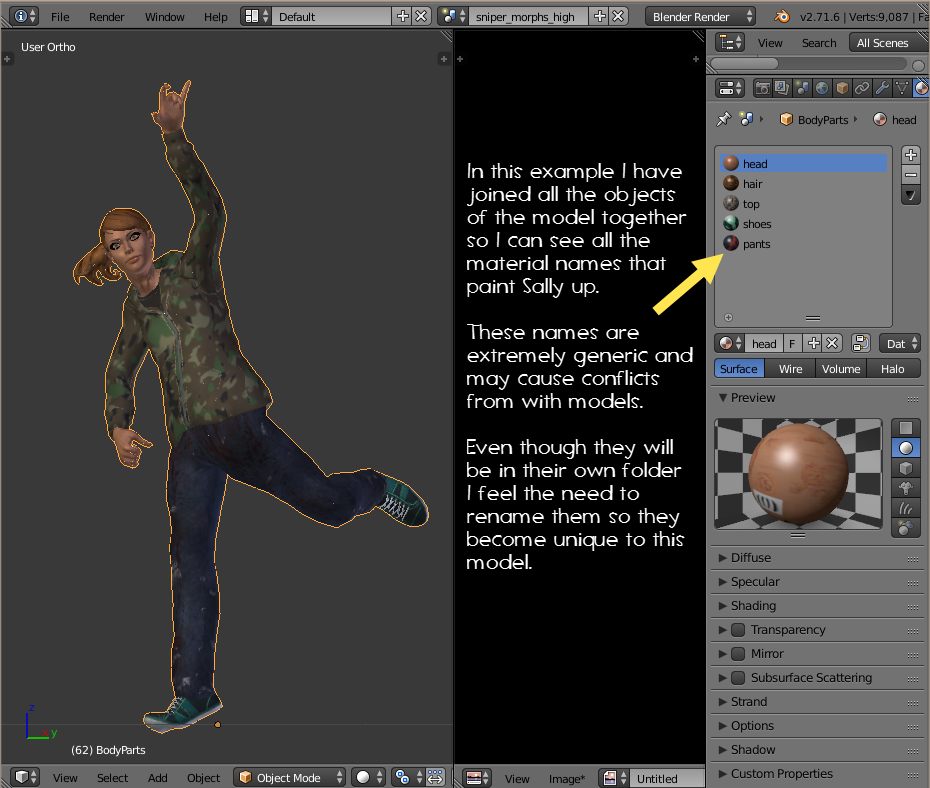
Sally is built up with 5 Objects, Her Hair, Head and hand, Tops (hoodie), Bottoms (pants) and her Shoes.
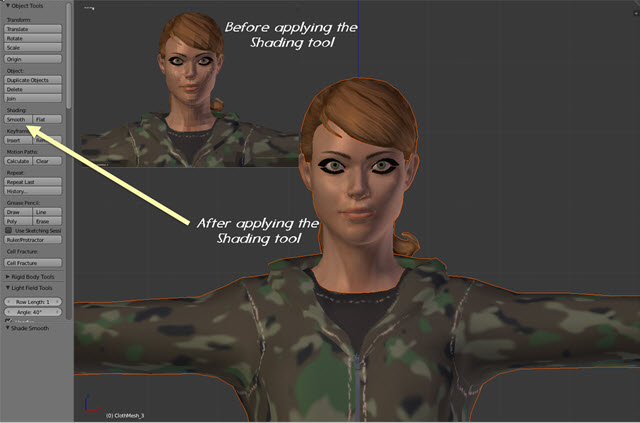
Select all the objects that make up the model with the 3D viewer in Object Mode. Look in the Tool Shelf for the Shading Tool and select Smooth.
Now I have created 2 materials in FUSE for her top, I want to make sure the textures are correct for both materials. I select just the Object that has multiple materials and go into Edit mode, If the model was painted when going into edit mode then UVMap should display the painted UV in the UV/Image Editor. If it wasn’t painted, Load the material and texture as we did for the Sniper.
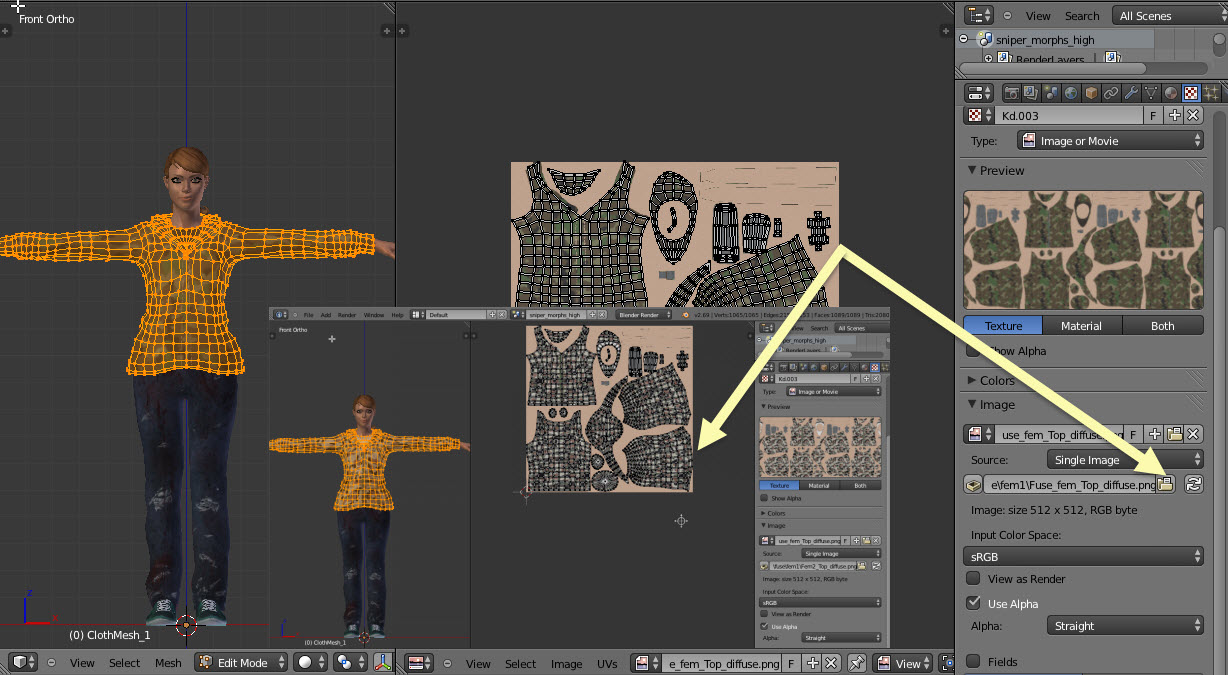
Although it doesn’t really matter, you should change the texture back to the default you plan to use as the primary skin. Remember, you are just checking UVs here and you may want the default material on the model when your start editing it. The reason it doesn’t really matter is that the Blender will only pass the Material name to the model at compile time; the qc will add the texture names.
Setting up the Blender Source Tools
There won’t be many time that you’ll have more than one project in Blender at a time. It’s not good practice to do so. It is very easy to become confused and accidentally switch between models and really pooch things up.
Blender Source tools can export multiple projects or an individual object for a model, however when it comes to compiling, I believe it can only compile one qc at a time.
This tool is amazing. It is actually quicker than using the old method of dragging a qc onto the Studiomdl.bat file and compiling using the SDK tools. There is no longer the need to use the GUIStudioMDL interface after the source files are exported either. It’s an all-in-one tool.
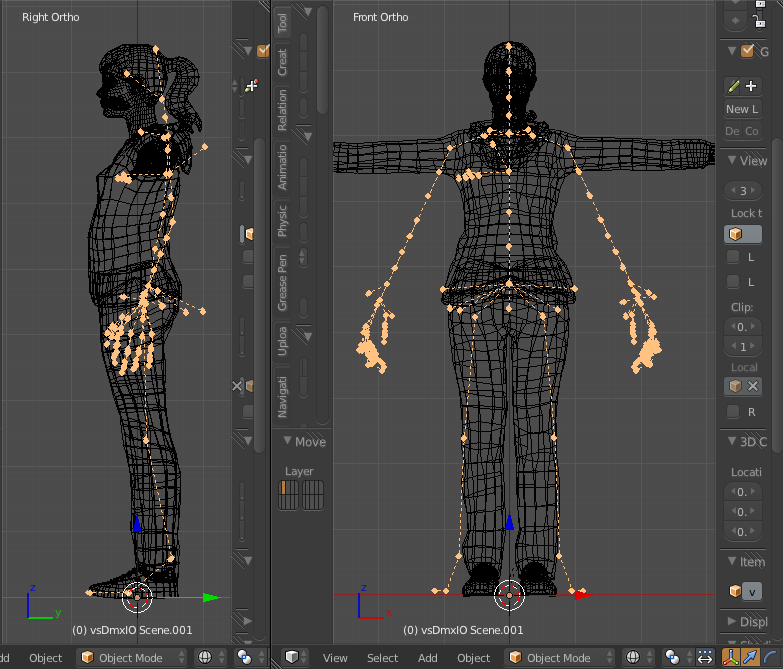
In this section, I am going to use SallyJ and port her into SFM as a prop using the tool and a very simple qc. Remember she has no bones and I am not going to add one either.
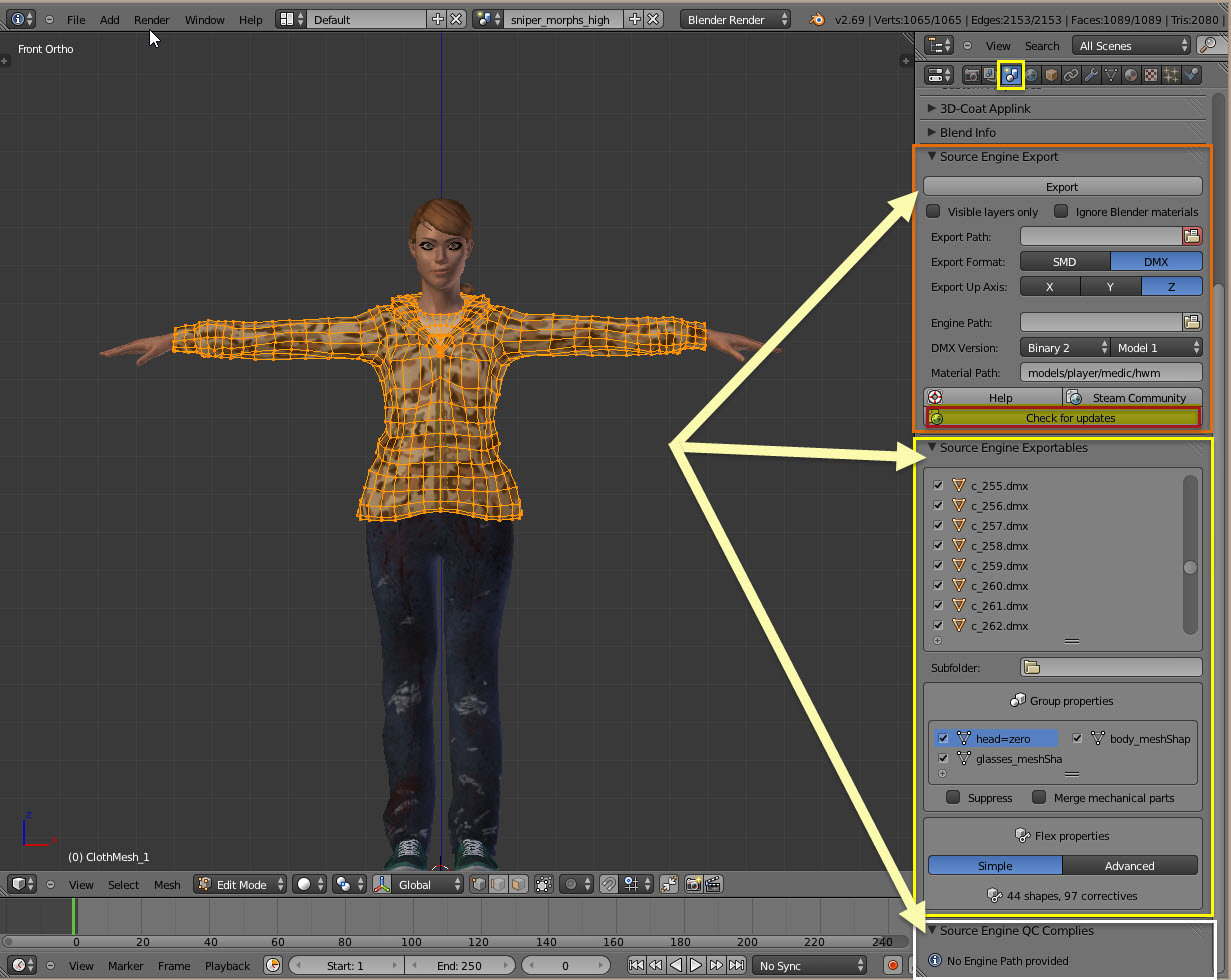
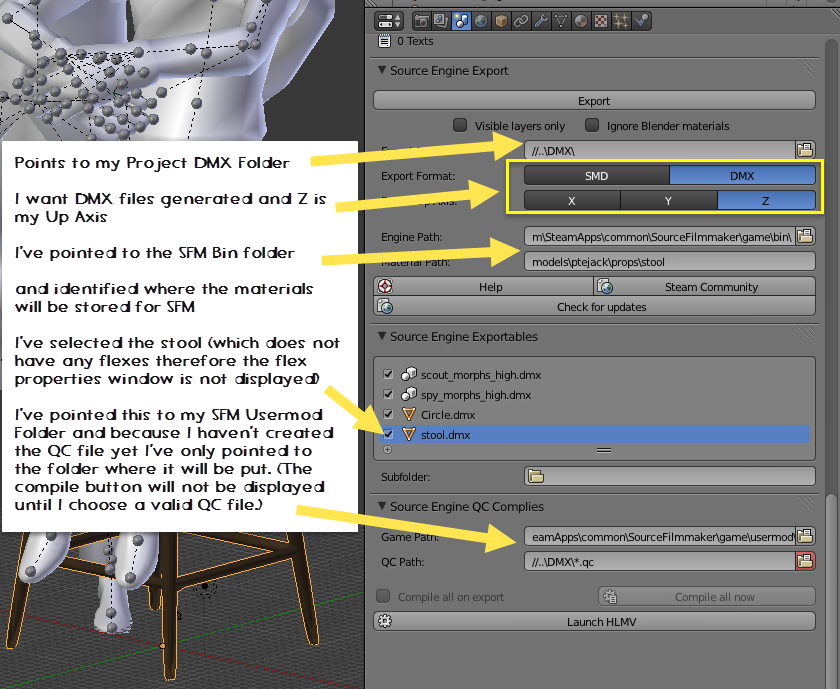
After you install the Blender Source Tools plugin, it will attach itself to the Scene button in the Project Properties panel. It consists of three tools. If an option for a tool or a tool itself doesn’t have a use, it will be hidden.
- The Source Engine Export tool
- This is where you set up the Export Path (where you want Blender to dump the Valve Model DMX or SMD files.)
Select the type of model Source File (SMD or DMX.) SMDs are the old format, in this tutorial I will only use DMX files and will point out why when we get into compiling models that have flex animations. - Tell the tool what is to be consider the Up Axis
Identify which Game engine StudioMDL compiler is to be used for the model (if this is not set for the DMX file type, you will have to specify what version of model you are trying to compile) - And for DMX types, identify the path to the Valve Material Texture Files for the model
- There is also a Check for Updates button located here. Always push this button before compiling a project if it has been a while. The tool will go out and compare the version of the plugin on your system then will download and install new versions if your copy is out of date.
- This is where you set up the Export Path (where you want Blender to dump the Valve Model DMX or SMD files.)
- The Source Exportable Items tool
- The window under the title will display every object that is available to be exported in the scene. Each item listed can create its own SMD/DMX file. All objects are selected by default but can be toggled on or off manually. Items toggled off will not be exported.
- If a model has objects grouped together they will be shown under the Group Properties option as a group. You can toggle these groups on or off for export, you can suppress the group, forcing each item to be exported as its own DMX file and you can merge objects that share the same bones into one DMX file.
- If selected object have mesh flexes, this option give you the ability to let the tool take care of the flexes (Simple) or allows you to apply changes like stereo controls rename controllers, apply dominators, etc (Advanced)
Note: If you select the SMD format, a lot of these options will not be available. If your model has flexes, the tool will create a VTA file containing the animations for the controls. You will have to assign and configure the controls in your qc.
- The Source Engine QC Compiles tool
- This tool will not be available until the fields in the Source Engine Export tool have been populated. This is where you’ll assign the path to the gameinfo.txt files to be used and the path and qc filename that is to be used for the model.
Ok, let’s set up SallyJ and export her as a prop
The QC file is the file that tells the Valve StudioMDL file how to compile the model. It identifies a multitude of things, Eyeballs, controllers for flexes, the source files to be added, Jiggle bone configuration, Textures to be used, Bodygroups, animation files to include, etc.
For this prop I am going to write it in about 7 lines. We aren’t going to include the second material for the hoodie this time. That’s for later.
So here is the qc. I save this to the folder I am going to send the DMX files to. I’ll name it salljprop.qc so I know that this is the prop qc.
// double slashes is a comment command anything behind them on a line is ignored
// Identify the model path and name in relation to the models folder
$modelname “testprop/sallyj/sallyjprop.mdl”
//identify the source files to join together to make the model
$model “face-hands” “bodyparts.dmx”
$body “top” “clothmesh_1.dmx”
$body “hair” “clothmesh_0.dmx”
$body “pants” “clothmesh_2.dmx”
$body “shoes” “clothmesh_3.dmx”
// All models must have at least one sequence
$sequence “idle” clothmesh_1.dmx
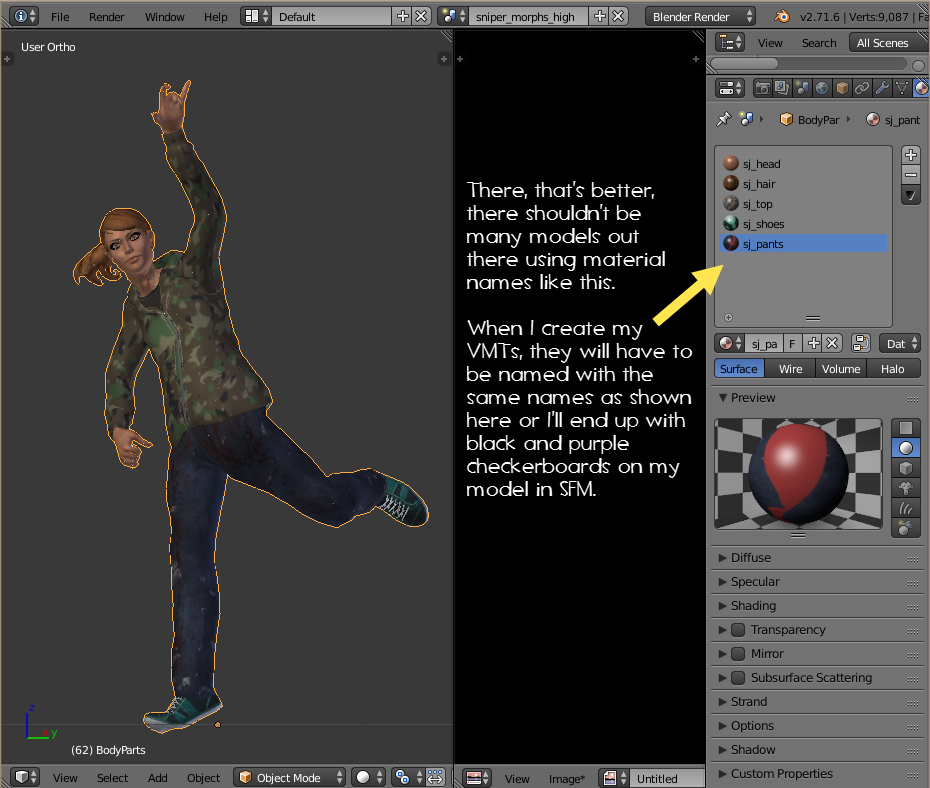
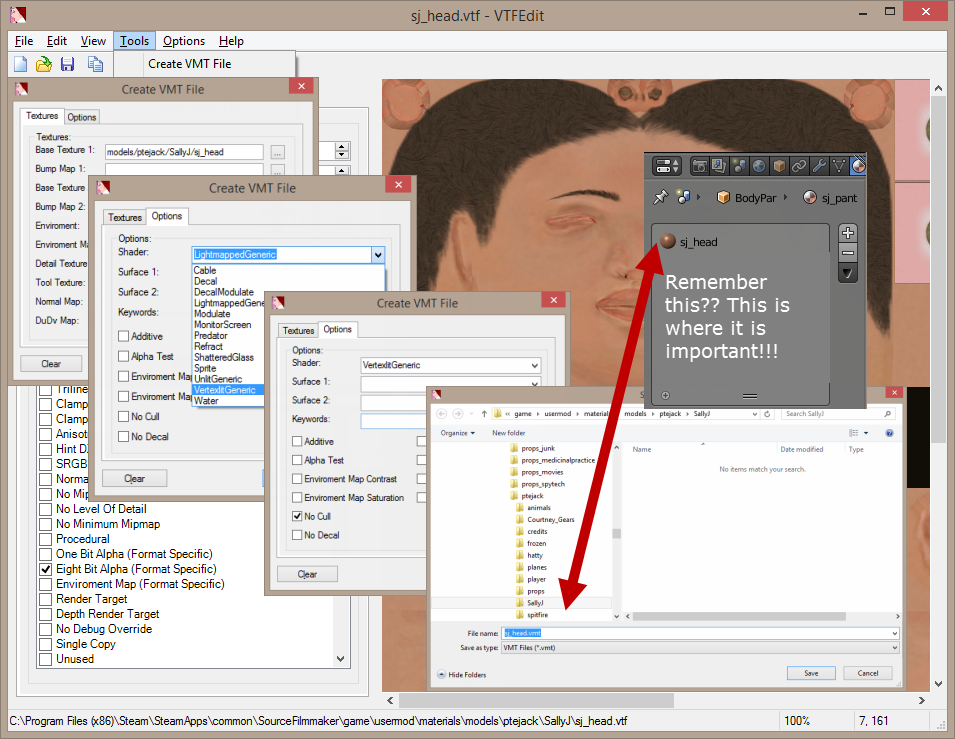
Before I can compile the model I have to convert my TGA (PNG or JPG) materials to VTFs then create the VMTs that will call them and place them in the folder that they will be called from. I must at least name the VMTs the same name that I called the Materials in Blender.
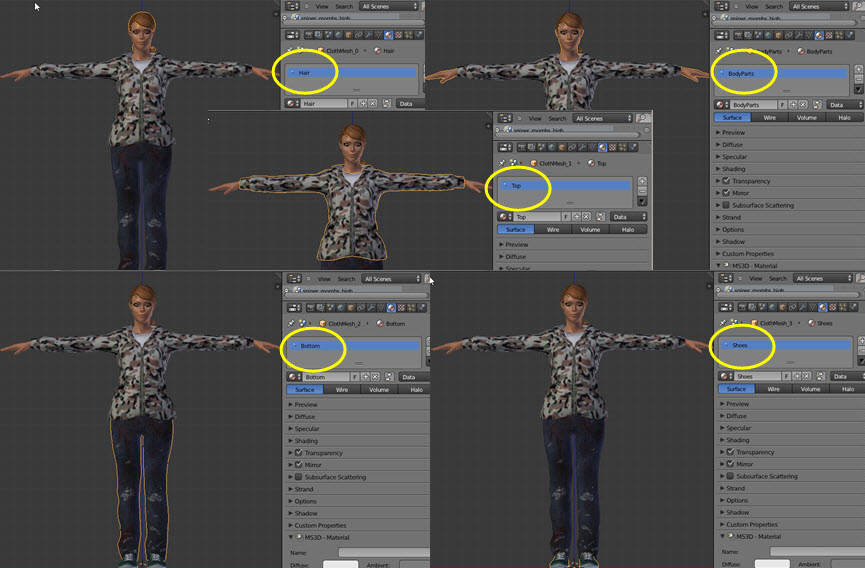

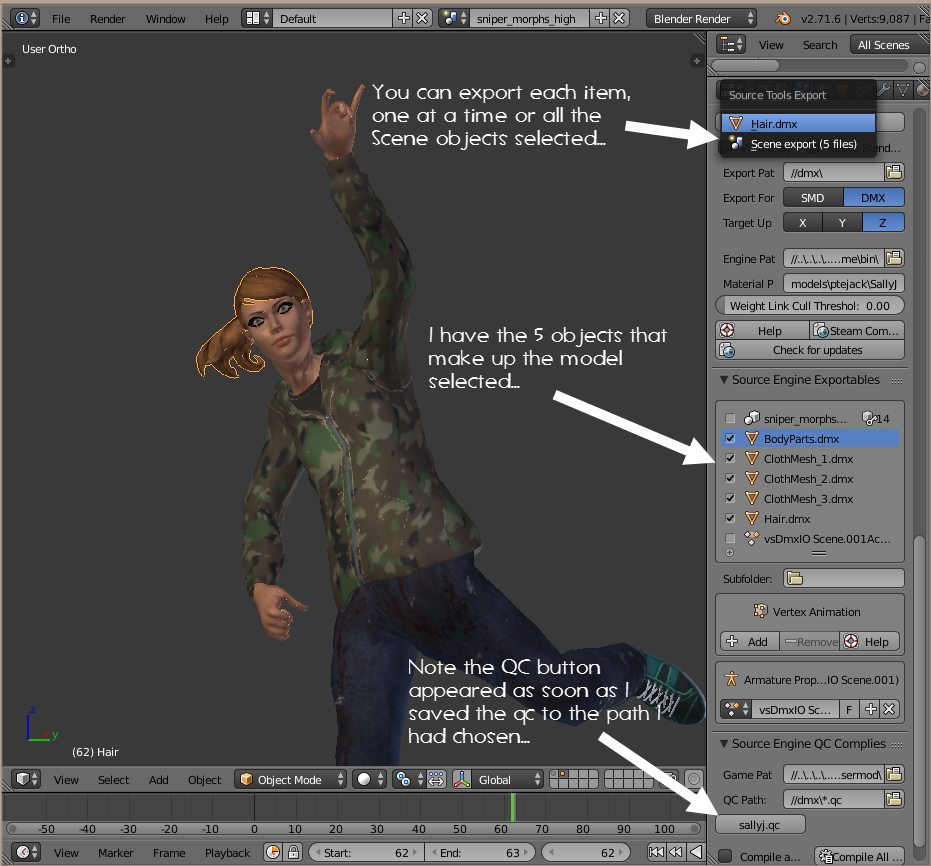
With this done, I can now set up the Blender source Tools for this model, Click the picture to enlarge the setup.

Final Check Before Compile – Origin Points
A little on a multipart models and origin points…
The origin point will form the Root Transform of a model. Every separate part (or blender object) has an origin point. If the model is standing properly at the xyz crossing point on the Blender grid, but the origin points are not at zero, when compiled into SFM and defaulted, the parts will offset by the distance the origin points were off the zero mark.
This is an example of the correct and incorrect way to layout origins and the result that will occur when the model is Defaulted in SFM…
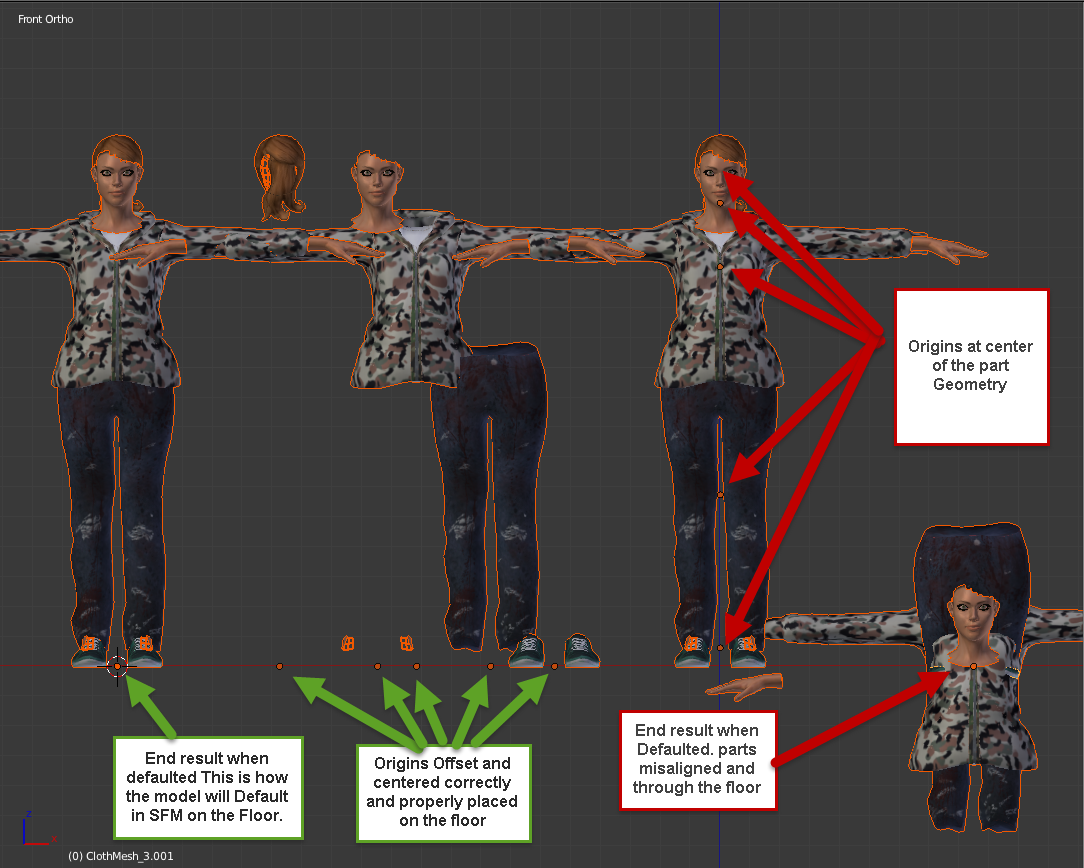
Before compiling a model, you must ensure that the original points are set properly for the effect you hope to achieve for that particular model.
Exporting DMX Files and Compiling a Simple Model
Now that the origin points are set, SAVE YOUR PROJECT then put the 3D Viewer back into Object mode. Press A a few times until all the objects of the model are selected. Go to the export button in the Blender Source Tools meun and press it.
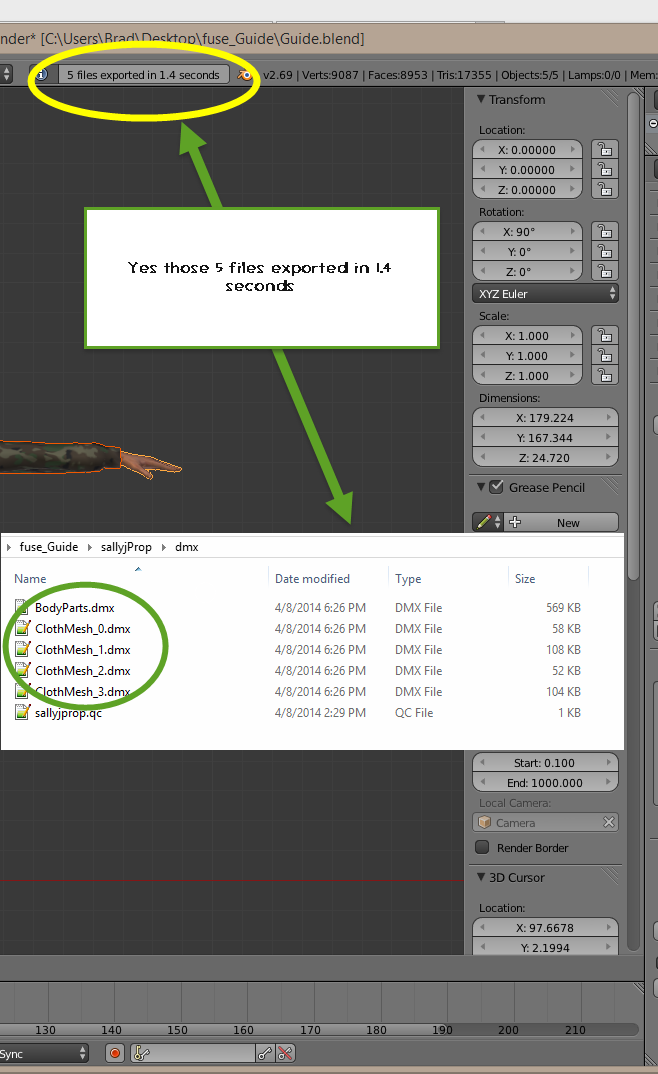
If all went well, go to the Folder you assigned as your Dump Folder and you should find your DMX files. Congrats so far…
Now let’s compile the model…
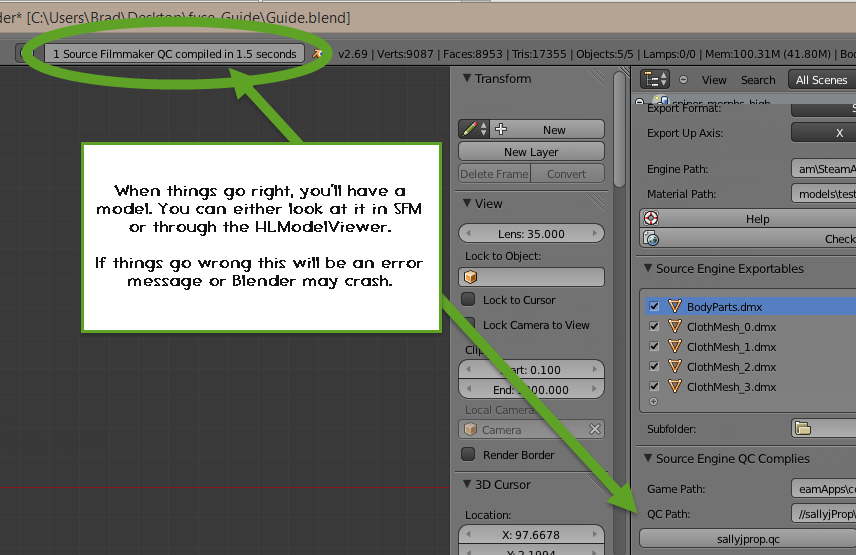
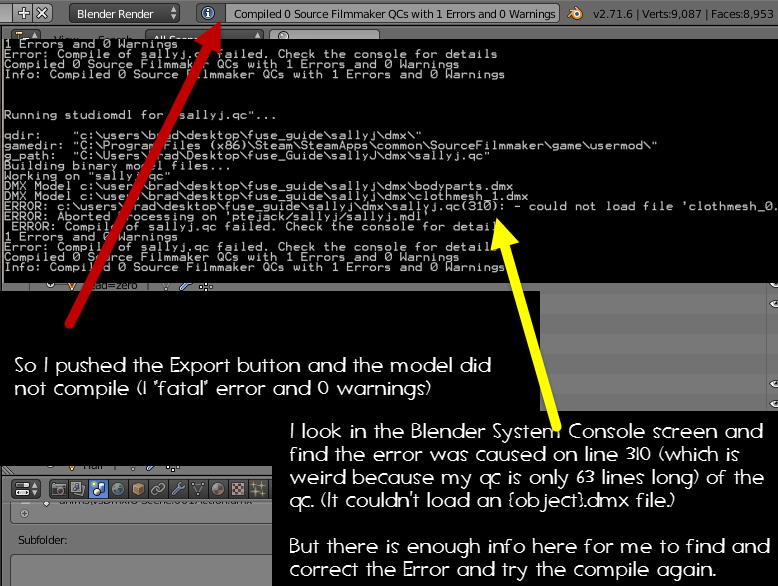
If things go well, you’ll get a message that the model compiled. If they go bad, you’ll get an error message or a crash….
If things went well, launch SFM and have a look at your model.
All the bones for the parts were created as was the root Transform, but it looks like we have a problem…

Moving On – Working With Various Model Types
Ok, Now that we know how to compile straight from Blender, let’s start looking and working with the models and make then SFM compatible. As I said, once you get a model into Blender (doesn’t matter what format it is) it can be compiled for use in SFM. So, let look at a few model types and some of the various problems with them.
XNALara is a posing program. It allows users to take detailed models into the program and use sliders to manipulate bones to place the model into poses. It also offers limited animation. People love this program because the level of detail of the models and their textures plus the support that modelers give to it.
The native format for a XNA model is {filename}.mesh and although there is a .mesh importer for Blender it is not the same format. In order to import a XNA model to Blender, first you have to load the model into XNALara then export a t-pose in “mesh.ascii” format (if you want bones) AND find the XNALara Importer plugin for Blender. (See my guide on converting XNA models for links and if you’re lucky the modeler has included a .mesh.ascii variant in his package.)
Anyway, we’re going to take a quick look at Ralph here…
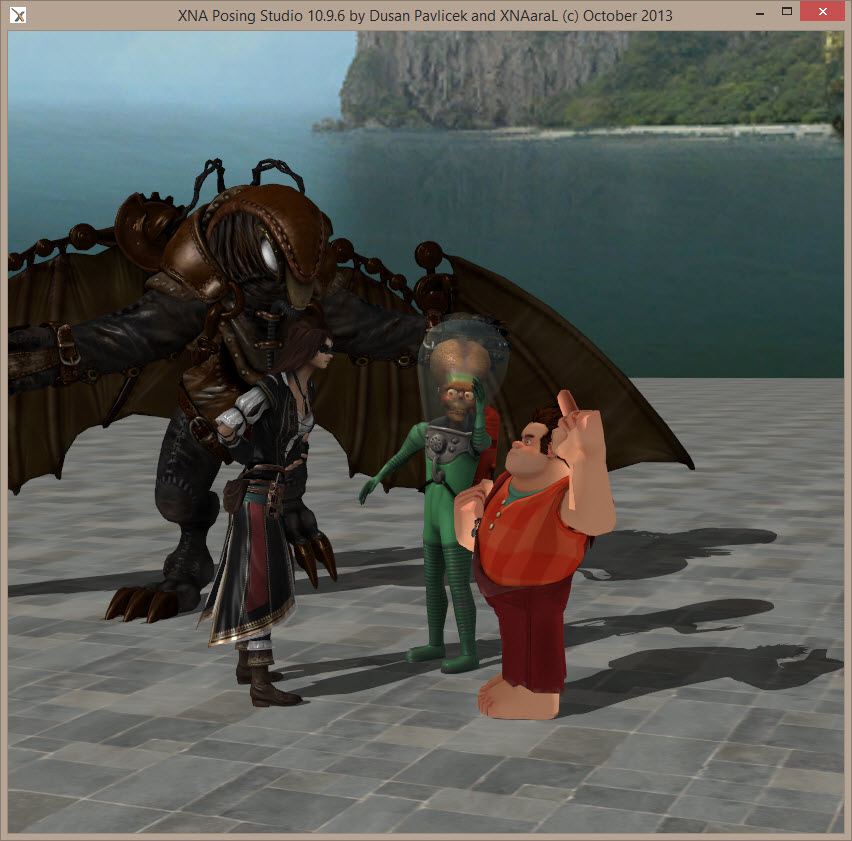
This is a real benefit when bringing the characters in to SFM. Mixed with the proper vmt commands, the models can really pop. (Unfortunately, I’m not there yet!!)
Another benefit is that they have bones. They need to be edited for SFM, but you aren’t forced to recreate them. This is probably one of the easiest model types to work with.
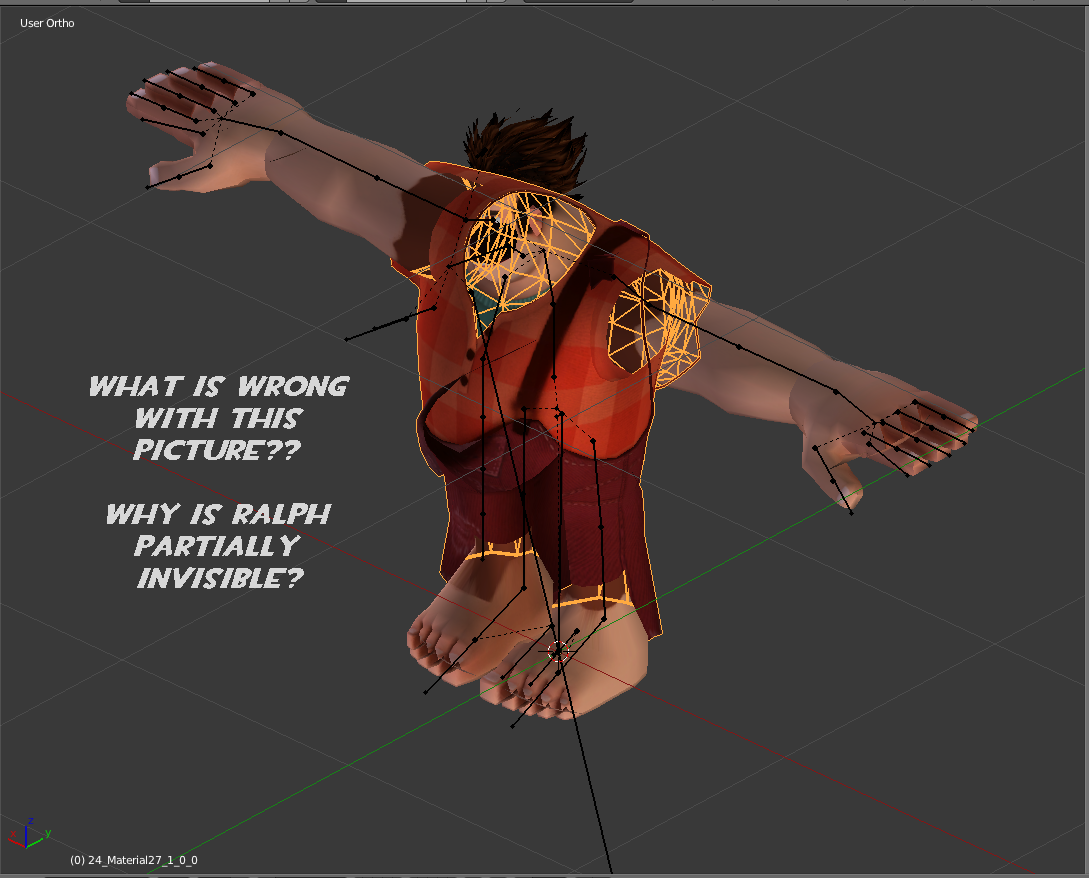
When textured in Blender everything seems backward or invisible.
If the model has the ability of facial flexes, these are all driven by bones, not shapekeys. However this could prove to be a benefit as well, something we’ll explore later.
Most (if not all) model faces are trigons or ngons, All though this isn’t really a problem, it throws the symmetry of the left and right side of the model pretty much out the window. This means that if you are trying to edit both sides a model, you can’t use the benefit of the mirror x features of Blender, you have to do each side separately.

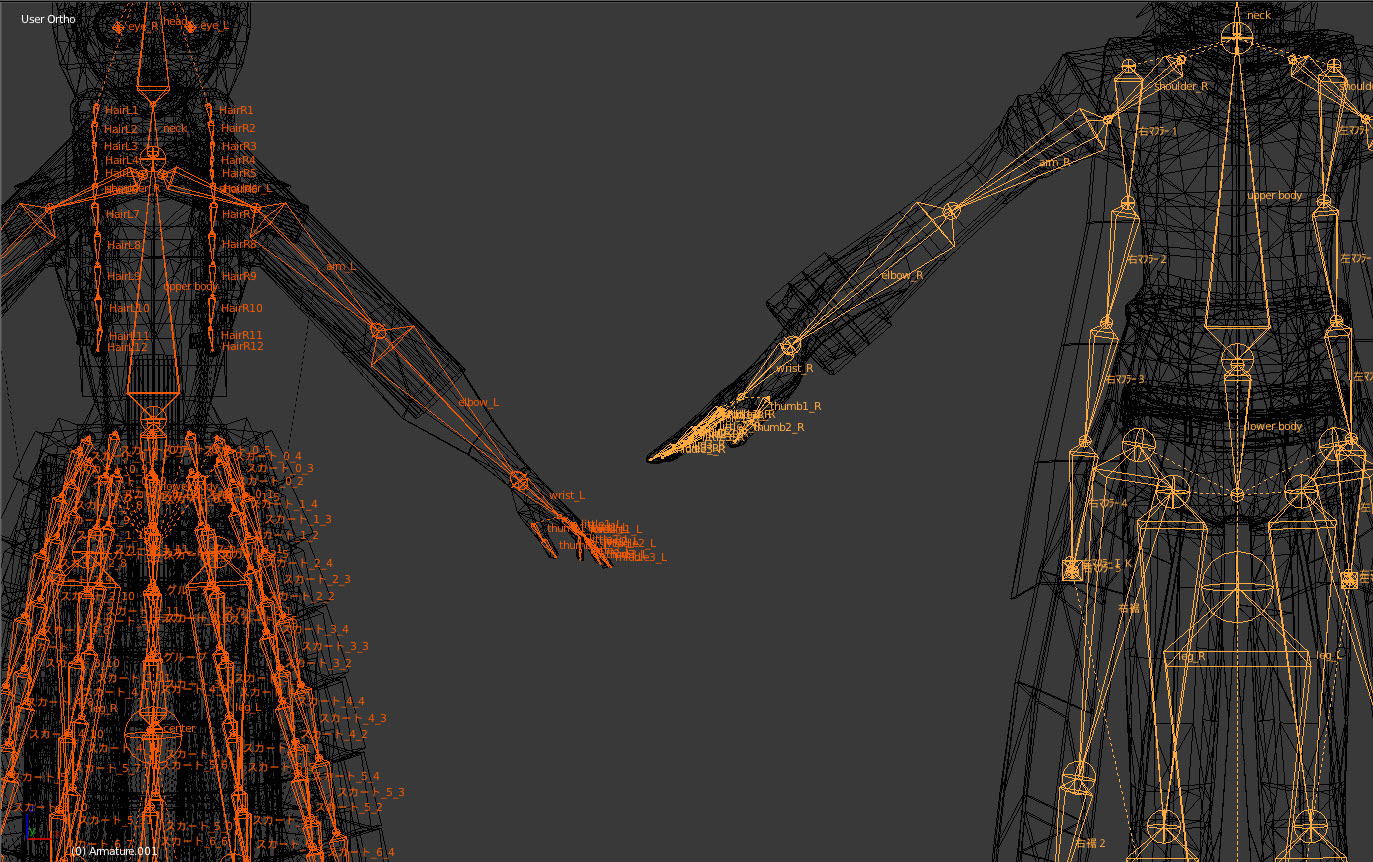

2 of the major cons to these models are, BONES!!! Plus, the language used to name everything is Japanese, (not a bad thing if you can read and type Japanese, but a real bane for those of us that can’t).
One of the advantages is that most have limited facial flexes that can be adapted for use in SFM.
Again, because they are coming from compiled model types, the mesh is trigon in nature.

It just goes to show you that if you search the web hard enough you should be able to find something out there that can be adapted at no cost…
The biggest disadvantage of this model type is that it doesn’t contain bones (at least I haven’t found one that does.) This means that you’re stuck with rigging the bones to the model yourself. Another disadvantage is that a lot of them are grey clay models, in other words, have no textures. This means you have to paint them yourself as well. There are some good programs out there for doing this; some are commercial and cost quite a bit. There is also GIMP which is free. I have found the a lot of the models I’ve obtained in OBJ format are built with Quads and are pretty much symmetrical, this is a great thing as I’ll point out later.
These are not the only model types that Blender is limited to. There are quite a few more. 3DS (I believe this is pre2009 with a 3ds extension models only), LWO, Collada, FBX (limited), Unreal PSK/PSA to name a few. There are quite a few Plugins out there for Blender for the different formats.
As for the newer versions of Maya and 3DSMax, Abobe is keeping their proprietary format pretty much to themselves and Blender cannot open files produced under their native format. If you are a Maya/3DSMax User and want to transfer your model to Blender, you’ll have to find a format that both support and export from Maya/3DSMax using that format.
The main point here, is that if you can bring a model into Blender, you CAN get it into SFM.
Size Does Matter – Scale
Keep in mind that most any model you work with will have to be scaled to meet the requirement of the project, as you saw above. If you are converting models from a game, or a program that pretty much uses a standard size model across its range of models (like the MMD models or you have a gambit of models from a single game resource), once you know how much you pumped or deflated a model to meet your need you should be able to apply that same scale change all of the models of that series. For example not all Valve games are the same scale, Halflife 2 is smaller than TF2, Dota2 models are gigantic, DOD and CS I believe are the same, but smaller than TF2, etc. So, if you bring in a model that you want to apply to your scene, make sure you check its scale against one of the main characters of your clip.
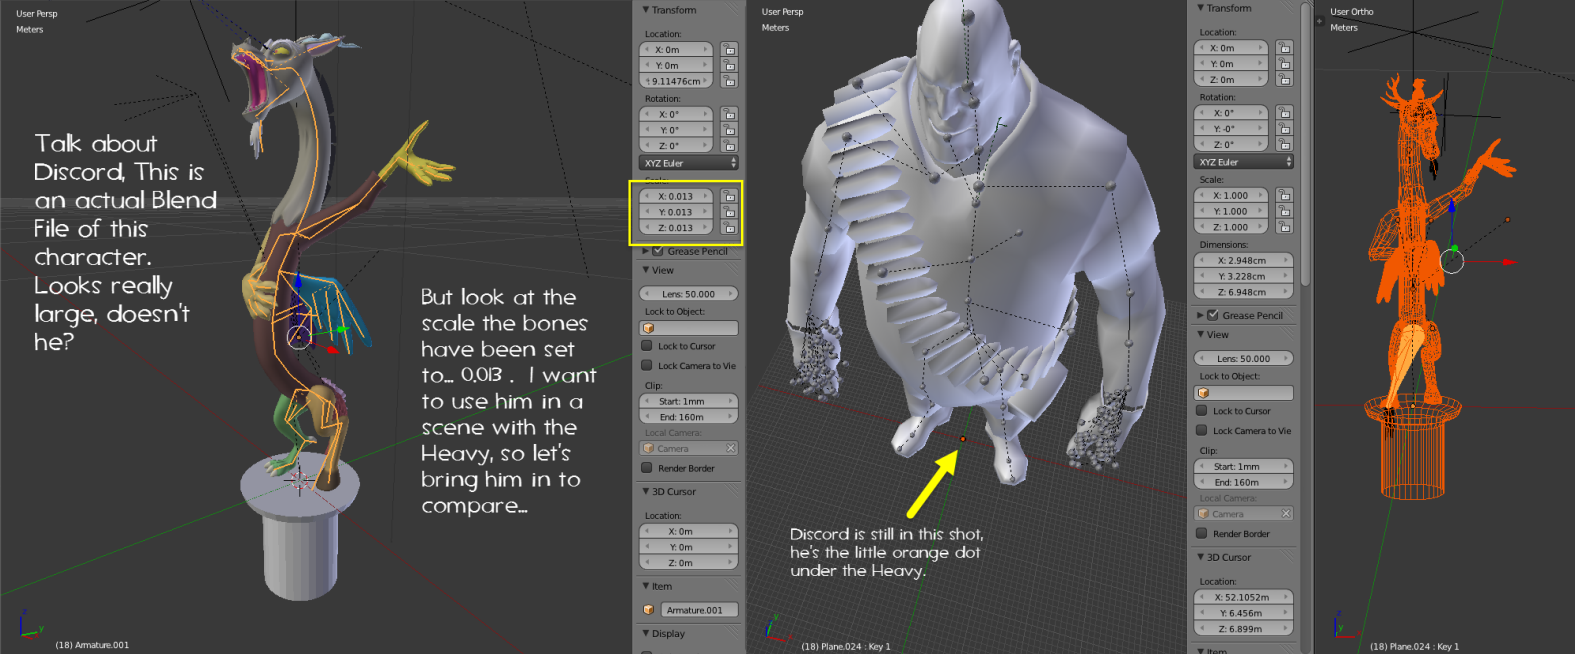
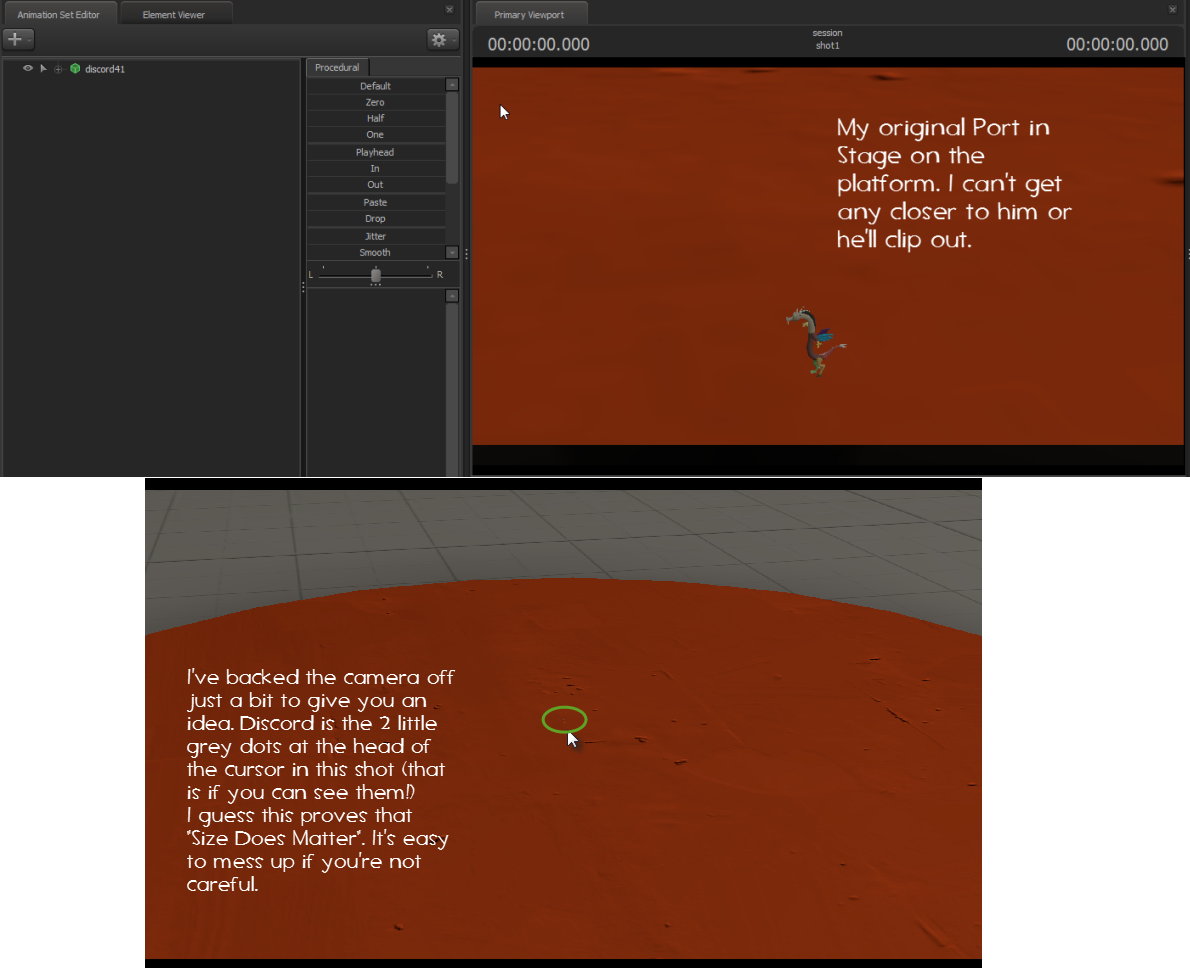
Here is an example of a character I found. The ZIP file had an actual Blend file included, so I didn’t have to worry about finding a conversion tool for it. I just had to open the Blend File. Anyway, I ported this model into SFM, but when I went to look at him, he was invisible. I thought I had a problem with textures, or with faces pointed the wrong way and ported him again. Same result, invisible. Then I noticed the scale of the bones (which control the size of the mesh) and smacked myself in the side of the head. True story, you can ask Riptorn, he was watching the session as I did this.
More Useful Models – Props Pt1 – Boning
Well, looking at the to-do list I think this is the easiest place to start; things that only need one or two bones and made in Blender.
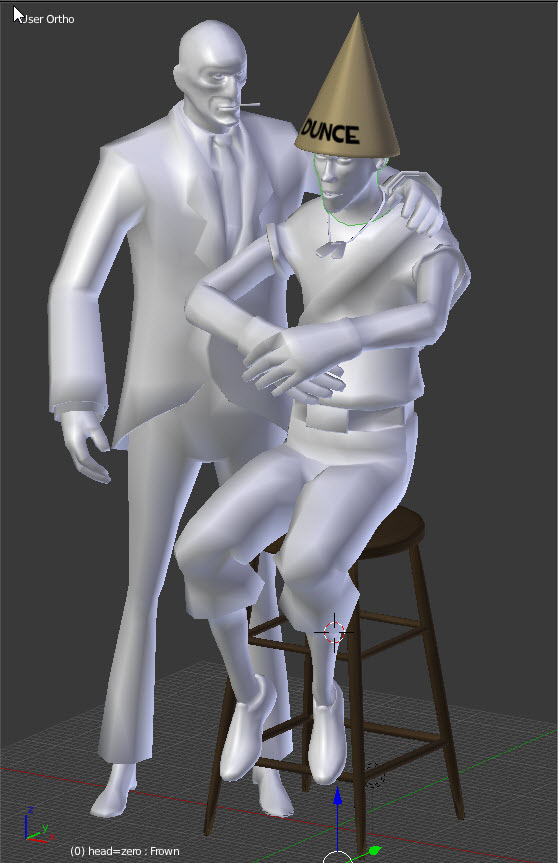
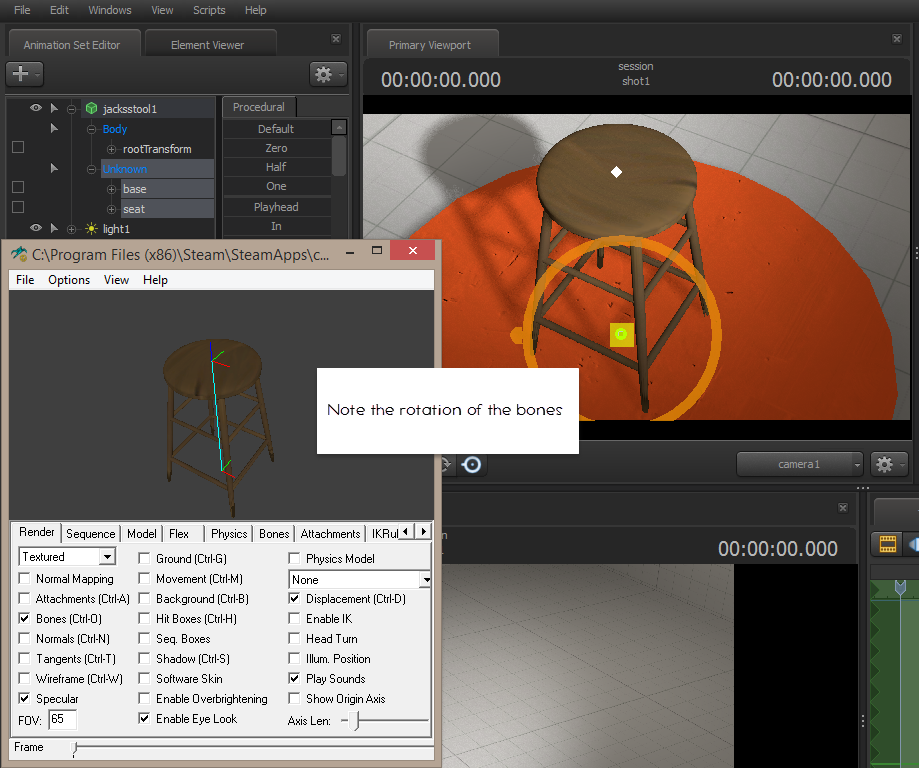
We’ve had one of those moments when we felt like our poor scout here; needing a little solace from some caring soul. But the Spy??? Hmmm!!!
The Stool – Your Own Creations
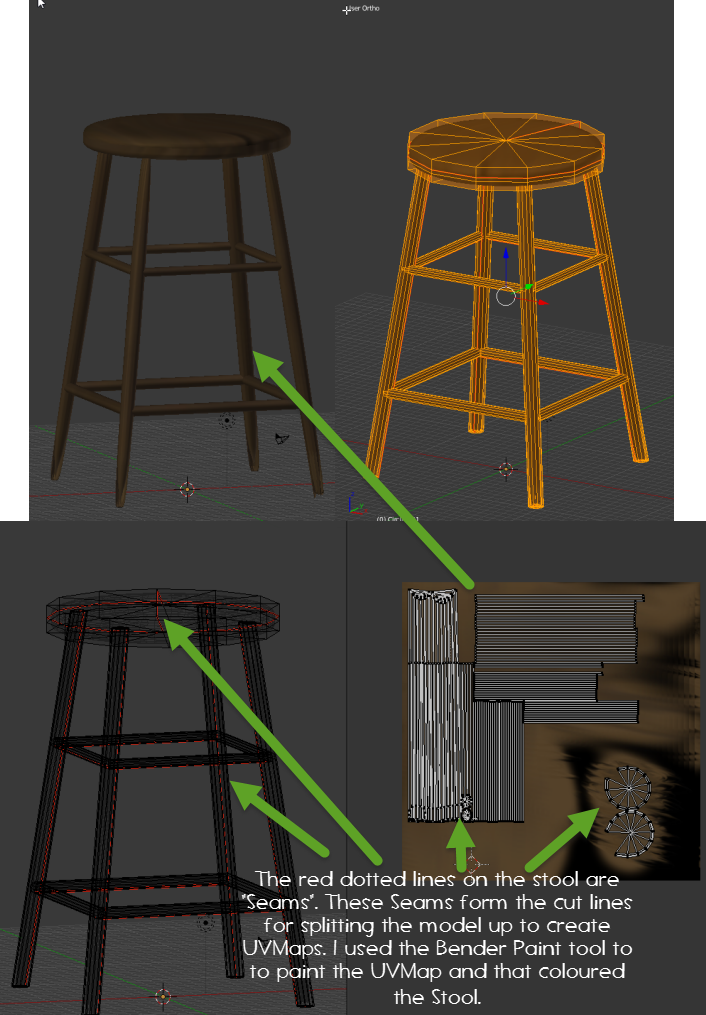
The stool was easy enough to make. It is an Extruded circle and 8 cylinders for legs and the cross members with a subsurface modifier and set to smooth to round out everything. Once built, I seam (cut) the model in such a way that the objects lay flat and pretty even on the UVMap.
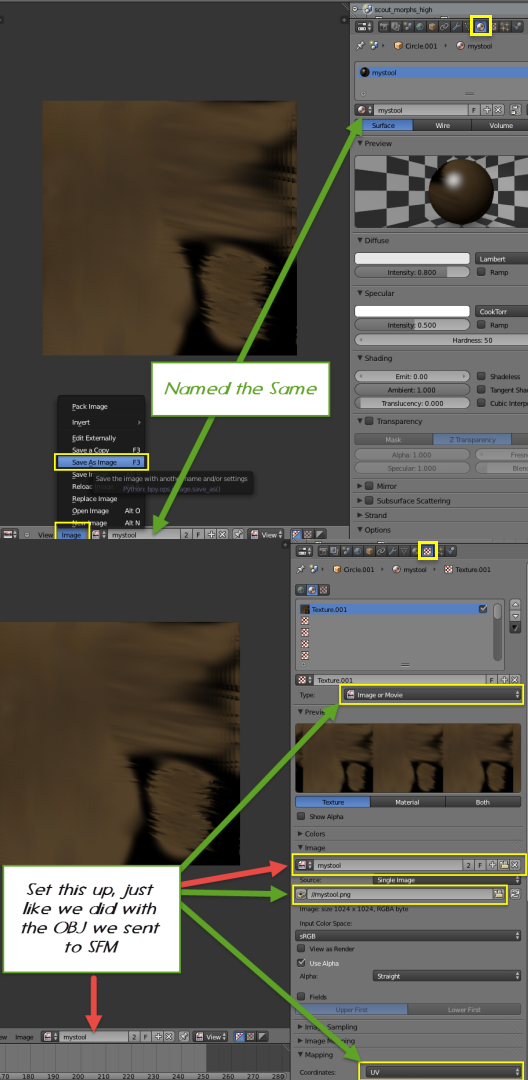
Once the UVMap is established, I dress the stool and assign the vertexes to the material.
I give the material a unique name that I will use as the name of my VMT.
Because I painted the item in Blender, I do not have an actual texture on my hard dirve and nothing to create the needed VTF for the compiled model. On the UV/Image Editor menu there is an Image button, I select that and save the image as a png image using the same name as the Material name. This gives me an image I can convert to the Valve VTF file I need.
Now I go into the Textures Properties and set up the png I just created as my texture.
Time to start talking about bones… You have a major decision to make here. Are you going to set this item up so it will work in both SFM and TF2, or just so it is oriented to the SFM world? Have you ever wondered why a TF2 Character will lie flat on the floor instead of stand tall and proud when you slide the default folder? Or why a hat item will sit inside and upside down on a character after locking bones and zeroing it? It all has to do with the orientation of the bones associated when the item was compiled. When you import a TF2 Character into Blender, if you don’t set the Y axis as Up, the character will come in lying down with it’s head point right along the Y axis.
The actual reason why the TF2 Character lies down is because the default up axis is the Y axis. For SFM the up axis is the Z axis, so there is a little bit of a disconnect between them.
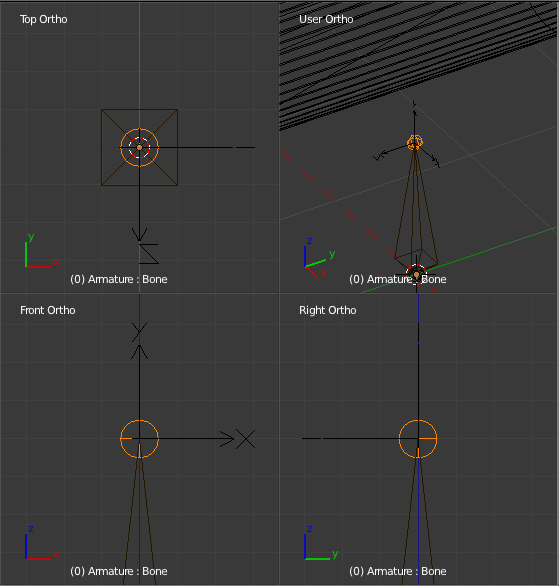
The decision I’ve made is that I want the bone orientation to reflect Both Blender and the SFM world. In order to do that I must rotate the bone -90 degrees on the x axis.
When I created the stool I ensured that i built it up from the center of the grid.
The stool is a single object and I’ve place the origin point so that it is center and on the floor so that the legs will sit properly.
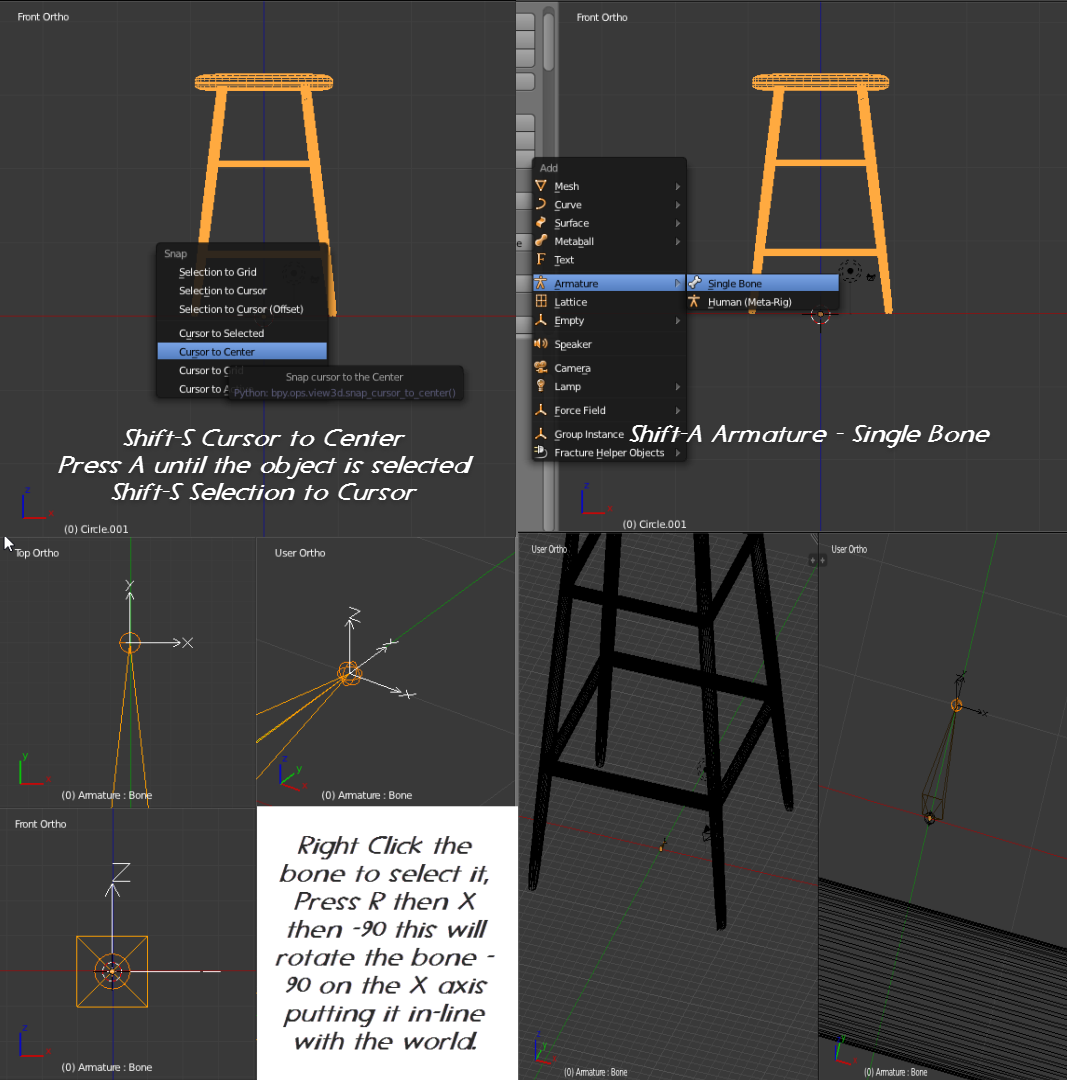
With the Mouse cursor in the 3D Viewing menu I press Shift – A, select Armature and then Single Bone to spawn a bone. This will automatically be named Bone by Blender.
I Right click on the bone to select it, then press R X -90 to rotate it on the X axis by negative 90 degrees.
This bone will form the Root Transform of the prop. If I don’t plan to use the prop for any but a prop, I could stop here and name the bone StaticProp, assign the object’s mesh to to it, then compile the model. When the object is spawned and defaulted in SFM, it would default to the map’s default point and be right side up and on the floor properly at that point. Just like the SallyJ Prop did.
But I want to do a little bit more with this. I want a bone that I can lock on to so that whatever I lock will attach to the center of the top of the seat. A point that would be easy to move a hand to the edge of the stool to pick it up.
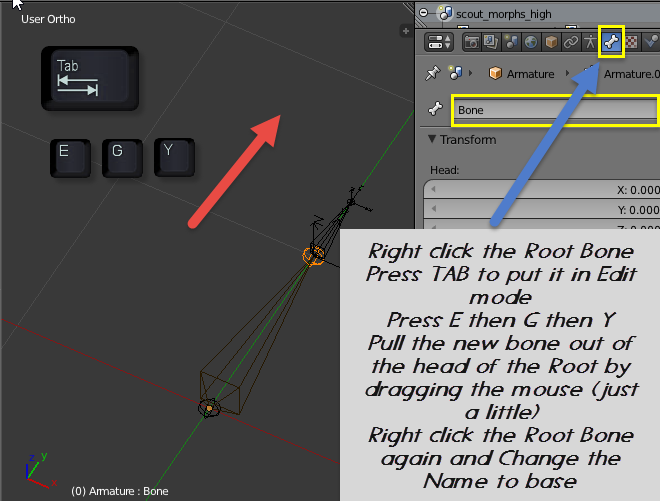
I Right click the Root bone again, look for the Bone Icon on the Project Properties panel and click it then rename the bone to base (all lowercase).
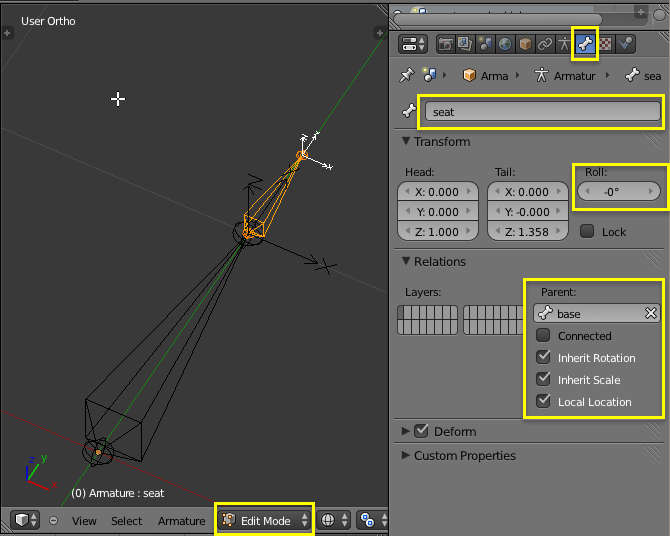
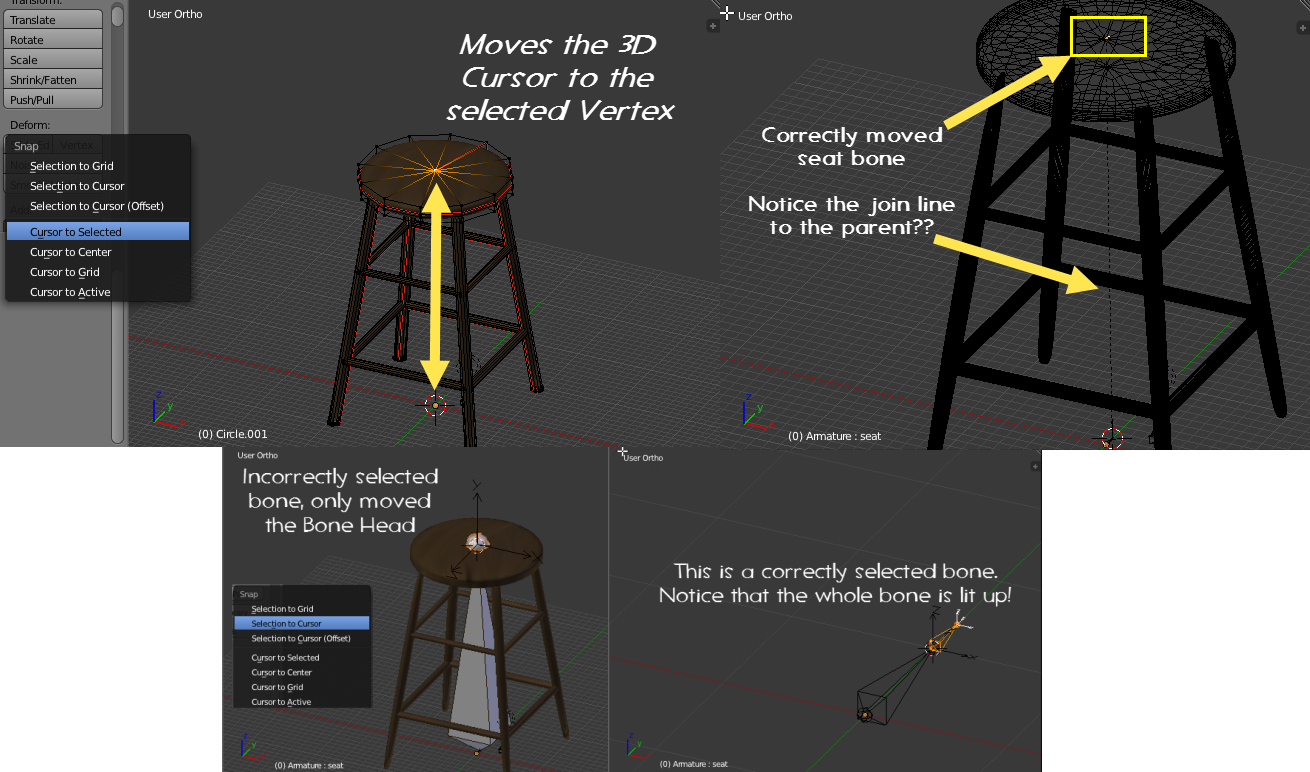
Now that the bone is in place (notice the dotted join line to the parent) I have to assign the whole stool to the seat bone. I can do this using an Armature Modifier and Vertex Groups.
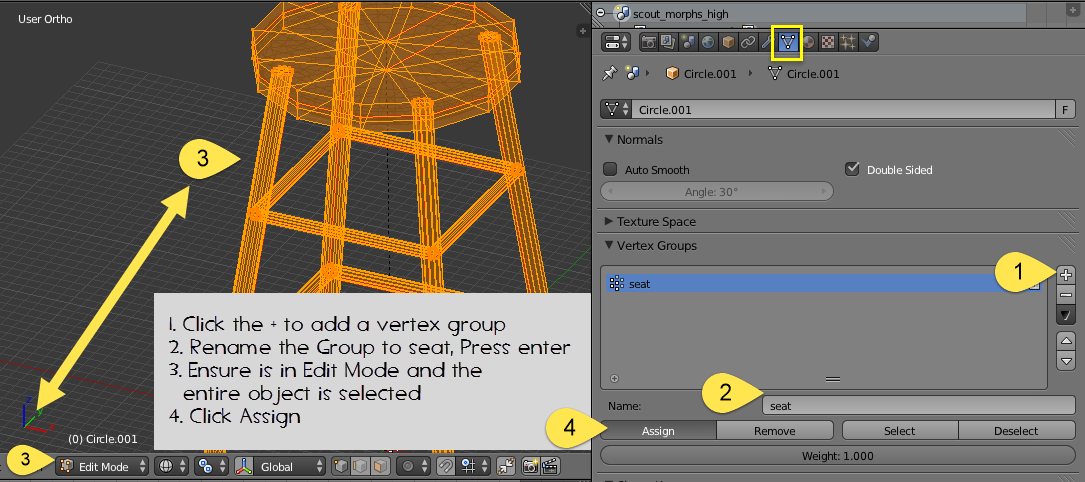
Ensuring all the vertices of the stool are selected, I press ASSIGN.This commits the vertexes to the seat vertex group (but not the bone, yet.)
Now I press the Object Modifiers Button on the Project Properties panel (looks like a wrench (or spanner if you prefer.))

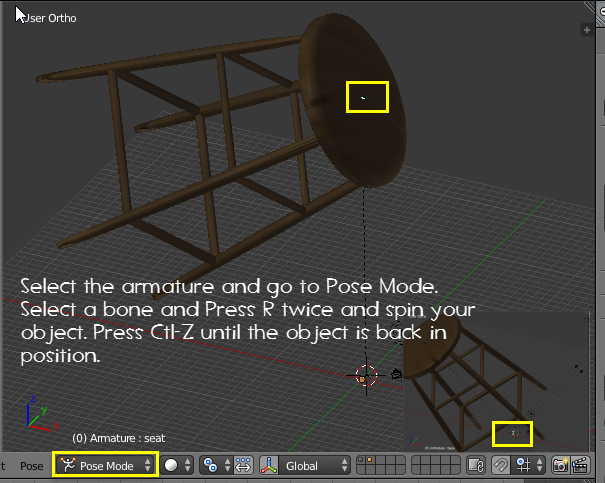
Props – Pt2 Compiling
I missed the portion on scaling in this prop tutorial because I had built the prop to the character I wanted to use it. (I also ran out of typing space in the above section.) So we’re going to jump right into Compiling this model.
This part is going to be short and sweet because we’re going to do almost exactly what we did with the SallyJ prop model.

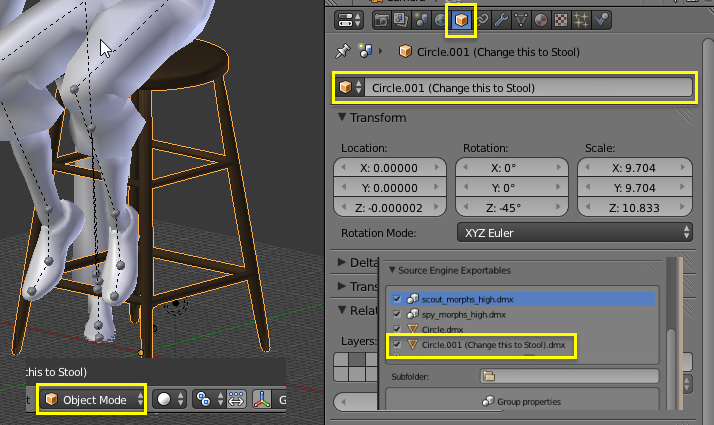
Now select the Object Button on the Project Properties panel
Change the name in the Object’s Name Field and press Enter
What you’ll find when you go but to the Scene Button is that the name of the object will have changed in the Exportables window to what you gave it. Do this for the Hat as well.
Ok, using the example of the SallyJ Prop Project, I’ll set up the following folders (something I should have done right at the start.)
ProjectsMdlSourcePropsStool
ProjectsMdlSourcePropsStoolBlend
ProjectsMdlSourcePropsStoolDMX
ProjectsMdlSourcePropsStoolMaterials
In my SFMUsermod Folder I’ll set up
ModelsPteJackPropsStool
and
MaterialsModelsPteJackStool
I convert my materials to VTF files and create the VMTs
I set Blender Source Tools like this
This is a simple prop, as this is for SFM, the qc is extremely simple. If I was making this for a Valve game, the qc would be a little more complex.
Here it is.
$modelname “ptejack/props/stool/jacksstool.mdl” // a unique name so it doesn’t conflict with others and points to the file path relative to the models folder
$body “stool” stool.dmx // the qc resides with the dmx file I don’t have to specify a path to the DMX
$cdmaterials “models/ptejack/props/stool/” // points to the material path the model will call the material. If I wanted to add multiple skins, I would make a textures group.
$sequence “ref” stool.dmx fps 30 // all models must have at least 1 sequence.
// If I plan to use this with SFMPhys, I may have to add hit boxes in order to give it physics, this is beyond the scope of the guide.
That’s it. I save it to the project’s DMX folder as stool.qc. As soon as Blender Source Tools sees the QC, it will automatically present the QC compile buttons.
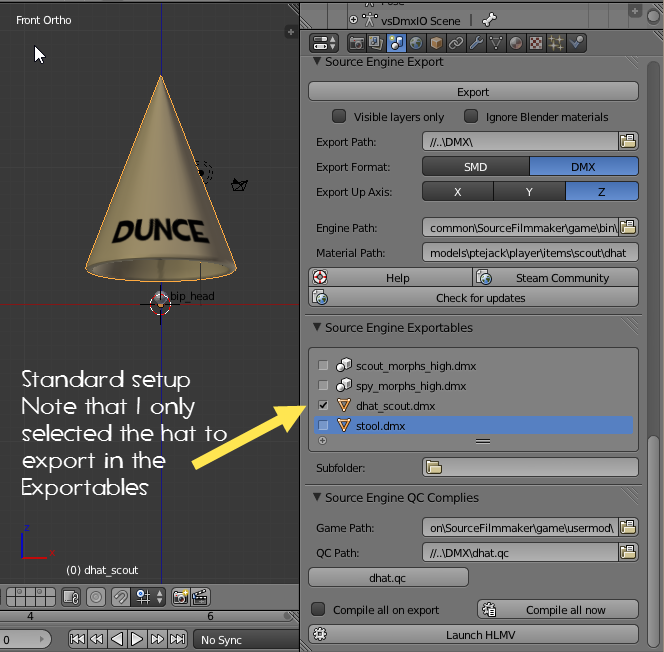
I select the model I want to export. in the Source Engine Exportables window.
Clicking the Export button will present the Source Tools Export dialog box. Inside the Dialog box I can choose to export the selected object or all of the Scene Objects.
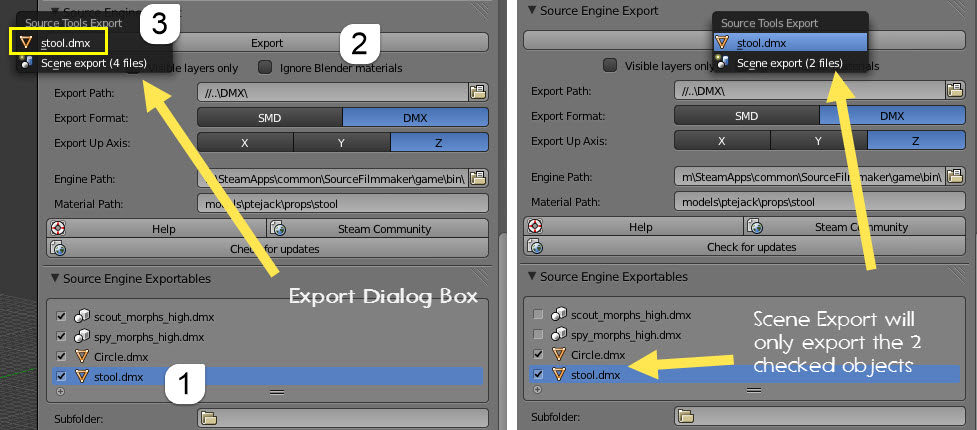
This is great if make changes to one of the objects that make up a model. I have the ability to export only the objects that I have made changes to.

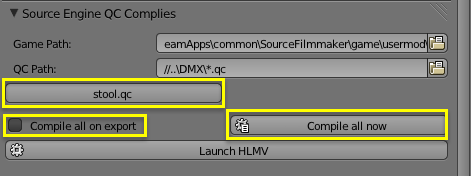

If all went well, you can launch the HL Model Viewer to view your model from the Blender Source Tools or you can go off to your Steam Client an load it up in SFM.
Hats – Part 1 – Positioning and Scaling
The difference between a hat and a prop is that instead of creating a skeleton from scratch, use the bones from the actual character you made the hat for. This way when the hat is locked to the character and zeroed, the hat bones will match the rotation is the locked locked bones of the character and fall into place extactly where you want it to.
So looking at the simple hat I created for the scout.
In this picture, the hat has been is placed the hat on the scout the way I want it to be when zeroed in SFM. Looking at the bone structure of the scout, this particular model has two bones that could influence the hat totally and keep it on the model without clipping when the head is moved. One is the bip_head and the other bone I “could” use is called bip_headEnd.
Planning the model to be used on other viariant is a good thing. The model used here is the HWM variant of the Scout, but the actual “Player” model doesn’t have the bip_headEnd bone. I want to be able to use this hat on both the HWM and the Player Models and be able to lock the hat by simply dragging the model I’m using on to it in SFM. Both models have a bip_head bone, and as bip_head can influence 100% of the mesh completely I will use it for the hat bone.
So let’s do this as if I just created the hat.
The next thing I want to do is import a representation of the character I want to dress the hat on.
Note: If you plan on making this hat available for different classes, you’ll have to do this for 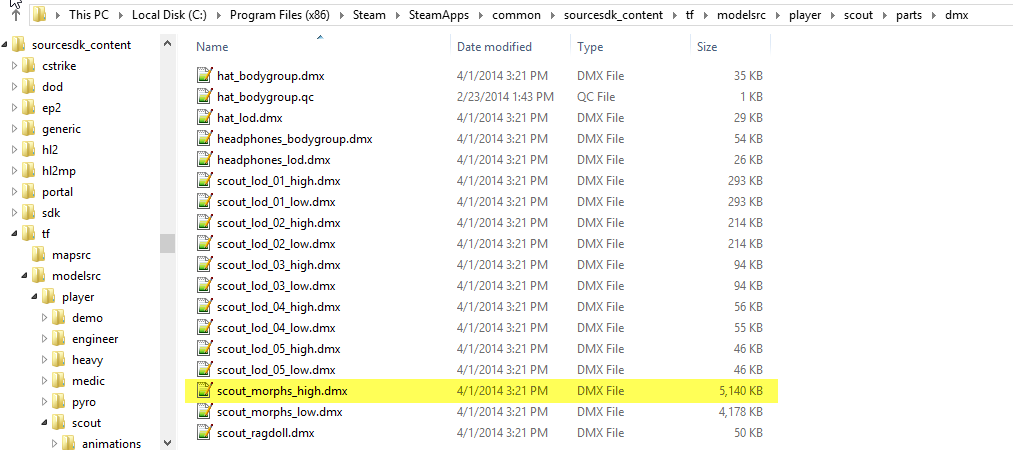
The Scout I’m using in this example is the scout_morph_high.dmx located in the SteamSteamAppscommonsourcesdk_contenttfmodelsrcplayerscoutpartsdmx folder

Ok,
There’s that word again. How do we scale an object? It is really quite simple really.
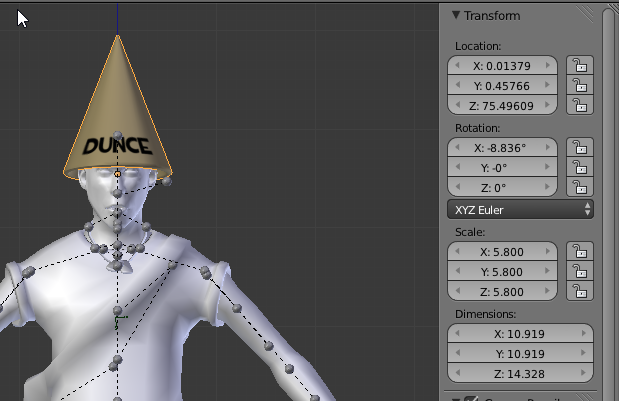
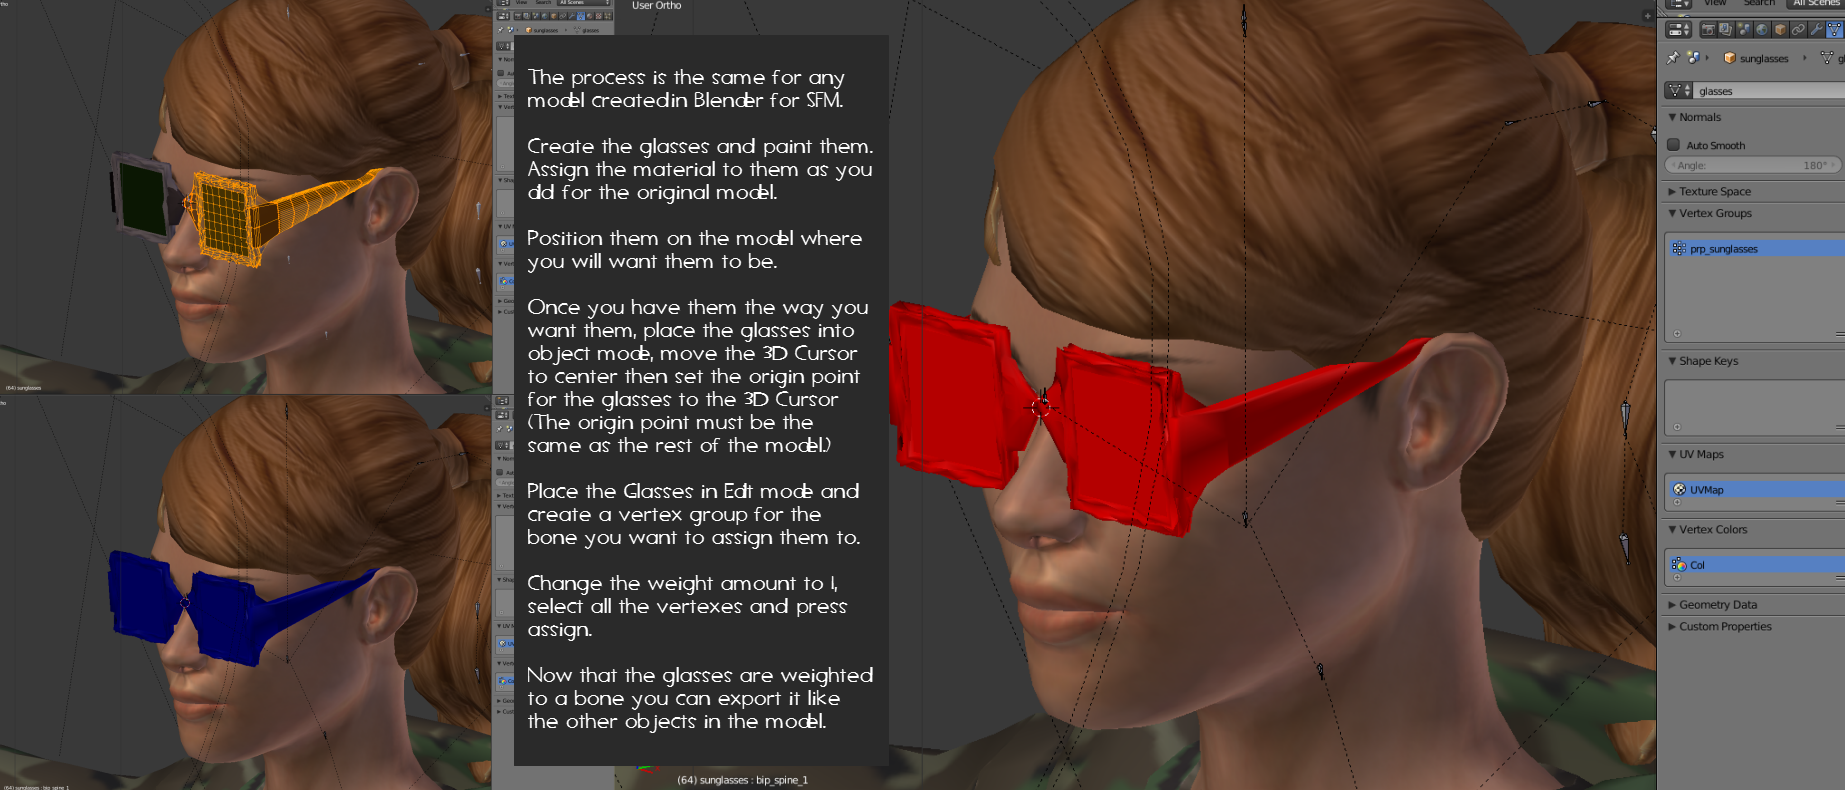
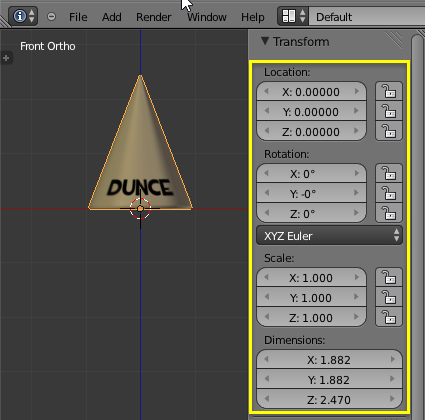
I bring in a copy of the model that I am going to put the hat on. In this case there isn`t a bone assigned to the object yet, so I`m only working with the object that I made. I select the hat and ensure I`m in Object Mode and move it to a point on the character that I need it. Because I`m in Object Mode, the origin point moves with the object. I change the pivot manipulator to Individual Origin Points. Now I can scale 2 ways, I can either press S and eyeball the change in scale or I can use the Scale tool in the Object Propert panel on the right of the screen (press N if it isn`t visible.) I move the object around by grabbing it, pivotting the view around, and get it into position and scaling it until all clipping isues are taken care of. I can Scale on individual axis as well by pressing S and then the letter of the axis I want to scale on, ie SZ, SX or SY.

Hats – Part 2 – Bones, Exporting and Compiling
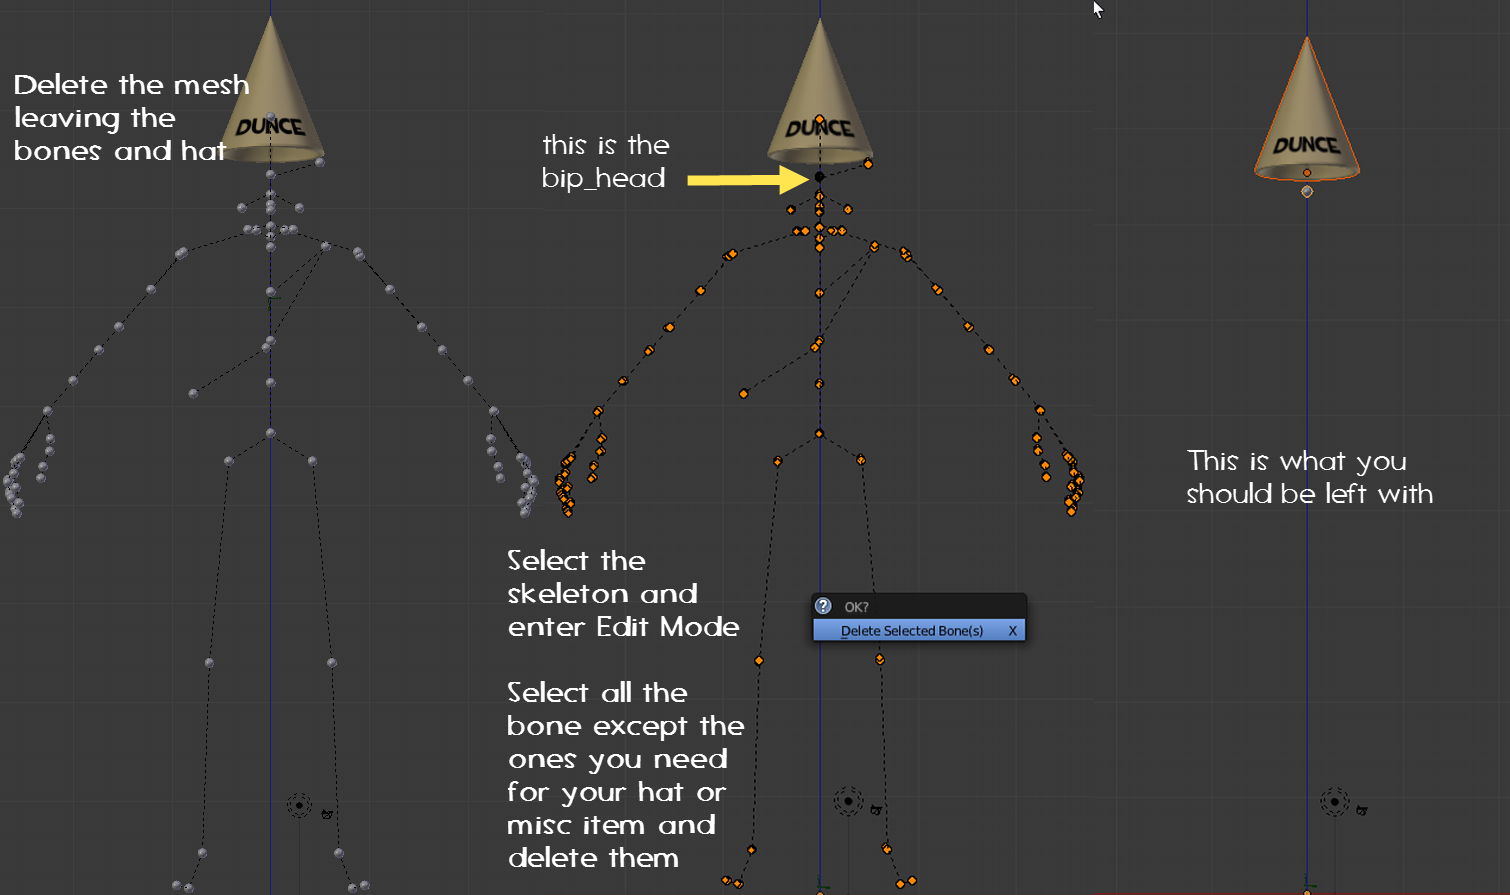
Now that the hat is on the head the way I want it to look in SFM I can delete the mesh of the scout but I want to keep the skeleton. This will give me the bone (or bones) I need for the hat (or misc item) I made.
So click on the various mesh objects that make up the character you put the hat on and delete them until all you are left with is the skeleton and the hat.
Right click the Skeleton and tab into Edit Mode
Select all the bones except for the bones needed for the hat or misc item.
Press X and delete them
Tab out of Edit Mode into Object mode. You should just have the Hat and the Bones you need for it.
Now that I a bone and the hat, I have to set Origin points and just like the prop I did, assign the mesh to the bone and ensure the bone weights are correct.
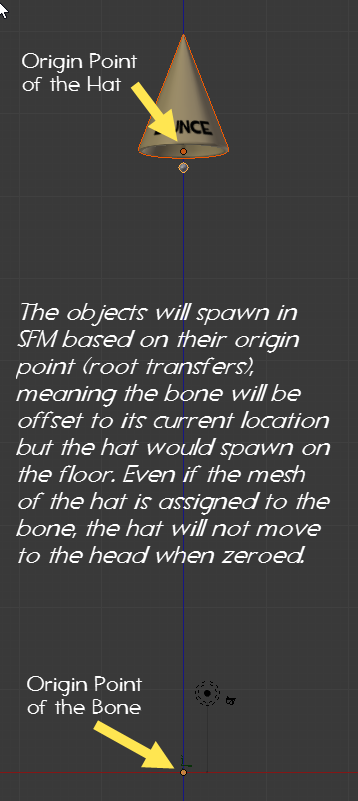
I have 2 options to assign origin points now and it depends on how I want the hat to spawn into the world. All movements involving an origin point is done in Object Mode.
The first option is to move the origin point of the hat to the origin point of the bone, This will cause the hat to spawn into the would as if it were already on the head.
The second option I have is to select both the hat and the bone and move them down the Z axis (select both, press G (to grab) and Z (to constrain to the Z axis) and pull with the mouse) until the bone touches the floor and press Enter (or left mouse click.)

Either method works as long as the Origin Points ar in the same place and you haven’t distrubed the X/Y axis coordinates or the rotations of either object.
Now the process is exactly the same as what I did with the prop. Assign the Mesh to the bone, ensuring 100% weight is assign to the bone. Convert the materials to Valve Format, export the DMX files, write the QC and compile.
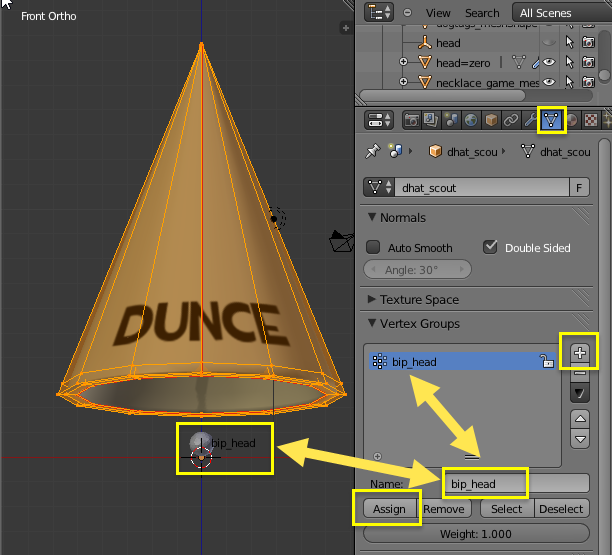
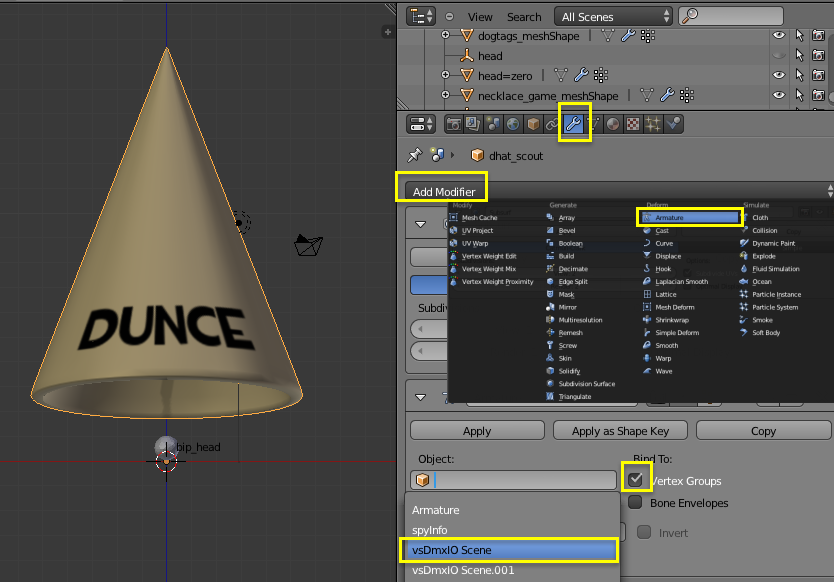
Now select the bone and go into Pose mode, grab bone and move it around. If the hat doesn’t move, you may have forgotten to ASSIGN the mesh to the vertex group in the last step or you selected the wrong skeleton .
So, same process I set up my folders
ProjectsMdlSourceitemsclassmodel
ProjectsMdlSourceitemsclassmodelblend
ProjectsMdlSourceitemsclassmodelDMX
ProjectsMdlSourceitemsclassmodelMaterials
In my SFMUsermod Folder I’ll set up
ModelsPteJackplayeritemsclassmodelname
and
MaterialsModelsPteJackplayeritemsclassmodelname
( ModelsPteJackplayeritemsscoutdhat
MaterialsModelsPteJackplayeritemsscoutdhat)
Save your Blend File
Again pretty simple
$modelname “ModelsPteJackplayeritemsscoutdhatdhat_scout.mdl // ident as scout hat in case I decide to make for other classes
$body “hat” dhat_scout.dmx // qc in same folder I don’t have to path to the dmx
$cdmaterials “ModelsPteJackplayeritemsscoutdhat” //If I made this an all_class hat, I would put the texture in the all_class items folder
$sequence “ref” dhat_scout.dmx FPS 30 // all models must have one sequence
I save this to the DMX folder I created and now I can set up Blender Source Tools.
Set up Blender Source Tools, press Export and select what you want to export.
If all goes well and the DMXs are exported, press the compile button
Anatomy of an SFM Character
The anatomy of a character for SFM can be as simple or as complex as you want to make it. In most cases you’ll want to keep it as simple as possible and as close to a main character used in your clip. This will aid animators when they use your model.
There are huge differences between Valve characters used in SFM. There are regular Player models and there are HWM (Hardware Morph) characters. You can find out more about the HWM model here. [link] , but the main difference between the 2 are the heads. HWM offers a greater control of facial animations and the capability of auto lipsync.
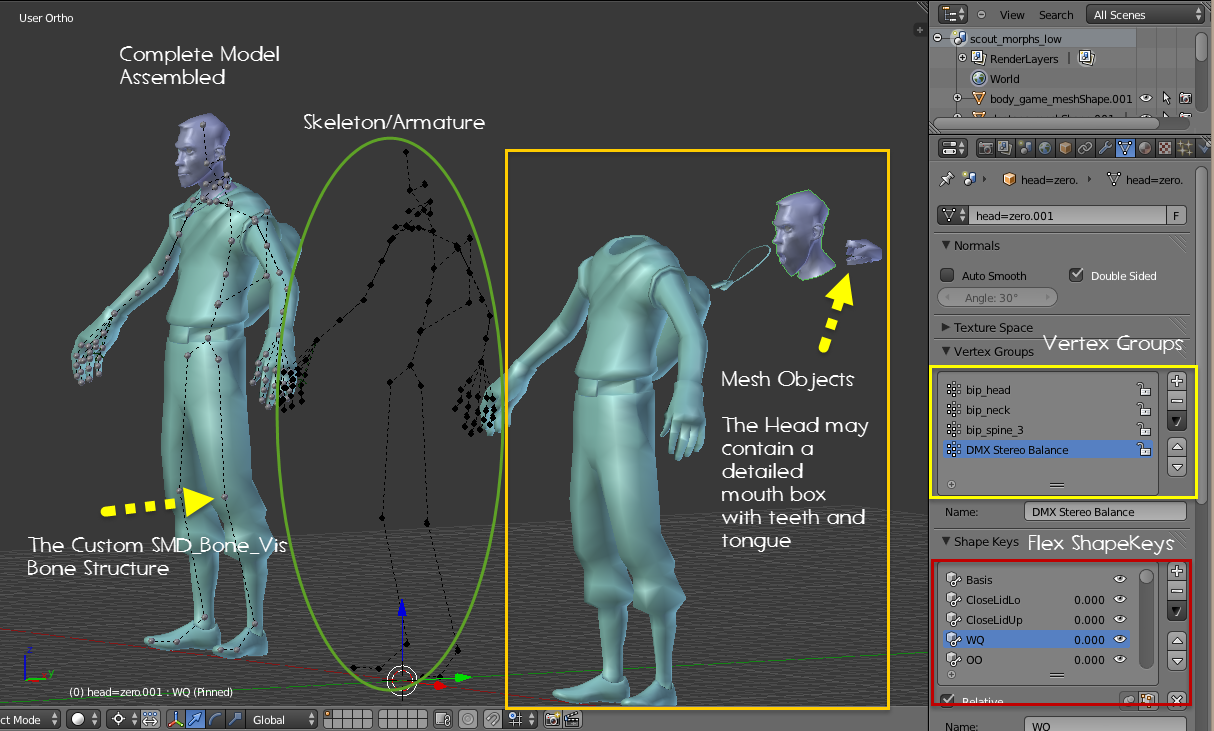
Now, let’s look at the make up of a Character model.
The Breakdown:
- The Skeleton/Armature
- this is the primary apparatus that we have to interact with the mesh of a model. It is the bones (some times refered to as a rig but not to be confused with an animator’s rig) of the model.
Not only does the skeleton give us the ability to bend and warp the model mesh (like arms, legs, torso and head) it also provides attachment points for weapons, hats and other misc items. Locking the bones of the skeleton to other models in a scene allows us to animate moving items around as if they are picked up, etc. - the skeleton is invisble to cameras and light. It will not cause shadows.
- this is the primary apparatus that we have to interact with the mesh of a model. It is the bones (some times refered to as a rig but not to be confused with an animator’s rig) of the model.
- The Mesh
- this is the skin of the model. It can painted with materials and is the visible part of the model that we see in the camera.
- we can not attach items to the mesh nor can the mesh actually touch and react to other objects i]n the scene. Other objects will pass through the mesh and you cannot attach other objects to mesh directly. (Items have to be attached to bones and position offset from the bone if required.)
- the mesh is made up of faces which reflect light and are the solids that will produce shadows if light hits it.
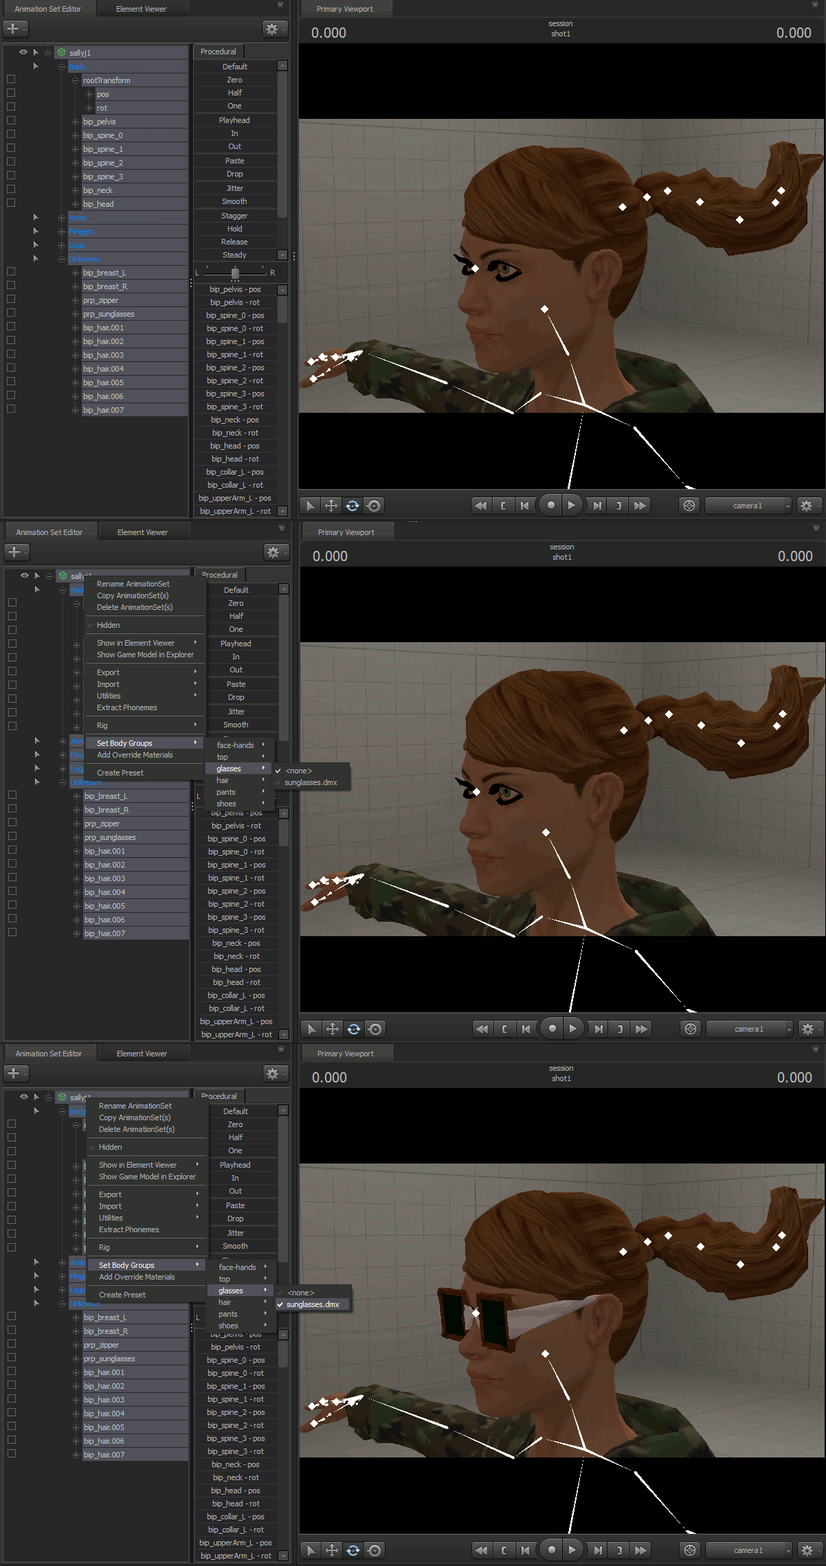
- the mesh is what makes up the physical being of the model and you can have many mesh objects in a single model. This is how bodygroups are made and can be as complex or simple as you want it to be.
- mesh react to the movement of the skeleton of the model and is assigned and weighted to bones via Vertex Groups at build time.
- the only way you can move mesh is by moving bones either manually or by assigning it to jiggle bones. The only other way of interacting with mesh is by creating flex animations which use control sliders to move it. An example of this would be facial animations via the flex controls and emotion presets or lipsync via phoneme presets.
- Vertex Groups
- this is a bunch of vertexes that have been assigned to a group. Vertex Groups make finding elements of a model easier and allow us to bind the group to a bone of the same name as the group via an armataure modifier (more on this later.)
- the are the things that would be assigned to an vertex group,
- all the vertices that make up a component of the model, for example you can select all the vertices the make up the head and assign it to a head group, then all the vertices that make up the neck and assign those to the neck group, all the vertices you want to move with the upper arm bone, elbow, hand, each joint of each finger and assign them to their own group.
- Mesh that would make up a flex could be given a group. For example lips, chins, eyebrows and lids, cheeks, nostrils, etc, etc, etc.
- vertex groups can overlap to include vertexes from another group, but you need to becareful here.
- only vertex groups that are named the same as a bone will be attached to a bone at compile time.
- Flexes (Shapekeys)
- this is what is used to create any type of mesh animation that is not bone related. It could include facial flexes such opening and closing eyes, mouths, puffing cheeks, moving lips, creating phonemes, expanding and shinking things like wings, capes, horns, glasses, etc into or out of the body so that they are hidden until needed or expanding and shrinking heads and appendages as if a model had been hexed by a WitchDoctor. For opening and closing doors, turning wheels, practically any animation that you want to cotrol by using a slider instead of a bone.
- there are limitations to what you can and cannot do with this type of animation, and the best way to learn is by going to the Valve Developer Website and looking it up. This is the main reference I have found but there are other specific to HWM flexes available as well. [link] .
- there are 2 type of flex animation, the Flex animation itself which form the actual animations when the sliders are used and then there are Corrective Shapes. A Corrective Shape is as its name implies. I believe these shapes are native to the DMX format and not readily avaialble for flexes used with the SMD format that are passed to a model via a VTA file, but don’t quote me on this, I’m still learning.
It is a flex or group of flexes the constrain the shape a Flex will take. For example, we’ve all seen the Derpy Scout faces that people have made using the the Player Scout facial animations both in SFM and GMod productions. Well Corrective Shapes, if added correctly, will limit the amount of movement a control can move a flex based on other flexes applied. The actual movement looks natural, and does not derp out as the old style did. It more or less a combination of flexes added to one slider to create a nice clean flex.
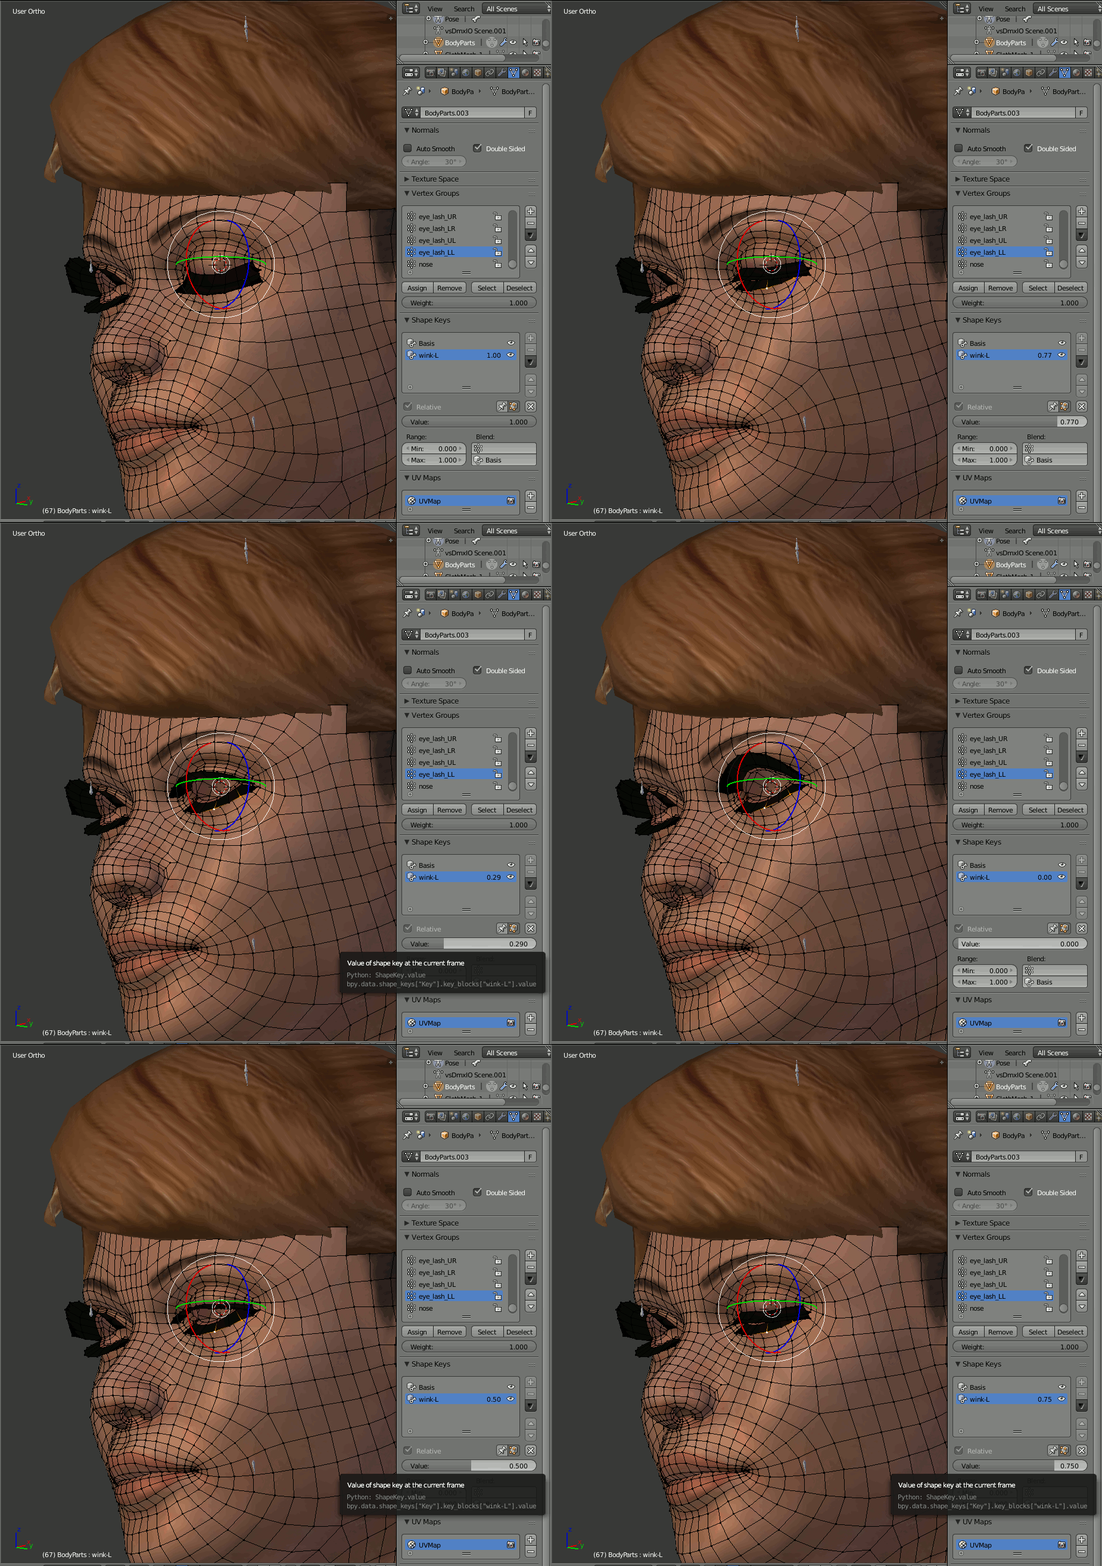
Corrective flexes are identified in Blender as Flex Names that have an underscore in the name.
So if you have a flex that cause the right eye to wink and name that shapekey wink_R, Blender Source Tools will see that as a Corrective shape and will not produce a slider for it at compile time. To get the control in your model, you would have to call the shapekey winkR (without the underscore)
That is about all I can tell you now about Flex Animation and Corrective Shapes for now.
- Collision Mesh
- This is an external mesh that is drawn around the exterior of the Mesh. If SFM had physics, from what I understand this is the object that would collide with other objects or keep things like particles from floating through a model.
- The collision mesh has an extremely low level of detail and is not visible. It will not cast shadows.
- As SFM does not have physics, I generally do not add one, should Physics be introduced, I will most likely have to go back and edit one into my models.
- Hit Boxes
- These are a series of mesh boxes that loosely surround a model. They are used in game to determine collision damage. These boxes vary from model to model, for example one hit box could cover an entire car model, where a character model may have individual hit boxes for each bone in the model. Hit box value are written to the model via the QC.
- I am still trying to determine if Hit Boxes are the actual cause of certain model disappearing when a camera is looking at them from a certain angle. I was in the process of developing a hat and when the hat started to started to display this tendency I asked the group. The response I got back was to remove the Hit Boxes from the model. When I did this the model stopped disappearing.
- Now this is confusing and another thing about Hit Boxes that I “have been told”. I have been told that if you use SFMPhys that the collisions in the physics engine is caused by Hit Boxes. That if a model doesn’t have the boxes it will not work with the Physics script. (Yes I did said SFM doesn’t have physics, but I said Built In Physics. SFMPhys is a script that loads the Bullet Physic engine into SFM and is extremely limited with what it can do.)
The SFM Controls for your Model
The sfm_defaultanimationgroups.txt file. This is an important file that specifies how your model’s controls are going to be represented in SFM. It is located in your SteamAppscommonSourceFilmmakergameplatformcfg folder.
This file identifies the known bones and flex sliders (controls) in your model. As you construct the skeletal system and flexes of your model and name the bones and flexes, if the name isn’t found in this file, the bone or flex will end up in the Unknown control group.

“Arms”
{
“control” “bip_collar_L”
“control” “bip_upperArm_L”
“control” “bip_lowerArm_L”
“control” “bip_hand_L”
“control” “ValveBiped.Bip01_L_Clavicle”
“control” “ValveBiped.Bip01_L_UpperArm”
“control” “ValveBiped.Bip01_L_Forearm”
“control” “ValveBiped.Bip01_L_Hand”
“control” “Bip01_L_Clavicle”
“control” “Bip01_L_UpperArm”
“control” “Bip01_L_Forearm”
“control” “Bip01_L_Hand”
}
So, if you give your left arm bones any of these names, they will fall into the Arms Control Group in SFM.
Looking at the names given, If you called your collar bone bip_collarL instead of bip_collar_L the bone would show up under the Unknown Control group.
That being said, you can add bones and flexes to the file so they would become known, however if you plan to upload your model to the workshop you should instruct the people who are gong to download your model what the control names are and which groups they should be added to so they can edit their file as well, just for usability sake.
Common practice is to use this file as a guide for naming your controls
XNA Lara – Part 1
I wrote a 15 section guide on converting these types of models. That guide is still available. The diference between that one and this one is a plan to do it quicker and completely through Blender once imported. So hang on to the hat you just made and let’s get started.

The beauty of any model that already has bones, is the fact that the mesh should already be weight painted to the existing bones. All we really have to do with it is decide which bones stay, which ones go, if you have to add more (if the existing bones done warp or jiggle the mesh the way we want) and make sure that twists and rolls are taken out. Then name them to make them easier to use in SFM.
As for the mesh, we have to check for the direction of normals, add features if needed, UV Map the additions, add the materials and ensure they are weighted to bones. Add Flexes or other things like the eyeballs or extra skins that we want. Then finally rescale, export and compile.
OR….
Leave it as is and pray for the best when we export and compile it.
Before we start, I wish to thank Jhony Hebert for his permission to use his excellent rendition of Wreck-It Ralph for the guides and and port I’ve already done and his continued support for using it in this guide as well. If you wish to grab the model to follow along with this guide it is available here [link]
Ralph is one of those models that does not have the required {modelname}.mesh.ascii included in the download pack. You will have to pass him through XNALara to create the file as described above. Download the most current version of XNALara (the XPS vesion is all you really need), reseach how to use it, load up Ralph and export the model.
Now that we have the model in a format that is importable into Blender, we’re finished with XNALara. Close it down and keep it handy for your next project.

This is the first problem we are going to fix.
Ralph is made up of 4 mesh objects and a skeleton. The objects are Hair, Head and Arms, his Main Body and his static Eyes. The XNA Model has 62 Bones in the skeleton. The model doesn’t have any facial flexes and although it has a fairly detailed mouth, does not have a mechanism to operate is. Even though the mesh is comprised of trigons, it is fairly symettrical (this is a good thing for later.)

Turn the Normals for the mesh faces on (click the picture if you don’t know how to do this.) If you zoom in on the direction lines, you’ll find that most (if not all of them) are pointed into the model instead of outward. The back side of a face on mesh is usually not painted or “Culled”. This allows you to see through the backside of the face and if the normals of the faces on the backside of the model had been facing outward, the model would have appeared invisible looking at it from the front. Because the all the normals of the faces are all pointed inward on this model, it is the reason we see the opposite side of the model when looking at it when painted.

With the object in Edit Mode, press A until all the mesh is selected. Then in the Tools panel find Normals and click Recalculate. Blender will examine all the selected mesh and decide which direction the normal should point. Blender is pretty good at doing this and is usually all you have to do, but is is best to actually examine the model, especially anything like mouths and eyes that are inside the model to see if Blender picked the correct direction. If it didn’t, select the faces that are not correct and press Flip Direction in the tool.
Do this for all the objects that make up the model.
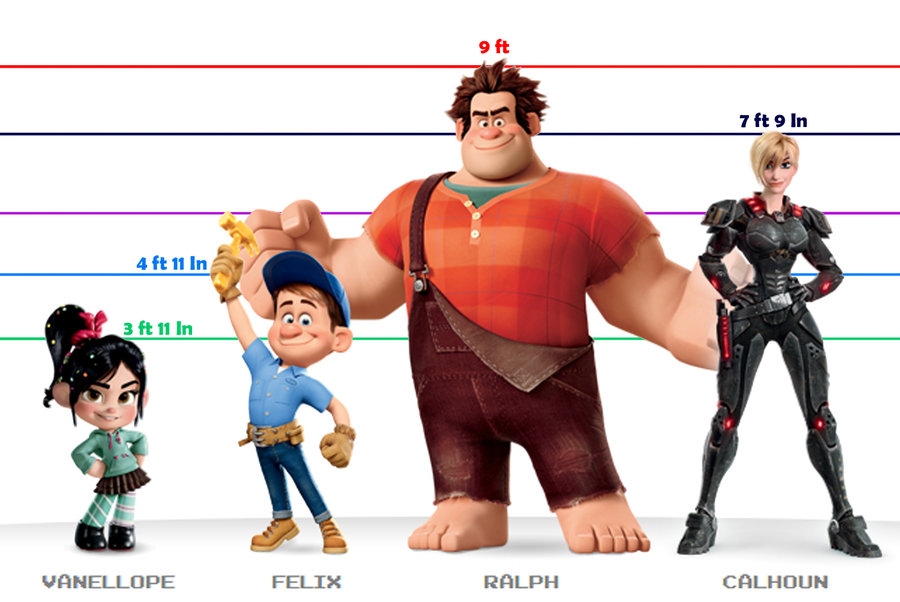
It’s your project, you decide.
For the purpose of this guide, I’m going to use the TF2 Scout, this will show you where I get it and how to import it into the project. The DMX (or SMD if your prefer) of the Scout is available in the SteamSteamAppscommonsourcesdk_contenttfmodelsrcplayerscoutparts(DMX or SMD) folder as scout_model.smd or scout_morphs_high.dmx. (The Hat, Dogtags and Headphones Bodygroups are also available as DMX files, but are not necessary for this exercise.)
To begin, I like to keep the first layer of Blender clear, this allows me to bring objects into the project and not have to worry if I’m going to mesh them into other objects. So let’s clear off the layer.
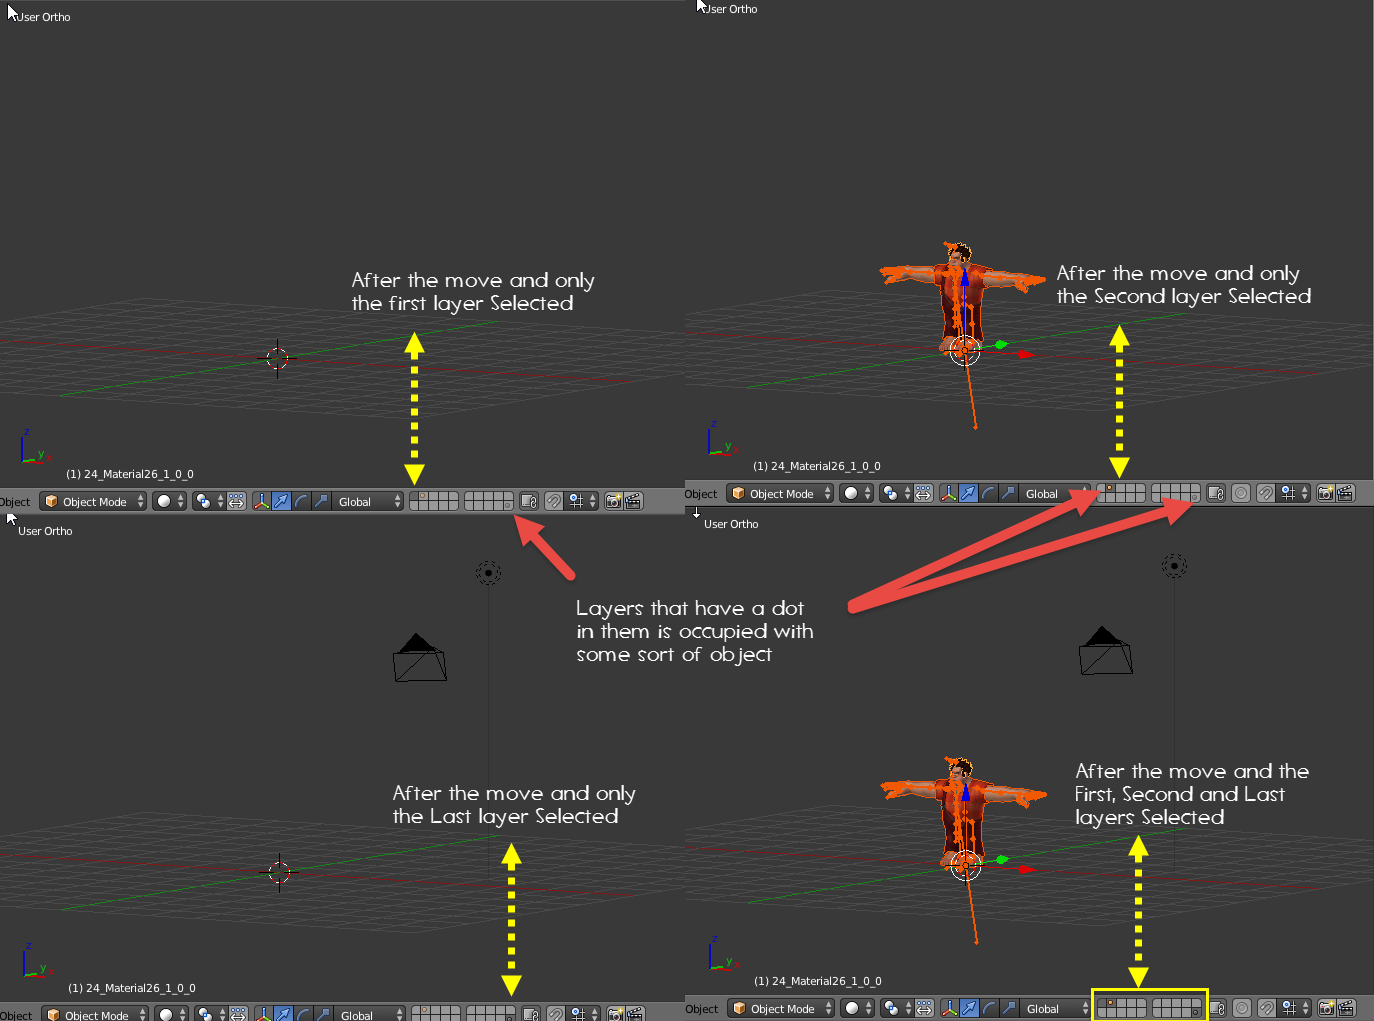
Buried in the some of the SDK Tools for the various games, there are reference models that are in their Model Source format (either SMD or DMX). You can import these references into Blender and use them to scale your model. If you find that you don’t have these SDK Tools in your SteamApps/Common folder, you may have to go into your Steam Client Library and go to the Tools tab then install the SDKs. There is a huge repository of models in the SteamSteamAppscommonsourcesdk_content Folder, check them out.
Out of space, Next part coming up….
XNA Lara – Part 2
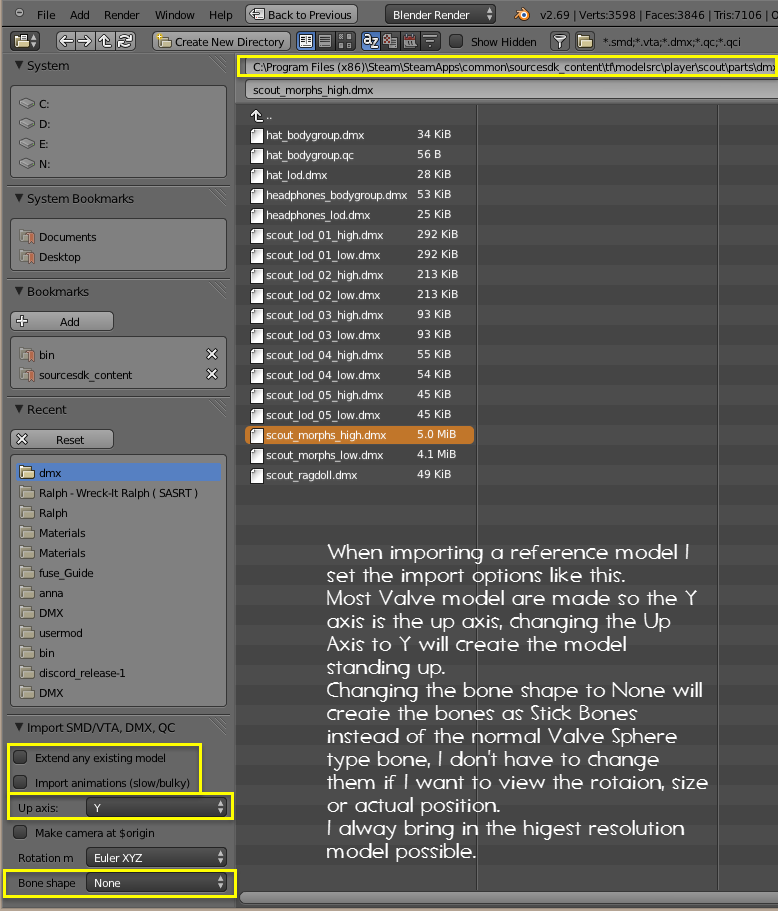
Once imported, move it to its own layer.

Now in Object Mode, select everything that makes up Ralph, all the mesh and the skeleton, make sure there is nothing on the reference selected and the all the origin points are correct and in the same location in relation to the model and coordinates 0,0,0 of the Blender grid (See the section on placement of Origin points. If you aren’t sure if you have all the Objects of the model selected, you can always just select the layer your model is on and press A until the entire model lights up, then press the Shift key and select the layer your reference is on.)
Make sure the Pivot Center for Rotation and Scale is set to Individual Origin Points, Press S and scale your model to the proper size. Because you’re scaling everything on all axis, the scaling will stay proprtional to the origin points of the selected objects. The closer your cursor is to the center of the pivot point when you press S, the shorter the distance required to scale the objects will be. If you lose sight of your reference object while scaling, press Z to go into wire frame mode.
Now that the model is scaled we can start concentrating on the Skeleton (aka the Armature).
Looking at the picture above we can see a lot of simularities and a some extra bones as well. These are probably the easiest models to convert. So the first thing we have to do is determine which bone stay and which bones go.
Getting to a Bone Only view
This is easy, Get into Object Mode, Press the Shift key then Right Click on each of the mesh objects. Once they are Highlighted, press H, the mesh will disappear and be hidden.
Ok, now we get in to the long and tedious process of editing the model. Right Click on the Skeleton (Armature) and TAB into Edit Mode.
Every model you work with will be different, bone names will be different, the number of bones that need to be removed or added will be different. So this is just and example, you’ll have to research EACH model on its own and make your own decissions on what to do with it.
In the case of Ralphie here, I deleted those bone I identified earlier.
Before I move or test anything I’ll check to make sure that there are Vertex groups assign to the mesh and that there is an Armature modifier assigned to bind the armature to the vertex groups. To do this I have to unhide the mesh. Switch back to Object mode and press ALT H.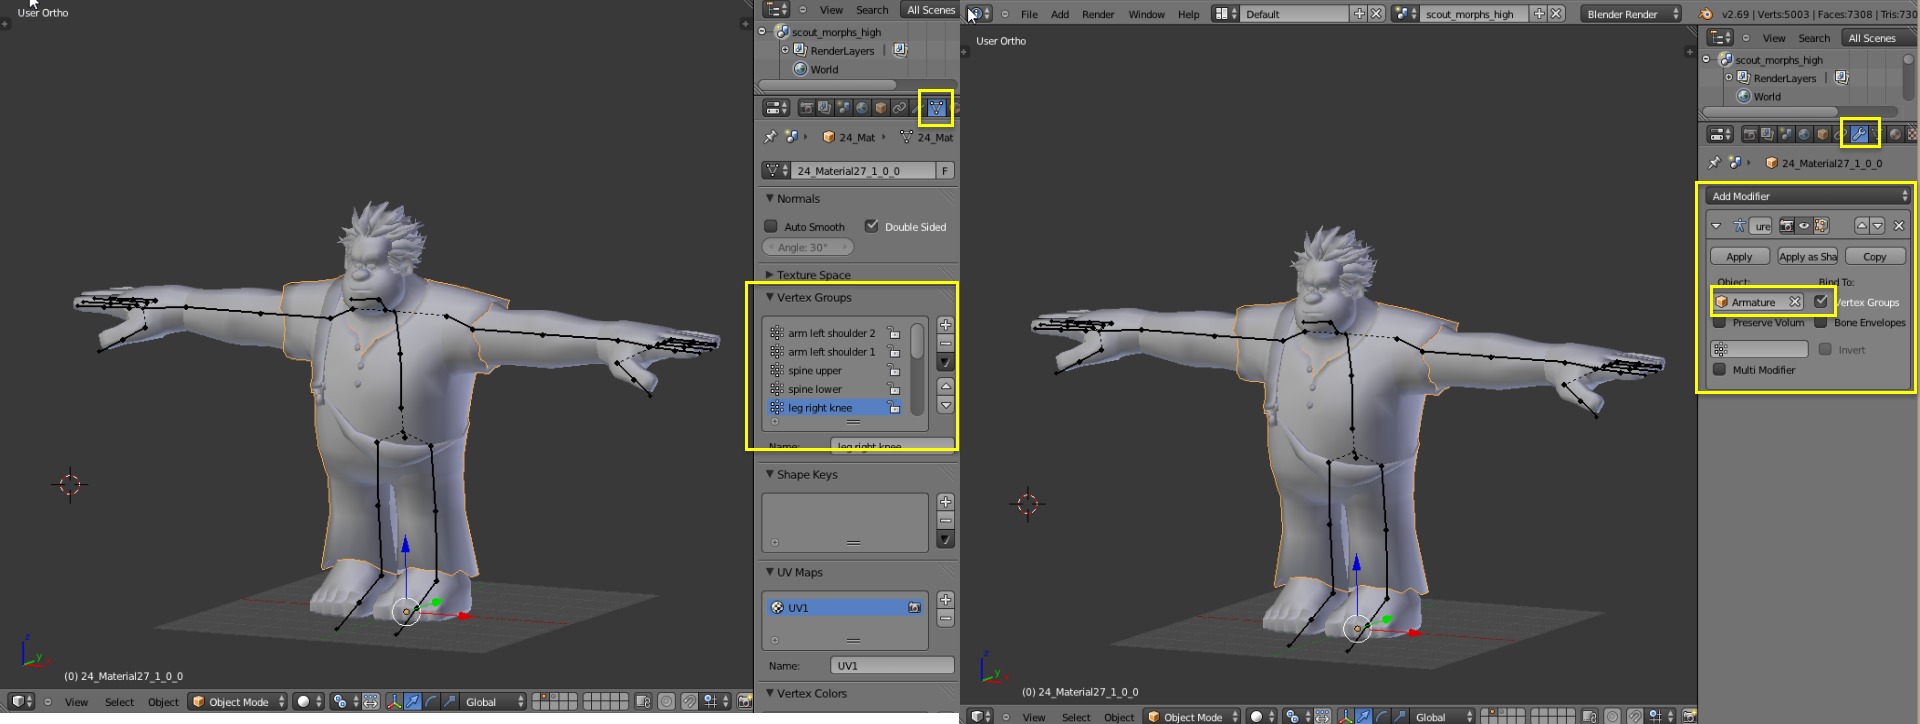
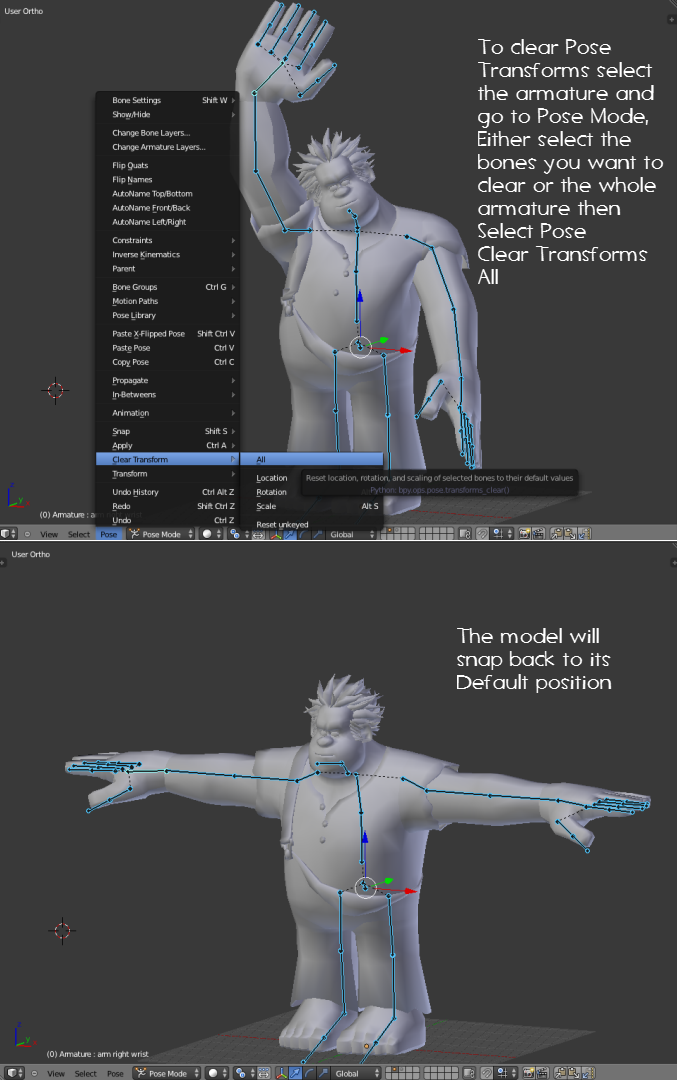
When complete my bone count changed from 65 to 41 during the process, all the mesh rotates where it is suppose to, so that tells me that no only are my bones ok, but the Vertex Groups are good as well.
Let’s say you forgot to hit the right mouse button to put the mode back to its T-Pose while you were testing the rotations. Not a problem, there is a menu option on the Pose menu that will allow you to clear the transitions.
This will not work if you moved the bones in Edit Mode or if you are in Edit Mode. Only posed transitions can be undone this way. If you moved bones via Edit mode, you will have to back out your changes or hopefully youv’e made backups that you can reload from. This is one reason why it is to make backups of your model before you make any significant change to it. (Personally I increment my backups and have anywhere from 3 to 10 backups that I can go back to if needed. Once a model is complete, I’ll make a master Blend file.)
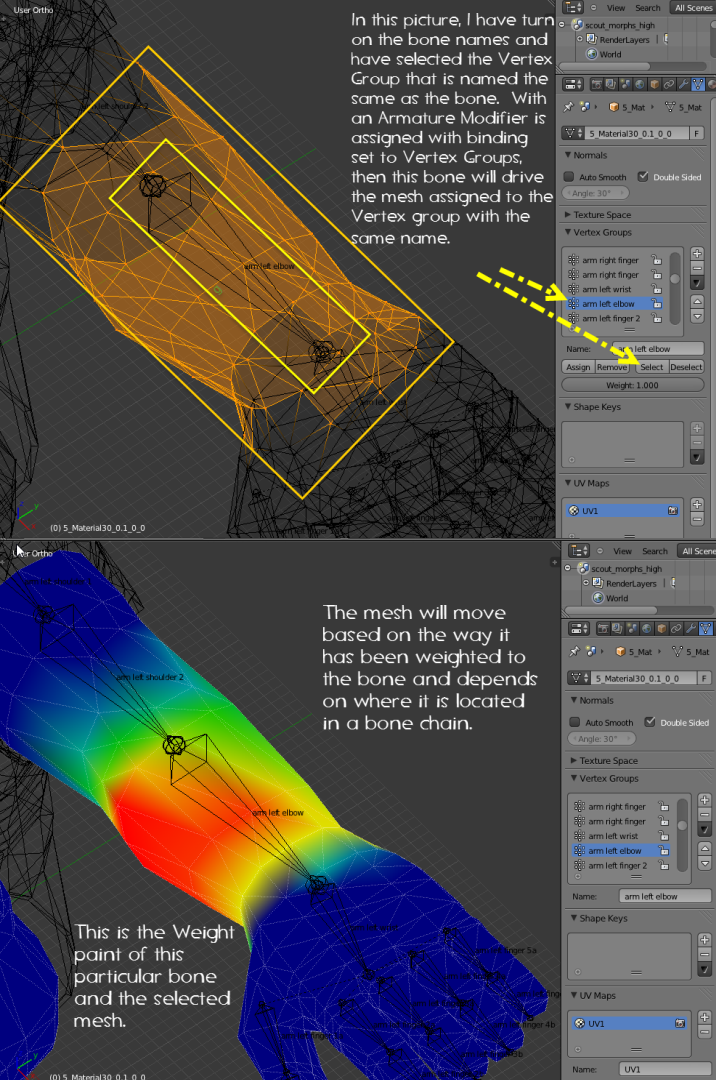
Vertex Groups – Armature Modifiers – Bone Names – Bone Weights all work together to drive your model. If properly set up when you change the name of one of these elements it will have a cascade effect on the others and the model itself. What this means is if I change the name of a bone, then the Vertex Group name that is associated to it via the armature modifier should change to the new bone name automatically, (this usually works the other way as well, however if a mesh area has been weighted to more than one bone, it can have an adverse effect on the Vertex Group. It is alwys better to rename a bone over the vertex group unless you absolutely have to.
This is a great feature built into blender and saves hours on renaming tasks. The important thing is that you must have an armature modifier set up and assigned to the model with the binding set to Vertex Groups and rename bones vice Vertex groups first.
When working with models that have bones and and has been converted from one format to to a format that can imported to Blend, Blender should automatically set this up for you when you import it.

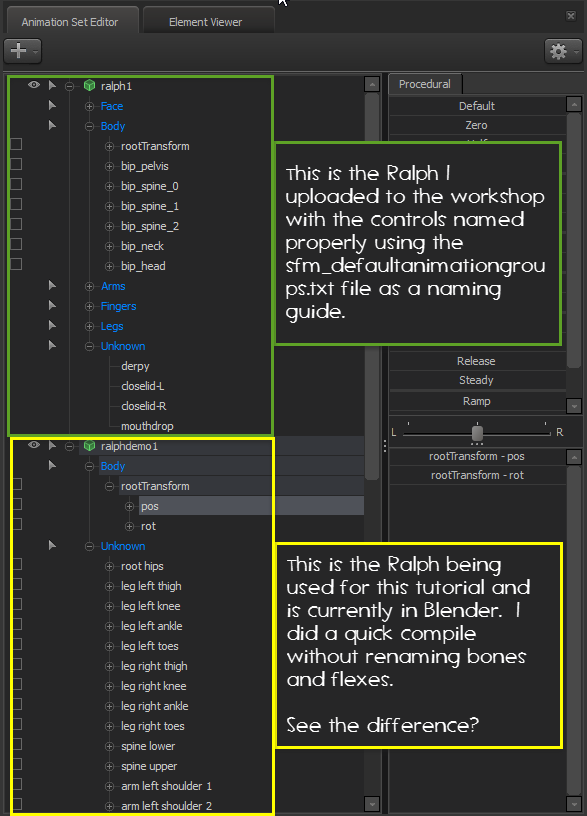
However, remember the section on the controls for your model. If the bone and shapekey names aren’t found in the sfm_defaultanimationgroups.txt file, then they are going to be scattered through the Unknown Control group, making your model hard to operate.
Although it is a tedious task, It is best to open the file and walk through the bone structure of your model and rename the bones to something known for the particular group that the bone or flex should fall into. You’ll appreciate it later when you are trying to animate the model in SFM and should you decide to upload it to the Workshop, the users who download it will appreciate it as well.
XNA Lara – Part 3
Next to creating the mesh, Weight Painting and establishing Vertex Groups this is the fourth most tedious job in modeling. It is best to describe the process in a picture.
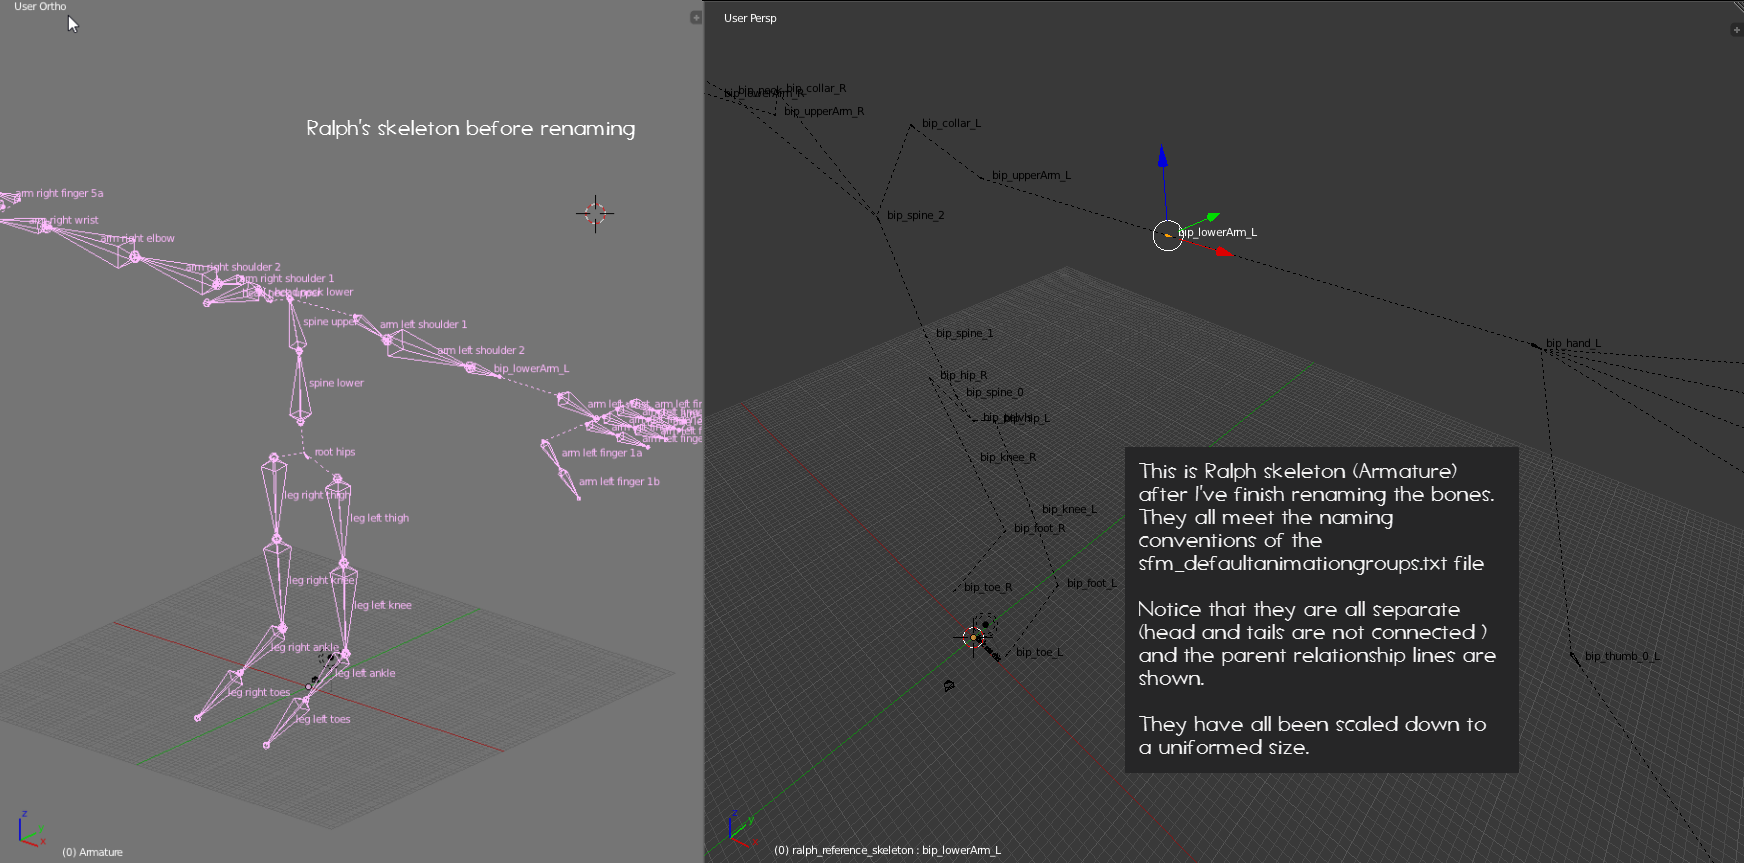
That’s pretty much it for model editing, now to do the final materials changes and setup for export, qc writing, exporting and compile.
We’ve talked quite a bit about materials but never discussed how they work in SFM (or most Valve Games).
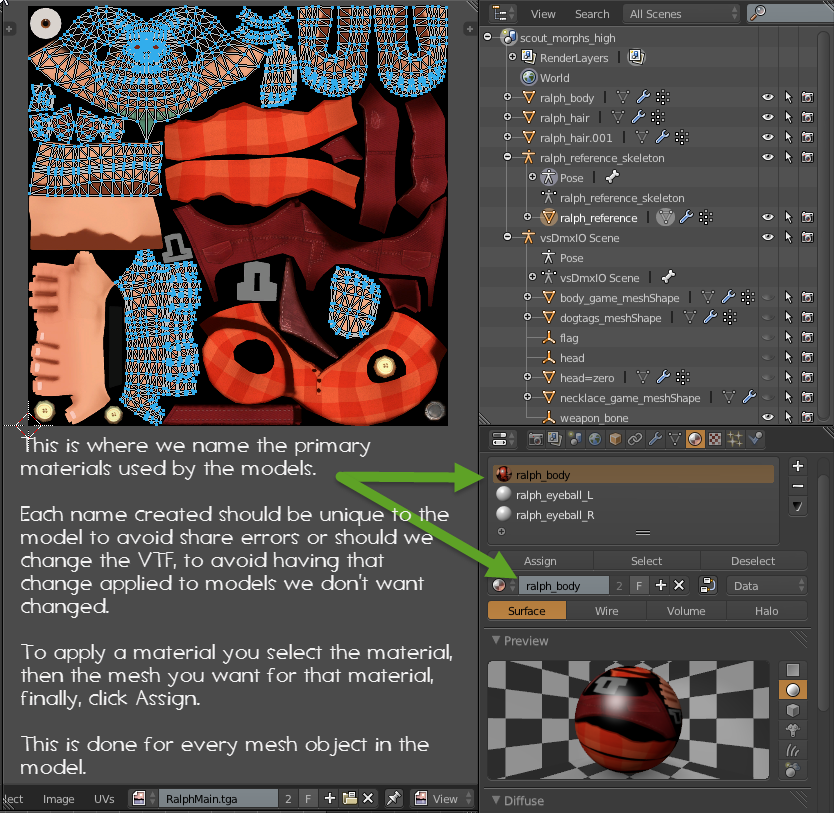

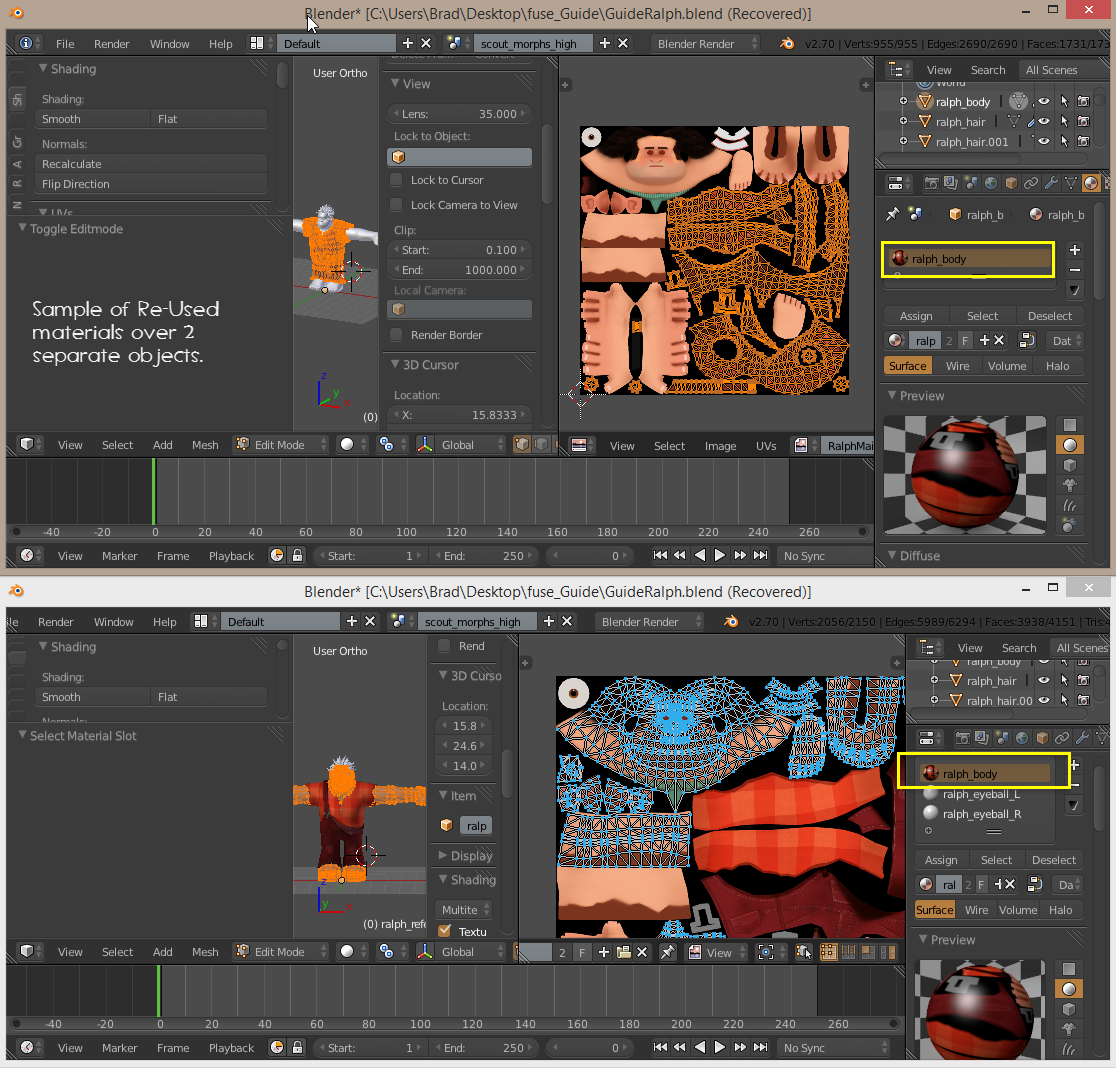
Use an image editor such as VTFEdit, GIMP or Photohop (something that has a VTF Plug in) to convert your images to VTF format and place them in the SFM folder that they will be called from. Use VTFEdit to create simple VMT files that will call the materials to the model.
Adding different skins to a model is controlled through the QC and will be covered later.
Once a model is compiled it must be able to find all the primary material names in the form of a VMT. The VTMs can call multiple materials, bump and normal maps and shared VTFs, (more on this later as well.) But you must have a VMT named the same as the material for each primary material assigned to the model in Blender. Failing to do so may result in Black and Purple checkerboards (the default Valve material) being displayed on your model in SFM.
Step through your model and give every material a unique name, one that isn’t shared by any other model in your inventory. (Good Luck!!)
With that complete, the model should now be ready for export, qc writing and compile, but you should walk though it one last time to check.
- Model is scaled to the proper size.
- Bones
- Amature modifier assigned
- Excess bones removed and missing bones added
- Bones and Vertex groups renamed (if required)
- Mesh deforms properly when posed or weights fixed
- Mesh
- Objects reduced to a commong mesh (If you want)
- unwrapped and assigned to UV Maps
- Primary materials assigned to all mesh objects and condensed to lowest number of materials used
- Normals pointed in the proper direction
- Doubles removed
- Mesh is weighted properly and that the Weight limits are set to a maximum of 3 (2 in Blender)
- Materials
- Renamed to something unique to the model
- All mesh object have a material applied
- Flexes added as needed
- primary materials have been coverted to VTF format and stored in the materials folder named in BLeST.
- VMTs written for the model and are name exactly the same as you named the materials in Blender.
- Objects
- Combined or separted as you want the model to work (ie joining the hands, arms and feet to the clothes object leaving the head and eyes as separate object)
- Renaming object to something understandable
- Finally the model looks and works as you want it to appear in SFM.
- Blender Source Tools
- Ensure that all the path and material options are set (We’ve been through that a number of times now)
Once this is done it is best to export the model to DMX/SMD to see if you have missed something that may cause an error. It will also give you the ability to use the filenames generated to assist in the building of your QC.
(Note: the Ralph in this sample does not have any flexes or movable eyes, it’s a plain mesh model with bones. The qc for this model is going to be simple and should get the model into SFM without problems. Because there are no flexes, there is no VTA produced and the need to write an flex into the qc is not required.)
XNA Lara – Part 4
As discussed earlier, this is a normal text type files and is the file that will instructs studiomdl how to compile the model source files into a binary model. It defines and adds things like flex controls, skins, constraints, sequences, animation includes, collision models and hit boxes into your model. Once the model is compiled the only way to make changes is to rewrite the QC and recompile the model, so make sure you hang onto your blend file this in your resources folders. If a qc completes properly you should end up with 3 binary files in the SFM model folder you specify. These files will be a {modelname}.mdl, {modelname}.dx90.vtx and a {modelname}.vvd file. If you model has animations,flexes or jiggle bones you may find a {modelname}.vrd file which contains the instructions for the procedural bones.
There are numerous commands we can add here, far too many to go into detail about here. If you want to research the various commands and learn their functions, go to [link] for details.
// qc Start – The double slashes in this line comments out the line, studiomdl will ignore anything on a line behind them
/* this is a multi-line comment
studiomdl will not read anthing between the slash star and the star slash delimiters
All commands start with a dollar sign
*/
$modelname “test/ralph/testralph.mdl” // assigns the name of the mdl to be produced and is usually the first lin of a qc
/*
The objects of your model are identified as the individual dmx/smd files created by BLeST. Ralph here is comprised of multiple objects, 3 to be exact, the face/arms/feet, the hair, the body.
I can either just include them with separate model commands, make bodygroups out of them or combine the 2 types. Using the Bodygroup/studio command allow me to turn body parts on and off or change them out with a different objects in SFM, ie like a hat, glasses or an entirely different model like a top or pants.
*/
$model “head and hands” “ralph_reference.dmx” // the first object is usually the head because of flex data.
/*
If your model has eyeballs, they need to be identified in this first block
those familiar with eyeballs will know what I mean
*/
$bodygroup “hair” {
“studio” “ralph_hair.dmx” // in a bodygroup, you must use the studio identifier for mesh objects”
“blank” // blank will create a “None” option allowing you to turn it off
// a body group’s content is contained between an open and closed curly bracket.
}
$model “body” “ralph_ body.dmx”
$cdmaterials “” // this is the start of the materials command it gives reference to the base folder
$cdmaterials “models/ptejack/ralph/” // this path is where the materials actually live
/*
I usually set up texturegroups for all my models that way if I decide to give a model a new
skin, I just have to revise this portion of the qc with the replacement materials, Because I laid out the material path in the cdmaterials statement I don’t have to give my material a path when I declare them.
*/
$texturegroup “skinfamilies” {
{
“ralph_body.vmt”
“ralph_eyeball_L.vmt”
“ralph_eyeball_R.vmt”
“ralph_hair.vmt”
}
/* now I would just add a new section for a new skin if I have other materials */
}
// Model uses material “ralph_body.vmt”, “ralph_eyeball_L.vmt”
// Model uses material “ralph_eyeball_R.vmt”, “ralph_hair.vmt”
// surfaceprop identifies what in game sound a collision should make, not used in SFM
$surfaceprop “flesh”
// the contents command is not really required for SFM either
$contents “solid”
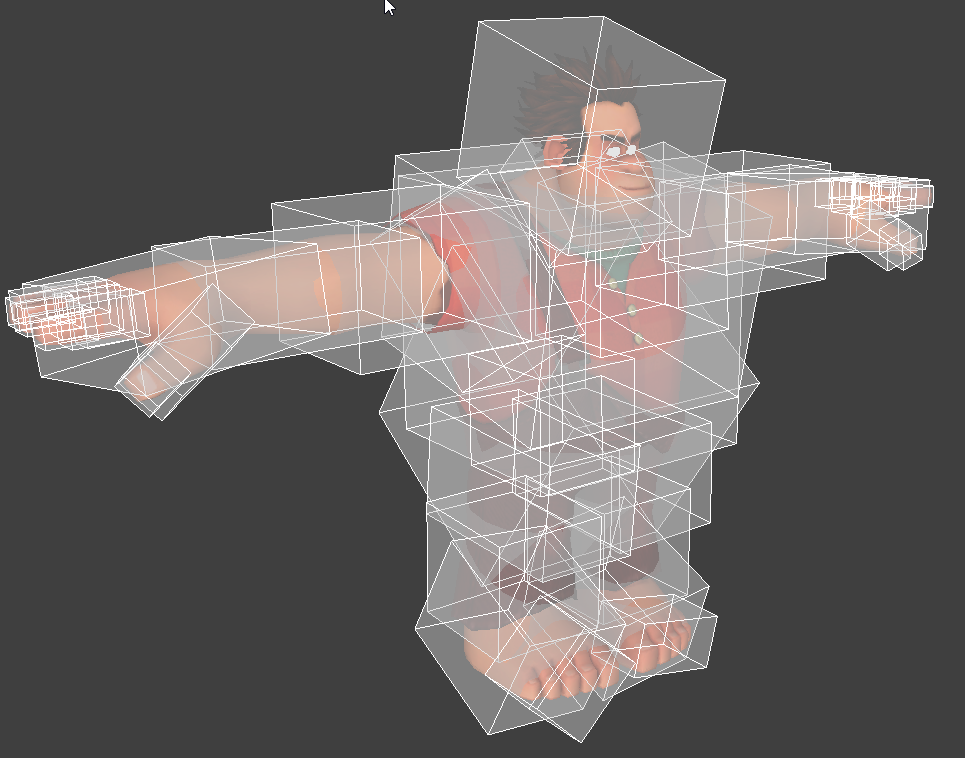
From what I am told, if you plan to use a model with SFMPhys, then the model needs a hitbox to detect collisions by the physics created by SFMPhys.
*/
$hboxset “default”
$hbox 0 “bip_pelvis” -15.559119 -9.375403 -16.293106 15.01412 23.781975 14.050005
$hbox 0 “bip_spine_1” -15.288443 -9.782969 -13.407857 16.144678 25.048658 19.000727
$hbox 0 “bip_spine_2” -17.75465 -10.52426 -13.13469 16.564758 14.9816 20.991447
$hbox 0 “bip_collar_L” -12.562283 -1.927123 -15.471767 9.583967 12.348301 6.965245
$hbox 0 “bip_upperArm_L” -6.98051 -2.792415 -9.478816 10.604407 26.005381 7.390375
$hbox 0 “bip_lowerArm_L” -6.150563 -7.342239 -6.949718 7.898524 19.836901 4.448638
$hbox 0 “bip_hand_L” -9.567935 -8.20653 -7.013438 9.672605 15.593413 3.483533
$hbox 0 “bip_index_0_L” -1.090473 0 -2.587486 2.437142 6.297052 1.669668
$hbox 0 “bip_index_1_L” -0.930838 -0.699944 -1.952278 2.482128 4.743726 1.323559
$hbox 0 “bip_middle_0_L” -1.436863 0 -3.687057 2.401102 6.552752 1.887475
$hbox 0 “bip_middle_1_L” -1.529374 -0.842638 -1.385329 2.055534 4.831155 1.586014
$hbox 0 “bip_ring_0_L” -1.793315 0 -3.319452 2.108721 6.564151 1.725743
$hbox 0 “bip_ring_1_L” -1.712048 -1.027459 -1.676183 1.796929 4.88898 1.272511
$hbox 0 “bip_pinky_0_L” -1.978501 0 -2.910268 1.380936 5.676812 1.433284
$hbox 0 “bip_pinky_1_L” -1.984756 -1.826565 -1.76738 1.343971 4.24828 1.433282
$hbox 0 “bip_thumb_0_L” -2.819754 -1.748362 -3.190395 1.734583 7.275597 2.698266
$hbox 0 “bip_thumb_1_L” -1.899606 -0.923652 -2.109496 1.874746 4.415763 2.826891
$hbox 0 “bip_neck” -8.124722 -0.705646 -8.553646 7.918879 6.016155 6.203082
$hbox 0 “bip_head” -10.316801 -2.506136 -15.509739 9.548319 18.243351 8.646918
$hbox 0 “bip_collar_R” -9.160201 -0.8247 -16.932673 12.226183 10.319824 6.386044
$hbox 0 “bip_upperArm_R” -11.495643 -4.389765 -9.661222 7.911756 19.763672 7.458787
$hbox 0 “bip_lowerArm_R” -8.204668 -6.683244 -6.971265 6.155955 20.050085 4.42567
$hbox 0 “bip_hand_R” -9.647043 -9.327951 -6.709294 9.758767 15.779364 3.802686
$hbox 0 “bip_index_0_R” -2.458299 -0.189797 -2.299572 1.070412 6.482256 2.285663
$hbox 0 “bip_index_1_R” -2.505234 -0.509839 -1.671285 0.909967 4.929269 1.60568
$hbox 0 “bip_middle_0_R” -2.401868 0 -3.227468 1.427393 6.746462 2.175555
$hbox 0 “bip_middle_1_R” -2.064268 -0.641759 -1.111696 1.517879 5.027471 1.868978
$hbox 0 “bip_ring_0_R” -2.114932 0 -3.029602 1.725258 6.765284 2.012577
$hbox 0 “bip_ring_1_R” -1.805307 -0.81941 -1.393699 1.701023 5.090545 1.554468
$hbox 0 “bip_pinky_0_R” -1.555779 0 -1.868979 1.961906 5.878167 1.75499
$hbox 0 “bip_pinky_1_R” -1.55578 -2.953697 -1.4433 1.967277 4.447865 1.754985
$hbox 0 “bip_thumb_0_R” -1.734797 -4.828428 -2.973265 6.525252 7.273667 3.08205
$hbox 0 “bip_thumb_1_R” -1.4554 -0.880224 -1.902289 2.088788 4.362433 2.8422
$hbox 0 “bip_hip_L” -7.38036 -0.791451 -17.462517 8.123623 13.826904 7.097634
$hbox 0 “bip_knee_L” -6.354938 -1.987266 -11.61176 9.250001 14.13858 5.640195
$hbox 0 “bip_foot_L” -5.921272 -5.69429 -8.585134 9.438091 14.001917 7.249537
$hbox 0 “bip_toe_L” -2.637105 0 -6.289689 4.993399 8.851824 7.855028
$hbox 0 “bip_hip_R” -8.670383 -1.585657 -18.006941 6.22649 13.91675 7.080091
$hbox 0 “bip_knee_R” -10.006625 -2.311822 -12.087159 6.511727 14.1919 5.007638
$hbox 0 “bip_foot_R” -10.314729 -4.905558 -9.63695 6.110357 15.11622 6.847478
$hbox 0 “bip_toe_R” -7.400508 0 -6.134327 4.557343 10.07836 6.532035
// lastly, every model needs at least one sequence included in order to compile.
$sequence “idle” “ralph_ body.dmx” {
fps 30
}
XNA Lara – Part 5
Hmmm, ran out of room again in that last section, anyway.
The Sequence portion of the qc can be as simple as a model of a small minute cube, reference back to a DMX/SMD that comprises your model (like in the example above) or an actual sequence animation of your model doing something, but there must be at least one sequence in your model.
There are a ton of other commands you can add to the model, however, this is just a basic model and all we want to do is get a working model into SFM. You can look up other commands at the reference given above.
Once you’ve written the qc, save it to the folder where you exported the DMX/SMDs.
Do your final check again, make sure materials are in there proper place and that all the references from the model are the same as the names you gave your material VMTs. Check your VMTs to ensure they call the proper materials and use shaders that SFM knows about (ie vertexlitgeneric)
If you’re following this with the ralph model and have made the changes as I have, you can copy the qc section above starting a the // qc start line into a text editor then save it as a qc. it will compile the model (even with the comments.)

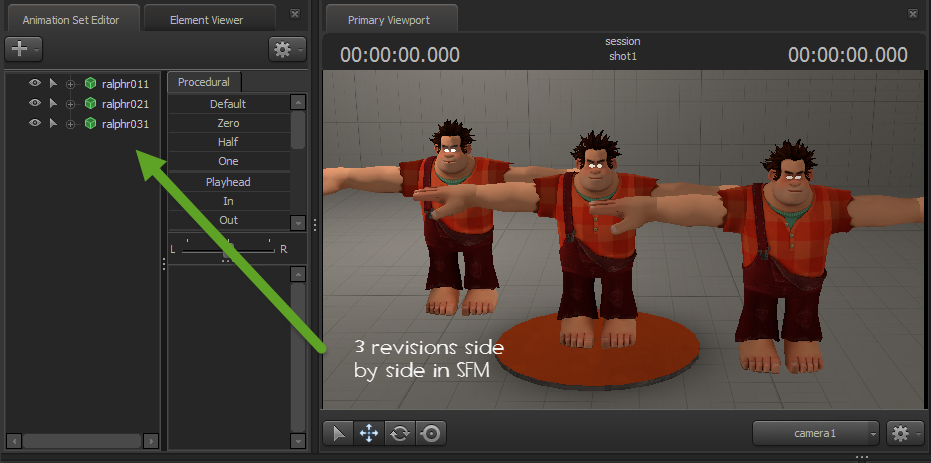
So the original qc line for the model name was $modelname {path}/ralphR01.mdl, after making the changes to the model I change this line to read to $modelname {path}/ralphR02.mdl before I compile.
Once compiled I can do a rescan of the models and I will find both models available without having to shut down SFM and restarting it. They are separate models, so they can be loaded at the same time and compared.
I do this until I have the model the way I want it. I do my final export and before I compile the model I change the $modelname line to the actual path and name of the model. Then I go back and delete the old revisions from SFM.
That’s it… You now have a converted XNA model for use in SFM.
MMD (Miku Miku Dance) Models – Pt1
Ok, the MikuMiku Dance (mmd) model. These models are different in setup and bone structure than an XNA model. They have a fairly simple as far as the skeletal system but when imported to Blender become extremely complex because of the constraints and physics given to them so they can “dance” in the MMD environment. The other BIG difference is that almost everything is named using Japanese.
Coverting these models to work in SFM is pretty much the same as converting an XNA model and I’m not going to get into that detail. All I’m going to say is “Fix this just like you would an XNA model” and you can go back to that sections and look it up.
I am going to go into a little detail on how a DMX export can be used to rename things and will introduce a Valve tool called DMXConvert, but more on this later.
There are a couple of plug in for Blender that will import the model types for a MMD model. To identify a MMD the file extension will either be PMD or PMX. The PMD file actually contains mesh and skeletal data, the PMX file usually contains just skeletal data when you import them to Blender. If you find a model and it is only accompanied with a PMX file, you may have to take it into a PMX/PMDEditor program in order to recreate the mesh element. You would export the result from the editor in PMD format then import that to Blender. (Much too deep to get into in this guide…)
SO, this guide assumes you have a MMD model that imports mesh and skeleton data into Blender.
Before we get into the model, let’s look at 2 different versions of Blender and the differences that can arise using the same plug in.
So, it looks like we’ll be switching to Blender 2.70 after all.
I was going to use Anna for this portion of the guide, but she has been partially converted and a lot of bones already renamed. So I went looking for a pure MMD model and found Kristoff.
Special thanks go out to 0-0-Alice-0-0 and Amniefancy-MMD of DeviantArt for creating the Frozen models and for allowing me to use them for the guide.
Most MMD models are built pretty much the same as this one so the process is basically the same for any MMD model.

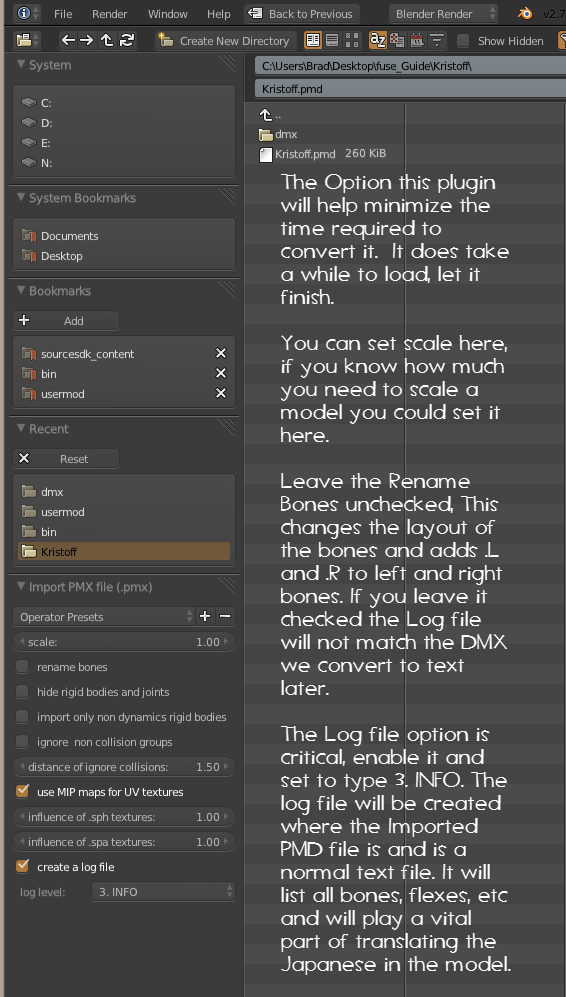
Importing MMD models can take a while because of the number of bones and all the constraints and rigid body associated with the model. Just grin and wait until Blender finishes the import.
I think Kristoff here took almost 3 minutes to finish loading up.
The next thing I do is dress the character by setting the materials to UV Maps and merge materials that use the same images.


The next thing I’m going to do, believe it or not, is try to export the model to DMX format. So off to the Blender Source Tools and a file browser to set up folders and BLeST.
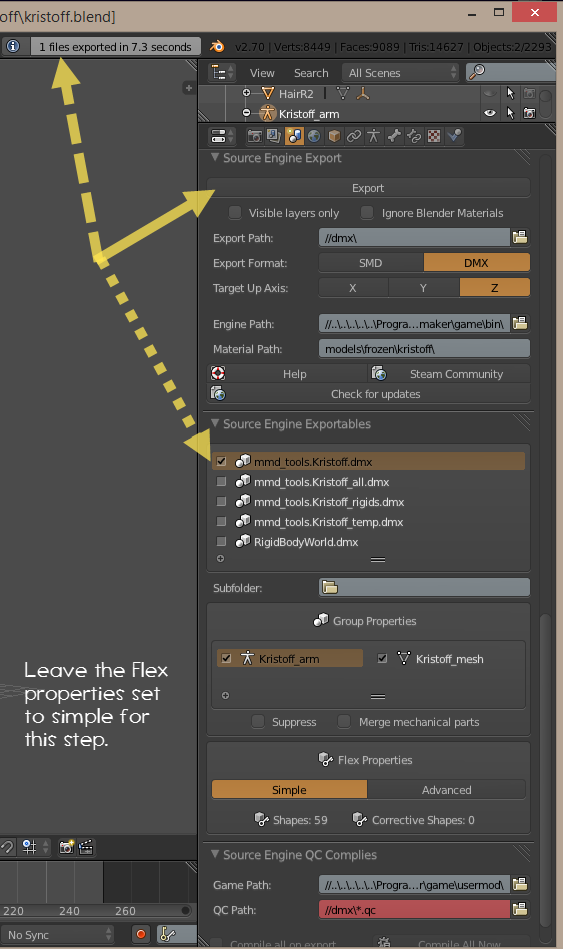
MMD (Miku Miku Dance) Models – Pt2
DMXConvert is a command line program used to convert DMX files from one format to another. The DMX Model Source File created by BLeST is in binary format and we’ll use DMXConvert to convert it into a Text format (.tex) so we can edit it in a text editor. The Editor of choice is Notepad++ and will be used here, but any text editor that will produce a pure ascii text file will do.
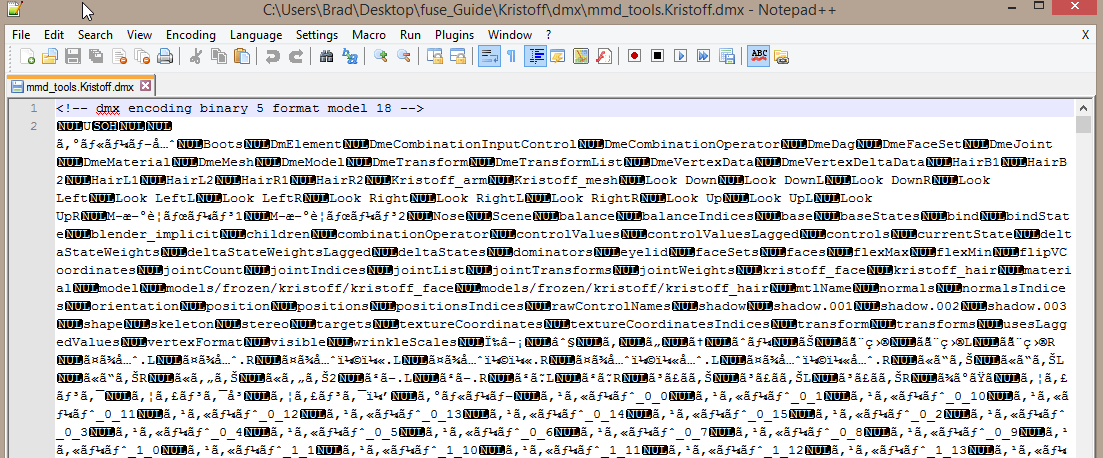
Using the Valve utility called DMXConvert we can convert the binary DMX to a Text File so we can edit it in a text editor. Doing this will allow us to translate and convert the Japanese in the model to English, thus renaming the bones and vertex groups in the process.
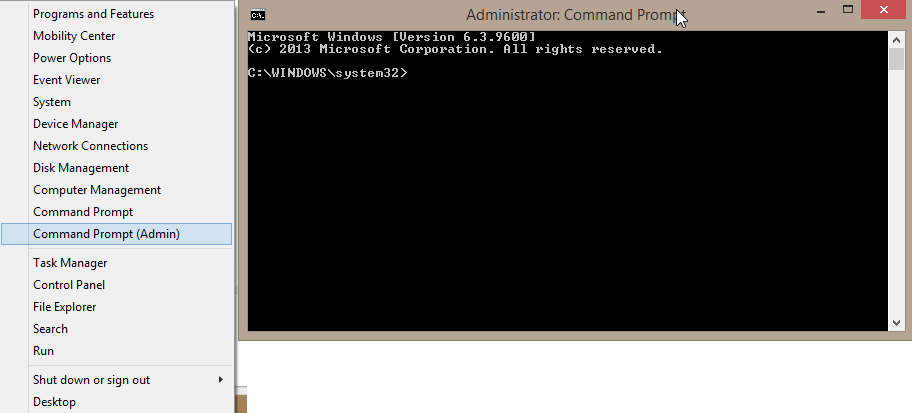
Launch a Command Prompt session (right click on the start button in Win7 or the Windows icon in Win8.x and click Command Prompt (as administrator), say Yes to the UAC prompt if applicable. This will open a Command Prompt window.
DMXConvert needs certain files located in the SFM Bin folder to operate, so we can’t just copy it to another folder and use it.
When you open the command prompt it will most likely open and be pointed to the C:WindowsSystem32 folder. We need to be in the SFM Bin folder. To change the folder, type CD “C:Program Files (x86)SteamSteamAppscommonSourceFilmmakergamebin” (or the path that points to where your SFM Bin folder is. The quotes are optional, but it is good programming practise to use them, especially if there are spaces in the path)
If you type dmxconvert and hit enter you should get syntax help information on how to use the program.
To convert the binary DMX to a TEX format, the command we need to use is:
dmxconvert -i “{path to the dmxfile/dmx filename of the in (-i) file}” -o “{path to where you want the outfile (-o) put/filename.tex}” -of tex (and tex is the outfile format (-of))
So in my case I want the outfile in the same folder as the original DMX file. My command line would look like this:
dmxconvert -i “C:UsersBradDesktopfuse_GuideKristoffdmxmmd_tools.Kristoff.dmx” -o “C:UsersBradDesktopfuse_GuideKristoffdmxmmd_tools.Kristoff.tex” -of tex
Even though it doesn’t look like it did anything the command will convert the Binary file to Text and place it in the folder you specified. If you check the folder you specified as the outfile path, you should find the filename.tex you specified. Open this file in any pure text editor and you should find that it is now completely readable and now you can make changes to it.
If you remember, when I imported the PMD file I created a INFO logfile. This file lists all the Japanese named bones, vertex groups and Shape Keys. Now that I have the model source in text format I can use the two files with Google translate to determine and change the data that was programmed in Japanese to something useable in English (or to your own native language.)
It’s a long and tedious process, but better than walking through the model and changing things one by one, line by line in Blender.
By doing a Replace All of the Japanese スカート to Skirt, I replaced 432 occurrences in one click. As the Vertex Groups assigned to Bones carry the same names as the bones they are assigned to, the vertex group name will be changed as you change the bone name. (Confusing eh? Not really we’ve already seen this in the XNA model, go back and have a look. It’s one of the reasons why the replacement occurrences are so high in the Skirt example, not only did it change the references for ALL the skirt bones, but it change the references for ALL the Vertex Groups assigned to those bones.)
When doing the Search/Replace function your should have the Match Whole Word check box turned on and walk through things one at a time. If you can determine that bones are named in such a manner that you can do a bulk replace, turn it off. For example the 144 bones in the skirt are named like スカート)_0_1, スカート)_0_2, スカート)_1_0, スカート)_1_1, etc. I can replace all instances ot スカート) with Skirt without risk of duplicating bones. So with one click, 144 bones and 144 Vertex Groups are changed. However, you don’t want to do this on a stereo object like a left and right thumb. The way the bones are named if you changed the Japanese for thumb to thumb, you would end up with duplicate thumbs without a left or right indicator. This is an example of where I would have Match Whole Word turned on.
Now all I have to do is go through and do the search and replace on the rest of the bones and flexes. When doing this I try to keep the naming conventions as close as possible to those used in a Valve model. If I’m not sure which bone I’m working with, I can always go to the model and look it up. (Hint: most bones that have the word destination in their converted names are usually End Bones)
Once you have finished translating the Japanese to English, save the the changed file with a new .tex filename. This way you have a backup of the original tex file you can go back to in case there are problems.
Now we have to convert this new .TEX text file back into Binary format so we can open it in Blender. To do this, we have to use DMXConvert again.
Remember, DMXConvert is a command line program and has to be run from a command prompt shell. The the command lines to convert the file back to Binary is almost the reverse of what we did to convert it to text.
First launch a Command Prompt (as administrator (if not already open)) and point it to the SFM Bin Folder
CD “C:Program Files (x86)SteamSteamAppscommonSourceFilmmakergamebin”
then to convert the tex file back to binary, the command would look like:
dmxconvert -i {“path to where you saved the new tex filefilename.tex”} -o {“path to where your DMX file isnewDMXfilename.dmx”} -of DMX (you want a new DMX filename so you don’t overwrite the original (again the original is a backup in case of problems))
So for my project the command would be:
dmxconvert -i “C:UsersBradDesktopfuse_GuideKristoffdmxmmd_tools.kristoff2.tex” -o “C:UsersBradDesktopfuse_GuideKristoffdmxmmd_tools.kristoff2.DMX” -of DMX
Now do a Valve DMX import of the new Binary .DMX file into a new session of Blender.
If everything went well all the Bones, Vertex Groups and Shape Keys will now be in the language you edited the name to (you may have to change a few because you missed some or named them wrong. I would expect that 99% of the renaming should be correct, if you did it right!!)
You should also see that all the contraints and IK Rigs are gone and that the 2290 object count is now reduced to 4, the mesh, the armature, a camera and a lamp. Because this is a Valve DMX import, the bones will be reshaped and reduced in size.
Test the model for posability, and check to see if the Shape Keys work properly. If they do, save and close the original Blend file with the imported PMD (as a backup). Next, File save the newly imported DMX Blend File (with a new name.) The new Blend file created from the DMX import will be the one we’ll use for the rest of the project.
MMD (Miku Miku Dance) Models – Pt3
Now that we have a model we can read, the process is pretty much the same as it was for the XNA model.
- Skin the model and check the materials, make adjustments if necessary
- convert the materials to Valve Format and write the VMTs
- Scale the model to the size we need for the SFM project
- make changes to the skeleton (armature), remove unnecessary bones and add new ones. Fix naming conventions that we messed up when renaming the bones. (we’re going to explore this in more detail in a bit, especially the spine and pelvis bones.)
- check and adjust bone/mesh weights
- adjust shape key flexes
- add sequences (if you want)
- export to DMX
- write the qc
- compile the model
- enjoy animating it in SFM
Open the new Blend File that we just created.
First thing, because the DMX didn’t reassign the UV Maps and textures to the character, go through and reassign the textures to tne materials and repopulate the UV Maps. Check them over to see if you have to adjust them (you really should have to.)
Now use VTFEdit or GIMP to convert the images to VTF format and use VTF Edit to create a simple VMT for the materials. (You can get into adding Phong, creating normal/bumps map and other effects on your own. That is beyond the scope of this document.) Save them to the Usermod Materials folder you identified earlier.

Now import another character from your project to use as a reference to scale this one. Make sure you uncheck the Append to Existing Model and Import Animations before you import. Set the Up axis according to the model you are importing’s up axis so it will stand up on import. If you are not sure, leave at Z and rotate the model accordingly after import.
Select the layers that contain the two models you’re working with (the reference and the new DMX) Then select the skeleton/armature of the DMX model and in object mode, scale the model to the proper size. We’ve already done this a few times now, so I should not have to explain how to do it again. If you’re not sure, go back to the XNA section on scaling Ralph.
In this next section I have hidden the Jacket Skirt bones so the Skeletal bones can be see more clearly. Also because the Jacket tails are completely controlled by those bones, I have separated the tails into their own object so I can hide them to see the weighting better.
There are going to be a lot of pictures in this portion, it’s easier to explain that way. Remember you can always click on a picture to blow it up so you can see everything better.
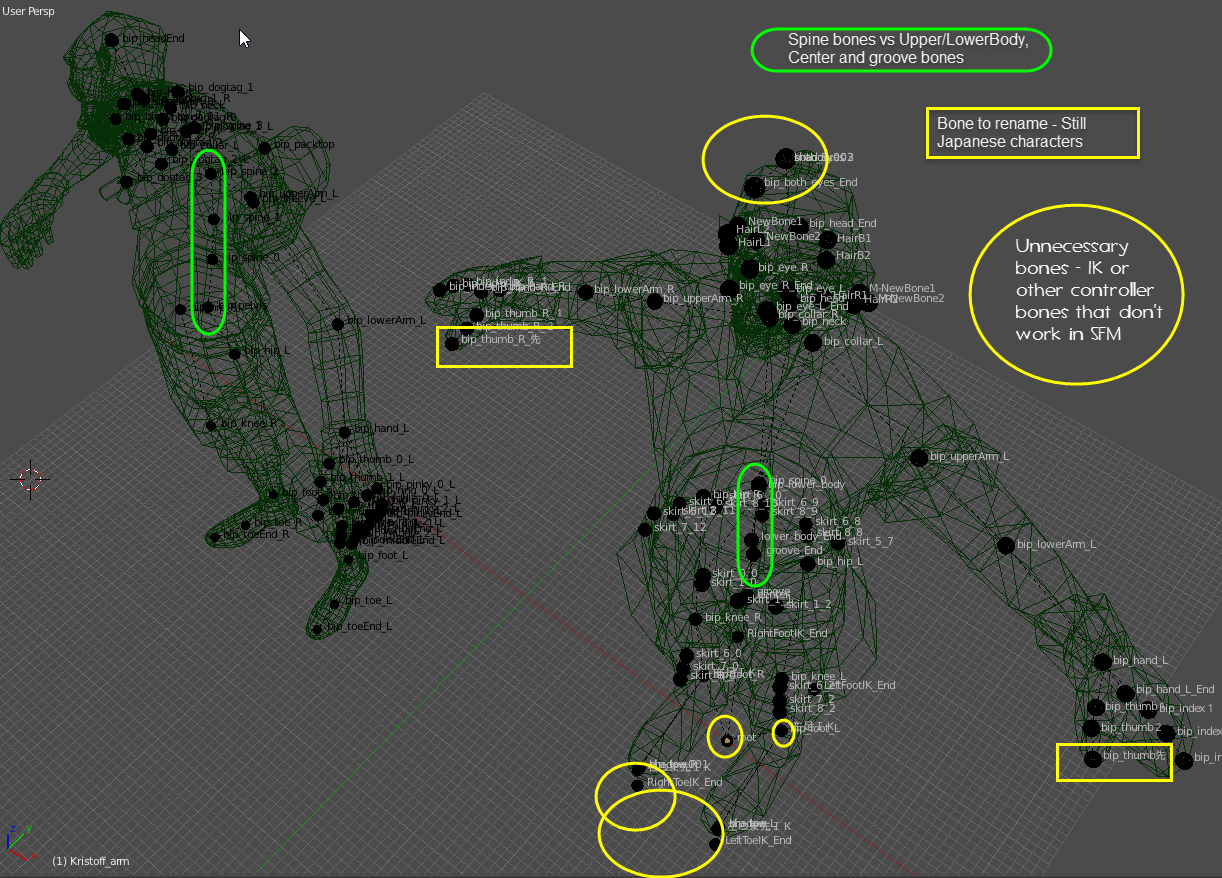
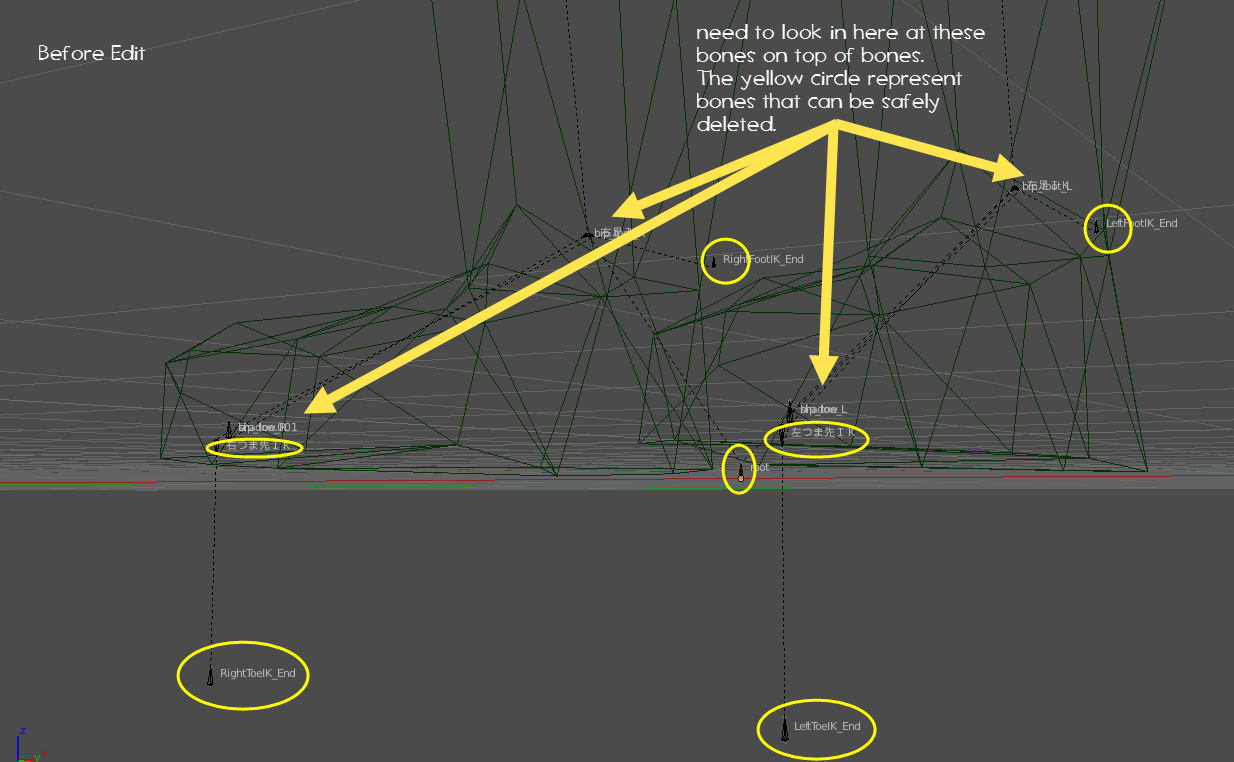
- Select the armature and go into edit mode. Select bone and press X to delete or G to grab them if you are going to move them. (Hint: put a model into front, side or top view before moving a bone. this way the bone will move straight along the axis you’re trying to move it.)
- Most MMD models have a root bone located on the origin point. This is a model control bone and is not required in SFM, it can be deleted.
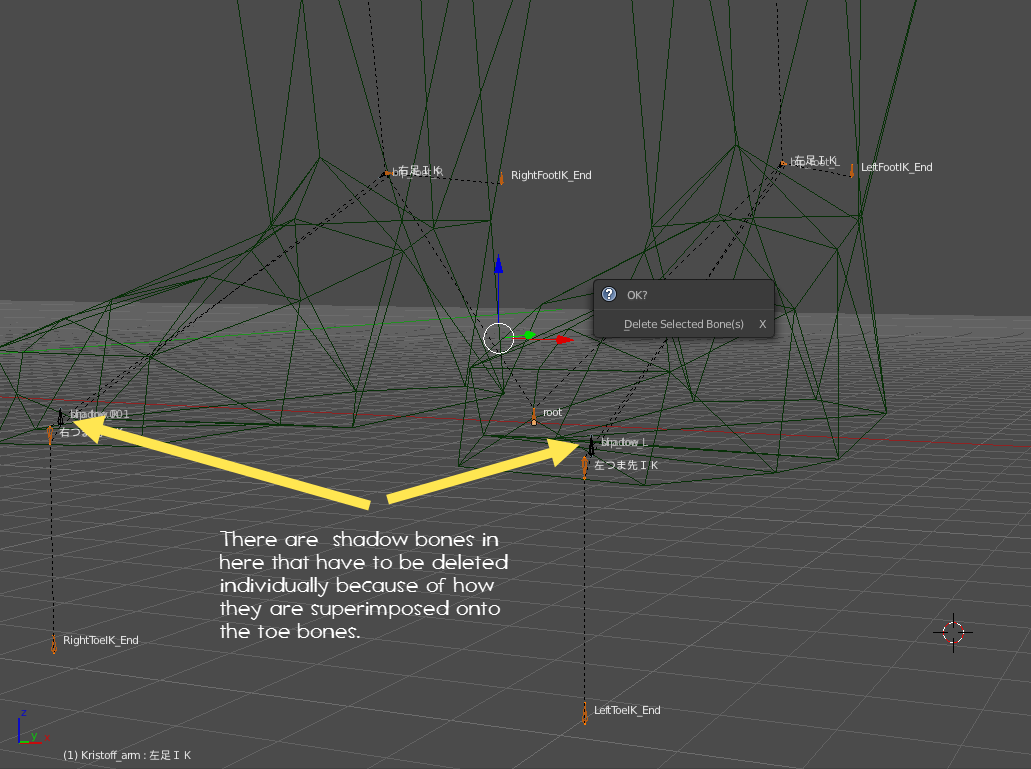
- As the IK system for rigs in SFM work differently than MMD, any bone with an IK extension can be safely removed.
- There are bones on top of bones in a MMD model, these have to be inspected one by one and then either deleted or moved into proper positions as required.

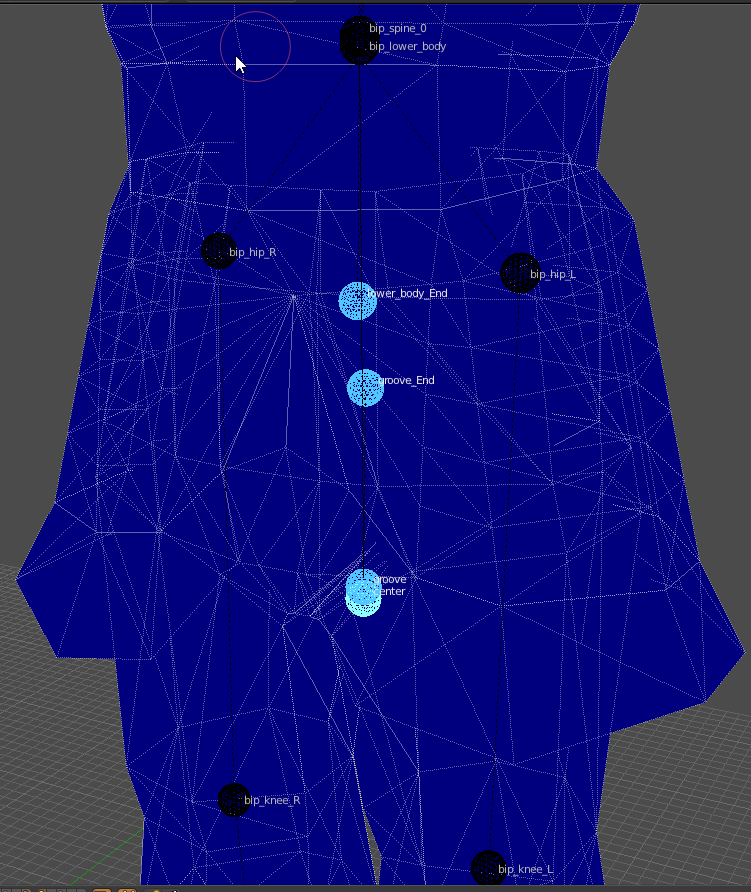
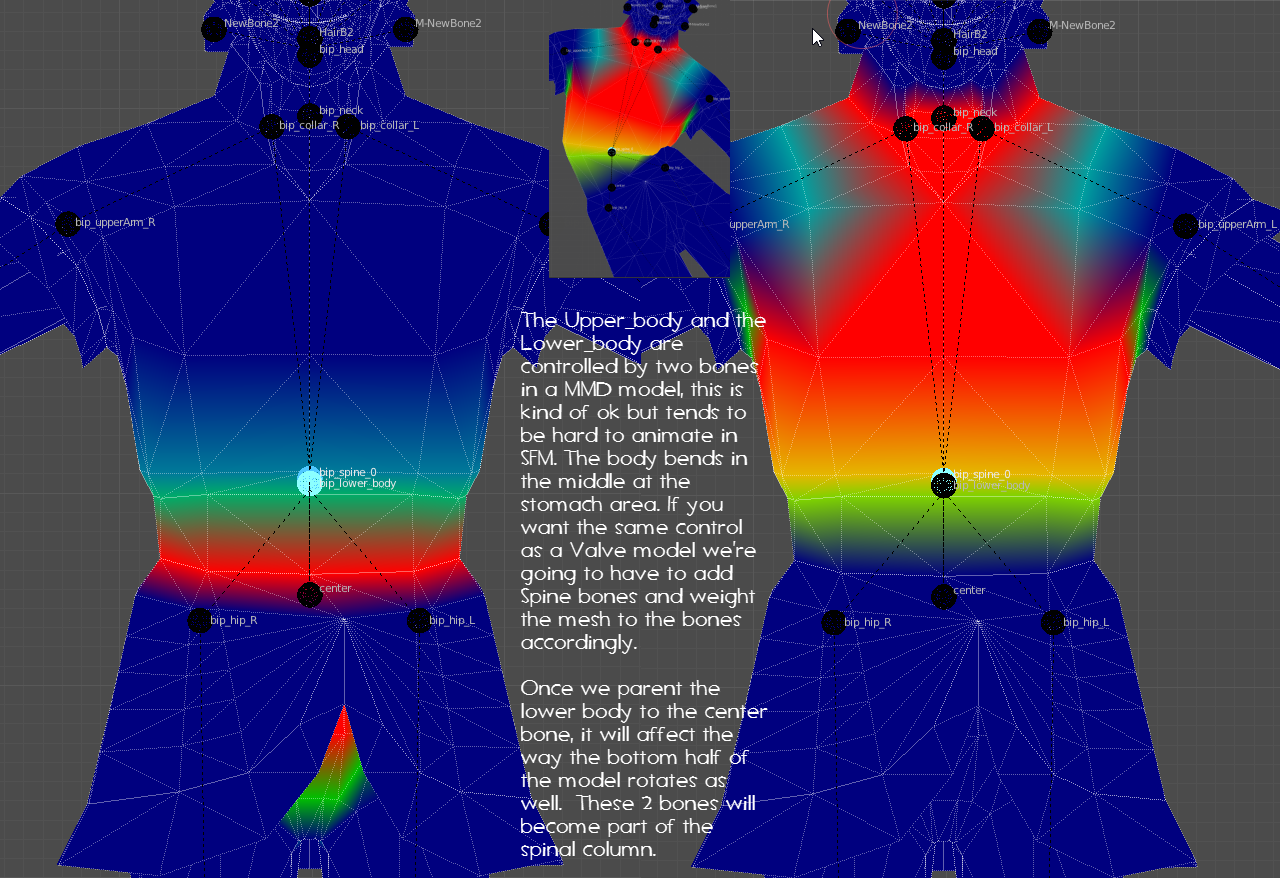
Now that we’ve walked through the bones, deleted the ones we don’t need and renamed others that we do, we need to concentrate on the Spine section and fix that then re-parent everything so that the flow of the bones is correct.
MMD (Miku Miku Dance) Models – Pt4
Now that the first spine bone has been adjusted, we need to add the rest. This requires looking at the mesh available and comparing that to a game based reference.

- Select the Armature and put it into Edit mode
- select the bone you want to be the parent bone (in my case, bip_spine_0)
- press E (for extrude) and Z (to keep it on the Z axis) then pull the bone out until it is about the same size as the parent
- now in the bone properites panel, click Connected until the check mark disappears, then rename the bone as per the other model.
Once this is done, select the bone and press G to grab it and Z to loack it to the Z axis only then drag it to the location you want to put it. (shown in the next picture.)
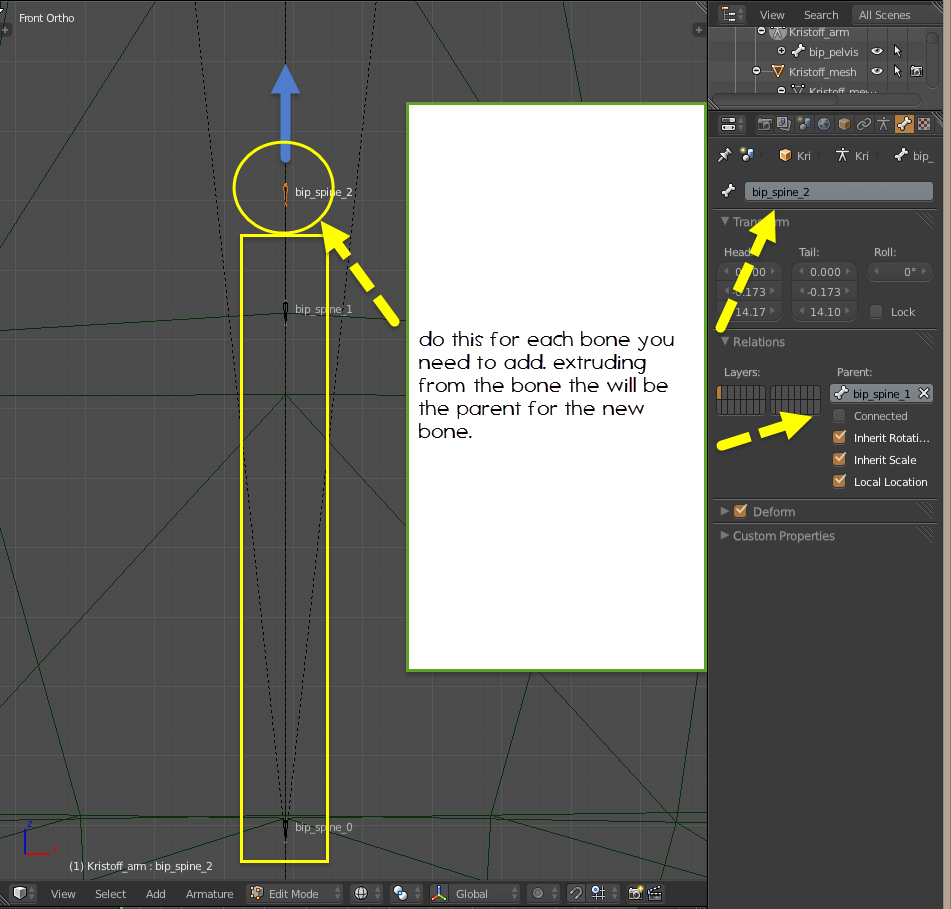
Make sure that you extrude from the new bone that will be the parent for the bone.
So in this case, I extruded bip_spine_1 from the bip_spine_0 bone and the bip_spine_2 from the bip_spine_1 bone.
Also make sure you lock the bone to the axis you want it to move on, this way the bone will be directly aligned with the previous bone.
Once you have all the spine bones you’re going to add, select the bip_neck bone, rotate it to the same direction as the scout’s and reparent it to your last spine bone.
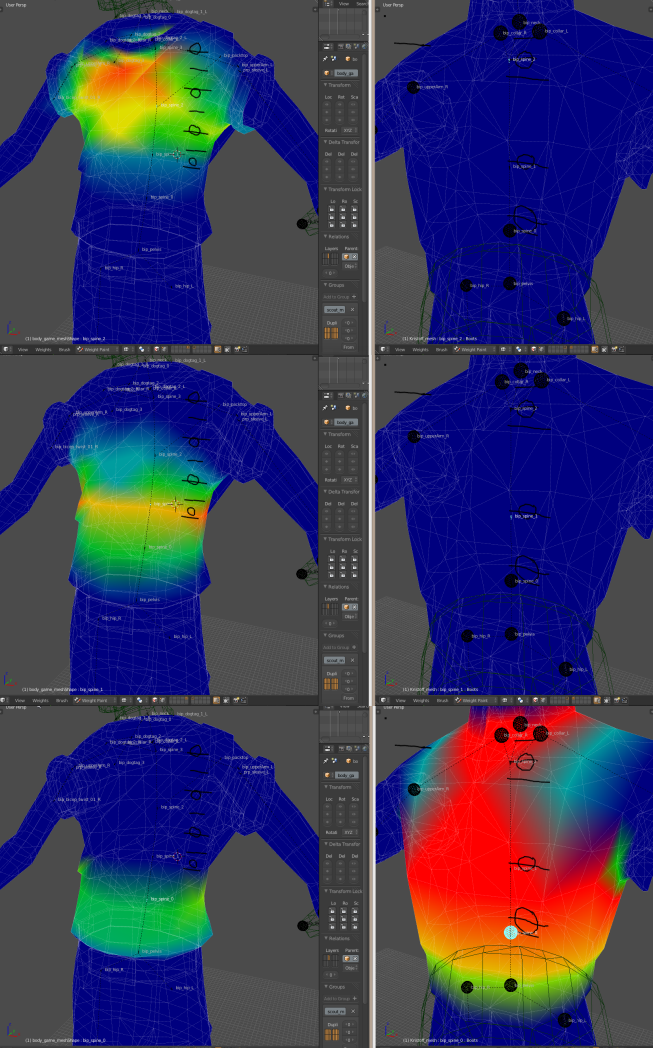
By putting both models into weight paint mode and stepping through the skeletal bones we can see that the new bones we added to the MMD don’t have any weight assigned to them. All the weight for the torso is still assigned to the original bone.
Because we’ve assigned an armature modifier to work with vertex groups, we can fix this pretty quickly by putting the mesh into edit mode then by selecting mesh and creating vertex groups for the selected vertexs, however we will still need to fine tune the weight painting in weight paint mode after the process is complete.
Other than coming up with a concept then actually designing your model in a 3D Edit program, weight painting is probably the hardest and most tedious process in the entire model creation process and because every model is different iIt is also probably the hardest to explain.
I guess now would be as good a time as any to bring up the way Blender assigns weights.
If a vertex is weighted, the total weight must equal 1 (or 100%.)
This weight can be distributed over many bones, but the total weight must equal 1.
So let’s say we ditributed the wieght of a vertex over 4 bones equally, each bone would influence the vertex by .25, 4x.25 = 1.
This would work in Blender but not in SFM.
SFM only allows a max of 3 bone to influence a weight.
So we would have to drop one of the bone influences and increase the values to the other 3.
Say 2 x .33 and 1x.34 = 1.
If a weight doesn’t equal 1, then Blender will automatically assign the missing values to make it 1. How it assigns this missing value, I’m not sure and is beyond the scope of this document, but I do believe that the missing values are assigned to the bone closest to the vertex.
This is a weight painting guide from the Blender documentation. It shows the colours that would be displayed on a mesh for a selected bone for the various values assigned. Dark blue is 0 or cold, and bright red is 1 or hot.

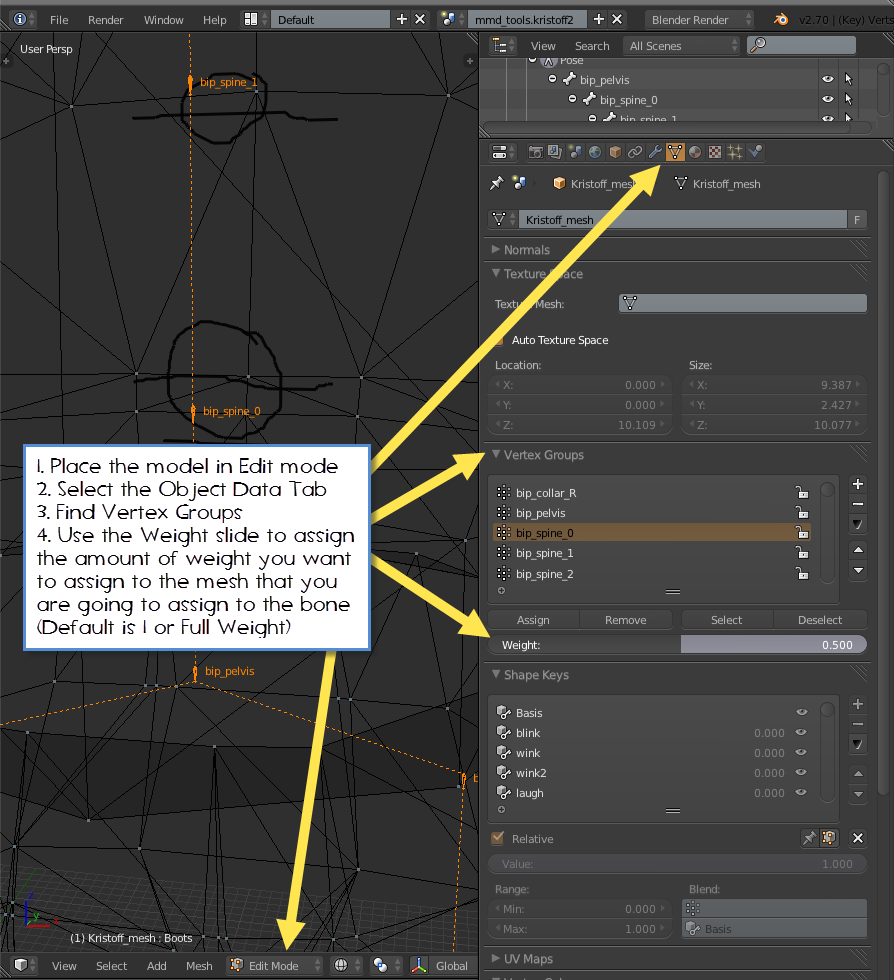
The process is fairly simple,
Place the model into Edit mode and click the Object Data tab on the Project’s Properties Panel. Find the Vertex Groups menus and press the + button to add a new vertex group for each of the new bones that were added but don’t assign mesh to them yet. Use the Weight Slider under the tool to set the amount of weight to be assigned to the mesh vertices when they are assigned to the group. The default is 1 (or 100 percent).
So, using the scout as a reference, plan out the vertexes that you want to add to the groups that you made for the new bones and select them in Edit Mode. Set the amount ot weight you want to set to the mesh for that group, then click Assign to assign the selected mesh and the weight to the group selected.
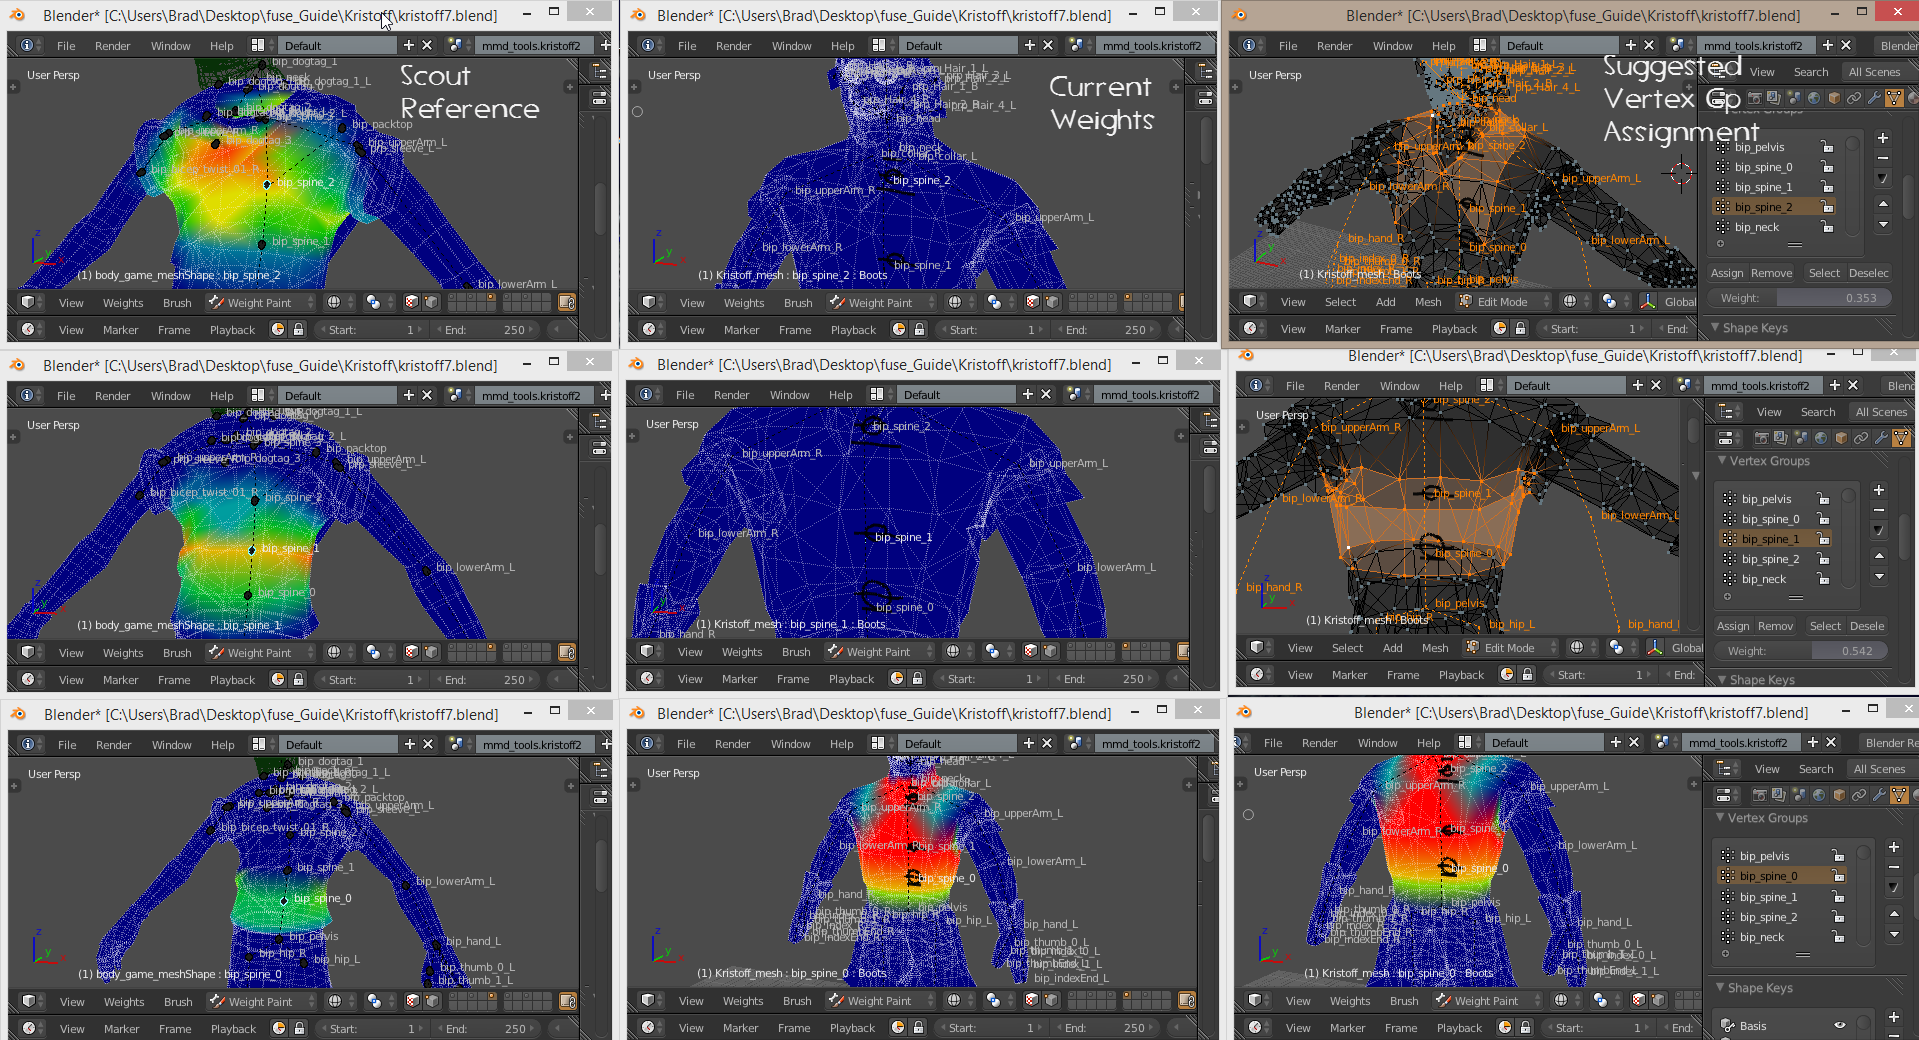
Now that the vertexes and weights have been assigned to the group, go back into weight paint mode and rotate the bones to see if there have been any missed vertices, and if the model deforms properly. This can now be adjusted manually.
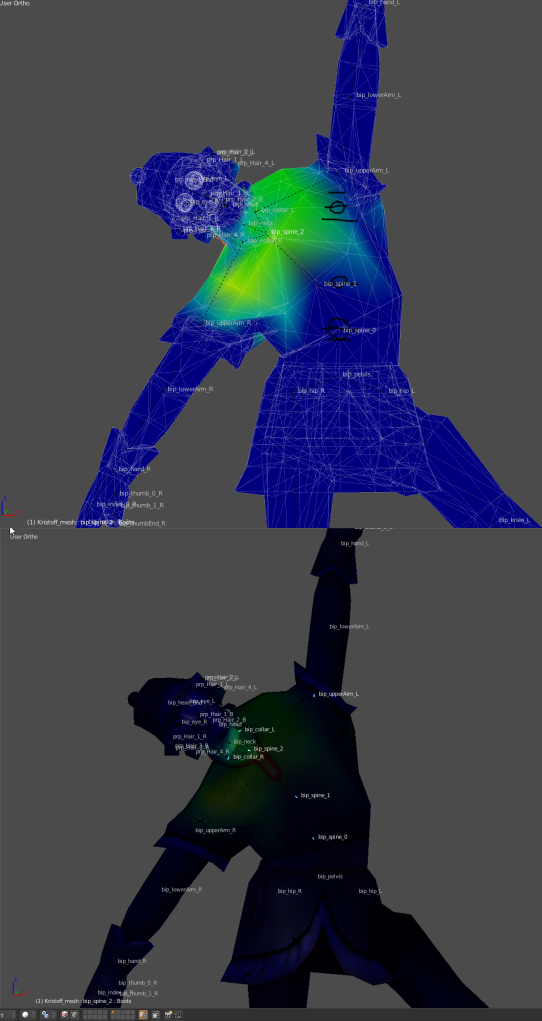
Once the bones and mesh are weighted and the mesh deforms properly, do the same for the coat tails. Add or remove bones as necessary and adjust the weights.
Moving bones will also move the pivot point of the mesh based on the position of the bone’s base. If you find that the mesh isn’t pivoting in the wrong place, move the bone around until you find that the mesh deforms the way you want it to.

MMD (Miku Miku Dance) Models – Pt5
Ok, now that I’ve thinned the tails bone count down to 95 from 145 and weighted it the way I want it, I’m ready to move on.
Most MMD Models have a basic set of facial animations that will import when you bring the model into Blender. These Facial Animations are controlled by what is known as Shape Keys. These Shape Keys are what are going to create the Facial Flexes sliders in SFM.
Shape keys move mesh, not bones. They are used to open and close mouths, move lips, make a model open and close eyes, blink and wink, etc.
(Note: Shape Keys are not limited to facial flexes, you can apply them to anything, however they are very limited in scope, they can only move vertexes a certain distance and the movement is a straight line from the origin point to the final point. You can’t really arc a movement. If the movement is complicated, consider using a bone and vertex group instead.)
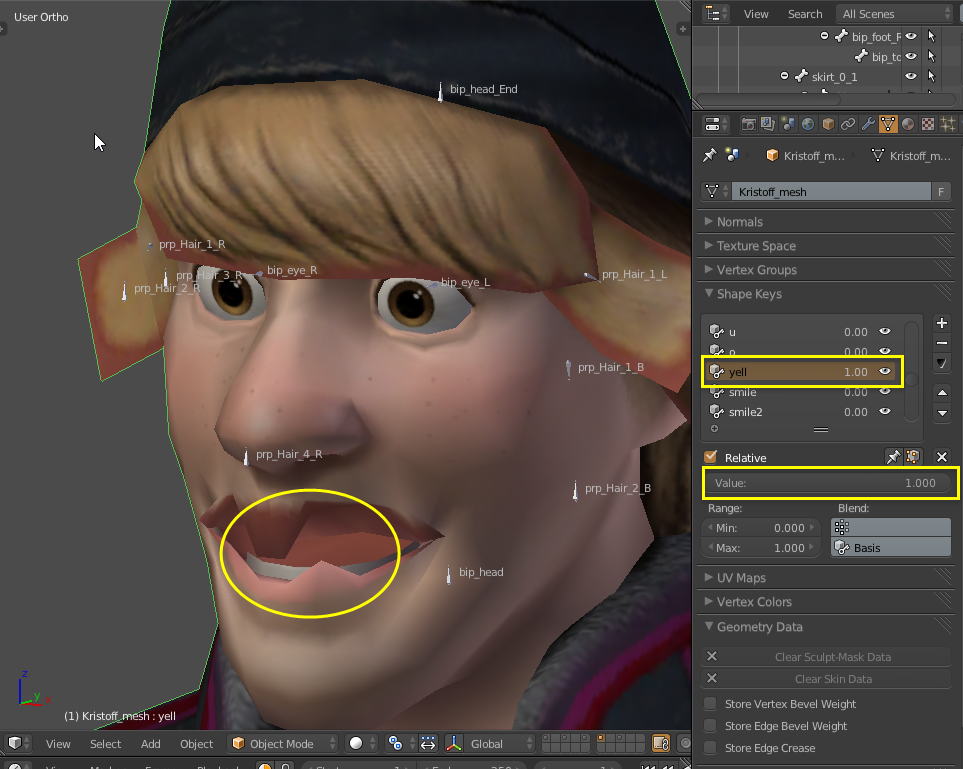
Fixing a Flex is pretty easy, its more time consuming than difficult. What you have to do is put the object that contains the flex into edit mode. Select the shape key that is broken and while moving the shape key slider, determine what is actually broken. Determine where the broken vertices are supose to be when the shape key slider is set to zero (0) then place them into the postion it is supose to be in (or its default position.) Most times the start position of a flex is ok, the mesh is in its proper place. The Start position is usually based on the original model at rest.
Now move the slider to its “on” (1.00) postions and move the broken vertices to where they are suppose to end up. Make sure you only have the vertex(es) that need to be repaired selected before moving anything. There nothing worse than finding out that not only did you fix the original flex, but you moved the whole back of the head as well because that mesh was selected when you moved the broken vertex(es).

Unfortuantely, I do not know of a way to fix multiple flexes that require the same type of change, each flex has to be fixed one at a time.
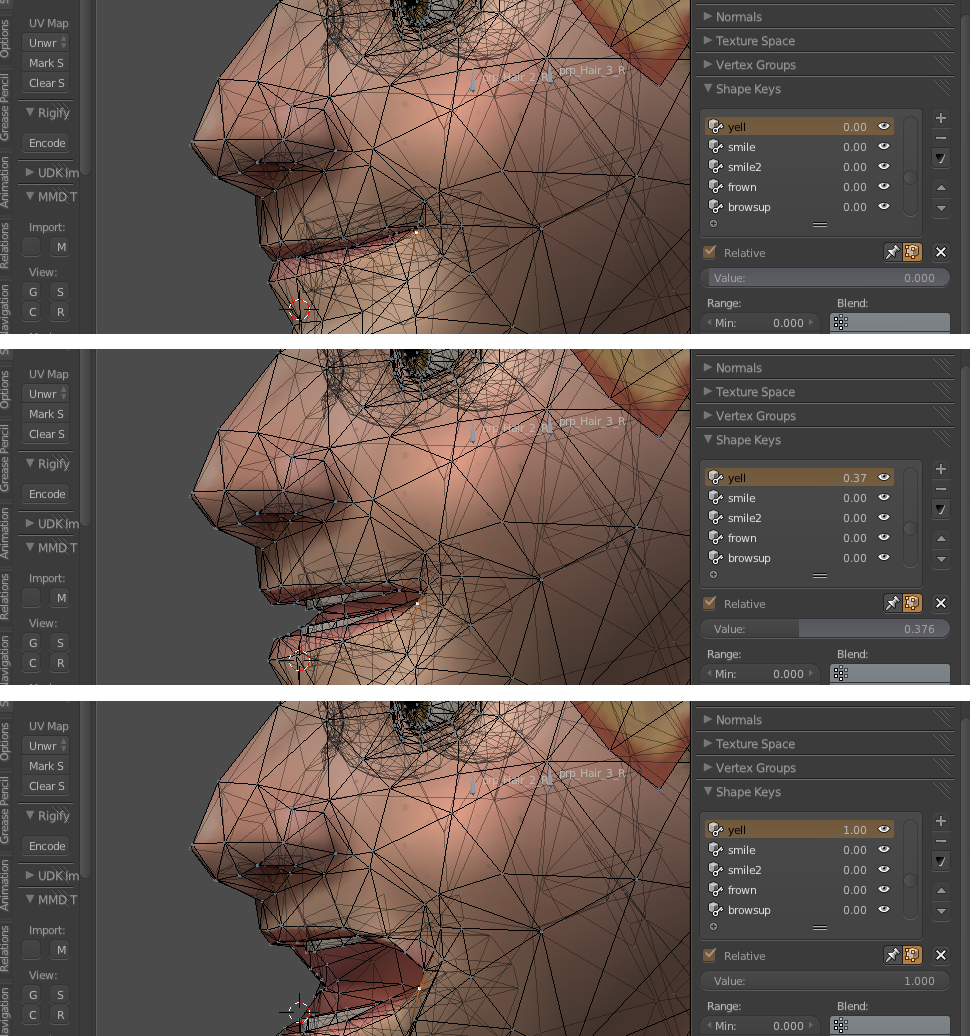
Walk through each of the shape keys and repair/delete any that are broken or add more as required. I’ll talk more on Shape keys and get into how to set up the flexes when I get to the conversion of the OBJ type model file.
I’ve already discussed the materials that may be found in a MMD model in the model characteristics portion of this section. If you haven’t trimmed down your matrials to only those needed and renamed them to something unique to the model, go back and do that now.
Now that the model is “as you would like it” everything bends and moves correctly and you’ve added or deleted everything you want to, it’s time to verify the set up of Blender Source Tools, create the VTFs, VMTs and place them in the proper folder, then write the QC.
Just like what was done for the other models worked on in this guide.
Ok, in this Blender Project I have 4 models. Each model is on its own layer. Blender Source Tools is so flexible that I could export Source models for an individual model to all 4 at once. (I only want to export the Krisstoff Model, so, all I have to do is ensure that his model is the only one seslected in the Exportables area. (Or I could delete the other three and leave him as the only model in the project.) This is extremely useful if I had other props that I had created for the model and wanted to save them as their own model without deleting everything.
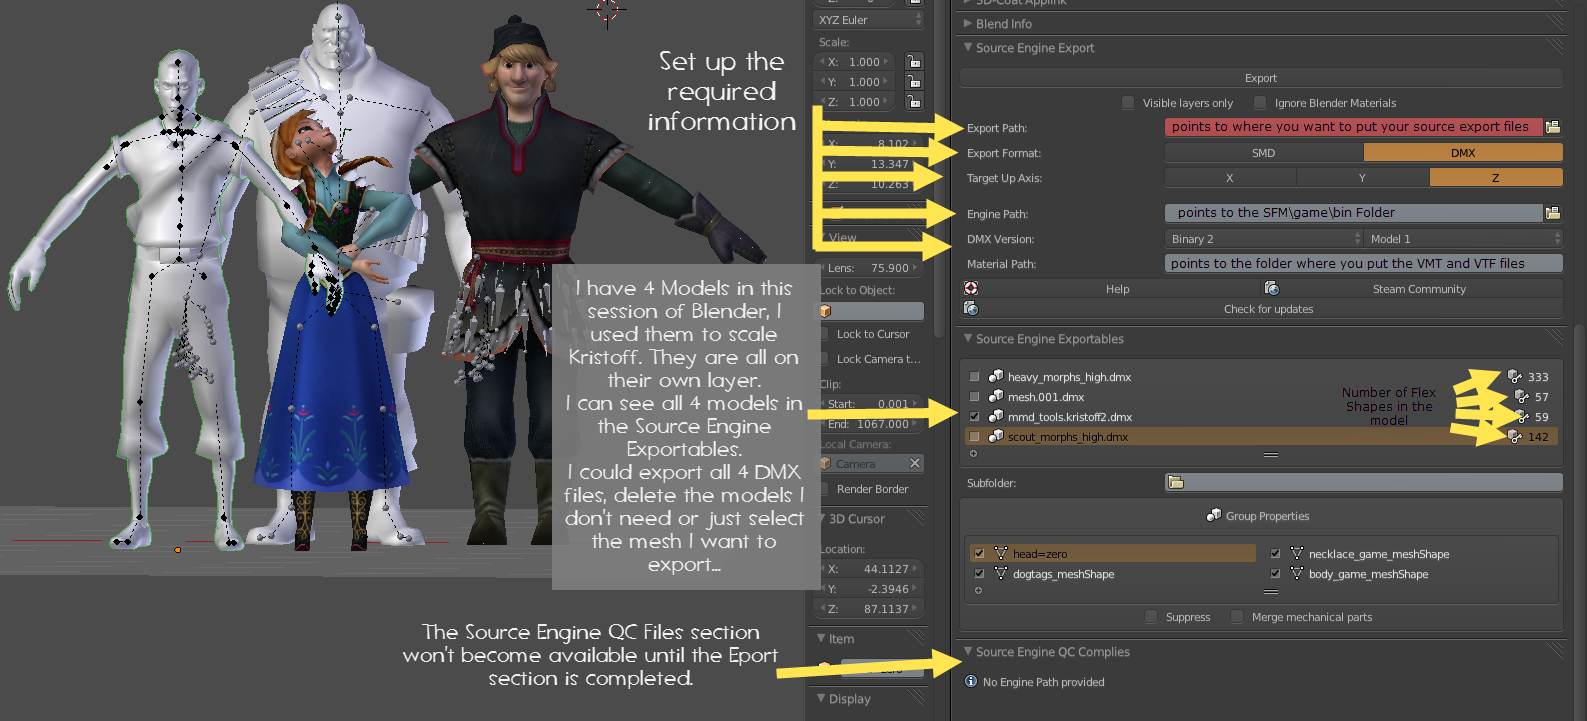

I’m going to select only the layer that Krisstoff is on,
Go Into Object Mode and select the Armature only
Press Shift-S and center my cursor
Then press Shift-S and move the Selected object to the cursor.
This will put the mesh and armature in the center of the workspace.

- Now I select the Kristoff Mesh
- Set up the Blender Source Tools,
- Eport Path,
- Export Format (DMX),
- Up Axis (Z),
- Set the Game Engine (the SFM gamebin folder, this will force use of the SFM studioMDL to do the compile)
- Tell SFM where the materials are going to live relateive to the game/usermod/materials folder (models/ptejack/frozen/kristoff/)
- make sure only the objects I want to export are selected in the Exportables
- set up the Flex animations (I’ll leave this to simple for this example)
- set my Game path to the SFM gameusermod folder, and lastly
- tell blender where my QC file is
When I’m happy with the set up, I export the model.
MMD (Miku Miku Dance) Models – Pt6
One of the beautiful things of using the DMX format for exporting Source models files over using SMD format is that if your model has Shape Key fexes, the flexes are built into the model itself in the DMX vice having a VTA file created and having to define the flex controllers in the QC when using SMD formatted Source files. The only exception to this is if your model has flex controlled material laid eyes, then the eye controllers have to be defined more matter which format is used. (As the Kristoff model doesn’t have this type of eyes, I’ll cover this when I get into the OBJ convertion.)

- $modelname – path to the model and its name
- $model – name of the main bodygroup and the dmx file that it uses
(as our model only has 1 mesh object this is all that is required. If you model is made up of other DMX files then a separate $model or $body command is required for each object.) - $cdmaterials – the double quotes indicate the base materials folder
- $cdmaterials – path from the base materials folder to where the materials live
(again, if your material are spread across multiple folders then a separate $cdmaterials command is required for each folder) - $sequence – sequence name and the dmx file that outlines a reference pose (all models must have at least one sequence. This can be an actual animation or one of your model’s dmx files)
My initial qc for the kistoff model is
//——
$modelname ptejackfrozenkristoffkristoff.mdl
$model “body” “mmd_tools.kristoff2.dmx”
$cdmaterials “”
$cdmaterials “modelsptejackfrozenkristoff”
$sequence “idle” “mmd_tools.kristoff2.dmx”
//———
This is enough to get the model into HLMV and SFM to see how it will work.
When I compile the qc the model will end up in my usermodmodelsptejackfrozenkristoff folder as kristoff.mdl as result of my $modelname statement.
There is only one mesh obj that makes up the model so I only require the one $model statement. If my qc is located in a folder other than the folder that contains my DMX files, I would have to specify the path to the DMX files in the statement. The group name will be known as body in SFM.
The materials are in my usermodmaterialsmodelsptejackfrozenkristoff folder.
My dmx will also be used as an idle sequence.
I save this file to the folder I identified in Blender source tools as my qc folder.
The QC should show up as a button in Blender Source Tools. I press that to compile the model.
Blender will inform me if studioMdl had errors, warnings or if the model finished the compile. If the model Errored out I would check the Blender System Console for what caused the problem and make adjustments to the model or the qc to correct the error. This has already been covered in other sections of this guide.

Once the model is compiled I will load it into HLVM (the Half Life Model Viewer and walk through the various tabs and options and look for errors, ensure bone show up in the proper places. I pay particular attention to ensure that there are no “Blender Implicit” bones. This is the next big thing that can go wrong with your compile.
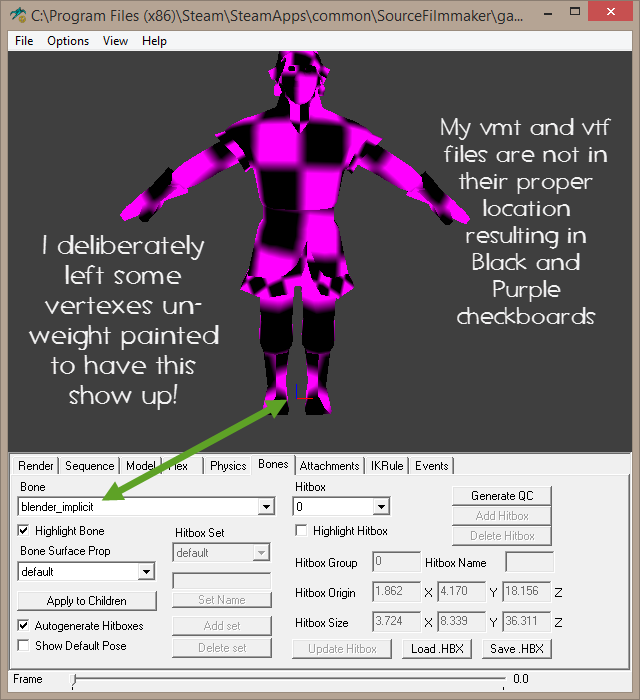
The best way to find out what vertices are causing a “Blender Implicit” bone is to load the model in SFM. Change to the Motion Editor and select the “Blender Implicit” bone, change to the move modulator and pull the bone around. The vertexes that are weighted to the bone will move. This will give you an idea of what needs to be repaired on the model in Blender.
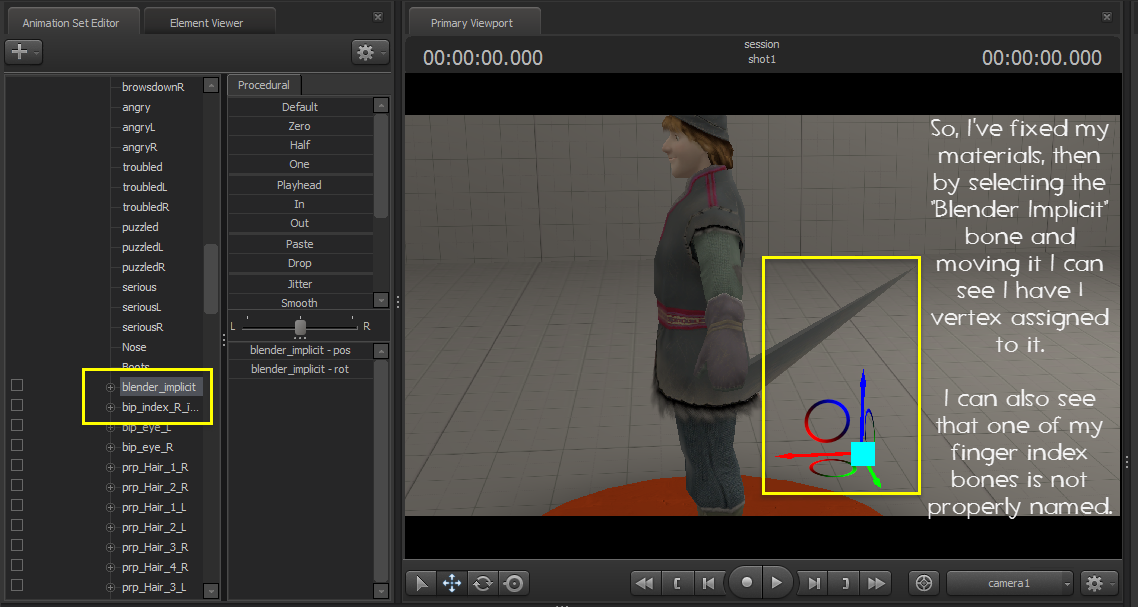
– When I have a problem like this where I have to do multiple exports and recompiles, I will change the model name by incrementing the name in the qc (ie, kristoff01, kristoff02, kistoff03, etc.) until I get it fixed. Once it is fixed, I’ll delete all the models I’ve created and export and compile a finished model with the correct model name. The reason I do this is that unlike the HLMV that can be refresh, SFM will not refresh a recompiled model, even after a rescan. If you don’t shut down SFM and restart it, SFM will crash after it sees the model has been changed. By renaming the model, I can perform a rescan and SFM will find the new model and allow it to be loaded. This also allows me to compare the old verus the new after the change.
This process can take quite a bit of time to identify the broken vertex and repair it (especially if it is a vertex under another layer of mesh), but you want to get rid of any Blender Implicit bone in order for your model to work properly. Fix it and re-Export the model, change the model name in the QC and recompile.
Repeat this step untill the model is fixed…
So after researching my “Blender Explicit” here I found that I somehow had 2 vertex groups named the same (Blender usually doesn’t allow this), one of them had Vertexes assigned, the other didn’t have anything assigned. StudioMDL assigned a Blender Explicit to the one that didn’t. Deleting the vertex group that didn’t have anything assigned to it killed the need for a Blender Explicit bone and after thexport/recompile, the Blender Explicit bone was gone from the compiled model.
I could go into hitboxes here, but I think I’ll leave that for the OBJ portion of the guide.
End result…
A converted MMD Model ready for use in SFM.
The materials on this model are contructed around very simple VTM files, (a VertexlitGeneric Shader and a $basetexture command only) no bump, normals, phong, etc added. I’m going to leave enhancing the Valve Material Files up to you to research.
The OBJ Character Model
Ok folks, now comes the model type that is a close to creating your own model and getting that into SFM; the OBJ model. As discussed when we ported the model we’ll work with into SFM as a prop, this model type is mesh only, there is no skeleton. Resources are pretty abundant out there for this type of model, but a lot of them are posed, which can make the process a little more difficult. But if you master the technique, you can increase your model library exponentially.
Ok, let’s get on with it… Miss Sally J, Center Stage, Please!
If you remember this is the model I created using FUSE and exported as an OBJ model. I’m not plugging the product here, but this IS a great product (well maybe I am but I really do like this product). The official release has occurred and there have been many enhancements added to it since I started this guide with more promised in the near future. Best advise I can give right now: Grab the Demo, Check it out, wait for a sale and snap it up…

I plan to add facial flexes to the Sally J model but my original export had her lips and teeth pressed together. It is going to be hard to select the mesh and separate it easily for the vertex groups I intend to use. Now with the enhancements in FUSE I can split her lips and separate her teeth prior to exporting the model. The export will retain the split lips and make the selecting of vertices a lot easier. This makes creating facial flexes a little easier in the long run… (Sale Plug finished)
Because most OBJ models found on the web are going to have closed mouths I’ll use the original export with the closed mouth for this guide.
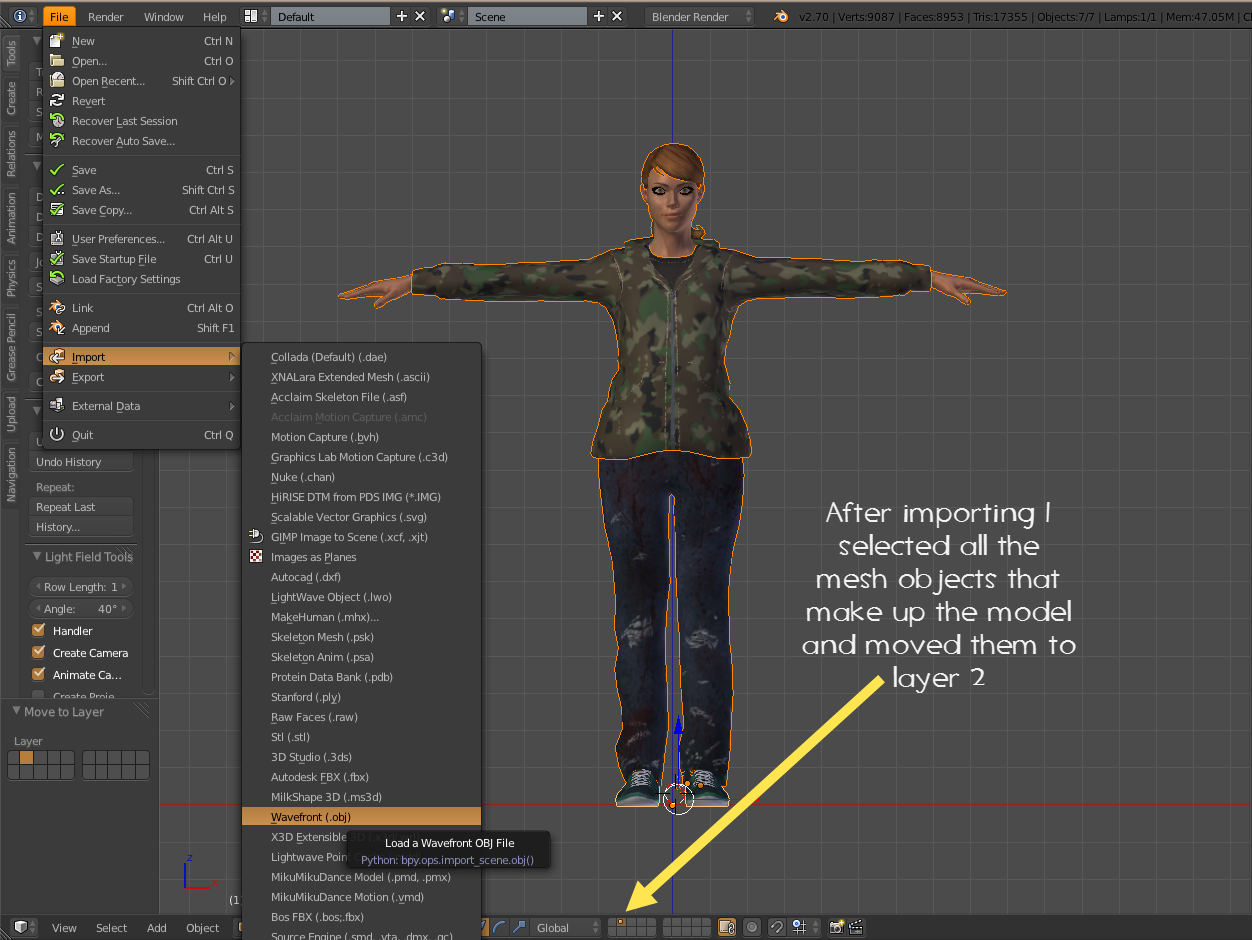
Once she is imported I select all the mesh objects and move them to Layer 2.

In this case I think the Sniper is the best model to base the bone structure on and I always use the highest detailed models to work with. I turn off the options and change the up access to Y, this way the model will import standing up on the floor, and change the bone display to default to get rid on the SMD_vis globed bones.
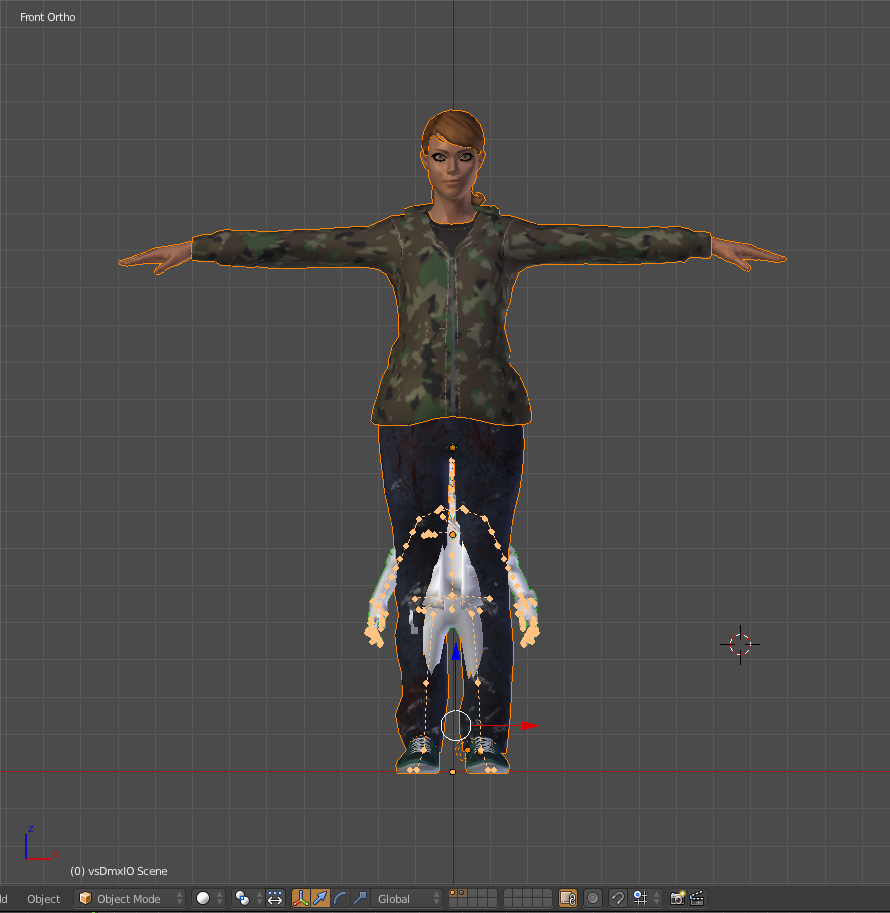
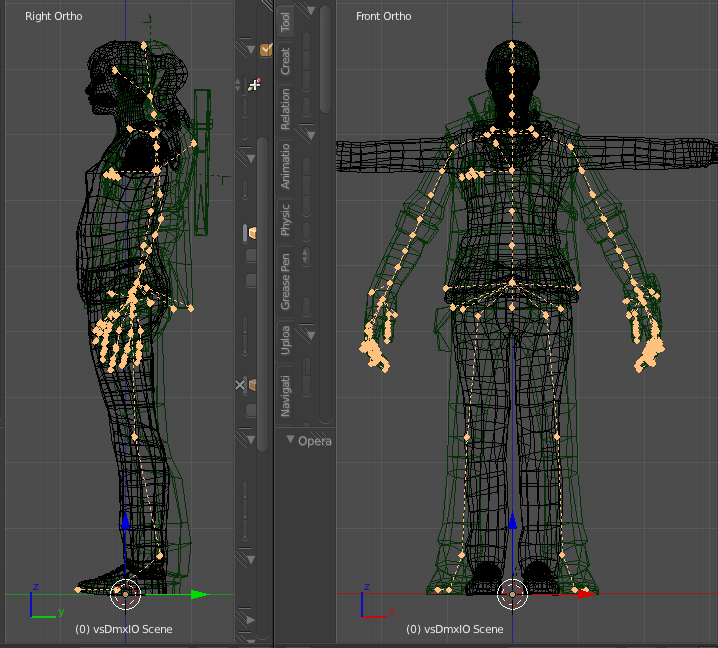
And now comes the fun part, positioning the bones on to the OBJ, deleting unnecessary bones and adding new ones where they are needed.
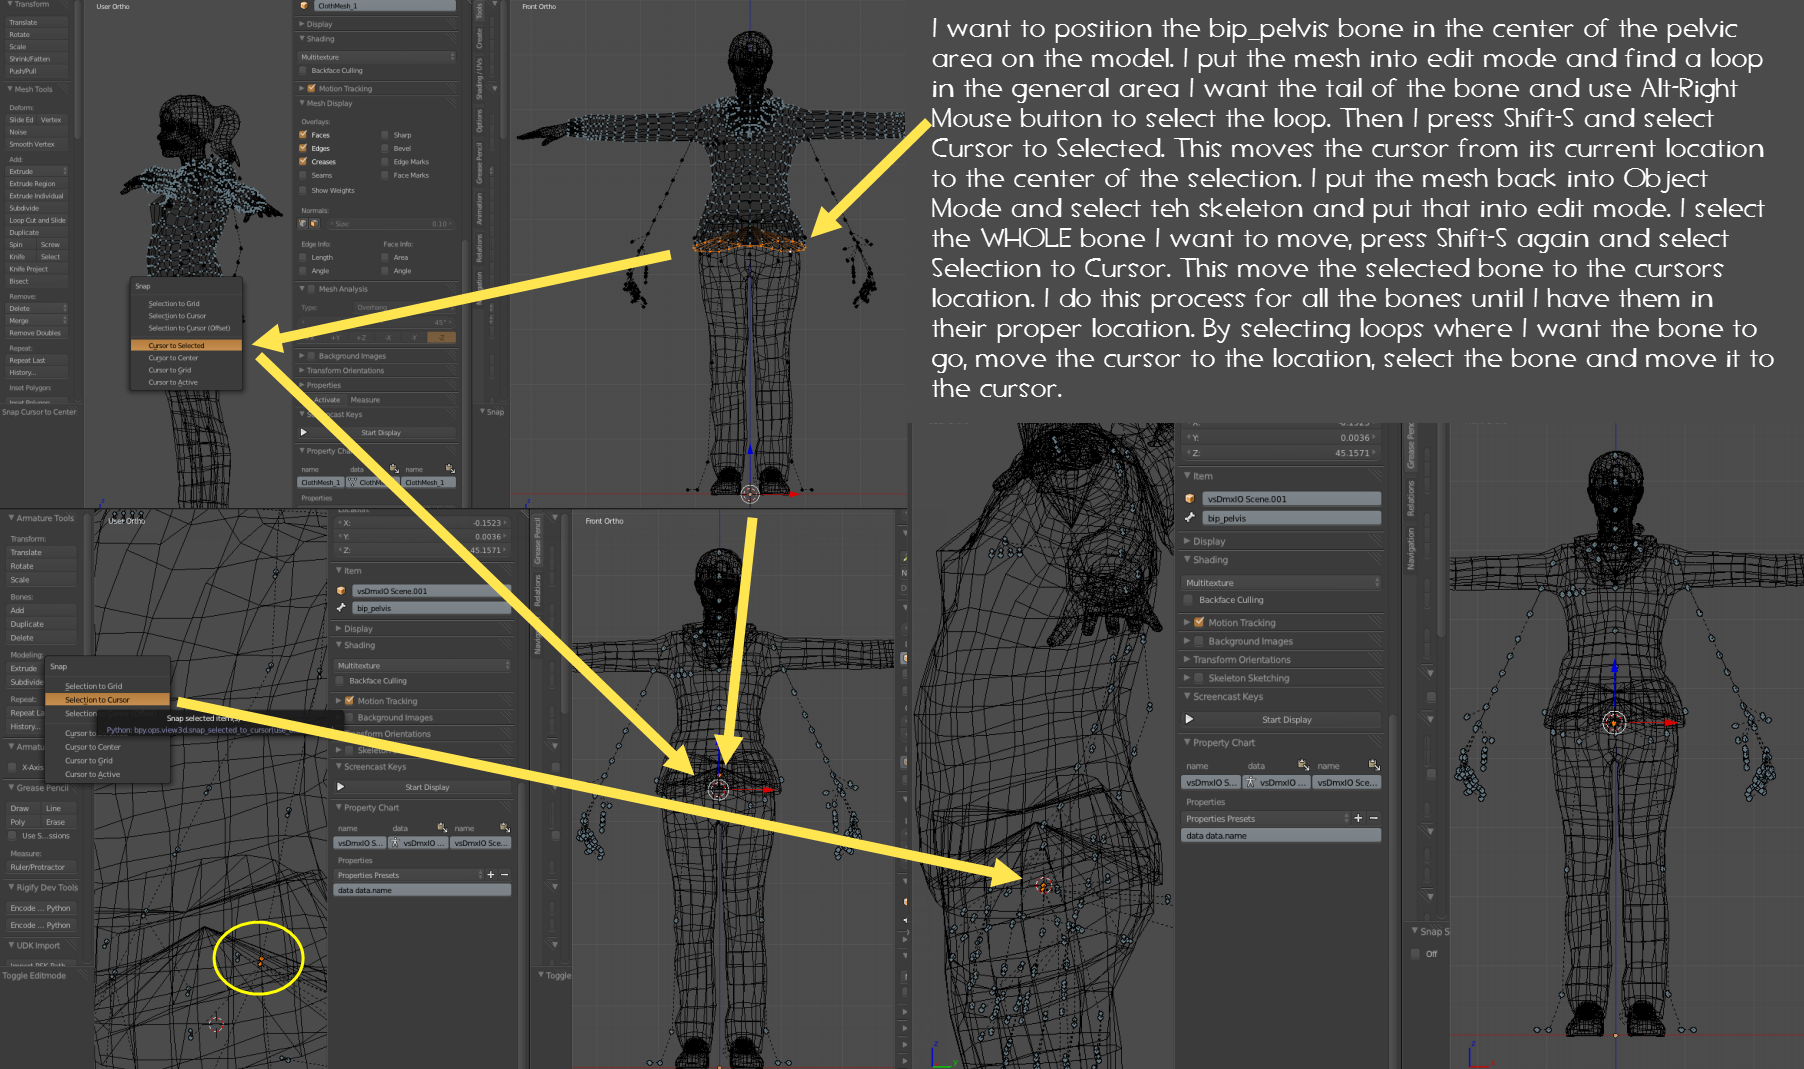
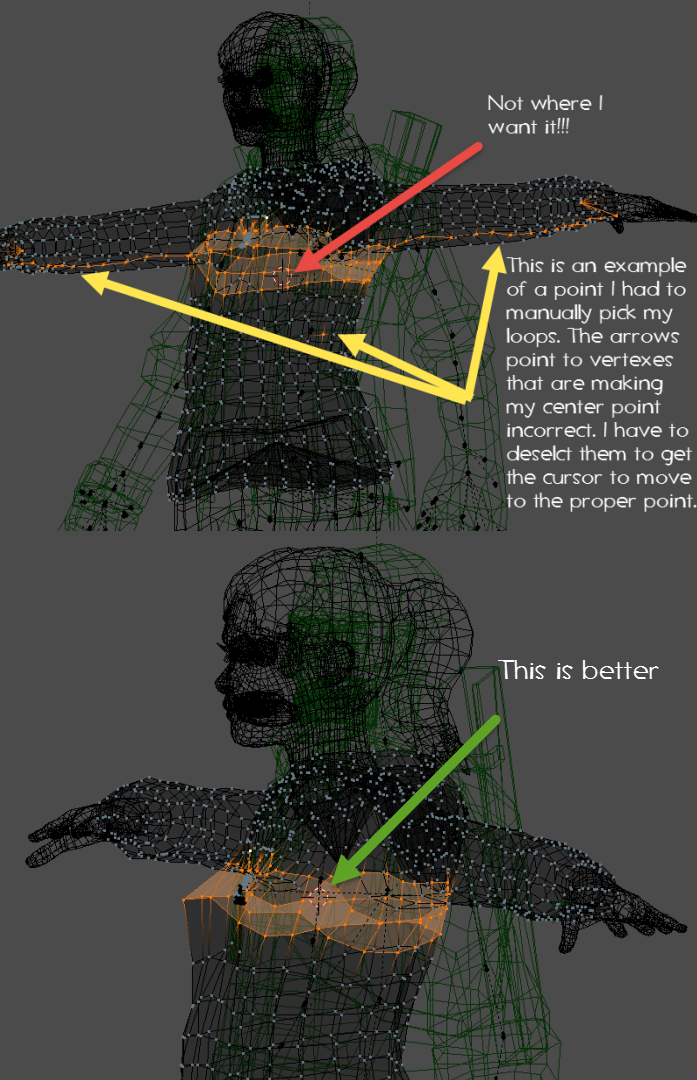
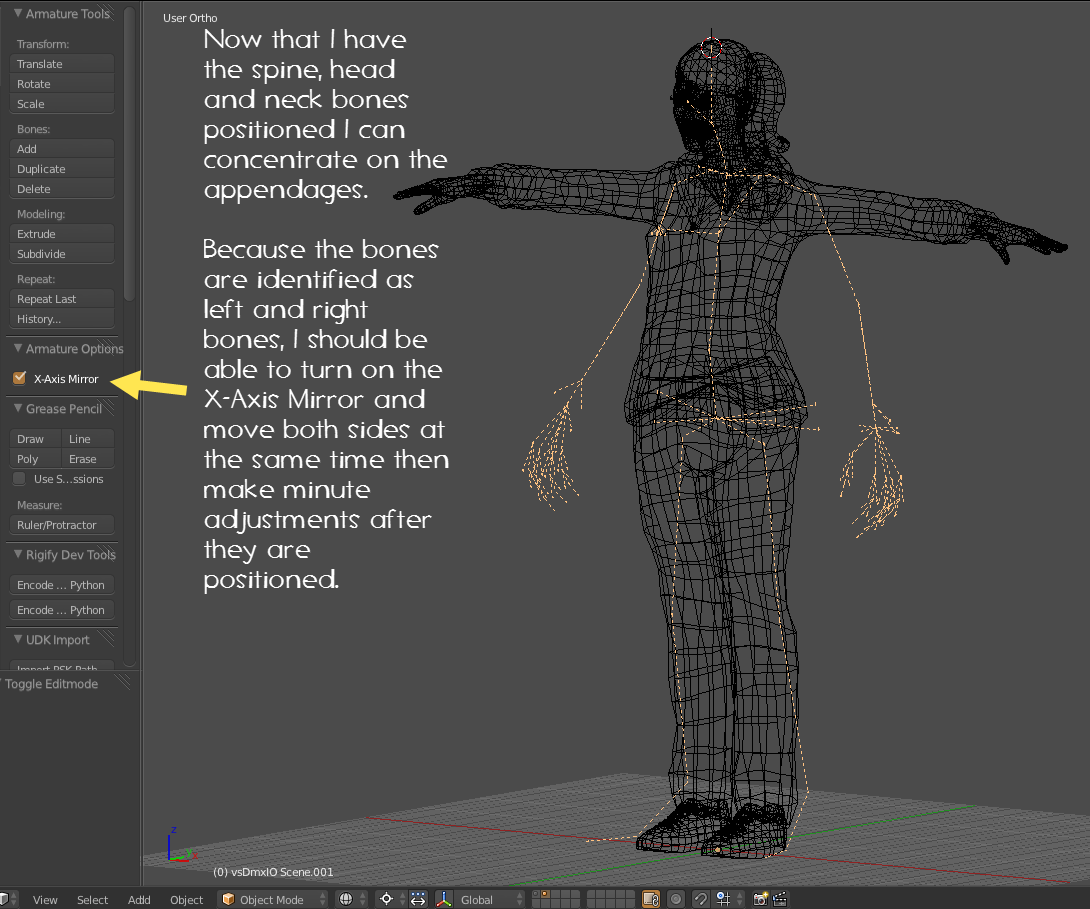
This is a video of how I use the X-Axis Mirror to postion the ring and pinky bones of both hands at the same time.
[link]

For this project all helper bones will be deleted, I might keep the coat tails and will add bones for the breasts and the pony tail. (If I learn how jiggle bones work before I finish this segment I might use those for the pony and the hoodie zipper pull.)

Once they are in place, I’ll display the reference model and check for rotations and make adjustments.
I do this before I add any new bones.
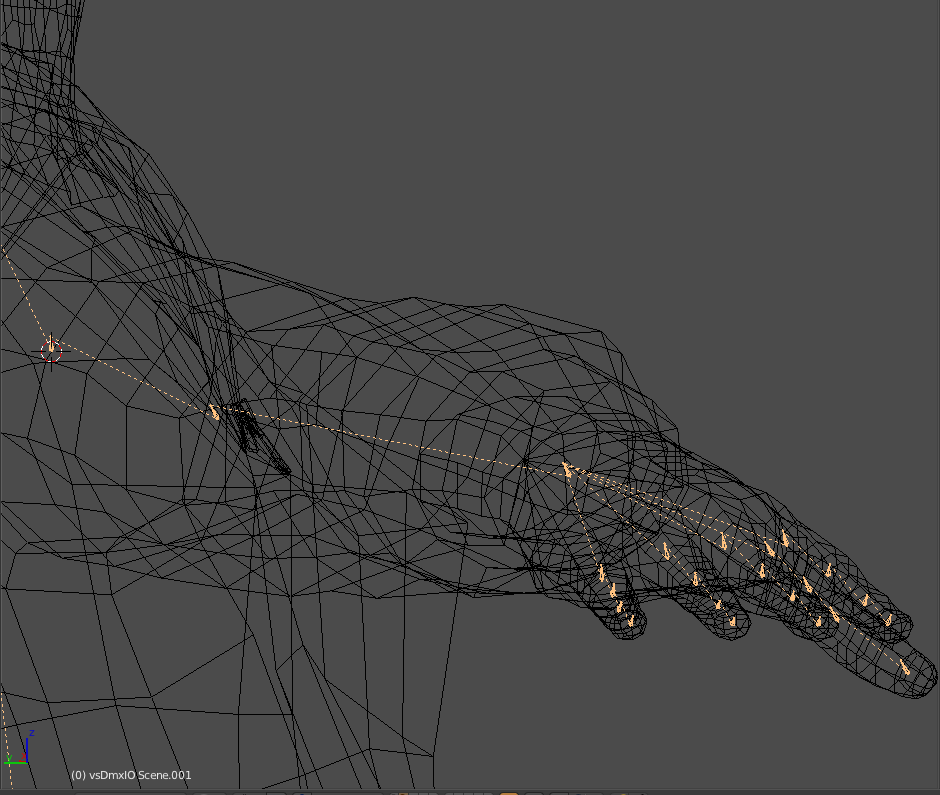
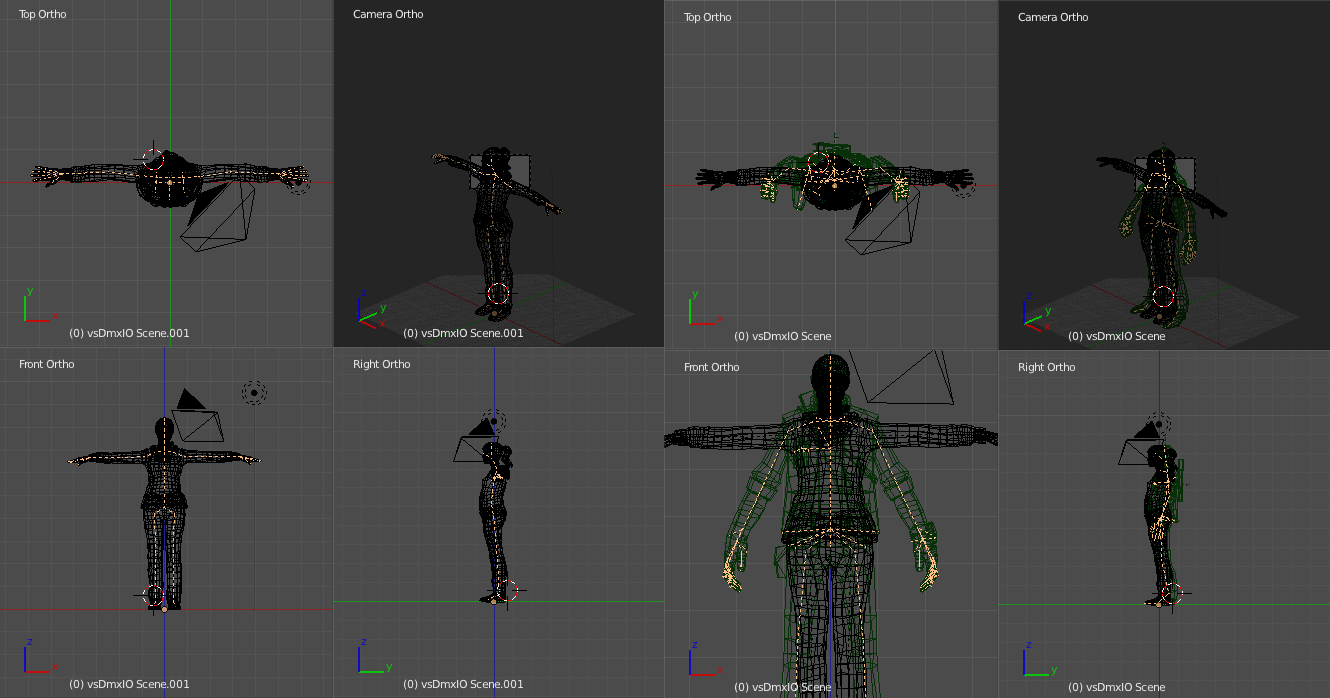
Here are examples of bones that need to be rotated. I will do these individually.
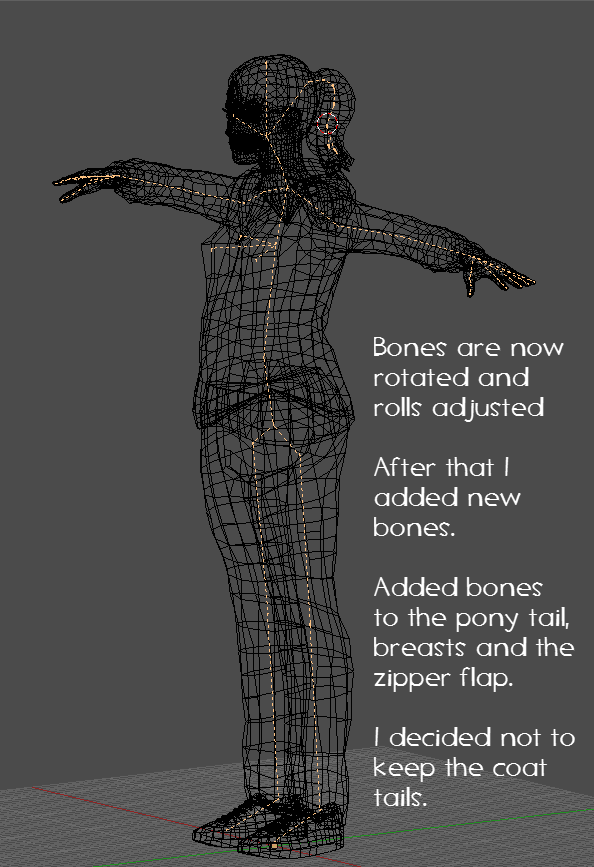
Weight Painting a Model to a Newly added Armature (Skeleton)
Ok, Folks, I’ve been away for a bit, let’s get this guide back on track.
We’ve added an armature to the mesh of the OBJ model above, added some new bones, deleted ones that aren’t need and adjusted them so that the bones are pretty much where they need to be. If we go into pose mode and move them, the skeleton will move, but none of the mesh does. This is because the mesh isn’t weight painted to the bones yet.
Now everyone has a preferred method to paint weights on bones, but if you’re just starting out, I’m going to show you a fast way to get initial painting done on a model that doesn’t have any painting at all.
There are at least three different ways to weight paint a model. (The first method discussed will not be shown, the second method was discussed in the XNA and MMD section of this guide. The third method discussed here is what we are going to focus on.

First method of Weight Painting – (This is the most tedious way of painting a model)
1) Place the armature into pose mode, select a bone, place the armature back into object mode.
2) Select the object you want to weight, put it into weight paint mode
3) Select the vertices you want to assign to the bone you selected
4) Adjust the amount of weight you want to assign to the selected vertices and paint them.
This “should” automatically add a vertex group for the bone and color your model.
5) Follow the above steps above for vertexes you want to assign a different weight to and change the amount of weight then paint those vertexes.
6) For each bone that the object uses, repeat the above steps
7) Finally for EACH object in your model, REPEAT the above steps until every vertex of the model is weight painted.
Second Method of Weight Painting a model – As Discussed in the MMD and XNA portion of this Guide
For each object in the model,
1) Place the object into Edit Mode
2) Select Vertices you want to assign weight for a specific bone
3) Create a Vertex Group and assign it the same name of the bone you want to assign
4) Assign the selected vertices to the Vertex Group
5) Repeat the above steps for each object until ALL the vertices have been assigned to a Vertex Group.
(Vertices may overlap in to up to 3 Vertex Groups, however, the weight amout has to be adjusted and distributed between the groups until the value equals 1.)
Again this is a long and tedious process, especially if your model has a lot of bones and vertiexes.
1) LET BLENDER DO ALL THE INITIAL WORK
Now this isn’t a sure fire method, there will be need to go through and make manual tweaks, but it is the easiest method of getting a model close to being useable in the minimal amount of time.
The process…
For Each Object in the model
1) Select an Object, the holding the Shift key select the Armature (in that order, the armature must be the active object. The Easiest way to select Objects is to use the Outliner)
2) Press Ctrl-P and select “With Automatic Weights”
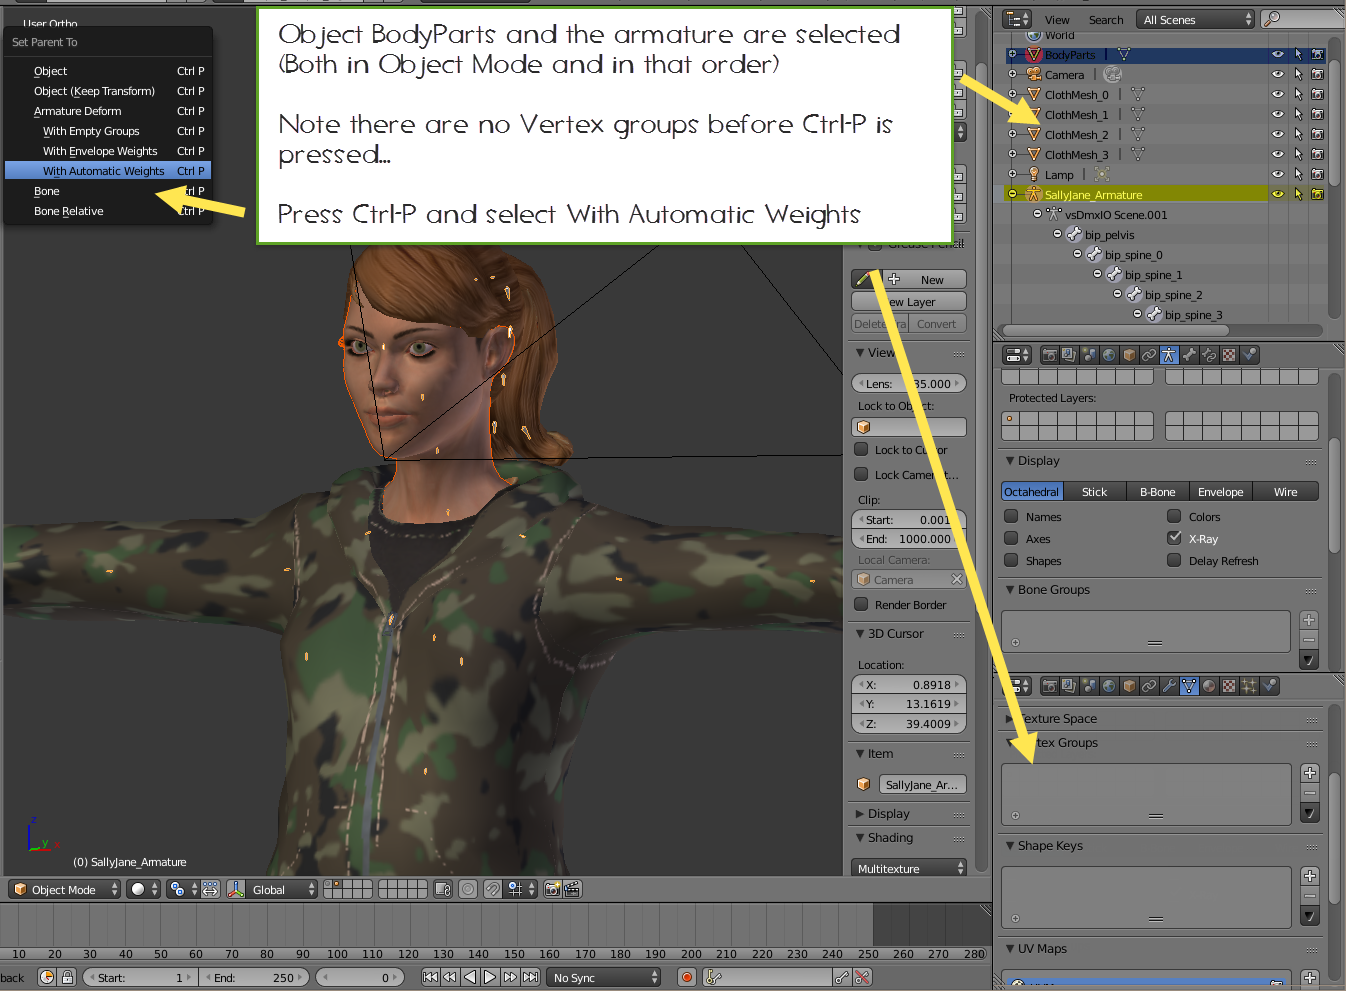
Sometimes this is good and sometimes it is bad depending on what it is you’re applying the weight to. Blender will create vertex groups for every bone in the object. If you find you have wieghts applied to an bone you don’t want or have vertex groups your don’t need for an object, you can just delete the vertex group.
But in the case of the head here, Blender did not do a good job…. I did do a good job on the fingers though. The Head will have to be manually repaired. after we get the rest of the weights assigned to the other objects.
4) Do the above steps for the other 4 objects.
5) Now that you have weighted vertex groups, you can step through them by placing the armature in pose mode and the object into weight paint mode. Select a bone and click thought the vertex groups to find what is painted to what and how the weight has been distributed.
6) Manually adjust weights, move bones to better control the deform and delete unneeded vertex groups from the groups.
Examples of how the weights were applied. (I’ve joined my objects into one object here to illustrate.)
Looking at this animated gif, we can see that the algrithm has assigned mesh to bones, however, the main hot spot (red) is in the middle of the bone and decrease in influence as it radiates out to the bone’s head and tail.
The head and eyes have been split up between the bip_head, bip_headEnd and the prp_sunglasses bones. The chin assigned to the bip_neck bone and part of the mouth box was completely omitted from the equation and stayed cold (blue). Part of the Hoodie’s hood was assigned to the bottom 2 hair bones.
Leaving the weights as is will lead to some weird deforms….
And here is a look at the typical way Blender assigned the weights.
In the case of the Upper Arm Bone, the bone itself could be moved closer to the hinge point in the shoulder. The influences in the sloulder could be a darker yellow to red round the area of the bones pivot point origin.
Anyway, there is no way that I can spell out how to fix the weights in a guide. It’s all trial and error. You just have to keep adjusting the weights until the model deforms the way you want it to.
Let’s look at the head and hair.
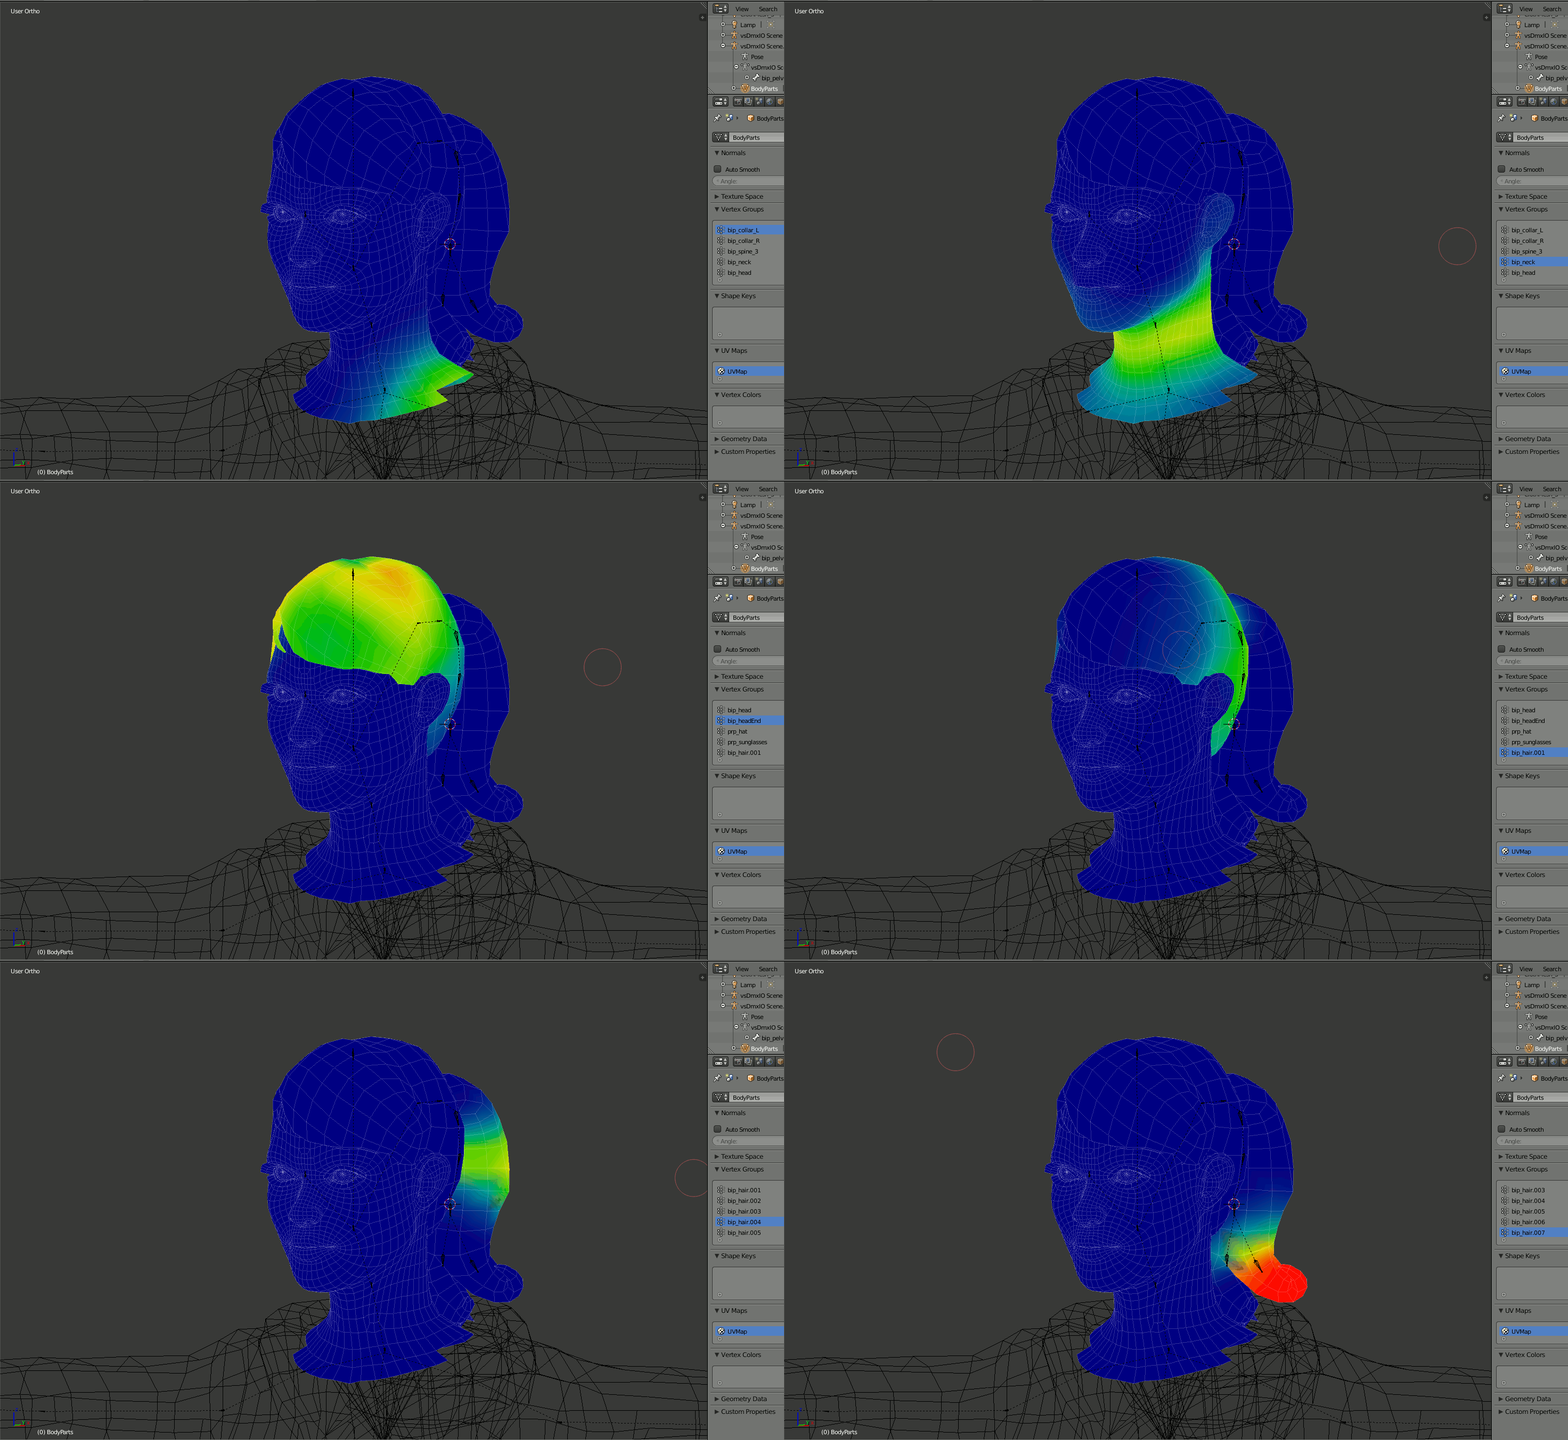


Now it is just a matter of walking though each bone and vertex group of every object and fixing the weights.
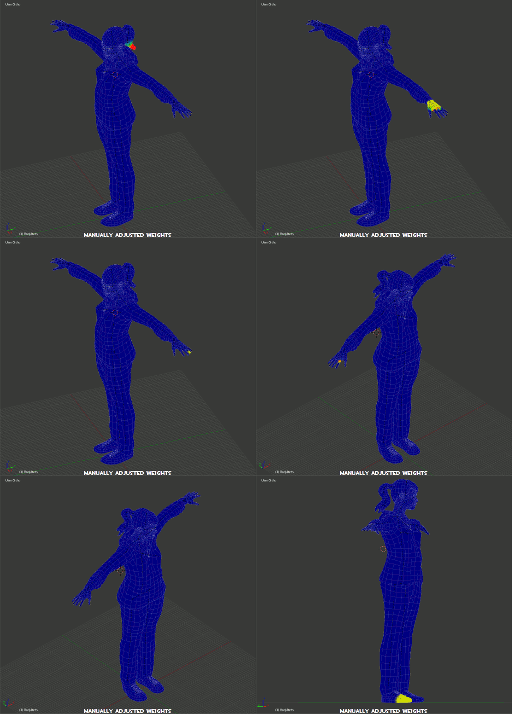
After 3 days of playing with the weights on this model, (even after using Blender to assign automatic weights), I’m “almost” ready to carry on with her.
I still have to fix the hoodie so that it rotates properly. The hardest parts to weighting a model are fingers and clothing. (IMOHO!!!)
Before moving on to shapekeys, eyeballs and sequences, we’ll eport the model into SFM. This will give us a chance to view it in the movie maker and see if it lives up to expectations. If not, go back a few steps and fix any problems.
Export, QC and Compiling the Alpha Model
There isn’t much sense in continuing to develop the model if it isn’t going to work in SFM, so time to compile an Alpha model just to see how it’s going to work.
This is exactly the same as we have done for the other models we’ve worked on in this guide.
NOTE: I have found that if a model uses materials from different folders it is better to leave the materials field blank and identiy the materials paths in the qc.
With Blender set up, the materials have to be converted to VTFs and simple VMTs written to answer the calls from the model, they also have to be named and placed in the path designated in Blender Source Tools.
NOTE (again): I have found that if a model uses materials from different folders it is better to leave the materials field blank and identiy the materials paths in the qc.
Now use GIMP, Photoshop (if you have the plugins) or VTFEdit to convert your image files to VTF format and place them in the SFM materials folder you are going to use. (don’t worry about bump/normal maps or specular/enviromental maps right now, just get the base materials converted)
Use VTFEdit to create a simple VMT (remember to change the shading from “LightMappedGeneric” to “VertexLit Generic”, SFM DOES NOT like LightMappedGeneric)
And Done with materials for now.
Using a pure text editor (like NotePad++) write a simple qc that will compile the model.
This is the qc that I came up with for this model
// double slashes is a comment command anything behind them on a line is ignored
/* The slash star – star slash is another comment delimiter.
It means do not process anything between these marks.
identify the source files to join together to make the model
because the qc resides in the same folder as the dmx files
I do not have to provide a path to them
*/
//QC Start
// Identify the model path and name in relation to the models folder
$modelname “ptejack/sallyj/sallyj.mdl”
$body “face-hands” “bodyparts.dmx”
// We’ll get into bodygroups later but this is how you remove or replace items that are built into the original model and are not standalone misc items (such as different tops, hair, gloves, etc)
$bodygroup “top”
{
studio “clothmesh_1.dmx”
}
$body “hair” “hair.dmx”
$body “pants” “clothmesh_2.dmx”
$body “shoes” “clothmesh_3.dmx”
// identify material paths
$cdmaterials “”
$cdmaterials “modelsptejacksallyj”
// with the texture groups command we set up different skins. I only need one skin at the moment, but this is now set up for the future
$texturegroup “skinfamilies” {
{
sj_head
sj_hair
sj_top
sj_bottom
sj_shoes
}
}
// model uses modelsptejacksallyjsj_head.vmt
// model uses modelsptejacksallyjsj_hair.vmt
// model uses modelsptejacksallyjsj_top.vmt
// model uses modelsptejacksallyjsj_bottom.vmt
// model uses modelsptejacksallyjsj_shoes.vmt
// Hit boxes – More on this later, not required right now.
// All models must have at least one sequence. This can be a call to a reference item or an actual animation. More on this later
$sequence “idle” clothmesh_1.dmx FPS 1
// End qc
Save the qc to the folder you designated in the Blender Source Tools. Make sure it is pure text and has .qc as its filename extension. (If you are using MS NotePad, you may find it saves as {filename}.qc.txt)
Now, back to Blender, select all the ojects for the model in the “Exportables” panel, right click on an object in the 3D Viewport and click Export. I have DMX source files selected, I’m not going to discuss SMDs here, but at this point it doesn’t matter which format is used as long as the qc has been written to the exported type.
1 of 3 things are going to happen
- All the items are going to export to the assign folder and you recieve a message that object have been exported
- You receive an error (usually that mesh is being influenced by more than 3 bones – go back to weight painting, put all object into weight paint mode, click the limit weights button and set the value to 3, once done I try to re-export the model)
or
- Blender errors out and crashes…
Once I get a good export I can try to compile the model.
There are multiple ways to compile the model, one is to drag and drop the qc file onto the studiomdl.bat file located in the SFMbin folder, or you can use a 3rd party GUI such as Crowbar or GUIStudio. But why bother, you can now do it direct from Blender. Just click on the QC button that appeared after you saved the qc to the QC path you specified.
Here again, 1 of 3 things are going to happen
- The model compiles without problems
- Blender reports an error either in the model or in the qc (The line number in the qc that caused the error will be identified so you can find it easily)
or - BLENDER GO CRASH CRASH CRASH (Beeggg Badda Boooom!)
Once you have a successful compile, you should be able to load up SFM (or the Half Life Model Viewer (HLMV)) and check out your model.
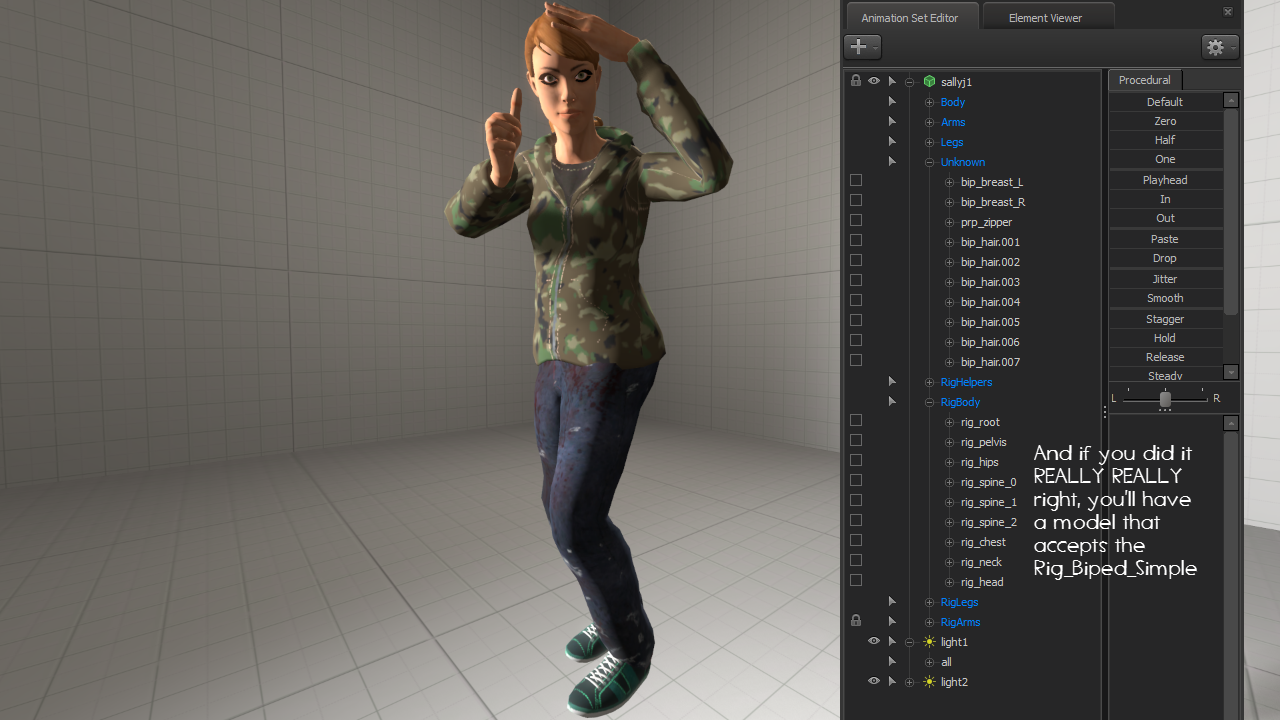
Now What??? – Body Groups
If you are happy with the Alpha model you could stop now and publish your model. But, if you want to embellish with adorments and skins, then keep reading. (This is where we get into the really GOOD stuff!!)
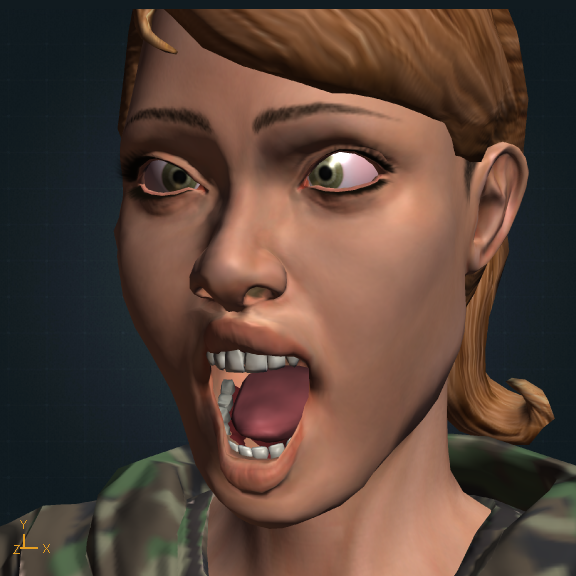
Don’t confuse Body Groups with Skins or with separate Misc, hats, or weapon items.
Body groups are pieces of the model that you can turn on/off or change out without having to add and lock another model to the one you’re working with. They are additional Mesh objects that are embedded in the existing model.
Examples of a body groups are the hat, headset and back pack on the Scout, the Snipers hat, gloves, quiver and arrows, the Heavy’s hands and boxing gloves, the demoman’s legs, a certain portion of the Zombie Skins, etc, etc, etc. Body groups can be as simple as adding or removing an article of clothing to as complex as changing the outfit a character is wearing completely. Body Groups replace, add or delete mesh and as I said are embedded in the compiled model file.
Skins on the other hand, are changes of material over existing mesh, they do not change mesh.
Misc and Weapon item are standalone models that have skeletons of their own which can be locked in SFM to another model.
Having appropriate body groups can aid in the attachment of Misc item, such turning off the Heavy’s hands so he can put on the boxing gloves, or turning of the Demoman’s legs so he can put on the Baphomet Trotters or the Cool Breeze.
To demonstrate how to add body groups to a model, I’ll create an absolutely perfect and beautiful pair of glasses for Sally here and assign them to the prp_glasses bone and I’ll give her a trench coat to replace the hoodie.
First let’s work on the glasses. I’ve modelled the glasses, and place them on the model in Blender where they will be when they are turned on.
I’ve painted them, assigned a texture and placed the VTF and VMT in the proper folder.
Once the item is in place and weighted to the bone (or bones) you want it weighted to, ensure that it’s origin point is moved to the models origin point or the item will not appear where to want it to be when it’s turned on in SFM.
Now I can export the model and write the qc.
There are 2 edits required in the qc. The $bodygroups command to add the mesh and make it so it can be turned on or off and to add the materials to the materials area.
In this case, my qc changes like this
$body “face-hands” “bodyparts.dmx”
$bodygroup “top”
{
studio “clothmesh_1.dmx”
}
// The Change here
$bodygroup “glasses”
{
blank
studio “sunglasses.dmx”
}
$body “hair” “hair.dmx”
$body “pants” “clothmesh_2.dmx”
$body “shoes” “clothmesh_3.dmx”
For the textures area,
$texturegroup “skinfamilies” {
{
sj_head
sj_hair
sj_glasses
sj_top
sj_bottom
sj_shoes
}
}
and here is the result exporting and recompiling the model.
You’ll notice that in the $BODYGROUP command above, I used a “BLANK” command.
In a body group this means mean “don’t display me”. It defaults to None in the SFM command list like when you turn off the Sniper’s quiver.
For mesh items that will be part of the body group, the source filename must be preceeded with a “STUDIO” command.
In the Glasses Bodygroup, I decided that the default for the glasses would be “off”. To accomplish this I placed the “BLANK” command ahead of the “STUDIO” {MESH TO BE DISPLAYED}.dmx command. If i wanted the glasses to be displayed as the default, I would reverse the order.
I can have as many different items (within reason and material count restrictions) that I want to change out for the group items as I want here, BUT, for every item between the cruly brackets of the group, only ONE thing can be ON at a time. The default is the first item in the group.
So let’s say I wanted her to have a pair of sunglasses the spawned on her nose like in the picture or have the sunglesses spawn in her hair above her brow or not have any at all, I would create a second pair of sunglasses as another object and place them above her brow in her hair and weight them to a bone (say the bip_head). I would then export the object and change my qc like this
I am also going to add the trenchcoat in this example…
$bodygroup “top”
{
studio “clothmesh_1.dmx”
studio “top02.dmx”
/* Note: there is no “blank” command here because
I need something to always be displayed. There’s
no mesh under either of the tops. adding a “blank” command would turn the enire hoodie or
trench coat off.
*/ But then you might want to do this if you had or planned to have a MIsc Item that could be loaded to replace them. Like the Demoman’s legs for the Cool Breeze.
}
$bodygroup “glasses”
{
blank
studio sunglasses.dmx //on nose
studio sunglasses2.dmx //in hair
}
For the textures, I add the textures for the glasses and the second top to my texture list
(We’ll get into texture groups later, but the way I have this set up now, I can easily start adding more skins.)
$texturegroup “skinfamilies” {
{
sj_head
sj_hair
sj_glasses
sj_top
sj_top02
sj_bottom
sj_shoes
}
}
Note: I don’t have to add another material call for the 2nd set of sunglasses, the 2nd set uses the same skin as the first set. However, if I had used a different material for the 2nd set of glasses, I would have had to.
Now that I’ve exported the model and made the changes to the qc, I simply recompile the model and watch for errors.
(Oh Heck, I’ve done the work, let’s just compile this so you can see what I mean in SFM)
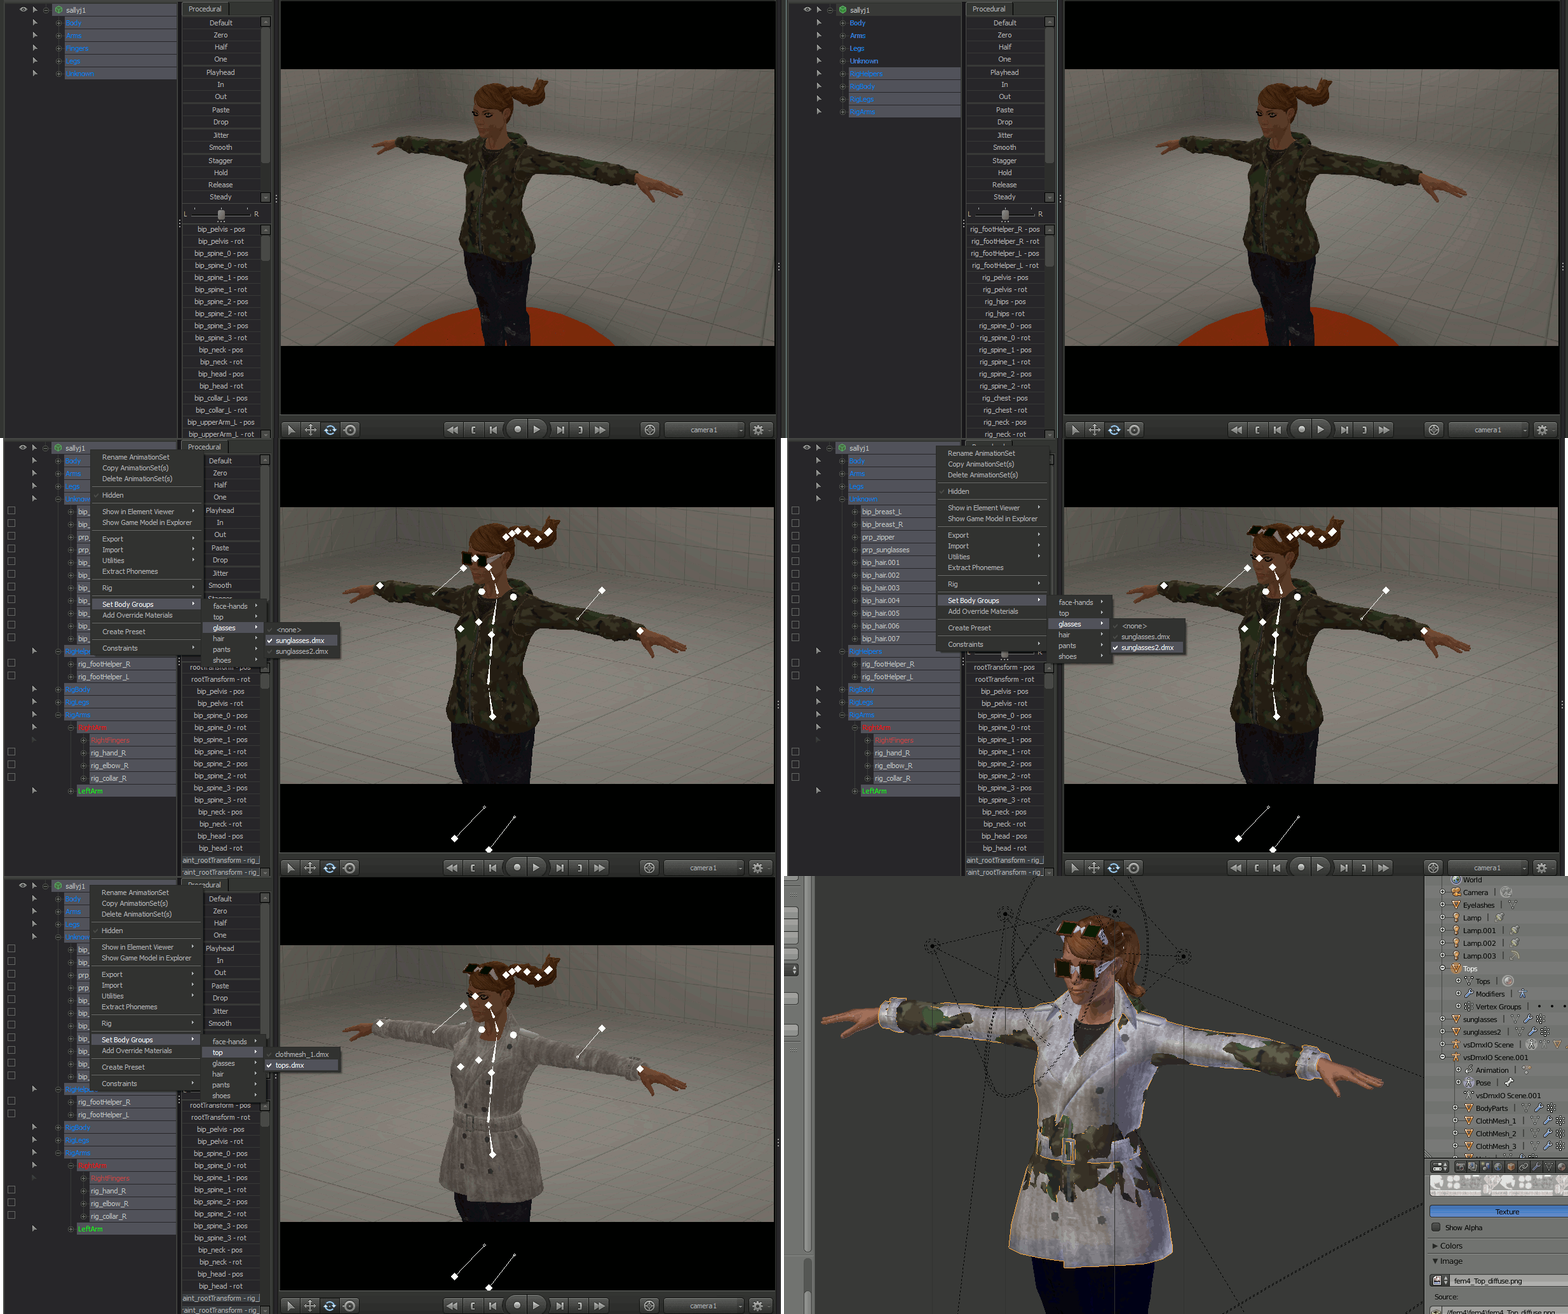
Fixing Textures or Reducing Texture Counts
Combining Multiple Textures Into One
A lot of models that come from other sources have materials that have been spread across multiple textures or the texture itself is not to the power of 2.
It is possible to resize the canvas of a texture or reduce the texture (and material) counts by combining the textures into fewer textures. If you decide to go this route, remember that if you reduce the resolution of the texture then it will show up on the model burred. Also remember that Valve materials must be to the power of 2, (meaning the widthxheight combination must be 32, 64, 128, 256, 512, 1024, 2048, etc) so if you start combining textures the end result must be to the power of 2. Just scaling a texture to the power of 2 will cause texture warping on the model. Instead of scaling, the canvas should be resized and the UVs moved to match the new match the new location of the requires texture part.
This video shows how to combine textures and fix the the UVs. The same process would be used if you are just resizing a texture.
[link]Texture Groups
This is where you tell the model what skins it has. There must be a group for each skin, each object of your model must have a materials within a group or it will display black and purple checkerboards when that skin is selected and it can get confusing very quickly when trying to assign materials to a group.
The qc comand to call materials for a model that only has one skin (no red and blue) is pretty simple
$cdmaterials “”
$cdmaterials “{path to the materials folder relative to the materials folder}”
$cdmaterials “{path to material in a different folder if required relative to the materials folder}”
That’s it… I don’t have to specify VMTs because the model calls them itself.
what {path to the materials folder relative to the materials folder} means is if I have the materials are in the materials/models/ptejack/player folder, the $cdmaterials command would be
$cdmaterials “”
$cdmaterials “models/ptejack/player/”
The models folder is a child (is relative to) the materials folder.
If I had materials in the player and some in a shared folder under the player folder, the command would be
$cdmaterials “”
$cdmaterials “models/ptejack/player/”
$cdmaterials “models/ptejack/player/shared/”
Now, it’s when a model has multiple skins that texture groups come into play
Let’s say my model has 2 objects the body and the eyes, but there is a red and a blue variant of it.
The body materials are in materials/models/ptejack/ and the eyes are shared and are in materials/models/ptejack/shared.
I have to identify the material paths, just like before.
$cdmaterials “”
$cdmaterials “models/ptejack/player/”
$cdmaterials “models/ptejack/player/shared/”
but now I have to tell the model that it has multiple skins it can wear. I do this with texture groups.
Here would be the qc commands
$Texturegroup “{name}” {
{
“name of the red body vmt”.vmt
“name of the red eyes vmt”.vmt
}
{
“name of the blue body vmt”.vmt
“name of the blue eyes vmt”.vmt
}
}
The first entry in the $texturegroup would refer to the materials that Blender knows about in the Materials Property panel …
The whole group is contained between the first and last curly bracket, then each skin is contained within a set of curly brackets inside the group.
Each group must follow the same order that the first group was laid out in. In other words, the red was laid out body, eyes. If I reversed that order for the blue, the body would be painted with the eye material and the eyes with the body material.
There is a limit to the number of materials a model can have. (I just can’t remember what that limit is right now.)
Now here is an example of how I would lay out Sally. Sally has 5 objects and 9 materials, 1 for the body parts, 1 for the hair, 1 for the glasses, 2 for the hoodie, 2 for the trench coat, 1 for the pants and 1 for the shoes. I want her to be able to wear both hoodies and trench coats and I can accomplish this with only 2 skins because the trench coat replaces the hoodie, they are the same bodygroup… All materials are located in my materials/models/ptejack/sallyj folder
In skin0 she’ll wear either the green hoodie or the white trench coat, in skin1 she’ll wear either the white hoodie or the brown trench coat (Don’t rile mean about how cruddy the skins are these are for demonstration purposes only… lol)
So here’s the qc
$cdmaterials “”
$cdmaterials “models/ptejack/sallyj/”
$texturegroup “sallyj”{
{
// this is skin0 Green Hoodie and White Trench Coat
“sj_hair.vmt”
“sj_head.vmt”
“sj_glasses.vmt”
“sj_top.vmt”
“sj_top02.vmt”
“sj_bottom.vmt”
“sj_shoes.vmt”
}
{
// this is skin1 White Hoodie and Brown Trench Coat
“sj_hair.vmt”
“sj_head.vmt”
“sj_glasses.vmt”
“sj_topb.vmt”
“sj_top02a.vmt”
“sj_bottom.vmt”
“sj_shoes.vmt”
}
}
and here is the resulting character skins.
But what if I wanted to give her a blue hairdo and rose coloured glasses to be worn with each outfit?
Well the texture group would look like this..
$cdmaterials “”
$cdmaterials “models/ptejack/sallyj/”
$texturegroup “sallyj”{
{
// this is skin0 Paint 1 with green lense and brown hair
“sj_hair.vmt” “sj_head.vmt” “sj_glasses.vmt” “sj_top.vmt” “sj_top02.vmt” “sj_bottom.vmt” “sj_shoes.vmt”
}
{
// this is skin1 Paint 2 with with green lenses and brown hair
“sj_hair.vmt” “sj_head.vmt” “sj_glasses.vmt” “sj_topb.vmt” “sj_top02a.vmt”
“sj_bottom.vmt” “sj_shoes.vmt”
}
{
// this is skin2 Paint 1 with with Rose lenses and brown hair
“sj_hair.vmt” “sj_head.vmt” “sj_glasses2.vmt” “sj_top.vmt” “sj_top02.vmt” “sj_bottom.vmt” “sj_shoes.vmt”
}
{
// this is skin3 Paint 2 with with Rose lenses and brown hair
“sj_hair.vmt” “sj_head.vmt” “sj_glasses2.vmt” “sj_topb.vmt” “sj_top02a.vmt”
“sj_bottom.vmt” “sj_shoes.vmt”
}
{
// this is skin4 Paint 1 with green lenses and blue hair
“sj_hair2.vmt” “sj_head.vmt” “sj_glasses.vmt” “sj_top.vmt” “sj_top02.vmt” “sj_bottom.vmt” “sj_shoes.vmt”
}
{
// this is skin5 Paint 2 with green lenses and blue hair
“sj_hair2.vmt” “sj_head.vmt” “sj_glasses.vmt” “sj_topb.vmt” “sj_top02a.vmt”
“sj_bottom.vmt” “sj_shoes.vmt”
}
{
// this is skin6 Paint 1 with rose lenses and blue hair
“sj_hair2.vmt” “sj_head.vmt” “sj_glasses2.vmt” “sj_top.vmt” “sj_top02.vmt” “sj_bottom.vmt” “sj_shoes.vmt”
}
{
// this is skin7 Paint 2 with rose lenses and blue hair
“sj_hair2.vmt” “sj_head.vmt” “sj_glasses2.vmt” “sj_topb.vmt” “sj_top02a.vmt”
“sj_bottom.vmt” “sj_shoes.vmt”
}
}
As you add new skins or objects to your model, your texture groups will grow exponentially. This why it is always good to include a materials list in the qc… like this
// model uses modelsptejacksallyjsj_head.vmt
// model uses modelsptejacksallyjsj_hair.vmt
// model uses modelsptejacksallyjsj_hair2.vmt
// model uses modelsptejacksallyjsj_top.vmt
// model uses modelsptejacksallyjsj_topb.vmt
// model uses modelsptejacksallyjsj_top02.vmt
// model uses modelsptejacksallyjsj_top02a.vmt
// model uses modelsptejacksallyjsj_bottom.vmt
// model uses modelsptejacksallyjsj_shoes.vmt
And this is what you’ll get for a model count doing something like this…
Adding new textures to existing groups is fairly easy. It’s just a matter of plugging the vmt call into the groups.
(out of space in this section so here’s a snippet a couple of the skins from the qc only)
Here I’ve added a couple of new materials to make the lenses transparent and the eyelashes a little more realistic. I try to keep all my transparencies on one or two VTFs. In this case because the lenses are green and pinkish, I had to use 2 vtfs.
// this is skin0 Paint 1 with green lense and brown hair
“sj_hair.vmt” “sj_head.vmt” “sj_glasses.vmt” “sj_transpar” “sj_top.vmt” “sj_top02.vmt” “sj_bottom.vmt” “sj_shoes.vmt”
}
{
// this is skin3 Paint 2 with with Rose lenses and brown hair
“sj_hair.vmt” “sj_head.vmt” “sj_glasses2.vmt” “sj_transpar2” “sj_topb.vmt” “sj_top02a.vmt” “sj_bottom.vmt” “sj_shoes.vmt”
}
{
// this is skin7 Paint 2 with rose lenses and blue hair
“sj_hair2.vmt” “sj_head.vmt” “sj_glasses2.vmt” “sj_transpar2” “sj_topb.vmt” “sj_top02a.vmt”
“sj_bottom.vmt” “sj_shoes.vmt”
}
The point I’m trying to pass here is if you look at the order of the textures in the skins, you find that the textures of subsequent skins follow the same order as the first skin texture entered.
Animated Sequences, Models and DMX Files
Before we get into Shapekeys and Eyeballs, let’s discussion animated sequences, model animation files and DMX animation imports to SFM.
– These are animations that are added direct to the model file. They are embedded in the model and are usually the models base animations, like Ragdoll, Ragdoll Spawn (which do not work in SFM), Ref, very basic animations. They can be called into SFM by using the import sequence function. They are added to the model using the
$sequence “{sequence name}” (
FPS xx
)
command in the qc. Each sequence requires its own call and a model MUST have at least one sequence or it will not compile.
(usually {modelname}_animations.mdl) – these are a cache, a library per-se, of animations thrown into a separate model file. The animation usually do not contain any mesh, just bones and movement of the bones (the animation). These are the more complex animations the walk/run, taunts, weapons firing, etc type animations. Rather than recompiling the actual model file everytime there is a new animation added to the model, this file can be updated and recompiled. When a model requires an animation out of this file, it is called by the model. Bones and animation lock into the model and the model performs.
The model receives intstructions to tap into an anmimation model file using the qc
$includemodel “{path/animation_filename}.mdl
command .
These animations will be available using the models import sequence function in SFM.
– It is now possible to create animations on the fly in Blender and use them in SFM without having to recompile a model. All you do is create the animation in Blender, export it as a DMX file. That DMX file can now be loaded into the Character by using the Import Animation function on the Character. When you select this function a file browser will pop up. Simply browse to the animation’s DMX file created and select it. The animation will load onto the character.
You can also create an animation in SFM for a model and Export that to a DMX file. That DMX file can then be imported into Blender for editing and refinement.
– These are animations that act on the vertices of the model, not the bones (not to be confused with creating shapekeys.) It is now possible to have a character melt into a puddle or shatter like a pane of glass using vertex animations. The problem with this type of animation though is processing power, the strain on resources in an actual clip is extremely intense and rendering this type of animation can take FOREVER. The render engine has to render each and every vertex movement.
Vertex animation is beyond the scope of this document, I just wanted to let you know it is now possible.
This is pretty simple. Load your model in Blender. Select the armature and place it into Pose Mode and move the bones around while adding keyframes as you go. Pretty much the same thing we do in SFM. The question is though, why use Blender when we can use SFM directly to make taunts and animations. This is true, however, one can add constraints to bones in Blender so they move more naturally, as well you can added physics, something not available in SFM. You can get some really good stuff. Anyway, constraining bone and addng physics is outside the prevy of this guide, just know that it is an option to do so.
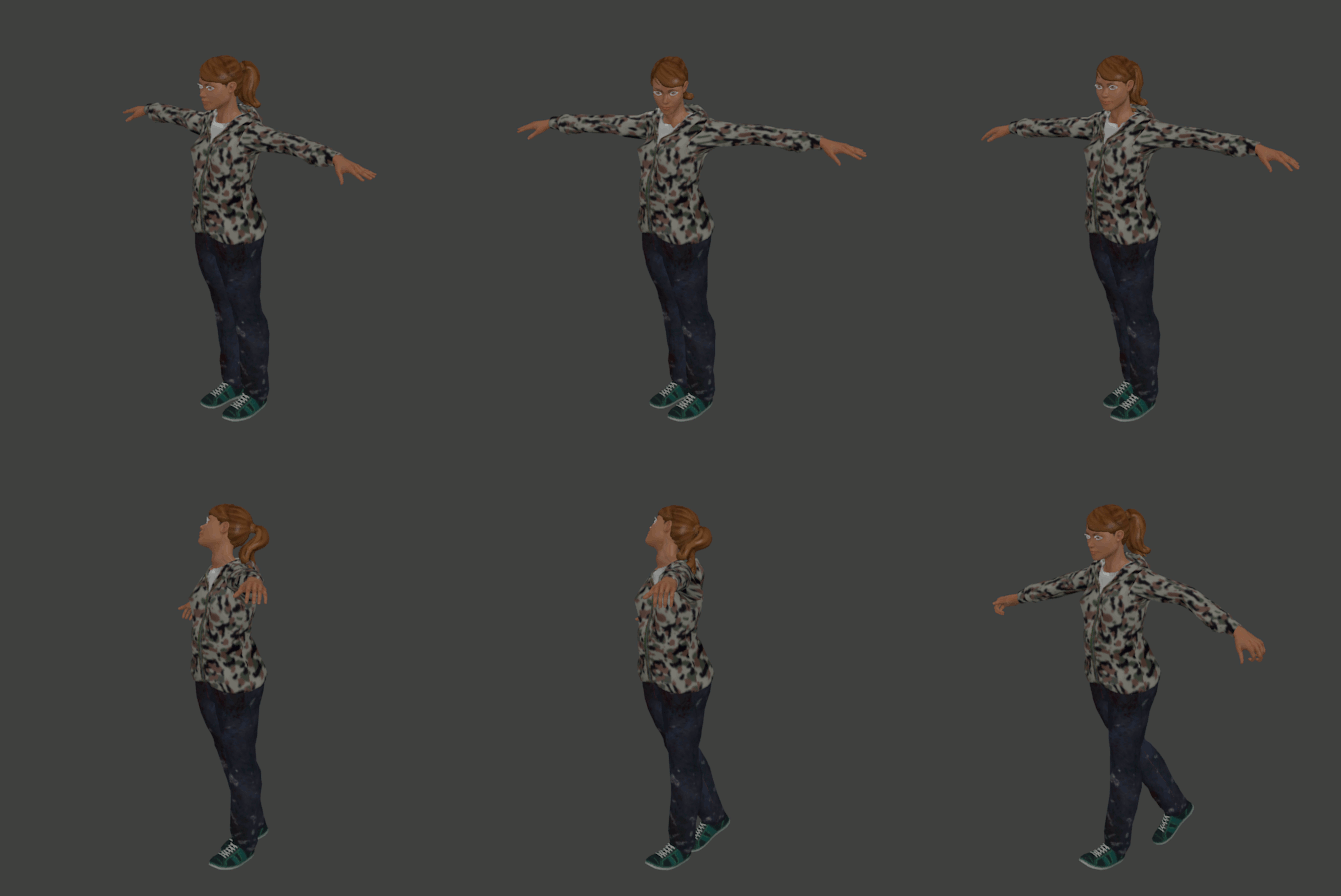
Because I can get more information into a section by using pictures and it’s easier to see what’s happening through picture, the next portion is going to BE pictures… You can click on the picture to blow it up to readable size.
If you look at the sample qc I posted earlier in the compiling the Alpha Model section, down at the bottom of the qc I had a command line that read
$sequence “idle” clothmesh_1.dmx
This loaded the one of the dmx files as the models Idle sequence. I’m going to edit this line to read
$sequence “ref” “animsref.dmx” {
FPS 24
}
Blender Source Tools exports all animations into a folder called anims located off the default export folder.
The command will instruct the studiomdl program to embed the new animation created into the model. Because it it the first animation sequence encountered in the qc, it will be the models default animation and the model will spawn in SFM in this pose.
It will also be an animation sequence available to me in the Import Sequence function when the model is is SFM. When I look at the model in the SFM model browser, this is the animation that the browser will play in the browser. It will play at 24 Frames per second.
End result….
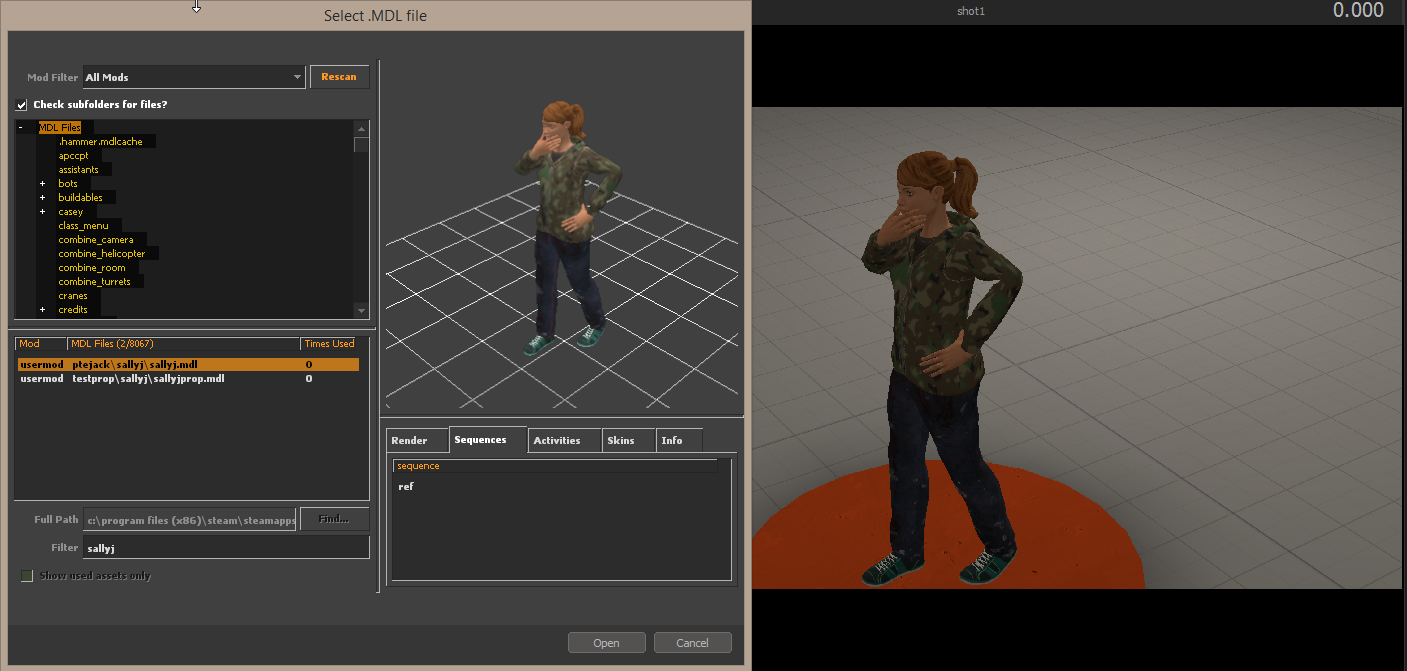
When creating a moving animation in Blender, it acts pretty much the same as posing to to pose animation in SFM. Blender will attempt to interpret the movment that takes place between KeyFrames. As you can see in the Animation Editor in the gif image below I had to intervene and fix the animation in places by adding more keyframes for individual bones. (Each pip is a keyframe).
If you already have an animation loaded in the Amination Editor and want to create a new one, you have to create a new animation by clicking the X button beside the current animation name and then selecting the NEW button and give the NEW animation a name.
At this writing, Blender Source Tools only sees the active animation. So if you look at the Exportables panel for animations, you will see that only the currrently active animation is available for export.
Ok, so I’ve created a new animation (see below) and I’m going to add it to the Sequences of the model along with the ref animation I added earlier.
I select the animation and export it. again this will export to the anims folder located under the assigned export folder.
To add it to the model all I have to do is add another
$sequence “{animation name}” “{path/animation_filename}.dmx” {
FPS xx
}
command.
So my sequence commands now look like this
$sequence “ref” “animsref.dmx” {
FPS 24
}
$sequence “AT-Pose” “animstotpose.dmx” {
FPS 24
}
Because the ref sequence comes before the T-Pose animation it will be the default sequence and spawn pose used by the model.
On compile, if you end up with an EXCEPTION_ACCESS_VIOLATION (assert: 1) error, re-export the animation again and try to recompile. Sometimes I find that I have to create a new model by changing the model name.
Animation out of Blender
Animated sequences now available to the model in SFM.
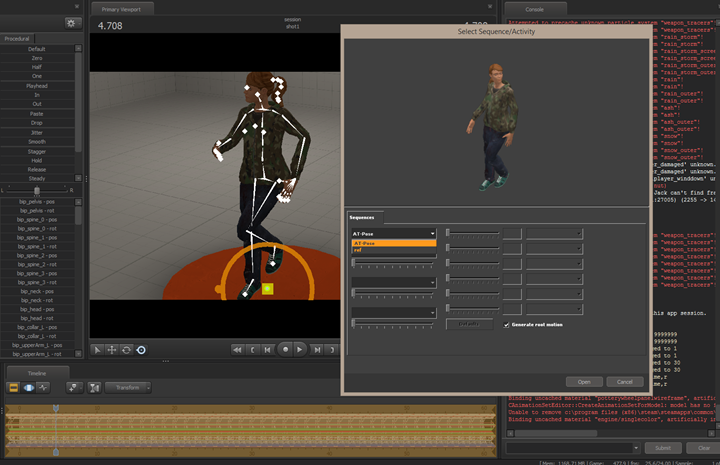
For those of you that don’t want to get into recompiling models with animations, here is an alternative.
Create an animation and export it as a DMX file. Open SFM, Load the character you made it for and right click, select Import Animation and select the DMX file.
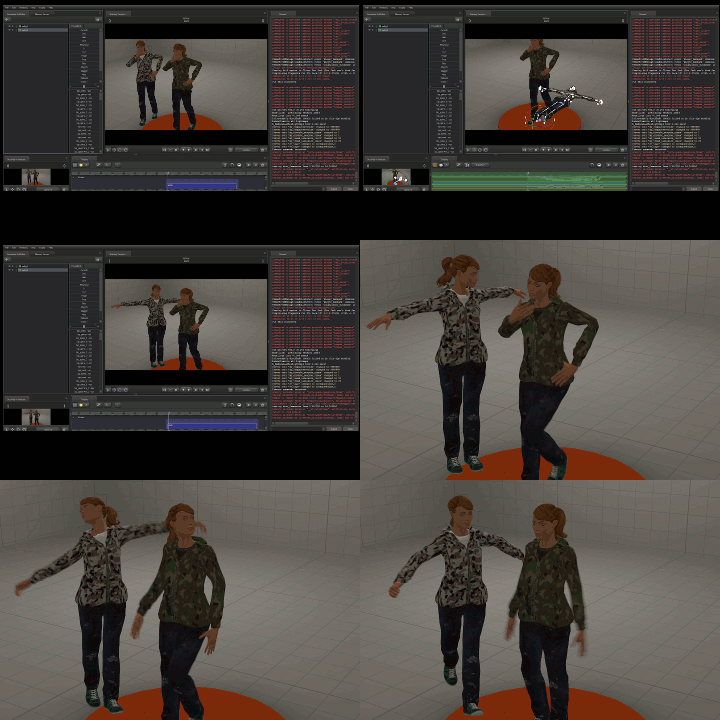
Taunt Animations Created in SFM for Import to Blender
It is possible to create taunt animations in SFM and import them into Blender for editing, however the process is a little tricky.
First create your taunt in SFM then right click the character and select export Taunt Animation. This will create a new DMX file. However when you try to import it to Blender, the animation will error out. This is because the DMX file created is in a TEX format (plain text, human readable) and at the time of this writing, Blender source tools appears to require Binary DMX files.
To get this animation into Blender we have to convert the TEX format to Binary. Valve has provided a neat command line program called DMXConvert.exe in the SFMgamebin folder. To use it we have to use an elevated level Command Prompt
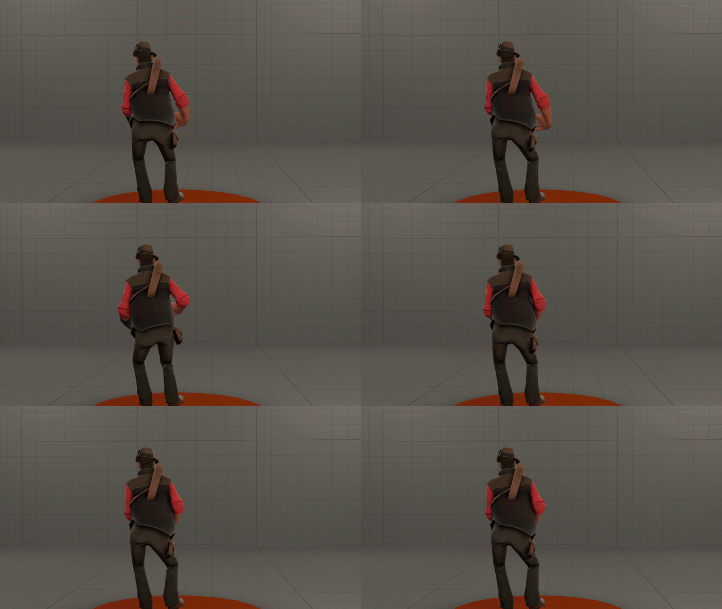

I then point the browser portion to the folder I want to save the DMX, give it a name and Save.
This is a snippet of the resulting DMX. If you click the image you’ll see it is plain text “readable”
If you try to import this DMX to Blender as is, you’ll receive an ERROR like this
To be able to import the animation it has to be converted to a binary dmx.
Open a command prompt session as an administrator.
If you open the converted DMX in Notepad++ you’ll find it is now a Binary DMX file
Import this file to Blender.. all your going to see is the Bone structure only, no mesh.
Playing the animation, you “should” see the bones move. Selecting bones in Pose Mode will cause the Time Line to display the animation keystrokes for that bone. Use the nomal Blender processes to edit the strokes.
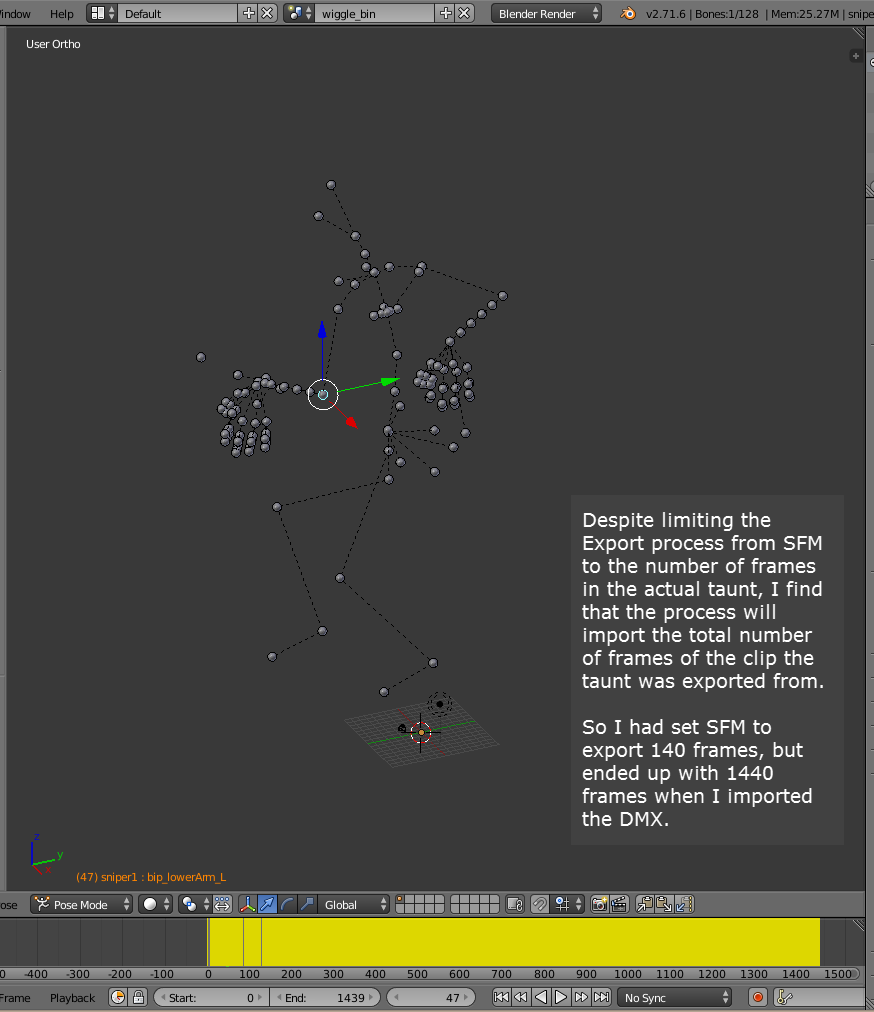
When your finished editing your taunt, export the DMX and use the Import Animations function in SFM (as discussed in the previous section) to reattach it to the SFM Model .
For those who are trying to use SFM to create taunts for the TF2 Workshop, on export from SMF, you may have to change the game configs in the export screen from the SFM defaults to the gamemod you’re creating the taunt for. Don’t forget to set Blender Source Tools up for the target mod as well before exporting the edited DMX. I haven’t played with this yet, so it is just a theory at the moment.
♫ JiggleBones ♪, ♫ JiggleBones ♪, ♫ Jig♫gle All ♪ the Way♫♪
First, just what the heck IS a JIGGLE BONE??
Well, EVERYTHING you need to know about Jigglebones can be found right here… https://developer.valvesoftware.com/wiki/$jigglebone
Basically a Jiggle bone is a special bone that can be stimulated by the game engine and move it dynamically during runtime. (In other words, it is a bone that is moved by the game engine based on the physics of the engine (gravity, wind, how the model moves, etc, not moved by you or a script!)
I’ve thrown some wonky jiggles into the ponytail here to just to demonstrate…
There are 3 basic property groups that a Jigglebone can have,
- is_rigid
- is_flexible, and
- has_base_spring
The property groups can be combined together and are optional on a bone to create the type of movement you require, however the groups Is_Rigid and Is_Flexible can not be used on the same bone togther. More on this in a bit.
So, how do we add these to our model? The answer is… “Just like any other bone!” Yup, that all there is to it, add them like any other bone, weight the mesh to the bone(s) and done in Blender.
As you saw in the gif above, the highlighted bones in this picture are jiggle bones.
Unfortuanately there is no way to see the jiggle effect in Blender, so everything from here on out is QC related and it becomes the pain staking process of trial and error. Even if you get the effect you want displaying in the Half Life Model Viewer, there is no guarantee that the result will be the same when you port the model to SFM.
Jiggle Bones are defined in the QC using the $jigglebone QC Command.
These are the definitions that I’ve used for the model in this example.
The format of the command is
and so on until all your jiggles are defined.
Flexes Using Shape Keys
We touched a little bit on fixing flexes and shape keys in the MMD model section. But what if there are no flexes on the model at all? In this section we’re going to touch on basic flexes, how to set up the model, set the shape keys and apply the flex. We’ll also get into the adding stereo controls (where required). We won’t be getting into corrective shapes, dominators or wrinkleScales other than to say this is where your set that stuff up.
Shape keys control the deform of mesh objects, NOT bones. Shapekey can be used to move things like mouths, eyelids and brows, make expressions and set up phoneme poses on faces and can actually deform or move mesh to be hidden inside a model, like the spy’s ciggy.
Shapekey animation is pretty limited in the way it moves the mesh, usually in a straight line between its basis point and the end point, so one has to be careful on positioning.
Shapekeys are what create the Flex sliders on a model. (I believe what i am calling shape keys are also known as Blendshapes in Maya, but don’t quote me on that, I don’t use Maya.)
We’ll start with simple flexes and move into the more complex advanced flexes (this is where stereo flexes will be discussed)
Let start with a model that already has flexes assigned to it. Say the Scout…
Models are becoming more and more complicated and working with them even more so.
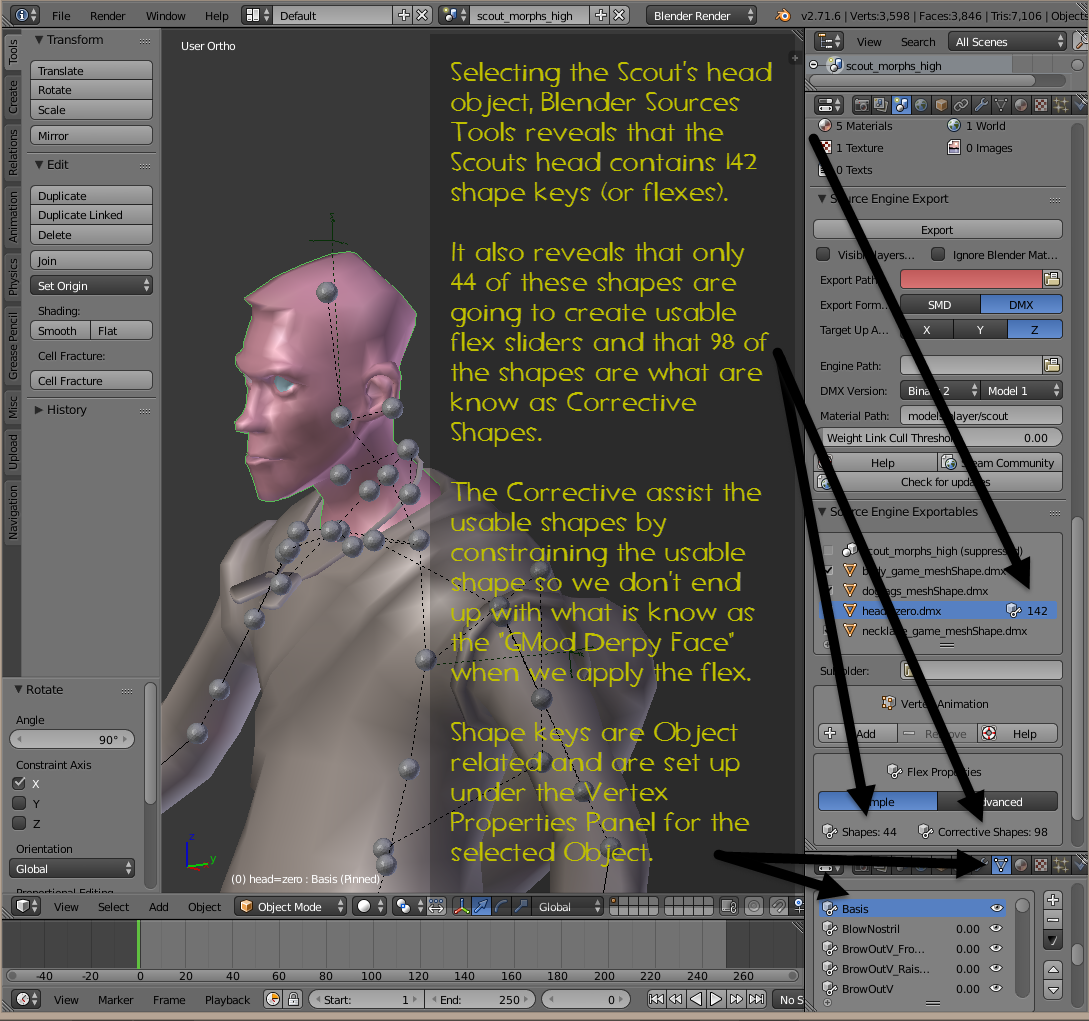
If you are creating shape keys for a model that will be exported for SFM, you have to watch how you name them. If you place an underscore “_” in the name of a shape key it will become a corrective shape and will not be converted to a flex controller usable on the model.

Notice how ALL the corrective shapes have a “_” (underscore) in their names. These will not create active flex controls on the model when Exported.
If we were to export these shapes to a .dmx now as “Simple” controls, the flexes in our model will adopt the names given here. (ie BlowNostril, BrowOutV, CheekV, ClenchJaw, CloseLidLo, CloseLidUp and CompressLips.) There is a way to rename these prior to export but that will be covered later.
I haven’t really dug deep enough into corrective shape yet to be able to talk on this subject, however there is some pretty good and detailed information in the documentation contained in Revzin’s Elizabeth Source files which can be found here. [link]
(Thanks Revzin… I really appreciated this. There is a lot of advanced topics in your documentation that I would not have even known to exist with out it.)
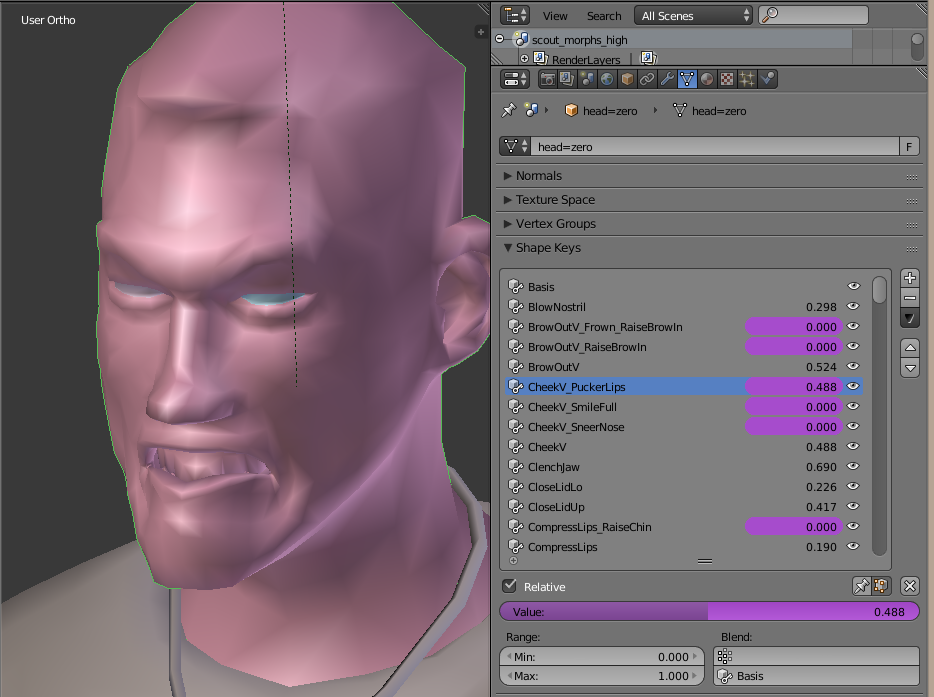
Shape keys can be added to any object in your model and the Shapekeys can have the same names between objects. For example, if I a head object but the eyelashes are a separate object on the model, and I want to make the model wink, I would create a basis key on the face and develop a shape key on the face object’s eyelid (say wink-L). When I apply that shape, the the eyelid moves to the proper position but the eyelash doesn’t move. This is because the eyelash is a different model object and a shape key has to be developed for that object as well, so I would have to create a basis key for the eyelashes and develop the shape to make it move to the position I want for the wink. Because this is different model object, I can call that shape key wink-L as well to help users see that the key should be applied if they wink the left eye.
If I export the model and create a SFM model like this, there will be 2 controllers, one for the eyelid and one for the eyelash. Both would have to be applied to make the model wink.
If I join the eyelashes object to the face object, because I gave both shape keys the the same name, Blender will merge the 2 keys together into one shape key animation so that if I apply the wink-L shape, both the lid and the lash will move under the same key, I don’t have to re-develop the shape animation for the joined object. If the names had been different, then blender would add the key name to the shape key list of the face when the lashes are joined and both keys would have to be moved to perform the wink. (Difficult to explain in plain language, but try it you’ll see what I mean.)
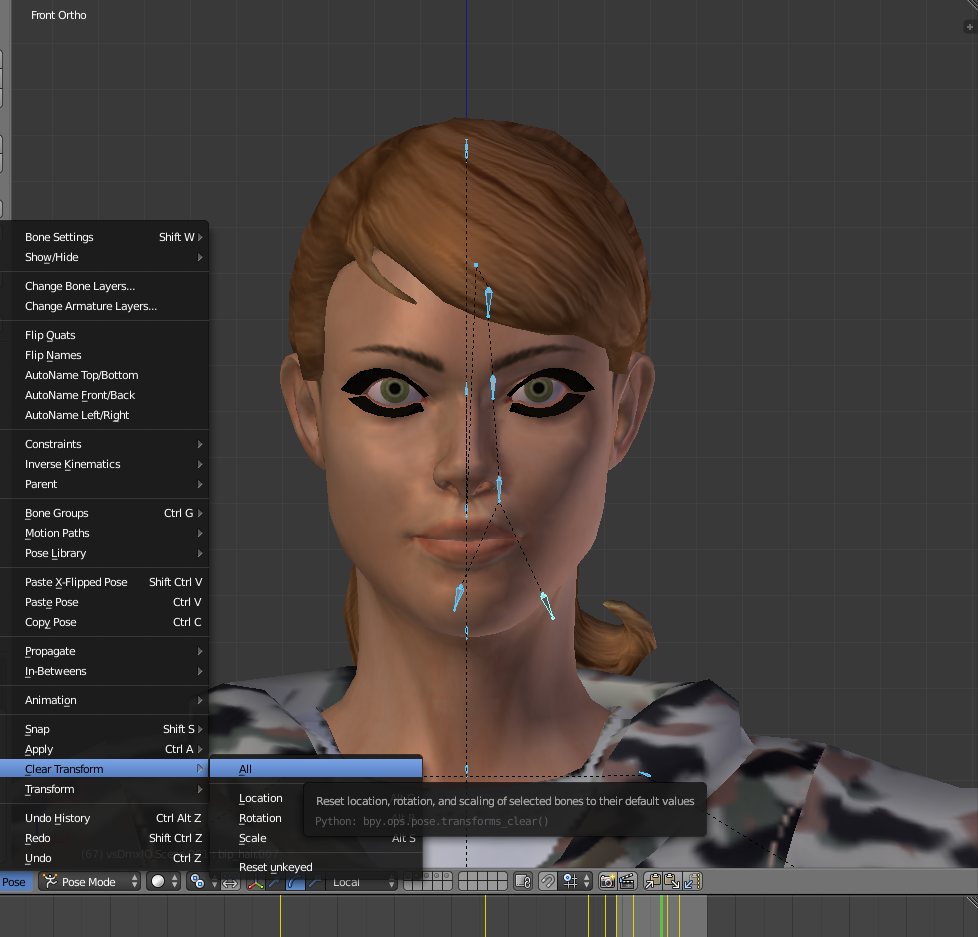
It is important before establishing the Basis key that the model is in its natural state.
Now that the model is in it natural position I put the object I’m going to add shape key to into edit mode, then switch to wireframe mode. I delete any vertex groups that are not required by the object by selecting each vertex group and pressing select. If a vertex group isn’t assigned to the the object none of the vertices will light up on the model. This also allows me to confirm that vertex groups are properly assigned for those that are required.
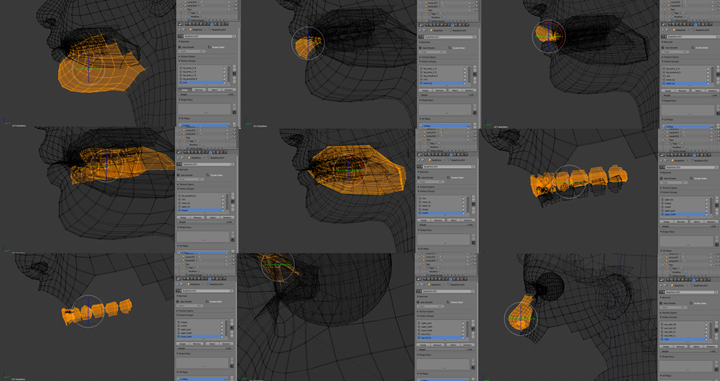
The way I do it is with the object in Edit mode, I’ll start creating vertex groups for the mesh I’m going to manipulate with shape key so that I can quickly select the mesh.
As things get harder to see you can hide vertices that have already been assigned.
Now that we have these vertex groups we can grab them quickly by
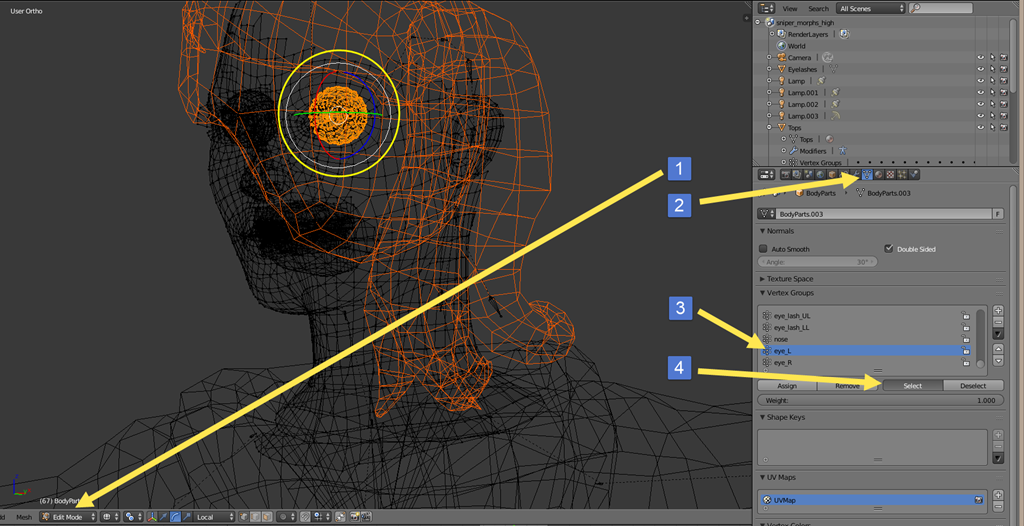
[2.] switching to the Data Property Panel,
[3.] selecting the vertex group we want and
[4.] clicking Select.
Now comes the part that takes talent and time, moving the mesh to create the shape assigned to a shape key. And this is going to be hard to explain in writing so I’ll try to use as many pictures as I can.
Shape keys are created with the object in Object Mode. You can not add a new shape key while the object is in edit mode. The first shape in a group is the basis shape (you can rename this but for simplicity sake we’ll leave it as is.) The rest of the shape keys of the group are usually built by moving mesh of the object from this position.
Note: Shape keys are cumulative, in other words if you apply a shape key and then use another shape key that drives the same vertexes, the second shape key will add to the flexes already applied by the first shape key. Where it is possible to build more complex shapes from other shape key positions of the group, it become much too complicated to relay in this guide and therefore will be left up to you to research on your own. That topic is out of scope of this document.
Simple Shape Keys
Ok, let’s start with a left eye wink,
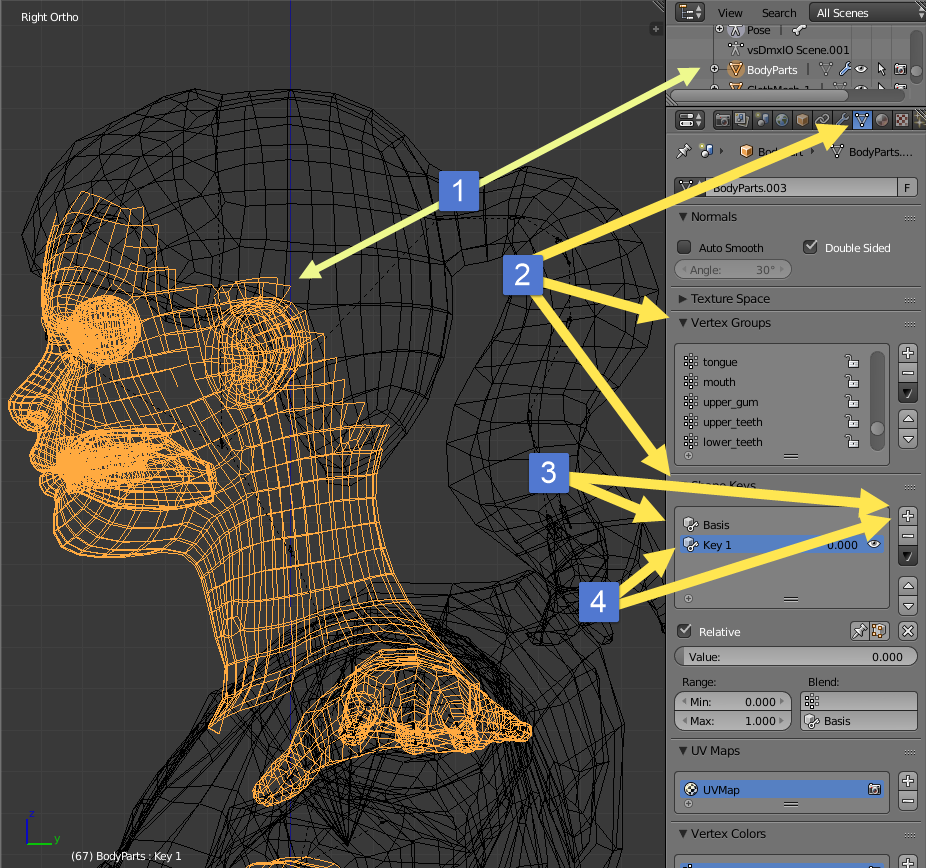
- Place the object that you want to add the shape to into Object Mode (after you have ensured that all poses have been cleared and the mesh and bone are in their rest position.
- Select the Data Object tab in the properties panel and scroll or expand the menu items so that the Vertex Groups and the Shape Keys panels are visible.
- If there isn’t a BASIS shape for the object click the + in the Shape Key panel to add one. This is the position the mesh will start in for any new key added.
- With the model still in object mode, click the + again to add the first key. (It should default to Key 1)
Contol Click on Key 1 in the Shape Keys property panel, this is how you edit the name in the Blender 2.7x series, If using an earlier version, select the Key 1 Shape key and change its name in the name at the bottom of the panel. Name it to wink-L (that’s wink dash L, remember if you use an underscore in the name, the shape key will become a Corrective shape and will not be passed to the model on export)
To make the shape change,
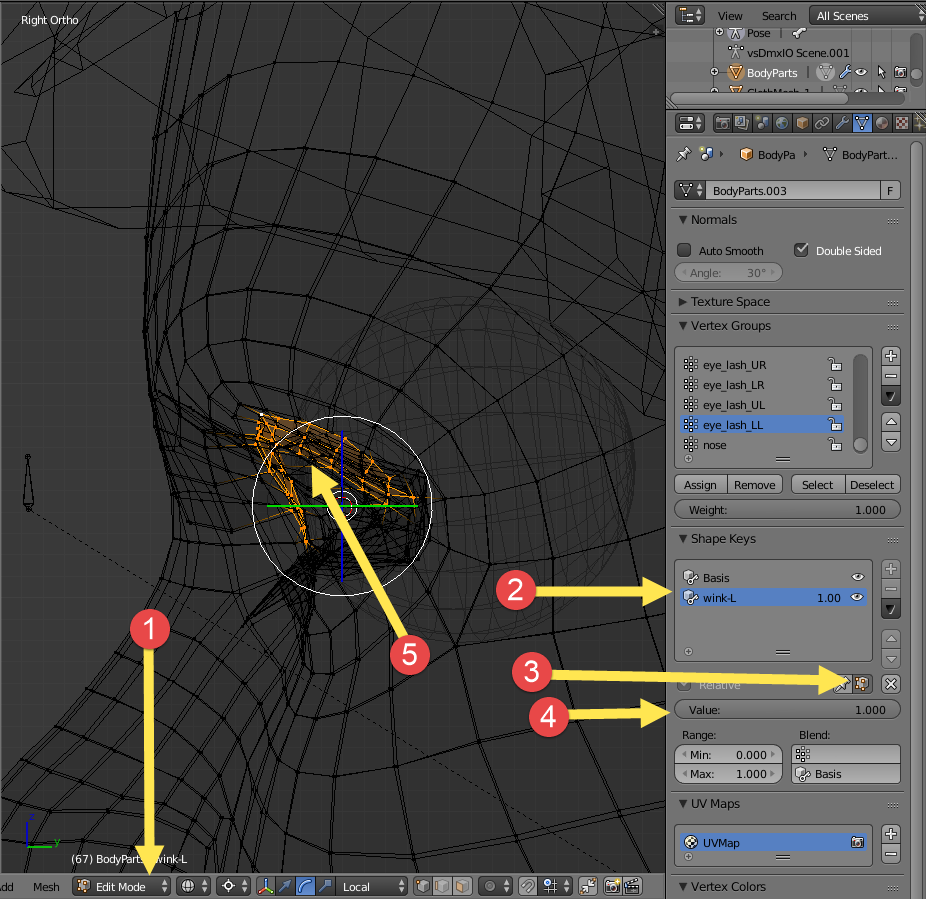
- place the object into edit mode
- select the shape key you want to edit
- turn on “apply shape in edit mode” button so the value slider is active
- set the value to 1
- select the mesh you want to change and model the mesh to the position you want it to take when the slider is applied. (most times this will require proportional scaling and rotation of the mesh. It depends on what you are trying to accomplish. Depending on the effect you are trying to accomplish, it is usually best to do your edits at right angles to the model, ie L/Rside, front/back, and top/bottom views. To better facilitate rotations, I place my 3D cursor at critical pivot points and use it as the base for rotations.)
Once you have the shape made, use the value slider to check it. If you find that the shape isn’t conforming to what you need at a certain point in the animation, move the value slider to that point and make your adjustment, then play it though after the change.
If your model is symmetrical (meaning that the mesh is mirrored exactly from one side of the X axis to the other) and you want to create the same flex on the other side of the axis, Blender can do that for you so you don’t have to animate the opposite side manually.

- Place the object in Object Mode
- Select the shape you want to mirror
- Move the Value slider to the position you want to copy (in my case I want the entire wink animation so I set the value to 1)
- Click the the Down Arrow Icon under the – Icon to expand the menu
- Click “New Shape From Mix” and a new key will be created
- Reset the value for the copied key to 0 then select the new key created and move the slider, it should play the animation you copied)
- Rename the new key (in my case I’ll name it wink-R)
- Select the new key and press the down arrow again to expand the menu
- Select Mirror Shape Key
- One of two things will happen 1) the shape will transfer to the other side and work, or 2) blender will report how many vertices it was able to mirror to the other side. Worst case scenerio, 0 vertices will be mirrored, as seen here. This means that the model is not symmetric and that you’ll have to create the shapes manually. If you get “SOME” vertices mirrored, play the animation by moving the slider and determine if it is worth editing the shape or just delete it and do it from scratch manually.
- If the mirror fails, you can attempt to mirror the shape by Topology, this may give you a good start point for your edit.
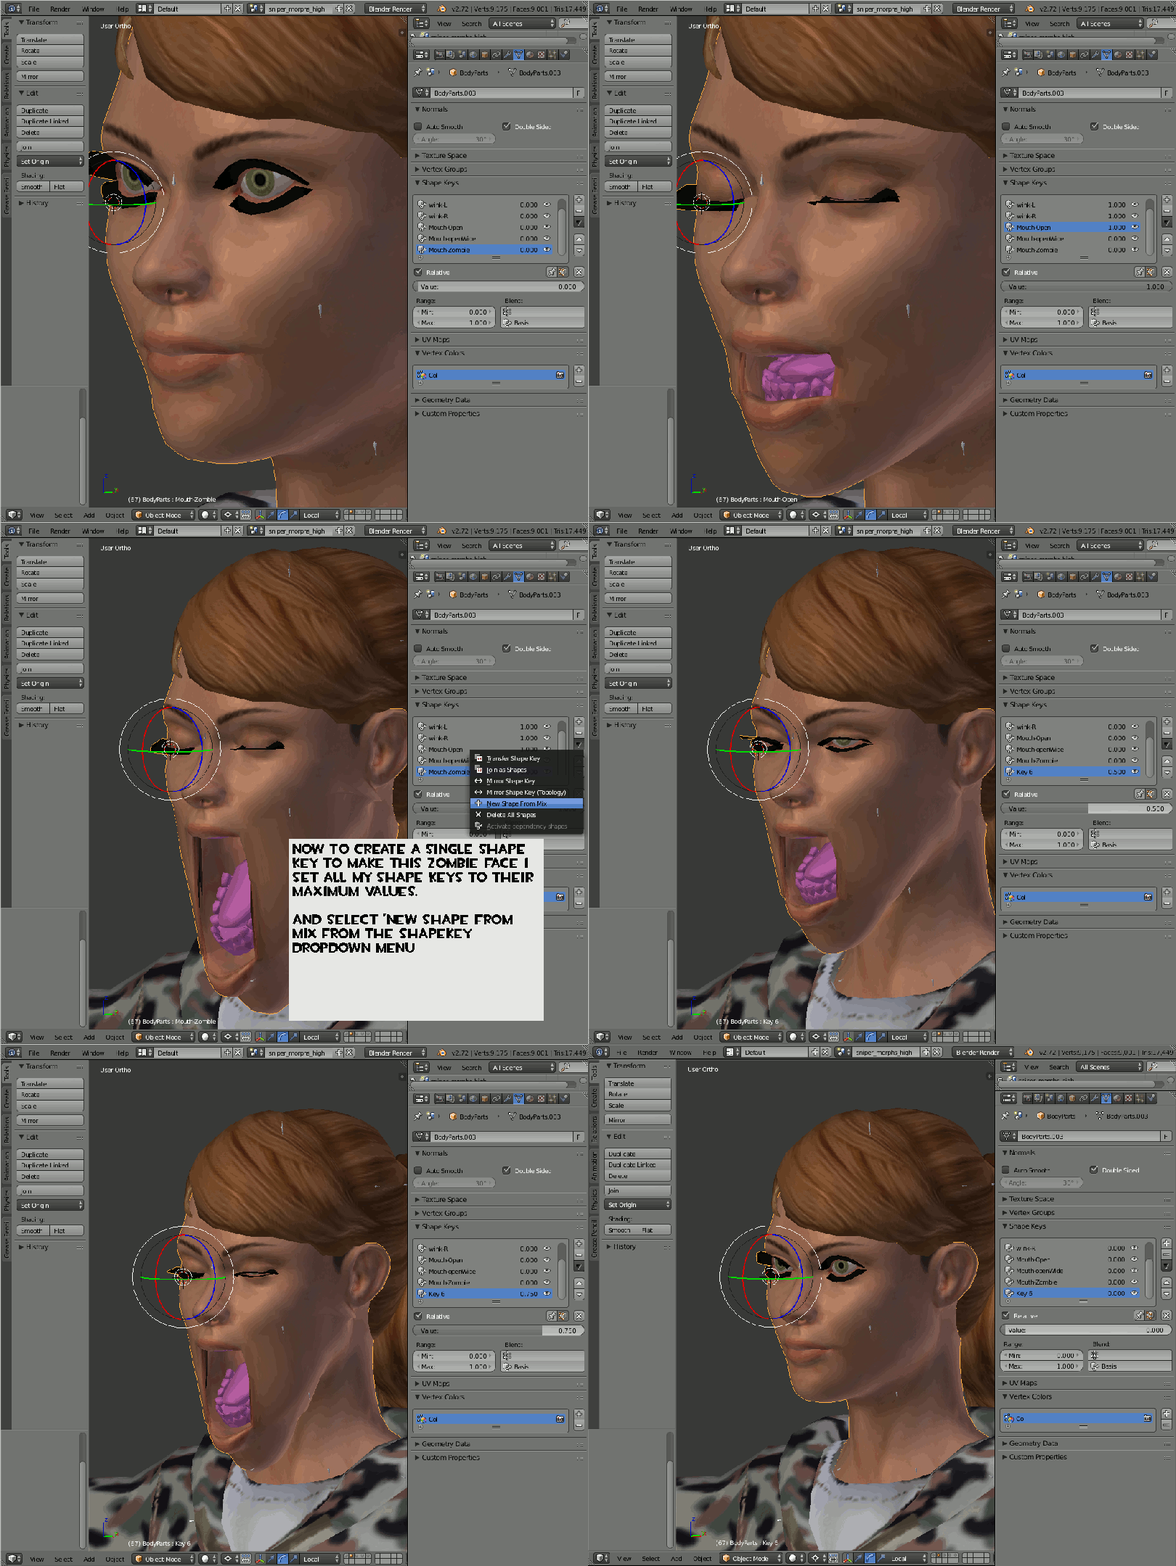
In the picture I combine the 4 shapes I have made to create a single shape key that will close both eyes and exaggerate the zombie mouth.
You have to be careful with combining keys as the mesh can distort if too much is added from the “blended” keys. Look closely at the teeth in the picture, you can see that they are beginning to stretch as result of over blending. (Remember you can click on an image to enlarge it.)
Now it’s a matter of repeating the process. I’ve already stressed that this document is not to teach “How To Use Blender” or “How to Model”, this is something you are going to have to research on your own. So for each shape you want to add…
- Put the model into Object mode,
- Ensure the Model is in its Rest Position,
- Select the Object you want to add a Shape Key to,
- Check to see if there are any Modifiers you want to apply before adding the First Basis Shape,
If there isn’t a Basis Shape add one, or add the next Key, - Select the key,
- Place the model into edit mode,
- Set the Value Slider to 1,
- Select the mesh you want to move with this key and model it into the shape you want,
- Test the slider and
- Edit as required.
It is going to take a lot of time and patience to add all the shape keys you want to incorporate into the model. If you remember looking at the Scout at the beginning of this section it had 142 shape keys, of those only 44 shapes are passed to the model, the other 98 were corrective shapes. But someone had to model each and everyone of them some how.
This picture sums up what we have done with shape keys so far!
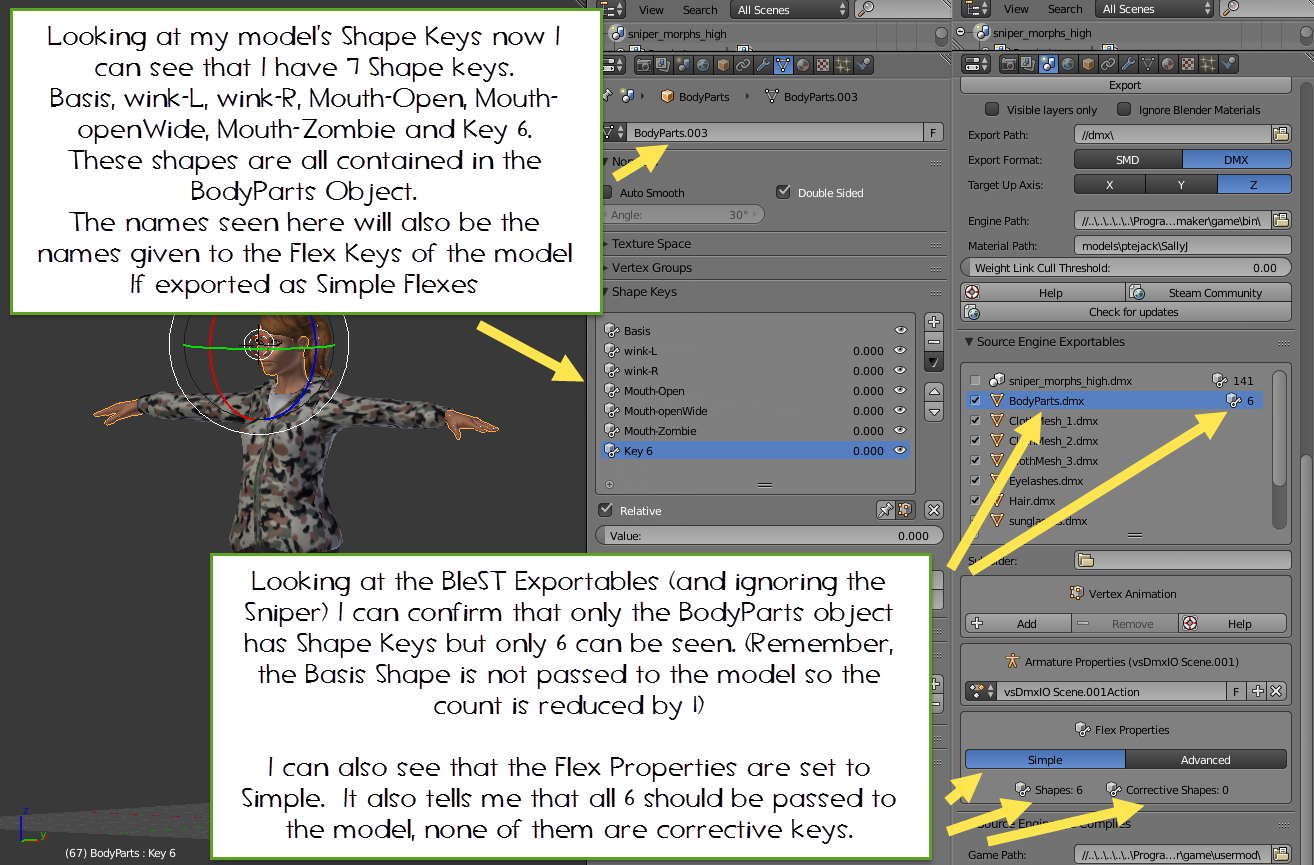
Time to export and compile the model and have a look…
Success!!!!
As I said there is no guarantee that the flexes you create in Blender are going to behave the same way in SFM. If you find that a flex doesn’t work in SFM then all you can do is come back into blender and try to see where it went wrong, fix it or remove the shape key and model it again then compile and test it again.
If you want to learn more about creating shapes, see my tutorial here.
[link]These Eyes!!!! – Getting Valve Type Eye Flexes on your Model
This is probably one of the most frustrating process to get right on your model. I struggle through it everytime I try to add them. However thanks to a project I assisted Confederate Joe with, I developed a better understanding of the process. (and other than positioning them properly it isn’t really that hard to do.) Thanks Joe!!!!
Ok, for this demonstration I am going to use the Sally OBJ file I’ve been working with during this tutorial and I’m going to refer you to 4 pages on the [link]
[link]
[link]
[link]
and
[link]
You can find everything you need to know about working with the Eye Refract layer on those 4 pages.
Now that we’ve covered simple flex keys let’s get some movement in the eyes. This can be accomplished a couple of ways, the first being to use textured orbs and using bones to move them. We’ve already covered adding bones, weight painting and posing in earlier segments. If that is what you’re going to do, stop reading here and carry on rigging your model.
However, if you want to learn how to give your model Valve type eyes that use dynamic irises which float over another texture and are poseable using flex controls, Read On!
First were going to talk about the Eyeball qc command. This command is a property of the $model command. For the eyeball command to work, each eyeball must have its own material. So let start there in Blender….
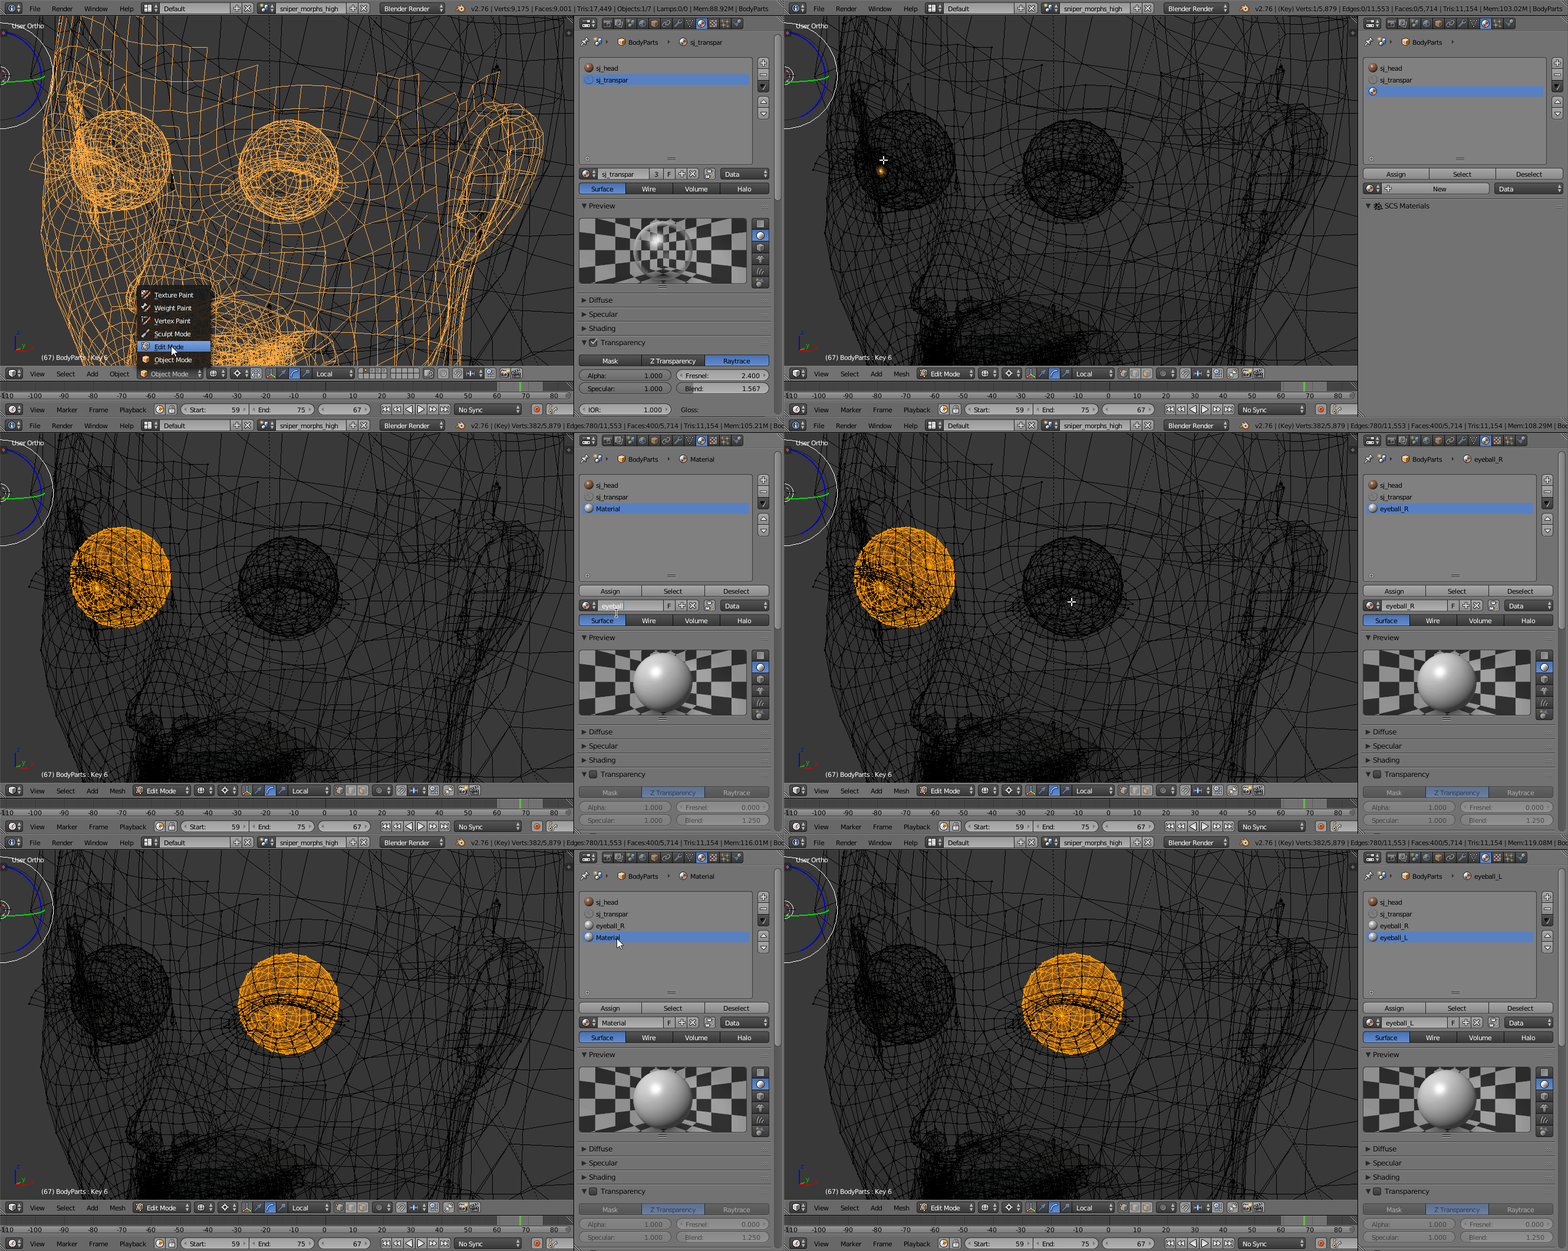
Now, make sure your eyeballs materials have a texture and that the eyeballs UV maps have been assigned to the textures properly. The texture for the materials can be the same texture, but the uv’s have to be mapped properly to it.
Now time to edit the QC and open a program buried in the Valve Bin folders called QC_Eyes.exe
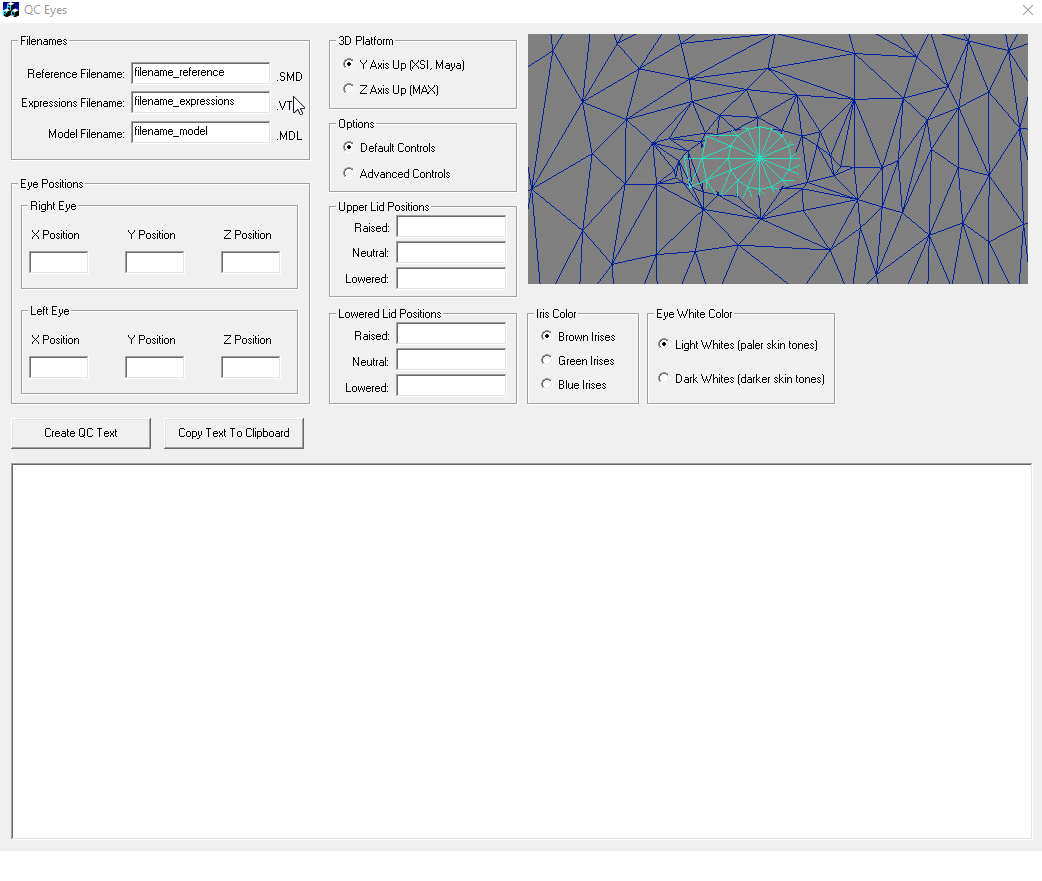
I’m only going to give a brief overview here and set up the eyeballs only. If you need more information on how to use this program or want to want to know how to add values so the eyeballs interact with the eyelids of your model, click the Eye Position Setup link provided above.
Ok, Back to Blender, with your eyeballs in edit mode and your model in wireframe mode, hover the mouse over the 3d viewer and press N untill the Viewer property panel is open.
Select the mesh of one of your eyeballs the press Shift S and select Cursor to Selected.What we have to do is find the center of the eye on all 3 axis (X Y Z). As I said, I’m fortunate here as my eyes are orbs or spheres. Finding my coordinates is not going to be that difficult. However, finding the Y position on a model standing on the Z axis (Z-up) or the Z position for a model that is standing on the Y axis (Y Up) that has almond eyes that connect to the head (like the TF2 Characters) is going to be a bit more difficult.
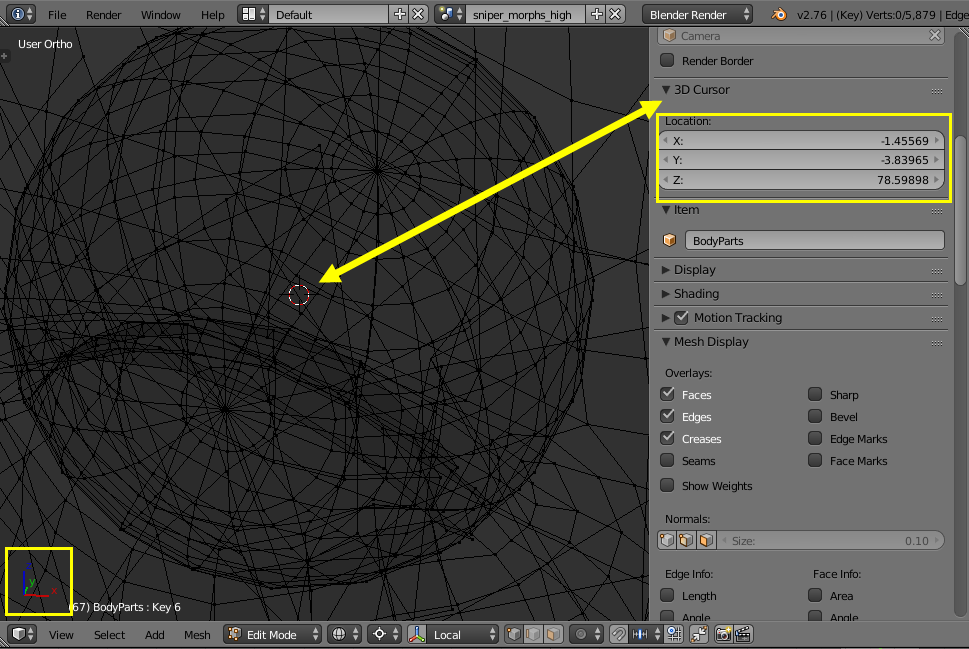
If you know what needs to go into the qc from here, add it and compile your model. You’re done. If not or your eyes just don’t work or are invisible,read on.
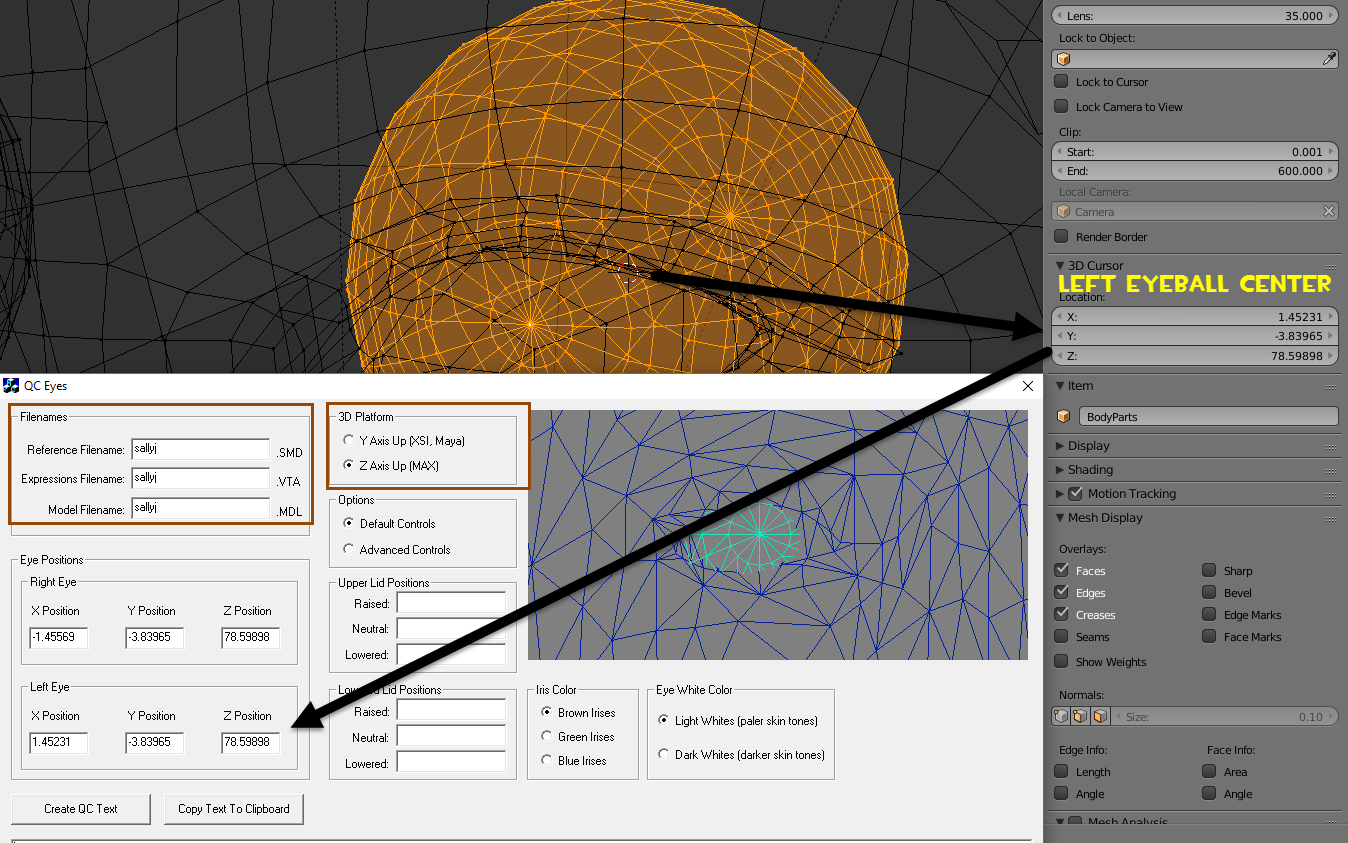
Place your 3d cursor in the center of your right eye and copy the cursor location into the eye positions field then relocate the cursor to the center of the left eye and copy the location into the required fields of qc_eyes.
We’re not going to cover the other setting for the lids, at least not yet.
Click the Create QC Text button…
and QC_Eyes will spit out some QC Code, we’re currently interested in the 6 highlighted lines in this picture. The highlighted code is required in the QC if you are using either SMD or DMX source files for your model.
Now off to a text edtor to edit the QC, create the necessary VMTs and recompile the model… The model has to be recompiled to see if the code works.
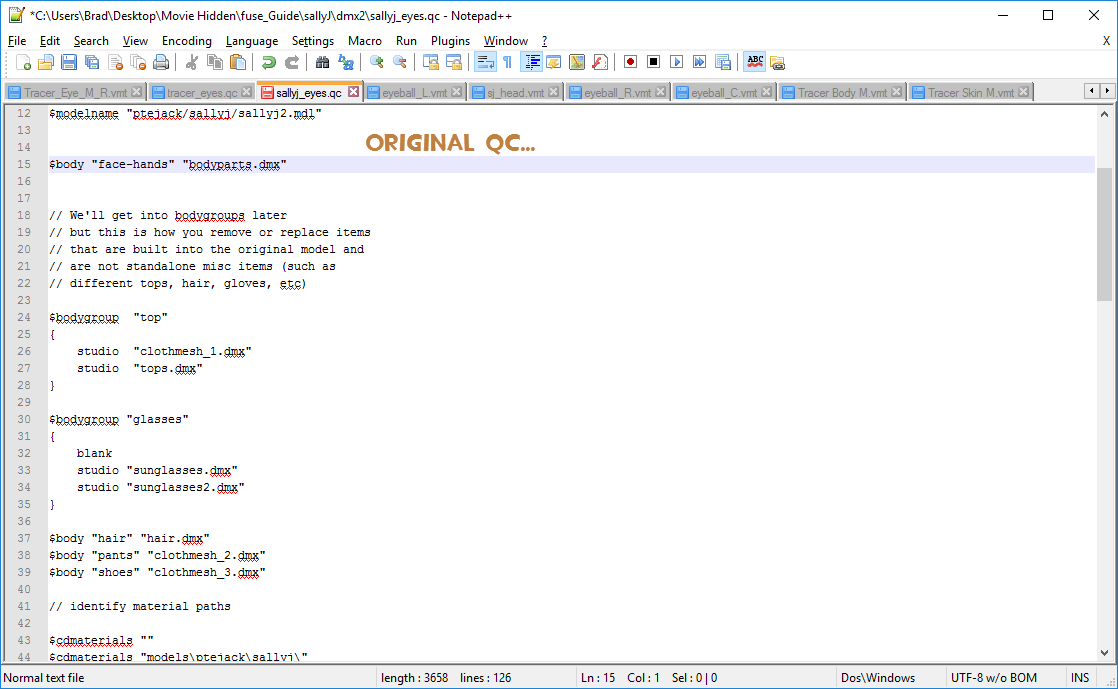
Next I’m going to incorporate the 6 highlighted lines from QC_Eyes into the QC. The reason I suggested using QC_Eyes is that you can actually see where the code has to be placed in your qc and it is almost usable right out of the box, but there are changes to that code we’ll have to do.
This picture depicts how I use the qc_eyes code to change the qc. Elements will be discussed a little further below.
Before the model can be compiled, the special materials for eye have to be set up. The vmt uses a special EyeRefract shader and has a lot of other elements in it such as the vtf call to the material that creates the iris, a special Cornea material, an ambientocculsion material and a bunch of numeric variables that define the eye. Each eye has its own material as we setup in Blender. The best thing to do is edit an existing material for one of the TF2 Characters. So as I’ve been using the snipe throughout theis document let open up the eyeball_L.vmt for him and have a look.
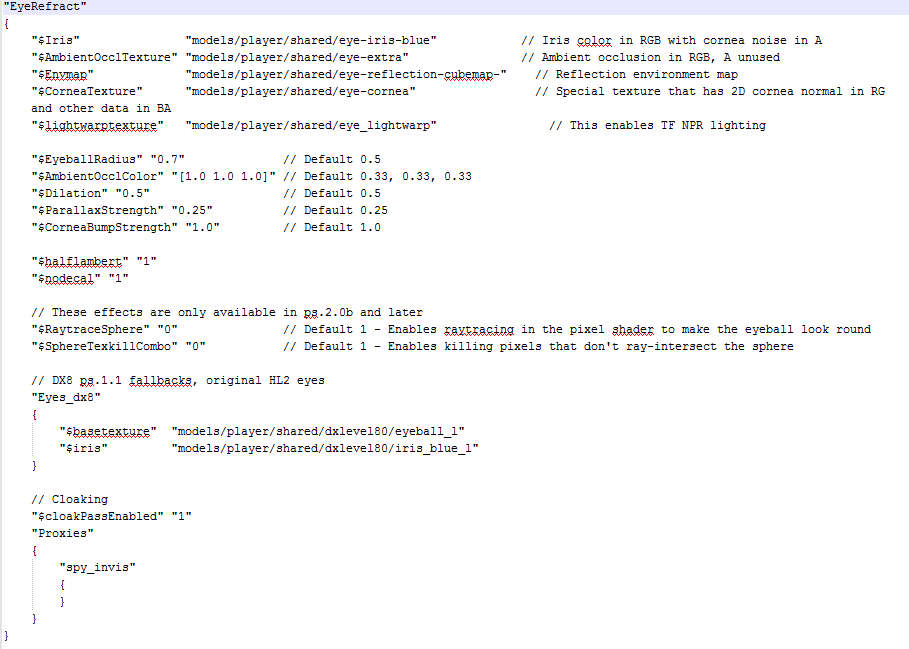
This is the eyeball_L VMT. The eyeball_R VMT is almost a mirror copy of this. Eventhough it looks pretty complicated, it isn’t really. As you work with this more and tweak your eyes, adjusting the values will become second nature. (Remember you can click on images to blow them up!)
Well out of space for this section, move on to the next chapter…..
These Eyes!!! – The QC Elements Explained
I guess now is the best time to go through the QC and VMT variables we’ve added and see how they work together. For this section I will define the command with an explanation of what it is or does. Then I will give an example of the command the way I used it in the QC or VMT.
QC Commands
$eyeposition {x y z} – This command is used by the AI engine and is used to check what a NPC can see, not really anything used in SFM, but does influence the sliders so it is included.
QC – $eyeposition 0 0 70
$attachment “{name}” “{parent bone attached to}” {x y z} location on the model of the attachment point [absolute] means that the point is parented to the models origin, but remain relative to the parented bone.
QC – $attachment “eyes” “bip_head” -0
$model “[bodypart name]” “[SMD/DMX of the object]” { (this curly bracket begins the wrap of the elements contained in the command)
QC – $model “face-hands” “bodyparts.dmx” {
eyeball [name] [attachment bone] [x y z] [material name] [diameter] [angle] [iris material] [iris scale]
Name – is used to match eyelid rules. For human type characters the names are righteye and lefteye.
Attachment Bone – this is self explanatory and is usually the head bone.
XYZ – these are the coordinates to the center of the eyeball.
Material Name – points to the Material VMT that will float on top of the eyeball. Each eye must have a unique name. This is why I assigned the materials eyeball_L and eyeball_R to the eyes in Blender. My VMT and the name used here will be eyeball_L for the left ey and eyeball_R for the right eye.
Diameter – this is the width of the eye when viewed from the front and is used to stop the eye from rolling completely in to the head. The iris will travel in a circle on the eye, even if your eye shape is oval. Adjustments are made on the flex controller statement.
Angle – is the yaw (Left/Right) offset (from directly forward) for the Iris. If you look in a mirror at your eyes, you’ll see that that are tilted inward toward the nose the don’t look straight out, also known as wall-eyed. Most humans have a 2-4 degree inward tilt (for lack of a better word). Not setting this properly could cause you model to be cross-eyed. Moving the center xyz forward or back to compensate for crossed eyes will cause flex problems tracking left and right.
Iris Material – As you notice I change the name of this to UnUsed. I did this because the Iris material will be defined in the eyeball VMT.
Iris Scale – this is how you control how big the iris will be on the eye
QC – eyeball righteye “bip_head” -1.46 -3.84 78.60 “eyeball_r” 1.00 4 “unused” 0.63
QC – eyeball lefteye “bip_head” 1.45 -3.84 78.60 “eyeball_l” 1.00 -4 “unused” 0.63
Always RIGHT First then Left, Always UP First then Down
flexcontroller [group name] [range negative up, positive down] [controller name]
Group Name – helps assign the the controller in the animationset Group structure as defined in the sfm_defaultanimationgroups.txt file. If the Group is not defined in that file, the flex will end up in the Unknown Controls group.
Range – the minimum and maximum value of the flex. If the min is a negative number the slider will offset from the center point based on the difference of the min and max numbers from zero. In other words a min of -45 and a max of 45 the slider handle will be in the center. A min of -10 and a max of 50, the slider handle will be closer to the left than the right. a min of 0 and a max of 50, the slider handle will be completely to the left.
For eyes, the range usually does not exceed somewhere around -45 min and 45 max. But this is one of those values that will need to be tweaked based on the model.
The max value must be greater than the min, or the slider will not work.
Controller Name – Self explanatory
QC – flexcontroller eyes range -45 45 eyes_updown
QC – flexcontroller eyes range -45 45 eyes_rightleft
} This curly bracket closes the group of commands in the $model group.
The code would be different for each model so the complete QC code for THIS particular model would look like this…
Now the eyeball_(L/R).vmt I’m only going to cover the top portion of the VMT code. If you need to find out more, go here… [link]
Ok as discussed before…
Each eye must have its own unique material. The material identified in Blender for each eye is what the VMT must be named. The VMT is a pure text files and is the material. VMTs call Texture files. In the Source Engine a texture is a VTF file.
Texture files are VTF files (the ones that have images in them.) Different VMTs can call the same VTF file, therefore in the case of the eyeball, if your model has 2 eyeballs it will require 2 unique eyeball material VMTs, however these 2 VMTs can call exactly the same VTFs. This means you don’t need to duplicate textures for your model.
And Time for another new section..
These Eyes!!! – The Material VMTs Elements and Final Compile Results
The eyeball_(L and R).vmt
“EyeRefract” – The eyeball shader
{ – This is an opening curly bracket, everything between an opening curly bracket { and a closing curly bracket } is a group. You can nest groups inside other groups like this…
Anywhere in this section you see {path}, the path is relative to a materials folder that SFM knows about. For example “models/test/eye” would point to a texture located in a known mod folder under the “materialsmodelstest folder.
$Iris – {path}/{basetexture.vtf} – this is the basetexture VTF texture that will form the floating iris of the eye.
VMT – “$iris” “models/test/eye”
$Envmap – {path}/{reflectiontexture.vtf} – This is usually an animated or normal VTF that will create the specular envirionmental reflection of the eye (like the reflection seen in a moist eye).
VMT – “$Envmap” “models/test/eye-reflection-cubemap-”
$CorneaTexture – {path}/{cornea texture.vtf} – This is a 2d bump/normal type texture that is going to be used and create the shape of the cornea of the eye.
VMT – “$CorneaTexture” “models/test/eye_cornea”
$lightwarptexture – {path}/{lightwarp Texture.vtf} – this enable the TF style NPR (non-photorealistic rendering) ligthing. It is a material the tints image pixels dependent on its brightness. It is usually a gradient black (left) to white (right) texture.
VMT – “$lightwarptexture” “models/test/eye_lightwarp”
$EyeballRadius [float] – This is the radius of the eyeball. If not spedified it will default to .5
VMT – “$EyeballRadius” “1”
$AmbientOcclColor [vector3 float array] – This controls the ambient occulsion color given to the eye, it is a 3 vector RGB array (ie [1 1 1]) fo the float type (values between 0 and 1, so like 0.1 to 1.0). 0 would be fully off for the RGB value and 1 would be fully on, so a value of [0 0 0] would be black, [1,0,0] would be red and [1 1 1] would be white. If the $ambientOcclColor is not specified in the vmt, it may result in a translucient checkerboard showing up on the eye. If used and not given a value, it will cefault to [0.33 0.33 0.33] (a grey)
VMT – “$AmbientOcclColor” “[1.0 1.0 1.0]” (This would be pure white)
“$Dilation” [float] – Controls the dilation of the pupil.
VMT – “$Dilation” “0.5”
“$ParallaxStrength” [float] – Parallax is defined as the displacement or difference in the apparent position of an object viewed along two different lines of sight. I’ve tried to find more info on how this affects the eyes, but came up blank.
$CorneaBumpStrength [float] – difines how much bump is applied to the Corenea
VMT – “$CorneaBumpStrength” “.2”
There are a few more settings, but these are the main. If you want to learn more, look up eyerefract on the developer wiki at the link given earlier.
So, I am going to use a VMT that looks like this for both my eyeball_L and eyeball_R materials.
This is an example of the VTF used in each of these settings
After setting up the new materials and textures, ensuring the eyes are properly assigned to create a new UVMap for them, reexporting the model from blender and recompiling using the model using the new QC, this is what I end up with….
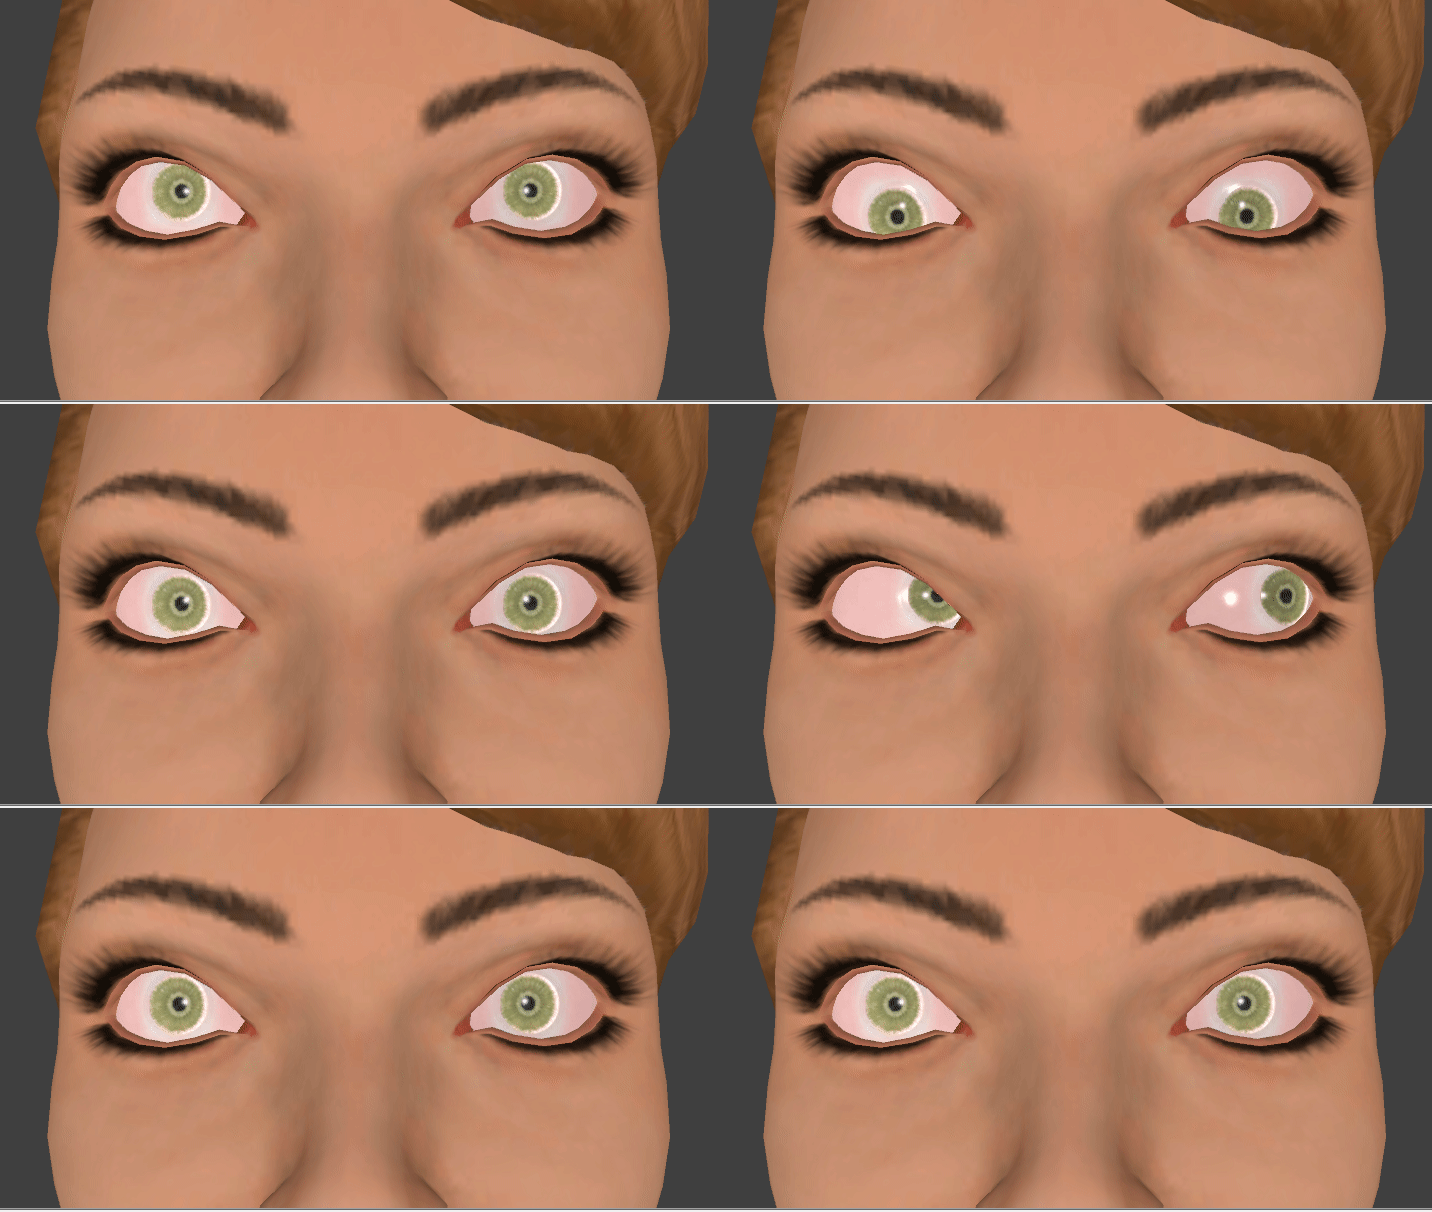
As you can see from the picture above, the eyes are floating in to the head on up, however they are pretty much where I want them on center, so now it’s just a matter of adjusting the variable to make the eyes look more natural.
I could adjust the eyeball code in the QC to move the center point and/or the flexcontroller amount to make finer adjustments, but if I ajdust the QC, it means that I have to recompile the model to see the results.
If I change the settings in the VMTs, I am making material adjustment and just have to refresh the model to view the changes. (If you are checking the material changes in SFM, all you have to do is type mat_reloadallmaterial in the SFM console and move the playhead when the process finishes to see the changes. However, if you have recompiled the model and did not give the compiled model a new name, you’ll have to shut down SFM and restart it to get the new model.)

Followed Your Guide, the Eyes Don’t Work
Okay, so you followed the guide and have set everything up correctly. You compile the model, reviewed it in the HLMV and the eyes seemed to track okay with the look at camera option turned on. However, when you load it into SFM and the eyes DON’T work or the spazz out.
Apparently this is a known problem (and I want to thank NotJames for bringing this to my attention so I could document it.)
The apparent fix for this is to add $attachment points for both eyes.
So,
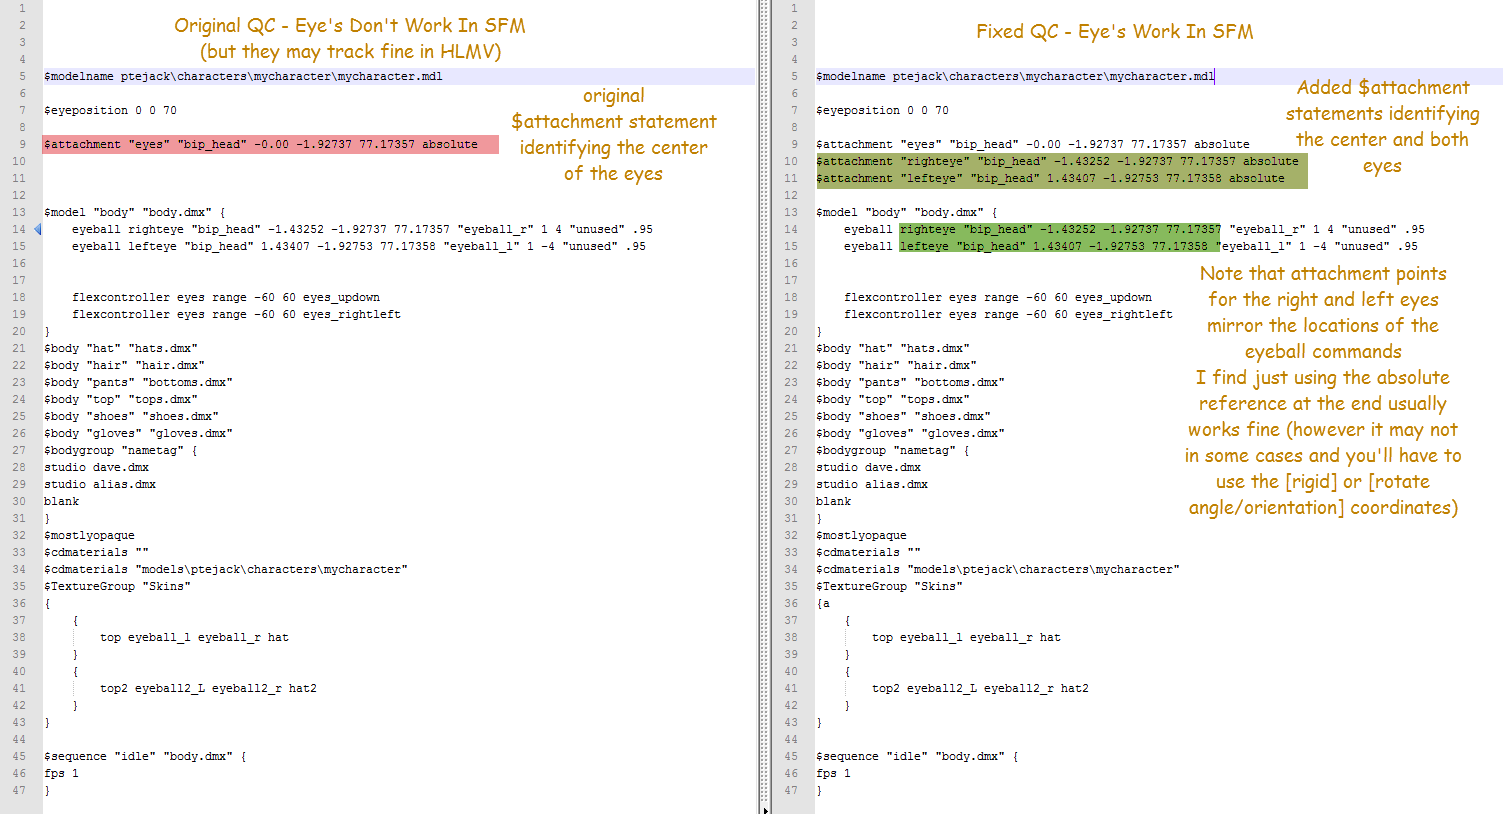
Rewrite the QC and include attachment points for both eyes, coords should mirror the locations of the eyeball commands, recompile, try again…
I have had this problem before and have used this fix, but thought it just the model I was working on at the time because other models had only required an attachment point for the center of the eyes.
EyeLids – Yeah I said I wasn’t going to cover this, BUT…
I said I wasn’t going to cover this earlier, however after much research (not finding anything on the subject for DMX exports) and trial and error to get something to work, I decided that this should be documented somewhere. So, here we go.
This is for DMX exports only because things involving Eyelids work differently than for SMD type exports. There is plenty information available for the SMD Eyelid avaiable here [link]
For DMX eyelids, it requires that you delve a bit deeper into the Flexes of your model and work with Advanced Flex controllers in Blender Source tools.
First thing you have to do is set up 2 Eyelid flexes on your model. One that completely closes the eyes using the upper eyelid and one that completely closes the eyes using the lower eyelid.

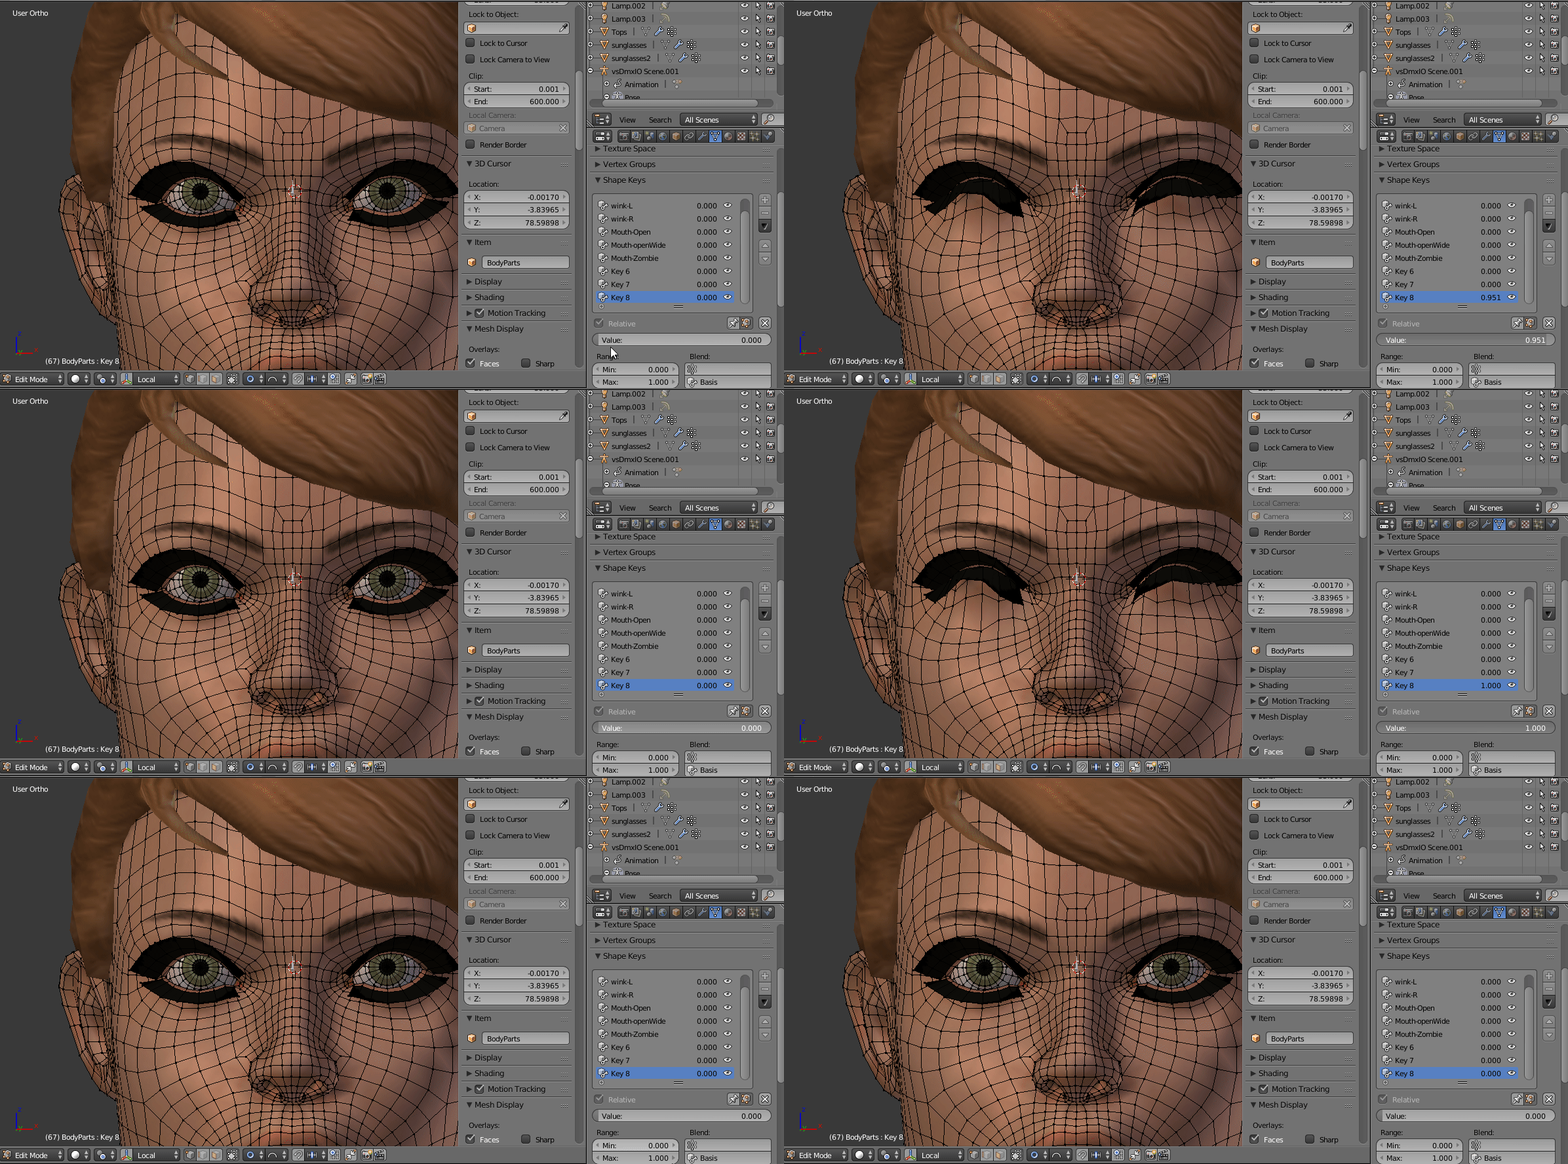
Rename your Shapes to something useful (I suggest NOT using Underscores ( _ ) in the name. Underscore will change your Flex into a Corrective Shape and we don’t want that.)
Now come the fun part and let see if we can get this to work
In Blender Spit the work area and open a Text Editor…
Now
1. Select the scenes property panel
2. In the Blender Source Tools select the object that contains your flexes
3. Change the Flex Properties from Simple to Advanced
4. (If you have Corrective Shapes) Click Generate Corrective Shape Key Drivers
5. Click Generate Controllers (As soon as you do that a property will add itself to the Controller Source Data Block. This is the name of the DMX Controller file)
6. In the Text Editor Window, Click the up/down arrowed box to display the list of embedded text files in your project.
7. Find the text object that is the same name as the filename that is in the Controller Source Box and double click it to open it. Use the Window slider or (with your cursor hovering in the Text Editor window) press Ctrl+Home to go to the top of the file.
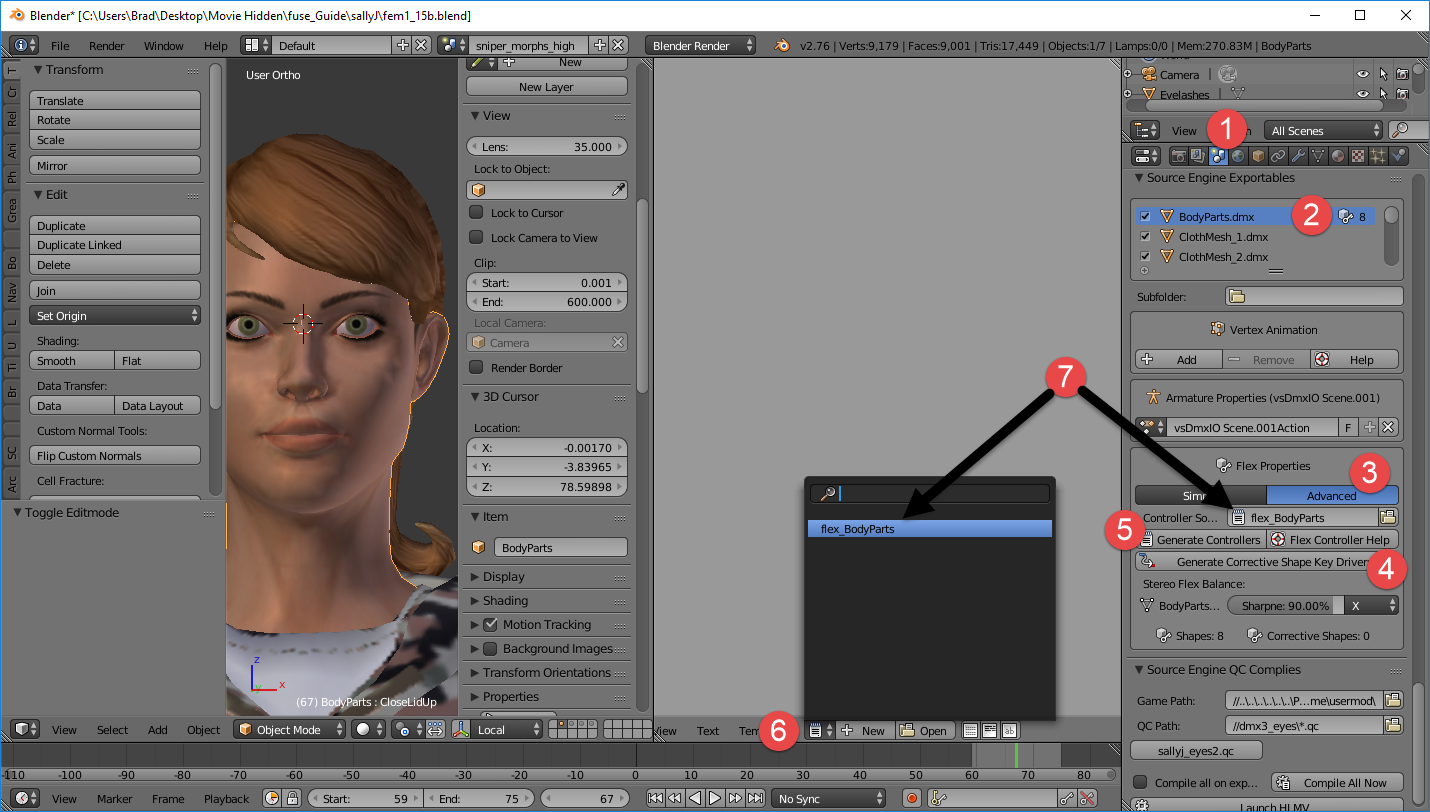
Ok, in the text Find the the reference to your Lower and Upper Lid flexes …
This is where we are going to combine those to flexes and make them an Eyelid Controller.
In the Lower Lid Controller segment, Find the “rawControlNames” line, move over to the opening Square Bracket and move it to a new line by pressing enter.
Now do the same for the opening quotation mark of the control name so it places the name under the opening bracket.
ADD A COMMA AFTER the closing Quotation mark in the controller name and press enter
Now find the rawControlName for the UpperLid ad add that (With Quotation marks) press enter so the closing Square Bracket in underneath the completed statement.
We’re not finished yet but your code for the lower lid SHOULD look like this now.
Now to finish the code…
Find the “name” “string” line and chane the name to something like “CloseLid”,
move down to the “eyelid” “bool” line and change the value from 0 to 1,
move down to the “flexMin” line and change the value from 0.00 to -1.00 (that’s Minus 1.00)
On the “wrickleScales” line, move to the opening Square Bracket and force to a new line by pressing enter, Move to the opening quotation mark on the “0.0” and force it to a new line then add a comma after it, press enter
add another “0.0” under that and force the closing Square Bracket to a new line by pressing enter.
So the completed code should look like this…
Now DELETE the entire code for the Upper Lid.

QC Time….
When using DMX files as source, you don;t have to do anything to the qc for it to find the Eyelids. The definition in the controller that we just created will do the work
UNLESS
You have this statement in your $model statement
localvar %dummy_eyelid_flex
If that statement exists in your qc Comment it out or the Eyelids will not work.
like this
// localvar %dummy_eyelid_flex
Ok, We are now working with ADVANCE ShapeKey, All the NON Corrective shapes will be added to the Controller text file. Blender Source Tools NOW knows to include the Controller Source to the model, it’s called by the Controller Source Text Box. Any shape you did not edit the text for will operate the same as if you were using SIMPLE Flex Properties for, It’s just that now you can see those calls in this new text file we’ve been editing.
All we have to do now is Export the model (or only the obj that has the flex we edited if you didn’t change any of the other blender objects since the last export) and recompile the model…
Good Luck!!! If your eyes are set up properly and the flexes are correct for the Eyelids, Things “SHOULD” work properly… (Not like what you see below, this is just the tutorial model, used for quick demonstrations… lol)
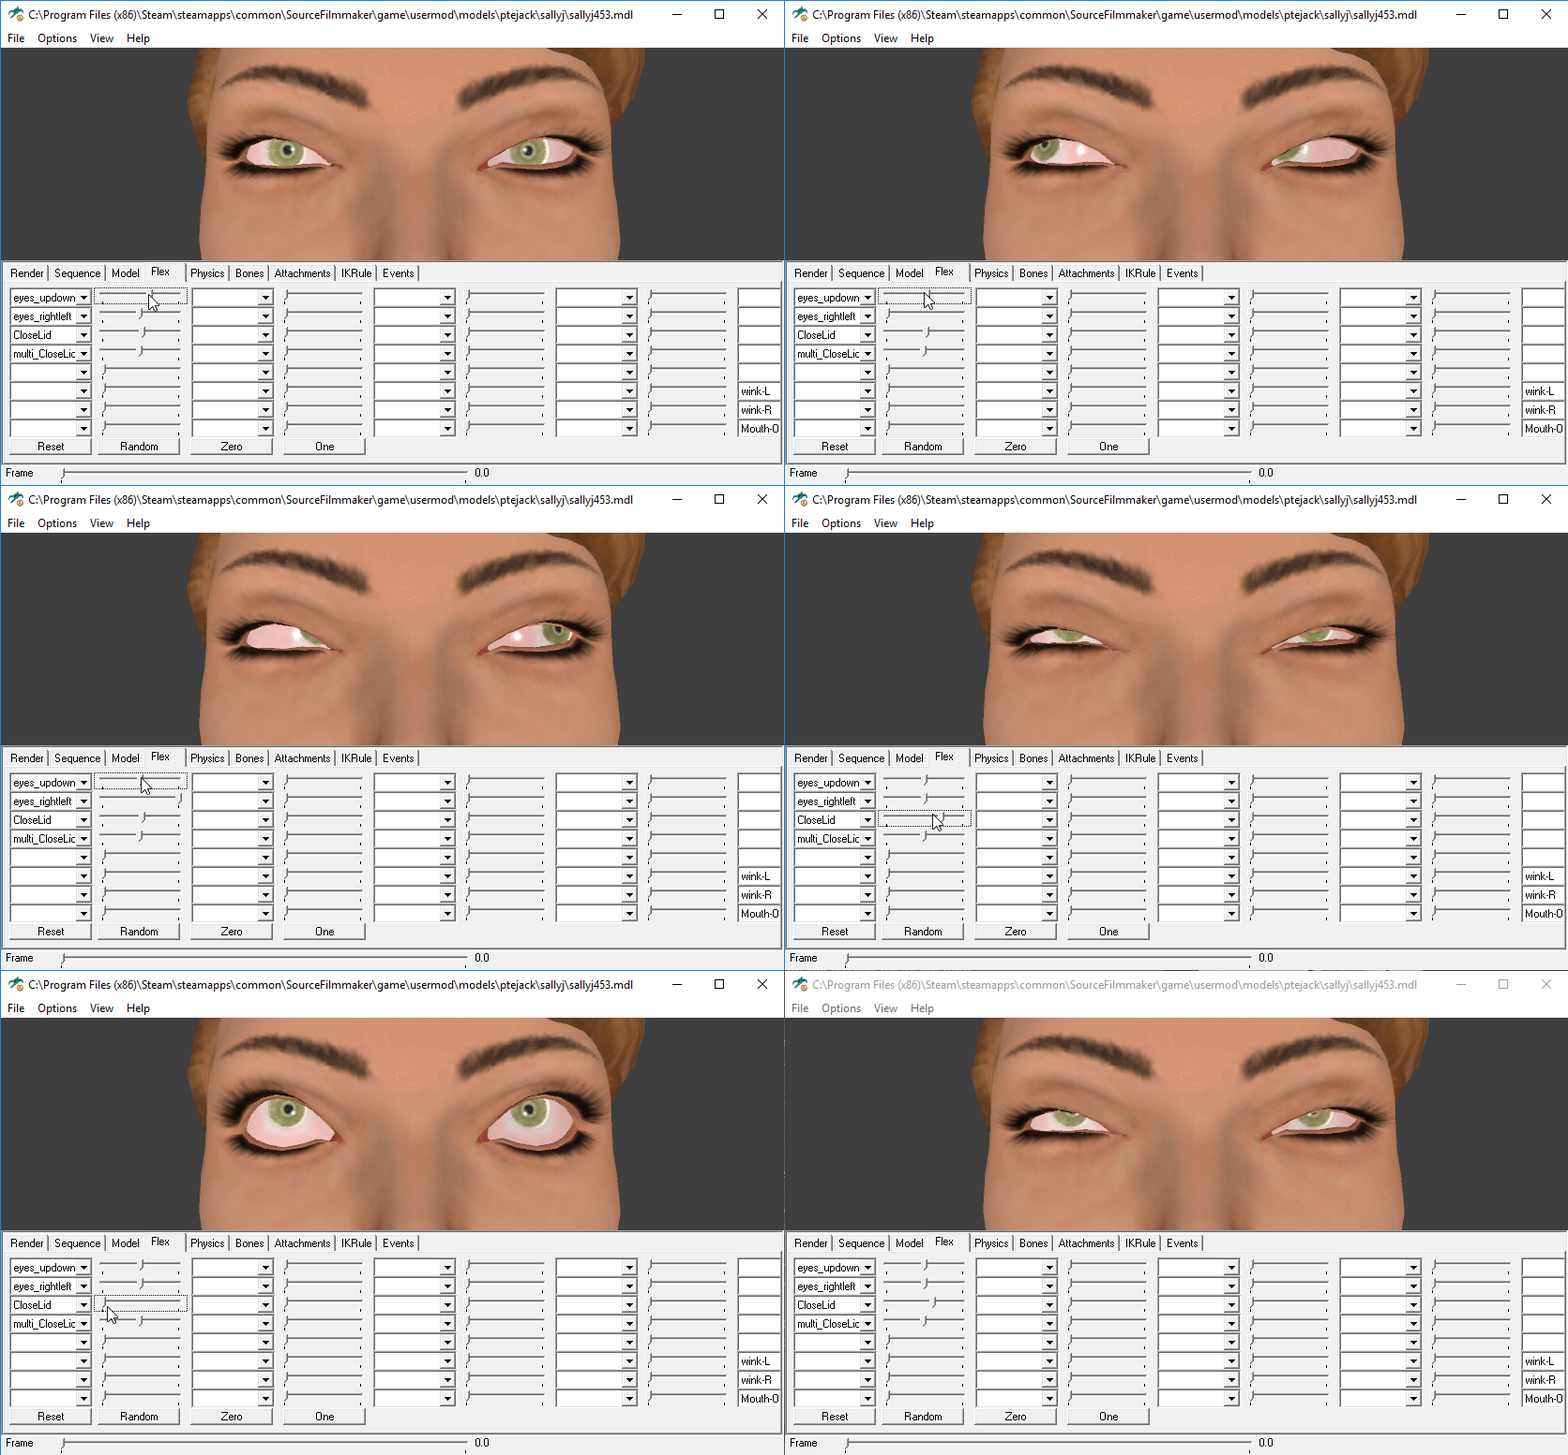
Shape Keys – Simple vs Advanced Flex Controls
Before I start, I want to say this…
!!EVERYTHING!! I have learned about creating Advanced Shape Keys I have learned from studying Revzin’s HWM documentation that he with his Elizabeth Source model files. So if you bump into him on the street and have learned anything from the following sections, THANK HIM!!
(Thanks Revzin!! Without your guide, I would not have a clue about this stuff!)
Now that you’ve seen one of the benefits of Advanced ShapeKeys in the Eyes section, Let’s get started in creating some.
The difference between Simple and Advanced ShapeKeys is like Night and Day. Using Simple ShapeKeys will give you exactlyly that, WYSIWYG (pronounced WizzyWig and means What You See Is What You Get). The name you give the Shapekey will be the name that is added to the model. ShapeKey names can not contain underscores (_) or BleST will think it is a Corrective Shape and will not produce it on your model at compile time. Simple shapes will not contain things like Stereo Controls for left/right, only the mesh assigned to the key will be affected. You can not combine different shapes without creating a new shape from mix.
Advanced ShapeKeys is what you need to be able to do those type of functions, but Advanced ShapeKeys require a bit of work in order to make them work.
Using Advanced shape keys will allow you to rename the Flex Controller (which can be renamed to include Special characters such as @#$^%& and underscores (if required)) so you can give your flexes meaningful names. You can combine shapes to produce split flexes so that your flexes can do left/right up/down in /out flexes and they allow you to to create Stereo controls so that you can apply the flex to one side or the other or in increments across the model.
So what is a Simple Flex control and what is an Advanced control.
Look here…
Simple Controls
Advanced Controls
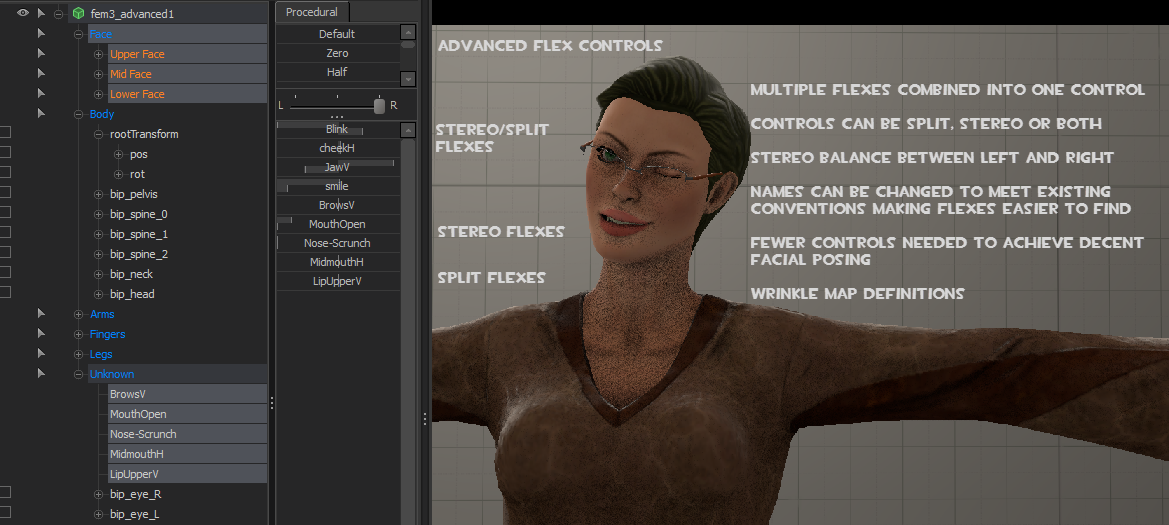
If your model has a winkle map, Advanced Shapekey is where you would apply the amount of Wrinkle the flex creates. This can not be accomplished using Simple Shapekeys.
When you export your model, and an object has shapekeys, you have to determine if you’re going to just use Simple keys or Advanced keys, you can’t use both on the same object. However, because the choice to use Advanced or Simple Shapekeys is Object based, if you have more than one object in your model that have Shapekeys, then one object can use Simple and the other Advanced.
If you’ve already worked through the Eye Section of this guide and have created Eyelids for your model, you’ve already touched on Advanced ShapeKeys. Now it’s time to get a little more “Advanced”.
I am only going to brush the basics of Advanced ShapeKeys. I will show how to rename Flexes, and create Split and Stereo controls. I’ll dust over Wrinkle map setting but will not be getting into Dominators and Suppressors. Also I will not be covering Corrective shapes. (These are topics that I still have to research and understand before I can comment on them. For example, there are 2 types of Corrective Shapes, Absolute and Relative. Absolute Corrective shapes are easy to work with, however Studiomdl prefers Relative Corrective Shape. At the present time and from what I’ve read so far, Absolute Corrective Shape need to be run through a python script to create the Relative Corrective shapes required. That is way beyond the scope of this document. If you want to investigate these shapes, I suggest you find a copy of the PDF document Revzin produced and included in his Elizabeth_Source models.)

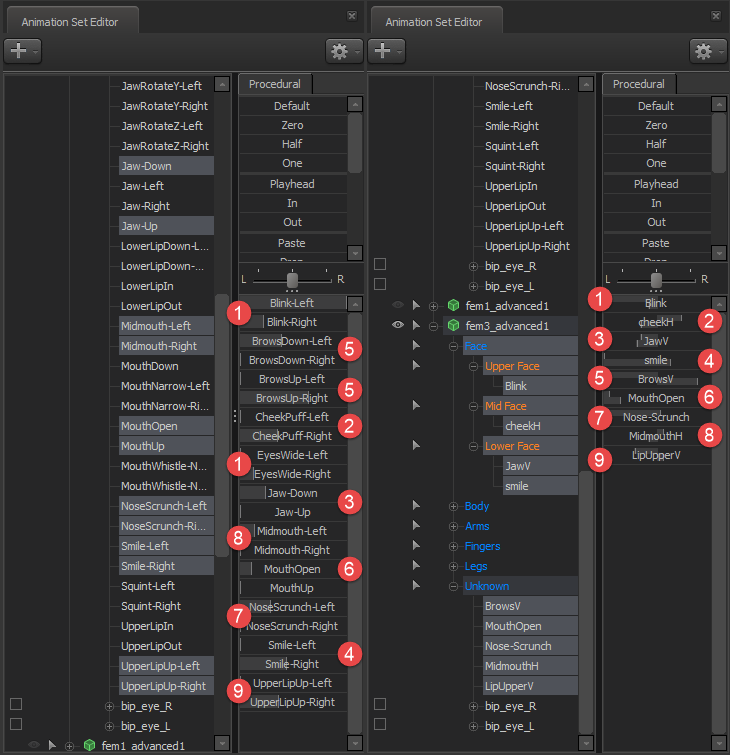
Advanced ShapeKeys – Setup
As I stated before, Advanced Shapekey require a bit of set up before they can be used. So, let’s get started.
I am going to use a FUSE model for this example, the reason why is that the SFM models that were produced prior to the move to ADobe provided a good set of BlendShape/ShapeKeys which means that I don’t have to design a model for this documentation, but the same process would be used on models you import from other sources or that you create yourself and want to have advanced controllers for.
The first thing I’m going to do is have a look at the various objects that make up my model.
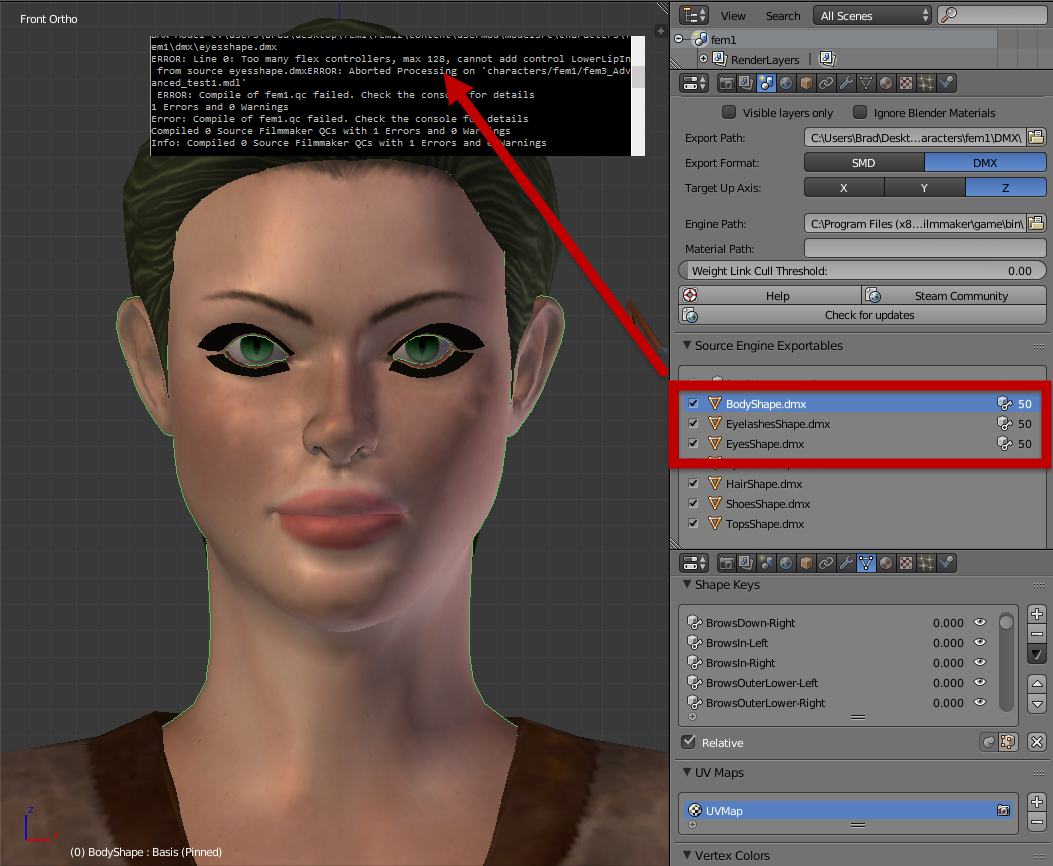
Further to this, if I step through the ShapeKeys of each object, I’m going to find that the names are all the same. This is not allowable on a single model. If I were able to compile this model, I would find that any shape on the main object (the head) that has the same name as any shape on the other objects will not work on the compiled model. The reason being that the model cannot tell what vertexes the flex has to move. SFM becomes confused, breaksdown and goes and sulks in a corner.
So to fix this I have 2 options.
Option 1:
- Walk through the ShapeKeys of all 3 objects and RENAME the shapes so they all have different names. (Changing the Case does not count as a different name)
- Delete Shapekeys until my total count is 128 or less…
OR
Option 2:
- Walk through the objects and inspect them to see if blending them into one object makes sense.
- Rename shapes that named the same that I don’t want to merge.
- Select the the objects (ensuring the one you want to be the master is the active object) and join the objects together into one. Blender will patch the shapekeys of the joined objects together and keep the vertices that are being moved by the same named shapes.
For example I have a shape called Blink-Left on all 3 objects, the shape key on the body object moves the left eyelid, the shape key on the eyelashes object moves the eyelashes and the shapekey on the eye object moves nothing. When I join the 3 objects together into 1, the Blink-Left shape key will move the eyelid and the lashes the same way as they did when they were separate objects.
In my case, I want everything to Blend together so Option 2 is the best bet for me. I join the 3 objects together, the shapekeys merge giving me proper shapes and I also reduce my ShapeKey count from 150 to 50… (see the pictures below…)
Separate Objects with Shapekeys of the Same Name
ShapeKeys after JoinNow that I have my shapes, I want to combine most of the Left/Right Up/Down shapes together (for example Blink-Left, Blink-Right, BrowDown-Left, BrowDown-Right, BrowUp-Left, BrowUp-Right, Smile-Left, Smile-Right, Etc) so I can create Stereo and Split Controls to operate them.
To do this what I have to do is Create New Shapes from Mixes in Object mode.
I go set the model into Object Mode, Select the Vertex Group Properties Panel, set the shapes I want to stereo and create a new shape from the mix… Like this
Once I have my new shapes completed, I can either delete the old shapes that I don’t need, OR if I want to keep them but not export them later, I can rename them and place an underscore ( _ ) in the name. This will make BleST think it’s a Corrective Shape and as long as the name on the left and right side of the underscore isn’t an actual shapekey name, it won’t be applied to anything.So in the case of Blink-Left and Blink-Right in the picture above, I would either delete those shapes or rename them to Blink_Left and Blink_Right.
However I would suggest deleting any unused shapes from the Blend file, the code and shapes from the changed names may still be written to the model, making the model filesize larger than it needs to be.
Ok, to keep this simple, I am only going to use 15 of the 50 ShapeKeys that I normally would. I have them setup now so that they move both sides of the face like I want them to. I could add more, or combine different shapes mixes and create new keys, but for this tutorial i think this is all I need.
Now that the shapes are setup the way we want, there’s one more thing to do before we start creating the advanced keys. The DMX Stereo Balance.The DMX Stereo Balance is the mechanism used to smooth out the in-between blend across the center axis of your flexes if you apply a stereo control. If you set this too tight to the center then your stereo flex is going to apply from the center point to the outer vertices of the the shape. Set it too loose then when you apply a left side flex, then the the flex could extend all the way across to the outer vertices of the right side of the flex.
As this can only be set for once for the entire set of shapes in the object, you have to determine if you really want to use a stereo control or actually make 2 separate shapes (0ne for the left side or one for the right side).
Go into the BleST Properties panel, select the object that contains the shapekeys you want to work with then select Advanced in the ShapeKey Flex Properties panel. The box will change giving you more options. The one we’e interested in right now is the Stereo Flex Balance tool (#3 in the picture.)
BleST gives you the option of how you can define the center point of the stereo control. Clicking the box that has the X displayedwill expand to a selection menu offering you X, Y, Z and Vertex Group. Depending on how your model is laid out on the axis, you would pick the axis that splits the left and right of your model. Once you determine the axis you want to use, you have to now set the sharpness that the flex is going to blend across the center point. The default is 90%, but I usually set the sharpness between 97 and 98.5% (this is one of those factors that you have to play and usually take a couple of compiles to get right.)
If your model is not symetric or your flexes are not relative to an axis, you can create a vertex group and weight paint the Stereo Balance.
A good example of this can be seen on the TF SDK_Content models.
The right side of the stereo influence is painted hot (Red, 100%), cooling off to the centerpoint, then turning 100% cold on the left side of the model. Like this.
With that, setup is now complete.One last word on the DMX Stereo Balance setup…
If you have Grouped your mesh objects into a group and you have multiple objects that have Shapekeys, when you press the Advanced button and the Stereo Flex Property panel opens you may see multiple Sharpness sliders. The sliders will appear for all mesh objects that have ShapeKeys. Like this…
Time to create the code that DMX coding that is required and needs to be edited in order to create the advanced flexes.(Sounds Scary!!! Blah-da-Blah)
Advanced Shape Keys – Creating the DMX Controller File and What the Elements Do
Those of you that are afraid of coding, STOP HERE and return to using simple flexes on your model… (LOL), but it really isn’t that hard, just time consuming depending on how many shapes you need to edit.
BleST is going to automatically generate the code, it will be a plain language text file, all you have to make some minor edits to it; and this can be done right in Blender!!!!
Here’s the process…
1. Split the work area screen
2. Open a Text Editor in the new area
3. Click on Generate Corrective Shape Key Drivers (For you who are more advanced than me and play with corrective shapes, this will create or update the Animation Drivers for your Shape Keys that are actually Corrective Shapes anytime you press the button, so you can play with the shape keys and not have to worry about manually updating drivers. Just press the button when your done and away you go. Be cautious if you are using Corrective shape, according to the BleST help information; “The algorithm for applying corrective shapes is not guaranteed to match Source’s, so always check your work in HLMV!”)
4. Click the Generate Controllers button. This will create a Blender “packed” or “linked” text file (meaning that the file will always be available to you in the Blender File after you save the Blender project. If you need to delete it, you have to “Unlink” it.
5. In the text editor panel, select the up/down arrows, and find the text entry that matches the filename in the Controller Source box in the BleST panel (Yellow arrow in the picture) and select it. (It will look like nothing happened so…)
6. Use the scroll bar of the Text Editor panel to scroll to the top of the page and
7. You should see the DMX Code that was generated by the process.
The code is going to look pretty confusing until you get use to it and if you created shapes for the eyelids the code for them will be here as well. (I did not create eyelids for this example as I just want to concentrate on the other flexes in this section, if you did, go back the the “These Eyes” section to see how they have to be set up.)
This is the code that is passed to the model as if you were to use Simple ShapeKeys, so if you were to export and compile the model at this point, that is all you would get, simple flexes. The code needs to be edited, elements joined together and switches toggled in order for it to create Advanced controllers. So, let’s look at the elements of a single shapekey to get a better understanding of what is being seen…
The DMX Header…
The Header identifies what the DMX code is for and where it’s coming from… (Nuff said on this, I’m not here to give a DMX coding lesson.)
The Controller properties definition
- DmeCombinationInputControl – All DMX elements have a DME type. The first line of this element identifies it as an Input Control type (A Flex Controller)
- The properties of the type are contained between curly brackets – { } (2nd and last lines of the code)
- elementid – EVERY element in a DMX code has a unique HEX type element ID. (3rd Line)
- A Name String – This is the name your flex is going to receive. It defaults to the name you gave the shapekey when you created it in Blender. This name can be changed to whatever you like and because it is a string value, it can contain key that are consider special or reserved keys, like _, *, &, %, #, @, etc.
- rawControlNames – This is the name (or names) of the ShapeKeys that make up the flex. Yes Names… This is how Split controls are created…
- Stereo – This is a boolean value, 0 is off and 1 is on. I wonder what we’re going to use this for hmmm? Yup, this identifies whether or not the flex can be controlled via a stereo control across the stereo balanced axis.
- eyelid – We saw this in the These Eyes section. This boolean value tells the flex if it controls the eyelids.
- flexMax – This Float value controls the maximum amount flex will move Default is 1.0 (or 100%)
- FlexMin – This Float value controls the minmum amount the flex will move to. Default is 0 (or 0%) As a side note, I have not had any luck setting this value to a negative value except in an eyelid control. I have to do more research on this.
- wrinkleScales – If you have wrinklemaps for your skins, this Float ARRAY value is where you set how much influence the flex on that wrinklemap. (Not covered in this document… well at least not yet.)
- Finally the comma. If the comma is present after the closing bracket, it means that this is a part of a series of controls of this type and that the next element will be another controller definition. If the compiler finds closing curly brackets after this and not another controller definition, the compiler will error out.
If the comma is not there, it means that this is the last of the series and the compiler will expect closing curly bracket for the group. If the compiler finds another controller definition and the element was not followed with a comma after closing, or is missing closing brackets where there should be some to close the DmeCombinationInputControl definition, the compiler will error out.
Now that the definitions are understood, it’s time to edit the controls so they’ll create split and stereo controls like those found on a Valve HWM or Player model.
Advanced Shape Keys – Edit DMX Controller Definitions and Create Advanced Flex Controllers – Pt1
Now for the magic….
Editing the DMX flex file is a heck of a lot easier than it was configuring the old VTA file. No more multi definitions, no more worrying if you need to define a flex controller or a flex pair, no more calculations, just some simple cut and pasting and turning toggles off or on.
Let’s take the first to Flex Controller Definitions from the file…
Now I know someone is going to ask, “Why do you call the first control “Blinky-Wink”?
Good question… and the answer is this… If I created eyelid controls like I do in the “These Eyes” section, the process automatically creates a flex control called “Blink”. For some reason, that Blink control doesn’t work in SFM. (Don’t know why, don’t ask…)
If I was to give “Blinky-Wink” the name “Blink” that would create 2 flex controls named Blink. As I already have stated, you can’t have 2 controls with the same name on a model, one will disappear, and the other (which may be visible on the compiled model) will not work. SFM is confused by the doubled flex control. So, I give my blink control the name “Blinky-Wink”. Why Wink in the name? Because I’m going to make it a stereo control so I can control the lids individually and not only be able to blink the eyes but be able to do a wink with each as well!… Hence, “Blinky-Wink”.
Simply change the “FlexName” porton of the “name” “string” “FlexName” property to whatever you want. Remeber it’s a string therefore anything goes (well within reason. I don’t know if something like •?((¯°·._.• þŁɨɲƙ¥-ώɨɲƙ •._.·°¯))؟• would work. SFM might not support that type of font.)
As I thought, Font is not supported, but this is the result of the compile using •?((¯°·._.• þŁɨɲƙ¥-ώɨɲƙ •._.·°¯))؟• as a control name.
Code sent through to the exporter and the compiler
result
And this is the result of sending the Japanese translation for Blinky-Wink through the compiler
But, note the different special characters produced in the flex names and the control still works as intended!!!
However, one of the things I try to do is maintain the naming conventions used on a Valve model. The reason why I do this is that the Flex will automatically be placed in the SFM Control groups because most of them are defined in the sfm_defaultanimationgroups.txt file. My flexes will be the pretty much the same as if I were using a Sniper, or any other TF class.
So, where can I find the names of the controls without having to load a class model in SFM and play with the controls there?
Another good question!!
If you have installed the Source SDK tool, the installation should have created a folder under the SteamAppsCommon Folder called SourceSDK_Content. Buried in that folder you’ll find various source file examples of Valve models in SMD and DMX Format. There is a folder called TF. In drill deeper and follow the path… commonsourcesdk_contenttfmodelsrcplayer{pick-a-class}partsdmx (Of course I’m going to use the Sniper so my path would be commonsourcesdk_contenttfmodelsrcplayersniperpartsdmx).
Locate the morphs_high dmx file of the class you selected, Right Click on it and select Open With then select a Text editor like Notepad or Notepad++. You should find that the file opens as a pure text DMX file, similar to the one you’re working with in Blender.
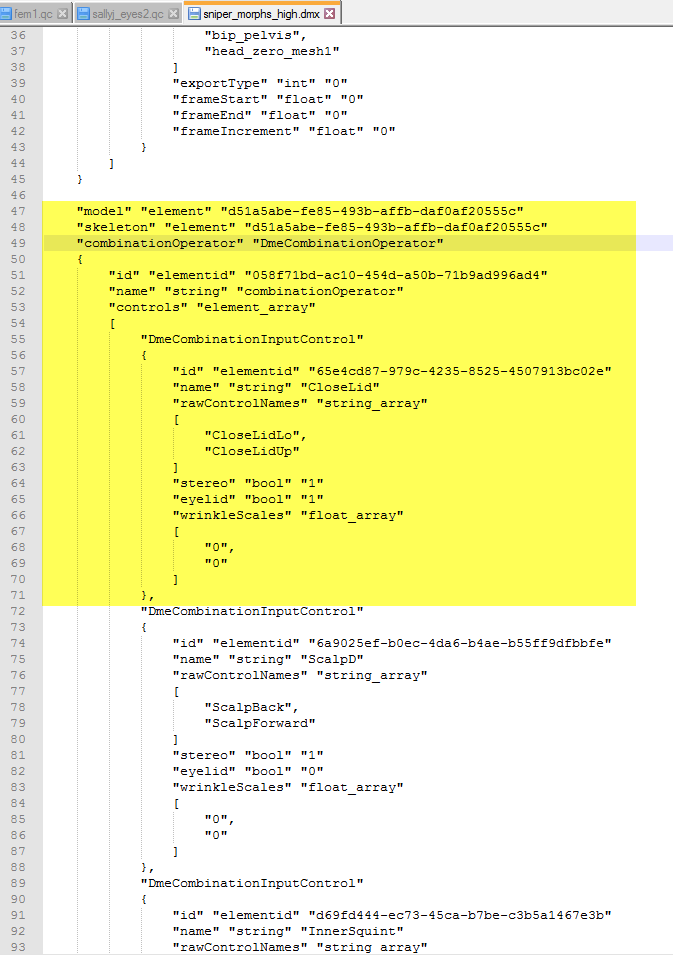
Not only will you find the names for the flexes, but you can see how Valve sets up the model. (Which controls are Stereo controls, what flexes are combined together to create split controls and what controls work the wrinklemaps and the values used for them.)
You may notice that the Max and Min Flex controls aren’t in the DMX control definitions of the Valve Model. This is because they use the default Min 0 and Max 1 default settings.
See the “stereo” “bool” “0” property in the shape definition?
Change the bool value from 0 to a 1 and done. It’s just that simple.
So to make Blinky-Wink stereo all I have to do is send the following code to the exporter…
This will result in the Blinky-Wink flex control reacting to the Left-Right control at the top of the Flex control manipulator in SFM. I can now Blink both eyes when the L/R controller is centered and I move the flex slider, or wink each eye, one at a time by moving the L/R slider to the extremes and moving the flex slider, or I can dial in an offset on the L/R Slider and have the eyes close at the same time at a different rate of closure.
Doh Too much code copied, I’m out of space for this section. Continued in the next.
Advanced Shape Keys – Edit DMX Controller Definitions and Create Advanced Flex Controllers – Pt2
So I have two shapes defined and in the Controller DMX file, “Blinky-Wink”, which closes both eyes, and “eye-Wide” which opens the eyes just a little bit wider. I really want to create a control that will close the eyes if I move the flex slider to the right and open them wider if I move the slider to the left.
Here’s the original code, we’ve already seen it in Pt1.
To combine these controls it’s a simple matter of cutting out the rawControlNames string array from one and pasting it into the other then adding the wrinkleScale for the pasted control. BUT, it has to be done in a certain way and a certain order.
Just like this…
Now from what I understand, you can add as many shapes as you want/need to a Multi-Shape combination however, when I try to add anymore than 3, I end up with an “list index out of range” export error from BleST, so 3 may actually be the actual limit, but I could be wrong and just haven’t figured it out yet.
Now, if you add more than 2 shapes to a control, a second controller will be added to the model. This controller will be named multi-{mainShapeName} (where mainShapeName will be the name you give the controller in the “name” “string” “{name}” of the shape) and will be used to blend between the shapes you’ve defined when you use the model in SFM.
The way I see this working is it appears that the position of the Multi slider determines which shape is going to be applied when you use the main slider.
For example, when you move the multi-{flexname} to the left and apply the flex slider, the first shape defined in the control is applied.
With the Multi slider in the center and you move the main flex slider, the second flex is applied.
With the multi slider to the right and the main flex applied, the 3rd shape defined is applied.
Then there’s the mix between the 3 shapes as you move the multi left or right.
The main slider controls the strength of the flex and is the one that support stereo flexes if the control is a stereo control.
An example of more than 2 shapes being used on a control is the Smile used by the TF2 sniper. The controller code, the flex sliders and the shape made using them look like this…
Let’s give this a try on the model I’m working on Here I’ll combine the Blinky-Wink, Eyes-wide and the smile shapes and I’ve made it a stereo type controller.
After compile this is what I get…
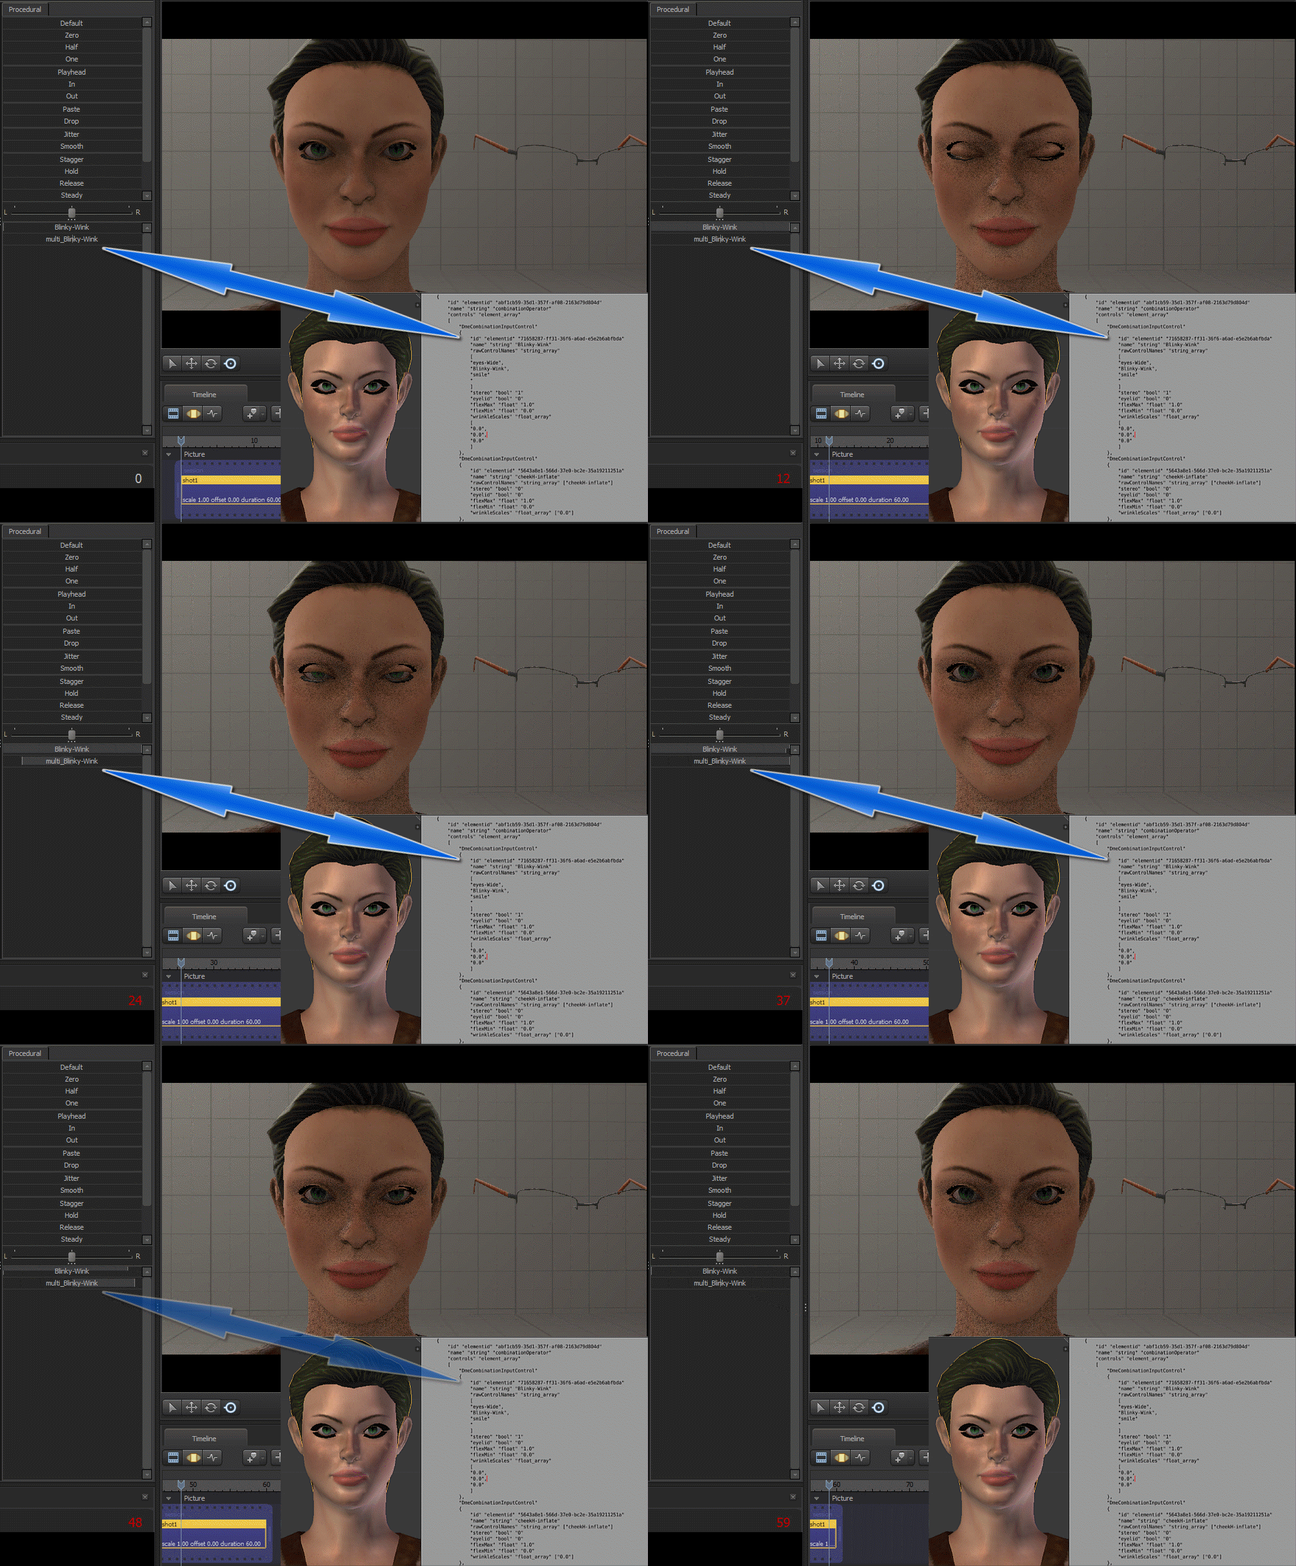
Now, I’ve tried this a few times and as you’ve seen I have gotten it to work, however, some of the models that I’ve tried this on CRASH SFM immediately without warning, yet they display and work perfectly fine in the HalfLife Model Viewer. It may be because I’ve tried to use one specific shape on multiple controllers or it’s just that SFM doesn’t understand the model, I don’t know. Eventually I’ll get this figured out, but, you’ll never know unless you experiment.
Advanced Shape Keys – The DMX Footer and Adding New Shapes
There is very little information available on the DMX format. When I google looking for information to investigate a property or control, most information found is on Electrical DMX (Digital Multiplex) Lighting. Other than the information that Revzin has provided in his documentation, the only real information I find on the DMX file format is in the Valve Developer Wiki (found here… [link] .)
If you scroll to the bottom of the DMX Controller file, you’re going to find the following…
A closing square bracket ( ] ) which closes the DmeCombinationInputControl elements
then the following control values…
“controlValues” which are vector3 arrays and (appears to be used to determine the Shapes’ rest position)
“controlValuesLagged” which are also vector3 arrays (unknown)
“usesLaggedValues” which is a Boolean value (if toggled between 0 and 1, would switch between using the controlValues and the controlValuesLagged)
“dominators” which are element array Strings (Dominates or suppresses shapes when certain shapes are applied (together))
“targets” which are also element array Strings (unknown)
Followed by 2 closing curly brackets ( } ) which close off the combinationOperator element and the finally the DmeElement definition.
When the Controller DMX is generated by BleST, BleST does the work for you by assigning default values to these controls/properties.
Each and every controller has a controlValues and a controlValuesLagged vector3 entry. Each vector3 array is defaulted to “0.0 0.0 0.5”.
The usesLaggedValues is defaulted to 0 (which means off or false)
The dominators and targets element array values are defaulted to nullstring arrays.
It is best to leave these elements alone, unless you know what you’re doing. Changes CAN cause a model to crash SFM immediately and without warning if they are incomplete or wrong and you attempt to load the model.
Ok. that was the warning!! Now for a real life more advanced situation.
You have just finished your model with over 100 shapes and it’s a really really excellent model. You’ve just spent an hour going through and finished editing the embedded Controller DMX file (named flex_{meshObj}) defining all the simple, combined and stereo controls you need.
You export the model and compile it, load it up in SFM and find that you somehow forgot to include a mouthopen flex, (or you used the mouthopen flex in a combination and didn’t create a separate shape to open it) so now the lips stay pressed together and moving all the flexes doesn’t open the mouth at all, but every other flex controller works perfectly.
You come back to your model in Blender, find the open mouth flex and create a new shape from the mix. HOWEVER, your current DMX controller file doesn’t know this new shape exists. So you press the Generate Controllers button again and BleST compilies and generates a new (embedded) file and tells you the the controller file for your model is now flex_{meshobject}.001 and places that value in the Controller Source box.
You switch to the text editor and open the new file and (DOH!!!) find that you are back at square 1, all the shapes are defined as simple, one shape per element, mono definitions.
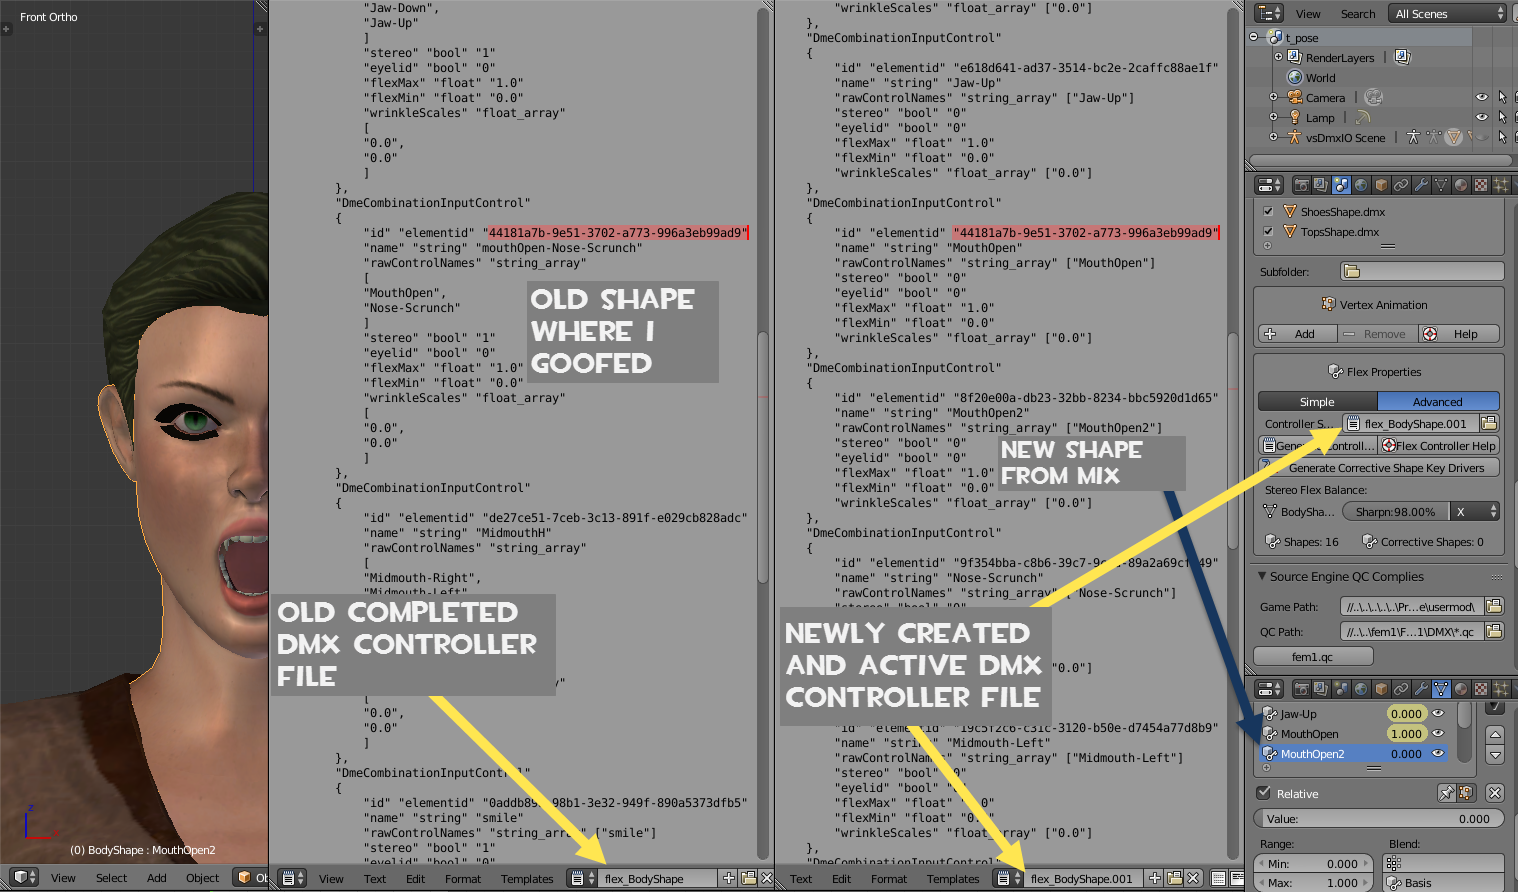
Ok, you have 4 options, all involve manually updating one or the other DMX file.
Option1:
- Take the time and redo the entire new controller file, redefining the shapes.
Option 2:
- Split the work area and load another text editor in the new screen.
- Open the old dmx controller definition file in the new screen.
- In the new Definition File, find the new controller definition(s) in the new file and make sure you remember where they are
- delete the other controller definitions ensuring you DON’T delete the new controller definition(s), the Header or the Footer
- Go to the Old definition file and copy the definitions from that file (They all work perfectly right?)
- paste them into the new file. (In the proper element location between the header and the footer)
- check the last line of the definitions to ensure that last line all definitions except the last one end with the continuation curly bracket and comma and the last definition ends with just the curly closing bracket.
- re-export the the mesh object, recompile, then test the model.
Everything should work properly because the required number of 3vector values in the footer were generated when you created the new file.
Option 3:
The reverse of option 2.
- copy and paste the new definition(s) from the new controller DMX
- paste them into the old definition screen.
- if you paste them at the bottom of the definitions, check the last line of the definitions to ensure that last line all definitions except the last definition end with the continuation curly bracket and comma and the last definition ends with just the curly closing bracket.
- for each each new definition added, add the default 3Vector value ( “0.0 0.0 0.5”, ) to the controlValues and the controlValuesLagged footer elements.
- change the name in the BleST Control Sources field to the name of the DMX Controller file you edited
- re-export the the mesh object, recompile, then test the model.
If you did it correctly everything should work as intended including your new flex.
Option 4: (The option I usually use…)
Manually add the new shape to the old Controller DMX, manually creating ALL the code required.
This is not really that hard to do.
- go to the last shape definition and copy all the elements from the opening “DmeCombinationInputControl” to the closing square bracket completely
- add a comma after the closing square bracket of the last definition and press the enter key to create a new line
- paste what you copied
- now we need a new and unique elementid but how do we create one? We can create one by using the Python Console in Blender using 2 simple Python commands.
- Spit the work area and open the Python Console in the new screen
- on the command line type
import uuid and press enter
then type
uuid.uuid4() and press enter again

–
–
–
–
–
- copy and paste the new code into the pasted controller “id” “elementid” value, replacing the old value. (This has to be done for each new control added.)
- now it’s just a matter of changing the other values to match the new shape and add a comma to the closing curly bracket of the definition if another is going to follow it
- for each each new definition added, add the default 3Vector value ( “0.0 0.0 0.5”, ) to the controlValues and the controlValuesLagged footer elements.
- change the name in the BleST Control Sources field to the name of the DMX Controller file you edited
- re-export the the mesh object, recompile, then test the model.
Done…
A Few Playlist References
As a warning, I do my ALL my videos in a manner so that they are easy for a new user to follow and over emphasize steps. I also throw errors into the mix and make it look as if I am having a hard time with them to show problem solving techniques.
Those who have more advanced skills using Blender may find them rather draggy and repetative. To these people who view my videos, keep the above in mind. The repetition and slow pace is intended, so don’t criticize that. Just flip through the video and find what it is you’re having problems with.
(If you know of a quicker method to do something that I am doing in a video, SHARE your method in the comments area of the video, show off your skills and help the rest of us learn!)
Decompiling, Editing and Recompiling Valve Models
12 Videos Covering
Decompiling using Crowbar, Editing the model in Blender, Adding new textures/UV Layout, Writing the QC, Export using Blender Source Tools, Recompiling the Model.
Rigging an Airplane
7 Videos Covering
Rigging the various control surfaces (Propellor, Rudder, Elevator, Ailerons, Flaps and Landing Gear), Baking Blender Textures into usable Textures, Export using Blender Source Tools, Writing the QC, Compiling using Blender, Rigging a more complex aircraft downloaded from a website.
Creating a Simple Model In Blender for Use in SFM (The Complete Process)
18 Videos Covering
Using reference pictures for modelling, Using Mirror and Solidify modifiers as modelling aids, Fixing textures that don’t conform to the “Power of 2” base required for Valve materials, Adding an Armature (Bones), Creating an Animation for use as a Sequence in the model, UV Mapping using the Project from View unwrap method, Texturing, BodyGroups for changeable items like hats, TextureGroups for Multiple Skins, Creating Hit Boxes using the HalfLife Model Viewer (HLMV), Export using Blender Source Tools, QC writing, Compiling using both Blender and Crowbar as the GUI to studiomdl and problem solving.
Half-life1 and Goldsrc Models to SFM
5 Videos Covering
The Decompile process for getting the original HalfLife, TF Classic and Counter Strike ver1.6 Gold Source models using Crowbar, Fixing materials that do not conform to the “Power of 2” base required for Valve models in SFM, Export using Blender Source Tools, QC Writing, Compiling using Blender.
Combining Multiple Textures Into One
A lot of models that come from other sources have materials that have been spread across multiple textures or the texture itself is not to the power of 2.
It is possible to resize the canvas of a texture or reduce the texture (and material) counts by combining the textures into fewer textures. If you decide to go this route, remember that if you reduce the resolution of the texture then it will show up on the model burred. Also remember that Valve materials must be to the power of 2, (meaning the widthxheight combination must be 32, 64, 128, 256, 512, 1024, 2048, etc) so if you start combining textures the end result must be to the power of 2. Just scaling a texture to the power of 2 will cause texture warping on the model. Instead of scaling, the canvas should be resized and the UVs moved to match the new match the new location of the requires texture part.
This video shows how to combine textures and fix the the UVs. The same process would be used if you are just resizing a texture.
[link]Todo List – Where Do We Start and What to Demonstrate (WIP)
Last Update – 22 March 2018 14:24 pm (MT)
Each model type has its own unique things that need to be tweaked and fixed. The hard part I have now is deciding which to tackle first!
In Progress – I think this guide is pretty much done now. If you have a topic I haven’t covered and think it should be a part of the guide, let me know in the comments section.
Possible updates coming – Crowbar and the new options added
This is ALWAY In Progress (as a section is developed) – Writing the QC, and Compiling – three simples done… more complex to come (To be covered in each section)
[link]
(In case you want to jump ahead before I get to a section.)
TODO –
MikuiMiku Dance (MMD) Models (PMD/PMX Imports) – Import a Model – Resources – Requires looking at DMX file, Japanese conversion using DMXCovert to to create text variant of the Model DMX so bones names can be changed in a Text editor, Tweaking the MMD Model – Subtraction/additon of bones (spine??) – bone Weighting , flex eyes vs boned eyes, Shape Keys (Simple vs Advanced), Why DMX is better than SMD, “Blender Implicit” Bones… – done
Tweaking the XNA Model – Pulling a model – Resources – Scale, Fixing bones and normals, leave flexes for the shapekeys section and eyeballs for the eyeball section, Probably the easiest to get ready ***Permission granted, resuming – Waiting permission to use Ralph from Jhoney *** – done
– Decompile using Crowbar (limitations) – – done
– Valve Models to Blender – done
– Anatomy of a Model – – done
Programs Required – done
[link]
[link]
Nem’s Tools Archive [link]
[link]
[link]
[link]
[link]
[link]
[link]
optional
[link]
Model Sources – done
Blender importable Formats – done
Into to Cowbar – done
[link]
Getting a model into Blender and paint it – done
Create and port a model, setting BST to export and compile – done
Various model types in Blender and some of the problems to be covered – done
Props and Hats – Basics -Your own models with boning from creation to compile – done
A Matter of Scale – Scaling reference of various base model types – done
Rigging and Tweaking the OBJ Model – Adding a skeleton, adding more bones, Weight painting (OhBoy) , Weight Limiting, Scaling, – done
Body Groups, Texture Groups – done
[link]
Animation Sequences/Models (With Blender) – done
[link]
Flexes (with ShapeKeys) – done
EyeBalls – done
[link] , [link] , [link] , [link]
EyeLids (DMX Eports only) – done
Jiggle Bones – done
Advanced ShapeKey Flexes – done
Lastly –
Enjoy Your Model in SFM – getting there!!!
Currently being developed
The section below contains the section(s) I’m currently working on

