
Overview
Ultrakill demands a lot of mechanical skill and movement from the player in order to receive high ranks in addition to just beating its bosses normally, here is a bunch of things you should know about Ultrakill before you go head long into danger.
Introduction
Last year we were hit with quite a big indie gem with the early access release of ULTRAKILL on Steam, a fast-paced cuhrayzee FPS that got a lot of attention from both fans of classic shooters and action games alike. Since it’s in early access, the game currently features its first act along with 3 secret missions and 1 special mission unlocked by getting P-ranks (perfect ranks). Despite this, the game is still a blast to get into now and hopefully this (in-progress) guide can help more players absorb more blood for fuel and get those P-ranks.

The Basics – V1 and Movement
ULTRAKILL introduces a number of basic elements in the form of on-screen tool tips whenever their first use is reached. We will recap V1’s attributes and movement with more detail in this section.
OUR HERO?
V1 is a machine that took part in a war that left humanity extinct. His primary directive is obtain blood as it is his only known source of fuel to stay alive. Without humanity to harvest from, V1 enters the Inferno itself in search of blood.

ATTRIBUTES
DAMAGE_SYSTEM
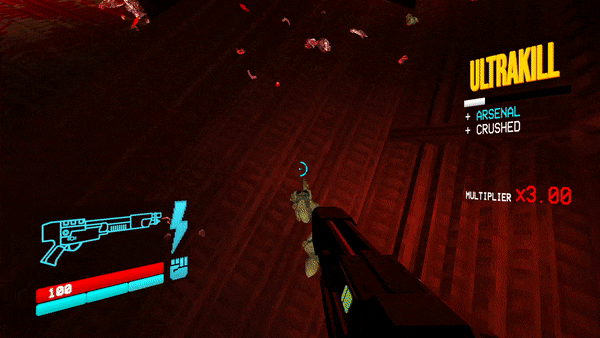
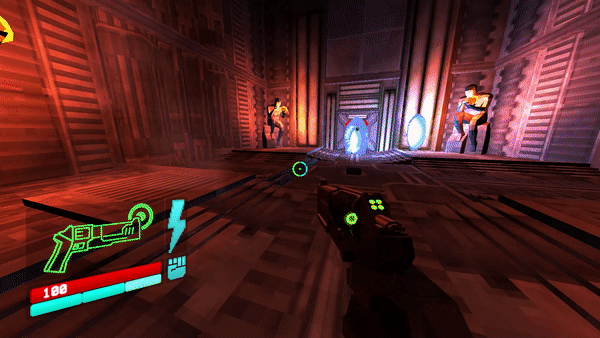
On the HUD, V1 has 100 health, but in reality its more like “10.0.” ULTRAKILL’s damage system is a basic system, where the lowest value is 0.1. V1’s health is effectively a 10x representation of this system. This guide will use numbers formatted as “N.N” to refer to weapon damage and enemy health and use “NN” to refer to V1’s health and enemy damage.

BLOOD_IS_FUEL
V1’s only means of recovering health is to damage enemies at very close range. This will douse him in fresh blood, restoring health proportional to the amount of damage dealt and his current missing health. V1 will recover more health when he is low and less when near max. Enemies that are covered in sand do not bleed, but parrying an attack from one will still heal you.

SOFT_DAMAGE
When V1 is hit by an attack, it will directly subtract from his current health. In Normal mode, most attacks deal 25 damage, though suffering multiple hits at once will diminish the subsequent damage taken. V1 dies if his health reaches 0, forcing a restart at the last checkpoint.

HARD_DAMAGE
When V1 is hit by attacks continuously, his maximum health will begin to decrease. This starts on the first instance of damage and quickly increases as more damage is taken. This system is to prevent players from abusing the blood mechanic and ignore dodging. Hard Damage can be recovered by not taking any damage for a long enough period of time. Certain attacks, such as the sand explosion from a Stalker, rapidly increase the hard damage amount.

RED_SOUL_ORBS
Some levels contain a red soul orb in its hidden secrets. In addition to granting the point bonus, it will grant an overcharge of 200 health, this overcharge cannot be maintained with blood nor does it carry over between levels.

STAMINA
V1 has a handful of actions that can only be performed when he has enough stamina. V1 has 3 Stamina and it constantly regenerates at a rate of around 0.5/s.

WASD
V1’s basic movement speed is certainly above average when compared to other shooters, but it isn’t necessarily his fastest movement when purely travelling a level. Moving is often combined with jumping as it allows you to avoid many attacks that have no vertical aiming. V1 will move much faster if you are playing the second difficulty of a mode (Lenient, Violent, UKMD) due to the increased game speed.

SPACE
JUMP
V1’s basic jump is very high, compensating for the inability to double jump. Many secrets can be found and obstacles can be cleared in a single jump or using the wall jump.

WALL_JUMP
V1 is capable of 3 wall jumps, allowing him greater vertical range. Many secrets will require some use of wall jump. There is an audio cue to alert the player when all 3 jumps have been used.

WALL_CLING
When moving against a wall without jumping, V1 will cling to it. This causes him to scrape against the metal and descend much more slowly than normal. The speed of the cling will gradually increase the longer you hold on. Use this to survey an arena or look to where to jump next.

ENEMY_STEP
When jumping off an enemy, either directly or with the Whiplash, the amount of wall jumps and wall cling weight are reset. Use this effect to extend your recovery or retreat when dealing with large encounters.

LEFT_CONTROL
SLIDE
Holding the button while on the ground will cause V1 to slide. While sliding: the position V1 is facing is locked and he cannot turn, his height is drastically lowered, his speed increases to a degree higher than his standard movement speed, he will pass through enemies, and stamina generation is paused. Sliding is similar to other shooters’ sprint, but here there are more limitations that prevent constant use.

GROUND_SLAM
Pressing the button while in the air will cause V1 to ground slam. This inflicts a forced downward momentum onto V1, rapidly descending toward the floor (or bottomless pit). Enemies directly below V1 take at least 0.5 damage as it will kill Filth in one blow.

SHOCKWAVE
Holding the button while in the air will cause V1 to perform a shockwave. In addition to being a ground slam, surrounding enemies that are light will be launched into the air and become helpless. This action costs 2 Stamina.
LEFT_SHIFT
Pressing the button will cause V1 to DASH. Dashing is an incredibly important defensive tool that briefly makes V1 invulnerable while instantly moving a short distance in the direction you are currently moving, or if you’re not moving then you move in whatever direction you are currently facing. Dashing can also be used to quickly cross short distances or gaps. This action costs 1 Stamina.

DASH_JUMP
Jumping during a dash will trigger a dash jump. This will launch V1 a very far distance forward and can be useful for fast movement or clearing large gaps. This action costs 2 Stamina despite dashing only costing 1 normally.

The Basics – Arms and Weapons
ULTRAKILL introduces a number of basic elements in the form of on-screen tooltips whenever their first use is reached. We will recap V1’s arms and weapons with greater detail in this section.
Feedbacker
V1’s default arm. Its punch only deals 1.0 damage, but is capable of parrying a great depth of attacks as well as perform other similar interactions. Punching a weak point will increase the damage to 3.0.

Knuckleblaster
Obtained in 1-4. Its punch deals 2.5 damage and inflicts heavy knockback on most enemies. Holding the button will cause a blast, dealing 1.0 damage in area in front of V1. This can be used to easily clear groups of Filth or stagger enemies to preventing them from attacking.

Whiplash
Obtained in 4-4. This permanently unlocks a new functionality for V1, a grapple hook. The grapple can be used to pull light enemies toward V1 or to reel V1 towards heavy enemies to quickly close the distance. The hook will only attach to living enemies, corpses, or special green crystals. Sticking an enemy on the ground will cause 0.2 damage or 0.3 if it is airborne, and the chain will break when using your main arm’s punch. Additionally, the chain can be used to pick up and place down key items such as skulls.


Revolver
Piercer
V1’s first weapon, obtained in 0-1. This hitscan attack deals 1.0 base damage and can deal more damage when hitting a limb or headshot. The alternate fire charges a beam attack that will strike up to 3 targets, dealing 3.0 base damage. The piercing beam will hit the same target multiple times if it is the only target hit. The piercing shot has a cooldown of around 2.4 seconds.

Marksman
Purchasable for 7,500P. Alternate fire will toss a coin: this coin can be interacted with in many ways, with the most common being shooting the coin with the revolver. Shooting coins will covert the attack into a RICOSHOT that will automatically target an enemy weakpoint or chain to another coin, with each chain increasing the damage by 2.0. RICOSHOTs can also become splitshots when shot at the right time, hitting two enemies at once rather than only one. The coins gain one charge every 4 seconds, up to 4 max.


Alternate
Obtained in 1-4 after all hidden slabs found in Limbo have been activated. The alternate revolver changes the primary fire from a fast weak attack to a much slower more powerful attack that can strike up to 2 targets. The primary fire now deals a flat 2.5 damage instead of 1.0 with location-based damage modifers. The variants are also affected: Piercer deals more damage and can now hit up to 6 targets, while Marksman cannot perform a splitshot from its RICOSHOT. There is also an internal cooldown for the the primary fire as attempting to cancel the hammer knocking animation will cause a penalty animation to be played instead.

Shotgun
Core Ejector
Obtained in 0-3, or 0-2 from the Secret Encounter. This break-action sawed-off energy based double barrel deals a massive 3.0 damage when all pellets connect. The alternate fire launches a grenade that deals splash damage and sets targets on fire, with targets near the epicenter taking the most damage and knockback. Being a projectile, it will be dodged by the Streetcleaners and the grenade will be deflected. On smaller targets, it will pierce through them letting you cut through scores of Filth and Strays.


Pump Charge
Purchasable for 12,500P. Primary fire is now slightly faster being a pump rather than sawed off, but total max damage is decreased to 2.5. The alternate fire now charges the shot up to 4 times. Each charge increases the damage and amount of pellets fires: 2 charges is 4.0 damage, 3 charges is 6.0 damage. The 4th charge increases the damage to 10.0, but at a cost; instead of firing pellets, it just explodes. This deals 50 damage to V1 and the explosion deals 10 damage to anything it hits. It also causes a great amount of knockback which is useful for clearing gaps or returning to the arena in Cyber Grind.

Nailgun
Attractor
Obtained in 1-1. The nailgun is a rapid fire automatic projectile spewer that showers the area in nails. The DPS is around 4.5, making it very effective against big kills like the Malicious Face. There is a limit however, it has an ammo count of 100 and it regenerates when not being used. It takes about 30 seconds for all 100 nails to regenerate. The alternate fire launches a magnet that nails will swarm toward, they can also be attached to enemies though it will cause the swarming nails to deal less damage. The magnets themselves can only hold so many nails, when they reach their limit it will explode. This blasts the nails all over the place dealing each nail’s individual damage, a +NAILBOMB if you will. Magnets have 3 charges that replenish over time.


Overheat
Purchasable for 25,000P. This nailgun removes the limited ammo count, but instead builds heat as it is fired. When it reaches max heat the fire rate will be reduced and the only way to remove the heat is to either stop firing or use the alternate fire. The alternate fire rapidly blasts out up to 57 nails based on the current heat amount while expending 1 heatsink. The overheat blast deals up to 12 damage, making it extremely useful for dealing burst damage to big kills. Once all heatsinks are expended, the fire rate is reduced to the point where it is unusable and at least 1 heatsink will need to recharge to restore the fire rate. Heatsinks take 8 seconds to recharge, up to 2 max.


Railcannon
Electric
Obtained in 2-2. The Railcannon is the big ♥♥♥♥ off gun of ULTRAKILL. This hitscan attack deals a mighty 8 damage and has unlimited pierce. Unlike other weapons, the railcannon has a fixed cooldown, taking 16 seconds to recharge before being usable again. This cooldown is shared between all variants.

Screwdriver
Purchasable for 100,000P. This variant fires off a drill that will stick into enemies. It deals a strong 10.25 damage and the drill will cause the foe to continuously spill blood in a larger area that will restore more health than normal. Useful for low mobility targets, especially bosses.

Malicious
Purchasable for 100,000P. This variant is a hitscan like the Electric, but deals 1 less damage. Instead of having unlimited pierce, it will instead create a big explosion on impact. Useful for blasting a group of projectile flinging foes.

The Basics – Parry and Attack Types
ULTRAKILL introduces a number of basic elements in the form of on-screen tooltips whenever their first use is reached. We will recap the Parry mechanic and different Attack Types in this section.
Introduced in 0-1, the Parry mechanic is a vital component to ULTRAKILL’s combat that can save V1 from certain defeat by turning the attacks of his foes against them in a variety of unique and powerful ways. Parrying an attack will add 5 damage and deflect it, while also fully restoring V1’s health up to the hard damage limit. However, the game also teaches the player that there are times where trying for a parry is inappropriate or not optimal.
Feedbacker
The most common and consistent way to Parry, accomplished by punching at the correct time. It is capable of nearly every form of parry, from reversing melee attacks to deflecting projectiles. The timing for projectiles is a window before the projectile would hit V1, while melee attacks from enemies are mainly indicated by a “blip” sound effect accompanied by a yellow spark particle.

Shotgun
Any shotgun is also capable of Parrying melee attacks, accomplished by using the primary fire at the correct time. The timing is more strict for this type of parry, and you are unable to deflect projectiles.

+INTERRUPTION
Any hitscan attack can perform an interruption effect by shooting the enemy’s projectile before they fire it. This causes the projectile to explode, killing the attacker and damaging any foes around them.

+INSTAKILL
Currently can only be performed on Streetcleaners. By precisely shooting or using a proper RICOSHOT on the gas canister at the backside of Streetcleaners, they will explode and will be instantly killed while damaging any foes around them.
Melee
Melee attacks are close range strikes that can be easily parried by using the Feedbacker or Shotgun before the attack hits or when indicated by the blip and yellow spark. The most common foe that uses melee is the Filth. Melee is also commonly favored by bosses like Swordsmachine and Gabriel. Parrying a melee attack will reverse the attack, add 5 damage, and heal V1.
Projectiles
There are a handful of enemies that use small and fast moving projectiles that are difficult to parry. Examples include the shotgun pellets from Swordsmachine and V2, but also includes the Orb held by Cerberus or the Hideous Mass’ harpoon. When Drones die, they turn themselves into a projectile and begin to fly toward V1. The Feedbacker is the only way to parry these attacks.
Parrying these attacks will deflect them in whatever direction you are facing, add 5 damage, cause them to become explosive, and heal V1.

Hell Energy
Hell Energy is the most common attack V1 will encounter, used by all Husks as well as other enemies like the Drone and the Mindflayer. These projectiles can also have a homing effect, locking on and automatically tracking V1. There is special form of Hell Energy used by Hideous Mass and the Very Cancerous Rodent, which is an explosive mortar type. The Feedbacker can both deflect and cancel Hell Energy, Shotguns can cancel Hell Energy, and it can trigger an Interruption effect when the projectile is hit with a hitscan attack before being launched. The Knuckleblaster can also be used to knock away homing Hell Energy, but not the mortars.
Parrying Hell Energy will deflect it in whatever direction you are facing, add 5 damage, cause it to become explosive, and heal V1. Melee parries will reverse the attack, add 5 damage, and heal V1.


Hitscan
A few enemies use a special hitscan attack that can only be parried at the moment before they initiate the attack, indicated by the blip and yellow spark. These attacks will instantly strike wherever they are being aimed at. The most common hitscan attacks are the Malicious Face’s laser and the Mindflayer’s death ray.
Parrying a hitscan attack will reverse the attack, add 5 damage, heal V1, and in some cases will create an explosion that will damage nearby foes. This explosion does not hurt V1.

Shockwave
A few enemies use a ground slam attack that will create a shockwave. This shockwave must be jumped over or dashed through, as it cannot be parried. Enemies will take minimal damage from the shockwave, and light ones will be launched helplessly upward.

Explosion
Used by Minos Prime, Sisyphean Insurrectionist, and as an attribute to other attacks. Explosions are large blasts that can only be avoided by either being out of its area of effect or dashing at the right time. The explosive strikes of the Insurrectionist and Minos Prime can be difficult to avoid at first due to occurring so close to V1.

Void Orb
Used by Corpse of King Minos and Flesh Prison. This special homing projectile is slow moving and has a very large hitbox. It cannot be removed from play unless V1 collides with it, which is not advisable as it will deal 10 damage and also set the hard damage to 99 if you happen to survive.

Divine Wrath
Used by Virtues and the Flesh Prison. This attack is indicated by a summoning circle and organ droll. When it triggers, a blinding beam of light will encase the inner parts of the circle and expand outward. The attack’s hitbox does not dissipate until the light has reached the full circle.

The Advanced – Movement
Now that we understand all of the basics, it is now time to discuss the more advanced tech that can be used. Here is the advanced movement that V1 can perform which will be helpful in obtaining P-Ranks and challenges.
Slide Jump
When performing a slide, jumping at anytime will launch V1 forward at a much faster speed than either walking or sliding on its own. This is the most effective way to traverse levels after combat encounters and will be vital when completing the S-Rank time requirements.

Slide Chain
Slide Jumps can be chained together to conserve the momentum from the previous jump. Mistiming this chain will reset the momentum, cause the next slide jump to be much shorter than normal. V1 can gain a very high amount of speed from properly chained slide jumps.

Momentum Storage
Slide Jumps can be used to store the momentum gained from sliding over a bounce pad or from a Dash Jump. This is more difficult to maintain due to the high velocity V1 travels, but can be useful in short bursts on levels like 2-1 and 2-4.

I-Frame Storage
Sliding immediately after dashing (on the ground) will keep the I-Frames active until the slide ends. This means you can extend the duration of the dash’s invulnerability for as long as you can slide. This is effective in larger arenas such as in 3-2 and P-1 or when trying to avoid shockwaves.

Slam Boost
Jumping immediately after performing a ground slam will propel V1 much higher than his normal jump. This is required to access some secrets and can be used to skip parts of levels that are intended to be traversed using the wall jump.

Slam Storage
This special technique can be tricky to consistently perform at first. The effect is that you cancel the forced momentum of a ground slam by performing a wall jump away from the wall. This will result in the action lines that surround V1 to stay active, but the downward momentum is no longer applied. Despite this, the momentum from the ground slam is still being built and immediately jumping will rocket V1 toward the ceiling (or the sky). This is required to complete the challenge in 0-3 and is most effective in the Cyber Grind to as a retreat option.

After shooting a shotgun grenade in the opposite direction of where you want to go, you can hit it with the malicious rail cannon for a hyper quick “rail cannon jump” that has the capibility to toss you across entire maps. Do note that it does deal half your health when performing it.

This intresting, albeit situational movement tech involves you whiplashing the virtue once you kill it. You dont necessarily need to whiplash the virtue ball after you kill it, since whiplashing to it and shotgun swapping will instantly pop the virtue giving you the same result. If done correctly, it can boost you across large sections of the map or give you alot of horiziontal movement speed needed to survive later waves of the cybergrind.

The Advanced – The Alternate Revolver
Within the climax of Limbo, first time players will find a vault in the left lower area while trying to find its skull. On the vault are 4 markings of roman numerals and slab in front of it. This is the puzzle players must activate in order to obtain the alternate primary fire for the Revolver.
The first hidden slab is found at the final room of 1-1. Through breaking the glass ceiling and slam boosting upward, players will find the first slab. Once activated, an on-screen tooltip will indicate that it has been pressed. The slabs only ever need to be activated once for progress toward unlocking to count.
The second hidden slab is found after opening the red skull door or taking the Railcannon shortcut. By going into the lava room and then turning left, you can find a cracked wall. Blasting the crack and going through what is maybe a sewer will lead you to the locked off slab. Finding the second cracked wall will have stroll through CV-11’s iconic dungeon and then have a (not so) fierce battle against Cancer Mouse. Upon his gory demise, the Very Cancerous Rodent will spawn outside to take revenge and defeating him grants access to the second slab.
The third slab is locked away in the Secret Encounter. In order to access the secret encounter, players must endure both skull gauntlets. After placing both the red and blue skull on their pedestals at the split door, a stain glass window will lower near the entrance that will lead to the slab. Steel yourself however, for it is guarded by Swordmachines Agony and Tundra. They must be defeated within a close time frame of each other, or else the downed one will begin to regain all of its health.
Once all three slabs are activated, simply press the final tablet. This will open the vault and permanently unlock access to the alternate fire mode for the Revolver. You are able to mix and match which variants use which fire mode. It is recommended that you use Alternate for Pierce and Normal for Marksman.
The Advanced – Combat
Now that we understand all of the basics, it is now time to discuss the more advanced tech that can be used. Here are all the advanced combat techniques that will be useful in rapidly defeating foes for both Kills and Time S-Rank requirements
RICOSHOT
Any hitscan attack can perform a RICOSHOT, not just the Revolver’s primary fire. The piercer charge beam, as well as the alternate’s primary fire and charge beam, can be converted to a RICOSHOT which will greatly increase the damage. The piercing effect is also retained and the beam will strike 2/5 targets between the coin and the coin’s target or hit the coin’s target multiple times if it is the only one.

Optimal Coin Usage
The first assumption players often make about the Marksman coins is that you’re intended to flip them forward in combat and shot the small projectile for the RICOSHOT, rewarding the player for accuracy. While this is a nice sentiment it is far from consistent or optimal usage. The best and most consistent way to use the coins for their auto-aim attack is to either look up, or down if you’re airborne, and them shoot with a hitscan attack or delay the attack if you’re planning on using a splitshot. The physics of the coin mean that you’ll hit it practically every time, allowing for quick kills or low HP targets or using all 4 coins at once to stack a big hit for a boss.

+CHARGEBACK
A special interaction between the Marksman coin and the Malicious Face’s hitscan laser. If a coin is flipped in front of the Malicious Face as the blip and yellow spark indicator trigger, then the coin reflects the laser back at the Malicious Face which kills it instantly.

Coin punching
Normally if you punch a coin it will do damage to the nearest enemy’s weakpoint and will fly upwards afterwards giving an opening to continue punching or shoot the coin. Splitshot timing gets reset after each coinpunch. However, you can punch/juggle your own coin with the feedbacker against the floor to stack damage up to 5 times for massive opening dps against bosses.


Shotgun Swapping
The shotgun cocking animation can be skipped entirely by changing to another weapon or changing the variant. This allows you to rapidly fire off shotgun shots, increasing your overall DPS as each cycle produces 5.5 damage. It is most effective against slow targets such as the Demons.

+PROJECTILE BOOST
By using the Feedbacker at the right time after firing any shotgun, it will perform the +PROJECTILE BOOST. This faux parry will increase the velocity of every pellet fired and turn one of them explosive. The explosive pellet deals 5 more damage, but can hurt V1, so be aware of this when using it at close range. Can be combined with shotgun swapping for 3 quick consistant projectile boosts, after that a melee cooldown takes effect where you can only boost every other shotgun swap. It is most effective against groups of enemies as an impromptu area attack.

Manual Grenade Detonation
While the grenade explodes in impact with the ground or most enemies, you are capable of manually detonating the grenade by shooting it with a hitscan attack. The resulting explosion is much larger and does double damage with a stylish new red color. You can take this even further by shooting the grenade with the malicious rail cannon for even more damage and quadruple the explosion size. This can be useful against enemies that are normally unaffected by the grenade such as the Malicious Face and the Streetcleaners.


Magnet Load Bearing
When multiple magnets are launched and are close enough together, nails will be pulled between them rather than only swarming to single one. This load bearing effect allows you to centralized the location of the nails and increase the amounts of nails present since the nails will be constantly moving between the multiple magnets instead of just one.

Early Heatsink Recovery
After the second heatsink is used, attempting to fire the Overheat will result in a pathetic rate of fire. While the fire rate is supposed to recover only after a heatsink is restored, sometimes the fire rate restores itself when the heatsink isn’t fully recovered. The Overheat alternate fire is also usable, but it resets the recharge progress that the heatsink made.
ULTRA-RICOSHOT
Just like the Piercer beam, the Electric and Malicious of the Railcannon can perform RICOSHOTs. Electric retains its unlimited pierce and the Malicious retains its explosion.

Railcoin
A complicated interaction with the Electric Railcannon and the Marksman coin. The effect involves flipping a coin straight up and then also flipping a coin behind the target. Hitting the coin behind the target while also hitting the target with the Electric Railcannon will chain the beam through the target to the coin in front of the target and then finally back to the target again, resulting in the target getting hit 3 times for massive damage. More than 2 coins can also be used, increasing the damage to crazy high amounts.
Enemies of different types are capable of damaging and a even killing one another with their attacks. Demons like Cerberus and Malicious Face can be lead into clearing swaths of lower enemies with their explosive attacks, saving you time and brainpower.

The Advanced – Enemies
Now that we understand all of the basics, it is now time to discuss the more advanced tech that can be used. Here are all the strategies for the various enemies and big kills ULTRAKILL will throw at you. Ordered first by type then listed by order of appearance.
Filth
First Encountered: 0-1
Health: 0.5
Attacks: Melee Lunge (30 Damage)
Weaknesses: blue nailgun by 200%
Shoot at it until it dies.
Stray
First Encountered: 0-1
Health: 1.5
Attacks: Single Hell Energy (25 Damage)
Weaknesses-blue nailgun by 200%
Annoying in groups and can easilly overwhelm if you dont pay attention to their attacks. A headshot is usually the quickest way to deal with them unless there are more than one. If that is the case, split ricoshots are fine.

Schism
First Encountered: 0-3
Health: 5
Attacks: Hell Energy Volley (25 Damage Each)
Weaknesses: blue nailgun by 150%
Can be killed easily with a point blank shotgun blast but if they are in groups it is recomended that you either projectile boost your shotgun or time their attacks to do a ricoshot interrupt.

Drone
First Encountered: 1-1
Health: 2
Attacks: Extended Hell Energy (25 Damage), Projectile Explosive Kamikaze (35 Damage)
Can be 1 shot with the alt revolver, knuckleblaster or a ricoshot. One way to deal with them is to pull them close with the whiplash and then slap them with the knuckleblaster to hit groups of enemies with them. In groups you usually want to split ricoshot them.

Streetcleaner
First Encountered: 1-2
Health: 4.5
Attacks: Fire Flamethrower (20 Damage Each)
Resistances: explosions by 50%
You can slide under their flamethrower and not take damage. Easiest way to deal with them both solo and in groups is to use the coin and ricoshot into the canisters on their backs.


Soldier
First Encountered: 2-2
Health: 2.5
Attacks: Extended Hell Energy (25 Damage), Melee Shoulder Bash/Kick (40 Damage)
Weaknesses: blue nailgun by 150%
Can be 1 shot with the alt revolver or a ricoshot. When fighting these guys in groups, split ricoshot them with the coin before they can fill the air with projectiles. The more spread out they are, the more dangerous they become.

Virtue
First Encountered: 4-1
Health: 10
Attacks: Divine Wraith (30 Damage)
Weaknesses: blue and green nailgun by 125% and electricity by 150%
Focus these guys whenever they show up because the longer they stay, the more annoying they become. Once enraged, their attack will start tracking in front of you instead of on you. Easist way to deal with them solo is to whiplash to them and shotgun swap, in a group it is recomended that you line up as much of them as you can with the electric railcannon and take them out with one shot.

Stalker
First Encountered: 4-2
Health: 3.5
Attacks: Sand Explosion (10 Damage, applies Hard Damage equal to missing health)
Weaknesses: revolver by 150% and blue nailgun by 150%
Can be 1 shot with the alt revolver, and is the prefered way to deal with them before they can get close to other enemies. In groups, it is difficult to take them all out quickly even with coin split shots espically in the cyber grind.

Malicious Face
First Encountered: 0-4
Health: 15
Resistances: Direct Explosions (Excluding the Malicious Railcannon)
Weaknesses: Nailgun damage increases by 150% and Ground Slam damage increases by 200%
Attacks: Two 6 Hell Energy Volleys (25 Damage each), Hitscan Explosive Laser (50 Damage)
Practically identical to its boss incarnation, except it has less health. It will enrage starting a 7.5 health; firing the Hell Energy volleys faster and using the laser attack twice per cycle. Dealing with them alone is easy, just parry the hell energy it throws at you back while hitting them with a charge shot from the alt revolver. The damage that the parry does is inconstant. Sometimes it 1 shots it with just 1 parry, other times you have to follow up with shotgun swapping or by simply poking at it with the alt revolver/nailgun from a distance. In groups, they can turn into a cybergrind run ender and can make you wonder if you are playing ultrakill or a bullet hell game. When the latter happens, its best to usually line up as much of them as you can and hit all of them with a shot from the alt revolver piercer shot, followed up with an electric railcannon shot and then pepper them down with either nailgun of your choice. Or be a chad and use the whiplash to get in close, parrying every thing they can throw at you while dashing through everything else, so you can shotgun swap/parry them point blank.

Cerberus
First Encountered: 1-2
Health: 22
Attacks: Melee Shoulder Bash (25 Damage), Projectile Explosive Hell Orb (20 Damage), Shockwave Ground Slam (25 Damage)
Much smaller and more mobile than its boss counterpart. The head is the weak point for revolver headshots and critical punches. It also retains its enrage behavior, so ones that spawn alone will never enrage. Enraged Cerberus attacks and moves much faster. Dealing with these guys solo is easy. You can either dump the blue nailgun into him, or you can choose to open with a shotgun swaped projectile boost into him 3 quick times and then just keep bursting him down with the green or blue nailgun or continue shotgun swapping. In groups its usually wise to get them weak before they start enraging, you can tell how weak a cerberus is by the cracks in him. In cyber grind these guys if left unchecked and enraged will try their hardest to make sure you never touch the ground ever again with their increased rate at which they throw fast balls. The best way to deal with them in the cyber grind is to bait them into charging at you while close to the edge. That way they can just fall off and piss off his friends to make it easier for you to bait them off the ledge.

Mindflayer
First Encountered: 2-3
Health: 30
Attacks: 5 Homing Hell Energy Volley (30 Damage each), Hitscan Death Ray (35 Damage), Melee Whips (30 Damage), Self destruct (50 Damage)
The Mindflayer will frequently teleport to V1’s location, and often initiates attacks by teleporting behind him. The teleport can be prevented by using the Screwdriver Railcannon or the Whiplash. Homing Hell Energy Volley can be knocked away with the Knuckleblaster, or one can be parried with the Feedbacker then the rest dashed away from. Death Ray initiates by teleporting away from V1 and blasting an arc at his current location. It can be parried, so use the Whiplash to close the distance. Melee Whips can be parried easily thanks to the classic blip+yellow spark telegraph. It will enrage starting at 15 health; teleporting more frequently and cycling through its attacks much faster. With proper timing, you can instantly kill the Mindflayer with any weapon that can create an explosion before she throws out her homing attack. In groups, you want to aim for that instant kill on one of them to make the rest of the fight easier and try to whiplash to another one and focus that one with shotgun swapping while dodging/parrying the attacks from it and others.


The Advanced – Prelude Bosses
Now that we understand all of the basics, it is now time to discuss the more advanced tech that can be used. Here are all the strategies for the various bosses ULTRAKILL will throw at you. Bosses are listed by order of appearance.
Under certain conditions a boss will enrage, increasing its speed and sometimes adding additional mechanics to its arsenal. Starting on Violent difficulty, most bosses will enrage when they reach below 50% health.

Malicious Face
Encountered: 0-1
Health: 25
Resistances: Direct Explosions (Excluding the Malicious Railcannon)
Weaknesses: Nailgun damage increases by 150% and Ground Slam damage increases by 200%
Attacks: Two 6 Hell Energy Volleys (25 Damage each), Hitscan Explosive Laser (50 Damage)
Found as the first official boss at the end of 0-1, the Malicious Face is a test of the player’s understanding of basic movement and parry mechanics. It fires two sets of 6 Hell Energy, the last of which is the easiest to parry. The hitscan laser has a long wind up, and the parry opportunity is indicated by the signature tell: the yellow spark and blip sound effect. It will enrage starting at 12.5 heath, in which the Hell Energy is fired out much faster and the hitscan attack is used twice in a cycle instead of once.

Swordsmachine
Encountered: 0-3, 0-2 (Secret Encounter)
Health: 50+75
Weaknesses: Shotgun damage increased by 150%
Attacks: Projectile Shotgun (25 Damage, Phase 1 Only), Melee Sword Combo (25 Damage each), Melee Jump Slash (40 Damage), Melee Spinning Sword (30 Damage, Phase 2 Only), Projectile Sword Throw (30 Damage, Phase 2 Only)
Swordsmachine is the first multi-phase boss encountered, featuring 2 health bars of different amounts. Phase 1 features a slow and cumbersome Swordsmachine, favoring the jump slash and its shotgun. Phase 2 lacks the shotgun attack, but features many more melee attacks and overall faster speed. Aside from the inaccurate shotgun and sword throw, all melee attacks feature no verticality which makes jumping away the most effective means to avoid damage. All of the sword attacks can be parried causing a brief stun, but this will also cause an enrage. While enraged, Swordsmachine’s attacks are significantly faster and parries will not stun it.

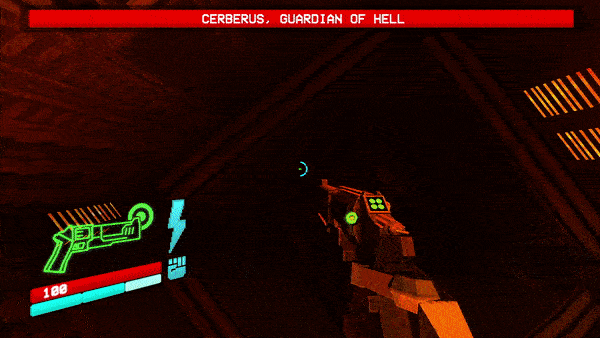
Cerberus, Guardian of Hell
Encountered: 0-5
Health: 80+40
Attacks: Melee Shoulder Bash (25 Damage), Projectile Explosive Hell Orb (20 Damage), Shockwave Ground Stomp (25 Damage)
Cerberus is a giant slow moving statue whose attacks are easy to avoid. The shoulder bash and stomp have long wind ups and can easily jumped or dashed away from. The Hell Orb creates a large explosion that can damage the Cerberus and it can also be parried. Once the first Cerberus reaches 40 health, a second one will awaken also with 40 health. It is important to defeat both at the same time, for if one dies before the other then the enrage effect activates. Enraged Cerberus attacks and moves much faster.

The Advanced – Act 1 Bosses
Cancerous Rodent and Very Cancerous Rodent
Encountered: 1-2 (Secret Encounter)
Health 0.1+50
Weaknesses: Ground Slam damage increased by 200%
Attacks: Nothing (CR), 3 Mortar Homing Hell Energy (20 Damage, VCR)
Cancer Mouse has no attacks and any attack of your’s will gib it. Very Cancerous Rodent is more dangerous for its volley of hell energy is both explosive and homing. Either repeatedly ground slam it while also attacking for max damage, or stand in front of its face to prevent the hell energy from properly spawning for max safety.


Agony and Tundra
Encountered: 1-3 (Secret Encounter)
Health: 50+50
Both Weakness: Shotgun damage increased by 150%
Agony Weakness: Electric damage increased by 175%
Tundra Weakness: Explosion damage increased by 175%
Attacks: Projectile Shotgun (25 Damage), Melee Sword Combo (25 Damage each), Melee Jump Slash (40 Damage), Melee Spinning Sword (30 Damage), Projectile Sword Throw (30 Damage)
These two colored Swordmachines possess all the attacks Swordsmachine has from both of his phases. When one loses all of its health, it will enter a downed state. You must defeat the other Swordmachine within a limited time or the downed one will begin to heal all of its health.

Hideous Mass
Encountered: 1-3
Health: 175
Weaknesses: Any damage dealt to the tail is tripled.
Attacks: 2 Mortar Hell Energy (60 Damage each), Shockwave Ground Slam (30 Damage), Shockwave Vertical Clap (40 Damage), Projectile Tail Harpoon (25 Damage)
This giant demon possess protective armor that deflects attacks aimed at it, even the Railcannon. Aim for the exposed flesh to deal damage, especially the tail. The tail is the weak point as all damage dealt to it will be tripled. The Tail Harpoon greatly limits you ability to move if it sticks into you, so if you happen to get hit either assault the tail or punch with the Knuckleblaster to free yourself. The Hell Energy and Harpoon are quite hard to parry, so it is better to avoid both of them. If you don’t want to deal with this large fella, then instantly kill him with the soap found in the blue skull gauntlet.

V2
Encountered: 1-4
Health: 40
Resistances: Revolver damage decreased by 60%
Attacks: Projectile Triple Revolver Shot (10 Damage each), Projectile Revolver Beam (30 Damage),
Projectile Shotgun (25 Damage), Projectile Core Eject (35 Damage)
V2 makes his grand entrance, wielding a revolver and shotgun. V2 rapidly traverses the arena, using different attacks depending on V1’s distance from him. Long range has him use the Revolver and close range has him use the Shotgun. RICOSHOTs can be useful in getting damage against him, but V2 is also capable of shooting the coins to inflict a COUNTER-RICOSHOT. Another approach for those ignoring style is to use coin punch stacking, as V2 is considered a valid target for the coin punch even when the battle hasn’t begun (The authors of this guide think this is a bug).

The Corpse of King Minos
Encountered: 2-4
Health: 65+160
Weaknesses: Revolver damage increased by 150% for King’s Hand
Attacks: Shockwave Slap (35 Damage, King’s Hand), Melee Fist Attack (45 Damage), 1 to 2 Hell Energy (25 Damage), 1 to 2 Homing Hell Energy (35 Damage), Void Orb (10 Damage, 99 Hard Damage)
The enormous late king of Lust tests the player’s situational awareness and ability to recognize special interactions and parries. The King’s Hand is a brief attempt to break down V1 before the real battle begins by creating shockwaves with his slaps, but is much weaker to the Revolver. Once the red skull is placed, approaching the center of the arena will begin the battle. Minos mainly attacks with his fists: punching, palming, or slamming. All of these can be parried, which deals massive damage helping you bring him +DOWN TO SIZE. After the first set of attacks, Minos will spawn a Void Orb, constantly following the player with its threatening promise of 99 Hard Damage. Starting at 80 Health two snakes will gouge out Minos’ eyes and throw normal and homing Hell Energy at the player on top of everything else Minos does.

Gabriel, Judge of Hell
Encountered: 3-2
Health: 50+50
Weaknesses: Nailgun damage increased by 125%
Attacks: Melee Sword Combo (15 Damage each), Melee Greatsword Combo (35 Damage each), Melee Spear Helmbreaker (25 Damage each), Projectile Sword Throw (25 Damage). Projectile Axe Throw (30 Damage), Projectile Explosive Spear Throw (50 Damage), Spinning Swords (35 Damage, Enrage Only)

The Advanced – Act 2 Bosses
Sisyphean Insurrectionist
Encountered: 4-2
Health: 90
Weaknesses: Fire damage increased by 500%
Attacks: Melee Malicious Beating (30 Damage), Explosive Concussion Impact (30 Damage), Shockwave (25 Damage)
If covered in sand, the Malicious Face in its hand can be shot for blood but deal no damage.

Mysterious Druid Knight
Encountered: 4-3 (Secret Encounter)
Health: 80
Attacks:
Full auto: 25 per shot
Fuller auto: 30 per shot

V2 Rematch
Encountered: 4-4
Health: 80+30
Resistances: Revolver damage decreased by 60%
Attacks: Projectile Triple Revolver Shot (10 Damage each), Projectile Revolver Beam (30 Damage), Projectile Shotgun (25 Damage), Projectile Core Eject (35 Damage), Projectile Nailgun (8), Ricoshot + counter-ricoshot= 7.5(coins+1)

The Advanced – Act 3 Bosses
SOONTM
The Advanced – Prime Sanctums
Prime Sanctums are special levels that are only unlocked by obtaining a P rank in all levels in Prelude and in all levels of the Act that correspond to the level’s number. P-1 requires P rank for all of Act 1 and so on.
Flesh Prison
Encountered: P-1
Health: 100 (1 for Spawn, 2 for Mini-Face)
Resistances: Electric damage decreased by 50%
Attacks: Spawn Hitscan Laser (15 Damage), Mini-Face Hitscan Explosive Laser (50 Damage, Violent+ Only), Divine Wrath (30 Damage), Homing Hell Energy Volleys (30 Damage each), Void Orb (10 Damage, 99 Hard Damage)

Minos Prime
Encountered: P-1
Health: 130
Attacks:
Kick combo “Prepare thyself”(can cancel into uppercut or continue into seeking snake): 30×2
Seeking snake: 30
Punch combo “Thy end is now”(can cancel into uppercut): 30×4
Dropkick “Judgement”: 50
Uppercut(usually combos into spike, rider kick, or crushing kick): 30
Rider kick “Die”: 30
Crushing kick “Crush”: 50
Shockwave: 25

The Gold Backs – Challenges
Coming SOONTM
The Gold Backs – Secret Missions
Within each layer of hell, baring every 3rd layer, a secret mission is hidden away in one of the levels. Accessing this level is often a simple, yet not obvious task. Each secret level is fundamentally different from both each other and ULTRAKILL as a whole. There is no grade, simply complete the level to earn progress toward the gold back.
Something Wicked
Encountered: 0-S
Health: N/A
Attack: Contact (1000 Damage)
Feared by both newcomers and veterans alike, 0-S puts V1 in a pitch black labyrinth with only the light of the skull and Piercer to guide him. Patrolling these dark halls is the infamous Something Wicked, who’s fast speed and spindly model make him a nightmare to fight against. His attack is an instant kill and with no checkpoints, it’s a reset to the beginning. Not all hope is lost however, for any attack whatsoever will dispel Something Wicked, teleporting it to either one of two locations, whichever is farthest. Something Wicked spawns as soon as the blue skull is picked up and starts from a room that contains a Cerberus, and will only despawn once the blue skull is placed at its destination. The same behavior is used for the red skull. When Something Wicked fixates on V1, a hissing sound is uttered and a vibrating sonic noise will grow in intensity the closer it is. Its insane height works against it for there any location with a low ceiling will prevent its assault.
Yourself
Encountered: 1-S
Health: 10
Attack: cool.mp4
Named for the puzzle game this level is based on, V1 must solve several different box puzzles in order to advance. The goal is to drag the solid box to the empty box, but quickly grows in complexity as the rounds progress. Adding dots that must be eaten and Xs that must be avoided, all topped off by adding multiple boxes of different colors. There is no fear of death in what should be the safest part of the Inferno, but the only demise found here is your inability to solve puzzles.
Mirage
Encountered: 2-S
Health: N/A
Attack: Robosexuality
Mirage finds herself slamming against the player on the way to school, and is clearly not happy about it. What starts as a simple riff on anime visual novel descends on a downward spiral of nihilism and defeatism. It is up to you, the player, to convince the prettiest girl in town that life is worth living, even if the cosmic odds are stacked against you.