Quick monster hunts overview
Intro
Hey guys, I've had a quick search and haven't been able to find a good guide for the new monster hunts in the Norsca DLC so having finished all the hunts, I thought I'd jot down some of my experiences into a guide to help you all breeze through them quickly.
This guide isn't supposed to be comprehensive but it'll take a lot of the guesswork out of the hunts and help you plan the trajectory of your campaign more effectively. For now, I'm not going to bother listing and analysing the rewards for each hunt but it's not something I'll rule out forever.
The hunts in general are quite similar to the legendary lord quests for the other factions. They're shorter, usually only having 3-4 steps and they only have one battle in them, the one where you take on the legendary beast itself. Each step of the hunt will add an extra 1500 to your treasury and you'll get a flat 10,000 gold for finishing it to reimburse you for the time you've taken to complete the hunt. As an added bonus, you'll also have the option of sacrificing the beastie to your favourite norscan god to gain a handy 12 favour with them. This is the equivalent of two razed settlements, so the hunts can be more than worth doing.
So without any further ado, let's get hunting!
*EDIT*
I've now added the first two hunts and organised the hunts into the order they should appear in your monster hunt book. I've also added what tier of monster hunt technology you need to tackle each one.
This guide isn't supposed to be comprehensive but it'll take a lot of the guesswork out of the hunts and help you plan the trajectory of your campaign more effectively. For now, I'm not going to bother listing and analysing the rewards for each hunt but it's not something I'll rule out forever.
The hunts in general are quite similar to the legendary lord quests for the other factions. They're shorter, usually only having 3-4 steps and they only have one battle in them, the one where you take on the legendary beast itself. Each step of the hunt will add an extra 1500 to your treasury and you'll get a flat 10,000 gold for finishing it to reimburse you for the time you've taken to complete the hunt. As an added bonus, you'll also have the option of sacrificing the beastie to your favourite norscan god to gain a handy 12 favour with them. This is the equivalent of two razed settlements, so the hunts can be more than worth doing.
So without any further ado, let's get hunting!
*EDIT*
I've now added the first two hunts and organised the hunts into the order they should appear in your monster hunt book. I've also added what tier of monster hunt technology you need to tackle each one.
Frigustrex, Scion of the Cold Void (I)
- Raid Tower of Khrakk
-Recruit Ice trolls/ Marauder hunters with javelins (recruiting the hunters will -1000 from your treasury)
- Move any character to Zolshenk
- Win battle at Fort Stragahov
Enemy forces
-Frigustrex, Scion of the Cold Void
- 4 Ice Trolls
- 2 Frost Wyrms
Reinforcements
- 4 Ice Trolls
- 1 Frost Wyrm
This is probably the easiest monster hunt and rightfully so, as this is the one the majority of players will be doing first. Frigustrex has the ability to summon snowstorms which is supposed to slow your troops down but I didn't notice a huge difference. The reinforcing armies will come from the left and right hand sides so flanking may be a possible issue but if you send almost anything to meet them they'll rout because of their sad leadership.
-Recruit Ice trolls/ Marauder hunters with javelins (recruiting the hunters will -1000 from your treasury)
- Move any character to Zolshenk
- Win battle at Fort Stragahov
Enemy forces
-Frigustrex, Scion of the Cold Void
- 4 Ice Trolls
- 2 Frost Wyrms
Reinforcements
- 4 Ice Trolls
- 1 Frost Wyrm
This is probably the easiest monster hunt and rightfully so, as this is the one the majority of players will be doing first. Frigustrex has the ability to summon snowstorms which is supposed to slow your troops down but I didn't notice a huge difference. The reinforcing armies will come from the left and right hand sides so flanking may be a possible issue but if you send almost anything to meet them they'll rout because of their sad leadership.
The Salzenmund Soul Eaters (I)
- Recruit Marauder Hunters with javelins
- Raid Middenheim
- Have 1500 in your treasury (this will net you a sorceror also)
- Move any character to Dietershafen
- Win battle in Dietershafen
Enemy forces
-Salzenmund Spirit Eater
- 3 Minotaurs (shield)
- 2 Razorgor Herd
- 4 Harpies
- 1 Cygor
Reinforcements
- 3 Razorgor Herd
- 3 Minotaurs (great weapons)
- 2 Minotaurs (shields)
- Salzenmund Shade Eater
This is quite a tough battle considering it's on the first tier of monster hunt techs. This is one you most certainly do not want to be blobbing up for, as the two Cygor brothers throw rocks that will splinter into smaller pieces creating a cluster bomb effect. If you do have blobbed up infantry, approach the enemy from the right hand side, as there are forests to cover your approach and they'll be unable to see you because of the hill. This however will bring the enemy's attention to your left flank so make sure the men there are robust enough to handle it.
The enemy's recinforcements will come from the passage on the left hand side behind your forces (assuming your camera is facing default position).
I would suggest tackling this hunt a little later in the game with an army made up of many monsterous units. It's also good to take this approach with the final battle you have to fight before the chaos invasion so your giant and mammoth heavy army can probably tackle both battles.
- Raid Middenheim
- Have 1500 in your treasury (this will net you a sorceror also)
- Move any character to Dietershafen
- Win battle in Dietershafen
Enemy forces
-Salzenmund Spirit Eater
- 3 Minotaurs (shield)
- 2 Razorgor Herd
- 4 Harpies
- 1 Cygor
Reinforcements
- 3 Razorgor Herd
- 3 Minotaurs (great weapons)
- 2 Minotaurs (shields)
- Salzenmund Shade Eater
This is quite a tough battle considering it's on the first tier of monster hunt techs. This is one you most certainly do not want to be blobbing up for, as the two Cygor brothers throw rocks that will splinter into smaller pieces creating a cluster bomb effect. If you do have blobbed up infantry, approach the enemy from the right hand side, as there are forests to cover your approach and they'll be unable to see you because of the hill. This however will bring the enemy's attention to your left flank so make sure the men there are robust enough to handle it.
The enemy's recinforcements will come from the passage on the left hand side behind your forces (assuming your camera is facing default position).
I would suggest tackling this hunt a little later in the game with an army made up of many monsterous units. It's also good to take this approach with the final battle you have to fight before the chaos invasion so your giant and mammoth heavy army can probably tackle both battles.
Traygard the Mountain Cleaver (I)
1) Move any character to Frozen Landing
2) Pay or Raid the slaver
Pay - Have 2000 gold in your treasury at beginning of turn
Raid - Raid Baersolings camp
3) Move any character to Baersonlings Camp
4) Fight battle in the Chaos Wastes (in the northeast)
Enemy Forces
- Traygard the Mountain Cleaver
- 4 Dragon Ogres
- 3 Feral Manticores
- 2 Dragon Ogre Shaggoths
I found this battle fairly straightforward. Tray will summon lightning storms to zap your men. You'll have a clear indication of where these storms will occur so be sure to move blobbed infantry out the way if you care about them. I personally didn't and lost a good chunk of my line infantry. It's probably better in this battle to bring anti large units with smaller units sizes such as Skin Wolves or those goofy cyclops things that I don't remember the names of.
2) Pay or Raid the slaver
Pay - Have 2000 gold in your treasury at beginning of turn
Raid - Raid Baersolings camp
3) Move any character to Baersonlings Camp
4) Fight battle in the Chaos Wastes (in the northeast)
Enemy Forces
- Traygard the Mountain Cleaver
- 4 Dragon Ogres
- 3 Feral Manticores
- 2 Dragon Ogre Shaggoths
I found this battle fairly straightforward. Tray will summon lightning storms to zap your men. You'll have a clear indication of where these storms will occur so be sure to move blobbed infantry out the way if you care about them. I personally didn't and lost a good chunk of my line infantry. It's probably better in this battle to bring anti large units with smaller units sizes such as Skin Wolves or those goofy cyclops things that I don't remember the names of.
Brood Queens (II)
1) Send any character to Valayas Sorrow
2) Raid Karak Eight Peaks
3) Fight battle in Karak Azul
Enemy forces
- 1 Night Goblin warboss on a squig
- 2 Goblin Forest Spider Riders
- 2 Goblin Forest Spider Rider Archers
- 3 Brood Queens
Reinforcements
- 2 Forest Spider Rider Archers
- 4 Brood Queens
Not a huge amount to say about this battle. The brood queens will periodically poop out baby spiders which you'll have to deal with. They aren't tough at all but will disrupt skirmishers.
2) Raid Karak Eight Peaks
3) Fight battle in Karak Azul
Enemy forces
- 1 Night Goblin warboss on a squig
- 2 Goblin Forest Spider Riders
- 2 Goblin Forest Spider Rider Archers
- 3 Brood Queens
Reinforcements
- 2 Forest Spider Rider Archers
- 4 Brood Queens
Not a huge amount to say about this battle. The brood queens will periodically poop out baby spiders which you'll have to deal with. They aren't tough at all but will disrupt skirmishers.
Blorgar the Mad Titan (II)
1) Send any character to Grung Zint
2) Raid Montford
3) Buy/Steal the Bretonian
Buy - ??? (WIP)
Steal - Perform a hero action against a greenskin settlement
4) Fight battle in Karak Azgaraz
Enemy Forces
- Blorgar the Mad Titan
- 4 Squig Herds
- 3 Giants
- 4 Trolls
As you're warned, Blorgar has extra stinky farts which will cause high AOE damage and give a big leadership penalty. Try to avoid blobbing units around him, instead leaving it to your heroes/lords and units like Skin Wolves to bring him down.
2) Raid Montford
3) Buy/Steal the Bretonian
Buy - ??? (WIP)
Steal - Perform a hero action against a greenskin settlement
4) Fight battle in Karak Azgaraz
Enemy Forces
- Blorgar the Mad Titan
- 4 Squig Herds
- 3 Giants
- 4 Trolls
As you're warned, Blorgar has extra stinky farts which will cause high AOE damage and give a big leadership penalty. Try to avoid blobbing units around him, instead leaving it to your heroes/lords and units like Skin Wolves to bring him down.
Radixashen, Sepent of the Worldroots (II)
1) Send any character to waterfall palace
2) Raze/Sack a wood elf settlement (currently bugged so any faction's settlement will do)
3) Raid the oak of ages
4) Fight battle in Vauls Anvil
Enemy Forces
- Radixashen, Serpent of the Worldroots
- 3 Sisters of Thorn
- 3 Forest Dragons
- 3 Great Eagles
- 4 Tree Kin
Reinforcements
- 10 'Ancient Protectors' (basically treemen)
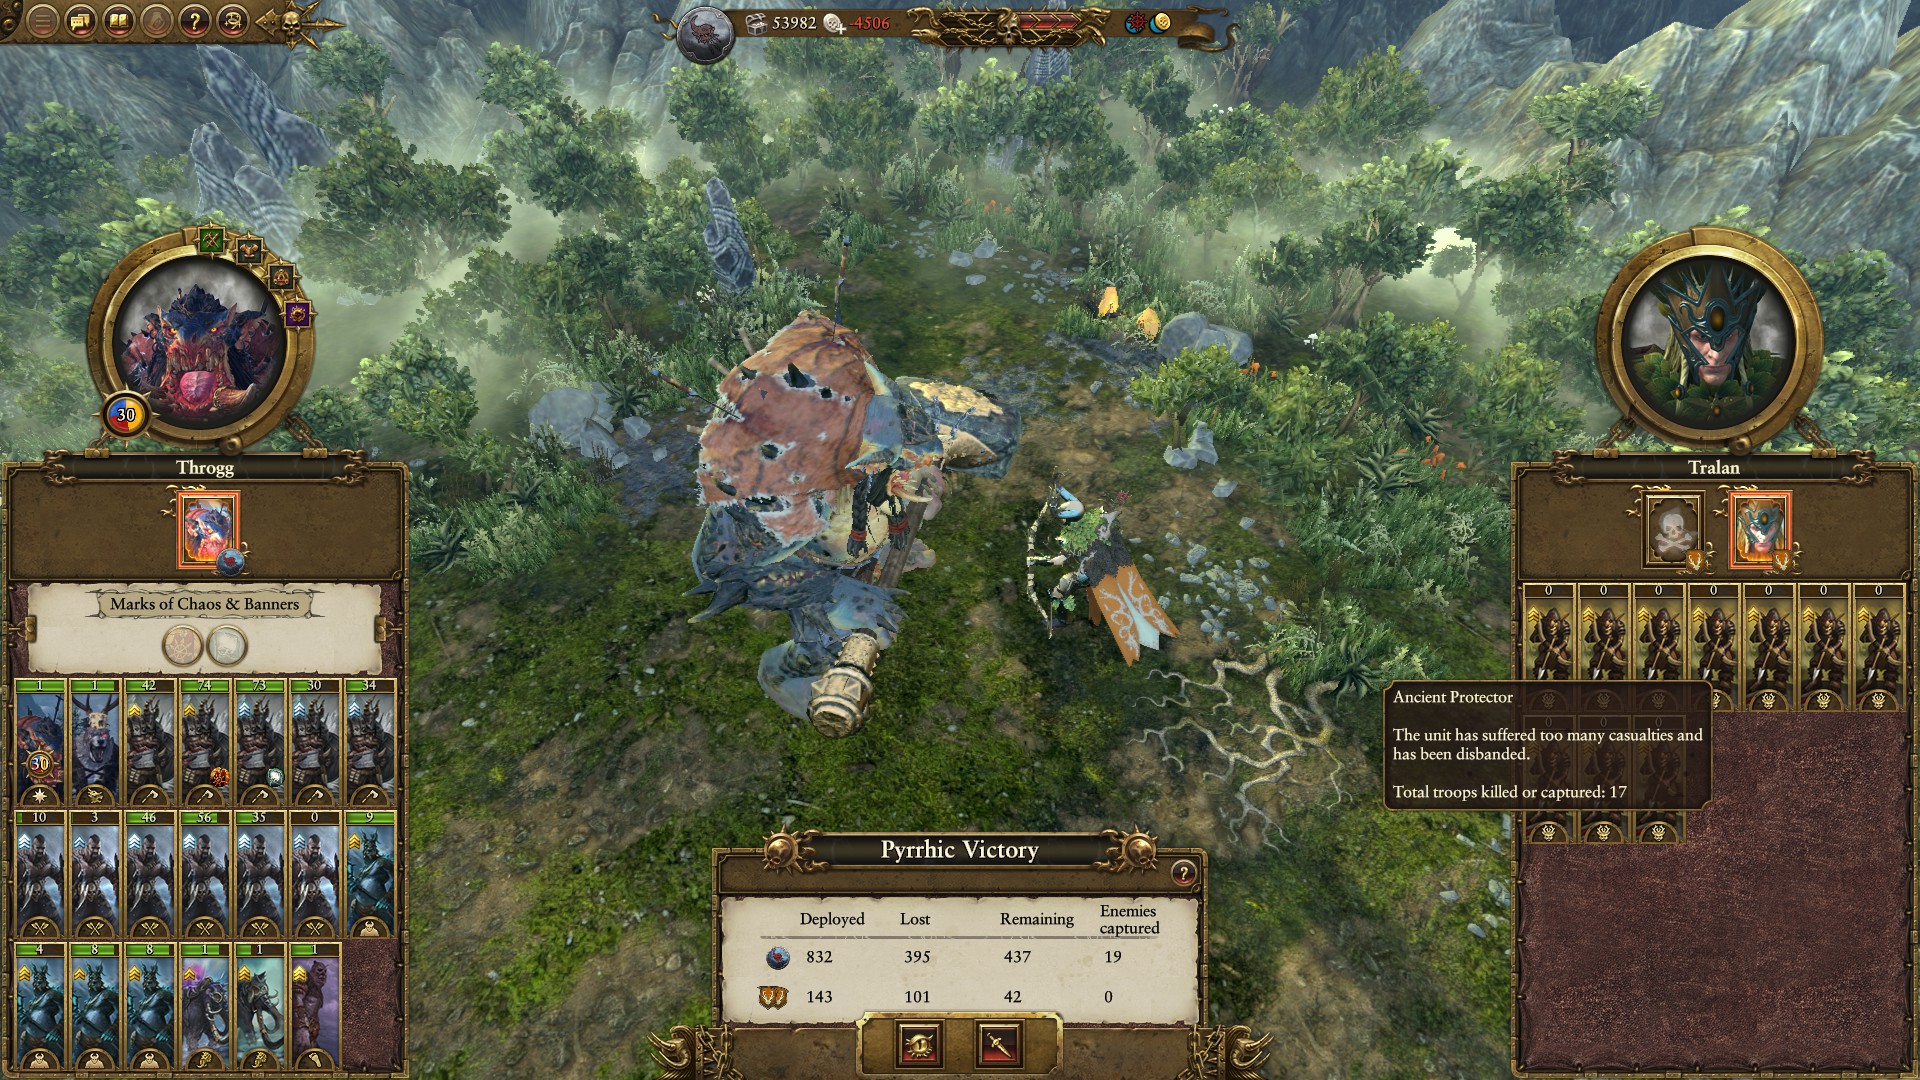
This is one of the tougher monster hunts. The ancient protectors are supposed to help Rad stay alive so be sure to take care of them. It's also worth saying that it didn't feel like there was 10 treemen in the battle with it only feeling like 4-5. I suppose it was possible that some were Tree Kin.
One thing that you'll want to do during this battle is BRING FAST UNITS! Don't make the mistake I did of bringing just trolls, mammoths and line infantry or you're going to have an annoying battle thanks to enemy skirmishers and units that keep coming back after routing. Warhounds will fit into this role perfectly and skirmishers wouldn't be bad either.
Also, when I think of what a unit called an ancient protector would look like I think of a goblin. Glad to see CA agree with me.
2) Raze/Sack a wood elf settlement (currently bugged so any faction's settlement will do)
3) Raid the oak of ages
4) Fight battle in Vauls Anvil
Enemy Forces
- Radixashen, Serpent of the Worldroots
- 3 Sisters of Thorn
- 3 Forest Dragons
- 3 Great Eagles
- 4 Tree Kin
Reinforcements
- 10 'Ancient Protectors' (basically treemen)
This is one of the tougher monster hunts. The ancient protectors are supposed to help Rad stay alive so be sure to take care of them. It's also worth saying that it didn't feel like there was 10 treemen in the battle with it only feeling like 4-5. I suppose it was possible that some were Tree Kin.
One thing that you'll want to do during this battle is BRING FAST UNITS! Don't make the mistake I did of bringing just trolls, mammoths and line infantry or you're going to have an annoying battle thanks to enemy skirmishers and units that keep coming back after routing. Warhounds will fit into this role perfectly and skirmishers wouldn't be bad either.
Also, when I think of what a unit called an ancient protector would look like I think of a goblin. Glad to see CA agree with me.
Abyssal Shrieker (III)
1) Recruit Shaman Sorcerer
2) Raid Castle Drakenhoff
3) Move any character to Wurtbad
4) Fight battle in Wurtbad
Enemy forces
- Abyssal Shrieker
- 6 Dire Wolves
- 8 Fell Bats
- 4 Terrorgheists
This is one of the tougher monster hunts alongside the forest dragon one. Our shrieking friend seems to have very high damage resistance and will take the brunt of his damage when he poops out skeleton minions. The problem here is that in my game he would only occasionally bother to poop out the skeletons and would spend most of the battle eating my forces alive and chasing my manticores like a dog chasing rabbits.
The shrieker is also supposed to have an ability which debuffs damage resistance by -100% in an area of effect. I can't say for sure whether or not he used it when I was claiming his ugly head.
The best piece of advice I can give is to not bother bringing manticores as they seem to disrupt the flow of the battle and you have a 0% chance of winning air supremacy in this battle unless you bring an army of 19 of them.
2) Raid Castle Drakenhoff
3) Move any character to Wurtbad
4) Fight battle in Wurtbad
Enemy forces
- Abyssal Shrieker
- 6 Dire Wolves
- 8 Fell Bats
- 4 Terrorgheists
This is one of the tougher monster hunts alongside the forest dragon one. Our shrieking friend seems to have very high damage resistance and will take the brunt of his damage when he poops out skeleton minions. The problem here is that in my game he would only occasionally bother to poop out the skeletons and would spend most of the battle eating my forces alive and chasing my manticores like a dog chasing rabbits.
The shrieker is also supposed to have an ability which debuffs damage resistance by -100% in an area of effect. I can't say for sure whether or not he used it when I was claiming his ugly head.
The best piece of advice I can give is to not bother bringing manticores as they seem to disrupt the flow of the battle and you have a 0% chance of winning air supremacy in this battle unless you bring an army of 19 of them.
Great Mawherd of Bloodfjord (III)
1) Move any character to Winter Pyre
2) Raid Kraka Drak
3) Raid Fort Ostorok
4) Fight battle in Volksgrad (southeast Volksgrad)
Enemy Forces
- 1 Dwarf Lord
- 2 Dwarf Warriors
- 4 Slayers
- 2 Rangers
- 2 Quarrellers (great weapons)
- 2 Bolt Throwers
Reinforcements
- 6 Slayers
- 4 Rangers
- 2 Grudge Throwers
For a change, we're going to do a good deed! The dwarves are trying to hunt a mammoth and her calves to satisfy a grudge and we have to try and protect them.
The dwarves have come ready for a mammoth hunt with plenty of anti large units. The mammoths have come ready to catch arrows with their faces as they'll only stand around as they get peppered with volley after volley of arrows. They will defend themselves in melee though. You'll want to get stuck into the battle quickly to help the mammoths. All the dwarf units in the initial army are rookies so even though they have plenty of slayers your trolls will make them sorry they were born.
It's worth mentioning that the reinforcing army will come directly from your flank and will contain elite slayers who will prove to be much more of a challenge than the greenhorns initially put onto the field to face the mammoths. Don't make the mistake I did and have the RoR hellcannon at the back of your army because it will get squashed by the reinforcing mob.
2) Raid Kraka Drak
3) Raid Fort Ostorok
4) Fight battle in Volksgrad (southeast Volksgrad)
Enemy Forces
- 1 Dwarf Lord
- 2 Dwarf Warriors
- 4 Slayers
- 2 Rangers
- 2 Quarrellers (great weapons)
- 2 Bolt Throwers
Reinforcements
- 6 Slayers
- 4 Rangers
- 2 Grudge Throwers
For a change, we're going to do a good deed! The dwarves are trying to hunt a mammoth and her calves to satisfy a grudge and we have to try and protect them.
The dwarves have come ready for a mammoth hunt with plenty of anti large units. The mammoths have come ready to catch arrows with their faces as they'll only stand around as they get peppered with volley after volley of arrows. They will defend themselves in melee though. You'll want to get stuck into the battle quickly to help the mammoths. All the dwarf units in the initial army are rookies so even though they have plenty of slayers your trolls will make them sorry they were born.
It's worth mentioning that the reinforcing army will come directly from your flank and will contain elite slayers who will prove to be much more of a challenge than the greenhorns initially put onto the field to face the mammoths. Don't make the mistake I did and have the RoR hellcannon at the back of your army because it will get squashed by the reinforcing mob.
In conclusion
I hope you found this guide helpful. I know it's quite bare bones and maybe somebody else will do an in depth one so I can take this down.
Generally I think Throgg is a better choice for tackling the monster hunts as his army won't suffer attrition in some of the rougher areas. (VC land, badlands, Athel Loren) He's also closer to all of the monster hunts based in the north.
I would advise against completing the hunts after triggering the end times chaos invasion as you'll auto declare war on everybody and on harder difficulties, I can imagine the AI being loathe to let you walk through their land while you're at war with them. Occasionally, they'll ask you for peace which you can take, but I wouldn't bet on it.
As a rough strategy it seems to work quite well to pin the monster you want in place with a tanky or expendable unit and then use marauders with javelins to do the bulk of the damage. This won't work as well in the terrorgheist or forest dragon hunts however due to the number of flying and manoeuvreable units on the field.
In terms of what order to tackle the hunts in, the obvious first one is Frigustrex. After Friggie, it should be quite simple to take on Traygard. Ideally you would tackle the mawherd here, but chances are you won't have the technology. Annoyingly, you also probably won't have the technology to tackle the shrieker which is the next nearest one.
At this point, you will probably only have enough cash to field two armies. Here I'd suggest splitting them in two and as I've already said, it's probably best to do this before giving full allegiance to any god. Send one west to complete Blorgar and Radixashen and the other south to nail the brood queens. After this, pledge allegiance and defeat the chaos challengers. During or after this phase raise a third army made up of lots of monsterous units and use it to win the Salzenmund soul eaters challenge and the final chaos battle. After invoking the chaos invasion, it's probably worthwhile to take the Vampire Counts capital so take that chance to take out the abyssal shrieker. (unless you decided to become the everchosen yourself, in which case I hope you have lightning strike/like setting ambushes)
This will vary depending on difficulty level, so it might be very difficult to win some of the battles with a balanced army.
Thanks for reading and happy hunting. :)
Generally I think Throgg is a better choice for tackling the monster hunts as his army won't suffer attrition in some of the rougher areas. (VC land, badlands, Athel Loren) He's also closer to all of the monster hunts based in the north.
I would advise against completing the hunts after triggering the end times chaos invasion as you'll auto declare war on everybody and on harder difficulties, I can imagine the AI being loathe to let you walk through their land while you're at war with them. Occasionally, they'll ask you for peace which you can take, but I wouldn't bet on it.
As a rough strategy it seems to work quite well to pin the monster you want in place with a tanky or expendable unit and then use marauders with javelins to do the bulk of the damage. This won't work as well in the terrorgheist or forest dragon hunts however due to the number of flying and manoeuvreable units on the field.
In terms of what order to tackle the hunts in, the obvious first one is Frigustrex. After Friggie, it should be quite simple to take on Traygard. Ideally you would tackle the mawherd here, but chances are you won't have the technology. Annoyingly, you also probably won't have the technology to tackle the shrieker which is the next nearest one.
At this point, you will probably only have enough cash to field two armies. Here I'd suggest splitting them in two and as I've already said, it's probably best to do this before giving full allegiance to any god. Send one west to complete Blorgar and Radixashen and the other south to nail the brood queens. After this, pledge allegiance and defeat the chaos challengers. During or after this phase raise a third army made up of lots of monsterous units and use it to win the Salzenmund soul eaters challenge and the final chaos battle. After invoking the chaos invasion, it's probably worthwhile to take the Vampire Counts capital so take that chance to take out the abyssal shrieker. (unless you decided to become the everchosen yourself, in which case I hope you have lightning strike/like setting ambushes)
This will vary depending on difficulty level, so it might be very difficult to win some of the battles with a balanced army.
Thanks for reading and happy hunting. :)
More Total War: WARHAMMER guides
- How to play the Vampire Counts★ 5 (937)44k views1.8k ♥91 minUpdated Jan 24, 2017
- The Empire: So you want to rule as Emperor? (UPDATED)★ 5 (563)31k views1.4k ♥24 minUpdated May 2, 2023
- WAAAAGH!! 101 (Greenskins Guide)★ 5 (420)31k views725 ♥43 minUpdated May 12, 2020
- Bretonnia: The Grand Campaign and how to be Manly★ 5 (498)31k views604 ♥11 minUpdated Jun 14, 2017
- Total War: Warhammer 100% Achievement Guide★ 5 (1.7k)27k views2.4k ♥44 minUpdated Mar 22, 2019
- Getting Started - Modding for Newbies★ 5 (221)22k views455 ♥9 minUpdated Jul 30, 2016


This guide was created by its original author on the Steam Community. Are you the author and want it removed? Request removal.