
Overview
This guide discribes how to make a TpF map representing an area of your choice!
Setup
For this guide you will need the following programs:
Inkscape 0.91 [inkscape.org] It’s FREE!
GIMP 2.9.5 64-bit Experimental portable[www.partha.com] Also FREE! (GIMP 2.8 will not do)
*I don’t have Photoshop, thus do not know how it works, but will most likely work similarly to GIMP
Download these programs before you start this tutorial.
Making the folder for your custom map
1) Go to the custom maps folder of Transport Fever (Program Files(x86) > Steam > steamapps > common > Transport Fever > maps)
2) Create a new folder and call it “MyMap”
Real World data to heightmap
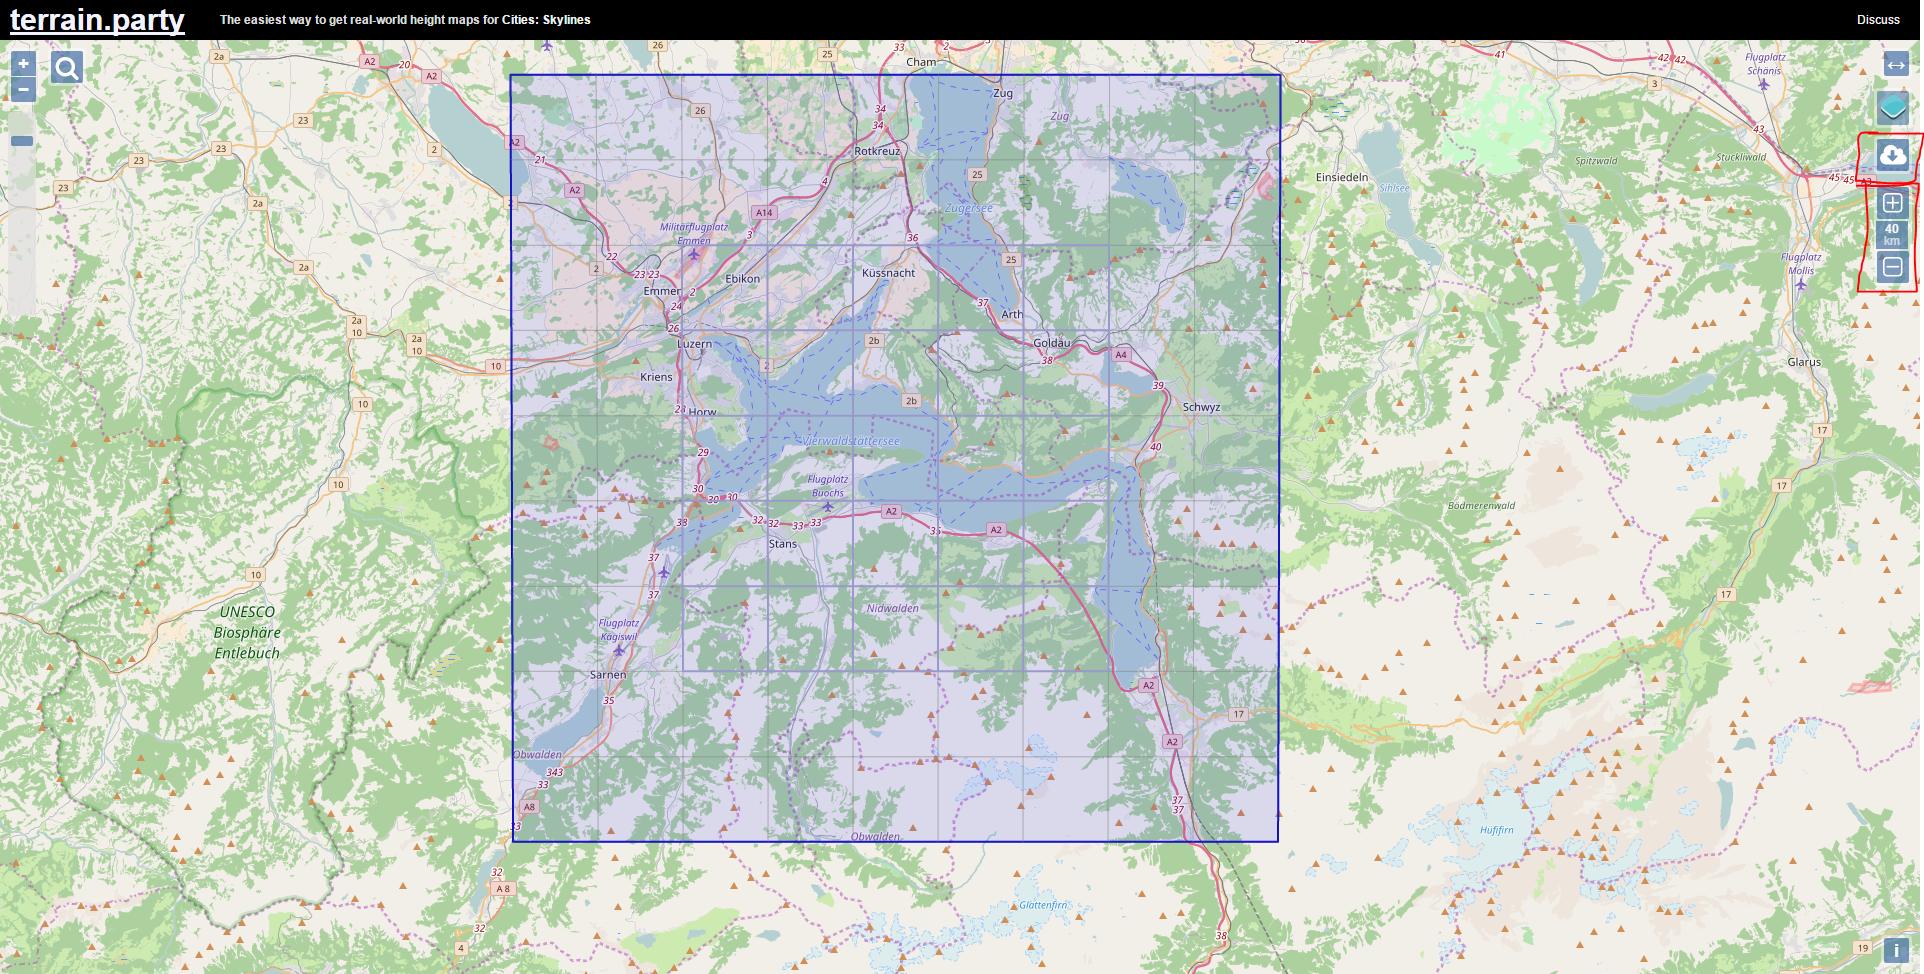
1) Go to terrain.party[terrain.party]
2) Select an area of your choice, with a minimum of 8km x 8km and a maximum of 60km x 60km
3) Download the data, choose any name you like
Resizing the heightmap
terrain.party produces a .png file with a resolution of 1081 pixels by 1081 pixels
Transport Fever Map sizes are different from this:
A small map has a size of around 1025 x 1025 pixels
A medium sized map has a size of around 2049 x 2049 pixels
A large sized map has a size fo around 4097 x 4097 pixels
If we keep the file at this size, a small map will be created.
Simply stretching the image will create a pixelated map. Therefore we transform this 1081 x 1081 pixel image to a vector image with the use of Inkscape. A vector image doesn’t save pixels, but lines, which is ideal in this case, because the lines will represent actual altitudes. This vector image is than converted to an image with the correct amount of pixels.
1) Open Inkscape
2) Open the terrain map: File > Open > “…/MyMap/[name] Height Map (ASTER 30m).png”. Use the standard settings
3) Convert the bitmap image to a vector image (Shift + Alt + B)
4) Choose the last option (greyscale) and Change the level value from 8 to 256 (the maximum)
5) Click on the image
6) Click on “Ok”
7) Wait for Inkscape to finish
8) Export the vector image to a size that suits you (Shift + Ctrl + E). Choose a size that is a little (20px) larger than the desired output size. The next step will erase a small portion of the outer edges.
9) Name this image “resized.png” and save it in the MyMap folder
Adding towns and industries
To preform the following step I used a very useful guide from steam user Xanos
1) Go to this TpF map maker[www.transportfevermods.com]
2) Click “New Heightmap” and open the “resized.png” file in the MyMap folder
3) Next we will need to do some map data and calculations:
We will use [link] to find the following heights in the selected area:
Heighest point
Shoreline point


We also need to figure out what the scale of the map will be:
As 1 pixel of the map will be equal to 4 meters ingame. This means a small map will be 4 km wide, a medium map will be 8 km wide and a large map will be 16 km wide.
We will also need the map width that you have chosen in terrain.party (8km ~ 60 km)
Calculate the scale:
Now for the calculations to enter into the TpF map maker
Note: the maximum height is 1000m, anything higher wil be set to 1000m
4) Enter the highest point into the corresponding box
5) Change the lowest point value untill the water level seems right on the preview map
6) Click on towns and add the desired towns (you can skip this step if you want random town creation done by TpF)
7) Click on industries and add the desired industries (you can skip this step if you want random industries creation done by TpF)
8) Click on metadata and add the map name, description, author and author steam ID (you can skip this step if you don’t care for this)
9) Click on Export Heightmap
10) Open the zipped map and go into the following folder: maps > [map name]
11) Copy both files to the MyMap folder
Terrain Smoothening
If we are going to use the map as it is we will have a map that looks like this:
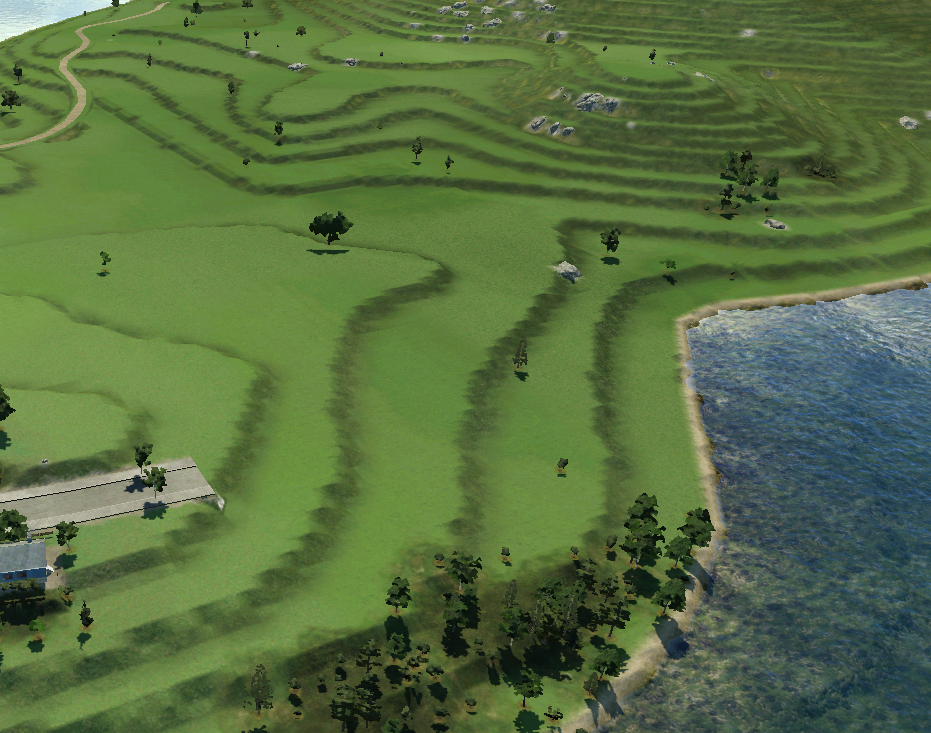
To smoothen this map we will be using GIMP 2.9
**Additional information
The map is the way it is because the greyscale is in 8-bit depth, which means that there can only be 2^8 = 256 different height values. This has to be increased, favourable to a 16-bit depth and than smoothened. GIMP 2.9 is one of the only free tools that can do such a thing. This 16-bit depth will give us 2^16 = 65536 different height values. More than enough.
1) Open GIMP 2.9
2) Open the height map file from the map maker: File > Open (Crtl + O) and navigate to “MyMap”
3) Open heightmap.png
4) Set the bit depth to 16 bits: Image > Precision > 16 bit integer
5) Blur the image: Filters > Blur > Gaussian Blur
6) Set the blur sizes: Size X to 5 and Size Y to 5
7) Click on Ok
8) Export the smoothened heightmap: (Crtl + Shift + E) and overwrite heightmap.png
Finishing touches
You can now enjoy your smooth, real world Transport Fever map!
Making a map with different water levels is probably the toughest thing to do. This is what I did with my Vierwaldstattersee map. These editing steps have been conducted in GIMP 2.9.5:
1) Color all water bodies in the darkest color (0,0,0)
2) Pick a water level you would like to have for your whole map
3) Color the shore of the remaining water bodies with the same color as that of the shoreline of the chosen water body
4) Use the bucket tool to fill up the water bodies to the shoreline color minus 3 (e.g. 7,7,7 shoreline becomes 4,4,4 water level)
6) Open your edited map in TpF and see whether the water levels are correct. Don’t mind the terraced look for now. Re-edit the parts of the map with GIMP 2.9.5 if necessary.
5) Conduct some gaussian blurring on the edited areas with the use of GIMP 2.9.5:
a) Go to Filters > Blur > Gaussian Blur
b) Select the area(s) you have just edited
c) Click on OK
6) Open the map in TpF to see whether this worked.

Great thanks to the creators of GIMP, Inkscape, the Transport Fever map editor and Xanos!
And of course the makers of Transport Fever for making an amazing game.
Good luck with all of your TpF adventures!
P.S. Don’t forget to share your maps in the workshop!
1) Make a new folder:
Program FilesSteamuserdata<SteamUID>446800localstaging_area<MyMapModName>
2) In this folder, make a new file called: mod.lua and edit it in a text editor to look something like this:

4) Make a second new folder:
Program FilesSteamuserdata<SteamUID>446800localstaging_area<MyMapModName>maps
5) Copy your heightmap and map.lua file into this folder
6) Open the game ‘Transport Fever’ and click on ‘PUBLISH MOD’. Choose your mod, upload it and you’re done!
7) Don’t forget to share your map in the comment section!
CHECK OUT MY MAPS:
4k Vierwaldstattersee 1:2.5
4k Oresund 1:3.5
4k Texel 1:2