Overview
After stumbling out of your escape pod and emerging out on to the unknown Rimworld, you realise you have no idea how to surive. Thankfully a book called the “Rimworld Survival Guide” is lying in the dirt not too far away.A guide for new players of RimWorld, to give some context to the demands of the Adaptive Tutor and some assistance in long term planning.This guide has been updated to cover most content as of 1.1. A few areas still need covering, however, the guide is mostly up to date.
Getting started:
The first thing to do in Rimworld is to start a new colony. So when starting your colony here are a few things to be aware of:
This guide will be dealing specifically with the “Crashlanded” scenario, due to this being the “traditional” Rimworld mode. The “Lost Tribe” and “The Rich Explorer” scenarios aren’t going to be covered in detail, since they offer a longer term challenge and for a first experience in RimWorld, the traditional is the best.
The AI storyteller affects the way in that events happen in your game. Here are the 3 default AI storytellers in the game and what to expect from them. All 3 storytellers try to maintain a minimum population of 4 colonists, however, Randy has a higher point of critical population, allowing larger colonies.
Cassandra:
Cassandra will cause semi-often events of increasing difficulty, in a typical style of game play, until eventually you can’t win and end up abandoning the planet or find yourself face down in the dirt with several gunshot wounds/stab wounds/boar tusks/thrumbo horns/warg teeth in your back or find your internal organs crushed by the friendly, local, rampaging muffalo.
Expect the game to get gradually harder. Reprieves may be long or short, depending what the game thinks will make for the best story.
Pheobe:
Otherwise known as “Friendly Pheobe”, this AI storyteller gives long reprieves between (generally smaller than other AI) attacks. At high difficulties however, Pheobe is capable of crushing colonies as well as Cassandra or Randy.
Easy game style, generally for those who don’t subscribe to the philosophy of “Losing is FUN!” or “Save Scum All The Way!”. Or those times when you want to build something without feeling like the game wants you dead.
Randy:
Generally the harder AI, since events don’t follow any rules and can happen at any time. However, if the RNG rolls in your favour Randy can have long periods of easy time, usually followed by periods of having your head smashed in with a brick at high difficulties.
For players who don’t want a traditional experience of increasing difficulty, something that doesn’t feel like a game. Additionally, if you don’t want to save scum, a hard hat might be recommended.
The difficulty you select affects various multipliers to effect how the game progress. In addition to modifier changes, Peaceful also disables the Flashstorm, Toxic Fallout and Volcanic Winter events.
- Peaceful
- Community Builder
- Adventure Story
- Strive to Survive
- Blood and Dust
- Losing is FUN
This table was pulled from the RimWorld Wiki here[rimworldwiki.com]
- Threat Scale controls the size of threats you will face, raids being a prime example of this.
- Mood bonus is the bonus or malus to mood your colonists will get.
- Sell price multiplier affects much silver you’ll get for your hard labour in manufacturing.
- Crop Yield factor affects the amount of food crops produce, harder difficulties mandate larger, more time consuming farms.
- Disease interval multiplier affects the time between colonists become infected with diseases
- Enemy Reproduction factor affects the rate of spread of insect hives.
A recommended configuration of story teller and difficulty

Your choice of landing site dramatically affect the difficulty of your game. The easiest biome is temperate forest with Ice Sheet and Extreme Deserts being the extremes of difficulty (freezing cold + no farm land and scorching heat + little farm land, respectively). Temperate forest offers plenty of farmland, literally tonnes of wood (a good early game building material), and no “extreme” temperatures. Mountains and hills can provide a large amount of metal and other mined resources along with cover from attackers, while plains offer large open areas for easy building. Growing seasons affect how much of the year you can spend growing crops outside, a long growing season means you can easily store enough food for the winter, where as a short one may mean you are dependant on hydroponics and hunting for food in the winter.
For a new player, Temperate Forest or Arid Shrubland are the good choices for a landing biome. Whether a mountainous or flat landing site is chosen is of little concern, both offer differing challenges.
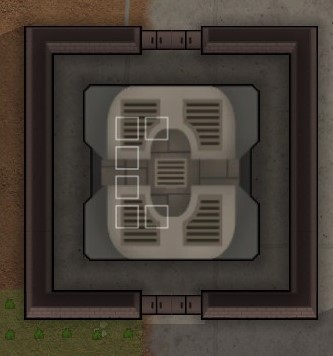
A recommended location to establish a colony. It is recommended to find similar locations on your own world.


When creating your characters, there are few “specializations” that are required to survive past early game, make sure at least one of your colonists has either a high skill or passion in these areas: Growing, Cooking, Construction and Mining.
These skills are by far the most helpful for establishing a early game colony, as it allows you to produce food (that doesn’t make people vomit) easily and helps construct a starting base fast, which will be important, as shown below. Construction is of particular note, since both early game forms of electric power generators require at least Construction skill 4.
Other nice to have skills are research, social, crafting, animals and combat (melee and shooting), however as long as all three of your colonists are capable of combat these aren’t too important.
Artistic isn’t really useful until mid-late game when you will have your colony built and will begin to fill it with art (sculptures). By that point you’ll have probably recruited someone arty anyway.
A good set of starting skills, whilst planting is a little low, the good construction skill will make for quick building and high quality furniture to boost moods.
Crashlanding:
After you first crash land you will need to focus on the 3 S’s to survive more than 12 days. These are:
- Shelter
- Sustenance
- Security.
However immediately pick up the survival rifle, the pistol and the plasteel knife you start with. You’ll see why later. A good step is to also equip your melee character with the armour that you start with.
The Map:
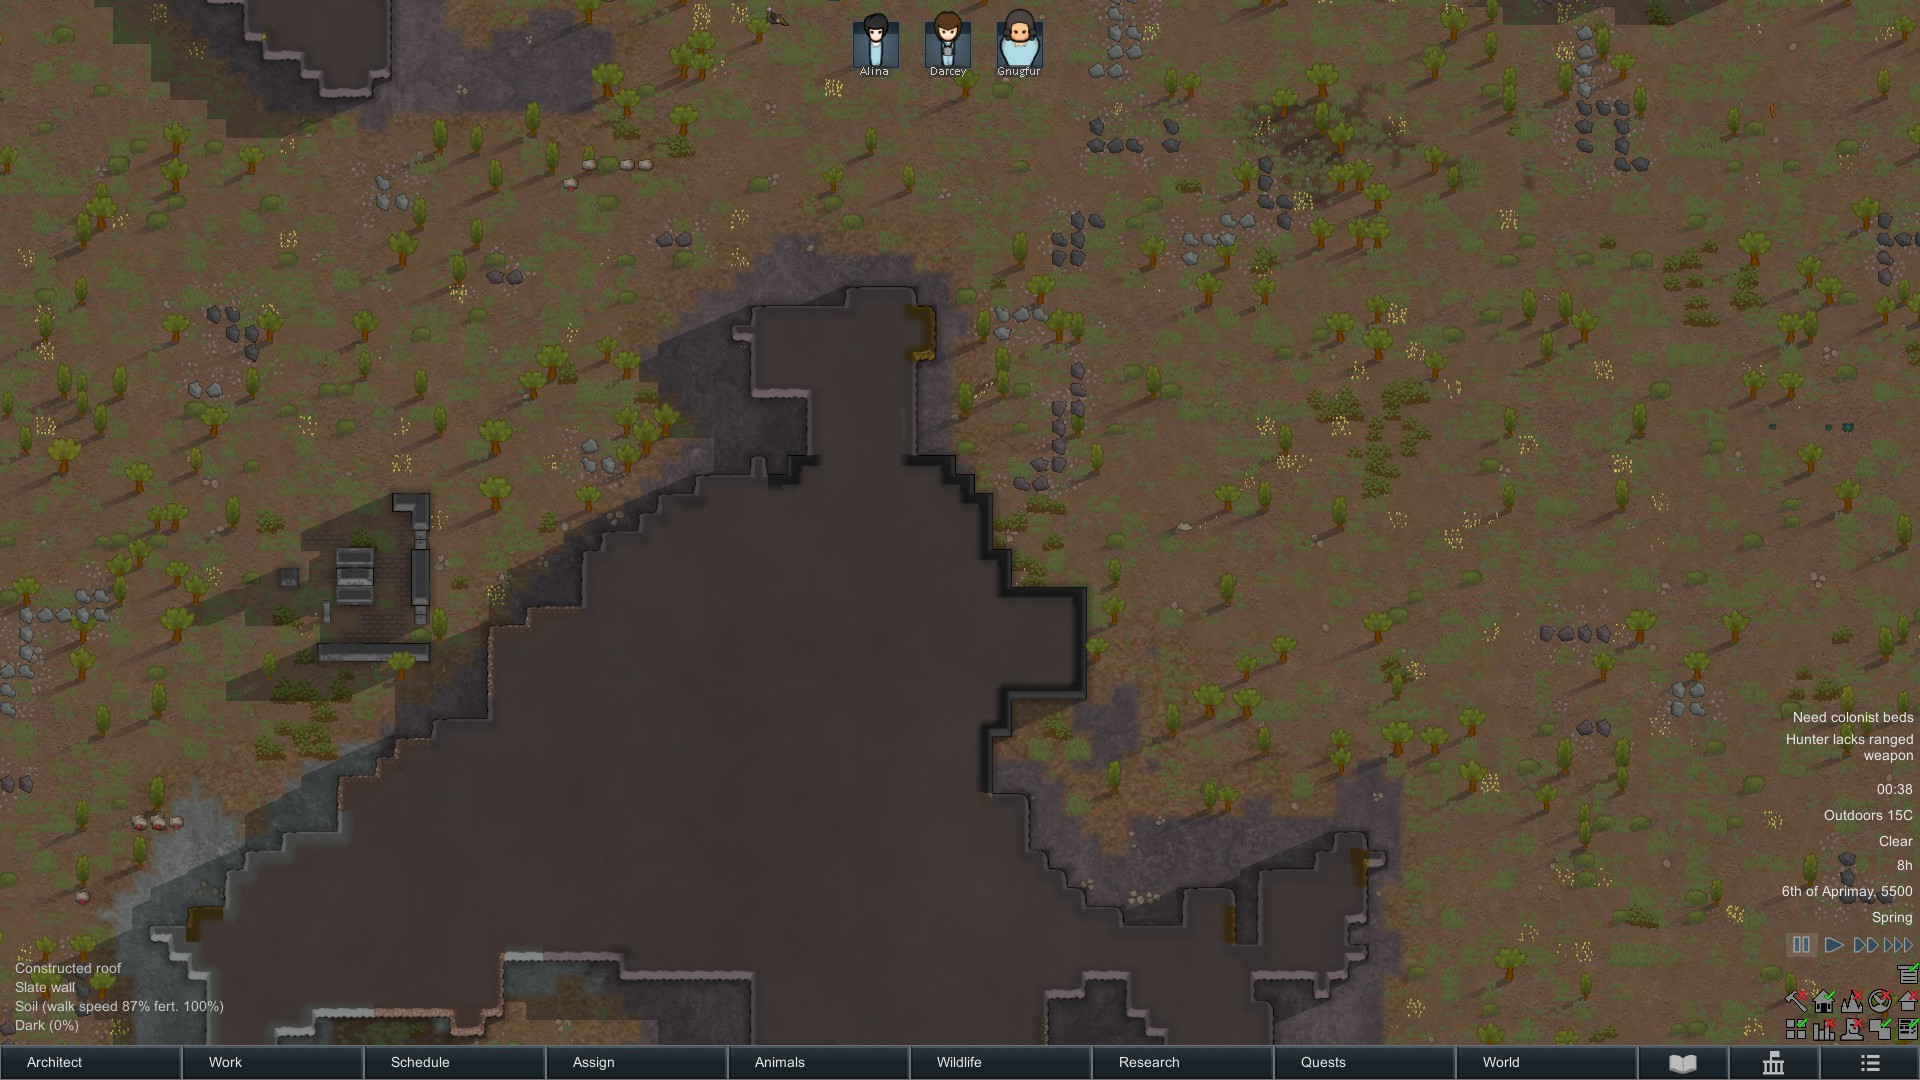
Firstly, pause the game and zoom out and inspect the map you’ve crashed onto. Note the location of any ancient ruins and anima trees on the map.
- Ancient Dangers can contain valuable items, from luciferium to psychic soothe pulsers. However inside is also a risk with the possibility of defending mechanoids or other risks. Open only with care and preparation, so something to be avoided when you first crashland.
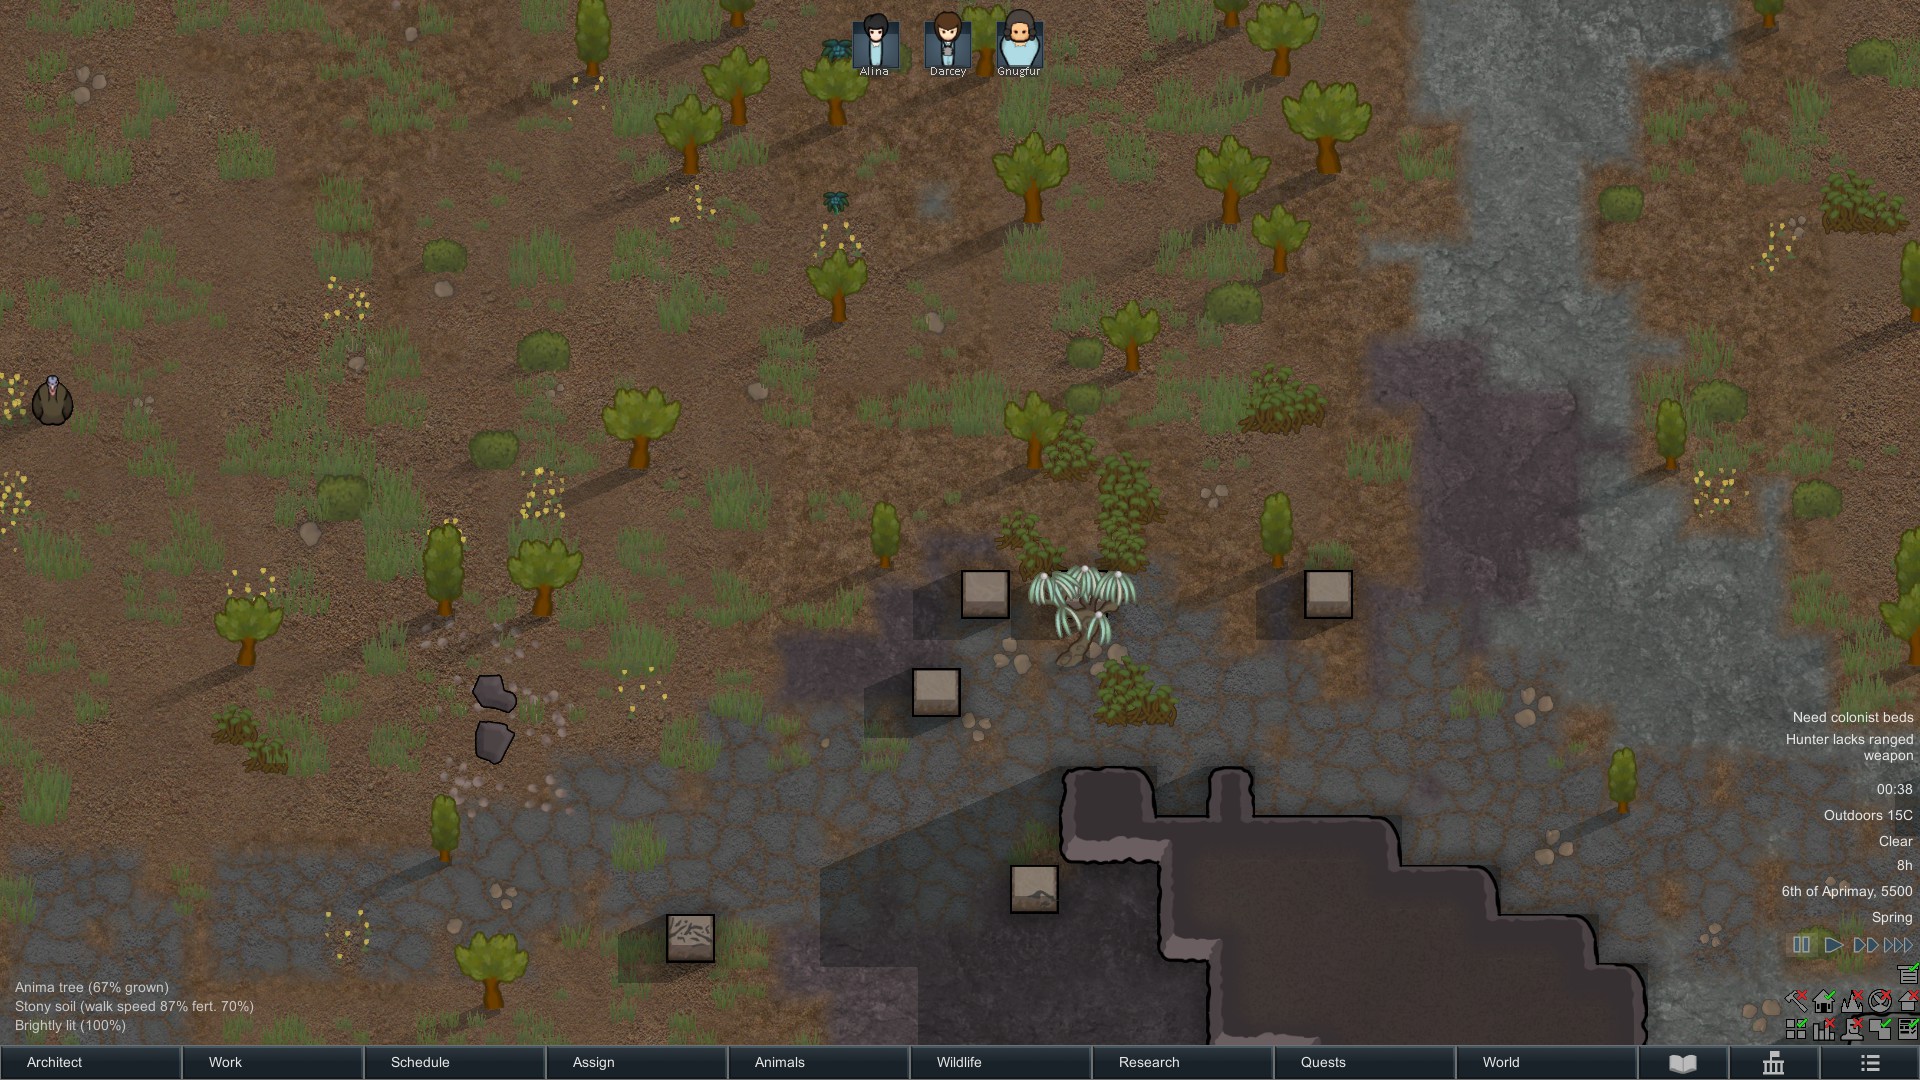
- Anima trees look like this. These are a part of the Royalty Expansion and will only spawn if you have the DLC. Since your pawns are spacers who have crashlanded, they lack the ability to use a nature psyfocus such as the anima tree. However, any pawns that are tribals and psychics can use the anima as a focus whilst meditating. In addition, the anima tree can be used to grant psycasts to a tribal pawn.
- Steam Geysers. These are important to note as they are a consistent form of power with no upkeep. It can be worth building a base around one early game to benefit from the free heating it provides and late game a geothermal generator can be built on top to provide power.

The work tab:
This is where you set the types of jobs each colonist in your colony, and the priority of them. Allows you to have dedicated cooks, builders, miners and cleaners, along with other things. There are two ways of using this, the basic and the advanced way.
You simply toggle which jobs a colonist should perform, keeping in mind that jobs further to the left have higher priority. So if you have a colonist set to cook and research they’ll cook first, and once all cooking bills are complete they’ll research. This means that your colony needs a lot of food to be cooked, your researcher won’t get much research done.
This method of assignment trades micromanagement for ease of use.
Here you can specify the priority of each job your colonists perform, on a scale of 1 to 4.
If a job type is given a priority of 1 then the colonist will always try to do this job first, followed by the next highest priority, followed by the next. Unless you want your colony to burn down while everyone is trying to get the mud off the floor, I recommend that firefight is always priority 1.
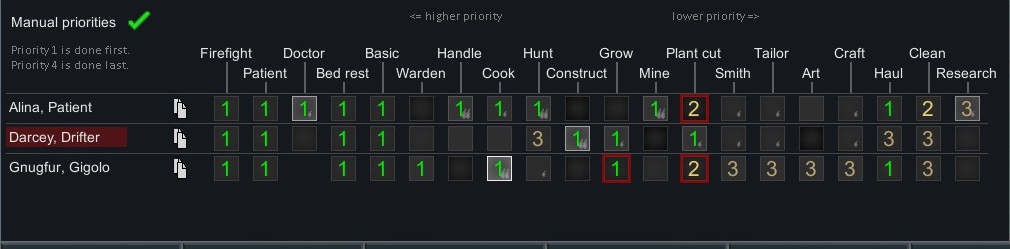
Similarly, Doctor should be a 1, to ensure that your doctor stops patients bleeding out before going to cook their meals and patient should also be a priority 1 to stop people going about their lives with gunshot wounds. Basic is a catch all term for tasks like flicking switches and should be kept as a priority 1. Bed rest covers medical none-emergencies, and should be a priority 1 so that colonists rest in bed to recover from illnesses.
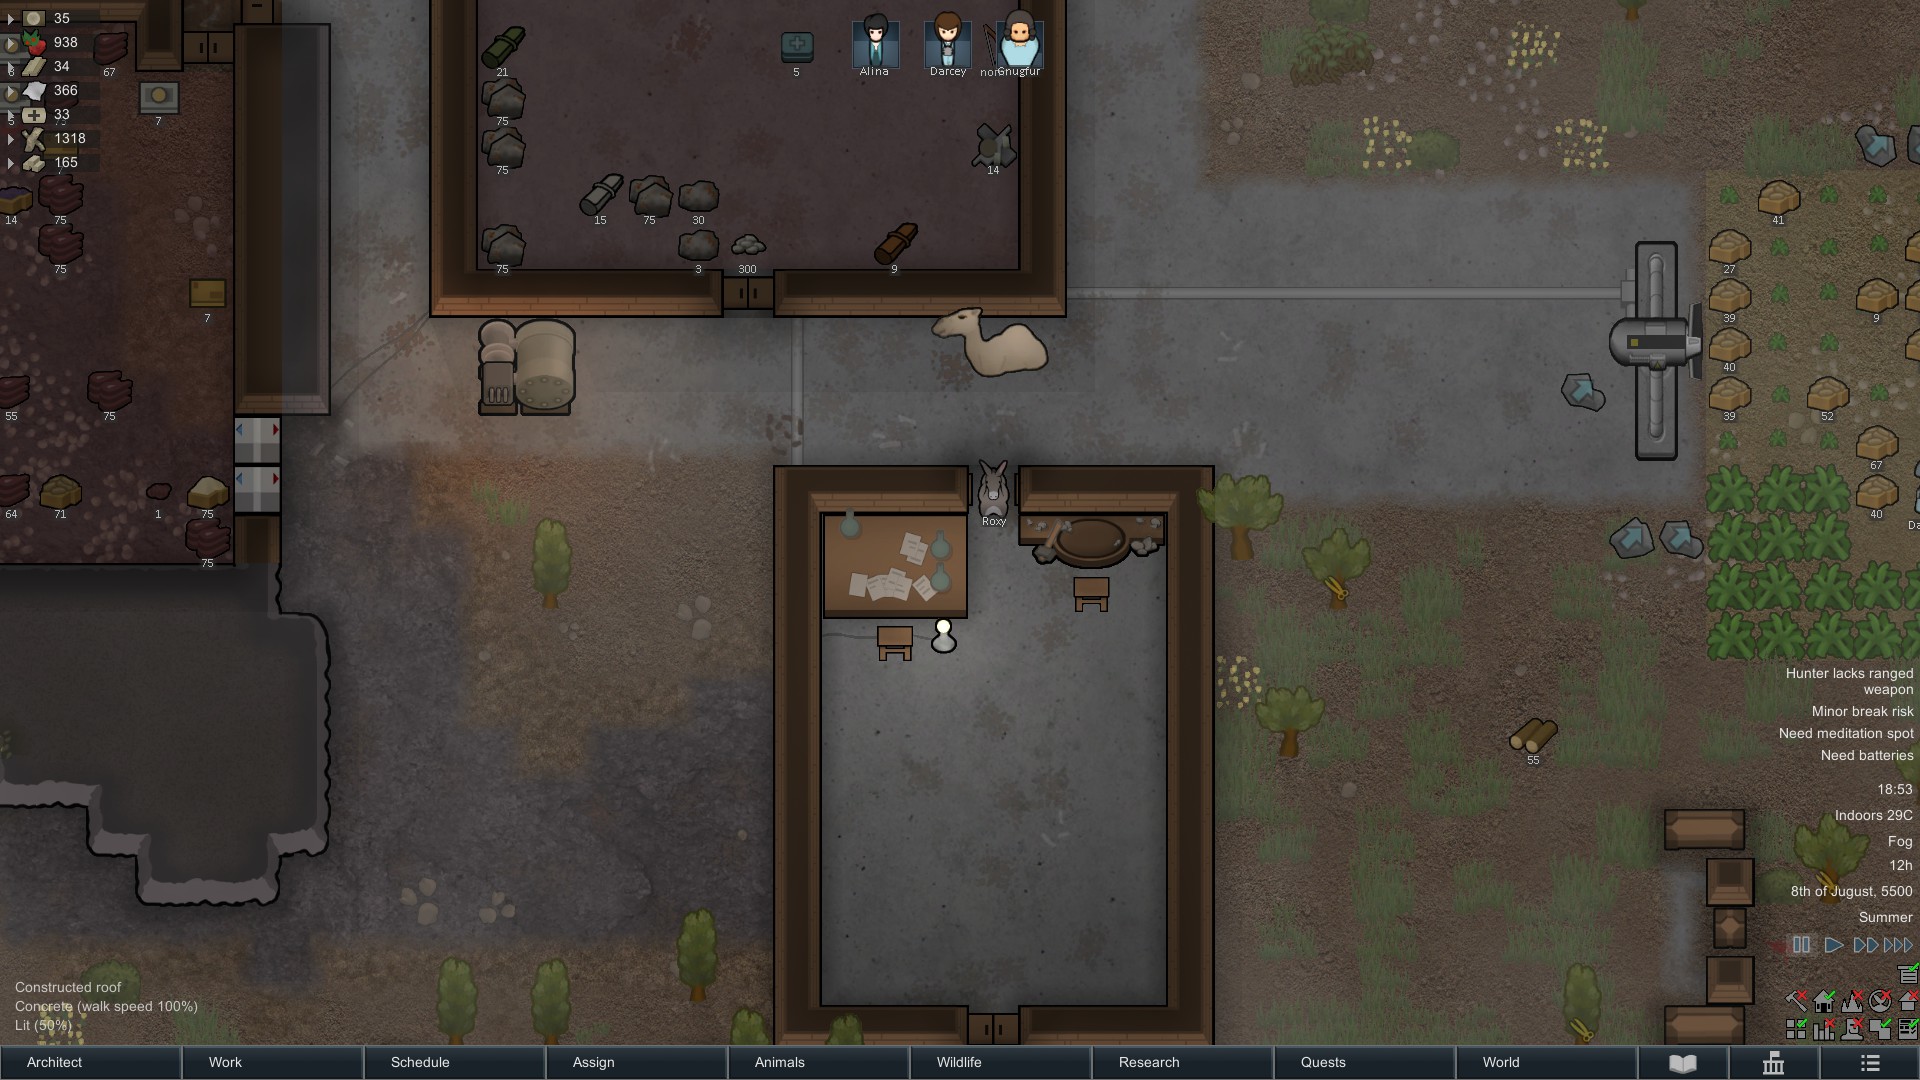
Afterwards, the skills in which the colonist specialise in should be at a high priority. Occasionally you’ll find a colonist with 2 skills in which they are the best of the colony at, which are in high demand, such as in the case of Darcy in the above screenshot.
A blank priority, similar to above, means the job won’t be carried out.
The rule of prioritises further to the left still are more important still applies, so you can use this to your advantage when specifying order.
Shelter:
The most important need to deal with, otherwise a few days after landing your colonists begin to suffer mental breaks caused by sleeping outside; and your vital supplies such as medicine will have decayed away to nothing.
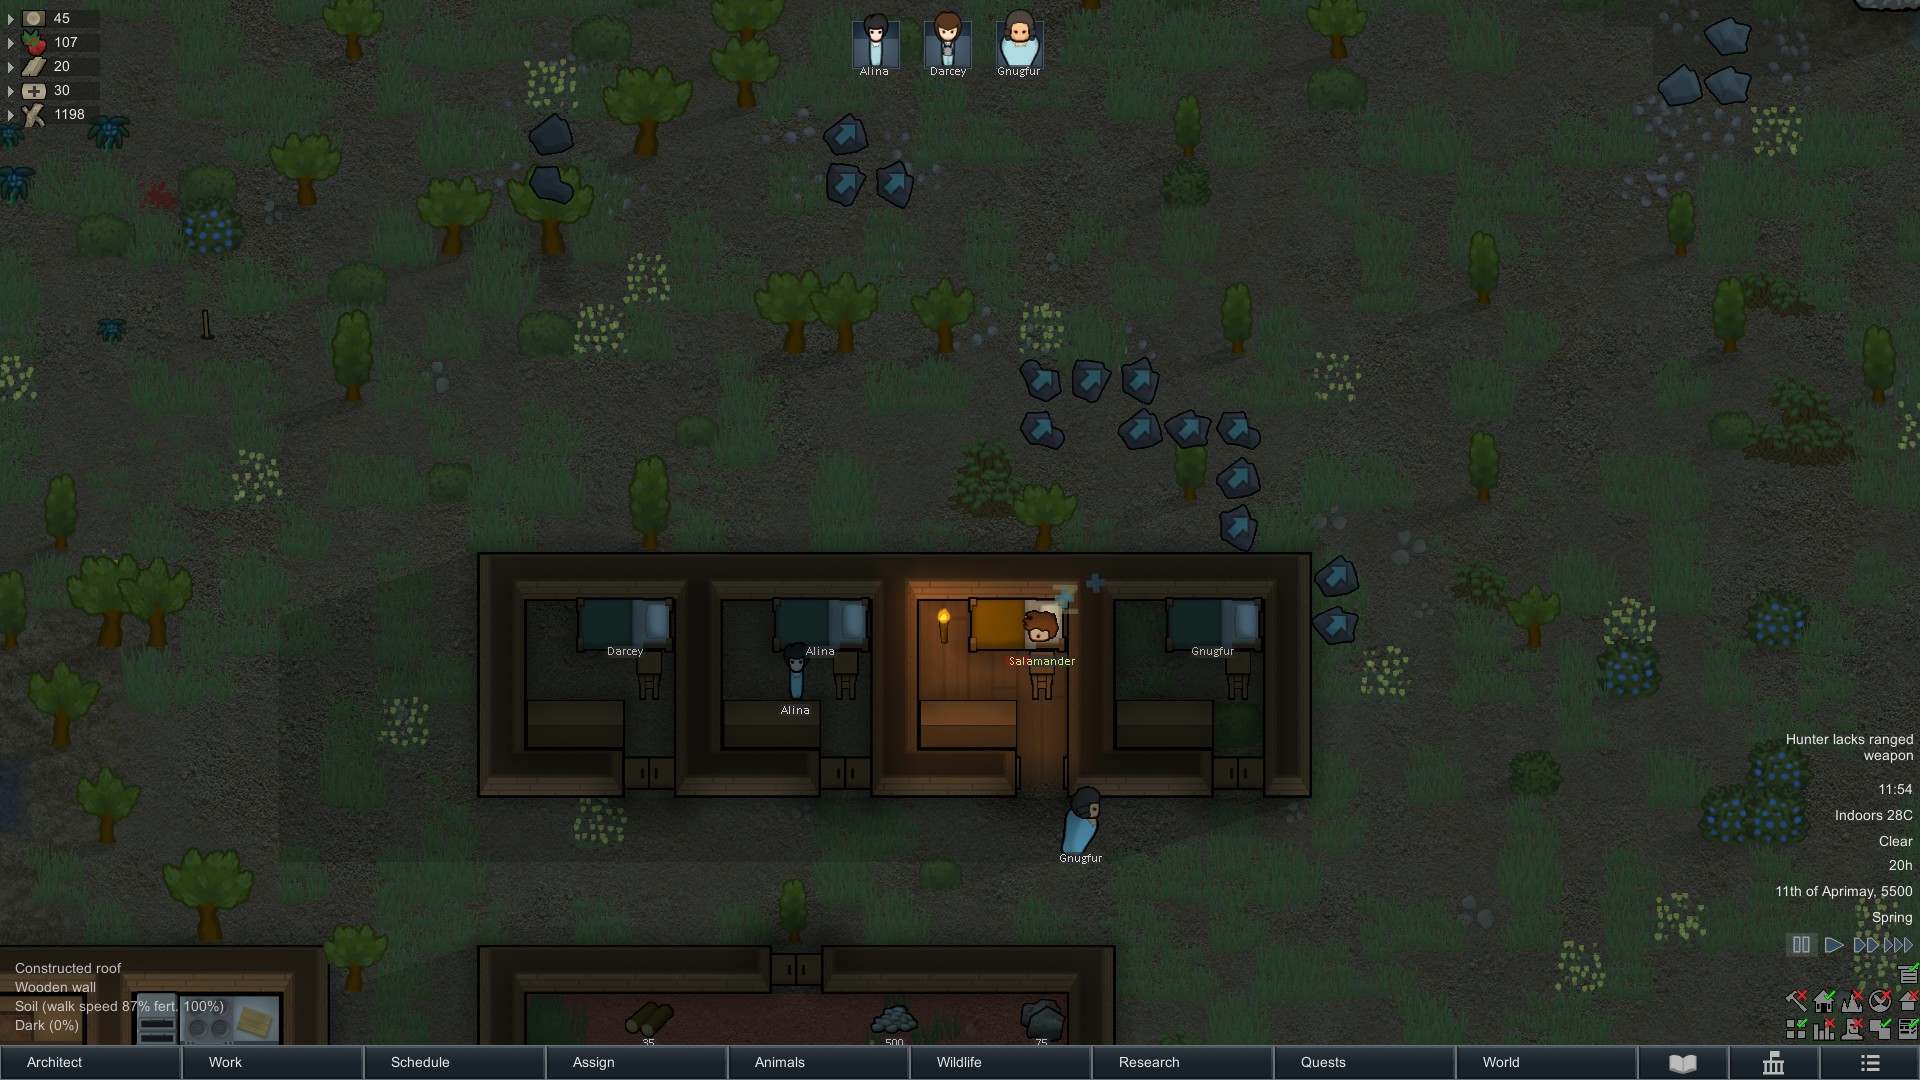
The first necessity is bedrooms for all colonists, the sooner they have their own room with a bed and roof the better their mood will be. Also, bed’s (unless they are of poor quality) allow the sleep need of a colonist to fill faster, meaning less time sleeping, more time working.
The game’s adaptive tutor should teach you how to build a room, however, if you want to rush this, here’s how: build a complete shape out of walls (Architect, structure) and add a door so it is possible for colonists to enter/leave the room. Once the walls and door have been built colonists will then assemble a roof.
First of all, look for a nice place to initially call home. This doesn’t have to be permanent, and you’ll want it to be somewhat defendable and near farmland. Then build a bedroom for each colonist, with a bed (Architect, Furniture) and some space for joy activities such as praying. Additionally, a dresser and an end table will boost the comfort of the bed, providing colonists with even better moods. A 3×3 room should suffice. A 4th room will allow you to house the wanderer that will join your colony in a few days, or to hold the prisoner from the first raid.
These 4 rooms should be more than sufficient to see colonists through the first few weeks, if not longer. Larger rooms may be necessary in the longer term to keep them happy
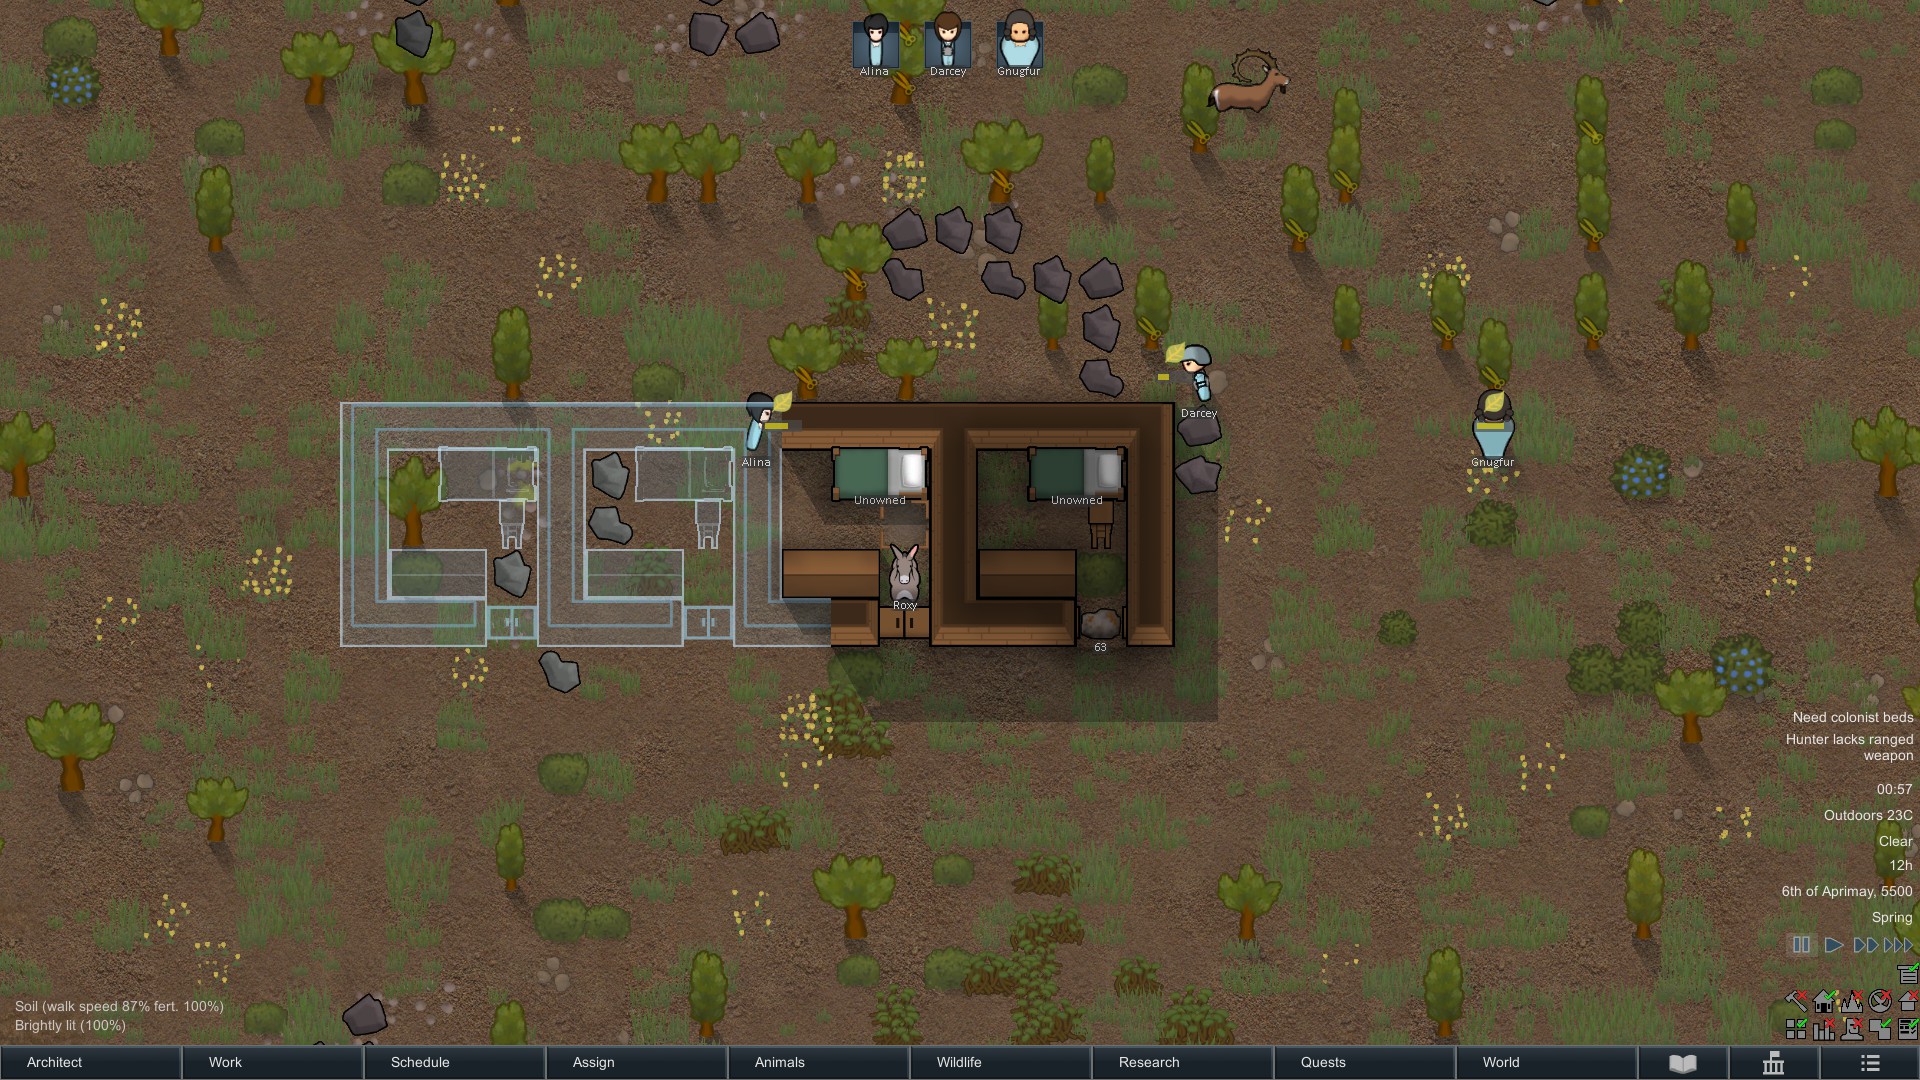
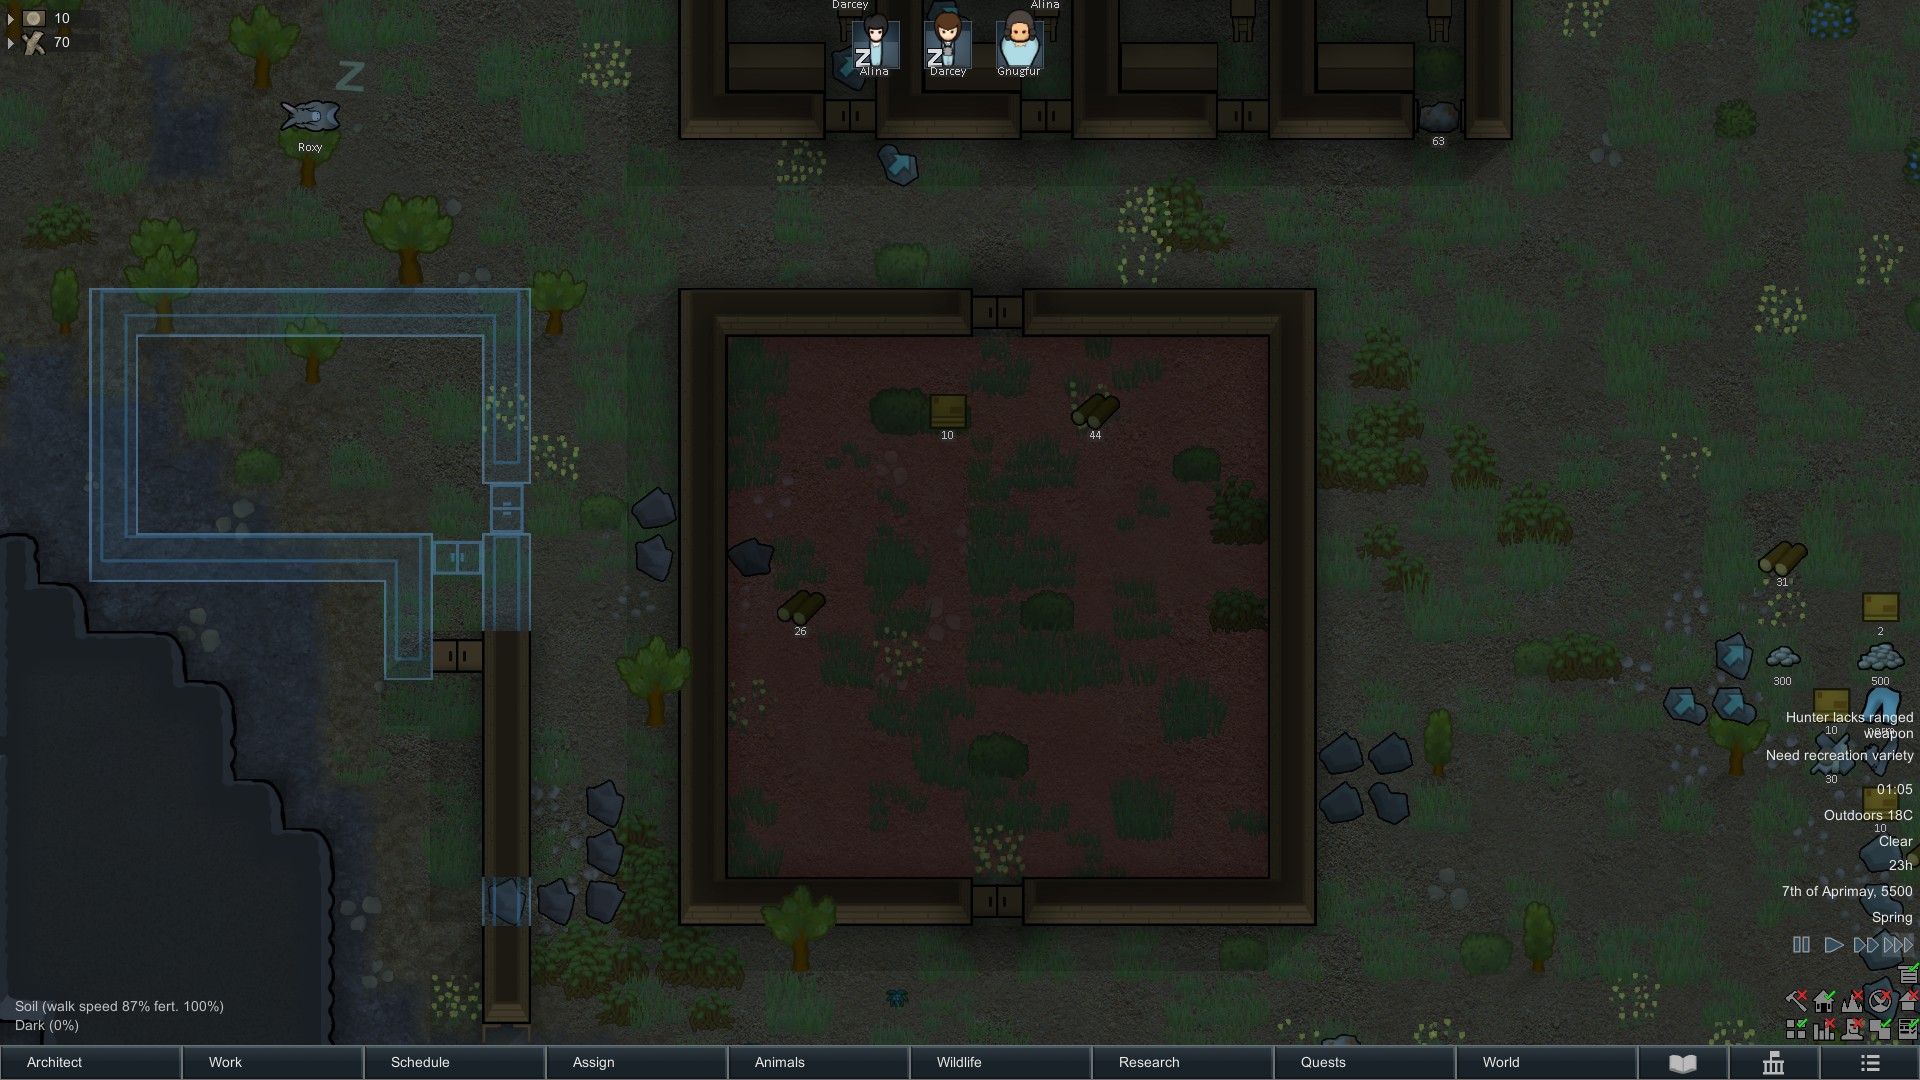
You’ll also want to build a store room, a building to keep all important items such as food, building materials and medicine in, to stop it decaying outside. Items that decay suffer no effects apart from lowered value, apart from guns. If a gun begins to decay, it suffers reduced accuracy. So that’s why you should’ve picked up the weapons you start with immediately, so that you don’t suffer accuracy penalties later. To get your colonists to haul items inside once you’ve built (and roofed) your stockroom, designate a stockpile zone (Architect, zone/area) in the building.
This simple 13×13 (11×11 internal) storeroom should be sufficient in the short term
Before you go to far, a horseshoes pin (Architect, Recreation) will help to keep your colonists from gaining to much tolerance to meditative joy, it’ll mean that your colonists spend less time having fun, meaning they spend more time working.
Sustenance:
After, well probably before you have a roof over your head you’ll want to start thinking about long term food. You crash with only 10 days of food for your starting colonists and a wanderer will join the colony soon. You’ll most likely capture the first raider to attack you, so you’ll have 5 mouths to feed. 30 packaged survival meals will only last at best 6 days. (Actually a few more, as the extra two mouths won’t appear for a few days, so you may get 7 days out of your packaged meals).
As a temporary measure you can find additional packaged meals on the map, but these are spread across the map and it will be a waste of time for your colonists to trek 5 miles to get their breakfast. So you’ll want to start farming and hunting for your food.
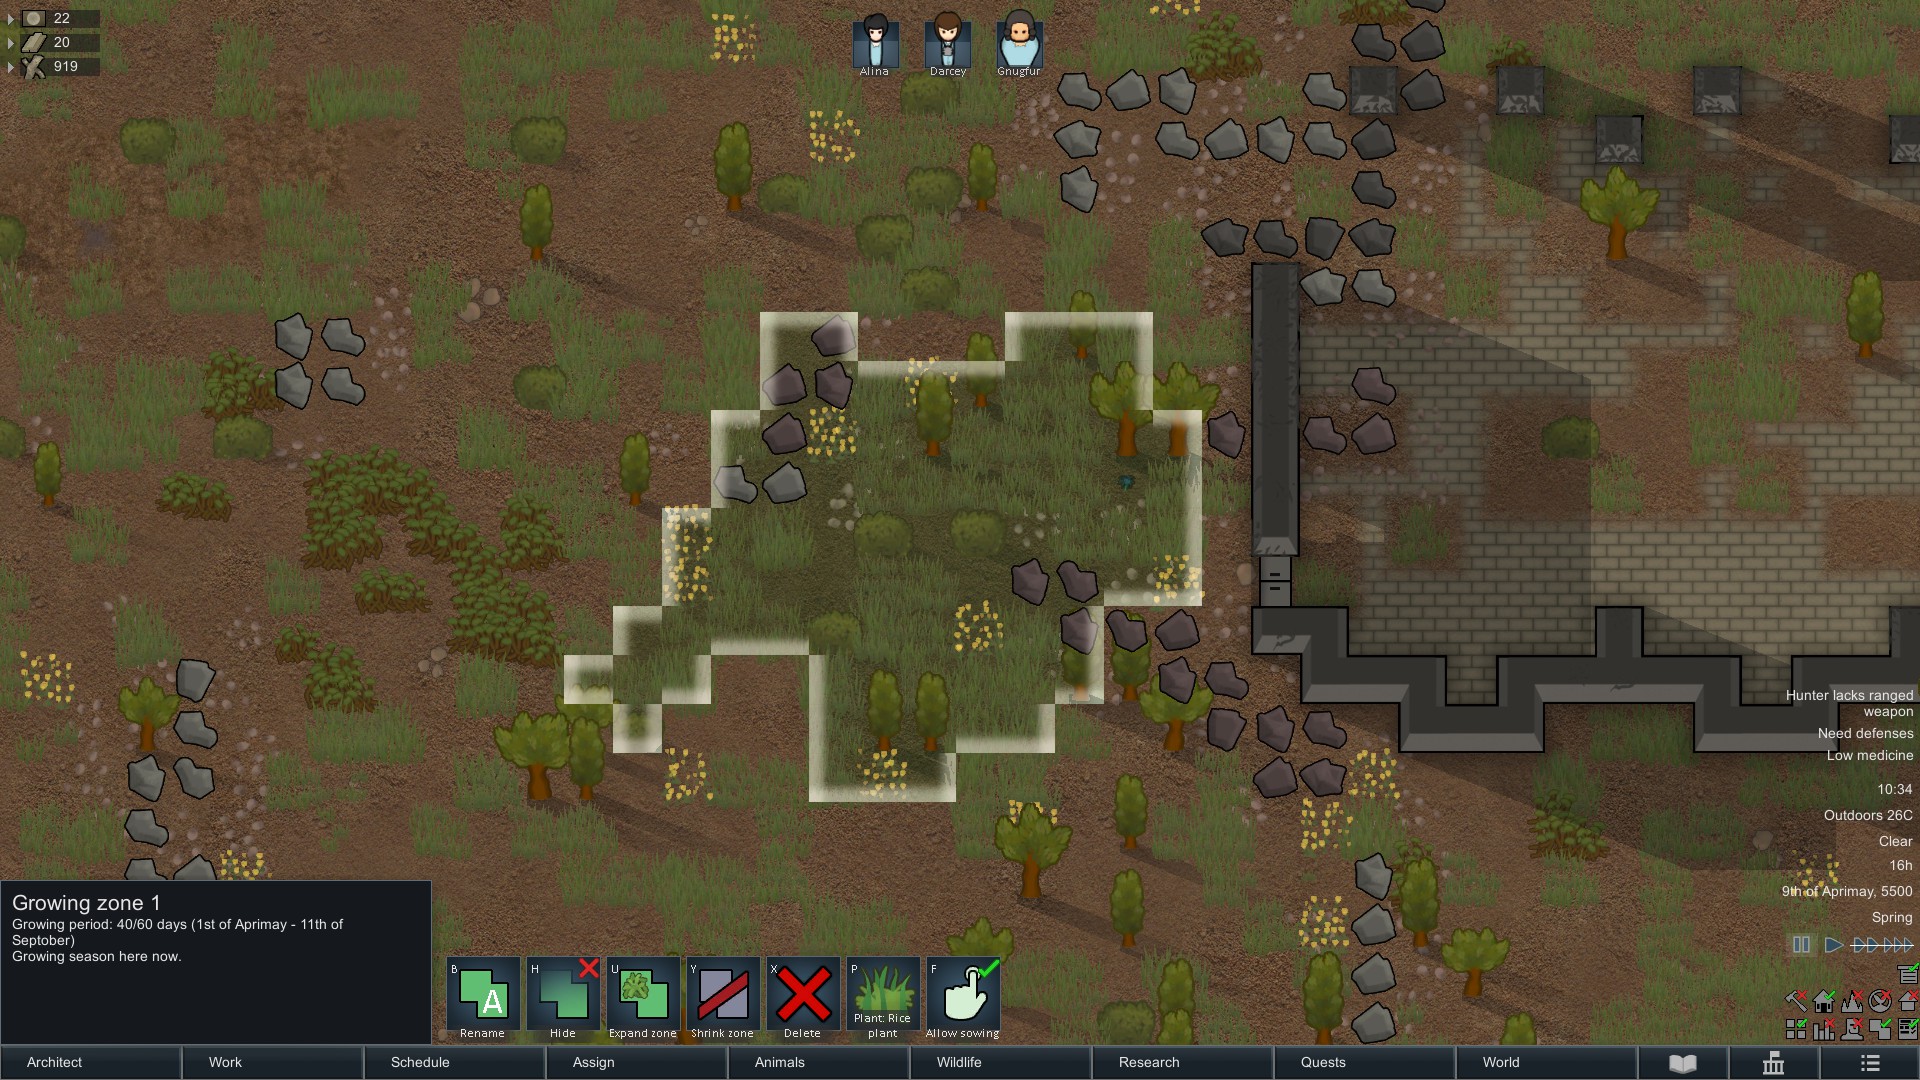
To start farming you’ll need to designate a growing zone (Architect, Zone/Area). A large growing zone is recommended but will require several days of planting to be fully sowed, and several days of harvesting, so having a too large field will slow down colony development. To locate good for food production turn on the fertility overlay, in the bottom left of the screen. Yellow is poor fertility, light green is average and dark green is high fertility.

For early game food production, it is recommended that you sow rice on high fertility soil and potatoes elsewhere, this is due to rice’s high fertility sensitivity, it benefits highly from fertile soils, where as potatoes will grow adequately in almost anything, but benefit little from good fertility.
Rice, with their high growth rate can provides lots of food quickly, however food supply based entirely on rice is highly labour intensive. Potatoes will provide additional food down the line and are less labour intensive. A system combining both works well in early game, with rice sustaining the colony until other, less labour intensive crops are viable.
This rice farm has been min-maxed so that rice is only growing on the high fertility soil, to avoid wasting farmer’s time.

In addition, the blight event causes blight to spread across crops, however, spread can be prevented by keeping at least 4 tiles of empty space between fields. Multiple small fields adequately spaced will prevent blight from completely ruining your food supply.
This large potato field avoids the poor fertility soil and is adequately spaced from the rice farm.

A final note maybe to use concrete to create paths around your fields and to your base. This will speed up your haulers bringing the harvested crops back, and, if the paths are 4 tiles wide, serve as a fire break to protect your crops from bush fires.
To start hunting, simply designate animals to be hunted and assign colonists to the hunting task. There are two ways to designate which animals should be hunted, this can be done either on the map, by either using the hunt tool (Architect, Orders) or by selecting the animal and clicking the hunt button.
Alternatively, you can use the wildlife tab, which will show all wildlife on the map, along with the option to designate hunting or taming targets. It also shows the chance of an animal to retaliate when injured.
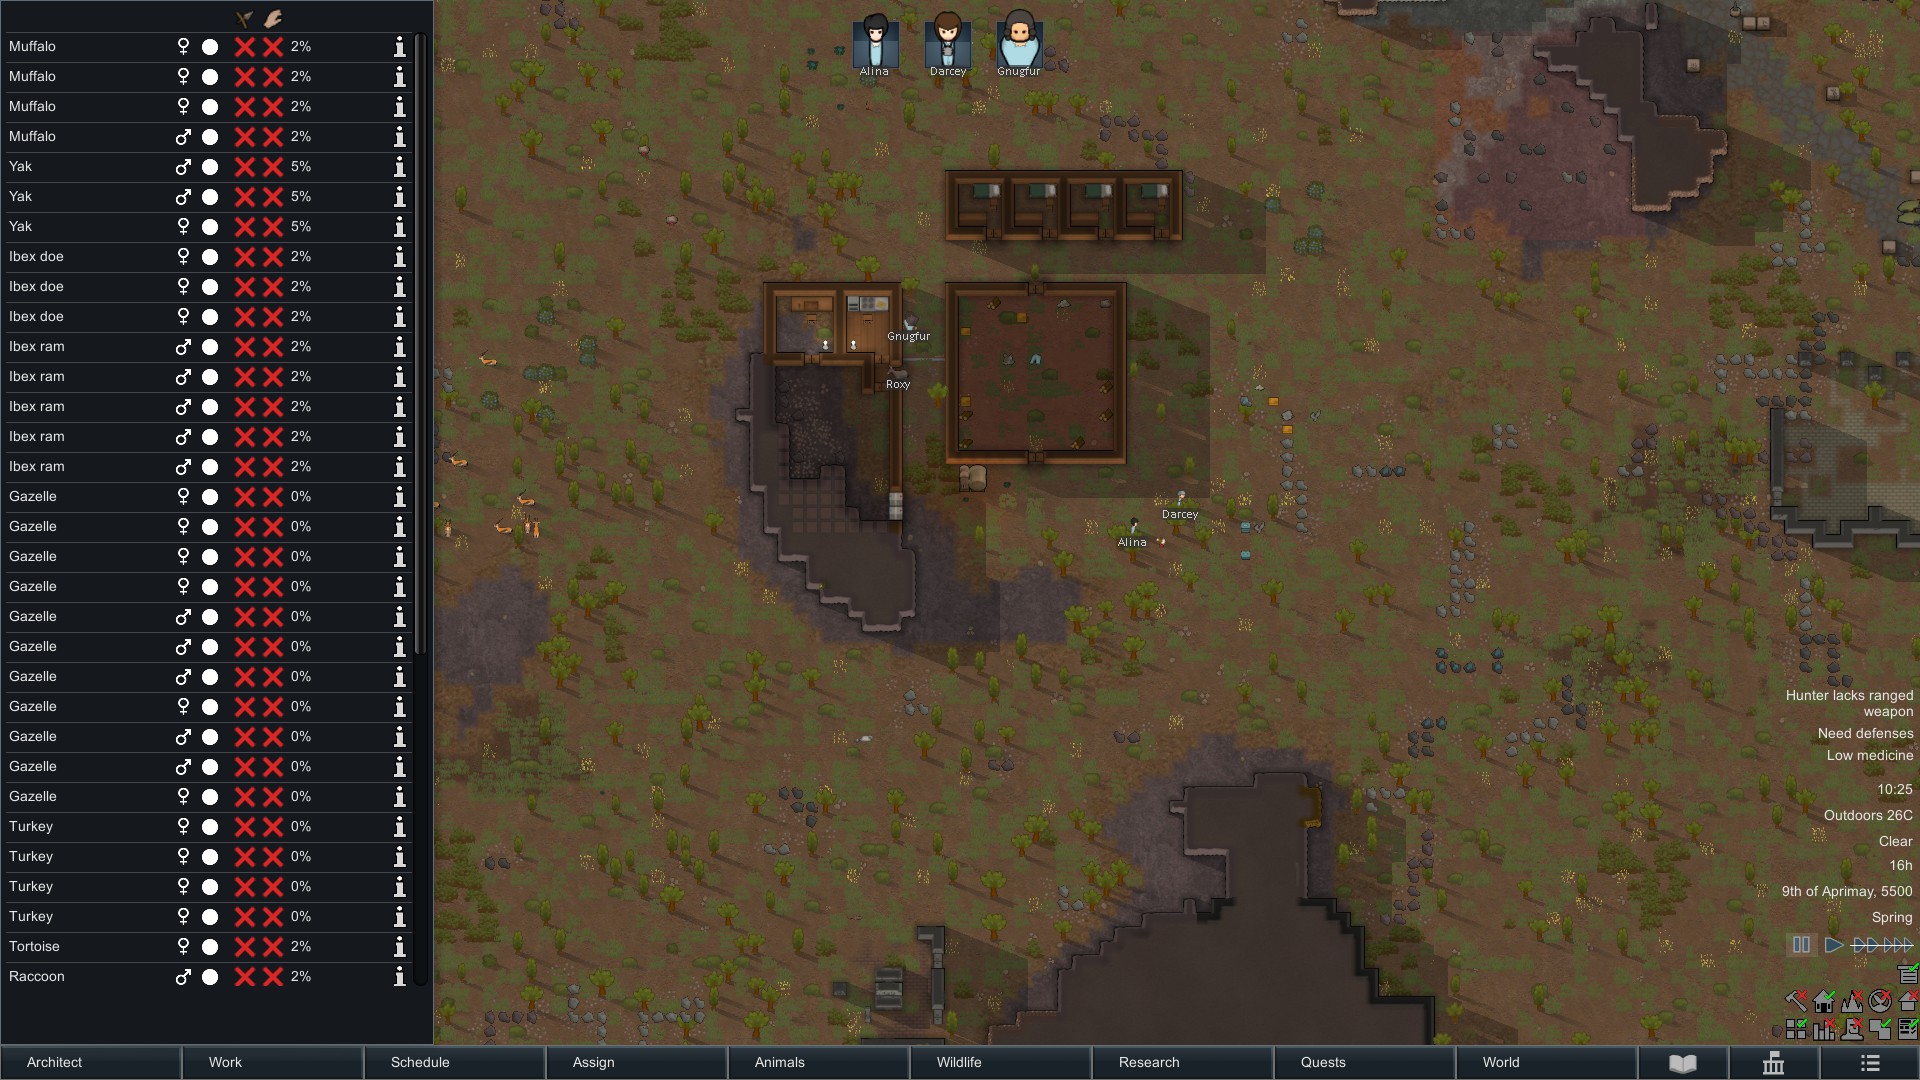
The chance to retaliate is modified by the hunter’s hunter stealth stat, and the distance to the animal. As such, colonists with high animal and shooting skills equipped with long range weapons such as the Bolt-action Rifle make the best hunters. Colonists with melee weapons will not hunt wildlife, due to the risk of an animal going man-hunter.
After you have your food, you need to make it into a meal. For this, your going to need a kitchen and a freezer to store your food without rotting.
A kitchen is simple, it needs to be an indoor space with a stove and if you are hunting for food, you’ll also need a butcher table to butcher animal corpses into meat. The stove and butcher table are found under the production tab on the Architect menu.
Most players will separate out the butcher table into a separate room, to avoid the mess of the butcher table leading to food poisoning.
Kitchen and butcher room, built to avoid food posioning


After you have prepared your food, you need to store it without it spoiling. For this, a freezer is needed. All a freezer is is a sealed room with a couple of coolers set to below the freezing point of water (0C/32F/273K). However, all freezers will actually be set to a few degrees below this (such as -5C) to prevent doors opening from raising the temperature and resulting in spoiled food.
For now, just place a wood fired generator close to your coolers. If you choose an electric stove, rather than a wood fired one, run some conduits to the stove. Electricity is a topic to be covered later.
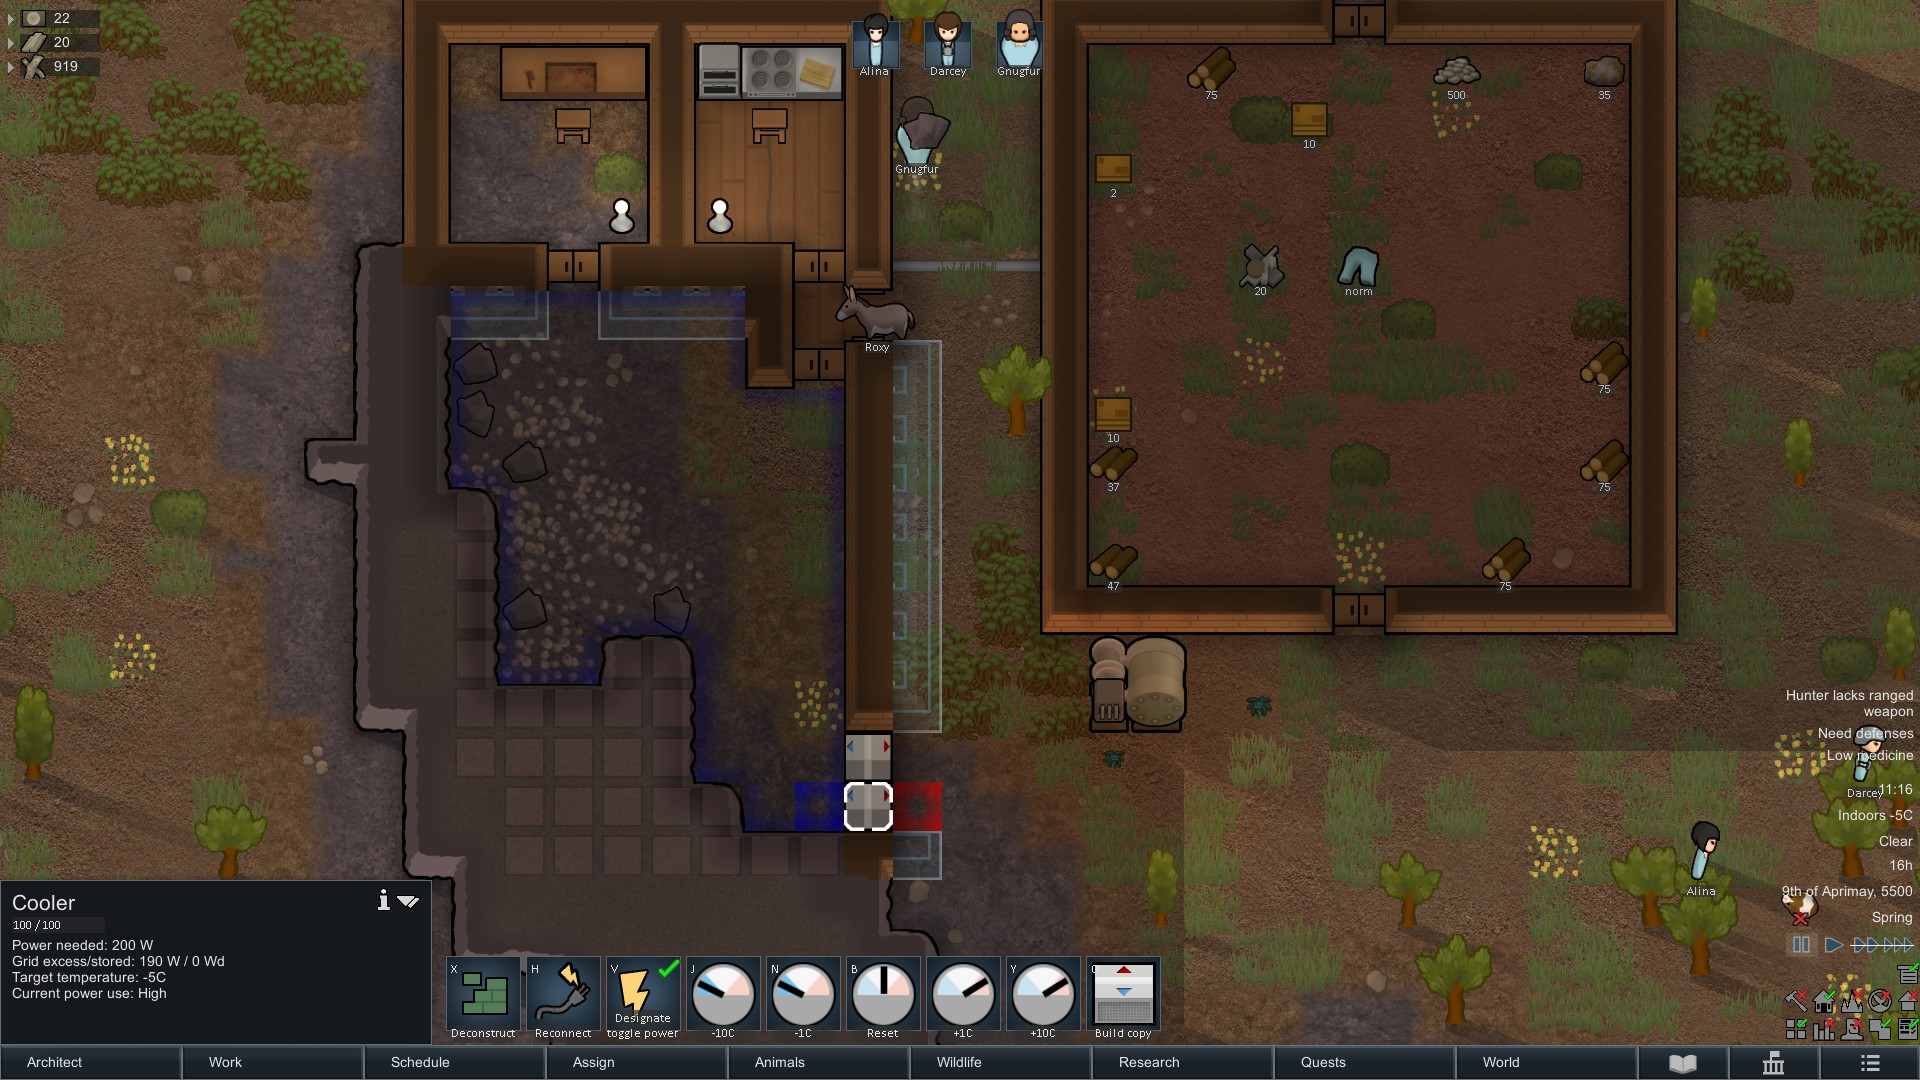
There are steps that can be taken to improve the efficiency of your freezer, such as staggering the target temperatures of your coolers, so that less power is used under normal circumstances, yet more coolers remain in reserve in emergencies (such as heatwaves). Additionally, doubling the wall thickness adds greatly to the insulation, reducing the heat lost, allowing larger freezers to be run on less coolers.
Security:
So by this point you should be doing great, with a roof over your head and enough food to survive until winter, but now you’re going to get a new pressing need: the neighbours. By now enough time should’ve gone by for a raid to show up (for Cassandra and Pheobe players, Randy people may go for ages without being raided or may have already had the door knocked down by mechanoids).
For some basic security some U shapes of Barricades around the perimeter of your colony will provide basic safety for your colonists. This traditionally used to be sand bags, but as of now, those require cloth, making barricades a good early game choice. Some concrete placed where your colonist will stand prevents trees from growing in that space.
This is where on mountainous maps building in a valley will have helped you, you can focus all of your defences on one direction. The initial few raids can be defeated by smart use of corners, doors and sandbags, but eventually you’re going to need turrets to help you defend your colony. Initially even a few turrets with some sand bags to stop bullets hitting them will be enough, but you’ll want to eventually upgrade to one of the more advanced forms of defence (see below).
Be aware however, that turrets will explode at low health, meaning you don’t get their full health bar and they can kill nearby colonists in the blast radius. One exploding turret can also cause another to explode in a chain reaction, so keep at least 3 tiles between turrets, or place a wall between them.
As for colonists protection, colonists can lean round walls, allowing them to shoot whilst in cover, useful for staying alive in a fire fight, sandbags can also help to stop bullets.
The same barricade set up, with walls to improve the defensive bonus it offers.

Don’t send melee characters out in the middle of a fire-fight, use them to chase down fleeing enemies and rescue downed allies. If they are sent out into a field of cross fire without a personal shield they’ll be cut to pieces.
Prisoners, and Prisons
As time goes on your going to be capturing raiders, while at the same time your colonists are going to become more and more wounded, and maybe even suffer a couple of deaths. Thankfully raiders can be recruited to join the colony and help grow it’s ranks.
A starting prison is often just throwing a sleeping spot down in the corner of a stockpile room and keeping one or two raiders locked up in there. There are a few problems with this:
- If a prisoner has a mental break, they’ll beat up all their fellow prisoners
- They all suffer a mood debuff from sharing a room
- If there are any guns or other weapons in your stockpile room, the prisoners will not hesitate to use these on your colonists in their escape attempt.
So the best course of action is to assign each prisoner to there own separate cell, this will prevent them from trying to kill each other, as well as make them happier as they don’t have to share a room.
The quality of your prison affects how easy it is to recruit prisoners, happier prisoners are easier to recruit and are less likely to suffer a mental break. So it’s recommended that to make it easy to recruit prisoners to give them a decent cell, with enough space to walk around, a comfortable bed and a table and chair to eat off, so that they don’t get too many mood debuffs.
Prisoners have a special tab on their inspect dialog, called “Prisoner”. This allows you to set your colonies stance on how the prisoner is treated. Do they get food? What level of medical care? How should wardens interract with them. These are all controllable. It is possible to tell your colonists to not go near the prisoner at all, not even for to deliver food or provide medical care, to telling your wardens to have friendly chats with them, try to recruit the prisoner, release them, or execute them.
Another use for prisoners is an organ farm, to replace lost kidneys and lungs in your own colonists, or just to havest the organs to sell, this does however provide a negative thought to the colony members, and the prisoner in question.
Executing an “innocent” prisoner will provide a mood debuff to the entire colony. Prisoners are considerred innocent when they have done nothing provocative, however if one injures a colony member or tries to escape, then they are then considerred guilty and this no longer applies.
Releasing a prisoner takes the prisoner and sets them free outside the colonies walls, so that they can make their way to the edge of the map and return to their faction. Doing this with outlander town or tribal prisoners will improve your relationship with their faction, with them eventually no longer hating you. Pirates and savage tribes will always be hostile, so the only good of releasing a pirate or savage tribe prisoner is to get rid of an excess mouth to feed.
To improve your chances of recruiting a prisoner, give them a high quality cell, as mentioned above, and use a warden of high social skill.
To train a colonists social skill, it is possible to keep a prisoner set to reduce resistance, so that your warden talks with the prisoner daily, but doesn’t attempt to recruit them or release them, leading to them being held perpetually in your prison as a training method for socialising.
Advanced information:
So your established, have fought off your first few raids and are looking like your actually going to make it to winter! So now you need to start working on future survival, which means getting some more advanced structures going. So here’s what the next steps of your game should be.
- Electricity
- Research
- Basic Crafting
- Permanent, sturdy structures
- Long term food planning
- Advanced defenses
- First Aid
- Art
- Trading
- Caravans, Launch pods and Travel
- Advanced medicine and colonist limb replacement (and upgrading)
- Drugs
Electricity:
Electricity is a key mechanic of RimWorld, many devices use it, from cook stoves to communicators, from autodoors to turrets.
How electricity works is that at all times your consumption must be less than your generation, otherwise your storage is drained to meet the shortfall. If your storage is empty then some devices shut down due to lack of power. Since at the start of the game you only have one consistent souce of power, your most likely going to be using inconsistent sources, so batteries are going to be needed to store power.
Provides a steady amount of power at all times, however it needs to be frequently resupplied with wood to burn. Also outputs very little energy (1000W) compared to other sources.
The step up from wood-fired generators, chemfuel powered generators produce the same amount of power (1000W), however, the fuel lasts far longer. Chemfuel can be obtained by milking boomaloopes or by refining biological matter.
Provides a consistent amount of power during the day, up to 1700W, ramping up through the morning and ramping down through the evening. At night, they provide no power at all. You’ll need batteries to have uninterrupted power.
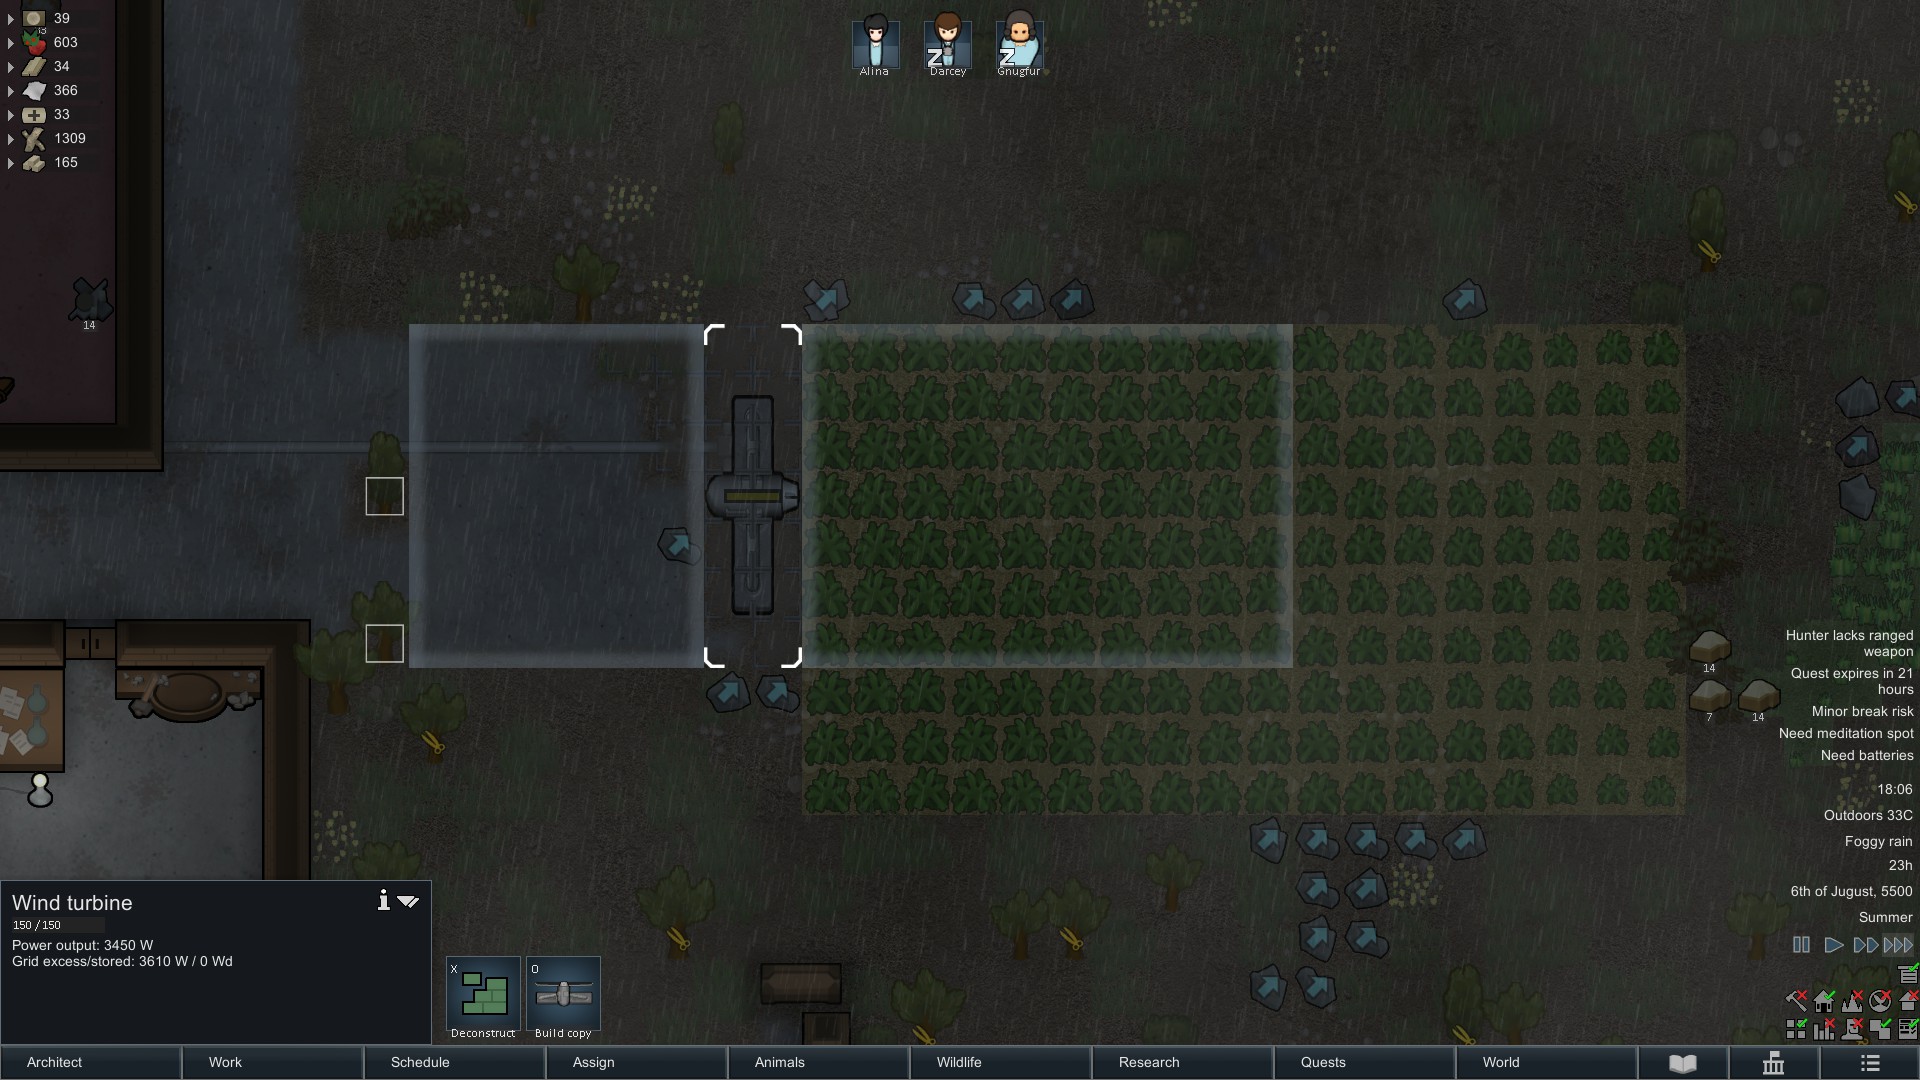
Provides variable power at all times. The output can vary dramatically, with a maximum supply of 3450W. You will need batteries to provide a stable supply of power.
Trees and walls, along with other obstructions can slow the blades so the area in front and behind the turbine needs to be kept clear. A good solution to this can be to build your wind turbines in your fields, due to your farmers cutting down trees automatically and crops not obstructing the blade. Alternatively, you can build a floor to prevent the growth of trees.

can be built, the vent can act as a source of free heat for a colony.
Must be placed on a mixture of solid terrain and running water. Provides constant power, however, placing generators too close together lowers the efficiency of the generators.
The Vanometric powercell is a piece of archotech and produces a continuous supply of 1000W without upkeep. It can only be obtained through quests.
Stores power at 50% efficiency for times when demand for power is greater than supply. Batteries catch fire if left out in the rain or placed in extreme heat. They also trigger the short-circuit event, where a random power conduit on your power network explodes: causing fire, damaging objects and draining all of the power stored in your batteries.
Research:
Research is the main progression in Rimworld. It’s pretty simple to get started, place down a basic research table (Architect, production), and designate a colonist as a reasearcher, using the work tab and then choose a research you want your researcher to work on. As you progress up RimWorld’s tech tree you’ll unlock the advanced research table and the multi-analyzer.
The advanced research table allows you to research 66.7% (2/3rds) faster than the basic table (the basic table has a research speed modifier of 0.6, while the advanced table has a modifer of 1.0). Research speed is also affected by the cleaniness of the room research is being carried out in. Research will progress faster in a sterile laboratory than in a normal room, and a normal room will be faster than one that isn’t cleaned. The multi-analyzer provides a bonus to research speed.

Here are some of my recommended researches, these provide major benefits when completed:
- Batteries: These will allow you to store excess power for later use. Essential for using solar generators or wind turbines.
- Vitals monitor: Great for hospitals, increases the rate at which colonist can recover from disease.
- Hydropnics: Great for growing crops indoors and quickly. These are a good tool for those wanting to feed a large colony or for keeping your colonists fed throughout winter. Borderline essential for Ice Sheet maps.
- Geothermal Power: The best power generation in the game, as it’s high power, consistent all the time and no maintenance (apart from breakdowns).
- Long range mineral scanner: Gives your researchers something to do once you’ve completed the tech tree and lets you find large clusters of ore to mine.
Basic Crafting:
Once you’ve researched more advanced items, you need to make them. Some of the items you’ll unlock are simply constructed using the architect menu, however other items, such as weapons or armour, will need to be crafted.
When first crafting, make sure you have the appropiate table (found under (Architect, Production)) to do so, a sewing table is not going to have the correct tools to drill a barrel for a gun, for example. If your having difficulty as to which table you need, A: experience will help, you’ll slowly learn what tables are required to do what, B: have a guess, even if you place the wrong table, chances are you’ll want it later for other items and C: I’ll include a section below on most of the vanilla tables and their uses.
After you’ve placed the type of crafting table you want, you’ll need to specify what your colonists should craft at it, using the bill system from before. Use Do X Times for items that you only need a small amount of, or only need occasionally, use Do until you have X for recipes for which you need a stockpile of the product, or need a constant amount, but beware, some bills do not support Do until you have X. Do Forever is best for bills that you need to be carried out continuously, or other circumstances (for example with butchering, raw meat lasts longer before it rots than animal corpses, and for some animals, it’s more space efficent to store meat than bodies.
The details button of a bill allows you to specify a range in which colonists search for ingrediants (can help make your production more efficent as colonists don’t walk half a map for ingrediants), the minimum and maximum skill ranges that colonists can carry out the bill for, and what ingrediants colonists can use. For some bills specific ingrediants must be used and by disabling one ingrediant you can prevent the bill from being completed, however for others you can use this to specify what material gets used (so you can produce only plasteel swords or marble statues).
To speed up crafting speed you can place tool cabinets near to your crafting tables, up to two can be linked to one table at once and each cabinet can linked to as many tables as you can fit near it.
Permanent Structures:
By now you’re going to have a decent colony, with 5 or 6 colonists if your lucky (or have save scummed), with hopefully a steady food supply and some okay defences. Now it’s time to start working on a permanent colony. There are two typical colony designs: mountain dwelling or outside huts.
These are giant colonies dug into a mountain. They trade speed of expansion for high security and lots of free material. How much is that of a trade off? Well if you find your stockpiles full of junk, or you need a new bedroom for each of the prisoners you just recruited, digging out those rooms can take a while. However these colonies are typically far harder to lose while playing, due to one the ability to have one entrance and exit at the end of a corridor of death and most of the vital parts of the colony protected by 10m of solid rock. They also get a large amount of rock to use in walls or sculptures, along with good access to steel. Also due to the fact that they are built into the mountain, they’re quite protected from mortars belonging to siegers.
These do come with their downsides however. Rooms have to be dug extra large as the natural rock walls are classed as “ugly” in the game, so proper walls have to built around rooms to hide them. There’s also a chance of the mountain collapsing in and crushing a colonist if supports aren’t left to stop the roof falling in. Also, mountain colonies have a chance of spawning bug hives, which spawn large numbers of oversized insects which want nothing more to expand their hive.
A mountain colony under construction, the corridor of death is mostly complete and side corridors for living space are being dug.

An outside colony may seem less defendable, but in reality there’s little difference. Rather than having a single entrance and a corridor of death, these colonies have lots of corners, meaning that combat takes a different approach, rather than shooting blindly down the corridor, you move around flank your opponents, and unlike corridor of death designs, your colonists are more spread out, meaning that rockets and grenades pose less of a threat.
These colonies are quicker to expand, due to the fact that to add a room or building you only need to build the outside walls, not dig out all the rock. Also, this style of colony rarely has to deal with colonists going stir crazy from being inside too long, as colonists will have to travel between buildings to carry out their jobs. Farming is considerably easier as well, as it’s possible to have your food storage closer to your farm, meaning less distance has to be travelled to store the food.
These still have downside though, during toxic fallout, roofed walkways have to be created to allow colonists to travel between builings without being poisoned. Also colonists may have difficulty reaching food if between them and the food stockpile is a pack of angry wargs that wants to eat said colonist.
Long term food planning:
Managing food long term is an important process in RimWorld. In most biomes you can’t farm outside during winter, so your going to have to resort to other strategies to make it through.
Here are the 3 4 typical ways of getting food in RimWorld:
- Outside farming
- Indoor farming, including hydroponics
- Hunting
- Cannabalism. Recovery of organic matter from house guests.
During winter, as mentioned before, outside farming is not possible, your crops just die so farming there is a waste of time. So to make it through winter you have to rely on the last 3 methods of gaining food along with having a large enough stockpile of food to last through the winter.
When stockpiling food, the first thing you need to do is to A: stop it decaying, if left outside it will decay into nothing, and that’s all your colonists will have to eat, B: stop it rotting, as then again, you’ll have nothing to eat. Since we’ve already covered how to stop items decaying (get it under a roof!), we’ll cover how to stop it rotting.
The speed at which items rot is dependant on the temperature it’s kept at. At 0 degrees celsius (32 farenheit) and below, items are declared as frozen and will not spoil. A few degrees above this food is classed as “refrigerated”, meaning they rot at a slower rate. Above this items will rot at the regular rate (it’s worth noting that your not shown how close to being rotten items are, just how long until they are. Also each degree above 0 in the refrigerated range affects the rate of rotting, so be aware of this.)
You can only control the temperature of rooms with a roof, so by getting all your food under a roof to stop it decaying has dealt with step of building a freezer. Then to actually cool the room so that food doesn’t rot you’ll need coolers (Architect, temperature). These need to be built into the wall (they can be built in such a way that they replace the wall, no need to demolish it first) have two sides, make sure the side with the blue arrow points into the room. Once you’ve built your coolers you’ll need to configure their target temperature, -5 degrees celsius (23 farenheit) should be cold enough so that opening the door doesn’t instant unfreeze all your food, but not so cold that your colonists freeze to death in the freezer. After that designate a stockpile in the room and specify that only food can be stored there (you may even want to increase the priority of the stockpile).
This requires either building a room and covering the soil inside with a roof, or using hydroponics anywhere (but not outside, or they’ll catch fire). Since there is a roof over the crops, they don’t get sunlight to grow, so you’ll need to use a sunlamp so that your crops can grow.
This is an option for food in RimWorld, but I seriously recommend against it. For starters, cannibalism gives all non-cannibal colonists severe mood penalties, even butchering a person for food gives every colonist severe mood penalties and makes the person who did the butchering unpopular with the rest of the colony. In short, cannabalism should be a last resort for when the only other option is to starve. However, feeding dead human bodies to animals has none of the downsides…
Advanced Defenses:
By the time you reach end game, your colony wealth is going to have risen to the point that raids will often consist of more raiders than you have colonists, and all will have decent body armour and high power weapons. One or two turrets, 2 pistols and a survival rifle aren’t going to cut it anymore. So you need to start working on some late game defenses.
There are designs that exist to get the most out of turrets and colonists shooting at enemies and they all revolve around getting the most amount of fire onto the least amount of enemies, and not allowing enemies cover. So as an example I’m going to show the mountain colony death corridor from above.

Most noticeably are the turrets at the bottom of the corridor, these are in place to provide a large amount of firepower so that even without numerical advantage, the defending colonists are still able to put out a lot more damage. Also there are walls between each turret to prevent a domino effect when one explodes.
Focusing on the rear of the chamber still, there is a power switch to make switching on and off the turrets quick and easy, rather than having to switch each one off separately the entire row can be done at the same time, nice if the a large raid is rushing your colony.
Now due to the size of the central chamber the roof would fall down, useful if you could do it by choice and bring the roof down on a horde of attackers, but since blasting charges were removed from the game and mines don’t have the power to bring the roof down (not to mention enemies will avoid repeated mine placements). So instead there is a deadfall trap behind the pillar in the direction enemies will come from, the first enemy to try and use that position will get hit by the trap (possibly killing him, depends where it hits) and others won’t try to use it, due to trap avoidance AI.
Also the chamber has been built in this shape so that all turrets (and colonists) can hit enemies from wherever they are at the defending line, a more diagonal line would mean that colonists on the far left and right would have difficulty shooting some enemies.
Finally, there are a few of standing lamps near to the entrance of chamber. One thing to note is that in RimWorld, darkness counts as cover, so by having your colonists in the dark and having your enemies brightly lit up means you have more of a chance to hit them.
A corridor of death like above is not the only way of doing major damage to enemies though, there are other methods, such as the cathedral of death, a long room where colonists with sniper rifles shoot enemies that enter, safe from harm.
Other methods, particulary useful for colonies not dug into mountains, are “bunkers” where single cell walls with sandbags between are used to create a room with a roof (you’ll need to designate the roof yourself). Colonists stand inside and gain cover bonuses from the walls, sandbags and darkness making them particulary hard to hit, whilst being able to shoot out at enemies.
Becareful of melee attackers from pirates or outlanders, they often have personal shields which can mean your turrets can’t kill them in time and the raiders are smart enough to run away from an exploding turret, so they can do a fair amount of damage to your turret row. To deal with this the best method is to have colonists nearby, they can either have melee weapons and personal shields to defend the turrets, or EMP grenades to completely discharge the enemies shields, so they can be hit by the turrets. Or you can just have colonists equipped with guns so that you can hope to over power their shields.
One final note about turret heavy designs though. Sappers, often noted by a message saying they are significantlt smarter in their tactics, will try and dig around turrets and attack your base elsewhere, rather than run blindly into your meat paste room. Make sure you still have colonists with weapons so that you can defend your colony from any point.
First Aid
Eventually, at some point, even the most well defended of colonies is going to have someone sustain some sort of injury.
In the best of circumstances, your injuries will probably wind up looking like one of these.
In this particular case, this tribesman has taken some damage to his body, and his first rib, due to a mining incident (roof colapse). This type of injury is not a particularly serious injury, but, since the torso itself has taken some damage, and has an open wound, there’s a chance of it getting infected, which is bad. To treat wounds, the colonist either needs to have a bed of their own to rest in, or they’d need to have a bed set for medical use only.

A colonist CAN recover from some wounds, such as cuts without medical treatment, but as mentioned before, you run a serious chance that you will get an infection. A colonist can’t recover on their own from certian damage types, such as gunshot wounds however, and that requires medical treatment.
Art:
Art is not a vital part of surviving, you can survive perfectly well without it. However having sculptures in key rooms (bedrooms, dining rooms and common rooms) can provide mood boosts to colonists and since the art system in the game uses events from the current save, you can get some interesting art pieces.
Most things in the game have a beauty stat, such as furniture, batteries, plants, natural rock walls and floors. Art pieces (sculptures) also have a beauty stat, but since the beauty value for an area or room is averaged, so having a legendary jade sculpture in a pool of blood on a rough cut stone floor surrounded by mined stone walls will still fill colonists with disgust. So if the room doesn’t have a good beauty value, adding a sculpture won’t do much to improve it. Also sculptures are not the only way to boost a rooms beauty score, high quality furniture and a nice floor along with no dirt on the floor can make a room be classed as “beautiful” with out having any art in it.
To start producing sculptures you’ll need a colonist who is capable of artistic actions, and a sculptures table. Set up a bill to produce sculptures (small sculptures take the least amount of time, resources and provide the smallest amount of beauty, grand sculptures cost the most and provide the most beauty. Small and Large sculptures on take one cell, while grand sculptures take 4 in a 2×2).
A high art skill is recommended for sculpture as the quality is pseudo random whilst based on your skill, ie a high skill sculpture will always produce various high quality sculptures, but not all of the same quality and never a low quality one, while a low skill sculptor will produce various bad ones, but never a really good sculpture. Since terrible sculptures provide very little beauty or can even provide negative beauty you’ll want to dissamble them and reclaim some of the materials for new scultpures, whilst placing sculptures in some key places:
- Bedrooms
- Dining rooms
- Workshop
Placing sculpture in a bedroom will help to raise the “impressiveness” value of the room, a colonist who has an interesting or better bedroom will get a mood boost, unless they have the ascetic trait. Eating in a impressive dining room will provide a mood boost as well, however this will only be a temporary one. Having sculptures in a workshop may seem counter intuitive, however high moods provide a boost to a colonists rate of work, so boosting beauty and impressiveness of the workshop can increase the efficiency of your crafting.
Trading:
Trading is a great way to get materials you don’t have much, get rid of excess materials and obtain some items that you can’t maufacture.
The currency of RimWorld is silver, all traders use silver and value goods in terms of “units of silver”. Because of this silver is rated as a small item and stacks up to 500, instead of the usual stack limit of 75.
There are currently 3 methods of trading in RimWorld:
- A trade caravan from a nearby friendly faction arrives at your colony to trade. They only accept specific items, based on what type of trader they are. Depending on the climate they will have either cammels or muffalo as pack animals. You can attack them to gain access to their goods at the expense of receiving raiders, rather than traders, in the future.
- A trade ship arrives in orbit. They only accept specific items based on why type of trader they are. You need an orbital trade beacon and a coms console to even be notified of these. Only items inside the range of a trade beacon are tradable. Items arrive via drop pod. Can’t be interacted with in any way apart from the trade window.
- You send a caravan to a nearby friendly faction base, or one of your caravans comes accross a caravan from a friendly faction. This is like standard trading, except that prices are more equal, so you earn a bigger profit for trading this way. It is more hassel this way however.
Some items are specific to certian traders, for example bulk traders will not carry guns, and aren’t interested in buying them, however they do carry uranium and jade, rare materials. Special goods traders carry artwork and prosthetics, but take very little care for other goods. Arms and slave traders will trade well for guns and weapons, but don’t want raw steel. Slave traders will also pay a lot for food.
Caravans, Launch Pods and Travel
As you saw above, you can trade with other settlements and there are various benefits to doing so:
- You get better prices for your goods
- You don’t have to wait for a trader to visit your colony
- There is a wider selection of goods than a trade caravan will sell/buy
You can also attack other settlements and will receive quests to visit various sites on the world, be it for raids on a pirate outposts, rescuing a prisoner from a hostile faction or to meet for peace talks.