Overview
A low effort way to farm equipment. No combat.
Intro
This is a risk-free, but tedious farm.
The first part is meant to get you geared up for your first boss fight, since you’ll probably still be equipped in whites at that point.
The second part.. You might get back to it later on if you find yourself undergeared. (There are some difficulty spikes in the early levels if you keep leveling up world tier.) You do get purples at higher levels after all…. or maybe you just need a ton of shards or scrap?
Just be sure to check where you are in the story progression. If e.g. you fight a giant spider, you will need to talk to an npc afterwards a couple of times, otherwise when you reset you’ll have to fight the giant spider again.
Once you have completed certain sections, if you go back to the timeline, no enemies will respawn.
But the chests will.
So you just have to find a good place to respawn chests in with the minimum amount of travelling and reloading.
Following are the best spots I have found so far.
Get the chests
make sure the game has saved (it saves every time you pick up stuff, but make sure you see the icon in the corner)
exit to lobby
click again on the same story point
…
Rinse and repeat and you’ll get some passable gear in no time.
Just remember to set world tier as high as possible. We are not fighting anything so no risk there.
Chest runs
Rift town – about 2 minutes from lobby to lobby. 3 chests and 3 iron nodes ( +1 chest and +2 nodes if you travel more) You have a vendor one jump away to dump trash.
Eagle peaks – about 4 minutes from lobby to lobby. 8 chests and 3 iron nodes (+2 chests and +2 nodes if you travel a tiny bit more, but there’s a possible load time) No vendor, but you can mod without changing timeline.
(Those are based on my loading times. I have an underspec pc with a somewhat decent SSD. YMMV)
Solar tower
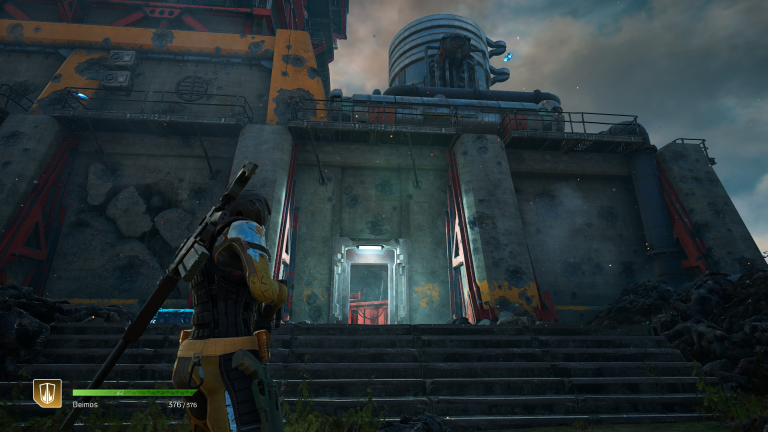
You need to at least have opened the door of the solar tower in the first map. (While you’re there, might as well plant your banner inside)
You cannot really miss it. It’s the giant lighthouse up on a hill.
For reference, here:
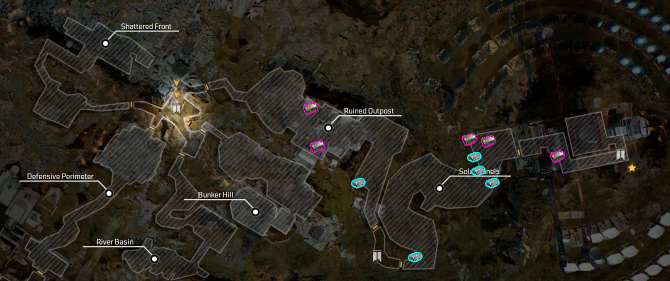
Here’s an rough map of chests (pink) and metal nodes (teal) locations:
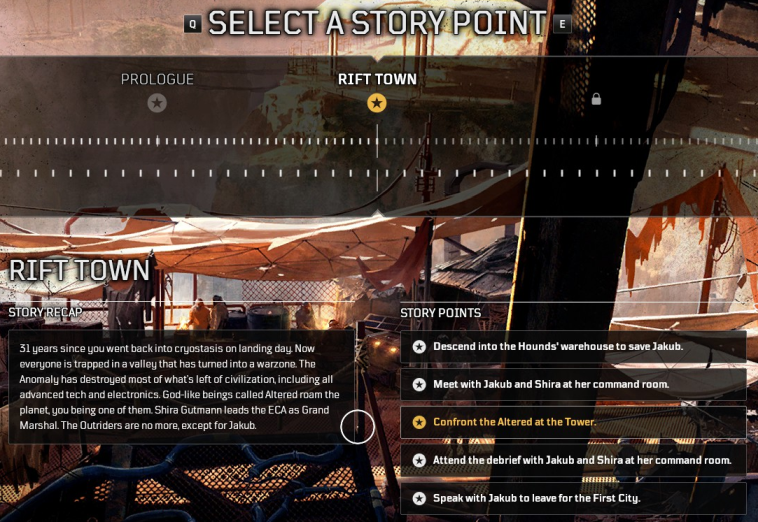
You just need to exit to the lobby, and choose the “Confront the Altered at the tower” story point, then enter the game again.
All those chests and nodes will have respawned, and you’ll be teleported in front of the door to the tower with no enemies around.
If you have trouble finding the chests, here are some pictures to help you out.
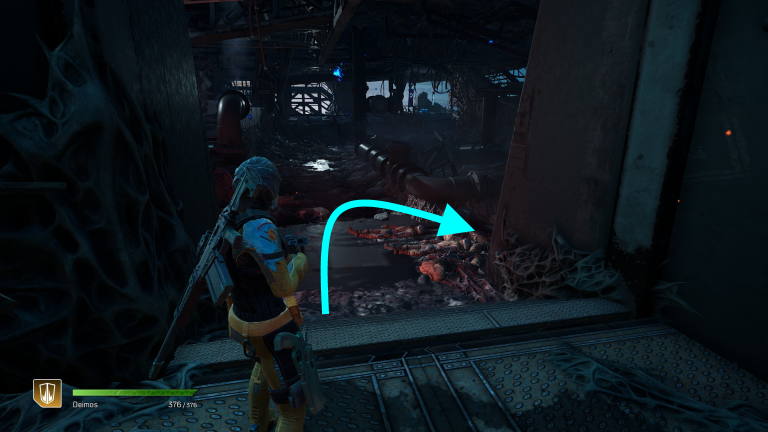
1st chest is inside the building. Walk in and at the bent pipe take a right. The chest will be in an alcove on your right
2nd chest is outside the building, on an outcrop on your right.

Now go down the path, there are two iron nodes in nooks left and right off the path
The node on your left sometimes is bugged, and your character just shuffles back and forth instead of digging. Just take a step back or alternatively roll towards the node, it should fix positioning.
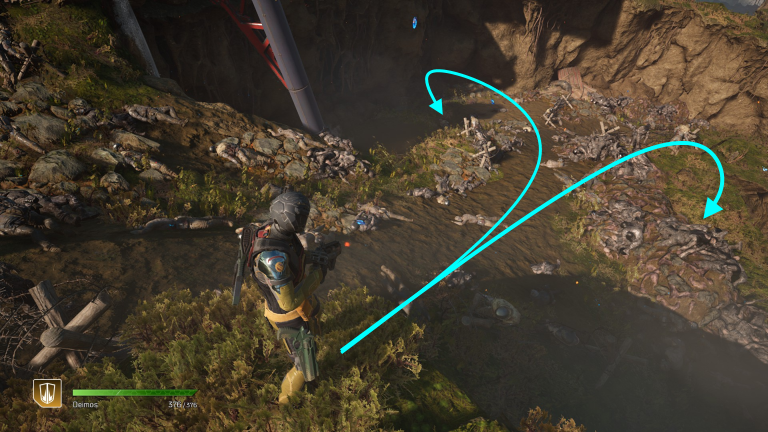
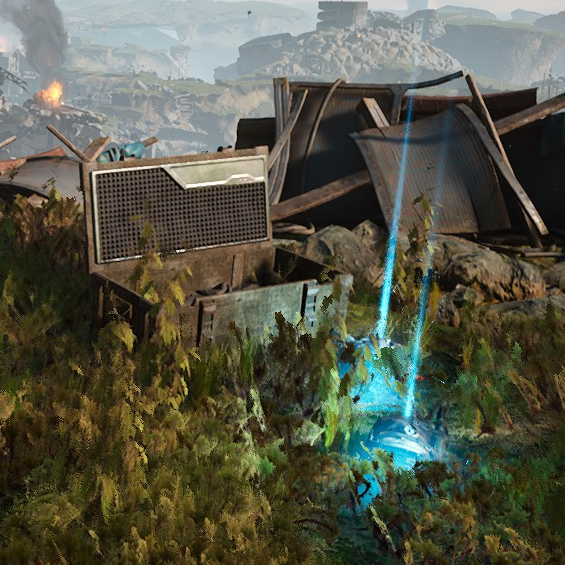
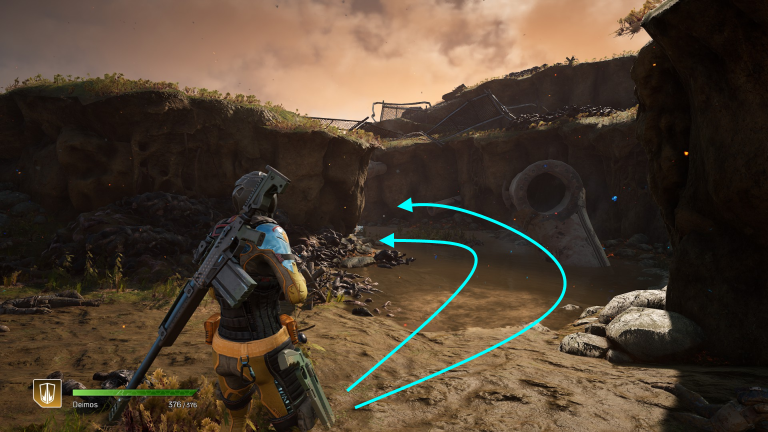
3rd chest, after you got the two nodes go down a bit more, and take a right.
Chest is at the end of the cul-de-sac, iron node at the start on your left.
And that’s it!
Return to lobby, click again on the same story point, return to game and you’ll be teleported in front of the tower again, with renewed chests and iron nodes.
Risk free equipment.
Solar tower – 2
If your loading times are not very good, you can slog it a bit on foot to catch 2 more nodes and either 1 or 2 more chests.
It will take you about 1 minute, so if your loading times are better you can avoid this part.
… or … well, maybe you need a ton of iron?
After you get the stuff in the previous section, go on downhill retracing your steps.
Near the middle flag, there’s an iron node
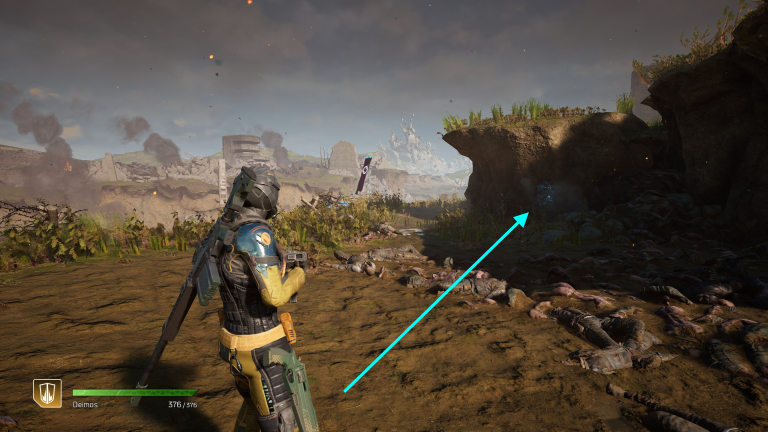
Continue to go downhill, and when the map opens up turn left. There’s another iron node on your left at the end of the path.
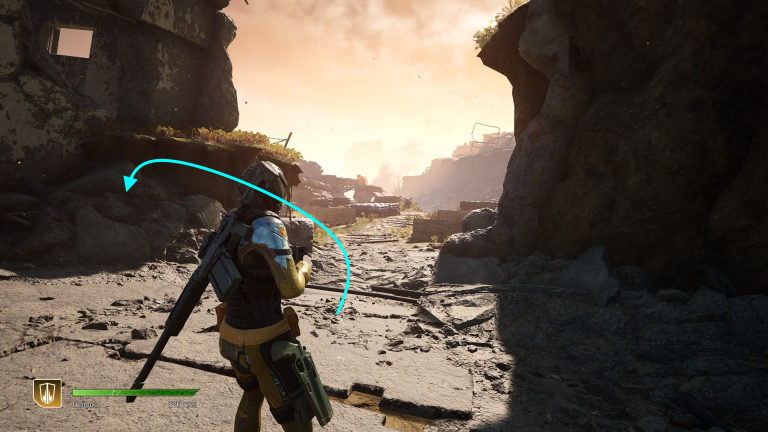
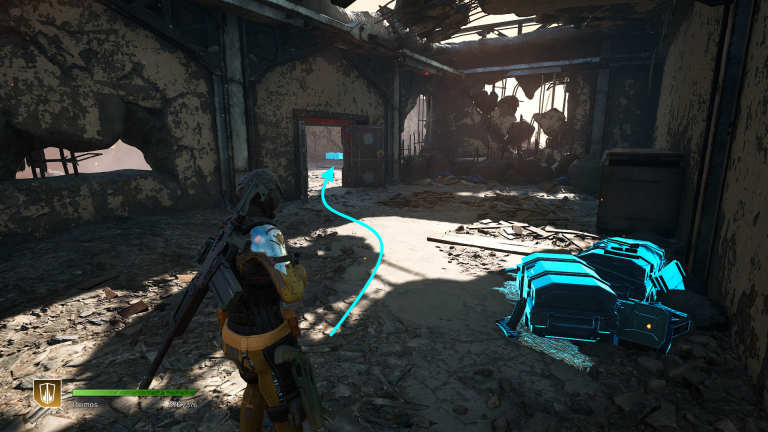
At last there’s a chest inside the ruins, near the ammo dump.
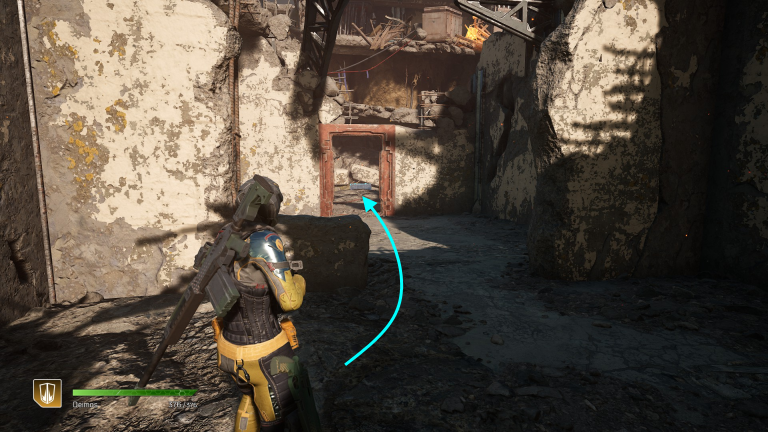
Now, the door leading to the “crossroads” area (the place with the wounded soldier) might be open or not. As far as I can understand if you want the last chest as part of your farming run, you must first enter the place the right way and kill the troops that respawn.
Once killed they should stay dead until you move to another place on the world map.
Last chest is just out of the locked door.
If you’re really strapped for iron you can backtrack all the way to the crossroads and mine the 3 nodes there too. It only adds about 15 seconds or so.
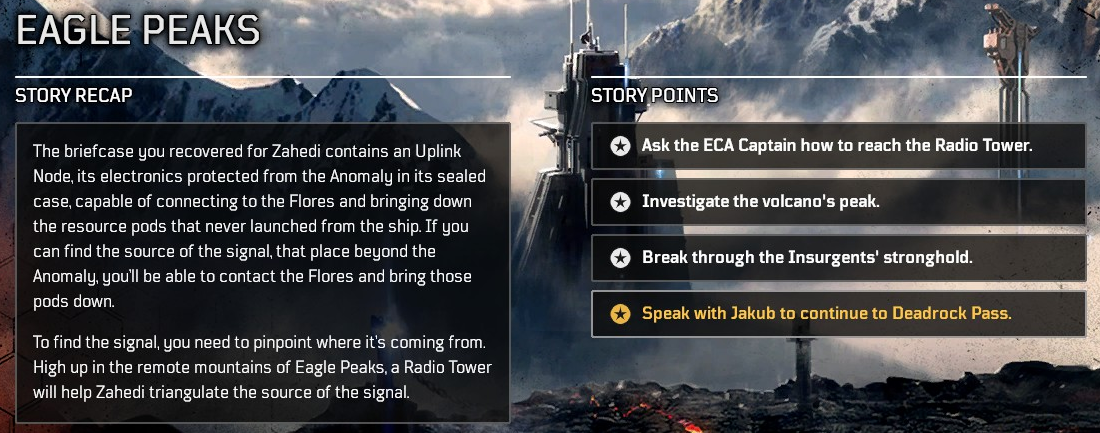
Radio tower
If you’re tired of the same farm, and you have completed the next map over, you can open up some chests at Eagle peaks. You need to have completed the map (side quests excluded).
Just do the same thing, exit to lobby, select the last entry in the eagle peaks timeline, and travel to the flag at Snowy Plateau.
This is a rough map of where the chests (pink) and nodes (teal) are. To get to the last ones you’ll need to take the cable car, so you might want to skip them if your loading times are too high. (remember you can skip the cutscene)

The first chest is just behind the banner, there’s a path between the stakes.

Take the stairs to move up, then on the long ledge there are two paths. take the upper and you’ll find the second chest in front of you.

Go on towards the bunker (there’s an iron node on your right, on the cliff face), go through it and you’ll find the third chest immediately on your right. There’s a second iron node on the cliff face too, near the chest.

Run up the slope, then at the downwards stretch go right and down. The fourth chest is on your right.

Go throught the roofless bunker (you can jump over the window’s ledge), then look at a gap between the rocks on your left, down a small slope there’s the fifth chest.

Go back and cross the doorway, then up the slope. There’s a chest at the foot of the building. A second one on your right and a third one (and an iron node) down the slope at the end of the cul-de-sac.

My thanks to … (who is maybe Shodan) for pointing out a chest I missed.
Radio Tower – 2
You can grab two more chests and two iron nodes taking the cable car.
It needs a brief load (you can skip the very long cutscene), you can do it or skip it depending on your load times. Grabbing the two chests takes about 20 seconds.
This is the cable car that takes you to the next section

There’s a chest on the square building on your right (the entrance is on the far side from you) and another in the small circular bunker with the giant antenna on top (a small room on your left in the middle of the structure)

Additional notes
- The character instead of drilling a node starts shuffling back and forth.
Take a step back and/or roll towards the node and try again - Things are dropping at the wrong world tier level.
Change maps and go kill something at the right world level, then reset timeline. - I dropped something I needed, but my backpack was full, where has the drop gone?
Any drop that cannot fit into your backpack automatically goes to your stash.
Sort of… it might get useful if you’re grinding World Tiers, and really need the leveled up gear, but by that point you’re probably better off doing expeditions.
It might come in handy if you need weapons of a specific level (assuming they do not fix the weird downscaling in the main campaign).