Overview
This part in a series will help you get aquainted with the basic aspects of RPG Maker 2003.
Beginning!

Greetings!
I’m ObsydianX and I’ve been a long time user of RPG Maker 2003. From custom Action Battle Systems (ABS) and Custom Menu Systems (CMS), I’ve done all I could get a hold of. I started in my early teens, soon after RM2K3 came out and while I’ve never had the patience to finish a game I’m writing this guide to help YOU achieve the very best that you can. This guide is for the absolute beginner.
Though there are many, many ways you can achieve the results you want, I’m going to show you MY methods of game design, art, and music design. Hopefully I can make this as comprehensible as possible.
Creating a New Project!
This tutorial will help you understand creating your first maps and creating a door to transfer the player between them. First off we need a new project for this series because starting from scratch will make sure you neither destroy your own personal project nor get lost in the process. If you have a project open, you can click File > Close Project and the File > New Project to create new project.
Or alternately you can click this:
And then this:

You’ll be greeted with this screen:

For now, we’re going to name the folder RM2K3 Basics! as well as name the game Tutorial. Don’t worry, both of these can be changed later so it’s not something you have to worry about from the start. Click okay and you’ll be met with this screen:

This is a brand new map, ready for your creative touch! But there’s a bit of work before you can even start the game. First things first, we need to make this map a bit more workable in size, add some terrain, and start your first playtest.
Editing Map Properties!
In the bottom left corner you can see you map tree:

To edit the Map Properties, right-click on the current map (MAP0001) and select map properties. That will let you edit many attributes of the map. Let’s go over a few:
Many of these things are self-explanatory so I’ll keep the descriptions brief:

- Name: sets the name of the map inside the editor and game. (Regardless of the name, the map will always have a unique map ID number which you can see on the title bar of the window. This is shared between the editor and the actual map files stored in the project folder.)
- Tileset: lets you select from pre-configured tilesets created in the database. We’ll cover that later.
- Map Size: this sets the size of the map in tiles. A basic map is 20×15 tiles (at 16×16 pixels per tile that’s 320×240 pixels, the resolution of the game engine. This is an unchangeable scale.)
- Scroll Type: allows you to have infinitely looping levels on the vertical or horizontal axis, or both.
- Encounters: this is the box where you configure random battles and the monsters you fight during them. Set Encounter Rate sets the number of steps between battles.
- Parallax Background: sets background on transparent maps. Once selected you can set the background to loop horizontally or vertically and/or have the background automatically scroll and the speed at which it does.
- Teleport: allows you to set the restrictions on whether or not players can use a teleport spell/item to escape the map. Useful for traps or story dependent scenes.
- Escape and Save: works the same as teleport.
- Battle Background: allows you (if a sub-map) to set the battle background the same as the parent map, to be based on its terrain setting (defined in the database) or to specify a certain background.
- BGM: same as Battle Background except with music
- Dungeon: lets you generate a random dungeon. To be honest, it’s really underwhelming and I never use it. Hand crafted levels flow so much better though I can see its’ use in a dungeon crawler game.
Creating a Map!
Now that the basics of map properties are more understood let’s get to making this map more workable. First, let’s name the map “Tutorial Town”.
Next, let’s set the size to 20×15, the smallest map possible.
(Pro-tip: instead of typing the numbers or using the arrows, click and hold on the diamond button in the size boxes and drag down. The editor will stop at the smallest size allowed for both horizontal and vertical tiles.)
Set the tileset to Exterior (useful for towns).
Click “OK” and the map should change. Notice the name changed in the map tree to the bottom left. The map will still be water if you haven’t filled it with anything yet. Let’s change that.
Creating a House!
Take a look at your tools at the top of the tile palette:

You can hold your mouse over these options and see what they do. In order from left to right its: Undo, Select Area, Zoom, Pen, Rectangle, Oval, and Fill Area. If you’re familiar with any drawing programs, it works the same. Select the Fill Area tool and the regular grass tile second from the top on the far left of the tile palette. Click the water with the fill tool and it should completely fill the area with grass.
Use the tan wall tiles and the red roof tiles to make a small house. I make my walls 3 tiles high and my roofs the same.
You should have something that looks similar to this:

Congratulations! You’ve made your first house. Let’s go to the upper layer and add some detail tiles.
This is the layer selector:

From left to right you have the Lower Level Tiles, the Upper Level Tiles, and the Event Layer. Click the upper layer and let’s add some windows, boxes, and whatever you think looks good. Make sure to leave space for a door.
Did you notice how the lower lever tiles dim a little to differentiate between the two layers? The upper layer also turns slightly transparent when editing the lower level as well. Note that editing the top layer will not change the lower level and vice-versa. They are completely separate as well as the event layer. The only exception is using the Select Area tool which only moves the lower and upper levels, not the event layer.
Once you’ve created something nice using whatever props you wish, you should have something like this:

(Pro-tip: You can click the Select Area tool to preview the map with both layers fully visible as I’ve done in this screen shot.)
Shifting the Map!
Looks great! But let’s give ourselves a bit more room to edit the yard. Right click on our map in the map tree and click Shift Map. I’m going to shift the map up by 3 to put more of a focus on the yard in front of the house instead of the back. It should look like this after:

Creating a Door!
Let’s put a door on this house and create the interior. First go to your event layer mode and right-click the grid at the base of the wall where you want the door to go. Select “Create Event” and you’ll get a screen like this:

This screen may look a bit intimidating but we’ll only focus on what we want to work on. First, let’s name the event “Door”. Go to the Graphic Box and click “Set”. Navigate to “Object1” and select whichever door you like. I’m going to select the second door. Click “OK” and your door is complete. For now it’s just visual only as it doesn’t teleport the player anywhere.
Creating an Interior Map!
Next, using the same methods we’re going to create an interior for our house. In the map tree right-click on the “Tutorial Town” map and click “New Map”. Name the new map “House Interior”, keep the size at 20×15, but this time set the tileset to “Interior”. Interiors are a bit different because they show parts that wouldn’t be visible to a person in the room because of the walls, but mappers have learned how to give the impression of a room to the player without drawing the whole scene. Use the bottom right pink block of the lower level tiles to make the map transparent (and in this case, black) to create the illusion of nothingness. Then, draw your floor and walls. Additionally, to help the player exit the room using doors that are on the wall the player won’t see, use a single tile to help guide them. You map should look similar to this:

The tiny bump on the bottom left is the door tile. Note, your maps don’t have to match the exterior in size perfectly, or at all. It’s your choice and your game; don’t let yourself be restricted by realism.
Creating a Transfer Between Maps
Next, let’s create a teleport event to get the player out of this room. Go the event layer and create and event on the tiny bump you created for the door. Name this event “Door” and set the Trigger to “Player Touch”. This allows the event to start as soon as the player enters the same tile. In the large “Contents” box double-click and navigate to the second page. Click the fifth option on the left column, “Transfer Player”.
This will open the Transfer Player settings. You want to move your player to the exterior of the map so select in the map tree “Tutorial Town”. Click where you want the player to transfer to, in the case it should be directly in front of the door. For the Direction setting, since the player is exiting the door facing down, you can select down to make the player face that direction after transfer. This is useful for oddly placed doors. Once you’re finished, click “OK”.
Next, you can do the same thing for the exterior door. On the “Tutorial Town” map, double-click on the door you created earlier and insert the same Transfer Player options. This time around, transfer to the “House Interior” map, teleporting on top of the interior transfer event. Be advised, this isn’t the best solution for large doorways that require more than one event to cover the door. In that case, place your teleport target one tile away from the interior transfer event.
Now your house is complete with transfer events between the interior and exterior maps. Let’s test it!
Testing Our Map!
On the “Tutorial Town” map, go to the event layer and right-click somewhere in the yard. Click “Set Player Starting Position”. This is where our player will spawn when the game starts.
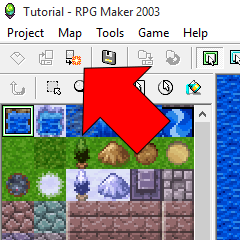
Look at the” Begin Playtest” option on the toolbar:

You can click this icon to start the playtest. Be advised, the two icons on the right are the “Fullscreen” and “Display Title Screen” options. With Fullscreen selected, the game will start maximized. The Display Title Screen option when deselected will not display your title graphics or play the title BGM. This is useful for preventing you from hating your title BGM after 30 playtests to get a scene right.
If you clicked playtest, hopefully you should have spawned on your Tutorial Town map and can traverse both maps without problems!
Conclusion!
Let me know if you spot any grammar/spelling errors. If you have an questions or comments, I’ll try to answer them. Also, if you have any suggestions, let my know. I hope to cover switches, variables, conditional branches, and tileset configuration.
Thanks for joining me for the first of hopefully many tutorials to come!
– ObsydianX