Overview
There’s a million different ways to mod Doom. Source ports, launchers, WADs, Brutal Doom. This is how I like to run the game, hopefully it’ll help you too.Covers:-Source Ports-Launchers-Enabling Steam Overlay In Doom II-Brutal Doom-PWADs/Mods/Custom MapsWorks For:-The Ultimate Doom (Doom I)-Doom II-Final Doom-The classic WADs included with Doom 3: BFG Edition-No Rest For The LivingI have a similar guide for Master Levels For Doom II that I’ll link later in the guide if you need help with that game, since it requires some more involved setup.
Intro
The old school Doom games are classics that are still amazing to play today. However the way the games ran and the control scheme are a bit outdated. This guide will show you how to mod these to be more modern. This will allow you to run Doom without issue through Steam, use the Steam overlay, take screenshots, and track your hours through Steam. I’ll also cover the Brutal Doom mod, as well as PWADs/custom maps.
You will need a few things to get Doom running properly, and I’ll go over where to get and what to do with each in more detail later.
1). A WAD[doom.fandom.com]. This is basically the game. You’ll get this when you buy Doom off of Steam.
2). A source port. This helps you run Doom more efficiently.
3). A launcher. This makes it easier to switch between different WADs and source ports.
I’ll also cover how to enable the Steam overlay for Doom II since it won’t work by default.
Source Ports
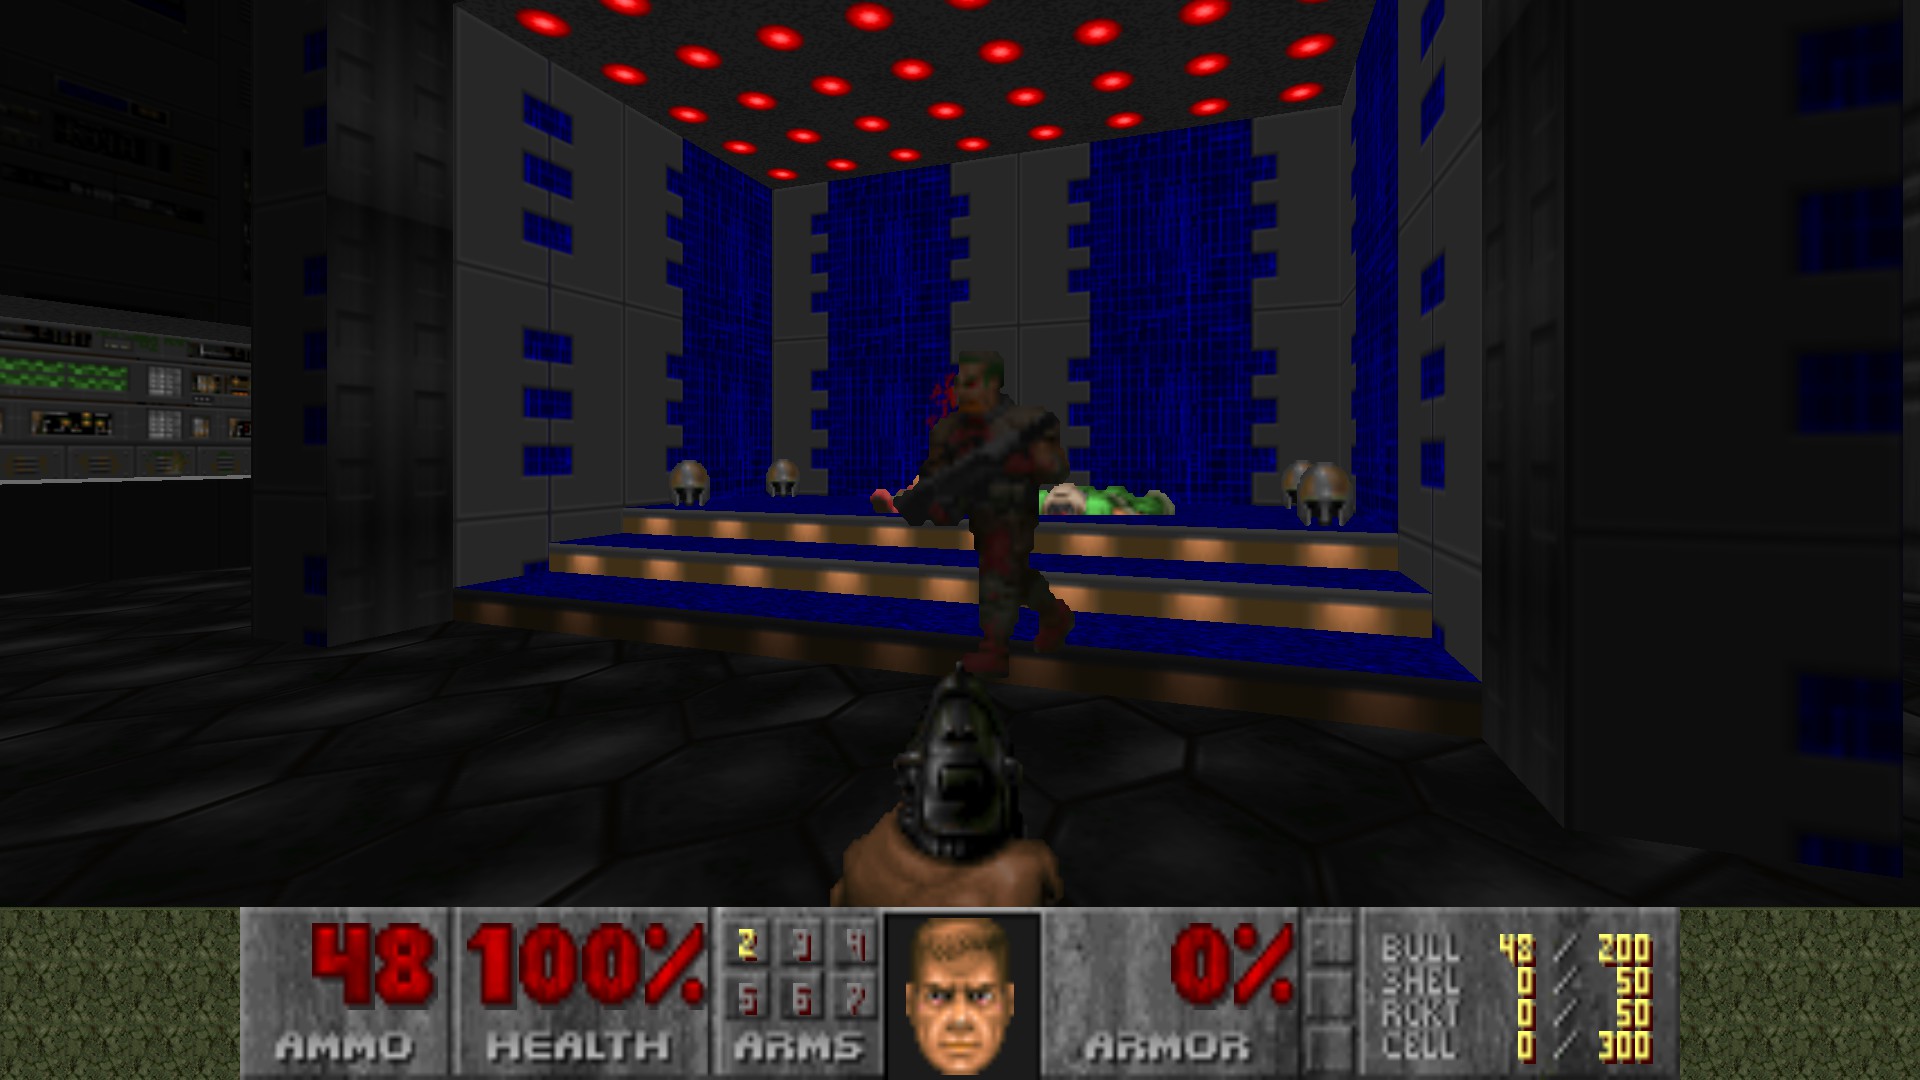
A source port is what you’ll use to run Doom. Source ports help with a variety of things, making it easier to remap controls, help running the game, bug fixes, and even graphical improvements. There are a lot of different source ports available and which one you use for just playing Doom itself is largely preference.
If you get int mods and custom maps then you may need to use a certain source port to run the map, so if you plan to get into Doom past just the base game (which I highly recommend doing) then it’s a good idea to have a few source ports laying around, and sometimes even more than one version of the same source port. Thankfully it’s very easy to swap between source ports thanks to a launcher that we’ll set up later on.
For now I’m only going to cover a couple source ports to get you started on the base games, you can delve into them more later on if you so choose.
List of source ports[doom.fandom.com]
Comparision of source ports[doom.fandom.com]
Info[doom.fandom.com]Download[www.chocolate-doom.org]
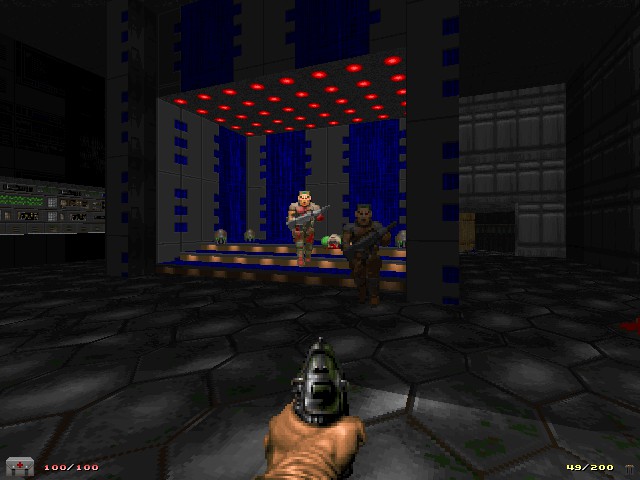
Chocolate Doom attempts to emulate original Doom as much as possible. It retains the original bugs and low res graphics, and as such isn’t the prettiest looking source port. The Steam overlay also won’t work with Chocolate Doom, though it will for GZDoom and Zandronum.

Info[doom.fandom.com]Download[zdoom.org]
GZDoom is based on the now discontinued ZDoom[zdoom.org] source port. It has all the features of ZDoom, as well as a few more, such as using OpenGL. It also has the best mod support of any source port. This is my preferred source port, as well as the one I’d recommend for Brutal Doom (though you’ll need to use an older version of GZDoom for Brutal Doom, I’ll discuss this more in the Brutal Doom section). The download link I gave above will let you download GZDoom, as well as the discontinued ZDoom, and an experimental source port known as QZDoom (which I haven’t used).
Info[doom.fandom.com]Download[zandronum.com]
A continuation of the discontinued Skulltag[doom.fandom.com] source port, based on ZDoom, and using the GZDoom renderer. Zandronum is designed for multiplayer, but does work fine for single player as well.
Download whichever source port(s) fit your fancy and we’ll get them set up.
Launcher (ZDL)
A launcher[zdoom.org] makes it much easier to swap between different WADs and source ports. Unlike source ports there aren’t as many options and I’m only going to focus on ZDL. Info[zdoom.org] Download[github.com]
It’ll look something like this once its all set up:

Go ahead and download ZDL and we’ll get to how to set everything up.
Running ZDL Through Steam
Now that you’ve downloaded your source port(s) of choice and ZDL we can set things up to run it all through Steam.
First thing you’ll want to do is create a folder to store all your source ports, launchers, WADs, and other mods. It doesn’t really matter where you create this as it’s really just for your convenience. I created mine in my Steam > Steamapps > common folder with the rest of my Steam games, though that isn’t necessary. Then create whatever subfolders help you find things more easily. I have a backup folder for my IWADs, a folder for my source ports, and another for additional WADs.

Next we need to make it so that Steam launches ZDL instead of the dosbox program it normally uses. You’ll want to navigate to Steam > Steamapps > common folder, then to the folder for the respective game, then click the “base” folder. If you’re using the default save locations you can copy paste the following into file explorer:
%ProgramFiles(x86)%SteamsteamappscommonUltimate Doombase
%ProgramFiles(x86)%SteamsteamappscommonDoom 2base
%ProgramFiles(x86)%SteamsteamappscommonFinal Doombase
Once there do the following (you can repeat this for each game without issue):
1). Paste the ZDL zip folder you downloaded into the game’s base folder.
2). Extract the ZDL zip folder into the game’s base folder.
3). Look for the program/file in the base folder named either “dosbox” or “dosbox.exe”. Rename this to either “Steamdosbox” or “Steamdosbox.exe”. (If you see the .exe at the end or not depends on if you set Windows to show file extensions or not. It won’t really matter either way).
4). Look for the program/file named either “ZDL” or “ZDL.exe”. Rename this to “dosbox” or “dosbox.exe”.
Now when you click “Play” through the Steam launcher it will load up ZDL, allowing you to select your desired source port, IWAD, and other options you enable. If you do the above with each game you will only have to set up ZDL once (which we’ll do in the next section) to select your source port and IWAD. Once you’ve done that just click the “Launch” button in ZDL and the game will boot up.
Setting Up ZDL
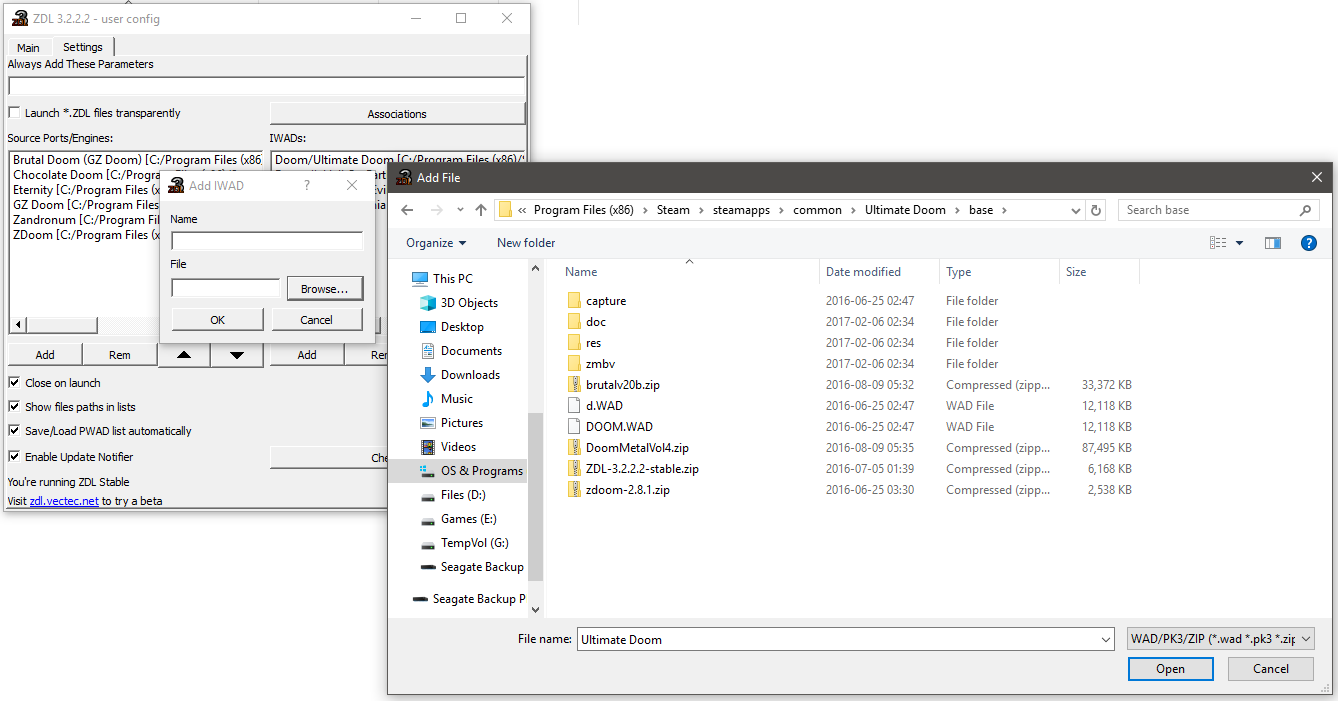
Setting up ZDL is thankfully pretty easy. You merely need to add your source ports and then add your IWADs. Both of these can be done from the settings tab at the top.

Adding source ports is pretty easy, go to the settings tab of ZDL and do the following:
1). Under “Source Ports/Engines” click “Add”
2). Navigate to wherever you saved your source port(s) (don’t forget to extract the source port from the zip file first).
3). Give the source port a name and click “ok.”
That’s it for adding source ports.

Adding IWADs is basically the same as adding a source port. Go to the settings tab of ZDL and do the following:
1). Under “IWADs” click “Add”
2). Navigate to where your IWADs are saved. If you’re using the default Steam save location those are:
%ProgramFiles(x86)%SteamsteamappscommonUltimate Doombase
%ProgramFiles(x86)%SteamsteamappscommonDoom 2base
%ProgramFiles(x86)%SteamsteamappscommonFinal Doombase
The WADs will be named:
DOOM.WAD
DOOM2.WAD
TNT.WAD
PLUTONIA.WAD
You might not see .WAD at the end if you don’t have Windows set to show file extensions, this isn’t an issue and you can still add the IWAD without issue.
3). Give the IWAD a name and click “ok.”
Now you’re ready to launch ZDL and play some Doom!
Enable Steam Overlay For Doom II
The Steam overlay won’t work with Doom II by default, but thankfully it’s also a pretty easy fix. This isn’t needed for Doom/Ultimate Doom or Final Doom as the Steam overlay already works for those games.
1). First go and download Steam Edit.[steamedit.tg-software.com] Once that’s done launch Steam Edit.
2). Use the search bar at the top to find Doom II.

3). In the bottom left click “Edit Launch.” This will launch a new window.

4). We need to change the executable for the first option. To do this click the file icon with an arrow next to the executable’s text box. (The button in the red circle in the below pic).

5). We need to navigate to the Doom 2base folder again. Steam Edit should open to this folder by default, but in case it doesn’t the default path is:
%ProgramFiles(x86)%SteamsteamappscommonDoom 2base
6). Select “dosbox” or “dosbox.exe” and click “open.” (Remember that dosbox.exe is really the ZDL launcher that we set up earlier.

7). Click “ok” in the bottom right.
8). Steam Edit should now look like the following picture:

9). Click “Save & Refresh” near the bottom right. This will close Steam. Close Steam Edit.
10). Relaunch steam. Now when you launch Doom II through Steam the game will launch through the ZDL launch, allowing you to select your source port and what have you, then once launched the Steam overlay will work and you can take screenshots!
Steam may revert the change you made above, meaning the overlay will no longer work. If this happens just load up Steam Edit and repeat steps 8-9 to get things working again.
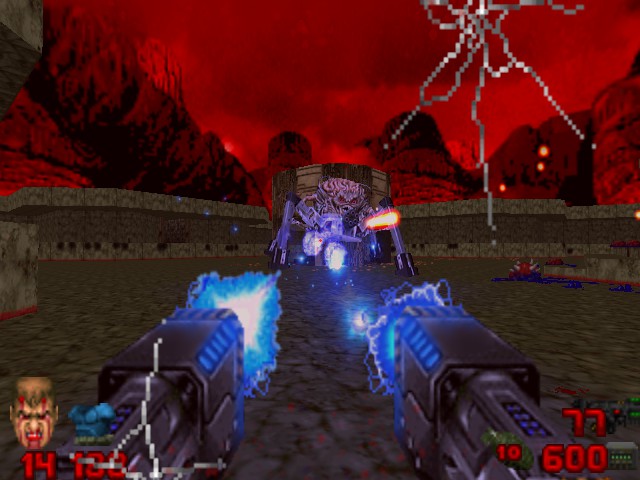
Brutal Doom
Brutal Doom is a Doom mod that adds a lot more violence and gore to the game, as well as some new weapons. We’re going to set it up to run through Steam via the ZDL launcher. A lot of other guides I’ve seen have you set things so that you have to add files to play Brutal Doom and remove said files when you want to revert back. We’re instead going to set it up so that Brutal Doom is effectively another source port.
Brutal Doom is designed specifically for GZDoom and it currently also supports Zandronum. That said you need to use a specific version of GZDoom if you want Brutal Doom to run smoothly. Newer versions of GZDoom may work, but it was a bit buggy for me when I tested it. In this case we want to get GZDoom 2.1.1 (I used this to play through Doom, Doom II, Hell On Earth Starter Pack, and swapped to it for No Rest For The Living when GZDoom 3.7.2 was giving me issues). The reason for this has to do with some major changes to the GZDoom code, for which Brutal Doom has not yet been updated for. (I’m not sure how Brutal Doom fairs with different versions of Zandronum, I’ve always stuck to GZDoom for it).
Sound scary? Trust me, it’s not as bad as it sounds. ZDL, which we set up earlier, makes it very easy to switch between source ports, and setting up Brutal Doom isn’t as daunting as it sounds.
If you’d rather set up Brutal Doom by adding the files instead of as a source port then skip to the next section on “PWADs & Mods” once you’ve downloaded the Brutal Doom files.
1). Download Brutal Doom. Click the “Files” tab to browse the available versions of Brutal Doom available for download. If you’re not sure what to download, then just get the following two:
Brutal Doom v21
Doom Metal Soundtrack
2). Download GZDoom 2.1.1.[zdoom.org] That page has every version of GZDoom released. We need 2.1.1, so you’ll want to get either one of the following (you don’t need both):
gzdoom-bin-2-1-1-x64.zip (If you have a 64 bit system)
gzdoom-bin-2-1-1.zip (If you have a 32 bit system)
If you’re not sure if you have a 64 or 32 bit system then get the second one, as that can be run on both. (64 bit systems can run 32 bit and 64 bit programs, 32 bit systems can only run 32 bit programs).
2). Go to wherever you decided to save your source ports and make a new folder called “Brutal Doom v21 Beta RC7 – GZDoom”
3). Copy/paste the two zip folders from step 1 into the “Brutal Doom v21 Beta RC7 – GZDoom” folder.
4). Copy/paste the zip folder for GZDoom into the same folder. (You want to use GZDoom for Brutal Doom). If you didn’t download it earlier then you can do so now. GZDoom[zdoom.org]

We’ve downloaded everything and put the zips all in the same folder. We now need to extract everything and put all the contents in the “Brutal Doom v21 Beta RC7 – GZDoom” folder. In case you’re not sure what to do:
1). Extract the contents of all 3 of those zip folders into the “Brutal Doom v21 Beta RC7 – GZDoom” folder.
2). Go into the “BD21RC7” folder. Copy everything in there and paste it into the “Brutal Doom v21 Beta RC7 – GZDoom” folder.
3). Go into the “DoomMetalVol4” folder. Copy everything in there and paste it into the “Brutal Doom v21 Beta RC7 – GZDoom” folder.
4). Go into the GZDoom folder. Copy everything in there and paste it into the “Brutal Doom v21 Beta RC7 – GZDoom” folder.
5). Now that everything is extracted your folder should look like the following:

We want this version of our source port to always load Brutal Doom, not vanilla, we have another source port for this.
1). We need to edit a .ini file. However this file won’t exist until after we launch GZDoom, so go ahead and do that. You can quit out once the game itself loads.
2). The .ini file will be named “gzdoom-NAME.ini” where “NAME” is the name of the Windows profile that is currently logged in.
3). Open the .ini file with either Wordpad or Notepad++ (regular Notepad won’t work right, it doesn’t recognize the line breaks so it looks like a mess).
4). We’re going to add the Brutal Doom files to the autoload[zdoom.org] list for our source port, we just have to add a couple lines.
5). Look for where it says “[doom.Autoload]”

6). Underneath this add:
Path=BD21RC7.pk3
Path=DoomMetalVol4.wad

7). Save your changes and close the program.
Now when you load this source port it’ll load up Brutal Doom no matter which IWAD you select. Simply use a different source port to play vanilla doom.
Note that you can also change your key bindings in the .ini file, If you already made key binding changes in the same source port elsewhere just open the first .ini file, look for “[Doom.Bindings],” copy everything in that section. Open the new .ini file and paste it over the new “[Doom.Bindings]” section.
Adding the Brutal Doom modded source port to ZDL is the same as adding any other source port to ZDL.

You can now play Brutal Doom through Steam via ZDL! This means you can track your hours, use the overlay, and take screenshots.

PWADs & Mods & Custom Maps
So now you’ve got Doom set up, you’ve played through the classic Doom games, maybe even with Brutal Doom too, but you still want more. The good news for you is that there are a lot of custom levels made by fans and they’re very easy to run as well.
Most Doom are in the form of PWADs[doom.fandom.com] or Patch WADs. These can be used for a variety of things from custom textures to brand new levels. There are even a lot of PWADs that feature a full games worth of levels, often referred to as a Megawad[doom.fandom.com]. Doomworld[www.doomworld.com] serves as a good archive for many of these WADs.
You’ll see that some PWADs will list “Boom compatible source port” or “limit removing source port” as a requirement to run. Both GZDoom and Zandronum can do both of those things, so if you’re using either one then you’re set.
Note that not all Doom mods will use the .WAD file extension, they may also use other file extensions, such as .pk3.
1). Download your PWADs/mods of choice and extract them from the zip folder they come in. I suggest creating a folder to hold all your PWADs/mods and then putting each one in its own respective folder.
2). Open ZDL and on the “main” page on the left hand side under “external files” click “add.”
3). Navigate to where you stored the PWAD(s)/mod(s) that you want to use, select them and click “ok.” In this example I’m adding a megawad called “Hell Revealed” as well as the music made for this megawad.

4). Select your IWAD and source port as you would normally. Bear in mind that some PWADs have to be used with Doom/Ultimate Doom as the base IWAD, while some have to be used with Doom II as the base IWAD. Some PWADs can use either. Make sure you select the proper IWAD when loading these. If your PWAD has any special requirements for the source port make sure that you pick a compatible one. Remember that both GZDoom and Zandronum should have you covered for most anything.
5). Launch Doom and enjoy!
If you want to remove any PWADs/mods from ZDL simply select the no longer desired on the left hand side under “external files” and click “remove.”

Do note that you can also add Brutal Doom using this method instead of setting it up as a source port like we did earlier. The advantage of Brutal Doom as a source port is that you can effectively toggle it on and off by switching your source port. The advantage of Brutal Doom as a PWAD is that you can switch which source port you use Brutal Doom with more easily. That said, Brutal Doom is designed for GZDoom so I’m not sure how much of an advantage that really is. If you want to add Brutal Doom as a PWAD simply look for the files:
BD21RC7.pk3
DoomMetalVol4.wad
And add those under external files as you would any other PWAD.
Master Levels For Doom II
We’ve got The Ultimate Doom, Doom II, and Final Doom working now, but what about Master Levels For Doom II? Well, that’s a little bit more complicated, so just check out my other guide for info on how to do that.
[link]Doom 3: BFG Edition
If you purchased Doom 3: BFG Edition on Steam it includes The Ultimate Doom and Doom II, as well as a new 9 map episode for Doom II called No Rest For The Living. You can run these through a source port of choice as well.
If you haven’t purchased any Doom games yet and aren’t sure what to get I recommend against Doom 3: BFG. Yes, it contains 3 games and some new content, but it neuters Doom 3, the classic Doom games it includes are slightly censored, whereas the old versions available on Steam aren’t. The new content is alright, but not essential. If you’re trying to figure out what to buy then I recommend getting Doom Classics Complete for the old school Doom and Doom 3 Pack for Doom 3. Each of those packs are usually only $5 during a Steam sale. Only get BFG if you have to play the new The Lost Mission campaign for Doom 3 and/or No Rest For The Living episode for Doom II. (Or if for some reason you really want the changed Doom 3 mechanics, but I think they’re changes for the worse personally).
If you’re already purchased BFG whether because you want all things Doom or you just disagree with my opinion and would rather go that route you can still run the included WADs in your source port of choice, use them in ZDL, and mods designed for those two games should still work just fine. Do note that if you play these games this way then Steam achievements won’t work.
Setting these versions of the WADs is the same as you would for the classic versions of the games.
1). Download your source port(s) of choice and download ZDL.
2). Configure ZDL to point to your source ports.
3). When configuring ZDL to point to your IWADs they are located in:
%ProgramFiles(x86)%SteamsteamappscommonDOOM 3 BFG Editionbasewads
You need to add “DOOM.WAD” and “DOOM2.WAD” as your IWADs.
4). To play No Rest For The Living add it as a PWAD when selecting Doom II as your IWAD. When you launch Doom II and click “new game” it will give you a choice on which campaign you wish to play.
Do note that I don’t rename ZDL or the BFG executable to launch ZDL through Steam for BFG.
If you need more info on how to do any of these steps then refer to the earlier sections of this guide for more details.
Conclusion
Hopefully this guide helped you get Doom up and running without issue. I’d like to update this guide once I mess around with more Doom mods, as well as the Hexen games. (In theory those should mod in a similar fashion, and I think they work with GZDoom). As of now I haven’t had a chance to play those yet though. Have fun playing Doom!

Version History
-Added info on Brutal Doom only working on some versions of GZDoom, something I was previously unaware of. See the “Brutal Doom” section for details.
Added sections:
-PWADs & Mods & Custom Maps
-Doom 3: BFG Edition
-Version History
-Added info on how to load PWADs, mods, and custom maps through ZDL’s external files function.
-Added info on how to load Brutal Doom using ZDL’s external files function instead of as a source port.
-Added info on how to run the WADs included with Doom 3: BFG Edition through source ports and ZDL.
-Fixed all images so that they don’t display garbled filename text underneath them. Steam guides do not like brackets in image filenames apparently.
-Added in an additional image in the “Enable Steam Overlay For Doom II” section that was mistakenly not included before.
-Minor formatting changes throughout the guide to make it look better.
-Renamed guide from “Doom Source Port Modding & Brutal Doom” to “Run Doom Source Ports & Brutal Doom Through Steam.” I think this title is more clear on what the guide aims to help with.
Added section:
-Master Levels For Doom II
Added a link to my other guide covering Master Levels For Doom II configuration instructions.
Created the guide. Sections included:
-Intro
-Source Ports
-Launcher (ZDL)
-Running ZDL Through Steam
-Setting Up ZDL
-Enable Steam Overlay For Doom II
-Brutal Doom
-Conclusion