Overview
An in-depth guide on keeping buildings and bases neat. Deep-dives into distances, dimensions, clearances, etc to squeeze the most out of a given amount of space.Intended for engineers who have already made it to T7 (or at least T5) and are looking to scale up.NOT a starting location guide or mathematics/ratios/best-alt-recipes guide!
Updates
2021-03-17
—————-
ohm y god water extractors snap now jgkfdjkfdjsfklskfdklklkflk4klfkl3
(updates coming to guide but need a week or two to digest u4)
2021-01-05
—————-
– Added Update 3 Bauxite processing section under Refineries
2020-12-21
—————-
– Added Water Extractor section
2020-12-20
—————-
– Added some troubleshooting ideas for pipes
– Added U3.6 basic rubber/plastic layout ideas
===============
2020-12-17
—————-
– Elaborated Conveyor Lifts – more clipping tricks
– Added pipes/junctions/pumps/valve
Here’s the deal! Fluid update is out, and there were rumblings of late-game buildings changing in Update 4. I’ve been weighing the pros and cons on doing stuff now vs waiting till changes and my conclusions are:
– pipe section is done (although there’s some bizarre issues with mk2 pipes at full capacity as of 3.6, just fwiw)
– fuel, turbofuel and refinery basics should be safe to investigate now. Refinery bounding box dimensions changed in 3.5, which did mix up a few setups I previously had
– After weighing in on aluminium, I think it’s worth just putting together a much rougher idea of what’s currently in the game in case folks want to experience content as-is in Update 3 before it goes away forever, and are looking for pointers. So I’ll be doing that… sometime soon, probably before the previous bullet points.
===============
2020-09-19 Just-as-quick-update: lol, been playing the waiting game to see if there was some kind of road-map for the game, so I could just work on guide stuff which isn’t going to be in updates FIRST, then the new/changed/balanced stuff LATER just to save on work. CSS did announce a change to ‘fluids’ in September October a couple streams back which I guess validated that, just realized today I haven’t popped by to update on how that’s gonna pan out w.r.t. the guide- Pipes have been on the menu as the next guide thingoo for a while, but it does look like it was ultimately accidentally a good idea to hold off and then only tackle that after that update hits. Probably could just get assemblers/manufacturers out of the way in the meantime.
===============
2020-07-13 Quick update: I’m slammed with work till end of the month, was hoping to get the pipes section done before clocking out for a while because that one has a lot of little tricks which aren’t immediately apparent (I discovered a few of them myself in the past week while experimenting for the guide) but them’s the breaks. Probably will be updated along with foundries deep-dive at the end of the month. Didn’t want to leave people hanging w/o knowing what to expect or not expect.
===============
2020-07-07
—————-
– Elaborated Basics – Efficiency in Building
– Added smelters general rundown, layout + video
– Added coal gens general rundown, layout + video
Preface
note: This guide is going to be highly WIP for a while because I’m chipping away at it in my spare time. Just like the game he he he. For the time being I’m probably going to flesh out all the minute tips and tricks for placements with specific buildings before working on the more macro look at things and overall base layout considerations. Also adding videos much, much later to help demonstrate some of the concepts.
Obviously as Satisfactory is a sandbox game there are many, many ways to accomplish the same thing so I’m always up for hearing input/alternatives.
Generally, there are three phases in a given run for Satisfactory
1) Early game- managing a limited amount of parts and power and teching up to T3 ASAP for Hypertube/Coal and T5 for trains
2) Mid-game- building a basic factory that automates everything required to construct large-scale buildings/expansion without being bottlenecked by how fast parts are being made. Best accomplished alongside a ‘mall’ system for quick retrieval of various parts, generally lasts through at least automating some Alclad and Turbo Motors. Exploring for HDDs for alt recipes
3) Late-game- Expanding all over the map to tap more nodes and essentially do the only thing left in the game- increase Turbo Motor production while slowly going insane. Framerate and save filesize become increasingly prominent considerations.
As this guide deals mainly with orthogonal grids and maximizing space by building on foundations for alignment, it mostly benefits mid-game and late-game but the concepts definitely also speed up early-game by hopefuly reducing the amount of retrofitting and re-doing overall layouts.
As mentioned in this description, this guide does not go over best starting locations or maths/ratios alt-recipes to look out for, etc- there are many excellent resources for those already.
The Basics- Efficiency in Building
Building Compact
The entire concept of the guide is as such: Satisfactory is all about efficiency. Pushing out as many parts as possible out of a given set of nodes, maximizing utilization of available power, but even in a meta context, playing the game without going insane boils down to taking as much of the headache/hassle (such as the game is with its current UX) out of the equation as possible.
As Satisfactory is more of a manual-builder game than a blueprint-related one, efficient base-building relies on designs that are:
1) compact
2) easy to build over and over
Despite there being virtually unlimited space to build (as long as the flying manta doesn’t ruin everyone’s day :'( ) there are still very tangible benefits to building compact- if you know getting an outpost to process 480 ore into ingots and the most basic parts takes X Y Z concrete in length/width/height, you’re going to spend less time laying down concrete.
Building compact for the main base is also advantageous as the less time you spend walking around the base, the more you’ll get done in the same amount of time.
Layouts that are easy to build is self-explanatory. The less time you spend aligning stuff, the faster you build, and the more you get done. This obviously gets more and more beneficial the more you scale up. Taking time to put down 4 smelters is fine. Put down 128 and suddenly every time-saver in the book makes life easier.
Feeding into that is knowing generally how much space what you want to build would take before you even start building.
In general, once it’s time to scale up it’s very much worth examining the most basic design blocks for a given system and to optimize the number of components in each. Not only does this make things significantly faster to build, it makes ultra-late-game more viable as both FPS issues and total object limit get stretched just that much longer. A very simple example are arranging rows of machines face-to-face or back-to-back to share splitters, mergers or pipes depending on which input/output is the least bottlenecked.

The Basics- Manifolds vs Discrete Units
There’s no right or wrong way to play Satisfactory as long as the power keeps on and the parts keep flowing. Obviously though, since we’re focusing on efficiency, it’s best to examine the different ways that things can be put together and the advantages and disadvantages to each.
A manifold refers to a row of machines fed by a single belt with a splitter going into each, to mass-produce parts. Manifolds generally tile a lot better at a micro-level, are easier to expand based on increasing belt speed and resource availability, but can be hard to troubleshoot if something goes wrong.
A discrete unit refers to a series of machines that go through the entire series of recipes that creates a desired final output out of the input resources.
For complex interdependent systems like bauxite, it’s best to use discrete units as it makes troubleshooting much easier.
For power systems, having at least one discrete unit that can function independently can help jumpstart things if mistakes are made and the power grid trips (this almost always WILL happen because we’re all bad at this game) You don’t want to try getting a 155 turbofuel plant with its own internal power draw of a few GW up and running from a cold-start because you accidentally cut power to the coal miner when expanding it and the entire system drained of coal->compact coal->turbofuel. <_<
Generally, anything that can be created in a manifold should do that, as it all goes back down to how fast things are to build and how easy they are to expand. While there’s nothing wrong with having e.g. an iron miner feeding a bunch of discrete smelter->constructor->constructor units to make screws, it’s much more tedious to retrofit if you suddenly need a ton of plates, vs rerouting a manifold’s output belt of ingots to a different row of machines.
For certain recipes where 1-2 machines will saturate a belt for a certain input (e.g. Heavy Flexible Frame 390 screws/min == 2 machines per mk5 screw belt) a secondary bus with multiple belts running alongside the main manifold belt to feed into the manifold works. Ditto Bolted Frame and Bolted Plate alts.
(TODO: add pictures)
(note: Load balancers are essentially equivalent to manifolds for the specific purposes of this discussion. While there are good compare-and-contrast discussions to be had w.r.t the advantages of manifolds vs load balancing, I’m basically going to be using only manifolds for this guide simply because they’re more compact and tile more easily)
The Basics- The Mall
A “mall” generally refers to a central area where various parts all dumped into containers, with a workbench, equipment workshop, MAM, etc handy. This is generally essential to cut down on the amount of time running around to retrieve parts for expansion or progression.
Even in the early stages of the game with massive spaghetti, this is already true
When planning a more permanent structure it’s a good idea to consider building everything around this central location as an anchor
There are a LOT of parts in the game so planning a mall size/parts assignment can get tedious. I’ve generally gotten by with 6 groups of 7 Industrial Storage (TODO: add exact layout as reference) which covers everything I need, with some still empty for future content. Swapping the ends of these arrays to Storage Containers stacked increases the number of discrete parts in the mall (e.g. I don’t think I’ll ever need to have a double belt of Turbo Motors or HMF entering an Industrial Storage Container nor will I ever need an Industrial Storage Container’s worth of those all at once, so that’s not ever a bottleneck consideration)
Ingots can safely be excluded from mall considerations. Not only are the times that retrieving ingots for handcrafting EXTREMELY few and far between, basic ingot->plate/rod/beam/pipe/sheet/wire production eventually wants to be shifted far, far away from the main starter building early on for FPS concerns, especially once trains are reached.
(For now?) All hazmats should be off at its own location far away rather than in the main mall, for obvious reasons.
A good base layout is one where various part constructions have reasonably easy access to dump a portion of their output into the mall while also getting wherever else those parts need to get.
I generally use the same setup every run so knowing where everything is is second nature, but it does help if a little of the entry or exit belt is visible on the user-side of the mall for quick visual reference of which containers hold what.

The Basics- Constructing Infrastructure vs Constructing Machines
There are very tangible benefits to separating out the process of setting up buildings into two distinct phases. Getting foundations, overall dimensions, traversal, power grid, etc set up FIRST, then populating it with machines SECOND.
Especially on when inventory space on the engineer is limited, carrying only mats needed for a particular phase helps cut down on supply runs back to the mall, e.g. starting with a lot of concrete & plates to lay down foundations and walls, then some pipes/sheets/rotor/encased for hypertubes and rods/caterium wire/cable/etc for power grid, then only everything else.
Ultimately the biggest benefit is that construction of new buildings can be rote repetition and this delineates the mundane part of the task from calculating machines/belts/etc. which can then be done without having to worry about power pole placement, etc. Limiting the initial task to just concrete and walls will also help assess footprint before putting down any complex setups. Nothing sucks more than putting down 3 manifolds, wanting to expand and then realizing the expansion is going to clip into terrain.
Of course, this does require some forethought (& just experience in general) to have an estimate of how much real estate is needed for a given task.
I’ve found that around the main base, platforms of foundations 4-wide has always been enough for all kinds of manifold setups up to and including refineries and manufacturers. These can be interspersed with margins of 1 foundation, then another platform 4-wide, etc. ~19 foundations long is also generally sufficient to put down lengthy manifolds up through the last parts of mid-game. These fit rows 6 manufacturers, 15 assemblers (a tight squeeze) or 18 constructors comfortably.
(TODO: pictures demonstrating the above)
(As of update 3 with its clipping Manufacturers) floors 3 blocks of 8x8x4 concrete high are sufficient for non-fluid manifolds. Refineries and generators generally need floors 8 blocks high.
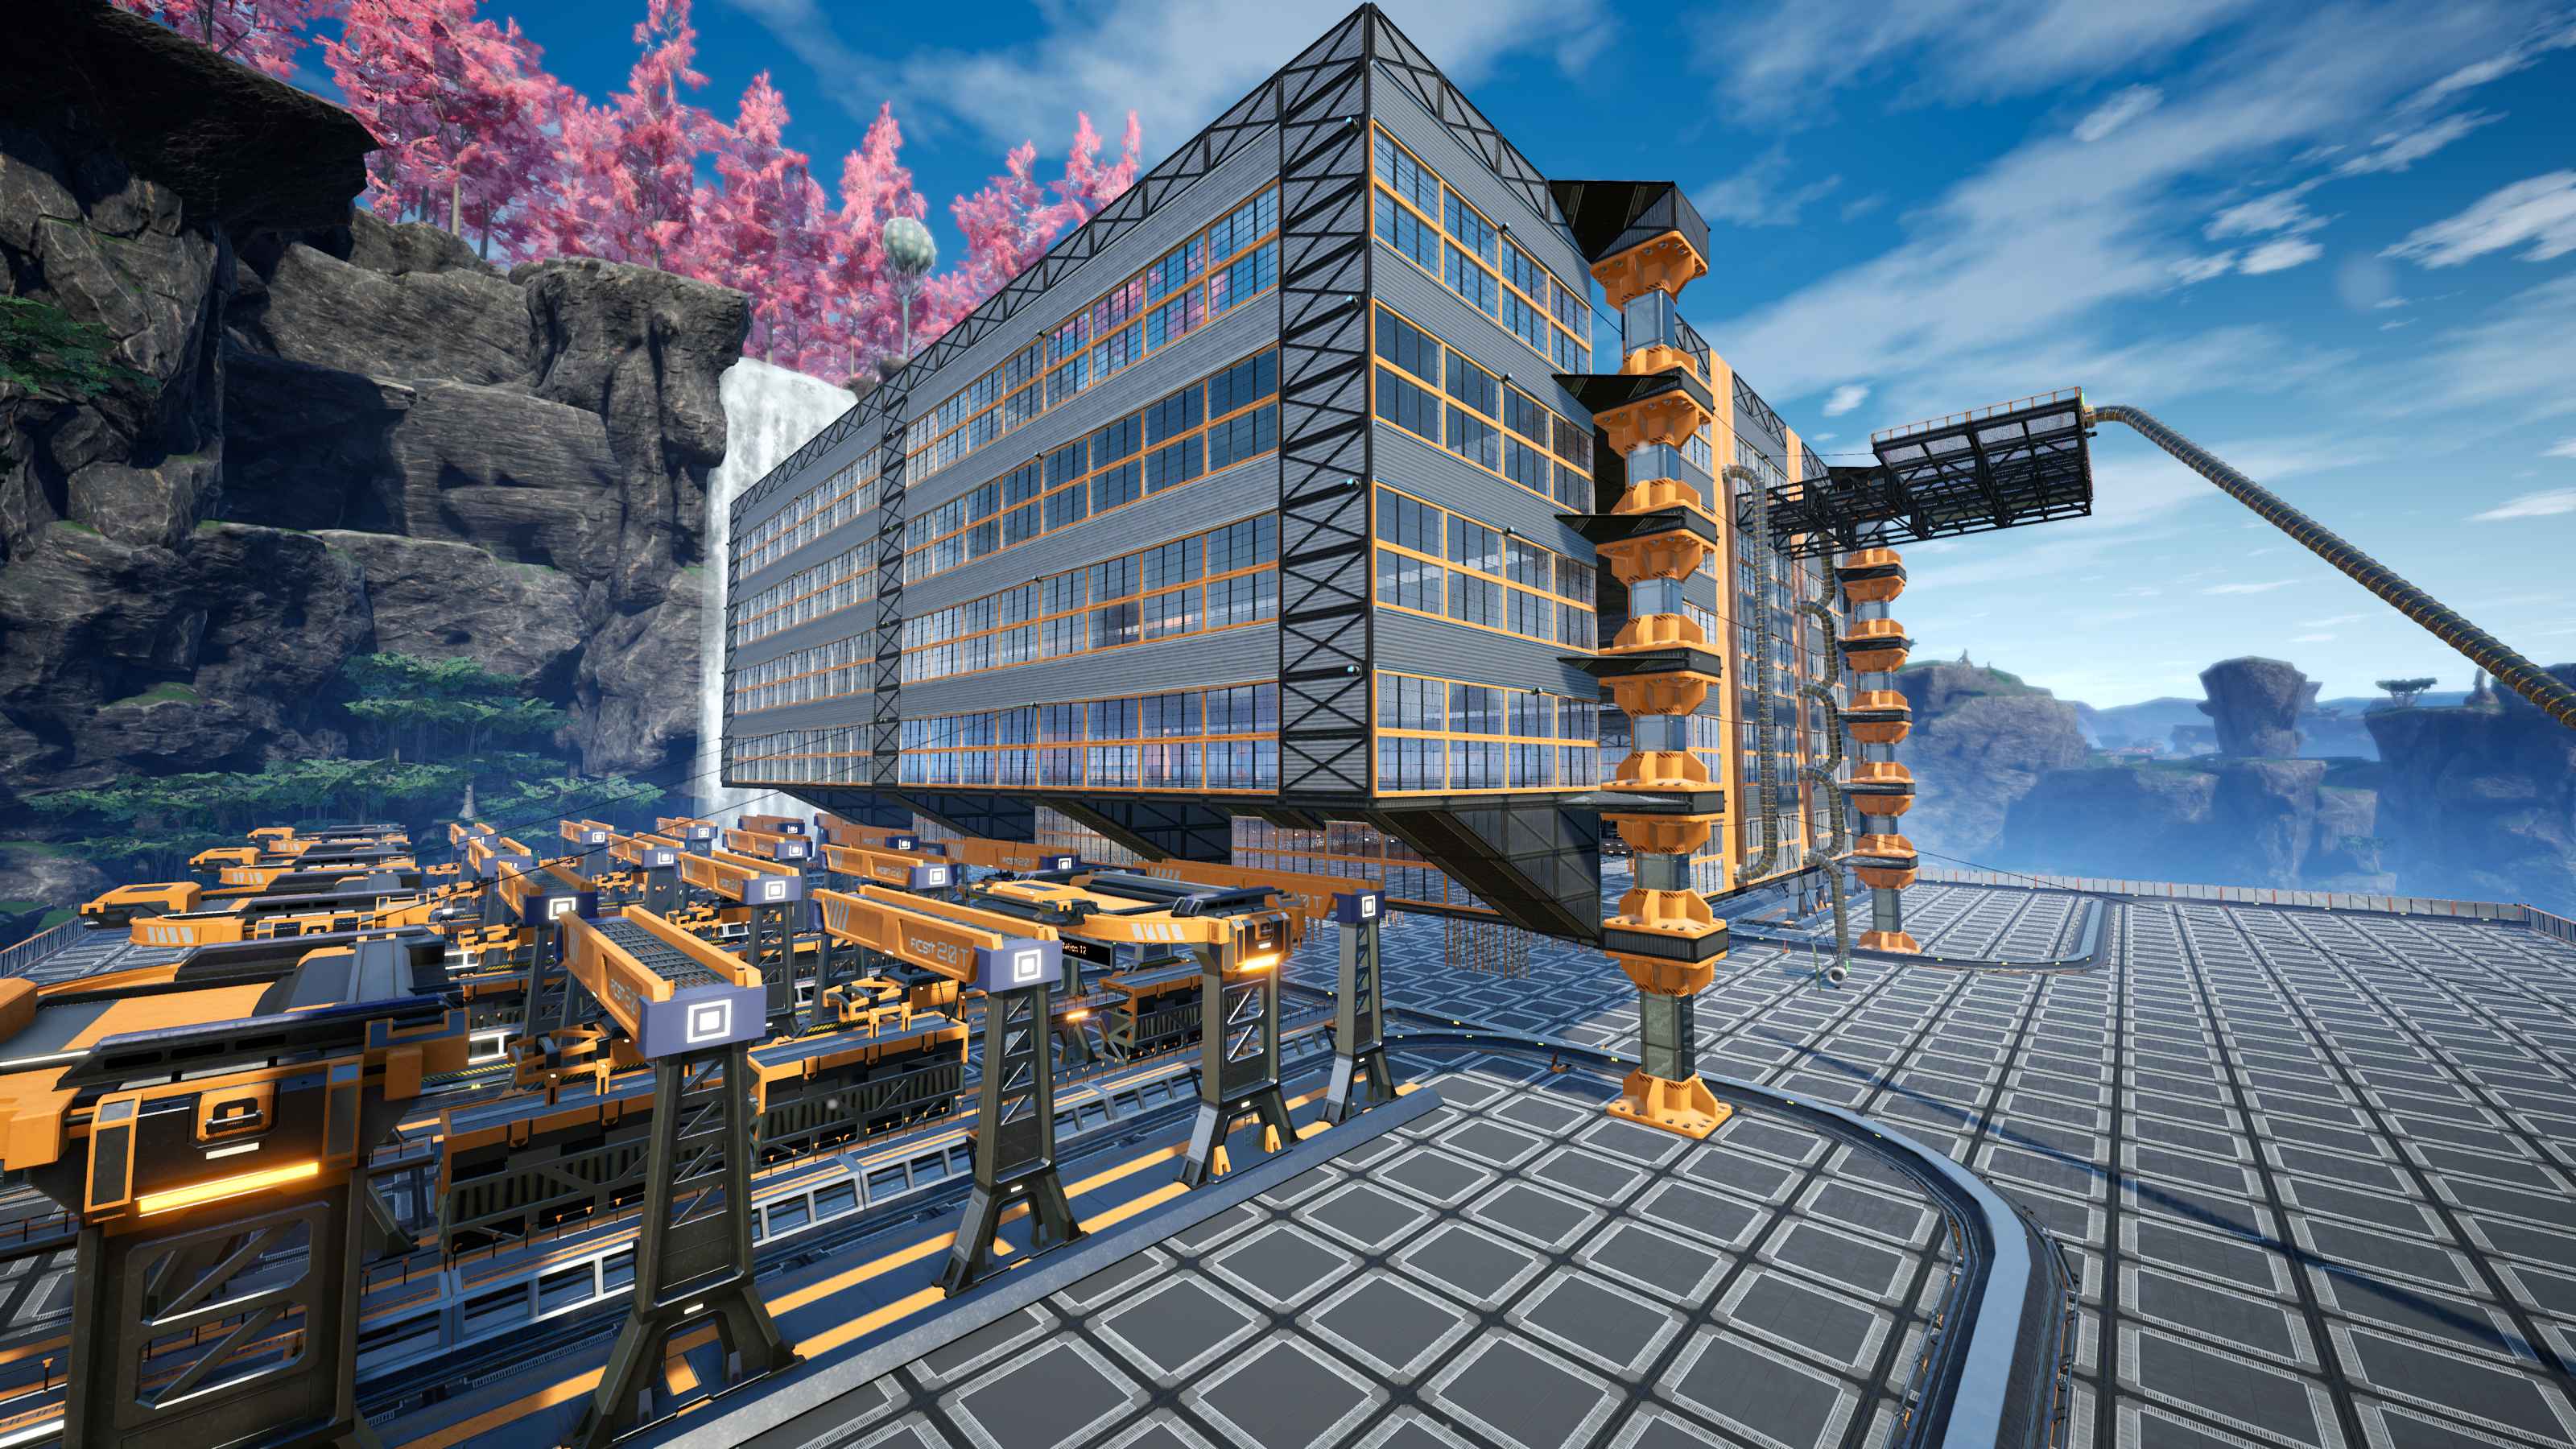
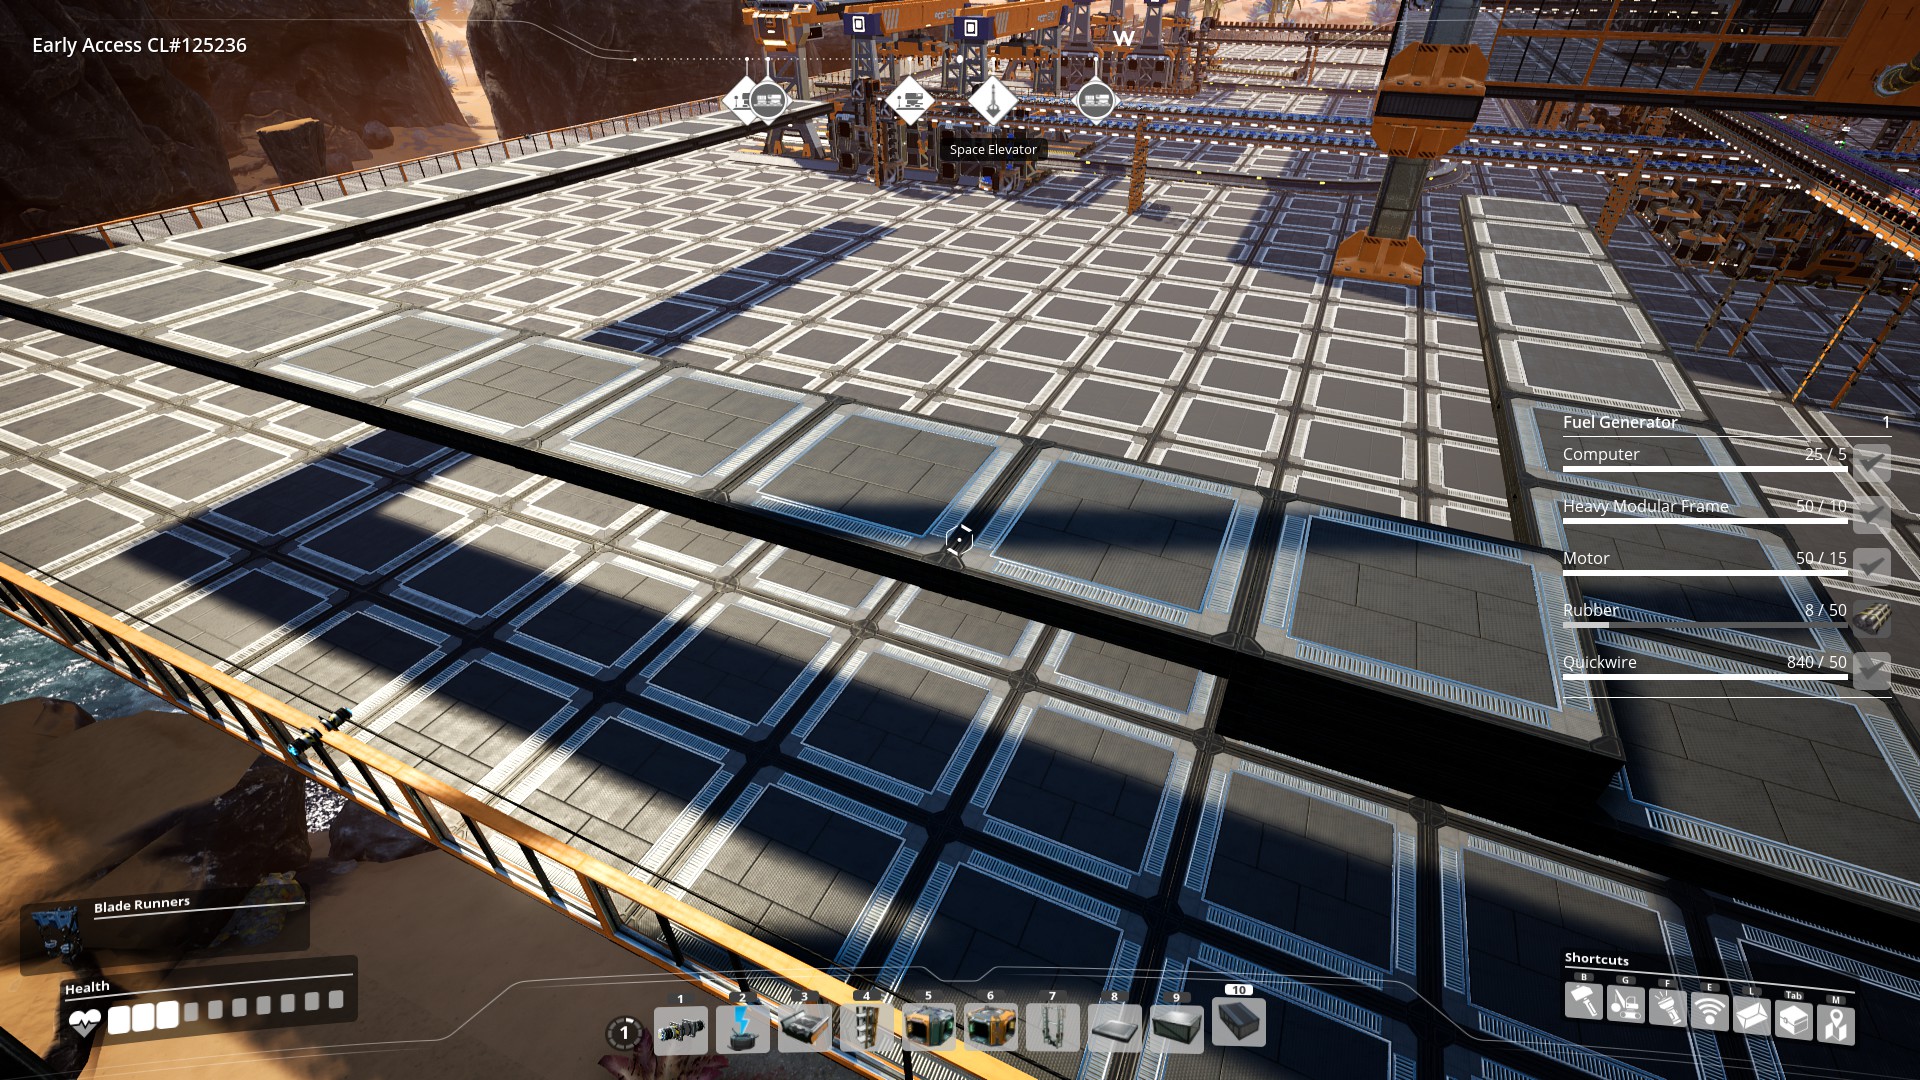
Generally my multiple level “main base” building of 21×19 foundations sits on top of a larger square of 41×41 foundations and this is enough additional real estate to put train stations, temporary rows of machines etc. outside. Getting it all built is tedious (and takes a ton of concrete, better have a bunch of that coming in all the time early-game!) but well worth it never having to worry about doing it again till end-game and building specialized parts outposts.
(TODO: in-depth main base layout for reference & routing to/from mall)
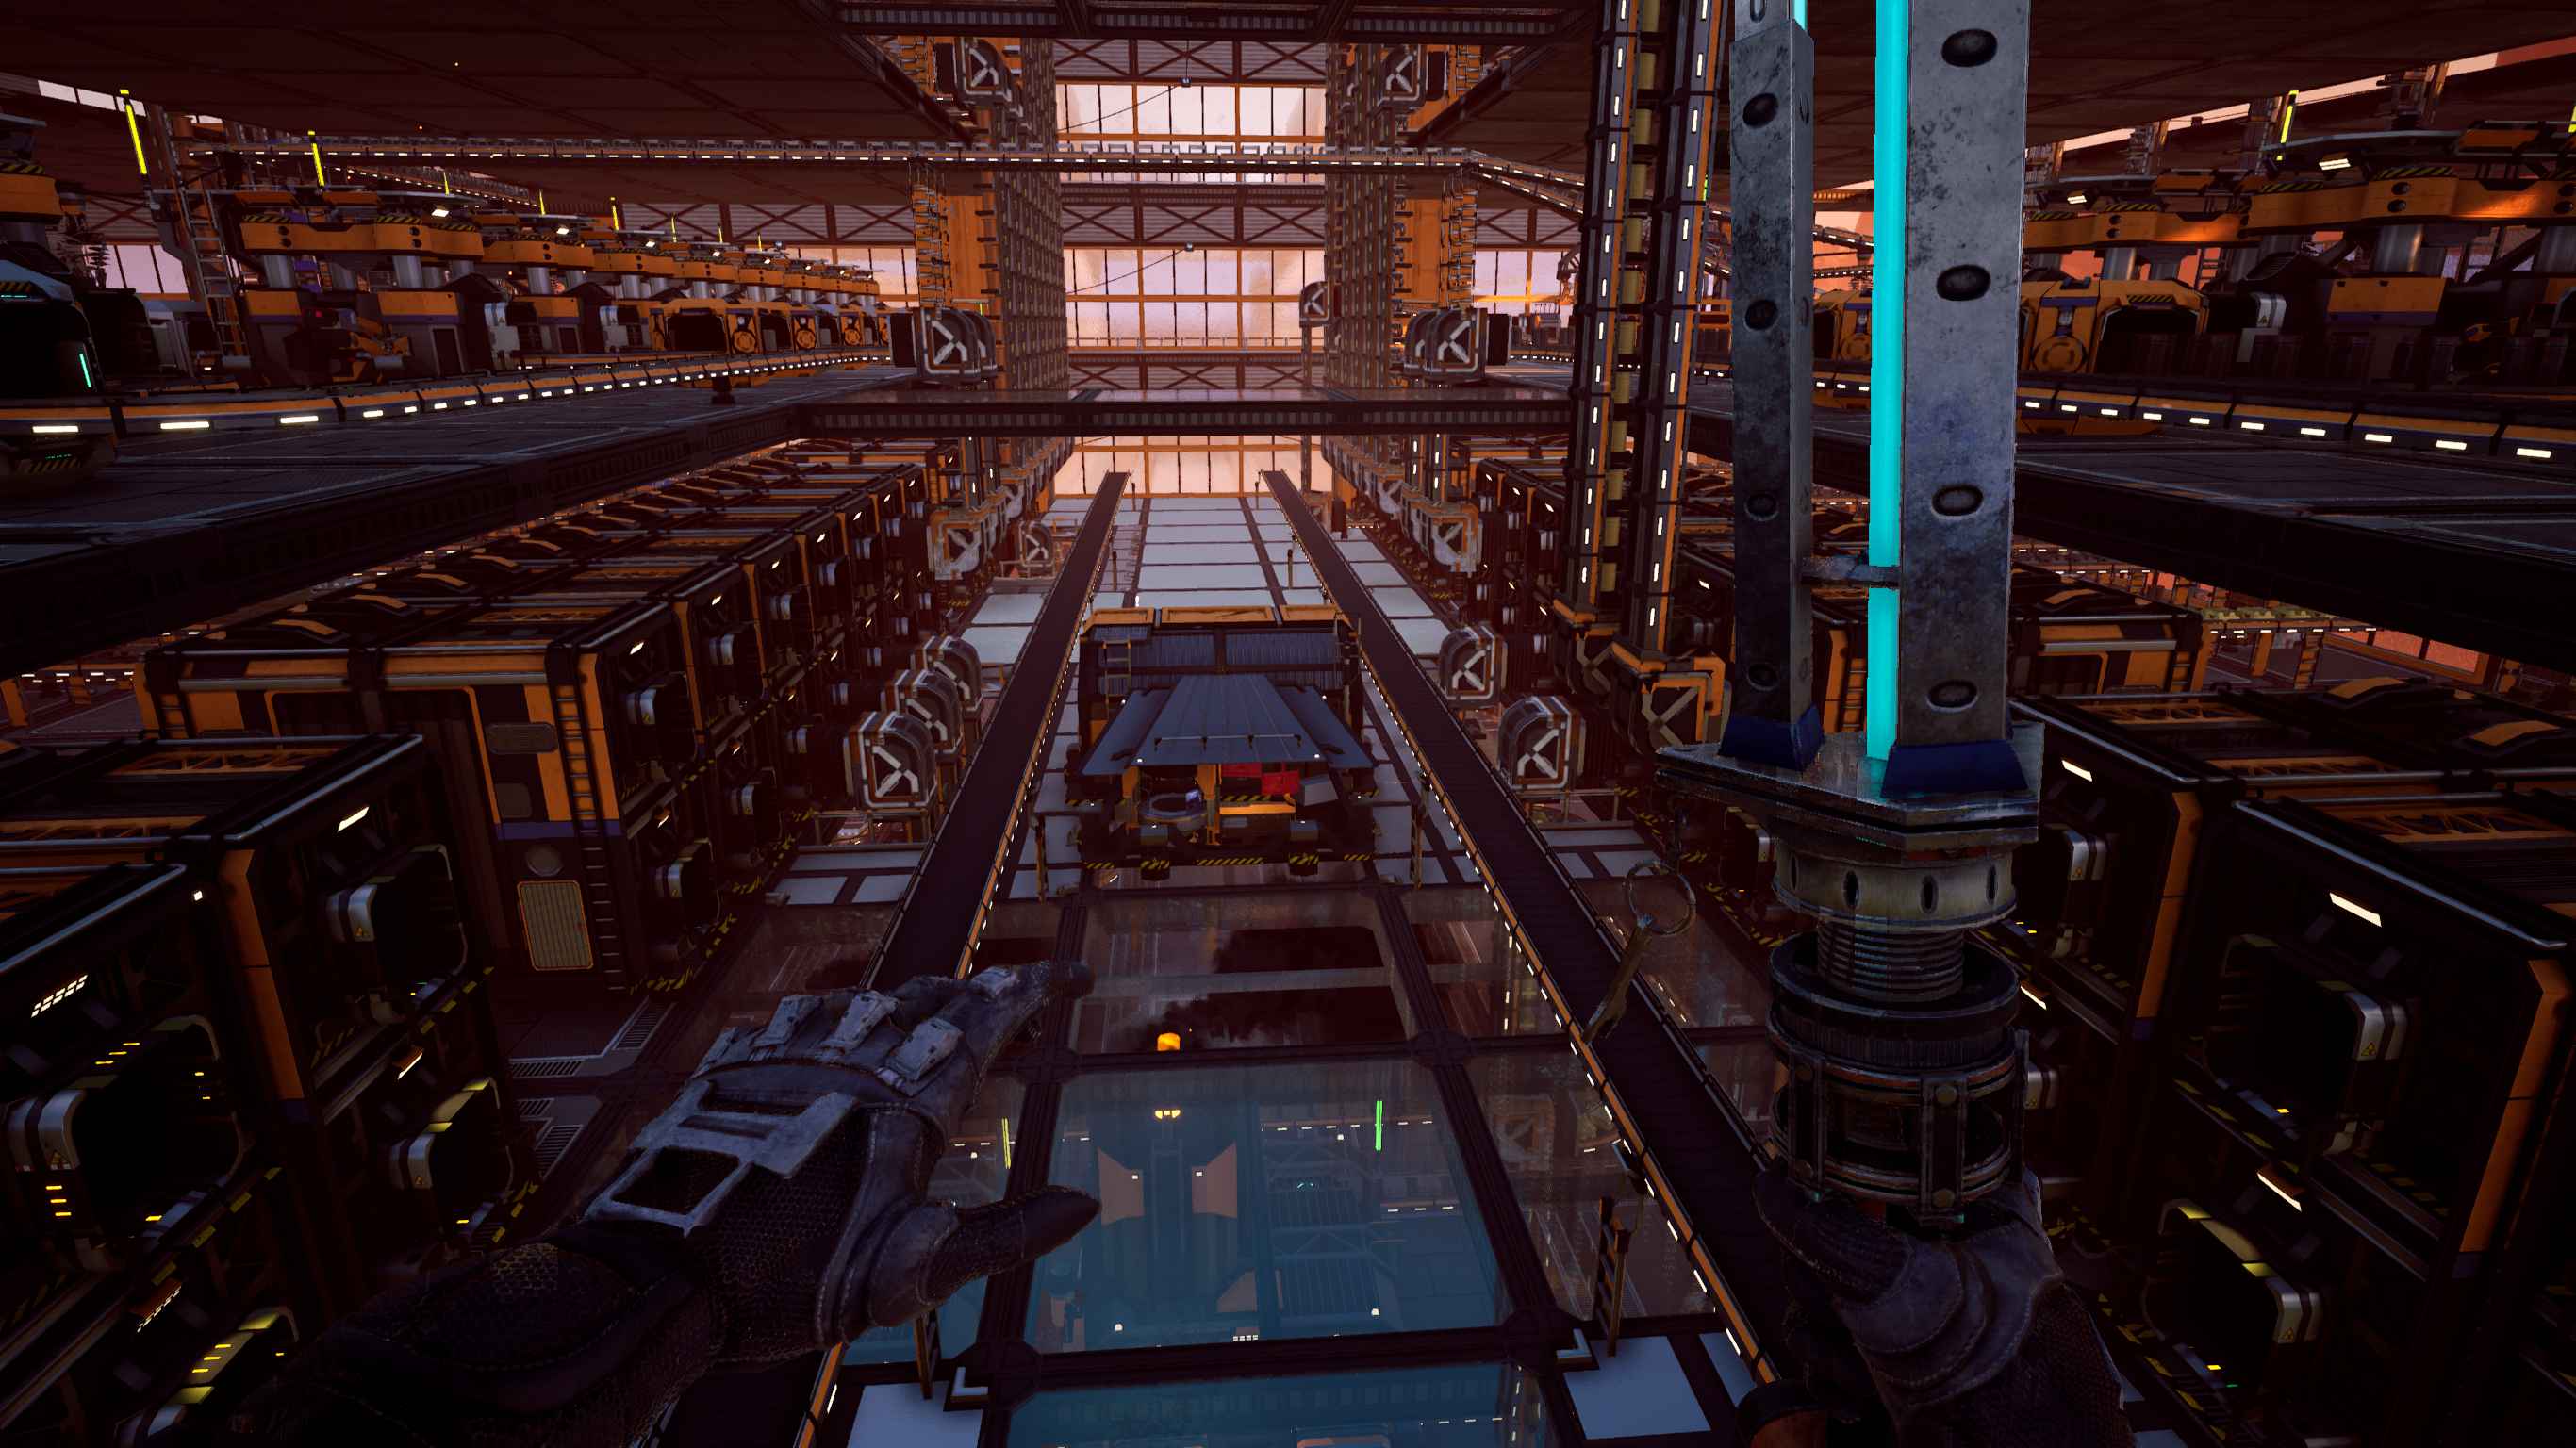
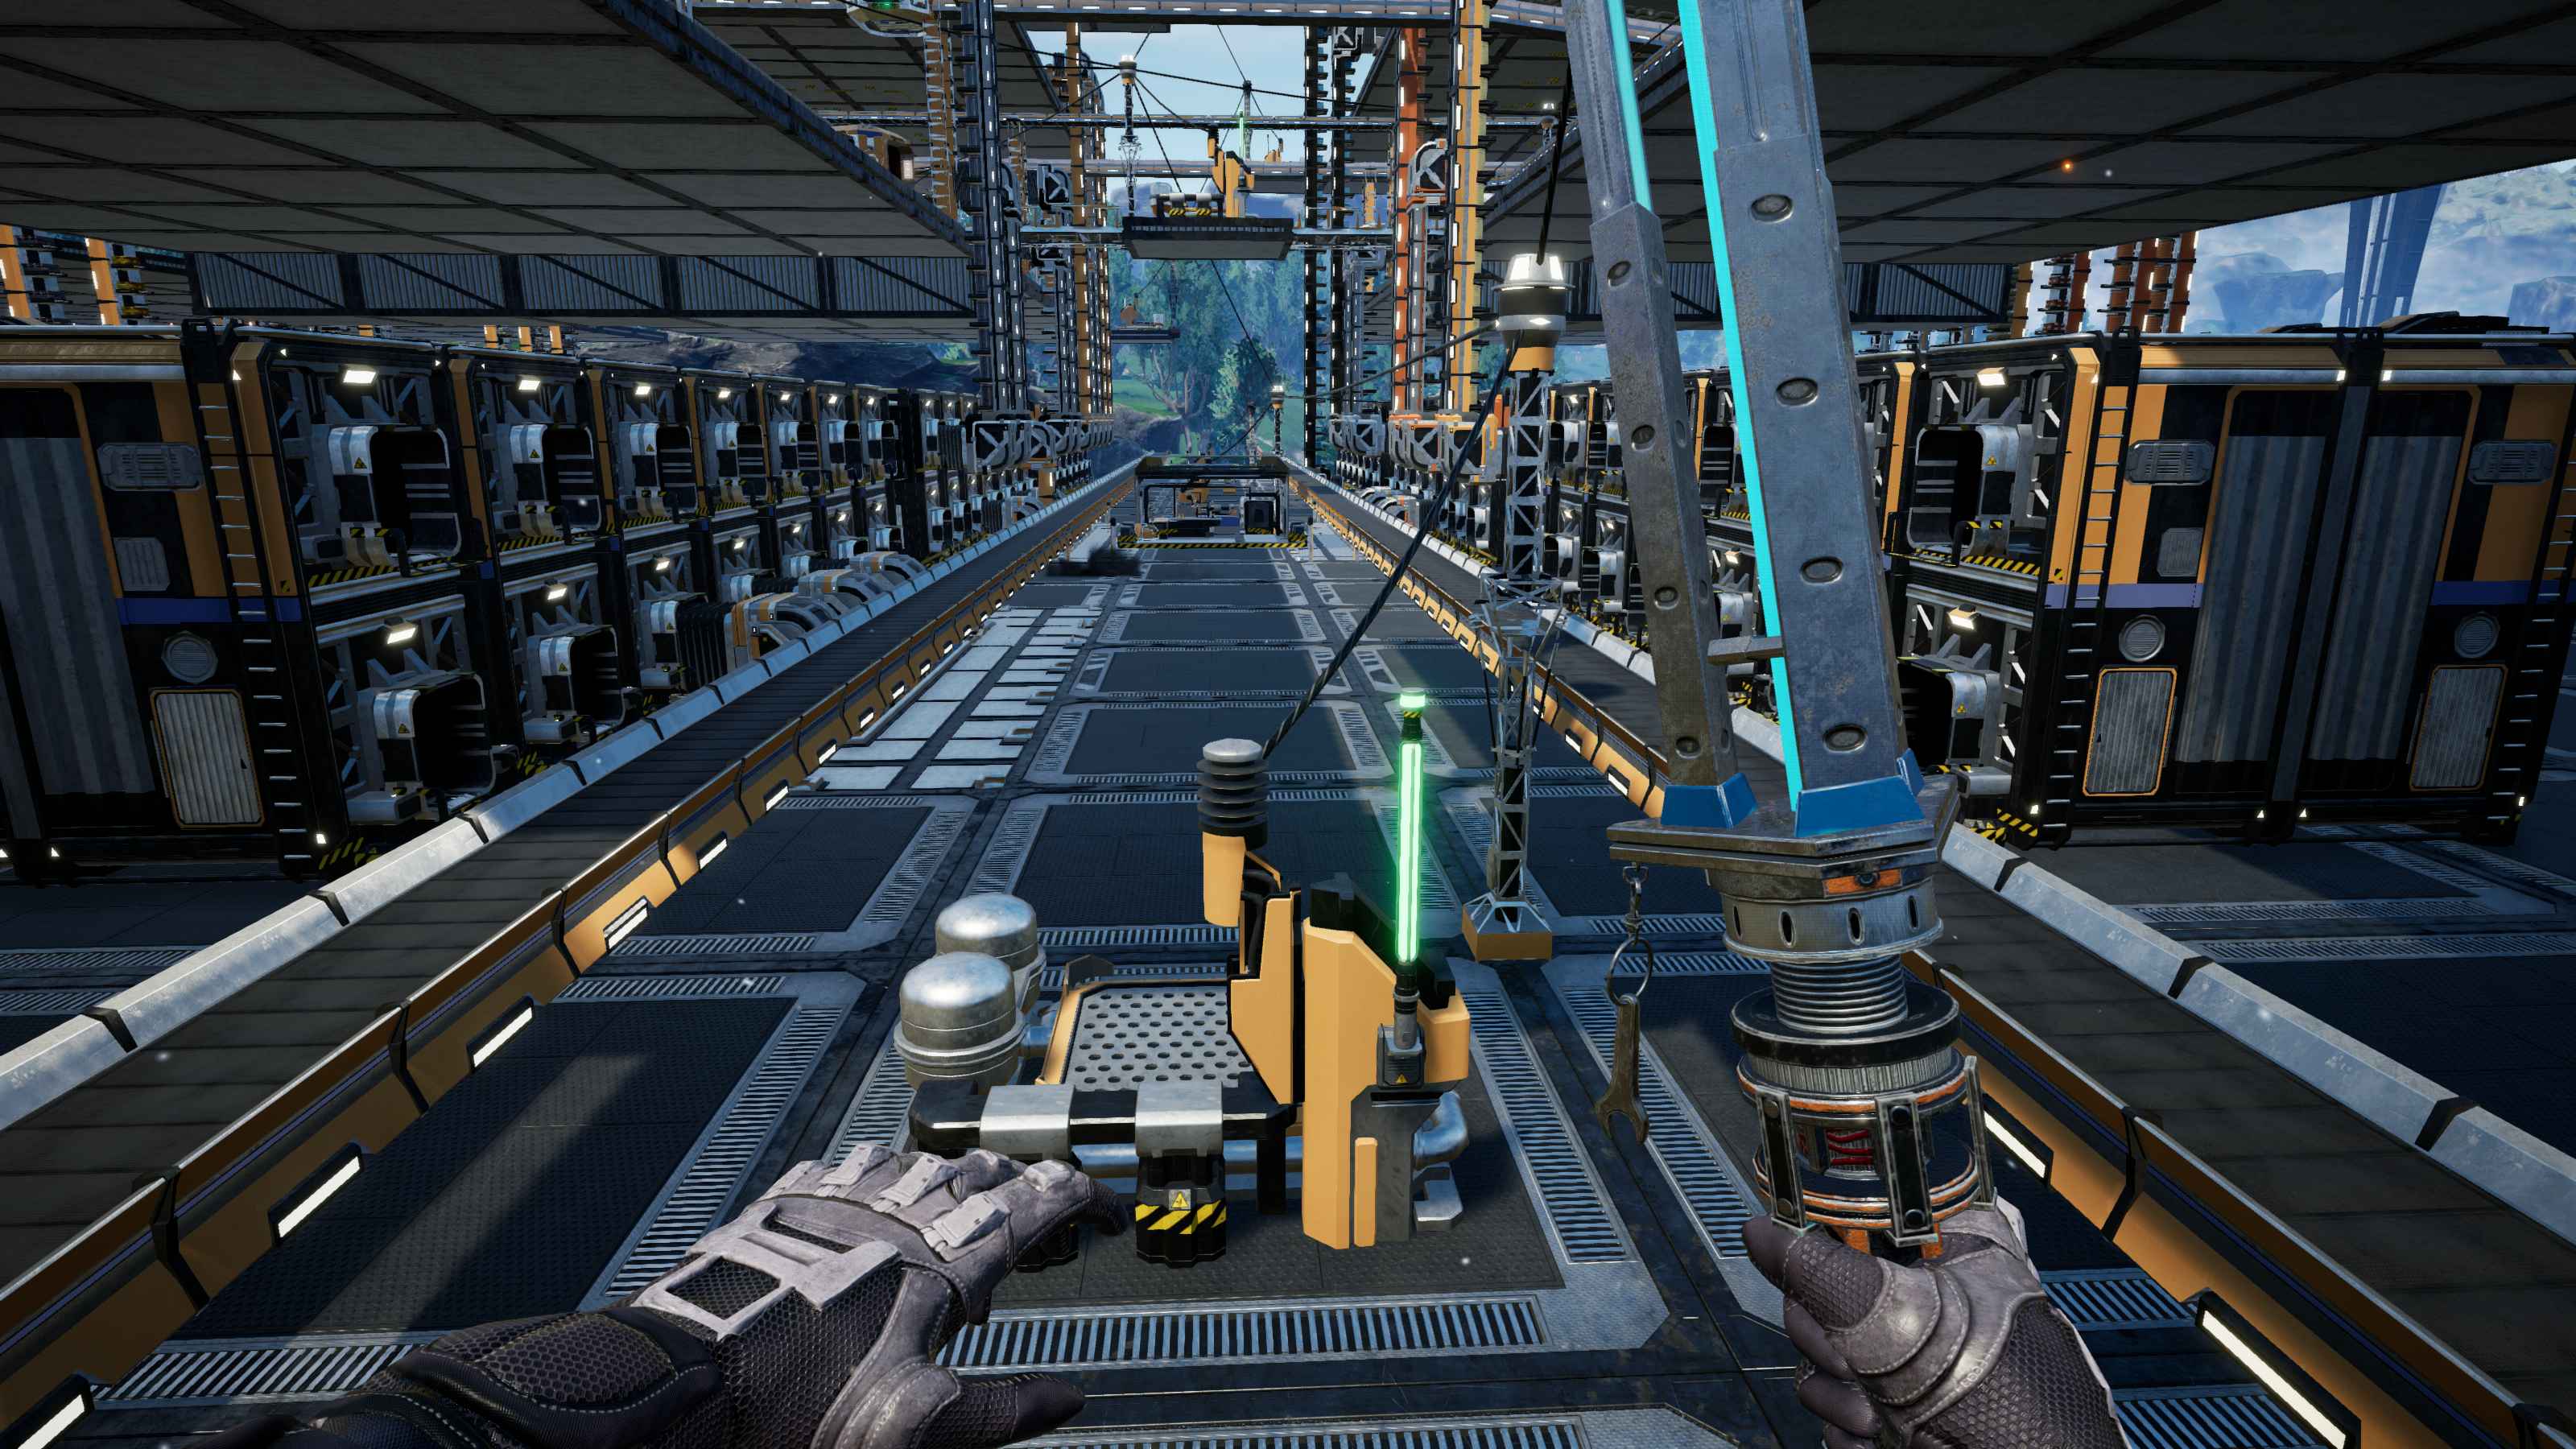
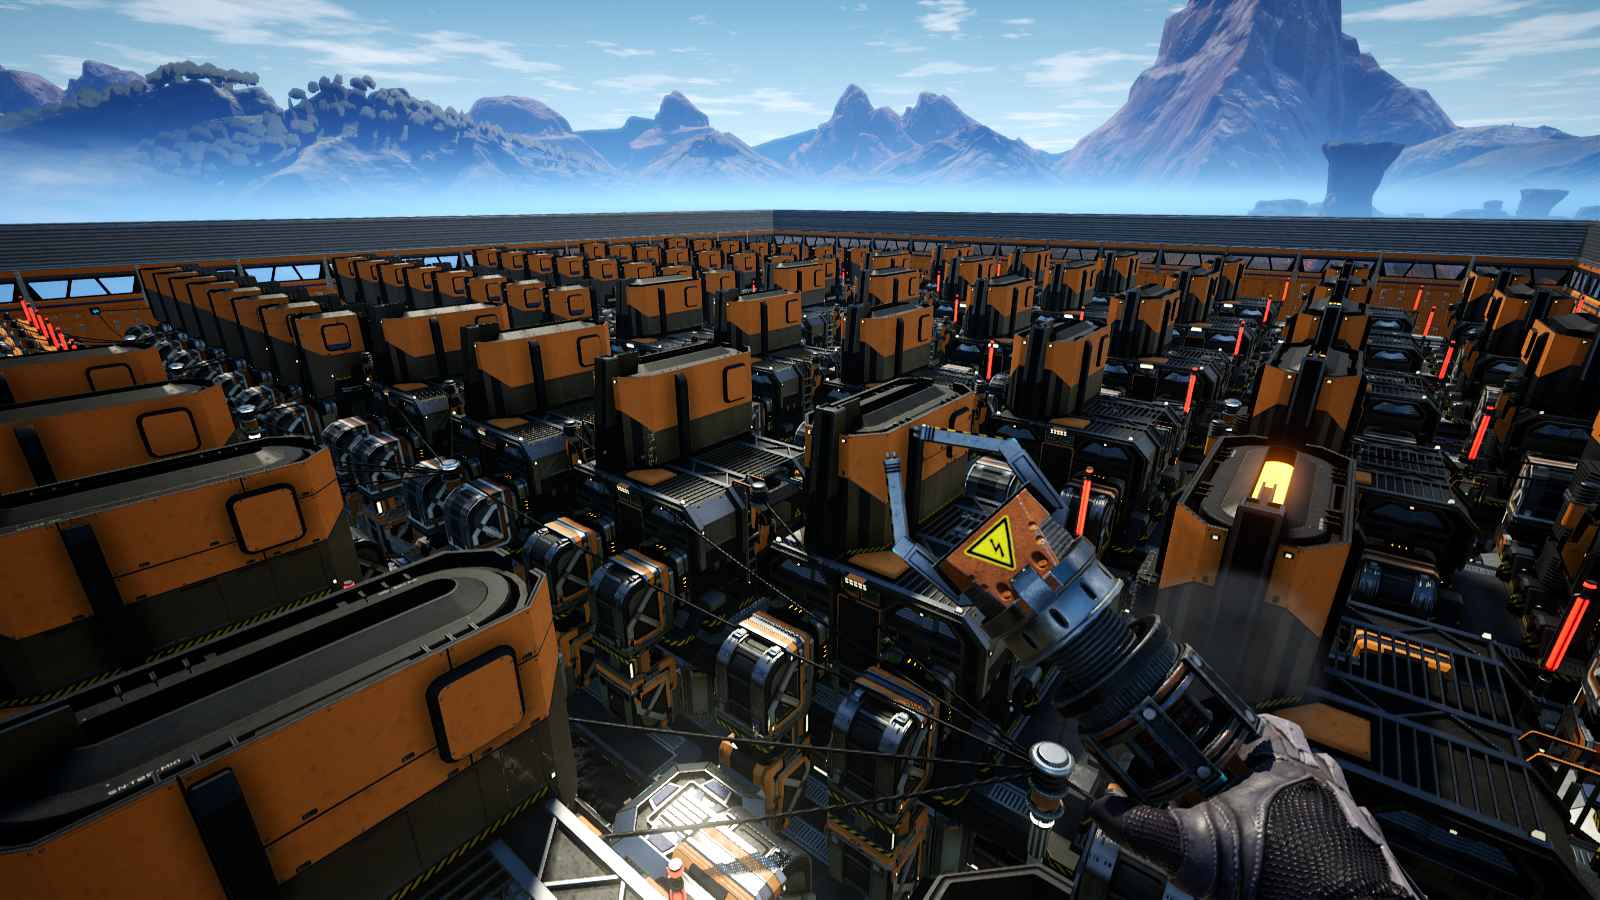
For me, at least, having proper structures makes the game much easier to parse at a glance. Irregular shapes casting shadows all over each other and non-orthogonal belts/cabling/etc. makes for unnecessary visual chaos
Consider the difference between this Update 2 screenshot (prior to hypertubes and wall-poles) vs Update 3, shader improvements aside
Concrete
This section will double as a little bit of a dive into player dimensions
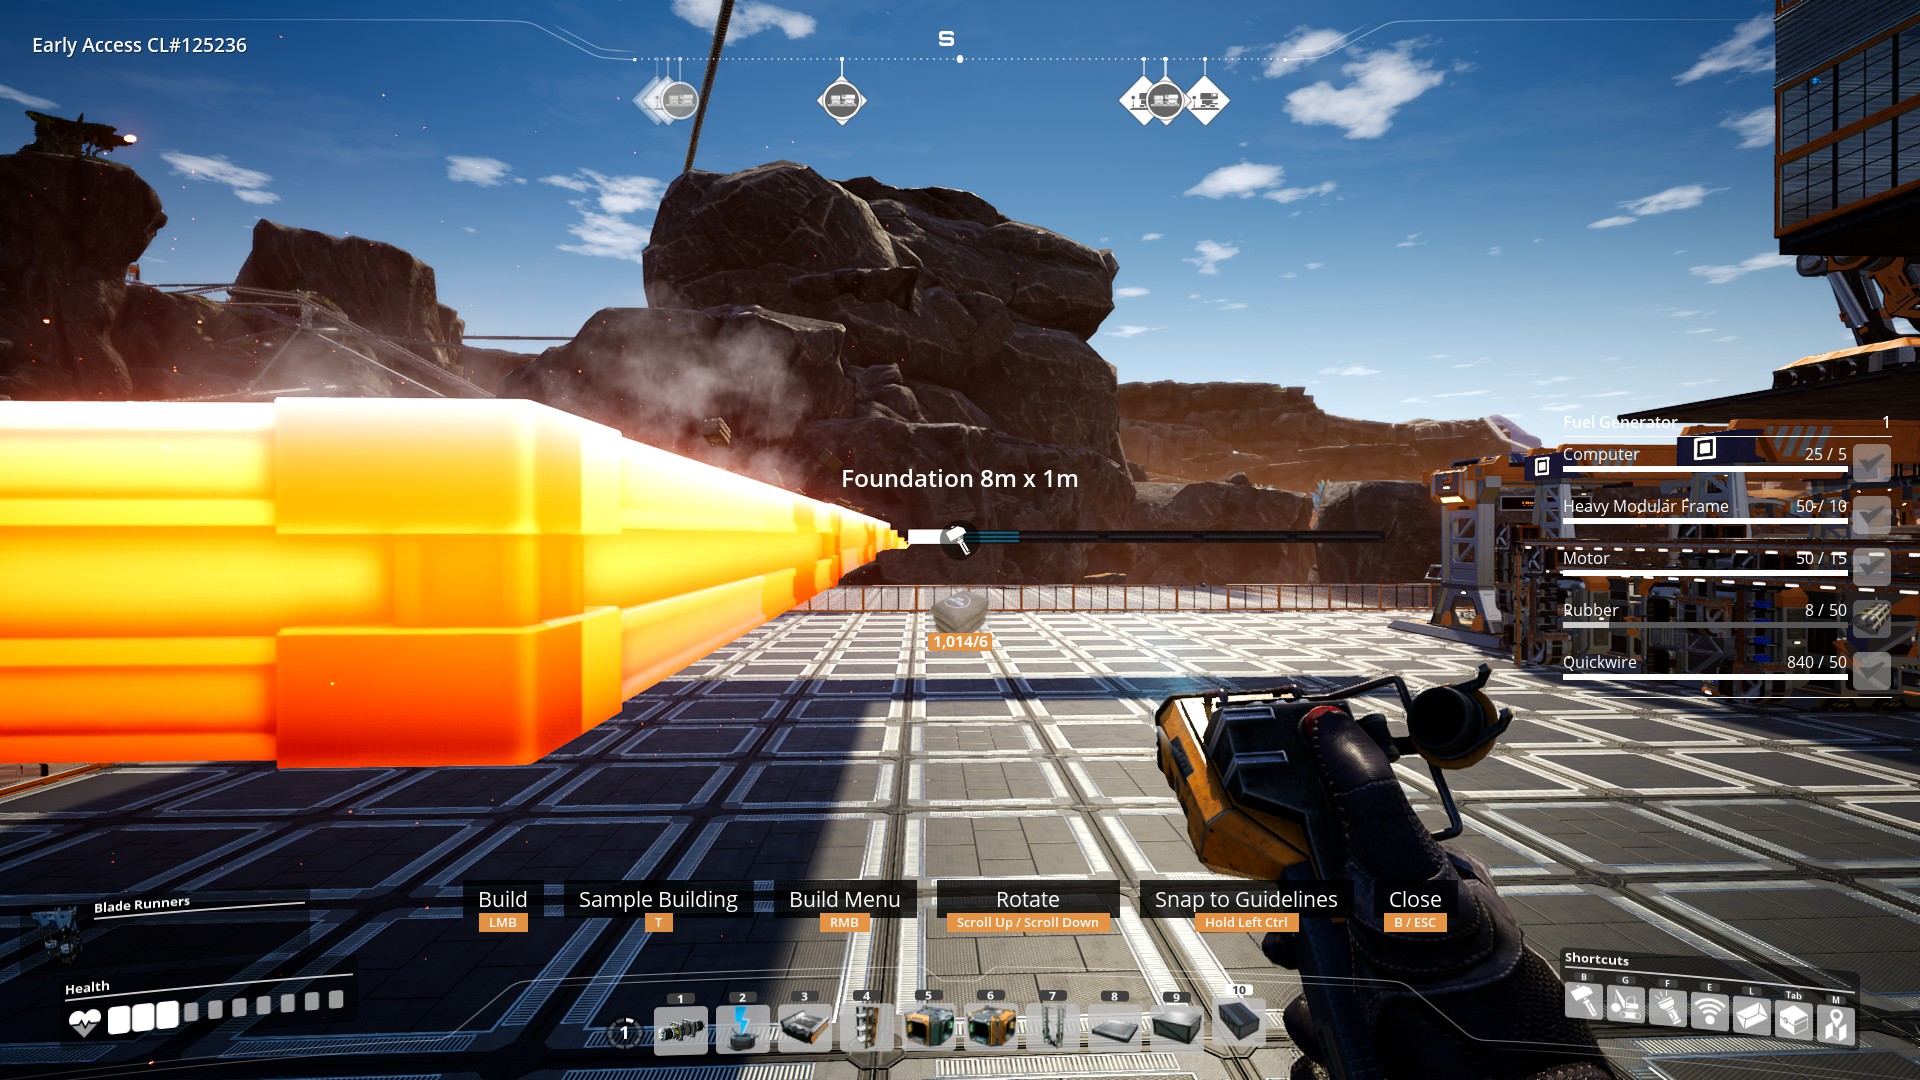
Concrete are 8×8 as stated in their description (duh), and understanding how to quickly eyeball where each of the 81 possible snap points on the concrete based on its texture will help with speedy building.

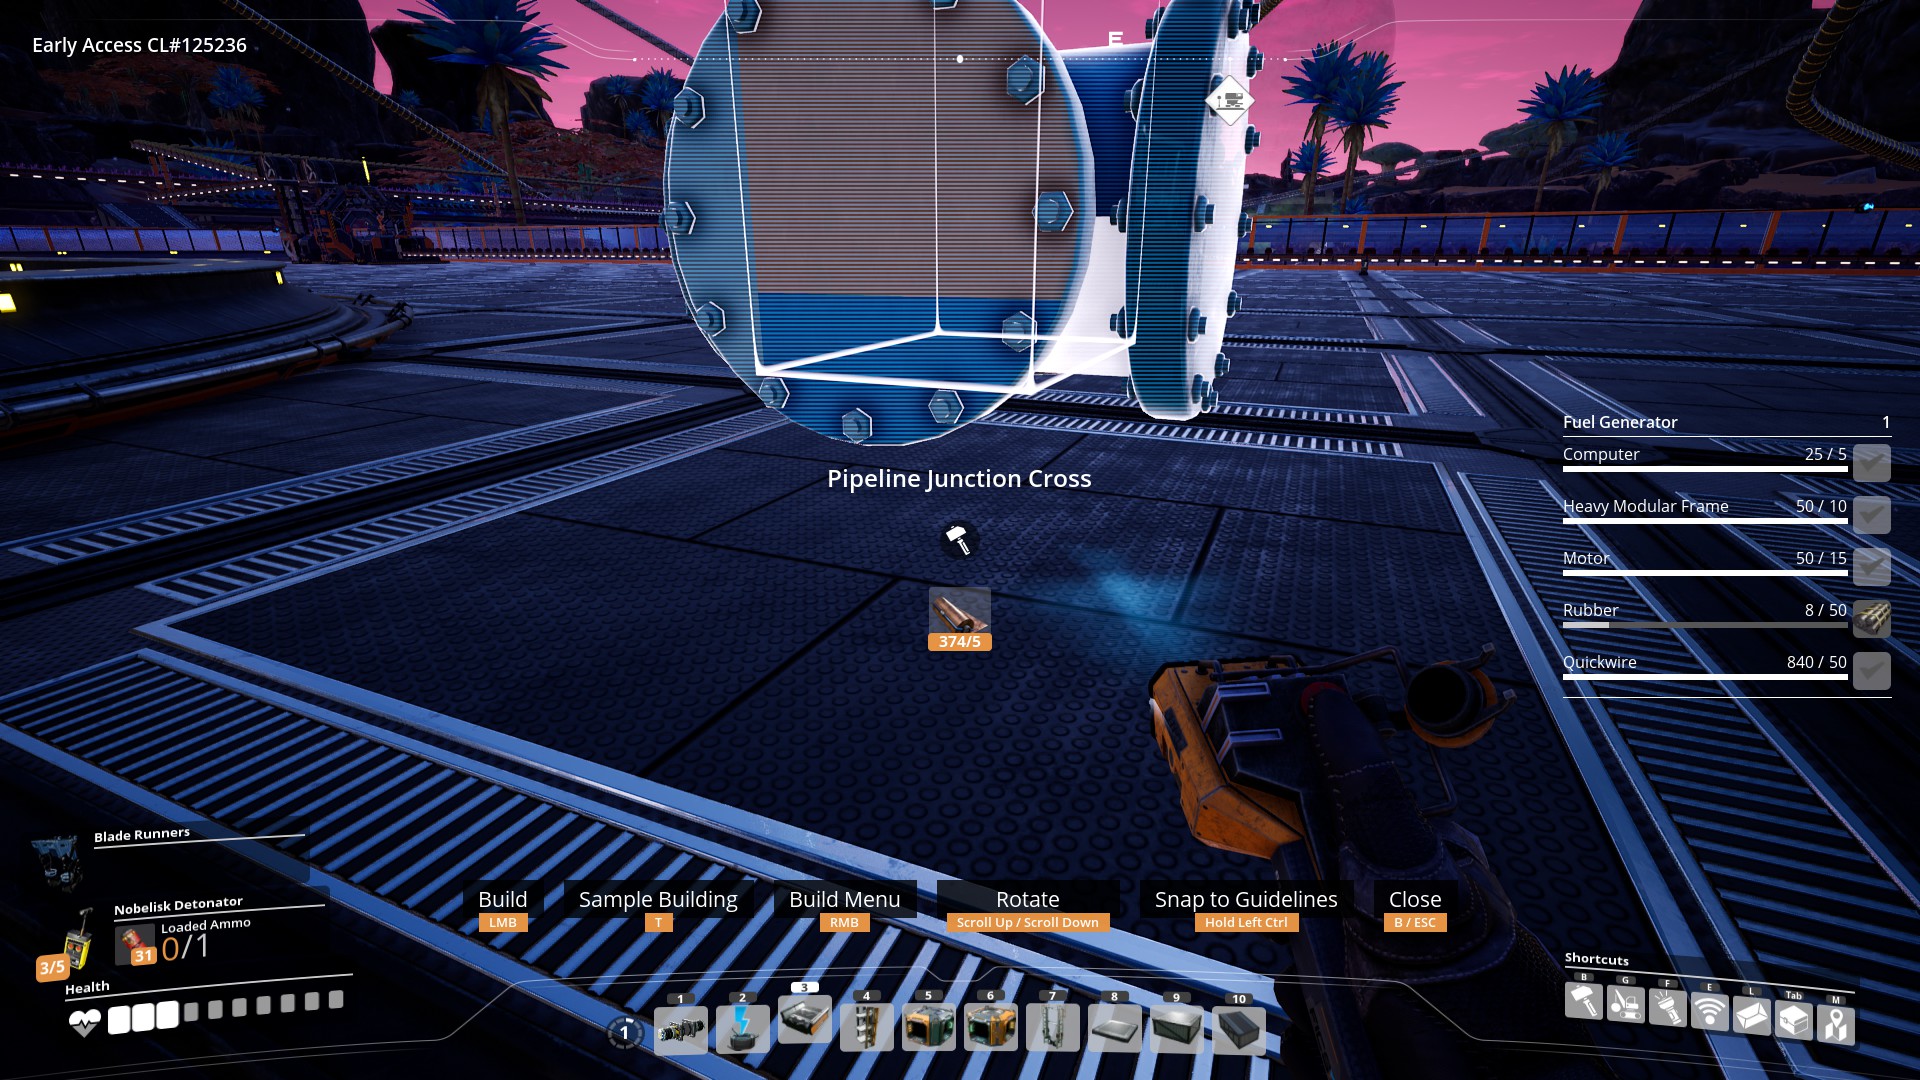
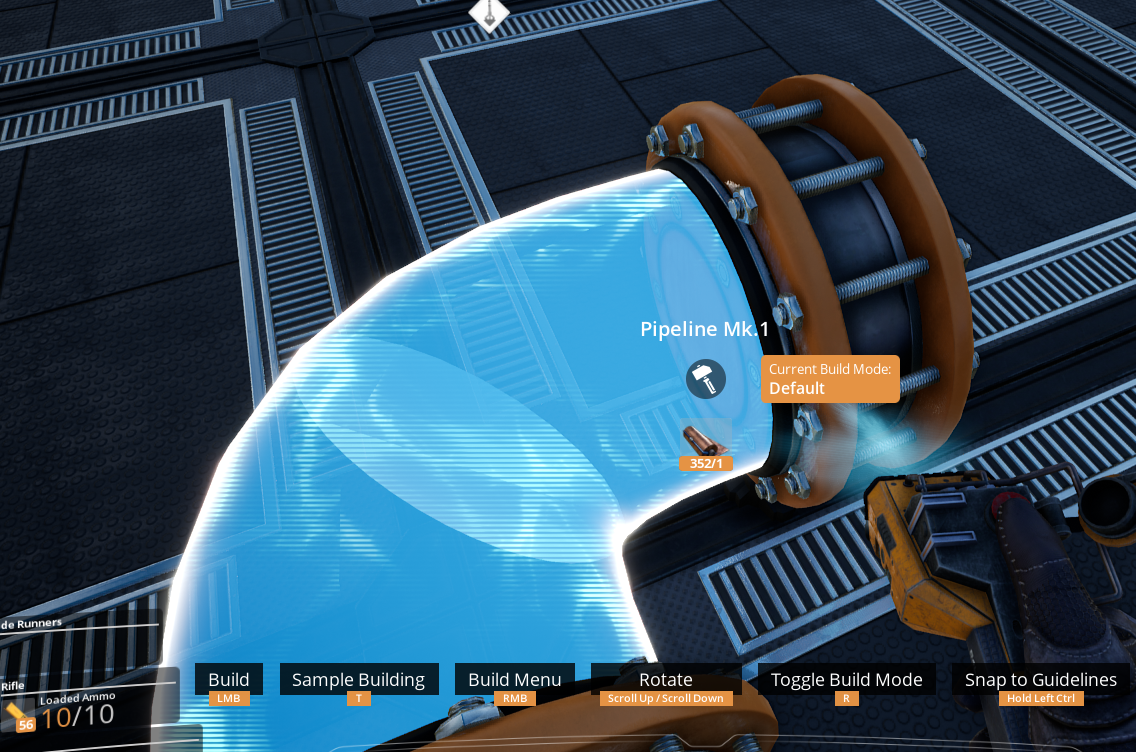
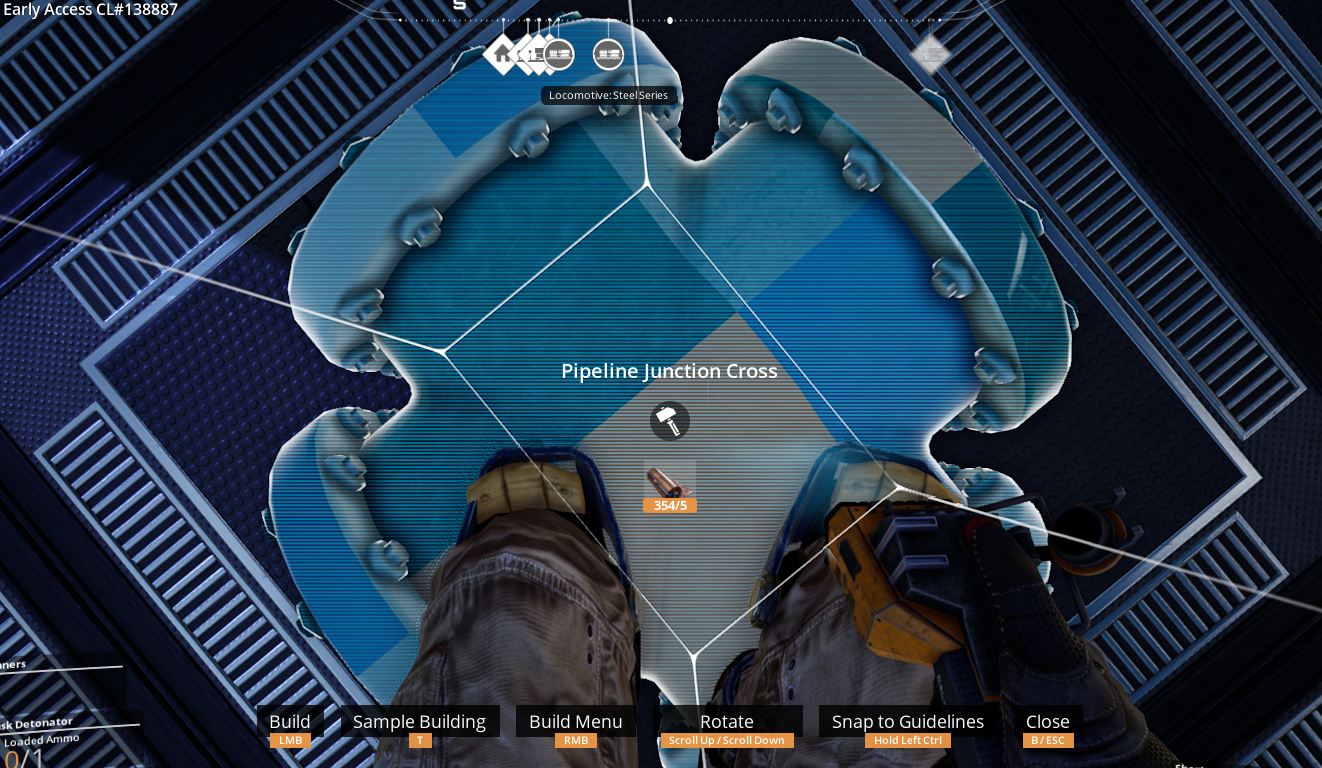
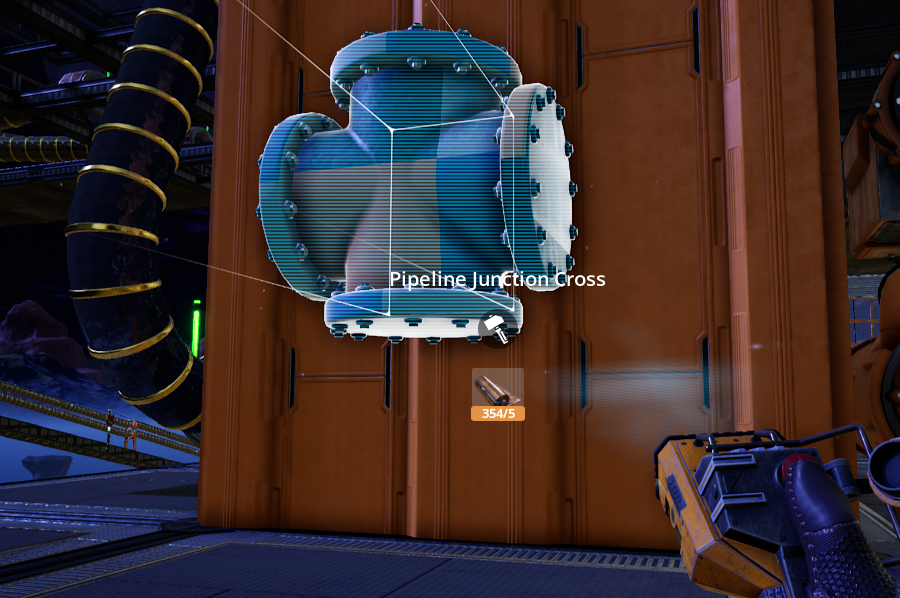
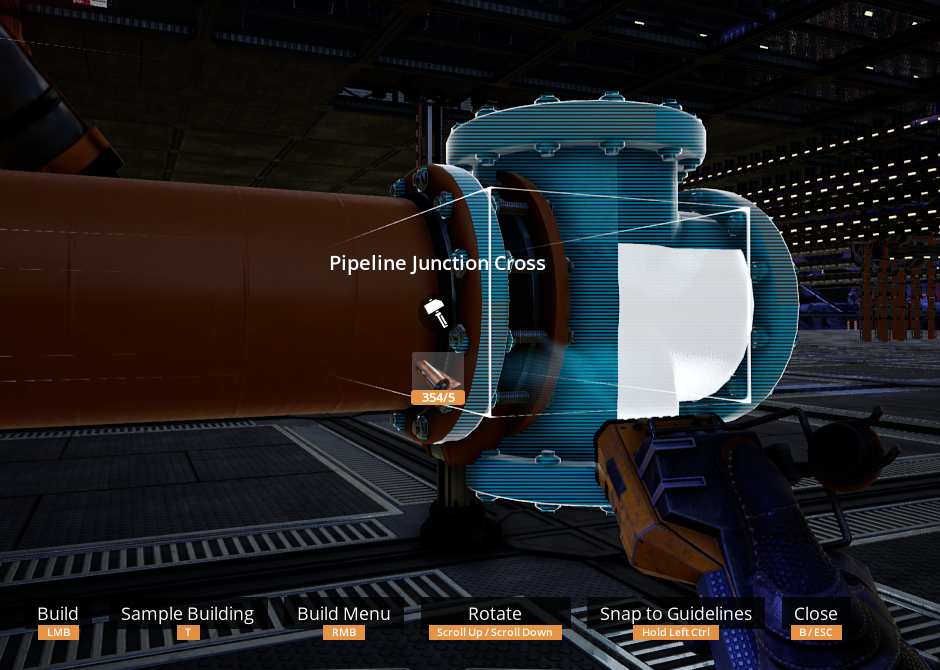
When placing anything on concrete, generally the center bottom origin of the building will be at the grid the cursor is pointing at. This is VERY helpful for placing conveyor stackers, splitters, etc. and especially pipeline junctions at the correct point to align orthogonally and avoid deconstructing over and over because it’s 1 unit off. For example in the picture below, this pipe junction is aligned right in the center of the foundation’s 8×8 which is hard to eyeball otherwise
Player needs a clearance of 2m to stand/walk/run and can slide under a 1m clearance.

—
The engineer’s eye level is roughly 1.5m, or right in the middle of 8x8x1 foundations. It is possible to speed-build large patches of concrete by building a temporary ‘scaffolding’ 2m lower than the desired elevation then using the opposing edge as the target point to quickly lay down rows of concrete
—
Concrete rotates at intervals of 10 degrees when placed freely on ground, meaning outside of mods it is currently impossible to create 45′ angles.
Anecdotally there can be rounding errors when placing concrete at anything other than cardinal directions (i.e. the edges of the foundation are facing directly NSEW) and building at extreme distances, i.e. a connected foundation bride circling around the map results in misalignment when returning back to the start point. I have not personally tried this but regardless since there’s no harm I always build concrete with cardinal directions for my buildings.
update: Yesterday on discord we were troubleshooting why this placement was illegal, and it had to do with non-cardinal foundation placement and rounding errors. Ugh 🙁

Belts
Belts have a width of 2m and an orthogonal turn radius of 2m.

This means that when making right-angles, belts will generally end up needing 1m of clearance to the side in the target direction to maintain orthogonality and keep its used spacing to exactly 2m across.
This is useful to keep in mind when e.g. laying conveyors along a foundation bridge and having its endpoint neatly line up with the edge of the bridge.

Many buildings have their inputs/outputs 1m ‘inside’ their bounding box, hence an orthogonal belt will bend into the input/output with just enough clearance to not encroach.
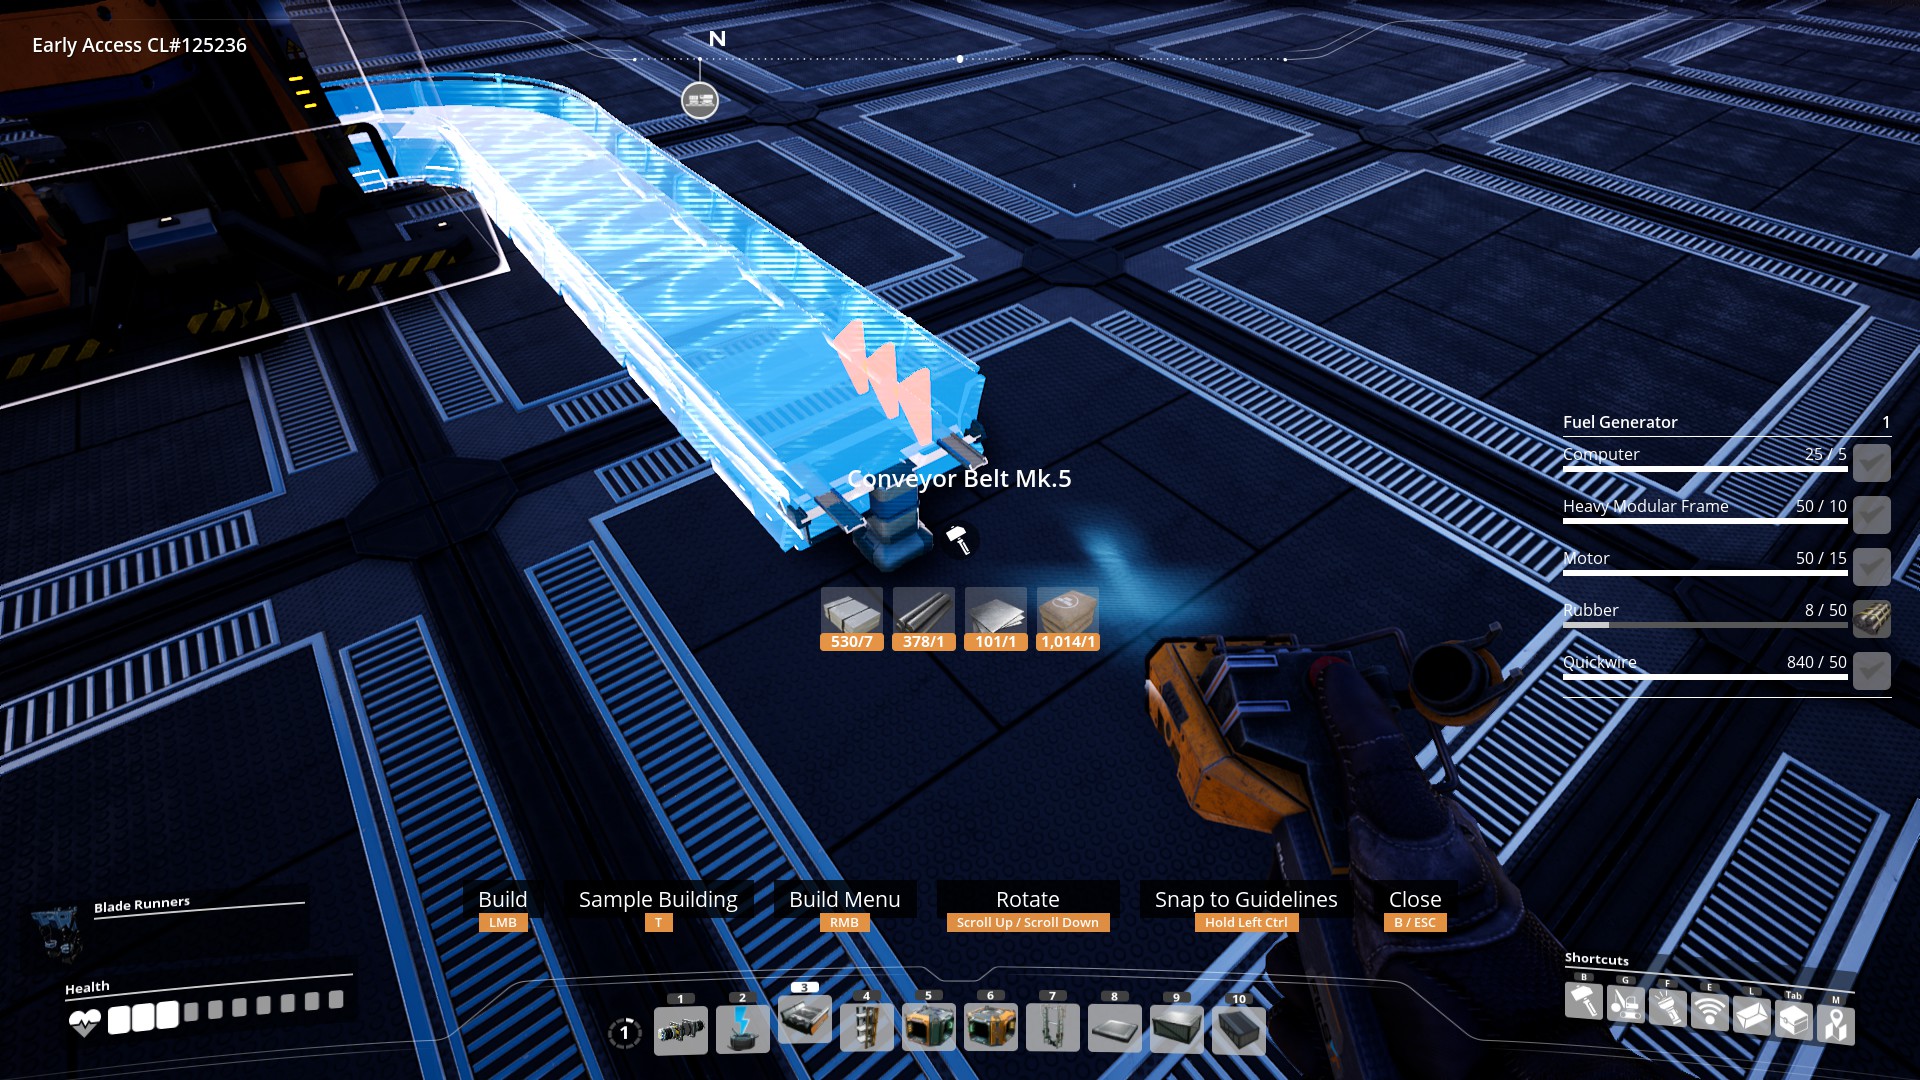
Belts have a maximum length of roughly 48m. When laying belts along foundation or concrete bridges it is faster to count 6 foundations to end a segment and start the next one.
Stackable Conveyor Poles
Note: Belts are ~1m high when built directly on concrete. For the purposes of this segment when discussing height, we only take the additional elevation (i.e. the difference) into account.
Stackable conveyor poles are 2m high.
Two stackable conveyor poles == 1 8x8x4 concrete in height (duh, lol)

A single stackable conveyor pole, i.e. 2m height, needs 3m of horizontal clearance for a straight belt to traverse the height differential

The same 2m climb needs 5m of horizontal clearance if a sideways displacement of up to 6m is required

For a sideways displacement of 7m or greater only 4m of horizontal clearance is needed as it just becomes an orthogonal ramp separate from the two 90 degree turns.

Specifically the 5m clearance is useful for a few things later on.

A stack 4 high (8m) will successfully traverse over constructors, assemblers and manufacturers. This will not work with foundries and smelters.
I am honestly unsure if the manufacturer vertical clearance is intentional, as the mesh clips through ceilings 12m high, but this still currently works as of update 3.
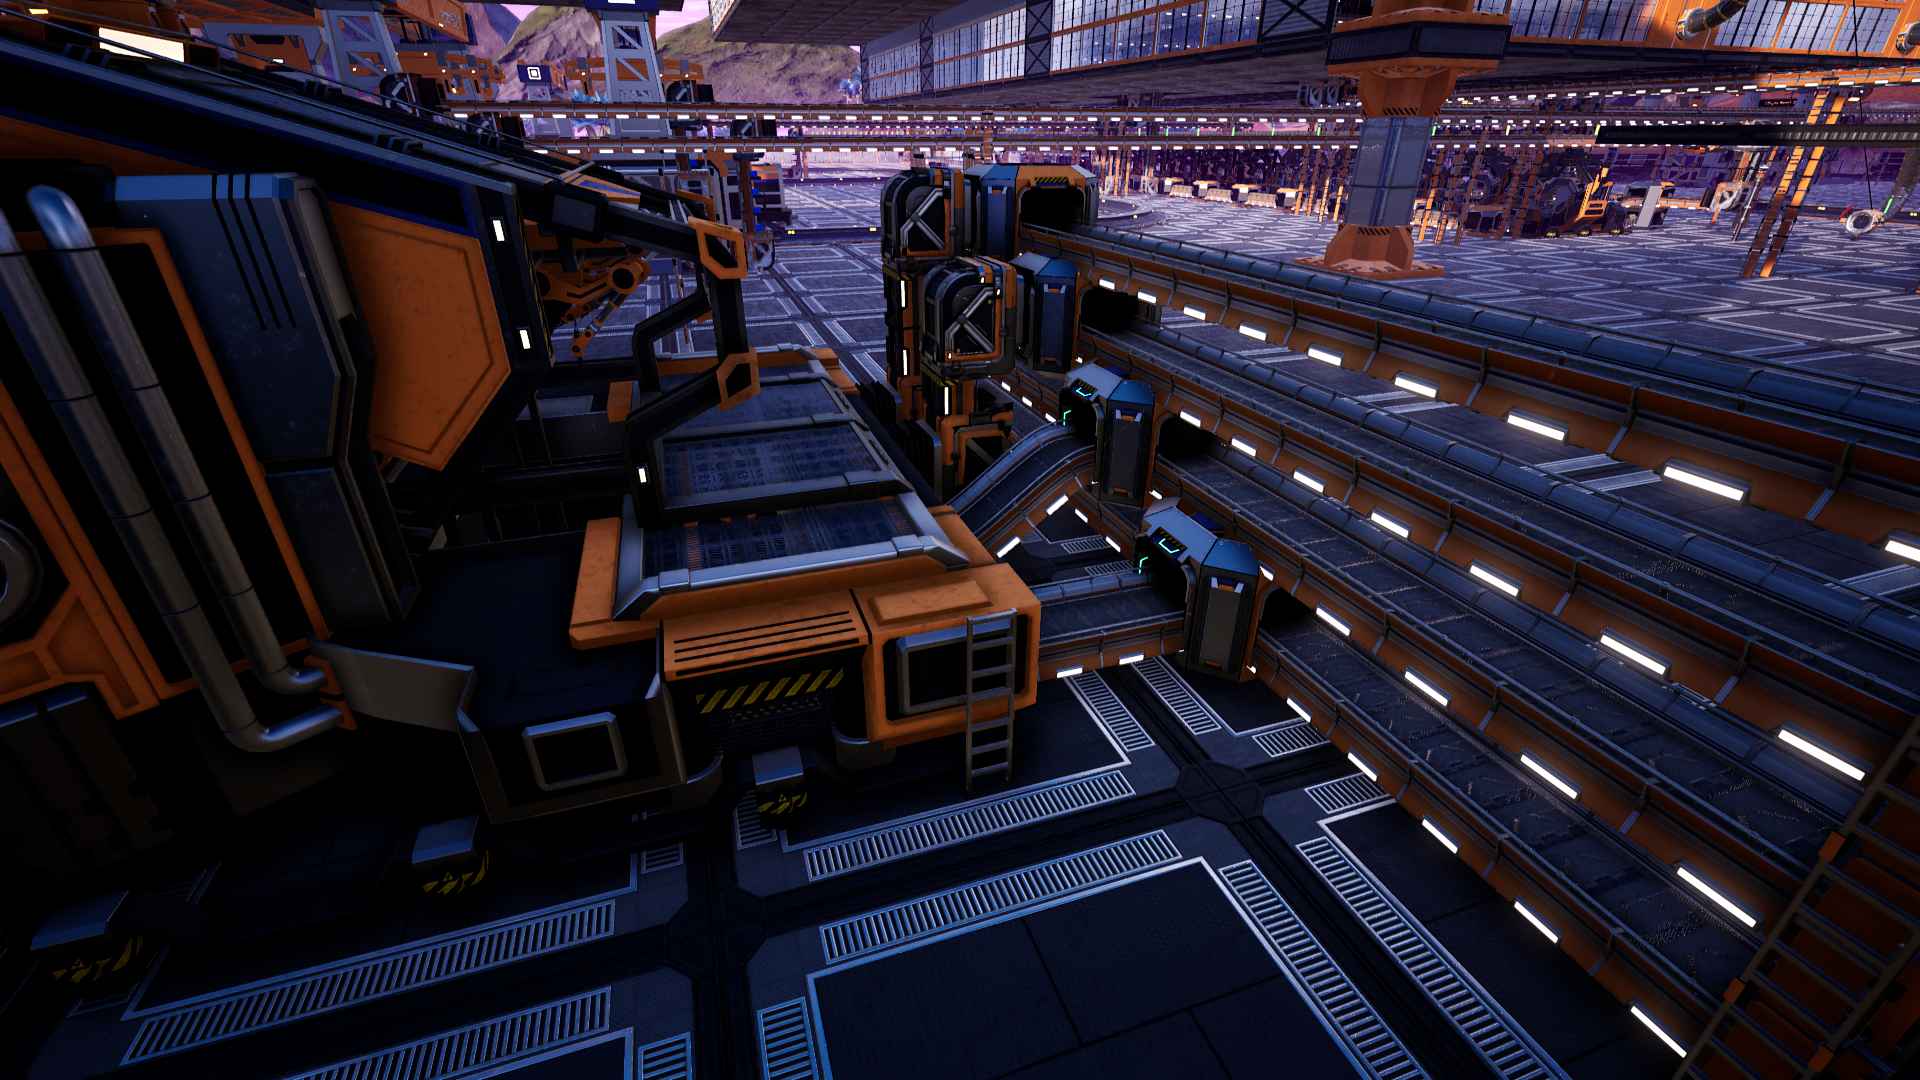
As of Update 3, Stackable Conveyor Poles can no longer clip each other, but they can still be laid flush side by side with zero clearance between them. This makes arrays incredibly compact and easy to plan so intersecting belt lines are put on different heights and do not collide.
Splitters/Mergers
Splitters/mergers are 4x4m in size. This helps quickly aligning on the grid vs foundations, especially if Conveyor Walls are going to be part of the equation.
(TODO: lots of pictures)
Splitters/Mergers can be placed directly on a belt, but without snapping to grid hence it almost always is better to lay it down on the grid FIRST, then hook up the belts after.
Splitters/Mergers can generally be placed almost anywhere ignoring all clipping/bounding boxes. You can place Splitters/Mergers flush against a wall, but dismantling the wall means you cannot put it back unless also dismantling the Splitter/Merger first.
Splitters/Mergers can be stacked and the height differential is 2m, same as stackable poles.
Temporary Splitters/Mergers can be quickly placed down as a handy 4m ruler
(TODO: update picture)

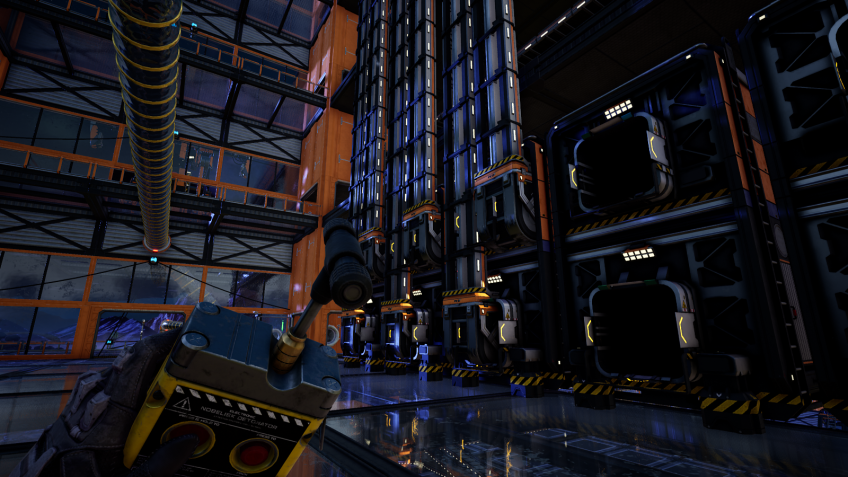
Conveyor Lifts
Conveyor lifts always build from input to output, unless the start point snaps to an input or belt start, etc. This exception can be used to build downwards conveyor lifts from the endpoint by putting down a splitter/merger first and connecting a lift to it.
Conveyor lift minimum height is 4m.
Conveyor lift bounding boxes are actually 2x2m, but have an additional 1m ‘margin’ on their endpoints in the direction the endpoint is facing. This includes the starting placement of a conveyor if snapping to an existing component, which adds this 1m margin to the positioning based on the component it snaps to.
In addition to snapping/connecting to the startpoint automatically if built on an input/output/belt, conveyor lifts also ‘snap’ at their endpoint if the positioning is valid. This can be used to speed many building processes up by e.g. putting splitters/mergers down first and then conveyor lifts after, as they’ll snap to the splitters/mergers. If you build the conveyor lifts first then the splitters/mergers, they do not automatically connect and require more belting shenanigans, even if the ends are flush.
(todo: add screenshots)
Conveyor lifts can ignore the 1m margin when snapping its endpoint. This can be used in a pinch if there’s little clearance available.
Top input on these storage containers ignore the 1m margin and still connect properly
Feeding concrete into a manufacturer manifold, ignores 1m margin
Additionally, conveyor lifts being built will ignore clipping issues with a component if it deems that it can snap to one of that component’s inputs or outputs. This can be abused to create all manner of monstrosities that save space.
Here’s a parallel 1:2 splitter made by building a floating splitter first (3 splitters stacked, remove bottom 2), then clipping conveyor lifts into it.

Same idea, parallel 1:3 splitter

Two input or output lifts can be connected to an Industrial Storage Container side by side, clipping into it, which looks incredibly wack, but works perfectly fine. I use this for my malls now as it makes it easier to navigate and grab stuff without lifts constantly blocking the way
Incidentally, since containers/ISC are 10m in length, this leads to some incredibly neat possibilities where inputs or outputs going down to a lower level connect to an ISC positioned against the edge of foundations, negating a need to have a hole in the foundations that people end up falling through because we’re bad at video games oh god

p.s. if coffee stain ever changes this clip-ignoring behavior of conveyor lifts i am uninstalling the game lol
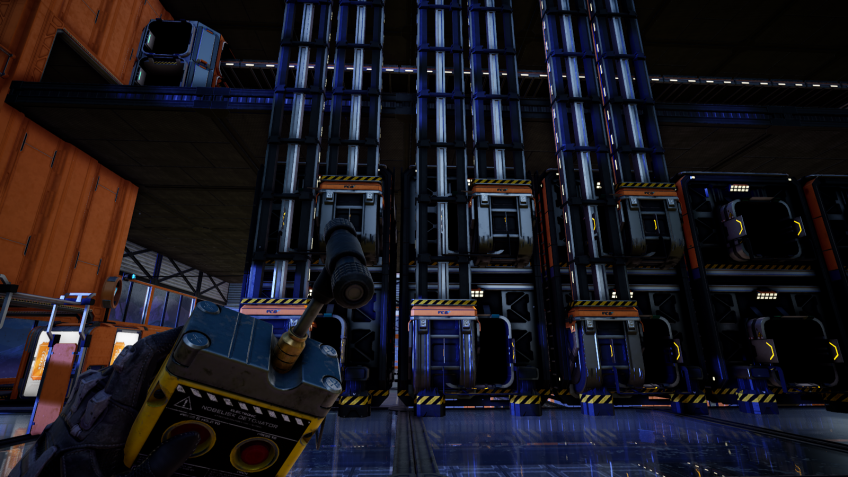
Smelters
Smelters, being 6m wide, stack 4-per-3 foundations neatly when aligned in a row.
Rows of 8 smelters (6 foundations long) are a good basic unit to get used to building quickly as that corresponds to early and mid-game ratios for input and output.
Even with a length of 9m, Smelters will fit on an elevated row of foundation
Belt-Under Layout
An elevated row of smelters is a configuration I call “belt-under”, where the input and output belts run underneath the elevation. The splitter and merger arrays are neatly aligned to foundations when done like this
This configuration can be tiled and the input/output belts line up with conveyor walls
(In this setup, the smelter rows are offset half a foundation for traversal & so walls do not encroach the smelters)
Belt-Under Smelter Layout Video
Other Layouts
A more compact layout that uses less components per-smelter taking advantage of sharing input/output belts can also be tiled. The outermost belts will be half-throughput in this setup.

However I am personally not a fan of this layout as it’s harder to align very quickly (i.e. slower building), harder to maintain/upgrade belts, and does not play nice with conveyor walls as the tiling does not line up with foundation sizes.
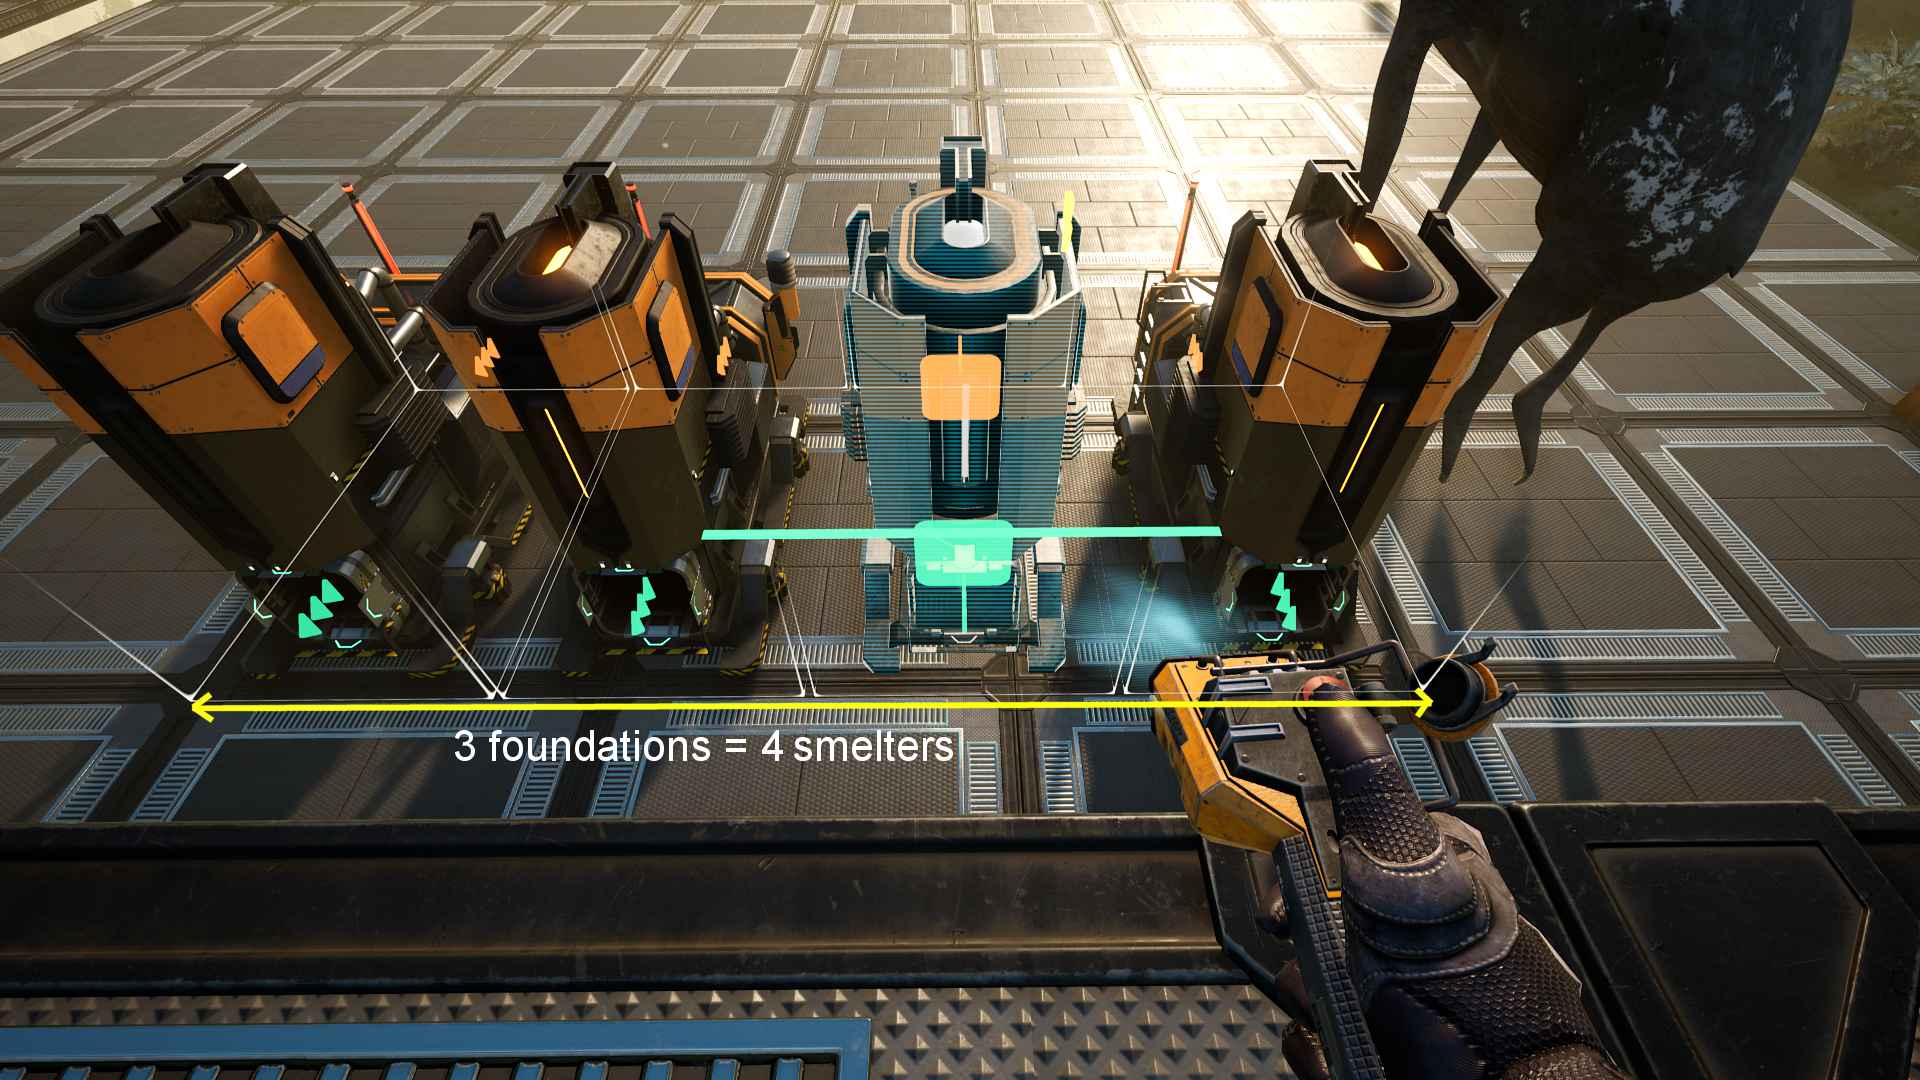
Foundries
(TODO: Dimensions, quick alignment for placement)
(Todo: belt-under layout)
(Todo: 8-on-6 manifold belt-under variation specifically for Solid Steel Ingot)
Constructors
At 10x8x7m, constructors are exactly 1 foundation wide and overshoot the edge of foundations in length by 1m in both directions.
They’re also the most varied in how many are used in a manifold to process a belt of 120, 240, etc. parts due to the large variance in recipe input/output rates.
When planning building space, constructor manifold length in foundations are simply based on the number of constructors because of the 1:1 correlation. 8 constructors at 30/min each to process a belt of 240? Plan for a space 8 foundations long.
Since walls clip against constructors laid flush, add 1 foundation to the manifold total length if planning to enclose in a building, e.g. 9 foundations for 8-constructor manifolds. In this setup, the center of each constructor (where input/output forms a line) is centered on foundation edges.
Since many recipes often have a bigger input parts-per-minute than output or vice versa, oftentimes an ideal setup is having 2-input-belts feeding 2 rows of constructors facing each other feeding a single output belt. This can still neatly align with the holes in conveyor walls. In this setup, the constructors are flush against the splitters/mergers on both input/output sides while maintaining their centered-on-border alignment lengthwise.
The reverse is also true- if recipes have a 1:2 input-output ratio (such as the basic Wire recipe) flip the constructors around to have 1 input belt feeding 2 output belts.
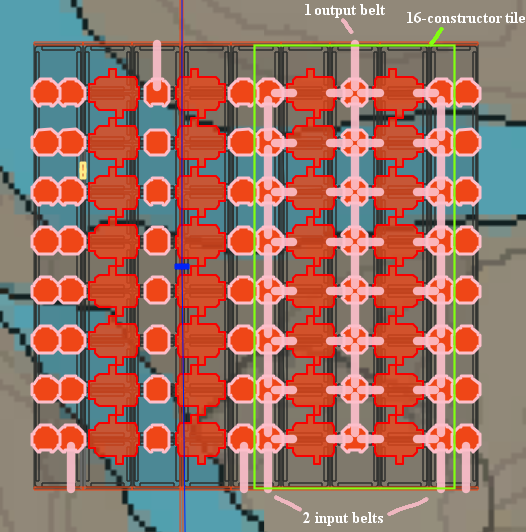
Constructor units like this one can be tiled vertically with floors being 3 8x8x4 concrete (12m) high.
==========================
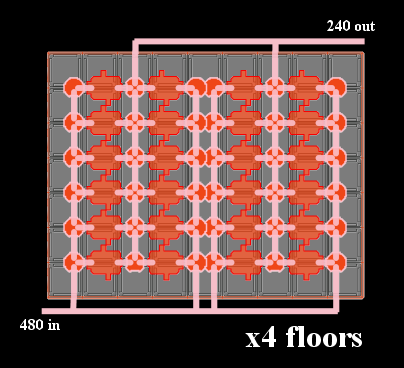
A tl;dr of how much space to plan for when plotting out mass constructors:
<manifold length +1> foundations long * <(# of manifolds*2) +1> foundations wide per floor
e.g. if I want to process 1920/min copper ingots into 960/min copper sheets and I have access to 240/min belts,
with each constructor making 10/min sheets, and 2 rows feeding an output belt:
240 / 2 / 10 = 12 constructors in a manifold row
with each manifold row making 120/min sheets and therefore taking in 240/min copper ingots:
1920 / 240 = 8 manifold rows
Therefore the size of the concrete I should lay out prior would be:
<12 + 1> * <(8*2) + 1> or a floorplan of 13 x 17 foundations.
==========================
If I wanted to reduce the footprint of the above setup, I could do 4 floors of 4 rows of 6 constructors, and pre-make a building 12 8x8x4 foundations high, 7 foundations long and 9 foundations wide. (The 480 input does assume faster belts than the prior example)
==========================
(TODO: belt-under setup for 1:1 recipe constructors while maintaining same horizontal footprint & a tradeoff of 4-high floors)

Assemblers
(TODO: Dimensions, quick alignment for placement)
An assembler manifold can use splitters stacked on top of each other with 4m clearance from the assembler bounding box, aligned center, to feed both inputs. Saves time laying everything down.
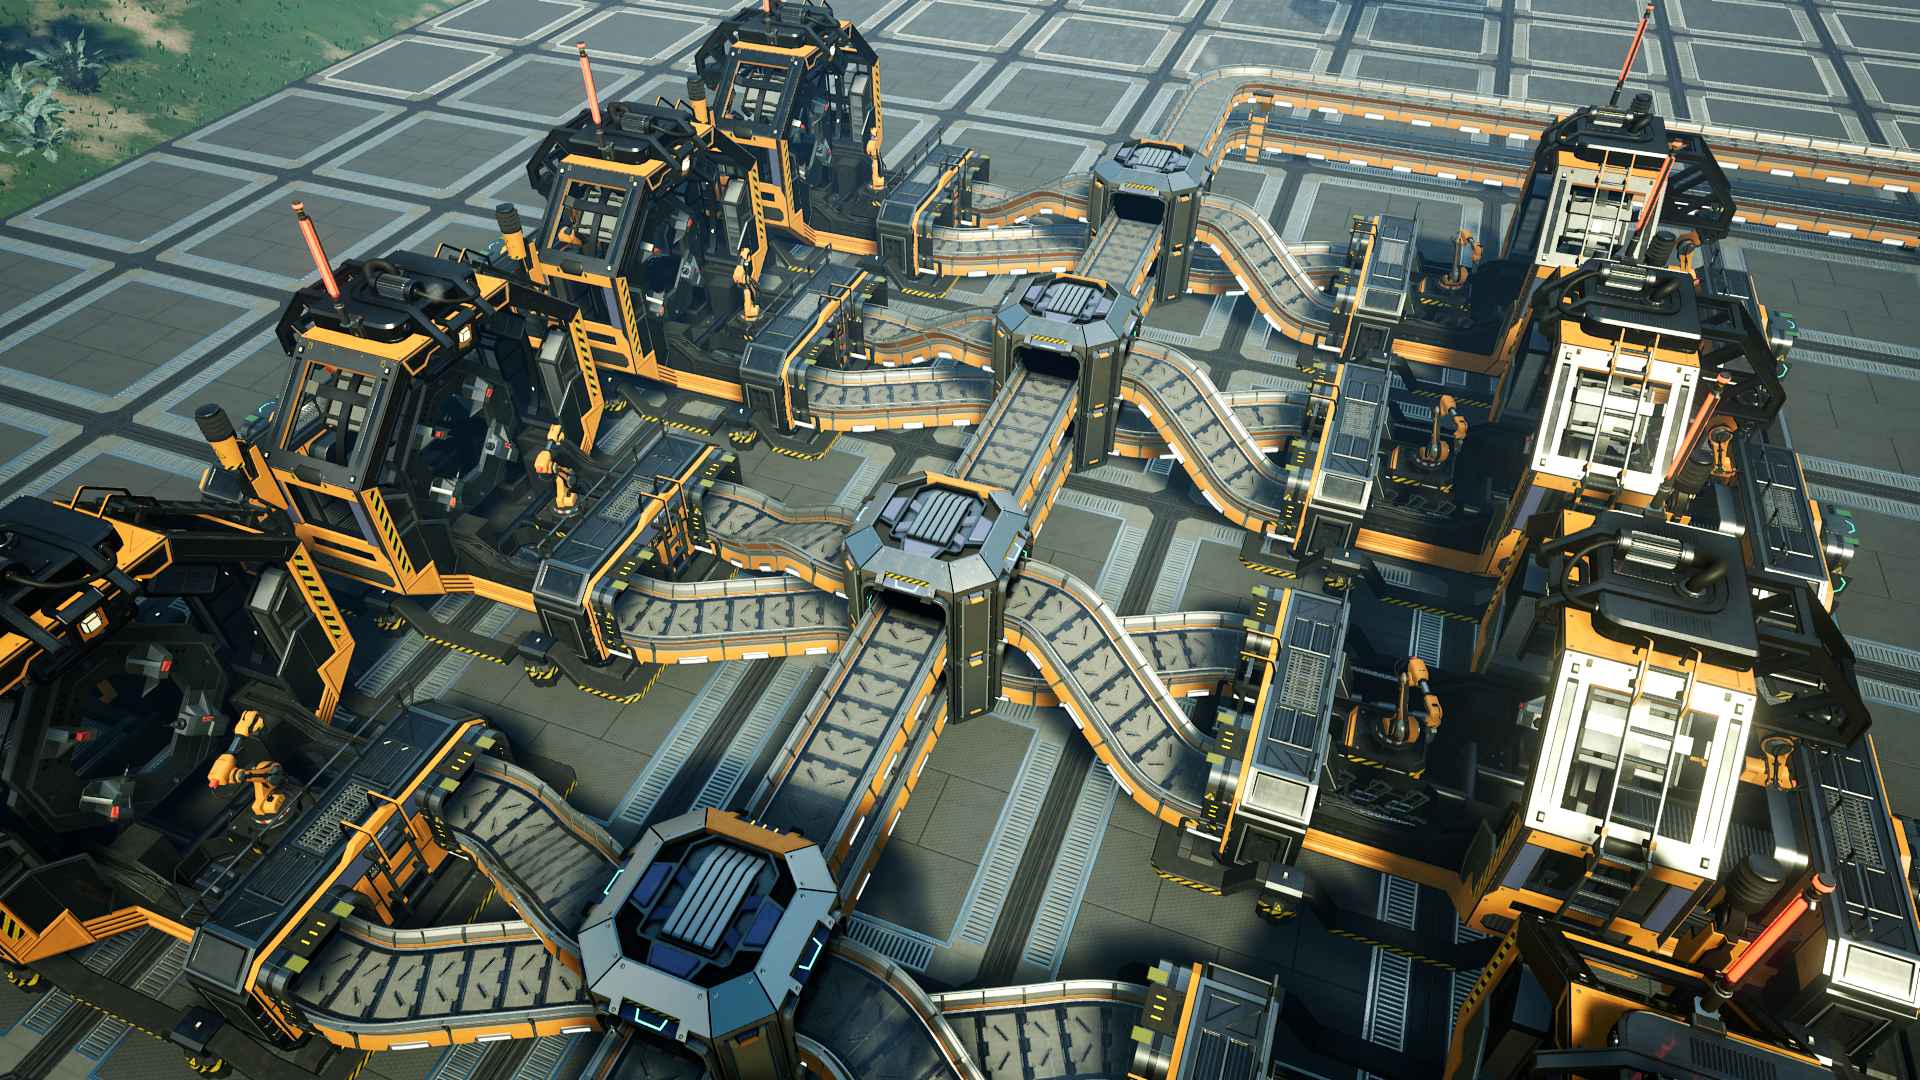
Manufacturers
Manufacturers can used a stacked manifold with its splitters giving 3m of clearance from the manufacturer’s bounding box.
As this creates a manifold 3 stackables high, other belts that are stacked 4 high to clear the manufacturer will also pass over the manifold.
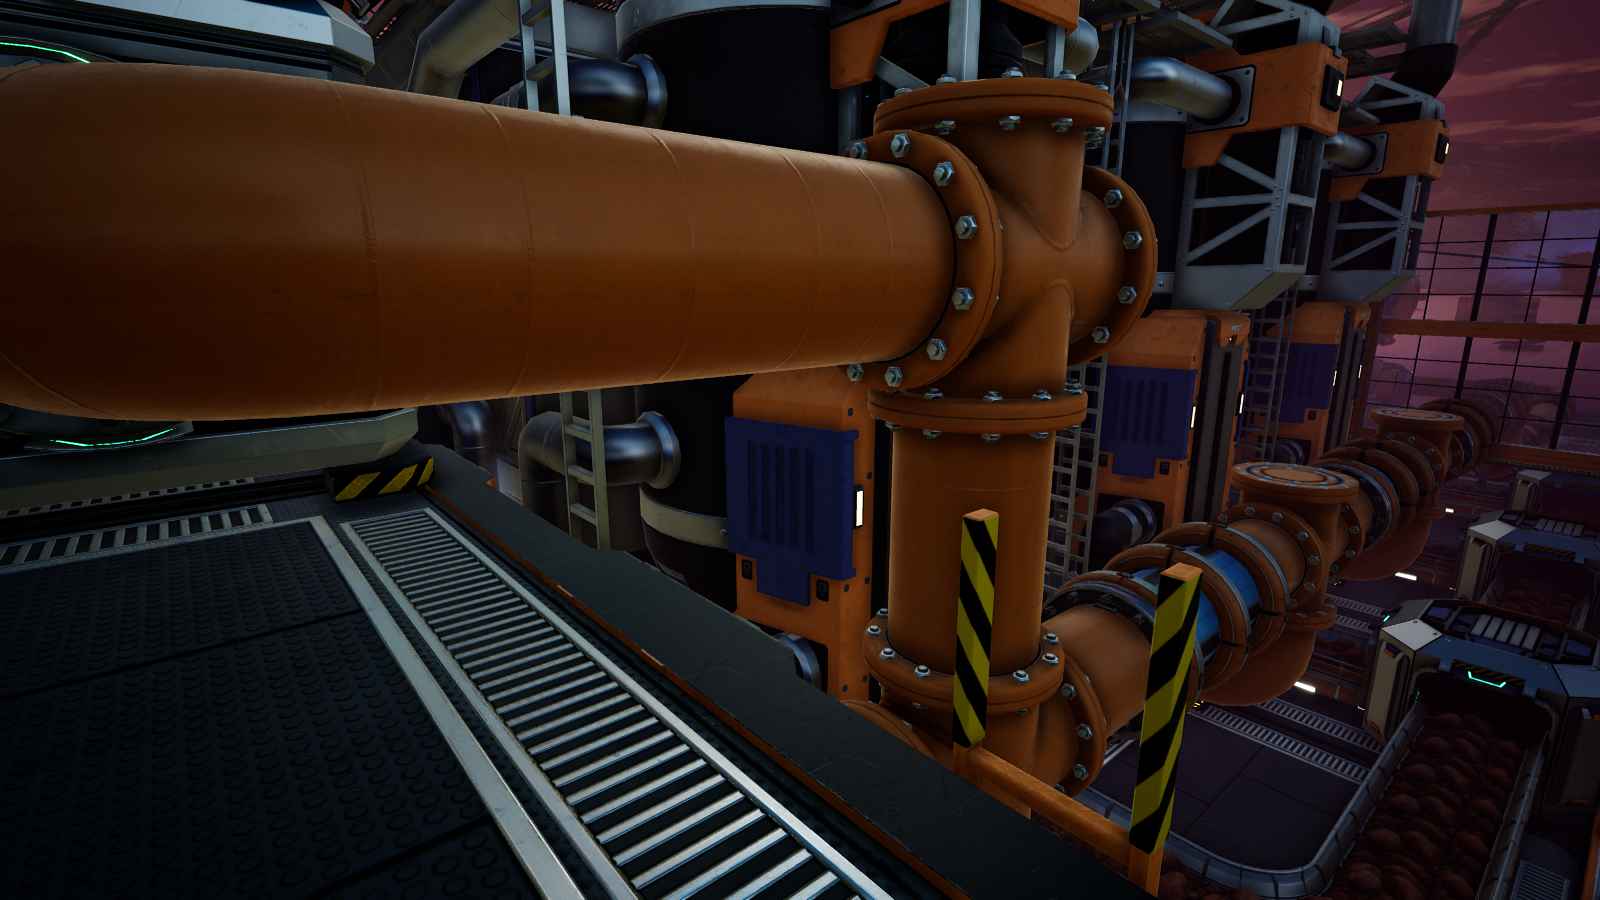
Pipes
As of 3.6, there’s some weirdness with pipes where in a system that theoretically should push max capacity, either throughput on a pipe spikes interminently from 300 (or 600) to a far lower number before recovering, or simply doesn’t touch maximum. This seems to happen a lot more with mk2 pipes as of this update, hence best practice unfortunately is to not plan around having long runs of mk2 pipes and expect it to max out.
General throughput troubleshooting tips include:
– Understand headlift mechanics and check that pumps or valves are not backwards, nor are pipe systems having headlift issues (see: [link]
– Try to not have pipes max out their flow if at all possible for setups where a lot of inputs or outputs connect to a single pipeline. 10 machines accepting 30m³/min tend to have more weird issues than 3 machines accepting 100m³/min each running off a Mk1 300m³ pipe.
– Understand junction priority. Junctions will dump fluids into downward-facing pipes first, then horizontal, then upward-facing pipes.
With the last two bullet points, one specific consideration is the unavoidable situation that an oil extractor typically is going to result in a maxed out pipe feeding a large number of machines. In this specific case, additional care can be taken to mitigate weird throughput spikes by making sure each junction feeding a refinery off the main pipe is perfectly horizontal.

This setup runs into throughput issues where the 300m³ main pipe intermittently spikes downwards to ~150m³ before recovering, due to all the junctions prioritizing their respective downward pipes. Even though the system theoretically should work, the end result is the last two Refineries not getting any oil.
======
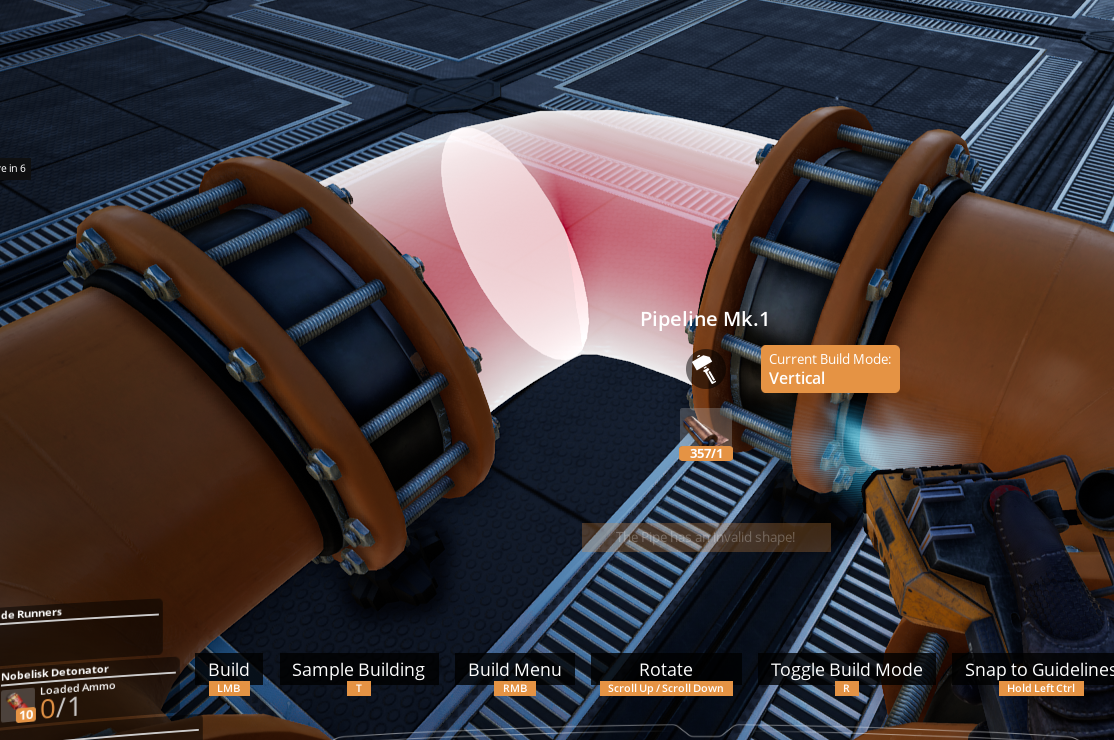
Pipes have a turn radius of 1m (as opposed to belts at 2m), BUT require 1m without turning from any start point in default build mode. That means in practice a 90 degrees bend requires a similar 2m clearance as belts do.
HOWEVER, since the actual turn radius is only 1m, it is possible to hairpin a pipe with a diameter of 2m. Belts can only do this with a diameter of 4m.

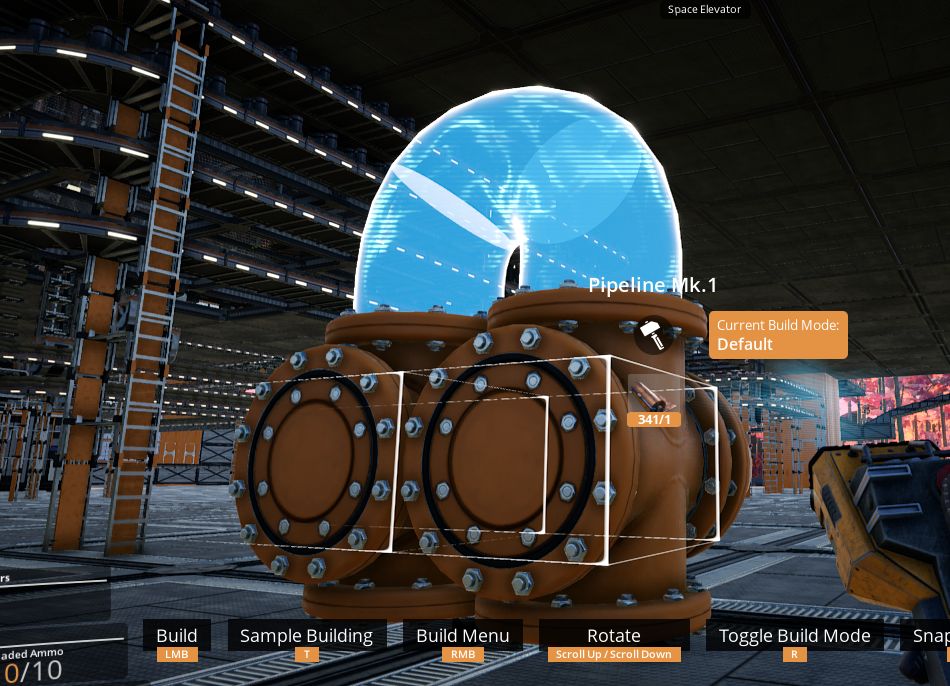
The same holds true when building vertically. As long as these junctions are on the grid, you can hairpin a pipe on their top connections.
There is some weirdness where commonly pipes which SHOULD be able to be built according to the rules above fail. In these cases often building in the other direction works, or even switching to conveyor mode.
CSS fix this please? 😀

Speaking of verticality:
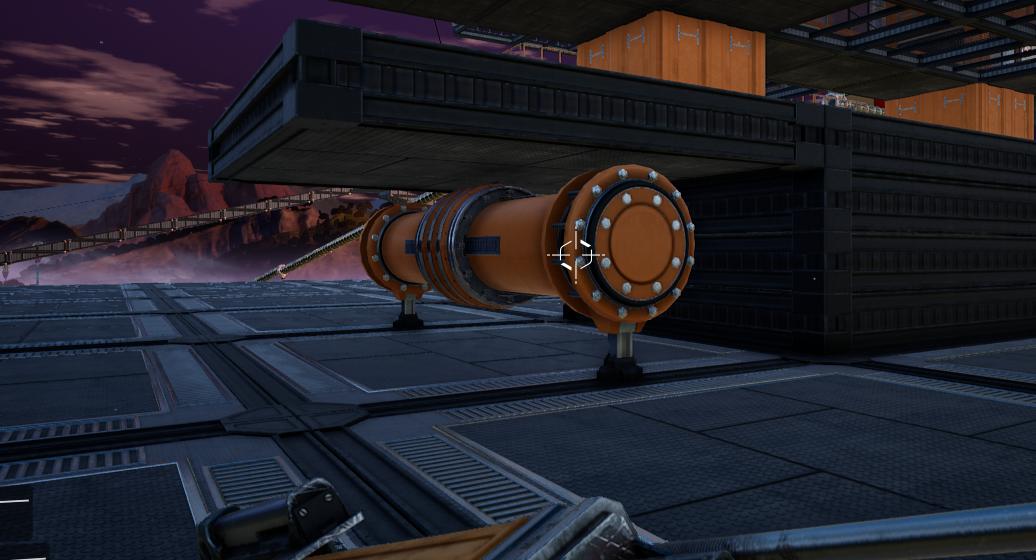
Pipes generally exist 1.75m above the surface they’re built on, means you can’t really vertically center them vertically in a clearance between foundations. 🙁
However, since every base component generally adheres to this 1.75m height rule (Mk1 Pipes and Valves exception to this), for all intents and purposes the 1-meter-grid mindset still applies to vertical orthogonal layout and construction for pipes. Here’s a 90 degree vertical bend with a wall mount ‘2m higher’ than a pipe support
Pipe supports at maximum vertical extension are == building supports on surfaces 3 meters higher
You can build junctions on surfaces. Easiest way to get positioning correct is to point straight down, jump and build the junction below the engineer.
You can place junctions on walls. This ensures they’re on the grid both vertically and horizontally. Similarly to belt and pipe wall mounts, the pipe junction’s center will be 2m off the wall. Building a temporary wall as ‘scaffolding’ then laying down an entire row of junctions is a quick way to get pipes laid out on the grid elevated off ground level.
You can place junctions at the end of pipes, including pipes ending in a support, although aiming in this specific case with a support in the way becomes a little troublesome since it’s a tiny sliver where the junction snaps to the end of the pipe. Junctions built this way are on the grid.
You cannot (as of Update 3.6) build junctions on ceilings which seems an oversight, especially considering wall-mounted power poles being changed to make that possible 🙁
You can place pumps on walls. However, the mk1 pump is a non-integer length, thus while they’re centered on the grid, the ends of the mk1 pump aren’t.
Conversely, mk2 pumps are exactly 4m long and thus pipes bending out from the ends of a mk2 pipe are properly on the grid.

You can place valves on walls. Similarly to the mk1 pumps, valves are centered on the grid but their ends aren’t.

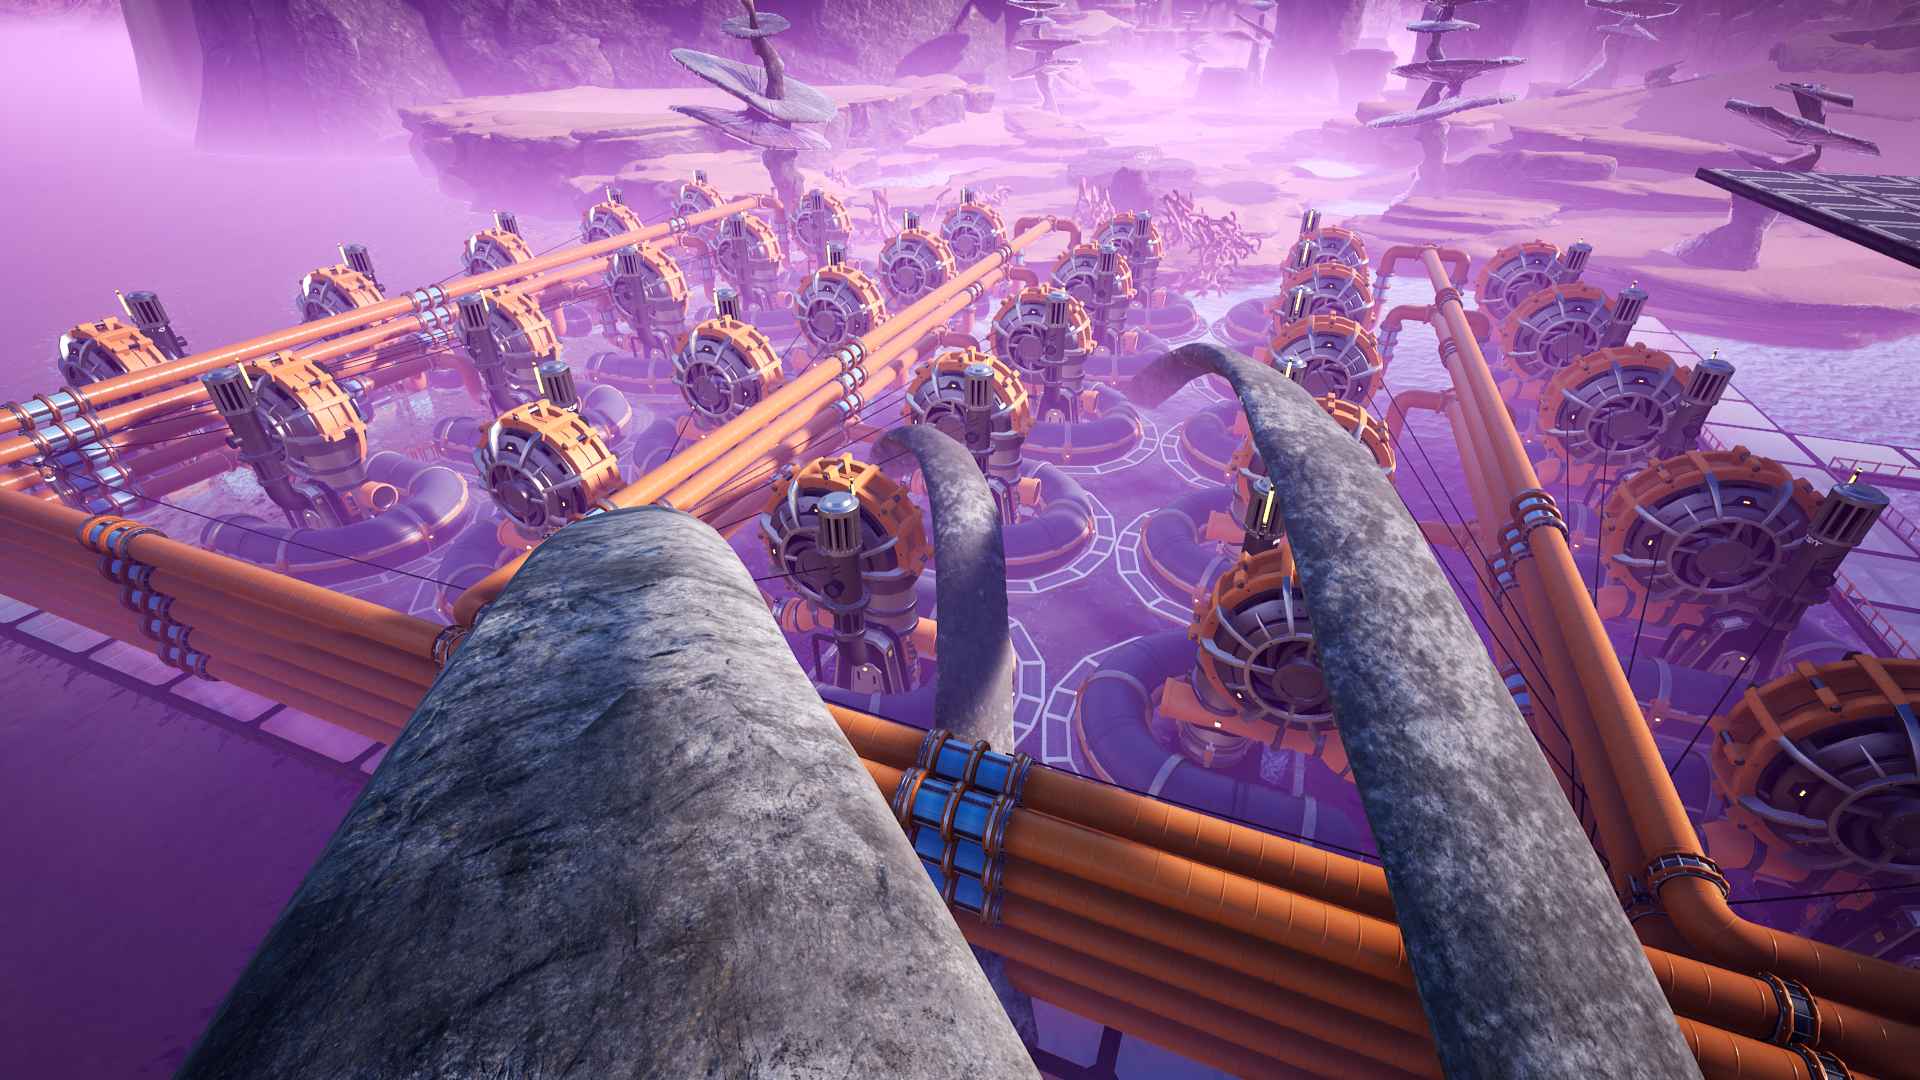
Water Extractors
Water Extractors are the bane of Falk’s existence as they:
– do not snap to ANYTHING
– have their pipe output *non-centered on their bounding box*
– generally do not tile nicely in small bodies of water due to the outlines of the water deliberately being a PITA to arrange things neatly in
However, there are several methods to build them relatively fast in a relatively compact manner.
Water Extractors have a bounding box that’s effectively slightly smaller than a 20m x 20m square, meaning they can be thought of as 2.5 x 2.5 foundations. Using foundations and walls as ‘scaffolding’, it’s relatively easy (albeit still quite painful) to put down rows of them.
In a layout like this, Water Extractors rows can be thought of as 3 foundations wide, with each Extractor occupying a space 2.5 foundations lengthwise across in the row (i.e. their centers alternate between being at the edge and in the center of foundation squares)

Here’s a simple example improvising around the shape of the lake to achieve the desired number of extractors
Keeping in mind that it’s not really possible to get an exacting position (outside of SCIM shenanigans, but let’s not consider that for the sake of building things fast) close enough is good enough.
The *deliberately non-centered dear God* pipe output of extractors can be eyeballed using the foundation and walls as a guideline for placement:
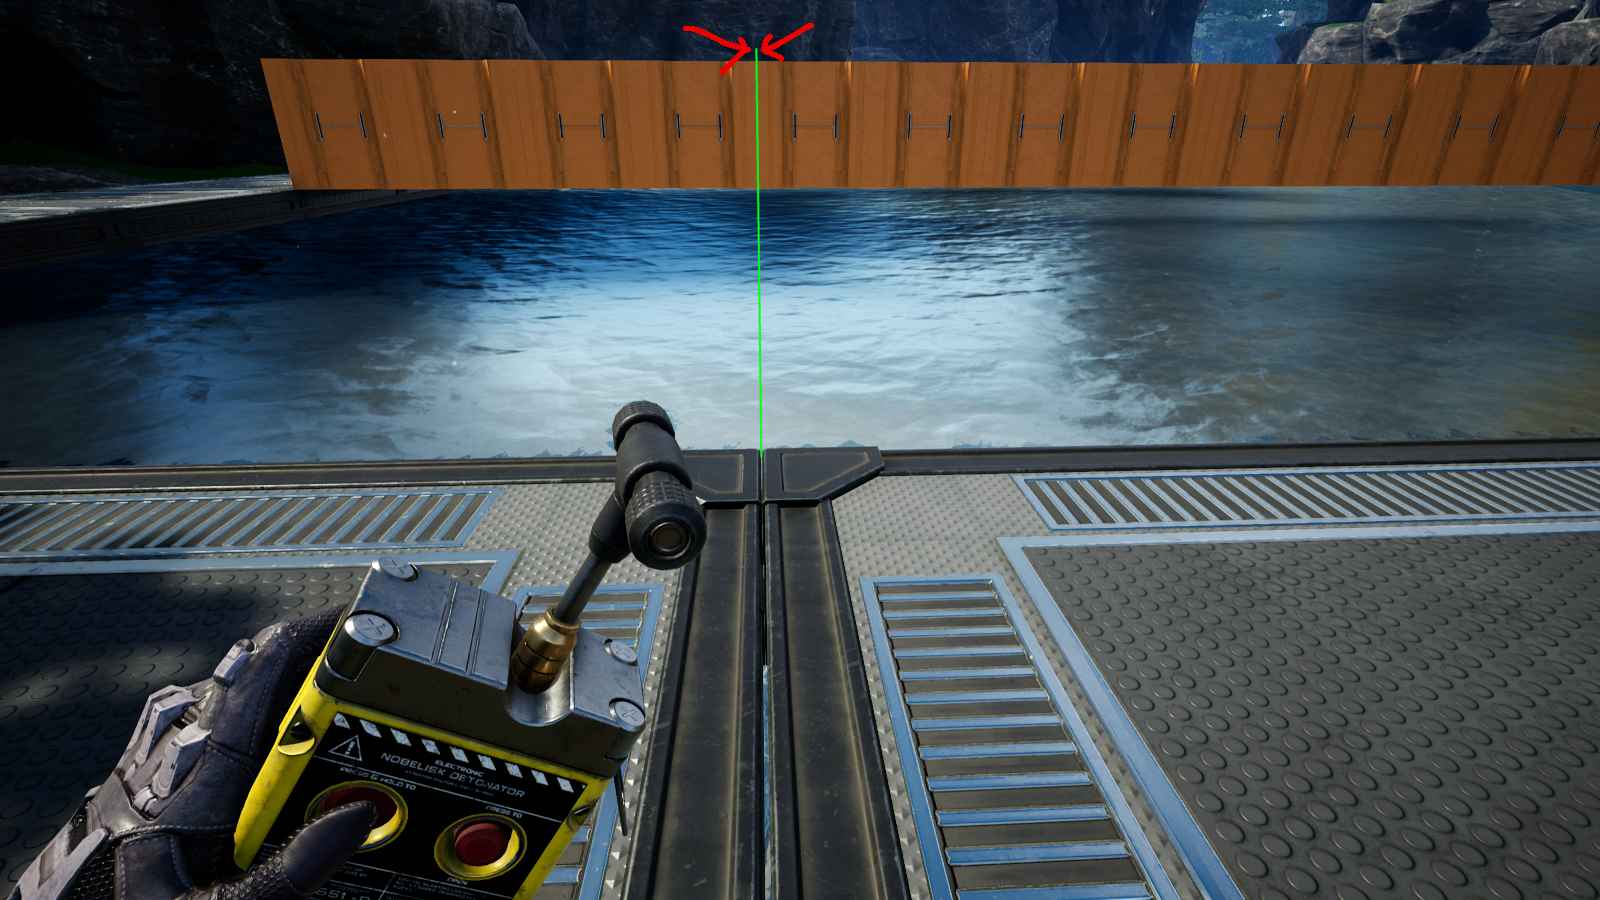
When the extractor is encroaching the wall, its ghost mesh has certain features (mainly the central line and pipe output) that can be used to adequately align.
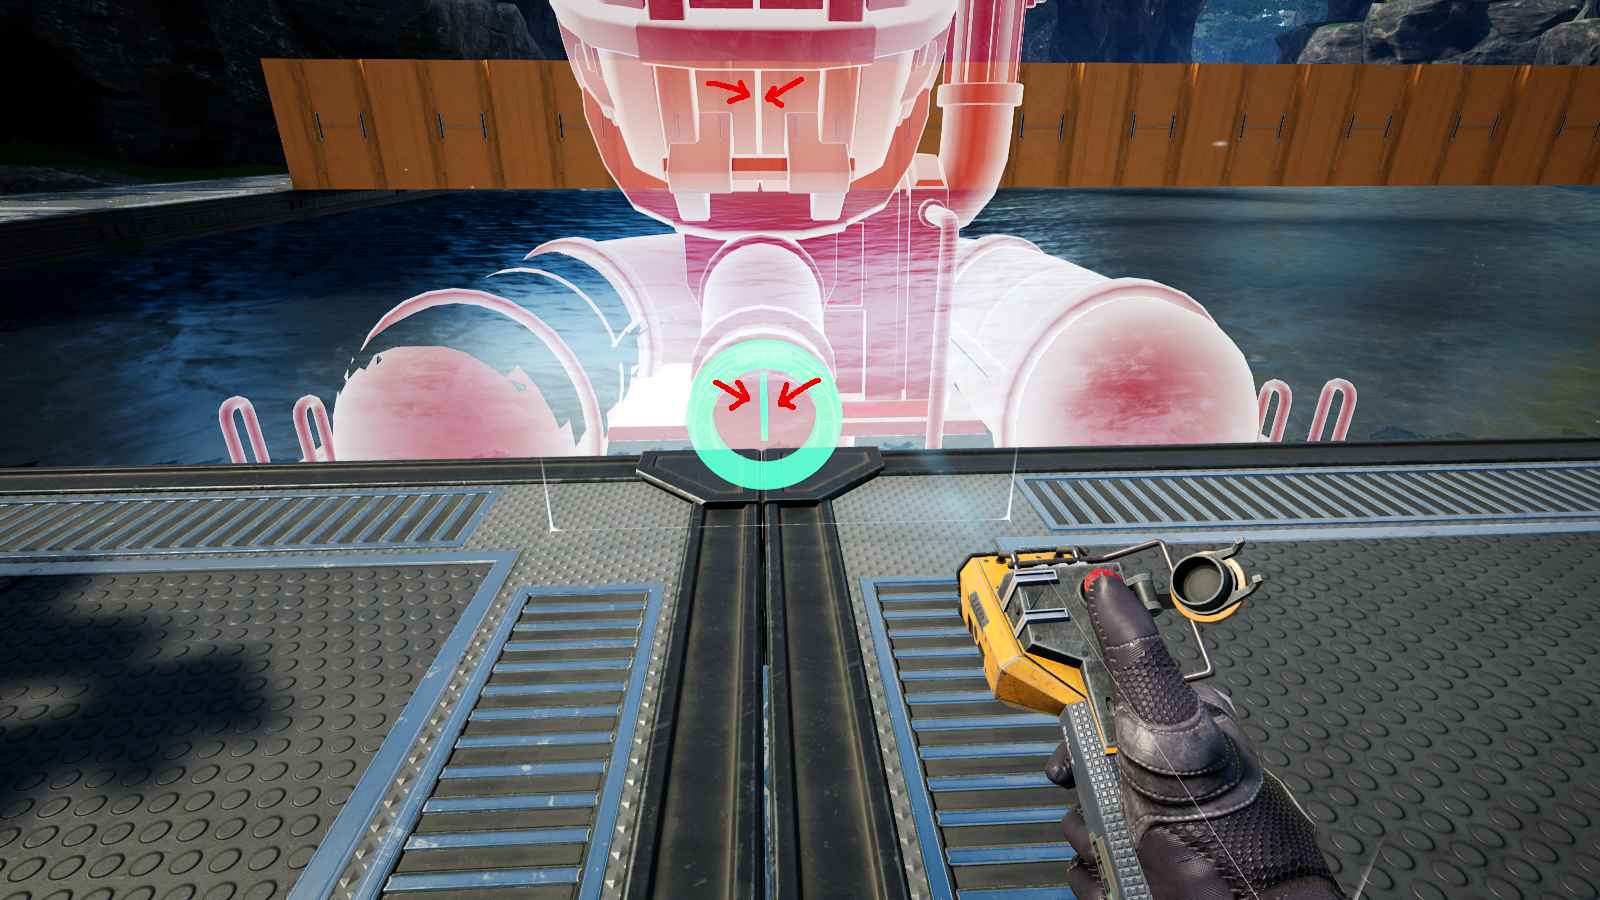
Move the placement mesh closer to where it can be built with the alignment.

Remember that extractors built in a row will alternate between aligning with foundation edges and foundation centers.
In an absolute pinch, this layout can be further condensed by doing away with the foundations in between the opposing rows of water extractors, but that requires laying down ALL pipe junctions, supports, etc first, bulldozing the foundations then building the extractors after. This is a complete PITA which takes way, way longer. There are better things one can do with one’s time, like building literally anything else in the game or just flat out spending that time to find a cure for cancer.
(For clarity’s sake, in this picture the pipes are stacked vertically, two extractors per pipe, not 10. This was prior to Mk2 pipes)

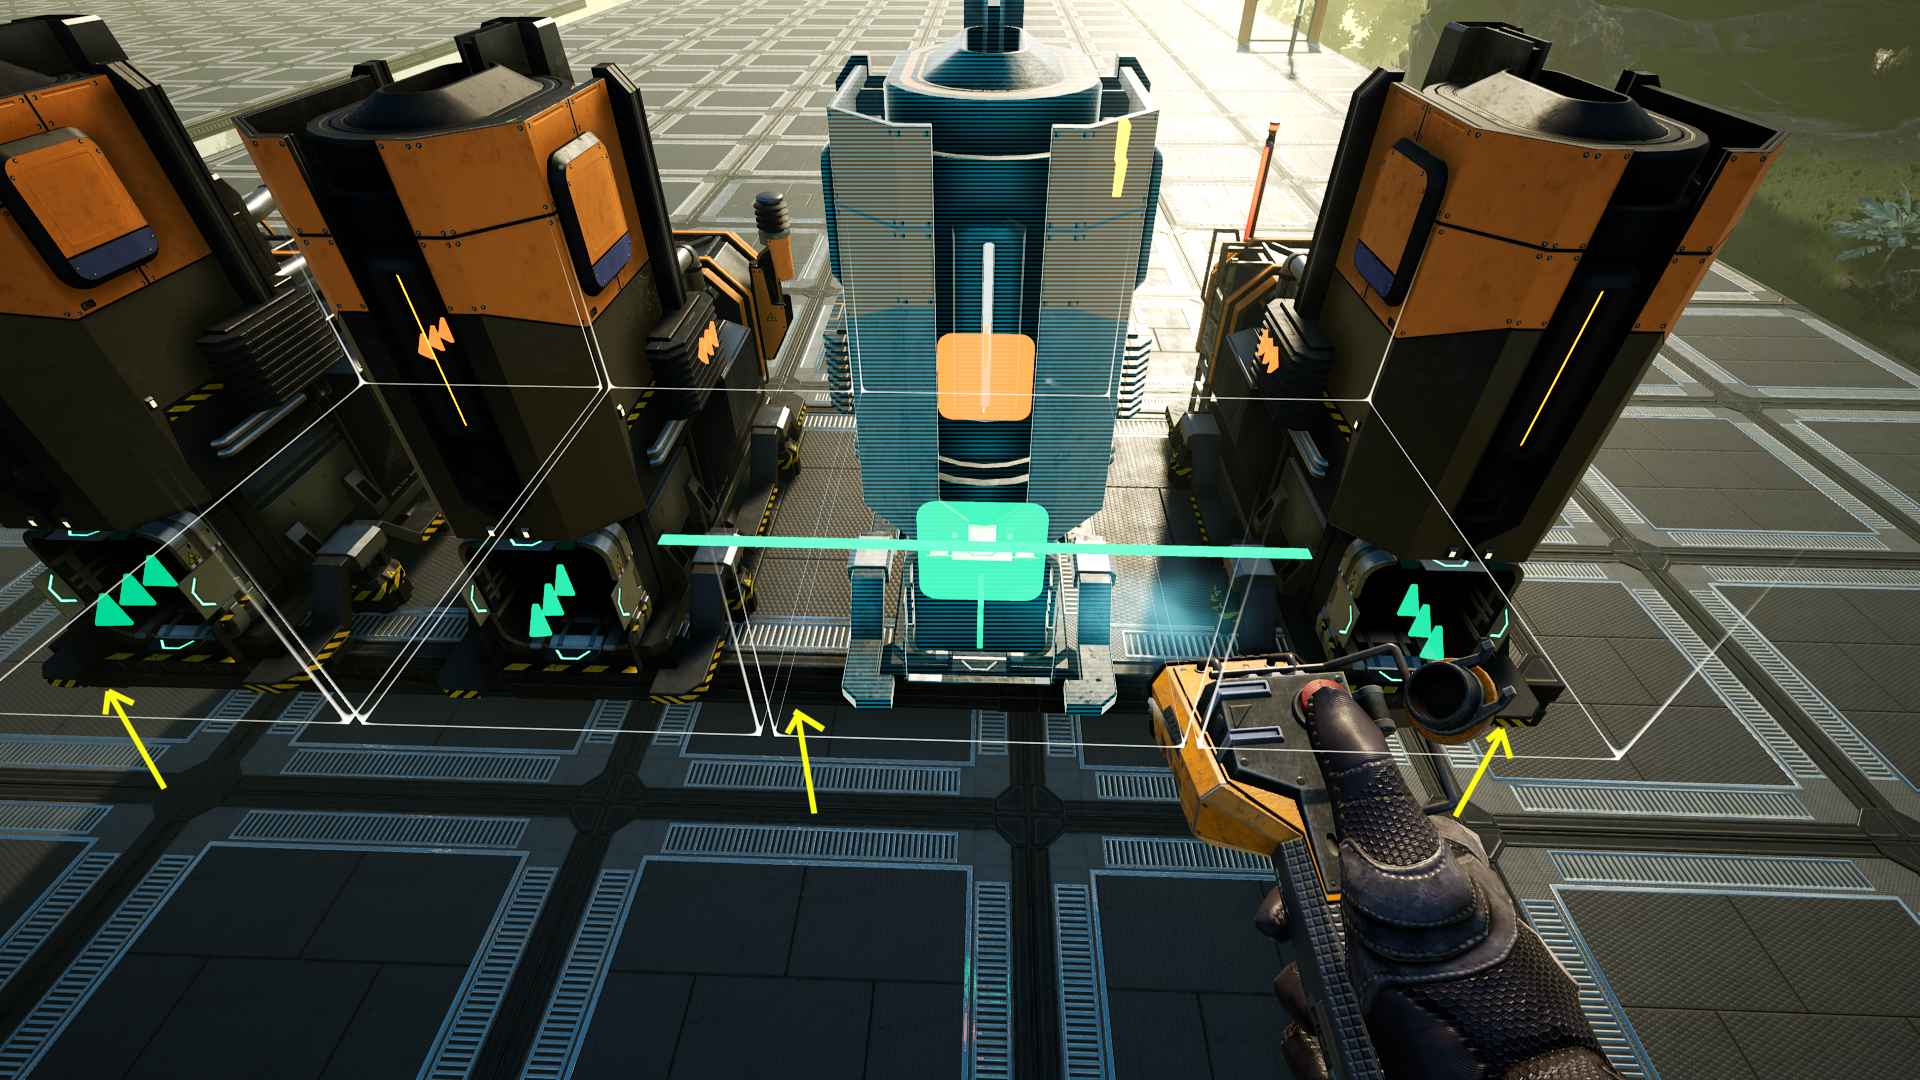
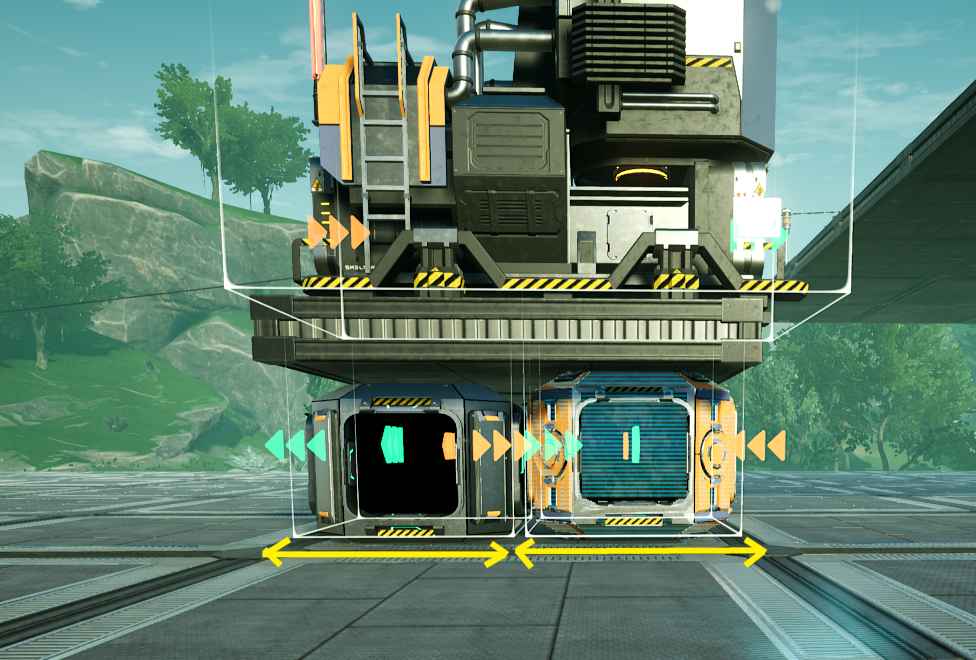
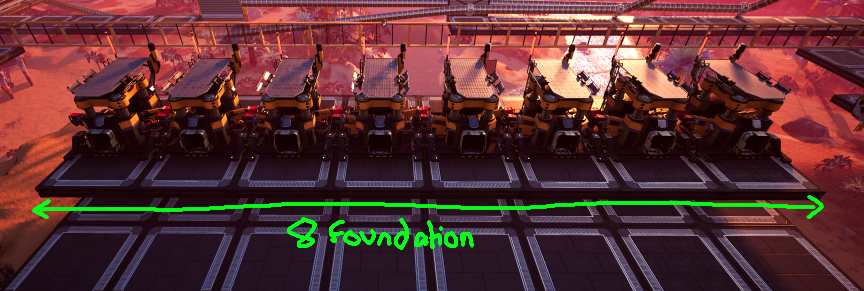
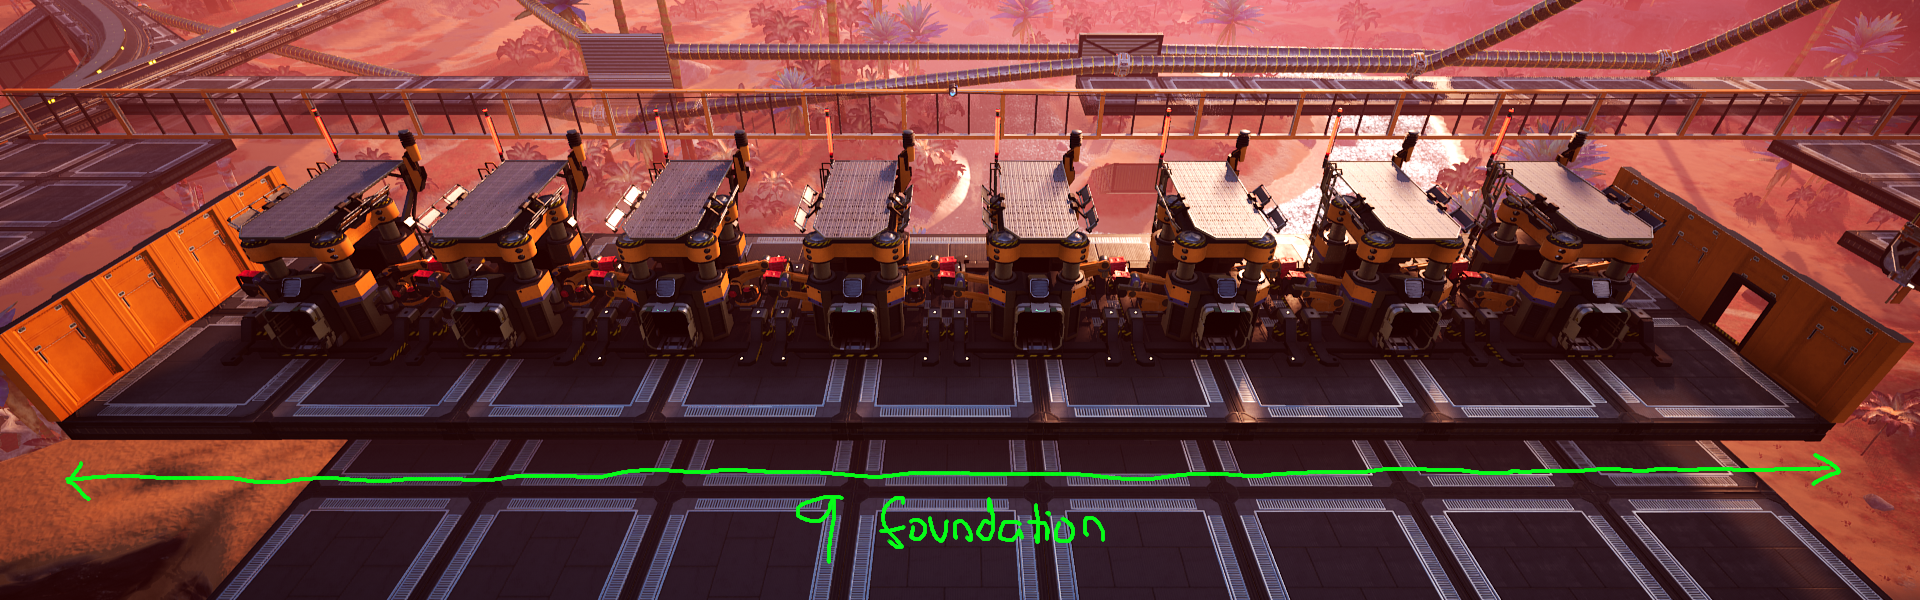
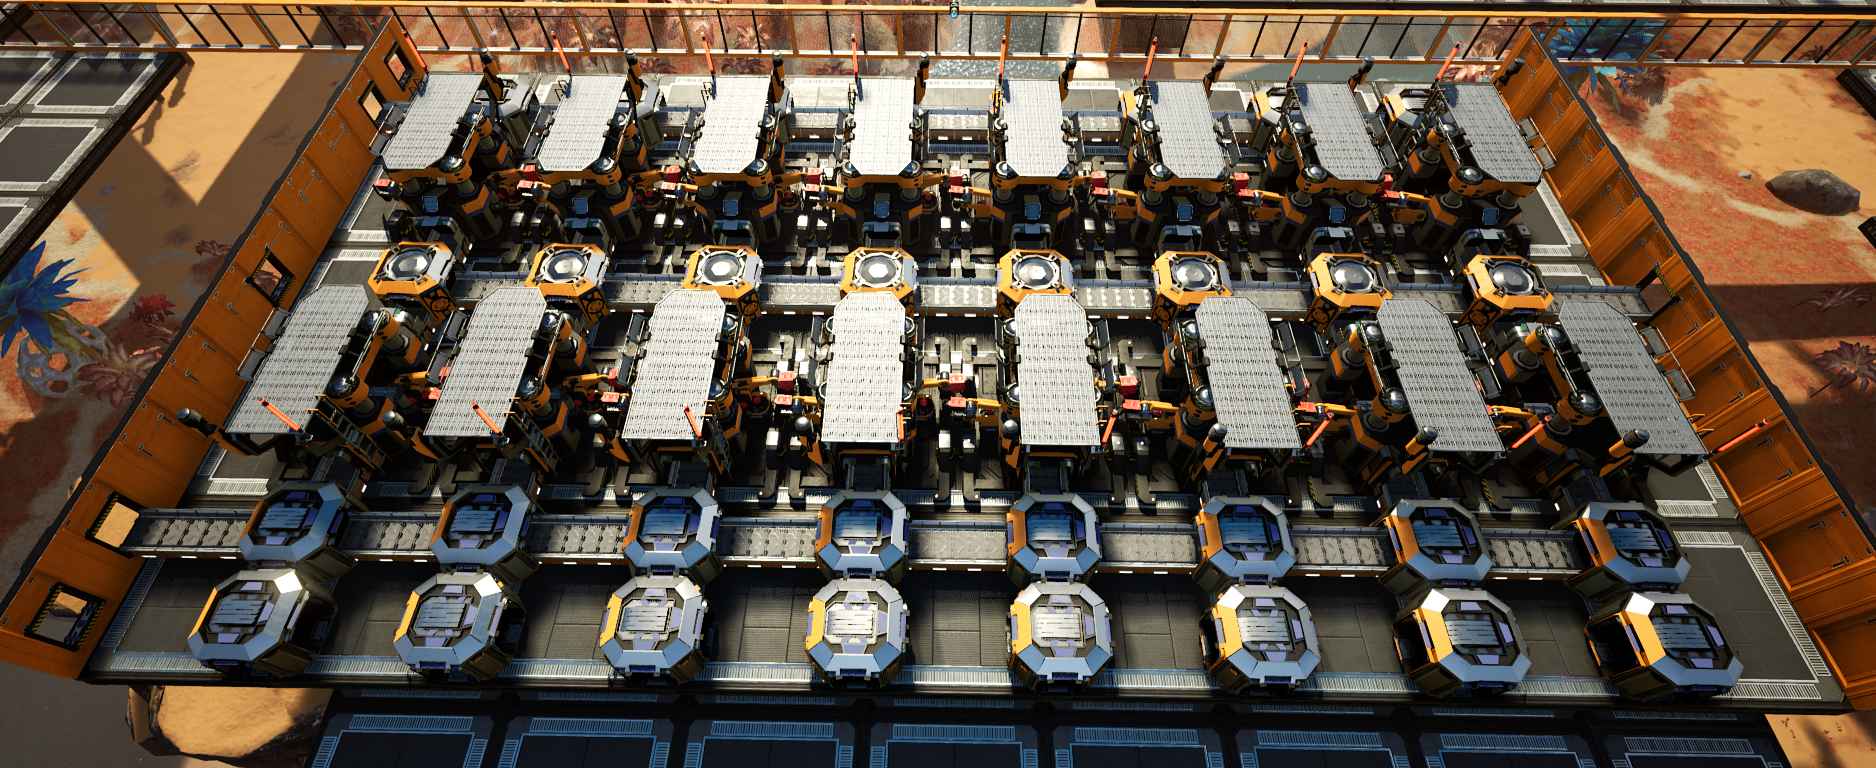
Coal Generators
Coal generators, at 25x10x36m are one of the more awkward buildings to work with. Not only are they slightly longer than 3 foundations across, they’re one of the tallest buildings and require a lot of liquid, making them annoying to tile vertically. Fortunately, 10m width can be capitalized on to make some really compact setups.
Coal generators are also notorious as of Update 3 for being a snag to smooth progression as it’s the first exposure to pipe shenanigans.
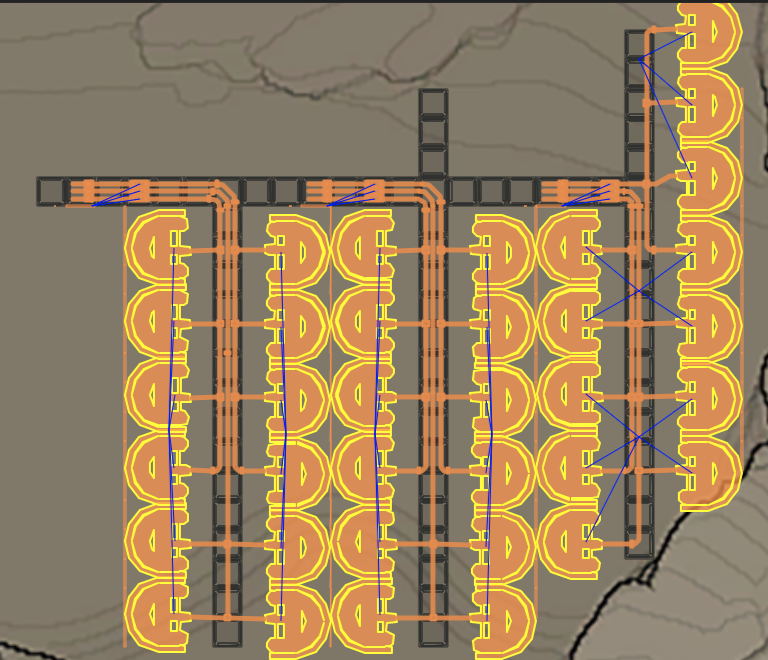
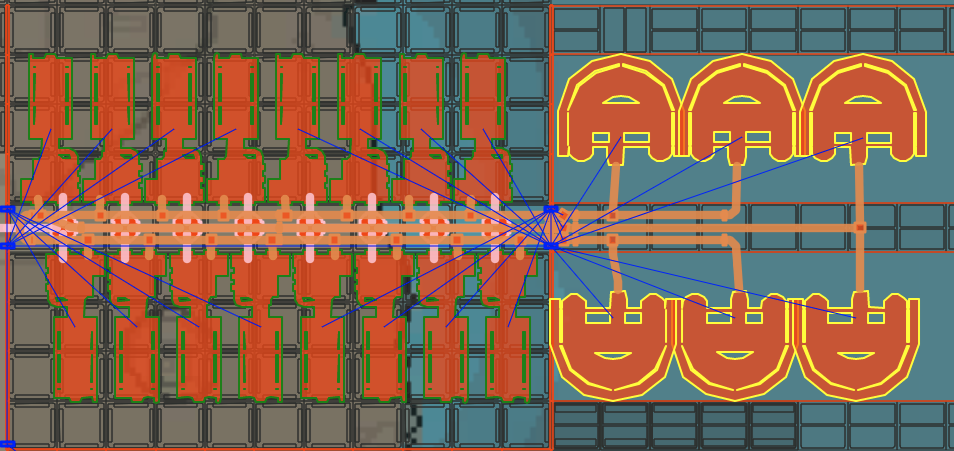
6-to-16 Coal Generator Layout
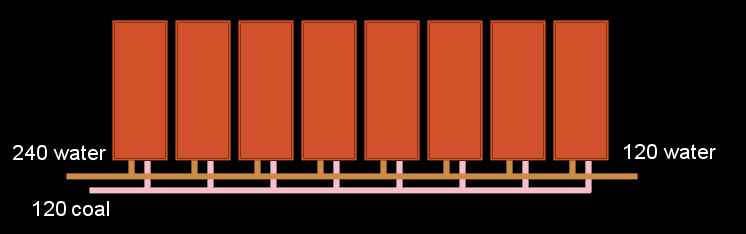
For a quick maths recap, coal generators take 15/sec coal and 45m³/sec water at full bore, and the common recommendation is 3 extractors to 8 generators (360m³/sec water).
The only two hard requirements for any given layout are that each gen isn’t underfed water/coal, and each pipe never exceeds 300m³. Belt capacity obviously also is a consideration but most people are very used to dealing with belt maths by this point (i.e. 240 on a belt for 16 generators)
For piping, first consider that to cut down the amount of piping, one can simply attach 2 water extractors to one end of an array and 1 water extractor to the other end:
The water will correctly fill all 8 machines here, meeting at the 6th generator.
Now consider if we mirrored this setup and mashed them together. Ha ha, big PIKOTARO energy here
By doing so, we now have a system with 3 separate 240-water inputs we can simply attach 2 extractors apiece to.
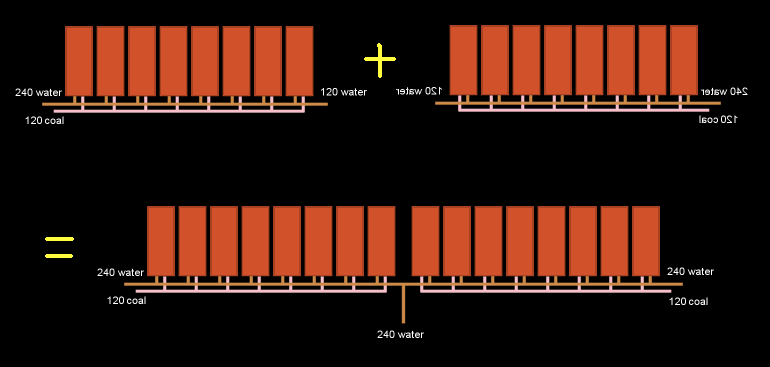
For the last step, we fold-over this layout to make two rows facing each other, so that the water all comes from the same direction and the coal belt can be consolidated, cutting down the amount of components even more by sharing splitters
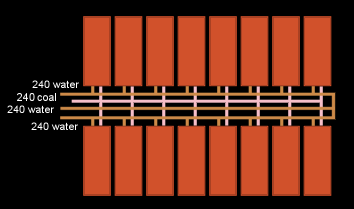
What we get is a tileable 7×11 foundation (realistically, 8×11 to keep things aligned) layout that takes 240 coal.
6-to-16 Coal Generator Video

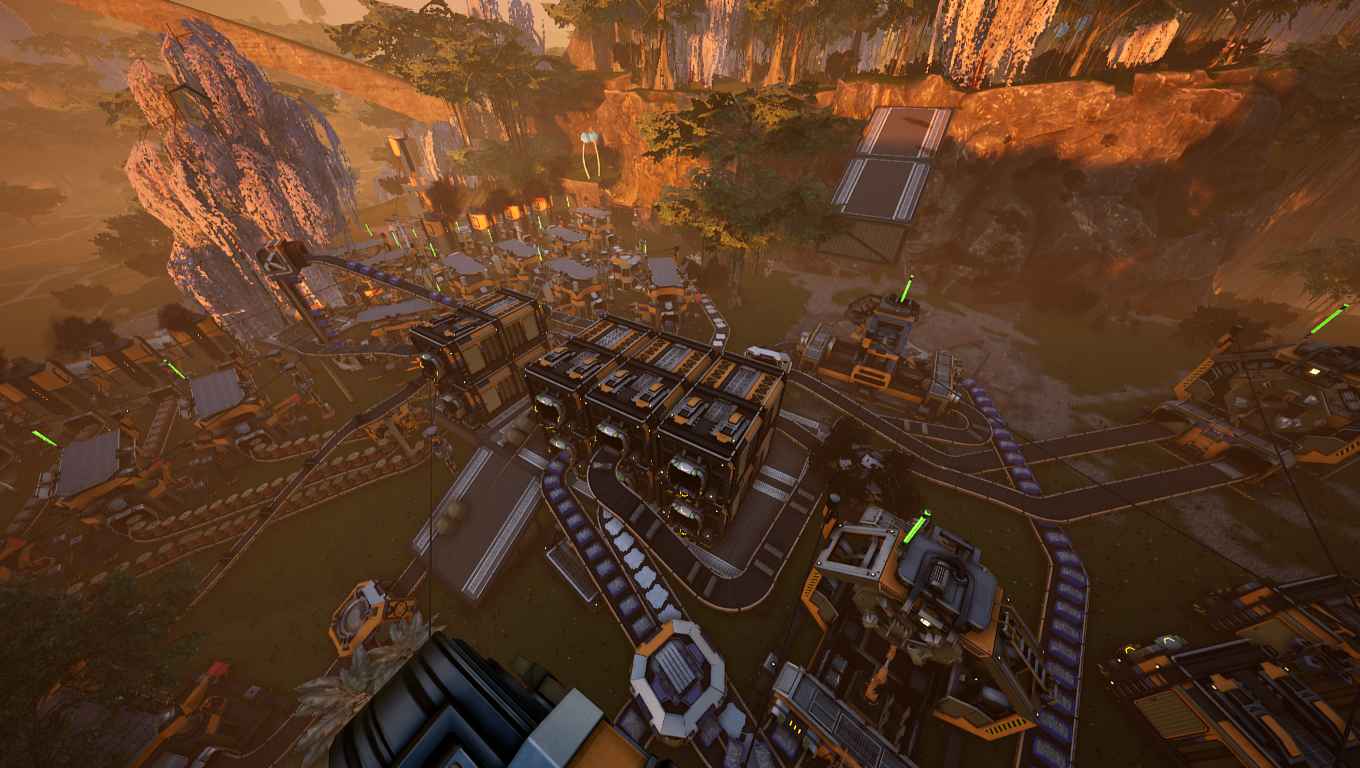
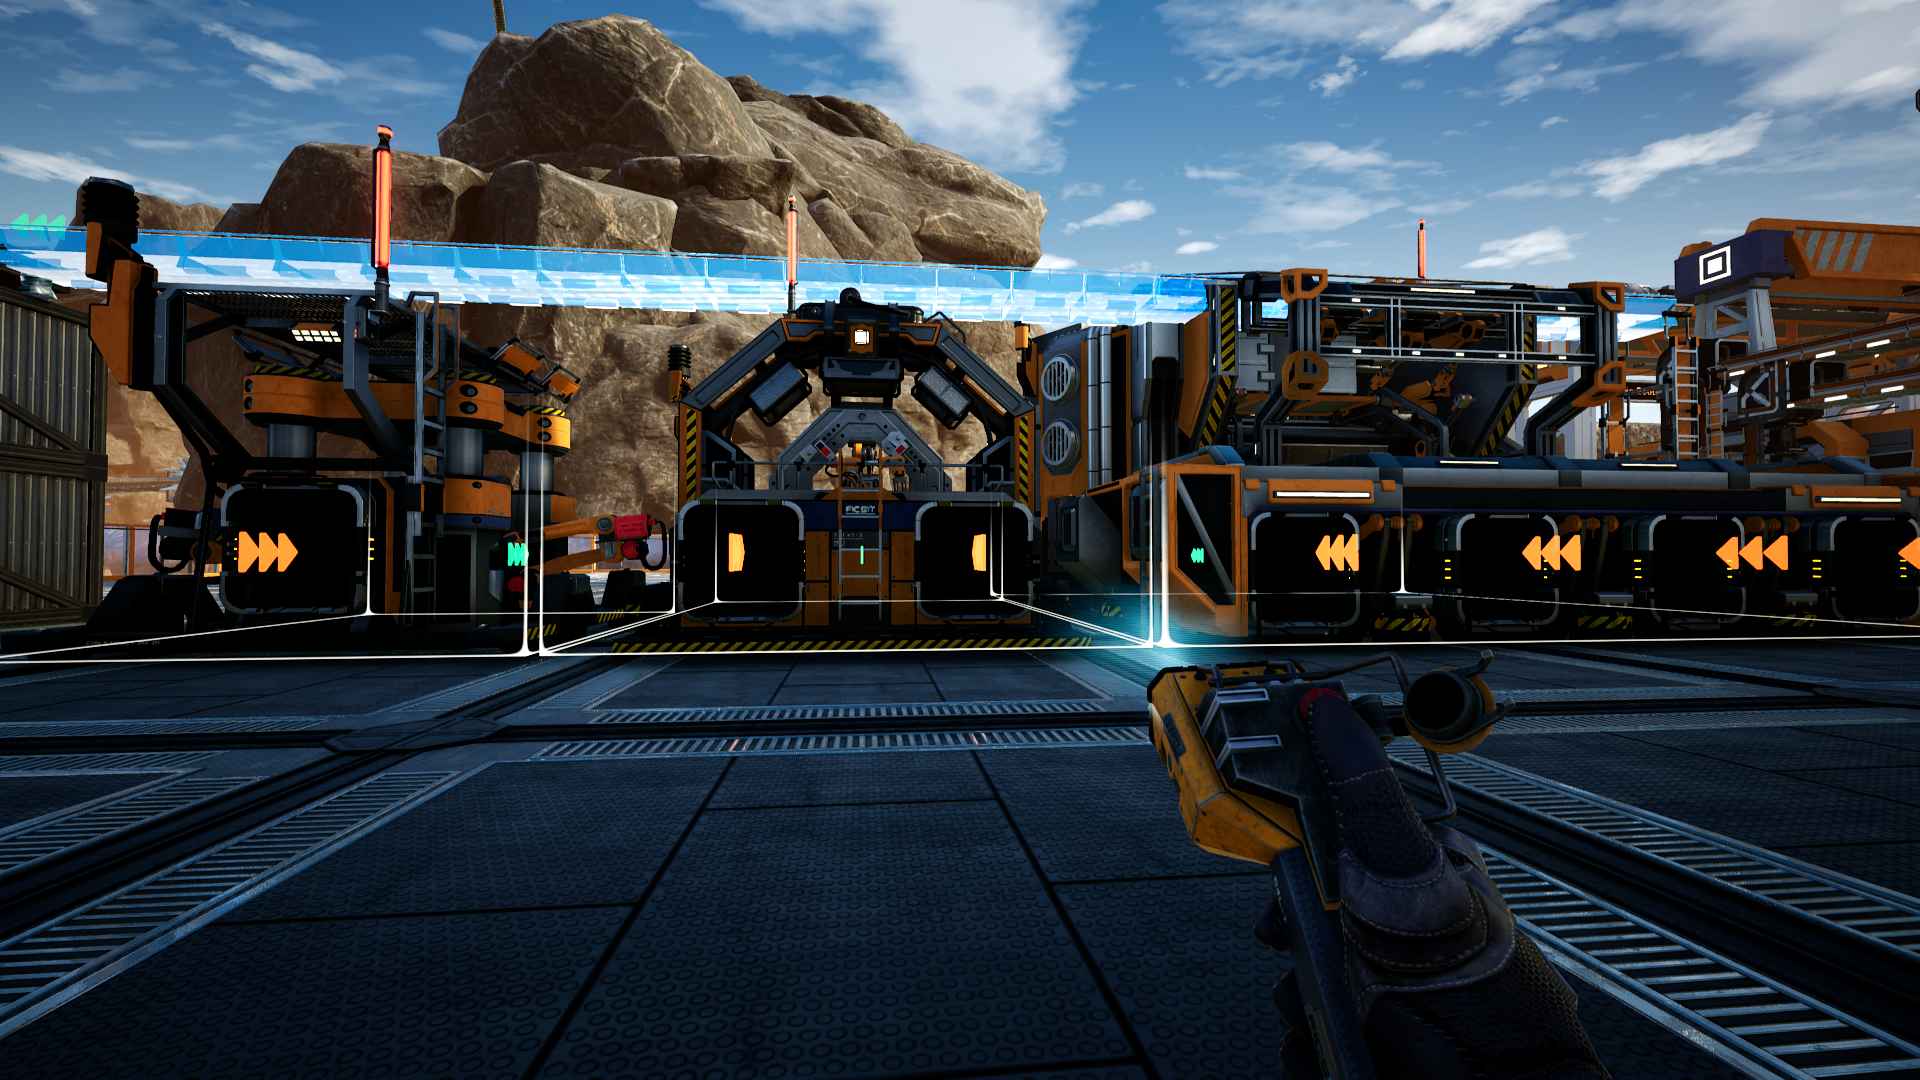
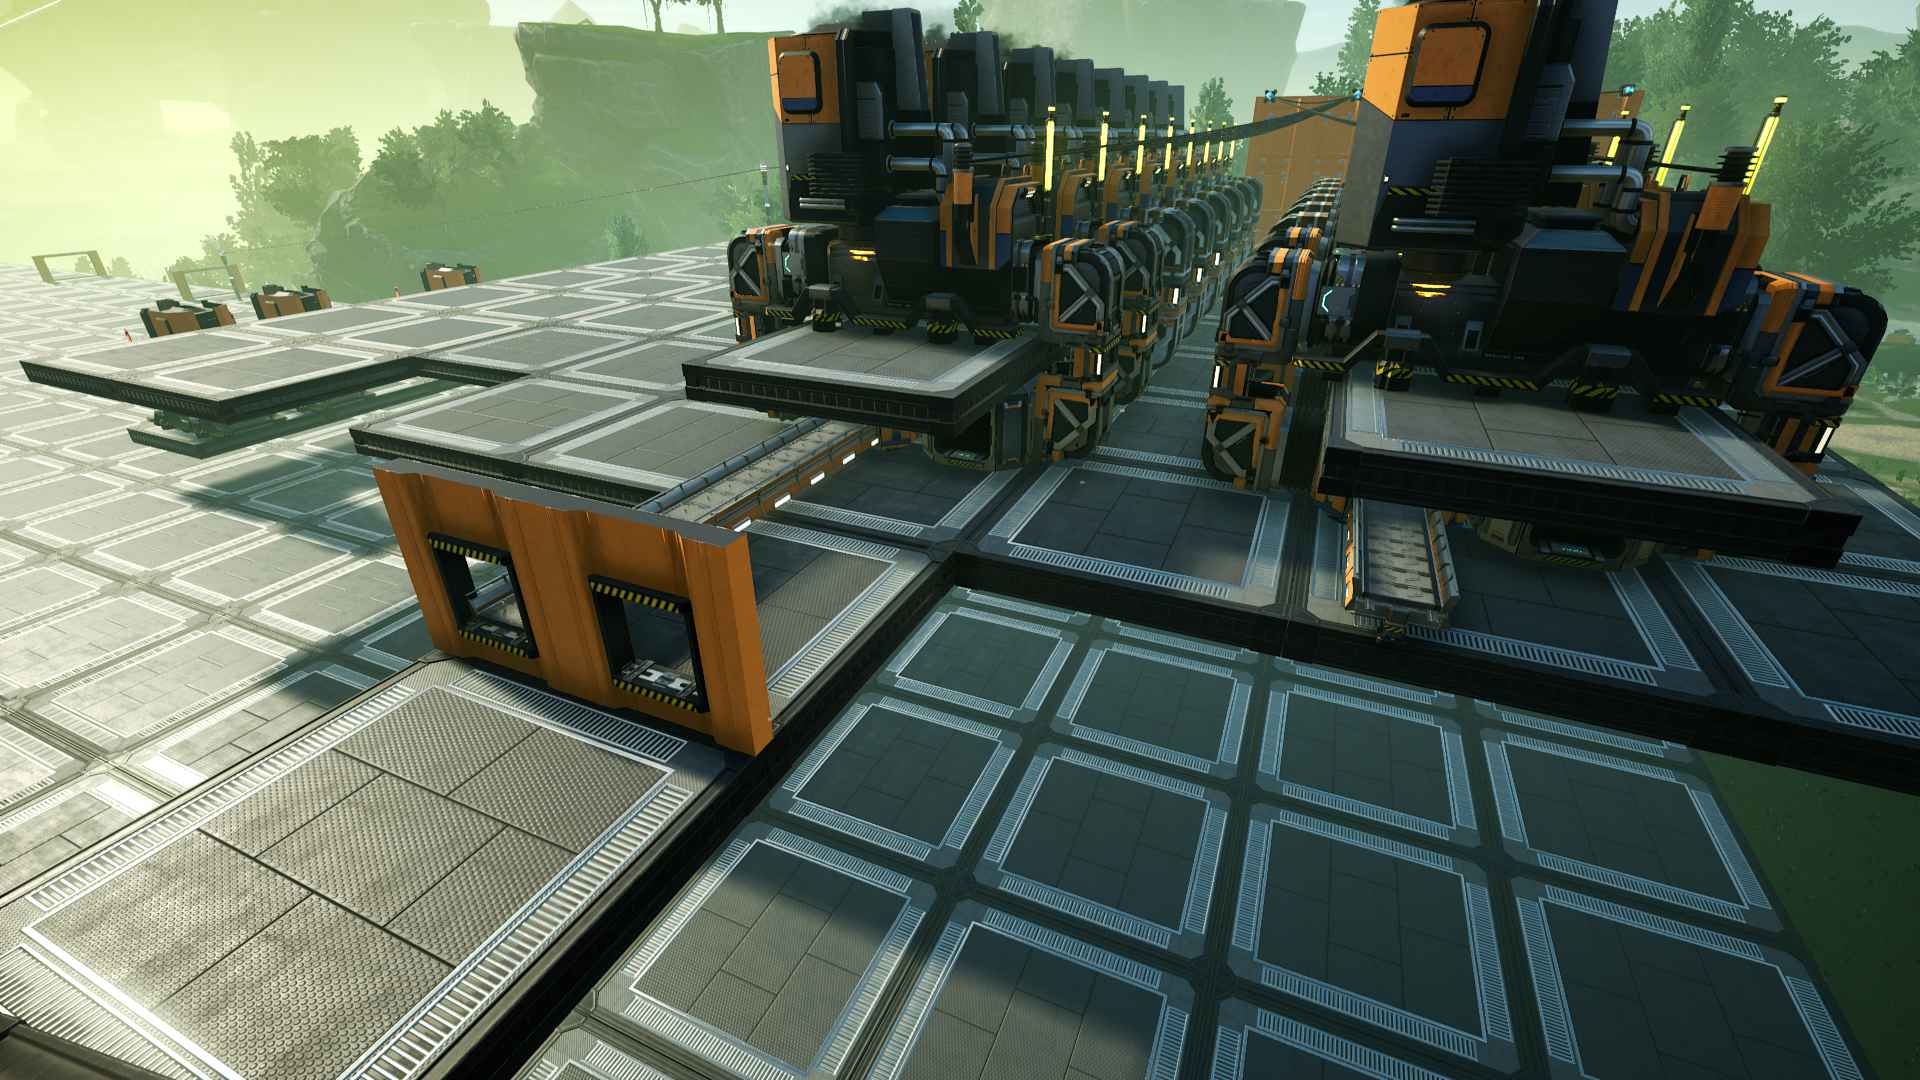
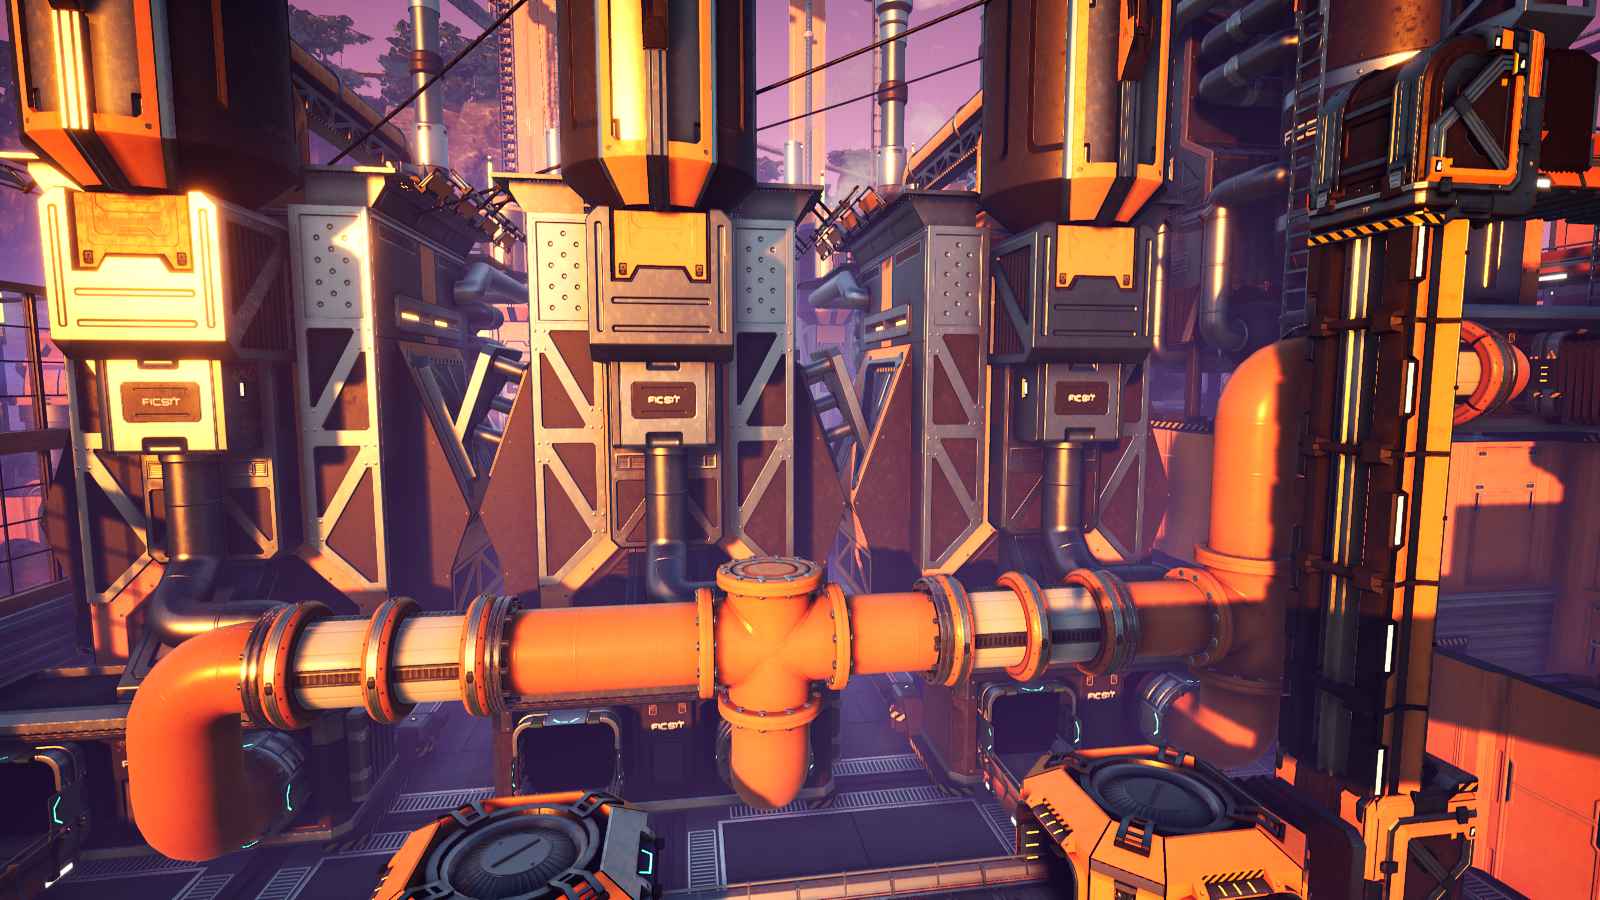
Refineries
Oil refineries are 10m x 20m (condensed in U3.6), thus fit 4 per 5 foundations.
Tier 5 can throw people for a loop as byproducts are now a thing.
I generally advise to keep power completely separate from production. This was already true with coal, as more power draw would start resulting in less Steel product, but is even more important with oil as generating power from byproduct gets incredibly finicky and hard to extend. Just tap more nodes and have power run off completely different nodes from plastic/rubber.
Basic 600 oil -> 200 Plastic/200 Rubber
To start off the tier, here’s a basic Plastic/Rubber setup that can initially run off mk3 Belts (eventually requires mk4)
The tier doesn’t really need anything close to 200 oil/rubber to start out with, especially since it’s initially required to unlock trains and moving around large quantities with oil so far from starting locations is painful, hence it’s good to have an idea of the final intended layout and start with a small section of it, expanding later, to minimize the amount of dismantling & rebuilding when it’s time to expand.
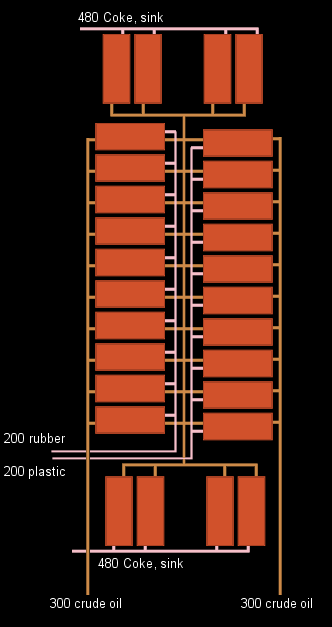
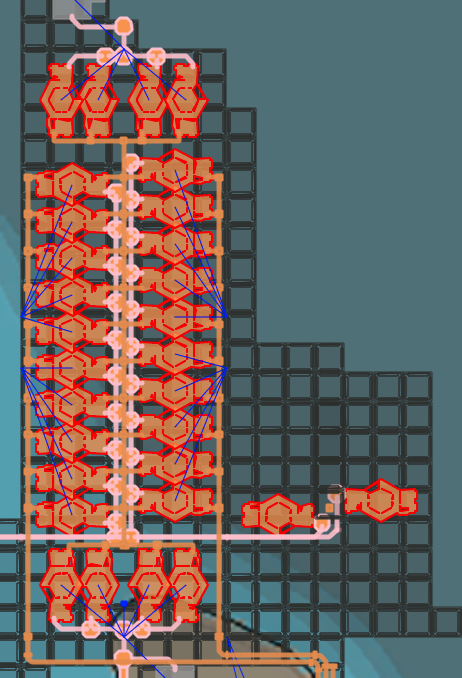
The general idea is for the final layout are two rows of 10 refineries (one plastic, one rubber) facing each other, both dumping the Heavy Oil Residue byproduct to a shared central pipe that’s discarded via the top and bottom refineries producing petroleum coke. The coke can initially be sinked, but is useful later on for Aluminium. Plastic and rubber output likewise run down the area between the two rows, and the entire system is fed from the outer ends with oil pipes.
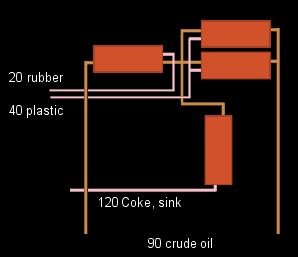
Here’s how things might start off, using four refineries. As the need for more rubber or plastic grows, refineries are added to the plastic and rubber rows, making sure there’s enough corresponding coke refineries (and thus sinks!) to deal with the byproduct.
The entire 600 oil -> 200 plastic +200 rubber setup can be tiled, although this largely wouldn’t be necessary because alts and more efficient builds for oil tend to be possible by the time a base requires that much plastic or rubber, but the option at least exists should the run be unlucky with HDD research options

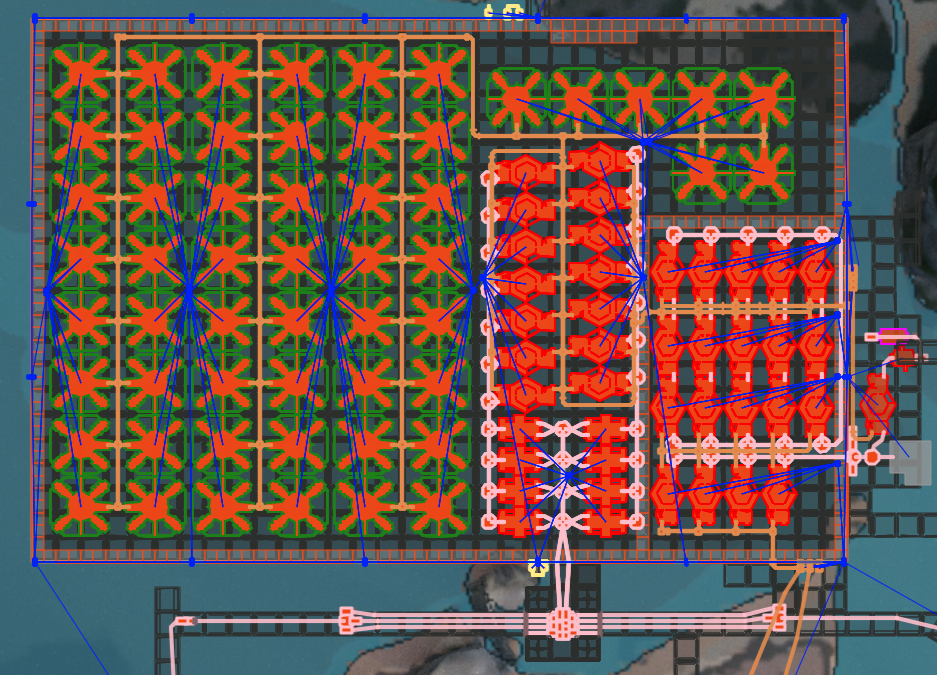
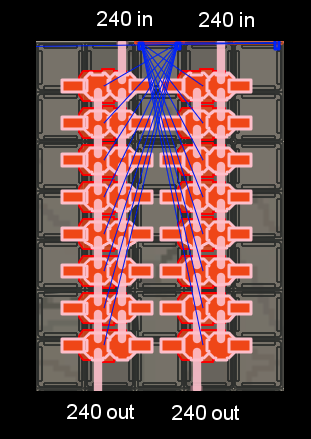
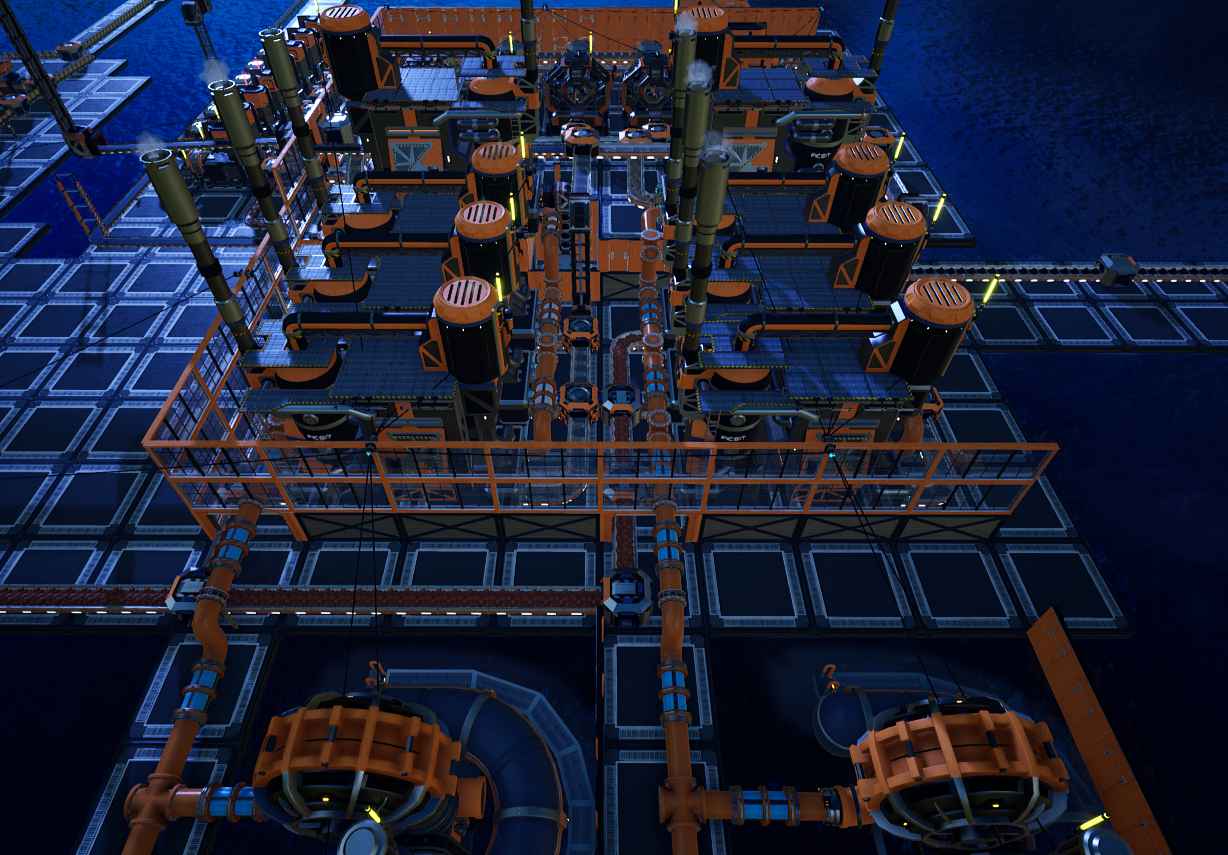
Basic 210 Bauxite -> 360 Aluminium Scrap (Update 3)
This section is somewhat rushed since Update 3’s Aluminium processing is on a very short lifespan and is being revamped/simplified in Update 4, but I figured it’d still be good to throw up a rough idea on how it’s tackled in case folks want to power through and experience this before it gets changed forever and are looking for pointers, and it also demonstrates how to deal with byproduct + fresh source in the same system using junction priority.
For clarification’s sake, the entire unit processes 210 Bauxite + 240 water + 60 Petroleum Coke -> 360 Aluminium Scrap + 60 Silica. More silica is needed to produce Aluminium Ingots in foundries down the production line, but for this section we’re focusing just on the scrap part of this process.
This demonstrates the ratio above tiled twice (since one mk5 belt can carry 360×2 aluminium scrap output). It can be tiled further indefinitely as long as the bauxite and Petroleum Coke lines have enough parallel space to feed the entire system.
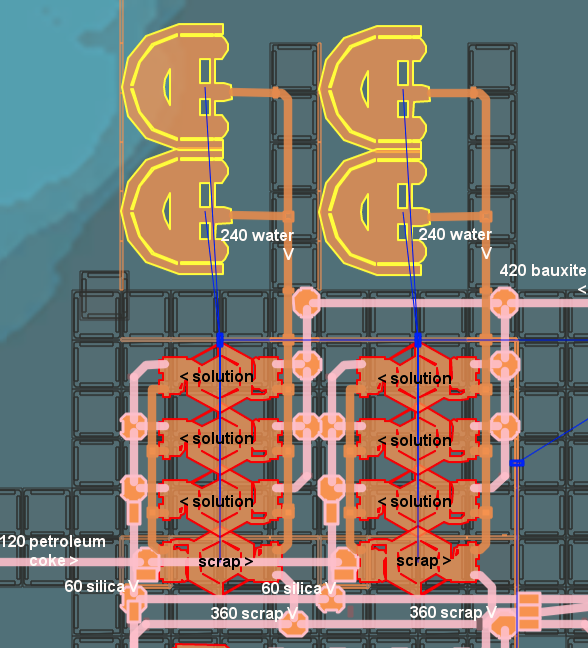
The basic idea is to have a loop of 3 Alumina Solution refineries being fed 240 water + 210 Bauxite, dumping the solution into an Aluminium Scrap refinery facing the other way, 8m higher.
The 8m height difference is important as it then allows the waste water generated by Aluminium Scrap processing to have priority over the fresh 240 water coming from the other direction (even though it mathematically should never overflow- it still happens over long periods of time anyway). 8m is also still comfortably within the Solution refinery’s innate headlift, so the entire system functions without additional pump shenanigans, especially if the Solution refineries are pretty much at sea level to also not require pumps coming from the water extractors. It’s important that the waste water from the Scrap refinery feeds the Solution refineries in the opposite direction from the Extractors to reduce possible issues w.r.t. pipe throughput & junction priority.
In this setup, the incoming Petroleum Coke line runs underneath the Scrap refineries. (Since there’s space down there, why not use it)
Alumina Solution being pushed upwards to the Scrap refinery
On the opposite side, the waste water going back down to the Solution refineries. There’s an additional junction on the top level in case there’s ever a need to build an overflow off the top of the junction so additional water can be siphoned off to package and sink, or whatever. In my experience with this elevated setup it’s never been a problem as long as everything in the production line is always running, but that option is there.
Train Tracks
(TODO: orthogonal distance measurements, turn radius, valid inclines, etc)
(TODO: expansion to new locations & building neat train track routes)
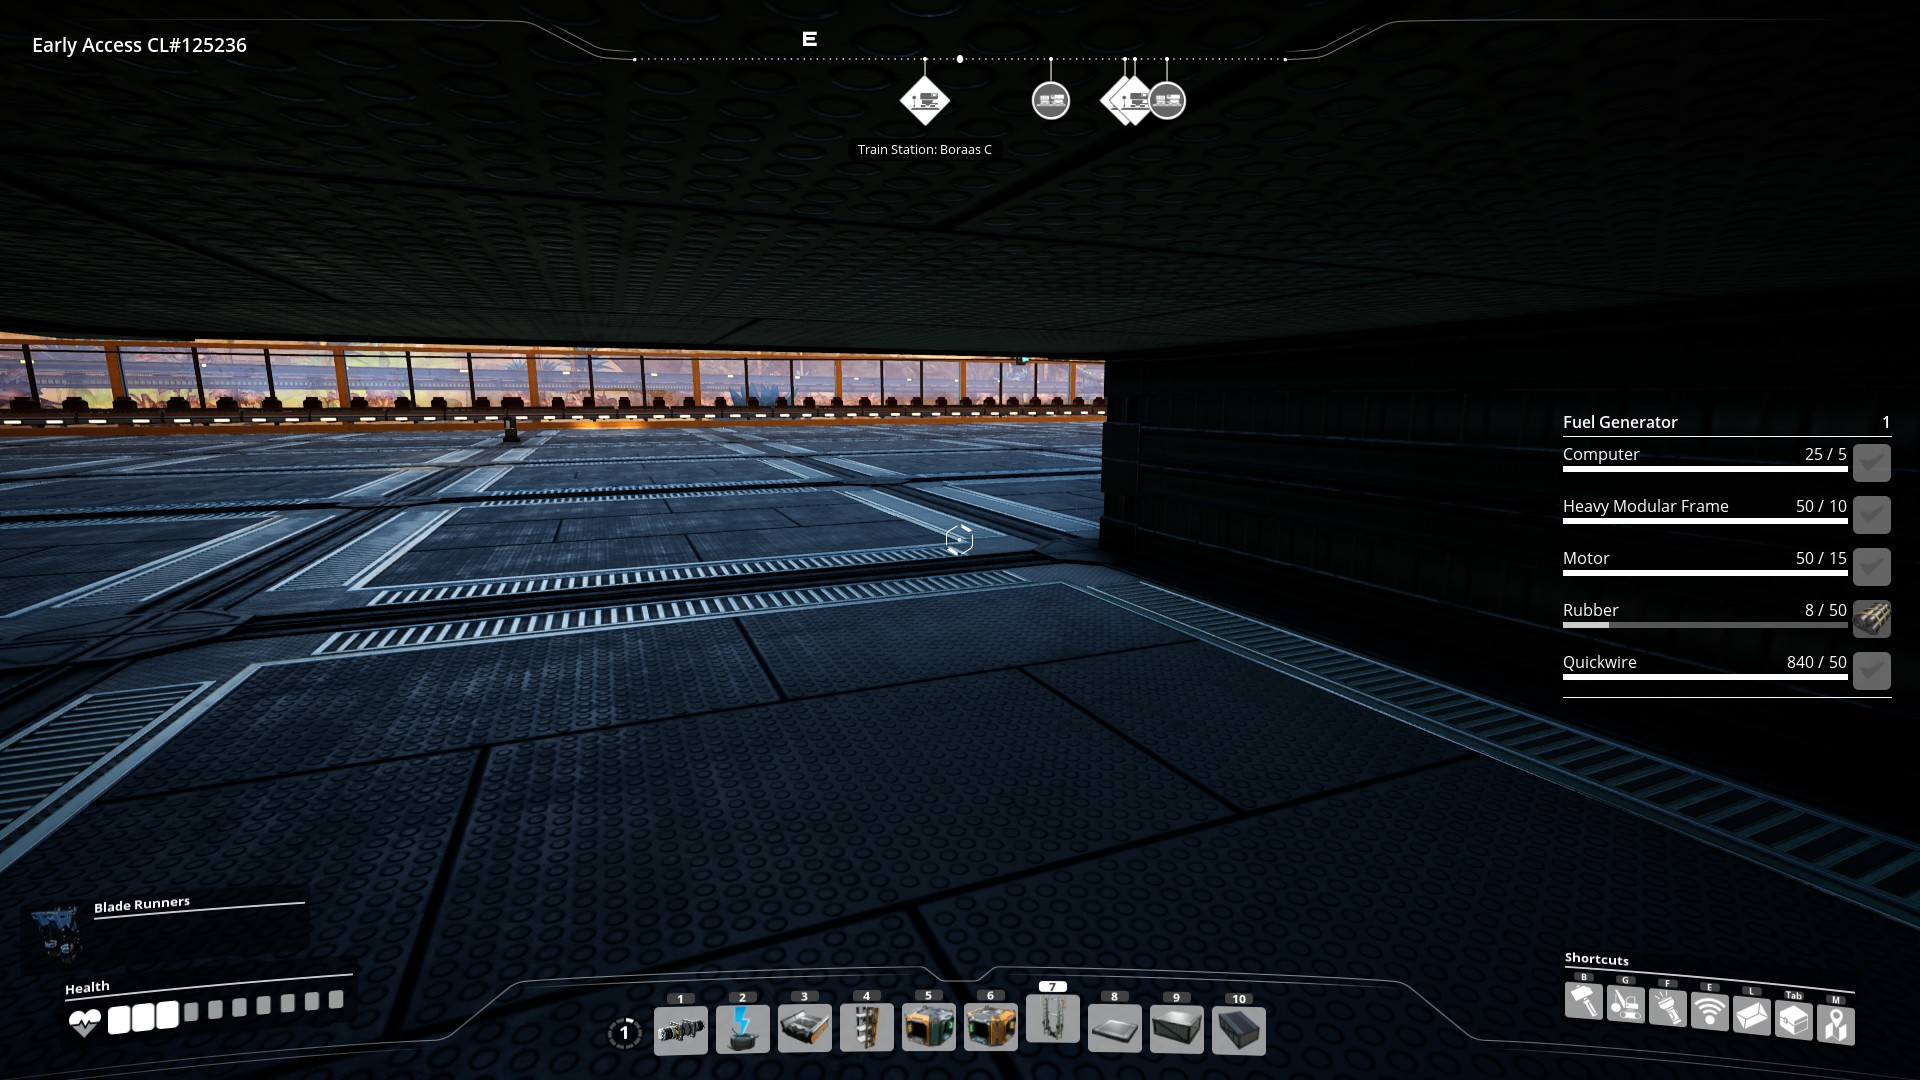
Fuel Generators
(TODO: Basic 1-5-13 setup)
(TODO: 200 coal/sulfur, 120 oil, 300 water Turbofuel setup)