
Overview
This is a guide describing the passage of the second Darkest Dungeon with a description of the characters, their skills, trinkets and used strategy in the assault.
Introduction
The main task during the second assault is to activate 3 Iron Crowns using Hands of Glory, which we get at the beginning of the expedition – during the preparation of inventories. The second Darkest Dungeon has a fixed structure and a fixed position of enemies so that we can work out optimum route, avoiding an unnecessary fight. For the impatient here is a link to the map of the dungeon: map[darkestdungeon.gamepedia.com]. In the corridors, there are lurking: Malignant Growth, Defensive Growth, Cultist Priest, Rapturous Cultist. However, the most dangerous enemies are waiting in the chambers in which the Iron Crowns must be activated: Flesh Hound, Polyp, Templar Warlord, Templar Impaler.
An unusual feature which distinguishes this assault from other missions is the need to equip heroes with Talisman of the Flame. Talismans are protecting against the ability of Templars called Revelation, which inflicts immense physical damage and stress. There are only 3 Talismans, so be sure to bring someone who will protect the hero without a Talisman. In the case of this guide, this protector is Man-at-Arms.
The Fellowship
The Fellowship of the characters shown below allows reasonably safe and stress-free transition of the dungeon. The main emphasis in this lineup is set for the defense and skills of Man-at-Arms – Retribution with a riposte.
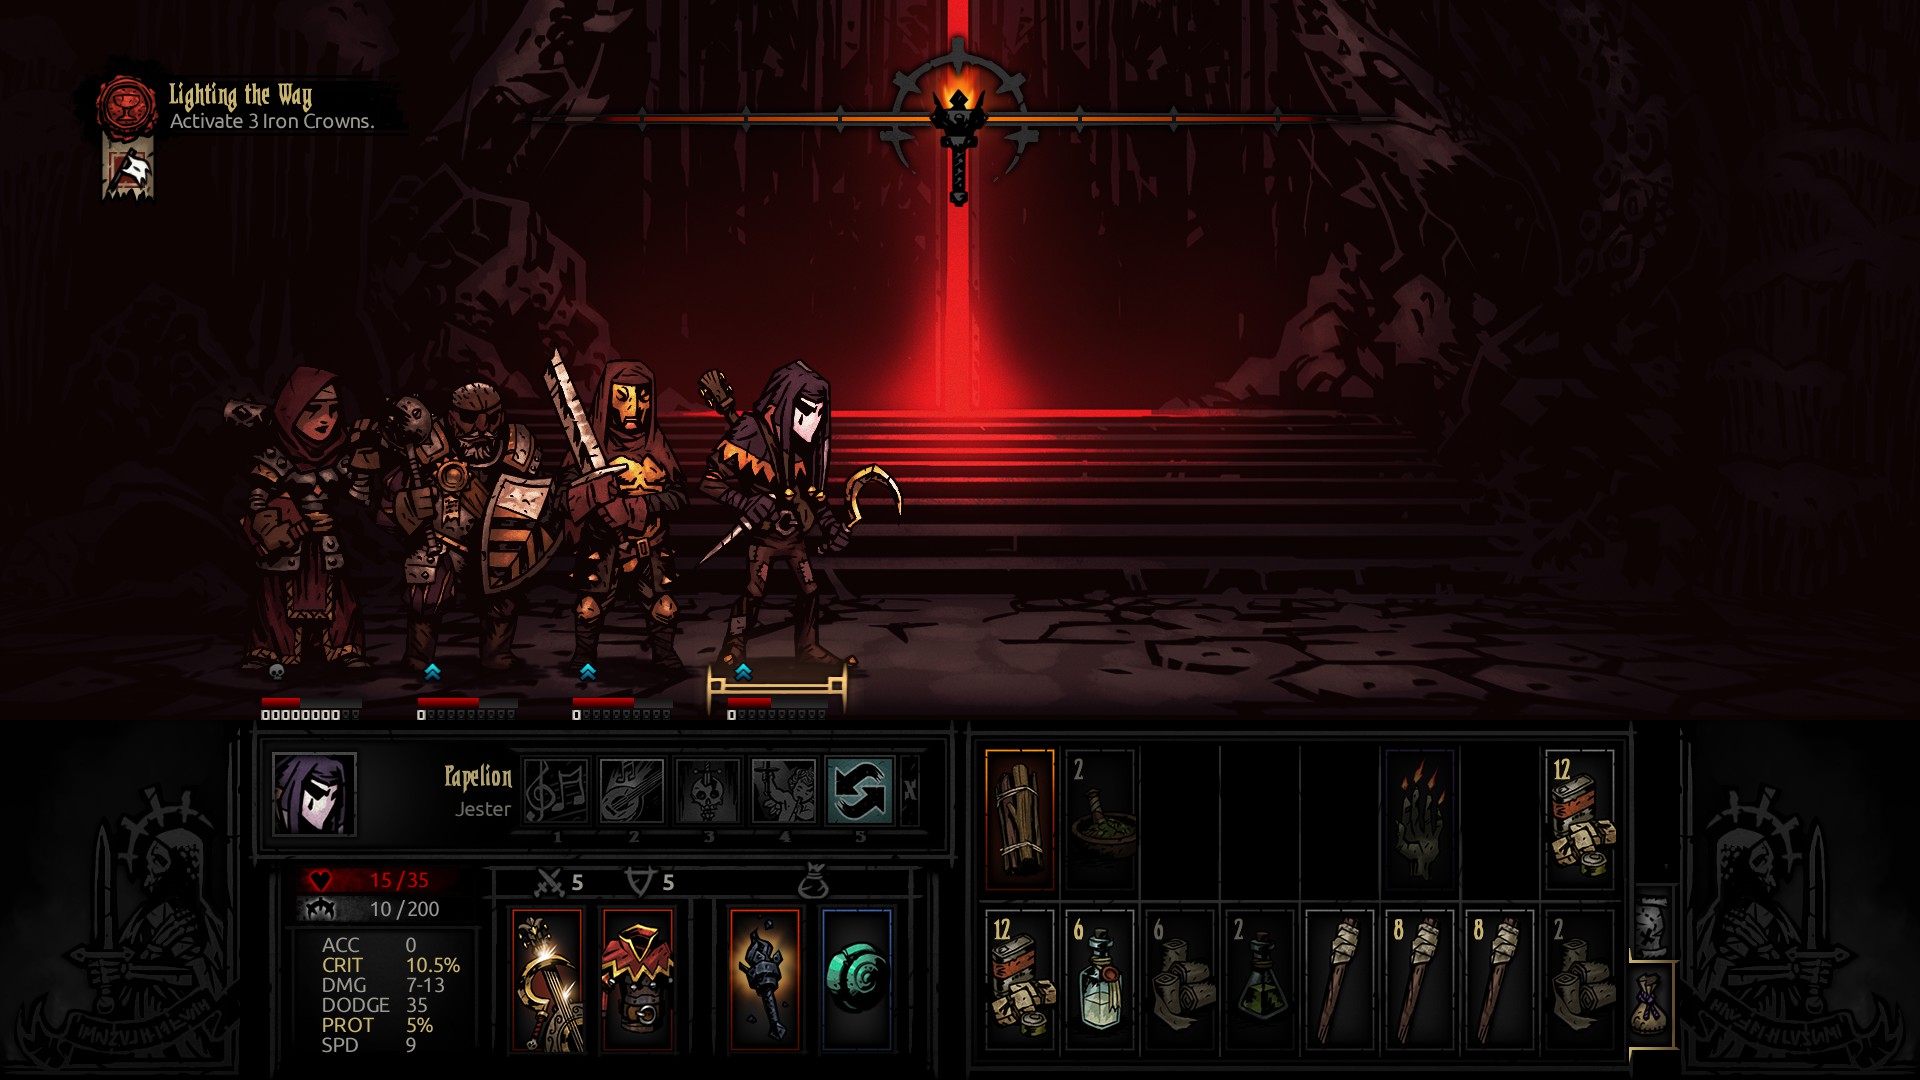
- rank: 1
- combat skills: Finale, Solo, Battle Ballad, Inspiring Tune
- trinkets: Talisman of the Flame, Recovery Charm
Fighting in the corridors:
Jester begins to fight using Finale on Malignant Growth. In subsequent rounds, he focuses mainly on reducing the stress of the other characters with Inspiring Tune.
Fighting in the chambers with the Templars:
If in the chamber is Flesh Hound or Polyp, the Jester tries as soon as possible to eliminate them using combination Finale -> Battle Ballad -> Solo.
If already there is single Templar or there are two of them, then Jester is usually at 4 rank. He is using Inspiring Tune there on rest of the team and, above all, increasing their accuracy through Battle Ballad. From time to time, you can venture to eject him on the 1 rank by Solo, so then use Finale. Thanks to Recovery Charm Vestal can save Jester, even in crisis situations.
- rank: 2
- combat skills: Chop, Hew, Withstand, Solemnity
- camping skills: Bloody Shroud
- trinkets: Talisman of the Flame, Immunity Mask
Fighting in the corridors:
Leper obtains the protection of 40% with Withstand. Then he helps eliminate Malignant Growth and one of Cultist Priest. When there are only two enemies: Cultist Priest and Rapturous Cultist, he maintains a protection level of 80% and heals himself thanks to Solemnity. When the entire team is fully healthy and has zero stress, he eliminates two enemies with Chop and Hew.
Fighting in the chambers:
The most important thing is to maintain the level of protection of 80% with Withstand. From time to time, he should use Solemnity to heal and increase immunity. When the defense is ensured he can attack – mostly using Chop.
- rank: 3
- combat skills: Crush, Rampart, Defender, Retribution
- camping skills: Maintain Equipment
- trinkets: Talisman of the Flame, Cleansing Crystal
Fighting in the corridors:
Man-at-Arms throws Defender on Jester or Vestal. Then he helps to eliminate Malignant Growth. Later he is using Defender skill alternating on Jester and Vestal.
Fighting in the chambers:
Man-at-Arms use Defender on Vestal – we must protect her against the ability of Templars – Revelation. Next, he activates riposte by Retribution. Defending the Vestal should be always active, so as riposte – keep it in mind.
Thanks to riposte enemies will slowly crumble. If the are Flesh Hound or Polyp in chambers, then his Crush attack should reach them from time to time.
- rank: 4
- combat skills: Judgement, Dazzling Light, Divine Grace, Divine Comfort
- camping skills: Pray, Sanctuary
- trinkets: Junia’s Head, Tome of Holy Healing
Fight:
Vestal mainly focuses on healing with Divine Grace. If there is no great need of healing she can hit with Judgement or Dazzling Light.
Supplies
We do not take the keys, shovels or medicinal herbs, but all packages of food, as well as the min. 6 Antivenoms, min. 6 Bandages, min. 6 Holy Waters, 16 Torches.
Walkthrough
From the start room, the team goes up where is fighting against two groups of enemies in the corridors.
In every fight in the corridor, you must as quickly as you can eliminate dangerous Malignant Growth and one Cultist Priest. And when there is only one Cultist Priest and harmless Rapturous Cultist, we maintain high protection of the Leper and Man-at-Arms at around 100%, so that the attack of Cultist Priest is negligible, and we can heal the whole team to full health and reduce stress to 0. When a team is fully regenerated two opponents can be eliminated and the team can move on.

The upper chamber with one Templar and two Flesh Hounds is the first major challenge. Remember about keeping high protection, protecting the Vestal against Revelation, riposte and increasing accuracy by Jester. As soon as possible eliminate the Flesh Hounds and then deal with Templar (thanks to riposte he will be killing himself).
After defeating the first Templar we can set up camp, regenerate and use the camping skills. I recommend here Bloody Shroud (Leper), Maintain Equipment (Man-at-Arms) and Pray (Vestal).
After camping the team, stronger thanks to the camping skills, returns with previously examined corridors to the starting point and goes to the left. There waits for you two fights in the corridors, which need to be addressed as it was described above. Then, in the left chamber waits for you Templar with two Polyps – you must handle them similar as in the previous chamber with the Templar. After winning the battle you can set up camp again and use the same camping skills.
The next step is to return to the starting point and go to the right. There are waiting for you two fights in the corridors, that must be solved as standard. And finally, you are standing before the last challenge – chamber with two Templars. Before entering there use Holy Water on each hero. The fight should begin Jester and his Finale and next, you should focus on defense, riposte and sporadic attacks of Leper in the nearest Templar.
The last battle is the most dangerous – it is possible that one of your characters will die, but because it is the last of chambers to activate the Iron Crown, the death will not affect the further game in the assault because the task will be already done.