
Overview
Here we will cover the topic of Animation in SFM, this is a more of a time-consumeing part than a diffucult part.
Part One: Loading a Model
(Please rate when you are done)
If you have read my other guides, this is just review; for the rest of you, however, this might be new.
What you need to do is locate is the little “+” button on your animation set editor and select “create animation set for new model”.
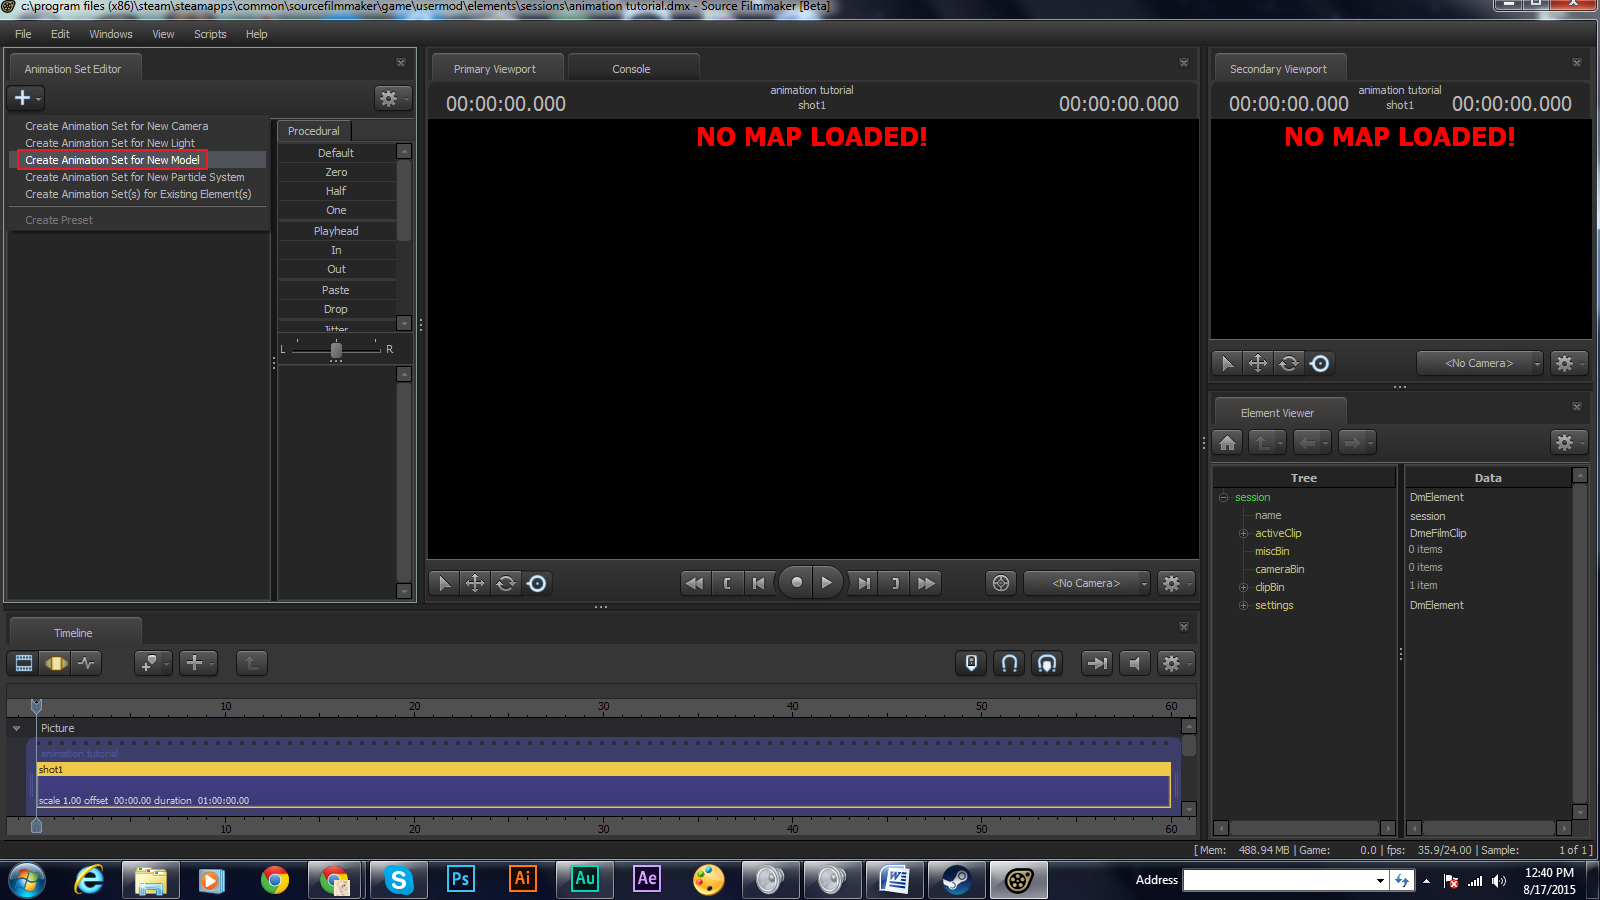
This will bring up a smaller window,

I recomend not useing the search for it tends to cause SFM to crash; instead, try useing the sorting. Once you select your model, make sure it is acctually working by looking in the screen at the right of the small window, if you can see the modle you selected then it works. now you can press “open”.
Part Two: Positioning Your Model
Okay, to be able to move your model, select the model in your Animation Set Editor. Locate your timeline, and select “Motion Editor”,
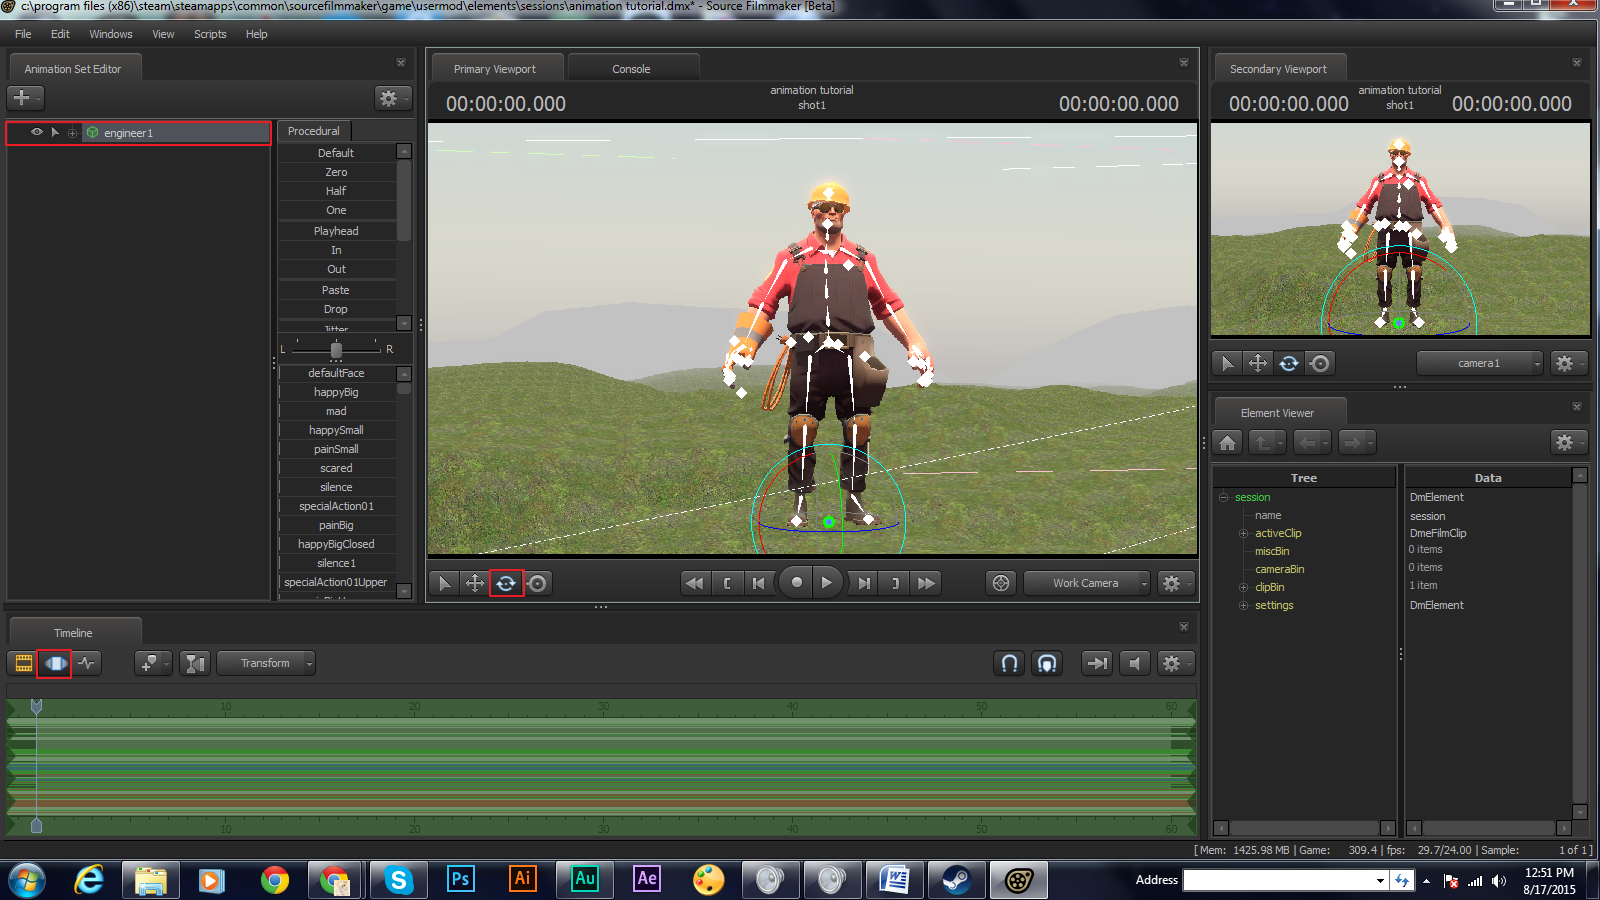
do not select the Graph Editor yet. Instead select the motion editor. it may be nessasary to un-select your model. when you have your model un-selected, you can now mouse over the viewport and hold ctrl, you will now see the joints(or bones) of the model. Select a joint of your choice by simply clicking on it. (NOTE: must still be holding ctrl) once you have selected your joint, you can now let go of ctrl. you will notice three lines making a sphere. Drag any one of these lines to move the selected bones.
Part Three: The Motion Editor
Okay, you can now drag the edges of the green bar at the bottem. (Will be orange if you have not pressed enter) Use the timeline at the top of the editor to aproximate how long you want the motion to take. (NOTE: Be sure to drag the two ends together) Once you know the motion, and approximatly how long you want it to take to complete. Move your cursor out from the little line you have in the editor (either left or right) untill the cursor changes to just a double sided arrow, drag that to about how long you want, do this to both sides of the line. (WARNING: this will give you a mechanical movement, this will be addressed in the next step)
Part Three: The Line Graph Editor
i know it has been a while since last update here so, let’s continue.
So we have covered part of the Motion Editor, the Graph Editor is very similar. The Graph Editor is much faster if you are moving multiple things, and it looks less robotic. With the Graph Editor, you use the bookmarks option to the top left of you timeline, this will put a blue triangle-ish thing (donno how to describe it with one word) you will want three of these; First one: so your starting position doesn’t change, Second one: will be how your model will move, Third One: so your ending position stays the same.

notice the curved lives,
indicateing a more fluid movement.
place the center bookmark to the spot you want the action to complete and be sure your time in the scene matches the time of the bookmark. Now you can move any part of the model you want by simply selecting it and turing it.
Want continuious help? join the group! [link]