
Overview
In this guide you will learn how to port models over from SFM to Garry’s Mod, whether you want to port something awesome from SFM that the original author doesn’t care to port themselves (but ask permission if you plan to put it on Gmod workshop), or are an author, but don’t know how to make physics. Other guides concerning Porting from SFM to Gmod (that are on Gmod hub) don’t cover making a physics model, in my guide, I will teach you how to make a physics model, anims, and setting up the collision joints for the QC.For this guide, I will be demonstrating with Blender, if you don’t already have it, get it, get familiarize with it, because I won’t explain how to use Blender, as there are online tutorials for that. I will assume you know some basics with Blender. Also, there is a bit of reading to be done in this guide, so please take your time.
Set Up: Things required
These are things you will need for this guide.
Blender[www.blender.org] (the main app we’ll be using to create physics and such)
Blender Source Tools[steamreview.org] (so you can import/export smds)
Crowbar (a good compile/decompile program)
Notepad++[notepad-plus-plus.org] (best for editing QCs)
And finally, two places to get models are SFM Workshop and SFMLab (but I don’t recommend)[sfmlab.com]. Likely chance you may already have the model you want to port.
Step 1: Decompiling/Setting up in Blender
Assuming now you have Blender and Crowbar, let me start by pointing out where to get the model if you downloaded it from Workshop, its located in:
C:Program Files (x86)SteamSteamAppscommonSourceFilmmakergameworkshop
If you have multiple addons containing models, check the materials and models folders for the right one, you need to copy both the models and materials of the model that you want to port and place them in a new folder on your desktop.
For SFMLab, just download it and place the zip somewhere you can easily locate, such as create a folder on your desktop and place/extract there.
Now here’s where Crowbar comes in, open up Crowbar and browse for the model,
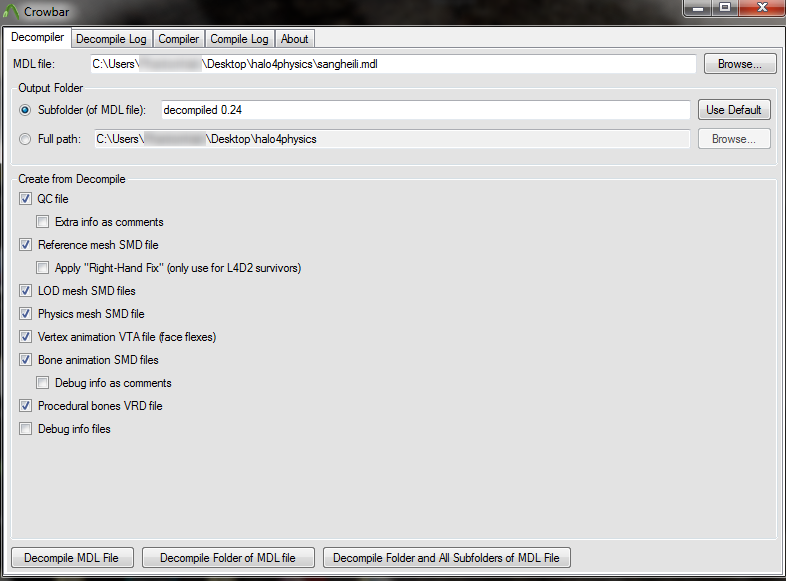
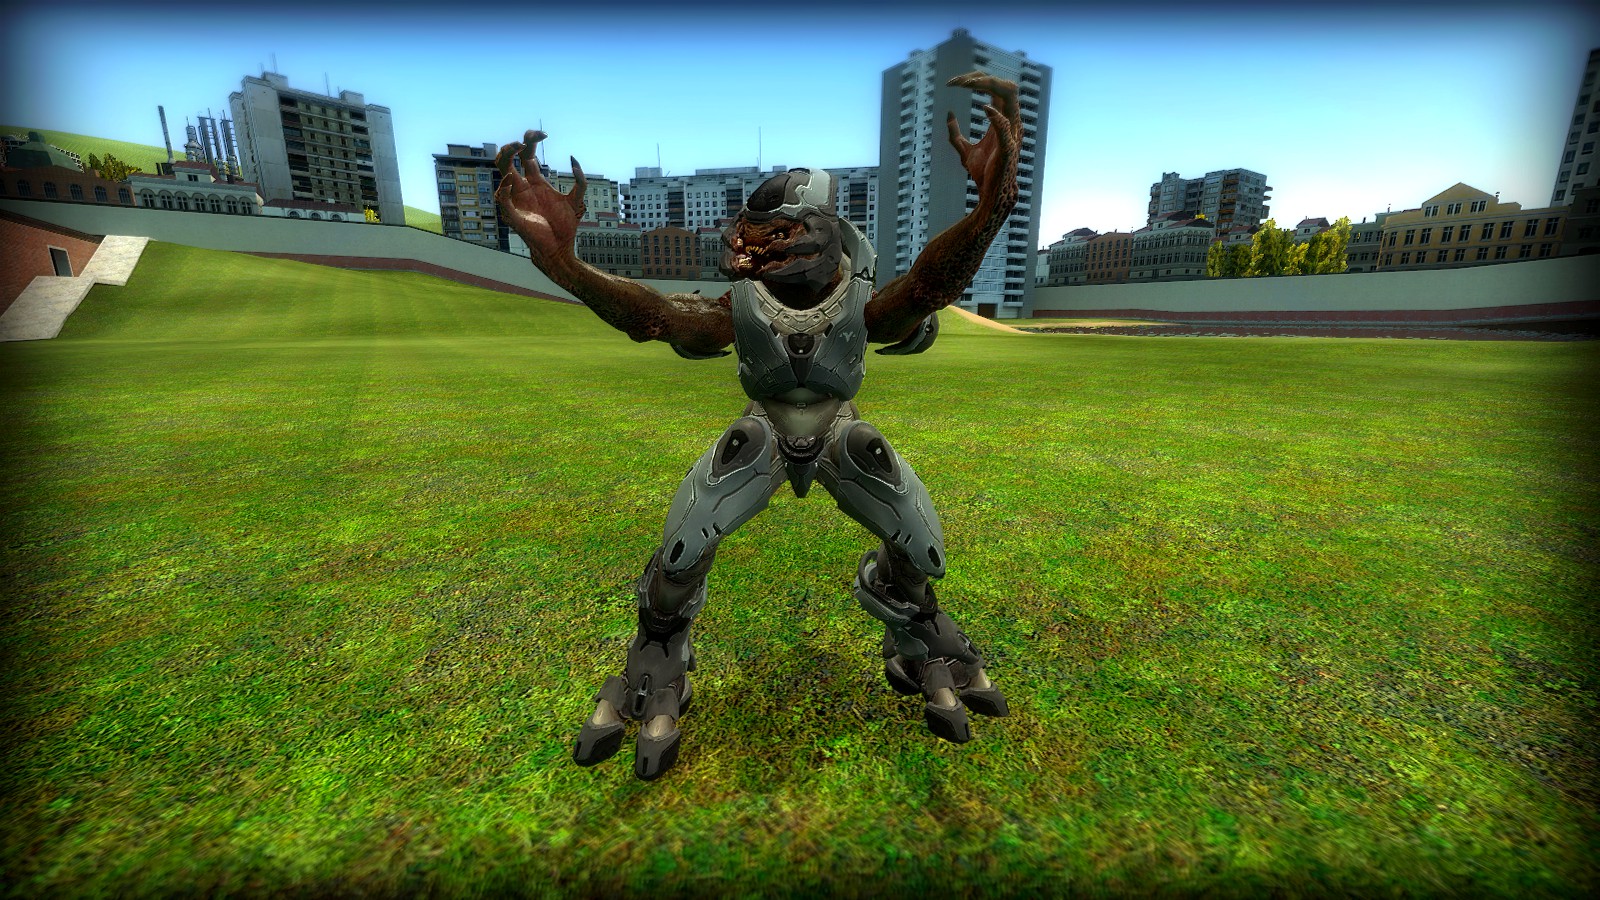
In my case, I will be demonstrating with a Halo 4 Elite from SFMLabs (for the sake of learning how to do this first time, you may want to get the same model: [link] ) Once you find the model, best would be to leave all the options as they are, including “Subfolder (of MDL file)” Finally, hit “Decompile MDL File” button and Crowbar will do its job. Now go to where you copied the model and look into the newly created “decompile 0.24” folder. We will edit the QC later, for now let’s open up Blender.
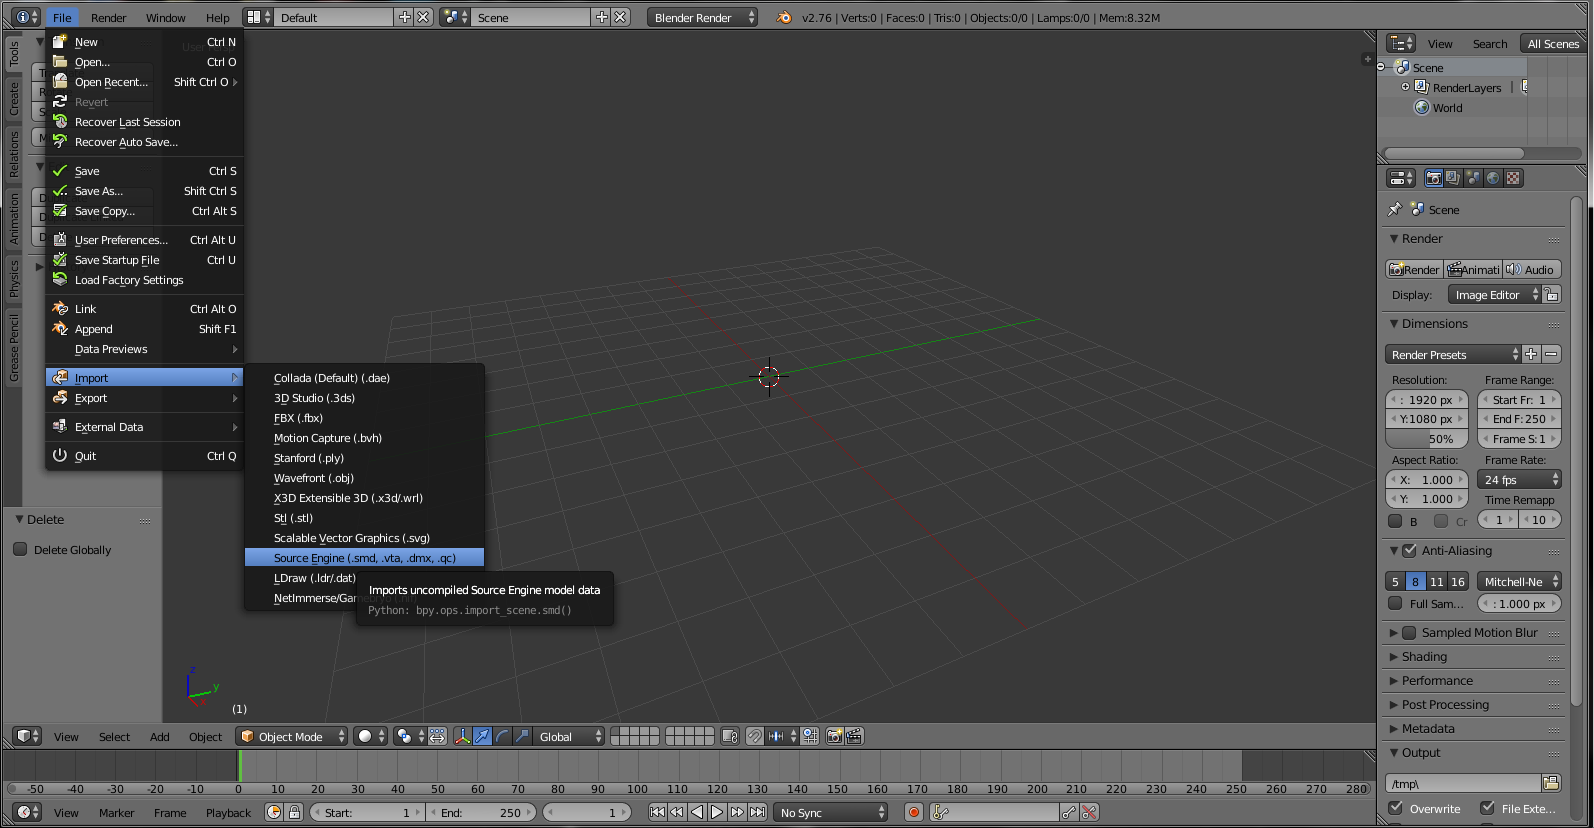
For me, I like to delete everything in the new scene by pressing “a” then hitting delete, its so we don’t get a cube on export with the model/physics. Next go to File>Import>Source Engine (assuming you’ve installed the plug-in) and find the model you decompiled.
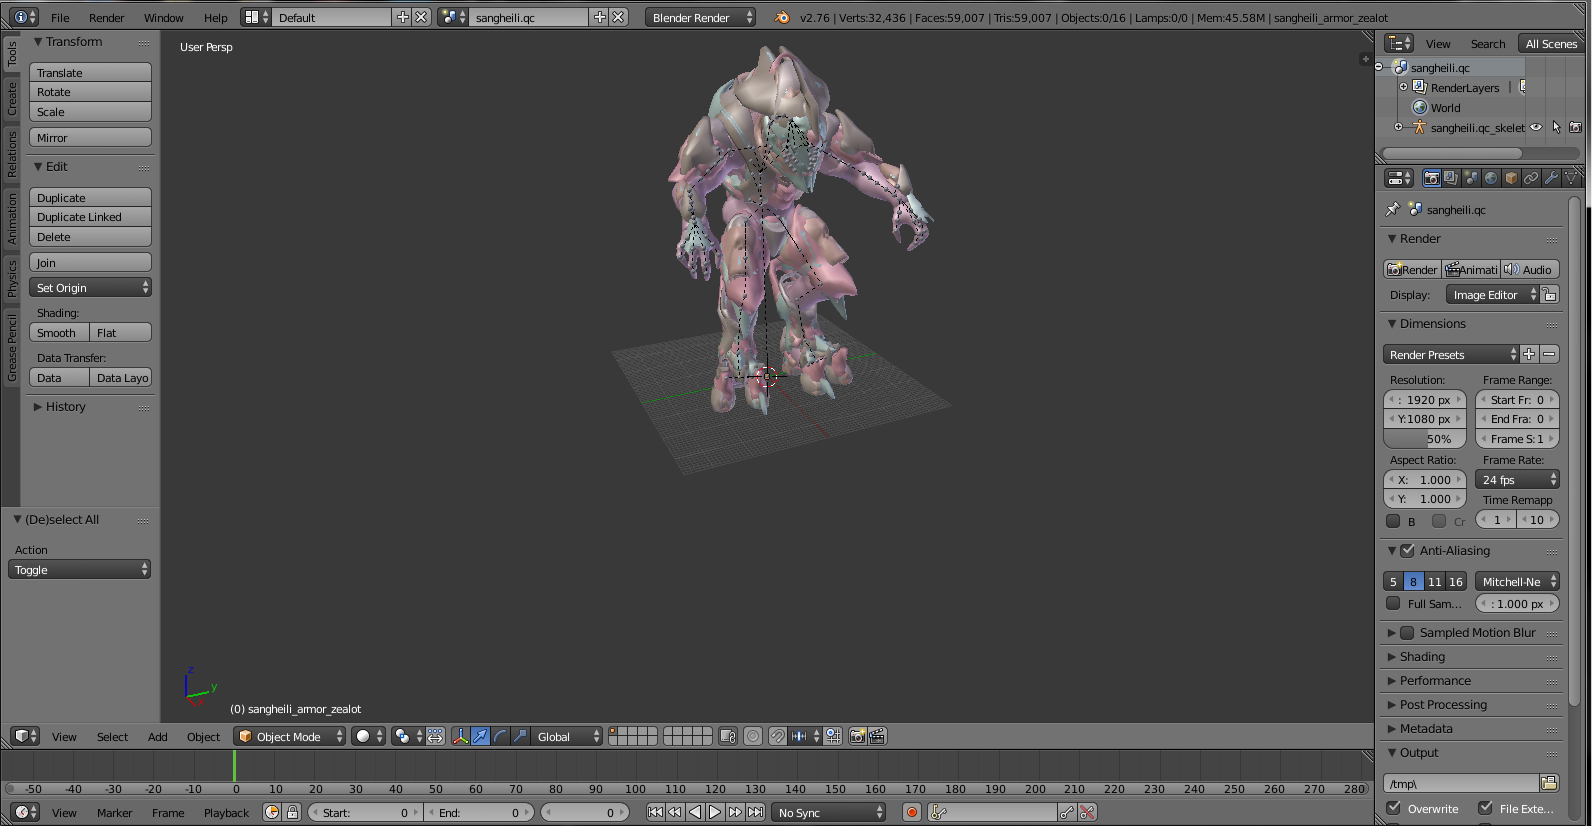
I also like to import the entire QC, so we get to look at everything first, some models (ragdolls) may appear backwards or on the side, so with the entire QC imported I can go to ‘object’ on the right panel (is an orange cube) and selecting the skeleton of the model (if its a ragdoll), in transform I simply rotate it either -90 or 180 degrees depending on which way its facing. If the model doesn’t need rotating, you can skip now straight to Step 2.
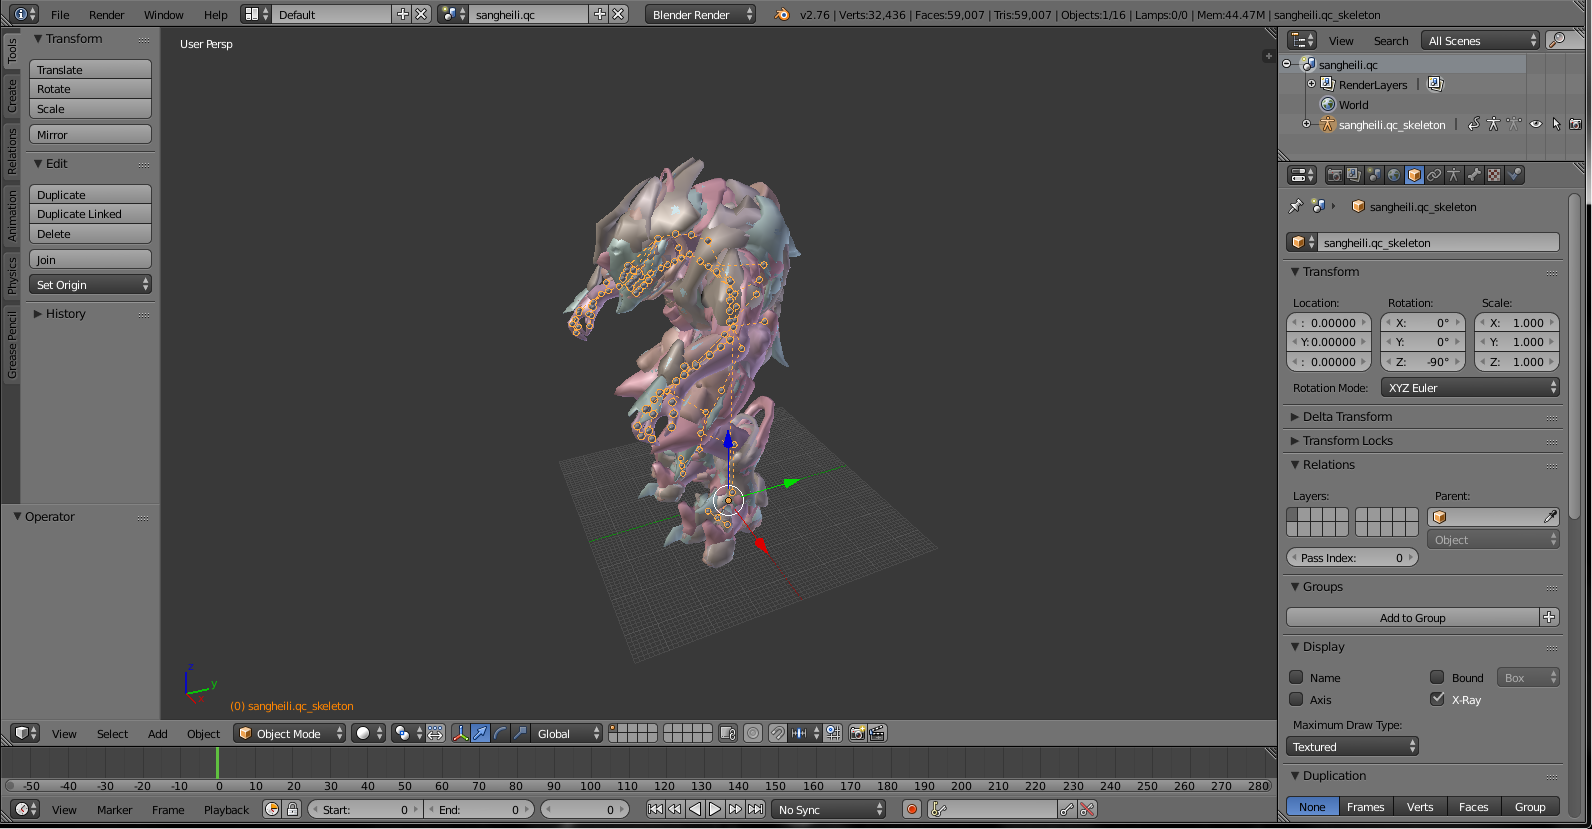
If its facing this direction, rotate by -90 so its facing the right way on the y-axis. Be warned, however, if this is a ragdoll model with poseable eyes, NEVER rotate it, even if its easier for the model to be facing the right way (when stand posing in Gmod), if you mess with its rotation, you’ll get errors with the eyes, its best just to leave it, unless of course, you know how to deal with the eyes, then you can set them to face the right way (in qc_eyes), but we’ll just leave it.
If you rotated it, be sure to press ‘ctrl a’ to apply rotation, or location if you moved it. Only do this while you have the skeleton selected, then press ‘ctrl i’ and ‘ctrl a’ again to apply rotation to the actual model, many times a model may not have bodygroups, but if it does, this is another reason importing the whole qc is important, its faster than opening each bodygroup manually to apply the rotation, because if its not applied, the bodygroup parts or model will appear back in the same place they were before rotated.
Once rotating and applying rotations is done (if it was needed), go to the “Scene” tab on the right panel, and down to “Source Engine Export” and select “SMD” then the export path which is the same place the qc of the model that you imported should be exported to overwrite it. Leave “target up” at z. Now that the model has been exported you also need to make a new anims file, because the model was rotated, if you were to compile it now at this state, you’ll find the model still facing sideways or backwards.
Another thing, if it needs scaling, AND has working eyes, you will have to learn how QC eyes (exe) works, find some other tutorials, because I won’t cover how to deal with eyes (yet).
Step 1a: Renaming Finger Bones
IF the model’s finger bones of which you are porting to Garry’s Mod are already set to “Valve.Biped” Then you may skip this section. To check whether they are or not quickly without even opening the model, double click on the model’s .smd file (having Notepad ++, it will open the smd as text)…you can look at it to identify the bone names. If you see bones called “ValveBiped.Bip01_L_Finger0” etc. etc. (look at the Valve finger name list below if need be) then you obviously can skip this step.
Now, before we step onto making the anims, we need to rename the finger bones of the skeleton for both the physics and the model’s actual mesh skeleton. Otherwise, it won’t work with fingerposer if you make an anim first, then rename the finger bones.
Here is a list of the Valve finger names:
First off, with Valve finger names; Finger0 is ALWAYS the thumb, Finger1 is always the index, Finger2 is always the middle, Finger3 is always the ring finger, and Finger4 is ALWAYS the pinky. Do not confuse them (I have multiple times). Many cases, like with our Sangheili, the model may only have four fingers. Meaning, there won’t be a need to call anything with “_Finger4” and so on. The “pinky” of the Sangheili will be called with “_Finger3”.
Don’t worry, you don’t need a full set of fingers for the fingerposer to work in Gmod. Fingerposer won’t show the posing options for the omitted fingers. For example the pinky setting normally for a human pinky will be missing. Anything with 01, 11, 21, 31, or 41 will be the second joint of those associated fingers. 02, 22, 32, and 42 are the third/last joint on the fingers. To simplify, in case you still don’t get it; Anything starting with 0 will be for the thumb, anything starting with 1 will be for the index finger, anything starting with 2 will be for the middle finger, anything starting with 3 will be for the ring finger, and anything starting with 4 will be for the pinky.
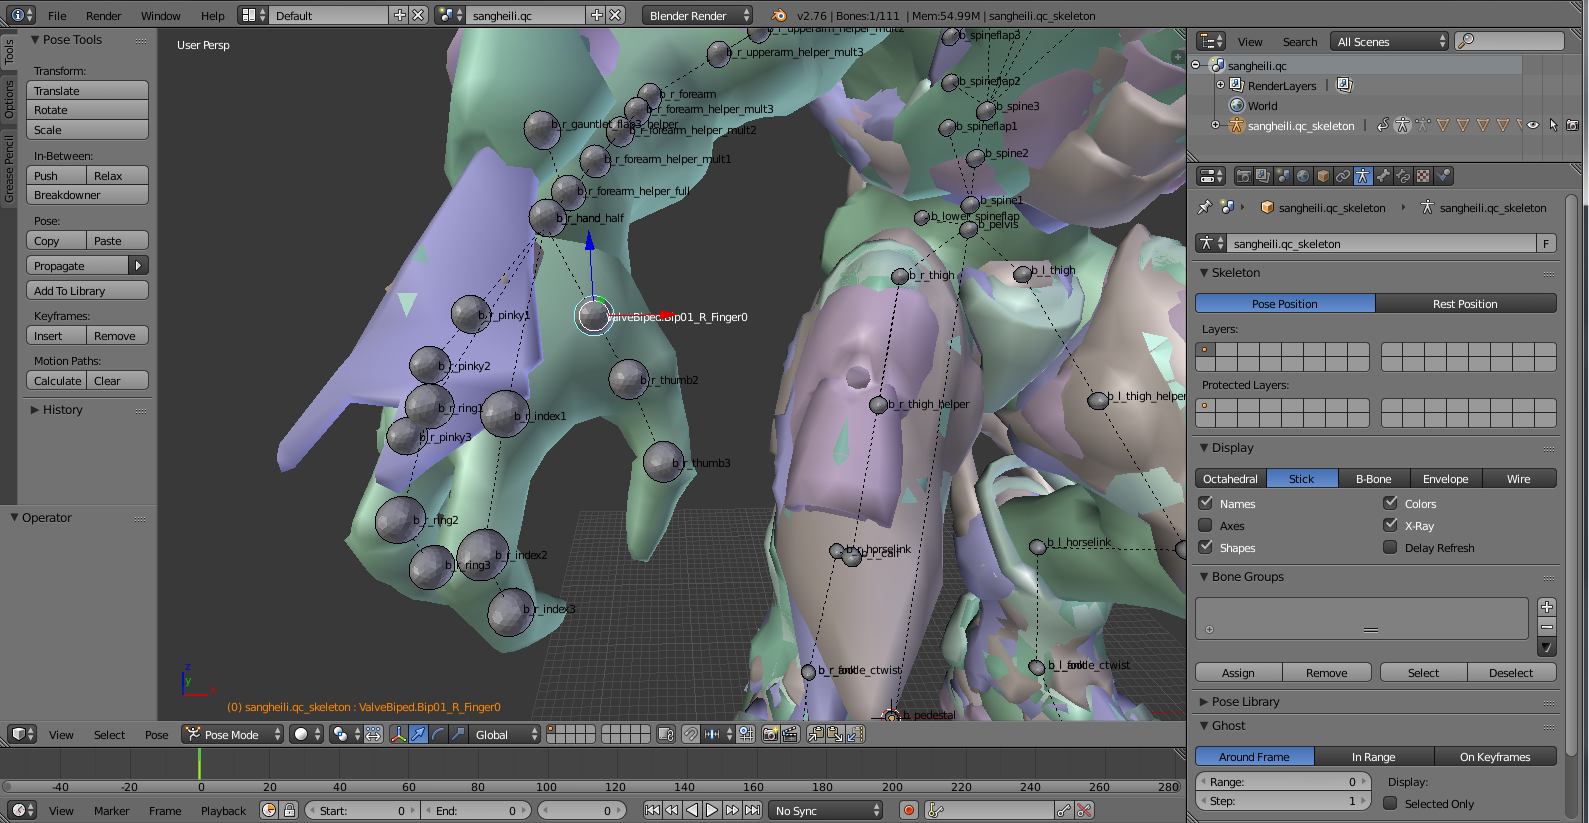
You can copy/paste the list of Valve bone names into a text file if you wish, so you can always refer to it later. Obviously, copy/paste the Valve bone name of which finger joint you want to start with (select the skeleton/armature and go into pose mode then click on the bone data which is a picture of a bone, for the bone name. I usually start with thumb, and end with pinky (if there is a pinky).
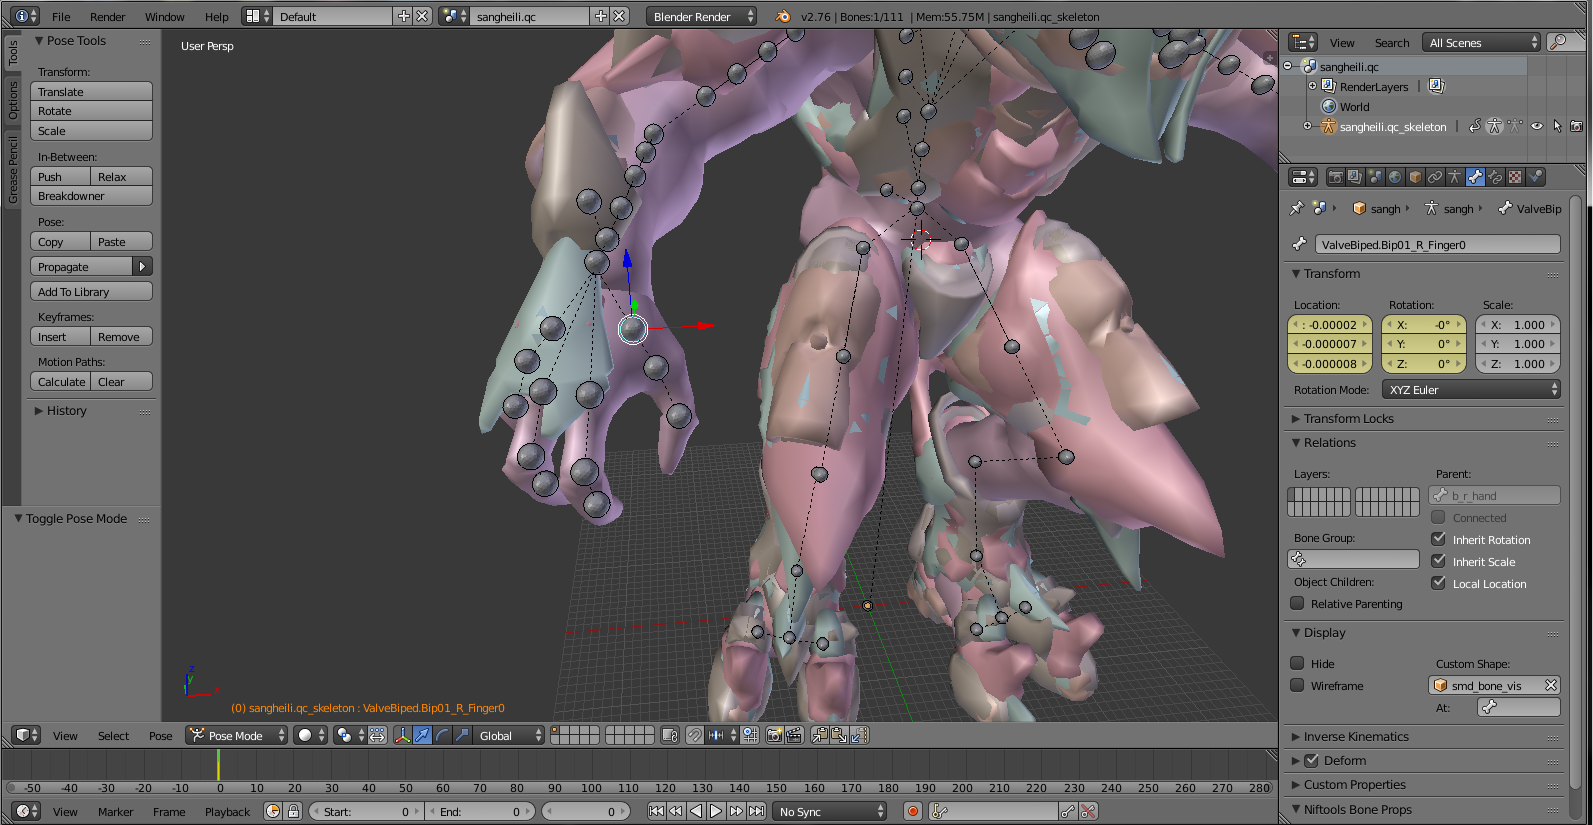
If you go into the armature tab (which is a picture of a person), you can set it to show all the bone names by selecting the “Names” under “Display” I personally don’t use it, because I know what all the bones are, and are supposed to be called, but you can use it to double check that you have renamed all the finger bones correctly.
Step 1b: Anim Creation
To create anims (for ragdolls) delete everything but the skeleton
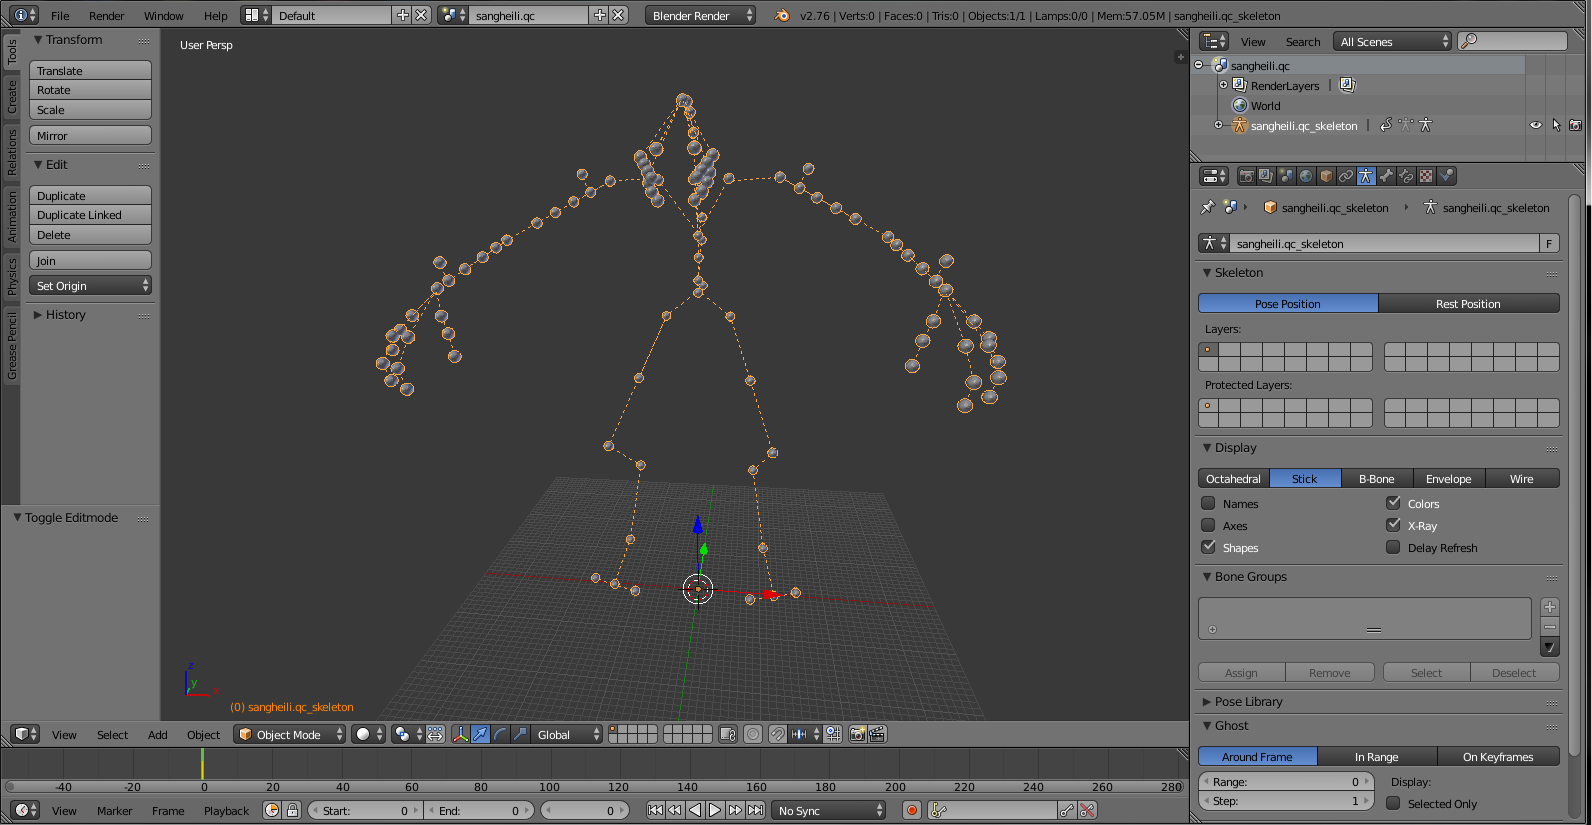
There is no need to save while doing this, but if you want to, make a new save. Now go into pose mode, hit a, then hit i, it will show a list of options, usually, always press “location” I have usually renamed the skeleton to idle_skeleton, because it’d be something like sangheili_skeleton, but it actually doesn’t matter, Blender automatically changes that when you export.
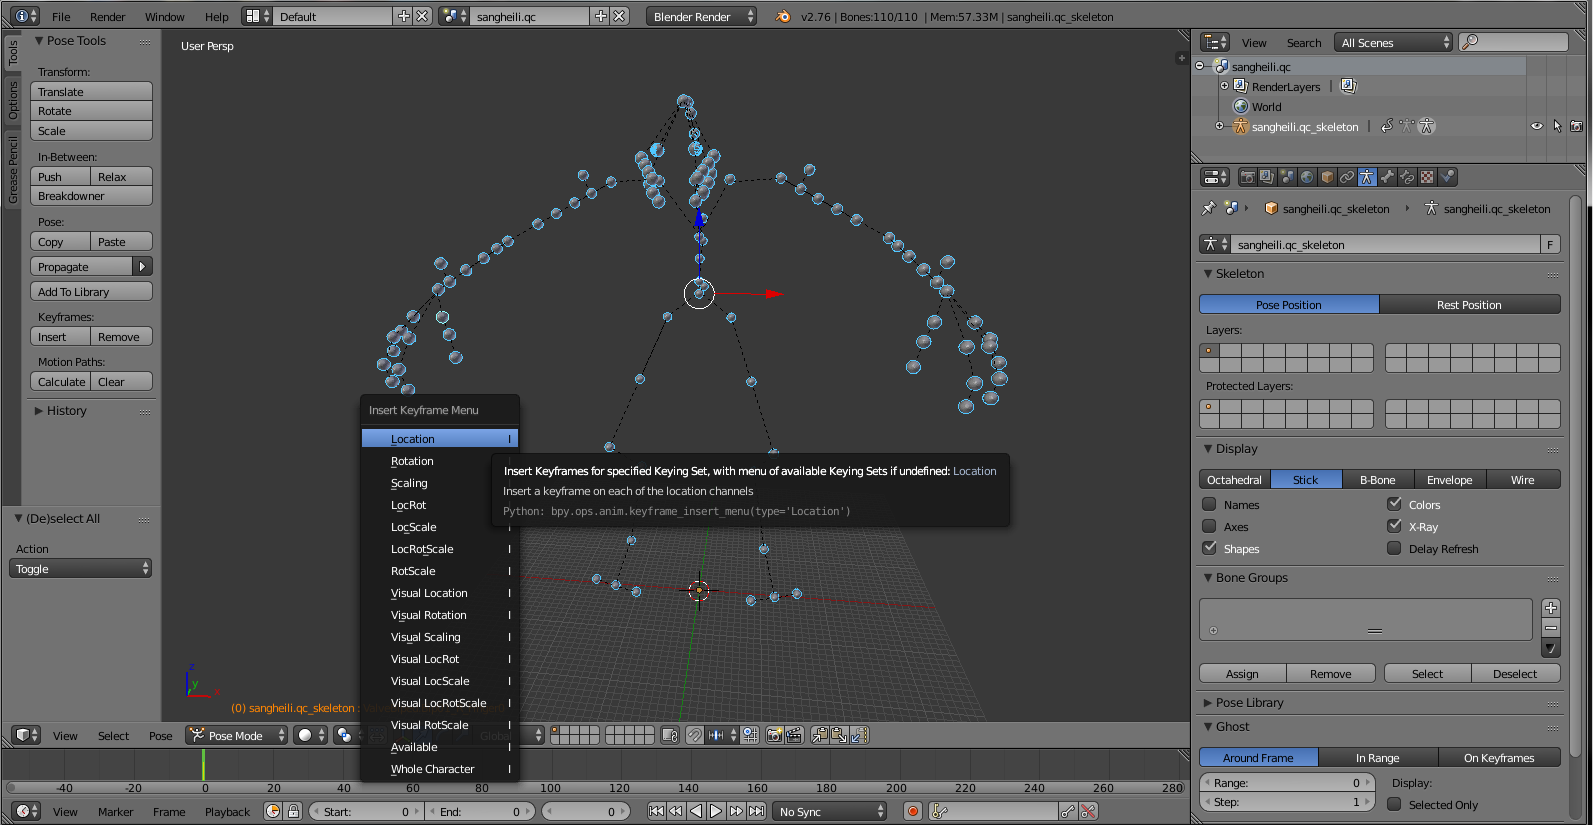
Finallly click on the “scene” button, scroll down and rename the “subfolder” to whatever the name of the model is, with ‘_anims’ at the end, or look into the folder containing the qc of the model, and take note of what the anims are called there.
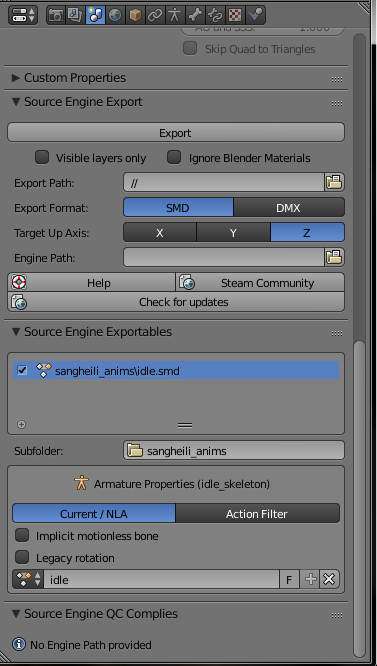
Write “idle” like in the picture below an option called “Legacy Rotation” Set the output of export (such as the place where the QC of the model is), and export as SMD. Undo that whole sequence of deleting the skeleton and dealing with the anims thing IF you did not make a new save (save at all), that way, you do not lose the model.
Step 2: Creating the physics
Now comes the fun part, creating the physics! Now, if you already know how to create a physics, then you can skip this step (proceed to step 3 for bone weighting, or step 4 for exporting if you already know bone weight), but please note that in this step I will show how to create a very accurate physics, it may take a bit of time though, (took me maybe 15 – 30 minutes). Also if you’re model is a prop, skip to Step 2a.
There are many ways to create one; making cubes and cylinders fit the model manually, copying a pre-existing physics from a Half Life character, and so on. But in this section, I will show an interesting way you can create physics, it may or may not save time, but the result is a fairly accurate physics model, but if you’re in a hurry, you may just want to create cubes and cylinders and fit them to the model.
If the model has any bodygroups, you can delete those now, and just leave it with the base of the model. I recommend making a new save called “physics” or something.
Before we edit, it’s helpful to delete all vertex groups for the bones. Select the model and go into ‘edit mode’ for this I will start at the hands, then work up to the head and eventually the legs, what we’ll be doing is cutting up the model into parts concerning the bones, like if you cut the hand, you’ll do it at the hand bone, each part will be the moveable part of the model’s body in Garry’s Mod, the part you pose with the physgun. However, if the model isn’t humanoid, or even digitigrade like the sangheili here, you do not need to cut every part, such as antennae or wings (unless you really wings to have physics), but keep it basic, any extra detail bones can be posed in Gmod with Joint Tool (I find it handy instead of having to manually pose a tail that doesn’t want to pose properly).
Anyway, enough rambling on, let’s get this over with 😛
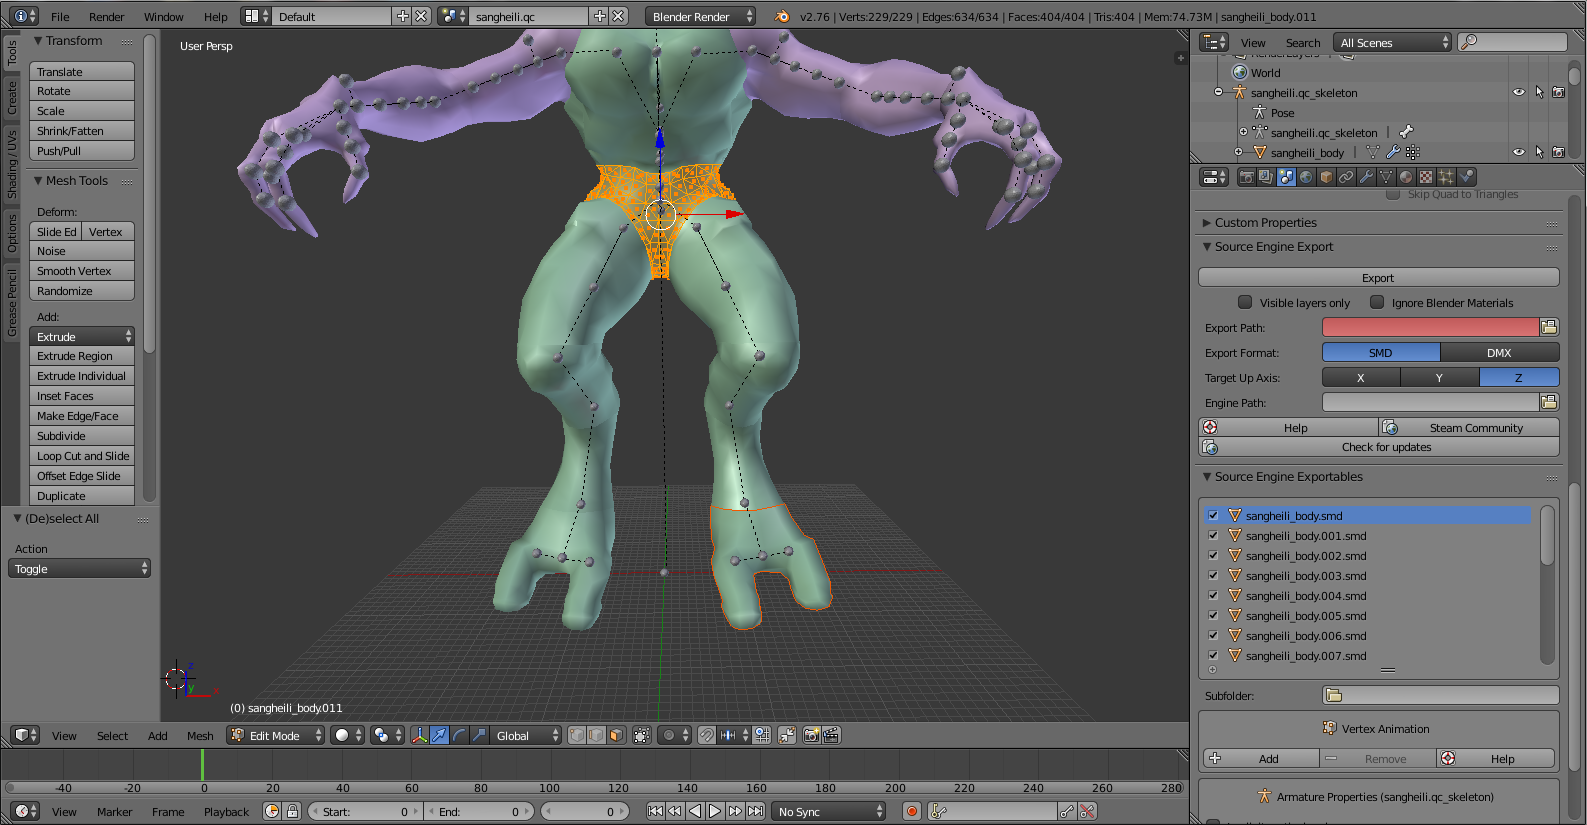
We’ll start at the hands, in edit mode select via pressing c for circle selection mode, and hit z so you can see the model in wireframe, its easier because you can select through the model, use face select to select the hand:

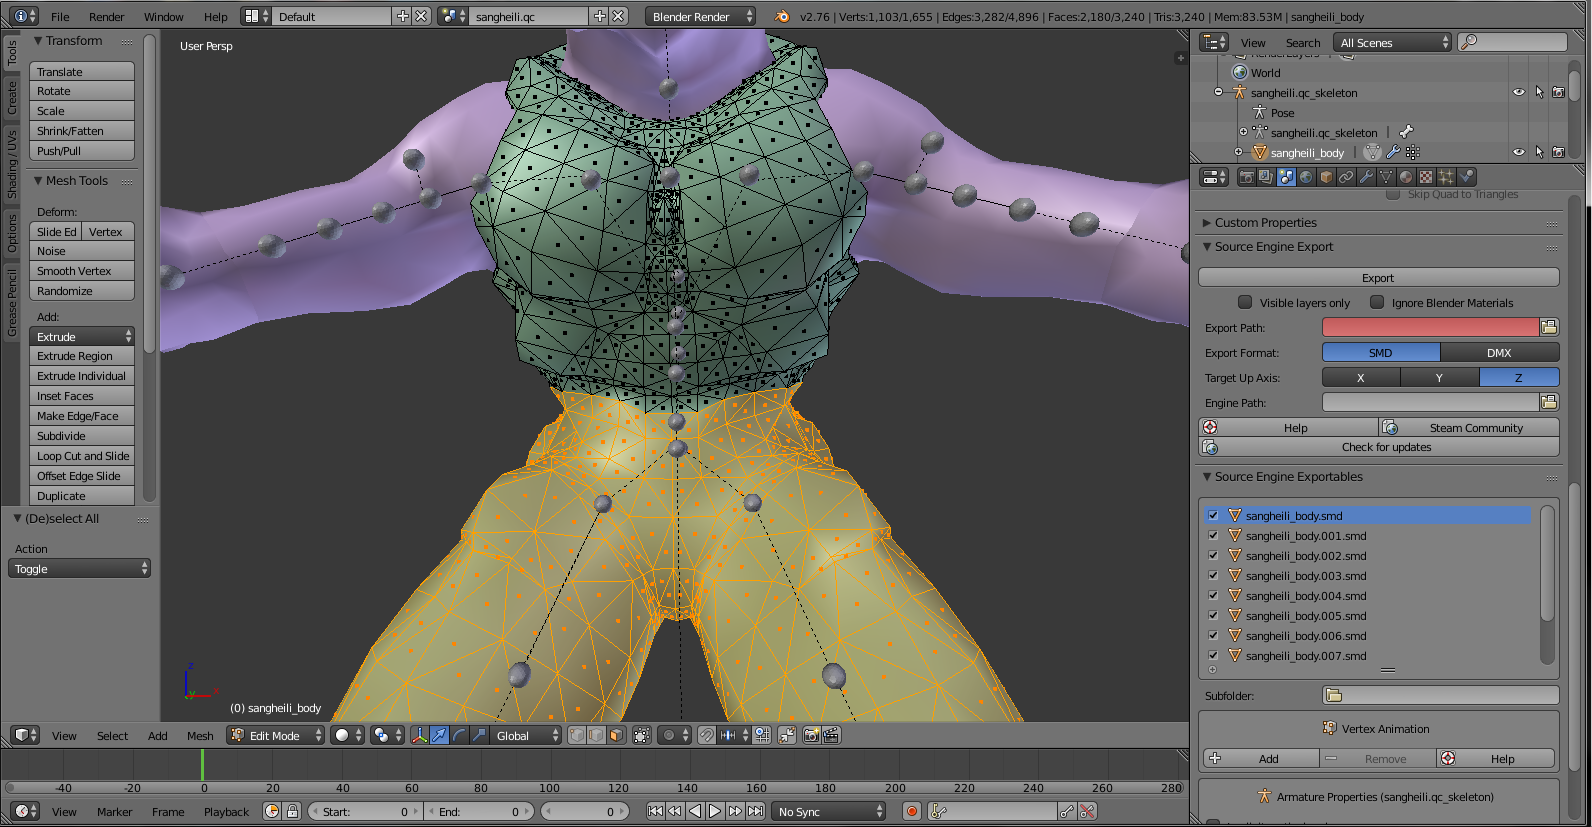
Once you’re happy with its selection go to mesh>vertices>separate>selection (which separates by selection) You can select the. The hand is now a new independent mesh, continue this process for the rest of the body parts, until the ragdoll is completely separated into parts. But I recommend separating the whole model by “loose parts” which is in the same location as we separated by selection. This is because of the chest and leg area, it’ll make it easier to do the rest (it also separates the head much to our convenience):
For the torso, cut it in half horizontally:

Now we can work with the legs and pelvis. Do the same you did with the arms (a little more challenging, because the legs are digitigrade), like so:

Then with the other leg:

Until the pelvis is the only part left:
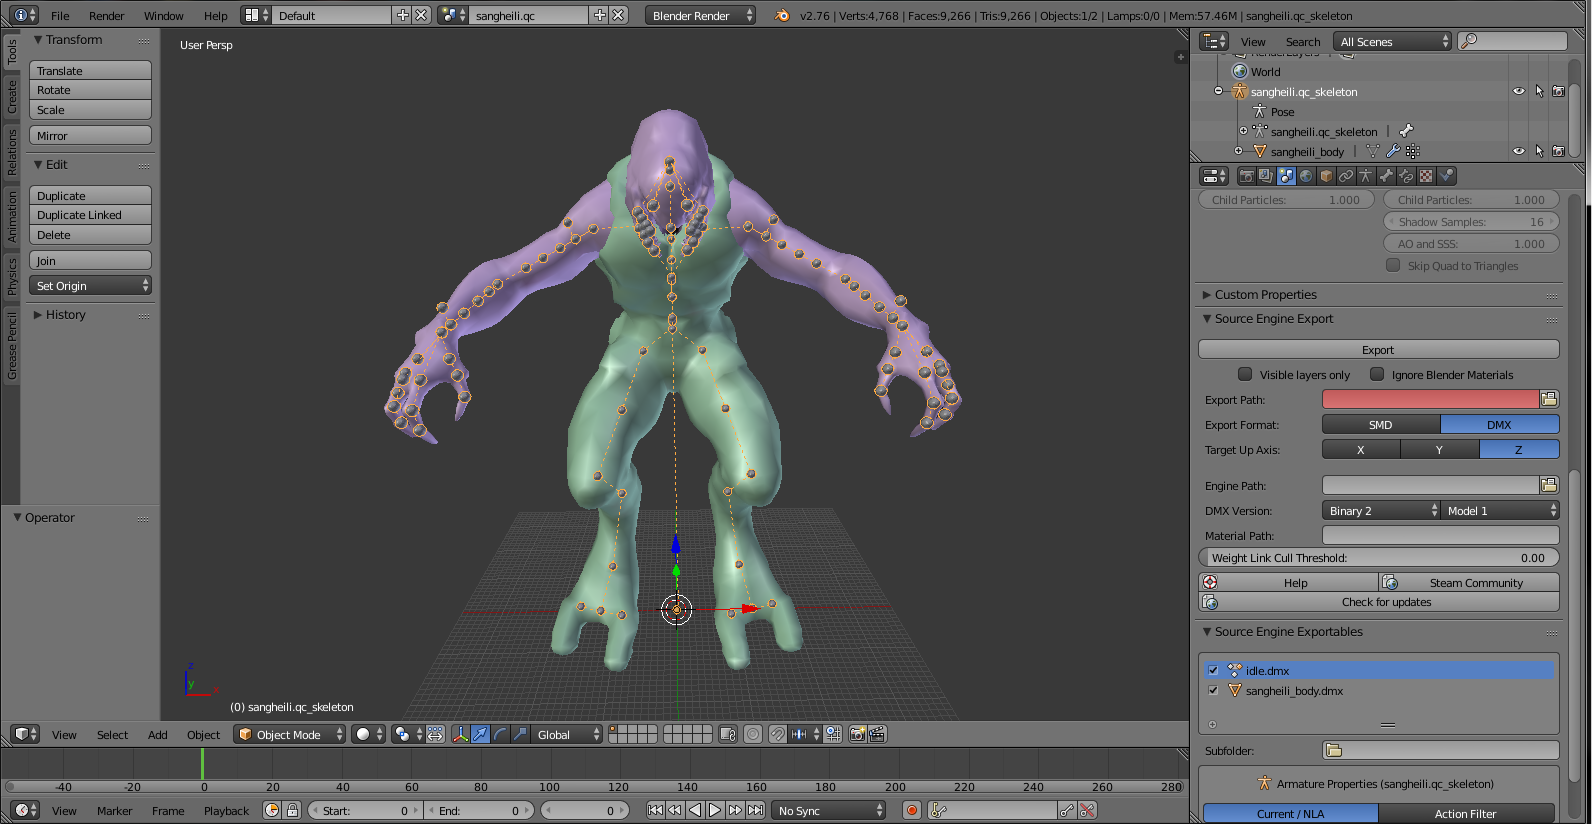
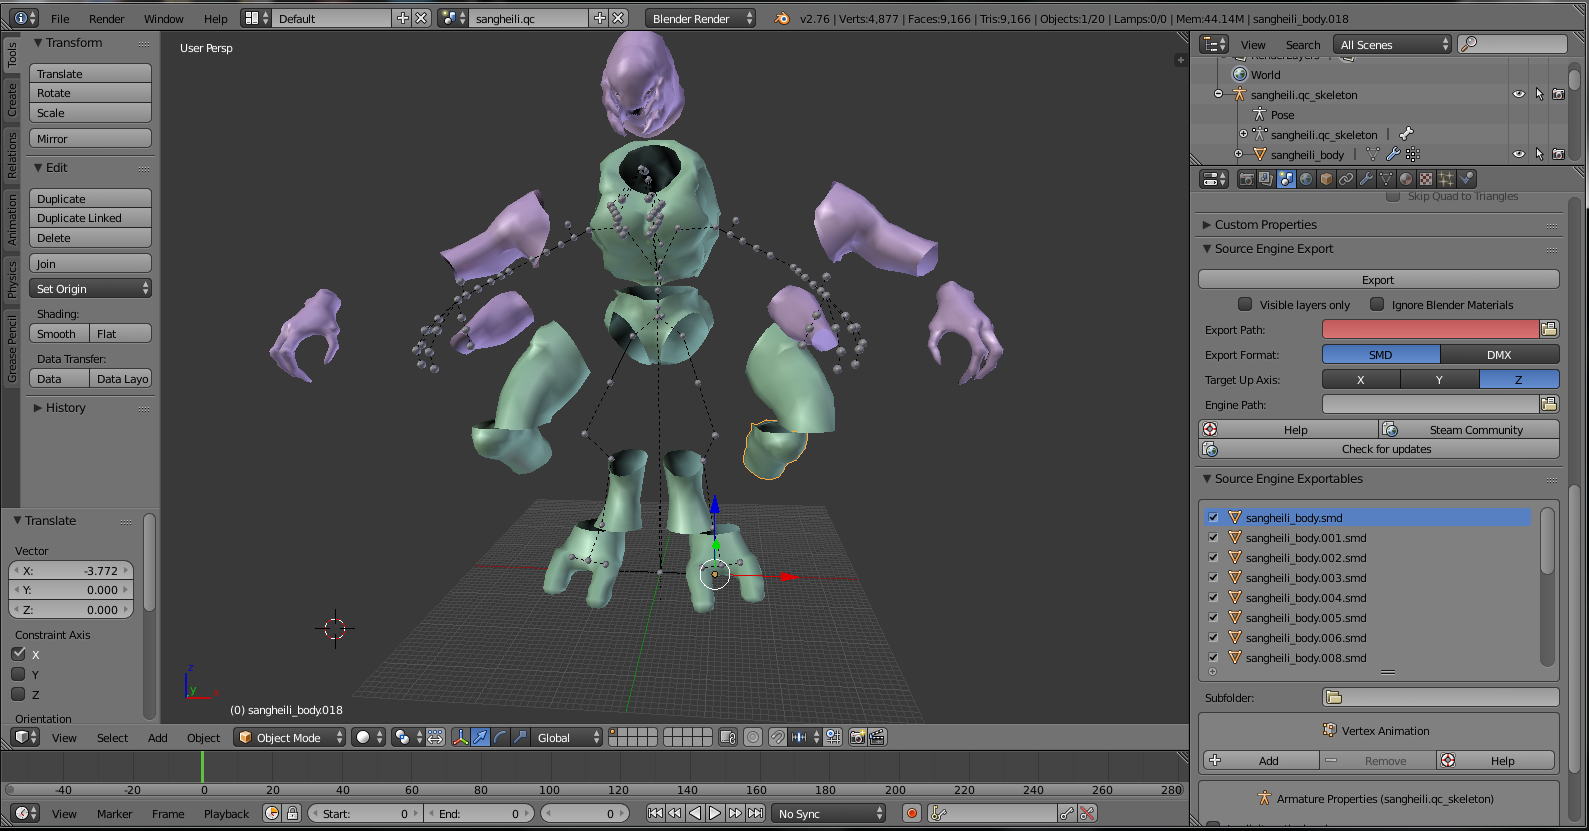
Now to show you what it should look like, if we were to move each individual part:
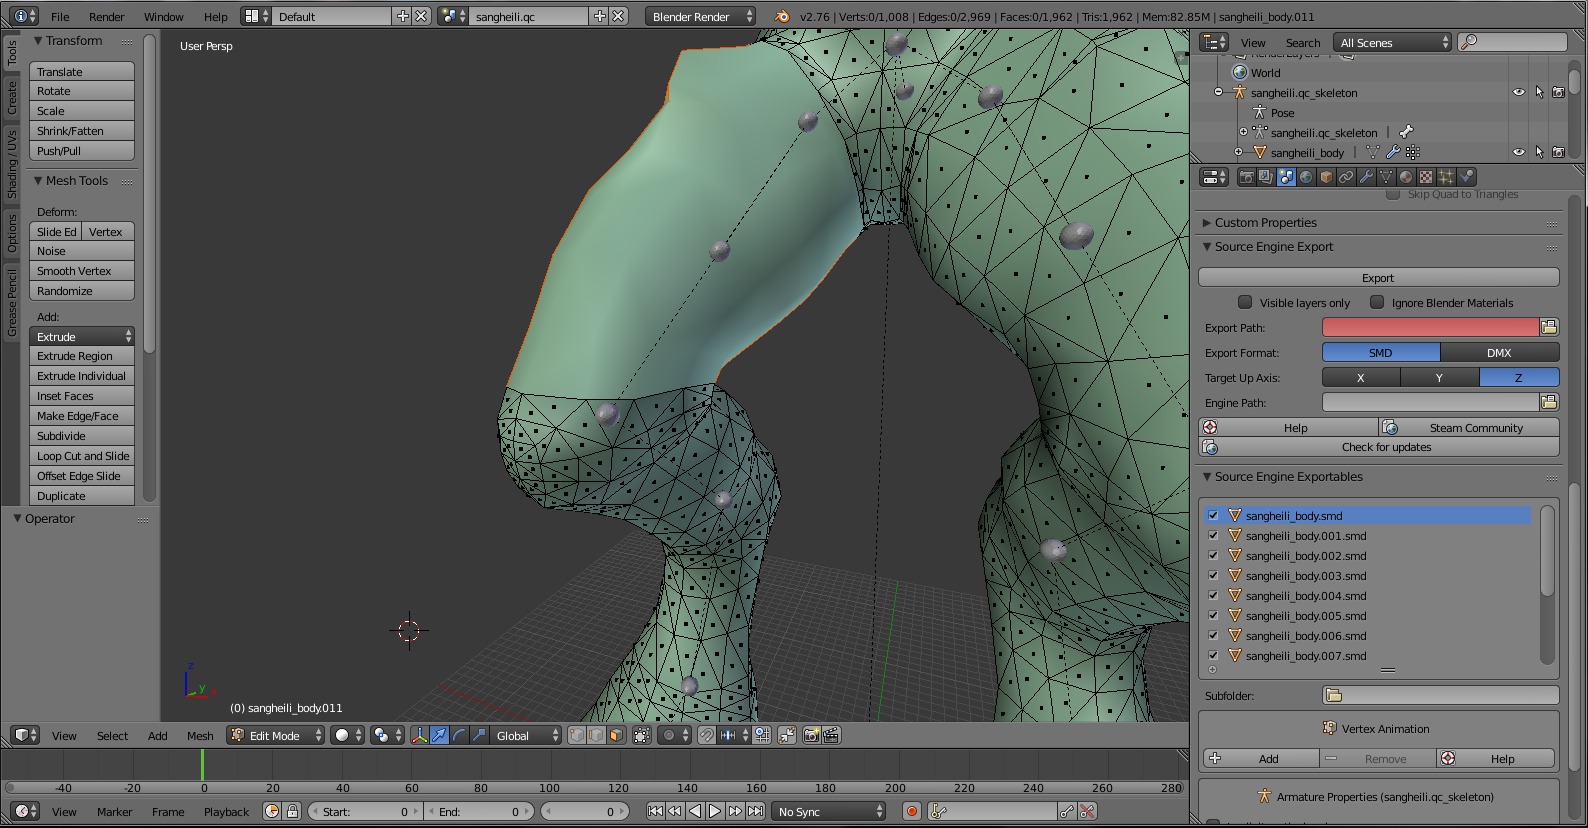
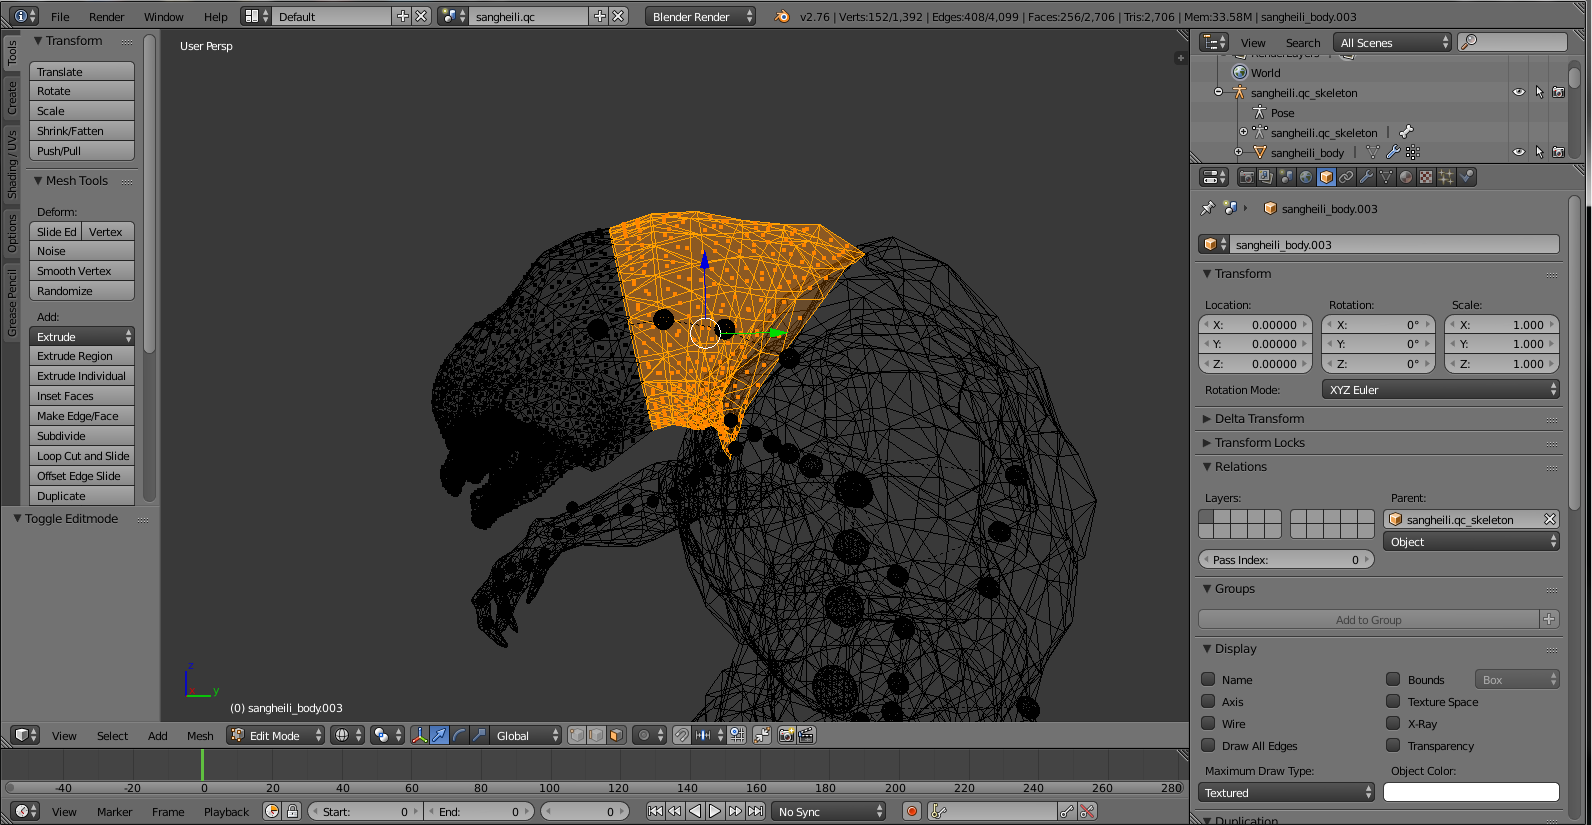
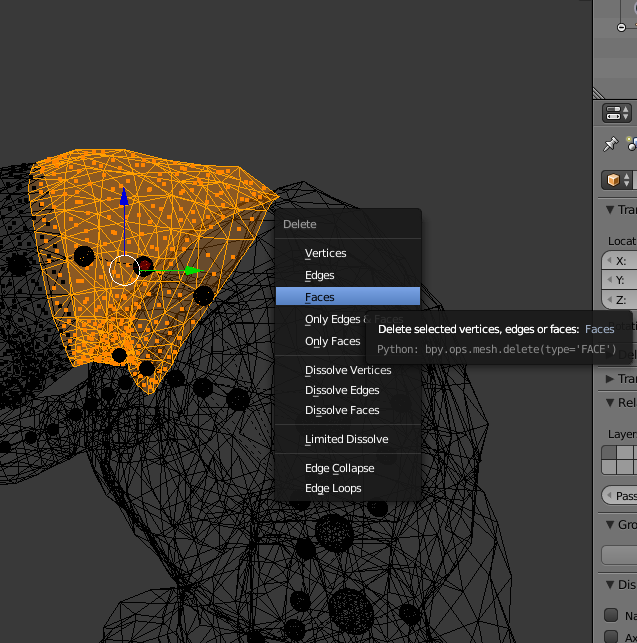
For the head, we will delete part of the neck, delete in selection mode by faces, I also recommend deleting some of the upper arm, like so in the pictures:
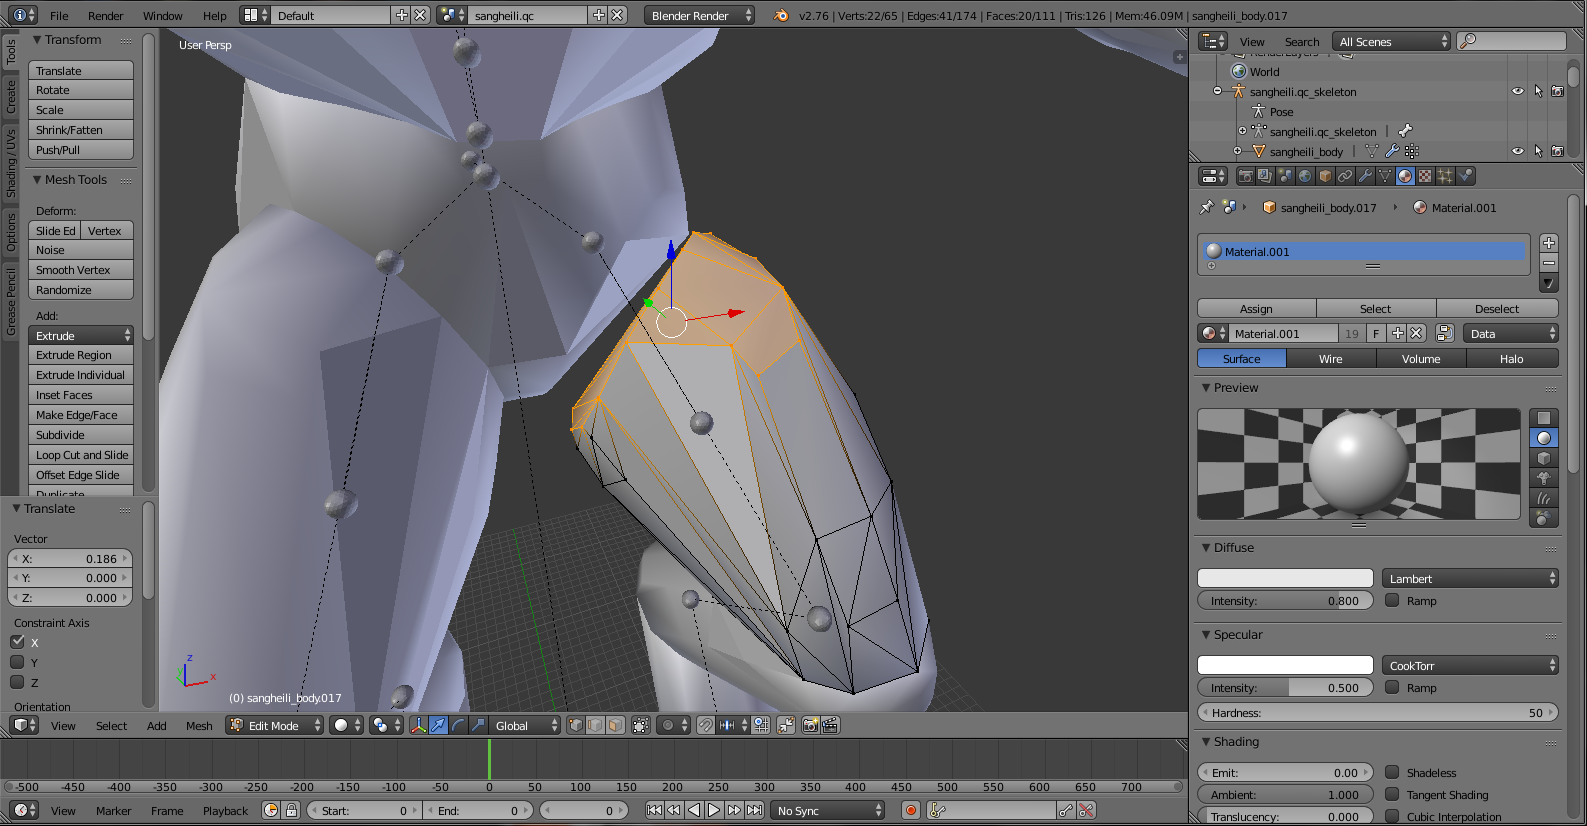
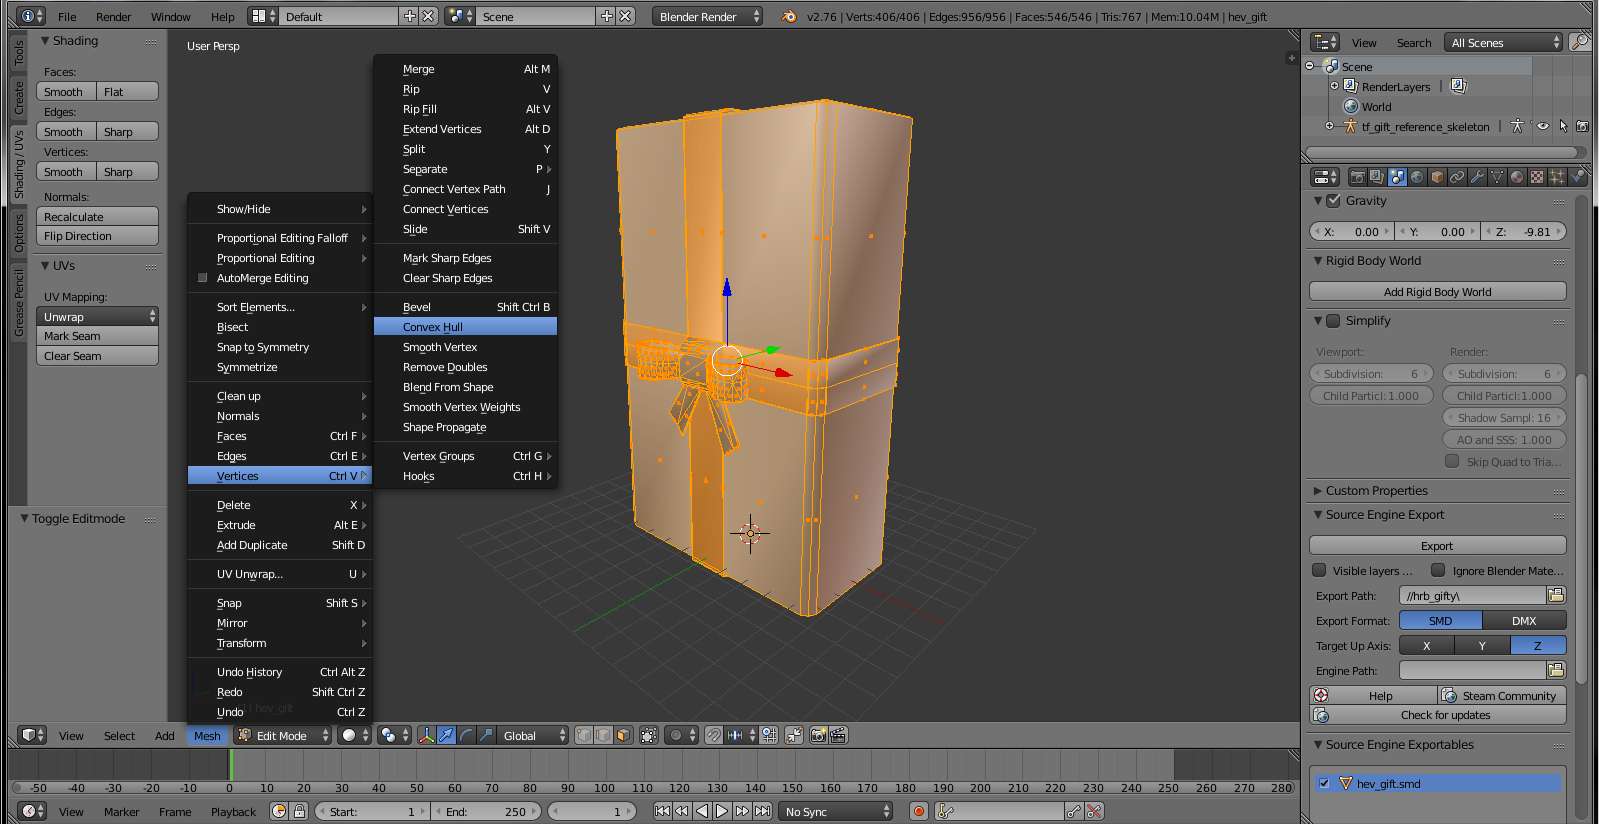
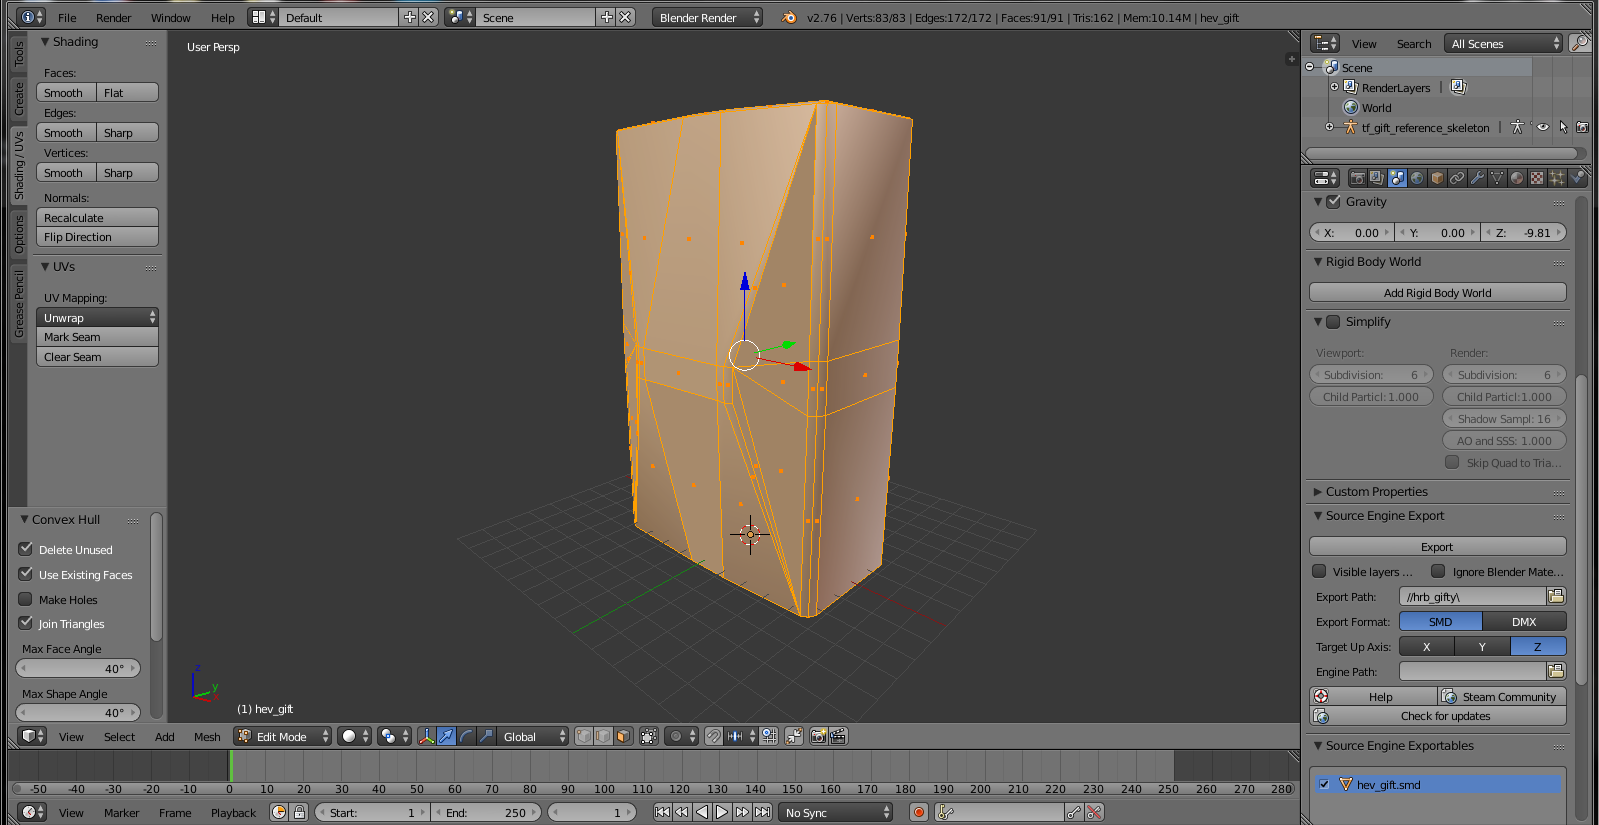
We basically cut up the whole model in every main bone joint. Now its time to make this model look like a physics should look! Select a part, go into edit mode, select the whole mesh by pressing a , then go mesh>vertices>convex hull, you’ll notice the part turned into a blocky thing:
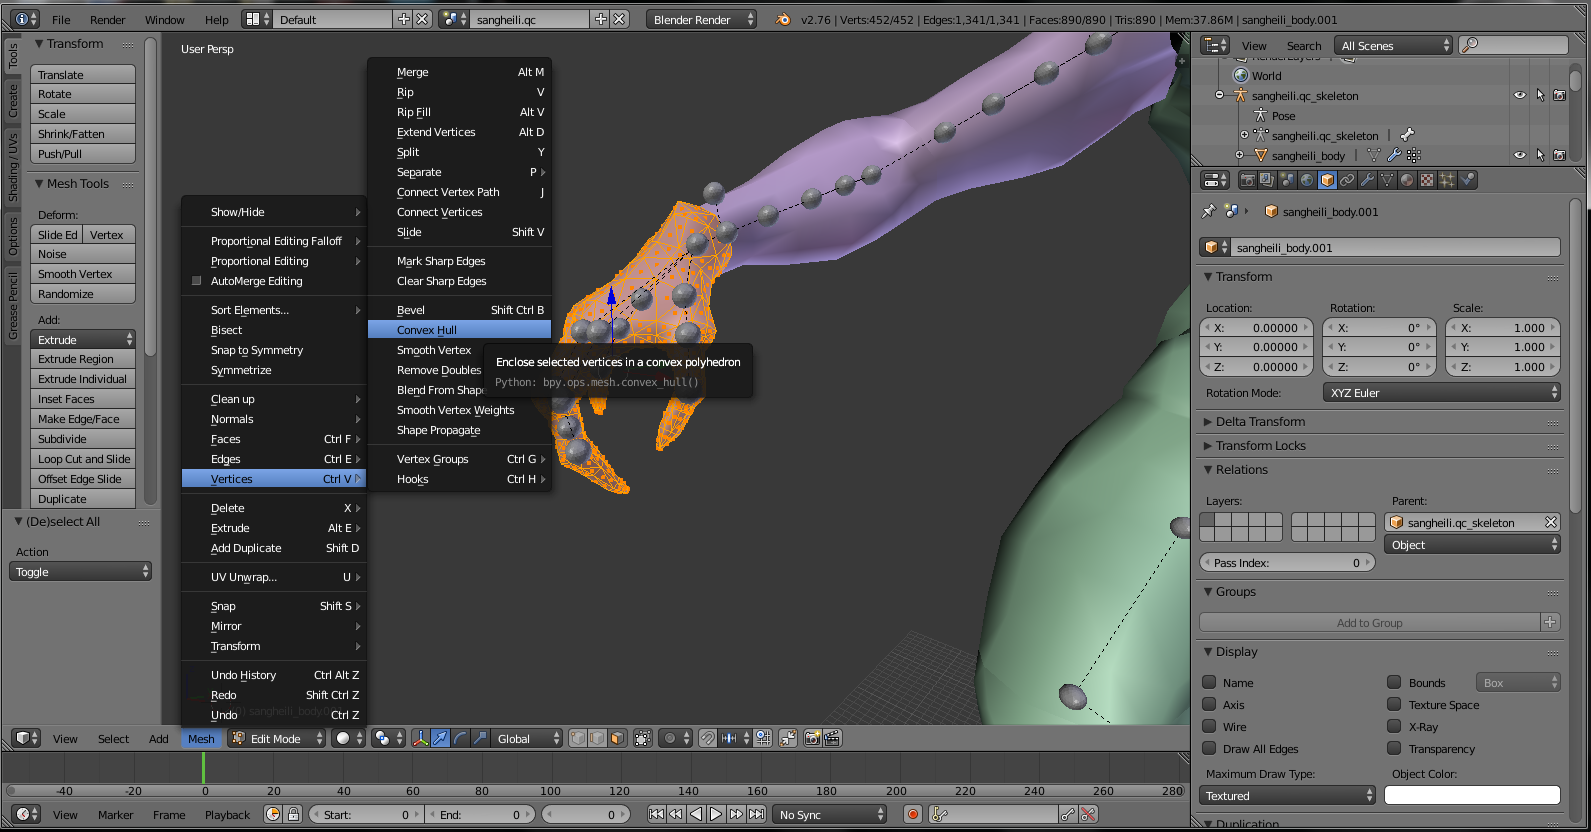
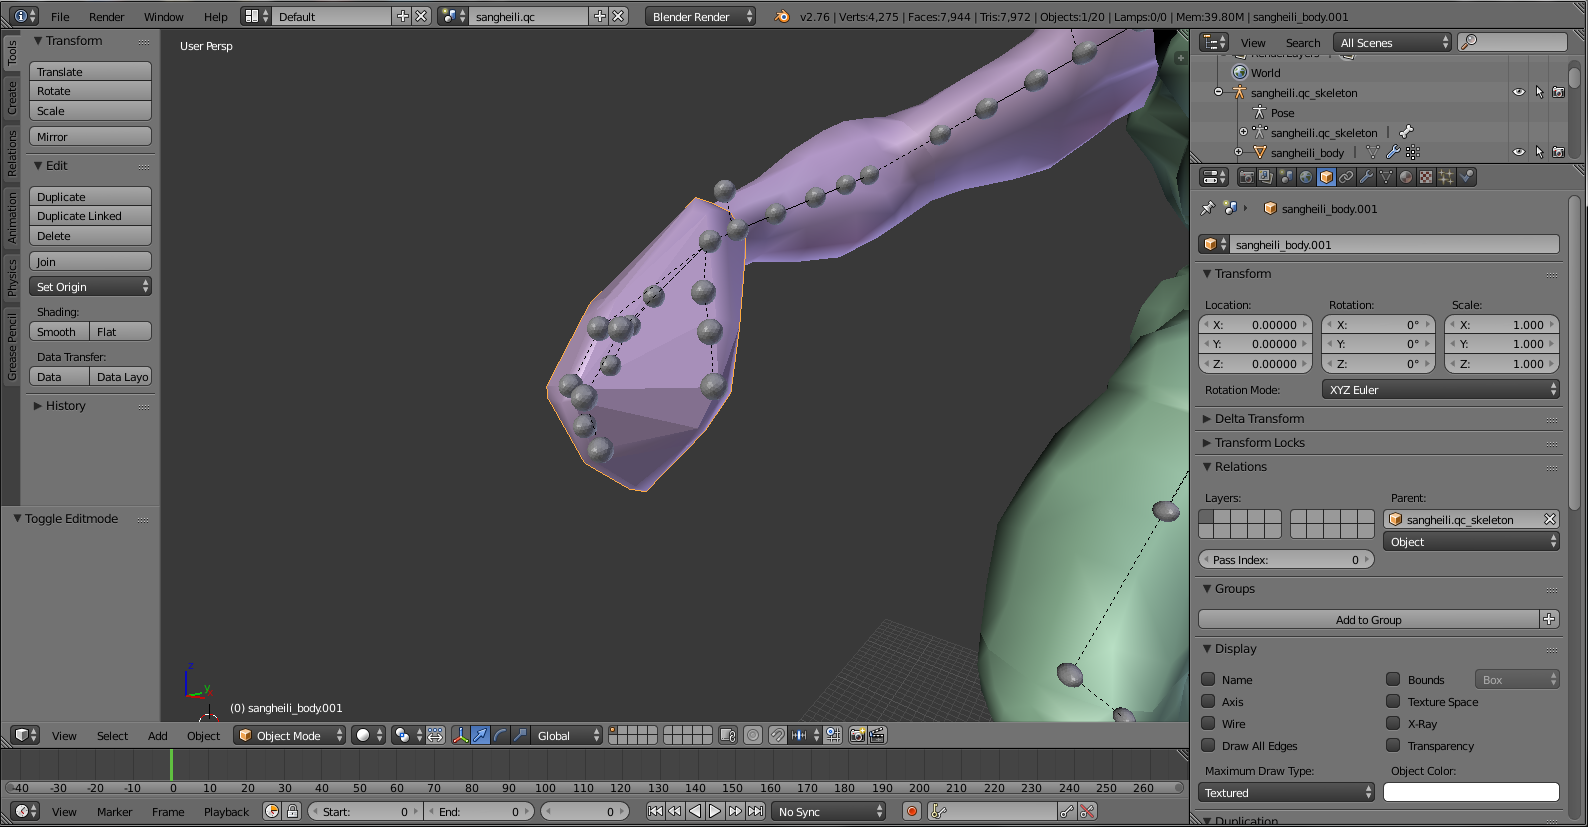
Repeat this step with EVERY part until it looks like this:

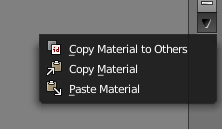
Also remove the old materials from each part:
Then add a new one, don’t bother calling it anything, it won’t matter. Select all the parts by pressing a (then a again), and select the part you made a new material on. And select Copy Materials to Others:

It’s looking pretty good now isn’t it? But we aren’t done JUST yet. Next we are going to size down a little each part, so they aren’t touching each other a lot like they are after we used convex hull, go into edit mode and select some vertices, likewise:

And with the 3D Manipulator widgits (the red, blue, and green thing) move it so it’s not touching the pelvis:
Do this with all the parts where they are touching another part. This is really to make sure the physics doesn’t act stiff. The physics is almost ready to be exported, the last thing to do is bone weight it properly.
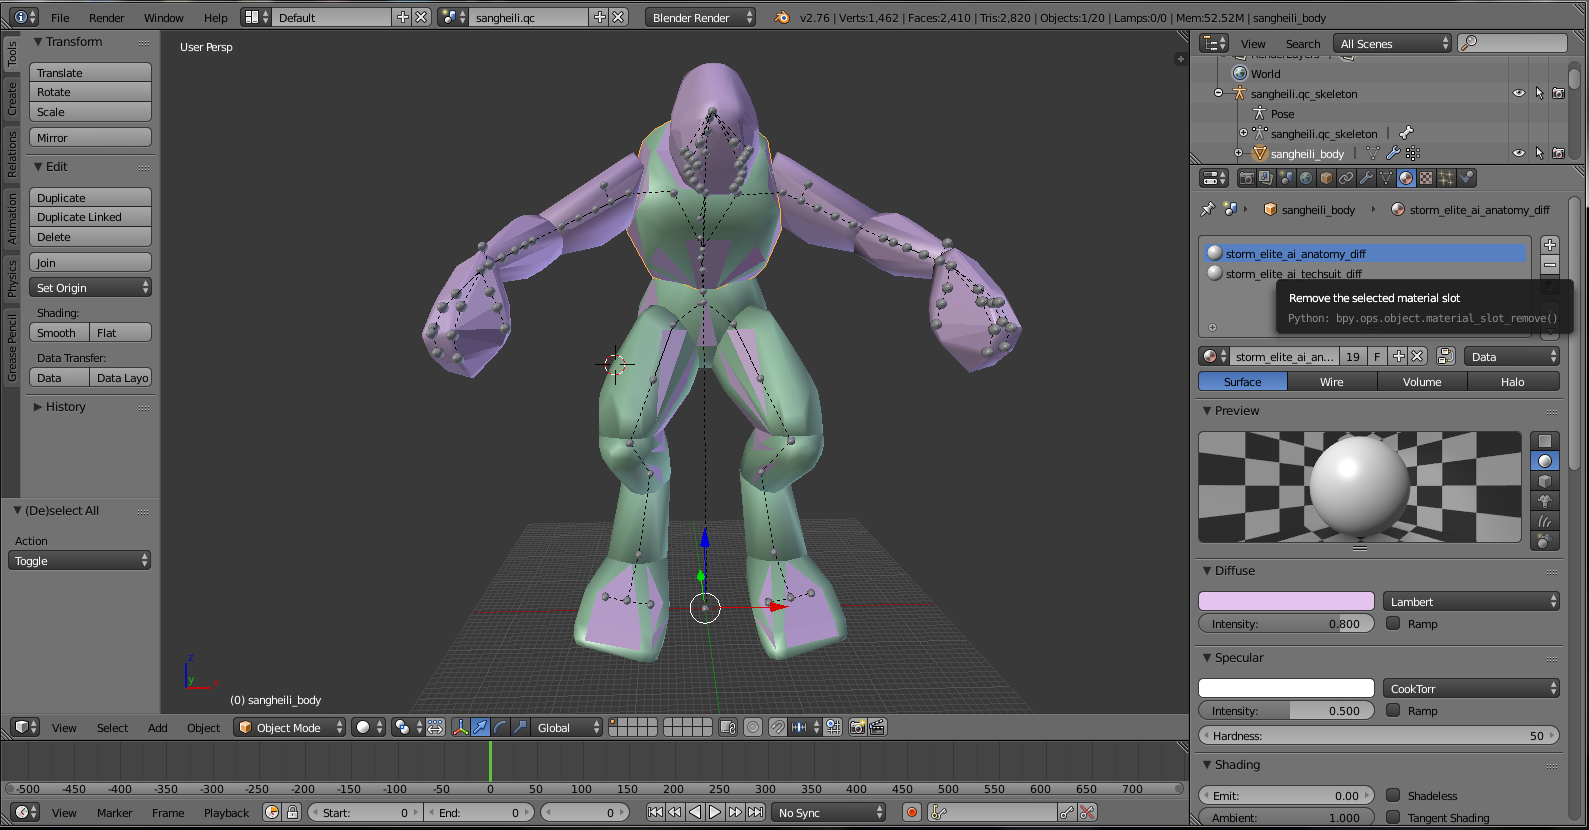
Final thing is to smooth it, select all the parts (press a) then select the “Smooth” button on the left panel under “Shading”

Here are some example physics:
^Yes, OW physics, so? Don’t ask (I won’t reply)!

Step 2a: Physics for Props
If the model isn’t a ragdoll, and rather a prop, all you need to do is go to edit mode, select the whole prop (ctrl a) and go to mesh>vertices>convex hull
And you have yourself a nice physics for the prop. If your prop has bones that you want to, say, work like a ragdoll, then just apply the same principle in the ragdoll physics creation steps. If it does have other bones, but you obviously want those to be posed via another tool like Joint Tool (Gmod workshop addon), then make the whole prop a physics as explained above, it doesn’t matter. If the prop has a skeleton, or even a single bone, follow the anims creation step.
This concludes actual physics creation, move on to boneweighting, then you are almost finished with porting.
Step 3: Bone Weighting
I reckon arguably the hardest part of making ragdolls for Gmod, Bone Weighting. Yes, it can be, but its more time consuming than difficult. However, when it comes to bone weighting physics, it’s much easier than you think. Thankfully, Source Filmmaker models are already bone weighted, so that’s the hard part already taken care of for us.
To start off with, seeing as your model is separated like so:
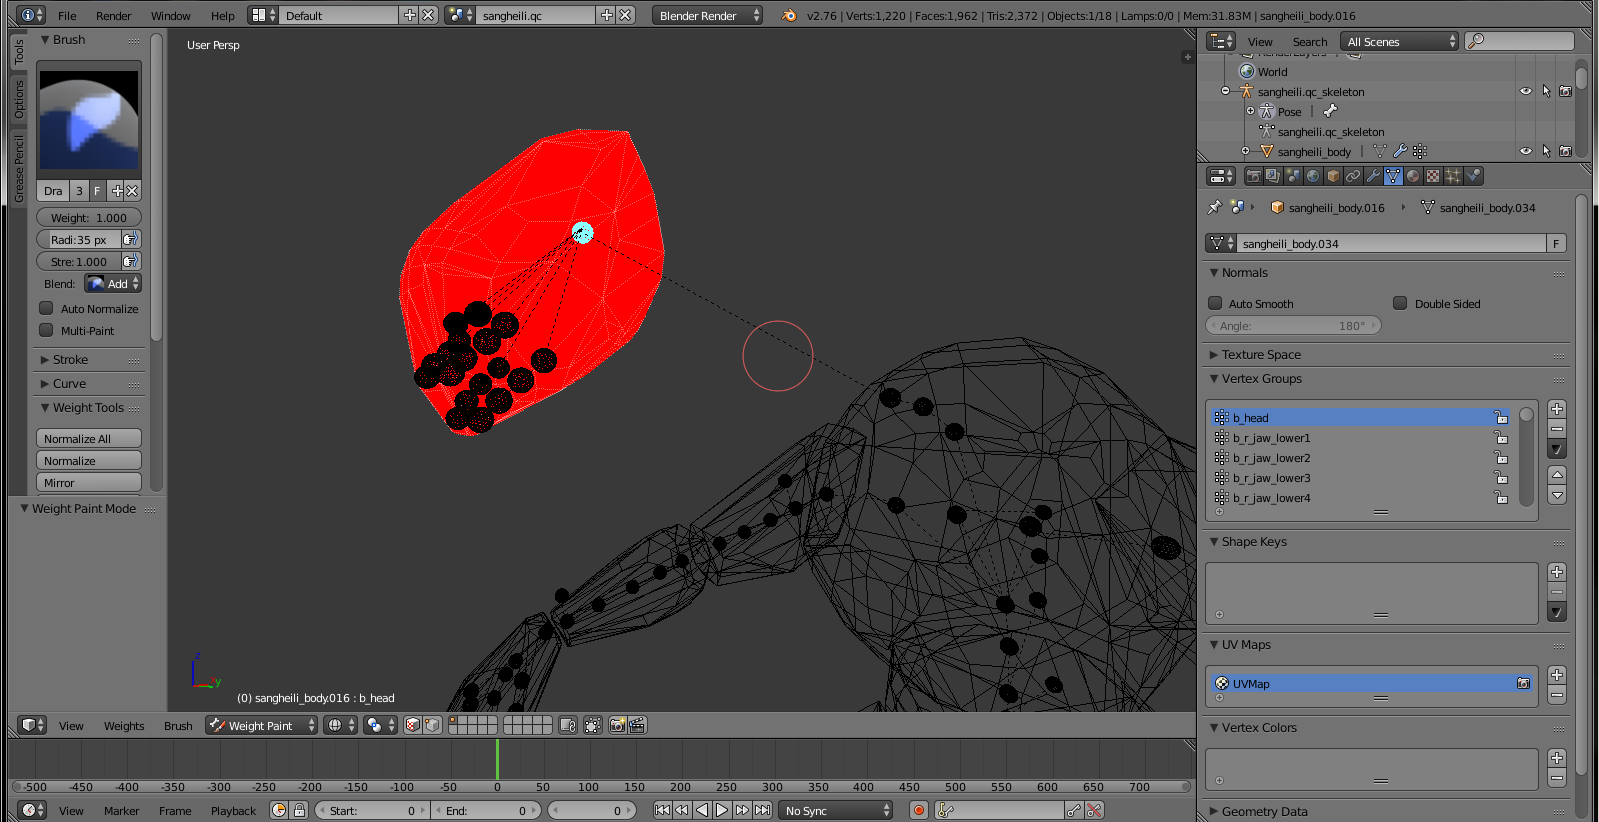
Select the skeleton and go into pose mode. Select which mesh you want to start with, I’ll start with the head. Select the head bone, then the head mesh and go into Weight Paint. Set the blend mode to add, and finally, move the bone somewhere off its original location (right clicking that bone you are bone weighting to, example: the head bone i.e. b_head), now click to paint on the mesh (that’s blue), and it’ll turn to red. The whole thing needs to be red for it to all work properly the way we want it to, so hit “Normalize All” and from the “Subset” select from the list “Selected Pose Bones” and uncheck the “Lock Active” button, it will turn the whole thing red for you, you don’t have to do it again after this (but every time you close and reopen Blender).

After that, rinse and repeat with all the rest of the meshes and their associated bones. For example, the right arm bone or b_r_upperarm you would select the right upper arm mesh to bone weight (don’t get confused, when facing the front of the model, the right side of it is to your left, not your right). Likewise with the left upperarm to the b_l_upperarm, or the right forearm to b_r_forearm, and so on. With the chest, you should bone weight it to b_spine2, and with the pelvis mesh, to the b_pelvis bone. Hopefully you get what I mean.
Don’t forget, with the fingers of every model you do not need to bone weight to the hand mesh, this will mess them up in Gmod.
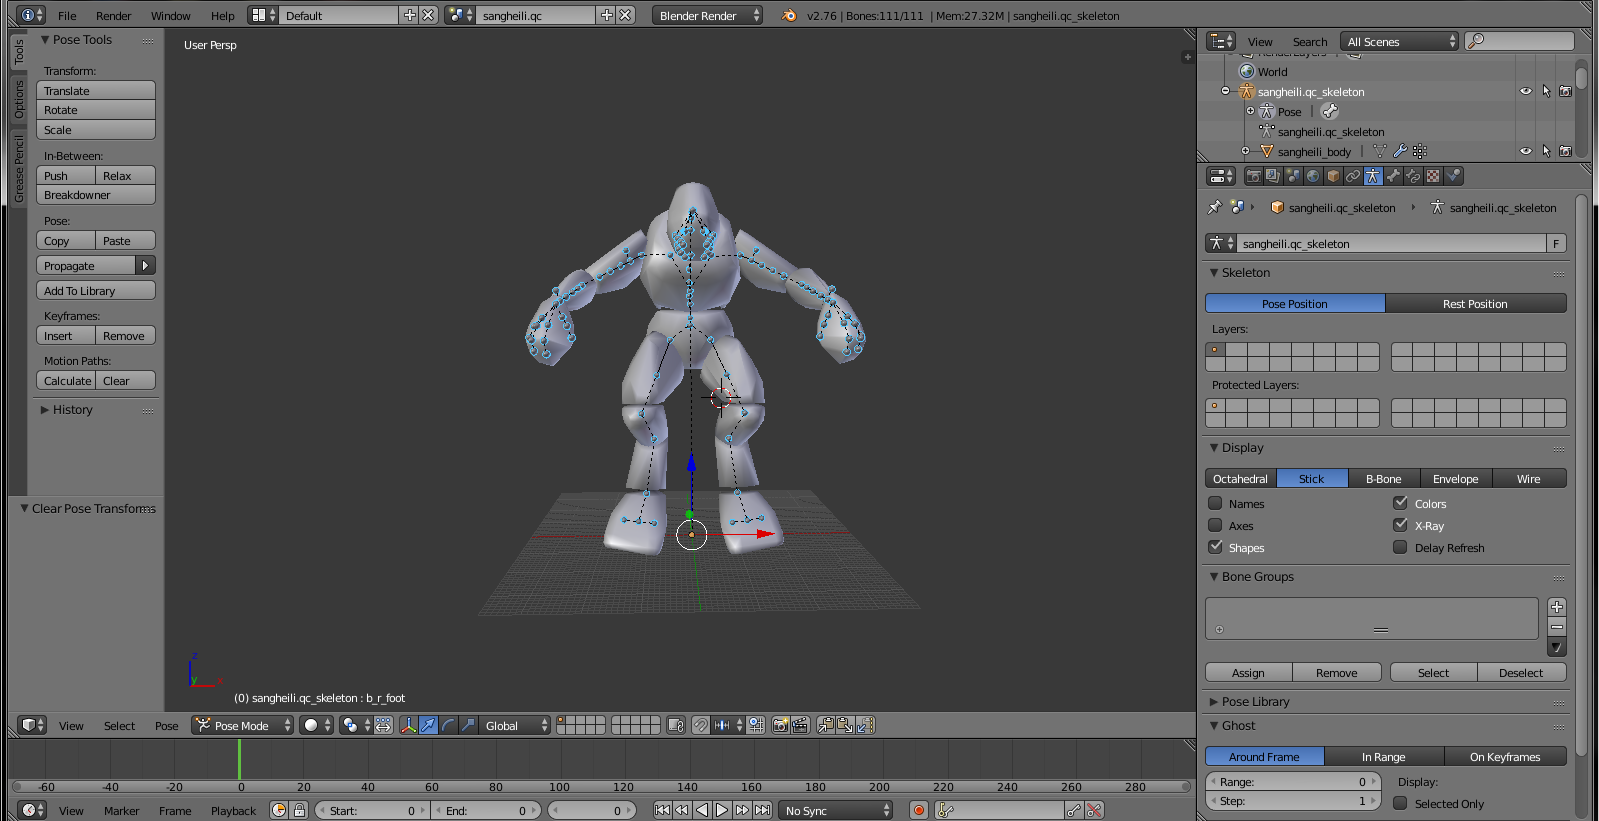
Because you posed all the bones in the bone weighting process, you will need to set them back to their original position. This is how; In pose mode select the “Pose” button, go up to “Clear Transform” and select “All”
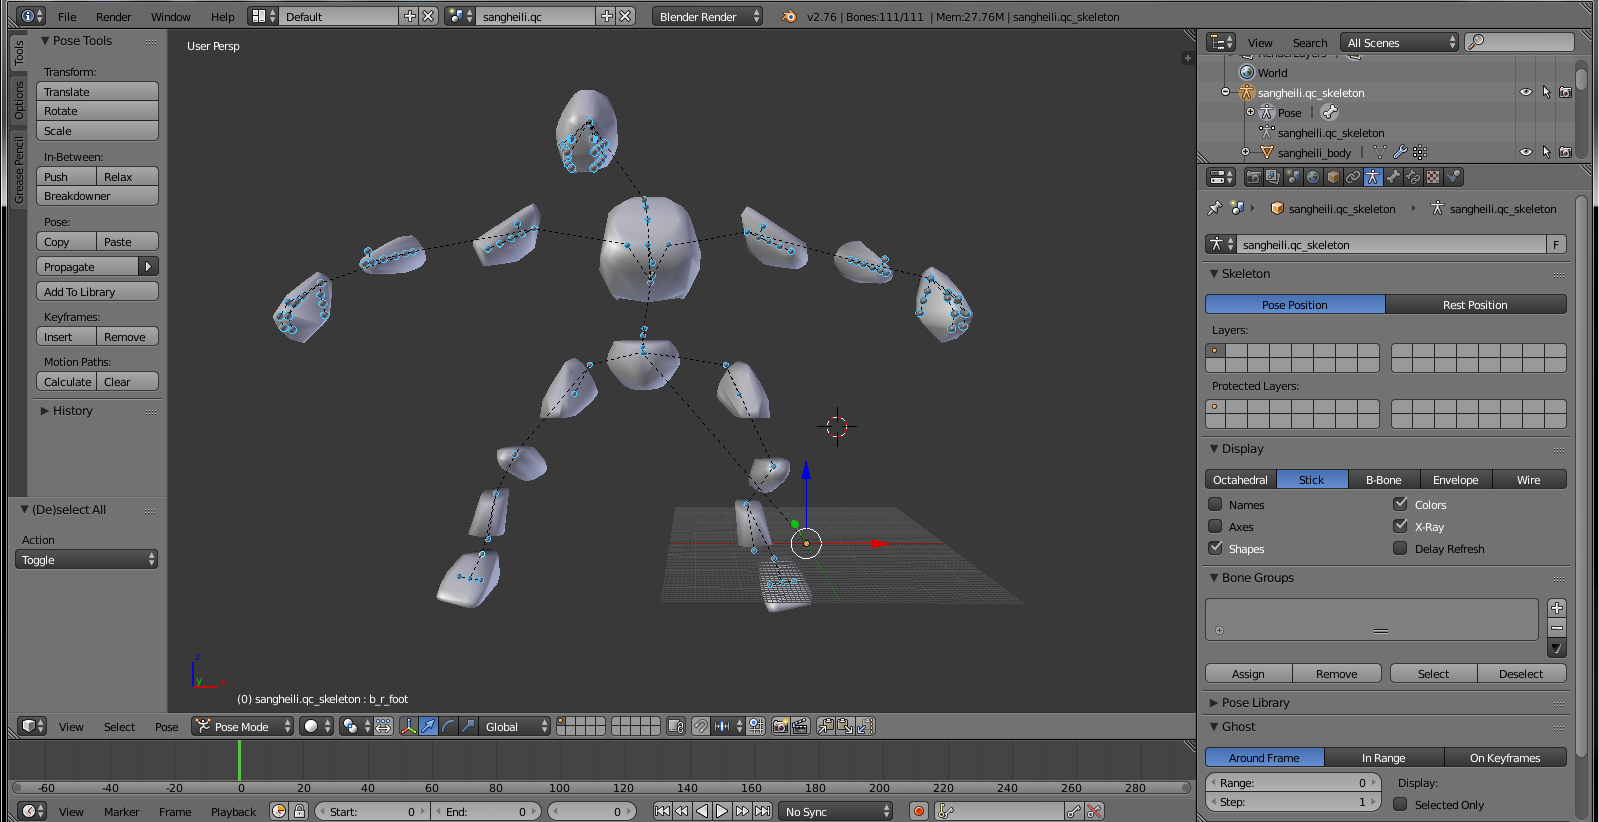
And…
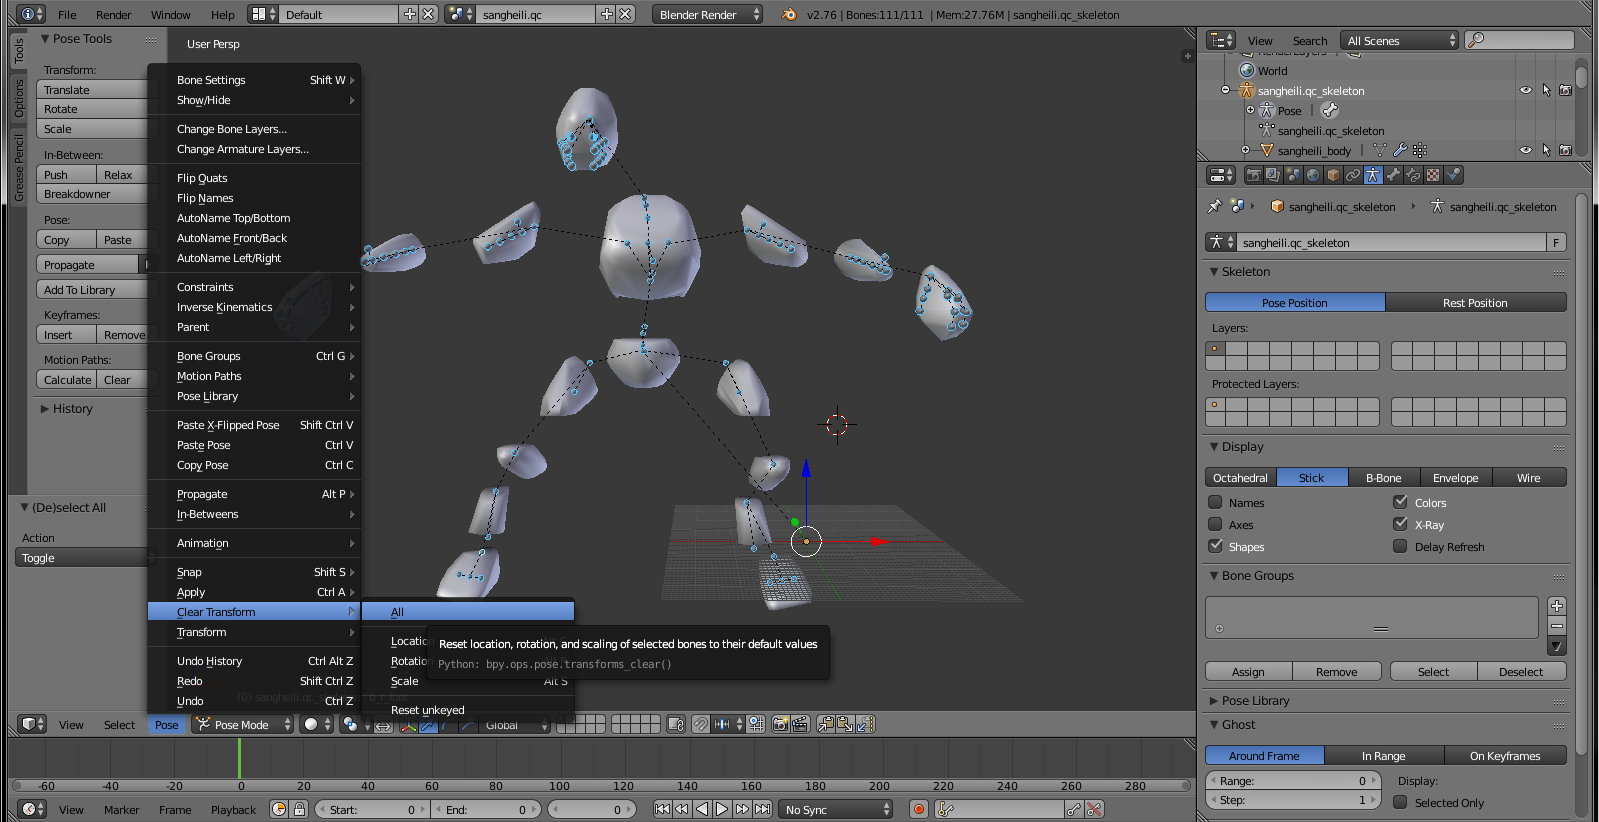
Voila! He is now back into his original position, now you can go back to object mode with the skeleton.
Step 4: The QC
Finally, all the models are fully dealt with and ready to go. Last thing that’s needed is dealing with the QC to be able to compile the models with their new physics mesh.
Most chances are, the models you are porting from SFM do not contain a physics already. And why would they? SFM doesn’t necessarily support physics, but that doesn’t mean it can’t create them, it just has invalid usage. I have made models with physics for SFM, but I highly doubt that anyone else does, so let’s just go with the assumption that the QC has no jointconstrains.
First thing you will need to do, is compile the model. Open Crowbar, go to compile tab, and set the game to Garry’s Mod (using Source SDK Base 2013 MP), then find the qc of the model, i.e. sangheili.qc, leave all the options as they are (but make sure this is disabled):
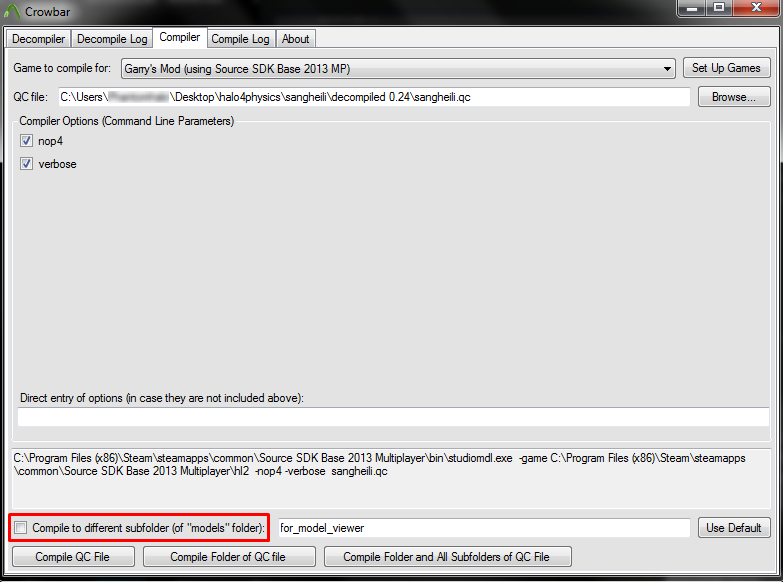
Now hit Compile QC File and Crowbar will do its job.
If you encounter errors, do let me know in the comment section. For now, here is one common error that I have gotten with Gmod compiling:
This can mean a ton of things. But the base reasons I have gotten it in the past is the fact the model’s file is too large, meaning it has too many vertices. You can try cutting the model into bodygroups and see if that helps, but most chances it will fare better as a complete model (but with its associated bodygroups if it already has some). Just pray you don’t get this error. It’s not always easy to fix. It has given me so much heartache in the past ;-;
You CAN bypass it though. Instead of compiling for Garry’s Mod, compile it back with SFM, it won’t hurt, except there is not dx80 file which is important for low-end PCs that do not support dx90 and above. If this model isn’t personal, but for Gmod Workshop, then be sure to warn other users of this (if you’re porting to workshop), as it may, and most likely cause them a crash if they are using low-end PCs with dx80. If you yourself get a crash from the models compiled with SFM, then it means you need a better PC, sorry, 😛
Step 4a: The QC – Collision Joints
Before you run off to test the ported model you need to make collision joints (or joint constrains) for the physics, if you don’t do this, the model will act like a block in-game. Making Joint Constains aren’t necessarily hard once you know what to do, neither is it hard to learn. The only downside to this is time, because making joint constains can take a lot of time especially at first.
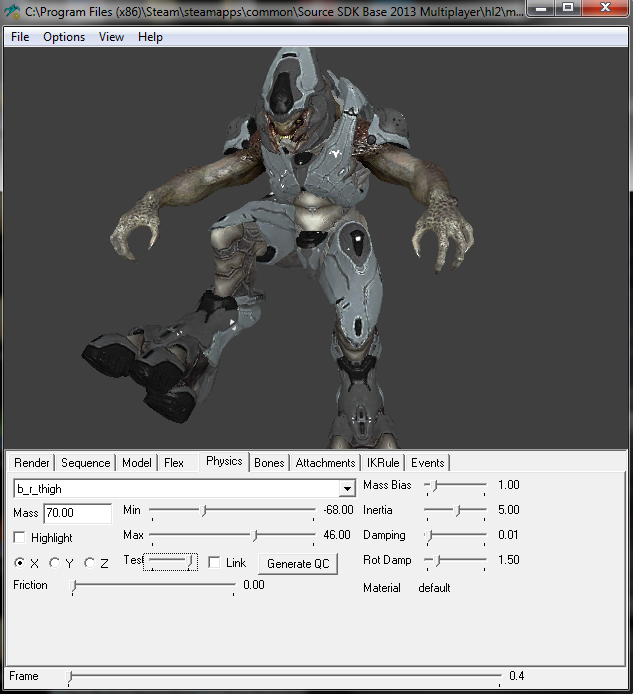
Keeping Crowbar open, select “VIew Model in Model Viewer” hopefully you don’t get any errors (if you do, perhaps the only thing I can think of doing is downloading Source SDK Base 2013 Multiplayer, if it’s a HLMV error, not a model error). Obviously this will open HLMV and you can look at the model. Most likely chances are, it gives you the missing textures of death (sarcasm). Only if you haven’t placed the textures into SDK’s files.
Go to C:Program Files (x86)SteamSteamAppscommonSource SDK Base 2013 Multiplayerhl2
And from where you put the downloaded model (and its textures) grab the materials folder from there and copy it into this location, accept it when it asks to overwrite folders (then you’ll have the textures working in HLMV, you don’t need to recompile the model to see the textures).
Of course, it’s not necessary to do this part, because its only for viewing in HLMV at the moment. In HLMV go to “Physics” tab, you’ll notice a list of bones, and other stuff,
The pelvis bone is usually the first bone of the list, we won’t be doing anything with this, because its not necessary. Select another bone from the list, like, b_spine 2 for example, then make sure its on X axis, set “Test” up the other way, and experiment with Max and Min (you’ll need to put the “Test” back where it was to see what Min looks like). You’ll see the model rotate accordingly.

The whole thing becomes self-explanatory, because all you need to do is test everything out, and determine if that’s how far the model will rotate in-game when posing. What’s is maximum and minimum rotations…when you’re happy with X, move to Y, and so on.
After you finish setting all the values on all three Axis’ move to another bone, then another, until ALL the bones in the list have their values set. All except the pelvis bone of course.
A test for example:
Finally, hit “Generate QC” and all those values will be in your clipboard. Don’t close HLMV just yet, just in case something goes wrong, you don’t want to redo all those values again.
Paste it into your QC now at the very end of the QC, and delete this line:
This is because the qc already contains a sequence for the ragdoll. Now scroll back up to where it says “$collisionjoints” and replace it with IF you haven’t already:
In between the quotation marks “” is the name of the physics.
Set the $mass to your liking. Mass means how heavy or light it will be in-game — the higher the value, the heavier. For all models in general, you’d be aiming for around 60 – 80 mass. Leave $inertia, $damping, and $rotdamping at their default value unless you actually KNOW what they do, they’re unimportant. Remember, the bigger the model, the higher your going to want your mass to be, too small of a mass on a big model will make it difficult to pick up in-game, because it will act really heavy. Too big of a mass and, well, it’s just lighter.
Now compile the QC again, hopefully no errors occur. Once it’s finished, hit “Go To Model File” Don’t just copy the model, but copy the whole model’s path. Or if you like copy the original downloaded files (should contain models folder and materials folder) into “Addons” But first make a folder such as “Halo 4 Sangheili” and put them inside that. Go through the models folder to delete the old files (including the “decompiled” folder) and copy your newly compiled model into it. That obviously should take care of the textures as well, so you won’t get errors.
All that’s left is to test it. If you were successful:
One final thing I highly recommend doing to avoid getting white textures all over the models, is delete custom cubemaps from all the vmts.
They go along the lines of:
This should finalize the porting from SFM to Gmod, if you get problems a long the way, be sure to comment about it, and I’ll see if I can help, if I can’t, you may want to ask on the SFM forums.
Final Conclusion
Hopefully, this guide has helped you learn how to fully port a model from Source Filmmaker to Garry’s Mod. I’m sorry if anything was confusing.
I won’t make any guides on porting models from other non-Valve games, or ragdoll creation, there are plenty out there already to help you get into modding.
Secondly ALWAYS give appropriate credits, check their credit list if they have one, and give credits to whom they are due to the ones who made/ported the models and textures and whatever else. It is alright for you to credit yourself for making the physics. I am not responsible for any problems you encounter for NOT asking their permission first.
Thanks, and Have Fun!