Overview
In-depth guide on effectively using Street Fighter V’s Rainbow Mika! Muscle Spirit Represent! Guide will be continually updated with match up information as time goes on.
Guide and Author Introduction
###########################################################################
GUIDE UNDER CONSTRUCTION – SEASON 3 CHANGES ARE NOT REFLECTED YET
###########################################################################
Thanks for checking out my Rainbow Mika guide!
My name is DrC, I’m a Street Fighter enthusiast and I enjoy teaching people how to improve. Feel free to add me on the in-game Capcom Fighting Network to check out my matches (CFN): DrChen
Personally, I don’t like to play Ranked matches as I prefer longer sets of Battle Lounge. I really feel it’s more beneficial to understand somebody’s playstyle and play them consecutively (win or lose) to facilitate understanding matchups. Feel free to watch an example match I played with a Rank 1359 Cammy (This was part of a first to 5 set, I ended up losing at 4-5, shoutout to BacoVEVO for letting me use this footage!)
This guide is designed for people wanting to learn about Rainbow Mika, what she’s about and how to use her to her maximum effectiveness. I’ve played a lot of Street Fighter throughout my days and hopefully I can teach you something. I will be going in-depth with her moves and what tools are effective. Resources will also be listed for beginner/intermediate players as many players need to improve their fundamentals.
If you’re a seasoned Street Fighter Player, please check out the Concise Guide section towards the end of this guide. This has all the basic information you’ll typically need. (Currently ***UNDER CONSTRUCTION***
Author’s Note: Please see the very bottom of the guide for the Update Log. As things are under construction, this is considered the beta release. Sections of this guide are still works-in-progress and will be eventually finished. Thanks for your understanding.
Rainbow Mika Character Overview

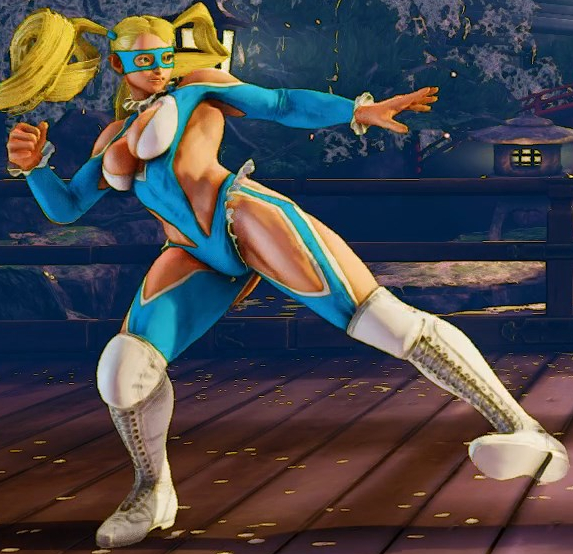
Mika is a grappler type character who mainly relies on utilizing the corner to deal a whirlwind of damage, quickly stunning and defeating her opponents. Her neutral game (normal attacks and tools when both characters are standing apart) is decent but sometimes forcing your opponent to the corner can be tough. Without getting to the corner, Mika loses a big part of her advantage and gameplan, which can make her matchups quite difficult.
Grappler characters demand being played fundamentally sound in order to be effective. If your defense is bad or you’re bad at judging spacing of your moves or you can’t execute combos consistently, your success with this character will vary wildly. Sometimes you’ll get lucky, get them in the corner and just clobber your opponent. Other times, you can’t get any offense started and just slowly die in the neutral game. The highs will be high, the lows will be low.
There are easier characters to learn with more forgiving moves and if you’re a total Street Fighter beginner, it’s hard to recommend playing Mika unless you’re ready to lose a lot. It will be your education. Another big part of playing grappler characters is you need to be constantly reading your opponent. You need look for an opening, can you stop a particular string of attacks that they always use, or the fact that they always jump in this particular situation? Find the pattern and see how you can exploit it. Mika has the tools to let you do this for the most part, but you need to see the pattern/habit.
Unfortunately, to see the patterns, you need fighting game experience. It’s not like Ryu where you can throw a lot of fireballs and just uppercut when someone jumps in. Obviously this is a grossly simplified explanation but it’s a much easier gameplan than actually trying to safely get in with Mika, which can vary greatly depending on who you’re fighting against. As Ryu you’re forcing a response from your opponent by starting your offense. For Mika and grapplers, this playstyle is more “active play”, a thinking-person’s character, how am I going to respond to what my opponent is doing. One style is like questioning, like can you respond (Ryu throwing fireballs), the other is the act of responding (Mika trying to get in and reacting to Ryu’s offense). Of course, once your opponent is in the corner, Mika will be doing the questioning as her offense has started, but to get there, you’re going to need to break open that Ryu’s defense.
As a grappler, guessing and feeling the tone of the match and your opponent is also very important. With Mika, you can put yourself in a lot of situations where you are forcing your opponent to guess (sometimes numerous times) in a short period of time. You need to know when to push and go aggressive and sometimes when to feign aggression but back off to let your opponent hang themselves (letting Ryu whiff a big uppercut because you felt/knew he was getting desperate). This comes with experience and observing what your opponent likes to do, but a big down-side of this is that sometimes you’re just going to guess wrong and it will be frustrating. This is just the nature of playing this sort of a character.
If you’ve read this far and can understand what it’s going to take to play Mika at a decent level and you’d still like to proceed, please join me with the rest of the guide.
In overall character standings, I think Mika is probably around mid-tier at best, low-tier at worst. The inherent “instability” of the character will make it difficult for Mika to win a major tournament in my opinion, though I still think she’s viable. I’ve played some strong character specialists and Mika has some problems getting in.

In offline play, her charged drop kick can be easily reacted to and you’ll either miss totally (low-profile Chun cr. mk) or get stuffed (Karin st. hp, Ryu Parry, Ryu shoryuken etc). You can try mixing it up in footsies but against good players, the move seems to have more limited use and should not be constantly abused like I see it used in online play.
Cr. hk is great when you connect but it’s absolutely horrible on block (-12), it’s almost like gambling at least 1/4 of your life every time you do it, because the punish potential is high. Even at max range, it’s punishable. None of the shooting peaches are safe on block (maybe if done meaty or at the very end of active) and really the only way in asides from that is walking forward or jumping. She does have some moves like cr. hp and f + mk to help her advance, but even they can be negative on block so you kind of have to wait for your opening (usually opponent making a mistake).
Overall, it’s an uphill battle and you will definitely need to be good at neutral in order to get anything going. Problem is, the higher level you go, the harder this is to do. Go participate in your local Street Fighter scene if you can, you will quickly see what you can and can’t get away with and it will tighten up your gameplay significantly. I think you will also come to realize how honest you have to play against experienced players to get your offense going.
That said, assuming you can get past this and somewhat reliably get your opponent in the corner, then you need to make a lot of good reads to keep the offense going. Thankfully, Mika does have good damage/stun so if your opponent makes a couple of bad guesses you can quickly end the round. She’s very much a feast or famine character, thrives when she has the momentum and is very mixup driven once in the corner. Regardless of what I’ve said above, she’s very fun to play and the fact she seems viable means I’ll probably continue playing her.
Overall Street Fighter Advice
Street Fighter V is probably my favorite Street Fighter to date (after Super Turbo). It’s also one of the most honest versions with emphasis on a lot of back-to-fundamentals stuff.
Thanks to the March 2016 Update, there’s now a ‘Challenges’ mode for all the characters. Going into ‘Challenges’ from the main Street Fighter V Menu has the following options:
- Trial
This mode allows you to select a character and perform many basic combos. This includes Rainbow Mika of course but many of these combos are not optimized for damage/stun/pushing to the corner. Make sure to check out the combo section of this guide for that. A cool feature is that you’re able to repeat a certain challenge over and over if you’re struggling with it, but I typically prefer the flexibility of normal Training mode. This is a great mode for beginners. - Demonstration
Demonstration is a non-interactive mode that basically explains many system fundamentals of Street Fighter V, like what V-Trigger is and how to activate it. It’s great to finally have an in-game mode to show people more advanced concepts.
These are great resources for all players to understand the basics of Street Fighter V.
Another method I like to use is if you want to quickly get used to a character, one of the first things to do is understand their normal attacks. Go into training mode and try out all the normal moves and try to imagine them in different scenarios. Is this move for tripping people? Maybe to hit someone out of the air? Perhaps a long range poke to harass? Get used to the ranges of various normal attacks, the timing of the button to hit someone out of the air, seeing the properties etc.
Once you feel like you have a good handle in training mode, go to the Gauge Settings and set everything to normal. Then set the dummy to CPU Level 4 (default) and restart the battle. See if you can defeat the computer only using normal moves (no specials etc). CPU Level 4 should be pretty easy so feel free to start to crank it up. Ideally if you can beat CPU Level 8 with showing good defense and normals, you’ve probably gotten a good understanding of what normal to use in different situations. Try against different CPU characters to get a feel of what moves/offense/defense to expect. Chun-Li is a good one to try at CPU Level 8.
Of course playing against people is still the best way to learn (especially by someone who can teach), but by playing this way against the CPU will help familiarize yourself with what a character is capable of. In my opinion it’s a good enough primer to get most beginner/intermediate level players started.

Use of Normals – Play against CPU in Training mode with all gauge settings set to Normal and the highest difficulty level you can manage. Only use normal attacks and pretend you’re playing against a real person. Focus as much as possible on a concept called “Anti-Airing”, hitting someone out of the air with a move, in order to stop their offense against you. So if the opponent jumps in, you need to have a normal attack to response against it. In the Mika normal moves breakdown, I’ll talk about which buttons to use for anti-airing.
Defending properly – How long can you last just blocking and punishing unsafe moves with normal attacks against CPU Level 8?
Understand the mechanics – An important aspect is understanding the game you’re playing. Without knowing what your options are in given situations, you’ll never be able to master the game at a higher level. Do you know how to build V-Gauge? What’s a V-Reversal and how do you execute it? What’s the difference between a normal/back recovery and how do you execute them? What are your crush counter normals? If you’re unfamiliar with Street Fighter V’s mechanics, definitely go through the ‘Challenges’ -> ‘Demonstration’ mode.
For more supplemental mechanics information check out:
MetalMusicMan’s The SFV Guidebook
Fundamental Knowledge and Resources
[link]In this guide I will be explaining certain concepts that are familiar to many fighting game players. If you don’t know what I’m talking about definitely check the link above and I’ll be posting links to specifics that I think are good to know and will probably touch on throughout the guide.
Frame Data, Frame Advantage/Disadvantage[en.wiktionary.org]
Low Profile – Moves that typically attack low and lower the characters body to a point where attacks that target the upper/middle part of the body will typically miss all together. This is often used by characters like Dhalsim’s slide to move under certain moves or not get hit by airborne attacks all together.
This is relevant when Mika does her charging st. hk, as it’s susceptible to being low profiled and the drop kick can miss completely if timed correctly by a smart opponent.
Command Notation Legend
Commands listed here will be assuming Mika is facing towards the right. If your character is facing the other way, reverse the controls. The table below represents a directional pad or arcade stick with the different directions listed.

Example Combo:
jf. hp, st. mp, f + mp, f + mp, back dash, charge st. hk, qcf + pp
Verbose Explanation:
Jumping forward hard punch, next command says st. mp for standing medium punch, which implies that you’ve landed from the jumping hard punch. Standing medium punch then transitions to forward and medium punch at the same time, which is Passion Press. The next forward and medium punch is Passion Rope Throw which throws your opponent towards the front. Back Dash is back, back. This results in the opponent hitting the forward edge of the screen. Charge standing hard kick (hold down the hard kick for a moment) which goes into the charged drop kick. After recovering from the drop kick, go into EX Shooting Peach, which is a quarter circle forward and any 2 punches.
For a more comprehensive look at Fighting Game notation: [link]
Normal and Unique Moves (1)
Normal moves are where the majority of the most important tools are in your arsenal. Knowing special and critical art moves is good, but the way to land those moves successfully is through smart use of your normals. Most normals have a purpose and specific situations to use them in. Try to understand what frame data is so you can interpret the numbers below, it will help you with what to do/not to do when looking at your own replays. If at any point you don’t understand certain terms described in the guide, please refer to the ‘Fundamental Knowledge and Resources’ section of the guide.

You can also hit confirm into moves like EX or Light Punch Shooting Peach (qcf + ppp or qcf + lp), even the Critical Art (qcb, qcb + p). This is one of the few normal moves you can use to safely tick throw without getting interrupted by any normal move due to the amount of plus frames you have (invincible reversal moves still interrupt though).
This is why Mika’s st. lp is the safest bet (at +2 frames on block), but at higher levels, good players will know this and know that you are more likely to command throw after a st. lp. They may be more willing to use an invincible move/reversal to get out so keep this in mind.
Overall, It’s good to mix it up sometimes and st. lk can be a decent alternative to use for tick throwing.

I also like using this move as an anticipatory challenge. If a Chun Li likes to walk forward and do a cr. mk, then st. mk to harass and I see it numerous times throughout the round, sometimes I’ll challenge it. I’ll wait to block Chun’s cr. mk, but then because I know they want to use st. mk (and they haven’t been punished for it yet), I’ll challenge with Mika’s st. mp and cancel into the mp Shooting Peach. Often times this will beat their poke, net you damage and give a knockdown allowing you to walk forward and put pressure.
If the opponent is on constant auto-pilot (not thinking and just doing the same patterns over and over), you can use this tactic often. If the person is a thinking individual, you’ll force them to think about whether or not they should use that particular attack string again. This strategy does take an understanding of rhythm and knowing when your opponent likes to press their buttons. Try to match the timing so you can stuff the attack string in Training Mode if need be.
Note you can also meaty this normal and combo straight into EX Shooting Peach. I know there are setups for this and it becomes much easier if it’s a counter hit.

The move has farther range than you think but if you get too close, it can end up trading frequently. One thing to keep in mind is that this move actually moves you forward slightly so you will need to adjust your spacing accordingly. There aren’t too many active frames either so you need to get good at the timing of hitting your opponents whiffs. Training mode helps here.


This drop kick can also go through fireballs but somewhat hard to time. She’s considered airborne from frames 23-38 and has lower body projectile invincibility from frames 26-39.
Normal and Unique Moves (2)


Mika is considered airborne on frames 9-11 and because this moves pokes upwards, you can actually completely miss crouching opponents. Another very interesting use for this move is that it can blow up throws/command throws but timing is tricky. At high level play, this has been used to negate a throw situation and get a counter hit. This can then be comboed into a st. lp or st. mp (more difficult) into more damage.
Another common use is to reset an opponent after a Lady Mika (f + hp) in the corner. This is typically used during passion rope throw mixups. (f + mp after a f + mp)
A potential use of this move can to feint into throw. For example, if both you and your opponent are crouching relatively close together (around sweep range), you can use the cr. mp to close the gap a bit more before going right into a command throw (hcb + p or k) or even Critical Art (qcb, qcb + p)

The range on this move is one of the longest normal moves outside of tools like f + mk and cr. hk, so it makes it a very consistent option if you’re trying to combo off a V-Trigger activation (though you should use st. hp when possible for more damage).
It’s also possible to use this move as a meaty and if it hits, it combos into Stomp Chop (st. lk, st. mp) easily as well.
One of the most unique uses of this move is if this move hits somewhat closely as a counter hit, you can combo straight into Critical Art without canceling. Just wait for the move to finish then have the Critical Art come out immediately. It will combo and it’s glorious.

This move can also be used as a meaty or spaced correctly to give +1 on block. Not earth shattering stuff but it’s a good way in. This move is helpful for landing V-Trigger as well, once you hit with cr. hp, perform a V-Trigger while holding back, from here you can continue block string pressure or just do a Wingless Airplane (qcf + k) to cross them up and hopefully get a free hit from your partner Nadeshiko.
Remember, while cr. hp is often used to get the opponent to block and for you to cancel into a V-Trigger activation, the entire cast can V-Reversal and potentially hit you out of whatever you were trying to do out of the cr. hp. If you meet a clever opponent like this, make sure to do a command throw immediately after the V-Trigger activation to catch their V-Reversal.
Another use for this move is for feinting, purposely miss and land close enough to do a command throw immediately after.

It’s also possible to low profile certain moves as you go so low you don’t get hit at all. This includes going under fireballs.
A nice safe jump set up is to get a crush counter cr. hk and as soon as it recovers, perform st. lk, st. lk (both whiffed), then jump straight up. This situation guarantees a free jump in attack of your choice to be blocked especially by characters with slow or bad reversals.
Normal and Unique Moves (3)


Often also used for jumping back or jumping neutral to stop other air attacks because of it’s range.
Normal and Unique Moves (4)
st. lk, st. mp
Stomp Chop is great for hit-confirming, for example, if you perform a meaty like cr. mk or st. mp while someone is getting up, if the move connects, go straight into this Stomp Chop and watch it easily combo.
jf. d + mp (during 50-75% of forward jump)

This move typically has three uses:
1. Baiting Uppercuts (like Dragon Punch) – Predictably jump forward and perform Divebomb just outside their uppercut range. If Ryu or Ken take the bait, up they’ll go and you would have landed already and can get a free combo.
2. Crossing opponents up – On a knockdown or a sudden jump while close to them, you can force a left/right block situation and if they guess wrong while you’re coming down you get a knockdown and damage.
3. Projectile navigation – Mika has cr. hk, charge st. hk, and Divebomb to dodge and weave around fireballs. Cr. hk is quite slow and it’s hard to do on reaction if the opponent is too close. St. hk is also heavily telegraphed and timing it so it goes through a fireball requires the opponent to throw the fireball when you’re already charging (starting the charge on reaction to the fireball is way too slow). This pretty much leaves Divebomb as a decent way of moving in especially at full screen. Still need to exercise caution as there are characters that can punish you from far away (Nash teleport, Dhalsim Teleport etc)
f + hp

If this move hits, it launches the opponent into a juggle-able state.
f + mp or b + mp (another f + mp or b + mp for Passion Rope Throw)

If this move is used mid-screen, typically you’ll want to backdash, this brings the edge of the screen towards you and the opponent will actually bounce off the edge and comes stumbling towards you. In this stumbling state, opponents are considered airborne which allow you to use Wingless Airplane (qcf + k) as a finish for good damage. You can also follow up with whatever you want, the sky is the limit!
If this move is used in the corner, the bounce on the edge of the screen basically happens immediately. You’ll need to use another move quickly to follow up and keep them in the corner. Lady Mika (f + hp) can be used here then followed up with a Wingless Airplane (qcf + k).
This move seems to have a good all purpose hitbox with a nice rectangle in front of her, beating long range pokes and even hitting people out of the air.
Reminder: The Passion Rope Throw move is also sometimes colloquially called Irish Whip by the Fighting Game Community (FGC).
Special and EX Moves (1)
qcf + p

lp – Airborne frames 8-24
mp – Airborne frames 12-28
hp – Airborne frames 15-35
qcf + pp

Unfortunately, the armor comes out on the 3rd frame, so this makes the move extremely susceptible to meaty attacks and throws. If you try to challenge a meaty with EX Shooting Peach you will get stuffed every time. So despite it looking like an amazing get-out-of-jail-free card, it absolutely cannot be abused. I’ve been thrown out of this more times than I can count, so definitely use with caution outside of combos.
qcf + k

lk – Airborne frame 4~
mk – Airborne frames 6~
hk – Airborne frames 9~
Typically I use Wingless in the following situations:
1. If I’m confident they’ll jump. Maybe if you notice a pattern, after you do a string of attacks that all get blocked, they like to neutral jump up. Once you get a read on that, do a Wingless and catch them. It can be quite demoralizing to be suddenly get “read”, so be on the look out for invincible reversals/uppercuts if they start getting desperate.
2. After Passion Press Rope Throw, I’ll sometimes use Wingless to deal the final blow. I believe this is typically the most combo damage you can deal after a midscreen Passion Press Rope Throw without using meter. Remember after the Rope Throw, when the opponent stumbles back from hitting the edge they are considered airborne, so you can perform this move and grab them reliably.
3. Getting out of the corner. If I get a good read on an opponent in the corner and do a Wingless Airplane and now switch sides so that I’m in the corner, if I feel like getting out, I will do a hk Wingless and jump out. This is not always safe against all characters so keep this in mind (characters with fast Critical Arts or teleporting abilities can pursue you if you are too predictable with this).
qcf + kk

Again, as with EX Shooting Peach (qcf + pp), this is not a true reversal and also gets stuffed by meaty attacks and throws easily. As we can see in the frame data, she’s not even off the ground until frame 4 and she’s only invincible after that. Just those 3 frames she’s on the ground dictates that she’s completely vulnerable for that very short period of time but if the opponent had a move out or was ready to grab you, you’re at their mercy.
This is a big weakness of Mika and she needs to have rock solid defense and patience because many times you’re just going to have to deal with the opponent’s pressure situation. Learning to block properly and tech throwing is a big part of close quarter defense.
Special and EX Moves (2)
hcb + p

Granted to most people these throw ranges won’t seem to make too big a difference but in Street Fighter, games are determined on pixels of distance so just being slightly out of range is the difference between continuing your momentum versus whiffing a throw and getting punished for it. Definitely practice in training mode to get an idea of how far you can stand and still get the command throw.
hcb + pp
hcb + k

Range is considerably worse however and you can easily poke yourself out of range. Even just a blocked st. mp at point blank range pushes back enough that you can’t grab with any normal version of Brimstone (EX Brimstone has enough range). Brimstone also does less damage and less stun compared to Rainbow Typhoon which you should try to stay alert about and go for more Rainbow Typhoons if the opponent is close to being stunned.
Once again, of the normal versions of Brimstone; light kick has the longest range, lowest damage and hard kick has the shortest range but highest damage.
hcb + kk

V-System Moves and Critical Art
mp + mk
By holding down mp + mk, Mika pulls out a mic and starts a monologue. The longer this is held, the stronger the boost to all her throw related moves. She also gains V-Skill meter for this and also has one hit of armor while performing this. The armor will absorb an attack (not multi-hit attacks or throws however).

Right when starting this move, she will be at Level 1, which provides a small damage and stun boost to all her throws (normal throws and all command throws including Wingless Airplane and her Critical Art). The more Mika talks, rings of smoke will come out periodically around her signaling another level up. There’s a total of 5 Levels and at the maximum 5 levels, any throw will instantly kill.
Once you let go of mp + mk, Mika will immediately stop talking and throw her mic on the ground and it will bounce forward slightly in front of her before disappearing. This is actually considered Mika’s only projectile and does do a small amount of damage (it’s possible to get Mic kills this way)
You can use this to nullify projectiles, set up a meaty microphone projectile, or potentially bait your opponent to come and attack you hopefully giving you an opportunity to land a powered-up throw.
Unfortunately, if you are hit anytime after being powered-up, or if you miss a throw attempt (including normal), the boost will be gone.
This is quite an interesting move as you are telegraphing that you will want to land a throw in the near future which can mentally prepare your opponent. On the other hand, the longer Mika monologues, the more V-Gauge you gain which helps you use V-Trigger and V-Reversal more often. Generally in real matches you can get up to a Level 1 or 2 boost before having to stop especially after a Rainbow Typhoon (qcb + p).
hp + hk
Mika’s V-Trigger is very unique in that she calls in her Tag Team Partner – Nadeshiko. One of the great things about V-Trigger is that you can use this to cancel normal moves at anytime which can make higher risk moves like cr. hk or cr. hp completely safe. It can also be used to interrupt your opponent or even augment Mika’s defense by forcing the opponent to deal with a distraction.

Assuming Mika is facing right when calling for Nadeshiko, there are a total of 3 ways to call her:
b + hp + hk (Left)

hp + hk (Neutral)

f + hp + hk (Right)

The direction dictates which side of the screen Nadeshiko comes from. If you use Mika’s V-Trigger by holding hp + hk longer (for any direction), Mika will raise both her fingers up and Nadeshiko will come out with a decent delay. This can help with setups and scaring your opponent as they know Nadeshiko will appear soon.
The back and forward version of Mika’s V-Trigger will knock the opponent down into a spinning state which can be juggled typically with Wingless or EX Wingless.
The normal V-Trigger where Nadeshiko comes straight down is primarily used as a combo extender and can also hit opponents that are grounded.
A problem I’ve noticed is that Nadeshiko can miss sometimes depending on how quickly your opponent moving. If Mika is facing right and is right up against an opponent, if you call Nadeshiko with a b + hp + hk, and immediately after calling her, start dashing/pushing your opponent forwards from midscreen, Nadeshiko will miss. Make sure you get a good handle on V-Trigger and knowing which one you want to use at what time.
f + kkk

Example:
Mika blocks a point blank range cr. lp from Ryu.
Mika V-Reversals. (Has 15 frames startup)
Opponent does a normal throw. (lp + lk, typically 5 frame startup)
Mika gets thrown.
So just remember, like many things in Street Fighter, this is not guaranteed to hit.
qcb, qcb + p


Hitbox / Hurtbox Data
Rainbow Mika’s hitbox data has been released to the public thanks to Overheat76 (Shoryuken[forums.shoryuken.com]) and eiSH (DeviantArt[eish.deviantart.com])! This is a good reference to see what an attack looks like behind the scenes. Ultimately, fighting games are just boxes overlapping each other and interacting (taking damage or pushing back etc). Seeing what an attack looks like gives you an idea of what sort of moves it can beat.
The best example is this video here that shows all the moves in slow motion:
You can also check out pictures here:
Rainbow Mika Hitbox Data[eish.deviantart.com]

Quick Combos / Bread N Butter Combos
These combos are mostly for quick hit-confirms and are highly encouraged to be used defensively and offensively as they typically start off with a fast attack. These are your workhorse combos that you can commonly land (hopefully). If you don’t understand the terminology listed (like qcf + p), please go to the ‘Command and Notation Legend’ section for more clarification.
If you’re really gutsy, if they block the st. lk, st. mp, you can just follow through with a lp or mp shooting peach regardless especially if you’ve conditioned them to try to punish you after the blocked st. mp. I would only do this against intermediate players and above especially if your opponent is very familiar with the Mika matchup.
Full Combos / Punish Combos
Full / Punish Combos are when you get a major opportunity where you can really capitalize, either a whiffed uppercut or if you successfully blocked an attack with major recovery. I will typically omit jumping attacks as you can add these to most of the combos for more damage.

Many of these combos will also involve standing medium punch into Passion Press to Passion Rope Throw (st. mp, f + mp, f or b + mp). Sometimes when the opponent is too far for the st. mp, feel free to omit it and just go straight for Passion Press to Passion Rope Throw.
The entire Passion Press to Passion Rope Throw can be a finicky beast. The way it behaves heavily depends on how close you are to the corner. You will need to experiment with timings sometimes and you will not necessarily be able to use all the combos at any time. The combos below will assume you and your opponent are midscreen (the range that Training Mode starts you off in), unless stated otherwise, like “Corner or Near Corner Only”.
st. mp, f + mp, f + mp, back dash, forward dash, qcf + k
Instead of performing and whiffing a qcf + lp (lp Shooting Peach), just dash forward. The idea behind whiffing the lp Shooting Peach is to build a slight bit of meter before ending it in the Wingless Airplane.
Regarding the back dash during this combo, you can technically walk backwards and the opponent will also hit the edge of the screen. The reason we back dash is to make the timing much more consistent rather than just walking backwards and judging it.
Remember, all standard Wingless Airplanes deal the same damage when they land. The reason we use lk Wingless in this combo is because it’s fastest to start up. A potential problem with this combo is that it does switch sides. If you don’t want to switch sides, use the first combo which just uses the charge hk dropkick and gives you a nice knockdown situation. The whiff lp Shooting Peach is just to build meter and cannot be punished as you have enough time to recover. The whiff lp Shooting Peach can also be omitted if you want to play it safe.
The third and fourth combo use meter to punish. The EX Shooting Peach pushes about 50-60% of an entire stage’s length. The positioning can be quite valuable and worth the slight decrease in damage. Use EX Wingless Airplane for maximum damage.
Crush Counter Combos / Punish Combos
Crush Counters are executed by basically getting a counter hit [en.wiktionary.org]while utilizing certain moves. In Mika’s case, landing a f + hp, st. hk, or a charged st. hk as a counter hit will result in a Crush Counter. When crush countering an opponent, the opponent will usually be in a particularly vulnerable state (like spinning in the air or staggered on the ground) that gives you quite a bit of time to follow up on and deal more damage.
To practice these combos in Training Mode, pause the game to open the Training menu. Go to ‘Dummy Settings’ then to ‘Counter’ and set it to ‘On’. All moves you initially hit with will be considered a counter hit and will result in Crush Counters.
The second and third combo both utilize EX Shooting Peach (qcf + pp) to push to the corner. Less damage but it corner carries.
The fourth and fifth combo use EX Wingless Airplane (qcf + kk) for more damage but positioning may not be optimal as it switches sides.
Regarding the third and fifth combo, the timing for using charge st. hk right after the Crush Counter Lady Mika is quite strict, there isn’t much room to delay and it’s very possible to miss. If you prefer more reliability, use the second or fourth combo which use the forward dash to another Lady Mika (f + hp).
Please note that damage for the second and fourth combo are less and actually come with their own caveats. One important thing to remember is to get into the habit of walking forward very, very slightly after the first forward dash but before hitting with the second Lady Mika (f + hp). This is to ensure the EX Shooting Peach doesn’t miss as it’s possible to be slightly out of range for the last hit.
Make sure to perform any EX Wingless Airplane (qcf + kk) after a Lady Mika (f + hp) or charge st. hk as fast as possible. It’s somewhat easy to miss if you’re late.
In all three combos, the forward dash can be omitted but dashing forwards will push towards to corner so generally it’s the optimal way to go.
The third combo is the only viable V-Trigger follow up to a uncharged st. hk Crush Counter.
If you’re able to land a Crush Counter charge st. hk dropkick on a grounded opponent, they are knocked slightly back and spin around. There’s quite a bit of time for you to work with and the most common thing to do after hitting is to dash forward. Right after dashing forward, you can execute any of the combos listed in the ‘Full Combos / Punish Combos’ or the ‘V-Trigger Combos / Punish Combos’ section of the guide for big damage.
Generally, if you weren’t expecting to get a Crush Counter off the charge st. hk, a safe way to get some damage is just to walk forward and press st. hp, then cancel into something (qcf + hp or qcf + pp or qcb, qcb + p etc)
V-Trigger Combos / Punish Combos (1)
The following V-Trigger combos truly maximize the amount of damage Mika can deal off certain moves. These combos are great for getting yourself back into the game or dealing incredible amounts of damage for only one to two bars of meter with a V-Trigger activation. For all intents and purposes, these combos are still considered Full / Punish combos but significantly optimized for damage.
The 3rd combo is the best I’ve found and that only uses 1 meter and doesn’t need the corner. When Nadeshiko hits, the opponent will spin over you in a spinning state. Mika can then do a lk Wingless Airplane to deal damage and still keep the same direction she was when she started the combo. 4th combo is exactly the same except for using EX Wingless Airplane as the finisher. Only a marginal increase in damage and I’m not sure it’s entirely worth it.
Remember, the 3rd and 4th combo need to be performed as quickly as possible. Nadeshiko should be hitting your opponent pretty much exactly when you finish the last hit of EX Shooting Peach. Afterwards, it’s important to get the Wingless Airplane timing down once your opponent spins over. If you are having problems with getting this to land, try using st. mp instead of st. hp, as this increases the consistency of this combo at the cost of a bit of damage.
The last combo is maximum damage into a Critical Art without the corner. Damage/Stun jumps up to 486/500 with a jumping hp or hk attack.
Definitely watch out for three specific moments in this combo, first, the V-Trigger (f + hp + hk) needs to be timed right after the f + mp. Then back dashing after this and doing the charge st. hk, then doing it against after Nadeshiko hits. All of these need to be performed together tightly, being slightly too late on any of them means you’ll drop the combo.
The last combo is the most damage I’ve found in the corner with V-Trigger with three reps of st. hp. With a heavy jump in attack, this combo is a staggering 536 damage 590 stun.
V-Trigger Combos / Punish Combos (2)
The first three combos are optimized and basically identical. They all whiff a lp Shooting Peach to gain a little bit of meter and have different finishers. The point of the charge st. hk finisher is so you are right next to the opponent. Finishing with hp Shooting Peach is to push to the corner (corner carry). Finally finishing with Wingless Airplane is for damage but Mika will switch sides.
The fourth combo is for corner carrying and spends a meter for EX Shooting Peach. The fifth combo emphasizes damage and works very similarly to the 3rd combo in the V-Trigger combos section (Nadeshiko will hit the opponent over your head while you do a Wingless Airplane to finish). The sixth combo is maximizing the damage but is more expensive at 2 meters for only 15 more damage.
Finally the last combo is a relatively easy way to land a Critical Art as you can see if you hit with the cr. hp or the V-Trigger before using it.
The second combo is still worth learning however, as they build the base for the third and fourth combo. Third combo keeps the opponent in the corner with EX Shooting Peach while fourth finishes with EX Wingless Airplane which switches sides.
Finally, if you’re willing to maximize damage and spend two meters for it, the last combo is what you’d want to do.
One of the best things about V-Trigger combos is the screen freeze during the V-Trigger as it gives you plenty of time to confirm if something hit or not. If your attempt was blocked you can still freestyle (command throw or continue attacking) and have Nadeshiko still be a threat.
Pressuring / Understanding Offensive Options
To effectively pressure your opponents, you must understand the options available to you at any given time. In this section, we’ll be primarily covering the wakeup/recovery situation and showing the decisions that you can potentially make. If at any point you don’t understand certain terms described here, please refer to the ‘Fundamental Knowledge and Resources’ section of the guide.

One of the most common situations for Mika is the decision that you make on your opponent’s wakeup game or hitting someone out of the air into a recovery situation. Both situations are fairly similar in that you have the initiative and can act first while the opponent needs to make a guess.
If you play the neutral game/footsies well, hopefully this can become a frequent opportunity for you to apply pressure and force your opponent to play a guessing game that’s relatively in your favor. Below is a decision tree of how each situation typically plays out. We will be assuming that you’ve knocked your opponent down and are now right in front of them deciding on what move to make. We will also be assuming that attacks and throws will be performed meaty, which forces your opponent to wake up into your attack.
Looking from left to right on the row ‘Mika Meaty Attack’, it’s pretty obvious that doing a meaty attack (usually st. mp or f + hp) on an opponent is incredibly advantageous due to all the ++ and +. The only thing that could possibly beat you is a fast, invincible reversal move like Ryu’s Shoryuken (Dragon Punch). Anything else they do, you’ll basically catch them and are guaranteed a follow up. Only blocking is a safe universal response that all characters can do but still leaves you in a situation where you have the momentum and can potentially continue the pressure.
The second option Mika can perform is to do a meaty normal throw (lp + lk) on the opponent’s wakeup. This is the soft counter to someone who blocks too much and is a relatively safe option that ends up in quite a few neutral situations at worst. Opponents could tech your throw leaving both players at neutral or they can back dash, resetting the situation. If the opponent neutral jumps or forward jumps however, there’s an opportunity to anti-air them (I recommend cr. mk). Even if they jump back, if you’re really on the ball, you can catch them with an EX Wingless Airplane (difficult to react to, qcf + kk) or EX Shooting Peach (qcf + pp). EX Shooting Peach seems to be quite a bit easier to do but sometimes it misses the last hit depending on the height you hit at.
Then we have the heavy committal option, going for a meaty command throw (hcb + p/k). This is arguably the highest risk thing we can do and it blows up one of the safest option an opponent has, blocking. Unfortunately, now we start to see some real potential drawbacks. Jumping and back dashing now become hard counters and you’re basically guaranteed to get punished as Mika’s recovery for a missed command throw is almost one whole second (quite a long time in fighting game terms). The invincible reversal also still reigns supreme against the command throw option as well. Potentially, you’ll be “gambling” with anywhere from 10-25% of your life depending on how your opponent guesses. It’s possible to have the tables turned on you if you miss.
That said, landing the command throw is awesome, generates momentum, deals damage/stun, and really forces your opponent to second guess themselves. Creating uncertainty in your foe is only in your favor and can create new opportunities for Mika as the opponent starts changing their behavior. Hopefully, your opponent starts making more unsafe decisions as they try to escape getting command thrown again.
Finally, there’s the lowly “Block” option. This is basically exercising patience and hopefully letting your opponent make a big mistake by letting them do their invincible reversal only to have you block it. This is also sometimes known as “doing nothing”, even though you’re really just suddenly playing passively/defensively and waiting for your opponent’s response.
Generally, blocking is the only hard counter to the an opponent’s invincible reversal and if you manage to defend against it, during the opponent’s recovery you can capitalize very hard, especially if you have V-Trigger and/or lots of meter to work with. By just blocking or waiting during an opponent’s wakeup you’re trading offensive pressure for safety and the chance to really punish. It’s very safe for you to just stand back in almost all your opponent’s wakeup situations and you’re generally in control of the situation. You will also be able to deal with forward and neutral jumps by performing an anti air like cr. mk as well as the possibility of reacting to various options the opponent has.
Understanding your Opponent (Offense)
Now that we’ve gone over all the pressuring options and the pros and cons, you can make a much more informed offensive decision and really start playing mind games with your opponent. Something very important to remember is to keep track of what your opponent did in certain situations.

Imagine Mika vs Ryu.
Perhaps you hit Ryu out of the air while he was jumping in and while Ryu was coming down, you went for a meaty st. mp, but he did a Shoryuken (his invincible reversal). You got hit this time, so remember that.
Next time this situation occurs again, it’s a good time to reevaluate the decision you initially made. Let’s say Mika decides to block and sure enough Ryu goes for the Shoryuken again, but this time he doesn’t connect. Now Mika can punish hard because you had V-Trigger and spent some meter (check out V-Trigger Combos / Punish Combos section).
Assuming the Ryu player is a thinking person and is adaptable, you’ve punished them for this mistake and hopefully they will respect you more and NOT Shoryuken when this occurs again in the future.
Now if this situation happens again, there’s now a prime opportunity to go for a command throw because if the Ryu respects the fact you might block the Shoryuken and ends up just trying to block a meaty attack, instead you’ve gone and thrown them now.
If you look at it simply, it’s just a constant game of rock-paper-scissors. This is what mind games are and why it’s important to get information from your opponent by keeping track of what they like to do in different circumstances. There are different types of players, good ones will try to adapt and change up their decisions, bad ones will typically follow the same patterns and do the same thing over and over again.
That said, just remember, in rock-paper-scissors it’s not impossible for someone to throw scissors three times in a row, it’s just usually unlikely. Just like you could Brimstone (hcb + k command throw) your opponent over and over, it’s possible the opponent won’t expect such boldness but don’t expect to win like this against all opponents.
Other things can factor in such as how much meter they have or how much life left they have as well as their temperament/play style (are they super aggressive or very defensive? Use this against them).
Ultimately there generally isn’t a 100% “best” answer and you’re just going to have to guess. Just do your best and go with your gut and the historical data you have. As you get more experience, you’ll be a better judge in making decisions in these crucial moments.
Patience / Understanding Defense Options
Look at the ‘Opponent Meaty Attack’ column and look downwards at all the options that Mika can do against a meaty attack. See how strong of an option it is for an opponent to meaty attack Mika’s recovery? In literally all cases shows up as a – or –, meaning from Mika’s perspective, doing almost anything leaves you in a disadvantageous situation.
You’ll have to exercise patience and be forced to guess correctly. This is not always easy to do and it’s good to understand that this is probably Mika’s greatest weakness; being put in defensive situations.
As listed in the ‘Special and EX Moves’ section of the guide, EX Shooting Peach and EX Wingless Airplane both lose completely to a well-timed meaty attack, essentially making them not viable options at all. The only time to do them is if you’re gambling that the opponent will mistime their meaty attack which will sometimes work but if someone has the meaty timing down, you need to be very careful. It’s still a viable option to test your opponent and maybe try escaping with a EX Wingless every now and again but against strong opponents this becomes a potentially dangerous gamble.
That said, you can probably get away with this “tactic” at intermediate and lower level play but don’t get reliant on it, as it’s not a solid strategy. When you play someone truly good, they won’t let you get away with doing that.
The only real way to beat a meaty attack with Mika is by burning all your meter and going for the Critical Art. This has enough invincibility frames to overpower an attempted attack but if the opponent does nothing and suddenly sees Mika start the Critical Art, they can just jump straight up and get a big punish.
Meaty throwing Mika is a pretty solid option for your opponent as well and many options come out in their favor. Generally, you can only break even by breaking the throw (Mika Throw) or back dashing out to avoid the throw entirely. Back dashing is somewhat of a hard read though as you’re guessing with confidence that your opponent is definitely going for a throw. Don’t rely on back dashing too much as many attacks can catch you and you could get crush countered.
Jumping out can work to let you escape, but it’s probably safest to jump backwards. Jumping straight up or even forwards gives the opponent an opportunity to anti air you for free and puts you in a recovery situation (where they have advantage again). This is why the result is ‘x or -‘, as you could escape and neutralize the situation, or get hit out of the air and put yourself in another situation.
Once again, this isn’t a good defensive situation for Mika but much like with the caveat with the Meaty Attack section, a mistimed Meaty Throw gives you an opportunity to use your 3-frame startup cr. lp (among the fastest normal attacks in the game). Assuming they mistime a throw, you could convert the cr. lp into a combo. Just remember that you can’t get away with doing cr. lp all the time but it is an option if you don’t think the opponent can perfectly time the throw.
Meaty command throwing Mika is very similar to the Meaty throw situation except the opponent is “all-inning” and really gambling on their command throw to connect. In this situation, guessing right and neutral jumping straight up or back dashing become incredibly advantageous for you as it gives you a big opportunity to punish. Depending on the amount of meter and V-Trigger you have, you can at least deal maybe 300-400 damage pretty easily.
There’s also the option to try to throw out a cr. lp if you think they will mistime the command throw as you’ll beat that out. Asides from that, assuming they time the Meaty Command Throw correctly and you guess wrong, you’re going to be taking that damage. Try your best to get back to the neutral game!
Generally an opponent doesn’t really have a good reason to respect Mika’s wakeup as she doesn’t have anything truly invincible asides from her Critical Art. In the event your opponent plays passively and lets you get up for free, you should count yourself lucky.
The only time I realistically see this happening is if you really like to abuse EX Shooting Peach on wakeup and they expect you to do it again. By blocking that, you’re hanging yourself and it would be a good read from your opponent.
Frame Traps / Meaty Attacks / Baiting
Frame Traps and Meaties are a big part of what to do once you “get in” and it’s important to understand what your tools look like. If at any point you don’t understand certain terms described here, please refer to the ‘Fundamental Knowledge and Resources’ section of the guide.
Whiff Punishing is important in neutral as you jockey for positioning and throw pokes out, it’s good to buffer (prepare follow-up attacks in case they hit).
Common attacks to buffer:
st. mp to mp Shooting Peach (qcf + mp)
st. hp to hp Shooting Peach (qcf + hp)
St. mp and st. hp are common moves to throw out during footsies, especially st. mp. By buffering a Shooting Peach, if the st. mp catches and opponent’s limb, you’ll immediately go into the Shooting Peach move, hopefully for a follow up.
st. hk to EX Shooting Peach (qcf + pp)
Make sure to mentally prepare an EX Shooting Peach if you plan on using st. hk because if you see a Crush Counter, you can combo off and push to the opponent to the corner quite easily. St. hk can also be used to counter low attacks as well as throws if you time it well enough!
Using Meaty Attacks on your opponent’s wake up is a very standard way of applying pressure to your opponent and forcing them into a situation you initiate. Typically as an opponent gets up, the following are good to use on their wake up:
st. lp – This move is at least +2 on block and allows for tick throwing opportunities. Strong options afterwards include attempting a throw, command throw or if you get a counter hit, stick out a st. lp into lp Shooting Peach or a Stomp Chop (st. lk, st. mp).
st. mp or cr. mk or st. mk / f + mk – These moves are primarily fishing for counter hits, when you expect your opponent to do something other than block or invincible reversal. During counterhits, hit stun is increased and provides a lot of flexibility for comboing after visually confirming. Good followups include Stomp Chop (st. lk, st. mp) or Passion Press (f + mp) if it can combo. Getting any follow ups off a meaty can convert into EX Shooting Peach or even Critical Art quite easily.
Lady Mika (f + hp) – This move provides the most amount of plus frames and gives you even more flexibility on follow ups if you expect them to block. You do need to be on the ball in case you do hit normally or via Crush Counter and get ready to combo them, most likely with a Wingless Airplane (qcf + k).
st. lp, st. mp, f + mp – This is a standard frame trap and you’re generally shooting for an opponent to do something after the st. lp as the st. mp will pretty much catch anything they do. The Passion Press (f + mp) is to follow up if you do hit.
st. lp, cr. lk, st. lp, EX Shooting Peach (qcf + pp) – There’s 2 gaps here, between the st. lp and cr. lk and the cr. lk to st. lp. Both have chances to catch an opponent pressing buttons but you can only follow up with an EX Shooting Peach as they’re quite far away after this string.
cr. lk, st. lp, lp sp/ex
charge st hk, cr. lp/st. lp/st. lk, st. mp
charge st hk, st. mp, st hp, hp sp/ex/ca
st. mp -> CA
Safer
st. mp, V-Trigger, CA
Safer
st. mk -> CA
st. mk, V-Trigger, CA
light tick to ex sp
cr. mp
throw
cr. hp
throw
Brimstone, dash st. lk is meaty and can go into st. mp into sp or ex sp
After EX SP in the corner, cr lp cr. lp, pp is meaty
After PP -> charge st hk, cr mp sequence, cr. lp, pp is meaty, you can also lady mika for meaty situation
Situational Baits
cr hp whiff into cr lp -> bnb
Most important setups
Post Command Throw Setups
EX SP in corner
Post SP Setups
PP Corner Setups
Tick Throw Utilization and Throw Loops
Mika’s arsenal of command throws can be very intimidating to the opponent if you’re near them but it’s even more important to understand the approximate ranges of throws at your disposal.
The command throw range order is from longest to shortest range:
Overall EX Rainbow Typhoon has great range and has lots of potential to be thrown in after blocked attacks. However, remember the Rainbow Typhoons throws your opponent quite far backwards and could ruin positioning. It’d be a bad idea to let a teleporting Nash out of the corner when it was so difficult to get him there in the first place.
Peach Assault (Critical Art) is technically the longest range command throw you have but does not work in tick-throw scenarios as the startup of the Critical Art is very obvious and people can hold up to dodge it.
While command throws can be used straight up when you’re in range, a common usage is to do a tick-throw. This means you get your opponent to block an attack (typically a fast move that doesn’t push them too far away), then immediately go into a command throw as they are ready to block another attack.
The following is a list of common tick-to-command-throw scenarios. These scenarios all assume you get your opponent to block the initial attack at point blank range/right next to them (usually when the opponent is getting up or recovering from the air), then follow up with a command throw.
st. mp -> EX Brimstone up
st. lp -> All command throws
cr. lp -> All command throws
cr. lk -> All command throws
cr. mk -> All command throws
st. lk -> All command throws
cr lk, cr. lp -> lp Rainbow Typhoon
charge st. hk -> Depends on range and where the opponent blocks
st. lp allows true meaty command throw, everything else can technically be potentially be interrupted by a very fast 3-frame startup normal unless done meaty (to get more frame advantage). Definitely experiment with this in Training mode to perform your setups with a Recordable Dummy. Then, switch to the other side and try to escape from them with attacks or reversals. This will give you a good understanding of how far you can go offense-wise.
Explain 5 frame startup and consequences of not
Brimstone looping
Example tick throws
lp lp
charge st. hk
Regular throws are still useful, especially jumpy opponents. Practice wakeup option randomization.
Important while throws are awesome to land, opponents are prone to panicking, adapt as necessary
Throw loops against quick rise after throw in the corner
Brimstone, forward dash, throw
Crouching throw, walk forward, throw
Throw loops if your opponent does NOT quick rise after a throw
Brimstone, forward dash, throw whiff, cr. mk, throw
Throw mixup from a sweep crush counter
Forward dash, Forward dash, Forward dash, st. lp (whiff), throw
Passion Rope Throw Reset Fundamentals
f mp, f mp, f hp, cr. mp reset
command throw
st. mp meaty -> Follow ups
f hp meaty -> Follow ups
Vtrigger shenanigans
Touch Of Death Sequences
Shooting for 1000 Stun
Try to end on a command throw if possible for less scaling.
Explaining 2-3 mistake concept.
Knowing Matchup stun. Cammy has low stun for example.
Setup Example
jf. hp, st. mp, f + mp, f + mp, back dash, jf. hp (Reset)
(Near the corner) jf. lk (cross up), st. mp, b + mp, b + mp, f + hp, cr. mp (Reset)
EX Brimstone (Dizzy)
jf. hp , st. mp, f + mp, f + mp, f + hp, Wingless Airplane
Corner – Over 1000 life
jf. hp, st. mp, f + mp, f + mp, f + hp, cr. mp (Reset) xx V-Trigger, forward dash
st. mp, b + mp, b + mp, st. hp (Reset)
Ex Rainbow Typhoon (Dizzy), forward dash, forward dash
jf. hp , st. mp, f + mp, f + mp, back dash, charge st. hk, EX Wingless
Dizzy
Corner – Over 1000 stun
jf. hp, st. mp, f + mp, f + mp, jb. lk (Reset)
st. mp (Meaty), st. lk, st. mp, qcf + mp (Knockdown)
(Opponent Normal Recovery) jf. lk (Crossup), cr. lk, cr. lp, qcf + lp (Dizzy)
Unblockable Setups
[link]V-Trigger Utilization and Tactics
Screen Freeze
Canceling
common used normal to cancel
Defensive uses
Anti air
creating temporary distraction
Offensive use
Pitfalls
Vreversal
Useful Technology
***UNDER CONSTRUCTION***
throw extending
Option select back dash catching
Passion Press Option Select
Strategies and Direction
Tactics and Responses
Dealing with Projectiles (Fireballs etc)
Dealing with Frame Traps (Attack Pressure from Opponents)
Dealing with Throws / Command Throws
Dealing with Jump-Ins / Cross-Ups
Dealing with V-Reversals
Dealing with Throw Baits (Shimmy/Shimmies)
Dealing with Predictable
Dealing with Low Attacks
st. hk
Dealing with Overhead Attacks
Dealing with Baits
Playstyles and Approach
Covering different playstyles and approaches
Neutral Game Approach
Hyper aggressive
Reset Focused

Damage Focused
Effective Practicing
***UNDER CONSTRUCTION***
Hit confirming (emphasis)
execution Practice
Meaty Attacks Timing
Meaty Throw Timing
Meaty Command Throw Timing
Setup Execution
Combo Execution
Situation Practice (Whiff throw in corner), random recovery action
Defensive practice against CPU
setups
anti airing
footsies
Mika Matchups
The matchup sections will be updated as I do more research/gain experience with these matchups. Under Construction!
Vs. Alex
Raw Shooting Peaches (qcf + p) can be used to get in during footsies.
Vs. Balrog (Boxer)
Vs. Birdie
Shooting peach over bananas and can (Birdie V-Skill) during footsies
EX SP through bananas and can
Shooting peach to puruse after blocked chain
st. lp to fmp frame trap?
st. mp to st. lp
Vs. Cammy
st. mk / f + mk beats normal divekicks clean if she lands on the leg you’re kicking with.
Cammy has good walkspeed but can get too confident moving forwards. Use f + mp to keep her honest and try to convert into f + mp again on hit if she likes to walk up in your face.
Beating EX Cannon Strike:
Cr. mp (Getting the correct angle is difficult though)
EX Wingless Airplane (more reliable but expensive over time)
Neutral jumping is a decent tactic to bait out her forward moving offense (Cammy V-Skill, Spiral Arrow). Don’t get too abusive as they can Cannon Spike if you get too predictable.
Vs. Chun-Li
Be careful of range on Kikoken, some chun lis will dash up after kikoken and light kick to catch neutral jumps.
Vs. Dhalsim
Cr. hp saves the day for getting in and trading in your favor with a heavy attack button. Remember, cr. hp’s hitbox grows the longer the move is out so if you can time it correctly with Dhalsim’s button pushes, you can cleanly beat out limbs. It’s worth seeing how limbs interact in training mode.
Watch the patterns, use hk Wingless Airplane to punish dhalsims that get too auto-pilot with the float. Even just throw it out there can be good if the Dhalsim isn’t going to punish.
You must master meaties. Personally, my timings were off and Dhalsim slipped out of favorable positions for Mika too many times. Do not let Dhalsim escape, it’s much easier to clobber him in the corner and keep him when you want. Make sure to put as much pressure as possible if you can manage to get close and start your offense. It may be your only shot.
J. hp blows up slide if you can manage to land on him.
Need to be strong defensively, lots of left/right teleport mixups with the fireballs.
V-Reversal any of Dhalsim’s block to V-Trigger. This is typically a “free” setup for him but by V-Reversaling, you nullify most of the effect and can get out. Try to always have 1 bar of V-Gauge ready for this situation.
if you see Dhalsim’s teleport, st lp or st hp (if you can time it), typically follow up with meaty when Dhalsim lands as most like to jump or teleport out. If you can condition dhalsim to start blocking when he lands from this, start command throws. Alternatively if you can react to it, you can also use Lady Mika (f + hp) and combo into EX Shooting Peach or EX Wingless Airplane.
Dhalsim slide in some ways sort of beats st. mk/f + mk because of how many active frames it has. even anticipating a slide, st. mk only beats lows for X frames, when Dhalsim has more active frames than that (X). I’ve been caught a few times from this so just be aware.
Punish missed jump back air attacks with Wingless. Need to test after being hit, using Wingless. Lots of Dhalsims like to use this as a finishing move, be aware of this and get ready to block high if you’re low on health. Landing an EX Wingless and a good read on Dhalsim’s wakeup could win you the round.
Another tactic is when you’re knocked down, back recover then forward dash into offense. This can catch Dhalsims off guard but don’t abuse it too much.
Vs. F.A.N.G
Vs. Guile
Vs. Ibuki
Vs. Juri
Vs. Karin
Guren Ken (Karin’s Rekka)
First, remember this: if you block a rekka just mash low jab. It will punish the rekka if she doesn’t do any followup, beat the elbow (down+P) and the throw (up+K) will whiff and land behind you.
Karin can only backdash (K followup) to make herself safe, or use the palm (P) or slide (down+K) to beat the jab.
If she has a full gauge, she can do palm xx super as an elegant strategy to beat the jab, so you might want to focus on blocking if she has the meter.
Mika’s option after blocking rekka
cr. lp
EX Shooting Peach (whiffs if up + K)
Countering Moves
Karin’s cr. hk:
EX Shooting Peach
cr. lp xx EX Shooting Peach (depends on range)
f + mp, f + mp (depends on range)
Karin’s st. hk:
st. lp xx EX Shooting Peach (depends on range)
Karin’s cr. mk:
st. lk, st. mp xx mp Shooting Peach (depends on range)
Karin’s f + mk (overhead):
st. lp xx lp Shooting Peach
Karin’s lk Mujinkyaku:
Blocked 1st hit: f + mp
Blocked both hits: st. mp xx mp Shooting Peach
Karin’s Orochi (shoulder check):
Blocked: Go for tick throw situation
You can also go for a neutral jump especially if Karin has no meter.
Karin’s hp Ressenha (overhead palm):
Blocked: Go for tick throw situation
You can also go for a neutral jump especially if Karin has no meter.
st. lp xx lp Shooting Peach?
cr. mk to catch Karin’s cr. mp. You can buffer a forward V-Trigger after the cr. mk in case you do catch it, then go into EX Shooting Peach into Wingless Airplane
Vs. Ken
Vs. Laura
Cr. hk is easy to land against Laura’s projectile. I’ve seen people charge this up from mid-screen and it’s basically getting free knockdown. Even if she releases the projectile when you’re getting close, the slide will go under regardless and hit Laura’s recovery.
Vs. M. Bison (Dictator)
cr. mk devils reverse
Vs. Nash
Stand at the range where Mika can Slide under or range where jf.hk hits.
Be heavily offensive. Keep walking/dashing forward. His buttons aren’t very good. That said, be wary of Nash’s dash, it’s deceptively fast and it’s good to throw out some fast buttons during footsies especially if Nash has no meter. Once Nash has 3 bars and CA ready to go, he becomes a lot more dangerous and must exercise more caution during neutral.
He has no wake-up options other than V-Reversal. He’s free to Mika’s mixups after a knockdown. Be relentless here as this is one of the only opportunities you’ll get to play Mika’s game.
Most important thing is keep track of his V-Gauge. If it’s full and has (or close to) full meter, it’s a safe bet they will try to teleport behind you and do combo into CA. Anticipate the teleport and punish it with a neutral jump j.hk, combo. Or just jf or jb if you’re not sure where he teleports to.
Notable Nash moves:
m.Scythe -8
Moonsault slashes are all + on block. It’s a good opportunity to V-Reversal here and not Nash gain plus frames on Mika.
Nash’s cr. hp is +3 on block, must be careful of the situation afterwards as you may get frame trapped.
Nash’s f + lk (Knee Bazooka) is -5 on block, -1 on hit
Nash’s f + mk (Jumping Sobat) is -3 on block, +2 on hit
Nash’s f + mp (Chopping Assault) is -6 on block, +1 on hit
Nash’s f + hk (Step Kick) is -2 on block, +2 on hit
Vs. Necalli
Vs. R. Mika
Cr. mk can be used to defensively to cleanly beat the other Mika’s charge st. hk. EX Shooting Peach can also be used on reaction if you’re close enough.
Liberal use of V-Reversal to get out of “Blender”/Heavy Mixup situation. This can be baited/defeated by a lp or lk into a throw/command throw however.
Vs. Rashid
beware neutral jumps on rashid when he has full meter (Rashid CA)
Must master the lp to lp sp to stop mixer strings
Dealing with Dash Eagle Spike
After blocking, forward dash, st. lp xx EX Shooting Peach
Hard to deal with this move as Mika
[link]
Whirlwind Shot
The first thing to keep in mind is that there is no reason to block HK Whirlwind Shot. The best answer is to interrupt it.
Rashid will most likely Whirlwind Shot from st.MP, f.MP (1), st.HP or cr.HP (1).
st.MP or f.MP (1) xx HK/EX Whirlwind Shot has at least a 5f gap so you can jump or even interrupt it. [That sounds off, f.MP xx EX Whirlwind seems like it has a 3f gap so you can’t jump, needs further testing].
cr.HP / st.HP xx EX Whirlwind is more dangerous. It’s not a true blockstring but you can not jump and can not interrupt it without an invincible move.
To sum it up:
st.MP / f.MP xx HK Whirlwind : Can jump or interrupt easily. Don’t block it.
st.MP / f.MP xx EX Whirlwind : 5f gap so you can jump on reaction [Again, need further testing on f.MP]
cr.HP xx HK Whirlwind : Press a button on the timing where you would have blocked an EX
cr.HP xx EX Whirlwind : 4f gap so it’s hard to interrupt. If you try to jump out you’ll get hit airborne, the correct answer is to block.
st.HP xx HK Whirlwind : Can interrupt
st.HP xx EX Whirlwind : Has the smallest gap at 3f. You jump you die. If you see the flash, block and maybe V-Reversal.
So there’s 2 things to keep in mind
After blocking st.MP or f.MP, if you see a HK Whirlwind press a sweep or another button, and if it’s an EX jump out.
After blocking cr.HP or st.HP, press a button on the timing where you would have blocked the EX Whirlwind.
attack constantly
bait out his 1-meter invi reversal
Rashid OB ACTIVE Mika
d.mp+mk > k -5 4 Max: EX.Peach
Far: mp xx m.Peach
qcb+k -20 ~ walk fw > Clap
EX.qcb+k -9 ~ Clap
mp+mk > k -24? ~ walk fw > Clap
dj > qcb+k ~ ~ walk fw > Clap
f.dash > f+k ~ ~ walk fw > Clap
qcf+lp (3 hits) Unpunishable
qcf+lp (5 hits) mp > Clap
qcf+lp (7 hits) Clap
Vs. Ryu
Ryu CA breaks guard, if they set you up in the corner, you’ll be eating a lot of damage guaranteed. If not, it’s still safe (example: shoryuken, cancel to CA). Be very careful when Ryu has full meter.
Ryu VTrigger fully charged normal hadoken also breaks guard. Many Ryus follow up with the Solar Plexus Punch (f + hp) for big damage.
Block a lot. His strings are tight.
Use charge.hk if you think he doesn’t kow how to deal with it
Get in by:
walk > block
dash in > lp > mp
dash in > mp / c.mk
dash in > c.lk > mk
dash in > c.lk > slight walk > c.lk
dash in > C.Throw
whiffing c.hp to bait
meaty c.hp
whiffing Dive Bomb to bait DP
dj.hp
dj.hk
dj.lk (crossup)
Meaty Peach
EX.Peach through FBs
Notable Ryu moves start OH OB
lp 3 4 2
mp 5 6 1
lk 4 -1 -2
c.mp 5 4 2
j.lk 4 crossup
Punishes Ryu Mika Difficulty
Blocked c.hk (-11) (max) EX.Peach
(closer) Clap Medium
Blocked f.mp (-4) (max) CA
(closer) lp xx EX.Peach Hard
Blocked Normal Tatsu (-10) mp > Clap … Medium
Intercepted mid-way Normal Tatsu l/EX.Plane Easy
Blocked EX.Tatsu (-19) Clap Hard
Fireball (close) EX.Peach Easy
Vs. Urien
Vs. Vega (Claw)
Beating EX Barcelona
cr. mp
cr. hk to make EX Barcelona whiff, then follow up with st. mp, f/b + mp, f/b + mp
You can also try jumping with hk to catch him out of the air (very dependent on where he is)
Vs. Zangief
f + mp his v-skill and charge st. hp. Depending on how much they like to spam
stand ch. hk is good when you can land, force a 50/50, either lp Rainbow Typhoon or EX, or st. lk, st. mp
Keep distance, his normals are further than yours.
Zangief putting pressure on Mika while she’s waking up is very bad news (bad reversals) do your best guessing, this is make or break.
Keep Zangief on his toes, dash in and command throw once in a while. Certain tactics like this can put mentally weaker opponents on tilt. Some try to “get you back” for doing that by trying their own forward dash to SPD. Try to understand your opponents state of mind.
Matchup is very temperamental, are they a defensive zangief or offensive. current exp is with offensive zangief, I could play against him ranged (stand around where f + mk barely hits, harass with it)
You must watch for patterns, what buttons until SPD? cr. lp, cr. lp SPD? remember it. Next time you get hit, jump up. lots of free easy damage this way. What setups did they like to use? I played a Zangief that like to use cr. mp as anti air, and when I landed went for the SPD 2 times. 3rd time, I jumped into full critical art punish combo.
Videos and Resources
CFN:
ebiumino1 – Ebi (JP)
hameko – Hameko (JP)
hashibiron – Fuudo (JP)
shimolen – Shimolen (JP)
200won – 200won (KR)
BIGDANMUL – BIGDANMUL (KR)
MarnHQ[www.twitch.tv] – Marn (VN)
BS_Dang – Dang (US)
ElChakotay – El Chakotay (US)
Kelvinshouse – Kelvin Jeon (US)
Pavocado – Pavocado (US)
RainbowImpact – Native Impact (US)
Mignon_Luffy – Luffy (FR)
GentlemanThief – Gentleman Thief (US)
OmGiTzRMika[www.twitch.tv] – OmgitzAndre (US)
RainbowImpact [www.twitch.tv] – Native Impact (US)
OlafRedland[www.twitch.tv] – OlafRedland (US)
Recommended Tools / Apps
FAT
V-Frames
[link]
https://www.reddit.com/r/streetFighter/
[link] [link] [link] [link] [link]TL;DR Concise Guide
Shoutouts and Credits
Thanks everyone for reading, feel free to contact me if you have any questions or want to provide feedback for this guide. Unfortunately, I’ve gone home and become a family man now, so while I am busy, I’ll definitely get back to you as soon as I can. Suggestions are always appreciated as the game matures things will need to be updated/changed. I also plan to continually update this guide as a personal reference especially for the matchup sections.

Contributors:
Aria – Matchup Notes, big thanks to you for contributing valuable matchup knowledge!
Big Shoutouts to:
ChesterCharm – First major SF training partner, thank you my friend.
Long Beach Street Fighter V Locals – Theo, Darien, Z, Abe, Evan, Porkchop and all the others, thanks all for showing up and throwing down.
Capcom – Thanks for the awesome game, we had a bit of a rocky start but the game itself is still solid. Love the focus on fundamentals.
Shoryuken Forums – Original stomping grounds, tons of knowledge here, thanks guys.
Mika Discord Chat – [link]
OlafRedland[www.twitch.tv] – Teaching me a lot about Rainbow Mika and showing me what is/isn’t effective
NativeImpact[www.twitch.tv] – Great channel, strong Mika, nice guy.
Vonsock – Kicking my butt in USF4 and cool with adding me (Abel, Evil Ryu)
Gorillacat – Exposing me in SFV, I want some runbacks! (Ryu, Chun-Li)
BacoVEVO – Amazing Cammy player, cool guy
VersacePython – Thanks for sharing your FGC stories, hope to play you with low latency one day!
Under Construction!
Video Links to Authors
Picture Credits
Other Contributors
Update Log
Version 0.9 (2016-09-01)
Added Aria’s matchup notes to the Matchups section.
Version 0.9 (2016-07-30)
Combos are done, finished Mika’s Offensive and Defensive option sections. Thinking of removing certain sections due to bloat. If anyone has any feedback about that, please let me know. Need to finish Frame Traps/Setups section. Not sure how detailed I should go into it as there’s tons to cover and lots of different setups.
Version 0.9 (2016-04-09)
Combos are almost done, just need to complete V-Trigger Lady Mika combos. Also finishing Pressuring and Defensive options sections, it’s helpful to go over everything and truly understand what options are available to Mika. I’m going to focus on Resets/Shenanigans soon and tighten my knowledge . I’m aiming for finishing everything outside of Character Matchups to be considered a 1.0 release.
Version 0.85 (2016-03-25)
Still fleshing things out. Need to finish V-Trigger-izing all punish combos and maximize damage (more testing and recording data for me). Continuing to add more to match up sections and cleaned up / clarified all sections up to the combos.
Version 0.8 (2016-03-14)
Initial Beta Release – Finishing this guide is taking much, much longer than I expected. I wanted to get this out last week but as I get further into the guide, I’m not satisfied with the level of thoroughness and quality as I’m testing everything and making sure what I put out there makes sense. There’s still more testing to be done but I think I need to let people see this guide especially before things get too obsolete (March Update incoming). I solemnly swear that I will get this a “1.0-worthy” state and continue updating until then.
cr lk after PP, cr. hp reset
cr. hp, vt cr. lk, jf belly