Overview
This guide is to help Sienna players and other players to help use their bright wizard to the best effect. Sienna was and is my main in the first game as well as this one. Don’t worry I’m an expert.
The basics
Sienna can fill a variety of roles depending on the play style, staff, and class you select.
Pyromancer: The special and boss killer, capable of dealing massive damage to single targets. In my opinion, this is the best one.
Battle Wizard: Battlefield control and AoE clearing, no one else can quite manage to same level of area damage as you, at the cost of being less effective against specials and bosses.
Unchained: You might consider playing another class, because you really love melee your staff is just there to hit things too far away for your sword. Hard to kill with proper management of heat and stamina.
Overheat
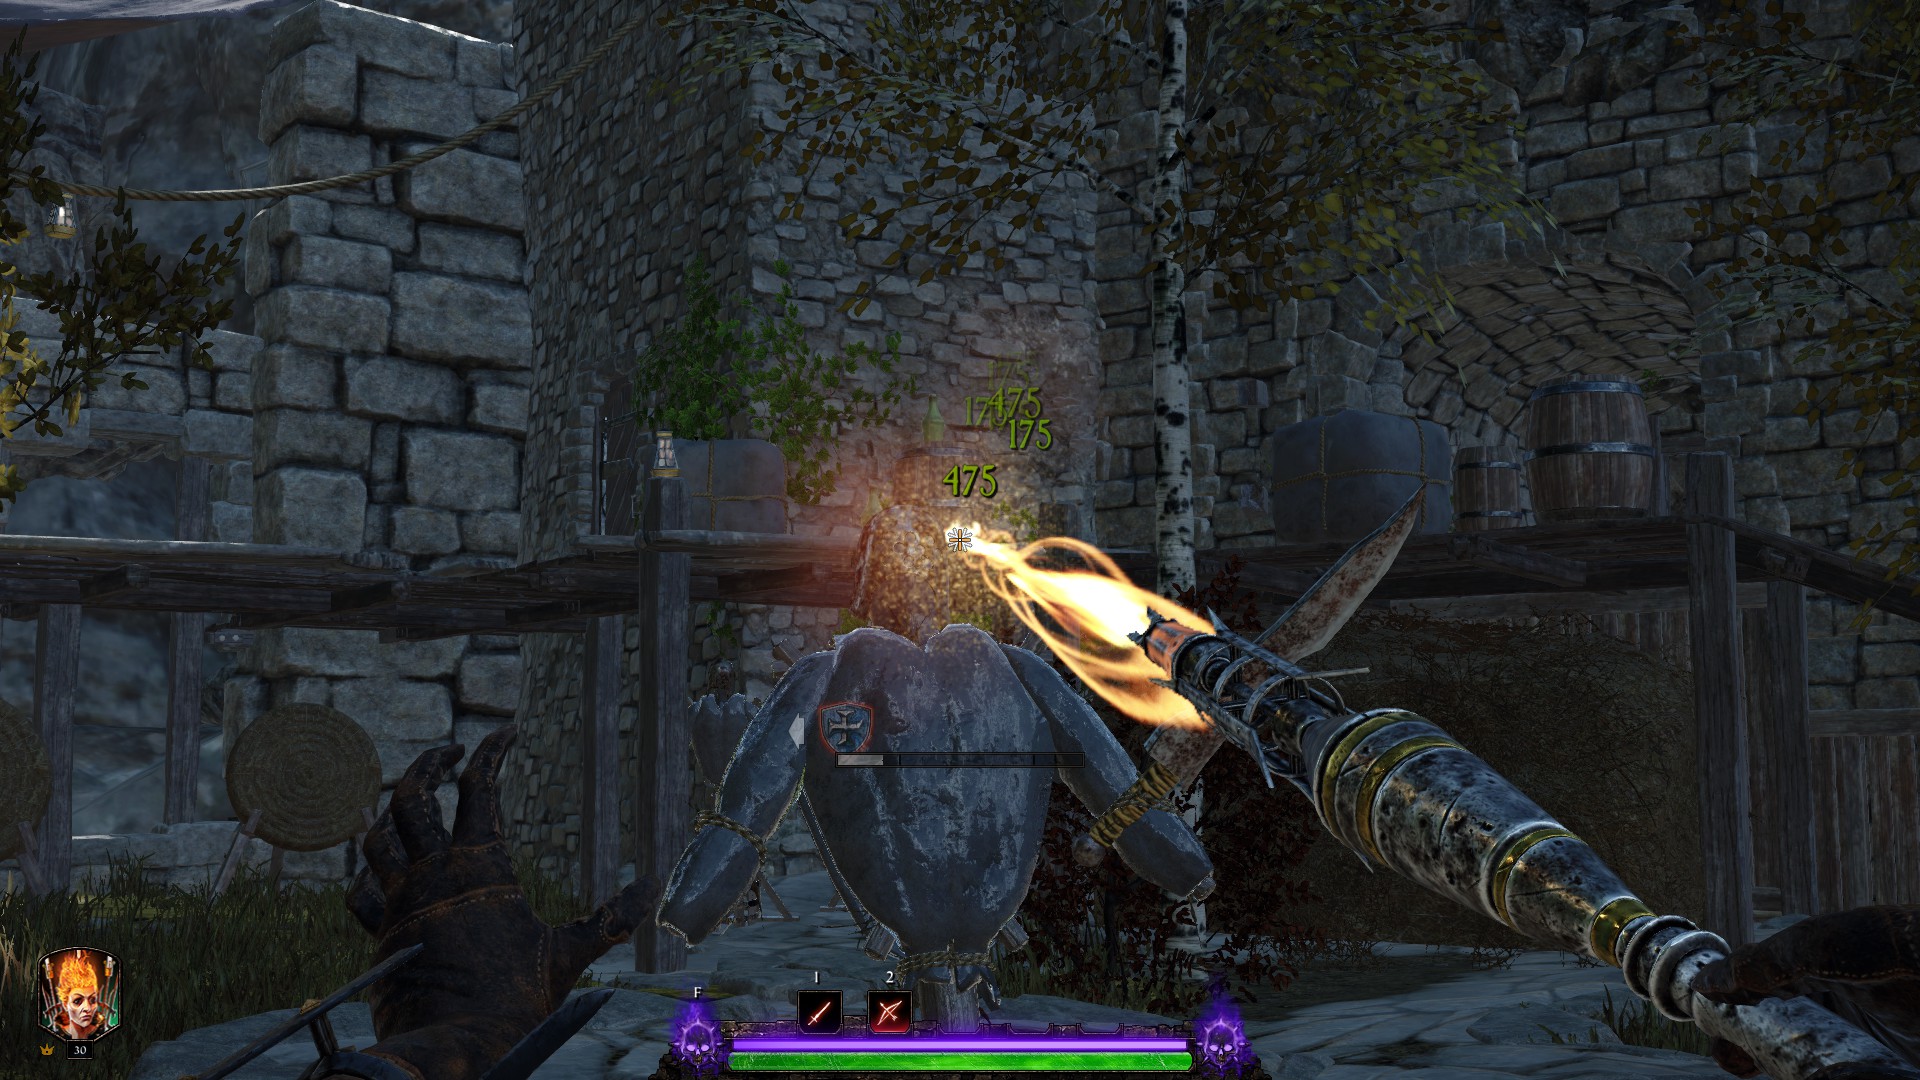
Overheating is what happens when you cast spells, the more you cast the more you generate until when the bar is finally full you explode. This vents passively, albeit -very- slowly or it can take some health to vent it. It only takes the health if it is above the first section of the bar.
The below shows a grey bar that indicates when you can vent overcharge without damage.
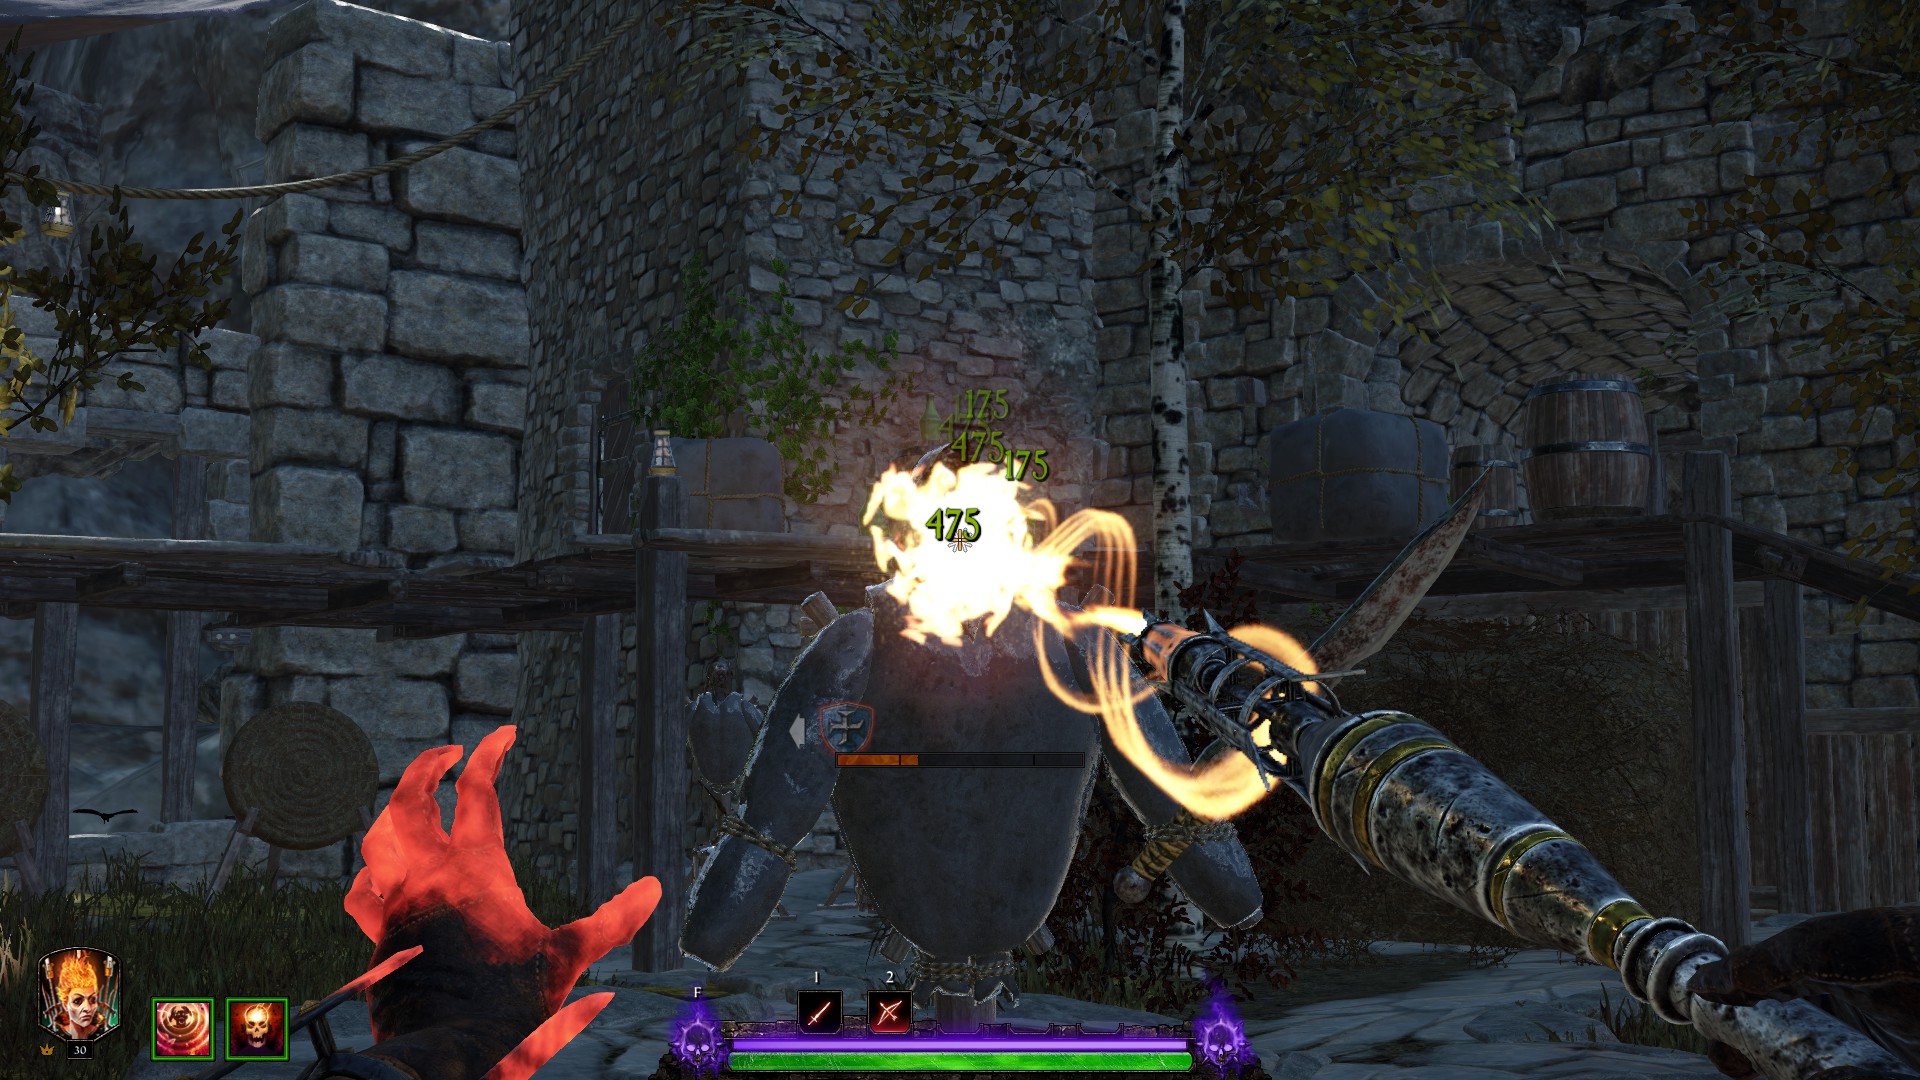
The below shows an orange bar, as well as a glow on the character herself it will deal damage to vent at this point and beyond.
This will likely see this guide downvoted and people mad at me but as the Bright Wizard you have to look at a situation and determine if the rather small amount of damage you would do with your staff abilities is outweighted by the swarm of enemies around an ally, or a special hitting them hard. On harder difficulties where only a couple hits can kill you, her damage is just the better option. Unless a Bw is trying to kill you directly her abilities don’t do that much damage. With the exception of her Burning head ult, and the left click of the fireball, conflag, and bolt staff. The right click of Bolt staff can chunk allies too.
The fireball can do a bit of damage, Conflag does next to nothing, Flamestorm can do moderate if the ally stays in it the entire channel, and the beam alt fire does little, sustained channel will do damage.
Flamestorm: While this flamethrower of a staff says close range it does have a surprising reach to it and comes with an effective knockback on most things save Rothelms and above. The primary attack is effective for a quick shot but generates a large amount of heat so it is better to try and position to get an even partial charge on the secondary attack. The Secondary attack on the Battle wizard build I use reaches full effect before hitting the first line on the overcharge and turning orange and you can get a good 5 or 6 seconds of flame torrent out of it. Obviously, this is great against the hordes of just about anything.
Pros
- + Excellent AoE
- + Moderate boss damage when close
- + Good heat management on secondary attack
Cons
- – No ability to snipe specials at range
- – Have to be really close to a boss for maximum damage from it.
- – Very likely to hit allies during a channel if they somehow miss the giant firestorm or you cast it poorly.
Bolt: The bolt staff is what some people prefer over the beam staff and having use it myself I can see the reasonf or it. It is a reliable staff to kill most specials with a headshot and the charged bolt can lance through several enemies, more so if they are in a line. However, the reason I don’t use it is the heat generation from bolt can grow fast, but what is worse is when you use the primary attack little fireballs, those will fill your heat bar far too quickly for my taste. Also it is a special sniping style staff with no zoom, while zoom isn’t needed it is quite nice at the same time.
Pros
- + Excellent range
- + Moderate heat management on charge
- + Line AoE on charge
- + Bane of stormvermin patrols
- + Good single target damage, a bit harder to manage heat on bosses.
- + Primary attack fires very quickly and can deal good damage
Cons
- – Situational AoE, only able to kill in lines which limits usefulness.
- – Primary attack generates heat rapidly and has a large spread
- – No zoom can make it difficult to snipe far off targets
Fireball: The fireball staff is a good one, and I might like it more if it had a bit more range on the blast of the fireball for which it is named. That said you can put out a lot of fireballs rapidly if needed before risking exploding yourself, or if you manage some venting between casts you can clear groups without much fear of overheating. The real devil is that the primary attack generates a large amount of heat, but will kill most nonarmored man-sized enemies quickly, 5 shots in rapid succession will put you over the first marker into orange heat. Some may find initial aiming at distance or danger close to allies difficult.
Pros
- + Good AoE
- + Primary moderate to good single target damage, the secondary is moderate.
- + Secondary has good heat management
- + Can hit ranged specials with the primary attack, though spiral to projectile makes it hard to get headshots at times.
Cons - – Primary attack generates heat quickly, keep an eye on it
- – aiming can be difficult to learn for some.
Conflagration: I use to love this staff but I can’t help but feel it just isn’t as useful as it was and it is multiple reasons for why it has fallen from grace so. At the least in quick play. On larger maps, it is less effective if for some reason you get caught in the open and can’t retreat to a choke point, as the flame patch and blast of the spell are relatively small and the flame patch doesn’t last long. Clever users can create your own choke points if only briefly by creating a flame patch near your flank the AI will avoid running through it. The biggest thing to keep in mind is that the secondary of this staff is largely support focused, it can knock around stormvermin and even keep an entire patrol reeling while applying a good burn DoT in addition to a flame patch. The primary attack is like the fireball staff though I feel it has more spread than fireball. The fact it has a targeting marker that allies can see is also helpful for keeping the limited FF damage of the secondary to a minimum, but mistakes happen.
Pros
- Area control, the only staff that can do such.
- Moderate heat management, try to vent between casts unless an emergency situation
- Place the targeting icon near allies to stagger shielded opponents but try not to hit them of course.
- Can kill ranged specials
Cons
- Lacking in accuracy at range
- Open areas present a problem to overall efficiency
- Single target damage is weak to moderate, can kill unarmored man-size well but rothelms and monsters are a bit of a problem.
Beamstaff: It gives good single target at long range, and has AoE clear with the secondary attack and can do limited line AoE near where the blast is used during channel. Staggers enemies well, precise. Solid all around really.
Pros
+ Beam staff
+ High single target damage
+ Ability to blast during channel for large damage
+ Good short range AoE secondary
+ Good heat management
+ Precise aim
Cons
- – Secondary can generate a fair amount of heat
- – Beam blast can generate fair heat.
Pyromancer
Use. The. Beam. Staff.
That staff is, without contest, the best staff in the game right now. It has the range, sniping, single target damage, and with the alternate attack can clear large swaths of enemies during a horde.
>BEAM BLAST<
This is the most important thing to know how to do, and MANY don’t know how to do it. The beam blast is what you get when channeling the beam you hit the RMB or whatever key you use for the Defend/Charge/Zoom keybind. This ends the beam with a heavy damage blast with the ability to penetrate enemies in a line.
During a Horde: When a horde horn sounds get into a narrow position as you should in general. If you can get a line on the enemy formation coming at you in a single file line begin spamming the beam blasts into the line to thin them. The standard beam will stagger the first few of the fodder level enemies (slave rats or plague cultists/zombies) allowing you to hold a large line up and then blast them apart.
During a Boss fight:
As usual, clear the enemies first while the boss is kited, the true danger of a boss fight is the specials and hordes that usually accompany them. Once those are dealt with turn your focus on the boss, aim for the head (the mouth that bites a grabbed enemy for the spawn.) and spam beam blasts when your ult is ready, once you are in red overcharge fire the ult with a clear line to the head for maximum damage. If you use my build you will vent all of your heat and can repeat the process though don’t beam blast until your ult is ready again.
The Burning Head:
This is ability is amazing, and very dangerous. You essentially form a flaming ping pong ball of murder and throw it into the field. There are things to note with this ability so use with caution and care.
- It will do a LARGE amount of friendly fire damage if it hits an ally.
- It can be ‘aimed’ by holding the button to cast it and pointed at the selected enemy, it will get a red outline and will (most of the time) hit that enemy first.
- It can 1 shot chaos warriors if you get a clear shot to the head.
- It attempts to get headshots and can get many enemies at once.
- It can bounce back at you, if you see it coming either pray to Sigmar or dodge.
For the love of Sigmar when the Bright Wizard is using the beam staff do not walk in front of it, it is impossible to miss the giant beam reaching across the map. If you run into it, its your fault. That said, try to keep in mind the BW is going to try and hit specials with the beam, and groups of enemies with the shotgun blast. This assumes they are using the beam staff, because they should.
If she is using the beam staff someone should watch her back, more so during the final boss fight as she can keep the caster from casting which makes the fight much easier. She is a powerful damage dealer but while zoomed in on her target she can’t see threats coming for her and it is possible for a charge attack to hit her and take her out while focusing on the boss.
Melee: Dagger or Firesword. Dagger was a surprise to me but is a killing machine and can deal with Rothelms quite easy. Crit chance and Crit power. Trait is up to you.
Staff: The Beam staff with the trait : Resourceful Sharpshooter, the one that reduces the cooldown on your ult for crits (and headshots work well) Crit power and chance.
Necklace: This is where taste comes into it again, some people love the natures bond trait to regen health on her to help offset any venting needed when without temp health. Boon of Shallya or Healer’s touch are my prefrence to increase the healing on you, or not use a healing item. Extra Health and reduced area of effect damage are my favored, helps take some of the sting out of those poison globes.
Charm: At first I liked the idea of Concoction so I could always get a purple potion (Pitch Black, as all the potions are mountain dew flavors.) However I would tend to say that Decanter and Home Brew are the better options. Your ult is an important part of your kit and can stagger bosses, if you use Decanter you will have numerous casts of it in the encoutner and can be spammed several times during the duration. The chance to not use is fairly obvious. Crit power and Power vs monsters
Trinket: CURSE RESISTANCE AS CLOSE TO 33% AS POSSIBLE. With my talents and the fact people get the grims you will want this. After that Crit chance. As for the trait, this depends on if you got a good PUB or a premade I think. If you do then I would say Shrapnel, as this will increase the damage the boss takes by a fair amount. Grenadier lets you have a chance to have more bombs, personally I was able to hit the Rotblood champion in War Camp three times in a row with a bomb because of it, needless to say it made it hilarious and easy.
- Martial Study: This is a personal taste tier, for me the attack speed helps ramp up the damage faster.
- Dissipate: This is not up for debate, you get a grim and you can cast more as the overheat meter goes down much faster.
- Blazing Equilibrium: This is a personal taste tier, for me I prefer slowing down how much overcharge I get the closer I get to a full bar letting me have maximized damage before needing to vent.
- Soul Snare: This is not really up for debate, killing enemies gives you temp health which gives you venting fodder. It is going away anyway so use it to vent overcharge and keep casting. The other two are alright, but Soul Snare is FAR more reliable.
- Exhaust: Personally I prefer it venting my heat, however the reduced cooldown isn’t bad either so you can spam the hell out of it.

Battle Wizard
The Battle Wizard is the first of the three classes and while it isn’t as useful in most cases as the Pyromancer, I do have a fondness for it.
This class focuses on dealing with groups and does so quite well depending on the staff used, unlike the Pyromancer there is no mandated staff here, at least in my opinion. I would say that the standouts are Flamestorm and Fireball, as much as I loved Conflag in the first one I can’t recommend it at this time.
You will want to learn how to hit ‘danger close’ to your allies with your abilities to hit the enemies with shields and armor that they might be fighting to stagger or kill them. This is a hard skill to master given how people move around in combat often. If you don’t feel you are up to the task then focus on thinning the horde as best you can at a distance, focusing on the densest packs you can for maximum effect.
Tranquility: I love this passive, while it can feel like awhile for it to activate once it does it removes your overcharge very quickly more so if you get the Centered Talent.
Fire walk: I use to not like this ability very much and still have some grumps about it, more so compared to the burning head of Pyromancer. However, it is effective as area control. My favorite use was on Righteous Stand at the end standing by the door I would use it to draw a line of fire that enemies would have to fight in, this can also be done for hordes. I personally never tried to see if it counts as other charges that stagger bosses.
Somethings to keep in mind
Leaves a fire trail
Has trouble going up slopes or stairs sometimes
If you use it to go over troll acid or globe poison, you still take at least one instance of damage.
Cooldown was reduced recently so it comes back faster now making it better.
Reckless Haste: Overcharge increases spell charge speed, so fireballs and Conflagrations and faster flamestorms. Just, be careful as this can make you overheat even faster but in a clutch moment a full charge can be key.
Pyromantic Surge: Increases your ranged damage, which is good not much more to say on that.
Melee: Up to you but you can still get use out of: Resourceful Combatant for the ult cooldown, but I have a fondness to Off Balance and Swift Slaying.
Staff: I would say Thermal Equalizer for less heat generation or Heat Sink to reduce overcharge, I think Thermal is better.
Charm: Decanter
Necklace: Healer’s Touch
Trinket: Grenadier
This build is around your heat management and damage, all in the name of massive AoE damage. Curse resistance, Crit chance, crit power, health and AoE damage reduction are my favorite stats to this end.
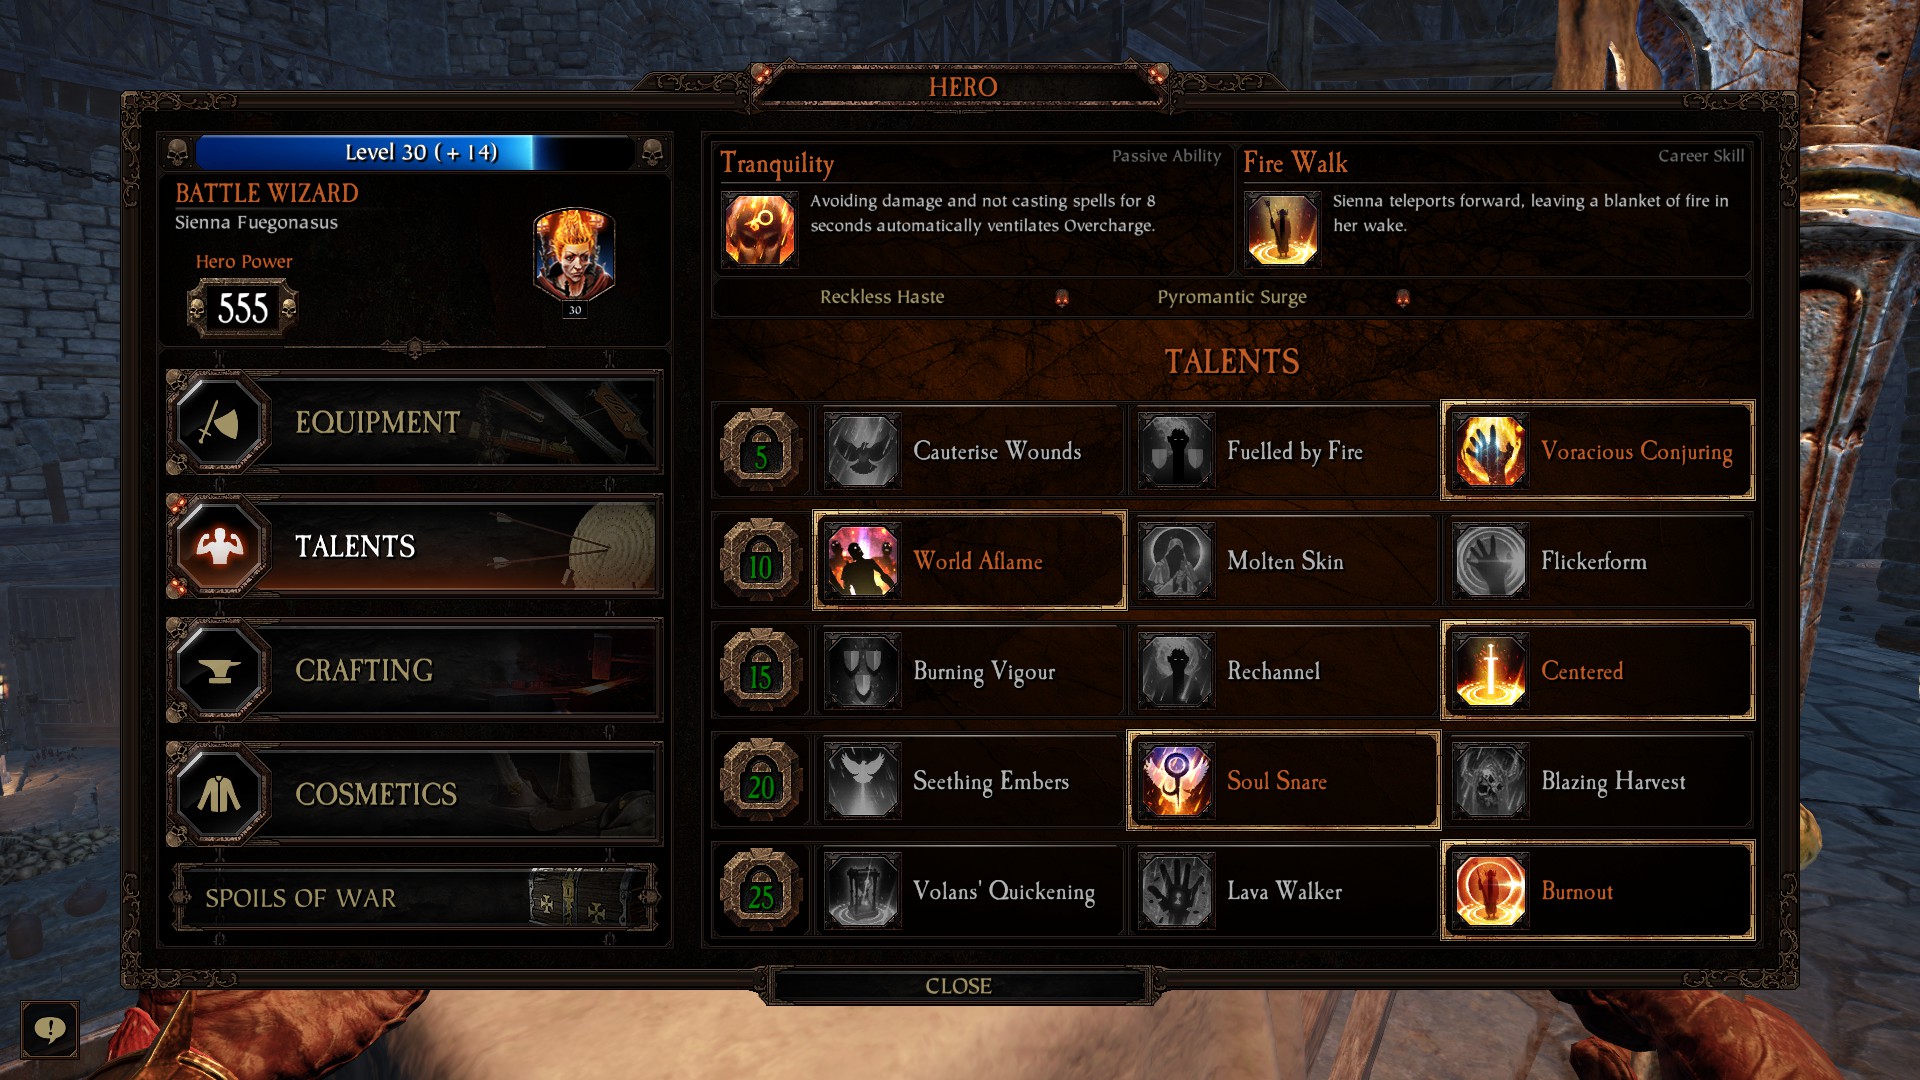
Tier 1: I feel strongly that Voracious conjuring to increase the speed of your secondary charges is important unless you plan to use beam staff. I would then say grab the 30% extra healing from Cauterize wounds.
Tier 2: World Aflame is my favorite in this tier by far, the more enemies near you the more damage you do, using this you can use it to do more damage to specials or clear the enemies near you faster. Overall more power is a great thick, the other two options I don’t care for. Less damage while being the last one standing is nice and all, but often times your major threat at that point is a gutter runner or packmaster. I don’t run into stun duration being that big of an issue myself.
Tier 3: Centered is my talent of choice here, making my overcharge go down faster means I can get back into casting as needed. An argument could be made for Rechannel but you wait 8 seconds to get a single faster charge? Not worth it in my mind. I personally feel Burning Vigour isn’t horrible but that focuses on a much more melee role than I use with the BW.
Tier 4: Soul Snare as with Pyromancer is the clear winner, if not more so on this class. You will be killing large amounts of creatures, each giving you more temp health. to me it isn’t even a question.
Tier 5: This is one where personal taste rules I feel. Burnout lets you vent all of your overcharge and in a pinch quite useful, Lava walker, however, increases the duration of the trail to 10 seconds so a few more seconds of it, the most I can give for that is an ‘eh, s’alright’. Volans’ Quickening I think is closer to Burnout as you can spam it more with 30% cooldown reduction and can be used for hordes to help.
Unchained
The unchained class is the one most focused on melee and being a very tough nut to crack. This is a hard one to master as even slight mistakes can see you blow up even if you had high health. You have to manage both your health and your overcharge far more closely as if your overcharge fills you explode, and half your damage taken goes to it. If you are attentive to that and good at melee you will do fine and the more overcharge you have the more effective you are but the danger of exploding from a mistake goes up.
I tend to be a bit more conservative and try to keep my heat around the 50% mark so I have room to make mistakes as it is the least played of my wizard classes. I prefer casting spells often. Most of your time will be in melee but staves still give you a strong AoE and ranged attack in times of need, unless you chose Flamestorm then someone else has to snipe the ranged specials. The Flamestorm is good to watch a flank or be the tank in front in a way like Iron Bardin. Most I have seen, and myself included use a beam staff to have the ability to take out specials and some groups to get their heat up to slice and dice.
As for melee weapons, I would say the swords or dagger, the dagger for an aggressive build in melee more trying to kill things before they can try and hit you. If you want to take advantage of the increased blocking one of the talents give you may want a sword just to get the most out of it. I am not a fan of the mace even if it is good for armored enemies.
Blood Magic: This is both a blessing and a curse, as 50% of the damage you take goes to overcharge instead, this is the core of this class and you will have to jockey this often.
Slave to Aqshy: Unlike the other classes you are not slowed down for being overcharged, which is good as you will likely spend a fair amount of time in that state.
Unstable Strength: High overcharge increases your melee damage, likely going to see this up often.
Blazing Sinews: Blocking will reduce your overcharge a key thing to keep in mind if you find yourself with high overcharge and Living bomb is on cooldown.
Living Bomb: Perhaps my least favorite of the ultimates but still useful. The reason it is my least favorite is it is hard to find a time to safely use it without risking singing Saltzpyre’s eyebrows or Bardin’s beard. Very effective area clear and resets your overcharge meter, which is all good just hard to find a good chance to use most of the time.
Flamestorm
Fireball
Beam
Melee: Resourceful Combatant
Staff: Heat Sink
Charm: Decanter
Necklace: Healer’s Touch
Trinket: Shrapnel
Crit chance, power, health and Curse resistance. These will all help get your ultimate back faster and help you last longer.
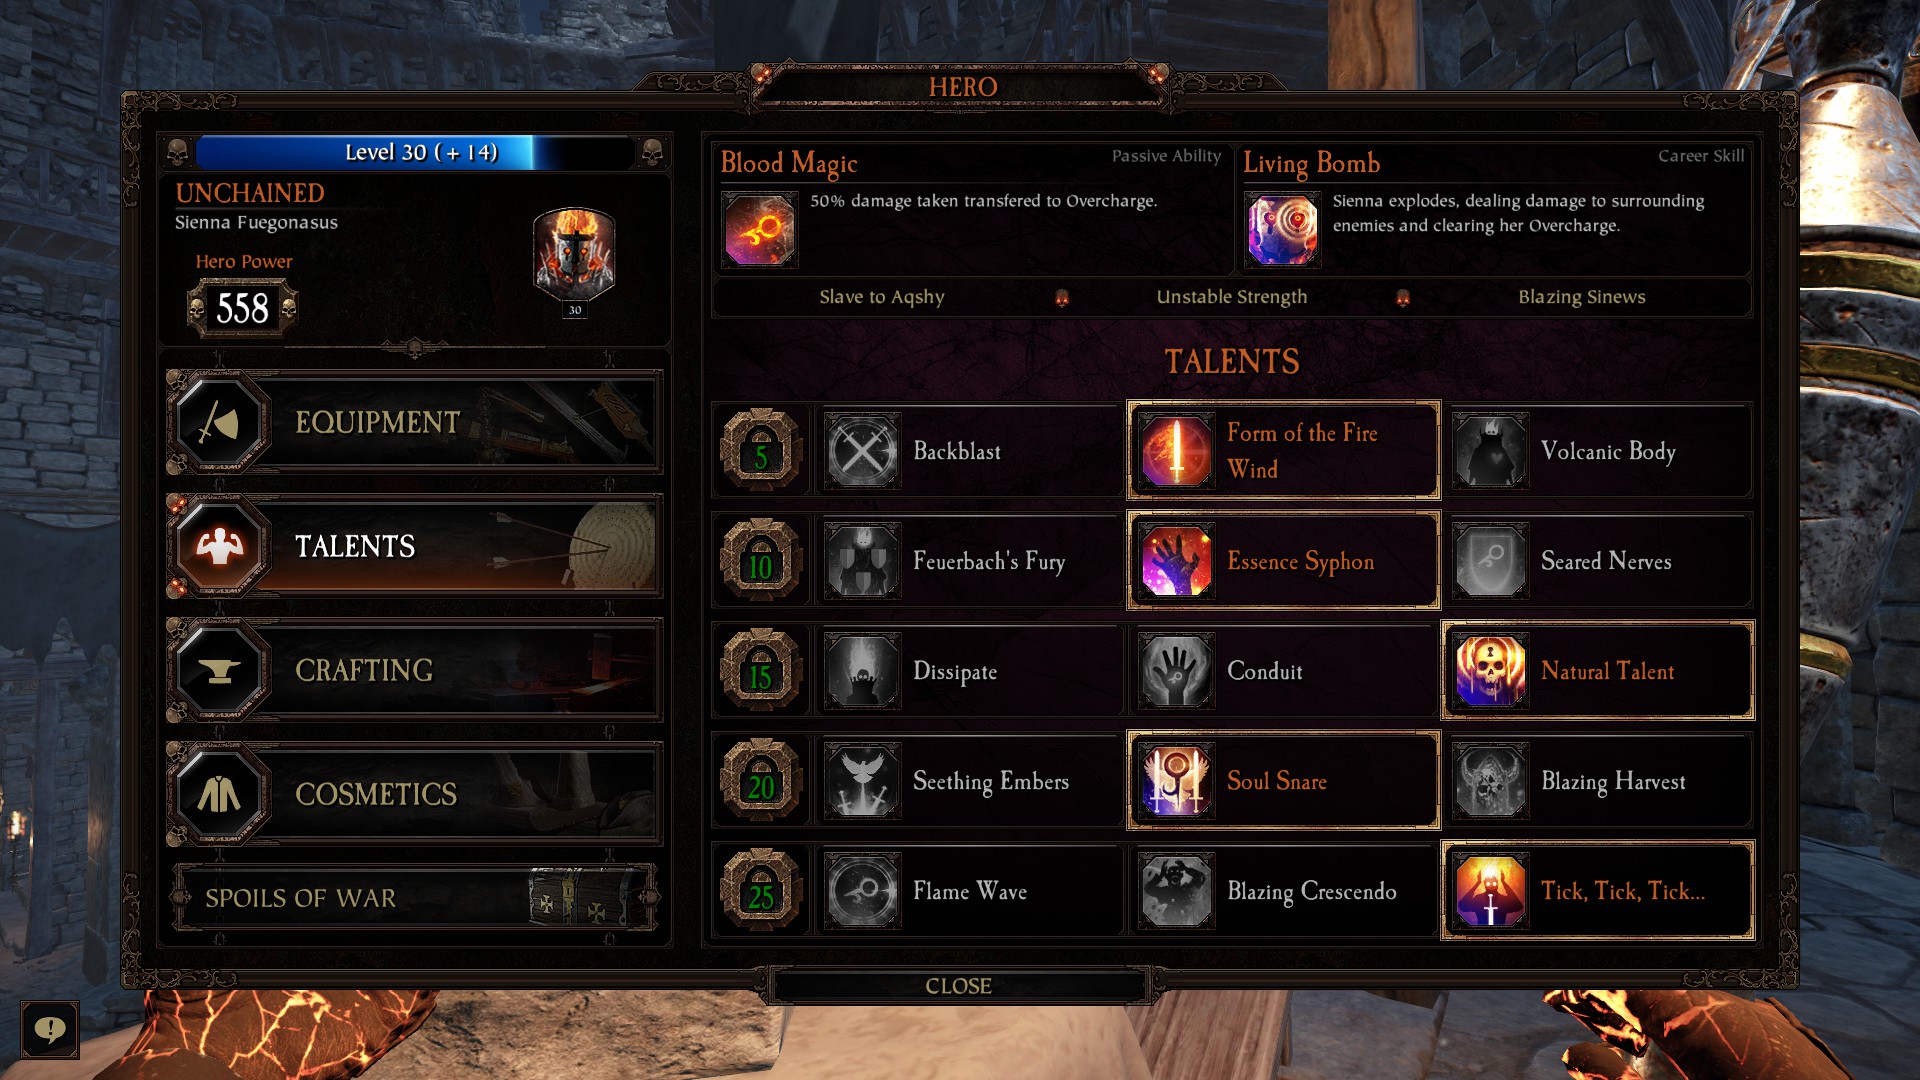
Tier 1: All of these talents are good so this makes it a somewhat hard choice, but I think Form of the Fire Wind wins out, it gives more Overcharge to play with. I play a very aggressive unchained though if you prefer the defensive then I would do Blackblast for the increased block angle then Volcanic Body would be the lowest, as odd as it is to say that.
Tier 2: Essence Syphon feels like the most useful, more so if you can get a good amount of Temp health before the boss is killed. Counts as using a healing kit or potion for healing wounds as well so overall less healing is needed.The other two just can’t compete with that.
Tier 3: Again, all of these are fair choices it comes down to less overall heat generated with Natural Talent, Venting faster with Conduit and reducing the damage from venting with Dissipate. I use Natural Talent.
Tier 4: Soul Snare like the other classes will always be my choice as it is more reliable, though that said I could see Seething Embers being worth it with a high crit chance build against a boss critting to get more temp health than to heal for more with Essence Syphon.
Tier 5: Tick, Tick, Tick… wins for me hands down, that ult being on cooldown is not a great time for her, having it back faster puts my mind more at ease. Increasing the damage or range has the negative effect of being more harmful to a team so not high on my list.
Summary
Pyromancer, Crit chance and Crit power items, Beam staff. Do this and you will have a good time. As things change I will add to this guide but as of this moment the Pyromancer build out does the others by a wide, wide margin.