Overview
SkullMod is a tool that lets you have custom game music, edit stages, and change around other tidbits. This guide teaches you how to use it!
Introduction
Want to test your modding mettle and change Skullgirls to your liking? Look no further; SkullMod allows you to edit music, stage textures, lighting, UI, and non-essential sprites with relative ease.
This guide will cover using SkullMod to create a “new” stage with altered music, textures, and lighting.
Preparation
Download SkullMod here[github.com].
For editing textures, I recommend using Photoshop CS6 or later as it has built-in DDS support (DDS being the format SG’s textures are in). You can also use Paint.NET or GIMP with a DDS plugin, but I haven’t tested these myself.
For editing audio I recommend Audacity, which you can download here[audacity.sourceforge.net]. You’ll also need ffmpeg[ffmpeg.zeranoe.com] and a tool that automatically converts mp3 songs to a format usable by Skullgirls, which you can download here[skullgirls.com].
Unpacking
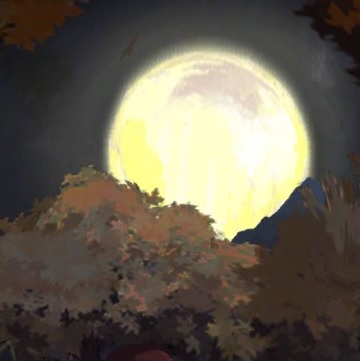
This is Maplecrest! It’s the stage that we’re gonna be working with for this guide. It’s a bright and colorful stage, so let’s turn a 180 and make it into a moody night stage; Slumbercrest!

Before anything else, we’ll need to gain access to Maplecrest’s texture files. Navigate to C:Program Files/Steam/steamapps/common/Skullgirls/data01, and you’ll find a bunch of GFS files. These files comprise the bulk of Skullgirls’ data, and they’re what SkullMod is made to edit! Stage textures are kept in levels-textures.gfs, our first target. Let’s dig in; it’s time to open SkullMod.bat.
SkullMod can unpack GFS files so that you can view and edit their raw contents. Click gfsEdit, and select the Unpack tab. Drag levels-textures.gfs into the drag-and-drop box, and click Unpack. SkullMod will unpack the contents of levels-textures.gfs into a folder in the directory that levels-textures.gfs is located in.
You can do this with any GFS file, and it’s the crucial first step to modding Skullgirls. Don’t forget it!
If you need to pack folders back into GFS files to test anything, skip forward to Packing.
Stage Textures: DDS Files and Transparency
Now that we’ve unpacked levels-textures.gfs, we can edit Maplecrest’s texture files. This guide will assume you’re using Photoshop for the job, which has built-in support for the DDS files that Skullgirls uses.
Navigate into the levels-textures folder you just created until you come across a bunch of DDS files. These files are the textures for everything in every stage; floors, backdrops, skyboxes, NPCs, everything. Maplecrest’s texture files are:
- maple.dds – The bulk of Maplecrest’s scenery, skybox, some NPCs
- maple_npcs_pets_01.dds – Animal NPCs
- maple_npcs_pets_02.dds – More NPCs
- maple2.dds – Part of Maplecrest’s road and grassy knoll
- maplecrest_anim_npcs_01.dds – The remainder of Maplecrest’s NPCs
First off, we’ll want to remove some of the NPCs. Why would they be hanging around at night?

You can paint over the alpha channel to remove any elements of a stage you don’t want visible (props like the blimp in Rooftops, NPCs, etc). Be mindful of the consequences if you are dealing with props that may cover up undrawn patches of the stage!
Stage Textures: Your Own Personal Touch
Here’s the part where everything relies on your creativity and artistic ability. With Photoshop, you can edit any aspect of a stage’s textures as you please! There’s a ton you can do with this that I can’t possibly all cover here, but I can document the progression of Slumbercrest to give you a general idea.


Maplecrest is now a pretty convincing nighttime stage, but our characters are still bright as if the sun’s beating down on them! This brings us to our next section…
Character Lighting
While stage lighting is baked into the textures, character lighting is dynamic. There’s no texture you can change to dim the lights on your character; instead you’ll have to edit a stage’s character light values.
Unpack levels.gfs, and navigate through the resulting folder until you find a collection of folders and LVL files. For this guide we need to edit Maplecrest’s lighting, so open up maple_crest_3d.lvl in a plaintext editor like Notepad.

For Slumbercrest, we’ll want to tone the ambient lighting down across the board so the characters appear dimmer, and make sure there is slightly more blue lighting than red or green so the characters are tinted alongside the stage. As such:
- Red ambient lighting (left) is lowered from 243 to 155.
- Green ambient lighting (mid) is lowered from 247 to 155.
- Blue ambient lighting (right) is lowered from 225 to 170, making it the most prominent lighting coloration.
BEFORE:
AFTER:

Most stages have additional point light sources; you may need to experiment on a stage-by-stage basis to tune them to your liking. In this case, the point lights can be left alone.
When relighting a stage, remember this rule of thumb used by Lab Zero themselves: A character should be around 20% lighter than the stage they’re on so they look like they belong on the stage, but without blending in too much.
Music
Slumbercrest might as well be done, but let’s give it a custom music track for good measure (and for tutorial purposes)! I want to use the song on the right as Slumbercrest’s music, so I obtained an MP3 of it to prepare for our next few steps.
Unpack music-win.gfs and navigate through the newly-created folder until you find a collection of WAV files. This is the music of Skullgirls, and it’s time to replace it with your own! Before we can do that, however, you need to make sure the song you want is prepared for the task.
Open the ffmpeg folder you downloaded earlier, enter the bin subfolder, and copypaste ffmpeg.exe to the same folder that adpcmencode.exe and convert.bat are in; the files in the other package you downloaded. Copy the MP3 you want to use into this same folder, and rename it “input”. Click convert.bat and the program should convert your song into a game-ready WAV. If you do not perform this step, your stage music will output as incredibly loud static.
Every stage in Skullgirls has two WAV files associated with it; one that contains the intro of the stage theme, and another that contains the looping segment that follows. If you’re clever and have a song well-suited for the job, you can edit your song into two WAVs so the intro of a song seamlessly segues into an indefinitely-looping segment without the song ever having to start over. The song above isn’t suited to this unfortunately, so we’ll just have to replace both slots with the same WAV. I’ll overwrite skull_maple_1.wav and skull_maple_2.wav with the above song in this manner.
We’re ready to go! We just need to bundle everything up…
Packing
Whether you’re all finished and ready to go or merely want to test your changes, you’ll soon need to pack your folders back up into GFS files. SkullMod has us covered!
Open SkullMod.bat, click gfsEdit, and select the Pack tab. Choose Select Directory, find the directory you wish to pack, and navigate downwards until you reach the temp folder. Doubleclick on temp, and click Open to confirm. Name your output file appropriately, check Include directory name, make sure alignment is on none (unless editing characters-art-pt.gfs), and click Pack.
If all went well, you should now have a new file sitting next to your temp directory in whatever folder you packed. Make sure this file matches the name of the file you originally unpacked, give it a gfs extension, and place it in C:Program Files/Steam/steamapps/common/Skullgirls/data01.
Additional Info
While SkullMod is a very useful tool, its uses are limited by Skullgirls’ design. Some GFS files are protected; if the game detects them as edited in any manner, it will immediately crash. Files protected in this manner include:
- All “characters” files
- dev.gfs
- ui.gfs
While these files may still be unpacked and viewed at your leisure, editing them is impossible and should not be attempted.
Closing
With SkullMod, we successfully transformed this:
Into this!

I really want Skullgirls modding to take off, so if there’s anything beneficial that you want added to 
Hope it helped!