
Overview
This is an unofficial guide for Slender: The Arrival that provides the backstory of the characters and how they contribute to the plot. This guide goes over the 9 levels and privides tips on how to complete them, the numbered note locations, collectables locations, achievements, and console commands. Because this is a fan-made guide constructive criticism and suggestions are always welcome in the comments. Please give this guide a like if you found it useful!
Controls

Movement
- W: Forward
- A: Straft Left
- S: Backward
- D: Straft Right
- Ctrl: Crouch
- Shift: Sprint
Camera
- Q: Zoom Out
- E: Zoom In
- Tab: Toggle HUD
Flashlight
- F: Toggle on/off
- RMB: Focus Flashlight (Used to stun Kate in “Into the Abyss”)
Other
- Esc: Pause game
- Tilde (~): Bring up console
Characters

Lauren
Lauren is the main character of Slender: The Arrival who investigates the disapearance of her friend Kate and finds out how it connects with Slender Man.
Kate (Proxy/Chaser)
Kate is a antagonist throughout most of the game but is the playable character in the Escape level. Because of Kate’s mother’s death, she decides to sell the house and asks Lauren to come visit, but cannot be found. The flashback level shows that she tries to escape Slenderman on a stormy night before Lauren’s visit by jumping out of her bedroom window, but is found as a proxy in the Into the Abyss level. Based on the letters between Kate and her friend C.R. throughout the game, the two friends both have seen Slenderman during past experences and share visions with each other.
Slender Man
Slenderman is the main antagonist of the game, and is held responsable of turning kate into the proxy. He appears in every level throughout the game, but isn’t a danger in the Prologue (since he only appears for a few seconds then disappears) and Homestead.
Carl Ross
Carl Ross or C.R. is a childhood friend of Kates who used to play “ghost hunting” in the woods with her (Kate’s mother didn’t approve of it). C.R. later in the story tries the help Charles Matheson who lost his son Charlie Matheson Jr. for reasons unknown by going to the Matheson Farm to investigate. Based on the letters he sends to Kate he wants to keep her safe even if it means leaving for good from their homes. At the end of “The Arrival” level you find what seems to be the corpse of C.R. in the radio tower.
Charles Matheson & Charles Matheson Jr.
Charles Matheson was the only one found dead in the remains of his house which was caused by arson. Based on a letter he wrote, he became depressed after his wife left and his son went missing, and felt like he didn’t deserve to live and go on with life. On another letter he wrote he said he could hear his son crying in his head and felt like it was his fault that his son went missing.
At that same time, C.R. often came to his house and asked about his son to help him. Charles tried to make him go away, but the man became more desprite. It is not known if it was Charles who burned his house down with himself inside, someone unknown, or if it was Kate who on the fridge wrote a list of supplies including a lighter and kerosone. She even wrote “Lock The House” which could mean that she didn’t want Mr. Matheson to escape his burning house (This is my theory which could be wrong). In the Memories level you see the final moments before Charlie was abducted by Slenderman. In the Prologue you find inside the burned down Matheson house Charlie crying about what seemes to be the death of his father.
Level 1: Prologue

The Beginning of the End
After the intro cutscene, you start off next to your car that has stopped behind a fallen tree, meaning that you have to instead continue the path to Kate’s house on foot. While you walk down the path, credits appear on the screen with the sound of an organ and chimes in the background, forshadowing mystery and trouble. When you come across Kate’s house at the end of the road, the sky suddenly turns dark. In the front yard you will find a swingset that brings up the message “I remember playing on this swingset with Kate when we were kids”. Outside Kate’s house, you see shattered glass next to the front door indicating something terrible happened.
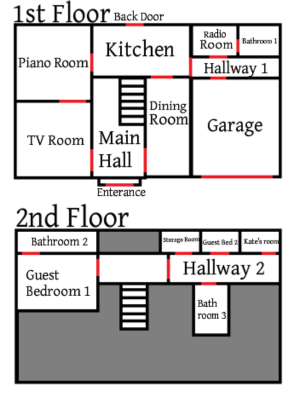
When you enter the house there are stairs leading to the second floor (I don’t recommend going up until you have a flashlight) and two doorways leading to rooms on either side. There are about 17 rooms in Kate’s house with several collectables and notes that you can collect (go to numbered notes and collectables section for more details). In one of the rooms on the first floor you will find a flashlight that will be used for the rest of your journey in the game (The location of the flashlight is randomized every time). Now that you have a flashlight, you can now head up the stairs to discover why Kate has disappeared.
The Room
At the end of the long hallway to the left is Kate’s room, but it is apparently locked, so you need to find the key to the door in one of the other rooms on the second floor (Like the flashlight its locations is randomized on the second floor). When you enter her room, you find many drawings on the walls and a single note on the desk that indicates that you must continue through the back gate of the house (You can see it if you look out the window). When you pick up the page you will hear the scream of Kate. When going to the back gate you might encounter slenderman a few yards away but if you advance toward him he disapears.
The Path Behind the House
When you head out through the back gate in the far distance to the right you come across a generator that activates a series of worklights down the path to the right. In the distant hills you might see a Slenderman silhouette which disapears in a few seconds after looking at it. Down the path you come across another generator the lights up a poster of Charlie and an upcoming wooden bridge. After you cross the bridge and walk down the pathway next to the river, you come across the Matheson household.
The Matheson Household
When you enter, you find everything to be burnt down and that it gets much darker. In the distance you can hear Charlie crying in one of the rooms in the house. When you come across him, you find him in the corner crying by himself, and if you disturb him he will jump at you and will dispay images on the screen for a second and then disapear. Besides that and collectables, there isn’t else to do in the house.
If you stay in the house long enough, an image of a father, mother and son happy together for a second or two.
Oakside Gate
When you activate another generator down the path, a construction site lights up with nothing else to do in there except collect a collectable on one of the sandbag stacks.When you get to the end of the pathway you come across the gate to Oakside Park. When you enter the Oakside Gate, you come across a book with writing all over the pages. After that the title of the game appears on screen, indicating that the game has now begun!.
Level 2: The Eight Pages

The Enterance
When the level fades in you continue from where you left off in the Prologue, but you notice that the closed door to your right is now open. After leaving the building and going down the path you come across an information center that has 4-5 collectables. When you enter the park by going through the gate the level has begun.
The Hunt
Once you’ve collected the first page, Slenderman starts to appear and a constant drum beat plays in the background indictating that Slenderman has begun hunting you. As you collect more pages, the background sounds become more omnious and the appearance of Slenderman becomes more frequent, trying to prevent you from collecting the 8th page.
The Blackout
Each time you enter the level, both the entrance to the park and the locations are randomly generated so it’s not always the same every time (The terrain isn’t randomly generated, but that would be pretty cool if it was). When you have collected the 8th page, everything goes silent as if the threat’s gone. But suddenly, Slenderman appears in front of you, leading you to running through the forest automatically with static going crazy on the screen. After a few seconds you suddenly blackout.
If you play on Hardcore difficulty, your flashlight has only limited battery, meaning that you have to only use it when nessesary, or else you’re in complete darkness which makes it EXTREMELY difficult to navagate the map.
Here are some tips in completing the level:
- Having the flashlight on can attract his attention and cause him to appear more frequently, so it is recommended to have it off some of the time to keep him away.
- Only sprint if nessesary, since it can attract Slendy’s attention with the noise you make. Another reason is if you constantly sprint, you will run out of stamima, meaning if he appears you can’t get away as fast.
- This one isn’t recommended as much as the previous ones, but crouching while walking reduces your noise, but makes you really slow.
Site 2: Information Center
Site 5: Water Tower
Site 7: Construction Area
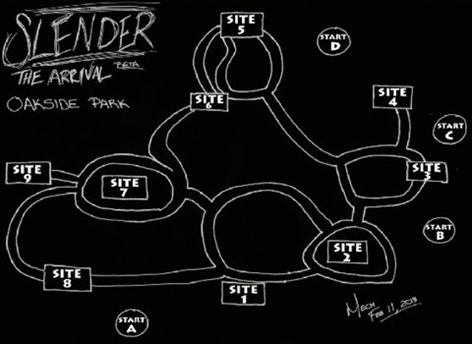
Sites 1, 3, 4, 6 and 8 has randomizing landmarks that will contain one of the following (Some landmarks may not appear in a playthrough): Billboard, Jeep, Old Car, Radio Tower, Porta Potty, and Campfire
Level map from the blog Spass Spiele
Level 3: Into The Abyss

Consciousness
When the level starts, you wake up from the previous level in a peaceful forested area outside of the park (you spawn in random locations, but are close to each other). If you explore around the area there are a couple collectables to find (one of them is well hidden).
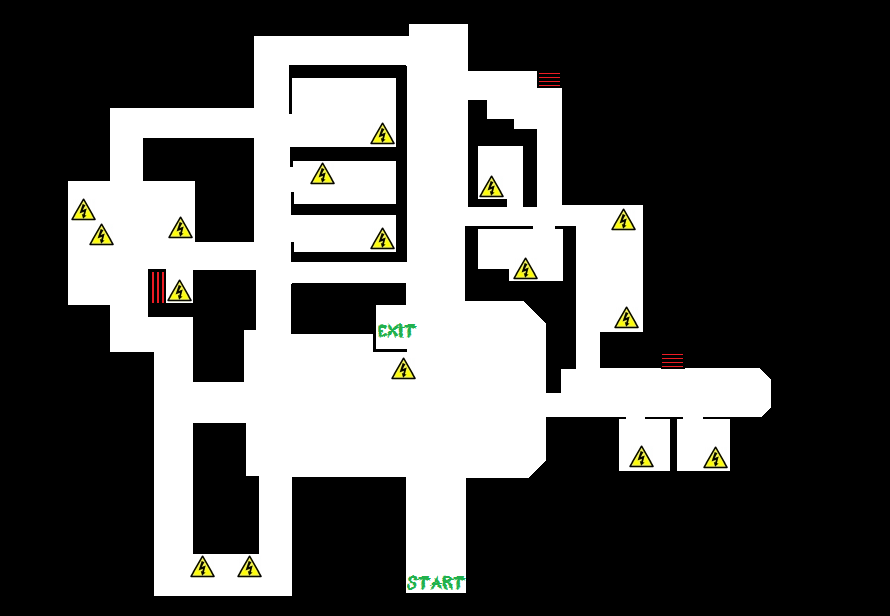
Kulman Mine
When you come across the mine a mysterious sound plays in the background indicating that the mine hasn’t been completely abandoned. When you enter the mine you pass by big crates and come across a small rectangular room with several collectables. When you continue into the mine, you come across a generator. When you activate it, the level begins.
Generator Hunting
In this level, the goal is similar to the collecting in The Eight Pages level. To escape the mine you need to activate 6 randomly scattered generators throughout the mine to power the elevator in the main room which will be used for your escape.
The Following Entity
While activating generators a mysterious hooded figure revealed as Kate roams the mine to stop you from achieving your task. If Kate catches you have a chance or two more to continue escaping. If she catches you 1-2 more times the game ends. As the amount of activated generators increase Slenderman himself starts to appear to assist Kate in stopping you.
Frantic Escape
Once all 6 generators have been activated quickly go to the main room and get onto the elevator platform. Press the big red button on the control panel to bring the elevator up through the shaft to get to the surface.
Here are some tips on how to beat this level
- As you pass rooms, look closely for bright red lights, since that means that there is a non-activated generator inside (so you don’t have to enter all of the rooms and save time)
- Don’t aways use your flashlight, since it can give away your position.
- When you’re in the room with the many crates, go up the stairs and to the end with the crate that sticks out that you can walk on. Wait for Kate to get close to you and then jump off and go down the nearby hallway. by doing this, she will go the other way down the stairs, making distance between you and her.
- When you hold right click to stun her with your flashlight, it makes her cover her eyes and stop, giving you time to regain stamina and run away as soon as you take your flashlight off of her.
- Make sure to not use up your stamina fast, since you will need it to run away if she is in view (if in some circumstance that you can’t use your flashlight in time).
- To lose Kate without having to run away, find a dark corner, turn off your flashlight and sit in the shadows until you wait for her to make her wierd noises and passes you unaware.

Level 4: Flashback

You start off at the top of the elevator and find a hallway to the outside. As you go down the path you can see the radio tower higher up (your destination) from where you are and you see from the edge of the path a forest below and mountains in the distance. You eventually come across a building with two VHR tapes near an old TV. One of them shows the disapearance of Kate in the Escape level and another shows the disapearance of C.R. in the Homestead level.
If you stick to the path on the edge of the cliff, you will come across a teddybear lying against a tree. Clicking on it will unlock and start the Memories level.
Level 5: Memories

Innocence
In this flashback level you are put in the eyes of Charlie Matheson when he was abducted by Slenderman. The level starts out facing a teddy-bear which assumingly is owned by Charlie and beach toys on a beach. In the distance you can hear the voices of Charlie’s parents calling him, urging you to find the source. As you walk down the shore of the beach, you notice a toy train lying in the sand that’s followed by other similar toy trains until you come across the edge of the woods.
Grasp
The lighting starts to turn a darkish blue green and a light fog fills the scene as you enter the forest which has no exit but only an enterance. The voices of Charlie’s parents start to get more urgent as they realize that they cannot find their son. Charlie also cries out for his parents as Slenderman’s notorious tenticles creep out from nowhere and strangle screaming Charlie into darkness. Although this level is very short and no jump scares are to be found, the atmosphere and the screaming for his parents make it a very creepy level.
Level 6: Escape

In this level you play as Kate drawing on her bed with a storm outside of her house. After a few seconds she picks up the camera and gets off the bed and whispers “He’s here”. The goal is to close 8 windows and doors before Slenderman appears. Wheither you closed all the windows or not doesn’t matter because either way Slenderman will appear. The new objective is to go to your room and hide, but when you enter your room he appears behind you, causing you to jump into the window, shattering the glass and falling to the ground below. You have now completed the level which will bring you back to the Flashback level.
Level 7: Homestead

The Investigation
Homestead is the one of longest levels in the game and is a flashblack level like Memories but instead is in the eyes of C.R. The game starts out in front of what is presumed C.R.’s car and him mumbling to himself about his investigation of the disapearance of Charlie. There are two pathways you can choose. You can either go straight through the shed and go straight to the rest of the level or you can start with the abandoned house which has some collectables and notes to collect.
When you enter the house you will notice that the inside is very dark and that there is a deep humming sound in the background. Before you enter the bathroom there is a note lying on a table which talks about a cellar and hide and seek. Besides the page and more darkness there isn’t anything else to find in the house.
When you enter the tool shed, you will notice that the exit is blocked by crates in some sort of elevator mechanism. To raise the crates, go up the stairs in the other room and click on the turning handle above your head on the second floor to raise the crates. This video I recorded shows me raising the crates. There is also a drawing of slenderman in front of a fire and Charlie’s name on a piece of paper.
Outside of the enterance to the barn is a Silo Generator which powers the lights inside of the barn. To turn the lights on you will need to find fuel to get the generator working. To the left of the generator is a small shed that leads to the other side of the fence into a corn field. When you reach the fork in the path, take the left path which leads to the previously mentioned cellar which contains the fuel that you need to power the generator (The path to the right takes you to a locked gate).
Charlie’s Cellar
When you go down into the dark cellar (Yes you have to go in there) the lighting gets SUPER dark except for lights that go off for a few seconds and come back on and then go back off again for a few seconds and so on. When you go down the hallways you will see in the distance when the lights turn back on Charlie standing motionless in your direction, but goes away when the lights turn off an on again. It is impossible (or from my experience) to be killed be Charlie in the basement even if you run toward him. When you try to go back out into the hallway in one of the rooms in the cellar you will see Charlie run past but won’t try to kill you. When you get the fuel and leave the cellar’s exit, you notice that the sun has gone down. When you go back into the corn field run toward the shed that leads to the silo and barn immediately or else Charlie will catch you.
The Silo
Go back to the generator and activate it using the canister that you collected in the cellar to turn on the lights inside of the barn. After getting the 1-2 collectables in the barn go to the remains of a burned down house where you will find the gate key.
The Chase
When you open the gate (at the end of the right pathway in the cornfield), you will come across a small church. When you enter the door shuts behind you and Slenderman will appear for a second, but then as soon as he comes he teliports away. In front of the pews you will find several red toy trains and a doll on the ground. When you pick up the doll Charlie bursts in through the door to the right of you and runs toward you To get away run back down between the pews, head into the room on the right, go down the hallway and then jump down the stage to make a loop around him to escape.
When you get to the end of the path you will find the back enterance to the abandoned house at the beginning of the level. When you head upstairs you will find a ransacked room with 4 collectables and writings on the walls. When you fall down through the “dropdown attic door” you will find Charlie behind you, giving you a 2 second headstart. To try to get away, run outside of the house to the car. But as you’re about to leave the enterance to the house you drop your camera which shows Charlie running past after C.R. Static suddenly appears on your screen and the level has ended.
Level 8: The Arrival

The Mountain Path
When you start the level you are in front on the old TV from the last level (After playing Homestead and Escape VHR tapes), but now the door to the outside is open. When you exit the building, you continue your journey climbing up the mountain, closer to reaching the Radio Tower. You then come across a small mine with a couple of pages and writing on the walls.
The Forest Fire
When you exit the cave you find a forest fire that was caused by unexplained reason. The goal is to run to the top of the hill while avoiding being burned and Slenderman who now tries to grab you with his tentacles.
Destination
When you enter the radio tower, the door behind you shuts closed, leaving you with your flashlight. The current goal is to find the key to the door across from the entrance in the of the rooms on either side. When you open the door and continue down the dark hallway only illuminated by some bonfires, your flashlight finally runs out of battery. As you go down the hallway, blue images appear on the screen, like the ones that you see when you disturb Charlie in the prologue.
Trapped
When you get down to the end of the hallway, you find a burnt corpse of C.R. next to a bon fire. Nearby is a video camera that plays disturbing sounds and voices when you click on it. When it’s finished it gets really all of a sudden. After a few seconds the light at the other side of the hallway dies, and Charlie attacks out of the shadows a few seconds later, leading to a black screen.
The End
After the blackout, you appear in a basement with a flickering lamp above with pages on either side, made into rooms by bars (maybe they were jail cells?) and Charlie crouched at the bottom of the stairs. To be able to get past him, you must collect each note on either side to make him disappear.
When you go up the stairs (you need to crouch to be able to get up) you are in a bunt house (like the Matheson house) that you have to navigate through to get to the room with the crying Kate. When you enter the room with Kate and disturb her, the proxy Kate jumps on you from behind (animation like when she tackles you and claws at you in Into The Abyss level and causes you to black out.
The last scene is where you see just the legs of Lauren on the ground through the camera and see her legs go out of screen being dragged away. When she has left the screen, the game goes black, going to the credits.
You have now beaten the game!
Level 9: Genesis

This bonus level is a remake of the original game Slender: The Eight Pages where of course, you collect eight pages. When you beat the level, a message by Slenderman appears on screen when he captures you says “I’ve got plans for you Kate”. The tips for this level are the same as The Eight Pages level previously in Slender: The Arrival, so refer back to the previous section for more details
Map level from Game Front slender page [link]

Level ???: The Glitched Level

The Glitched Level can only be entered by doing a sequence of events in the Prologue level
Step 1: Enter the scene Prologue
Step 2: Obtain flashlight in the house
Step 3: Turn on the radio in the first floor bathroom
Step 4: Go outside and collect the Charlie Matheson poster
Step 5: Quit to main menu
Repeat these steps 3-4 times and you will enter the secret level
Since it’s a secret level I won’t go into any detail about it 🙂
Once you enter the Secret Level there is no back, there is only forward…
Numbered Notes Locations

Note 1
(Prologue)The first note is located on a shelf by the stairs when you enter Kate’s house

Note 2
(Prologue)The second note is located in the room with the radio (If you don’t know where the room is, go through the door that connects with the dining room and the kitchen, and when you step in the kitchen, go right down the hallway and take a left).

Note 3
(Prologue)The third note is located on the playground at the back of Kate’s house

Note 4
(Into the Abyss) This one is a bit harder to do. Go to the house on the ground (not the one on stilts) and face your back to the boarded up door. At an estimated 30-40 degrees to the right, you should see two thick white trees (use your flashlight to make them stand out from the others more) and a thin white tree in front of the rocks on the left (look at the picture and you’ll see what I mean). Go straight between them and you should come to a rock wall that’s the edge of the map. Look left and you should see a hole in the rock wall and on the other side is the 4th page on a tree.

Note 5
(Into the Abyss)This one is much easier.Go to the house on stilts and the barrel to the left of the stairs has the 5th page on it.

Note 6
(Into the Abyss)This page is on the right of the mine’s enterance on a billboard with another piece of paper.

Note 7
(Into the Abyss) When you go into the mine and into the room on the right with the boxes and the chain wall, on the left is the 7th page on the control pannel thingy (look at picture).

Note 8
(Flashback)Right as you step off the elevator, go to the end of the hallway and you’ll find the page on the lowest box.

Note 9
(Flashback) When you get outside, walk down the path and to the left is a chain link fence with a page on it.

Note 10
(Flashback) When you go down the path that has the cliff on the left, keep track of the rock wall on the right because at a certain part the wall goes back and there will be a steep hill and on top is the 10th page

Note 11
(Flashback) When you continue down the path and enter the building, to the left on the wall above the boxes is the 11th page

Note 12
(The Arrival) When you exit the building, there is a path that goes up into a cave and on the path is the 12th page on a wooden stake.

Note 13
(The Arrival) When you go into the cave, at the far wall is an orange box with the 13th page on it.

Note ?
(The Arrival) When you get into the basement scene after the dead end in the radio tower with C.R., go into the room on the left and on the wall is the final page.

Collectables Locations

Thank You Letter
(Prologue)This paper is found on the table in the TV room in Kate’s house.

Honoring the Life of Beth Hayes Flyer
(Prologue)This paper is found on the table in the kitchen in Kate’s house.

To Do List Whiteboard
(Prologue)It is found in the kitchen on the refrigerator.

Charlie Matheson Jr. Missing Poster
(Prologue) To find it, put your back to the garage door of Kates house, and you should see a small piece of paper on a tree (Use flashlight to see better).

Apology Letter By CR
(Prologue) You will find this note behind the trashcan in Kate’s room

The burning of the Matheson House Newsletter
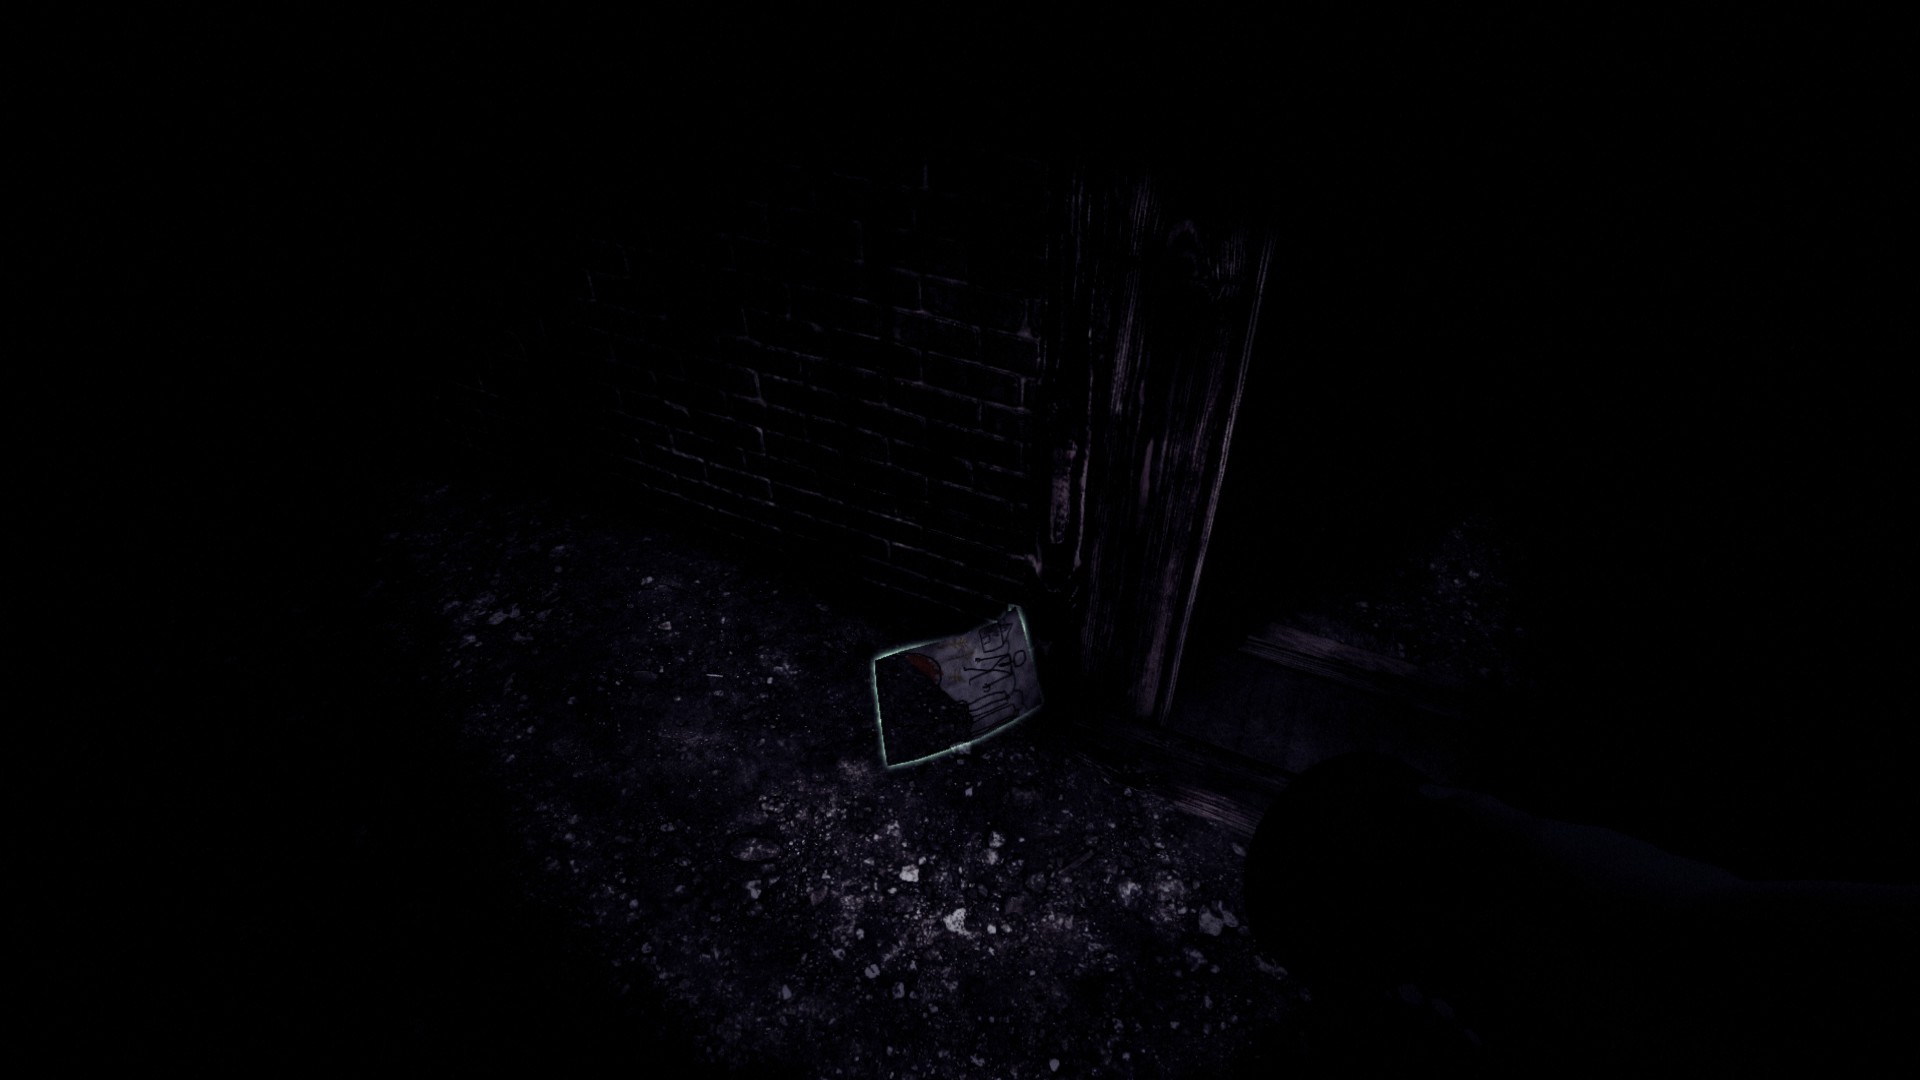
(Prologue) Down the path after you turn on the lights with the first generator you’ll find the paper on the object as shown above.

Crazy Letter
(Prologue) This page is found half burried when you enter the Matheson house and take two rooms to the right and one room forward.

Old Farm picture
(Prologue) in the back room of the Matheson house that is connected to the back door there is a picture that’s half burried in the ground.
Matheson Jr. Slender Drawing
(Prologue) When you leave the house through the back door to the right on the ground is Charlie’s drawing of Slenderman.
Residential Development in Oakside Park Outskirts
(Prologue) When you turn on the generator by the house an area will be lit up by the lights. On a pile of bags on the left side is the paper (use the picture to help find it)

Journal
You will find it in the biggest room in the Oakside Park gate on the table on the far side by the door.

Oakside Park Map
(The Eight Pages) It is located on a wall of the information center or on a cardboard box at the beginning of the level.
Oakside Park Canoeing rules
(The Eight Pages) It is located on a wall of the information center at the beginning of the level with the park map.

Oakside Park Canoe renting sign
(The Eight Pages) It is the sign on the infromation center at the beginning of the level. Collecting this sign gives you an achievement.

Attention All Employees Letter
(Into The Abyss) This page is found on the billboard outside of the mine’s enterance next to the 6th paper.

Letter by Charles Matheson
(Into the Abyss) This letter is hidden behind the wall shown in the picture on the left side of the enterance of the mine.

Evacuation Instructions
(Into the Abyss) You will find it in front of you when you enter the second room in the mine on the chain link wall.

Park Sold to Mining Co. article
(Into the Abyss) You will find it at the far side of the second room you enter in the mine.

The NO’s paper
(Flashback) You wil find it outside next to the door of the building with the TV.

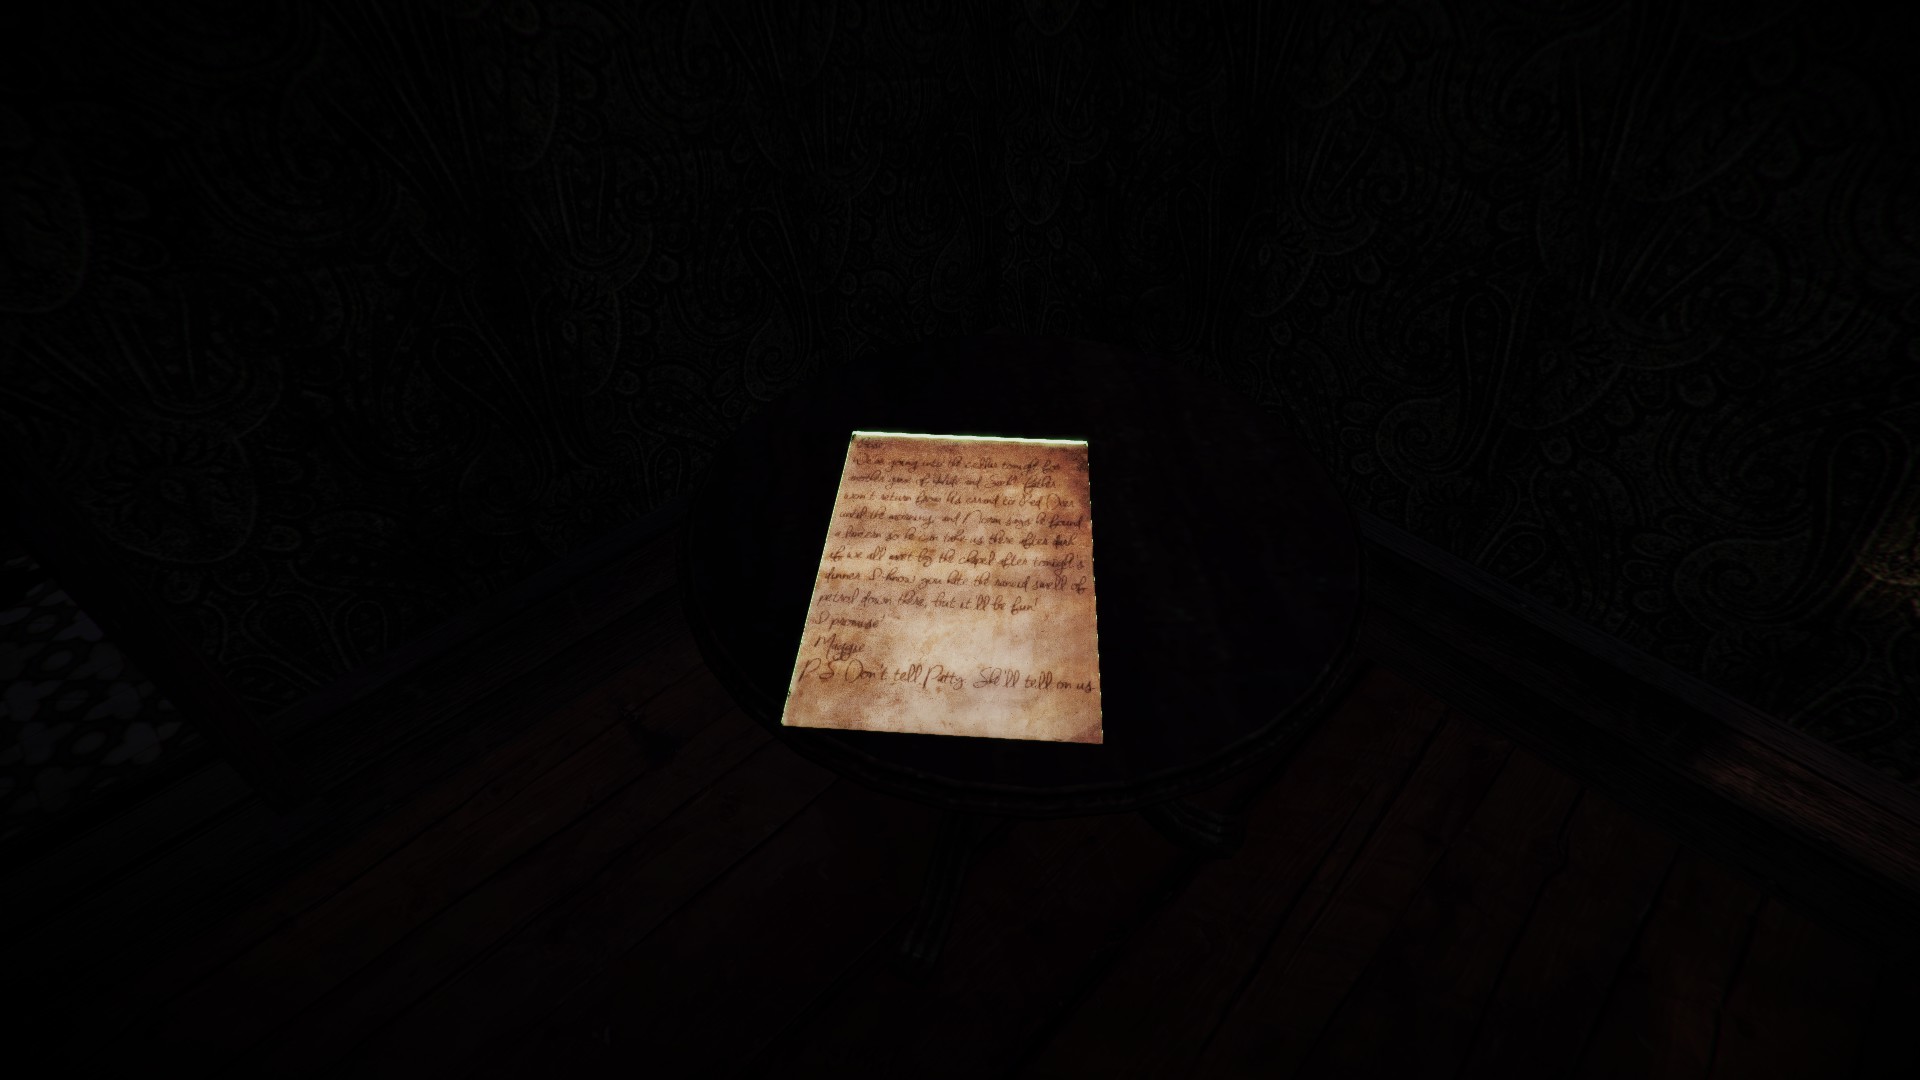
Letter by Maggie Matheson
(Homestead) You will find it in the old house at the beginning of the level on a table.
Slenderman and the kids
(Homestead) You will find it inside the big shed before coming across the barn and silo.

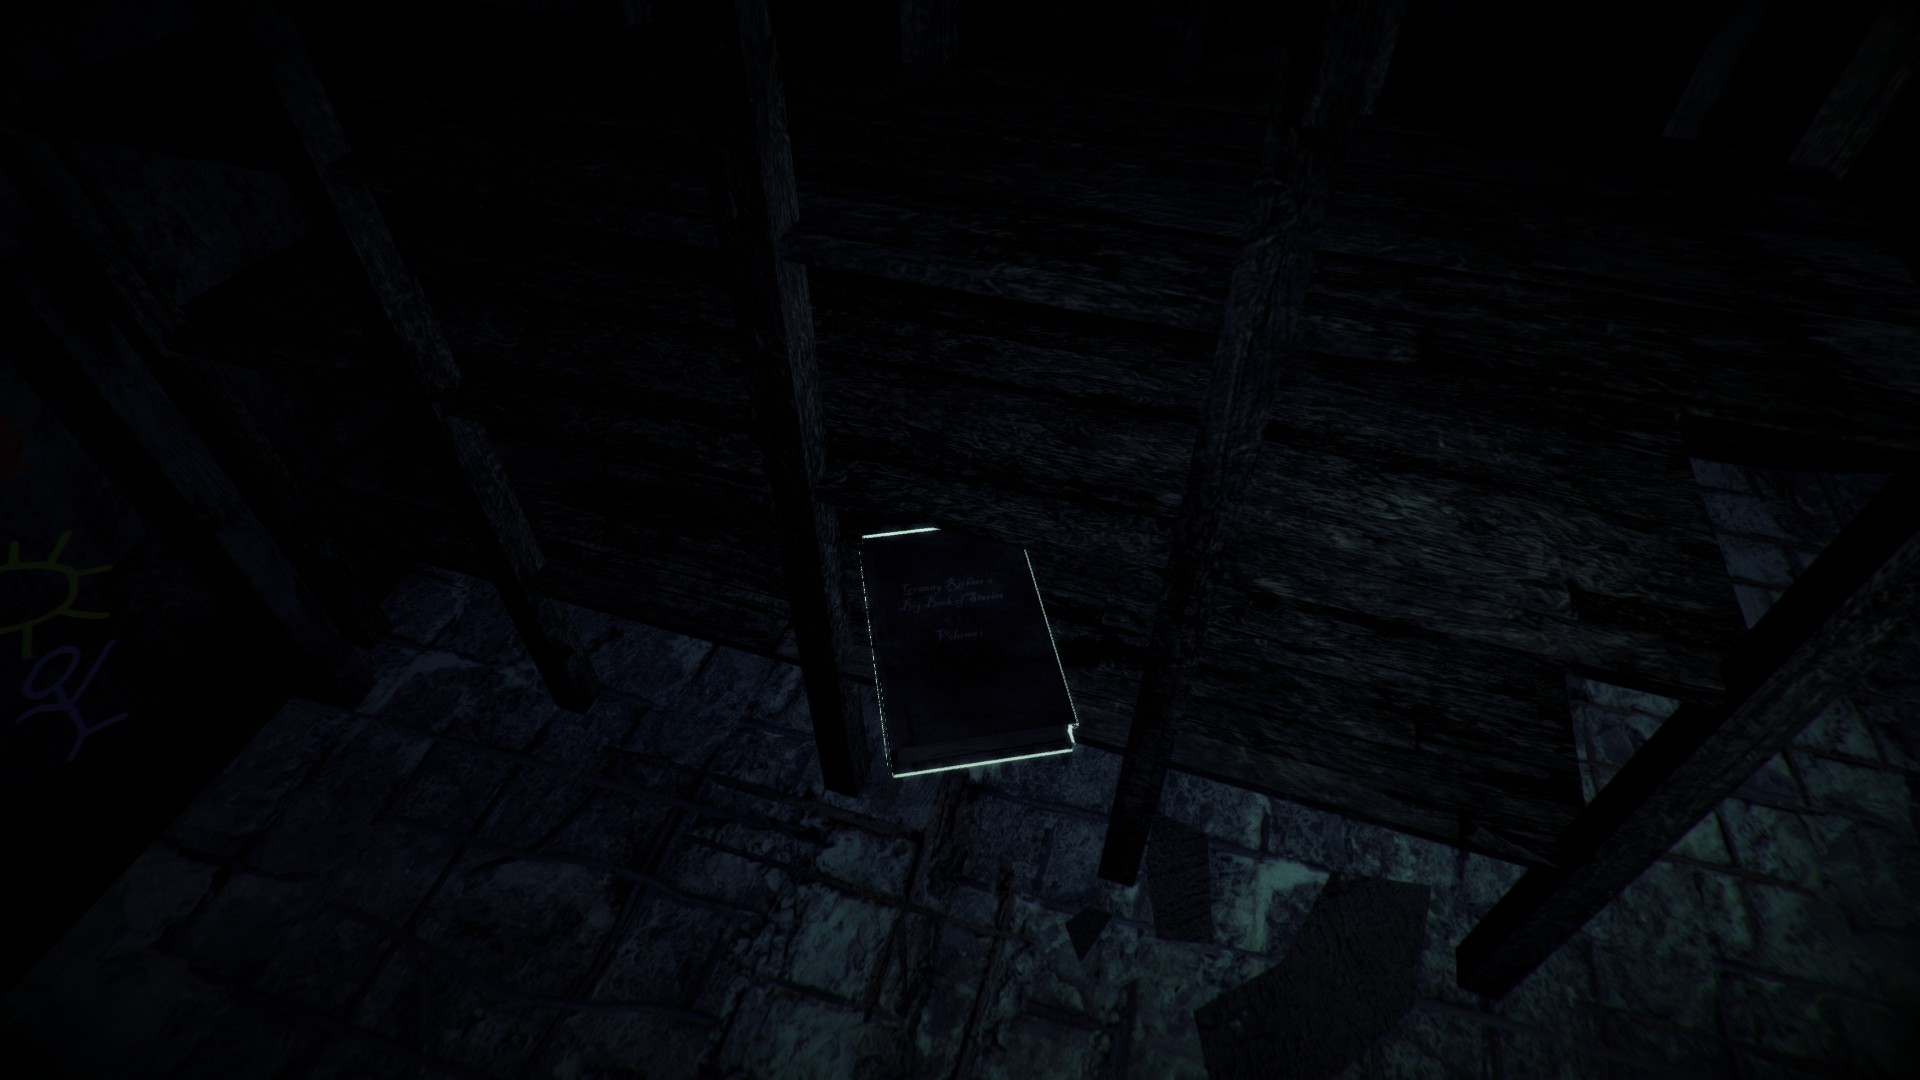
Grannie’s Big Book of Stories
(Homestead) You will find it on a shelf in one of the rooms in the cellar.
Kulman Mine Sign
(The Arrival) You will find it outside the enterance to the mine on the right side.

The Crazy Paper II
(The Arrival) It is in the cave that is before the forest fire and after the flashback on the TV. There is white writing on the walls.

Letter by Charles Matheson 2
(The Arrival) It is in the basement with the ? Note but is in the room on the other side.
Achievements

Master Pianist

Fearless Fun

Insta-Killed

Marathon Runner

Tangled

I…I’ll just…take this..I guess?

I’m Free!

I Love Radio

Get Me Out of Here!

Well At Least You Tried

Speed Runer III

Why Am I Still Playing This Game?

Cry Baby

Speed Runner I

Speed Runner II

The Collector I

Retro Fan

I Escaped?

Fire Proof

The Collector II

Fearless

Console Commands

To open the console, press the ~ key on the top left corner of your keyboard. With the console open, you can use it to do cheats including infinite sprint and unlocking all levels. Here is a complete list of all of the commands (type in these phrases exactly how I put them or else it won’t work).
1. addprogress
Add 1 towards completion of objectives
2. progress
Completes all objectives
3. toogledebug 1
Enables Debug Mode. Enables use of some other commands and gives information currently in game (Slenderman’s position…etc)
4. master 1
Enables GodMode, Unlimited Sprint & Unlimited Stanima
5. god 1
God Mod (Will cause looping issures if captured, disable to resume at checkpoint)
6. lockscenes
Relocks all levels/scenes/stages
7. resetscrapbook
Removes all scrapbook items
8. iamallama
Returns with “No you aren’t”
9. showfps
Displays Frames Per Second
10. sprint 1
Unlimited sprint
11. stamina 1
Unlimited stanima
12. unlockscrapbook 1
Unlock all scrapbook items
13. unlockscenes 1
Unlocks all scenes/levels/stages