Overview
A simple, step-by-step guide on how to get into Orbit. No advanced techniques, no difficult mathimatics, and if you do it right, no unnessassary explosions.
How to Space: Building the Rocket
The Penguin Space Program welcomes you to Space 101. In this lesson, you will build a rocket that will leave atmosphere, make orbit, and land safely again.
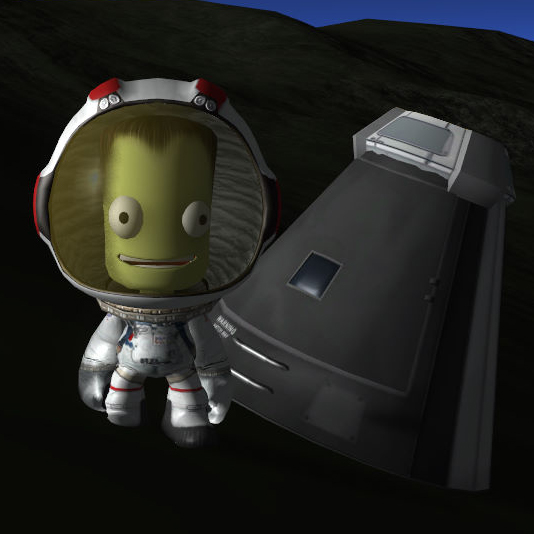
The Command Pod
 Start off with the simple Command Pod Mk.1. Although unmanned pods keep your Kerbals safe, they need electricity to work, and have no built-in SAS. Do yourself a favor and risk the Kerbal. He knew the risks when he signed up. Besides, these risks can be mitigated with…
The Parachute

DO NOT FORGET THIS THING IF YOU HAVE KERBALS ON BOARD. We know that every Sci-Fi show in the world has a rocket that lands using its engine, but a powered landing is way more difficult than you need right now. Since we’re not worrying about reusing the rocket later, then the parachute can just go on the command pod.
Decouplers, SAS, & Batteries

Without decouplers, you have no control over where the rocket explodes. With them, you have power over which parts explode. The command pod is the only think we want back, so put the decoupler directly under the pod.
SAS modules let you keep the rocket from spinning around in space when you don’t want it to. We at the Penguin Space Program follow the Rule of One Per Plus One: one SAS under the command pod, and one SAS per engine.
While we’re here, slap a battery pack down. SAS needs electricity to work, and the command pod only carries so much. For this rocket, one battery pack will be enough. We promise.
Fuel
 Don’t go overboard with the fuel. Every bit of fuel you take with you is extra weight for your engines to fight. You might be tempted to add more engines to counter the added weight, but that just means you’ll run out of fuel faster. You can easily get into an endless spiral of adding fuel and engines until the rocket collapses under its own weight.
In this case, we’ll use this smallish fuel tank to circularize the orbit, and come back down from space.
Engines and more SAS
 Like with fuel, don’t go too crazy with the engines. The bigger the engine, the more power it can put out, which means you can go faster. It also means you’ll use more fuel, so a giant engine is just overkill.
 Don’t do that.
Remember the Rule of One Per Plus One. Another SAS goes just above the engine here.
More fuel, more engines, and winglets
 The next stage is the one that’ll get us out of atmosphere, so it needs to be bigger. We’ll use the next size up of fuel tank, and a more powerful engine.
Since this stage is in the atmosphere, winglets will work better than SAS to keep the rocket pointing straight. You’ll want one of the winglets with control surfaces so you can actually control it.
 These winglets don’t have any control surfaces, so all they’ll do is make your rocket flail wildly. if you prefer…
 You can add seperate control surfaces. We’ll use the ones that come with control surfaces just to make this easier. Use the symmetry to make things easier later on.
More Rockets!
 The next stage is the one that you’ll start off from. You’ll want more fuel, but the size of the engine can stay the same. Again, remember the SAS.
Radial Decouplers and Symmetry
 We’re going to need to put some boosters on to get us up to speed, but we also want the main engine to be firing while we’re at it. Make sure to use symmetry to keep you Center of Mass in line. Otherwise, your rocket will start tipping over, and you will not be going to space today. In this case, x4 symmetry is enough.
Solid Fuel Boosters
 The mythical perfect engines. Solid Fuel Boosters, or SRBs, burn fast and hard, and aren’t affected by the throttle. For most rockets, if you use them, you’ll want to put them on the first stage from launch. Otherwise, they’ll just be dead weight.
Top them off with Nose Cones to cut down on drag. It’ll make you go a bit faster, and you’ll look cool doing it.
Stability: Struts fix everything!
 For safety’s sake, we’ll attach the SRBs via struts to the main body. Struts will keep the booster from twisting around, which could tear the booster off and send it flying into the main body. That would be bad.
Launch Stability Enhancers will keep the rocket from tipping over the launch pad. Without them, the rocket would be standing on only the engines, and which might cause it tofall and explode horribly.
Pre-Launch Remajiggering
 We’ll want to move some of the staging around before we put this thing on the launch pad. We’ll put the Launch Stability Enhancers, the main engine, and the SRBs all on the same stage so that everything goes up at once. Next, the radial decouplers, so that the SRBs drop off without slowing down the rocket.
Finally, alternate between decouplers and engines until we get to the last decoupler. We can put the parachutes on the same stage as the last decoupler, since the parachutes don’t activate until you’re in atmosphere.
Put a name on the rocket, then push that Launch Button!
How to Space: Getting to Space
 The sun is rising, and Jebediah Kerman is ready to go to space.
Before you start the Rocket
 Make sure you turn on SAS by pressing ‘R’ before you launch. If you leave SAS off, then you’ll be at the mercy of your rocket, and your personal ability to keep the rocket straight. Don’t be a hero; let the computer fly for you a bit.
When you’re ready, throttle up to 1/3rd, and launch into the air.
Stage One: SRBs
 At about 8,000m, the SRBs will run out of fuel. Cycle to the next stage to drop them once they stop burning so you’re not carrying the dead weight, and throttle up to full power.
Stage Two: the Main Engine
 Once you pass 10,000m, start your “gravity turn”. Turn to the right until you’re pointing at about 45 degrees, and just stay there for a while.
Stage Three: the Secondary Engine
 The main engine will run out of fuel at around 20,000m. Start up the next stage and keep on course at 45 degrees.
Stage Four: the Orbital Engine
 By the time the secondary engine runs out of fuel, you’ll have an apoapsis of about 130,000m. Cut the throttle and cycle to the last engine in the staging.
 Click on the apoapsis to set up a maneuver. Pull the yellow slider until the projected apoapsis and periapsis are about even in terms of altitude, about equal to your apoapsis. At this point, you can either wait for an hour in real time to reach the maneuver, or fast forward via the time controls until you’ve got about 10 seconds until you reach it.
 Once you hit the maneuver node, turn to point at the blue mark on the trackball, and throttle up to full until the green slider reaches 0.
Welcome to Orbit!
 You’re now in orbit with half a tank of gas left! Stay up there as long as you want, then burn retrograde (toward the light green mark on the trackball) until you run out of fuel, and you’ll be back on a course to the ground. Change stages until the parachute activates, turn off the SAS, and watch the shiny reentry effects.
How to Space: Gratuitous Rentry Effects


Thanks for reading!