Spriting for Starbound
Quick pixel art fundamentals!
Let's talk about what makes pixel art feel authentic. I won't spend too much time on this because there are tons of discussions online about this same topic. That said, I feel like many of them are too wordy. Let's get started!
To understand pixel art is to understand two types of limitations. Limitation in size, and limitation in color. Most people understand the limitation in scale, but not everyone understands the limitation in color.
To demonstrate how effective you can be with a limited palette, here's a boulder I made.

This is 25x25 pixels, so it's pretty small. That's an obvious example of size limitation. But what might not be immediately apparent, is that this is only 4 shades of the same color.
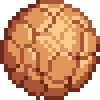
Now that it's bigger, can you tell? Here's the exact colors I used:

To understand pixel art is to understand two types of limitations. Limitation in size, and limitation in color. Most people understand the limitation in scale, but not everyone understands the limitation in color.
To demonstrate how effective you can be with a limited palette, here's a boulder I made.
This is 25x25 pixels, so it's pretty small. That's an obvious example of size limitation. But what might not be immediately apparent, is that this is only 4 shades of the same color.
Now that it's bigger, can you tell? Here's the exact colors I used:
How does Starbound do it?
Like in the section above, many of Starbound's colors utilize only 4 shades maximum. Let's break down some colors in Starbound for good measure.
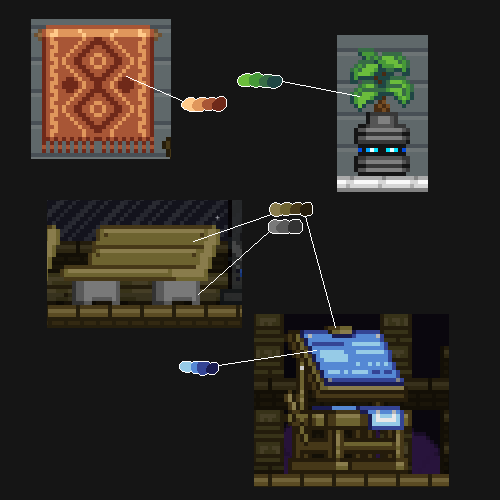
As you can see, Starbound rarely ever goes above 4 shades per color. Did you notice how the wood color remained the same between two entirely different objects? This is a great example of how Starbound remains thematically consistent between objects, by reusing the same palette between two different usage cases. For your reference, here's an image where I've collected a number of colors from Starbound.
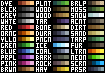
Here's a smaller one for when you're working on a small canvas:

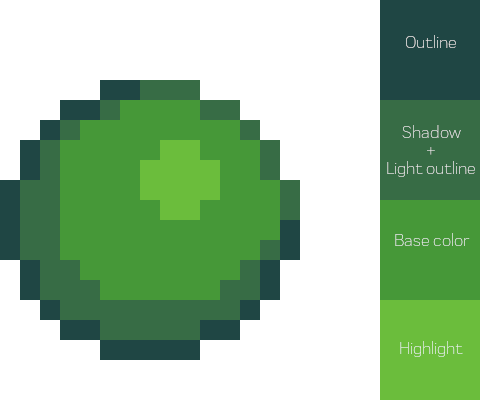
Now that you have an understanding of how many colors are used in Starbound, here's a small breakdown of how they are used. I've sprited a small green ball here and labeled what color I used for what.
As you can see, Starbound rarely ever goes above 4 shades per color. Did you notice how the wood color remained the same between two entirely different objects? This is a great example of how Starbound remains thematically consistent between objects, by reusing the same palette between two different usage cases. For your reference, here's an image where I've collected a number of colors from Starbound.
Here's a smaller one for when you're working on a small canvas:
Now that you have an understanding of how many colors are used in Starbound, here's a small breakdown of how they are used. I've sprited a small green ball here and labeled what color I used for what.
What software should I use?
Doesn't matter mostly, although the software you use should support exporting transparent images, and it helps if they allow a custom grid, since Starbound typically works on an 8x8 grid.
I recommend GIMP or Aseprite, myself. Aseprite is paid, but has really nice animation and palette tools if you're working on an animated object, but GIMP is free and works well too, just not so much for animation.
Here I'll show you how to set up an 8x8 grid in GIMP.
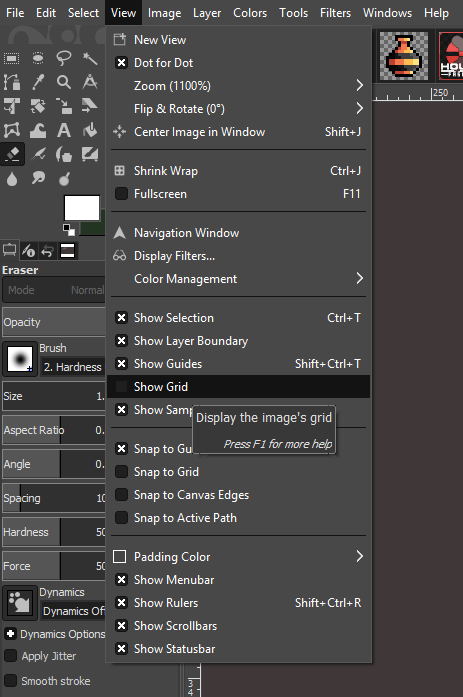
1.) Go to View and check "Show Grid."
2.) Your grid is now visible!
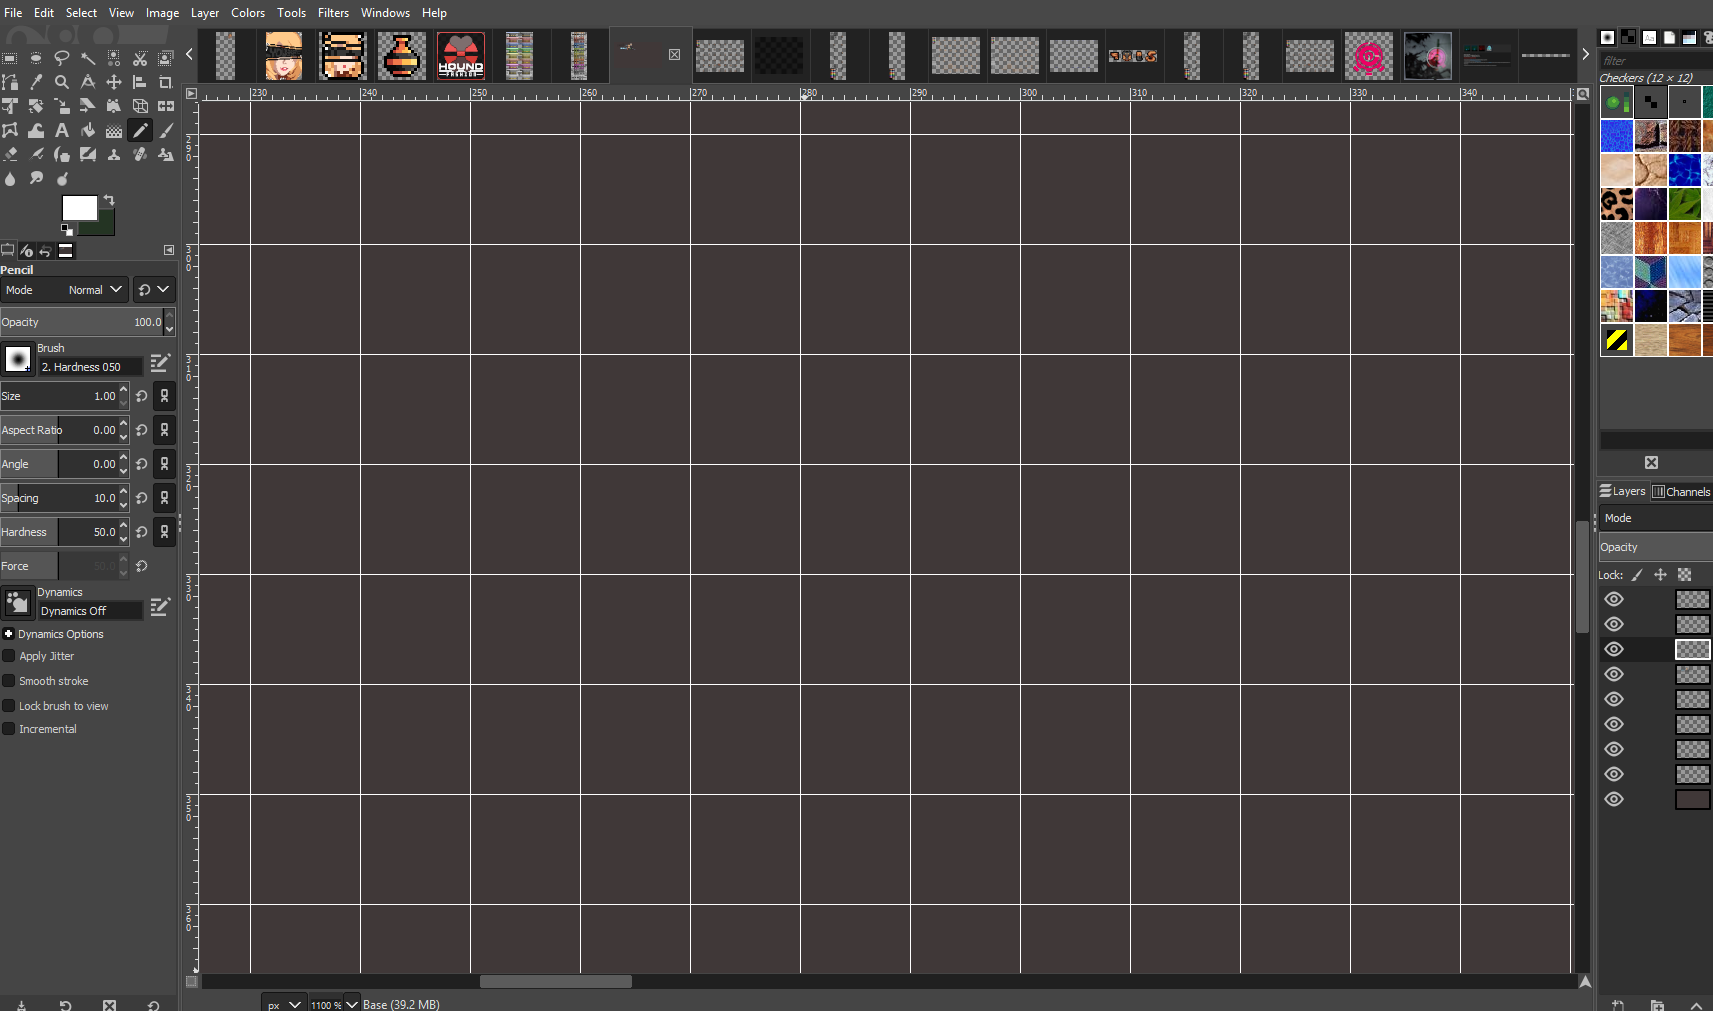 but it's probably not configured to 8x8.
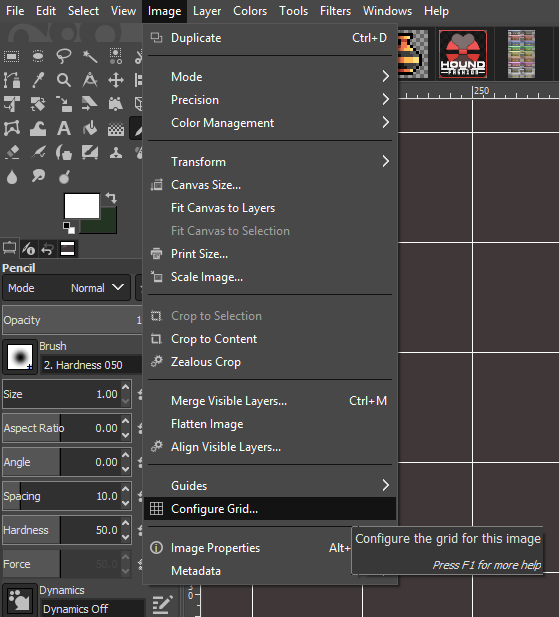
3.) Go to Image and click "Configure Grid..."
4.) Configure your grid to be 8x8 pixels. Unlink the little chain icon before you do though.
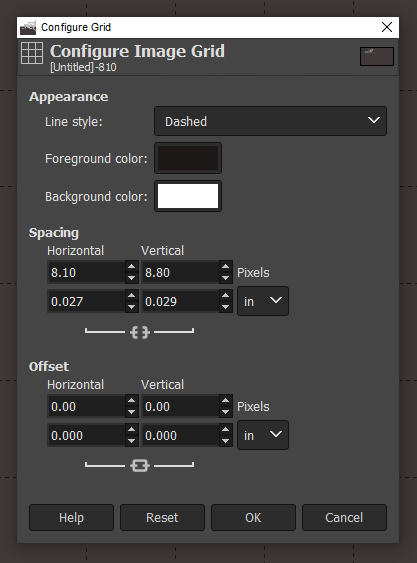
You can mess with the coloration and style of the lines too if they're too distracting.
That should be it for GIMP! In Aseprite it's as simple as going to
View > "Grid" > "Grid Settings".
I recommend GIMP or Aseprite, myself. Aseprite is paid, but has really nice animation and palette tools if you're working on an animated object, but GIMP is free and works well too, just not so much for animation.
Here I'll show you how to set up an 8x8 grid in GIMP.
1.) Go to View and check "Show Grid."
2.) Your grid is now visible!
but it's probably not configured to 8x8.3.) Go to Image and click "Configure Grid..."
4.) Configure your grid to be 8x8 pixels. Unlink the little chain icon before you do though.
You can mess with the coloration and style of the lines too if they're too distracting.
That should be it for GIMP! In Aseprite it's as simple as going to
View > "Grid" > "Grid Settings".
More examples!
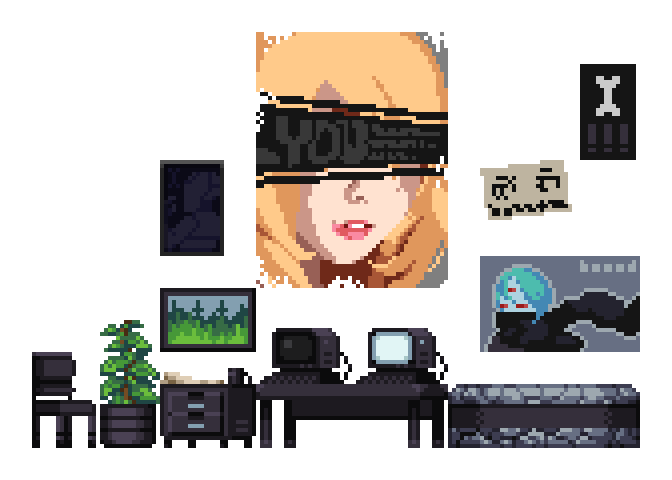
Here's some of my sprite art to give you an example of what I said above in practice. Get to work and have fun!
More Starbound guides
- Starbound 100% Achievement Guide★ 5 (3k)60k views5k ♥14 minUpdated Jan 21, 2024
- How to construct a liquid erchius fuel generator★ 5 (726)40k views1.9k ♥2 minUpdated Jan 19, 2019
- Starbound: Гайд для начинающих! [Первые боссы, Первый Артефакт - Флоран!]★ 5 (1.1k)39k views1.8k ♥35 minRussianUpdated Jun 14, 2017
- Русификатор для Starbound 1.4.4★ 5 (770)38k views997 ♥1 minRussianUpdated Feb 16, 2021
- Starbound + Frackin’ Universe Guide to Automation [Part 1]★ 5 (451)33k views1.5k ♥23 minUpdated Oct 19, 2024
- Русскоязычное руководство по моду Frackin' Universe (частично актуально)★ 5 (975)30k views2.2k ♥52 minRussianUpdated Nov 26, 2024




This guide was created by its original author on the Steam Community. Are you the author and want it removed? Request removal.