![STAR WARS Jedi Knight: Dark Forces II Remastered Mod [Simple Guide][03.07.2020] for STAR WARS™ Jedi Knight: Dark Forces II](https://steamsolo.com/wp-content/uploads/2021/07/star-wars-jedi-knight-dark-forces-ii-remastered-mod-simple-guide-03-07-2020-star-wars-jedi-knight-dark-forces-ii.jpg)
Overview
This guide shows the simplest possible way to get the Remastered/HD version of game (hardware acceleration, compatibility fixes, high resolution support, new textures, nicer models, FOV configurability etc.) on Win 7/8/10 machines. I created this this guide because just like many other people I’ve had issues with game eg. black screen after adding mods or inability to play modded game directly from Steam. So I created this simple guide I would love to have before my “adventure” with modding SWJKDF2. This guide: provides link to one mod installer package (yeah, only one with JKGFXMOD, the Jedi Knight Neural Upscale Texture Pack, the Enhancement mod for JkGfxMod and Jedi Knight 2009 FOV – Mipmap Patches included), explains how to install it (which certainly is not a rocket science) and configure game in mod settings (which is simple when you know what to do), explains in what way launch modded game for a first time and how to configure it in game settings , explains how to integrate modded game with Steam (launching it directly from Steam and working Steam Overlay). It works like a charm on my Intel/Nvidia rig (i74770k, RTX2070Super, 16GB RAM) in 2560×1440 resolution.
Download and Install Mod Installer Package
Check Jedi Knight Remastered project site on Mod DB: [link] if that is what you want. Author of the package provides us with short information about it as a whole and about its components (with links to each of them if you would like to install them separately).
Screenshot with info about mods:

If you like it, download mod installer package from [link] and unpack it.
Screenshot with download site:

After unpacking the interior of your Jedi Knight Remastered folder should look like this:

Run the JediKnightRemastered v1.0.exe from folder displayed above and install the mod package into your Jedi Knight Dark Forces 2 game directory. For Steam default directory is:
C:Program Files (x86)SteamsteamappscommonStar Wars Jedi Knight
so You need to change to above one or Your custom one (mod package default directory is GOG directory).
You should install Mod Package on fresh Steam installation. If you played game before, You should uninstall it and remove any files from or just delete Star Wars Jedi Knight folder in Steam directory and install fresh game.
Screenshots from installation process:

After installation you will get 4 new icons.
Do not launch game at this moment.
Configure Mod Package
After installation of Mod Package, you should run JKR Configuration shortcut on your desktop or in the Start Menu Jedi KnightRemastered folder. After clicking it Windows will ask You about the program you want to open the settings configurator with. Choose Notepad like I did:

Then you may modify your settings in Notepad and then save changes. Most important is to put your desktop resolution and FOV (field of view) which is default 90 (and that is bad FOV). Below is my configuration with 2560×1440 resolution and 115 FOV:
{
“resolution”: [ 2560, 1440 ],
“fullscreen”: true,
“correct_game_aspect_ratio”: false,
“correct_menu_aspect_ratio”: true,
“hud_scale”: 4.0,
“max_anisotropy”: 16.0,
“antialiasing”: {
“type”: “SSAA”,
“samples”: 2
},
“enable_bloom”: true,
“enable_ssao”: true,
“enable_parallax”: true,
“enable_texture_filtering”: true,
“enable_posterized_lighting”: false,
“vram_texture_preload_size”: 700,
“command”: “jkr-fov115.exe”
}
It requires a decent rig. If the game stutters for you, try to play with max_anisotrophy and antialiasing.
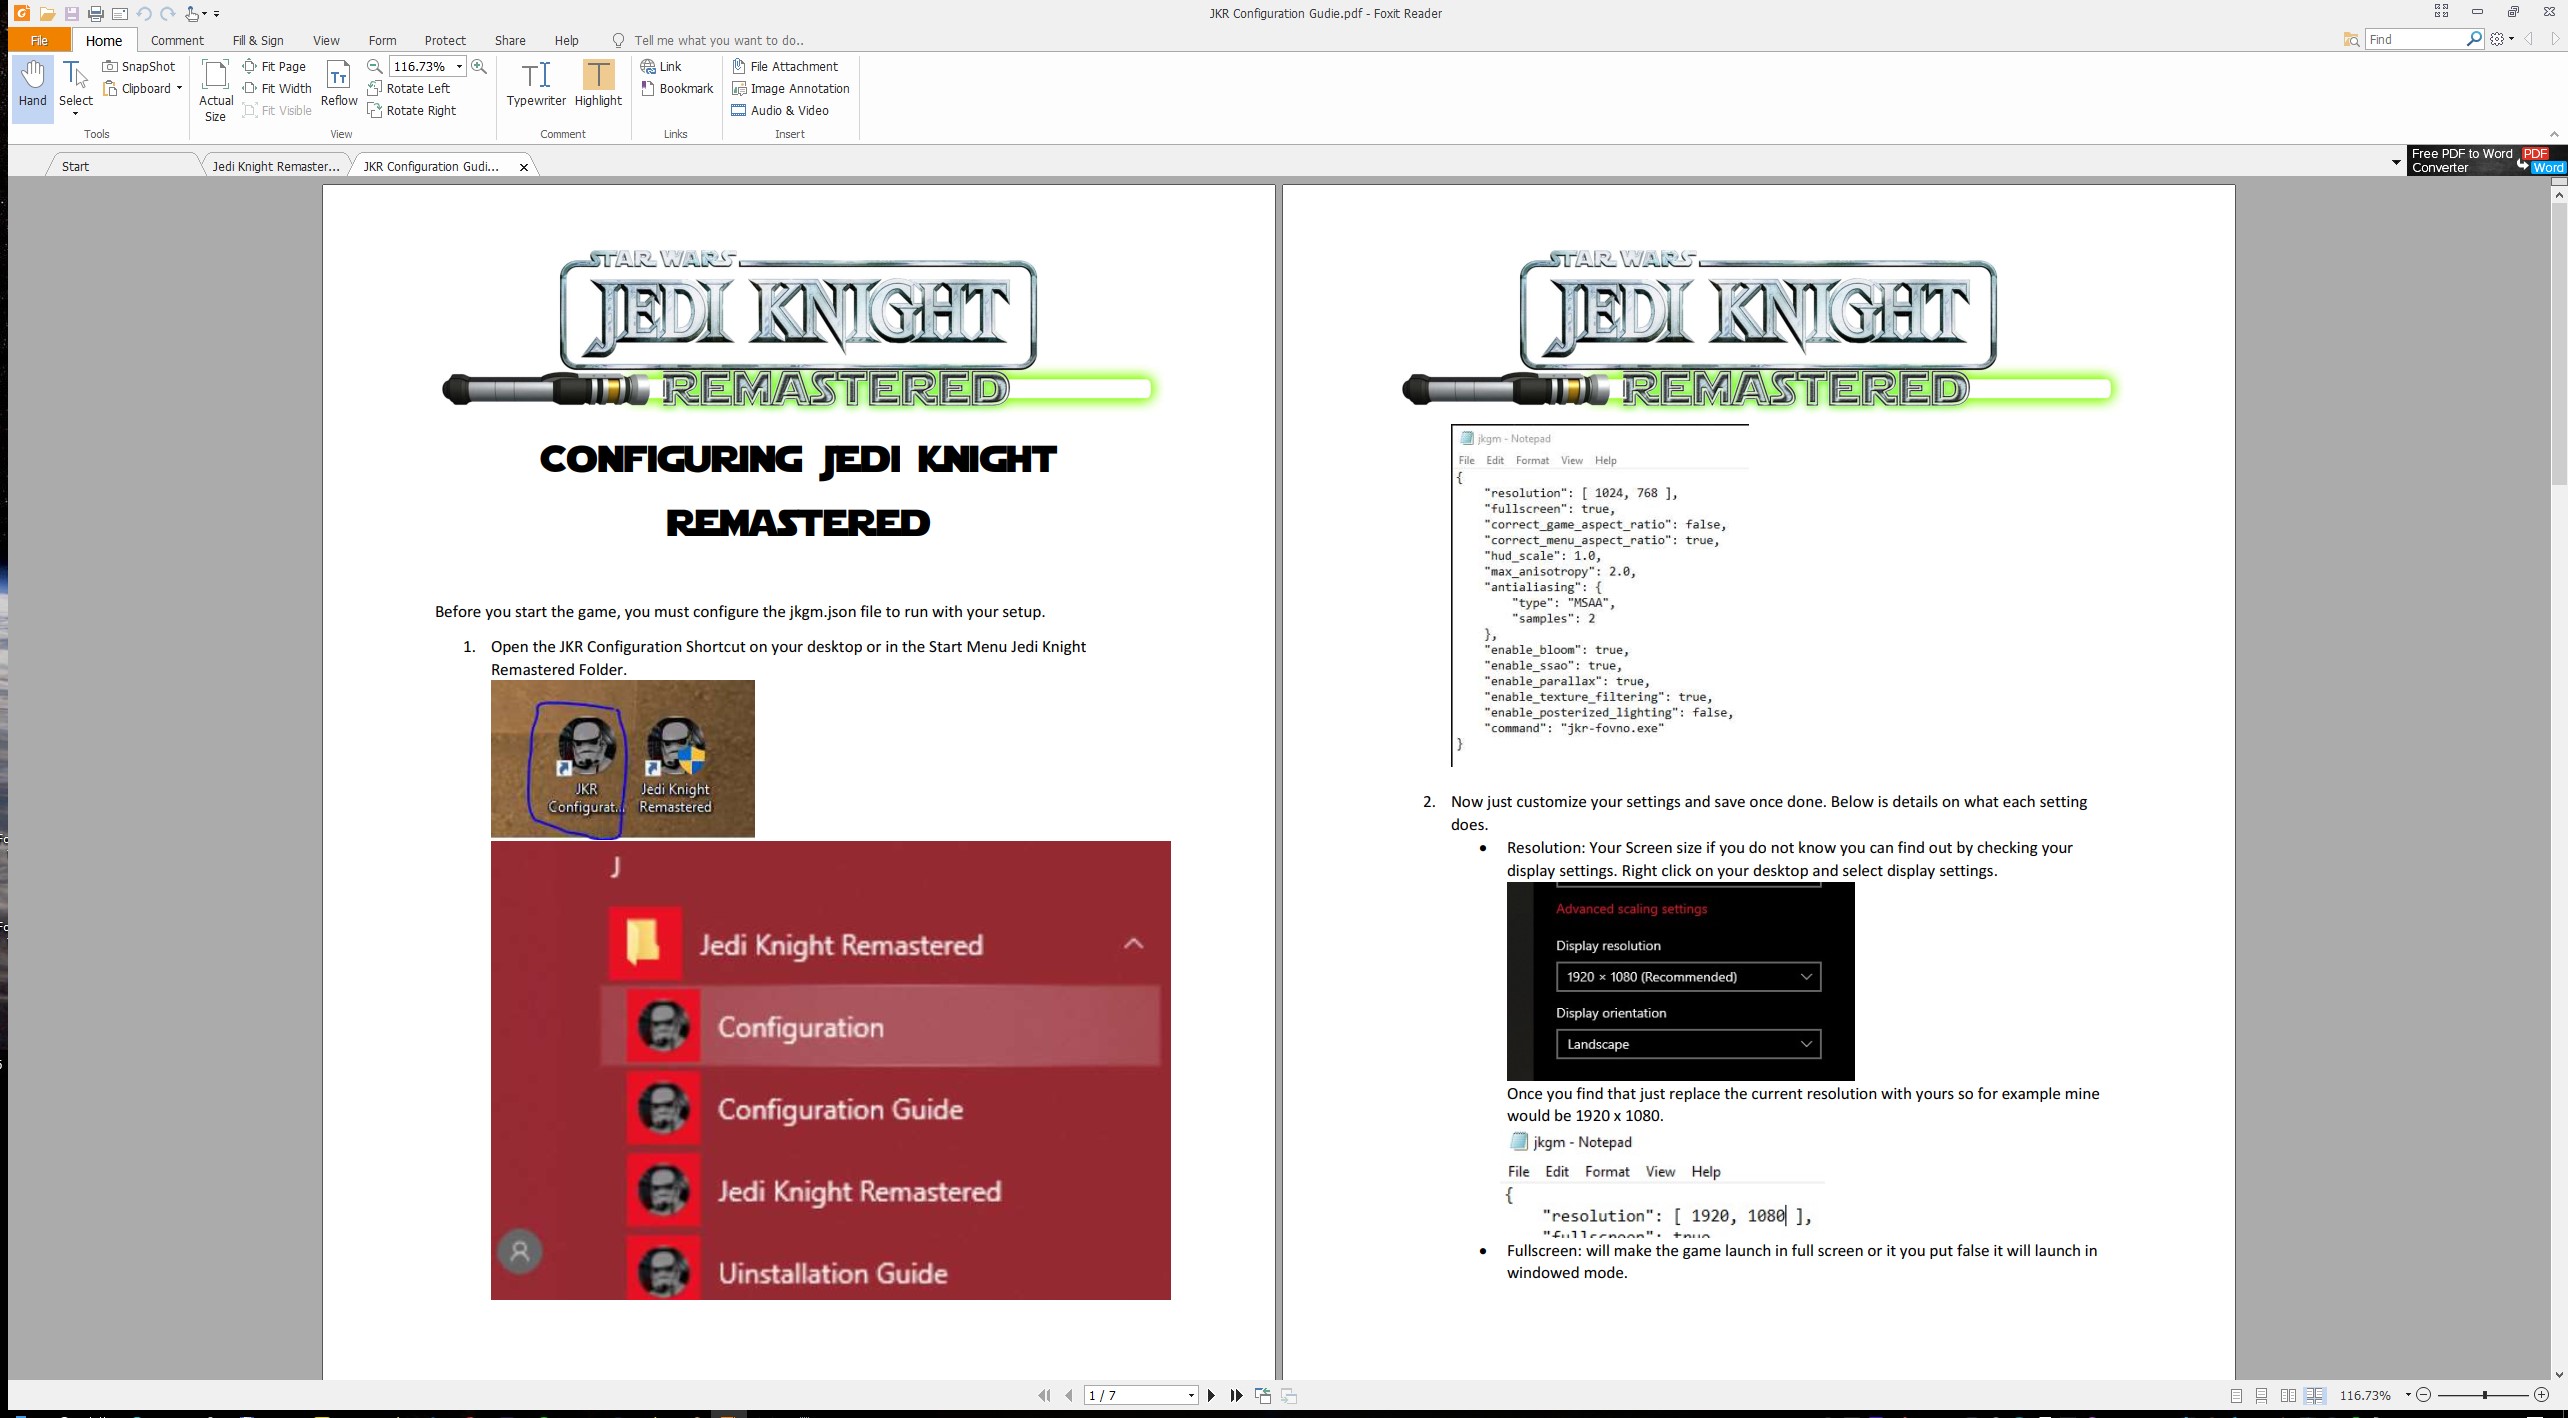
You may check JKR Configuration Guide shortcut to see what different options do. It launches .pdf file which looks like this:
Right-click on Jedi Knight Remastered shortcut and set it to administrator rights as I did:

Configure Game Settings
Run game from Jedi Knight Remastered shortcut (not from Steam) and set ingame options:
Enable/Disable subtites in General Settings:

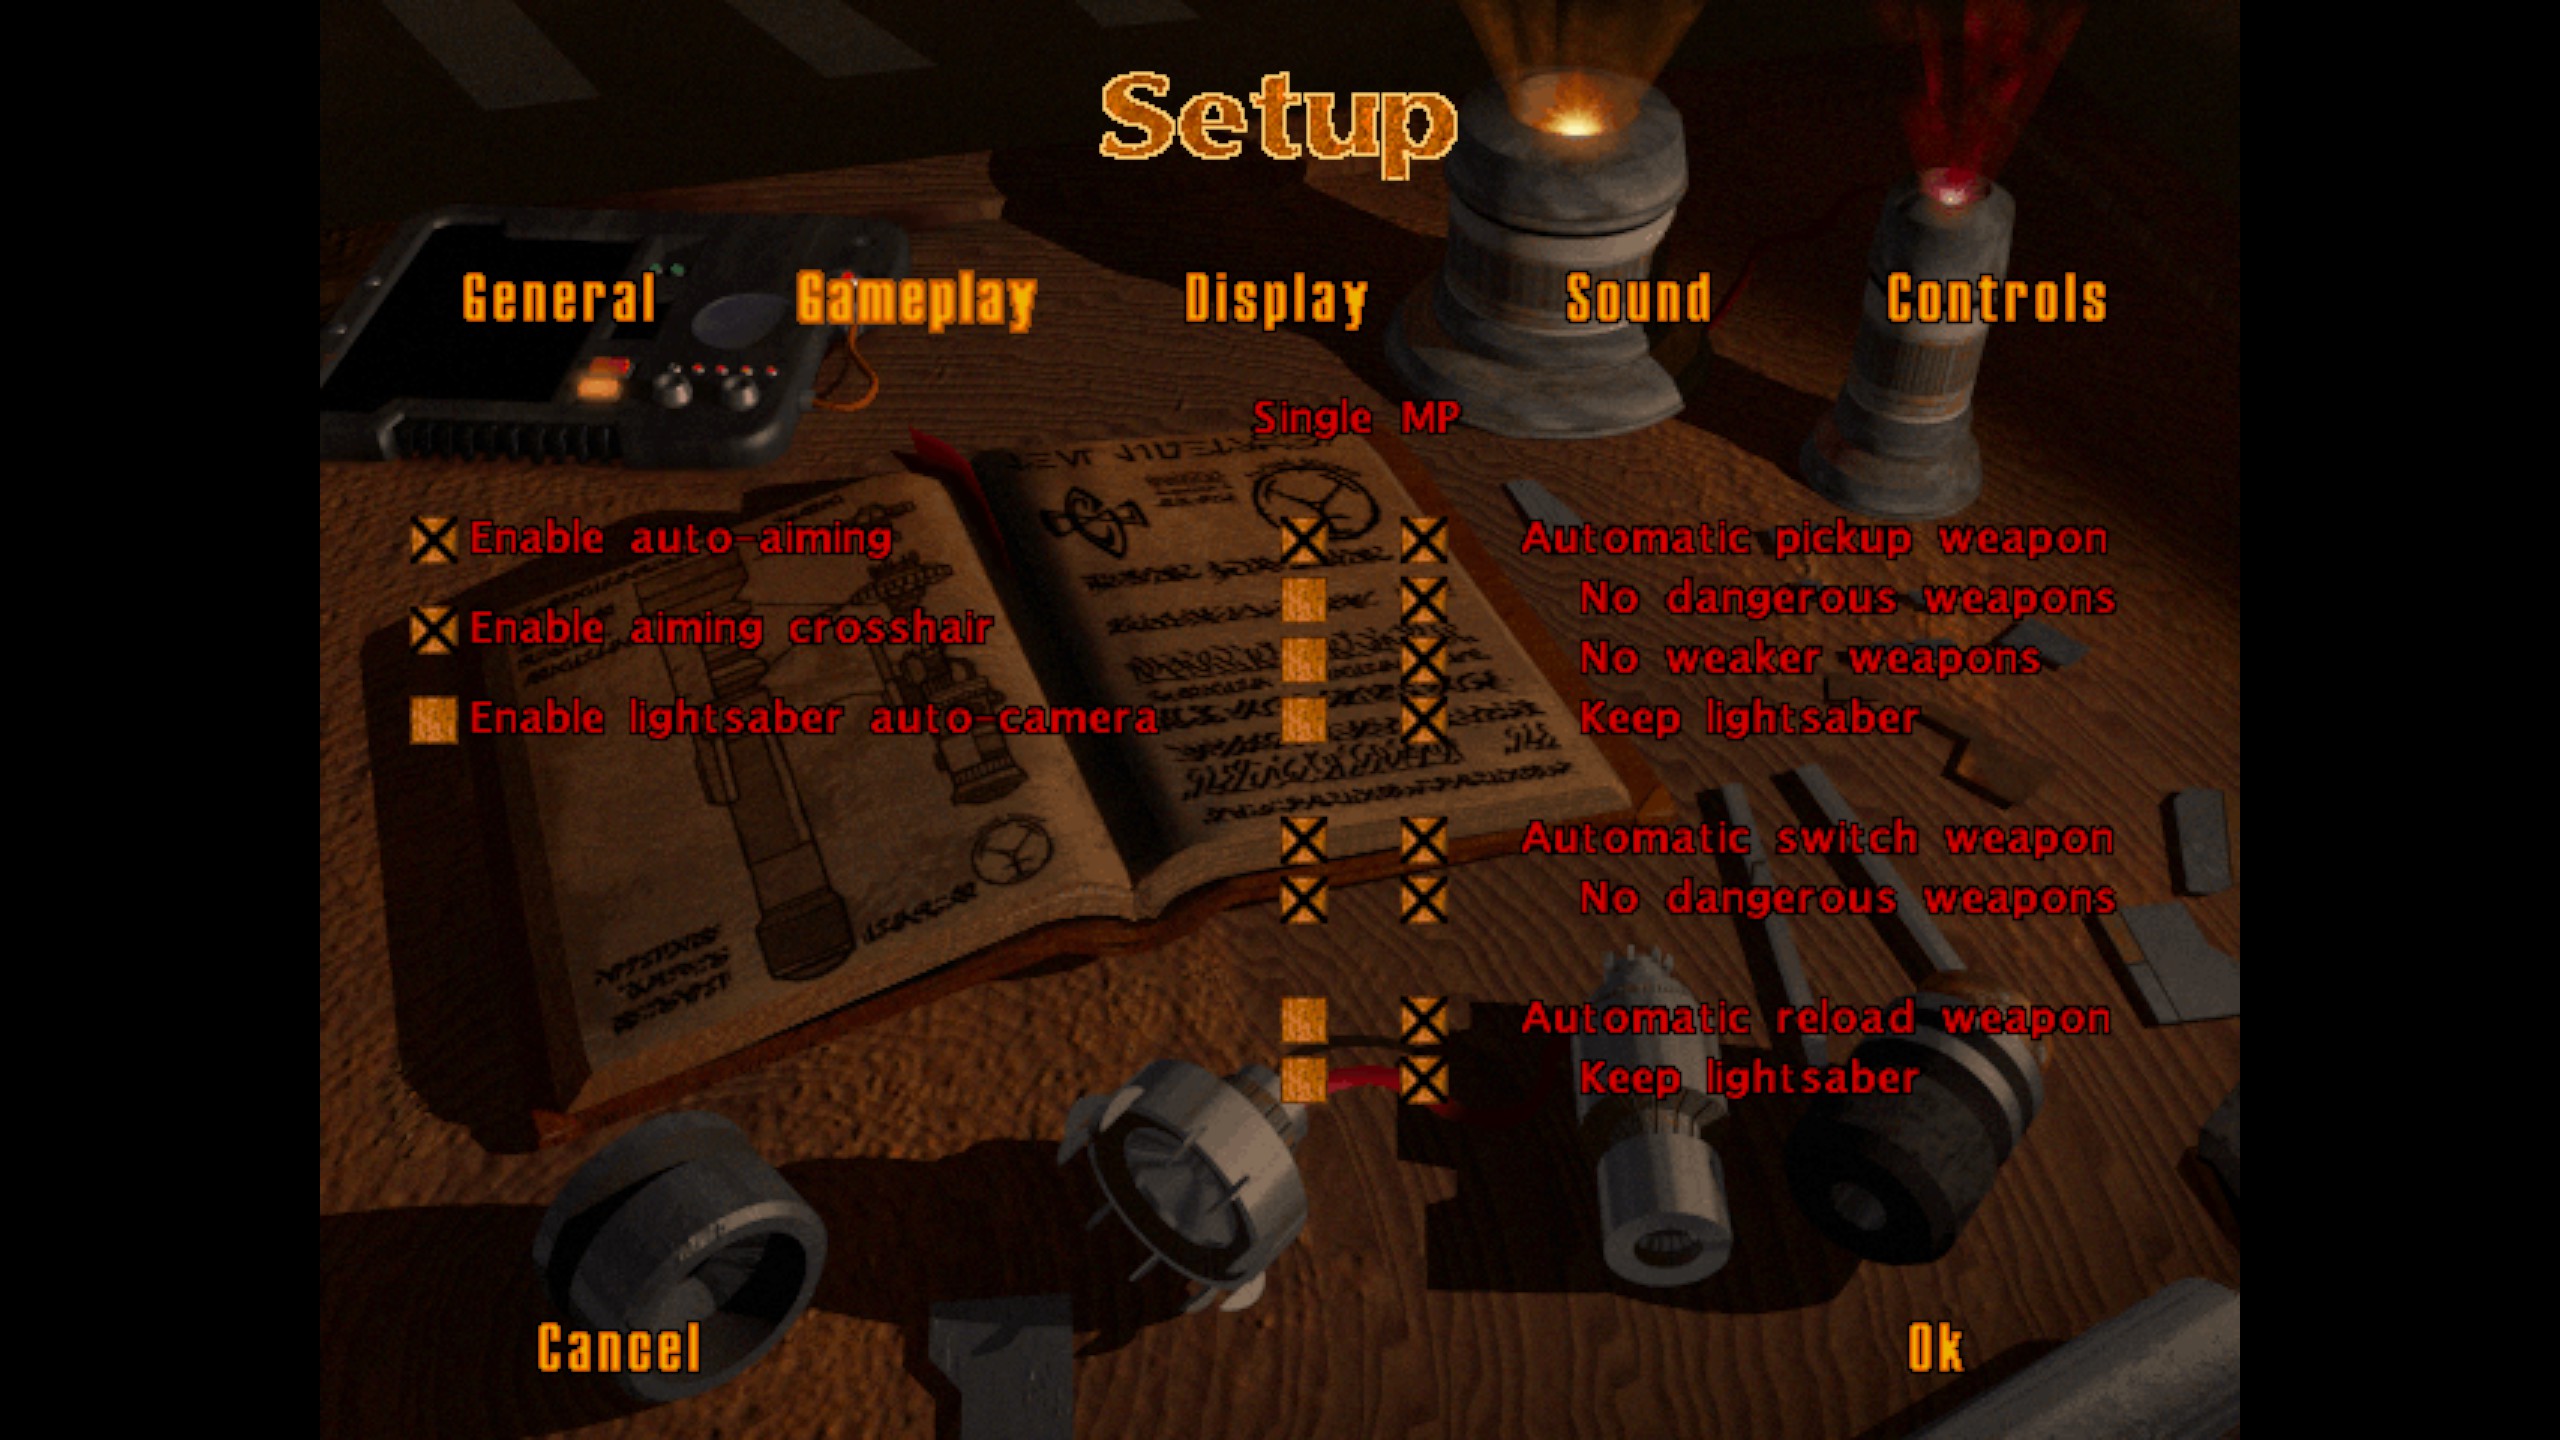
Enable/Disable auto aiming and aiming crosshair in Gameplay Settings:
Enable 3D Acceleration and View Size (should be less than max to show HUD) in Display Settings:

Setup Sound in Sound Settings:

Setup Keyboard and Mouse (inverted or non-inverted) in Control Setiings:

After that game you may start gameplay (but do not launch it from Steam) to see if everything works fine. If you want to just play game and not integrate it with Steam you may play it from Jedi Knight Remastered shortcut.
If you want Steam integration (launching directly from Steam, Steam time count, Steam Overlay, Steam screenshots) check Integration with Steam part of this guide.
Additional Fixes – Updating Mod Components
There is one problem with simple solutions – simple is not best. Mod packs almost always include mods a bit outdated compared to versions of mods “flying” online. The problem with Jedi Knight Remastered is that I haven’t seen the author of it (GeneralTantor) on mod.db website since May 2020, so I fear he will not update it. But you can still update components by yourself to play best version of game.
Further info about updating the components to the newest version is thanks to Dan Evans who was kind enough to write everything important. He also sent the recommended configuration of the game for 2560×1440 resolution, which I included in Configure Mod Package section. I’ve just edited his information from a private message directed to me to the style of guide.
The Jedi Knight Remastered mod contains the 0.5 build of JKGM, built in October of 2019. Version 1.0, the final build, was released in November of 2020. It is recommended that after following previous sections of guide, you download the 1.0 build (can be found here: [link]), and replace the following files in your steam directory with the ones from version 1.0 to improve both performance and quality:
– inject.exe
– renderer.dll
– thiedparty.md
– ALL files from the jkgm/shaders directory:
– game.vert
– game_opaque_pass.frag
– game_trns_pass.frag
– menu.frag
– post_box4.frag
– post_gauss7.frag
– post_opaque_composite.frag
– post_ssao.frag
– post_to_srgb.frag
– postprocess.vert
Further notes (included in config from Configure Mod Package section):
Recommend values for HUD scaling (based on 360p HUD size and Jedi Outcast/Academy HUD sizes): `2.0` for 720p, `3.0` for 1080p, `4.0` for 1440p, `6.0` for 2160p.
Another value that is not included in the jkgm.json config file, but noted in config.md, is the “vram_texture_preload_size” value, which should be ADDED to jkgm.json directly under the “enable_posterized_lighting” value, and set to a value of ‘700’ to compensate for the ~680mb texture pack, enabling the mod to preload the added textures in the materials folder to VRAM and reduce stuttering/loading times.
Other changes I’d make only if you have a competent machine:
– Change the antialiasing type to SSAA; retain a value of 2
– Change the max_anisotropy value to 16.0 instead of 2.0
Antivirus info:
Most antivirus/antimalware software will snag and quarantine “inject.exe as a trojan as it’s injecting the renderer.dll into the game. This should be whitelisted in whatever antivirus/antimalware software you use.
Integration with Steam
Go to your C:Program Files (x86)SteamsteamappscommonStar Wars Jedi Knight folder and:
- rename JediKnight.EXE to backup-JediKnight.EXE
- rename inject.exe to JediKnight.exe
- launch game from Steam and wait until it launches (it may take few seconds as its downloading some files before first launch)
- go to Display Settings and check 3D Acceleration and View Size again if needed.
Interior of C:Program Files (x86)SteamsteamappscommonStar Wars Jedi Knight folder should look like this:

Done. You may play game directly from Steam with screenshot ability etc.