
Overview
So when I started playing Stardew Valley I wrote down a lot of notes for myself since I forget things quite easily. So I put it into a guide to help others out when you forget something that can be really simple. Contains Spoilers. Currently Updating for 1.5
Starting Out in Stardew Valley
When you first get into Stardew Valley here are a few thing to remember to do daily.
1. Television: In your house will be a Television make sure you check it! This will tell you the following:
a. The whether for the following day. This can be Sunny, Raining, Thunder and Lightning, Snow and Windy.
b. Fortune Teller. This will let you know if you should enter the mines or not depending on the ‘spirits’ gifting you luck. The luckier you are the more ore, geodes and gems you will find and the less monsters you will encounter.
c. Queen of Sauce. This is a cooking show that allows you to cook new recipes or ones you might have missed if you forgot to watch on a certain day.
d. Livin’ off the land. This show can help you out when you are playing for the first time! It give you small tips and hints about certain things in the game. It can also let you know when salmonberry and blackberry season has started.
2. Collect wood. Cut down a few trees to obtain this material it is super important! If you get 50 you can create a chest to store items and if you collect 300 head down to the beach and repair the bridge so you can collect coral, shells, sea urchin and some crab pot fish. These can help you earn money while you wait for your crops to grow.
3. Keep some items as spares. You will need these for quests and to make other items later on.
4. Be a raccoon! Yep go through peoples garbage cans everyday! There are 7 different cans in the town you will need to check (Just make sure nobody is nearby). By doing this it will give you a lot of different items from food to materials to even actual garbage (garbage doesn’t sell for any money so keep these; they will come in handy later).
5. Don’t cut any of the grass (don’t be a fool like me). When you start out at your farm there will be patches of grass (you are able to walk through grass), DON’T CUT them. These will be needed to get hay so you will need to build a SILO or two first before you order any other building. Grass is different from weeds, you can walk through the grass and it is tall in appearence while weeds are small and look like bushes.
6. Keep an eye on the date! This is important as crops will die the next day if they haven’t finished growing by the end of the season (28 days) so make sure you check how many days they will need to finish growing.
7. Visit the wagon lady. On Fridays and Sundays there will be a wagon located south of your farm. Here you can buy different and it will change each time you visit. It can be expensive when you first start out but can be useful if she is selling items at a much lower cost than other shops. She will also sell a rare seed for 1000g this can be grown in fall and is needed to obtain a stardrop which will increase your energy.
8. Talk to villagers. When you are walking around and if you see a villager go up and talk to them this gives you heart points (+20 points), you can also loose points by not talking to villagers each day (-2 points).
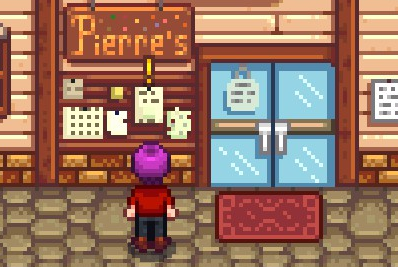
9. Check the notice board. Outside of Pierre’s is a board, here you will find the calendar, this will let you know what days are birthdays or festivals. If a villager has there birthday make sure you give them a gift this will get x8 more heart points than a gift on a different day. (depending on the type of gift you can either gain (loved/liked/neutral) or lose (disliked/hated) points)
10. Buy seeds that will continue to make produce once fully grown. Some seeds will let you harvest from them multiple times throughout the season which means more money without spending to buy more seeds.
Spring: Green beans (60g), Strawberry (100g)
Summer: Blueberry (80g), Corn (150g), Hops (60g), Hot pepper (40g), Tomato (50g)
Fall: Cranberry (240g), Eggplant (20g), Grape (60g), Corn (150g)
Winter: No seeds available.
11. Produce. Keep at least 3-5 of each produce you grow you can use them for quests and once you have obtained the seed maker you can create 1-3 seeds per item each time so you don’t have to buy more. If you grow a golden star item; keep it for the fall festival so you can get a higher score than what you would get with lower rated produce.
12. Don’t buy any animals or animal buildings during your first year unless you are confident you will go okay. Animals are expensive when you first start out and keeping them fed is also hard. Make sure you have at least 1-2 silos built before hand or you will have to buy hay from Marnie’s ranch for 50g per piece. Its not worth it and animals start out at 800g for a chicken.
12.2. If you do buy animals, keep all the items they produce; you will need them when you get a mayonnaise and cheese maker (you will make a ton of more money than selling the regular item).
Keep these in mind while playing and you should go great and make a good amount of money.
Creating You!
When you start your game you will get the chance to design your character! (or you can click the die in the corner to randomize them).
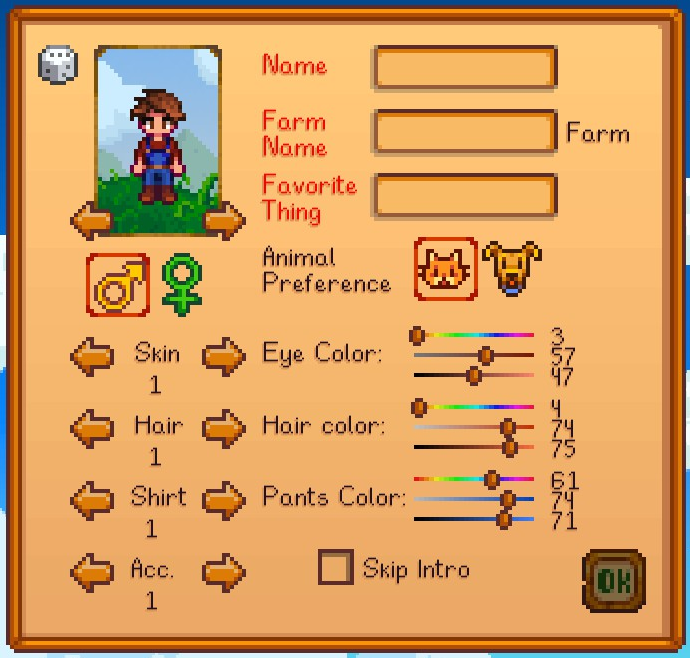
- Gender
- Name
- The Name of your farm
- Favourite thing. Make sure you don’t put something stupid in unless you want a good laugh (I put ‘d*ck’ and I died inside every time it came up in the game.)
- Cat or Dog for a pet with 3 different looks for each.
- Your characters appearance in game (you can also change this later when you become good friends with the wizard).
- If you want to skip the intro or not.
- What type of Farm you would like – each selection helps with a different skill. (See below)
The following are the 6 types of farms you can choose from with each one focusing on helping develop a certain skill.

The majority of this map is farming land, ideal for crops and animals.

The majority of this map is water. Fishing is viable on this farm.
Players can catch the same fish that are found in Pelican Town.
The water significantly decreases the amount of farming area.

Many trees are found all around the map.
In the west area of the map large stumps, season forage and unique weeds spawn
The additional cliffs and added ponds decrease the overall farming area.

A special mining area, in the southwest part of the map, spawns the stones, ore and geodes
The additional cliffs and added stream decrease the overall farming area.

Monsters spawn at night (scales with the player’s Combat level).
Wilderness Golems are unique to this map.
The additional cliffs and added ponds decrease the overall farming area.

This farm is split into 4 different sections with the greenhouse in the middle of the map. Each corner has a specific advantage from the other farm maps.
The additional cliffs and areas for mining, fishing and foraging decrease the overall farming area.

Players can catch the same fish that are found at the beach. They can also collect shells and supply crates that wash up.
Due to the large amount of sand sprinklers will not work unless placed on the small 10×20 plot provided.
This map is designed for advanced players who will rely little on crop growing.
I would recommend either farming, foraging or mining for beginners (I chose combat first and it was a big pain).
Tips for Beginners – Part 1
When you start out there are a few things you will see on your screen.
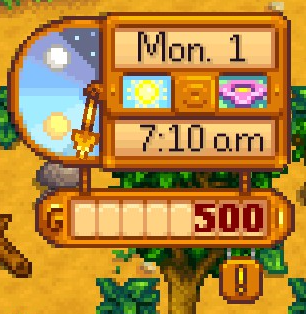
Keep an eye on the time if you stay out and it reaches 2am you will faint and loose some money and possibly a few items that you have on you. When you wake up you will be at home.
Below this is a box that say G 500 – this is how much money you currently have and will change when you buy or sell items.
You will also have a ‘!’ below your money. This is your journal which has the quests you have accepted. You can click ‘F’ to open it.

2. In the bottom left you will see a green bar with an ‘E’ at the top. This is your energy which you need to use certain tools (Each tool uses 2 energy per use). If you use up this energy you will start to walk and cannot use tools until you have either slept or eaten a food item. Hovering your mouse over the bar will tell you how much energy you have left.

a. Axe – you can use this to cut down trees but stumps and logs will need a silver or gold upgrade to be chopped.
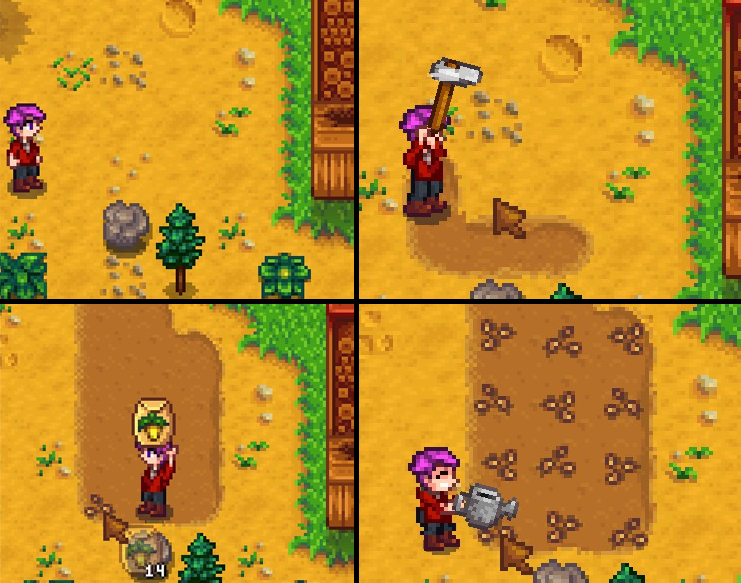
b. Hoe – you can use this to dig and till soil at your farm or around town. You can also dig up little spots that look like wiggling worms that can give you artifacts which can be donated to the museum.
c. Watering Can – you can use this to water crops and can be filled up at any water source. When upgraded you can hold down the mouse to water multiple spaces.
d. Pickaxe – you can use this to break rocks but some stones that are larger will need an ungraded gold pickaxe.
e. Scythe – you can use this to cut grass and convert cut grass to hay if you have built a silo. This tool uses no energy when used.
Use can use the 1-0, – and = key to scroll through the items or if you can use the wheel on your mouse.
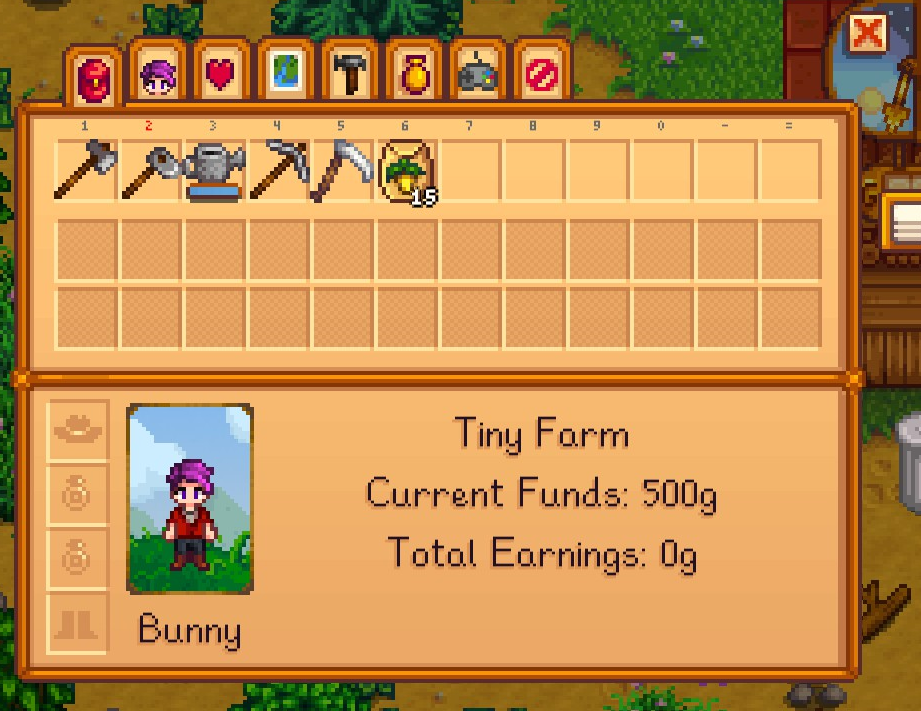
At the top of this screen are tabs the first tab (Red Bag icon) shows the items you are carrying and you can move them to different spaces. Below the your inventory slots you have you character info (Farm name, character’s appearance, current funds, total money earned and will show your pet’s name when they are obtained). You can also drop 1 hat, 2 rings and 1 pair of shoes/boots in the empty slots beside your character. To the right of this tab is a small white looking box click this to automatically put items in a recommended order.
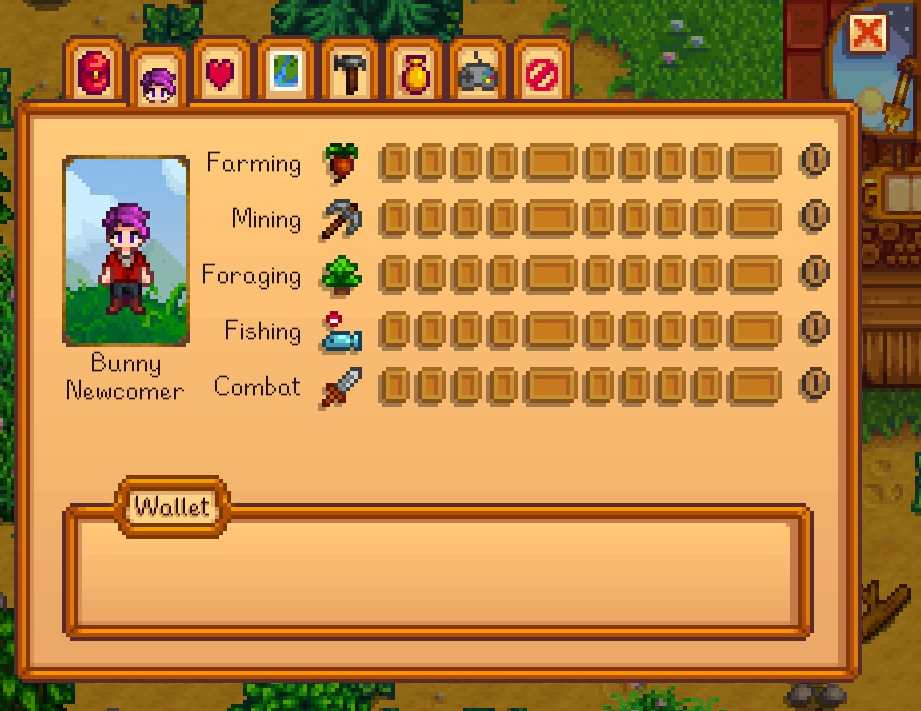
You will also gain bonuses for each level you gain in each skill.
Farming: +1 Proficiency with your hoe and watering can.
Mining: +1 Proficiency with your pickaxe
Foraging: +1 Proficiency with your axe
Fishing: +1 Proficiency with your fishing rod
Combat: +5 max health each level gained.
Below this is your wallet. You will gain the items for this later in the game.
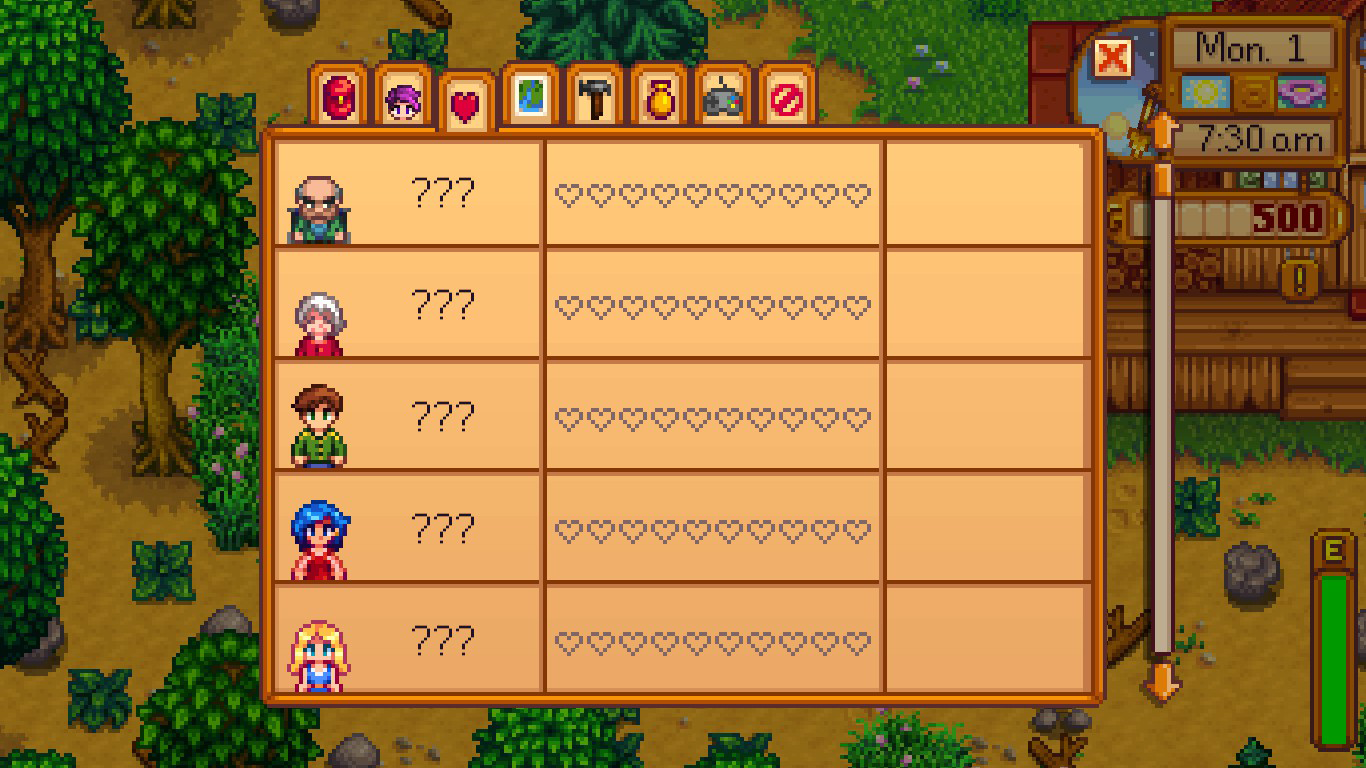
You can see who you have yet to meet here and keep an eye on relationships you gain with them.

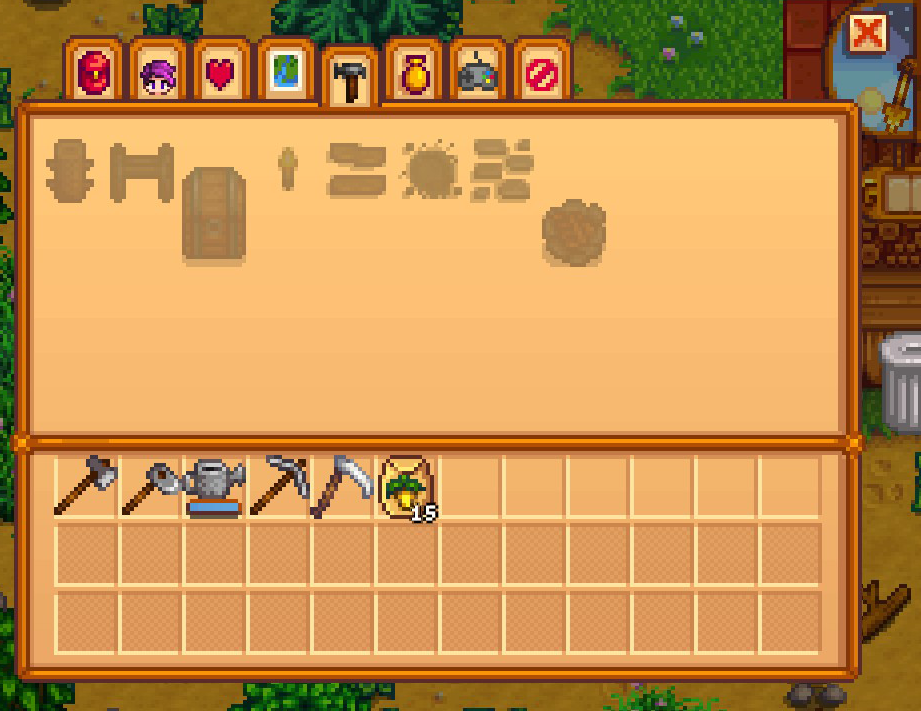
You will gain more of these recipes as you level up your skills and become friends with villagers.
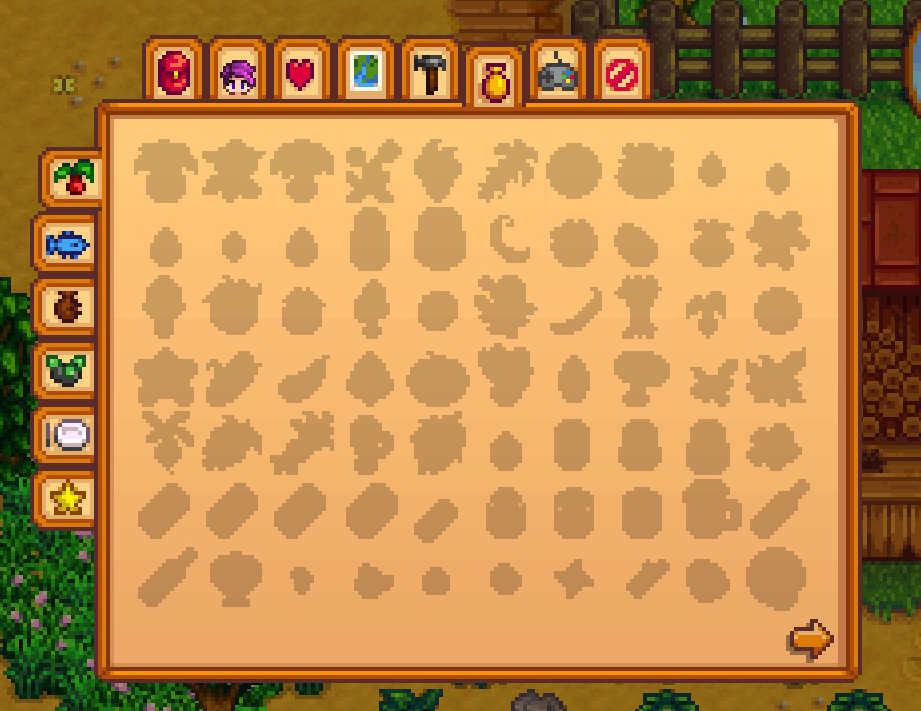
The first one shows what items you have ‘Shipped’. These are items you have placed in the shipping box outside your house. To add an item to the list you must first place the item in the box and wait till the next day.
The second shows the types of fish you have caught.
The third has artifacts you have dug up and donated to the museum.
The forth shows the gems you have collected while mining.
The fifth shows you the dishes you have cooked (You can do this when you have obtained a kitchen from the first house upgrade)
The sixth tab shows your achievements and what you must do to complete them.
Just click the red x to exit the menu.
Tips for Beginners – Part 2


Shipping Box:

When using the shipping box please note that you can only retrieve the last item you placed in there. Any item that was placed in before this is lost for good so be careful. For example: if I placed a Leek and then a Dandelion in the box I can only get the Dandelion back.
Items in the shipping box will not be sold until you have gone to sleep so if you want the money immediately you must go to Pierre’s shop and sell the items there.

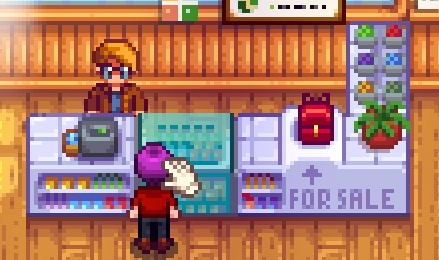
Be careful when buying! I constantly kept trying to move my seeds around and accidentally sold them for less than what I bought them for! You can only move your items once you have exited the shop menu and gone to your inventory.
Once you have bought the seeds you want or not bought any at all head back to your farm or continue to walk around.
The rest of the story is up to you so have a fun time!
Multiplayer
This is an optional game mode where you can add up to 3 of your friends to the same world over the internet (Players will need to each own a copy of the game) and is pretty much identical in terms of game play to playing single-player. There are specific feature which do add a slight difference though.
There is a max limit of 3 cabins, these can be made when creating a multiplayer game or buying them from the carpenter’s shop for 100g and 10 wood or stone depending on the cabin type.
The host of the world (the player who created the world) can remove cabins at anytime they want and if a cabin has been removed the player who was in that cabin will also be removed from the game.
The players who own a cabin can upgrade their own 2 times at the carpenter’s shop these upgrades are identical to an upgraded farmhouse. A cellar upgrade is not available to cabin owners.
Cabin players will also have a chest of drawers in their cabin which replaces the fireplace (A fireplace can be bought at the carpenter’s shop). This cannot be moved or accessed as this item is used to store the cabin owner’s items when they are logged off.
This mode is unavailable if a world was created as a single-player world and had cabins added after.
When a player is creating a new multiplayer game they have the option to create a profit margin (25%, 50%, 75% or default 100%). This can make a multiplayer game harder by reducing the gold that is earned when selling items and increasing the price of buying items.
This makes early game a challenge and increases the importance of completing in game help wanted quests.
There will be some decisions that all players will need to decided on such as:
– when to sleep and continue to the next day
– when a festival will start
– finishing the community center bundles or the joja membership bundles
– when to pause the game (The game cannot be paused by opening your player inventory)
All players will share the same farm and money, but each player will have their own energy bar, their own skills, luck for the day and relationships* with the villagers
When shipping items if a player has a skill that increases the shipping price of an item and a different player places it in the shipping box, the skill will still increase the sell price.
When obtain skills only the player who interacted with the needed requirements will gain points. So if a player plants 20 turnips and waters them but a different player harvests them only the player who harvested the turnips will get the experience.
* Relationships
All players can date the same bachelor and bachelorette, but once a player has married a specific marriage candidate all other players can no longer marry or date them.
Players can also marry eachother and hace children. To do this players will need to propose to each other with a Wedding Ring which can be crafted. The recipe can be bought from the traveling wagon for 500g, to make the ring you will need 5 iridium bars and 1 prismatic shard.
Players can also dance together at the flower dance festival in spring.
4. Progressing the Game and Quests
Features to come.
A new feature will be added where players have the option to separate the money they earn and use. This can allow players to have challenges in the game such as who can earn the most, who develops their farm section faster, etc.
With this a new farm will also be added where players are separated into 4 different corners allowing for an easier way to know which crops and items are who’s.
Skills
Skills are super important and will give you bonuses for every level you gain. This will depend on the skill you have leveled up.
Farming: +1 Proficiency with your hoe and watering can.
Level 1: Scarecrow and Basic Fertilizer recipes
Level 2: Mayonnaise Machine, Stone Fence and Sprinkler recipes
Level 3: Bee House, Speed-gro and Farmer’s Lunch recipes
Level 4: Preserves Jar, Basic Retaining Soil and Iron Fence recipes
Level 5: Profession Gained: Rancher (Animal Products worth 20% more) or Tiller (Crops worth 10% more). – Tiller is recommend for beginners.
Level 6: Cheese Press, Hardwood Fence and Quality Sprinkler recipes
Level 7: Loom and Quality Retaining Soil recipes
Level 8: Oil Maker, Keg and Deluxe Speed-Gro recipes
Level 9: Seed Maker, Iridium Sprinkler and Quality Fertilizer recipes
Level 10: Profession Gained: Rancher branch – Coopmater (Befriend Coop animals faster and incubation time is halved). Or Shepherd (Befriend barn animals quicker. Sheep produce wool faster). Tiller branch – Artisan (Artisan Goods worth 40% more) or Agriculturist (All crops grow 10% faster).
Mining: +1 Proficiency with your pickaxe
Level 1: Cerry Bomb recipe
Level 2: Staircase recipe
Level 3: Miner’s Treat recipe
Level 4: Glowstone Ring recipe, Transmute (Fe) recipe
Level 5: Profession Gained: Miner (+1 ore per vein) or Geologist (50% chance for Gems to appear in pairs)
Level 6: Bomb recipe
Level 7: Transmute (Au) recipe
Level 8: Mega Bomb recipe
Level 9: Crystalarium recipe
Level 10: Profession Gained: Miner branch: Blacksmith (Metal bars worth 50% more) or Prospector (Coal find doubled). Geologist branch: Excavator (Geode find doubled) or Gemologist (Gems worth 30% more)
Foraging: +1 Proficiency with your axe
Level 1: Wild Seeds (Sp), Field Snack recipes
Level 2: Survival Burger recipe
Level 3: Tapper recipe
Level 4: Charcoal Kiln and Wild Seeds (Su) recipes
Level 5: Profession Gained: Forester (Wood worth 50% more) or Gatherer (20% chance for double harvest of foraged items). Gather is recommend for beginners as more money is gained.
Level 6: Lightning Rod, Wild Seeds (Fa) and Warp Totem Beach recipes
Level 7: Wild Seeds (Wi), Warp Totem Mountains and Tree Fertiliser recipes
Level 8: Warp Totem Farm recipe
Level 9: Rain Totem and Cookout Kit recipe
Level 10: Profession Gained: Forester branch – Lumberjack (Normal trees occasionally drop hardwood) or Tapper (Syrup is worth 25% more) Gatherer branch – Botanist (Foraged items are always iridium quality) or Tracker (Locations of foragable items are revealed) Botanist recommend for beginners as more money is gained.
Fishing: +1 Proficiency with your fishing rod
Level 1: None
Level 2: Bait recipe
Level 3: Crab Pot and Dish O’ The Sea recipes
Level 4: Recycling Machine recipe
Level 5: Profession Gained: Fisher (Fish worth 25% more) or Trapper (Resources required to craft crab pots reduced)
Level 6: Spinner and Trap Bobber recipes
Level 7: Cork Bobber and Treasure Hunter recipes
Level 8: Worm Bin, Barbed Hook and Dressed Spinner recipes
Level 9: Seafoam Pudding and Magnet recipes
Level 10: Profession Gained: Fisher branch – Angler (Fish worth 50% more) or Pirate (Chance to find treasure doubled) Trapper branch – Mariner (Crab pots never catch trash) or Luremaster (Crab pots no longer need to be baited)
Combat: +5 max health each level gained.
Level 1: Sturdy Ring and Bug Steak recipes
Level 2: Life Elixir recipe
Level 3: Roots Platter recipe
Level 4: Warrior Ring recipe
Level 5: Profession Gained: Fighter (All attacks deal 10% more damage + 15 HP) or Scout (Critical Srike chance increased by 50%)
Level 6: Slime Egg-Press and Oil of Garlic recipes
Level 7: Ring of Yoba and Thorns Ring recipes
Level 8: Slime Incubator and Explosive Ammo recipes
Level 9: Iridium Band recipe
Level 10: Profession Gained: Fighter branch – Brute (Damage is increased by 15%) or Defender (HP is increased by 25) Scout branch – Acrobat (Cooldown on special moves in cut in half) or Desperado (Critical hits are deadly)
You will also gain a title for total count of each level you gain. These will appear below your character’s name on the skill tab.
Level 1-2: Newcomer
Level 2-4: Greenhorn
Level 4-6: Bumpkin
Level 6-8: Cowpoke
Level 8-10: Farmhand
Level 10-12: Tiller
Level 12-14: Smallholder
Level 14-16: Sodbuster
Level 16-18: Farmgirl/Farmboy
Level 18-20: Granger
Level 20-22: Planter
Level 22-24: Rancher
Level 24-26: Farmer
Level 26-28: Agriculturist
Level 28-30 Cropmaster
Level 30: Farm King
Quests – Part 1
Quest are given to you or have to be accepted by you to activate. Some quests will be timed while others have no time limit at all; there are also quest that where no reward will be given, but most of them will have rewards.
These quests need to be completed in 1-2 days time before expiring.
Gathering Ore/Coal: Clint will request you to collect ores (20-40) or coal so he can inspect it (You will keep all the ore/coal you gather + money reward).
Gathering Wood/Stone: Robin will ask for wood or stone.
Slay Monsters: You will need access to the Mines for theses quest and will ask you to defeat a random number of a specific type of monster. This will be based on what Levels on the mine you have reached.
Fishing for Willy: Willy will ask you to catch a certain number of 1 kind of fish.
Villager Delivery: Villagers will ask you for a specific item for various reasons. These items can be crops, forage, fish, minerals, metal bars, animal products and cooked foods. These quests pay x3 more than if you sold the item at the store.
Introductions: Greet the 28 villagers of Pelican Town (No reward is given, ‘How to Win Friends’ quest is activated)
How to Win Friends: Give someone a gift (100g reward)
Getting Started: Cultivate and harvest a Parsnip (100g reward – Activated when package in room is opened)
To the Beach: Visit the beach before 5:00 pm (Bamboo Pole reward – Activated on day 2 from mailbox)
Raising Animals: Build a Coop (No reward is given ‘Advancement’ quest is activated)
Advancement: Reach Farming Level 1 and Craft a Scarecrow (110g reward)
Explore the Mine: Reach level 5 in the mines (No reward is given ‘Deeper In the Mine’ and ‘Initiation’ quests are activated)
Deeper In the Mine: Reach level 40 in the mines (No reward is given ‘To the Bottom?’ quest is activated)
To the Bottom?: Reach the bottom of the mines – Level 120 (Skull Key reward)
Archaelogy: Activated when you dig up a mineral or artifact. Enter the Museum with a mineral or artifact in your inventory and donate it. (250g reward)
Forging Ahead: Craft a Furnace (No reward is given ‘Smelting’ quest is activated)
Smelting: Use your furnace to smelt 1 Copper Bar (No reward is given)
Initiation: Defeat 10 Slimes (You are able to enter the Adventure’s Guild)
Robin’s Lost Axe: Find Robin’s lost axe. Can be found near the swear pipe in Cindersap forest. (250g reward)
Jodi’s Request: Bring Jodi 1 cauliflower – Can be grown in Spring (350g)
Mayor’s “Shorts”: Find and return Mayor Lewis’ Shorts – Can be found in Marnie’s Room. You will need 2 hearts to enter her room. (750g reward)
Blackberry Basket: Find Linus’ blackberry basket – Can be found near the tunnel left of the bus stop. (no reward is given)
Pam is Thirsty: Bring Pam a Pale Ale – You will need a Keg and grow Hops (Summer crop) (350g + 1 friendship heart)
A Dark Reagent: Bring the Wizard a Void Essence (Can be obtain in the mine from shadow brute) (1000g reward)
Cow’s Delight: Bring Marnie 1 Amaranth (Fall crop) (500g reward)
The Skull Key: Find the purpose of the skull key – Access the Desert Mine (No reward is given ‘Qi’s Challenge’ quest is activated)
Crop Research: Bring Demetrius 1 Melon (Summer crop) (550g + 1 friendship heart)
Knee Therapy: Bring George a Hot Pepper (Summer crop) (200g + 1 friendship heart)
Qi’s Challenge: Reach level 25 in Skull Cavern mine (10000g)
The Mysterious Qi: Leave a Rainbow Shell in the box the the train platform (Unlock by putting a battery pack in the lock-box in the tunnel next to the bus stop)
The Mysterious Qi: Place 10 beets inside Mayor Lewis’ fridge (No reward)
The Mysterious Qi: Give the sand dragon his final meal – Put 1 solar essence in the sand dragon’s mouth.
The Mysterious Qi: Inspect the lumber pile beside your house (Club card for Casino access)
Carving Pumpkins: Bring Caroline 1 Pumpkin (500g reward)
A Winter Mystery: Interact with the bush right of the playground.
Strange Note: Enter the Secret Woods between 6am and 7pm with 1 maple syrup in your inventory.
Cryptic Note: Reach level 100 of Skull Cavern. (health increased by 25 points)
Fresh Fruit: Bring Emily 1 Apricot – Grown in Spring you must buy an Apricot Sapling and plant it 28 days before spring (600g reward)
Aquatic Research: Bring Demetrius 1 Pufferfish (600g reward)
A Soldier’s Star: Bring Kent 1 Starfruit – Seeds are bought at Oasis (500g reward)
Mayor’s Need: Bring Lewis 1 bottle of Truffle Oil – You will need to have a pig and a deluxe barn to obtain truffles(500g reward)
Wanted: Lobster: Bring Gus 1 Lobster – You will need to catch one with a crab pot (500g reward)
Pam Needs Juice: Bring Pam 1 Battery Pack (400g reward)
Fish Casserole: Enter Jodi’s house with a Largemouth Bass in your inventory at 7:00pm (Event Scene is given)
Catch a Squid: Bring Willy 1 Squid (800g reward)
Pierre’s Notice: Bring Pierre 1 Sashimi (1000g reward)
Clint’s Attempt: Bring Emily 1 Amethyst (no reward is given)
A Favor For Clint: Bring Clint 1 Iron Bar (500g reward)
Staff of Power: Bring the Wizard 1 Iridium Bar (5000g reward)
Granny’s Gift: Bring Evelyn 1 Leek (500g reward)
Exotic Spirits: Bring Gus 1 Coconut (600g reward)
Catch a Lingcod: Bring Willy 1 Lingcod (500g reward)
Dark Talisman: Speak to Krobus (You will then venture through to the Mutant Bug Lair and retrieve the talisman and return to the cave at the railroad.) (No reward is given ‘Goblin Problem’ quest is activated)
Goblin Problem: Speak to the Henchman outside the Witch’s Hut and give him 1 Void Mayonnaise as a gift. (Wizard Buildings available and access to Witch’s Hut reward)
The Pirate’s Wife: Speak with the old lady (Birdie) on Ginger Island. Give War Momento to Kent, Gourmet Tomato Salt to Gus, Stardew Valley Rose to Sandy, Advanced TV Remote to George, Arctic Shard to the Wizard, Wriggling Worm to Willy and then the Pirate’s Locket to Birdie – in that order. (Fairy Dust recipe and 5 Golden Walnut reward)
Quests – Part 2
Available on Fall 2, Year 1. Lewis will install a special board in front of his house that will have requests for larger orders. These quest can be fill automatically and don’t require interaction with the requester.
Some orders will require you to place them in a container, items obtained before hand can be used but you must still collect new items as well.
Example: Having 27 tomatoes will still require you to pick 27 new tomatoes as well.
New orders will appear every Monday and be available for 7-28 days. Taking a quest on a day other than the Monday will not reset the time limit.
If you fail a request you can collect the items you already donated at the Lost and Found box at Lewis’ House.
- Some quests are non-repeatable.
- Quests with more than one item option will shuffle through them randomly.
- Crop and Fishing quests will always require you to collect new items while the quest is active.
Island Ingredients (28 days): Ship 100 Taro Root, Ginger or Pineapple. (Gold and solar panel recipe reward) – Require Ginger Island to be activated.
Cave Patrol (7 days): Slay 50 Bats, Dust Sprites, Skeletons or Grubs. (6000g and geode crusher recipe reward)
Aquatic Overpopulation (7 days): Catch 10 Sunfish, Sardine, Flounder, Largemouth Bass, Halibut, Rainbow Trout, Dorado, Tilapia, Tuna, Red Mullet, Tiger Trout, Albacore, Midnight Carp, Carp, Salmon, Squid, Perch or Lingcod – will vary by season. (Gold and farm fomputer recipe reward)
Biome Balance (5 days): Catch 20 River fish, Ocean fish or Lake fish. (1500g reward and farm computer recipe reward).
Gus’ Famous Omelet (14 days): Collect 24 Eggs. (3000g, mini-fridge and special cutscene reward)
Crop Order (28 days): Harvest and Ship 100 Cauliflower, Garlic, Green Bean, Potato, Blueberry, Hot Pepper, Melon, Radish, Tomato, Wheat, Amaranth, Artichoke, Bok Choy, Cranberries, Eggplant, Grape, Pumpkin, Yam – will vary by season. (Gold and mini-shipping bin reward)
Robin’s Resource Rush (7 days): Collect 1000 Wood or Stone. (2500g and stone chest recipe rewards)
Non-repeatable Quests:
Rock Rejuvenation (7 days): Collect 1 Ruby, Topaz, Emerald, Jade and Amethyst – stones can be collected beforehand. (1000g, Emily friendship points, sewing machine and special cutscene reward)
Gifts for George (28 days): Collect 12 Leeks. (2000g, coffee maker and special cutscene reward)
Fragments of the Past (7 days): Collect 100 Bone Fragments. (3500g and bone mill recipe reward)
Community Cleanup (7days): Gather and place in the train platform bin 20 trash items (except Joja Cola. (500g, Linus friendship points, fiber seeds recipe and special cutscene reward)
The Strong Stuff (14 days): Brew 12 Potato Juice – potatoes must be placed in kegs while the quest is active. (3000g, Pam friendship points, special cutscene and F.I.B.S. television channel unlocked)
Pierre’s Prime Produce (28 days): Harvest 25 Gold-quality Vegetables. (2500g, special cutscene, mini-shipping bin reward)
Robin’s Project (7 days): Collect 80 Hardwood. (2000g reward, Robin friendship points, special cutscene reward. Deluxe red double bed now available for purchase)
Juicy Bugs Wanted! (7 days): Collect 100 bug meat – must be collected while quest is active. (3000g, quality bobber recipe and special cutscene reward)
Tropical Fish (7 days): Catch 5 Stingray, Blue Discus and Lionfish. (2500g and deluxe fish tank reward)
A Curious Substance (7 days): Collect 1 Ectoplasm. (2500g and mini-obelisk recipe reward)
Prismatic Jelly (7 days): Collect 1 Prismatic Jelly (5000g and monster muck recipe reward)
Mr. Qi’s Special Request
Unlocks after collecting 100 Golden Walnuts on Ginger Island. The request board is located in Mr. Qi room on Ginger Island. 2 quests are added everyone Monday and all quests are repeatable.
All quests give Qi Gems that can be spent in Mr. Qi’s reward store.
Qi’s Crop (28 days): Ship 500 Qi Fruits.
Let’s Play a Game (7 days): Score 50 000 points in Junimo Kart Endless Mode.
Four Precious Stones (28 days): Collect 4 Prismatic Shards – already obtained gems can be used.
Qi’s Hungry Challenge (7 days): Reach level 100 of Skull Cavern without eating food items – building and using staircases is the easiest way to pass this challenge.
Qi’s Cuisine (14 days): Ship 100 000g worth of ‘Fresh’ cooked items.
Qi’s Kindness (7 days): Give 50 loved gifts in one week.
Extended Family (3 days): Catch Ms. Angler, Glacierfish Jr., Son of Crimson fish, Radioactive Carp and Legend II – these fish will appear in the same areas as the original Legendary Fish that they’re named after (Legend II doesn’t require rain days to catch).
Danger in the Deep (7 days): Reach the bottom of the mountain mines – the elevator will be reset meaning that building and using staircases are the easiest way to complete this quest.
Skull Cavern Invasion (7 days): Reach level 100 of Skull Cavern – building and using staircases is the easiest way to complete this quest.
Qi’s Prismatic Grange (14 days): Place 100 red, orange, yellow, green, blue and purple items into Qi’s collection box. – deposited items will not be returned if the quest is failed.
Secret Notes
These are collectible notes which are unlocked during winter when the player walks into the Bus Stop area between 6am and 4pm, triggering a cutscene; if the player is riding a horse it will not trigger.
You will need to complete the quest which is given after the cutscene (A Winter Mystery). The quest will reward the player with a Magnifying Glass which will be on the player’s wallet and the player can gain the secret notes while digging, chopping trees, mining, fishing, chopping giant crops and slaying monsters.
You can read a secret note by using the same way as eating food. The note will be added to the collection tab on the player menu.
Notes will differ with some hinting at villager’s favorite and hated items, some have images and other notes showing solutions to certain in game puzzles and secret items.
Tools and Equipment
Tools are used a lot in the game and you can upgrade them at the blacksmith. When you buy an upgrage you will not get the item back for 2 days and cannnot purchase anything from the blacksmith or open geodes you have found.
Hoe – Can be used to dig and till soil. Each upgrade allows you to hold down the mouse to dig multiple squares.

Hoe:
Cost: You begin the game with this item
Hits: Can dig up 1 plot at a time.
Copper Hoe:
Cost: 2000g and 5 Copper Bars
Hits: Hits 3 squares in a line when mouse is held down.
Steel Hoe:
Cost: 5000g and 5 Iron Bars
Hits: Hits 5 squares in a line when mouse is held down.
Gold Hoe:
Cost: 10000g and 5 Gold Bars
Hits: Hits a 3×3 area when mouse is held down.
Iridium Hoe:
Cost: 25000g and 5 Iridium Bars
Hits: Hits a 6×3 area when mouse is held down
Pickaxe – Can be used to break rocks and break farm items (eg. scarecrow) so you can move or store it.

Pickaxe:
Cost: You begin the game with this item
Hits: You can mine small stones, ore and geodes.
Copper Pickaxe:
Cost: 2000g and 5 Copper Bars
Hits: You can mine big stones that are 2×2 in size. You also have less hits needed to break small stones, ores and geodes.
Steel Pickaxe:
Cost: 5000g and 5 Iron Bars
Hits: You can break the large boulders on your farm and also the barrier in the mine. You also have less hits needed to break small stones, ores and geodes.
Gold Pickaxe:
Cost: 10000g and 5 Gold Bars
Hits: You can break a meteorite that will land on your farm. You also have less hits needed to break small and large stones, ores and geodes.
Iridium Pickaxe:
Cost: 25000g and 5 Iridium Bars
Hits: You have less hits needed to break small and large stones, ores and geodes.
Axe – This tools is needed to cut down trees for wood, sap, hardwood and tree seeds. This tool is also used to break and harvest ‘Giant Crops’

Axe:
Cost: You begin the game with this item
Hits: Can chop down trees with 10 hits and small stumps with 5 hits.
Copper Axe:
Cost: 2000g and 5 Copper Bars
Hits: You can chop down large stumps and also have 8 hits on trees and 4 hits on small stumps.
Steel Axe:
Cost: 5000g and 5 Iron Bars
Hits: You can chop down large logs and also have 6 hits on trees and 3 hits on small stumps.
Gold Axe:
Cost: 10000g and 5 Gold Bars
Hits: You have 4 hits on trees and 2 hits on small stumps.
Iridium Axe:
Cost: 25000g and 5 Iridium Bars
Hits: You have 2 hits on trees and 1 hit on small stumps.
Watering Can – This tool is used to water crops and stop them from withering during the season.

NOTE: When upgrading your watering can make sure it will be raining the next day so you don’t have any need to use it. Or during winter when you won’t be able to grow crops (except winter seeds).
Watering Can:
Cost: You begin the game with this item
Hits: Can water 1 plot at a time.
Copper Watering Can:
Cost: 2000g and 5 Copper Bars
Hits: Waters 3 squares in a line when mouse is held down.
Steel Watering Can:
Cost: 5000g and 5 Iron Bars
Hits: Waters 5 squares in a line when mouse is held down.
Gold Watering Can:
Cost: 10000g and 5 Gold Bars
Hits: Waters a 3×3 area when mouse is held down.
Iridium Watering Can:
Cost: 25000g and 5 Iridium Bars
Hits: Waters a 6×3 area when mouse is held down
Trash Can – A tool used to delete items from you inventory menu.

Copper Trash Can:
Cost: 1000g and 5 Copper Bars
Bonus: When deleting an item receive 15% of the item’s monetary value.
Steel Trash Can:
Cost: 2500g and 5 Iron Bars
Bonus: Reclaim 30% of the deleted item’s monetary value.
Gold Trash Can:
Cost: 5000g and 5 Gold Bars
Bonus: Reclaim 45% of the deleted item’s monetary value.
Iridium Trash Can:
Cost: 12500g and 5 Iridium Bars
Bonus: Reclaim 60% of the deleted item’s monetary value.
Fishing Pole – This tool is used to catch fish. You hold down left click to determine how far to cast and play a mini game to catch the fish.

Bamboo Pole:
Cost: This is given to you by Willy after the quest ‘To The Beach’. This can also be bought from Willy’s Fish Shop for 500g.
Fiberglass Rod:
Cost: 1800g – Fishing Skill must be Level 2 and you will get a letter.
Bonus: You can now use bait to get fish to bite quicker.
Iridium Rod:
Cost: 7500g – Fishing Skill must be Level 6 and you will get a letter.
Bonus: You can now use tackle along with bait.
Other Tools and Equipment
Scythe: You can use this to cut grass (You will need to build a Silo if you want hay)
Golden Scythe – a more powerful scythe that can be found at the end of the Quarry Mine.
Milk Pail: You can use this to milk cows and goats. You can buy this for 1000g from Marnie’s Ranch.
Shears: You can use this to collect wool from sheep. You can buy this for 1000g from Marnie’s Ranch.
Heater: Keeps your animals warm during winter. You can buy this for 2000g from Marnie’s Ranch.
Copper Pan: You can use this to gather ore from streams. (You can unlock this by completing the Community Certer Fish bundles or buy the Joja Upgrade if you purchased a membership.)
Auto-Grabber: Tool that automatically harvest from your animals every morning. Must be placed inside the coop or barn to work. Can be bought for 25000g from Marnie’s Ranch when you reach Farming Level 10.
Auto-Petter: A tool that pets your animals every morning, has less effectiveness than petting them yourself. Must be placed inside a barn or coop to work. Can be bought from the Joja Mart for 50000g or found in Skull Cavern (rare reward).
Weapons
Weapons are used against monsters (monsters can be found in the mines, skull cavern and the secret forest – they can also be found on the farm if you have chosen the wilderness map or activate them at the witch’s hut). When defeating a monster you can gain loot which makes weapons nessassery to collect certain materials or explore certain areas.
Some weapons come with a few of the following extra stats:
- Speed: Increases the amount of attacks you can deal in a row.
- Defense: Increases the player’s defense and allows you to take less damage from enemy attacks.
- Weight: This affects how fast you can attack and how far the ememy will be knocked back.
- Critical Power: This adds a certain percentage of damage – to your attack – when you make a critical hit.
Swords:
- Rusty Sword
- Wooden Blade
- Steel Smallsword – Speed +2
- Silver Saber – Defence +1
- Pirate’s Sword – Speed +2
- Cutlass – Speed +2
- Iron Edge – Speed -2, Defence +1, Weight +3
- Forest Sword – Speed +2, Defence +1
- Insect Head – Speed +2, Crit. Chance +2
- Claymore – Speed -4, Defence +2, Weight +3
- Templar’s Blade – Defence +1
- Dark Sword – Speed -5, Weight +5, Crit. Chance +2, Vampiric 9%
- Neptune’s Glaive – Speed -1, Defence +2, Weight +4
- Tempered Broadsword – Speed -3, Defence +3, Weight +3
- Obsidian Edge – Speed -1, Crit. Power +10
- Ossified Blade – Speed -2, Defence +1, Weight +2
- Bone Sword – Speed +4, Weight +2
- Yeti Tooth – Defence +4, Crit. Power +10
- Steel Falchion – Speed +4, Crit. Power +20
- Lava Katana – Defence +3, Crit. Power +25, Weight +3
- Dragontooth Cutlass – Crit. Power 50
- Dwarf Sword – Speed +2, Defence +4
- Galaxy Sword – Speed +4
- Infinity Blade – Speed +4, Defence +2
Daggers:
- Carving Knife
- Iron Dirk
- Wind Spire – Crit. Power +10, Weight +5
- Elf Blade
- Burglar’s Shank – Crit. Chance +2, Crit. Power +25
- Crystal Dagger – Crit. Power +50, Weight +5
- Shadow Dagger
- Broken Trident – Crit. Chance +1
- Wicked Kris – Crit Chance +4
- Galaxy Dagger – Speed +1, Crit. Chance +1, Weight +5
- Dwarf Dagger – Speed +1, Defence +6, Crit. Chance +2, Weight +5
- Dragontooth Shiv – Crit. Chance +3, Crit. Power +100, Weight +5
- Iridium Needle – Crit. Chance +6, Crit. Power +200
- Infinity Dagger – Speed +1, Defence +3, Crit. Chance +4, Weight +5
Clubs and Hammers:
- Femur – Speed +2
- Wood Club
- Wood Mallet – Speed +2, Weight +2
- Lead Rod – Speed -4
- Kudgel – Speed -1, Crit. Power +4, Weight +2
- The Slammer – Speed -2
- Galaxy Hammer – Speed +2, Weight +5
- Dwarf Hammer – Defence +2, Weight +5
- Dragontooth Club – Crit Power +50, Weight +3
- Infinity Gavel – Speed +2, Defence +1
Slingshots and Ammo:
- Slingshot
- Master Slingshot
- Explosive Ammo
Other weapons:
Your Axe, Pickaxe and Sythe can be used as a weapon but don’t do as much damage as a basic weapon would.
Hats, Rings and Footwear
These items can be worn by the player, some can boost certain stats and give perks but most item don’t have any effects at all and are just for appearance.
These hats are given as rewards or can be purchased from certain shops/events.
- Cowboy Hat – Complete museum collection
- Top Hat – Bought for 8000 Qi Coins at the Casino
- Straw Hat – Rewarded for winning the Egg Hunt during the Egg Festival
- Skeleton Mask – Adventurer’s Guild Reward for defeating 50 Skeletons.
- Sailor’s Cap – Rewarded for winning the Fishing Competition during the Festival of Ice
- Fedora – Bought for 500 Star Tokens at the Stardew Valley Fair
- Hard Hat – Adventurer’s Guild Reward for defeating 30 Duggers.
- Blue Cowboy Hat – Chests in Skull Cavern
- Red Cowboy Hat – Chests in Skull Cavern
- Cone Hat – Purchased from the Magic Boat Shop at the Night Market
- Living Hat – 0.001% drop from cutting weeds and 0.01% drop from Wilderness Golems
- Emily’s Magic Hat – Obtained from Emily’s 14-heart cutscene
- Mushroom Cap – 1% drop chance from chopping down Mushroom Trees
- Dinosaur Hat – Made from Tailoring
- Totem Mask – Made from Tailoring
- Logo Cap – Made from Tailoring
- Wearable Dwarf Helm – Made from Tailoring
- Fashion Hat – Made from Tailoring
- Pumpkin Mask – Made from Tailoring
- Hair Bone – Made from Tailoring
- Knight’s Helmet – Adventurer’s Guild Reward from defeating 50 Pepper Rex
- Squire’s Helemt – Drops from defeating Metal Heads
- Spotted Headscarf – Made from Tailoring
- Beanie – Made from Tailoring
- Flopping Beanie – Made from Tailoring
- Fishing Hat – Made from Tailoring
- Blobfish Mask – Made from Tailoring
- Party Hat (Red) – Made from Tailoring
- Party Hat (Blue) – Made from Tailoring
- Party Hat (Green) – Made from Tailoring
- Arcane Hat – Adventurer’s Guild Reward from defeating 100 Mummies
- Pirate Hat – Made from Tailoring
- Flat Topped Hat – Made from Tailoring
- White Turban – Made from Tailoring or from chests in Skull Cavern
- Garbage Hat – 0.2% chance to drop when searching town Garbage Cans
- Golden Mask – Made from Tailoring
- Propeller Hat – Made from Tailoring
- Bridal Veil – Made from Tailoring
- Witch Hat – Made from Tailoring
- Copper Pan – Place Copper Pan tool in hat slot.
- Green Turban – Desert trader for 50 Omni Geodes
- Magic Cowboy Hat – Desert trader for 333 Omni Geodes
- Magic Turban – Desert trader for 333 Omni Geodes
- Golden Helmet – 5% drop chance when opening Golden Coconuts
- Deluxe Pirate Hat – Volcano Dungeon chests
- Pink Bow – Dwarf’s Volcano Dungeon shop
- Frog Hat – Gourmand Frog’s cave on Ginger Island
- Small Cap – Island Trader on Mondays for 30 Taro Roots
- Bluebird Mask – Island Trader on Wednesdays for 30 Taro Roots
- Deluxe Cowboy Hat – Island Trader on Fridays for 30 Taro Roots
- Mr. Qi’s Hat – Qi’s Walnut Room for 5 Qi Gems
- Dark Cowboy Hat – Treasure chests in Skull Cavern
- Radioactive Goggles – Made from Tailoring
- Swashbuckler Hat – Made from Tailoring
- Qi Mask – Made from Tailoring
- Star Helmet – Made from Tailoring
- Sunglasses – Made from Tailoring
- Goggles – Made from Tailoring
- Forager’s Hat – Made from Tailoring
- Tiger Hat – Drops from Tiger Slimes
- Warrior Helmet – Made from Tailoring
- ??? – Interact with the monkey in Volcano Caldera once you’ve achieved 100% Perfection
These Hats can be bought from the mouse at the abandoned house for 1000g each and are unlocked when an achievement is made.
See Achievements for the details on each hat and how to unlock them.
All rings will give an effect, some being more useful than others. 2 different rings can be worn at one time and effects can be stacked. These rings can be obtained from chests in the mine, from completing Adventurer’s Guide Quest, purchasing them from Marlon or crafted at a certain skill level.
- Small Glow Ring – Emits a 5×5 circle of light.
- Glow Ring – Emits a 10×10 circle of light.
- Small Magnet Ring – Increase players pick up range by 1.
- Magnet Ring – Increase players pick up range by 2.
- Slime Charmer Ring – Prevents damage and debuffs from slime.
- Warrior Ring – Has a chance to give the wearer Warrior Energy when a monster is slain.
- Vampire Ring – Restores 2 health after slaying a monster
- Savage Ring – Gives a 2 second +2 speed boost after slaying a monster.
- Ring of Yoba – Occasionally shields the wearer from damage. Lower health = Higher chances
- Sturdy Ring – Cuts the duration of negative status effects in half.
- Burglar’s Ring – Loot drop chance from monsters increases.
- Iridium Band – Glows, attracts items, and increases attack by 10%.
- Jukebox Ring – Plays music.
- Amethyst Ring – Increases knockback by 10%.
- Topaz Ring – Increases weapon precision by 10%.
- Aquamarine Ring – Increases critical strike chance by 10%
- Jade Ring – Increases critical strike power by 10%
- Emerald Ring – Increases weapon speed by 10%
- Ruby Ring – Increases attack by 10%
- Wedding Ring – Allows other players to marry each other in a Multiplayer Game.
- Crabshell Ring – Increases Defence by 5
- Napalm Ring – Causes slain monsters it explode and damage objects and enemies. Does not damage the player.
- Thorns Ring – Monsters take equal damage when they hit the player.
- Lucky Ring – Increases luck by 1.
- Hot Java Ring – Increases chances to find coffee and triple shot espresso when slaying monsters.
- Protection Ring – Increases invincibility time by 0.4 seconds
- Soul Sapper Ring – Gain 4 energy after slaying an enemy.
- Phoenix Ring – Restores 50% health once a day after being knocked out.
- Immunity Ring – Increases immunity by 4.
- Glowstone Ring – Combination of the glow and magnet rings.
These items are worn on the player’s feet and can be either purchased or found in the mine. They will either provide a Defense boost, Immunity boost or both.
- Sneakers – +1 Defense
- Rubber Boots – +1 Immunity
- Leather Boots – +1 Defense & +1 Immunity
- Work Boots – +2 Defense
- Combat Boots – +3 Defense
- Tundra Boots – +2 Defense & +1 Immunity
- Leprechaun Shoes – +2 Defense & +1 Immunity
- Thermal Boots – +1 Defense & +2 Immunity
- Cowboy Boots – +2 Defense & +2 Immunity
- Dark Boots – +4 Defense & +2 Immunity
- Firewalker Boots – +3 Defense & +3 Immunity
- Genie Shoes – +1 Defense & +6 Immunity
- Space Boots – +4 Defense & +4 Immunity
- Emily’s Magic Boots – +4 Defense & +4 Immunity
- Cinderclown Shoes – +6 Defense & +5 Immunity
- Mermaid Boots – +5 Defense & +8 Immunity
- Dragonscale Boots – +7 Defense
- Crystal Shoes – +3 Defense & +5 Immunity
Crafting – Part 1
Crafting is needed to advance the game and also to make equipment to gain more money and process items or obtain specific items.
Crafting recipes can be gained from leveling up skills, befriending villagers or buying them from certain stores.
Starter Recipes: These are crafting items you will start with when beginning the game.
Gate
Uses: Allows the player to pass through a fence.
Cost: 10 Wood
Other: This item will last for 100 days before breaking.
Wood Fence
Uses: Keeps animals contained in one area and stops grass from spreading.
Cost: 2 Wood
Other: This item will last for 23-33 days before breaking.
Wood Path
Uses: Is used for decoration or to create pathways.
Cost: 1 Wood
Gravel Path
Uses: Is used for decoration or to create pathways.
Cost: 1 Stone
Cobblestone Path
Uses: Is used for decoration or to create pathways.
Cost: 1 Stone
Wood Sign
Uses: Use an item to change what is displayed here. Items won’t be consumed.
Cost: 25 Wood
Stone Sign
Uses: Use an item to change what is displayed here. Items won’t be consumed.
Cost: 25 Stone
Torch
Uses: Provides a small amount of light when held or placed on the ground.
Cost: 1 Wood and 2 Sap
Campfire
Uses: Provides a small amount of light when placed on the ground.
Cost: 10 Stone, 10 Wood and 10 Fiber.
Chest
Uses: Holds 30 different items and is used as storage.
Cost: 50 Wood
Other: Can be changed to different colours.
Bought Recipes: These recipes can be bought from specific stores or during festivals.
Wood Floor
Uses: Provides a small amount of light when placed on the ground.
Cost: 1 Wood
Obtained: Carpenter’s Shop 500g
Straw Floor
Uses: Provides a small amount of light when placed on the ground.
Cost: 1 Wood and 1 Fiber
Obtained: Carpenter’s Shop 1000g
Weathered Floor
Uses: Provides a small amount of light when placed on the ground.
Cost: 1 Wood
Obtained: From Dwarf 500g
Crystal Floor
Uses: Provides a small amount of light when placed on the ground.
Cost: 1 Refined Quartz
Obtained: From Krobus 600g
Stone Floor
Uses: Provides a small amount of light when placed on the ground.
Cost: 1 Stone
Obtained: Carpenter’s Shop 500g
Stepping Stone Path
Uses: Provides a small amount of light when placed on the ground.
Cost: 1 Stone
Obtained: Carpenter’s Shop 500g
Crystal Path
Uses: Provides a small amount of light when placed on the ground.
Cost: 1 Refined Quartz
Obtained: Carpenter’s Shop 1000g
Wooden Brazier
Uses: Provides a small amount of light when placed on the ground.
Cost: 10 Wood, 1 Coal and 5 Fiber
Obtained: Carpenter’s Shop 250g
Stone Brazier
Uses: Provides a small amount of light when placed on the ground.
Cost: 10 Stone, 1 Coal and 5 Fiber
Obtained: Carpenter’s Shop 400g
Gold Brazier
Uses: Provides a small amount of light when placed on the ground.
Cost: 1 Gold Bar, 1 Coal and 5 Fiber
Obtained: Carpenter’s Shop 1000g
Carved Brazier
Uses: Provides a small amount of light when placed on the ground.
Cost: 10 Hardwood and 1 Coal
Obtained: Carpenter’s Shop 2000g
Stump Brazier
Uses: Provides a small amount of light when placed on the ground.
Cost: 5 Hardwood and 1 Coal
Obtained: Carpenter’s Shop 800g
Barrel Brazier
Uses: Provides a small amount of light when placed on the ground.
Cost: 50 Wood, 1 Solar Essence and 1 Coal
Obtained: Carpenter’s Shop 800g
Skull Brazier
Uses: Provides a small amount of light when placed on the ground.
Cost: 10 Hardwood, 1 Solar Essence and 1 Coal
Obtained: Carpenter’s Shop 3000g
Marble Brazier
Uses: Provides a small amount of light when placed on the ground.
Cost: 1 Marble, 1 Aquamarine and 100 Stone
Obtained: Carpenter’s Shop 5000g
Wood Lamp-post
Uses: Provides a good amount of light when placed on the ground.
Cost: 50 Wood and 1 Battery Pack
Obtained: Carpenter’s Shop 500g
Iron Lamp-post
Uses: Provides a good amount of light when placed on the ground.
Cost: 1 Iron Bar and 1 Battery Pack
Obtained: Carpenter’s Shop 1000g
Tub o’ Flowers
Uses: Flowers that bloom in Spring and Summer and is used as a decoration.
Cost: 15 Wood, 1 Tulip Seeds, 1 Blue Jazz Seeds, 1 Poppy Seeds and 1 Summer Spangle Seeds.
Obtained: Pierre’s stall at the Flower Dance Festival 2000g
Jack-O-Lantern
Uses: Used as a decoration.
Cost: 1 Pumpkin and 1 Torch
Obtained: Pierre’s stall at the Spirit’s Eve Festival 750g
Wicked Statue
Uses: Used as a decoration.
Cost:25 Stone and 5 Coal.
Obtained: From Krobus 1000g
Gifted Recipes: These recipes will be given by specific villagers when the correct requirements are met or are rewards for completing a certain quest.
Furnace
Uses: Allows you to turn 5 of the same ore into metal bars with 1 coal.
Cost: 20 Copper Ore and 25 Stone
Obtained: From Clint the morning after your first visit into the mines
Ancient Seed
Uses: Plant this is Spring, Summer and Fall to produce Ancient Fruit.
Cost: 1 Ancient Seed
Obtained: Donate 1 Ancient Seed to the Museum.
Wild Bait (5)
Uses: Used to cause fish to bite faster.
Cost: 10 Fiber, 5 Bug Meat and 5 Slime
Obtained: Four Hearts event with Linus.
Flute Block
Uses: When walked past it will make a flute sound
Cost: 10 Wood, 2 Copper Ore and 20 Fiber
Obtained: From Robin’s 6 heart event.
Drum Block
Uses: When walked past it will make a drum sound
Cost: 10 Stone, 2 Copper Ore and 20 Fiber
Obtained: From Robin’s 6 hearts event.
Farming Recipes: These recipes are gained when leveling up your farming skill.
Basic Fertilizer
Uses: Improves the soil quality (a little) and increases the chance for crops to grow higher quality.
Cost: 2 Sap
Obtained: Level 1 Farming
Scarecrow
Uses: Stops crows from eating seeds around the scarecrow (8 spaces)
Cost: 50 Wood, 1 Coal and 20 Fiber
Obtained: Level 1 Farming
Stone Fence
Uses: Keeps animals contained in one area and stops grass from spreading. Lasts longer than a wood fence.
Cost: 2 Stone
Other: This item lasts 55 to 66 days before breaking.
Obtained: Level 2 Farming
Sprinkler
Uses: Waters 4 adjacent tile every morning.
Cost: 1 Copper Bar and 1 Iron Bar
Obtained: Level 2 Farming
Mayonnaise Machine
Uses: Produces Mayonnaise from eggs (chicken, duck and void)
Cost: 15 Wood, 15 Stone, 1 Earth Crystal and 1 Copper Bar
Obtained: Level 2 Farming
Bee House
Uses: Collects honey during all seasons except Winter.
Cost: 40 Wood, 8 Coal, 1 Iron Bar and 1 Maple Syrup
Obtained: Level 3 Farming
Speed Grow
Uses: Increases growth rate of crops by 10%.
Cost: 1 Pine Tar and 1 Clam
Obtained: Level 3 Farming
Preserves Jar
Uses: Processes Fruit into Jam and Vegetables into Pickles
Cost: 50 Wood, 40 Stone and 8 Coal.
Obtained: Level 4 Farming
Basic Retaining Soil
Uses: Allows the soil a chance of staying watered overnight.
Cost: 2 Stone
Obtained: Level 4 Farming
Hardwood Fence
Uses: Keeps animals contained in one area and stops grass from spreading. Lasts the longest of all fences.
Cost: 1 Hardwood
Other: This item lasts 260 to 300 days before breaking.
Obtained: Level 6 Farming
Quality Sprinkler
Uses: Waters 8 adjacent tiles every morning.
Cost: 1 Iron Bar, 1 Gold Bar and 1 Refined Quartz
Obtained: Level 6 Farming
Cheese Press
Uses: Processes milk into cheese. (Cows and Goats)
Cost: 45 Wood, 45 Stone, 10 Hardwood and 1 Copper Bar
Obtained: Level 6 Farming
Loom
Uses: Processes wool into fine cloth (Rabbits and Sheep)
Cost: 60 Wood, 30 Fiber and 1 Pine Tar
Obtained: Level 7 Farming
Quality Retaining Soil
Uses: Soil has a high chance of staying watered overnight.
Cost: 3 Stone and 1 Clay
Obtained: Level 7 Farming
Keg
Uses: Processes fruit and vegetables into drinks.
Cost: 30 Wood, 1 Copper Bar, 1 Iron Bar and 1 Oak Resin
Obtained: Level 8 Farming
Oil Maker
Uses: Makes truffle oil from truffles (Pigs)
Cost: 50 Slime, 20 Hardwood and 1 Gold Bar
Obtained: Level 8 Farming
Deluxe Speed-Gro
Uses: Increases the growth rate of crops by 25%.
Cost: 1 Oak Resin and 1 Coral
Obtained: Level 8 Farming
Crafting – Part 2
Farming Recipes (continued)
Iridium Sprinkler
Uses: Waters 24 adjacent tiles every morning.
Cost: 1 Gold Bar, 1 Iridium Bar and 1 Battery Pack
Obtained: Level 9 Farming
Quality Fertilizer
Uses: Improves the quality of the soil and gives you a higher chance to grow quality crops. Mix into tilled soil before planting seeds.
Cost: 2 Sap and 1 of any fish
Obtained: Level 9 Farming
Seed Maker
Uses: Turns crops into seeds (randomly generates 1-3 seeds) and doesn’t work with crops from fruit tree.
Cost: 25 Wood, 10 Coal and 1 Gold Bar
Obtained: Level 9 Farming
Mining Recipes: These crafting items are gain when leveling up mining skill.
Cherry Bomb
Uses: Creates a small explosion. Will harm the player if they are within range.
Cost: 4 Copper Ore and 1 Coal
Obtained: Level 1 Mining
Staircase
Uses: Creates a ladder to access the next level in the mines.
Cost: 99 Stone
Obtained: Level 2 Mining
Transmute (Fe)
Uses: Turns copper bars into 1 iron bar
Cost: 3 Copper Bars
Obtained: Level 4 Mining
Bomb
Uses: Creates an explosion. Will harm the player if they are within range.
Cost: 4 Iron Ore and 1 Coal
Obtained: Level 6 Mining
Transmute (Au)
Uses: Turns iron bars into 1 gold bar
Cost: 3 Iron Bars
Obtained: Level 7 Mining
Mega Bomb
Uses: Creates a powerful explosion. Will harm the player if they are within range.
Cost: 4 Gold Ore, 1 Solar Essence and 1 Void Essence
Obtained: Level 8 Mining
Crystalarium
Uses: Makes copies of a gem when it is placed inside.
Cost: 99 Stone, 5 Gold Bars, 2 Iridium Bars and 1 Battery Pack
Obtained: Level 9 Mining
Foraging Recipes: These recipes are gained when leveling up Foraging skill.
Wild Seeds (Sp)
Uses: Allows you to grow 10 wild spring seeds per craft. (Wild Horseradish, Daffodil, Leek and Dandelion)
Cost: 1 Wild Horseradish, 1 Daffodil, 1 Leek and 1 Dandelion.
Obtained: Level 1 Foraging
Field Snack
Uses: Restores 45 Energy and 18 Health when eaten.
Cost: 1 Acorn, 1 Maple Seed and 1 Pine Cone
Obtained: Level 1 Foraging
Tapper
Uses: Place on a tree (maple, oak or pine) and after a few days you will get a product based on the type of tree.
Cost: 40 Wood and 2 Copper Bar
Obtained: Level 3 Foraging
Wild Seeds (Su)
Uses: Allows you to grow 10 wild summer seeds per craft. (Spice Berry, Grape and Sweet Pea)
Cost: 1 Spice Berry, 1 Grape and 1 Sweet Pea
Obtained: Level 4 Foraging
Charcoal Kiln
Uses: Turns 10 Wood into 1 Coal.
Cost: 20 Wood and 1 Copper Bar
Obtained: Level 4 Foraging
Wild Seeds (Fa)
Uses: Allows you to grow 10 wild fall seeds per craft. (Common Mushroom, Wild Plum, Hazelnut and Blackberry)
Cost: 1 Common Mushroom, 1 Wild Plum, 1 Hazelnut and 1 Blackberry
Obtained: Level 6 Foraging
Lightning Rod
Uses: Collects energy during lightning storms and coverts it into battery packs.
Cost: 1 Iron Bar, 1 Refined Quartz and 5 Bat Wing
Obtained: Level 6 Foraging
Warp Totem: Beach
Uses: Warps the player to the beach and is consumed when used.
Cost: 1 Hardwood, 2 Coral and 10 Fiber
Obtained: Level 6 Foraging
Wild Seeds (Wi)
Uses: Allows you to grow 10 wild winter seeds per craft. (Winter Root, Crystal Fruit, Snow Yam and Crocus)
Cost: 1 Winter Root, 1 Crystal Fruit, 1 Snow Yam and 1 Crocus
Obtained: Level 7 Foraging
Warp Totem: Mountains
Uses: Warps the player to the mountains and is consumed when used.
Cost: 1 Hardwood, 1 Iron Bar and 25 Stone
Obtained: Level 7 Foraging
Warp Totem: Farm
Uses: Warps the player to the farm and is consumed when used.
Cost: 1 Hardwood, 1 Honey and 20 Fiber
Obtained: Level 8 Foraging
Rain Totem
Uses: Once activated it will increase the chance of rain the next day. Is consumed on use.
Cost: 1 Hardwood, 1 Truffle Oil and 1 Pine Tar
Obtained: Level 9 Foraging
Fishing Recipes: These recipes are gained when the Fishing skill reaches certain levels
Bait
Uses: Attached to a fiberglass or iridium rod and makes fish bite faster.
Cost: 1 Bug Meat
Obtained: Level 2 Fishing
Crab Pot
Uses: Place in water with bait attached and will allow crabs and other sea creatures to be caught.
Cost: 40 Wood, 3 Iron Bars (25 Wood and 2 Copper Bars when Trapper Profession is used)
Obtained: Level 3 Fishing
Recycling Machine
Uses: Coverts Trash into other items.
Cost: 25 Wood, 25 Stone and 1 Iron Bar
Obtained: Level 4 Fishing
Spinner
Uses: Increases the bite rate of fish
Cost: 2 Iron Bars
Obtained: Level 6 Fishing
Trap Bobber
Uses: Fish will escape slower when they aren’t being reeled in.
Cost: 1 Copper Bar and 10 Sap
Obtained: Level 6 Fishing
Cork Bobber
Uses: Slightly increases the size of the fishing bar.
Cost: 10 Wood, 5 Hardwood and 10 Slime
Obtained: Level 7 Fishing
Treasure Hunter
Uses: Fish will not escape when treasures are being collected. This also increases the chance of finding treasures.
Cost: 2 Gold Bars
Obtained: Level 7 Fishing
Dressed Spinner
Uses: Increases the bite rate of fish.
Cost: 2 Iron Bars and 1 Cloth
Obtained: Level 8 Fishing
Barbed Hook
Uses: Causes the fishing bar to cling more to the fish. But only works best on slow, weak fish.
Cost: 1 Copper Bar, 1 Iron Bar and 1 Gold Bar
Obtained: Level 8 Fishing
Worm Bin
Uses: Produces bait
Cost: 25 Hardwood, 1 Gold Bar, 1 Iron Bar and 50 Fiber
Obtained: Level 8 Fishing
Magnet
Uses: Increases the chances of finding treasures but will decrease the bite rate of fish.
Cost: 1 Iron Bar
Obtained: Level 9 Fishing
Crafting – Part 3
Combat Recipes: These recipes are gained when a certain level of the combat skill is reached.
Sturdy Ring
Uses: Halves the time of negative status effects.
Cost: 10 Copper Bars, 5 Refined Quartz and 10 Earth Crystal
Obtained: Level 1 Combat
Life Elixir
Uses: Restores 200 energy and 80 health when consumed.
Cost: 1 Red Mushroom, Purple Mushroom, 1 Morel and 1 Chanterelle
Obtained: Level 2 Combat
Warrior Ring
Uses: When a monster is slain the wear may be infused with ‘warrior energy’
Cost: 10 Iron Bars, 25 Coal and 10 Frozen Tears
Obtained: Level 4 Combat
Oil of Garlic
Uses: Restores 200 energy and 80 health
Cost: 10 Garlic and 1 Oil
Obtained: Level 6 Combat
Slime Egg-Press
Uses: Creates a slime egg when 100 pieces of slime is placed inside.
Cost: 25 Coal, 1 Fire Quartz and 1 Battery Pack
Obtained: Level 6 Combat
Ring of Yoba
Uses: Will occasionally prevent damage to the player when worn.
Cost: 5 Gold Bars, 5 Iron Bars and 1 Diamond
Obtained: Level 7 Combat
Explosive Ammo
Uses: Is used with a slingshot
Cost: 1 Iron Bar and 2 Coal
Obtained: Level 8 Combat
Slime Incubator
Uses: Hatches slime eggs into slimes.
Cost: 2 Iridium Bars and 100 Slime
Obtained: Level 8 Combat
Iridium Band
Uses: Glows, extends the magnetic pick up range and increases the player’s attack damage by 10%.
Cost: 5 Iridium Bars, 50 Solar Essence and 50 Void Essence
Obtained: Level 9 Combat
Wedding Ring (Multiplayer Only)
Uses: Allows players on multiplayer to marry each other and have children.
Cost: 5 Iridium Bars, 1 Prismatic Shard
Obtained: Bought for 500g at the Traveling Wagon.
Garden Pot
Uses: Grows any crop of any season indoors.
Cost: 1 Clay, 10 Stone, 1 Refined Quartz
Obtained: Cutscene with Evelyn after the Greenhouse is repaired.
Shipping – Page 1
Shipping items are sold on the next day when placed in the shipping box outside the player’s farmhouse. You can keep track of these items in the collection tab of your inventory which shows the number of the product shipped and how much it will ship for.
The following is the full list of the items that will appear on the ‘Shipping’ page and where you can find them.
Page 1:
- Wild Horseradish – Found in Spring.
- Daffodil – Found in Spring
- Leek – Found in Spring
- Dandelion – Found in Spring
- Parsnip – Can be grown in Spring and seeds can be purchased from Pierre’s.
- Cave Carrot – Can be found in the mines or sometimes in garbage cans.
- Coconut – Can be found in the Calico Desert.
- Cactus Fruit – Can be found in the Calico Desert.
- Banana – Can be harvested in Summer and saplings can be purchased from the Ginger Island Trader.
- Sap – Obtained by cutting down trees.
- White Egg – Are produced by white chickens.
- Large White Egg – Are produced by white chickens.
- Brown Egg – Are produced by brown chickens
- Large Brown Egg – Are produced by brown chickens.
- Milk – Can be harvested from cows using a milk pail.
- Large Milk – Can be harvested from cows using a milk pail.
- Green Bean – Can be grown in Spring and seeds can be purchased from Pierre’s.
- Cauliflower – Can be grown in Spring and seeds can be purchased from Pierre’s.
- Potato – Can be grown in Spring and seeds can be purchased from Pierre’s.
- Garlic – Can be grown in Spring and seeds can be purchased from Pierre’s in Year 2.
- Kale – Can be grown in Spring and seeds can be purchased from Pierre’s.
- Rhubarb – Can be grown in Spring and seeds can be purchased from Pierre’s.
- Melon – Can be grown in Summer and seeds can be purchased from Pierre’s.
- Tomato – Can be grown in Summer and seeds can be purchased from Pierre’s.
- Morel – Can be found in spring in the Secret Woods (Or on the farm if the Forest Farm map was chosen or the Mushroom Cave was chosen)
- Blueberry – Can be grown in Summer and seeds can be purchased from Pierre’s.
- Fiddlehead Fern – Can be found in Summer in the Secret Woods.
- Hot Pepper – Can be grown in Summer and seeds can be purchased from Pierre’s.
- Wheat – Can be grown in Summer and Fall and seeds can be purchased from Pierre’s.
- Radish – Can be grown in Summer and seeds can be purchased from Pierre’s.
- Red Cabbage – Can be grown in Summer and seeds can be purchased from Pierre’s in Year 2.
- Starfruit – Can be grown in Summer and seeds can be purchased from Oasis.
- Corn – Can be grown in Summer and seeds can be purchased from Pierre’s.
- Unmilled Rice – Can be grown in Spring and seeds can be purchased from Pierre’s in Year 2.
- Eggplant – Can be grown in Fall and seeds can be purchased from Pierre’s.
- Artichoke – Can be grown in Fall and seeds can be purchased from Pierre’s.
- Pumpkin – Can be grown in Fall and seeds can be purchased from Pierre’s.
- Bok Choy – Can be grown in Fall and seeds can be purchased from Pierre’s.
- Yam – Can be grown in Fall and seeds can be purchased from Pierre’s.
- Chanterelle – Can be found in Fall in the Secret Woods (or the Mushroom Cave if chosen)
- Cranberries – Can be grown in Fall and seeds can be purchased from Pierre’s.
- Holly – Can be found during Winter.
- Beet – Can be grown in Fall and seeds can be purchased from Pierre’s.
- Ostrich Egg – Can be obtained from Ostriches and by solving Journal Scrap #10 on Ginger Island.
- Salmonberry – Can be found on bushes during Spring day 15, 16, 17 and 18
- Amaranth – Can be grown in Fall and seeds can be purchased from Pierre’s.
- Pale Ale – Can be made from Hops with the use of a Keg.
- Hops – Can be grown in Summer and seeds can be purchased from Pierre’s.
- Void Egg – Can be obtained from the witch event (randomised) and can be bought from the traveling wagon or Krobus.
- Mayonnaise – Can be made from Eggs by using a Mayonnaise Machine
- Duck Mayonnaise – Can be made from Duck Eggs by using a Mayonnaise Machine
- Void Mayonnaise – Can be made from Void Eggs by using a Mayonnaise Machine
- Clay – Can be obtained by digging up dirt, sand or artifacts spots and can be found when processing geodes at the blacksmith.
- Copper Bar – Can be made with a furnace from 5 Copper Ore and 1 Coal.
- Iron Bar – Can be made with a furnace from 5 Iron Ore and 1 Coal.
- Gold Bar – Can be made with a furnace from 5 Gold Ore and 1 Coal.
- Iridium Bar – Can be made with a furnace from 5 Gold Ore and 1 Coal.
- Refined Quartz – Can be made from
- Honey – Can be produced with a bee house during all seasons except Winter.
- Pickles – Can be created from any Vegetable by using a Preserve Jar.
- Jelly – Can be created from any Fruit by using a Preserve Jar.
- Beer – Can be created from
- Wine – Can be created from any Fruit (and some Vegetables) by using a Keg.
- Juice – Can be created from any Vegetable (some Vegetables will produce wine instead) by using a Keg.
- Clam – Can be found on the beach during any season.
- Copper Ore – Can be obtained from breaking copper nodes and sometimes found in crates and barrels in the mine. It can also be found when processing geodes at the blacksmith.
- Iron Ore – Can be obtained from breaking iron nodes and sometimes found in crates and barrels in the mine. It can also be found when processing geodes at the blacksmith.
- Coal – Can be obtained from breaking rocks and can be made using the Charcoal Kiln.
- Gold Ore – Can be obtained from breaking gold nodes and sometimes found in crates and barrels in the mine. It can also be found when processing geodes at the blacksmith.
Shipping – Page 2
Page 2
- Iridium Ore – Can be obtained from breaking iridium nodes or meteorites and sometimes found as drops from very high level monsters in the mines. It can also be found when processing geodes at the blacksmith.
- Wood – Can be collected by chopping down trees, stumps and logs.
- Stone – Can be collected by breaking stones.
- Nautilus Shell – Can be found on the beach during Winter.
- Coral – Found all year round on the beach.
- Rainbow Shell – Found during Summer on the beach.
- Spice Berry – Can be found during Summer.
- Sea Urchin – Found all year round on the beach.
- Grape – Can be found in Summer but only grows in Fall and seeds can be purchased from Pierre’s.
- Spring Onion – Found in Spring.
- Strawberry – Can be grown in Spring and seeds can be purchased from Pierre’s stall at the Egg Festival.
- Sweet Pea – Can be found during Summer.
- Common Mushroom – Can be found during Fall.
- Wild Plum – Can be found during Fall.
- Hazelnut – Can be found during Fall
- Blackberry – Can be harvested from bushes during Fall on day 8, 9, 10 and 11.
- Winter Root – Can be dug up during Winter
- Crystal Fruit – Can be found during Winter
- Snow Yam – Can be dug up during Winter.
- Sweet Gem Berry – Can be grown during Fall and seeds can be purchased at the traveling wagon.
- Crocus – Can be found during Winter.
- Red Mushroom – Can be in the Secret Woods, Mushroom Cave or the Mines.
- Sunflower – Can be grown in Summer and Fall and seeds can be purchased from Pierre’s.
- Purple Mushroom – Can be found in the Mines (starting at level 82) or the Mushroom Cave.
- Cheese – Can be made from milk from cows with a Cheese Press
- Goat Cheese – Can be made from goat’s milk by using a Cheese Press
- Cloth – Created using a loom from wool.
- Truffle – Can be dug up by pigs.
- Truffle Oil – Made using an oil
- Coffee Bean – Can be grown in Spring and Summer and seeds can be purchased from the traveling Wagon.
- Goats Milk – Can be harvested from goats using a milk pail.
- Large Goats Milk – Can be harvested from goats using a milk pail.
- Wool – Can be harvested from sheep using shears.
- Duck Egg – Can be produced by ducks
- Duck Feather – Can be produced by ducks
- Caviar – Can be made from Sturgeon Roe using Preserves Jar.
- Rabbit’s Foot – Can be produced by rabbits
- Aged Roe – Can be made from any Roe (except Sturgeon Roe) using Preserves Jar.
- Ancient Fruit – Seed can be bought at the traveling wagon.
- Mead – Can be made with honey by placing it inside a keg.
- Tulip – Can be grown in Spring and seeds can be purchased from Pierre’s.
- Summer Spangle – Can be grown in Summer and seeds can be purchased from Pierre’s.
- Fairy Rose – Can be grown in Fall and seeds can be purchased from Pierre’s.
- Blue Jazz – Can be grown in Spring and seeds can be purchased from Pierre’s.
- Poppy – Can be grown in Summer and seeds can be purchased from Pierre’s.
- Apple – Can be harvested in Fall and saplings can be purchased from Pierre’s.
- Green Tea – Can be made from Tea Leaves by using a Keg.
- Apricot – Can be harvested in Spring and saplings can be purchased from Pierre’s.
- Orange – Can be harvested in Summer and saplings can be purchased from Pierre’s.
- Peach – Can be harvested in Summer and saplings can be purchased from Pierre’s.
- Pomegranate – Can be harvested in Fall and saplings can be purchased from Pierre’s.
- Cherry – Can be harvested in Spring and saplings can be purchased from Pierre’s.
- Bug Meat – Dropped from bugs, cave flies and maggots.
- Hardwood – Are dropped from logs and large tree stumps and can also be found in the mines.
- Maple Syrup – Harvested from maple trees with a Tapper.
- Oak Tar – Harvested from oak trees with a Tapper.
- Pine Tar – Harvested from pine trees with a Tapper.
- Slime – Dropped from slimes.
- Bat Wing – Dropped from bats.
- Solar Essence – Dropped from ghosts, metal heads, squid kids and mummies.
- Void Essence – Dropped from shadow brutes, shadow shamans and serpents.
- Fiber – Obtained from cutting weeds.
- Battery Pack – Created by placing a lightning rod outside during thunderstorms.
- Dinosaur Mayonnaise
- Roe – Produced by fish in a Fish Pond.
- Squid Ink – Produced by squids and Midnight Squids in a Fish Pond. Also dropped by Squid Kids in the Mines.
- Tea Leaves – Can be harvested in Spring and saplings can be purchased from the Traveling Cart or crafted using the recipe given by Caroline (2 Hearts).
- Ginger – Can be dug up on Ginger Island or dropped by Tiger Slimes.
- Taro Root – Grown in Summer from Taro Tubers that can be purchased from the Ginger Island Trader.
- Pineapple – Can be harvested in Summer and seeds can be purchased from the Ginger Island Trader.
- Mango – Can be harvested in Summer and saplings can be purchased from the Ginger Island Trader.
Shipping – Page 3
Page 3
- Cinder Shard – Ore mined from the Volcano on Ginger Island.
- Magma Cap – Grows in the Volcano Dungeon on Ginger Island.
- Bone Fragment – Dropped by Skeletons and Lava Lurks or from Bone Nodes on Ginger Island.
- Radioactive Ore – Mined from Radioactive Nodes in the Mines and Skull Cavern.
- Radioactive Bar – Can be made with a furnace from 5 Radioactive Ore and 1 Coal.
Fish and Fishing – Part 1
Fish will become available once a fishing rod is obtained and can be caught in any type of water. Fish will vary between types of water and some fish are more difficult to catch than others.
Once a ‘bite’ has been made by a fish, the player has to play a mini game using the mouse. The player must keep the fish between the green bar, if the fish stays within the bar the meter on the right will go up once it is full the fish is caught successfully, if the fish leaves the bar the meter will go down until the fish is back inside it. If the meter goes down completely the fish is lost.
When fishing there is also the chance the player will catch items labeled as ‘trash’. These items can be kept until a recycle machine is obtained. There is also a chance while playing the fishing mini game that a chest will appear. When this chest is there the player has the chance to hover over it and catch it, but only if the fish is caught as well. If the fish is lost the chest will also disappear.
Continually pressing the mouse in succession is recommended as this is the easiest way to keep the bar in place and raise or lower it quickly.
The following is a list of fish, where and when to find them and what equipment to use. Some fish will be repeated on some lists as they can be found in multiple locations.
Ocean: These fish are found in the ocean by fishing on the beach or on the pier.
Fishing Pole needed:
- Pufferfish – Can be found during Summer on a Sunny day between 12pm – 4pm
- Anchovy – Can be found during Spring and Fall on any day at anytime
- Tuna – Can be found during Summer and Winter on any day between 6am – 7pm
- Sardine – Can be found during Spring, Fall and Winter on any day between 6am – 7pm
- Red Mullet – Can be found during Summer and Winter on any day between 6am – 7pm
- Herring – Can be found during Spring and Winter on any day at anytime
- Eel – Can be found during Spring and Fall on a Rainy day between 4pm – 2am
- Octopus – Can be found during Summer on any day between 6am – 1pm
- Red Snapper – Can be found during Summer and Fall on a Rainy day between 6am – 7pm
- Squid – Can be found during Winter on any day between 6pm – 2am
- Sea Cucumber – Can be found during Fall and Winter on any day between 6am – 7pm
- Super Cucumber – Can be found during Summer and Fall on any day between 6pm – 2am
- Tilapia – Can be found during Summer and Fall on any day between 6am – 2pm
- Albacore – Can be found during Fall and Winter on a Sunny or Rainy day between 6am – 11am and 6pm – 2am
- Halibut – Can be found during Spring, Summer and Winter on any day between 6am – 11am and 7pm – 2am
Crab Pot needed: These fish aren’t caught right away and require you to wait until the next day to collect.
- Lobster
- Crab – Can also be obtained by defeating rock crabs and lava crabs in the mines
- Cockle
- Mussel
- Shrimp
- Oyster
Lake: These fish can be found in the lake located in the mountains outside of the mines.
- Largemouth Bass – Can be found during all seasons on any day between 6am – 7pm.
- Rainbow Trout – Can be found during Summer on a Sunny day between 6am – 7pm.
- Walleye – Can be found during Fall on a Rainy day between 12pm – 2am.
- Perch – Can be found during Winter on any day at anytime.
- Carp – Can be found during all seasons on any day at anytime.
- Sturgeon – Can be found during Summer and Winter on any day between 6am – 7pm.
- Bullhead – Can be found during all seasons on any day at anytime.
- Chub – Can be found during all seasons on any day at anytime.
- Lingcod – Can be found during Winter on any day at anytime.
River: These fish can be found in either Cindersap Forest or in Pelican Town. (Fish in Pelican Town can also be found at the farm if the hill-top or riverland farm map was chosen)
- Angler – See legendary
- Bream – Can be found during all seasons on any day between 6pm – 2am
- Catfish – Can be found during Spring and Fall on a Rainy day between 6am – 12am.
- Chub – Can be found during all seasons on any day at anytime.
- Dorado – Can be found during Summer on any day between 6am – 7pm.
- Glacierfish – See legendary.
- Lingcod – Can be found during Winter on any day at anytime.
- Perch – Can be found during Winter on any day at anytime.
- Pike – Can be found during Summer and Winter on any day at anytime.
- Rainbow Trout – Can be found during Summer on a Sunny day between 6am – 7pm.
- Salmon – Can be found during Fall on any day between 6am – 7pm.
- Shad – Can be found during Spring, Summer and Fall on a Rainy day between 9am – 2am
- Smallmouth Bass – Can be found during Spring and Fall on any day at any time.
- Sunfish – Can be found during Spring on a Sunny day between 6am – 7pm.
- Tiger Trout – Can be found during Fall and Winter on any day between 6am – 7pm.
- Walleye – Can be found during Fall on a Rainy day between 12pm – 2am.
Pond: This is located in Cindersap forest on the north-west side.
- Carp – Can be found during all seasons on any day at anytime.
- Catfish – Can be found during Spring and Fall on a Rainy day between 6am – 12am.
- Smallmouth Bass – Can be found during Spring and Fall on any day at any time.
- Walleye – Can be found during Fall on a Rainy day between 12pm – 2am.
Secret Woods Pool: These fish can be found in the small pool on the west side.
- Carp – Can be found during all seasons on any day at anytime.
- Woodskip – Can be found during all seasons on any day at anytime.
- Catfish – Can be found in this location during Spring, Summer and Fall on a Rainy day between 6am – 12am
The Mines: These fish can be found in pools of water/lava/ice at certain floors.
- Ghostfish – Can be found during all seasons on any day at anytime on floors 20, 60 and 100.
- Ice Pip – Can be found during all seasons on any day at anytime on floor 60.
- Lava Eel – Can be found during all seasons on any day at anytime on floor 100.
- Stonefish – Can be found during all seasons on any day at anytime on floor 20.
The Sewer: Can only be obtained in the sewers.
- Carp – Can be found during all seasons on any day at anytime.
- Mutant Carp – See legendary.
The Desert: These fish can only be obtained once you have access to the desert location.
- Sandfish – Can be found during all seasons on any day between 6am – 8pm
- Scorpion Carp – Can be found during all seasons on any day between 6am – 8pm.
Mutant Bug Lair: Only found once access the the mutant bug lair is given.
- Slimejack – Can be found during all seasons on any day at anytime.
Witch’s Swamp: Only unlocked once a quest has been finished.
- Void Salmon – Can be found during all seasons on any day at anytime.
Freshwater Crab Pot: These fish can be caught in any freshwater area.
- Crayfish
- Snail
- Periwinkle
Fish and Fishing – Part 2
Legendary Fish
These 5 fish can only be caught once and will never spawn again. These are difficult to catch and will require an upgraded pole, plus bait and high quality tackle to make it a bit easier.
- Crimsonfish – Can be found near the east pier in Summer between 6am and 8pm (you will need 300 wood to repair the bridge) and requires you to have at least level 5 in Fishing Skill.
- Angler – Can be found in the water north of the Joja Mart at any time during Fall, you must be standing in the middle of the wooden plank and cast your line north. You will need at least level 3 in Fishing Skill.
- Legend – Can be found in the Lake in the mountains, during Spring while it is raining between 6am and 8pm. You will get a more likely hit near the log and will need to have level 10 in Fishing Skill before it can be caught.
- Glacierfish – Can be found in the south part of Cindersap forest on the middle island (triangle) during Winter between 6am and 8pm. You will need at least level 6 in Fishing Skill.
- Mutant Carp – Can be caught in the sewers at any time and season.
Artifacts
Artifacts are items that can be found when digging up an ‘artifact spot’ or dirt areas in the mines with your hoe. They can also be obtained from treasure chests while fishing or be dropped from certain monsters. These items can be dontated to the museum or sold (if you find multiple).
The following is a list of all the artifacts that can be found and where to look.
- Amphibian Fossil – Can be found while digging up artifact spots in the Forest and Mountains or from treasure chests while fishing.
- Anchor – Can be found while digging up artifact spots at the Beach or in treasure chests while fishing.
- Ancient Doll – Can be found while digging up artifact spots at the Mountains, Forest, Bus Stop, Pelican Town and Mines. It can also be found in treasure chests while fishing or as a secret santa gift during the Feast of the Winter Star.
- Ancient Drum – Can be found while digging up artifact spots in the Mines, Bus Stop, Forest and Pelican Town. It can also be found by opening Omni Geodes at the blacksmith.
- Ancient Seed – Can be found while digging up artifact spots in the Forest and Mountains. It can also be dropped from monsters and found in treasure chests while fishing.
- Ancient Sword – Can be found while digging up artifact spots at the Mountains and Forest or in treasure chests while fishing.
- Arrowhead – Can be found while digging up artifact spots at the Bus Stop, Mountains or Forest.
- Bone Flute – Can be found while digging up artifact spots in the Mines, Mountains, Forest and Town or in treasure chests while fishing.
- Chewing Stick – Can be found while digging up artifact spots at the Mountains, Forest, Pelican Town or in treasure chests while fishing.
- Chicken Statue – Can be found while digging up artifact spots at your farm or from treasure chests while fishing.
- Chipped Amphora – Can be found while digging up artifact spots in Pelican Town.
- Dinosaur Egg – Can be found while digging up artifact spots in the Mines, Mountain or in treasure chests while fishing.
- Dried Starfish – Can be found while digging up artifact spots at the Beach or in treasure chests while fishing.
- Dwarf Gadget – Can be found while digging up artifact spots in the Mines or by opening Omni Geodes at the blacksmith.
- Dwarf Scroll I – Can be found in the mines and can be dropped by monsters.
- Dwarf Scroll II – Can be found in the mines and can be dropped by monsters.
- Dwarf Scroll III – Can be found in the mines and can be dropped by monsters.
- Dwarf Scroll IV – Can be found in the mines and can be dropped by monsters.
- Dwarvish Helm – Can be found while digging up artifact spots in the Mines or by opening Omni Geodes at the blacksmith.
- Elvish Jewelry – Can be found while digging up artifact spots in the Forest or from chests while fishing.
- Glass Shards – Can be found while digging up artifact spots at the Beach or in treasure chests while fishing.
- Golden Mask – Can be found while digging up artifact spots in the Desert.
- Golden Relic – Can be found while digging up artifact spots in the Desert.
- Nautilus Fossil – Can be found while digging up artifact spots on the Beach or in treasure chests while fishing.
- Ornamental Fan – Can be found while digging up artifact spots at the Beach, Forest and Pelican Town or in treasue chests while fishing.
- Palm Fossil – Can be found while digging up artifact spots in the Forest, Beach or Desert.
- Prehistoric Handaxe – Can be found while digging up artifact spots in the Mountains, Forest and Bus Stop.
- Prehistoric Rib – Can be found while digging up artifact spots in Pelican Town.
- Prehistoric Scapula – Can be found while digging up artifact spots in Pelican Town and Forest.
- Prehistoric Skull – Can be found while digging up artifact spots in the Mountains.
- Prehistoric Tibia – Can be found while digging up artifact spots in the Forest and Railroad.
- Prehistoric Tool – Can be found while digging up artifact spots at the Bus Stop, Mountains and Forest. It can also be found in treasure chests while fishing.
- Prehistoric Vertebra – Can be found while digging up artifact spots at the Bus Stop.
- Rare Disc – Can be found while digging up artifact spots in the Mines or from treasure chests while fishing.
- Rusty Cog – Can be found while digging up artifact spots in the Mines and Mountains or in treasure chests while fishing.
- Rusty Spoon – Can be found while digging up artifact spots in the Mines and Pelican Town or in treasure chests while fishing.
- Rusty Spur – Can be found while digging up artifact spots at your farm or from treasure chests while fishing.
- Skeletal Hand – Can be found while digging up artifact spots at the Beach or Woods behind your farm that leads to the Mountains.
- Skeletal Tail
- Strange Doll (Green) – Can be found while digging up artifact spots in any area or from treasure chests found while fishing.
- Strange Doll (Yellow) – Can be found while digging up artifact spots in any area or from treasure chests found while fishing.
- Trilobite – Can be found while digging up artifact spots in the Forest, Beach or Mountains.
Artifact Troves
Containers that can be bought from the Desert Trader for 5 Omni Geodes. They can also drop from Haunted Skull enemies.
These boxes will hold one random artifact.
These boxes can be opened a the Blacksmith for 25g.
Minerals and Mining
Minerals can be found in the mines or skull cavern while mining. Some can be picked up while others have to be broken out of nodes. There is also a chance that they can be obtained when breaking open any geode at the blacksmith.
These items are needed to complete the museum collection as well as create certian items. They can also be sold for a certain amount of money using the shipping box or at the blacksmith.
The following is a list of minerals and where they can be found.
Foraging: These minerals can be picked up from the ground and don’t need to be collected using a pickaxe.
- Quartz – The Mines Level 1-120
- Earth Crystal – The Mines Level 1-39. Can also be found by Panning or opening Geodes.
- Frozen Tear – The Mines Level 40-79. Can also be found by Panning or in treasure chests while fishing.
- Fire Quartz – The Mines Level 80-120. Can also be found by Panning.
Gems: These can be collected by using a pickaxe to break a certain node.
- Emerald – Emerald Nodes, Gem Nodes, any level below 80 in the Mines and by Panning. Can also be a gift during the Feast of the Winter Star.
- Aquamarine – Aquamarine Nodes, Gem Nodes any level below 40 in the Mines and by Panning. Can also be found in treasure chests while fishing.
- Ruby – Ruby Nodes, Gem Nodes, any level below 80 in the Mines and by Panning. Can also be a gift at the Feast of the Winter Star.
- Amethyst – Amethyst Node, Gem Nodes, any level of the Mines and while Panning. Can also be found when search Garbage Cans.
- Topaz – Topaz Node, Gem Nodes, any level of the Mines and while Panning. Can also be found when search Garbage Cans.
- Jade – Jade Nodes, Gem Nodes, any level below 40 in the Mines and by Panning. Can also be found in treasure chests while fishing, from Garbage Cans in town and can be a gift at the Feast of the Winter Star.
- Diamond – Diamond Nodes, Gem Nodes, any level below 50 in the Mines and by Panning.
- Prismatic Shard – Iridium Nodes, Mystic Stones and Omni Geodes. Can also be dropped from Shadow Brutes, Shadow Shamans, Mummies and Serpents.
Geode only Minerals: These can only be obtained from breaking open certain geodes at the blacksmith.
- Tigerseye – Can be found in Magma and Omni Geodes.
- Opal – Can be found in Frozen and Omni Geodes.
- Fire Opal – Can be found in Magma and Omni Geodes.
- Alamite – Can be found in Geodes and Omni Geodes.
- Bixite – Can be found in Magma and Omni Geodes.
- Baryte – Can be found in Magma and Omni Geodes.
- Aerinite – Can be found in Frozen and Omni Geodes.
- Calcite – Can be found in Geodes and Omni Geodes.
- Dolomite – Can be found in Magma and Omni Geodes.
- Esperite – Can be found in Frozen and Omni Geodes.
- Fluorapatite – Can be found in Frozen and Omni Geodes.
- Geminite – Can be found in Frozen and Omni Geodes.
- Helvite – Can be found in Magma and Omni Geodes.
- Jamborite – Can be found in Geodes and Omni Geodes.
- Jagoite – Can be found in Geodes and Omni Geodes.
- Kyanite – Can be found in Frozen and Omni Geodes.
- Lunarite – Can be found in Frozen and Omni Geodes.
- Malachite – Can be found in Geodes and Omni Geodes.
- Neptunite – Can be found in Magma and Omni Geodes.
- Lemon Stone – Can be found in Magma and Omni Geodes.
- Nekoite – Can be found in Geodes and Omni Geodes.
- Orpiment – Can be found in Geodes and Omni Geodes.
- Petrified Slime – Can be found in Geodes and Omni Geodes.
- Thunder Egg – Can be found in Geodes and Omni Geodes.
- Pyrite – Can be found in Frozen and Omni Geodes.
- Ocean Stone – Can be found in Frozen and Omni Geodes.
- Ghost Crystal – Can be found in Frozen and Omni Geodes.
- Jasper – Can be found in Magma and Omni Geodes.
- Celestine – Can be found in Geodes and Omni Geodes.
- Marble – Can be found in Frozen and Omni Geodes.
- Sandstone – Can be found in Geodes and Omni Geodes.
- Granite – Can be found in Geodes and Omni Geodes.
- Basalt – Can be found in Magma and Omni Geodes.
- Limestone – Can be found in Geodes and Omni Geodes.
- Soapstone – Can be found in Frozen and Omni Geodes.
- Hematite – Can be found in Frozen and Omni Geodes.
- Mudstone – Can be found in Geodes and Omni Geodes.
- Obsidian – Can be found in Magma and Omni Geodes.
- Slate – Can be found in Geodes and Omni Geodes.
- Fairy Stone – Can be found in Frozen and Omni Geodes.
- Star Shards – Can be found in Magma and Omni Geodes.
Geodes: These can be opened at the blacksmith for 25g each and will contain a random type of mineral, gem or ore.
- Geode – The Mines level 1-39 and can be mined on the farm (if Hill-top map was chosen). This can also be a secret santa gift during the Feast of the Winter Star.
- Frozen Geode – The Mines level 41-79 and can be mined on the farm during Winter (if Hill-top map was chosen). This can also be a secret santa gift during the Feast of the Winter Star and be found in treasure chests while fishing.
- Magma Geode – The Mines level 81-120 and can be found in treasure chests while fishing. This can also be a secret santa gift during the Feast of the Winter Star.
- Omni Geode – The Mines and Skull Cavern. This can also be found while panning and can be bought from Oasis and Krobus on certain days.
Cooking and Food
Cooking is only opened to you once you have upgraded your house, but you can gain recipes for any food item without having access to the kitchen. You can gain these recipes by either purchasing them from Gus at the saloon, watching Queen of Sauce on a specific day or as a gift from villagers once a certain number of friendship hearts are gained.
Below is a list of the recipes, what ingredients are needed and how you get the recipe.
- Fried Egg – Egg (1) || From Start
- Omelet – Egg (1), Milk (1) || Cooking Channel Day 28 Spring Year 1
- Salad – Leek (1), Dandelion (1), Vinegar (1) || Emily (3 Hearts)
- Cheese Cauliflower – Cauliflower (1), Cheese (1) || Pam (3 Hearts)
- Baked Fish – Sunfish (1), Bream (1), Wheat Flour (1) || Cooking Channel Day 7 Summer Year 1
- Parsnip Soup – Parsnip (1), Milk (1), Vinegar (1) || Caroline (3 Hearts)
- Vegetable Medley – Tomato (1), Beet (1) || Caroline or Gus
- Complete Breakfast – Fried Egg (1), Milk (1), Hashbrowns (1), Pancakes (1) || Cooking Channel Day 21 Spring Year 2
- Fried Calamari – Squid (1), Wheat Flour (1), Oil (1) || Jodi (3 Hearts)
- Strange Bun – Wheat Flour (1), Periwinkle (1), Void Mayonnaise (1) || Shane (3 Hearts)
- Lucky Lunch – Sea Cucumber (1), Tortilla (1), Blue Jazz (1) || Cooking Channel Day 28 Spring Year 2
- Fried Mushroom – Common Mushroom (1), Morel (1), Oil (1) || Demetrius (3 Hearts)
- Pizza – Wheat Flour (1), Tomtao (1), Cheese (1) || Cooking Channel Day 7 Spring Year 2
- Bean Hotpot – Green Bean (2) || Clint (7 Hearts)
- Glazed Yams – Yam (1), Sugar (1) || Cooking Channel Day 21 Fall Year 1
- Carp Surprise – Carp (4) || Cooking Channel Day 7 Summer Year 2
- Hashbrowns – Potato (1), Oil (1) || Cooking Channel Day 14 Spring Year 2
- Pancakes – Wheat Flour (1), Egg (1) || Cooking Channel Day 14 Summer Year 1
- Salmon Dinner – Salmon (1), Amaranth (1), Kale (1) || Gus (3 Hearts)
- Fish Taco – Tuna (1), Tortilla (1), Red Cabbage (1), Mayonnaise (1) || Linus (3 Hearts)
- Crispy Bass – Largermouth Bass (1), Wheat Flour (1), Oil (1) || Kent (3 Hearts)
- Pepper Poppers – Hot Pepper (1), Cheese (1) || Shane (3 Hearts)
- Bread – Whear Flour (1) || Cooking Channel Day 28 Summer Year 1
- Tom Kha Soup – Coconut (1), Shrimp (1), Common Mushroom (1) || Sandy (7 Hearts)
- Trout Soup – Rainbow Trout (1), Green Algae (1) || Cooking Channel Day 14 Fall Year 1
- Chocolate Cake – Wheat Flour (1), Sugar (1), Egg (1) || Cooking Channel Day 14 Winter Year 1
- Pink Cake – Melon (1), Wheat Flour (1), Sugar (1), Egg (1) || Cooking Channel Day 21 Summer Year 2
- Rhubarb Pie – Rhubarb (1), Wheat Flour (1), Sugar (1) || Marnie (7 Hearts)
- Cookie – Wheat Flour (1), Sugar (1), Egg (1) || Evelyn (4 Hearts)
- Spaghetti – Wheat Flour (1), Tomato (1) || Lewis (3 Hearts)
- Fried Eel – Eel (1), Oil (1) || George (3 Hearts)
- Spicy Eel – Eel (1), Hot Pepper (1) || George (7 Hearts)
- Sashimi – Any Fish (1) || Linus (3 Hearts)
- Maki Roll – Any Fish (1), Seaweed (1), Rice (1) || Cooking Channel Day 21 Summer Year 1
- Tortilla – Corn (1) || Cooking Channel Day 7 Fall Year 1
- Red Plate – Red Cabbage (1), Radish (1) || Emily (3 Hearts)
- Eggplant Parmesan – Eggplant (1), Tomato (1) || Lewis (7 Hearts)
- Rice Pudding – Milk (1), Sugar (1), Rice (1) || Evelyn (7 Hearts)
- Ice Cream – Milk (1), Sugar (1) || Jodi (7 Hearts)
- Blueberry Tart – Blueberry (1), Wheat Flour (1), Sugar (1), Egg (1) || Pierre (3 Hearts)
- Autumn’s Bounty – Yam (1), Pumpkin (1) || Demetrius (7 Hearts)
- Pumpkin Soup – Pumpkin (1), Milk (1) || Robin (7 Hearts)
- Super Meal – Bok Choy (1), Cranberries (1), Artichoke (1) || Kent (7 Hearts)
- Cranberry Sauce – Cranberries (1), Sugar (1) || Gus (3 Hearts)
- Stuffing – Bread (1), Cranberries (1), Hazelnut (1) || Pam (8 Hearts)
- Farmer’s Lunch – Omelet (1), Parsnip (1) || Farming Level 3
- Survival Burger – Bread (1), Cave Carrot (1), Eggplant (1) || Foraging Level 2
- Dish O’ The Sea – Sardine (2), Hasbrowns (1) || Fishing Level 3
- Miner’s Treat – Cave Carrot (2), Suger (1), Milk (1) || Mining Level 3
- Roots Platter – Cave Carrot (1), Winter (1) || Combat Level 3
- Triple Shot Espresso – Coffee (3) || Stardrop Saloon (5000g)
- Seafoam Pudding – Flounder (1), Midnight Carp (1), Squid Ink (1) || Fishing Level 9
- Algae Soup – Green Algae (4) || Clint (3 Hearts)
- Pale Broth – White Algae (2) || Marnie (3 Hearts)
- Plum Pudding – Wild Plum (2), Wheat Flour (1), Sugar (1) || Cooking Channel Day 7 Winter Year 1
- Artichoke Dip – Artichoke (1), Milk (1) || Cooking Channel Day 28 Fall Year 1
- Stir Fry – Cave Carrot (1), Common Mushroom (1), Kale (1), Oil (1) || Cooking Channel Day 7 Spring Year 1
- Roasted Hazelnuts – Hazelnut (3) || Cooking Channel Day 28 Summer Year 2
- Pumpkin Pie – Pumpkin (1), Wheat Flour (1), Milk (1), Sugar (1) || Cooking Channel Day 21 Winter Year 1
- Radish Salad – Oil (1), Vinegar (1), Radish (1) || Cooking Channel Day 21 Spring Year 1
- Fruit Salad – Blueberry (1), Melon (1), Apricot (1) || Cooking Channel Day 7 Fall Year 2
- Blackberry Cobbler – Blackberry (2), Sugar (1), Wheat Flour (1) || Cooking Channel Day 14 Fall Year 2
- Cranberry Candy – Cranberries (1), Apple (1), Sugar (1) || Cooking Channel Day 28 Winter Year 1
- Bruschetta – Bread (1), Oil (1), Tomato (1) || Cooking Channel Day 21 Winter Year 2
- Coleslaw – Red Cabbage (1), Vinegar (1), Mayonnaise (1) || Cooking Channel Day 14 Spring Year 1
- Fiddlehead Risotto – Oil (1), Fiddlehead Fern (1), Garlic (1) || Cooking Channel Day 28 Fall Year 2
- Poppyseed Muffin – Poppy (1), Wheat Flour (1), Sugar (1) || Cooking Channel Day 7 Winter Year 2
- Chowder – Clam (1), Milk (1) || Willy (3 Hearts)
- Fish Stew – Crayfish (1), Mussel (1), Periwinkle (1), Tomato (1) || Willy (7 Hearts)
- Escargot – Snail (1), Garlic (1) || Willy (5 Hearts)
- Lobster Bisque – Lobster (1), Milk (1) || Cooking Channel Day 14 Winter Year 2 or Willy (9 Hearts)
- Maple Bar – Maple Syrup (1), Sugar (1), Wheat Flour (1) || Cooking Channel Day 14 Summer Year 2
- Crab Cakes – Crab (1), Wheat Flour (1), Egg (1), Oil (1) || Cooking Channel Day 21 Fall Year 2
- Shrimp Cocktail – Tomato (1), Shrimp (1), Wild Horseradish (1) || Cooking Channel Day 28 Winter Year 2
- Ginger Ale – Ginger (3), Sugar (1) || Ginger Island Dwarf Shop (1000g)
- Banana Pudding – Banana (1), Milk (1), Sugar (1) || Ginger Island Trader (30 Bone Fragment)
- Mango Sticky Rice – Mango (1), Coconut (1), Rice (1) || Leo (7 Hearts)
- Poi – Taro Root (4) || Leo (3 Hearts)
- Tropical Curry – Coconut (1), Pineapple (1), Hot Pepper (1) || Ginger Island Resort
- Squid Ink Ravioli – Squid Ink (1), Wheat Flour (1), Tomato (1) || Combat Level 9
Achievements
These are allow linked to Steam and when completed you will gain a reward in the game. These need to be unlocked each time in each new game to obtain the rewards. Most of these will reward you with a hat you can purchase for 1000g at the abandoned house in Cindersap Forest while others have no reward other than having the achievement gained on your Steam account.
Achievements with Rewards: These achievements will give you the ability to buy a new hat in game and will need to be completed every new game to obtain.
Greenhorn
Goal: Earn 15000g
Reward: Good Ol’ Cap
Cowpoke
Goal: Earn 50000g
Reward: Lucky Bow
Homesteader
Goal: Earn 250000g
Reward: Cool Cap
Millionaire
Goal: Earn 1000000g
Reward: Bowler Hat
Legend
Goal: Earn 10000000g
Reward: Sombrero
A Complete Collection
Goal: Complete the museum collection.
Reward: Cowboy Hat
A New Friend
Goal: Reach 5-heart friendship with 1 person.
Reward: Butterfly Bow
Best Friends
Goal: Reach 10-heart friendship with 1 person.
Reward: Mouse Ears
The Beloved Farmer
Goal: Reach 10-heart friendship with 8 people.
Reward: Cat Ears
Cliques
Goal: Reach 5-heart friendship level with 5 people.
Reward: Tiara
Networking
Goal: Reach 5-heart friendship level with 10 people.
Reward: Santa Hat
Popular
Goal: Reach 5-heart friendship level with 20 people.
Reward: Earmuffs
Cook
Goal: Cook 10 different recipes
Reward: Delicate Bow
Sous Chef
Goal: Cook 25 different recipes
Reward: Plum Chapeau
Gourmet Chef
Goal: Cook every recipe
Reward: Archer’s Cap
Moving Up
Goal: Upgrade your house.
Reward: Tropiclip
Living Large
Goal: Upgrade your house to the maximum size. (Second upgrade)
Reward: Hunter’s Cap
D.I.Y.
Goal: Craft 15 different items.
Reward: Daisy
Artisan
Goal: Craft 30 different items.
Reward: Trucker Hat
Craft Master
Goal: Craft every item.
Reward: Gnome’s Cap
Fisherman
Goal: Catch 10 different Fish
Reward: Sou’wester
Ol’ Mariner
Goal: Catch 24 different Fish
Reward: Official Cap
Master Angler
Goal: Catch every Fish
Reward: Eye Patch
Mother Catch
Goal: Catch 100 Fish
Reward: Watermelon Band
Treasure Trove
Goal: Donate 40 different items to the museum.
Reward: Blue Bonnet
Gofer
Goal: Complete 10 Help Wanted requests
Reward: Polka Bow
A Big Help
Goal: Complete 40 Help Wanted requests.
Reward: Chicken Mask.
Polyculture
Goal: Ship 15 of each Crop
Reward: Cowpoke Hat
Monoculture
Goal: Ship 300 of one Crop
Reward: Cowgal Hat
Full Shipment
Goal: Ship every item.
Reward: Goblin Mask
Fruit Trees – Basics
Fruit trees are bought from either Pierre’s, the Travelling Cart or the Island Trader as saplings and there are 8 different trees with each tree producing a certain type of fruit in different seasons. Each tree must be planted 28 days before the start of the season they produce fruit in, trees also need to have 8 empty squares around them or they won’t grow. Once fully grown the trees can be paved around or decorate without worry on destroying the tree. Each year the tree is fully grown its produce will increase in quality (1 star per year). If a tree is struck by lightning it will produce coal for 4 days. To remove trees you must chop them down with an axe, when this is down you will get wood.
If fruit trees are planted on Ginger Island they will produce fruit each day after maturity regardless of the season.
Spring Trees: These trees need to be planted at least for 28 days before Spring and will produce 1 fruit every day for that season.
Apricot Sapling:
Fruit: Apricot
Cost: 2000g
Cherry Sapling
Fruit: Cherry
Cost: 3400g
Summer Trees: These trees need to be planted at least for 28 days before Summer and will produce 1 fruit every day for that season.
Orange Sapling:
Fruit: Orange
Cost: 4000g
Peach Sapling:
Fruit: Peach
Cost: 6000g
Banana Sapling:
Fruit: Banana
Cost: 5 Dragon Tooth (Island Trader)
Mango Sapling:
Fruit: Mango
Cost: 75 Mussel (Island Trader)
Fall Trees: These trees need to be planted at least for 28 days before Fall and will produce 1 fruit every day for that season.
Apple Sapling:
Fruit: Apple
Cost: 4000g
Pomegranate Sapling:
Fruit: Pomegranate
Cost: 6000g
The Cave (Farm)
When you start you will find a cave near the back of your farm right next to the path that leads to the mountains.
This has no use until after you have earned 25 000g. Once you have reached this requirement Demetrius will visit you and ask to use the cave as a research area. He’ll allow you the option to choose between 2 options; fruit bats (leaves fruits) or mushrooms (mushrooms will grow). This cannot be changed after you have selected the research you want.
Fruit bats will leave certain fruits in the cave every-so often, this will be an excellent choice for players who wish to make Artisan Goods (Wine and Jelly) and will also help with completing the Artisan Bundle in the Pantry for the Comunity Centre (without the need for growing fruit trees). If you have chosen to learn the Botanist Skill at level 10 of Foraging, all fruits dropped will not only be doubled but will also be at iridium quality.
The following fruits can be found in this cave:
- Cherry
- Pomegranate
- Peach
- Apple
- Orange
- Spice Berry
- Apricot
- Wild Plum
- Blackberry
- Salonberry
If this cave type is chosen 6 plots will be added to the cave. In these plots 1 mushroom will grow at random. This type of cave is perfect if you wish to craft the elixir as quick and as often as you possibly can. The mushrooms can be collected daily compared to the fruit bats which can take 2-3 days to spawn 1 fruit.
The following mushrooms can be grown in this cave:
- Common Mushroom
- Red Mushroom (Uncommon)
- Purple Mushroom (Rare)
- Chanterelle
- Morel
Farm Buildings and House Upgrades
Up in the mountains is the Carpenter’s Shop which is run by Robin. It will be open everyday from 9:00am to 5:00pm (Except Tuesdays and Festival days) and gives you the option to upgrade your house and construct buildings on your farm. You can also buy wood and stone; as well as some crafting recipes and Furniture – These items will change each day. All construction Projects will take 2 days to build and once you have ordered the building you cannot purchase anything from her until it has been completed.
Farm Buildings
These buildings are used to house animals, store items or are used to produce some specific items. Coops and Barns need to be upgraded to obtain certain animals.
Note: Build at least 1 or 2 Silos before purchasing Coops and Barns (You will have to buy hay from Marnie’s Ranch for 50g a piece if you don’t which can be very costly). Also make sure you have a ton of grass to cut so you have a way to obtain hay (Must do this before winter or the grass will die).
Silo:
Ability: You can gain hay from cutting grass (240 pieces per silo)
Cost: 100g, 100 Stone, 10 Clay and 5 Copper Bars
Coop:
Ability: Houses 4 chickens.
Animal Types: Chickens (Bought from Marnie’s Ranch for 800g)
Cost: 4000g, 300 Wood and 100 Stone
Size: 3×6 area
Big Coop:
Ability: Houses 8 animals can be Chickens or Ducks. You can also hatch eggs with the incubator. And you can hatch dinosaur eggs which is found while artifact hunting.
Animal Types: Unlocks Ducks and ability to hatch Dinosaur Eggs. (Ducks bought from Marnie’s Ranch for 4000g)
Cost: 10000g, 400 Wood and 150 Stone
Size: 3×6 area
Deluxe Coop:
Ability: Houses 12 animals can be Chickens, Ducks, Dinosaurs or Rabbits and comes with an automated feeding system.
Animal Types: Unlocks Rabbits (Bought from Marnie’s Ranch for 8000g)
Cost: 20000g, 500 Wood and 200 Stone
Size: 3×6 area
Barn:
Ability: Houses 4 Cows
Animal Types: Cows (Bought from Marnie’s Ranch for 1500g)
Cost: 6000g, 350 Wood and 150 Stone
Size: 4×7 area
Big Barn:
Ability: Houses 8 animals which can be Cows or Goats
Animal Types: Goats unlocked (Bought from Marnie’s Ranch for 4000g)
Cost: 12000g, 450 Wood and 200 Stone
Size: 4×7 area
Deluxe Barn:
Ability: Houses 12 animals which can be Cows, Goats, Sheep or Pigs.
Animal Types: Sheep and Pigs unlocked (Bought from Marnie’s Ranch for 8000g and 16000g)
Cost: 25000g, 550 Wood and 300 Stone
Size: 4×7 area
Slime Hutch:
Ability: Houses 20 Slimes (when troughs are filled with water slime balls will be made)
Animal Types: Slimes (Can be obtained by using a Slime Incubator to hatching a slime egg. Slime Eggs can be obtained by putting 100 slime balls into a Slime Egg-Press)
Cost: 10000g, 500 Stone, 10 Refined Quartz and 1 Iridium Bar
Size: 7×11 area
Stable:
Ability: Allows you to keep and ride a horse around. Horse is included.
Animal Types: Horse
Cost: 10000g, 100 Hardwood and 5 Iron Bars
Size: 2×4 area
Well:
Ability: Provides a place to refill your watering can.
Cost: 1000g and 75 Stone
Size: 3×3 area
Mill:
Ability: Allows you to make flour from wheat and sugar from beets.
Cost: 2500g, 50 Stone, 150 Wood and 4 Cloth
Size: 2×4 area
Shed:
Ability: This building is empty and can be used to place items or use as a storehouse. Interior can be decorated.
Cost: 15000g and 300 Wood
Size: 3×7
Fish Pond:
Ability: Place a fish in the pond to reproduce it to a max of 10 fish. Legendary fish cannot be placed in the pond.
Cost: 5000g, 200 Stone, 5 Seaweed and 5 Green Algae
Size: 5×5
House Upgrades
You can upgrade the house on your farm 3 times; each stage gains a cetain perk.
Upgrade 1:
Perk: Increase in house size and you get a kitchen and double bed.
Cost: 10000 and 450 Wood
Upgrade 2:
Perk: Adds 2 rooms, one is completely empty while the other has a crib and 2 single beds for children. Kitchen is also made larger.
Cost: 50000g and 150 Hardwood
Upgrade 3:
Perk: Cellar is added under the house which can be accessed from the kitchen. This allows you to build casks to age wine and cheese products and increase the quality.
Cost: 100000g
Furniture
Furniture items can be placed inside your house to decorate it and are available at the Carpenter’s Shop and sometimes at the Tarveling Wagon. (These items will change everyday). You can also purchase the furniture catalogue for 200000g, this gives you access to all available items for free. (Reward items not included)
Items include:
- Chairs
- Benches
- Armchairs
- Couches
- Tables
- Long Tables
- Bookcases
- Dressers
- Rugs
- Lighting
- TVs
- Plants
- Paintings
- Windows
- Decorations
Wallpaper and Floor
These items are used to decorate the floor or wall of 1 room in your house and can be bought from Pierre’s and Joja Mart (Joja is slightly more expensive). Once it has been used you cannot get it back, so if you buy two different wallpapers and place one down and then a second one down, you can’t get the first wallpaper back and will have to buy it again.
You can purchase the catalogue from Pierre’s for 30000g which gives you access to all wallpapers and floors for free.
There are 112 different wallpapers and 40 different floors that can be purchased.
Friendship and Marriage
When you arrive at Stardew Valley one of your first quests is to meet the villagers. With each villager you can get 10 hearts and the more hearts you get with people they will send you gifts and cooking recipes.
There are many factors that can affect the friendship you have with each villagers. Some can be positive while others can be negative.

Some things to remember about Friendship:
- Each heart is a total of 250 points.
- Each villager has a total of 10 hearts (12 for your spouse) you can also gain 10 hearts for all Marriage candidates by giving them a bouquet when they are at 8 hearts(Can be bought at Pierre’s once you have gained 8 hearts with 1 candidate).
Friendship can be gained by doing the following:
- Talking to a villager once per day (20 points)
- Completing a delivery quests (150 points)
- Gifting twice per week – This is reset every Sunday and you can gift a thrid gift if it is the villager’s birthday (80 points = Loved, 45 points = Liked, 20 points = Neutral)
- Certain choices during villagers heart events.
- Dancing with a marriage candidate at the Flower Dance (250 points) You must have 4 hearts with them first.
- Luau (Festival): Placing a high quality or good item in the pot (Golden star Yam, Cauliflower or Melon is recomended) (120 points for every villager)
Friendship can be lost by doing the following:
Not talking to a villager once per day (-2 points)
Gifting gifts villagers dislike (-20 = disliked, -40 = hated)
Hitting them with the slingshot
Rummaging through a garbage can while they are nearby (-25 points)
Luau (Festival): Not placing a high quality or bad item in the pot (Avoid Holly, pufferfish, red mushroom,sap,scorpion carp and sea cucumber) (-100 points)
Once a heart meter is full it will never decay if you don’t talk to the villager. Gifting bad items will still affect this.
You can enter villager’s rooms when you have gained 2 hearts with them.
When gifting birthdays and secret santas will gain more points than regular days.
Loved Gifts: + 640 (Birthday) and +400 (Secret Santa)
Liked Gifts: + 360 (Birthday) and +225 (Secret Santa)
Neutral Gifts: + 160 (Birthday) and +100 (Secret Santa)
Disliked Gifts: -160 (Birthday) and -100 (Secret Santa)
Hated Gifts: -320 (Birthday) and -200 (Secret Santa)
The quality of a product will also affect the points gained
Normal: None
Silver: +10%
Gold: +25%
Iridium: +50%
See: Villager – Likes and Dislikes for more info on the villager’s common gifts.
Marriage:
You can marry certain villagers once you gain 10 hearts with them. All candidates will have (Single) under their name when you have met them and max out at 8 hearts unless you gift them a bouquet.
Once you have gained 10 hearts you can buy a Mermaid Pendent from Old Mariner down at the beach during a stormy or rainy day (he never appears in winter). This will cost 5000g and you will need to repair the bridge with 300 wood and must have your house upgraded once to have a double bed.
Once you have given your candidate of choice the Marmaid Pendent the wedding ceremony will occur 3 days later. After the ceremony you and your spouse will appear back at the farm at 6:00am. If there is a festival on the day of the wedding ceremony, the wedding won’t take place until the next day.
10 Heart Group Event
Both Bachelors and Bachelorettes have a special 10-heart event which requires you to be dating all 6 of them at once and to have seen each of their personal 10-heart event.
The event will trigger depending on which group you have at max hearts.
The Bachelors will have their event at the Saloon while the Bachelorettes have theirs at Haley/Emily’s house.
The event will differ depending on if you have a Rabbit’s Foot in your inventory. If you do the event will consist of a friendly game of pool for the men and a gossip session about Marnie and Lewis’ relationship for the girls.
If no Rabbit’s Foot is in your inventory the groups will express their anger about dating them all at once. They will all agree to ignore you for a week, this will result in angry dialogue from them when spoken to and they will reject all gifts. After the week is over they will forgive you and return to their normal dialogue patterns.
This event only triggers once per save file and will not trigger if you are married or have given a Wilted Bouquet or Mermaid’s Pendant to one of the marriage candidates.
Married Life:
Once you have been married your villager of choice now lives on the farm with you. They will now have 14 hearts and if they are kept at 12 or higher hearts they will help with certain tasks or cook you breakfast or dinner (One task per day).
These tasks include:
Watering all the crops on the farm (not in winter).
Feeding the animals.
Filling it the dog or cat bowl.
Repairing broken down fences.
Cooking: Omelet, Pancakes, Bread, Crab Cakes, Parsnip Soup, Fried Eel.
If you reach 13 hearts with you spouse they have a chance to give you a stardrop as a token of their love.
At 14 hearts you will unlock a heart event with your spouse. There is a different heart event for each spouse.
Your spouse will also have a room to the right of the bedroom which is based on their room before they moved in. They will also have a outside area behind the house based on their hobby.
You can have children when you have upgraded your house a second time for 50000g and 150 hardwood. If the couple is the same sex they will adopt 2 children. If you go to bed before your spouse (and have 10 hearts) there is an increased chance them asking to have a child. You can have 2 children and only 1 girl and 1 boy. You can only have a second child once the first has out grown their crib. The child will take 14 days to be born or be adopted, and spends 14 days sleeping in the crib, 14 days standing up in the crib, 14 days crawling around the house and finally reach their toddler stage, where a second child can be obtained soon.
Completing any Community Center or Joja Mart bundles will skip the event of the baby being born or adopted.
Divorce
Divorce can be made for 50000g at the Mayor’s Manor with a small book. After it is chosen you have the option to cancel before 10pm. If it isn’t cancelled the spouse will be gone the next morning and their friendship level will be at 0 hearts and they will have (ex) under their name. The villager will have negative attitiude towards the player due to the divorce BUT any child you had during the marriage will stay at the farm.
You can visit the Witch’s Hut that is unlocked later in game to wipe the memory of this villager and costs 30000g and once completed the villager will have no memory of the marriage or divorce and you have the option to re-marry them.
You can also remove children from the farm by taking a Prismatic Shard to the Witch’s Hut and using dark magic to turn them into ‘doves’. Once they are gone they cannot be returned.
Sending your children away will also result in 2 Easter Eggs. The first will be a phone call with an otherworldly voice saying ‘Y-O-U H-A-V-E F-O-R-S-A-K-E-N U-S’. The second will only unlock when watching TV on Fall 26. A ??? channel will appear and when selected an Ancient Doll appears on screen with the message ‘You’ve brought this upon yourself… now I’m free… Hee hee hee!’. The doll with then pop out of the TV and fly away. It will attack you when you stand in front of the Dark Shrine of Selfishness in the Witch’s Hut.
Villagers – Likes and Dislikes
The following gifts are ones that get a common response from all villagers. (With some exceptions)
Loves – These gifts will always get +80 points from villagers (400 Santa and 640 Birthday)
- Prismatic Shard – can be found while mining
- Rabbit’s Foot – can be produce by a rabbit with a high relationship.
Exceptions:
- Haley hates Prismatic Shard
- Penny hates Rabbit’s Foot
Likes – These gifts will always get +45 points from villagers (+225 Santa and +360 Birthday)
- All Gems
- All Cooking (Fried Egg and Bread neutral and Strange Bun and Oil of Garlic hated)
- All Artisan Goods (Pine Tar and Oak Resin disliked and Void Mayonnaise hated)
- All Fruits from Fruit Trees
- All Vegetables (Wheat and Hope disliked)
- All Flowers (Penny hates all flowers but Poppy flowers)
Exceptions:
- Abigail, Haley, Jas, Vincent and Sam dislike Vegetables
- Sebastian, George and Clint dislike Flowers
- Sebastian, Jas and Vincent dislike all Artisan Goods(except Mead)
- Sebastian dislikes Omelet, Complete Breakfast and Farmer’s Lunch
- Caroline dislikes Mayonnaise
- Emily dislikes Ice Cream
- Leah dislikes Pancakes and Gems (except Diamond and Earth Crystal)
- Maru, Sam and Shane dislike Pickles
- Maru dislikes Maple Syrup and Honey
- Penny dislikes Pale Ale, Mead and Wine
- Pierre dislikes Gems (except Diamond)
- Evelyn, Emily and Kent dislike Sashimi
- Willy dislikes most cooking (except fish dishes)
- Krobus dislikes cooking
- Harvey loves Coffee, Pickles, Truffle Oil, Wine and Super Meal
Neutral – These gifts will always get +20 points from villagers (+100 Santa and +160 Birthday)
- Duck Feather
- Sweet Gem Berry
- Fried Egg
- Bread
- Wheat
- Hops
Exceptions:
- Leah hates Bread
- Elliot loves Duck Feathers
Dislike – These gifts will always get -20 points from villagers (-100 Santa and -160 Birthday)
- All Fish
- All Crafting Items
- All Minerals (except Gems)
- All Building Materials
- All Fertilizers
- All Monster Loot
- All Seeds
- All Tackles
- Chanterelle
- Cave Carrot
- Driftwood
- Wheat Flour
- Oil
- Void Egg
- Vinegar
- Rice
- Field Snack
- Geodes (Frozen, Magma, Omni)
- Oak Resin
- Pine Tar
Exceptions:
- Sebastian and Krobus love Void Eggs
- Wizard loves Solar Essence and Void Essence
- Clint and Dwarf love Omni Geodes
- Sebastian and Abigail like Quartz
- Leah likes Driftwood
- Willy likes many of the fish types
- Robin likes Hardwood
Hate – These gifts will always get -40 points from villagers (-200 Santa and -320 Birthday)
- All Garbage
- All Bait
- All Furniture
- All Artifacts
- Fiber
- Sap
- Carp
- Seaweed
- Greed and White Algaes
- Hay
- Poppy
- Copper Ore
- Iron Ore
- Sea Urchin
- Red Mushroom
- Bug Meat
- Snail
- Slime
- Bat Wing
- Oil of Gralic
- Strange Bun
- Void Mayonnaise
Exceptions:
- Krobus loves Void Mayonnaise
- Penny loves Poppy flowers
- Dwarf likes Dwarf Scrolls I, II, III and IV as well as Dwarvish Helm and Dwarf Gadget
- Leah, Marine, Sam and Shane dislike Seaweed
- Penny dislikes Red Mushrooms
- Wizard dislikes Slime
Bachelors

- Birthday: Summer 13th
- Loved: Complete Breakfast (Recipe obtained Year 2), Salmon Dinner (Recipe obtained 3 hearts Gus)
- Liked: All universal likes – Hashbrowns and Potato (Easiest to obtain)
- Hated: All universal hates (See Villager Like/Dislike list)
Locations: Under tree (Spring & Fall), Entryway of Home (All seasons), Haley & Emily’s (Wednesdays in all seasons), Stands by Dog Pen (Except Summer – Only there Wednesdays), At Beach (Summer Mornings), Working at Ice-Cream Stand (Summer – Except Wednesdays), Mens section of Spa (Mornings during Winter except Wednesdays), Stands in Room (8pm). Summer Day 16 he will be at the clinic.
Heart Events:
2 Hearts: Go to the Beach during summer on a sunny day when Alex is there. (Not Wednesdays or Day 16)
4 Hearts: Enter Pelican Town between 9am – 4pm.
5 Hearts: Enter Alex’s House while he is there.
6 Hearts: Enter Alex’s House while he is there.
8 Hearts: Go to the Beach during summer on a sunny day when Alex is there. (Not Wednesdays or Day 16)
10 Hearts: Go to the Saloon between 7pm – 10pm (Alex will send you a letter).

- Birthday: Fall 5th
- Loved: Crab Cakes, Duck Feather, Lobster, Pomegrante, Tom Kha Soup
- Liked: All universal likes – Parsnip and Sweet Pea (Easiest to obtain)
- Hated: All universal hates (See Villager Like/Dislike list)
Locations: Stands near Leah’s cottage, stands on bridge near the beach, at his home (On Wednesdays), on beach near camp fire, Pierre’s Store (Thursday. Also Fridays in Summer), Library (Fall and Winter), Saloon (Sunday during Fall and Winter).
Heart Events:
2 Hearts: Enter Elliot’s Cabin when he is there.
4 Hearts: Enter Stardrop Saloon between 3pm – 10pm.
6 Hearts: Enter Elliot’s Cabin when he is there.
8 Hearts: Visit the Museum between 1pm – 7pm. (You will get a letter from Elliot)
10 Hearts: Go to the beach while it is sunny between 7am – 1pm. (You will get a letter from Elliot)

- Birthday: Winter 14th
- Loved: Coffee, Pickles (any), Super Meal, Truffle Oil and Wine (any).
- Liked: All universal likes – Blackberry, Blueberry, Corn or Strawberry (Easiest to obtain)
- Hated: All universal hates (See Villager Like/Dislike list)
Locations: Clinic, standing in garden west of town sqaure, standing by river near bridge leading to the beach, at home, visits Pierre’s store, saloon (Sunday nights or when raining), stands south of fountain.
Heart Events:
2 Hearts: George’s House while George is there.
4 Hearts: Enter the clinic while Harvey is there.
6 Hearts: Enter Pierre’s Store between 11am – 3pm.
8 Hearts: Enter the clinic
10 Hearts: Go to the railroad tracks between 9am – 5pm (Harvey will send you a letter)

- Birthday: Summer 17th
- Loved: Maple Bar, Cactus Fruit, Pizza, Tigerseye
- Liked: All universal likes – Honey and Joja Cola (Easiest to obtain)
- Hated: All universal hates (See Villager Like/Dislike list)
Locations: In room at home, in entryway of home, stands near river outside home, stands behind bush south of Mayor’s Manor, goes to Joja Mart with mother (Wednesdays and Saturdays) goes to stardrop saloon (Friday nights), stands by water at beach (Summer), Stands in woods at Cindersap Forest.
Heart Events:
2 Hearts: Enter Sam’s house while he is there.
3 Hearts: Go to the beach on a sunny day (not winter) between 7am – 3pm. (Only in Year 1)
4 Hearts: Enter Sam’s house while he is there.
6 Hearts: Enter the town on a sunny day between 12pm – 4pm
8 Hearts: Sam will be at your doorstep between 6am – 8am (must see 2 heart event first)
10 Hearts: Enter town on a sunny day between 8pm – 12am (Sam will send you a letter)

- Birthday: Winter 10th
- Loved: Obsidian, Sashimi, Pumpkin Soup, Frozen Tear, Void Egg.
- Liked: All universal likes – Cauliflower, Amethyst and Parsnip (Easiest to obtain)
- Hated: All universal hates (See Villager Like/Dislike list)
Locations: At bedroom computer, stands in home kitchen, stands next to water by house to smoke, plays pool at saloon (Friday nights), stands in front of Haley and Emily’s house, Smokes outside Sam’s house, stands at pier (rainy), stands beside arcade at saloon (rainy), stands at railroad, plays music in Sam’s room.
Heart Events:
2 Hearts: Enter Sebastian’s room while he is there.
4 Hearts: Go to the mountains between 11am – 5pm.
6 Hearts: Enter Sebastian’s room while he is there.
8 Hearts: Enter the beach on a rainy day between 12pm – 11pm.
10 Hearts: Enter the mountains between 8pm – 12am.

- Birthday: Spring 20th
- Loved: Beer, Pizza, Pepper Poppers, Hot Pepper
- Liked: All universal likes – Blue Jazz, Green Bean and Salmonberry (Easiest to obtain)
- Hated: All universal hates (See Villager Like/Dislike list)
Locations: In his room, at home kitchen, at Joja Mart (9am – 5pm), saloon (5pm – 12am), Pierre’s Store.
Heart Events:
2 Hearts: Enter Cindersap Forest between 8pm – 12pm
4 Hearts: Enter Marnie’s Ranch while Shane is there.
6 Hearts: Enter Cindersap Forest on a rainy or stormy day between 9am – 8pm.
7 Hearts (Part 1): Enter Marnie’s Ranch while Shane is there (Must see 6 hearts event first)
7 Hearts (Part 2): Enter town on a sunny day between 10am – 4pm (must have 2 hearts with Emily and Clint to activate)
8 Hearts: Enter Marnie’s Ranch while Shane is there.
10 Hearts: Leave your house between 6am – 6:30am
Bachelorettes

- Birthday: Fall 13th
- Loved: Blackberry Cobbler, Chocolate Cake, Spicy Eel, Pufferfish, Amethyst, Pumpkin
- Liked: All universal likes – Tulip, Topaz and Sweet Pea (Easiest to obtain)
- Hated: All universal hates (See Villager Like/Dislike list)
Locations: In room at home, Pierre’s store, Carpenter’s shop, looks at books in museum (Wednesdays), goes to Saloon (Fridays), stands in graveyard (Wednesdays), stands on the pier (Fall), stands at bus stop (Fall), Stands at train platform (Summer), stands on bridge near Joja mart (Spring), Play flute near river east of carpenter’s shop (6th & 16th all seasons), Stands near wizard tower (Sunday)
Heart Events:
2 Hearts: Enter Pierre’s store while Abigail is there (except saturday)
Four Hearts: Enter the mountains between 12pm – 7pm while raining.
6 Hearts: Enter town between 9pm and midnight while its sunny or snowy.
8 Hearts: Enter Pierre’s store between 8pm – 10pm. (You will receive a letter)
10 Hearts: Enter the mines between 5pm – 12am.

- Birthday: Spring 27th
- Loved: Survival Burger, Emerald, Aquamarine, Amethyst, Ruby, Topaz, Jade, Cloth, Wool
- Liked: All universal likes – Daffodil and Parsnip (Easiest to obtain)
- Hated: All universal hates (See Villager Like/Dislike list)
Locations: In her room, standing at the bookcase in her home, behind the bar at the saloon, goes to Pierre’s for exercise class (Tuesdays).
Heart Events:
2 Hearts: Enter Emily’s house while she is there.
4 Hearts: Enter town on a sunny day (except Winter).
6 Hearts: Enter Emily’s house while she is there.
8 Hearts: Go to the Mayor’s Manor between 8:30am – 10pm. (you will get a letter)
10 Hearts: Go to the Secret Woods at 10pm. (you will get a letter)

- Birthday: Spring 14th
- Loved: Pink Cake, Fruit Salad, Sunflower, Coconut
- Liked: All universal likes – Daffodil and Topaz (Easiest to obtain)
- Hated: All universal hates (See Villager Like/Dislike list)
Locations: In her room, standing in home kitchen, stands south-west of Leah house (Monday during Fall & Spring), stands near town fountain, stands on the west side of the beach (Summer), stands next to ice-cream stand (Summer).
Heart Events:
2 Hearts: Enter Haley’s house while both her and Emily are there.
4 Hearts: Enter Haley’s house while she is there.
6 Hearts: Go to the beach between 10am – 4pm (except Winter)
8 Hearts: Enter Cindersap Forest while its sunny between 10am – 4pm
10 Hearts: Enter Haley’s house while she is there.

- Birthday: Winter 23rd
- Loved: Salad, Vegetable Medley, Stir Fry, Poppyseed Muffin, Wine, Goat Cheese, Truffle
- Liked: All universal likes – Melon, Dandelion, Salmonberry (Easiest to obtain)
- Hated: All universal hates (See Villager Like/Dislike list)
Locations: At her cabin, stands by the lake, goes to clinic, stands on the waters edge at the beach (Summer), visits Pierre’s store, stands at the river beside the blacksmith, goes to the saloon (night).
Heart Events:
2 Hearts: Enter Leah’s Cabin while she is there.
4 Hearts: Enter Leah’s Cabin while she is there.
6 Hearts (Part 1): Leave your house between 6am – 11:30am
6 Hearts (Part 2): Enter Cindersap Forest when Leah is there (Except Winter)
8 Hearts: Depends on your choice in the 2 hearts event.
a. Art Show: If you suggested her to have an art show, enter town between 3pm – 5pm.
b. Web Store: If you suggested her to open a web store, enter her house while she is there.
10 Hearts: Enter Cindersap Forest between 11am – 4pm (except Winter)

- Birthday: Summer 10th
- Loved: Cheese Cauliflower, Cauliflower, Pepper Poppers, Rhubarb Pie, Miner’s Treat, Strawberry, Diamond, Gold Bar, Iridium Bar, Battery Pack
- Liked: All universal likes – Parsnip, Sweet Pea and Topaz (Easiest to obtain)
- Hated: All universal hates (See Villager Like/Dislike list)
Locations: In her room, in the labratory at her home, sitting on bench on east side of community center, sitting on bench south of saloon, working at clinic (Tuesdays and Thursdays).
Heart Events:
2 Hearts: Enter Maru’s home while she is there.
4 Hearts: Enter Clinic while she is there.
6 Hearts: Enter mountain area on a sunny day between 9pm – 11:40pm.
8 Hearts: Enter Maru’s home while she is there.
10 Hearts: Enter Maru’s home between 9am – 4pm.

- Birthday: Fall 2nd
- Loved: Red Plate, Tom Kha Soup, Roots Platter, Melon, Diamond, Emerald, Sandfish, Poppy, Poppyseed Muffin
- Liked: All universal likes – Leek, Tulip and Dandelion (Easiest to obtain)
- Hated: All universal hates (See Villager Like/Dislike list)
Locations: Trailer, sitting under tree left of graveyard, stands near river next to Joja Mart, sits on bench south of saloon, tutoring at museum, stands by river south of museum, walks Jas and Vincent home, looks through books at museum (Raining).
Heart Events:
2 Hearts: Enter town while its sunny between 9am – 2pm.
4 Hearts: Enter trailer while she is there.
6 Hearts: Enter trailer while she is there.
8 Hearts: Enter Cindersap Forest between 9am – 4pm
10 Hearts: Enter spa and go to the very south end of the pool between 7pm – 12am. (You will get a letter)
Other Villagers – Part 1

- Birthday: Winter 7th
- Loved: Fish Taco, Sumer Spangle
- Liked: All universal likes – Daffodil and Parsnip (Easiest to obtain)
- Hated: All universal hates (See Villager Like/Dislike list)
Locations: Stands in home kitchen, stands in the store (Pierre’s), Stands in town square, stands in living room, Reads at museum (Friday), stands under tree (behind Pierre’s).
Heart Events:
Six Hearts: Enter Pierre’s when noth Caroline and Abigail are there.

- Birthday: Winter 26th
- Loved: Artichoke Dip, Fiddlehead Risotto, Emerald, Aquamarine, Ruby, Amethyst, Jade, Gold Bar, Iridium Bar, Omni Geode, Topaz
- Liked: All universal likes – Parsnip, Iron Bar and Kale (Easiest to obtain)
- Hated: All universal hates (See Villager Like/Dislike list)
Locations: At Blacksmith, Goes to the Saloon (8pm)
Heart Events:
3 Hearts: Enter the Saloon between 7pm – 11pm on a Monday.
6 Hearts: Enter town between 9am – 6:30pm.

- Birthday: Summer 19th
- Loved: Bean Hotpot, Rice Pudding, Ice Cream, Strawberry.
- Liked: All universal likes – Salmonberry and Hot Pepper (Easiest to obtain)
- Hated: All universal hates (See Villager Like/Dislike list)
Locations: Stands in Lab, Stands in home kitchen, stands next to Robin at home, Goes to saloon (6pm on Fridays), Stands near enterance of the mines, stands near fountain in town, stands near cliff outside his house.
Heart Events:
Six Hearts: Enter his home when both Robin and Demetrius are there.

Birthday: Summer 22nd
Loved: Emerald, Aquamarine, Ruby, Amethyst, Topaz, Jade and Omni Geode.
Liked: All universal likes – Earth Crystal, Dwarf Scroll I, II, III and IV (Easiest to obtain)
Hated: All universal hates (See Villager Like/Dislike list)
Locations: Stands to the east of the mines entrance (Must break rock to get there)
Heart Events:
0 Hearts: Enter Swears after you have bought a Stardrop from Krobus

- Birthday: Winter 20th
- Loved: Chocolate Cake, Stuffing, Beet, Tulip, Fairy Rose, Diamond.
- Liked: All universal likes – Daffodil, Sunflower and Sweet Pea (Easiest to obtain)
- Hated: All universal hates (See Villager Like/Dislike list)
Locations: Stands near gardens (near saloon or west of Pierre’s), Stands next to George in living room, Stands in home kitchen.
Heart Events:
4 Hearts: Enter Evelyn’s home when she is there.

- Birthday: Fall 24th
- Loved: Fried Mushroom, Leek
- Liked: All universal likes – Daffodil, Cookie and Ice Cream (Easiest to obtain)
- Hated: All universal hates (See Villager Like/Dislike list)
Locations: In living room at his home, In home kitchen, leaves to stand in front of Yoba Statue inside Pierre’s (Sundays Only).
Heart Events:
6 Hearts: Enter George’s house when his is home.

- Birthday: Summer 8th
- Loved: Fish Taco, Escargot, Orange, Diamond
- Liked: All universal likes – Parsnip and Cauliflower (Easiest to obtain)
Hated: All universal hates (See Villager Like/Dislike list)
Locations: At Saloon (12pm), At Pierre’s (certain mornings)
Heart Events:
4 Hearts: Enter Saloon at 12pm – 12am

- Birthday: Summer 4th
- Loved: Pink Cake, Plum Pudding, Fairy Rose
- Liked: All universal likes – Daffodil, Sweet Pea and Tulip (Easiest to obtain)
- Hated: All universal hates (See Villager Like/Dislike list)
Locations: Sitting in room, Sitting in entryway of home, Jumping Rope near tree above Cindersap Forest Pond, Sits inside museum, stands near tree south of museum, stands outside Vincent’s house (Afternoon), plays near playground (Saturdays during Winter).

- Birthday: Fall 11th
- Loved: Vegetable Medley, Pancakes, Crispy Bass, Chocolate Cake, Rhubarb Pie, Fried Eel, Eggplant Parmesan, Diamond
- Liked: All universal likes – Blueberry and Parsnip (Easiest to obtain)
- Hated: All universal hates (See Villager Like/Dislike list)
Locations: At home in kitchen or front room, stands in town square (afternoon), attends exercise class at Pierre’s house (Tuesday), Stands in front of Yoba statue at Pierre’s (Sunday), shops at Joja Mart,
Heart Events:
4 Hearts: Leave your house between 6am – 9:30am.

Birthday: Spring 4th
Loved: Fiddlehead Risotto, Roasted Hazelnuts
Liked: All universal likes – Daffodil, Melon, Salmonberry and Parsnip (Easiest to obtain)
Hated: All universal hates (See Villager Like/Dislike list)
Locations: Stands in home, Stands outside of home under tree, stands in park behind his home, goes to saloon (night), stands near bridge leading to the beach, goes to stand in front of Yoba statue inside Pierre’s (Sundays)
Heart Events:
3 Hearts: Enter Kent’s home while both Jodi and Kent are there.

Birthday: Winter 1st
Loved: Diamond, Iridium Bar, Wild Horseradish, Pumpkin, Void Egg, Void Mayonnaise
Liked: All universal likes – (Easiest to obtain)
Hated: All universal hates (See Villager Like/Dislike list)
Locations: Sewers.
Heart Events:
0 Hearts: Enter sewers after purchasing the Stardrop from him
Other Villagers – Part 2

- Birthday: Summer 26.
- Loved: Duck Feather, Mango, Ostrich Egg, Poi
- Liked: Dragon Tooth, Mango Sticky Rice, Nautilus Shell, Quartz, Rainbow Shell, Sea Urchin, Spice Berry.
- Hated: Beer, Holly, Hops, Mead, Morel, Oil, Pale Ale, Pina Colada, Triple Shot Espresso, Unmilled Rice, Wine.
Locations:
Less than 6 Hearts: Ginger Island.
More than 6 Hearts: treehouse in the Mountains, Mountain area, Museum, Ginger Island hut (Sundays and Mondays)

- Birthday: Spring 7th
- Loved: Vegetable Medley, Glazed Yams, Autumn’s Bounty, Hot Pepper
- Liked: All universal likes – Parsnip and Potato (Easiest to obtain)
- Hated: All universal hates (See Villager Like/Dislike list)
Locations: Stands in a shop (randomly chosen), Stands inside home, stands next to clinic, stands at the notice board, goes to the saloon (night).
Heart Events:
6 Hearts: Enter Pelican Town on a sunny day between 7pm – 11pm (Must have 6 hearts with Marnie)

- Birthday: Winter 3rd
- Loved: Blueberry Tart, Dish O’ the Sea, Coconut, Cactus Fruit, Yam
- Liked: All universal likes – Wild Horseradish and Daffodil (Easiest to obtain)
- Hated: All universal hates (See Villager Like/Dislike list)
Locations: Stands near river edge (mountains), stands near spa, stands inside spa entrance, stands near tent, inside his tent.
Heart Events:
4 Hearts: Enter mountain on a sunny or snowy day between 8pm – 12am

- Fall 18th
- Loved: Pink Cake, Farmer’s Lunch, Pumpkin Pie, Diamond
- Liked: All universal likes – Parsnip and Corn (Easiest to obtain)
- Hated: All universal hates (See Villager Like/Dislike list)
Locations: Stands behind counter at home, stands in room, goes to Pierre’s for exercise class (Tuesdays), stands in home kitchen, saloon (night), stands inside Pierre’s (Mondays)
Heart Events:
3 Hearts: Leave your house between 6:30am – 9:30am
6 Hearts: Enter town on a sunny day between 7pm – 11pm (Lewis also needs to have 6 hearts)

- Birthday: Spring 18th
- Loved: Parsnip Soup, Glazed Yams, Pale Ale, Beer, Parsnip, Cactus Fruit, Mead
- Liked: All universal likes – Omelet and Diamond (Easiest to obtain)
- Hated: All universal hates (See Villager Like/Dislike list)
Locations: Inside trailer, stands in Joja Mart, Saloon (night) || After Bus is fixed: Stands next to bus, then goes to Saloon.

- Birthday: Spring 26th
- Loved: Fried Calamari
- Liked: All universal likes – Daffodil and Parsnip (Easiest to obtain)
- Hated: All universal hates (See Villager Like/Dislike list)
Locations: Pierre’s store, saloon (at night), at home in kitchen.
Heart Events:
6 Hearts: Enter Pierre’s Store

- Birthday: Fall 21st
- Loved: Spaghetti, Goat Cheese, Peach
- Liked: All universal likes – Salmonberry and Sunflower (Easiest to obtain)
- Hated: All universal hates (See Villager Like/Dislike list)
Locations: Stands behind counter at home, stands outside home near cliff edge, stands in kitchen, goes to Pierre’s to attend exercise class (Tuesdays), goes to saloon (Friday).
Heart Events:
6 Hearts: Enter her home when she is there.

Birthday: Fall 15th
Loved: Daffodil, Sweet Pea, Crocus
Liked: All universal likes – Topaz (Easiest to obtain)
Hated: All universal hates (See Villager Like/Dislike list)
Locations: Oasis store in the Desert

- Birthday: Spring 10th
- Loved: Pink Cake, Cranberry Candy, Grape
- Liked: All universal likes – Daffodil, Crocus and Pizza (Easiest to obtain)
- Hated: All universal hates (See Villager Like/Dislike list)
Locations: Plays at home, plays in garden behind home, plays on beach (summer), goes to museum, plays in playground (fall), stands near tree south of museum, stands outside home (afternoon).

- Birthday: Summer 24th
- Loved: Catfish, Octopus, Sea Cucumber, Sturgeon, Pumpkin, Diamond, Iridium Bar, Mead
- Liked: All universal likes – Parsnip and Potato (Easiest to obtain)
- Hated: All universal hates (See Villager Like/Dislike list)
Locations: Fish Shop, Fishing outside his shop, fishing near bridge near beach, fishing near Leah’s home, saloon (night)

- Birthday: Winter 17th
- Loved: Solar Essence, Void Essence, Purple Mushroom, Super Cucumber
- Liked: All universal likes – Parsnip, Sweet Pea and Amethyst (Easiest to obtain)
- Hated: All universal hates (See Villager Like/Dislike list)
Locations: At his tower in Cindersap Forest.
Festivals and Events – Part 1
Festivals will occur on a specific date on a certain season. There will be 2 of these festivals per season and Mayor Lewis will send you a letter letting you know what time to arrive. On the day of the festival you will not be able to enter the area the festival is being held in until the event has started. When the festival has begun you will get a note on the bottom left corner of the screen telling you. Time has no effect during the fesitival so the player has more time to explore. When the festival ends you will arrive home at 10pm unless the festival happens at night then you will arrive home at 12am.
Some festivals will allow you to obtain certain items either by winning the main event or by purchasing them from Pierre’s Stall.
This festival occurs on the 13th of Spring from 9am – 2pm at Pelican Town Square.
The player can purchase the following items from Pierre’s Stall:
Plush Bunny 2000g
Strawberry Seeds 100g
During this event the player will participate in the egg hunt, to win the egg hunt you must collect 9 eggs (if not Abigail will win). If the egg hunt is won a straw hat is rewards for the first time, every other time the player will win 1000g.
This festival occurs on the 24th of Spring from 9am – 2pm at Cindersap Forest.
The player can purchase the following items from Pierre’s Stall:
Tub o’ Flowers 1000g
Tub o’ Flowers Recipe 2000g
Rarecrow (#5) 2500g
Dandelion 50g
Daffodil 50g
During this event the player has the opportunity to dance with one of the available bachelors and bachelorettes. (Must have 4 hearts for them to say yes). Dancing with someone will gain you 1 heart (250 points) with them. You must talk to mayor Lewis to start the dance but must ask someone to dance before starting the dance.
This festival occurs on the 11th of Summer from 9am – 2pm at the Beach.
During this event the player has the option to place a food item into the potluck. The overall taste of the soup will depend on the item the player includes in the soup. The taste will also effect the friendship gained or lost with EVERY villagers during this event. If no item is placed in no friendship will be gained or lost.
Depending on the food item one of the following 6 reponses will activate (Easy items – for your first year – have been bolded):
Best: These items give you 120 points with all villagers.
Silver: Crimsonfish, Ice Pip, Lava Eel, Legend, Starfruit
Gold: Angler, Artichoke, Catfish, Cauliflower, Chanterelle, Cheese, Crimsonfish, Fairy Rose, Glacierfish, Goat Cheese, Ice Pip, Lava Eel, Legend, Melon, Mutant Carp, Purple Mushroom, Red Cabbage, Starfruit, Sturgeon, Super Cucumber, Truffle, Yam.
Good: These items give you 60 points with all villagers.
Normal: Amaranth, Angler, Apple, Artichoke, Beer, Beet, Cactus Fruit, Catfish, Cauliflower, Chanterelle, Cheese, Coffee, Cranberries, Crimsonfish, Crystal Fruit, Dorado, Energy Tonic, Fairy Rose, Glacierfish, Goat Cheese, Goat Milk, Ice Pip, Juice, Kale, Large Goat Milk, Large Milk, Largemouth Bass, Lava Eel, Legend, Lingcod, Maple Syrup, Melon, Milk, Morel, Muscle Remedy, Mutant Carp, Oil, Orange, Pale Ale, Peach, Pike, Pomegranate, Poppy, Purple Mushroom, Red Cabbage, Rice, Snow Yam, Starfruit, Strawberry, Sturgeon, Super Cucumber, Tiger Trout, Truffle, Truffle Oil, Tuna, Vinegar, Walleye, Wine Yam.
Silver: Albacore, Amaranth, Angler, Apple, Artichoke, Beet, Blueberry, Bok Choy, Bullhead, Cactus Friut, Catfish, Cauliflower, Chanterelle, Cherry, Cranberries, Crystal Fruit, Dorado, Eel, Fairy Rose, Fiddlehead Fern, Glacierfish, Grape, Halibut, Hazelnut, Juice, Kale, Largemouth Bass, Lingcod, Melon, Morel, Mutant Carp, Orange, Peach, Pike, Pomegranate, Poppy, Potato, Purple Mushroom, Red Cabbage, Red Mullet, Salmon, Sandfish, Snow Yam, Spice Berry, Squid, Strawberry, Sturgeon, Summer Spangle, Sunflower, Super Cucumber, Tiger Trout, Tilapia, Truffle, Tuna, Walleye, Wild Plum, Winter Root, Woodskip, Yam
Gold: Albacore, Amaranth, Apple, Beet, Blueberry, Bok Choy, Bullhead, Cactus Fruit, Cherry, Cranberries, Crystal Fruit, Dorado, Eel, Fiddlehead Fern, Grape, Halibut, Hazelnut, Kale, Largemouth Bass, Lingcod, Morel, Orange, Peach, Pike, Pomegranate, Poppy, Potato, Radish, Red Mullet, Salmon, Sandfish, Snow Yam, Spice Berry, Squid, Strawberry, Summer Spangle, Sunflower, Tiger Trout, Tilapia, Tuna, Walleye, Wild Plum, Winter Root, Woodskip.
Neutral: These items will not loose or gain any points.
Normal: Albacore, Apricot, Blue Jazz, Blueberry, Bok Choy, Bream, Bullhead, Cave Carrot, Cherry, Chub, Common Mushroom, Corn, Dandelion, Duck Egg, Eel, Egg, Eggplant, Fiddlehead Fern, Garlic, Ghostfish, Grape, Green Bean, Halibut, Hazelnut, Hops, Hot Pepper, Large Egg, Leek, Parsnip, Perch, Potato, Radish, Rainbow Trout, Red Mullet, Red Snapper, Salmon, Sandfish, Sardine, Shad, Smallmouth Bass, Spice Berry, Squid, Sugar, Summer Spangle, Sunflower, Tilapia, Tomato, Tulip, Void Egg, Wheat Flour, Wild Horseradish, Wild Plum, Winter Root, Woodskip.
Silver or Gold: Apricot, Blue Jazz, Bream, Cave Carrot, Chub, Common Mushroom, Corn, Dandelion, Eggplant, Garlic, Ghostfish, Green Bean, Hops, Hot Pepper, Leek, Parsnip, Perch, Rainbow Trout, Red Snapper, Sardine, Shad, Smallmouth Bass, Tomato, Tulip, Wild Horseradish.
No Item: No friendship is gained or lost but the Governor will say it tastes like an item is missing.
Bad: These items loose you 60 points with all villagers.
Anchovy, Blackberry, Carp, Crocus, Daffodil, Field Snack, Green Algae, Herring, Joja Cola, Salmonberry, Seaweed, Spring Onion, Sunfish, Sweet Pea, White Algae.
Worst: These items loose you 120 points with all villagers.
Holly, Pufferfish, Red Mushroom, Sap, Scorpion Carp, Sea Cucumber.
This festival occurs during on the 28th of Summer at 10pm on the Beach.
The player will watch a cut scene during this event which will begin by talking to mayor Lewis.
Festivals and Events – Part 2
This festival occurs on the 16th of Fall between 9am – 3pm at Pelican Town Square.
During this festival the player can purchase the following items using Star Tokens:
Dried Sunflowers 100 Star Tokens
Fedora 500 Star Tokens
Rarecrow (#1) 800 Star Tokens
Stardrop 2000 Star Tokens
The player has the chance to show off produce during this event and will win Star Tokens depending on the score they obtain. The player also has to pick up their items once the judging is finished if not the items will be lost forever.
Display items must be gold star rated with different types of produce to have a chance at getting first place (1000 Star Tokens)
Example: (What I used)
1 Pumpkin (Vegetable) – grown in fall (must be planted before day 4)
1 Melon (Fruit) – grown in summer
1 Sweet Pea (Flower) – found in summer
1 Leek (Forage) – found in spring
1 Large Egg (Animal Produce) – Picked up inside chicken coop
1 Amethyst (Mineral) – Obtained from the Mines
1 Jam (Artisan’s Good) – Made with any friut and a preserves jar
1 Cheese (Artisan’s Good) – Bought large milk at the traveling wagon
1 Oyster (Fish) – Picked up at the beach
Cooking can also be included but certain dishes will gain less points than others.
As long as you have 1 of each item type that are all gold star rated (except minerals) you should have a good shot. Most Animal Produce items will not be obtainable during your first year unless you are super prepared for it (I was able to get large eggs and mayonnaise). All other items can be grown or foraged for so if you pick up a gold star item just place it in a chest away from your other items to use for that years festival.
Once you have been awarded your Star Tokens you still won’t have enough for the Stardrop. (You will most likely get 2nd place during your first year unless you are well prepared)
1st Place: 1000 Star Tokens
Disqualified: 750 Star Tokens (Include Mayor Lewis’ shorts in your display)
2nd Place: 500 Star Tokens
3rd Place: 200 Star Tokens
4th Place: 50 Star Tokens
If you have a lot of extra money you could try the fishing game for 50g per play (easy way to get the points fast). Or if you don’t want to spend money and like the idea of chance try the spinning wheel (This can be very hard to win if you bet a lot of points). You can also try the Slingshot game for 50g per play to gain Star Tokens or if you have a lot of money to blow you can purchase 1 Star Token for 50g at the Star Token Seller.
This festival occurs on the 27th of Fall between 10pm – 11:50pm at Pelican Town Square.
During this festival the player can purchase the following items from Pierre’s Stall:
Rarecrow 5000g
Jack-O-Lantern 2500g
Jack-O-Lantern Recipe 3000g
The Jack-O-Lantern will turn into a Rotten Plant once enough time has passed.
During this event the player can explore the maze. In the maze is a chest containing a Golden Pumpkin which can be sold for 2500g.
How to find the Golden Pumpkin:
To find the pumpkin the player must reach the area when Sam is standing. Walking up to the West wall will allow the player to pass through to a secret area. Then going up and through the cave the player will be on the eastern side of the maze. The player must walk down to the chest and will obtain the Golden Pumpkin. To exit the maze the player must retrace their steps back through the secret area.
This Festival occurs on the 8th during Winter between 9am – 2pm at Cindersap Forest.
During this event the player will join the fishing contest. To win the player must catch at least 5 fish. By winning the player will get a Sailor’s Cap and 3 tackles (1 Barbed Hook, 1 Dressed Spinner and 1 Magnet) after that they will win 2000g each time.
This Festival occurs on the 15th, 16th and 17th of Winter between 5pm – 2am at the Beach.
During this festival the player can buy items and go for a boat ride. Unlike other festivals time will continue to progress and certain places during the festival days will close at a certain time.
Night Market Attractions:
Decoration Boat
Here you can decorative items for your farm and farmhouse.
Big Green Cane 200g
Green Canes (Small) 200g
Mixed Canes (Small) 200g
Red Canes (Small) 200g
Big Red Cane 200g
Seasonal Plant (Seven Different Kinds) 500g each
Famous Painter Lupini
At this stall you can buy a different painting each day, a painting sold in year 1 will not become available again until year 4.
1000 Years From Now (Winter 16th – Years 2,5,8,11,etc.)
Clouds (Winter 15th – Years 2,5,8,11,etc.)
Land of Clay (Winter 17th – Years 3,6,9,12,etc.)
Portrait of a Mermaid (Winter 16th – Years 1,4,7,10,etc.)
Red Eagle (Winter 15th – Years 1,4,7,10,etc.)
Solar Kingdom (Winter 17th – Years 1,4,7,10,etc.)
The Serpent (Winter 15th – Years 3,6,9,12,etc.)
Three Trees (Winter 17th – Years 2,5,8,11,etc.)
Tropical Fish #173 (Winter 16th – Years 3,6,9,12,etc.)
Fishing Submarine
Players can go on a deep-sea fishing tour for 1000g. When accepted the submarine will descend and a trapdoor will open allowing the player to fish. On this tour are 3 fish that are only available to be caught there. Midnight Squid, Spook Fish and Blobfish. The player can also catch seaweed, pearl (Rare), octopus, sea cucumber and super cucumber.
Magic Shop Boat
This shop sells decorative items, seeds and 1 unique hat and fireplace. The unique hat is sold at the cheapest price on Winter 16th. The stock for this shop changes each night. All seeds are sold at the same price as Pierre’s General Store.
Items on Winter 15th
Grave Stone 200g
Stone Frog 500g
Cone Hat 5000g
Spring Seeds (Parsnip, Bean, Cauliflower, Potato, Tulip, Kale, Jazz, Garlic)
Iridium Fireplace 15 000g
Items on Winter 16th
Suit of Armor 200g
Stone Parrot 500g
Cone Hat 2500g
Summer Seeds (Melon, Tomato, Blueberry, Pepper, Wheat, Radish, Poppy, Spangle, Hops, Corn, Sunflower, Red Cabbage)
Iridium Fire Place 15 000g
Items on Winter 17th
Log Section 200g
Stone Owl 500g
Cone Hat 10 000g
Autumn Seeds (Corn, Eggplant, Pumpkin, Bok Choy, Yam, Cranberry, Wheat, Fairy Rose, Amaranth, Grape, Sunflower, Arichoke)
Iridium Fireplace 15 000g
Mermaid Boat
This area is open from 5pm – 12:30 am. When the player enters a mermaid will appear and sing to the player, this will also include a cutscene. The performance will last 1 hour, 40 minutes of game time but the player may leave at any time they wish. After the show the player can click on the clam shells inside the boat to play music notes. A special item will be awarded if the player plays the notes in the right order.
To see the correct order of the notes the player will need to find the secret note #15 (but the player can still claim the reward if they haven’t found it).
Solution: 1 – 5 – 4 – 2 – 3 (Left to Right) The reward can only be claimed once per player.
Shrouded Figure
This NPC will offer to teleport the player back to their farm for 250g.
Traveling Wagon
The traveling wagon that appears on Fridays and Sundays will appear on a raft at the festival selling the usual items including the Wedding Ring recipe (Multiplayer).
If the player has placed items on the beach before the Night market arrived. They will not have access to these items until the 18th of Winter when the Night Market leaves.
This Festival occurs on the 25th during Winter between 9am – 2pm at Pelican Town Square.
During this festival the player will need to have a gift for their secret santa (The name of the person will be given to the player 1 week before the festival). Giving a loved gift will result on the player gaining 400 points with that specific villager. You can also loose 200 points if the villager hates the gift.
The player will also get a random gift that will depend on which villager is the secret santa.
Community Center and Joja Bundles
Depending on the player’s choice, there will be a certain way to obtain certain ‘perks’ these can be given by the Junimos at the Community Center or by Joja (if membership is bought). You can only have 1 way obtain these rewards and if you fill in a Community Center bundle then buy a Joja Membership the Community Center items will be lost.
These are all unlocked by ‘funding’ the projects with money. These can only be obtained once a Joja Membership is bought for 5000g.
1. Bus – 40000g
2. Minecarts – 15000g
3. Bridge – 25000g
4. Greenhouse – 35000g
5. Panning – 20000g
By completing the Community Development projects will unlock the Joja Co. Member of the Year Achievement. But if you fill in any Community Center bundle before this the achievement will not be gained. You will also get a Joja Cola Machine as a reward.
These are bundles that require you to donate a certian item to the Community Center under the correct scroll. Each of the 5 bundles unlocks a certain perk with some allowing you access to cetain areas. You will also gain a minor reward for each single bundle you complete on each scroll.
At the beginning of each new game there is an option to remix the bundles for variety play through.
Remixed bundles will have a mixture of permanent bundles and randomly selected bundles. This will also vary in completion difficulty.
Craft Room: This is the first set of bundles unlocked and is the easiest to complete.
The Reward gained will be the Repiar of the Bridge at the Mountains.
Permanent Bundles
Spring Foraging Bundle:
Items: Wild Horseradish, Daffodil, Leek, Dandelion
Reward: 30 Spring Seeds
Summer Foraging Bundle
Items: Grape, Spice Berry, Sweet Pea
Reward: 30 Summer Seeds
Fall Foraging Bundle
Items: Common Mushroom, Wild Plum, Hazelnut, Blackberry
Reward: 30 Fall Seeds
Winter Foraging Bundle
Items: Winter Root, Crystal Fruit, Snow Yam, Crocus
Reward: 30 Winter Seeds
Randomly Selected (2)
Construction Bundle:
Items: 99 Wood, 99 Wood, 99 Stone, 10 Hardwood
Reward: 1 Charcoal Kiln
Exotic Foraging Bundle: This bundle only needs 5 out of the 9 items.
Items: Coconut, Cactus Fruit, Cave Carrot, Red Mushroom, Purple Mushroom, Maple Syrup, Oak Resin, Pine Tar, Morel
Reward: 5 Autumn’s Bounty
Sticky Bundle:
Items: 500 Sap
Reward: 1 Charcoal Kiln
Wild Medicine Bundle: This bundle only needs 3 out of the 4 items.
Items: 5 Purple Mushroom, 5 Fiddlehead Fern, 5 White Algae, 5 Hops
Reward: 2 Cookout Kit
Pantry Room: This is unlocked once you have completed 1 minor bundle. This bundle will require you to grow crops and raise animals for animal products.
The Reward gained will be the Repiar of the Greenhouse on your Farm.
Permanent Bundles
Spring Crops Bundle:
Items: Parnip, Green Bean, Cauliflower, Potato
Reward: 20 Speed-Gro
Summer Crops Bundle:
Items: Tomato, Hot Pepper, Blueberry, Melon
Reward: 1 Quality Sprinkler
Fall Crops Bundle:
Items: Corn, Eggplant, Pumpkin, Yam
Reward: 1 Bee House
Randomly Selected (3)
Quality Crops Bundle: These items must be Golden Star rated. Only 3 of the 11 items are needed.
Items: 5 Parsnip, 5 Green Bean, 5 Potato, 5 Cauliflower, 5 Melon, 5 Blueberry, 5 Hot Pepper, 5 Pumpkin, 5 Yam, 5 Eggplant, 5 Corn
Reward: 1 Preserves Jar
Animal Bundle: Only 5 of the 6 items are needed.
Items: Large Milk, Large Brown Egg, Large White Egg, Large Goat Milk, Duck Egg
Reward: 1 Cheese Press
Artisan Bundle: Only 6 of the 12 items items are needed.
Items: Truffle Oil, Cloth, Goat Cheese, Cheese, Honey, Jelly, Apple, Apricot, Orange, Peach, Pomegranate, Cherry
Reward: 1 Keg
Rare Crops Bundle: Only 1 of the 2 items are needed.
Items: Ancient Fruit, Sweet Gem Berry
Reward: 1 Preserves Jar
Garden Bundle: Only 4 of the 5 items are needed.
Items: Tulip, Blue Jazz, Summer Spangle, Sunflower, Fairy Rose
Reward: 1 Quality Sprinkler
Fish Farmer’s Bundle: Only 2 of the 3 items are needed.
Items: 15 Roe, 15 Aged Roe, Squid Ink
Reward: 1 Worm Bin
Brewer’s Bundle: Only 4 of the 5 items are needed.
Items: Mead, Pale Ale, Wine, Juice, Green Tea
Reward: 1 Keg
Fish Tank: This will be unlocked when 1 minor bundle is complete.
The reward will result with the Glittering Boulder Removed.
Permanent Bundles
River Fish Bundle:
Items: Sunfish, Catfish, Shad, Tiger Trout
Reward: 30 Bait
Lake Fish Bundle:
Items: Largemouth Bass, Carp, Bullhead, Sturgeon
Reward: 1 Dressed Spinner
Ocean Fish Bundle:
Items: Sardine, Tuna, Red Snapper, Tilapia
Reward: 5 Warp Totem Beach
Night Fish Bundle:
Items: Walleye, Bream, Eel
Reward: 1 Small Glow Ring
Randomly Selected (2)
Crab Pot Bundle: This bundle only needs 5 of the 10 items to be completed.
Items: Lobster, Crayfish, Crab, Cockle, Mussel, Shrimp, Snail, Periwinkle, Oyster, Clam
Reward: 3 Crab Pots
Specialty Fish Bundle:
Items: Pufferfish, Ghostfish, Sandfish, Woodskip
Reward: 5 Dish O’ The Sea
Master Fisher’s Bundle: Only 2 of the 4 items are needed.
Items: Lava Eel, Scorpion Carp, Octopus, Blobfish
Reward: 1 Dish o’ The Sea
Quality Fish Bundle: These items must be Golden Star rated.
Items: Largemouth Bass, Shad, Tuna, Walleye
Reward 1 Dish o’ The Sea
Boiler Room: This collection unlocks when 2 bundles have been completed.
All bundles for this area are randomly selected (3).
Blacksmith’s Bundle:
Items: Copper Bar, Iron Bar, Gold Bar
Reward: 1 Furnace
Geologist’s Bundle:
Items: Quartz, Earth Crystal, Frozen Tear, Fire Quartz
Reward: 5 Omni Geodes
Adventurer’s Bundle: This bundle only needs 2 of the 4 items to be completed.
Items: 99 Slime, 10 Bat Wing, 1 Solar Essence, 1 Void Essence
Reward: 1 Small Magnet Ring
Treasure Hunter’s Bundle: Only 5 of the 6 items are needed.
Items: Amethyst, Aquamarine, Diamond, Emerald, Ruby, Topaz
Reward: 1 Lucky Lunch
Engineer’s Bundle:
Items: Iridium Ore, Battery Pack, 5 Refined Quartz
Reward: 1 Furnace
Bulletin Board: This collection becomes available when 3 bundles have been completed.
Reward: This collection rewards you with 2 hearts with all non-marriage villagers.
All bundles for this area are randomly selected (5).
Chef’s Bundle:
Items: Maple Syrup, Fiddlehead Fern, Truffle, Poppy, Maki Roll, Fried Egg
Reward: 3 Pink Cake
Dye Bundle: Only 6 of the 12 items are needed.
Items: Red Mushroom, Beet, Sea Urchin, Amaranth, Sunflower, Starfruit, Duck Feather, Cactus Fruit, Aquamarine, Blueberry, Red Cabbage, Iridium Bar
Reward: Seed Maker
Field Research Bundle:
Items: Purple Mushroom, Nautilus Shell, Chub, Frozen Geode
Reward: Recycling Machine
Fodder Bundle:
Items: 10 Wheat, 10 Hay, 3 Apple
Reward: Heater
Enchanter’s Bundle:
Items: Oak Resin, Wine, Rabbit’s Foot, Pomegranate
Reward: 5 Gold Bar
Home Cook’s Bundle:
Items: 10 Egg, 10 Milk, 100 Wheat Flour
Reward: 5 Complete Breakfast
Children’s Bundle: Only 3 of the 4 items are needed.
Items: 10 Salmonberry, Cookie, Ancient Doll, Ice Cream
Reward 3 Battery Pack
Forager’s Bundle: Only 2 of the 3 items are needed.
Items: 50 Salmonberry, 50 Blackberry, 20 Wild Plum
Reward: 3 Tapper
Vault: This collection will be available when 4 bundles are completed.
This collection reward is the repair of the Bus.
All Bundles in this area are permanent.
2500 Bundle:
Items: 2500g
Reward: 3 Chocolate Cake
5000 Bundle:
Items: 5000g
Reward: 30 Quality Fertilizer
10000 Bundle:
Items: 10000g
Reward: Lightning Rod
25000 Bundle:
Items: 25000g
Reward: 1 Crytalarium
By completing the Community Center bundles will result in the achievement Local Legend being unlocked and a Stardew Hero Trophy. Pierre’s will also be open on Wednesday as well as the disappearance of the local Joja Mart.
Stardrops
Stardrops permanently increases the player’s maximum energy by 34 points per Stardrop. They can be found by completing different achievements or when certain requirements are met.
When eaten a text box will describe the taste which will be the text you typed in under the ‘favourite thing’ on the character creation screen.
There are only 7 known ways to obtain a stardrop.
Where to find them:
- Sold for 2,000 Star Tokens at the Stardew Valley Fair.
- Obtained on floor 100 in The Mines.
- Gift from your spouse when friendship is 13/12 hearts.
- Bought from Krobus for 20,000g in the Sewers.
- From Old Master Cannoli, in the Secret Woods, after giving him a Sweet Gem Berry.
- Gift from Willy after the Master Angler Achievement.
- Completing A Complete Collection Achievement (donate 95 items to the Museum).
Importance of Weather and Seasons
The weather can determine what fish can be caught, what crops can be grown, what items you can forage for and what villagers will say when you speak to them. Weather can also destroy crops during thunder storms this can be prevented by using a lightning rods. The weather will also affect the look of your screen and you can see what the weather for the next day will be by watching the weather report on your TV.
Season will do the same as weather. Fish, crops, forage items and villager dialogue will all change depending on the season. There will also be a change of seeds that can be bought from Pierre’s and the Joja Mart and these shops will usually sell seeds grown in that season. There will also be 2 fesitvals that will change depending on what season it is. You will also unlock certain areas depending on the season.
Winter:
This Season is the least ‘profitable’ when it comes to growing crops as only Wild Seeds (Wi) can be grown, unless you have the greenhouse rebuilt. During this season it is recommended that you organise your farm, explore the mines, collect materials for crafting items and to go fishing. Try to use this time to design your farm the way you want it and will make farming easier and more profitable for you.
You can use this website to design your farm before you start to move your buildings around.
[link]
Unlockable Areas
There are many areas that are not available to the player when starting the game. These are unlocked if certian requirements are met or on a specific day.
1. The Mines: this area is blocked during the player’s first 4 days and is opened on day 5 (Spring).
This area allows players to explore 120 levels of the mines that have different resources and monsters depending on the level reached. Every 5 floors there will be an elevator and every 10 floors there will be a chest with an item reward for the player.
2. Railroad: this area is unlock on the 3rd day of summer during the 1st year. In this area is a spa which the player can use to re-gain energy and health. There is also possible for a train to pass through, during this time there is a chance the train will drop an item such as stone, coal, ore, wood and geodes. If the player is not in the area when the train is passing a message will pop up on the bottom left of the screen stating that a train is passing by.
3. Quarry: this area is unlocked by completing the Crafts Room bundle at the Community Center or by purchasing the Joja Bridge repair project if Joja Membership was bought. This area is located East of the mines and this area spawns a selection of rocks and ores each day.
4. Secret Woods: this area is only unlocked once you have upgrades your axe to a silver axe and break the log blocking the path. The area is located on the North-West side of Cindersap Forest. In this area the player can break open stumps obtaining 12 hardwood per day. Mushrooms and foragable plants can be collected depending on the season. There is also a statue called Old Master Cannoli, where if a Sweet Gem Berry is placed inside a stardrop is given as a reward.
5. The Desert: this area is unlocked by completing the Vault bundle at the Community Center or if you bought a Joja Membership can be obtained by purchasing the bus repair Joja Project. This area cost 500g to get to each day and is only active 10:10am – 5:00pm but is not affected by time if the player is already there (the player will still pass out at 2am). This area gives access to Coconuts and Cactus Fruits as well as sandfish and scorpion carps. There is also 3 pillars in the northern part of the area where if the player walks into the center holding a Prismatic Shard the Galaxy Sword is obtained. You also have access to 3 different areas:
a) Oasis: Is a store run by Sandy and sells seeds that are not available for purchase in Pelican Town with some other items that will change depending on the day.
b) Casion: Is located inside Oasis and is unlocked when the player completes the ‘Mysterious Qi’ quests. In this area the player can purchase 100 Qi coins for 1000g and can also gamble using these coins to gain more. The coins can be spent to obtain items.
c) Skull Cavern: Is similar to the Mines in Stardew Valley but is only opened by the Skull Key found at level 120 of the Stardew Valley Mines. There are 300 over floors and fainting in this mine will take away 1000g from the player as an ’emergency surgery’ fee and some items will be lost.
6. Dwarf Store: this can be unlocked by breaking the barrier on the right side when entering the mines. To do this the player must have a silver pickaxe or using a cherry bomb. The player must also have donated all 4 dwarf scrolls to the museum to be able to talk to the Dwarf. Once opened and the dwarf language scroll obtained; the player can purchase items from the Dwarf.
7. Sewers: this area is unlocked once 60 items are donated to the museum and gunter gives you the rusty key. Once open the player can catch carps and the mutant carp. The player can also buy items from Krobus including a Stardrop.
Ginger Island – Introduction
This island is unlocked after repairing the boat in Willy’s Fish Shop. The room which houses the boat is inaccessible until you complete either the Community Center or Joja Community Development Form. Willy will mail an invitation once this area is unlocked.
Repairing the boat costs:
- 200 Hardwood
- 5 Battery Pack
- 5 Iridium Bar
Once repaired tickets can be bought for 1000g and Willy’s store doors are unlocked at 8am. (Willy’s schedule will remain the same)
When returning from the Island you will be placed inside the shop, but if a festival day is active and the path back to the farm is inaccessible you will be placed at the bus stop instead. On days that the beach is inaccessible due to a festival you will be placed at the bridge leading to the beach.
Residents
There are 5 interactive residents on Ginger Island.
1. Leo – A boy who’s parents were lost at sea. He considers the parrots on the island his family. At 6 hearts he will move to Stardew Valley and live in the Tree House in the Mountain area (just east of the Rail Road entrance). When there he becomes friends with Linus, Jas, Vincent and Penny.
2. Birdie – An old woman who lives on the far west of Ginger Island. If spoken to the quest ‘The Pirate’s Wife’ is activated. She will not appear when it is raining. She will not accept gifts but can be spoken to.
3. Professor Snail – a man who is trapped inside a mushroom cave. Once freed he will return to his tent and trade Golden Walnuts for fossil or mummy artifact donations. He will not accept gifts but can be spoken to.
4. Island Trader – a bluebird who will trade for items rather than gold. The trader is unlocked for 10 Golden Walnuts after you have purchased the Island Farmhouse.
5. Mr Qi – he will appear on the island in his walnut room once you have obtain 100 Golden Walnuts. He will give special Qi challenges which can be completed for Qi Gems which can in turn be spent at his rewards shop.
Skull Cavern (Desert Mines)
This mine is located in the Calico derset so it will cost you 500g for each trip there and you will also need to have the bus fixed if you wish to travel there (by completing Joja Bundle or Community Center Bundle). This area is quite difficult if you are not prepared and you will need many items as well as cooked dishes to eat rather than just fruit, vegetables or field snacks.
This mine has the following.
- Iridium: This item is MUCH more frequent in this place than in the Mines or Quarry, and the chances of finding Iridium increase with every 10 floors. Purple slimes also spawn in large numbers and can drop Iridium ores, as well as bars. (This drop chance will increase every 10 floors)
- There are NO ELEVATORS! You must always start on floor 1 due to there are no elevators. However, you can come across holes that can drop you down several floors at once at the cost of some health. (Further the fall the more health lost)
- Stairs still work! If you want to skip a lot of floors and you have a large amount of stone, you can descend quickly this way. It only takes one full inventory slot of stone to descend 10 floors with stairs, something to think about if you want to hunt for Iridium.
- Mummies: These monsters spawn in this place (very common), and while they can be knocked down, they can only be killed using bombs on their corpses. So make sure you have a ton of bombs with you (Mega bombs and Cherry bombs are not recommended as Megas cost a lot while cherries might not hit all the targets in range.)
- Iridium Bats: These monster appear at level 50+ and have very HP and deal a large amount of damage.
- Treasure Rooms: Small rooms can appear containing treasure every 10 levels. The chance of these rooms appearing will increase depending on the player’s daily luck. Items in the chests will differ from seeds, saplings, sprinklers, totems, bombs, slime eggs, dishes, prismatic shards, hats and crafting items (such as a crystalarium, seed maker, etc.)
- BOMBS: Be careful when using bombs as the noise will spawn serpents which can do 20 or more damage to the player and can easily swarm you.
- Warp Totems: Have a Warp Totem: Farm in your inventory so you can go back to your farm instantly if you start to run low on supplies, energy and health.
- If the player has read the Secret Note #10 and reaches the 100th floor the player will find Mr. Qi and a cutscene will be activated.
The Three Pillars
In the Calico desert you will find 3 pillars that form a triangle. In the center is a small dent in the sand, this will be useless to you until you have found a Prismatic Shard. Prismatic Shards can be found in Iridium Nodes, Mystic Stones, Omni Geodes (Very Low Chance) and can be dropped when defeating Shadow Brutes, Shadow Shamen, Mummies and Serpents (Very Low Drop Chance). You can use the prismatic shard by holding it and walking into the center of the 3 pillar triangle. This will give you the Galaxy Sword.
Credits
I double checked most information with the Stardew Valley Wiki[stardewvalleywiki.com].
The Missing Bundle – Movie Theater
After completing all the bundle for the Community Center the JojaMart will be abandoned until the next rainy or stormy day which will trigger a cutscene the night before.
Inside a bundle can be found and once fulfilled will result in the building being converted into a Movie Theater.
The Missing Bundle: Only 5 of the 6 items are needed to complete this bundle.
Items: Silver or higher quality Wine (any), Dinosaur Mayonnaise, Prismatic Shard, 5 Gold quality Ancient Fruit, Gold or Iridium quality Void Salmon, Caviar.
Reward: JojaMart is turned into a Movie Theater.
If you have chosen the JojaMart bundles; Morris will offer to turn the Joja Warehouse into a Movie Theater for 500 000g.
Once built you can watch a movie once every 7 days. Each ticket costs 1000g. This can be alone or with a guest.
If you gift a movie ticket to a villager you must enter the theater the same day as the ticket was given otherwise the ticket is forgotten.
The movies showing are 8 in total and rotate on a 2 year cycle. The cycle will be based on when the Movie Theater is unlocked.
Each villager has a preferred movie. A loved movie earns 200 friendship, a liked movie earns 100 friendship and a disliked movie (luckily) doesn’t affect friendship at all.
*Penny will love any movie as long as Pam is also in the audience (some villagers may appear in the theater at random times).
*Krobus will not attend any movies on Fridays.
Movie Loves and Dislikes (if a character is not in either options they fit into the liked category)
The Brave Little Sapling
Shown: Spring Year 1
Loved: Caroline, Dwarf, Jas, Penny, Sandy, Vincent.
Disliked: Krobus, Linus, Sebastian, Shane, Wizard
Journey of The Prairie King: The Motion Picture
Shown: Summer Year 1
Loved: Caroline, Dwarf, Jas, Robin, Sandy, Vincent
Disliked: Elliott, George, Haley, Harvey, Krobus, Leah Linus, Wizard
Mysterium
Shown: Fall Year 1
Loved: Abigail, Dwarf, Elliott, Leah, Sandy, Sebastian, Wizard
Disliked: Emily, Evelyn, George, Gun, Harvey, Jas, Kent, Lewis, Linus, Penny, Vincent
The Miracle At Coldstar Ranch
Shown: Winter Year 1
Loved: Dwarf, Emily, Evelyn, Gus, Harvey, Marnie, Sandy
Disliked: Abigail, Demetrius, Krobus, Linus, Sam, Sebastian, Shane, Vincent, Wizard
Natural Wonders: Exploring Our Vibrant World
Shown: Spring Year 2
Loved: Demetrius, Dwarf, Jas, Lewis, Leo, Maru, Sandy
Disliked: Alex, Krobus, Linus, Vincent, Wizard
Wumbus
Shown: Summer Year 2
Loved: Alex, Demetrius, Dwarf, Gus, Jas, Maru, Pierre, Sam, Sandy, Shane, Vincent
Disliked: Caroline, Haley, Krobus, Linus, Wizard
It Howls in the Rain
Shown: Fall Year 2
Loved: Abigail, Alex, Dwarf, Sandy, Sebastian, Shane
Disliked: Elliott, Emily, Evelyn, George, Harvey, Jas, Kent, Krobus, Leah, Lewis, Linus, Penny, Vincent, Wizard
The Zuzu City Express
Shown: Winter Year 2
Loved: Dwarf, Evelyn, George, Harvey, Jodi, Sandy
Disliked: Abigail, Clint, Demetrius, Krobus, Linus, Sam, Sebastian, Shane, Vincent, Wizard
The theater has a concessions counter where you may purchase a snack for your guest. Giving them a loved snack will earn 50 friendship, a liked snack will give 25 friendship and a disliked snack (luckily again) will not gain or loose any friendship. The stand will only sell 5 randomly chosen food at a time.
Snacks Loves and Dislikes (if a character is not in either options they fit into the liked category)
Apple Slices
Cost: 100g
Loved: Harvey
Disliked: Clint, Dwarf, George, Gus, Jodi, Krobus, Pam, Sam, Shane, Willy, Wizard
Black Licorice
Cost: 25g
Loved: George, Krobus, Wizard
Disliked: Everyone else.
Cappuccino Mousse Cake
Cost: 220g
Loved: Elliott, Evelyn, Gus, Haley
Disliked: Dwarf, George, Krobus, Pam, Sam, Sebastian, Shane, Willy, Wizard
Chocolate Popcorn
Cost: 130g
Loved: Jodi
Disliked: Dwarf, George, Harvey, Krobus, Wizard
Cotton Candy
Cost: 50g
Loved: Penny, Sandy
Disliked: Alex, Caroline, Elliott, George, Gus, Harvey, Jodi, Kent, Krobus, Robin, Willy
Fries
Cost: 100g
Loved: Clint
Disliked: Caroline, Dwarf, Elliott, Emily, Evelyn, Haley, Harvey, Jas, Leah, Marnie, Wizard
Hummus Snack Pack
Cost: 90g
Loved: Shane
Disliked: Abigail, Clint, Demetrius, Dwarf, George, Gus, Jas, Jodi, Pam, Sam, Vincent, Willy, Wizard
Ice Cream Sandwich
Cost: 150g
Loved: Marnie
Disliked: George, Harvey, Krobus
Jasmine Tea
Cost: 50g
Loved: Harvey, Lewis, Sebastian
Disliked: Abigail, Clint, Demetrius, Dwarf, Evelyn, George, Gus, Jas, Pam, Sam, Vincent
Jawbreaker
Cost: 250g
Loved: Vincent
Disliked: Alex, Caroline, Elliott, George, Gus, Harvey, Jodi, Kent, Krobus, Robin, Willy
Joja Cola
Cost: 40g
Loved: Shane
Disliked: Everyone else (except Pam and Sam)
JojaCorn
Cost: 10g
Loved: Shane
Disliked: Everyone else (except Pam)
Kale Smoothie
Cost: 120g
Loved: Emily
Disliked: Abigail, Clint, Demetrius, Dwarf, George, Gus, Jas, Jodi, Pam, Sam, Sebastian, Shane, Vincent, Willy, Wizard
Nachos
Cost: 100g
Loved: Pam and Shane
Disliked: Caroline, Dwarf, Elliott, Emily, Evelyn, Haley, Harvey, Jas, Leah, Marnie, Wizard
Panzanella Salad
Cost: 200g
Loved: Gus and Leah
Disliked: Abigail, Clint, Demetrius, Dwarf, George, Jas, Jodi, Pam, Sam, Sebastian, Shane, Vincent, Willy, Wizard
Personal Pizza
Cost: 150g
Loved: Sam, Pierre, Shane
Disliked: Caroline, Dwarf, Elliott, Emily, Evelyn, Haley, Harvey, Leah, Wizard
Popcorn
Cost: 120g
Loved: Demetrius and Kent
Disliked: Dwarf, Elliott, Emily, Evelyn, Haley, Harvey, Jas, Leah, Wizard
Rock Candy
Cost: 90g
Loved: Abigail and Dwarf
Disliked: Alex, Caroline, Elliott, George, Gus, Harvey, Jodi, Kent, Krobus, Robin, Willy
Salmon Burger
Cost: 150g
Loved: Alex, Linus, Willy
Disliked: No one.
Salted Peanuts
Cost: 120g
Loved: Robin
Disliked: Dwarf, Elliott, Emily, Evelyn, Haley, Harvey, Jas, Leah, Marnie, Wizard
Sour Slimes
Cost: 80g
Loved: Jas
Disliked: Alex, Caroline, Elliott, Gus, Jodi, Kent, Lewis, Penny, Robin, Sandy, Willy
Star Cookie
Cost: 150g
Loved: Evelyn, Gus, Maru, Wizard
Disliked: George, Harvey, Krobus
Stardrop Sorbet
Cost: 1250g
Loved: Everyone
Disliked: Krobus
Truffle Popcorn
Cost: 180g
Loved: Caroline, Elliott, Gus
Disliked: Dward, Evelyn, Haley, Jas, Marnie, Sam, Shane, Vincent, Wizard
Inside the theater lobby is a Crane Machine, it cost 500g per play. There is a 25% chance in game that a man will be occupying the crane game making it unplayable at that time, it will always be occupied after you have watched a movie.
The game gives you 3 chances to grab a prize and each attempt has a 15 second timer that starts when you first move the crane. If you grab a prize on the first or second chance it will not end the game meaning you can grab up to 3 prizes max.
Each time you pay to play the prizes reset. The prizes presents will be randomised.
To play you will first move the crane horizontal using the right-arrow. The second move is vertical which will also drop the crane when completed. The crane will drop where its shadow lands.
The further the item is away from the collection chute the higher the chance that the crane will drop the prize.
Some prizes such as Dinosaur Eggs and Free Movie Tickets may be hidden behind foliage inside the game and will be revealed if the crane drops another prize.
Prizes (randomised)
Anytime: Futan Bear, Futan Rabbit, Small Junimo Plush (any colour), Large Futan Bear, Dinosaur Egg, Omni Geode, Warp Totem (farm), Mega Bomb, Movie Ticket, Exotic Tree, Deluxe Tree, House Plant #13, Poster of the current movie showing.
Spring: Indoor Hanging Basket, Plush Bunny, Lawn Flamingo, Seasonal Decor, Seasonal Plants (#1, 2, 3 or 6)
Summer: Indoor Palm, Wumbus Statue or Bobo Statue (only is Wumbus is playing), Long Palm, Long Cactus (only is Prairie King is playing)
Fall: Small Wall Pumpkin, Wall Pumpkin, Dried Sunflowers, Grave Stone, Green Serpent Statue, Purple Serpent Statue
Winter: Winter Tree Decal, Big Red Cane, Big Green Cane, Green Canes, Red Canes, Mixed Canes, Tree of the Winter Star