
Overview
This guide goes into detail regarding NPR themes, combat, stats, drops, tips, and more.
UPDATE
Note with subsequent updates to Starfighter:Infinity, some information, like additional item drops and NPRs, have been added to the game.
I have been working with others at the Starfighter:Infinity Wiki: [Click Here to Visit][starfighter-infinity.fandom.com]
In order to ensure up-to-date information using the tools available at the wiki – this guide may become outdated over time as a result, but the information is still useful. I highly recommend taking a look at the wiki for many more tips, details, and information regarding Starfighter:Infinity!
-ReThink
Introduction – NPRs
This guide is intended to provide a complete list of all NPR (non-player race) information that could be useful for fighting/farming/discovering NPRs in Starfighter:Infinity – both for new and experienced players. Note some information is still being collected, and there may be a delay between new content being added to the game and added to this guide.
This guide will include information on each NPR:
- NPR Images
- Their first encounter-able minimum level
- Their hotspots/frequent spawn locations
- Background lore
- Ship variants/stats + boss ship
- Combat/behavior tips
- Available item drops
- Misc. quirks and tips
- Commission/History Information
- Spoilers, so read at your own discretion!
Please comment/note any missing/incorrect information and it will be corrected ASAP.
Upcoming Additions:
- Images for each NPR ship (this could take a while)
- Name of related hotspot relic(s)
- List of related non-spawning relics
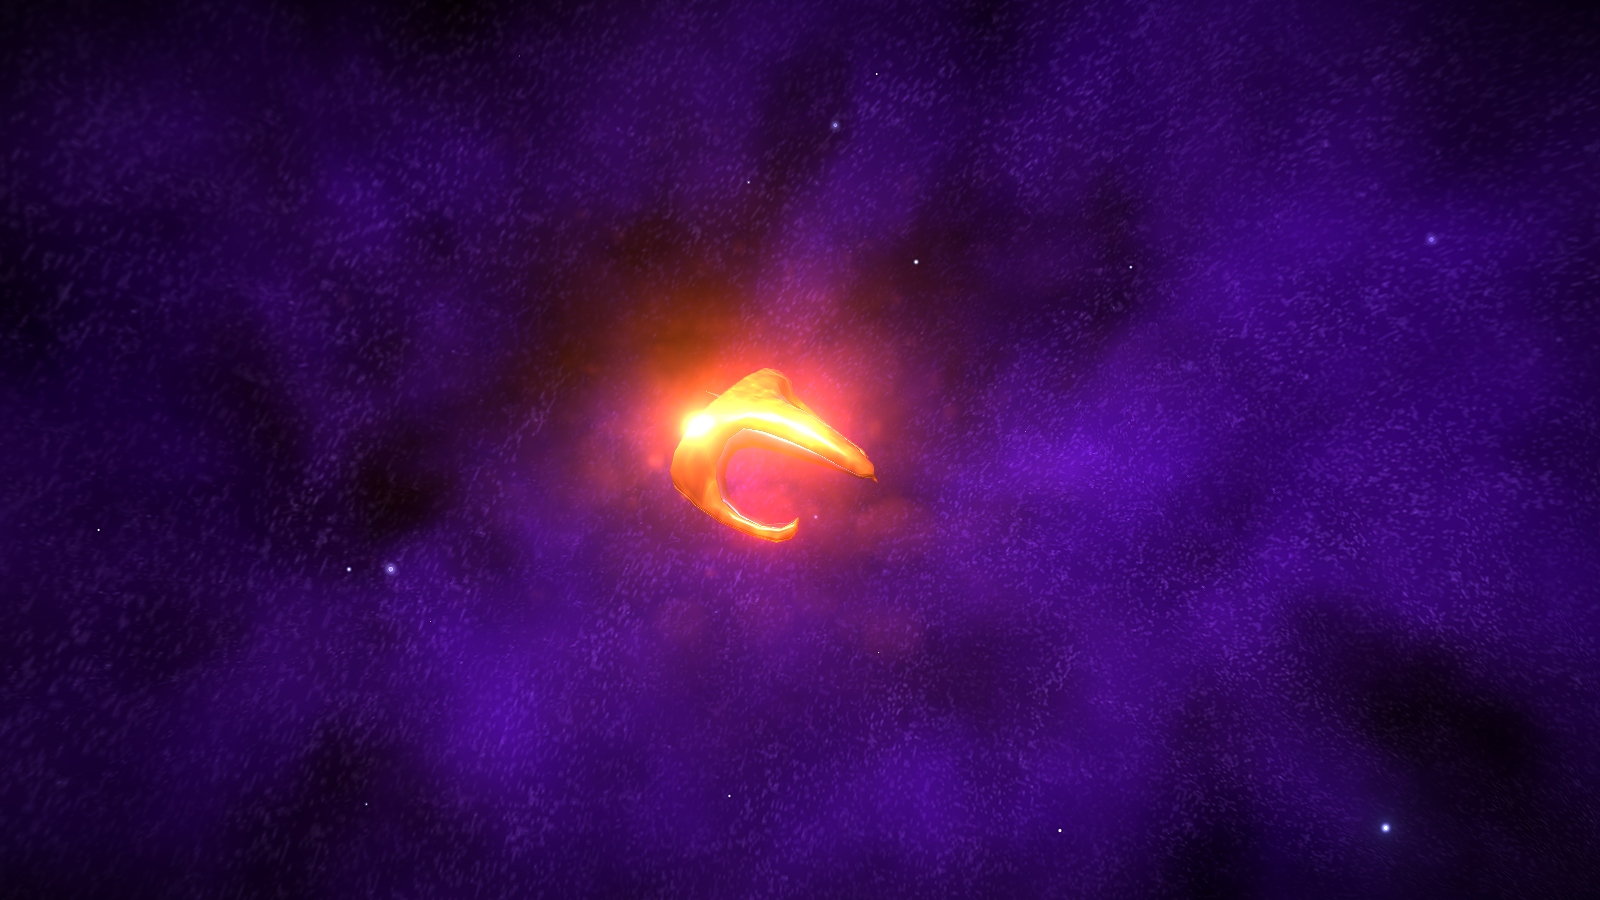
NPR – Forkworms
Minimum Level Accessible: 5
Hotspot(s):
Lore:
Numerous and procreative, Forkworms often occur in swarms – the odd Forkworm isn’t much of a threat, but a horde can worry even the most equipped fighters. They make their nests in the dense nebulae of star systems, where they build their homes out of metal.
Commissioned By: Ben & “JT”
Combat:
Forkworms and Forklings employ simplistic charging tactics as they are restricted to close-range combat due to only having their primary weapon. Any ranged weapons will defeat them with ease – they are extremely prone to gravity effects due to their low mass.
Combat:
Forkworms are essentially larger Forklings: they employ simplistic charging tactics as they are restricted to close-range combat due to only having their primary weapon. Any ranged weapons will defeat them with ease – they are extremely prone to gravity effects due to their low mass. Forkworms have slightly more shields than Forklings and can take a little bit of chip damage before being defeated.
Engine Summon Cost: 10,000 credits and 55 Enriched Red Xand
Combat:
Forkworm Queens boast one of the highest shield pools in the game, along with the ability to create swarms of forklings near-instantly. The queen also has access to short-range forklets, which have very good tracking at the cost of speed. Energy drain weapons can prevent forklet spam, and ranged weapons can wear down the massive health pool of the queen. DOTs also are quite effective to prevent the shield regen process, especially if the queen tries to flee/retreat. Chain laser weapons are effective at hitting the queen and her swarm at once – as are clusters of mines.
Drops:(4)
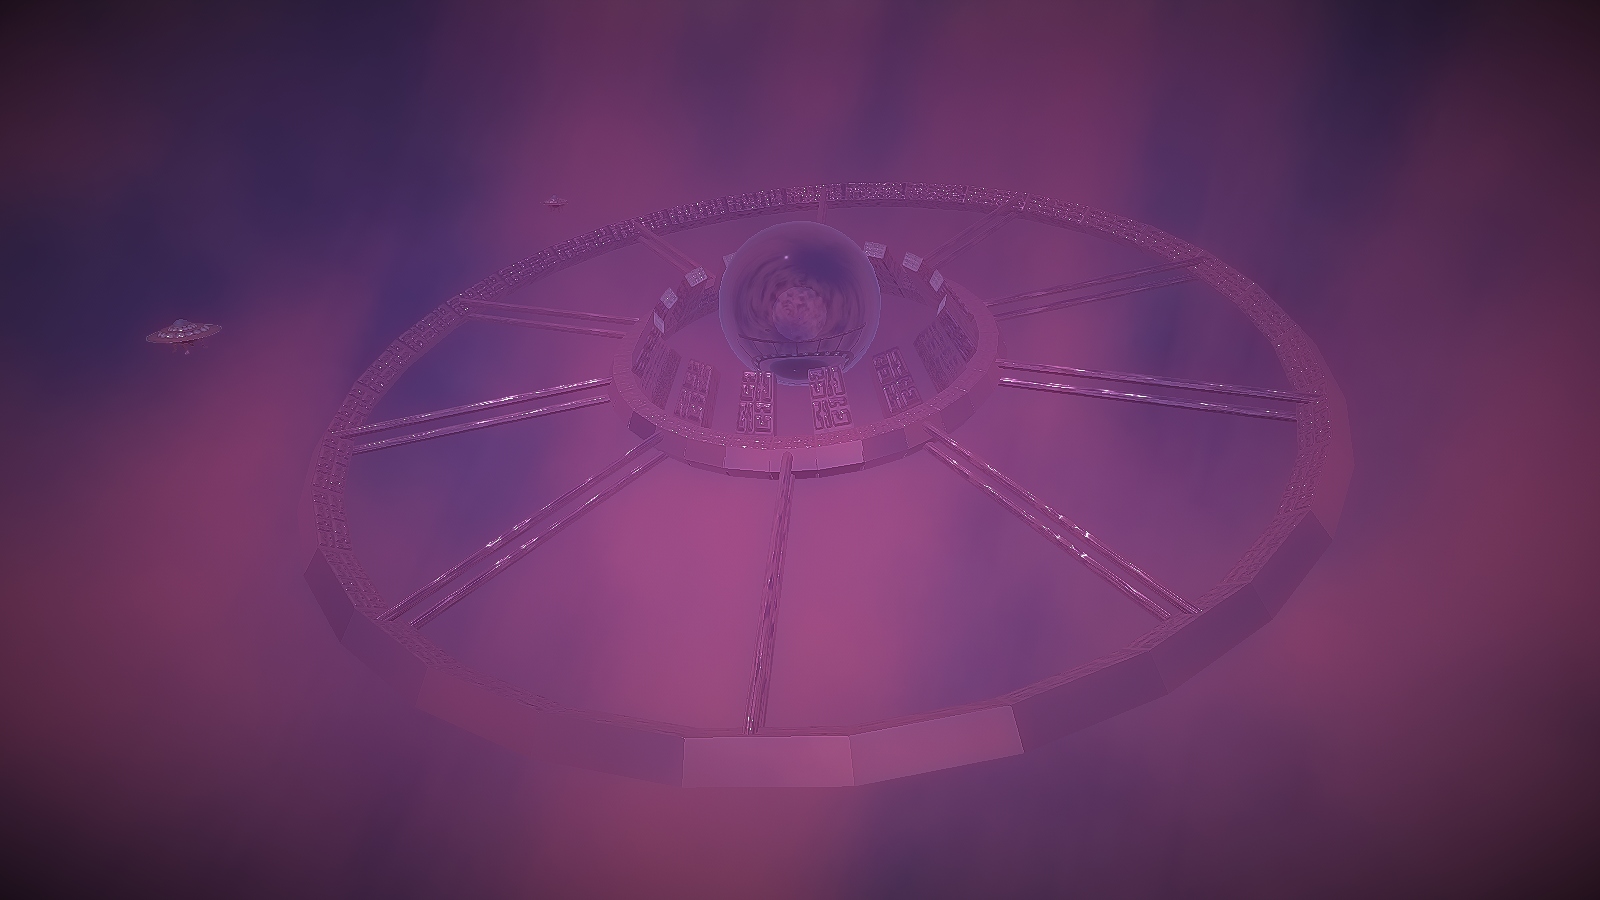
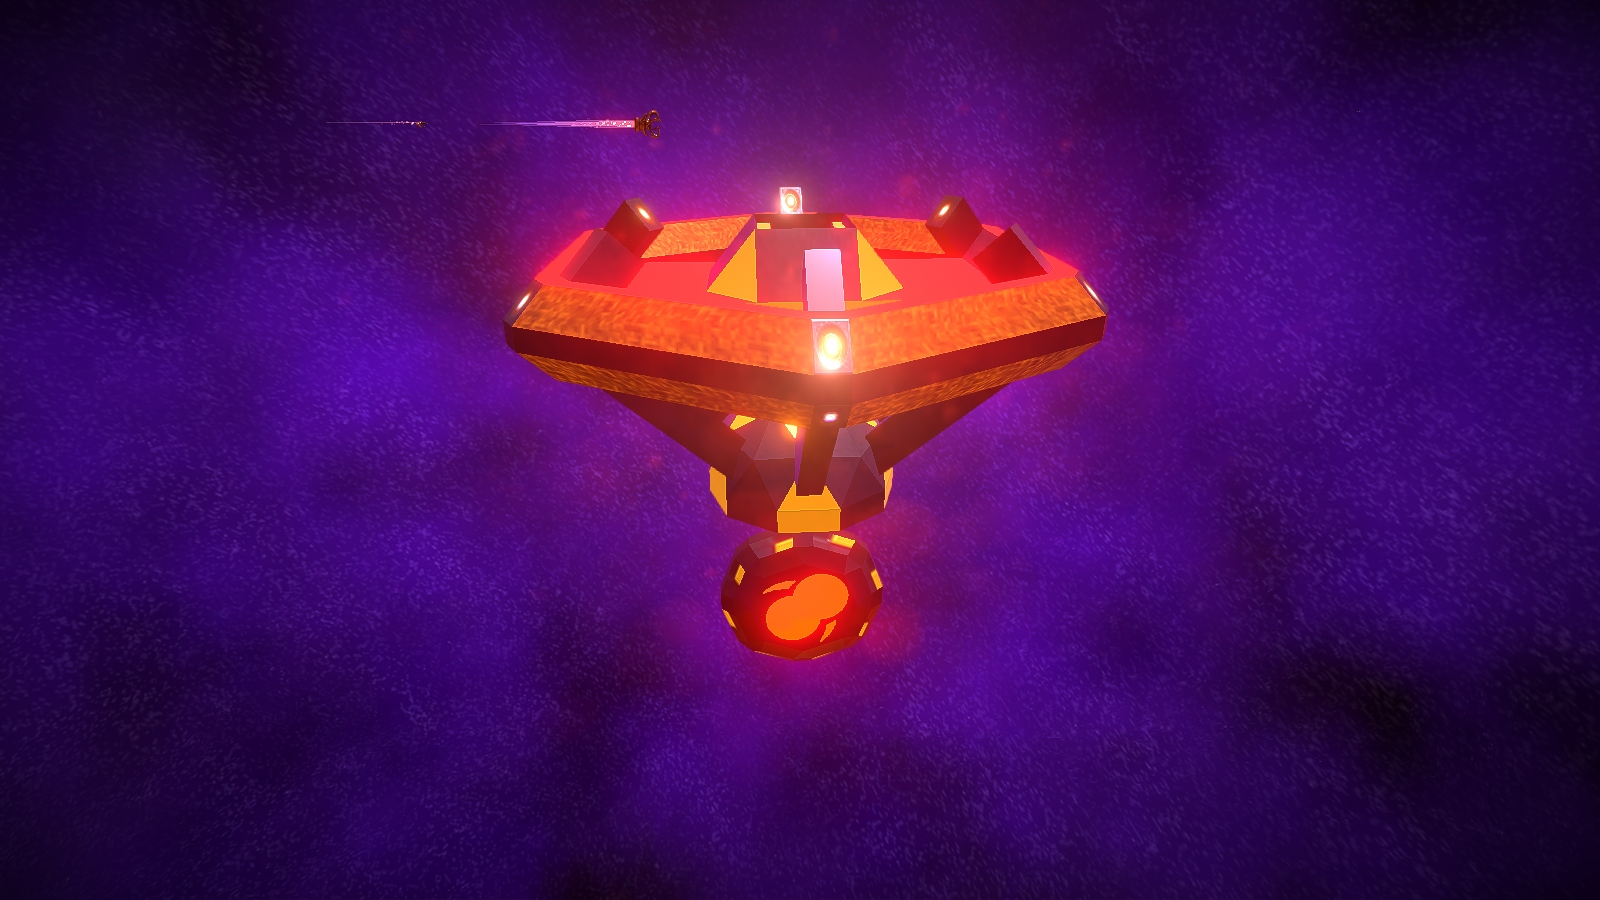
NPR – Sheenites
Minimum Level Accessible: 10
Hotspot(s):
Lore:
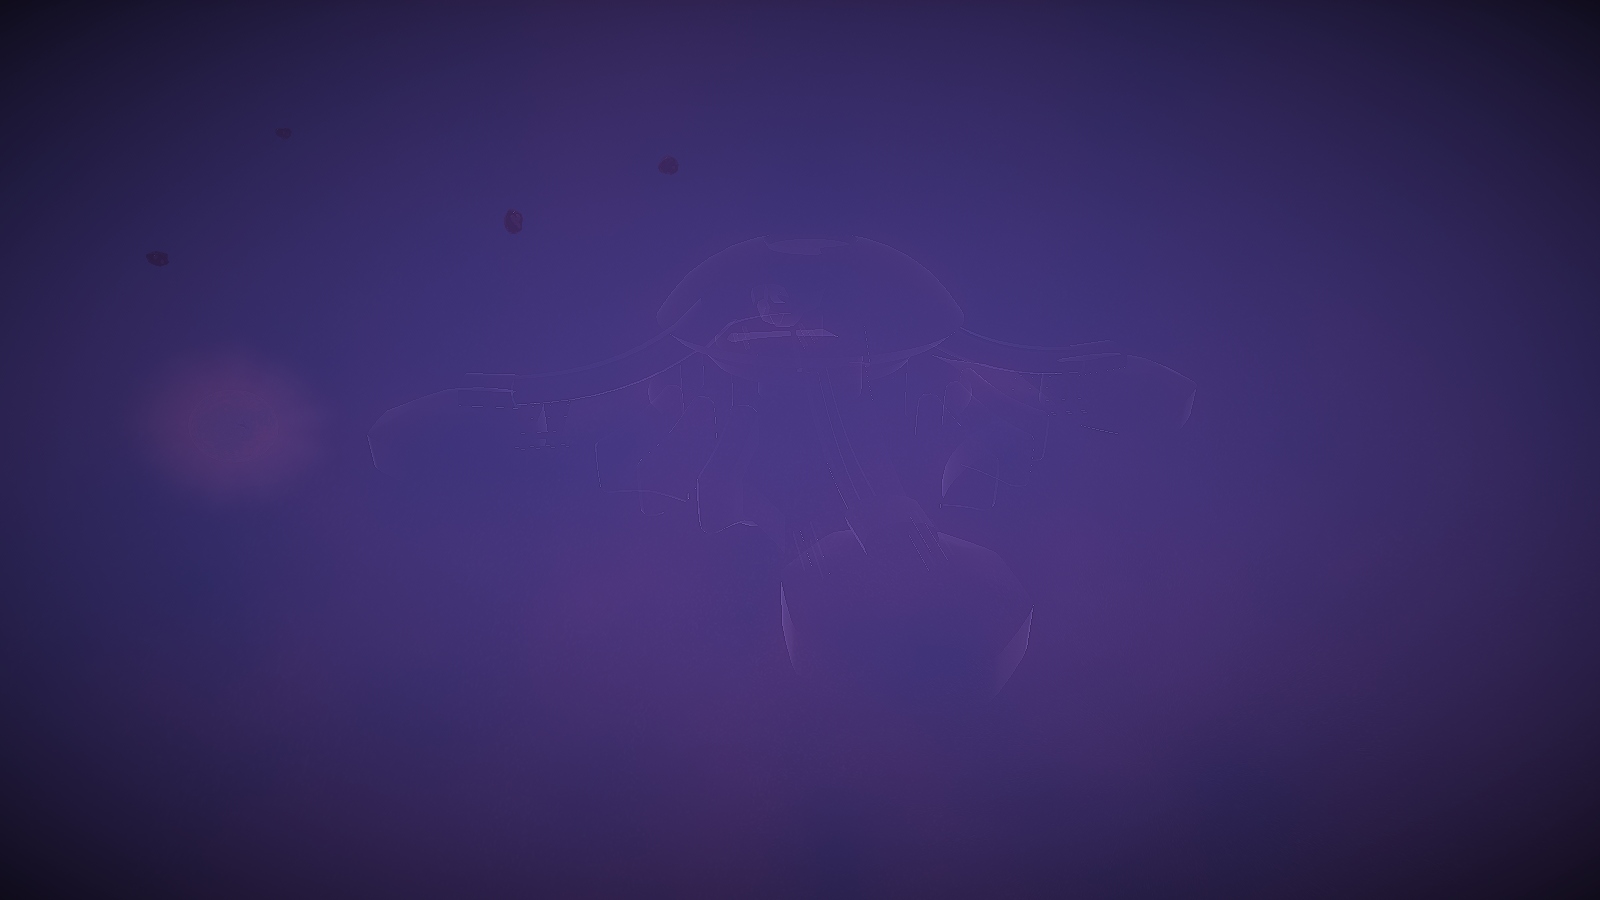
These retro-futuristic saucers reside in the luminescent Sheenland, which is only accessible via white holes, light anomalies, and micro gates. They occasionally venture into the world through temporary light anomalies through which they terrorize the cows of the galaxy.
Commissioned By: “Hazmat”
Combat:
Combat is virtually the same for all sheenite ships – being a mainly dumbfire-based NPR, they rely on spam to deal damage, thus keeping distance is extremely effective, especially in low detection areas, such as nebulae, where they mainly are found. Barriers are extremely effective against them as well, blocking all but one of their available weapons. They possess only 2 locking weapons – hexagons and scaler beam- which the former has a unique flight pattern, and is defeated using common anti-locking gear. The scaler beam is less effective from afar, and is only dangerous up-close. They have no defenses themselves other than the occasional teleport, so guided weapons can be freely fired to defeat them.
Engine Summon Cost: 10,000 credits and 35 Enriched Silver
Combat:
All strategies for the normal saucer apply to the Mega Saucer. Additionally, the Mega Saucer is extremely large, which makes hits from afar trivial, even with wide-spread weapons. The Mega Saucer also has access to dumbfire arrays, which can do a lot of damage up-close.
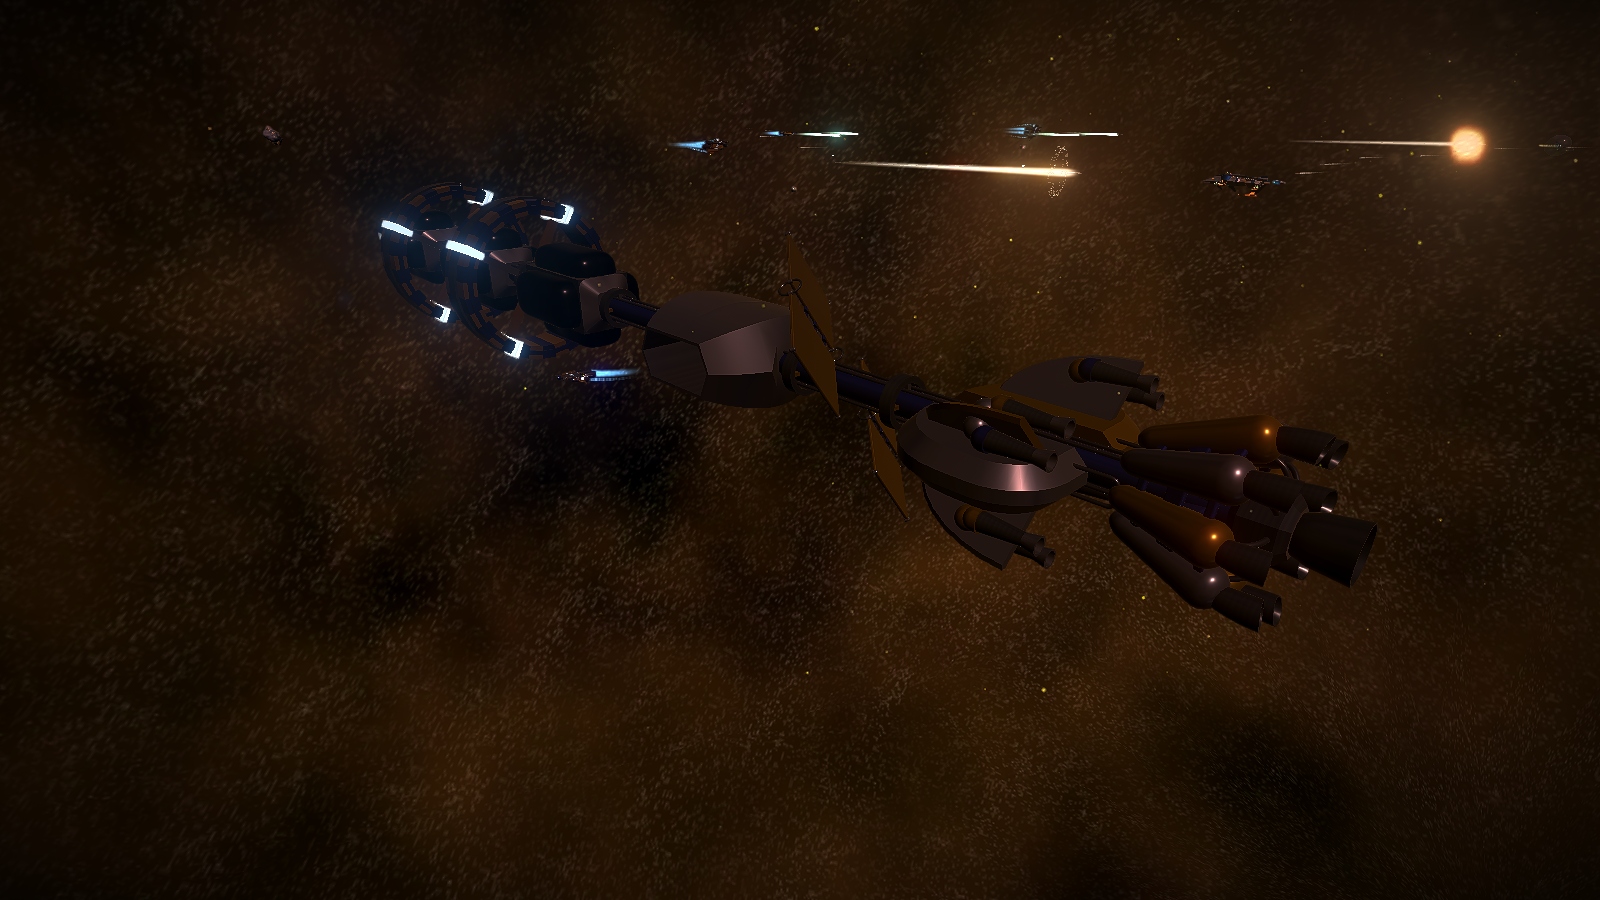
NPR – Null Dwellers

Minimum Level Accessible: 10
Hotspot(s):
Lore:
Residing in the dark void of the null space which is only accessible through a dark anomaly, the Null Dwellers thrive in the dark edges of known territory. They venture out of their shattered system through stone rings to invade other systems using the power of cold fusion weaponry.
Commissioned By: Ben
Combat:
The Null Drone is both a naturally spawning Null Dweller and the spawn of the Null Battleship. These drones can do significant damage if they player does not keep moving, due to their high-damage primaries and secondaries. Swarms of drones can quickly turn into a lot of damage – swiftly picking drones off one-by-one is recommended. Chain laser is an option here, but is relatively risky to get close to swarms of drones. It is NOT recommended to use gravity effects, as Null Dwellers resist gravity effects by 50%.
Combat:
The Null Fighter is a beefier version of the Null Drone – the same strategies can be employed, but extra care must be taken.
Combat:
Null Destroyers are extremely potent enemies, especially for the level at which they are introduced. Their cold ray is incredibly powerful, as well as their dark mines and cold fusion proxy blasts. Keeping a distance is highly recommended, as well as slow whittling down of the massive health pool. Even then, lock-ons are frequently negated by the null hiding in their smokescreens or converting guided weapons into energy via their dark bubble. An anti-lock is recommended due to their constant dark photon bomb spam at range, which is augmented by their seemingly endless supply of energy via their dark charger and dark shield bubble. Beam, effect, or cold fusion resistive shields are recommended to neutralize the main applications of cold fusion. For first-time fighters, distance and DOTs are a must to avoid being melted by cold fusion.
Engine Summon Cost: 10,000 credits and 45 Enriched Platinum
Combat:
The Null Battleship is an even tankier version of the Null Destroyer, and has access to Null Drone Launchers, Null Turrets, and Cold Fusion Bombs. It is even more critical to give the battleship a wide berth than the destroyer, and to not be impatient in whittling it down.
- Null Dwellers can spawn at stone rings, which activate in an unknown pattern. One gate is always open in the Chaos Engine, and the others follow the aforementioned unknown pattern:
- DTr-0-14
- Be-3-4

NPR – Splicers
Minimum Level Accessible: 15
Hotspot(s):
Lore:
The disgruntled space salvagers that are the Splicers are well known for being territorial, possessive, and dangerous; they often lay claim to any ship that enters their perceived territory, dismantling ships for scrap to build their machines.
Commissioned By: “f71CkY”
Combat:
A fairly low-level NPR, Splicers can pose a threat to an unprepared recruit. The main weakness of the Splicers is that all their weapons are extremely slow, so agile and quick ships will have no issue weaving out of their fireballs, radiation-riddled rockets, and dumbfire-tracking glaives. Larger ships are at risk of not being able to outrun their glaives and radiation rockets, which can do significant damage to more massive ships due to radiation. Hilariously enough, their engine boost utility also boosts enemies, so the player can be boosted by them as well. The only thing to consistently watch out for are their spliced bombs, which are XHE mine variants that have higher damage and apply a slow effect at the cost of a longer timer. A small, quick fighter is all that is needed to take on the Splicers.
Combat:
Spliced Security Turrets only have access to slow, primary fireball-like weaponry. A mediocre-speed ship negates this threat entirely, despite their large health pool.
Engine Summon Cost: 600 credits and 280 Enriched Nickel
Combat:
Spliced Monstrosity is more tough than spliced combat ships, but is an easier target and has the same issues with having slower weaponry. It also has access to the glaive array, which the player needs to outrun and then resume combat when the glaives run out of lifetime.
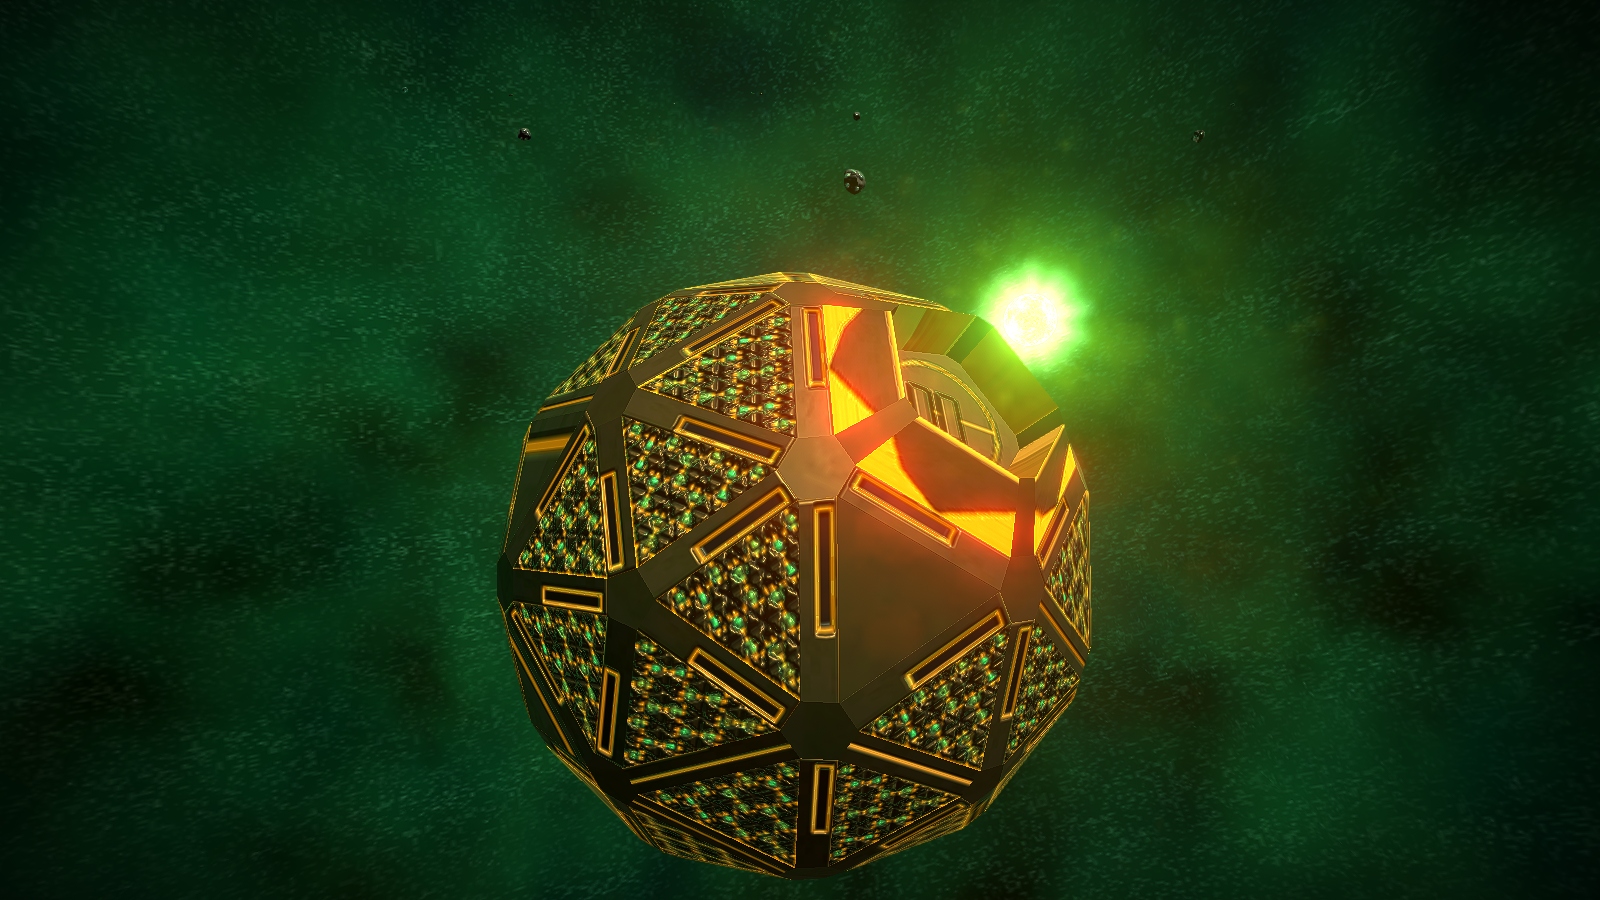
NPR – Andromedans

Minimum Level Accessible: 15
Hotspot(s):
Lore:
The only known NPR to hail from another galaxy, the Andromedans invade the Milky Way through a series of gates spread across the star systems, and stagger which are activated at any given point in time. Not much is known about these emerald invaders outside of their desire for conquest.
Commissioned By: Ben
Combat:
If encountered early on, Andromedans can be a significant threat to a low-to-mid level player. They possess no locking weapons, but have a unique shield that allows them to be unlockable from further than 120su, at the cost of being 2x weak to heat damage. Their hoops can prevent recharging, while being fairly spammy, quick, and decent damage. Their quad hoops can be particularly devastating if a player is not attentive. Their ram shields can be used to dodge incoming fire, increase speed, and damage attackers. Their sentries can be used to create bullet hell for a player – take care in avoiding close proximity to too many of the sentries at once. Their escape teleport can allow them to dodge incoming projectiles at the cost of energy. Overall, having a solution for their dumbfire spam, such as a barrier or speed, as well as a heat weapon, particularly the heat ray to prevent their dodging, will allow the player to negate most of their threat.
Engine Summon Cost: 1,800 credits and 90 Enriched Xand
Combat:
The Andromedan Destroyer can be defeated with the same tactics as the frigate, but can take much more heat damage and has access to droid and hoop arrays that can massively increase its close-range threat. Care must be taken to flank it properly while burning it, otherwise the player may take the full brunt of the droid array/hoop array.
- Andromedans spawn only at 2 gates at any given time: the first is the one in the Chaos Engine, which is always open, and the other rotates from any in the list below in a currently unknown pattern:
- MnA-6-16
- Re-16-14
- An-15-15
- EAu-15-15
- GV-11-5
- Ca-13-5
- Be-8-8
- Re-6-0
- Al-6-0
NPR – Tobor
Minimum Level Accessible: 15
Hotspot(s):
Lore:
The Tobor are the backward-named epitome of human arrogance. Evolved from glitched AI humanity created, these robotic ships carry traces of their old programming they couldn’t quite shed.
Commissioned By: “Rom”
Combat:
The Tobor are quite difficult for early players – alll tobor have near-instant recharge delay and energy deflection. Piques are able to spam long-range bolts at a distance to chip down the player, which also knock them back out of range. They can also spam splinter torps to keep the player at bay, which can deal high damage if enough of them are left undefended. Lightning orbs can be dangerous, allowing them to chain attacks on the player. High-damage ammo-based locking weapons are useful for knocking out Piques, such as positronic convergence discs.

Combat:
Tobor security turrets are weak to a similar strategy to taking down piques, however they are much tankier and unguided weapons are recommended instead of guided due to their potential use of the tobor returner, which can prove dangerous to unprepared players when their own lock-ons are returned to them.

Combat:
The Tobor Pova boasts a massive shield capacity and can be a devastating foe. Again, Tobor Pova and turrets often come equipped with their own version of the RTS – the tobor returner, which operates on ammo and cannot be energy drained, though notably they only have 1 utility slot, so if an advert is seen, it is an indicator that lock-on weapons are OK to fire at them. They also make use of their long-range bolt primaries to spam enemies down, as well as their destabilizing and shocking lightning orbs. The splinter torps can be quite a threat as well to players without stealth, signal scramblers, or a barrier. Tobor Pova can also spam Piques – this means the chain laser is a valid tool to cut down hordes of tobor at close range. Typically, however, it is better to attack this NPR from a distance and keep pressure on their shield delay.
NPR – Dartians
Minimum Level Accessible: 30
Hotspot(s):
Lore:
The remnant workers of a long-lost race, the Dartians are mysterious mining-focused worker bees that pack a radioactive punch.
Commissioned By: “Darty”
Combat:
Dartian Probes are quite easy to combat – low shields and lack of any real weapon besides a primary make them trivial to take out. Their only hitch is their ability to spam the Dartian Detonator, which can destroy all incoming guided weapons. Thus, unguided weapons are the best choice to take them out.
Combat:
Dartian Workers are mostly harmless, but their use of radioactive orbs and radioactive torps/smart torps can hurt, especially on larger ships. Generally their projectiles can be outsped, but a shield bubble shuts them down nicely. Also beware their mines, which have a strong nuclear effect. They also have access to the detonator, same as the probes. Keep in mind to not trail a worker, as their Dartian Mines deal heavy nuclear damage.
Engine Summon Cost: 10,000 credits and 35 Enriched Silver
Combat:
With a monstrous shield capacity, a plethora of aforementioned nuclear weapons, and access to the dartian waste container, the Dartian Garbage Ship can take a beating and dish out radioactive damage. Also beware their dartian torpedo arrays, which can hurt a non-bubbled target. Be wary of their tractor beam as well, which applies radiation damage, and with its heavy mass has quite a pull and combo with other dartian weapons. Overall it’s a large, slow target that can be chipped away from afar.
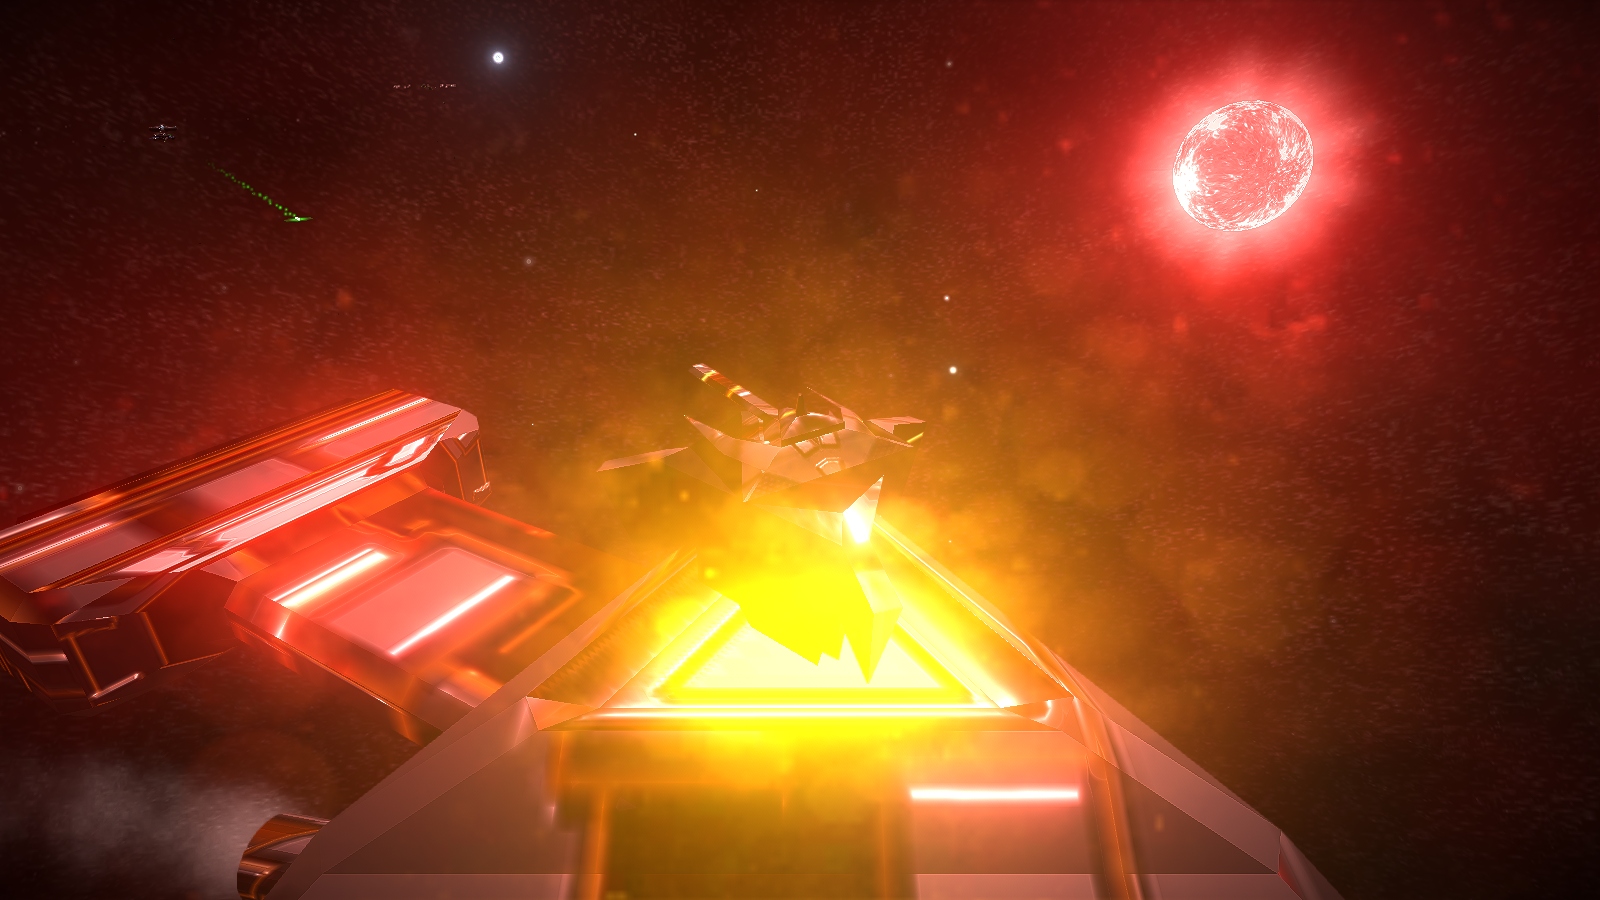
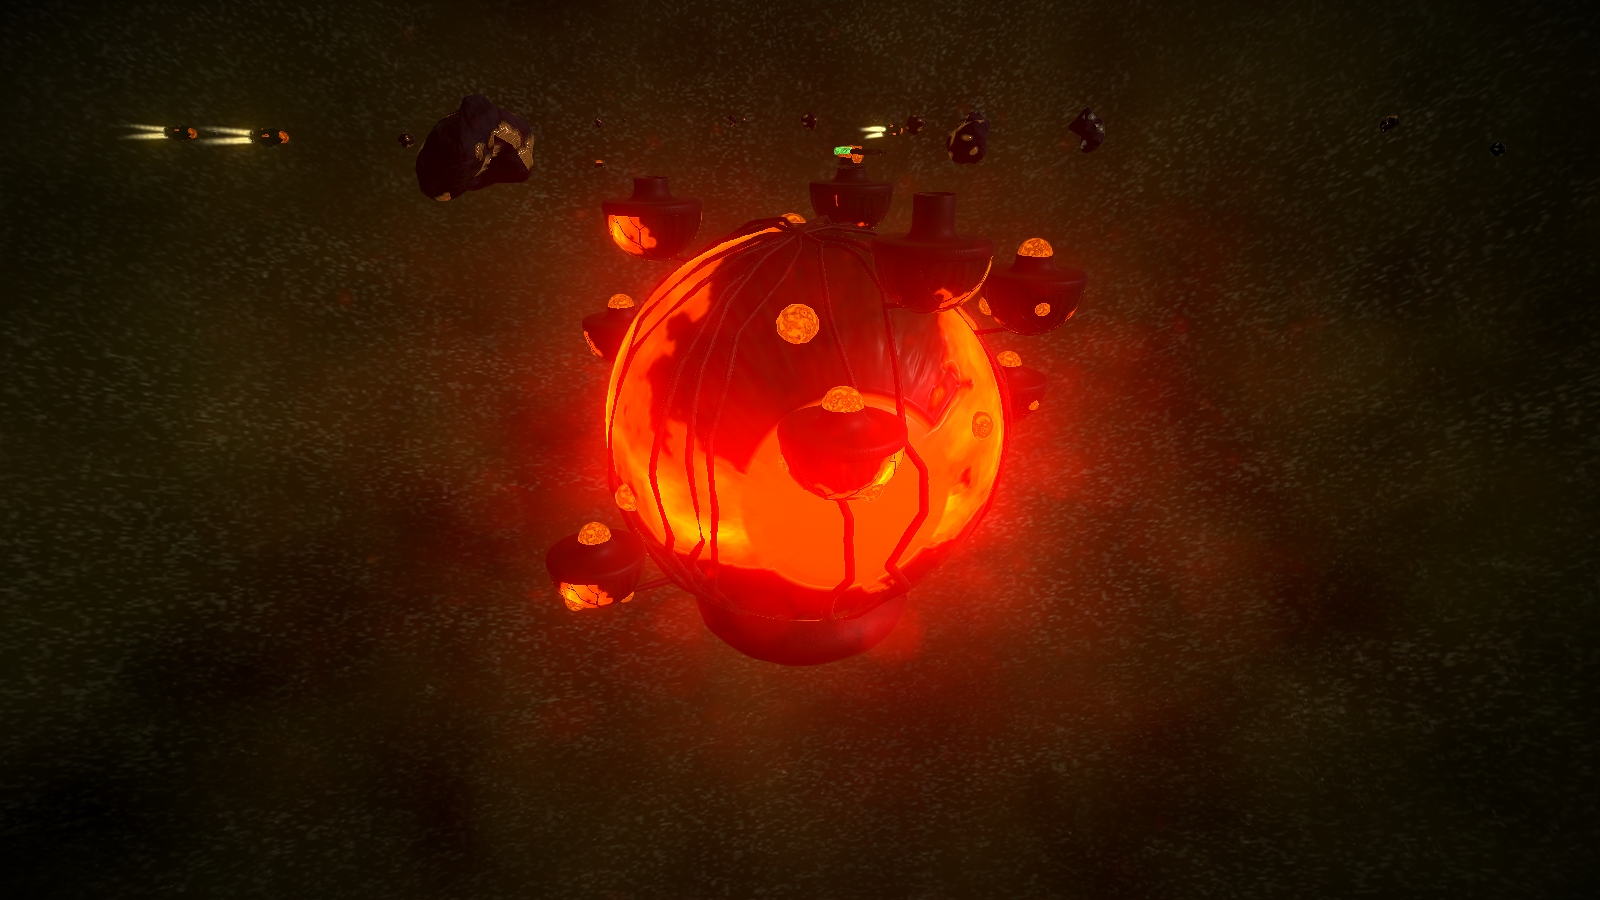
NPR – Solarians
Minimum Level Accessible: 35
Hotspot(s):
Lore:
The warring thermal zealots of the stars, the Solarians clash over their philosophies of light and dark wielding potent heat weaponry.
Commissioned By: “Advisor Libra”/”Wurmish”
Combat:
Solarian Novae pack on the heat damage, as all of their weapons are some form of solarian sphere; an unguided, smart-aiming projectile that does explosive damage with an additional heat DOT effect. Their primaries and proximities consist of these spheres, and spam them quite often. Note only barriers and KFD will fully mitigate these spheres. Solarians are also resistant to heat damage via their thermal shield, regen energy from heat damage via the solarian supercharger, and frequently spam smokescreens to hide and protect themselves from locking weaponry. It is recommended to bring a thermal shield to prevent slowly burning from sphere spam. Solarians also have barriers that can occasionally block dumbfire weapons, but due to their rotation lock usually don’t do them much good.
Combat:
The Solarian Eclipse is an amped-up version of the solarian nova that has additional access to the large sphere – a secondary weapon with slower speed, but significantly higher damage and burn time. Large spheres must be avoided, as they can be crippling along with normal sphere spam.
Engine Summon Cost: 5,000 credits and 15 Enriched Gold OR 65 Enriched Uranium
Combat:
The Solarian Supernova is a further increase in the deadliness of the solarians, as in addition to everything an eclipse can have, the solarian supernova also has access to a large-slot weapon: The Solarian Nebula Bomb. The nebula bomb can turn the entire sector into a thick nebula for roughly 20 seconds, which is advantageous for solarians due to their smart-aim and desire to hide. Their augmentations allow them to detect enemies in smoke in nebulae, which prevent the player from gaining an advantage from the nebula as well. Take care to avoid large spheres hidden in the nebula, as they have a deeper, distinct sound compared to the normal spheres.
NPR – Rodions
Minimum Level Accessible: 45
Hotspot(s):
Lore:
The Rodions are a tragic race that has been stranded in Gamma Velorum – their mothership and low population indicative of their desperate fleeing from an unknown enemy.
Commissioned By: Unknown

Combat:
Rodions are a fairly straightforward enemy – their energy based engine overdrive is frequently spammed at a hint of trouble, which can be irksome to chase them down to defeat them. Up close, they use their hyper cannons and projectile cannon (a vulcan cannon-esque primary) to deal high CQC damage, both of which are projectile damage type. They also have access to dart variants, as well as a dart array, which are slow moving/turning torpedoes that hyperspace into the enemy when they are within range. These do heavy damage, so it is best to ensure that the player has a solid anti-lock weapon, such as the shield bubble, as these torps can be unpredictable and can’t always be avoided. Note that every rodion ship can have an array, as all rodion ships have a large slot.
Engine Summon Cost: 1,600 credits and 45 Enriched Palladium
Combat:
The Armoured Rodion Frigate is virtually the same as the rodion frigate, with the exception of higher shields, less agility, and higher mass. The same strategies of projectile avoidance apply here, as well as a solid anti-lock defense.
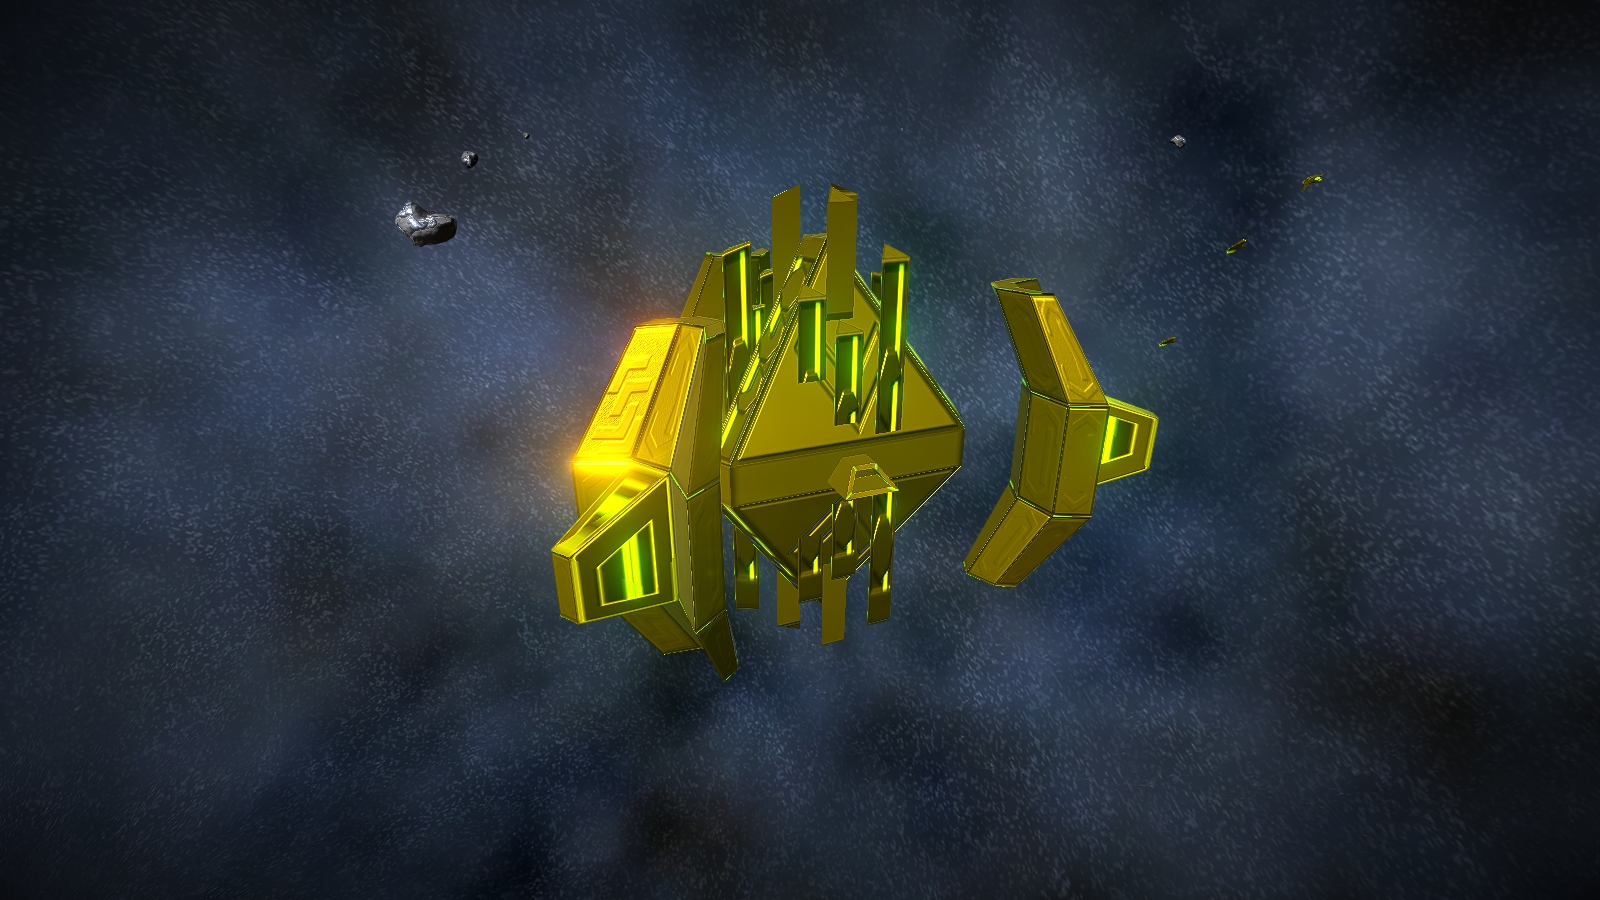
NPR – The Gao
Minimum Level Accessible: 45
Hotspot(s):
Lore:
The Gao are a unique hivemind NPR that employ biological weaponry – not much else is known about the Gao.
Commissioned By: Unknown
Combat:
The Gao possess a fairly limited arsenal, and are thus fairly easy to predict and handle. Their bolts are fairly long-range, high impact, and high recoil projectiles and spam the player quite frequently. Their blobs possess a unique splitting ability that can quickly create hazards for the player. KFD, barriers, and/or an agile ship can mitigate these splitting blasts, as well as projectile repulsion fields. The Gao also possess a freeze ray that can incapacitate ships that venture too close. At range, their projectiles are fairly easy to dodge, and they are large targets – thus they are prone to being chipped down with long-range lock-ons safely.

Combat:
The Gao Turret fights similarly to the bubble ship, but cannot move, thus making it an easy target from even further away, with only slightly higher health.
Engine Summon Cost: 6,000 credits and 65 Enriched Iridium
Combat:
The Gao Devourer possesses all aforementioned gear, but also has access to multiple devourer beams, which act like the plasma relay with a fairly weak gravity effect. Getting caught in this beam, however, can do up to 700 damage if held on a ship for the entire duration. Keeping a good distance will allow ships to whittle down the devourer with little retaliation, especially given it’s massive size.
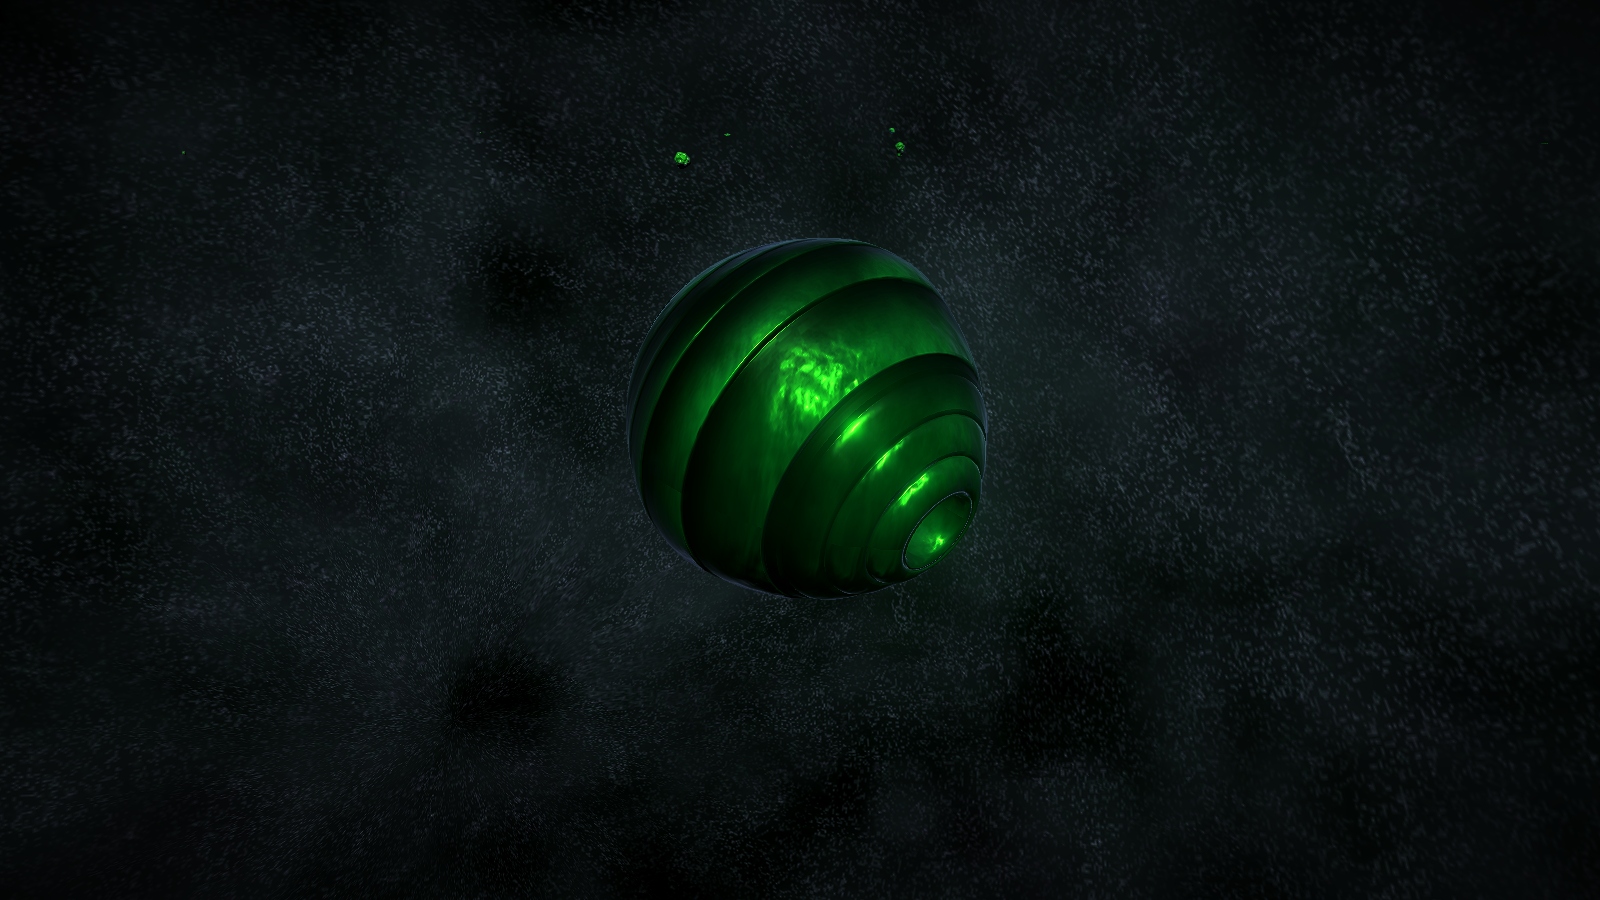
NPR – Relisk
Minimum Level Accessible: 50
Hotspot(s):
Lore:
The Relisk are the portal-using temple dwellers of Mintaka A. A few of their strange portal relics are scattered across other star systems.
Commissioned By: Ben & “JT”
Combat:
Relisk Fighters are speedy annoyances on-par with Tobor Piques – high damage primary spam, teleporting mines and secondaries, the former of which applies diruption, and a near-instant recharge delay on shields along with a resistance to lasers make the relisk quite the pests. Thankfully most of their weapons can be blocked with the standard shield bubble, and they take 30% more damage from explosives, so quick-firing, speedy explosives, such as the minibomb, can make quick work of them.
Strangely enough, the Relisk Fighter does not have any utilities, and thus no access to their signature gear: portals. They also possess proximity slots and large slots, but the relisk have no proxy or large weapons.
Engine Summon Cost: 700 credits and 65 Enriched Blue Xand
Combat:
The Relisk Cruiser can be taken down with the same strategy as the Relisk fighter, however they have access to their arsenal of portals, which they occasionally use to ambush, confuse, and dodge incoming threats. This typically only delays their takedown rather than posing a serious threat. They too possess a proximity slot that goes unused.
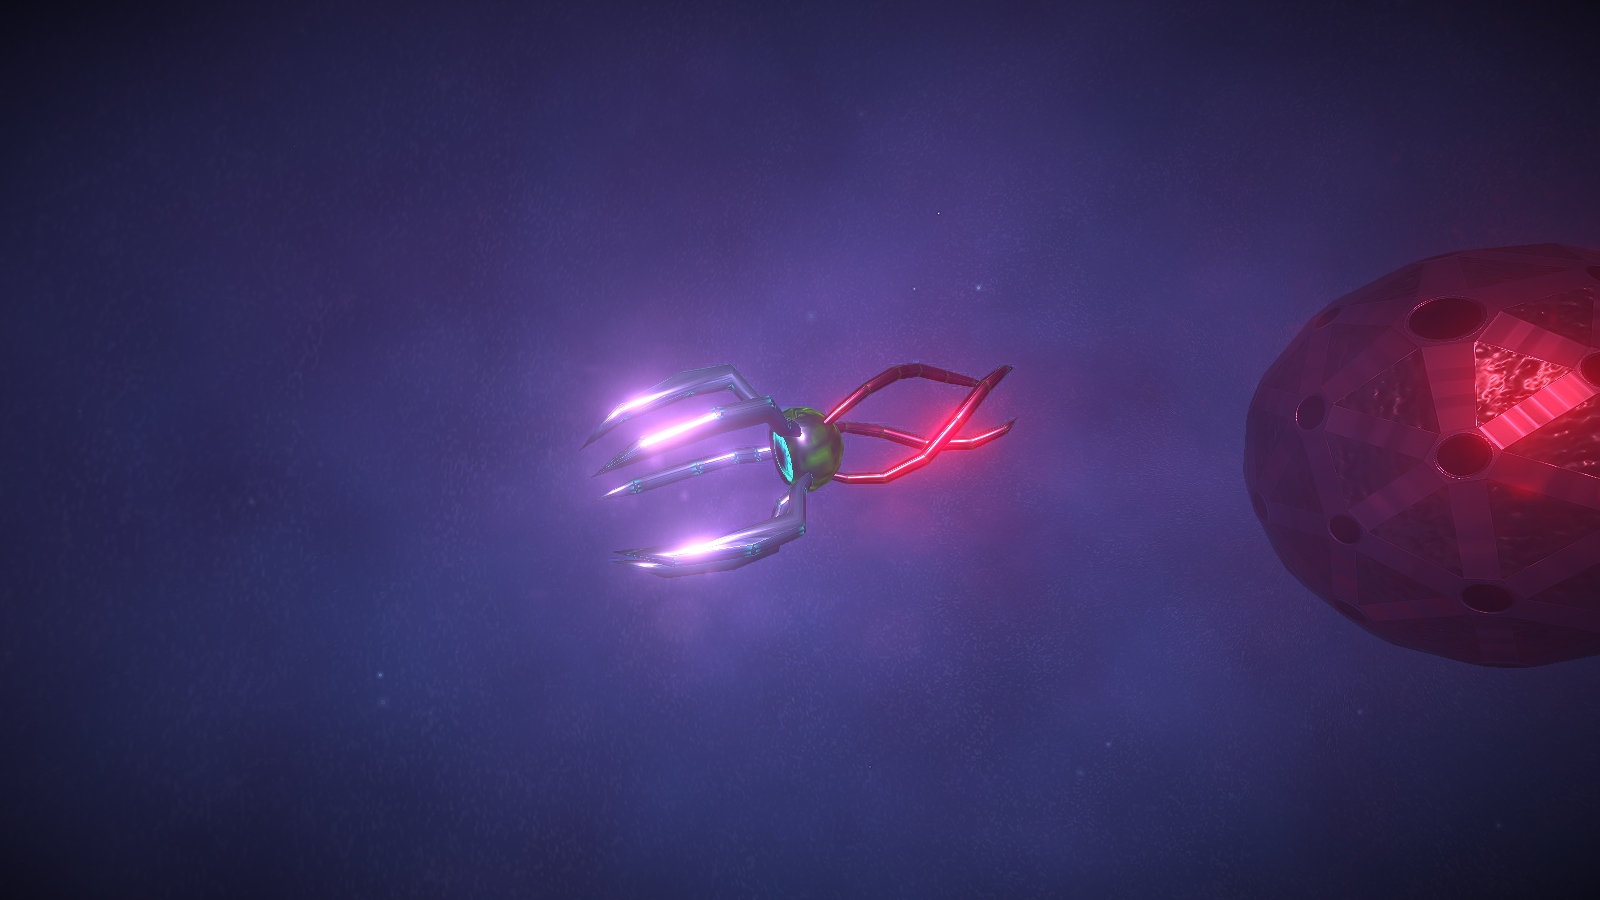
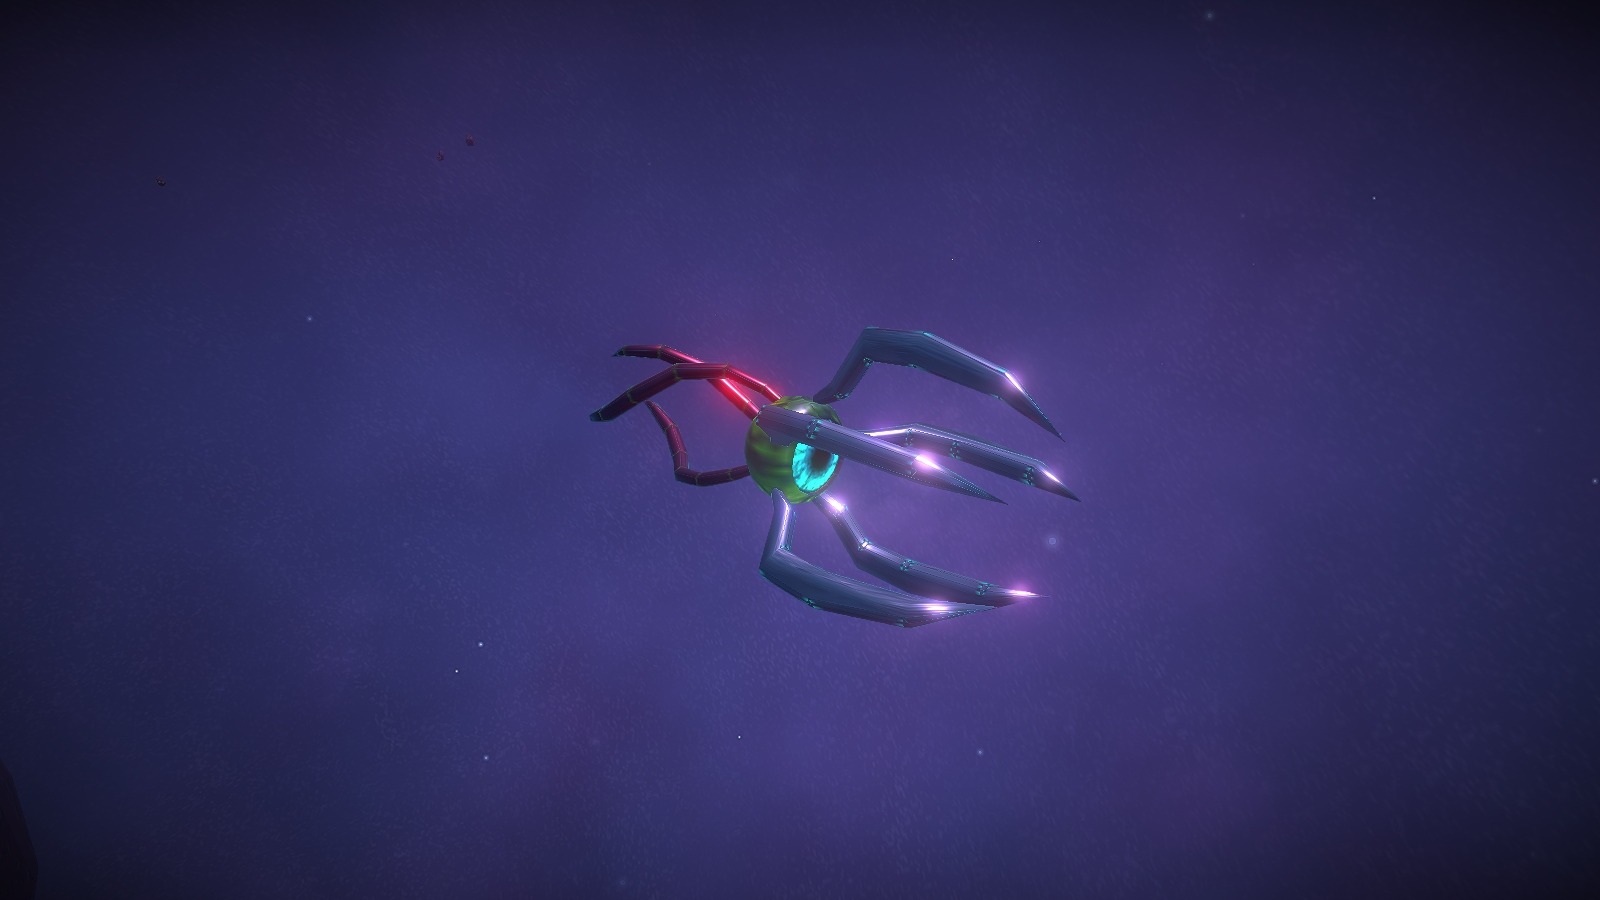
NPR – Vacuum Flies
Minimum Level Accessible: 60
Hotspot(s):
Lore:
The Vacuum Flies are the scum of the stars – infecting ships with their corrosive spit and swarming from the carcasses of their dead brethren, the Vacuum Flies can quickly overwhelm lone fighters.
Commissioned By: Ben
Combat:
Vacuum Hatchlings are the swarm fighters of the flies – they possess extremely low shields and only have low-damage primary weapons with limited range and slight corrosion effects, but have incredible agility and speed good for swarming fighters and allowing their corrosion effect to build up on an enemy. Hatchlings also spawn in great numbers from dead flies and queens, so be ready to face up to 5 hatchlings when a fly or a queen dies. Chain lasers, gimbal cannons, and gravity effects are extremely effective at cutting them down. Hatchlings also attempt to flank from the back – facing them causes them to flee and re-group.
Combat:
Vacuum Flies are tougher than hatchlings, and spawn hatchlings when defeated. They too only possess primary weapons, and can be defeated in the same manner as hatchlings.
Engine Summon Cost: 3,000 credits and 135 Enriched Barium
Combat:
Vacuum Fly Queens are much tankier than flies, and have access to additional quick-firing acid blast proxies, which can do high corrosion damage to an enemy. They also have access to more varied spit weapons with more corrosion, damage, and range – take care to avoid hits using barriers, high agility to abuse the queen’s low turn rate, effect reduction shields, and stealth. The anti-nuclear shield also depletes corrosion, which is quite effective against vacuum flies.
NPR – Tyraan
Minimum Level Accessible: 65
Hotspot(s):
Lore:
The Tyraan Empire focuses on long-range artillery and sheer damage, often at the cost of ammo, accuracy, and/or long arm times.
Commissioned By: “Darty” and Ben
Combat:
Tyraan Artillery ships are deadly foes – sporting long-range, high-damage & speed torpedoes, a dumbfire torpedo that can AOE-apply anti-stealth effects, a decoy that applies absorbing stealth to nearby friendlies, mine cluster torps, torps that explode into bubble-piercing shrapnel, high-damage primaries, and bombs that split into many torps, the Tyraan Artillery ship is well-armed to offset its low shields. As mentioned above, they can hit through shield bubbles with cluster torps, defeat stealth with anti-stealth torps, hide themselves using their decoys, and can deploy long-range artillery that doesn’t last long enough to be returned to them. They also possess torpedoes capable of attracting mines to a target even more strongly than projectile attract. To add onto their dangers, they often explode in clusters of dangerous stun/jammer/laser mines, the latter of which are hard to avoid. It is recommended to try and dumbfire them from afar, and making sure to deploy the proper countermeasures depending on which weapon they are firing, such as bubble against guided torps, or stealth against cluster torps, etc. In higher numbers, artillery ships can light up an entire sector with long-range, high-damage spam.
Combat:
Tyraan Turrets lack the defenses of the artillery ship, but can still put out massive damage, which is aided by their large lock angle. They are easy to take out with long-range dumbfire weaponry.
Engine Summon Cost: 600 credits and 70 Enriched Uranium
Combat:
Tyraan Command Ships boast all the previous gear, along with a mid-range laser-based proximity and mine clusters. Mine clusters in particular can be very deadly, as they do high damage on contact, and the laser mines have an AOE coverage. On death, their multiple aug slots allow them to have a few deathraps. Ensure to not destroy them at close-range for this reason.
NPR – Human & Aralien Ghosts
Minimum Level Accessible: 65
Hotspot(s):
Lore:
The echoes of the past known as the human and aralien ghosts haunt the residents of Epsilon Aurigae – a reminder that not even death can relieve soldiers from the burden of war…
Commissioned By: Ben
Ghost Warship Engine Summon Cost: 700 credits and 35 Enriched Yittrium
Ghost Destroyer Engine Summon Cost: 700 credits and 6 Enriched White Xand
Combat:
Combat with all ghost ships is virtually the same – with some exceptions, all ghost weapons are harmless to a player. When hit by projectiles, ghost ships teleport after taking the damage, making them tiresome to fight. Dephase/Dephaser allow ghosts to avoid hits completely, save a few weapons, such as auto-locking laser and lightning weapons, as well as proximity weapons. The only way to lock onto ghost ships is to have their respective locking augmentation equipped. Ghost weapons can apply an extremely quick effect depending on the weapon, but typically this is harmless.
Ghost Warships and Ghost Destroyers (bosses) possess ghostly PCBs and ghostly VBs, respectively, which DO deal normal damage to the player, although they are weaker and don’t have as much range.
Note that ghost ships can be difficult to locate/see, and do not show up in sector chat, but do show up in the hostile ship counter.
NPR – Igni
Minimum Level Accessible: 75
Hotspot(s):
Lore:
The Igni are the biologically baffling rock-based lifeforms that roam Castor, using their rock-based weaponry to slam ships into scrap.
Commissioned By: Ben
Combat:
The Igni Assault ship has incredible stats and loadout, along with a good variety of gear. Assault ships have access to un-redirectable rockets, destabilization mines, solid barriers that can impact ships to deal damage, a damage reduction ability that reduces their speed, destabilizing orbital proxies, and other minor gear. Their main weakness is their shield, which makes them take 2x laser and photonic damage while being immune to explosive damage. This, coupled with their high mass, makes the neutrino beam arguably the most effective weapon against them – dealing increased laser damage and massive radiation damage. Take care to have a shield bubble or barrier ready, otherwise rock rockets add up – with multiple assault ships the rock rockets can add up.
Engine Summon Cost: 6,000 credits and 280 Enriched Copper
Combat:
The Igni Defence ship is a beastly upgrade to the igni assault ship, but shares the same weaknesses and fights about the same. It also has the capacity for more gear/options, so be wary of multiple walls, barrages, etc.
NPR – Resonites
Minimum Level Accessible: 75
Hotspot(s):
Lore:
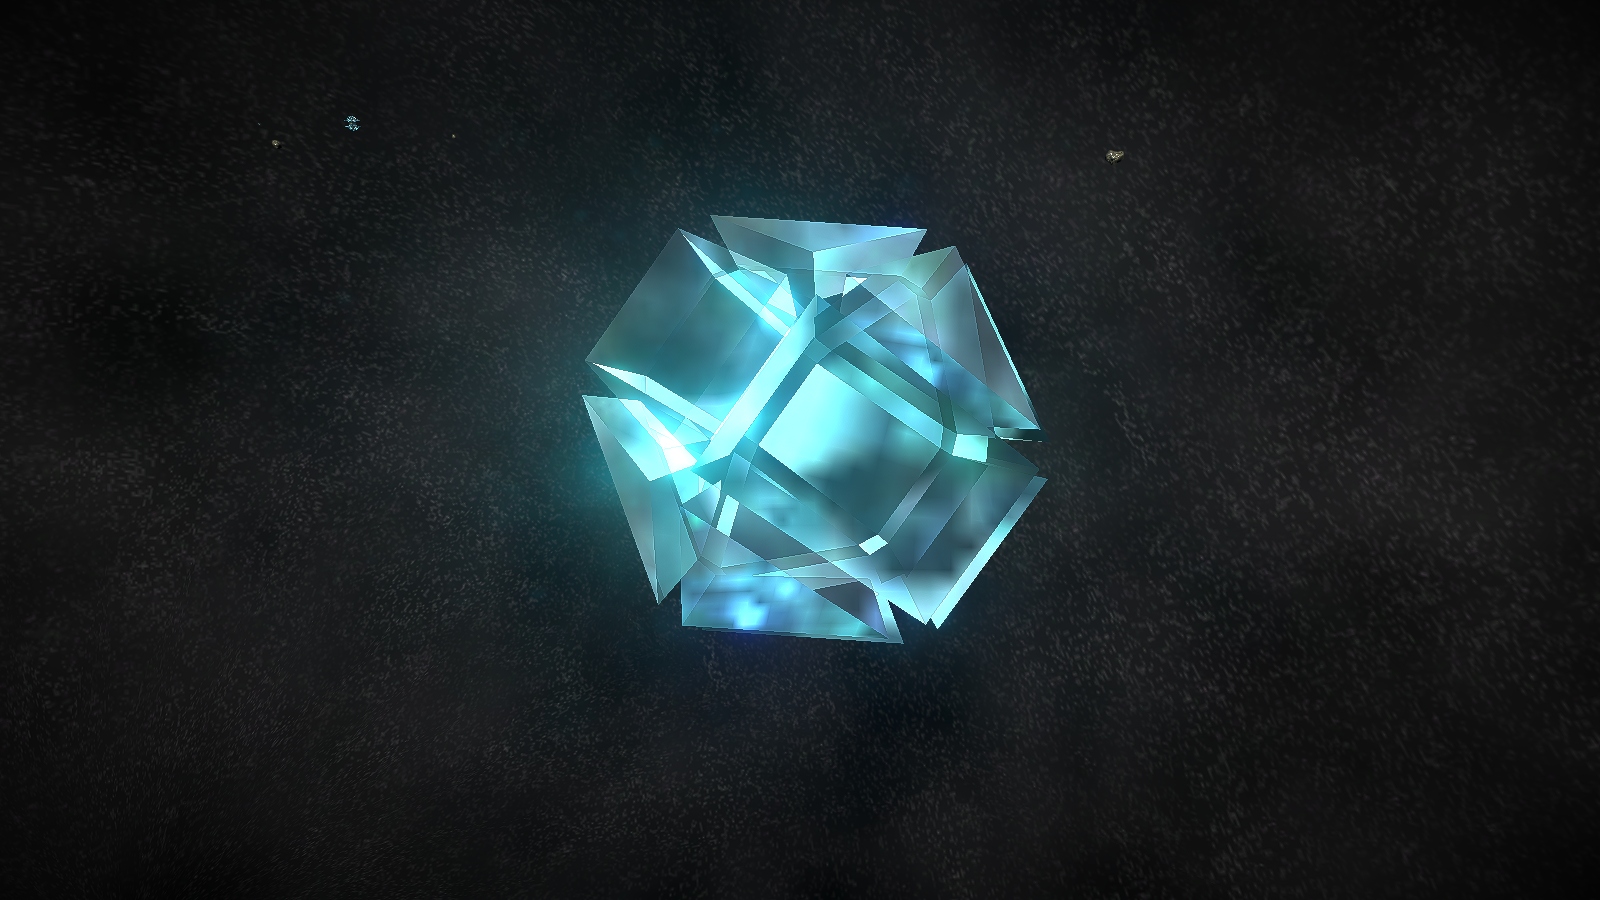
The crystalline counterpart to the igni, the Resonites sow terror through their disturbing movement, crystallization of objects, and powerful resonant weaponry.
Commissioned By: Ben
Combat:
With incredibly high-damage mines, means to close distance on targets, and a powerful primary and crippling resonance beam, Resonite Resonators are truly terrifying enemies. Their jumps move them towards their targets at high speeds, their mines do around 150 damage per hit (though thankfully can only be placed one at a time), their primaries are energy hungry, but do high DPS, and their resonant beam prevents the target from firing, while doing damage to shields and energy reserves. The key to fighting resonites is keeping constant distance from their jumps and their beam + primary combo. They are immune to laser and photonic damage, but similarly to relisk take increased damage from explosves – 2x, in this case. As a result, explosive long-range weaponry can make quick work of them before they jump close. Note that their beam does not prevent augmentation use, so a movement aug to escape is preferred. They can also deplete projectile attract, so that is ineffective at attracting weapons to them.
Engine Summon Cost: 4,000 credits and 165 Enriched Cobalt
Combat:
The Resonite Quartz is a beefier version of the Resonite Resonator – the same tactics apply, so take care to make plenty of space to prevent getting beamed down or jumped on. Often it is a good tactic to try and get it to aggro another target, leaving it vulnerable to high-damage explosives.
Drops:(10)
NPR – Prongworms

Minimum Level Accessible: 90
Hotspot(s):
Lore:
The deadlier evolutions of the Forkworms, Prongworms are much more resilient and dangerous, but are not nearly as numerous as their weaker, populous cousins.
Commissioned By: Ben & “JT”
Combat:
Similar to their Forkling cousins, Pronglings are close-range only enemies – but do more damage, have better stats, and inflict energy drain instead of recharge block upon a successful hit. Take care to not be swarmed, as the energy drain can leave a ship unable to escape the constant high-damage bombardment of the Prongling brainblast. Note they are still susceptible to gravity effects, chain lasers, and AOE effects.
Combat:
Prongworms employ the same rush tactics as Pronglings, but have further boosted stats and can take quite a beating compared to Forkworms. Take care to give Prongworms a wide berth and gun them down at long range.
Engine Summon Cost: 18,000 credits and 280 Enriched Nickel
Combat:
Boasting one of the highest shield capacities in the game, the Prongworm Queen is an absolute monster. Powerful brainblasts, slow-but-agile guided pronglets, and constant spam of Pronglings make the queen a constant threat. Due to its limited range, distance is again the weakness of the colossal worm. Again, ensure to avoid their energy-draining shots to prevent getting stunlocked and defeated.
NPR – Radii

Minimum Level Accessible: 90
Hotspot(s):
Lore:
The nanite-savvy aliens of Iota Leporis augment their ships and weaponry with advanced applications of electromagnetism – enabling them to create interesting tweaks on common technologies and assault enemies from afar.
Commissioned By: “Dmaster”
Combat:
Radii are known for their long-range weaponry and annoying defenses. They possess dumbfire photon bombs that can deal high damage and come in barrages/storm variants, incredibly long-range lock-on slugs that can deal high damage, hardlight barriers infused with nanites that can perfectly reflect energy weaponry, decoys that can scramble weapons, auto-aiming laser primaries, and a shield that can deplete up to 50% of any negative effect applied on their ships.
Photon-resistant shields, barriers, and agility are all good ways to prevent being storm one-shot from across a sector, as is a solid stealth system; though getting too close enables them to use their anti-stealth proxy and/or repulsion proxy. Effect-based weapons are usually wasted on them due to their ability to quickly deplete them, so it is best to use raw damage to defeat them. A signal scrambler, shield bubble, and/or stealth system is recommended to avoid constant slug bombardment within 300su of any Radii ship. Their barriers and regeneration can make combat at a distance difficult, so gear that circumvents barriers is recommended, such as the teleporting stinger or laser beam. The resonite shield in particular negates a good deal of radii weaponry, leaving only their projectile primary and slugs. It is crucial to avoid being targeted by multiple frigates without cover or counters, or they will make quick work of any ship.
Engine Summon Cost: 6,000 credits and 15 Enriched Gold
Combat:
The Radii Battleship possesses more agility and lock angle than it has business having – allowing it to quickly turn and barrage enemies with slugs and photons. The battleship also has access to the radii large weapon: the Mass Driver. This has a long, distinct warm-up during which the player needs to take evasive action, or risk massive damage and destabilization. Radii Battleships’ main weakness is their large size, which cannot hide behind a single barrier. This allows careful dumbfire and lock-on shots to weaken them before going in for the finishing blow.
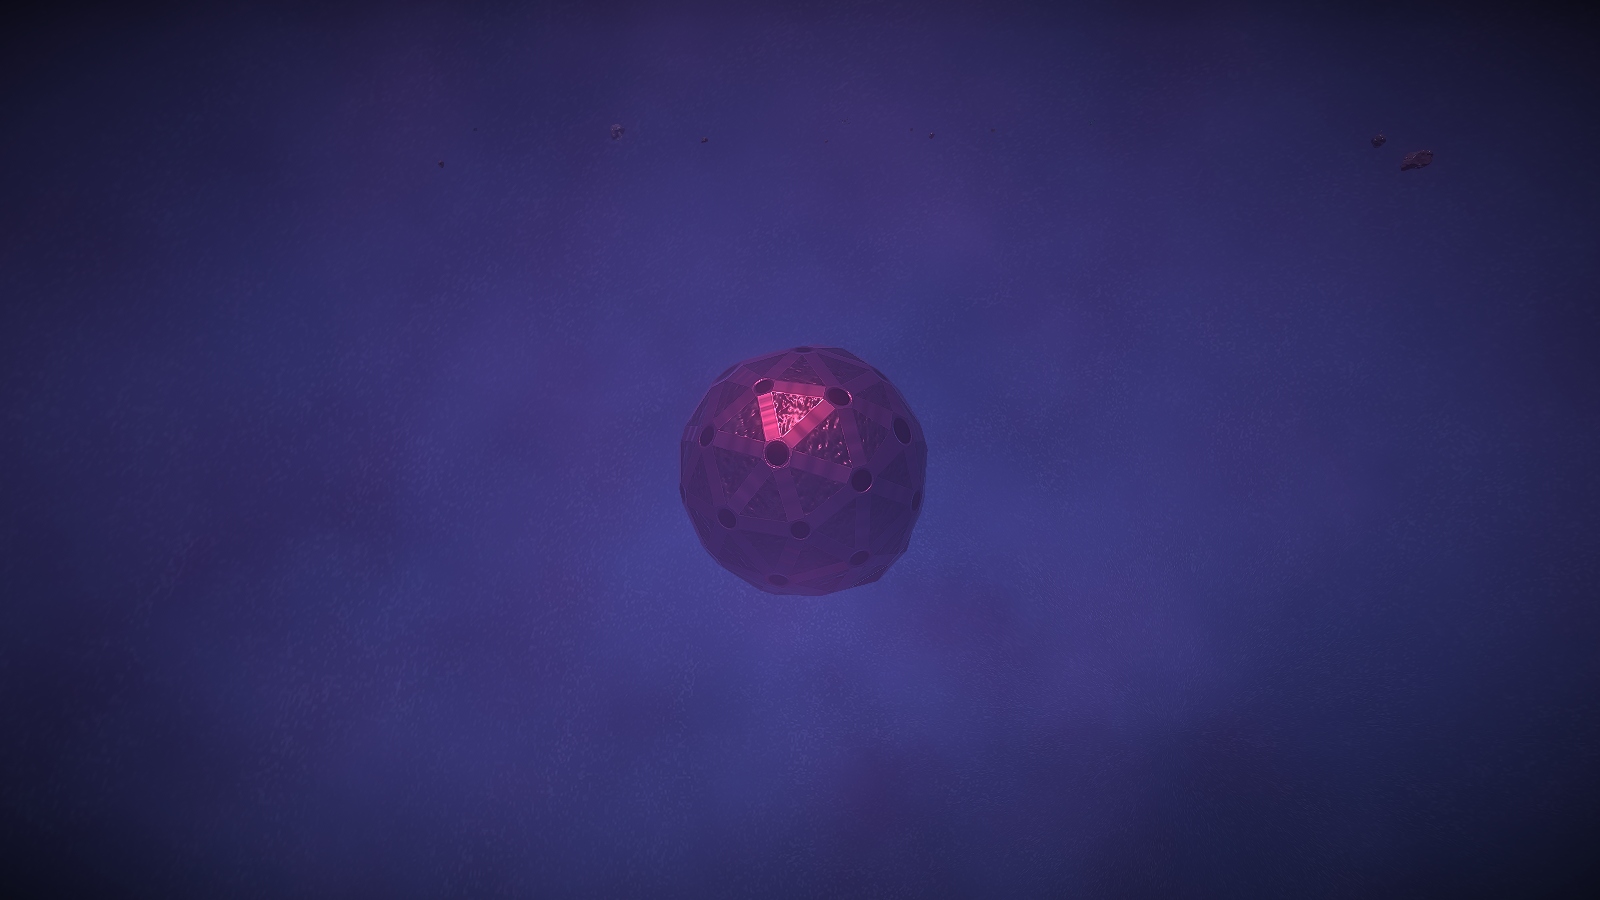
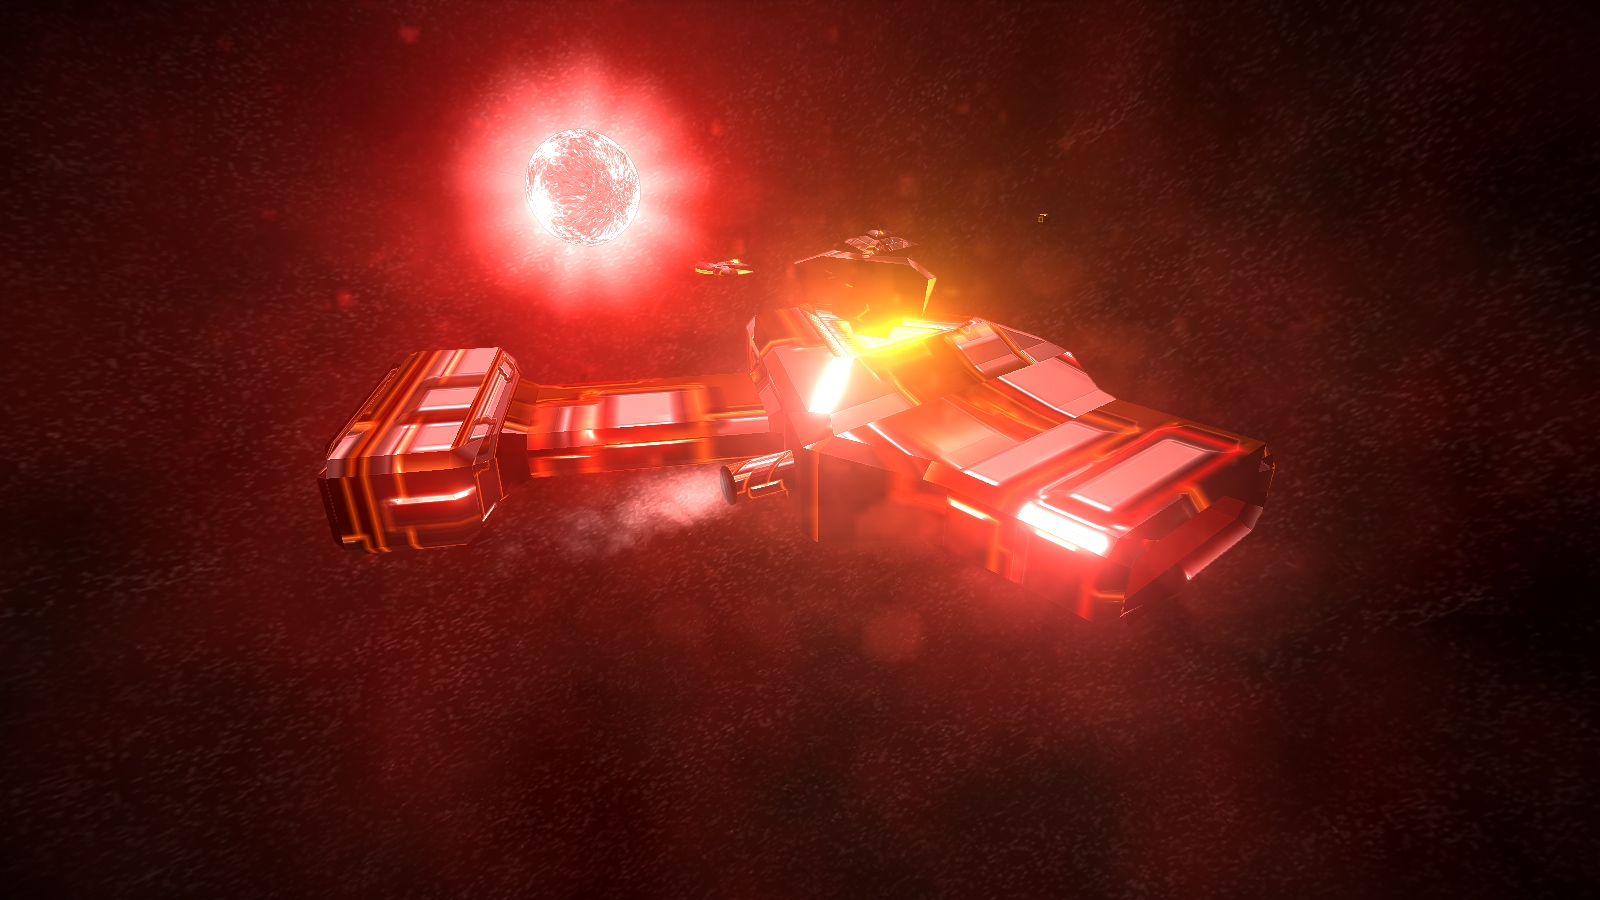
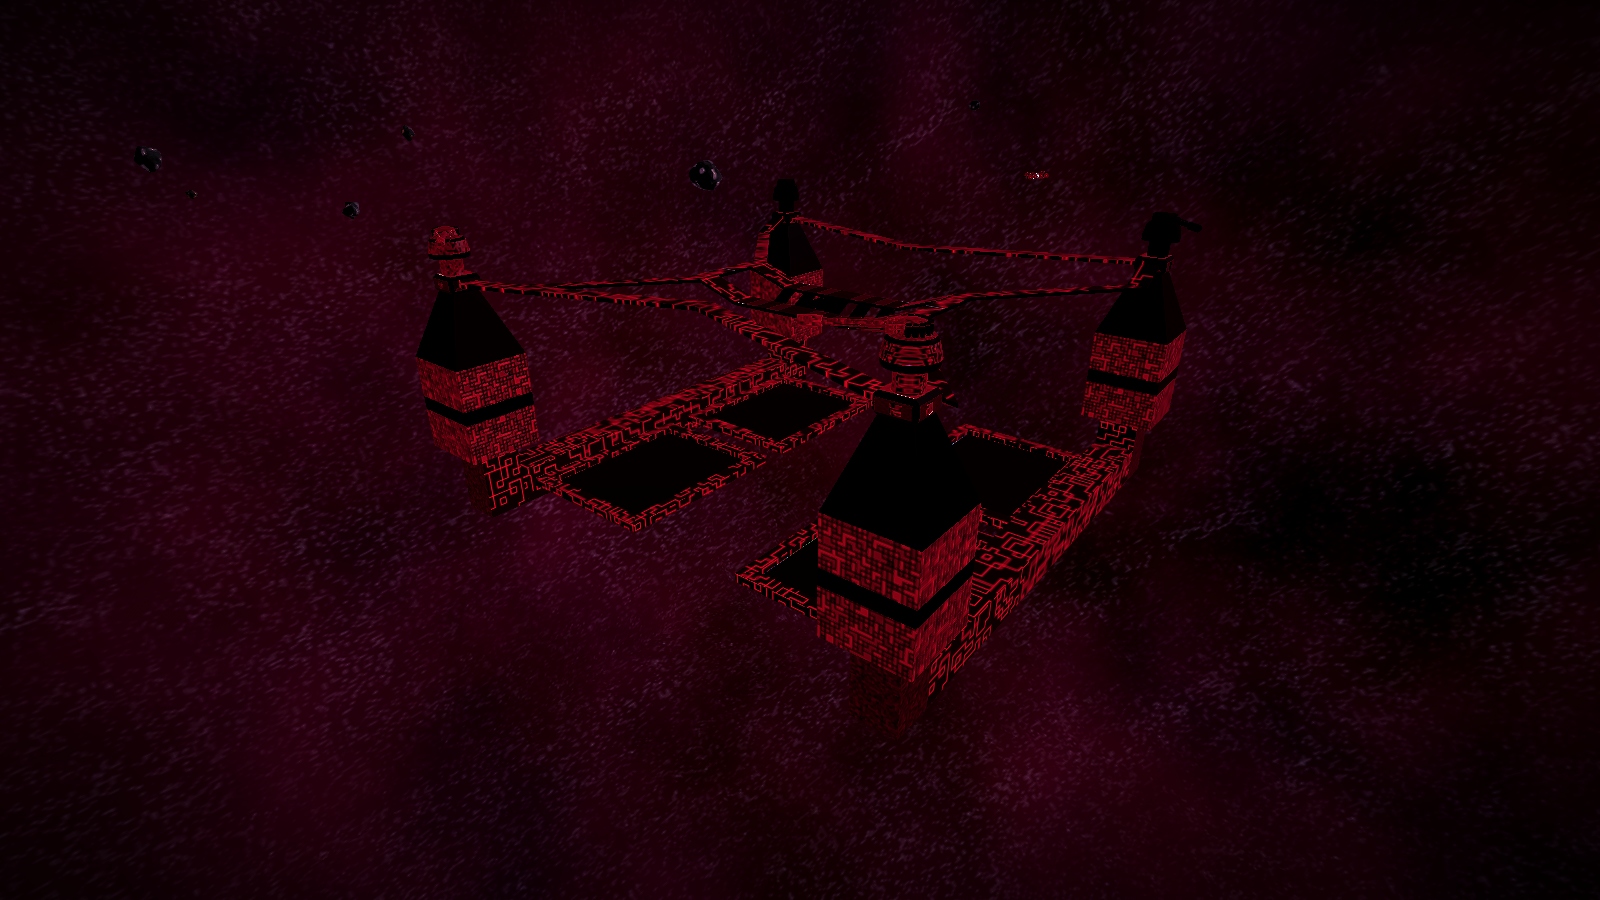
NPR – Red Mist

Minimum Level Accessible: 100
Hotspot(s):
Lore:
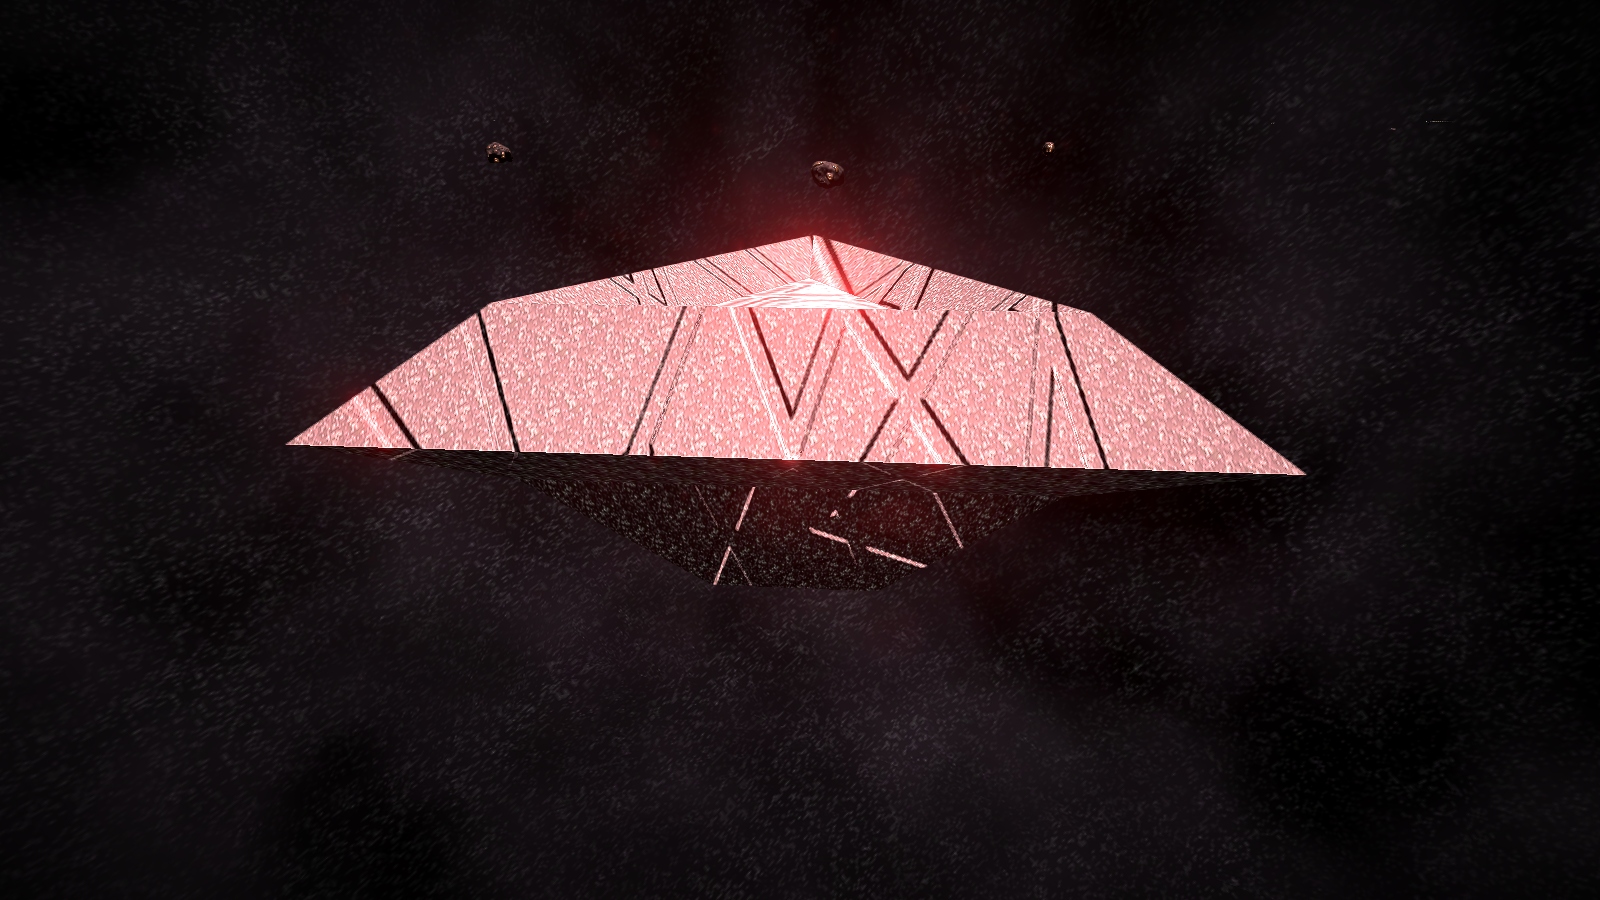
Addicted and consumed by the ominous energies of mysterious red crystals found in Epsilon Indi, the Red Mist expose enemies to the powers of the red mist in hopes of adding them to their ranks.
Commissioned By: “VoidViper”
Combat:
The Red Mist possess many weapons in their arsenal: drills that apply slowdown and do damage over time, short-range hammers with high damage and destabilization, lock-on spinners that become slower and more accurate over time, high-agility orbs that apply big doses of red mist, syringes that apply red mist, blades in the form of mines and proximities that apply red mist, a quick-use shield, and more.
The primary threat of red mist enemies are their ability to apply red mist haze, which gives the inflicted a 50% damage reduction. After reaching a few seconds of threshold value, however, red mist haze builds up red mist overdose, which causes damage to the inflicted the more they move – doing more damage the faster the inflicted moves. For this reason, the red mist ships have a high threshold for red mist via their shields, which allows them to effectively double their health under its use, while targets typically suffer damage from moving. This makes red mist application weapons more deadly than the consumed fighter’s other weapons, as effectively keeping a target still is more debilitating than standard damage. Red mist orbs apply the haze for the longest, and thus must be avoided at all costs. KFD, shield bubble, signal scramblers, barriers, and stealth can all avoid the orbs effectively. Syringes are dumbfire and fairly easy to avoid, but also apply the haze. Spinners do quite a bit of damage and must be constantly evaded or countered to avoid high damage. Hammers are quite easy to avoid by staying out of range, as are bladed weapons.
Typically the most effective tool against the red mist is range and using slow-moving, high-damage weaponry to abuse their slow speed and counter their damage reduction. Multiple attack angles are suggested to counter their temporary barrier, the scutum. Effect-reducing shields, like the endurer, can allow the user to shrug off the red mist haze and overdose.
Engine Summon Cost: 7,000 credits and 45 Enriched Platinum
Combat:
The Consumed Mist Carrier has a full arsenal of red mist tools at its disposal, along with the ability to effectively double its health using the power of red mist coupled with its resistive shield. The Consumed Mist Carrier also has access to hammer arrays as well as misted orb arrays, which can stack an incredible amount of red mist on a target if not countered using an anti-lock or barrier. Additionally, the red mist slammer large weapon can cause immediate concussion along with a long red mist effect after a few seconds delay, which can absolutely shut down quick builds. Ensure any quick-fighters have some solution to having to hold still temporarily, because it eventually will happen. Due to its size, the Consumed Mist Carrier is much easier to hit with slow, high-damage weapons at range, effectively nullifying any real threat other than the red mist slammer and the occasional spinner.
NPR – Devimon

Minimum Level Accessible: 100
Hotspot(s):
Lore:
Dwelling in the inky blackness of Sagittarius A, Devimon are a hellish race that hail from another dimension. Wielding powerful demonic weaponry, the devimon are a threat to any visitor of the supermassive black hole.
Commissioned By: “Lancelot”
Combat:
Devimon Sprites have access to a variety of weaponry, despite only having access to a primary and single secondary weapon. Illusion seekers are slow-turning, high top-speed lock-on weapons with high damage and a long illusion effect that distorts the screen, hellfire blasters that are amped-up xand blasters that apply hellfire, hellfire spheres that are slow with extremely high damage, stealthed spikes with high knockback, and fireballs as their primary weapon.
The main dangers of the devimon are the fire DOT and the hellfire DOT. The hellfire DOT does almost twice as much damage as normal fire, but usually depletes much quicker. Stealthed targets under the effect of hellfire can be locked onto, so stealth is not recommended. Hellfire spheres are easy to avoid, but should always be kept in mind, as a max level sphere can almost one-shot medium-shielded ships. Spikes are spammed quite frequently, so it is best to not fly in straight approach vectors, but rather a serpentine approach or a fly-by. Fireballs are quite easy to avoid in the same method as the spheres.
As expected, thermal shields are the best bet to take on Devimon in general, along with speed and a solid anti-lock item. Note that their shields make them highly resistant to fire and gravity-based effects. High-damage lock-on weapons are effective as well, as the Devimon have no long-range counter to lock-on weapons.
Combat:
Devimon Frigates are more tanky than sprites, and have access to hellfire mines and illusion mines, which can pack quite a punch, especially with the gravity of Sag. A pushing them around. Devimon Frigates also have added access to ice/heat proximities, which are both negated by a thermal shield or effect reduction shield. Frigates also have utility access, which allow them to use various runes that apply curse (increased damage on afflicted targets), energy drain, slow, and scanner jam.
Engine Summon Cost: 7,000 credits and 90 Enriched Xand
Combat:
The Devimon Dreadnaught has access to all previously mentioned gear, along with the Devimon Portal – which summons several sprites before applying a fairly long curse on all targets in the sector. It is advised to keep distance while the curse and portal are being used, then pick off the sprites before harassing the Dreadnaught. Long-range guided weapons can make the encounter quite trivial, with the user only needing to avoid spikes and fireballs, along with the occasional hellfire blaster. Given its large size, dumbfires can even be used at range if the user adjusts to the pull of Sag. A on projectiles.
Drops:(43)
Closing
If you used this guide and enjoyed it/found it useful, feel free to leave a like, favorite, or rating – it helps visibility for other players who may find it useful as well. Happy flying!
Special Thanks
- Darty, for organizing data/stats exported from the game
- Ben, for providing the data export and making an amazing game
- Wurmish/Advisor Libra, for providing commission information
- TmickyD, for errors and some new info