Overview
Learn how to bind your own custom VR controls using the SteamVR action binding system
Accessing the input binding window
(please note: SteamVR may be updated in the future and this process may change)
You can open and edit your VR controls bindings from within your VR headset.
Simply open SteamVR and launch Rolling Line, then while in VR, press the system button to open the standard SteamVR overlay.
As long as both SteamVR and Rolling Line are up to date, you should be greeted with this view:

From here, use the “Controller bindings” button.
This will bring you to a menu with various input binding options:
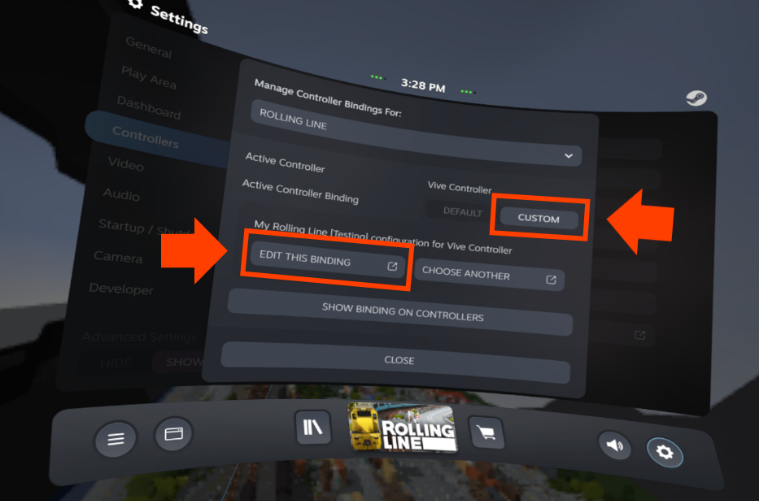
From here, toggle the “active controller binding” from “default” to “custom”.
Then choose “edit this binding” as shown.
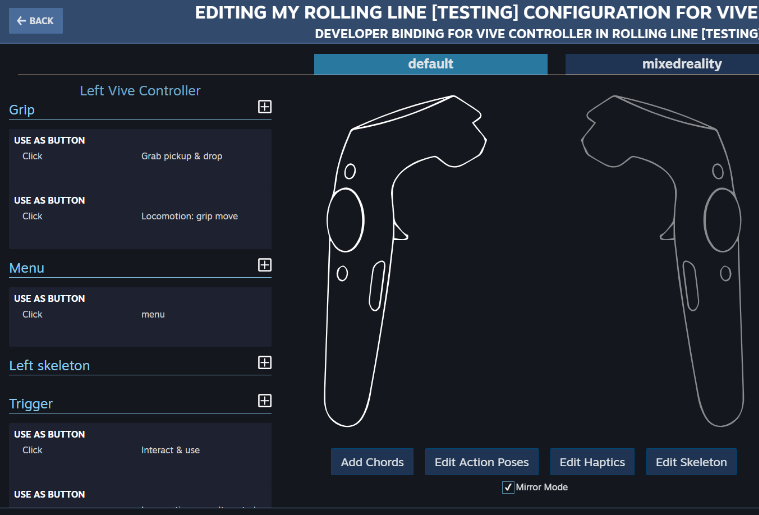
This will open the full SteamVR bindings window, which looks like this:
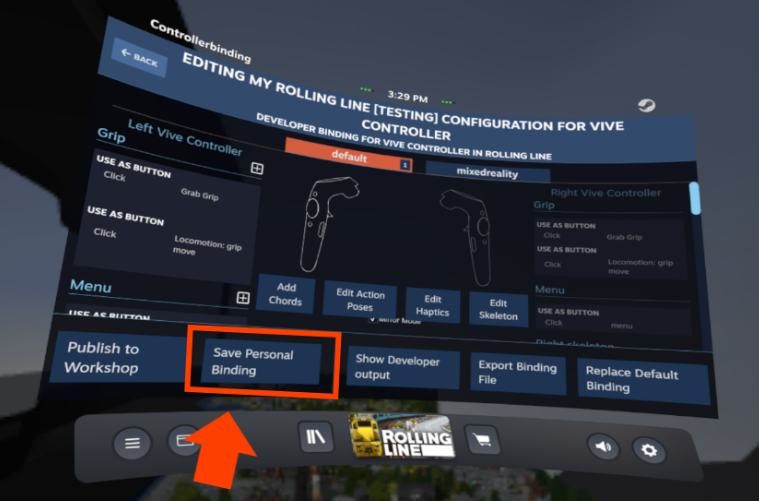
From here you can manually change bindings as you please.
Once you are happy with your bindings you can press “Save personal binding” to save your new control scheme!
The next section of this guide will explain what each action does, and how to make full use of the Rolling Line control options.
What each action does
Once you have the SteamVR action binding window open you can customize what each button on your controller does.
All the different options for what a button can be bound to are known as “actions”.
These range from locomotion controls, to picking things up, to the context up/down/left/right options you see when hovering over an item.
Here is the full list of possible actions:

I will now go in to more detail as to what each of these actions does and how to bind it.
This is the basic “use” button (usually the trigger) which is used to click buttons, clone items, click menu items, etc. This can be bound to any standard button or trigger on your controller.
The button used to go to the in-game menu. This can be either a button/trigger or even clicking a thumbstick if you choose.
This is the button you hold and release to teleport around in in the scale you are currently in (e.g. when in miniature, continue to teleport in miniature, when in large scale, continue to teleport in large scale)
This is the button you hold and release to teleport between the two scales (large and miniature). If you are in large scale and press this, you will teleport into miniature, and miniature into large scale.
This is the button you hold and release to teleport around in large scale.
Use this instead of “current scale” and “toggle scale” if you prefer this style of teleporting.
just like large scale, this is the button you hold and release to teleport around in miniature scale.
Use this instead of “current scale” and “toggle scale” if you prefer this style of teleporting.
This is a default action used by the Valve Index controllers, you dont need to bind this and it can be ignored.
The button/trigger used to pickup, hold and drop all items. You can change the grip behavior further in-game and choose between options like “hold to grip” (where the button/trigger must be held down to keep the item in your hand) or “toggle to grip” (where pressing the button/trigger once will pick up the item, then pressing it again will drop it).
Locomotion: rotation snap right
When manual rotation is enabled (without smooth rotation) these button bindings are used to rotate in snap amounts (like 90 degrees on one button press).
When manual rotation is enabled as well as smooth rotation, this binding is used. This is a smooth value which can be bound to a touchpad or joystick.
When directional movement is enabled, this binding is used. This is a smooth value which can be bound to a touchpad or joystick.
When grip movement is enabled, this binding is used. Grip movement is when you hold down your grab button to drag yourself around in space. This cab be bound to any button/trigger.
You may choose to bind this to a separate button from the pickup button if you prefer to separate this movement from picking things up, for example.
This is a bit of a complicated one. with some control schemes (e.g. the default Vive bindings) the directional movement controls overlap with the teleport & rotation controls. The solution for this is to have an extra button that can be held to switch between control schemes.
So this means that if you choose to bind this action then this button must be held to use the teleport & rotation controls if trackpad locomotion is enabled.
For example, in the default Vive bindings:
– The D-pad is used for directional movement, but it is also used for teleporting (up/down) and rotation (left/right).
– The “use alt control scheme” button is bound to the trigger.
– This means that the D-pad is used for directional movement, but if you hold the trigger then the D-pad is instead used for teleporting and rotation.
– If directional locomotion is disabled, then the teleport & rotate controls behave as normal, and trigger doesn’t need to be held.
If you dont want to use this feature, and you have a control scheme set up where directional movement doesn’t overlap with anything, then simply leave this action unbound.
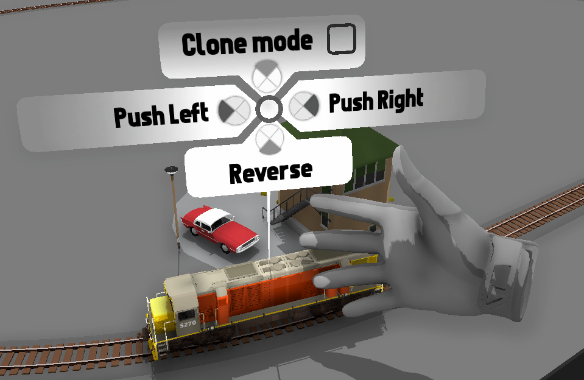
Context action down
Context action left
Context action right
These are the directional buttons used for the “up/down/left/right” actions shown when hovering over an item in game. This includes cloning/reversing trains (up/down), changing the speed of trains on a held controller (left/right) etc
This joystick/touch-pad value is used to display the “selector” dot when hovering over items to aid in choosing a context action. This should be bound to the same joystick as the “Up/down/left/right context actions”
With these options you can customize the control scheme as you please, and even upload your binding to Steam for others to use!
If you have any questions please ask in the comments section below.