
Overview
This guide will lead you through SteamWorld Dig’s many secrets. If you’re looking to pick up the glove that is the Master Prospector achievement, knowing where the secrets are will help you a lot.
Foreword
Secrets in SteamWorld Dig are sometimes hard to spot, especially early in the game, so here’s a little guide to help you.
Note that this guide is best consulted after you’ve finished the game. There will be some minor spoilers in this guide as I will need to mention the upgrades you get for use in getting those secrets, and certain key locations that progress the story. Just play the game naturally first. I promise you, you won’t regret it :).
I will go through all secrets in order of depth, not chronologically. I might do a youtube video of all secrets later on – that will get added to this guide as soon as I have one. Of course, feel free to make a video of this yourself and link it to me, I wouldn’t mind either option.
There are 19 secrets in the game. 3 in Archaea, 6 in the Old World, and 10 in Vectron. So let’s get to it!
Area 1: Archaea
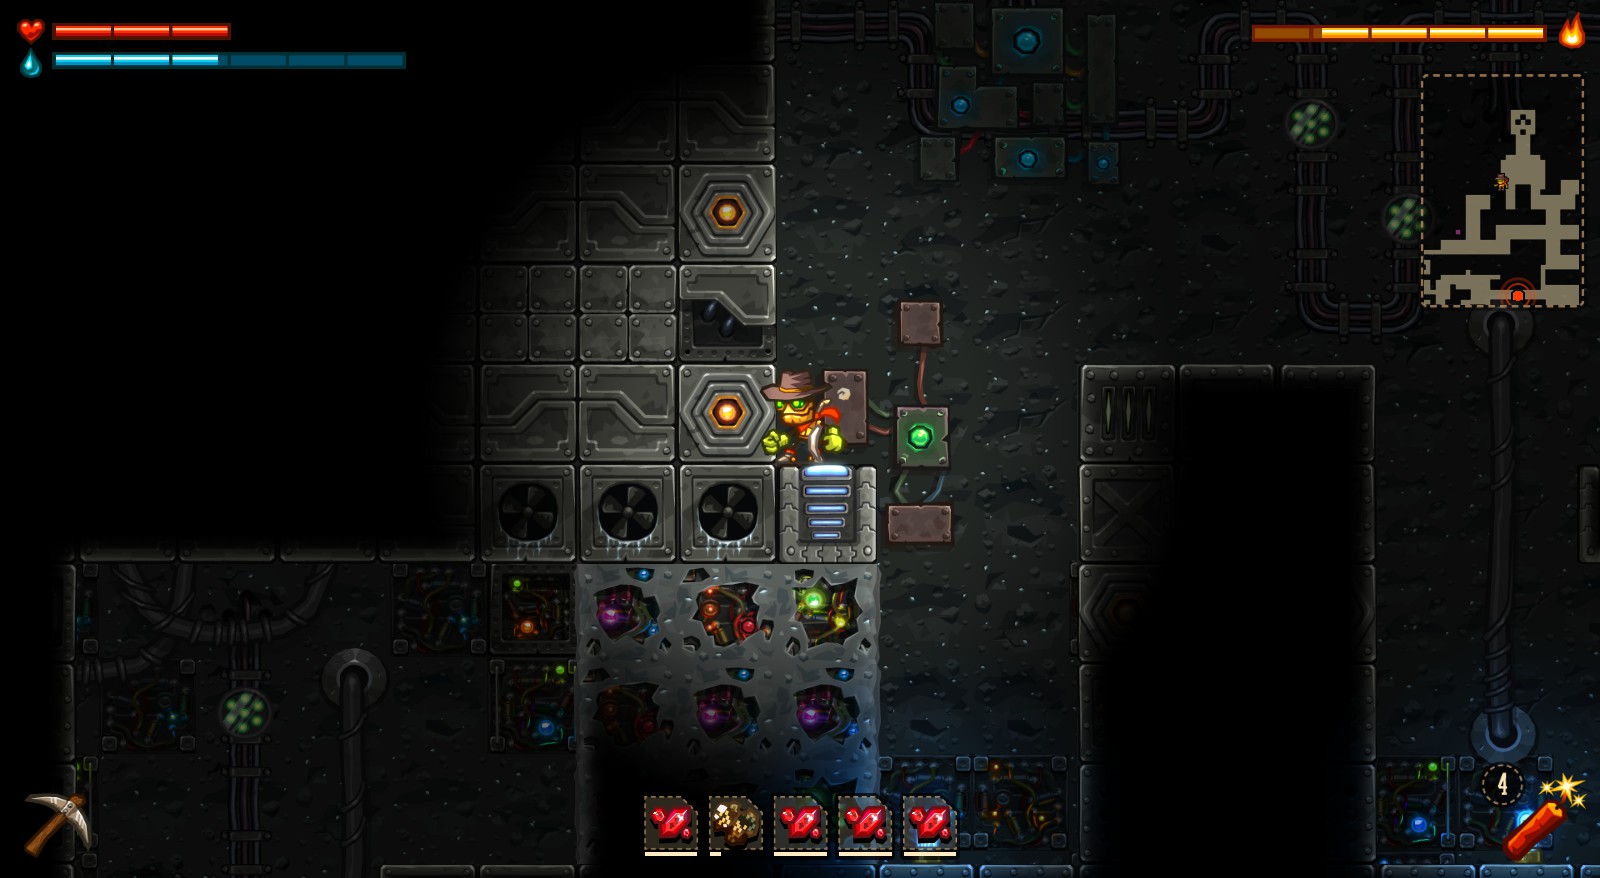
This secret is located in the generator room. As you enter the room, simply walk to your right. The secret is right beneath your feet.
This one is slightly further down the generator room. At the point where you need to break the dirt for the little magnet to create a platform on the right side, head slightly more to the left, then mine upwards. Secret get!
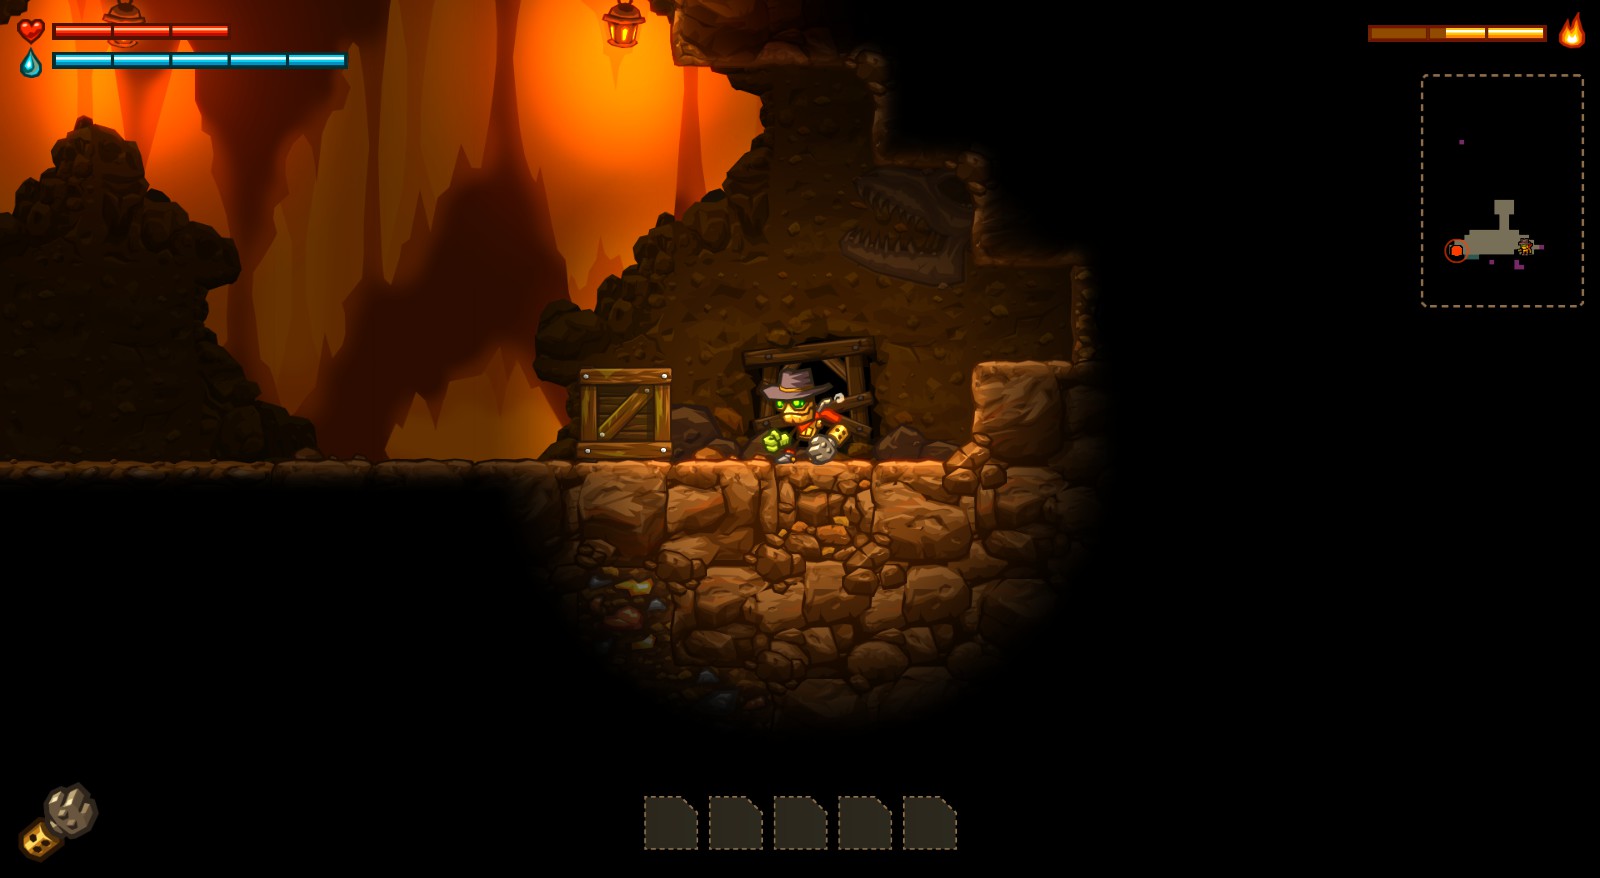
This is the cave where you get the drill, all the way at the bottom of Archaea. Just enter it, jump past the trilobites on the left, then jump to the patch of dirt right above the entrance. Break it open, and voila, secret get!
That’s it for Archaea. Easy, right? Next stop: Old World!
Area 2: Old World
This secret is located in one of the optional caverns in the Old World. Enter the cave, jump down, (kill the shiner,) bounce your way through, then in the little corridor on the right, hit the patch of dirt for a secret.
With the Static Dash, this secret is very easy to get. Just jump up all the way, then walk to the right until you see a sleeping shiner. The secret is a patch of dirt to the left of the guy. Without the static dash, however, you’ll need to go all the way around. To the left, down the ladder, past the acid, up the ladders, past the acid again, kill the bottle-throwing shiner with TNT, then jump up the wall above him and head towards the sleeping shiner.
This one’s easy. Just walk towards the left and hit the wall.
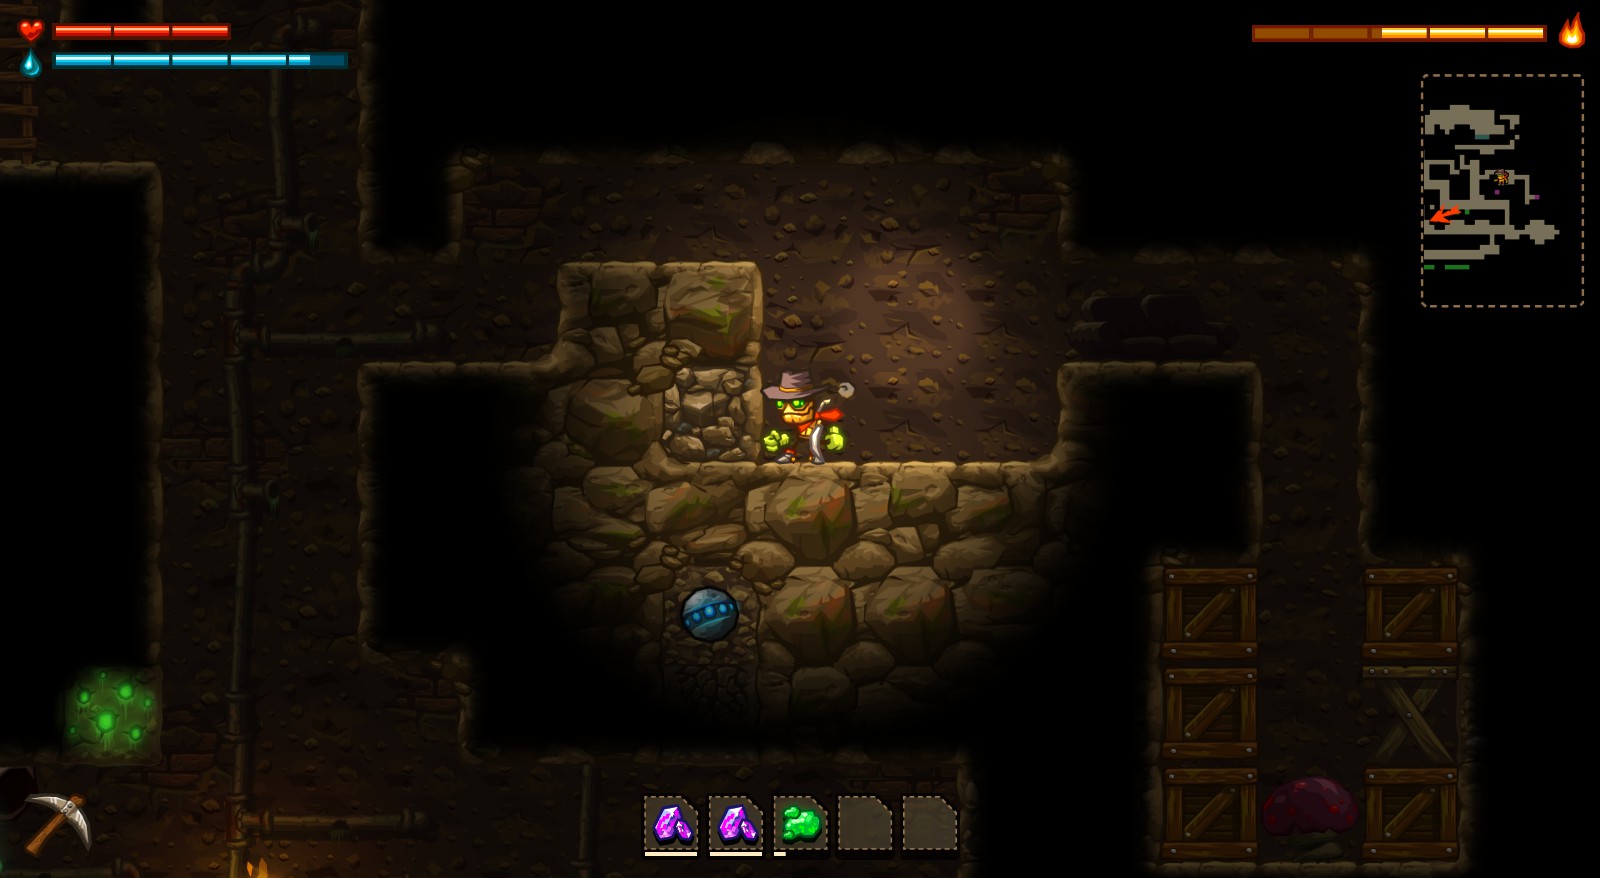
This secret had me confused for a little while. Just take the bouncy mushrooms to your right and jump all the way up until you see a large orb stuck in dirt in an inaccessible area. The lantern isn’t bright enough to fully light up the secret tile, but in the screenshot it’s visible. Just break that block and you’re good to go!
There sure are a lot of secrets in here. In the room where you get the fall dampeners, there’s a patch of dirt in the left wall. You’ll need the steam punch for this, as ladders can’t be used in caves. Break it open and the secret pops up.
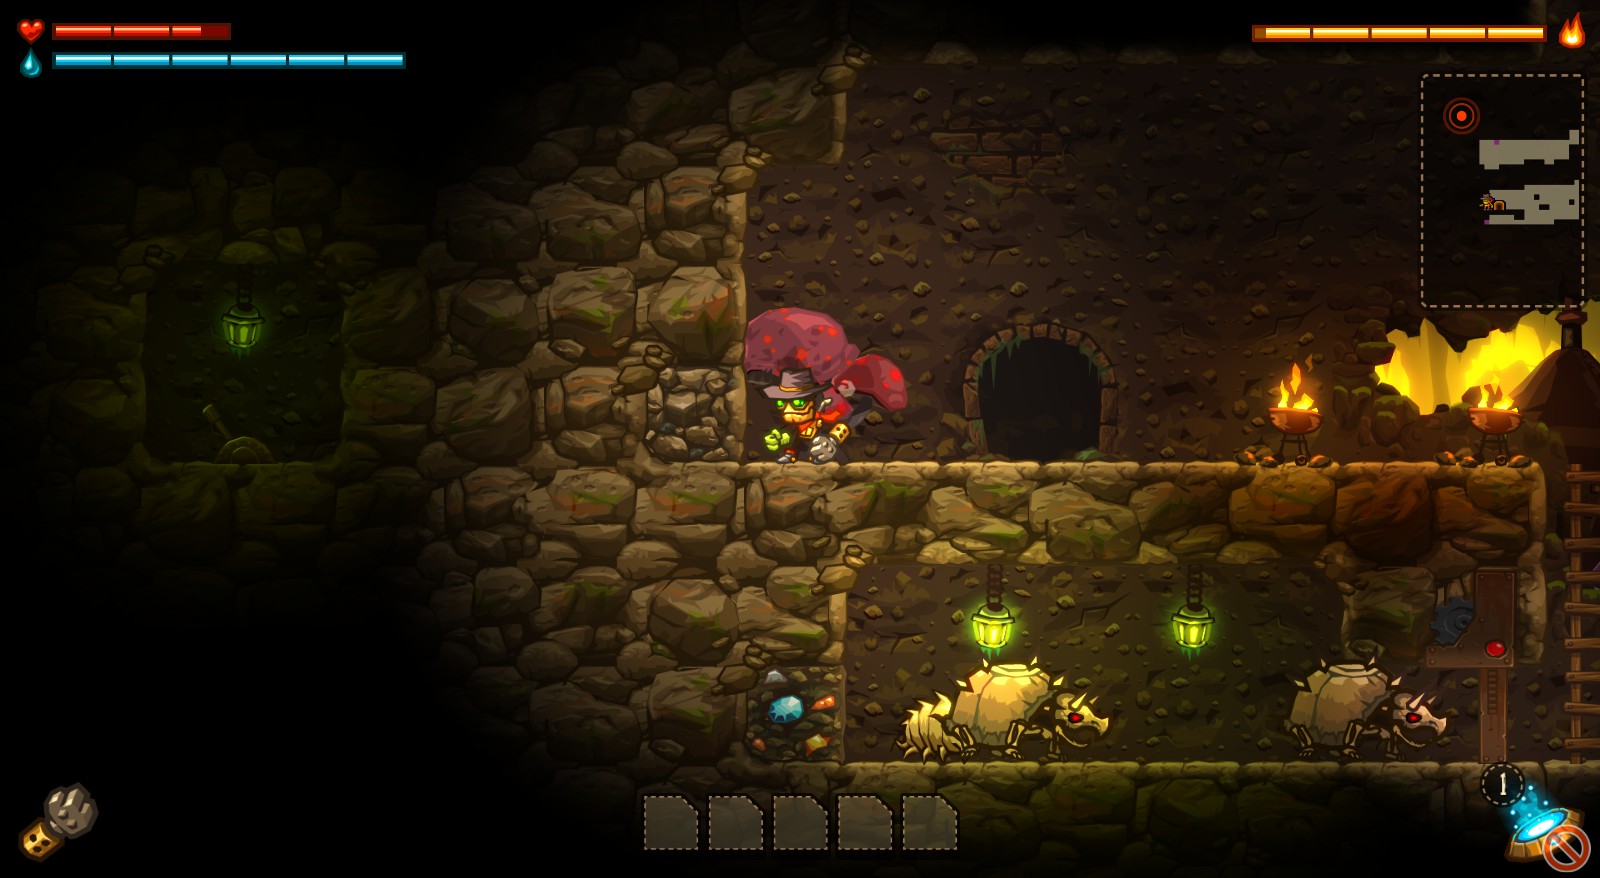
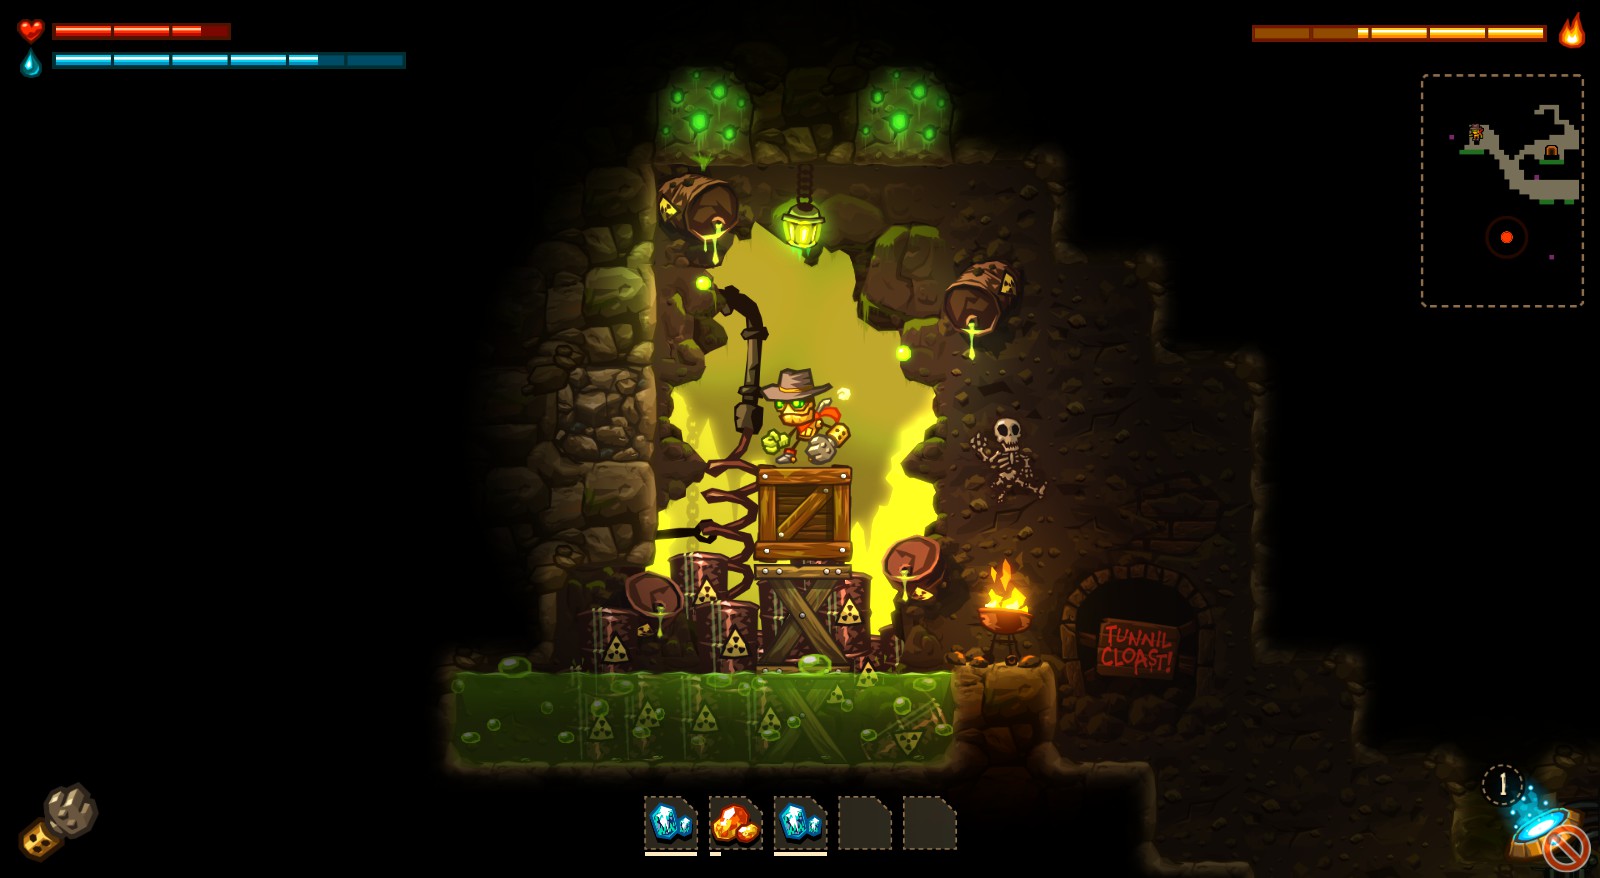
The final secret you’re looking for in the Old World is in the generator room in Cave 5. Once inside, head left, then go up to the crates placed carelessly over an acid pool. The trick to being able to get to this secret is to either use dynamite on the top crate immediately, or step on the gap in the crates, punch the one above you, then take out the crate you were standing on (from a safe distance). The last crate will help you access the secret. That’s it for the Old World, let’s leave this post-apocalyptic mess!
Area 3: Vectron

From the entrance, head left, jump up to the maze, and head right. The secret is right in front of you.
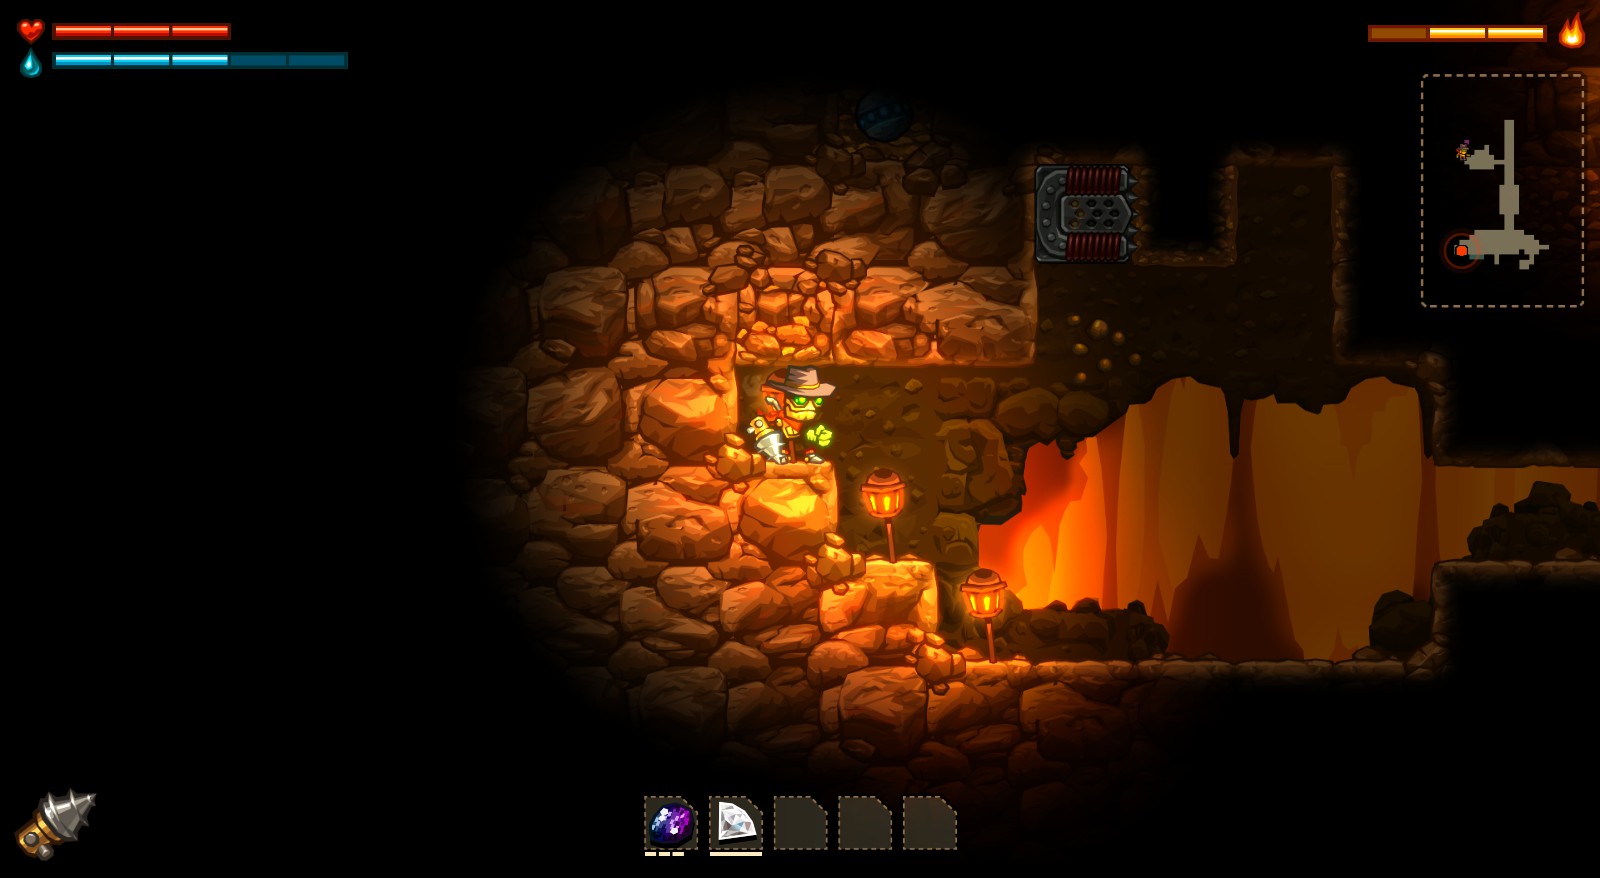
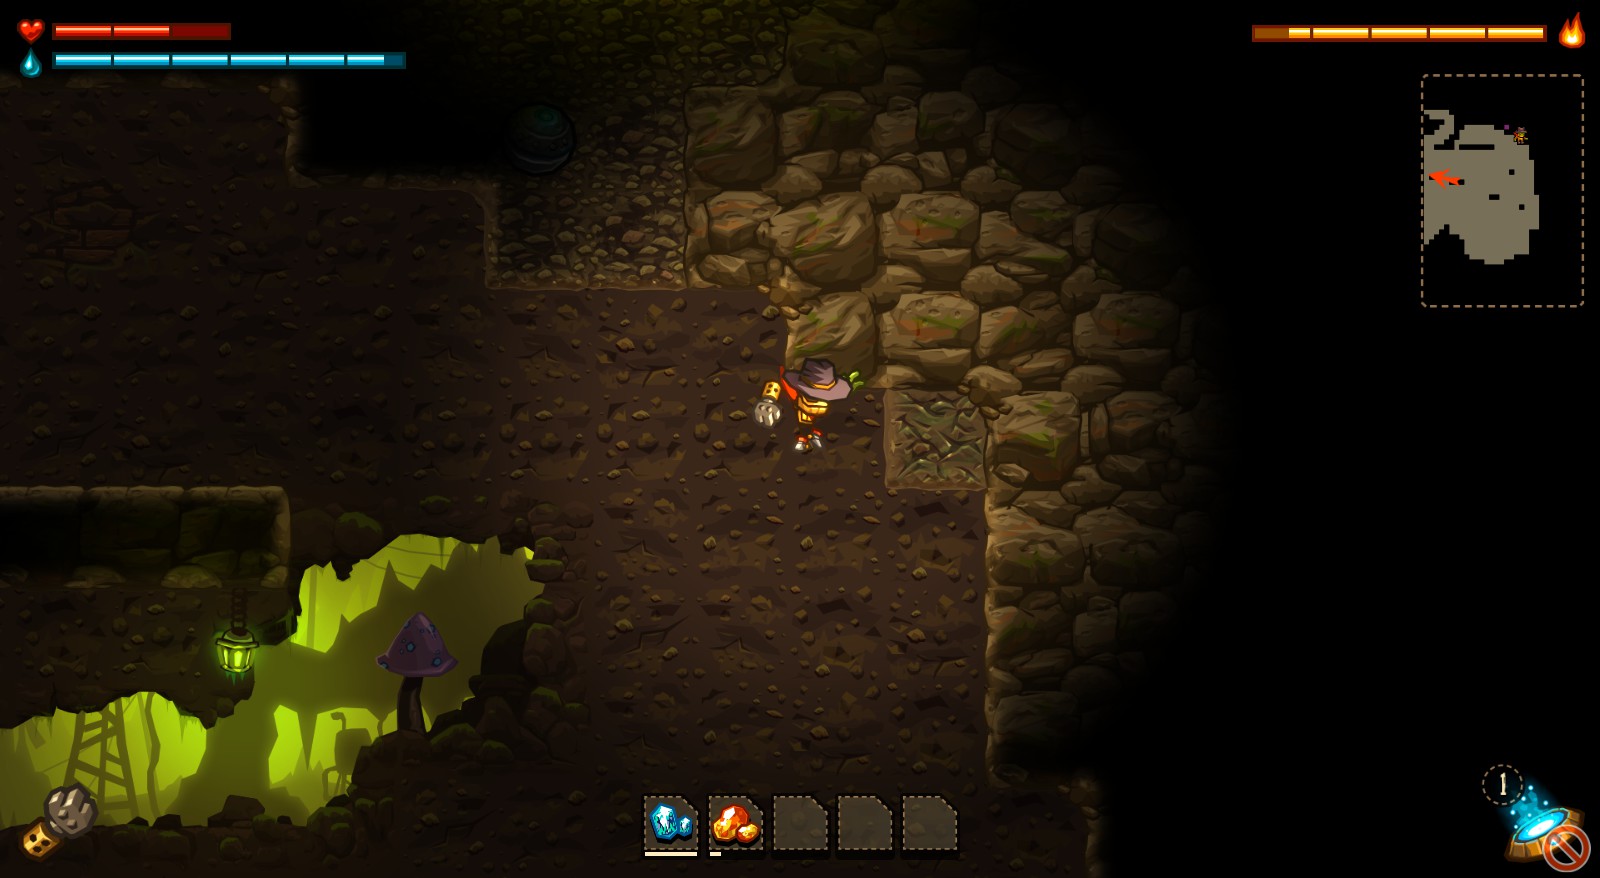
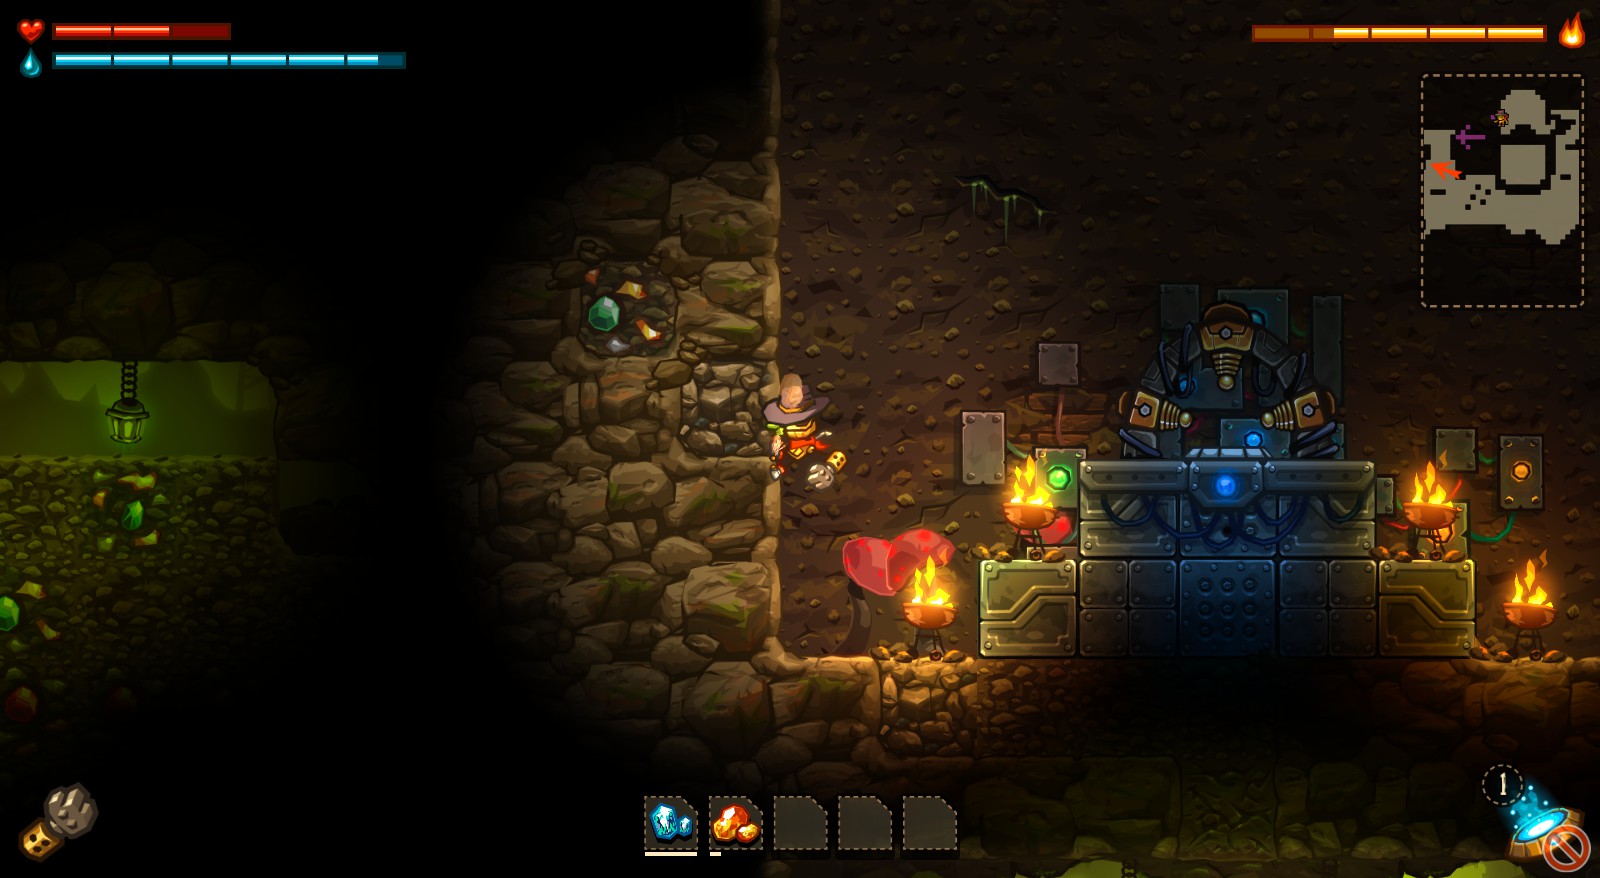
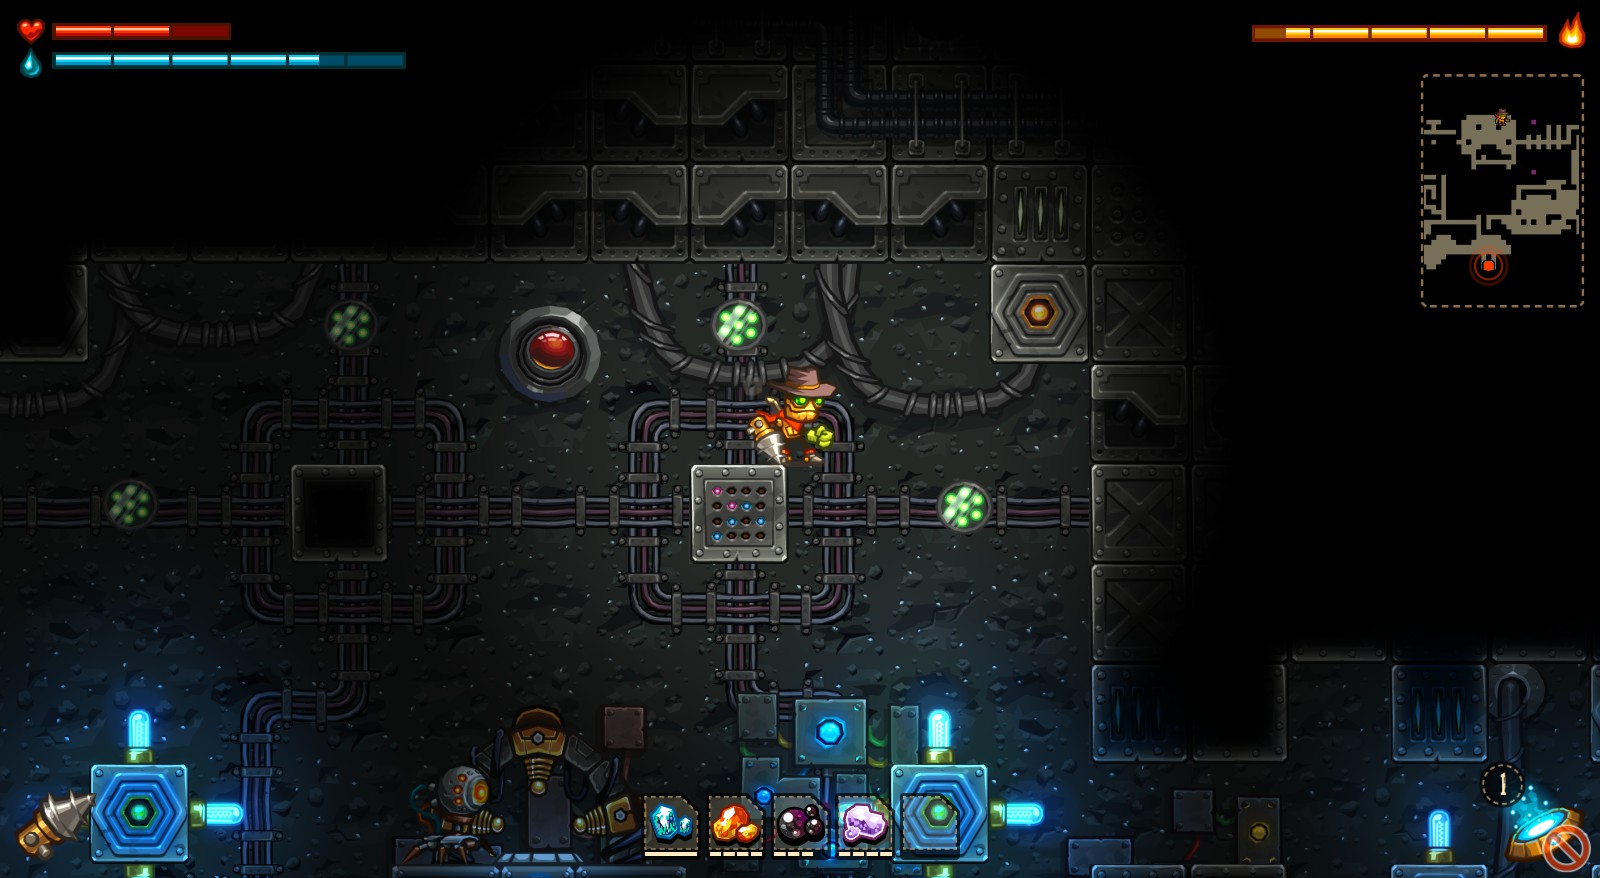
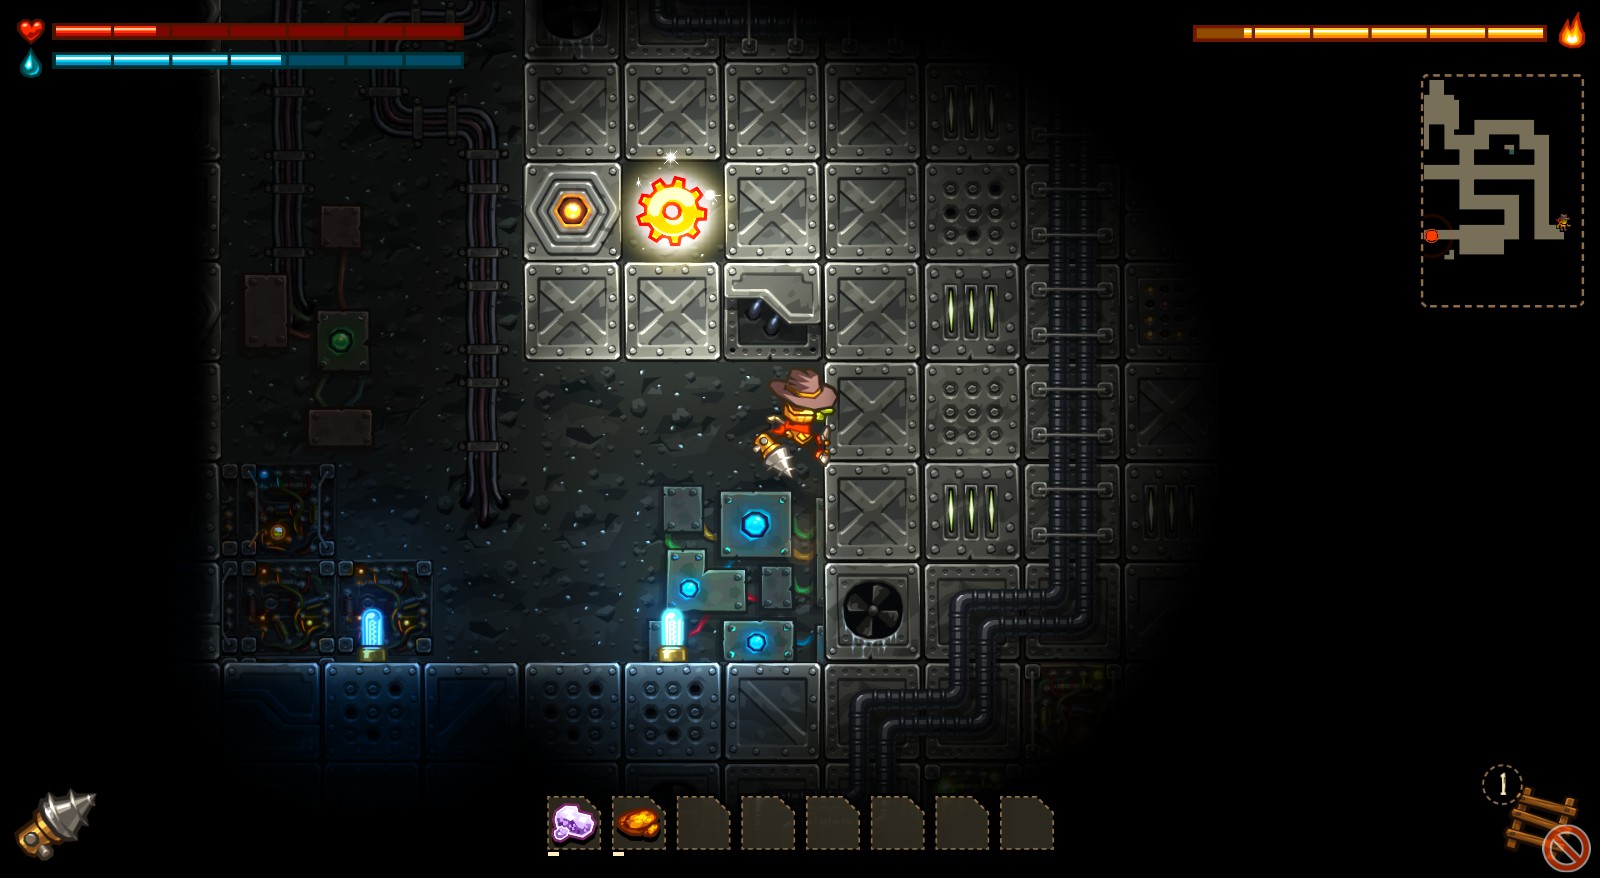
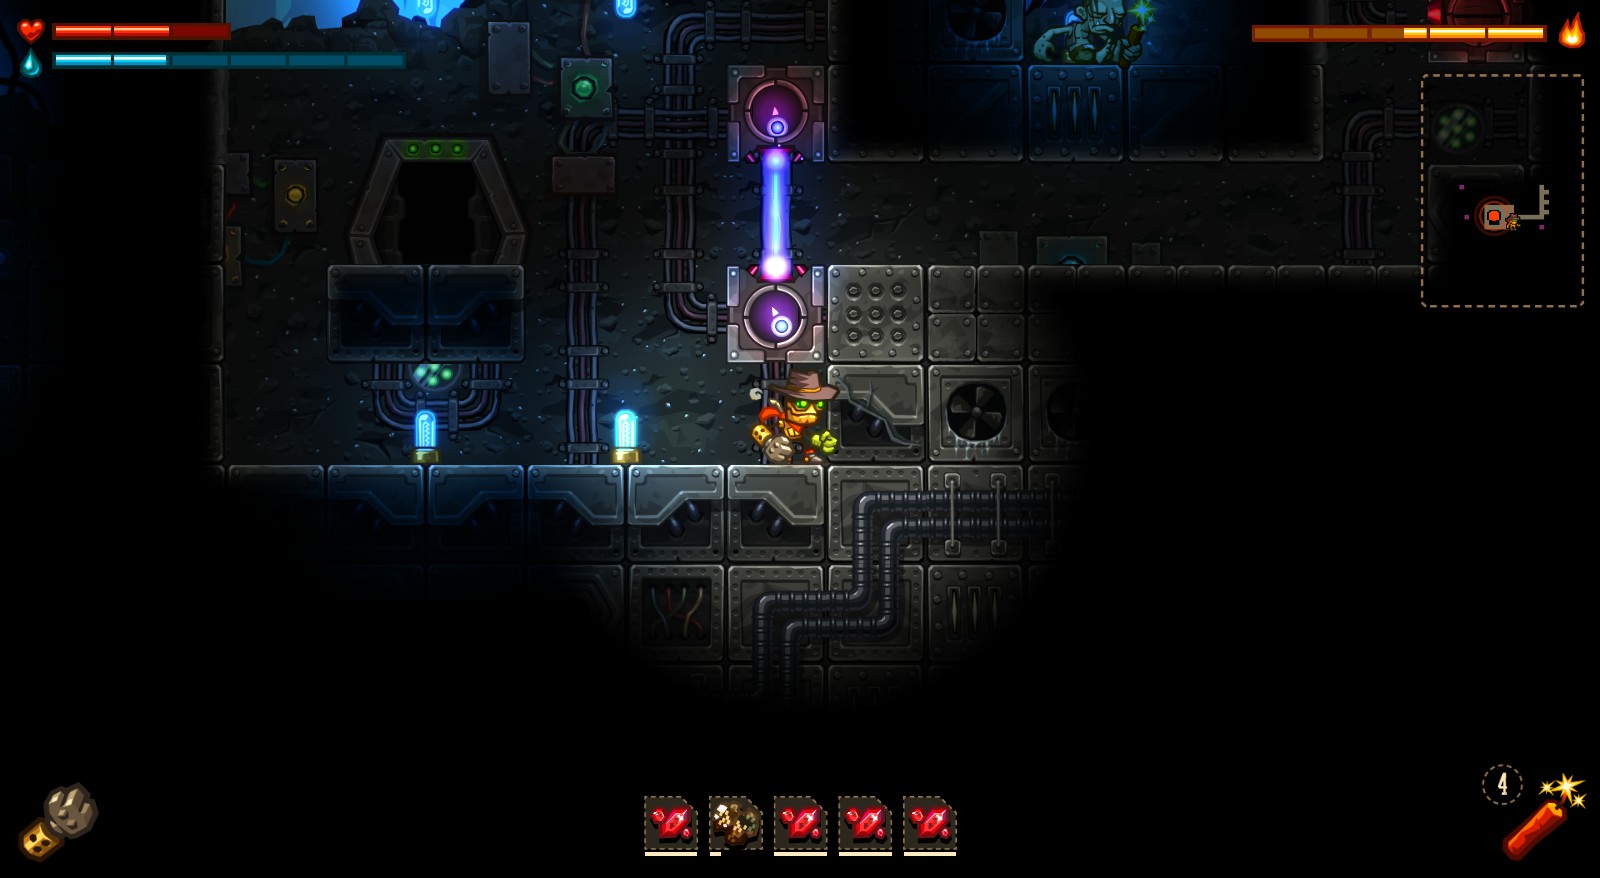
Once you get the mineral detector from the room specified in the screenshot above, hop on up to the top right platform, and hit the right wall with one or two fully charged steam punches for the secret message to pop up.
You won’t be able to get this secret without destroying the generator first. Once that’s done, jump up to the top corridor and punch a hole in the ceiling.
This secret, again, won’t be achievable without the generator destroyed. Just come back to the turrets when that’s done and break the left wall. The road to the actual ore is quite far, so this secret is easily missable.
Right after jumping past the lasers in this cave, jump down, step a few tiles to the right, and punch upwards. You’ll get this secret. (Thanks to Deputy Dingby for pointing this one out!)
Right from the generator room, you’ll see a pool of water in a wall, along with some ore. Hit the block to the right of that ore.
Once you’ve destroyed the generator, hop back down to the platform you steam jumped from, and use steam punch on the wall to your left. This is another easily missable secret.
This one’s easy. It’s under the lower laserbox, to the right.
Try not to die as you dodge the crazed exploders in this room. The secret is beneath you once you’ve passed them.
The final secret you’ll get before you face the antagonist of the story. You can sprint past the laserboxes at the beginning, but you WILL get hit, so just deactivate them temporarily. The block you need to destroy is past those lasers.
And there you have it. All secrets found and achievement get!