
Overview
This is a guide to surviving Survival Mode to 100+ population without spending any real-world money for Lunchboxes or Mr. Handies. If you’ve tried Survival Mode and found it frustrating because you’re getting wiped out by Raiders or Deathclaws, this guide may help you.
Introduction
This is a guide reaching 100+ dwellers in Survival Mode without spending any money on Lunchboxes or other premium items. When I mention Lunchboxes and Mr. Handys in this guide, I mean items you’ve picked up by fulfilling goals and finding items on quests.
Be aware that your Dwellers are going to die, often in unreasonable ways. Don’t get frustrated if a dweller with hundreds of hours of experience dies. You’ve probably spent only a few minutes actually doing anything with them, even if they’ve spent a lot of real-world time in training rooms or exploring the Wasteland.
The most common causes of death are explorers running out of Stimpacks in the Wasteland and runaway fires in the late game. Sometimes you just can’t get back to the game in time to tell them to return from a Wasteland expedition, and sometimes fires just kill dwellers because you can’t click fast enough on them, particularly if a bunch of level 1 dwellers all take damage at the same time, possibly in different rooms.
The early stages of play in Survival Mode are a bit time consuming, because you have to send Dwellers out into the Wasteland for equipment, and if you don’t check on them often they die permanently.
Long term vault layout
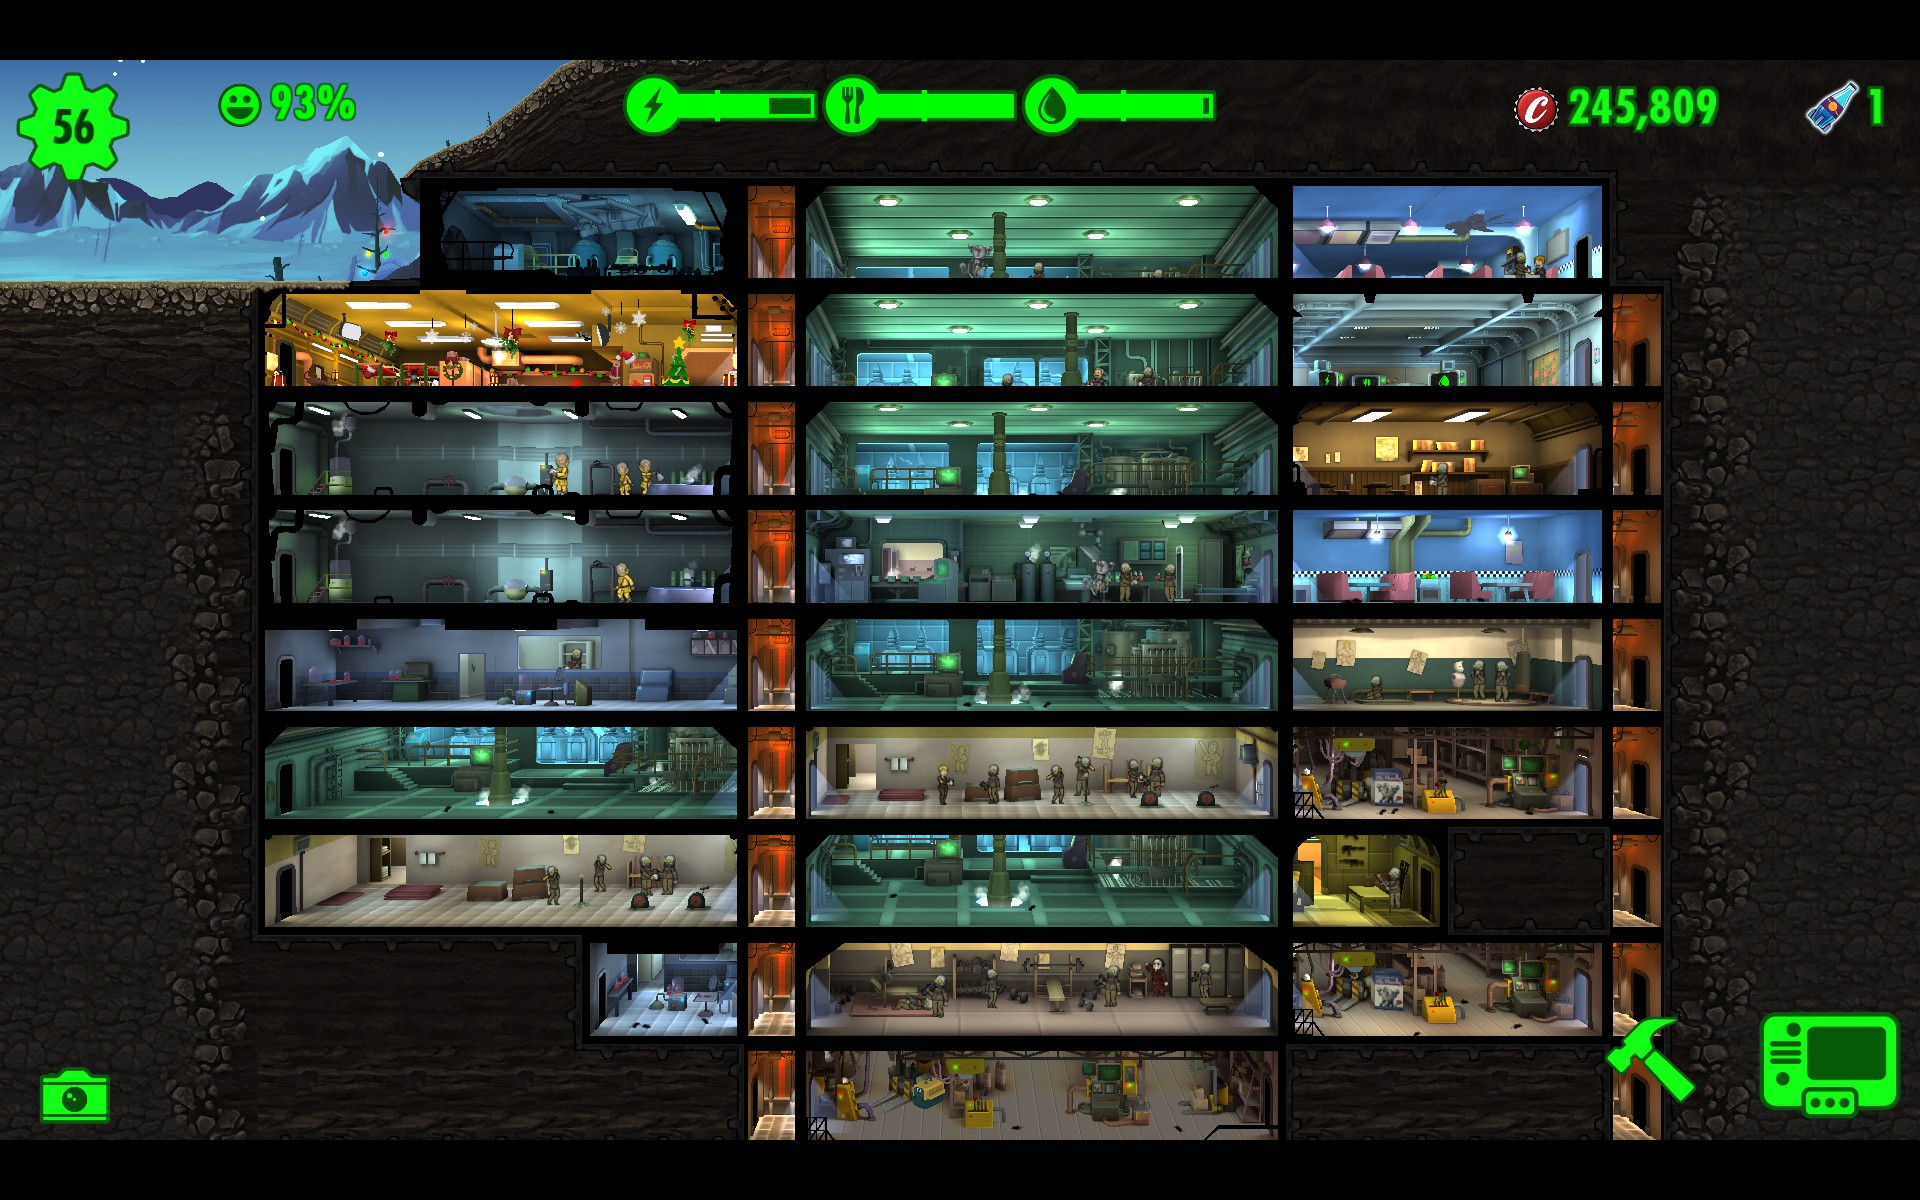
In the long term, your goal is to have an initial pair of rooms for defense on the top floor, one 3 wide and one 2 wide, filled with your toughest, best armed Dwellers. There should only be one elevator, next to the entrance way, so Deathclaws entering your vault must fight through the 3-wide room, the 2-wide room, and then return through the 3-wide room before they can enter the rest of your vault. With sufficient weaponry they will never make it past these two rooms.
Another security problem is empty rooms. Storage rooms, living quarters, and production rooms that you build to increase your power, water, food, Stimpack, and Radaway storage but don’t need to man.

Early in the game, you can isolate empty rooms. A threat like a fire that breaks out in a room that’s not adjacent to other rooms will go out without any intervention.
Once Radscorpions show up, isolated rooms like this are a liability. Because radscorpions can move anywhere in your vault, and drain power for as long as they’re alive, a single radscorpion can drain all your power reserves by switching from isolated room to isolated room. They won’t stay in one room long enough for you to move defenders from distant rooms.
Thus you want to alternate functional rooms and empty storage rooms, so that every empty room has at least one adjacent room with Dwellers that can rush in and defend it. To prevent the spread of other threats, no two empty rooms should be adjacent.
Initial Layout
With the long term layout in mind, build down rather than horizontally. Alternate spaces for empty storage rooms and production rooms.
Your first power generator should be the first room on the first floor. Eventually this will become your main defense room. A power generator room makes sense for defense because you can increase it easily to 3 wide before other rooms, since it doesn’t require power.
Your initial layout should look something like this:

Food and Water Shortages
At the start of the game, you can’t afford to keep many Dwellers in the Vault. You start with 3 specialist Dwellers with decent Strength, Agility, and Perception, but everyone else has 1-3 points in each attribute. That’s not enough to make up for their food and water consumption.
Each Dweller actually inside your vault consumes 0.36 food and 0.36 water per minute, for a total of 0.72 / minute. Dwellers in the Wasteland or waiting in line do not consume food or water.
Dwellers in width 1 level 1 food and water rooms produce 0.55 food or water per attribute point. So a Dweller with Agility 1 produces 0.55 food / minute, and a Dweller with Agility 2 produces 1.10, and a Dweller with Agility 4 produces 2.20 food / minute. The numbers are slightly higher for wider rooms (0.60 for a width 2 or 3 level 1 room), but not by much.
You need considerable margin in your actual surplus food production. I suggest keeping it above 2x your consumption. Dwellers inside the vault need scores of 4 of higher in strength, perception, or agility. You need +2 and +3 outfits like Handyman Jumpsuits to bring your starting Dwellers up in to this range.
Level 2 rooms are more efficient, but too dangerous for you now.
Population 1-13
Your initial goal is to obtain weapons and +2 outfits for everyone. Put just 2 dwellers into power, food, and water production initially, and send the rest out into the Wasteland looking for gear. As immigrants come to your vault door, send them out exploring as fast as you get them.
At the start of the game, Wasteland exploration is very dangerous. Explorers should be your least valuable Dwellers, with low Strength, Perception, and Agility scores, either bare-handed or equipped with your worst weapons. Your specialists and any Rare dwellers you get from lunchboxes should stay home.
Your best weapons should go to the Dwellers in your primary defense room, and the rest should go to Dwellers staying behind, to help with Radroaches. Wasteland explorers should only start with a weapon or outfit if all the Dwellers staying behind have better ones. Explorers can also take outfits that don’t improve strength, perception, or agility.
If a Dweller dies in the Wasteland, you haven’t lost much, because they’re not very good and you’ve sent them out with your worst gear.
Until you get to population 14, things are going to be rough because your Dwellers exploring the Wasteland will only last 90 minutes or so before they’re in serious danger of dying. They won’t be able to stay out much longer until you can make Stimpacks and Radaways.
Your Dwellers returning from the Wasteland will be injured. Don’t immediately let them back inside your vault. While they’re waiting in line, they’re safe and not consuming food or water. Once someone inside the vault is healed enough to go out again, you can let one of the Dwellers in line back in.
If you know you won’t be able to get back to the game for another hour or two, recall everyone in the Wasteland. That way they’ll be safe, and waiting outside the vault when you return. You can always send them back out again later.
As you get more +2 and +3 outfits you can let more dwellers stay to produce power, food, and water.
Keep your power, food, and water production above at least 2x your consumption. Check the Stats page under the Vault Dwellers Survival Guide to check your current per-minute production and consumption. Don’t build more rooms until you have a power surplus, and don’t let more Dwellers stay in the vault until you have a food and water surplus.
Also keep your storage for power, food, and water above at least twice your minimum required. Basically, keep the “surplus” portions of your bars at least halfway across. If they have shifted to the right of that, build more rooms for storage.
You’ll almost certainly hit population 14 fairly quickly just from new Dwellers showing up outside your vault. You shouldn’t bother getting Dwellers to reproduce unless you suffer a lot of casualties.
Your Fragile Starting Dwellers
Don’t tap your Dwellers to increase their levels. Level increases heal your dwellers, and until you have a steady supply of stimpacks, it’s best to save that healing for when you need it.
Accepting a level increases your Dweller’s maximum hit points, but because your Dwellers current have low Endurance, they’re only getting 3-4 HP per level, instead of the 9-11 HP per level they’ll get later. It’s important to save those level gains until you can train Endurance in a Fitness room.
Threats scale with the level of your dwellers. Because your dweller aren’t gaining a lot from increased level yet, the threats get stronger faster than your dwellers do, at least for now.
Outfits that increase Endurance can help this somewhat. Wasteland explorers should equip endurance-boosting outfits if you find any.
Don’t upgrade rooms at this point. Your internal threats (Radroaches and fires) increase in difficulty with the level of the room. Your Dwellers are too weak to deal with level 2 and level 3 fires.
Population 14-15
At population 14, you can make a Med Lab to make Stimpacks. This is an important milestone because you can heal damage from events, and you can send your explorers out with some stimpacks so they’ll last longer.
As soon as you can build a Med Lab, and can afford the power, it makes sense to build a 2 or 3 wide lab, even if it only has one Dweller in it. You’ll harvest 3 or 4 stimpacks when you first load the game, and it’s not very important that it will take 30 minutes or more to create another load. Just wait at least another 30 minutes before loading the game again.
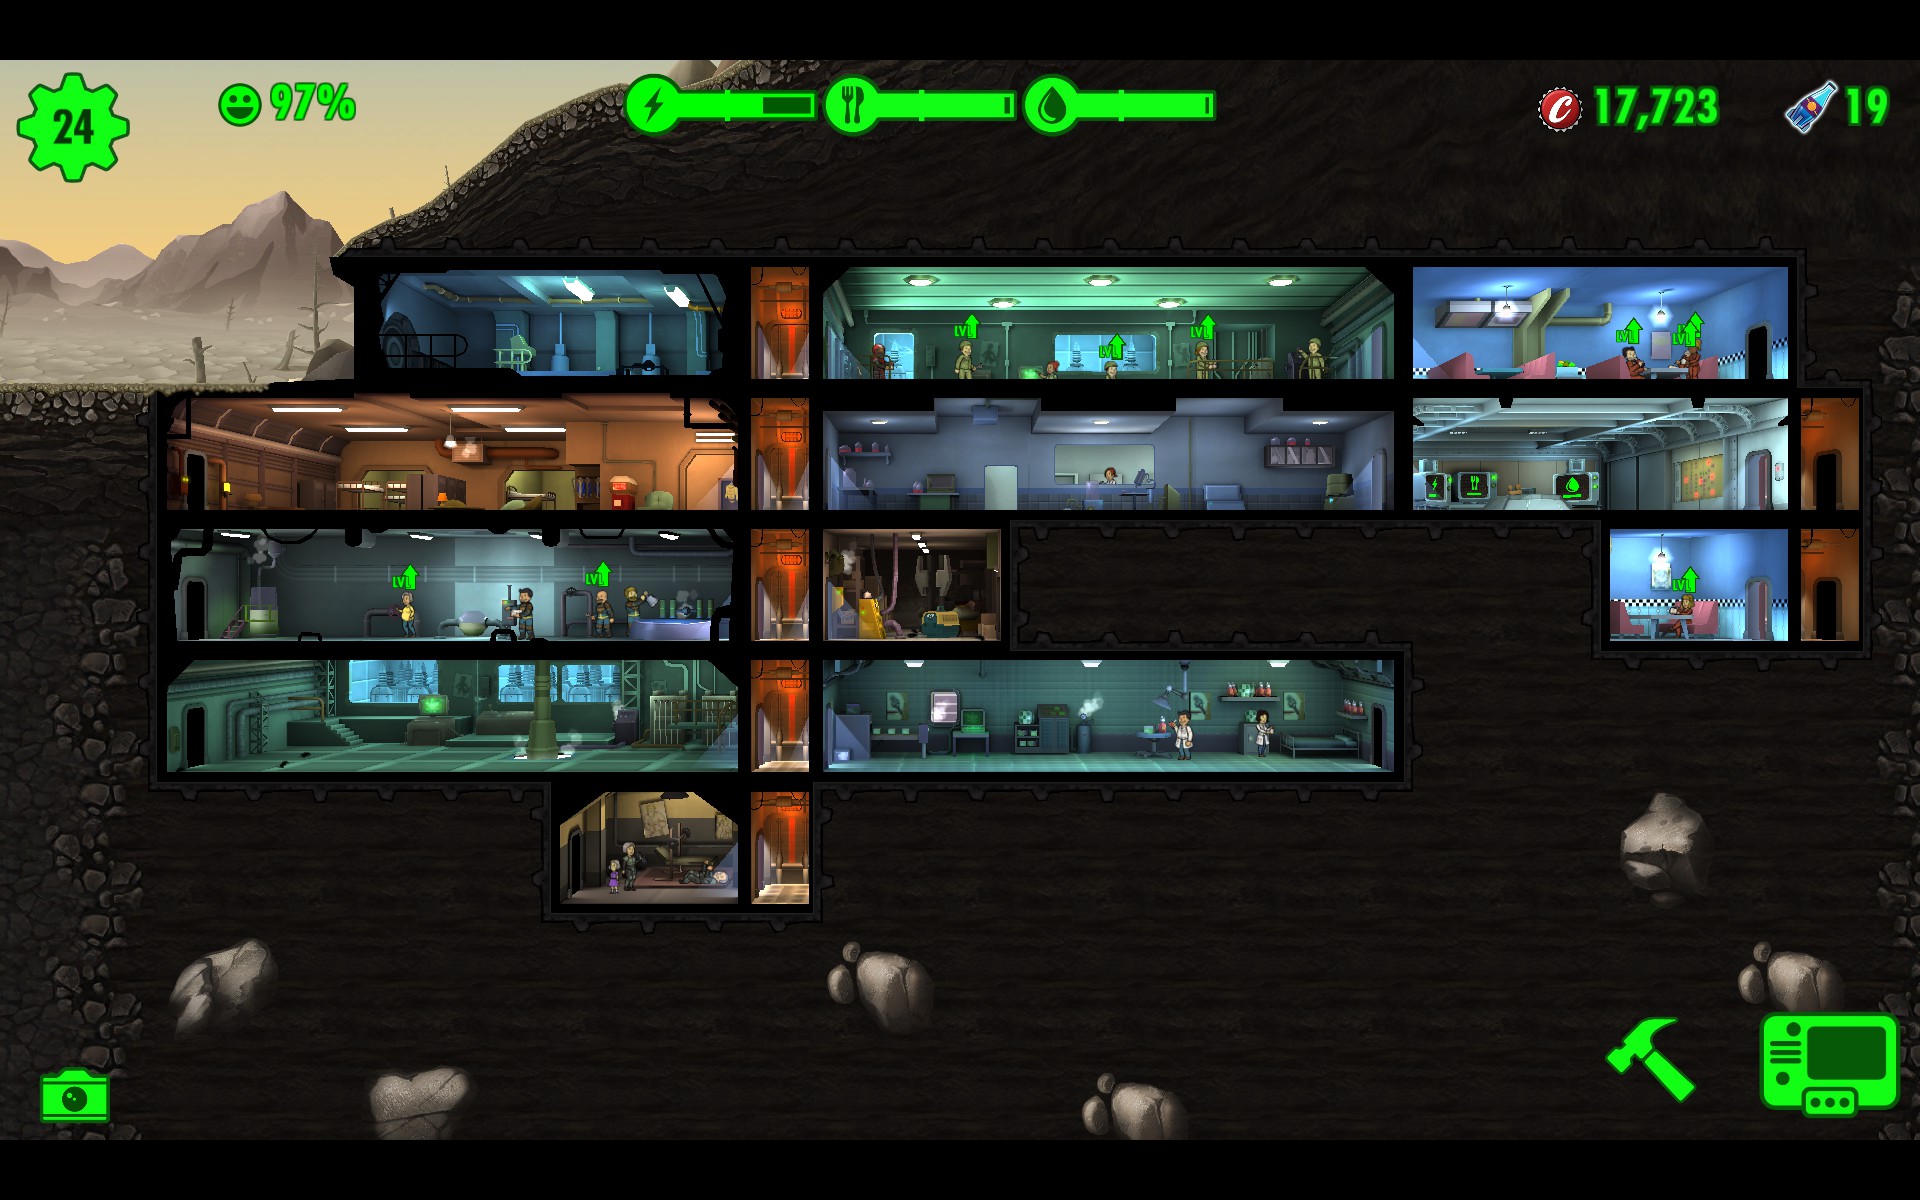
Your vault will look something like this:
The radiation damage your Wasteland explorers take is still a problem. You can’t make Rad Aways yet, so the only way to heal that radiation damage is to let them rest in your vault. With 5-6 stimpacks your Dwellers can stay in the Wasteland for 3-4 hours before radiation damage forces you to recall them. Some will get unlucky and need a recall after just an hour or two. +Endurance outfits are useful at this point for cutting down on radiation damage, and incidentally improving HP gain.

It’s too dangerous to reach 16 population in order to unlock the Science Lab for Rad Aways. The problem is that Raiders also start appearing at 16 population, and you need a defense that can rapidly defeat raiders without draining your stimpack reserves. You want 6 defenders with damage 7 weapons (sawed off shotguns and rusty laser pistols) defending your vault in your power generator room before you risk growing to population 16.
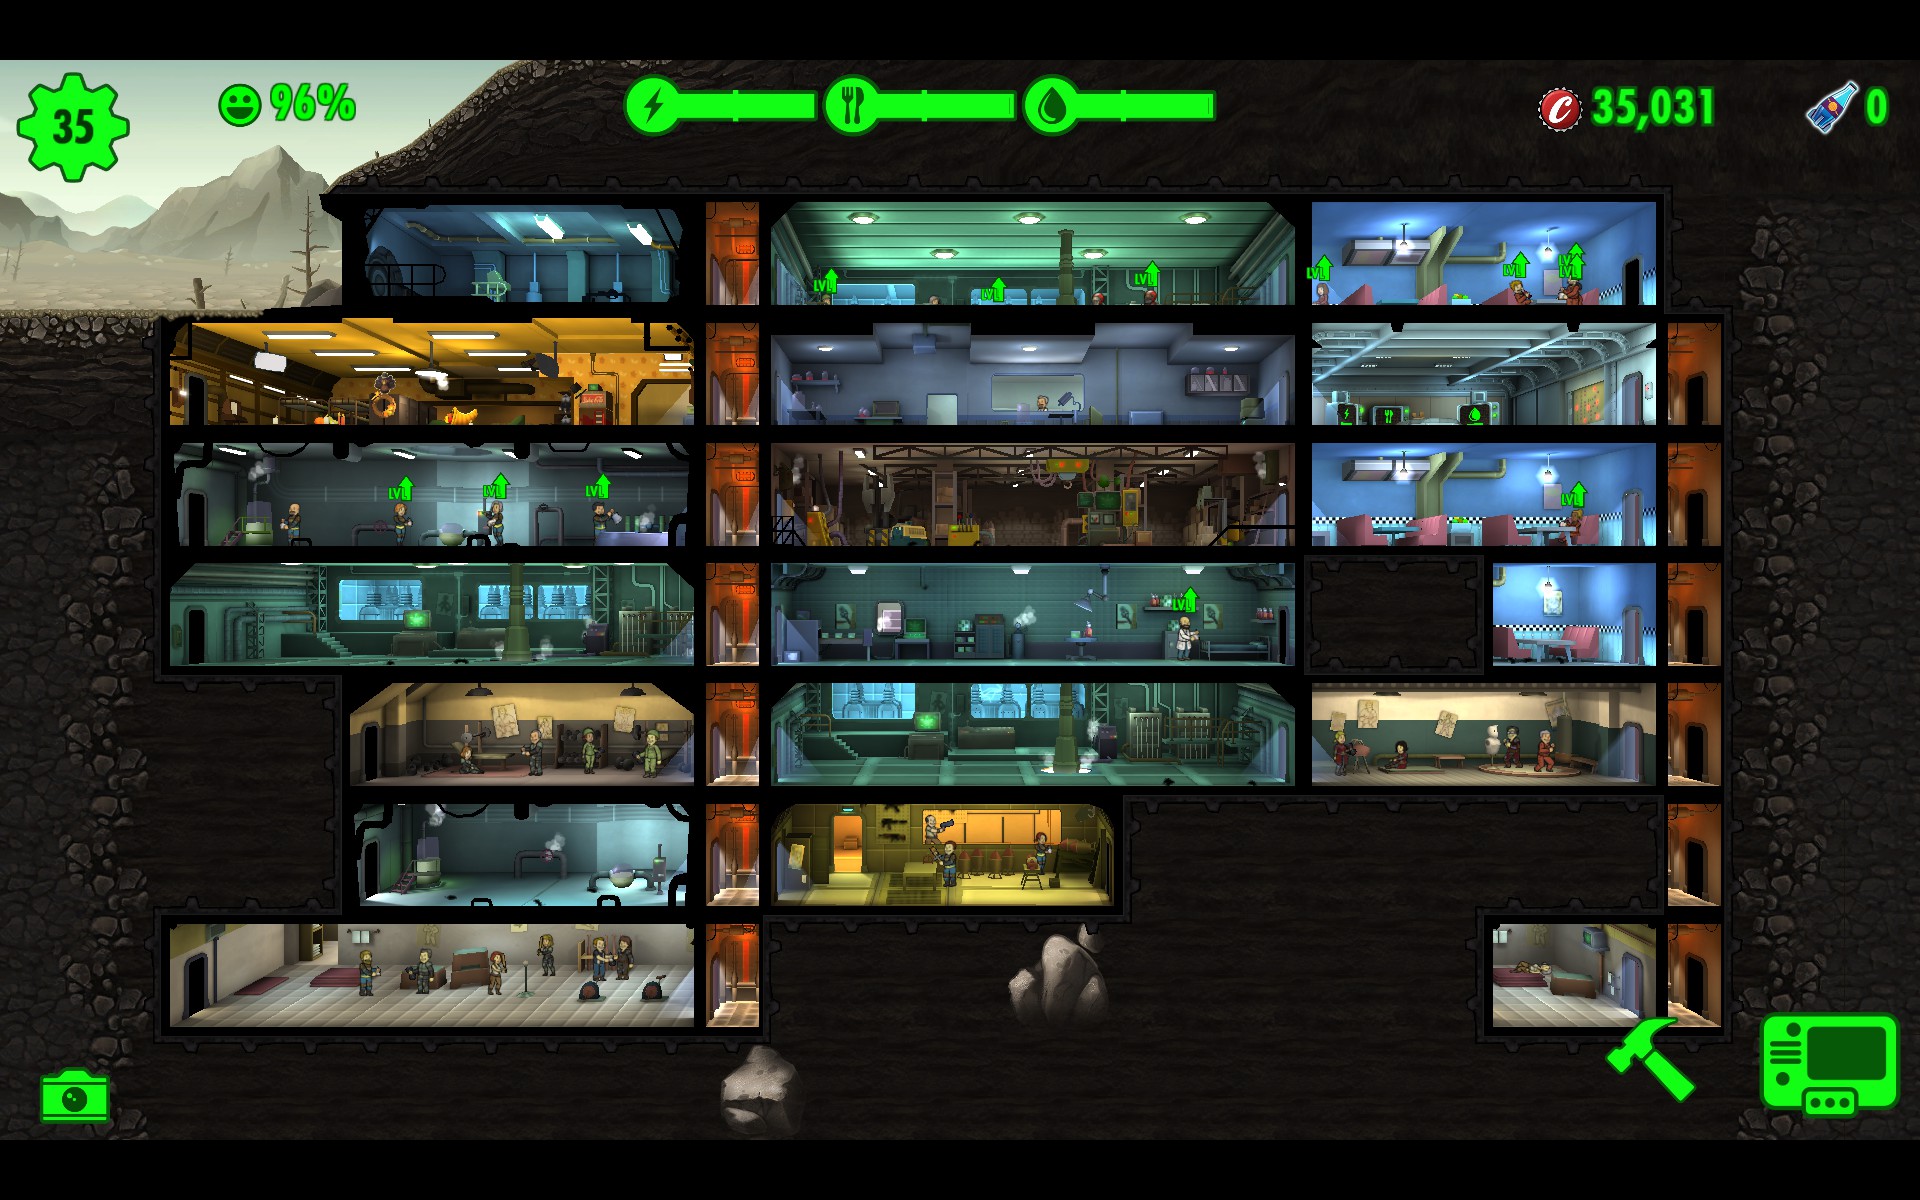
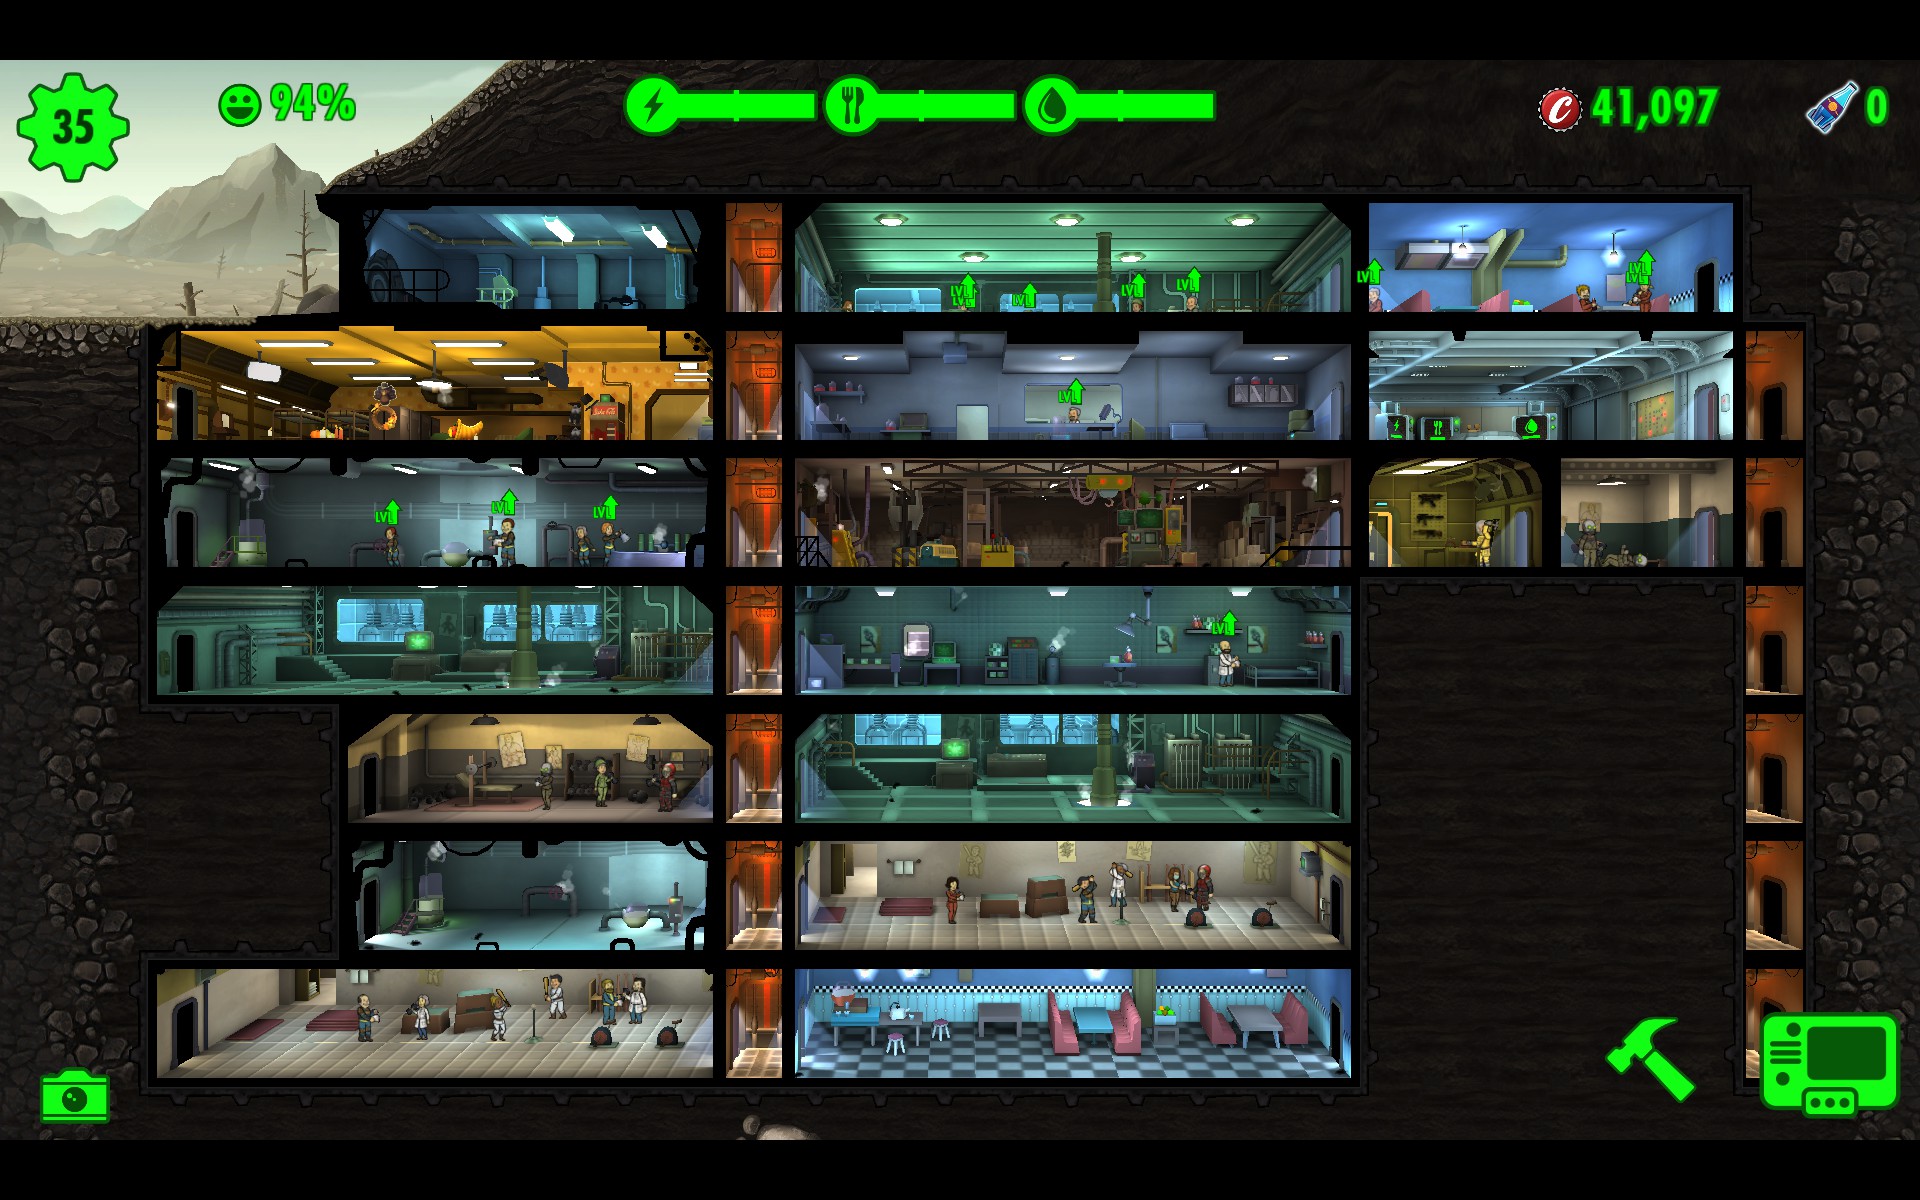
Your vault should look something like this when you’re ready to advance:
With a setup like that, you should take only light damage when Raiders do show up:


Population 16-23
Your first priority is to build a 3-wide Science Lab to make Radaways for your Wasteland Explorers. As with the Med Lab, you only need one Dweller in the lab now to keep it running.
At this point, you will probably find that even though you’re generating enough power, you don’t have enough power storage. While you could upgrade your starting power room for more storage, it’s still not very safe. It makes more sense to build an extra, unmanned power room just for power storage.
Now that you can make Rad Aways, your Vault no longer demands regular checkups every hour or two. You can send explorers in to the Wasteland with 25 Stimpacks and 10+ Radaways and they’ll be fine for 8 hours or more. Sending one dweller out with a lot of both is more productive than sending several out with just a few Stimpacks and Radaways each.

You can no longer count on immigrants from the Wasteland to increase your population. You need to start using the Living Quarters to produce children. Since children consume food and water, and your margins for those are still tight, you should only make one new child a time.
When choosing parents for a child, you might as well choose two with the lowest current happiness (usually 75%). Do this enough times and your Vault happiness will soon reach 90% or more.
At 18 population, it makes sense to build an Overseer’s Control Room immediately. You should have extra power from the 6 defenders in your power station, and going on the tutorial quest awards a lunchbox. Quests are safer overall than Wasteland exploration, since there’s no danger of a quest group dying just because you didn’t check on them soon enough.
Don’t bother making a Radio Room at population 20. The benefits are small, and it’s better to have Dwellers who might man the radio making Stimpacks and RadAway.

There’s no point in building a Weapons Workshop at population 22. Right now you can only make Common weapons, and you will find enough in the Wasteland to equip everyone with the best of those.
Your first quests
Quests are much more lethal in Survival Mode than regular difficulty. While the first few are still pushovers, boss enemies have a tendency to do rapidly do 50% or more damage to your low Endurance Dwellers. Any time you encounter a boss, be sure to focus fire on it, and be prepared to use stimpacks early on the Dweller taking damage from the boss.
Unlike regular difficulty, it’s likely you may lose a Dweller or two on quests due to timing and low health, which is why anyone you send out should be expendable.
The “Zines from the Commonwealth” quest line is good to pursue early, because it awards a Mr. Handy box midway through, and only requires level 9 Dwellers.
Beware of the boss at the end of the Bottle & Cappy quest line. She’s capable of wiping an entire group of level 20 Dwellers who haven’t gained levels at Endurance 13+ with her area effect attacks. It’s best to put her off until you can make high-HP Dwellers at population 35.
Junk to save
Later, your crafting priorities will be Sturdy Wasteland Gear and Plasma Rifles. Stockpile Brahmin Hides, Magnifying Glasses, Toy Cars, Alarm Clocks, Globes, and Microscopes.
Population 24-34
At population 24, the Weight Room unlocks. Your priority now is to make your Dwellers more efficient, eventually using nothing but Dwellers with 10 in the attribute for the room. The extra Dwellers you had producing Stimpacks and RadAway can shift to training, though of course you’ll want leave at least 1 Dweller in your Med Bay and Science Lab to keep production going.
You should build small training rooms for Strength, Agility, and Perception as they unlock. As your Dwellers increase in ability, you can rotate them into the power, food, and water rooms, so your production per Dweller slowly increases. While Intelligence is also valuable, for the moment it’s less important than getting Strength, Agility, and Perception up to 10 for the corresponding rooms, so you should delay building a Classroom and focus on the other 3 attributes.
Making your Dwellers more efficient through training is a higher priority than Wasteland exploration right now, though you should keep one Quest team running to bring in a steady stream of weapons and outfits for your increasing population. If you’re still hurting for appropriate outfits and halfway decent weapons (damage 5+), you can always send out some wasteland explorers as well.
Resource Shortfalls
Power, food, and water consumption continue for a few minutes after you log out, and of course you can’t manually collect them while the game is off. Getting a Mr. Handy or two from quests will fix this, since Mr. Handies will continue to collect resources after you log out.
In the meantime, you will find that your resource levels drop even though you have a good surplus of production. Every few sessions you will have to spend time building up your reserves to full. Temporarily moving Dwellers out of training rooms to produce resources can help speed this up. You can move them back when your meters are full again.
Population 35
Population 35 unlocks the Fitness training room, so you can finally train Endurance. It’s also a stopping point because at population 36, Death Claws and Rad Scorpions arrive, and you aren’t ready for them yet.
This is going to be a long pause where you do a lot of training without gaining much in the way of new gear or unlocking new rooms. You need tougher Dwellers before you can survive Death Claw attacks, which means you must train at least the Dwellers in your first two rooms to Endurance 10, and then bring them up to at least level 30.
This pause to train is, unfortunately, rather boring, since little is going to happen in your vault except SPECIAL increases for a while. However, getting high-HP Dwellers will be a huge advantage for the rest of the game.
Stop Wasteland exploration and questing for now. From now on, no Dweller is allowed into the Wasteland until they have Endurance 10 and a +Endurance outfit.
By this time you should have 2-wide training rooms for Strength, Agility, and Perception, each training 4 Dwellers at a time. Your Med Bay and Science Lab need one Dweller each. Any extra Dwellers should start training Endurance.
As your Dwellers reach 10 in Strength, Agility, or Perception, they can move into production, and you will need fewer Dwellers to produce enough power, food, and water. This means you can gradually shift more and more Dwellers to training Endurance, though you’ll need to keep 6 defenders in your power room.

After a Dweller reaches Endurance 10, they can go out into the Wasteland with +Endurance gear to gain levels, or start training Strength, Agility, or Perception if you don’t have enough Stimpacks and Radaway to give them a full load for a Wasteland expedition.

From now on, at least a few levels of experience gained at Endurance 13+ (Endurance 10 plus an outfit) are a requirement before a Dweller can graduate to doing anything else. Once a Dweller has Endurance 13+, it’s no longer important to save level increases for later, as you should have been doing up until now.
Further, you may want to consider keeping the +Endurance gear on all your Dwellers until they reach level 50. Yes, your Dwellers will be less efficient than they would be with appropriate gear, but they’ll also gain more health, and when they hit 50 you can switch. At the minimum, you want to do this with your Dwellers who will eventually fight Deathclaws.
Room upgrades at population 35
Your Dwellers are still pretty fragile. Fires are your worst enemy, though Mole Rat attacks are damaging as well. A fire in a level 2 room is likely to do serious damage, and a fire in a level 3 room will probably kill everyone in the room.
Fortunately, the main reason to upgrade rooms is to reduce power consumption, and at this point your Power Room defenders should be producing lots of surplus power. It’s OK to have an extra Diner or Water Treatment room just for extra food or water storage.
If you upgrade a room that’s normally empty, like a storage room or living quarters, you can bring it all the way up to level 3, but only if you never defend it. Let a fire in a level 3 room spread rather than try and fight it. If the adjacent rooms are all level 1, four level 1 fires will do less damage to your dwellers than a single level 3 fire. Level 3 fires are deadly, and your Dwellers need a lot of HP before you can attempt it.
A room manned by 6 decent-level (20+) Dwellers who gained most of their HP at Endurance 13 or better can defend a Level 2 room against a fire. A room full of level 30+ Dwellers can handle a level 3 fire, though it’s almost as painful as a Deathclaw attack.
Never upgrade your training rooms, because Dwellers rotate in and out of those, and some will often be level 1.
Dweller Naming and Tracking Maximum Health
Unfortunately, while you can see SPECIAL attributes and sort the Dweller list by any SPECIAL value, you can’t see total Hit Points or sort by it. You need some way of tracking approximately how much total health a Dweller probably has. A Dweller starts with 105 HP and gains 2.5 + (Endurance * 0.5) hit points per level, so a level 50 Dweller could have anything from 252 HP to 644 HP, depending on Endurance.
The easiest method is just to mark Dwellers who reach Endurance 10 at level 1 with a prefix in their names, like * or + or some other symbol, to distinguish them from everyone else.
I prefer a system that gives me more information. It’s going to be a long time before you have Dwellers who reached Endurance 10 at level 1 for all your important tasks, and even longer before you have Dwellers who managed to gain 49 levels at Endurance 17 (with a +7 outfit) instead of just 13 (with a +3 outfit). I like to prefix Dweller names with a Health number, indicating how many hit points they’ll have at level 50.
The basic version is when a Dweller first reaches 10 Endurance, subtract their current level from 82. This gives a Health prefix from 81 (best) to 32 (worst). For example, if Alice was level 12 when she finished Endurance training, she now becomes “70Alice.”
8x this prefix, minus 4, is how many hit points she’ll have at level 50, provided she wears a +7 Endurance outfit for the next 38 levels. 70 x 8 – 4 = 556 HP in this example. It’s not important to do the exact HP calculation; just knowing that a Dweller with a prefix of 80 is twice as tough as one with a prefix of 40 is good enough.
If you sort your Dweller list by name, and invert the sort, you’ll see your best dwellers first. The main drawback is that any dwellers who don’t have prefixes yet will appear before your best Dwellers, so you should add “0” to the names of your Dwellers still working on their Endurance so they’ll be last on the list.
Once a Dweller hits level 50, you can switch to gear boosting other attributes and ignore +Endurance, since your Dweller cannot gain any more health.
This basic system assumes you have +7 Endurance outfits, which you don’t yet. For more accuracy, subtract 3 points for every point of Endurance below 17. If Alice dons a +3 Endurance outfit at level 12, subtract an additional (17 – 13) * 3 = 12 points, making her only “58Alice” instead of “70Alice.”
Most of your early Dwellers will have a 12 point penalty, though some will have a 15 point penalty for +2 Endurance outfits. Later on, you’ll have a lot of Dwellers with 6 point penalties for +5 Endurance outfits.
This additional tweak isn’t hard, and it’s worth doing. In the early game, the best you can do is reach Endurance 13 at level 1, which is an adjusted prefix of 82 -1 -12 = 69. There are late-game bosses on quests that can one-hit kill Dwellers with this many hit points. When the Quest level requirement is level 50, knowing which Dwellers are really prefix 81 (644 HP) instead of 69 (548 HP) may prevent a party wipe.
Getting Really Nerdy about Prefixes
This part is entirely optional. I don’t really do any of it myself, but I’m going over the math if you’re curious.
If you want to know how many HP a Dweller has right now, if you absolutely want to know which of your Dwellers are the toughest now rather than at level 50, you can mentally subtract (50 – current level). If Alice has a prefix of 58, but she’s only level 30 right now, think of her as being 58 – 20 = 38. This isn’t correct unless she has +7 Endurance gear, but it’s close enough.
You might want a Dweller to abandon +Endurance gear for another outfit before level 50. If they’ve gained a bunch of HP in the meantime, you can lower the penalty instead of subtracting the full 3 points per Endurance. The exact penalty is (remaining levels * Endurance lost / 16).
For example, if Alice is wearing a +3 Endurance outfit and has a Health prefix of 58, and you decide to put her into a +5 Strength outfit at level 40, that’s a (50 – 40) * 3 / 16 = 2 point penalty, instead of a 3 * 3 = 9 point penalty.
Legendary Dwellers from the Wasteland and Lunchboxes often start with at with a few levels and moderate Endurance. The easy method is to ignore any extra health, and treat them like they were Endurance 1 for all levels before you started training them.
If you want to be super-accurate, the correct penalty is (levels * missing Endurance) / 16, both for the levels the Dweller gained before they arrived, and for the levels after you train them.
For example, if Amata is level 31 and Endurance 7 when you get her, she has a 30 * (17 – 7) / 16 = 19 point penalty for her initial health. If you train her to Endurance 10 and give her a +3 Endurance outfit, that’s a 19 * (17 – 13) / 16 = 5 point penalty for the remaining 19 levels. Her proper prefix is 82 – 19 – 5 = 58.
That’s higher than the easier, basic calculation of 82 – 31 – 12 = 39, but honestly, Amata is never going to be as good as a Dweller you trained from level 1, who can manage a prefix of 69 with a +3 Endurance outfit, so this level of detail isn’t that important.
Questing at population 35
At this point, you can start seriously whittling away at quests. The Bugle Boy quest line is of particular interest early on because it’s one of the easier ways to get a Mr. Handy. Having a couple of Mr. Handies will fix your ongoing problems with power, food, and water depleting after you log out of the game.
Your questing Dwellers will have to settle for sawed off shotguns and the like for a while. Better weapons should go to your defenders on your top floor. If you manage to arm all of them with Rare weapons or better, you can give better weapons to your quest team. It’s not so important at this point to arm the rest of the vault well, you probably have sawed off shotguns for everyone now.
Unfortunately level progress for your Wasteland explorers will still be slow. Even with Endurance 13+, your dwellers are going to gain only a few levels in a day of exploration, and will likely die if they stay out overnight. Weak weapons and low attributes are still holding them back.
Population 36-49
At population 36, Deathclaws start attacking. Your two defense rooms should be full of level 30+ Dwellers who have Health Prefixes of 55 or better, armed with weapons that do 13+ damage. The Deathclaws will make it through both rooms, reverse direction because there is no elevator at the end, and die while trying to make it back through the first room.
Your Dwellers should be tough enough that they won’t need Stimpacks to survive a Deathclaw attack, providing they were at full health when it began. Many will be badly injured, so it’s best to heal them afterward, in case you get a Raider or Deathclaw attack next. You’ll use 6-10 Stimpacks after each attack, so you should keep a reserve of 20 Stimpacks at all times against this possibility.
Stimpack production becomes quite important. Your next goal will be to have a level-2 Med Bay with at least 4 Intelligence 10 Dwellers. That should be more than enough to supply you through a worst-case series of back-to-back fires and Deathclaw attacks. Particularly if you rush Stimpacks from the Med Bay periodically, which with Intelligence 10 Dwellers should have about a 70-80% chance of success.
While the Charisma and Luck training rooms unlock at this point, you probably don’t have time to train those yet. Your Dwellers are still focused on Stimpack production and reaching level 50 by Wasteland Exploration so they can replace +Endurance gear with other outfits.
Deathclaws are the last serious obstacle to your vault’s growth. Now that you can consistently defeat them, you can consider the rest of the advice in this guide to be optional.
Population 50-54
At population 50, Rad Scorpions start showing up. While these do less damage than fires or Deathclaws, and don’t multiply the way many internal emergencies do, they have the nasty habit of teleporting from room to room until they’re killed, while draining your power reserves the entire time.
Your main defense against this is to distribute your empty storage rooms throughout your vault, so whenever possible, there’s at least one room adjacent with some Dwellers to fight Rad Scorpions. The sooner you can kill them off, the less power you’ll lose.
Putting two empty storage rooms adjacent is still a bad idea because it means fires, roaches, and moles will spread.
It’s now also worthwhile to build several extra power rooms just for power storage, so that you have a 75% reserve before power becomes critical during a Rad Scorpion attack. Fortunately power rooms don’t cost power, so you’re only really limited by money and space.
Population 55-74
At population 55, you can make Rare outfits. There was no point in making a workshop prior to population 55, because Wasteland explorers will bring in more Common outfits than you need.
Your first priority is to make a pile of Sturdy Wasteland Gear (Endurance +5). Because crafting goes much, much faster with attributes above 13, every Dweller you equip with a +5 Endurance outfit should immediately start working in the Outfit Factory, displacing an Endurance 13 Dweller. A workshop with Endurance 13 Dwellers takes 95 minutes to make a +5 Endurance outfit; a workshop full of Endurance 15 Dwellers requires only 22 minutes.
Once you have a pile of +5 Endurance outfits, you might consider opening a Weapon Workshop and cranking out a few Plasma Rifles. It’s likely you have Damage 15-ish weapons for all your primary defenders by now, but the Plasma Rifles at still an upgrade at an average damage of 17.5.
Wasteland exploration is now primarily about boosting the experience levels of your Dwellers, rather than gaining gear. Mainly because Plasma Rifles are better than the vast majority of the weapons they will find in the Wasteland.
When you unlock Nuclear Reactors at population 60 you’ll probably want to upgrade your power rooms to Nuclear.
Population 75-99 and crafting Legendary weapons
Once you’ve crafted enough Plasma Rifles to arm your defense forces on the top level, and to arm all your Quest groups, you want to shift your attention to crafting Legendary weapons. It’s not terribly important to arm the rest of your Dwellers with Plasma Rifles, and the rifles you’ve already made will slowly trickle down to your Dwellers exploring the Wasteland for experience.
At population 75, you can upgrade the Weapon room to make Legendary weapons. It’s important to make some dedicated weapon crafting Dwellers at this point, because Legendary weapons take much, much longer to build otherwise. Strength 15+ Dwellers are particularly important, because the most important Legendaries all require Strength to craft.
Crafting time is roughly (base time * (1 – total attributes / 93) for rare items and (base time * (1 – total attributes / 105) for legendary items.
For example, a Fat Man requires nearly 6 days to craft with 6 strength 10 Dwellers, and only 2 days with strength 15 Dwellers. You will probably have to shift a bunch of Dwellers who haven’t reached level 50 to +5 Strength outfits, which means taking the long-term hit in max HP. Obviously you’ll want to use Dwellers with low Health prefixes, since they’re already poor choices for defense or questing.
+7 outfits are even better. A room full of Strength 17 Dwellers can finish that Fat Man in just 10 hours. It’s worth the time investment to make +7 Strength outfits, provided you’ve found the recipe. If not, you’ll have to make do with +5 Outfits.
Legendary require a population of 90. Your first priority is +7 Endurance outfits, provided you’ve found the recipe. Other than +7 Endurance outfits and +7 outfits for crafting Legendary weapons, most Legendary outfits aren’t really worth the time. The benefits for production and quests are small. I suggest making them only if you have a surplus of +5 and +7 Endurance outfits, and your outfit workshop would otherwise be idle.
Population 100+
At population 100, the Nuka Cola bottling plant unlocks, and renders your earlier Food and Water production facilities obsolete. Since it requires Endurance for production, you no longer have to trade off dedicating some Dwellers to +Agility or +Perception outfits for production at the cost of their total health. The Dwellers manning your Nuka Cola plants can wear the best +Endurance gear you have, and get the health benefit while maximizing production.
From now on, the primary benefit of training Agility and Perception is to make your questing teams stronger. There’s also some benefit to Wasteland explorers, but it’s fairly minor.
