Overview
From the landfall, through the dunes, and back into space!Updated for 9.6.0 2307. Originally written for Alpha 8.2.
Introduction
Public game version Alpha 8.2 introduced a new type of starter planet for random scenario — an Arid Planet. That was a good change, as temperate planets didn’t provide enough environmental challenge to the player. A breathable atmosphere and possibility to retreat to the starter biome, where temperatures do not require wearing armor at all gave relaxing experience. But the arid planet is completely different story. Now we have occasional starter biome temperatures able to bake you right in your light armor, non-breathable atmosphere and a constant radiation level between 2 and 3 Rads that rises during radioactive fog weather condition, meaning you have always stay on guard, even when there are no enemies nearby. However, everything is possible with good planning. Let me show you how.
Abbreviations
I’m using certain abbreviations throughout this guide, and although I give explanation when introducing them, here they are for reference.
BF — Bio Fuel
CV — Capital Vessel
EG — Emergency Generator
HV — Hover Vessel
LM — Low Mountains
MC — Mobile Constructor
PC — Portable Constructor
POI — Point Of Interest
RCS — Reaction Control System
RP — Robinson Protocol
SB — Starter Biome
SV — Small Vessel
Prepare Your Game
Start a new game and select “Default Random’ scenario”. For the purposes of this guide, I’m using the name “Arid Guide” and seed 242675. Change the starting location from temperate Tynori to arid Venida. Yeehaa! I already love this planet: 20% O2! Still not breathable, though. Finally, hit the difficulty button.
Change the difficulty preset to “Hard”. This will allow us to have a deeper game experience. In the construction section change “Blueprint Spawn Limit” and “Block Limit for Certain Devices” to “True”. These limitations are nice. Regarding “Auto Miner Depletion”: this I usually set to “False”, as there is a much easier and fun way to get unlimited amounts of ore than auto-mining, but more on that below.
Thus the difficulty settings are:

Hit “OK”, then “Start” and off we go!
Till Dusk
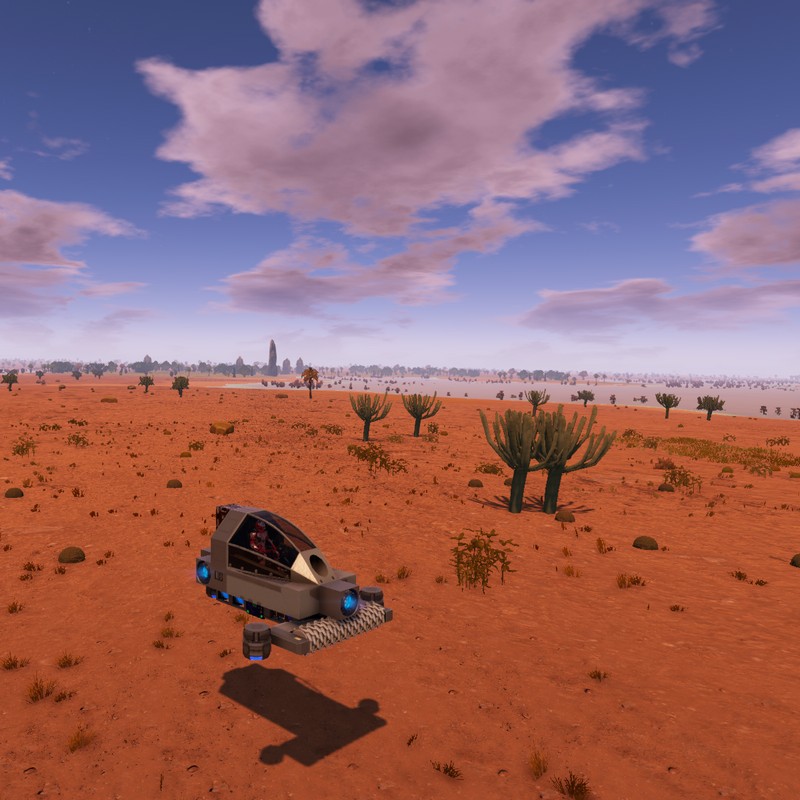
Lovely! Our escape pod is bringing us to the next magnitude of trouble:

There are wreckage-like silhouettes to the N and something that looks like low mountains biome to the west. I remember the first time I started the arid planet (but not the seed), the game threw me right into the radiated biome. Unforgettable experience! Died several times, then quit. Now I would probably managed to survive.
Which brings me to the point: the game is in hard mode, but still allows us to respawn indefinitely. Let’s not forget about this and try do everything that makes life easier for the future us. For instance: steer your pod to land in the starter biome (SB), preferably near some fruit trees. This biome has temperatures our suit is able to digest (most of the time), plenty of food and herbal leaves, and the pod itself is a great storage place for excessive supplies.
Back to the game, however. I choose to follow the Robinson Protocol (RP) without actual intention to follow it, just not to get too many items right from the start. The harder, the better.

Now, there’s no Bio Fuel (BF) we would otherwise got by skipping the RP. Oh no, we all gonna die! …We surely will, but for now we have a water bottle from the escape pod and five oxygen in our pockets, so survival tool in hand, let’s start getting resources our next spawn will be able to use. The strategy is:
- craft Portable Constructor (PC: 3 iron ore, 2 silicon ore, 1 copper ore)
- craft Emergency Generator (EG: 1 iron ore, 3 copper ore)
- gather Wood and Plant Fibers to make BF
- feed them to PC
- feed the BF to EG
- live until dusk
Sounds like a plan! It will require us to cover great distances, so either move diagonally (this increases speed without running) or bounce-run on jetpack and hope this will save you some oxygen. Often there is plenty of iron in the SB and plenty of copper in the low mountains (LM) biome, — that’s why I was looking for them when flying in the escape pod. The silicon is in the LM too, though not as common. As we don’t have a PC at the moment, we cannot craft ores from crushed stone, and this gives us a little choice as of where to go. Beware the jabberwock Dunes and Sand biomes — they are extremely hot during the day; unless you managed to generate a rather cool arid planet, don’t even try to travel there in sunny weather: you will overheat and die pretty soon, making the life of your successor more difficult too. The night is another story. Soon we’ll be making a lot of night dune travels, and at high speeds too!
Let’s check the map. There are low mountains to the SW and to the N. Also, it looks like the SB extends in both directions, but I somehow prefer the former. Probably making my usual mistake, I guess.

Yeah, again! There was sand, and not LM, but I managed to get some silicon and return back to the escape pod while surviving heat stroke. Let’s go N. Bad luck. The E part is much better, but now I’m dying for sure. I will save two oxygen bottles for my successor.

At least I got to Level 3 while gathering resources, especially the plant fibers. If I have chosen to skip the RP, I would be happily breathing by now. I died, but my spawn has found some copper in the dunes to the east, and crafted a PC and…. Now I’m moving to high grounds in the SB to camp, as this planet is so hot, even where you are supposed to be safe. And almost no iron in SB, which is pretty sad.
Died another time. The good thing is, if you are crafting something in the survival constructor and die, the thing will continue to be crafted in the constructor of your spawn. Thus you are not losing resources on unfinished crafts.
This time I have found a good spot to put down a tent (in desert camo, of course), place a PC and EG and started crafting another EG. You better have two or even three of them; besides, they are stackable, and look cool placed on top of one another, like some industrial apparatus. The PC will craft BF all night long from fibers I have gathered so far.

The great news are, you are not loosing oxygen or food while sleeping, and constructors keep constructing, generators keep generating, and the plants continue to grow! The best advice is found in the pillow, as they say.
Generating Oxygen
I managed to put one BF canister into EG before going to sleep, and now I have seven more, plus five water bottles and six oxygen bottles. The survival constructor in the suit is able to convert water to oxygen, so fire it up right now and make it busy with something useful. The second EG is ready too. Divide the BF between them and get ready for work.
First, mark the tent on the map, so you always know your distance to the camp. Until I get a good reserve of oxygen I try to stay within 250—300 m. from EG’s to quickly refill the suit O2 tank when needed if I run out of oxygen bottles in my inventory. After doing that, proceed to the resource gathering spree. There are plenty of fiber plants in our SB, just watch your temperature and oxygen levels and act accordingly. When eating raw fruits and vegetables, make sure you have herbal leaves on you to cure indigestion. Cut down all the trees you can find, just don’t touch fruit trees. Without them, the vegetables will be your only food. Save these trees for the extreme case. Crush all the rocks, you need ores for our first building project — the Immobile Constructor *wink*.
When cutting down trees don’t stand with your back to the nearby insects. Some of them will think your are trying to attack them with the defense mode of the survival tool and will bite you. Use herbal leaves if you get effects more serious than stunning. These bites also wear up your suit. Dinos are nice, but don’t shoot near them too. They won’t touch you until provoked. And don’t provoke the worms with teeth — these creatures attack in packs and are very dangerous when angry. Otherwise, they basically ignore you.
One hour before the dusk is the time to go back home. I managed to advance to Level 4 during this day and gather lots of wood and fibers. After putting all the ores and crushed stone into PC it became obvious that I cannot craft a hover vehicle starter: more silicon and copper is needed. But I can craft myself a bike! As EG’s are well supplied with fuel by now, I command the PC to stop BF production and make a bike. Tomorrow we’ll go for a ride!
HINT: Carefully arrange production queues. Ctrl + left click adds a full stack of products to the queue, Shift + left click adds 10 of them, and all to the same slot, not to the end of the queue. Ctrl + click on item under production will remove the full stack except the item currently being produced. So remove all BF except one, add a bike to the queue, and when its crafting starts, add BF again.
Bike Riding
After a good night’s sleep the morning reveals we are sort of rich on oxygen and BF. Time for bike riding! We really need those minerals, especially copper and silicon. I’m not crafting a drill, as it uses BF and we need BF for more urgent tasks. The survival tool is quite sufficient for now.
I’ll go around the edge of the SB first to gather all easily accessible rocks. Today is a hot day! The temperature rises to 55 degrees Celsius even in some areas of the SB! But I got some copper and a little of iron. The rest of the day I cruise inside the SB to better survey it and gather stone. I think this night I won’t be sleeping as we are still low on silicon and we don’t have enough crushed stone to manufacture it in the PC.
The good thing about jetpack jumping technique is not only you travel faster when on foot, but also you can see better not resorting to your F5 drone to perform the reconnaissance.
The sun sets and it’s time to go a little deeper into the alien territory. The temperature gradually climbs down, so we probably visit the nearby wreckages to check for loot including that wreckage the RP asked us to survey.
The PC now shows it can craft that HV Starter. Let’s do it and then go for silicon. After finishing the housekeeping I jumped into the saddle, and… Oh, no! The Geiger starts singing and I see that radiated fog is coming upon this poor land. I have noticed the fog intensifies in the lowlands, and although our camp is located on the elevated ground, the counter shows 5 Rads already. That ruins all the plans, and I even have no permanent shelter. Just got the resources to craft a core. Earlier it took about five days at least for the radiated fog to come, but not this time. Let’s feed our EG’s, go into the tent and hope the morning will drive the fog away.
Note: In Alpha 9, though, it looks like the radiated fog starts to appear only after you visit the radiated biome. Don’t take it for granted! The devs might change this any moment to the old behaviour and then to something new again.
Land Survey
There is one significant problem with the radiation on arid planets: you need mushrooms to craft anti-radiation medicine, mushrooms grow in oases, and even there they are very, very rare. Not to speak about the food processor, which we don’t have at the moment.
In the morning the radiated fog went away, but the weather is still foggy. The fog of any kind prevents the sun from overheating the planet surface, so we may be able to venture outside SB. I will go and check wreckages now for any supplies and gather silicon in the sands.
The wreckages had some antibiotics and canned food, the main wreckage had usual PC, a bike and crops. The day netted us 91 iron, 40 silicon and 17 copper ores, and a surveyed territory.

The radiated area is important for us as it contains plenty of wood, and oasis have many plants, besides wood.
Let’s do the usual housekeeping and go to sleep.
Immobile Constructor
The reason behind the immobile constructor is the weight we are removing from the light vehicles. The mobile constructor (MC) weights 1 t, and that is basically 1 m/s we are stealing from acceleration and generally make the life harder for hover engines on jumps.
For the Immobile Constructor we need an HV starter (crafted already), a generator, a fuel tank, and a constructor itself. It would be also nice to have some boxes for additional storage. If you wish, add oxygen tanks and an O2 station. On level 5 we can also add a fridge. And you better use the second PC to craft all this stuff during your sleep. Otherwise, use the craft time to gather food and fibers.
Here is the foundation:

Then put some fuel in the tank and craft two cargo boxes:

This constructor is able to craft many new items we need, including the harvester module. Just don’t forget to switch the whole structure off when not crafting to save fuel. If you notice that constructor is crafting an item never actually producing anything, check the fuel tank: its probably empty.
Lumberjack
The Lumberjack is your work horse to harvest wood. It is easy to make in survival without resorting to blueprints. Remember, we set blueprint spawn limit in difficulty options? That would require us to prepare some basic concrete surface with a core, and that’s another story.
Begin with placing an HV starter and cutting all grey blocks and the front blue block (use salvage mode of the survival tool). Attach a generator.

Using the immobile constructor, craft a harvester. Unlock it in the tech tree first, then attach it to the generator.

Cut off the remaining blue blocks and add a fuel tank, an RCS and a harvest box. Don’t forget to eat and breathe!

Attach three hover engines.

Attach a cockpit. You want exactly that one shown, named “Cockpit 2”, as it’s the lightest. Notice how it fits nicely to the harvest box.

Attach four small thrusters. The front one.

Back and side thrusters.

That’s it! Enjoy the stats.

Fill the tank with BF and go into radiated area to do some deforestation. The radiation cannot harm you while you are sitting in the cockpit. Avoid the red-dotted bugs. They spit nasty substance that follows you while you are trying to dodge it. Save at least a half of the fuel in your inventory. This way you will always have a reserve to return to your camp. And don’t be carried away with harvesting! Two hundred logs is more than enough unless you aim to build a base made of wood. By the way, trees will slowly re-grow.
Note: In recent game versions, use Container Controller for Ore and Wood instead of the Harverst Box.
Hunter
Our next project will be the Hunter. It’s quicker, it’s more powerful, it has oxygen tanks, a-a-and it has …guns! Our first real weapons in this guide.
Proceed in the same manner as with the Lumberjack, but now we have a little different ground floor plan, with ammo box and RCS in the back, between the oxygen tanks.

Then put a cockpit right on top of the whole thing.

Add six thrusters, three by each side.

Add four hover engines.

Add two gatling guns.

Add a cargo box and a fridge behind the gatlings.

Add two spotlights to fuel tanks in the front.

Add railings (six truss walls) above the spotlights, — this makes a looting platform, where you stand without the risk of falling off the vehicle while examining the game.


Here we are.
Note: The platform is a nice hunting and role-playing touch, but using your F5 drone is much simpler and more practical. You can use it for looting corpses from HV, from SV that is 10 meters above the ground, from inside of any vehicle large enough to allow you to spawn the drone without leaving it, etc.

Regarding the ammo, the golden rule is to have about 3000 rounds on board when leaving the base. The 15 mm cartridges are crafted in batches of 100. Add 30 units to the production queue of the immobile conctructor.
Night Hunt
So what this flying cabin is capable of doing?
First of all, it is nicely balanced, making it a very good dune rider. Going at full speed, it jumps easily off the ridges. Make sure to have its bottom parallel to the surface of the dune on touchdown, that will produce an immediate second jump off the next ridge.
I’m using the keyboard to control hover craft almost all of the time, this way you can use the mouse for free look in the 3rd person view, much like in GTA III. Up and down arrows control the pitch of the vehicle with little finger movements, and with the mouse you have to use your whole arm. The mouse is definitely for shooting.
Second, vehicle’s balance provides easy aiming both at land and airborne targets. Very handy when defending your base from the drones.
Third, the looting platform. Drive up to your breathless victim, exit the cockpit and slowly go forward. The railings will stop your movement. Do the looting. When hunting, keep the height at 1—1.5 m, and you will be able to reach anything on the ground while standing on the platform. Then turn around and enter the cockpit to continue.
Fourth, the forward acceleration of 10 m/s allows you to climb the steepest of mountains.
Fifth, it consumes very little fuel. You can probably do three round-the world trips on planet size 3 if you fill tanks to the brim at the base.
Find something to do during the day. Gather food, craft yourself a shotgun, and a detector. If you are still at level 5 this will deplete your tech unlock points completely. That’s why I don’t unlock and craft items that are not immediately useful. Fill fuel and oxygen tanks of the Hunter. Don’t forget about the ammo! When evening comes, go to the eastern desert towards the night and patrol the dunes until you spot a desert golem. He’s a melee fighter and poses no threat at the distance. Kill him with gatlings and loot.
Holy-shmoly! What do we have here! I told you, it will be fun. Flying through the desert at night, finding good golems and killing them… You’ll never do mining again, I swear. Mining is for losers and multiplayer, not survival. Hunting gives you everything. Once I brought back about 300 iron ore only, not to speak about other ores, from a single night session.
If you spot some lonely drones, practice on them too. You will need the drone-shooting skill when defending the base.
After meeting sunrise in the east, stay with the night and proceed west zig-zagging through the dunes from north to south. This way you prolong nighttime and have more golems to shoot. Your hunting grounds will be naturally limited by mountains, water, other biomes and enemy installations. Keep away from the latter, especially when you see the flying Xenu mainframe. These areas are usually patrolled by Zirax troops that will swarm you easily if you are not careful.
After you meet the sunrise again, now in the west, it’s time to go home. I earned five experience levels, and a nice supply of minerals.

At level 10, with the goodies provided by golems you can build a CV with a warp drive and leave this planet for good.
Shelter
Whether you want to spawn a CV using a factory or want to build it yourself, you will need some sort of base. PC is able to process only iron, copper, and silicon. MC adds cobalt, neodimium and sathium to this list. Neither of them can process zascosium or erestrum needed by stock blueprints, and the CV starter can be crafted only using large constructor (LC). You can always cheat, put something together in creative, then spawn it on a base consisting of a core and flat surface to put your blueprint on, but that neither fun nor hard and therefore contradicts the very name of this guide. Let’s build a shelter with our own hands.
Start with a foundation 7 by 7. The roof of this size gives a place for four turrets and we will have four exits from our shelter. It will be more an anti-aircraft site than a housing. Look strictly at N or S, then place a base starter. It’s a nice habit to have. This structure will be properly oriented should you decide to add solar panels to it.

Make the walls three blocks high. This will give us an additional volume for such a small building. Put a roof on top of them. The roof will be the fourth block. You need only 165 concrete blocks for this structure.

You don’t even need doors to be safe from radiation! The doors will be needed only if you wish to make inner space oxygenated. Now make an LC and put it over the core. Fill it with resources required to craft 2 cannon turrets and 700 rounds of 30 mm ammo (70 rounds per batch), see picture below. Put the ammo box in the corner over the LC. You won’t be accessing it often anyway, and it is more convenient to add ammo using the control panel of your base.


Order it to make 2 cannons and 10 items of 30 mm ammo. Make sure the LC is on, so the production begins immediately after the base is powered. Put a small generator and a fuel tank in another corner. Open control panel, add fuel and turn the power on. Let’s see, who will be the first: turrets on your roof or drones at your door. Once it took them about 10 days do decide to pay me a visit.


Damn drones are ignoring us again! Forget about the drones, you can add a fridge and a food processor too, if you wish.
Brick Flying
On to the CV. As we got no drone attacks yet, and we don’t know where the drone base is located, how do we decide where to put the shipyard? It is possible that a large ship will be sitting directly on the firing line. Actually, that is not a problem. If you spawn something large, you can move it away literally the moment you spawn it, and our flying brick will be the same height as the base, so the turrets should be happy anyway.
A word of caution: even the small CV, as the one we are going to build, requires a lot of resources, so a single night hunt will probably not be sufficient. Feel free to hunt golems for more goodies. Sooner or later drones will come too, with flux coil, nanotubes and other components. Put these to good use.
Make a concrete platform, say 5 x 4 where the terrain allows, and let’s start building a CV. Place the starter so it will be parallel to the shelter, not running directly into it. Make CV bottom 5 x 17 steel blocks. I have colored blocks for you to better see what’s going on.

Make an YZ symmetry plane to aid you.

Put the second layer of blocks.

Put windows and doors. Switch symmetry plane on and off as you see fit.

Put food processor, fridge, clone chamber and an advanced constructor.

Put armor locker, ammo box, ventilator.

Put 2 T2 fuel tanks and a large oxygen tank. The reason behind using T2 tanks is they consume less energy per storage space unit. If the radioactive fog comes, stay in shelter and use your drone for construction.

Put 2 small generators. Large generator is too powerful for this ship.

Make a multi tool and charges for it. Fill fuel tanks of your ship and use the AC to make a T1 RCS (gray). Don’t sit in the cockpit! Use your ship’s control panel for that.
Put RCS above the armor locker. Use the multi tool to remove the core. Place a steel block instead of it. Make a new core and place it between the ventilator and top of the clone chamber.

Place 3 elevator blocks behind the pilot’s seat.

Use ship’s AC to make a warp drive and a warp tank. Put them between AC and generators. Colored them in pink so you can better see.

Put two double size cargo boxes to the left of the AC. Overview of all internal equipment, color coded, in place:

Complete the hull, put a spotlight over front windows and a shutter door over the elevator.

Put 10 small thruster blocks on the sides, right in the middle of the hull, in a cross shape.

Put one minigun turret in the front.

And two in the back. Couldn’t resist, painted it yellow and black, like survival school bus.

Put ramps under doors.

Check the stats.

Stuff it with fuel and oxygen, and the sky is the limit. At the moment, in fact, the sky IS the limit, as we don’t have any pentaxid. I didn’t find any in lakes, probably it doesn’t generate there on arid planets, but there are crystals in radiated areas. Or you can put a mining turret on this ‘bus’ and mine pentaxid on the moon.
Conclusion
The construction of the CV marks the end of the survival oh this planet. I haven’t covered two topics: gardening and POI looting, but they are the same as on temperate planets, and are not strictly necessary for a successful survival.
All the vehicles for this guide are available in the Steam Workshop:
If you desperately want a small vessel to park on top of the survival bus (yep, the elevator is there for a reason), try this one: Orca Scout Gunship by Jolly R0ger. It’s cheap and very maneuverable. For even more strafe and gun power there is an armored Gyurza, dedicated attack fighter for POI turret suppression. Better to change its gatlings for something more substantial, though.
I have created another CV for arid planets survival, MFG Cobra Mk III, based on the original Elite model, in full combat armor and desert camo. It definitely has a survival interior, too.

Check it out, and good hunting!