
Overview
In this guide I will show you how you can edit an existing scenario to replace the player’s train, or any AI train, with a different train of your choice. This is a new feature in Train Simulator 2015. If you look for advice on how to swap trains, you’ll often find outdated discussions telling you that it’s impossible without external tools, or that it requires manually re-entering a train’s schedule. This is no longer true! It’s so trivial now, I figured I’d whip up a guide.
Introduction
For this guide, I’m going to edit a scenario on the Cologne-Dusseldorf route, replacing the default train with one of my own choice.
For those interested, the new train I’m introducing is a Dutch Railways Mat ’64 four car EMU. This train is not (yet?) available on Steam, but can be bought directly from the developer on [link]
Pick the scenario you want and clone it
It’s a bad idea to directly edit the scenario for two reasons.
First, if you mess things up and then press save, you are left with a broken scenario.
Second, your changes may be thrown away when an update to Train Simulator or its DLC is released, and your file is overwritten. Or when you verify the integrity of your game files.

I usually put a little text in front of the original scenario name, like “[Personal Edit]”.
After your cloned scenario appears in the list, you can directly move on to editing it by pressing the “Edit” button at the bottom right of the screen.
(optional) Choose additional content to be loaded
At this point you should be in the scenario editor. Move your mouse to the top right corner of the screen and the scenario info panel will show up. You can change the season and weather if you want, but whatever you do, don’t change the “Start Time”.
If you want to swap the train with a train that’s not included with the route you’re playing. you first need to tell the game which additional content to load.


After you pick a vendor, a list of content packs will appear below. Pick the content pack you want. You may need to do a little exploration to learn which train comes with which vendor. The vendor named “Kuju” contains the classical trains included with the game when it was still called Railworks. “RSC” contains more recent stuff. The names may be slightly different than the names used in the Steam store, e.g. “KentHighSpeed” is the London-Faversham High Speed DLC. The manuals usually mention where you can find your train of choice.

The more content you add, the longer your loading times will be, so enable as little as you have to.
Place the train and transfer the train’s orders
NB: I’m not going into the finer details of using the scenario editor, as there are some good guides available on that already. I recommend SpacialKatana’s video series.
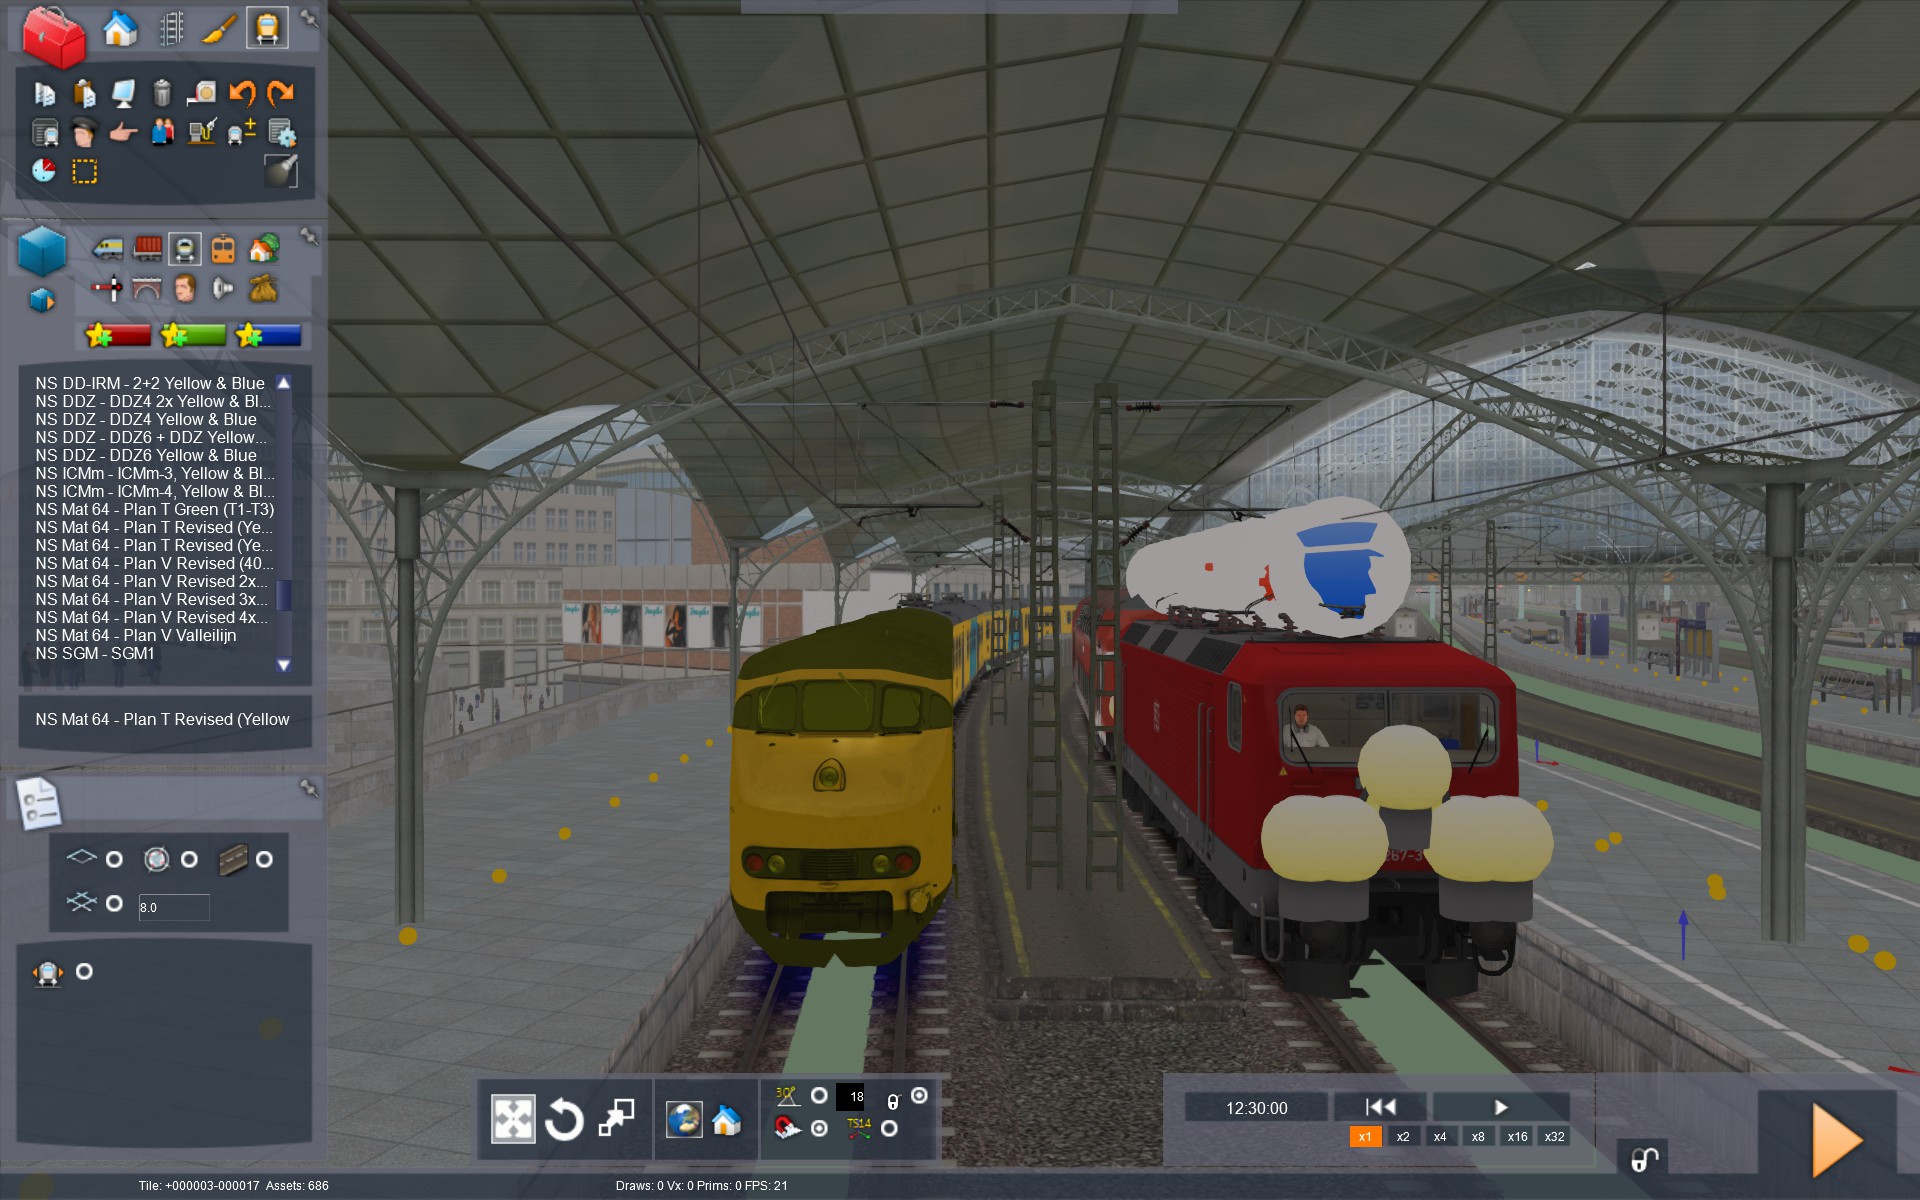
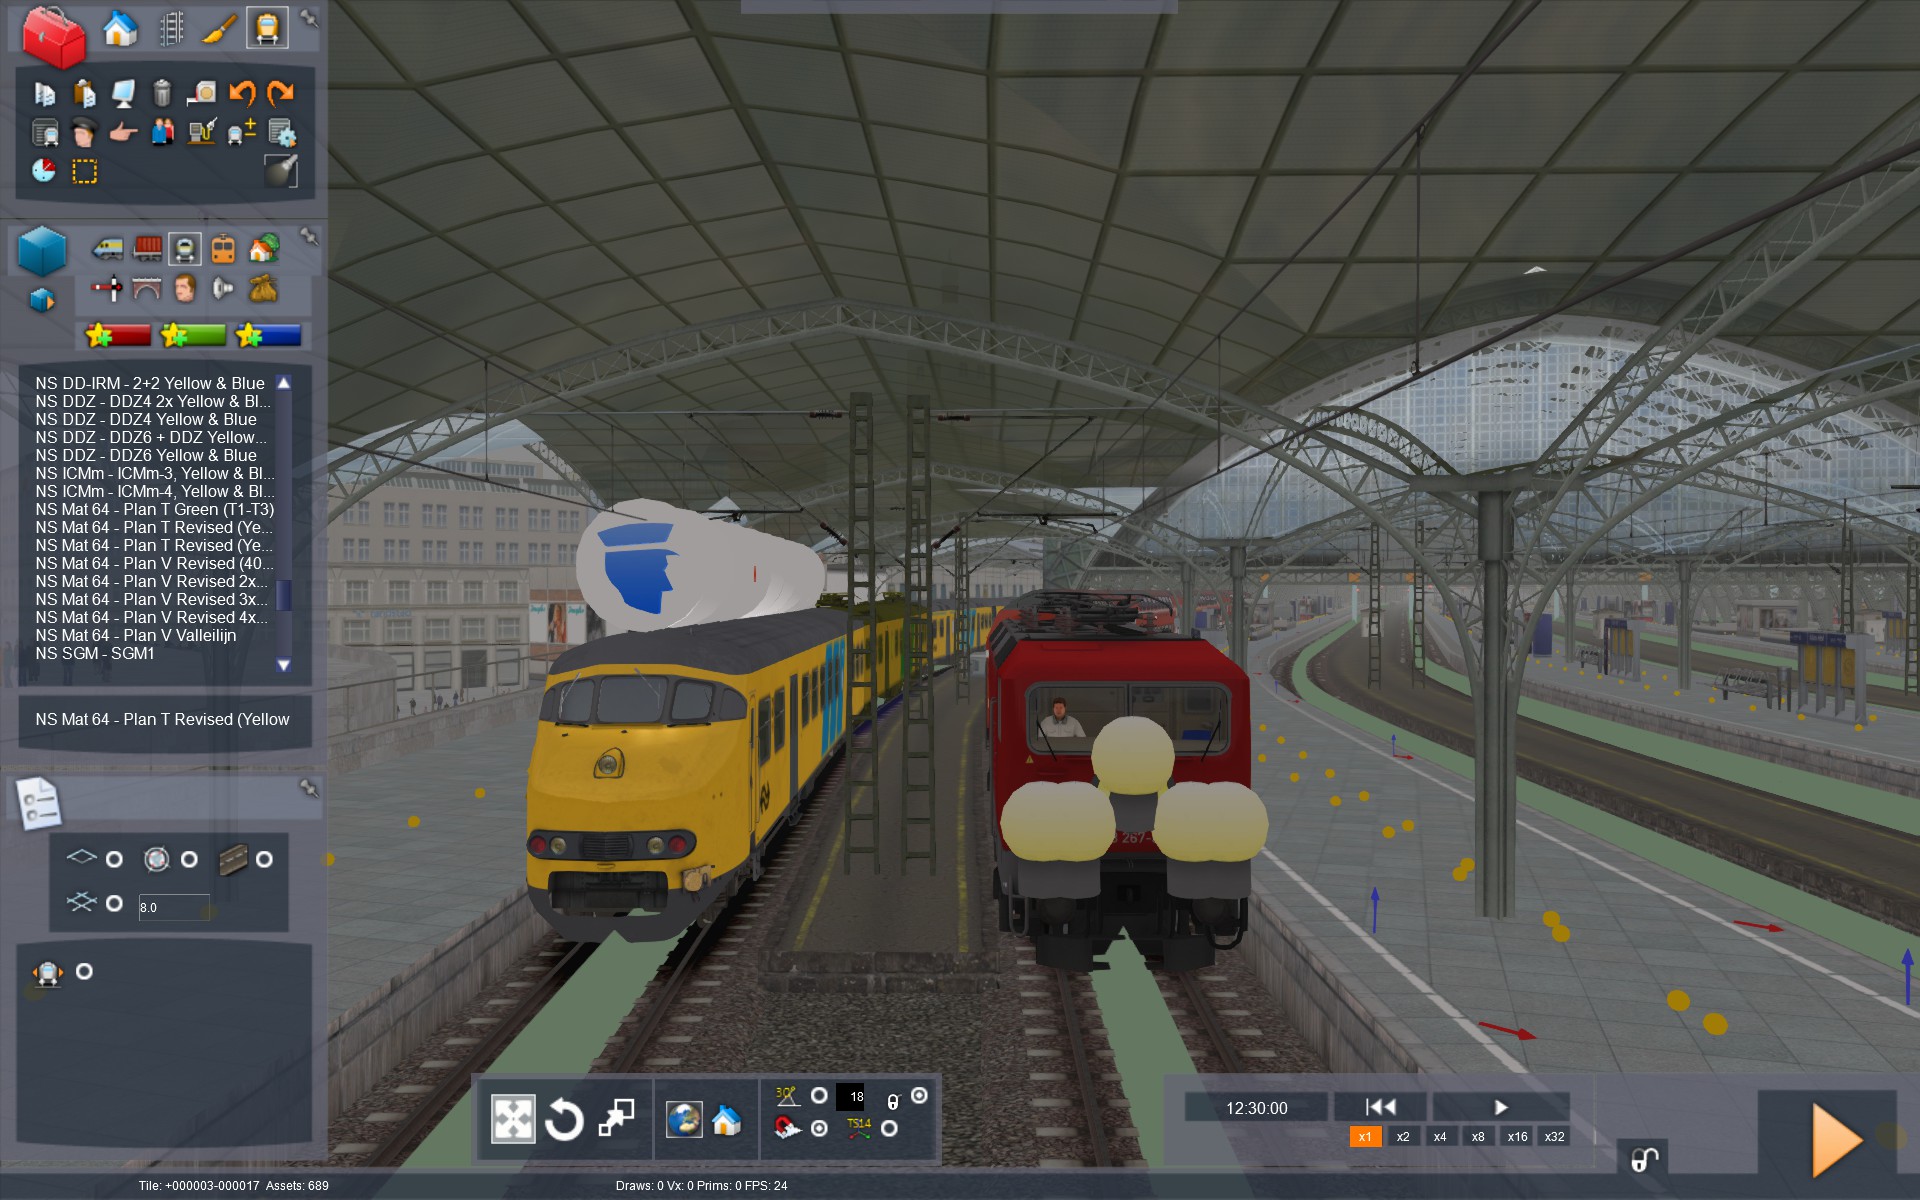
You will now need to move around the map to find the player’s train. Floating above the train are little icons representing the orders it has. Instructions for the player and AI trains look exactly the same, so we need to check if this is indeed the player’s train.

Find some space nearby where you can place the new train. In this case, there are plenty of empty tracks available, but you can also use the track in front or behind the train. Don’t worry too much about it, you’re only looking for a temporary holding space.
In the following examples, we’re going to swap the player’s red train with the yellow one. Remember that you can press Ctrl+Z to undo if you make a mistake.


Usually there should be no problems, but you may experience a few signalling issues, where the lights stay red forever. After saving the scenario, you can go back to the main menu and load it from there, that should fix this problem.

Potential issues
Warning: This section has quite a bit of train nerd stuff going on.
Swapping a train may cause some problems, sometimes insignificant and sometimes game-breaking. Please keep these in mind. Usually things will only look a bit odd, but they will still work.
Your train’s engine(s) may be too weak, so that it takes longer to reach cruising speed, or you may not even be able to reach the maximum allowed track speed at all. Similarly, your brakes may be weaker so you need more time to slow down.
If I’m driving a German or Dutch train on a UK or US route, the speed limits are advertised in miles per hour, whilst the train can only tell me what speed I’m going in kilometres per hour. Either convert these values in your head, or just rely on the speed in the HUD, which should always display the speed in the correct type for the route.
Not really a gameplay issue, but it may look a bit odd. Trains that are too wide appear to clip through the platform.
In proper terminology, the train is too large for the line’s loading guage[en.wikipedia.org].
Generally speaking, in the UK the loading guage is rather small. This is why you never really see double decker or bi-level trains there. In the US, the loading guage is pretty big, cars with two standard shipping containers stacked on top of each other are a common sight. The German profile is somewhere in between those two. Despite this, the track guage in all three countries is the same, 1435mm, also known as standard guage.
The smallest loading guage I can think of, with regards to Train Simulator, is on the Isle of Wight. The tunnels on that route are too small to fit regular UK-sized trains, so instead former London Underground Tube trains are used.
Also, the overhead wire may be too high for the pantograph to reach. This is mostly an issue if you use a UK or German train on a US route. In the game, even if the pantograph doesn’t make contact, it should still work.
The wrong loading guage shouldn’t really cause any game-breaking problems, your train will just clip through tunnels and scenery without crashing. Theoretically, there’s a chance your train can hit cars on parallel tracks because of its width. I haven’t actually seen that happen, there’s almost always enough space between the tracks.
I don’t own any routes for Train Simulator that have a track guage that’s not 1435mm, but player Budge4 has informed me that trains of the wrong guage will still work, they will just not appear to touch the rails properly and seem to float.
If you’ve swapped a diesel or steam train with an electric train, and the route’s not electrified, you’re not going anywhere. Similarly, a train that uses overhead wires for power, may not be able to drive on track that uses a third rail, and vice-versa.
How big of an issue this is, depends on the route and the train. I’ve found that often the train will work anyway. I’ve driven trains that require an overhead wire for power, on tracks that only had a third rail, and vice versa. Sometimes, you don’t even need to raise the pantograph, even when there’s only a third rail available. On the dashboard it may appear as if you have no power, but your train might move anyway. If not, just raise the pantograph. It’ll look a bit odd, but your train should move.
If you don’t like the way this looks, and your train is of the electric multiple unit (EMU) type, you may be able to swap out the car with the pantograph for one that doesn’t. You may still need to press the “raise pantograph” button.
German trains tend to use PZB/LZB, UK trains tend to have AWS. On US trains, usually nothing specific, although some routes use a form of in-cab signalling, like the New York-New Haven line.
If you use a train that has a different safety system than the route, the safety system will simply not be active. All this means is that you, as the driver, will need to pay a little extra attention.
It is only really a problem if you need to depend on in-cab signalling, and you’re in a train that has no support for it. You may be able to make do with information from the game’s HUD.
On some routes, trains are required to have an emergency exit on the front and back of the train. If the train were to come to a standstill in a confined space, such as inside a tunnel, or on a bridge, there may be no room for passengers to exit using the regular doors on the side. This is true for many routes in the UK, and it’s why so many trains there have a door on the front and back.
Of course, the door can also be used to let passengers move to a different train that’s coupled up to it, and many trains in the UK also have this capability. But some trains have this door purely for safely reasons, like the London Overground Class 378 and the Class 319. Another example are the trains on the London Underground. The more modern Docklands Light Railway doesn’t have these emergency doors, because its tunnels are big enough to let passengers disembark using the regular side doors.
This, obviously, is not an issue that affects gameplay, it’ll just look somewhat unrealistic.
Have fun!
I hope that this guide will let you get more out of the Train Simulator content you already own. In this guide, for example, I’ve replaced a German S-Bahn train on the Cologne-Dusseldorf route with a Dutch train. I was never a big fan of the default trains that came with this route, and I also had these Dutch trains lying around which didn’t come with many scenarios of their own.
Instead of taking the time to create my own scenarios, I’ve simply swapped a train around so I can play the game the way I want to play it.
