
Overview
A complete walkthrough for the main storyline, tips and tricks for beginner, map of the regions, hidden achievements and more.(still in working!)
1. Notes and personal oppinion
After buying the game and encountering problems with the Storyline i realized that there are pretty much no written guides or walkthroughs for the game yet. I do realize that it isn’t long since the game got released but I wanted to at least put something together. I know my englisch sucks as hell and I’m sorry for that, but u gotta deal with it. I would appreciate any tips and corrections to eventually reach a full, usable guide! :3
I read some of the reviews from other players and just can’t resist to give my personal opinion to it.
First of all: The game got Voice-lines, that are, !!!like showed on the store-site!!! only available in Japanese! The interface and subtitles are available in most common languages. Thus, if you really can’t play without englisch dub, better refund the game now and don’t blame the devs but your incompetence to read!
2nd: The game supports controllers pretty good, but it could happen that you have to set it up in the “Big Picture”-mode of steam first and restart it before you can use it! You can look it up here: [link]
3rd: The categories of the game are first and foremost “Single-player”, but also Online Multi-Player and Online Co-op. This doesn’t mean its an MMORPG! BUT after you get through the dialogues that could pretty much fill complete manga-chapters and anime-episodes you can enjoy a decent combat-system that reminded me quite a bit of Monster Hunter. After completing the first Region (1 Region consists of multiple areas) you will unlock the Multiplayer-mode. In my opinion this extremely resembles Monster Hunter ’cause u can either just solo the game with your NPC-companions or get some friends to clear the map together!
The game consists of multiple parts, for example after clearing the main storyline you will unlock the DLC-part WotS (Warriors of the Sky). You can transfer your safe-file over (recommended). There are multiple parts where this occurs ’cause there are 3 DLCs in total. For the PC-version of the game all DLCs got implemented, thus “Deluxe Edition”, you just have to unlock them while progressing through the game.
The guide is for new players joining the game and ought to be read from the top to the bottom, thus content that gets implemented later or isn’t important until you get further into the game won’t be explained earlier!
2. Basics
First of all here is a short external guide to the basics:
[link]
In this section you will find my personal recommendations and explanations about the game. The information you find here doesn’t have to be on the mark or the best choice, but it certainly is a good start if you are a casual player in the world of RPGs!
Affection System
There is an affection system in the game. While fighting with your team you will see their emotions and can upvote those. I recommend upvoting the following emotions depending on their role:
- Heavy Support/Healer: Caring (Selica)
- Tank: Planning (Lizbeth)
- Fighter: Fiery (Asuna)
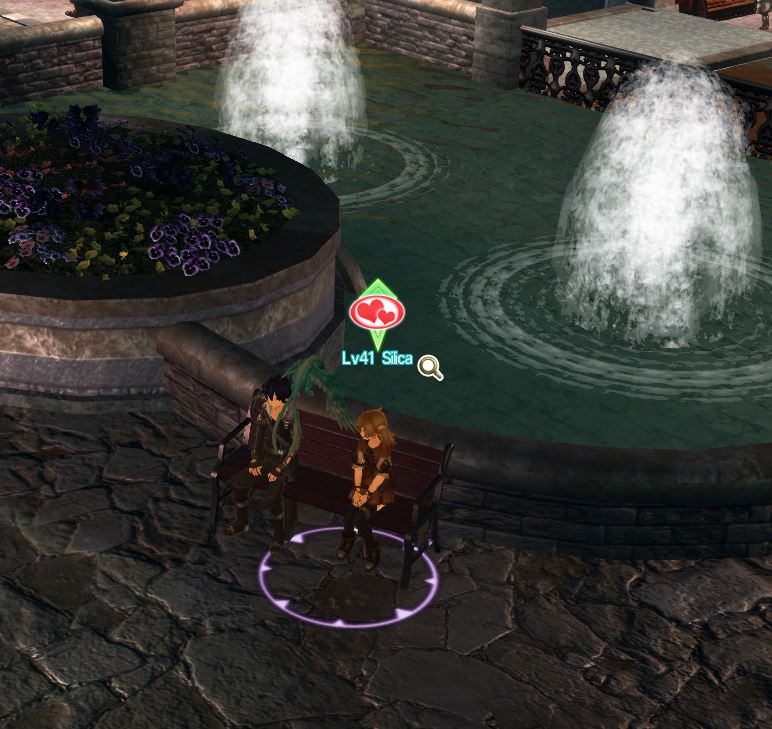
If you want to get the achievements for maximum affinity here a short guide to get some progress while playing:
Take 3 “victims” with you while roaming outside the town and keep upvoting their emotions. After you hit “Intimate” with them you can change your party for your next ones. While you are in town you can take those with an intimate friendship on a walk.
Now just start a deeper conversation(you will see a heart above their heads):
By the way you trigger the conversation with the same button you start a normal conversation with them. Now right after the conversation starts zoom in (you will trigger actions just spam the button):
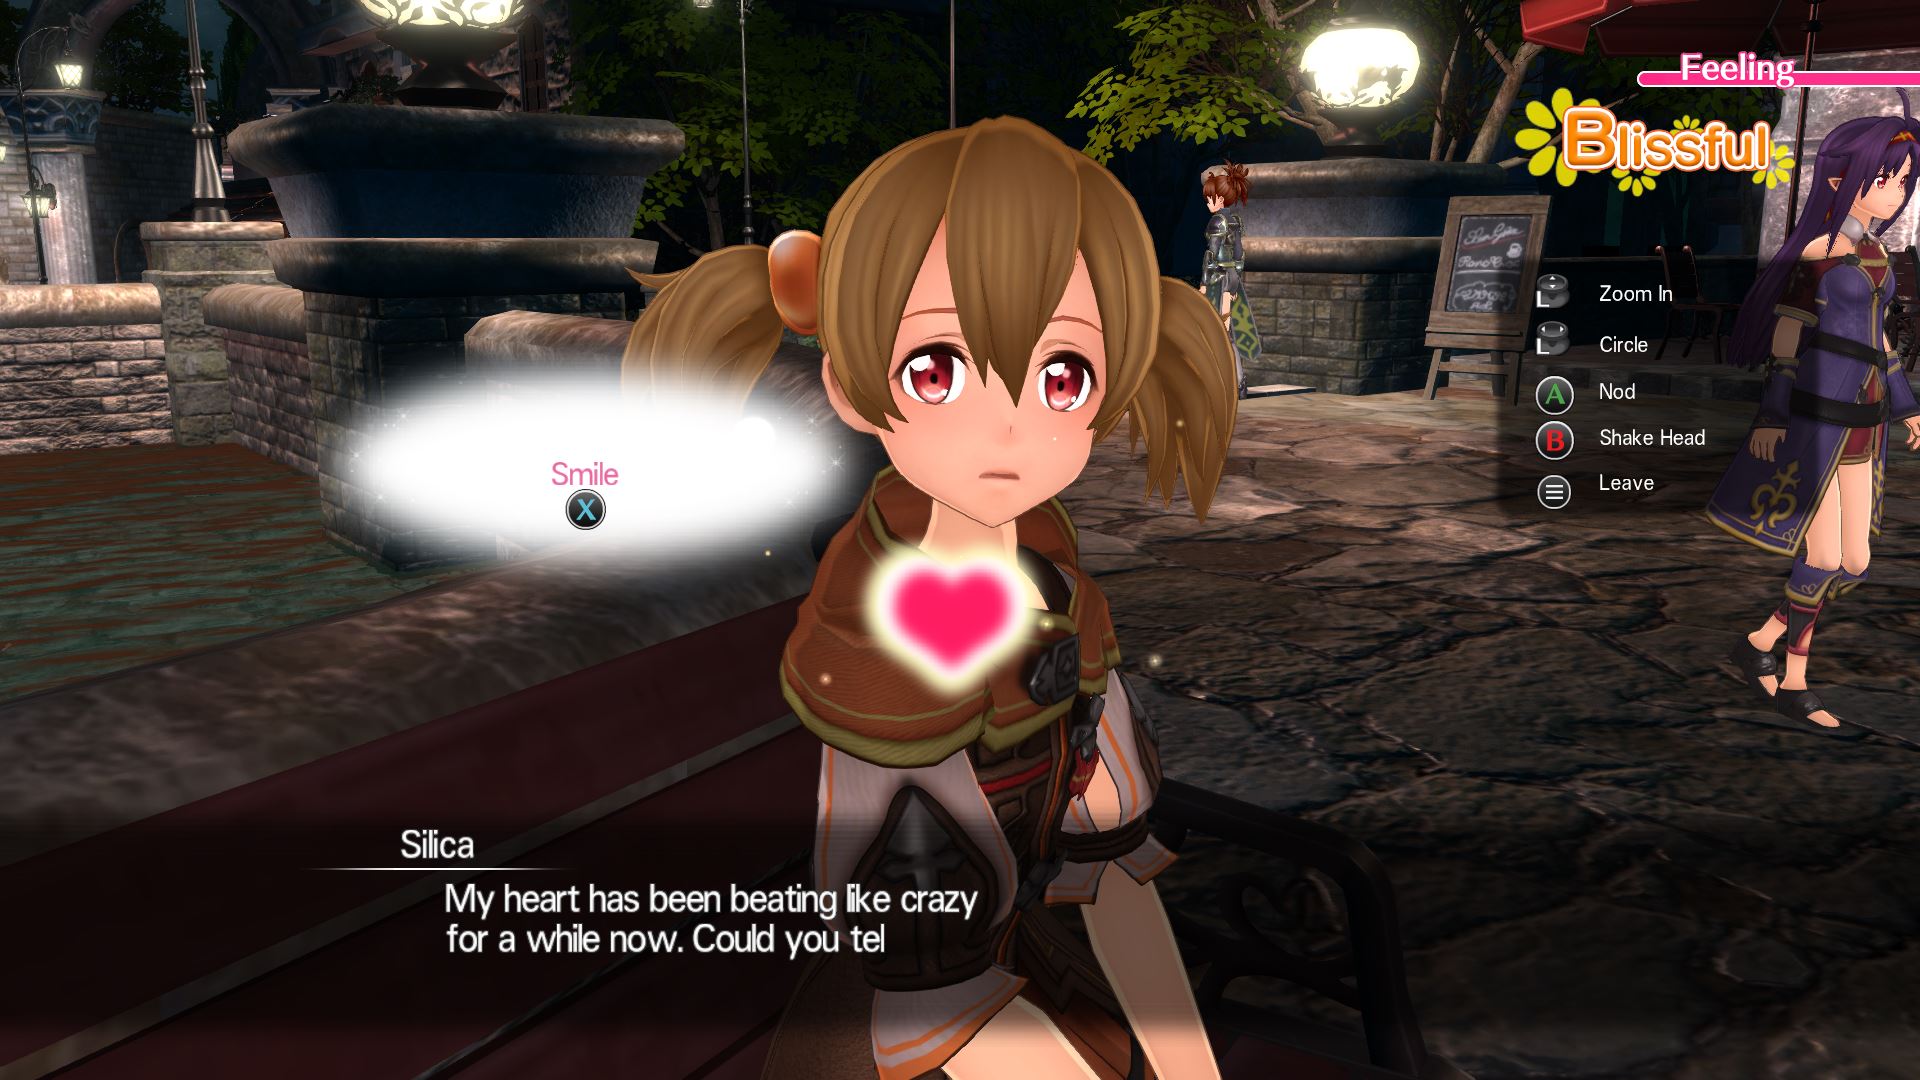
Do this up to the 10th level without a break (the last level is the “Kiss”-action) and stop right there:
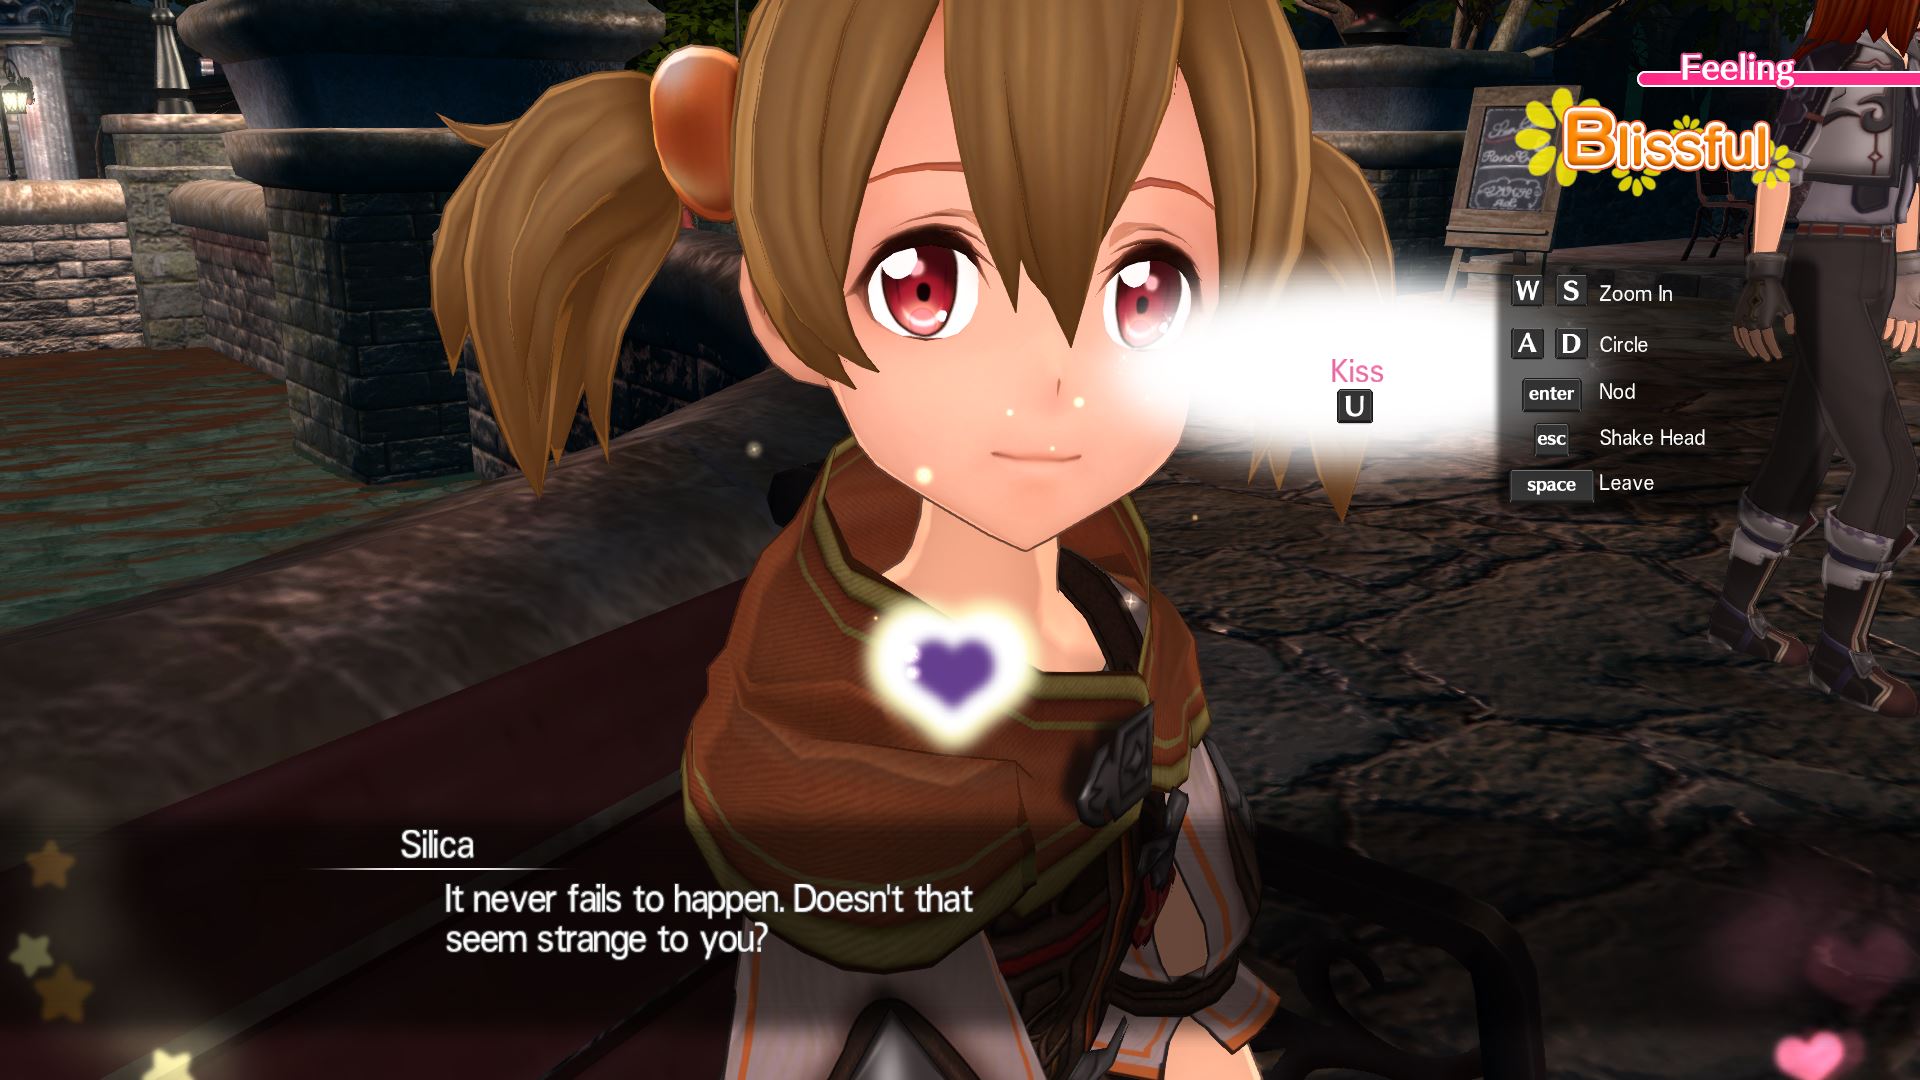
The heart should be purple so don’t move any further and just give her the kiss, after that just stay there and nod /shake your head depending on what she says. You should get at least +70 points per conversation this way.
Appearance & Gear
So maybe you don’t want to part ways of your stylish blackwing coat? Worry no more, here is the solution:
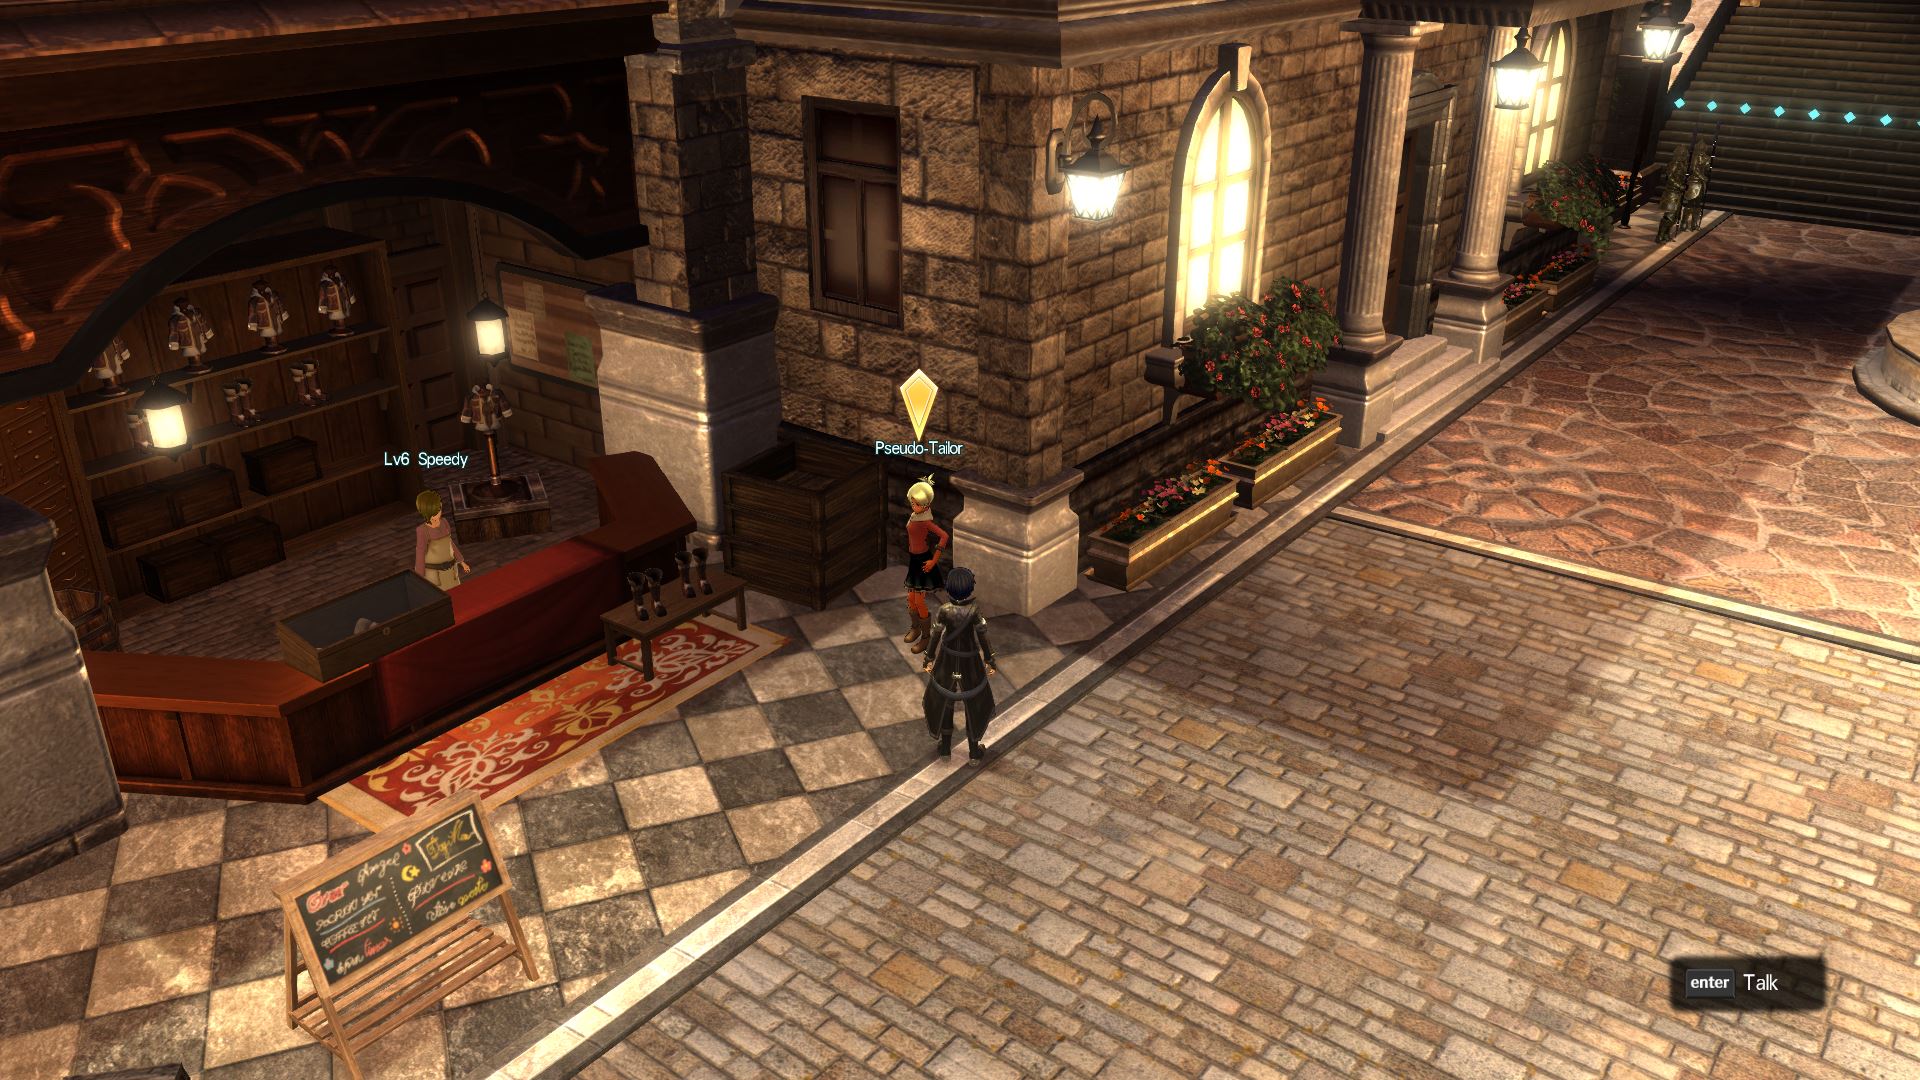
Here you can change the appearance of your equipment. It also works on your allies, so if you have a maid-fetish… 😉
Now for the gear. Like alrdy mentioned at an earlier section of the guide you will get new boots and a coat from Liz after clearing the 2nd region. Thus, you don’t have to focus on that parts. You can still exchange the gear for those parts for some better but you shouldn’t waste your resources on upgrading them!
Now for the stats. It doesn’t rly matter which weapon you use or which stats the equipment got at the start. In my opinion the most important stats you need are no negative stats (- VIT) and Health. You can focus on dmg at your weapon, but for all the other gear-parts you should look for anything that gives you a nice health-bonus. This will raise your survivability at the earlier stage of the game extremly! The best example are nearly every youtube-streamer that made a walkthrough. If you watch them fighting bosses they loose 3/4 of life taking 1 hit. With some gear with health-bonus u won’t even need to dodge ’cause you got way more life. (for example you start with around 200-300 life, 1 decent gear-part can give you 1.000+ life, the boss-monster at the beginning do ~100-150dmg, I think you get what I mean just imagine yourself with 6 items that give 1.000+life for the earlier stage of the game!)
Black Market
If you go to the Teleport Gate Plaza you can find the “Shady Merchant”:
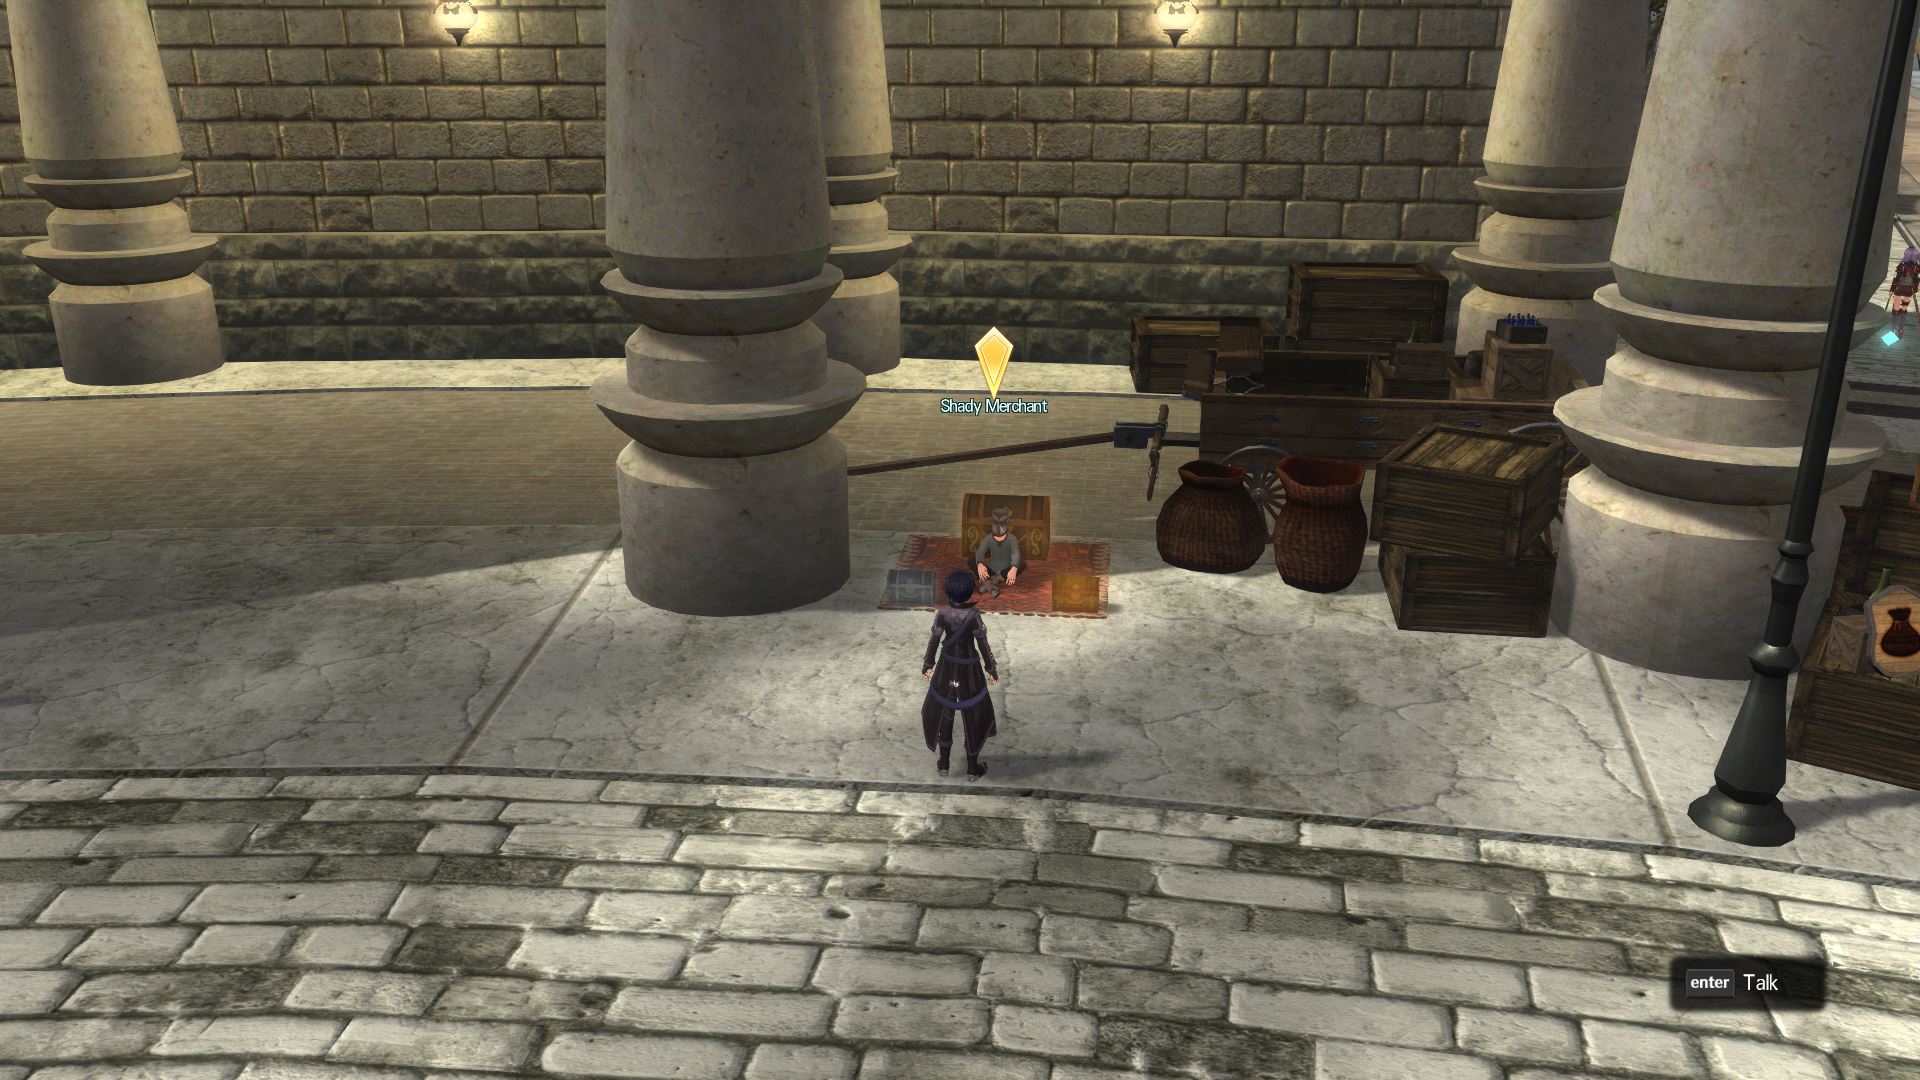
So if you didn’t read the tutorial here some information:

This is a normal store where you can buy elixirs for Ultana GP
- you can buy elixirs from him that will permanently increase a specific stat
- you can only use 200 Elixirs, after that you can still buy them but they won’t increase your stats!
- you can use the “Restorative Elixir (stat)” to delete the effect of all elixirs you used on that stat
- deleting/resetting the stat will naturally give you the opportunity to use the same amount of elixirs on another stat
So there is a Black Market with some strong items from which I can recommend getting 2:
- Odin’s Touch
- Divine Harbringer
There are 2 chests before the merchant. The stuff you get from them is randomized and will be updated after some progress in the storyline. Until you finish the storyline and reach WotS you won’t be able to use the golden chest though.
First of all, I recommend using them for elixirs and getting Odin’s Touch / Divine Harbringer.
There are also items that require a Paradise Ticket. You get those from fighting any NM in WotS. (you will unlock this later)
To farm Ultana GPs I recommend this method:
But you can also just go for a combo chain, just kill some monsters to raise your bonus-ep. The higher the count, the higher the possibility of obtaining an Ultana GP!
Combat 2.0
I wasn’t sure if i should implement it but i found it a bit hard to find or figure out myself. Further below in the guide in the section “5. Itemdrop locations and more” I linked another guide. I recommend reading the section “SSC combo” in it. It explains how you can chain your sword skills correctly to increase your damage output (the longer the chain the higher the damage-boost like 110%, 120%, 130%). The bonus only applies as long as you can maintain the chain though!
I also want to add another part that I couldn’t find in any other guides. Just like the blue stars you can see at the end of your skills there is also a yellow star in your auto-attack combo:

You will also hear a specific sound. If you time it correctly, you can chain a skill on this yellow star that will reduce it’s SP-cost by 50! I don’t know though if you do more dmg but it is an amazing option to stay on the attack 24/7 unlike just spamming auto-attack which can get you in a vulnerable state where you cant dodge for 1-2 secs (this changes later as u get skills that use more than 50SP as well as complete animation-cancel skills). If you time your chain correctly you will hear a 2nd sound. At this part I want to warn you though, I came to the conclusion that you can be 2 fast so you have to wait at least 0,5 secs after the star shows up before you can successfully chain! This is due 2 the game blocking the command for ~1sec if u for example spam the button. Please take note that your auto-attack pattern is different if you use it shortly after dodging as well as moving into a direction while atacking!
Something that I also realized while watching some of the youtube-walkthroughs is that the Parry-skill isn’t used much. I rly recommend it for the start cause the monsters attack rly slow so it is easy to time and if you get the hang of it you get 50SP (it costs 50 and gives 100 for blocking) and also stuns your target. Another command is “Switch” that can be found in the sub-palette that can be used for animation cancel, stuns most enemies and also lets you back off a bit from them for no SP! Also your selected partner will jump in and deal quite some dmg so it is a skill you should always use especially cause if it succeds u get a skill connect which results in ur enemy falling into a weakend state and ur abilities getting an insanely high dmg-boost. You also have the “Dodge”-command in your sub-palette to get your companions out of enemy-attacks, even though u won’t rly use this one later anyway (u need the space for skills) – except Switch which will stay quite some time.
Another command that can be hard to use at the beginning is “Use Skills!” from the sub-palette. Your teammates will chain their skills and after they are finished the last one of the chain will call your name. For this part you can just spam a combo-skill but it is essential that it is aregarded as a “Combo Attack”. You can check that over the skill tree though the weakened skill you use at the end of your auto-attack pattern is a combo-attack as default, but I can’t recommend to count on it cause the time it takes to execute your full auto-attack pattern (that can be interrupted by the enemy) can be 2 long to trigger the chain-bonus and thus results in the skill-chain to fail. If you succeed, your companions will say that you did a great job (all at the same time) – yes, this is the same thing that happens if u use the command “Switch!”. The only difference is that “Switch!” also works as a free animation-cancel and has a high chance 2 stun ur enemy if it’s charging an attack.
Controls
While watching some walkthroughs on youtube I came to the conclusion that most guys don’t focus in the tutorial or forget some of the most important commands to make this game quite easy!
Just to be on the safe side here a rly short table for the (in my opinion) most important commands that you will use troughout the game:
EX-Skills
There are some hidden skills like Dual Wielding that can be unlocked by fullfilling hidden requirements! I wanna update this section frequently to have a list for all hidden “EX-Skills” in the future:
After searching a bit I found a complete guide for this part:
[link]
Pls note: U can freely equip an ex-skill even if u don’t have the appropriate weapons equipped for it (for example u can have shield+sword equipped while ur active ex-skill is Celestial Blades(Dual Blades)). Due 2 that u won’t be able 2 use the attack skills of that ex-skill, but take advantage of their passive skills as well as buffs! Keep in mind that switching 2 a weapon type u didn’t use before can result in a display bug not showing the ex-skills anymore – just reequip it over the skill-window 2 solve this!
Gender and Voice
The default character is actually Kirito himself, but you can customize the character and even create a female one. If you do so, please note that the game will ask you if you want to turn off Kirito’s voice-line. I recommend you to do exactly that, so you won’t here a male voice in your place throughout the dialogues!
General Information / Tips & Tricks
The game certainly has it’s focus on the SAO-fans as playerbase and thus I will warn all of those that only watched the Anime! The story in SAO:HR isn’t based on the anime, but on the novel! Thus, there are differences, for example characters that u may have never seen before or that Kirito met different persons way earlier than in the anime. It’s nothing world-destroying, but something u gotta keep in mind if you don’t skip all those dialogues.
- The teleport-platforms are more like fast-travel points from skyrim, you don’t have to walk there after unlocking them! This also applies for in the town! You can just open the map and quick-travel!
- Dual Wielding is fun, but the weapons are pretty much balanced, so you don’t have to go for it!
- If you are aiming for an EX-Skill(Celestial Blades/Tank/Buffer/…) keep in mind to save up skill points so that you won’t have to fight without any abilities!
- After clearing the 2nd region Liz will open up her shop in town. Afterwards you can take her with you again, the shop will be managed by a small NPC-girl. She is like a fast-travel to Liz so that u won’t have to search for her in town to upgrade your stuff the whole time:
- I would always take all killing-quests from the board and complete them
- In most cases you need the materials you gather yourself later so I don’t recommend going for the gathering quests except you really got way 2 much of the required resource(200+)
- Occasionally a “revenge-bosses” can spawn on the map. Those are usually lvl 90+, so don’t try fighting them, you don’t stand a chance at the start
- I recommend Liz as blacksmith for later (just my personal opinion)
- You will get an enhanced coat and boots later from Lizbeth that look exactly like Kirito’s gear from the start so you don’t have to worry about upgrading gear for those places(boots and chest) too much in my opinion.
- There is a command for your companions to heal, use it if your HP drops ’cause they will also heal you with their skills
(Silica got heal-skills so take her for the start but other characters also have them!) - If u go on a walk with someone u can interact with them 2 find the option “gift”. This option is in fact ur opportunity 2 equip ur teammates. U will see their current equipment on the bottom of ur screen.


Weapon, skills & skillpoints
This part of the game, again, resembles Monster Hunter quite a bit. You can change your weapon anytime you want and are thus free to choose with what to fight. Depending on the weapon the skills will naturally change!
I recommend using every weapon for a short time until you get a skill level of 100 with each of them (achieved by just spamming auto-attacks to kill mobs):

This will result in a huge amount of skill points, because you get them with the progression of your weapon-skill level!:

Next to the weapon skill level there is also a sword-skill level(SS level). You have to do some math to find out how high it is for your current weapon. Just add up the SS mastery of all active skills:
Some of the skills need a level requirement that isn’t connected to your character level.
They can be referring to your SS level or your weapon skill level. You can discern them by looking at the Level Req. itself ’cause the maximum weapon skill level is 1000. Thus, all abilities with a Level Req. of over 1.000 are referring to your SS mastery. By the way the highest Level Req. for your weapon skill level is 500:


Now if you still remember I recommended using all weapons once to reach a weapon skill level of 100. It doesn’t even take that much time but I still have to explain how this works. You get experience for your weapon skill level for each HIT. This INCLUDES abilities (cause of that you also see how many hits they do!) but it isn’t as effective as normal attacks. The reason is that the experience you get is bound to the amount of hits you do. The damage though isn’t implemented in that calculation. So to effectively lvl your weapon skill level you want to do as little dmg and as many hits possible! Don’t worry, this isn’t important if you only want to hit 100. The reason for that is that the experience you get per hit diminishes with the progress of your weapon skill level for that weapon.
Now this isn’t rly hard to explain. For every 10 (I think) weapon skill level you get 1 skill point. No, you don’t get any for levelling up, only your stats rise that way!
This one is easy: Your sword skill mastery rises by 1 each time you use that ability. Simple, right? Just spam your abilities if you need a higher sword skill mastery. Now why should you do that? Well like mentioned there actually are abilities that have your sword skill level as requirement.

3. Storyline – Base game
Tutorial
Again, I rly rly rly recommend using a controller!
I don’t know what to say for the tutorial part, but for the part where you ought to use the Chain command, you have to use a Combo-Skill at the end after the other 3 finished their attack and call you name. It is the first skill you have as default so just use it 2-3 times and it should do the trick!
Town of Beginning
After the tutorial you will be dialogue-chained for days so better prepare some good food to enjoy while reading or just skip the hell outta it :3
You gotta run around with Asuna and listen to even more conversations, you will be finished after visiting all areas of the Town of Beginning at least once (there are 4 areas in total)
After you finished everything you should be able to enter the first area over the Teleport Gate Plaza.
Rustoria Plains
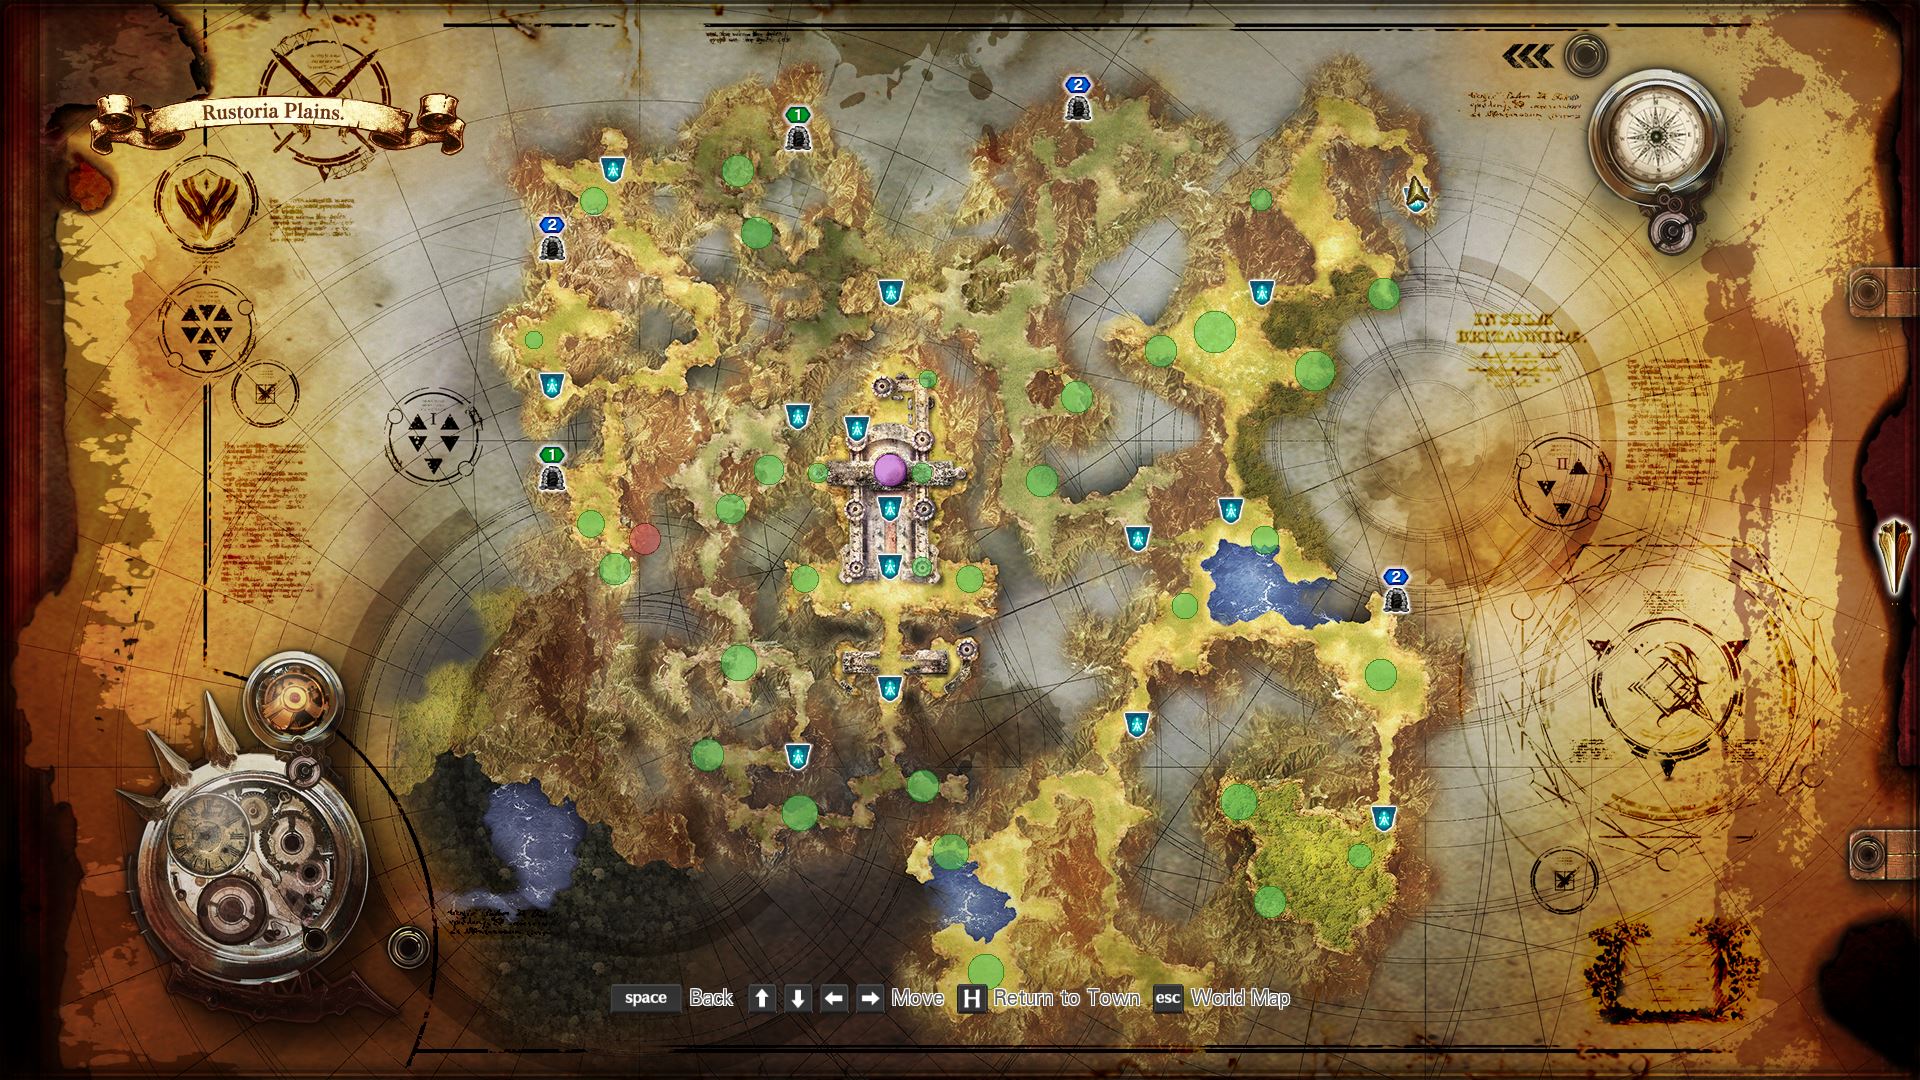
Argo’s Quest
The aim is to finish the event in the middle of the first map.

I recommend to finish all quests from the quest-board(except the gathering ones) and level up slowly with mobs at your level (cause it will go way faster than trying to kill stuff thats 3-4 level above you at the start) so that you are at least level 5-7 or even higher (you can’t proceed to the next map unless returning to the town first)
Get the popcorn out, another dialogue-session awaits you after returning to town 😀
Liz’s Quest
After surviving the 2nd wave of dialogues combined with lightning-speed combat-time you can finally take control of your character back and proceed to the 2nd map 😀
To achieve this you have to start at the 1st map again and proceed to the end of it, then just cross over the border to enter the 2nd map:

The aim of the quest is an item Liz desires which you can find here:

And now enjoy yet another dialogue-wave :3
After you finished the first manga/novel-chapter about Premiere you can finally proceed to the 3rd map. There you will trigger the “Castle”-Quest
Some seconds after that you should reach the Castle-Gate and get the “Golem”-quest, the first part where most players mentally die. To solve the quest you have to retrieve the heart of the golem that can be found here:


Now you can return to the castle-gate and activate the golem. After defeating it you can pass the gate and enter the next area.
After entering the cave you will soon arrive at a dead end with a male NPC before it. He tells you to get two different materials for him so that he can craft dynamite and clear the path.
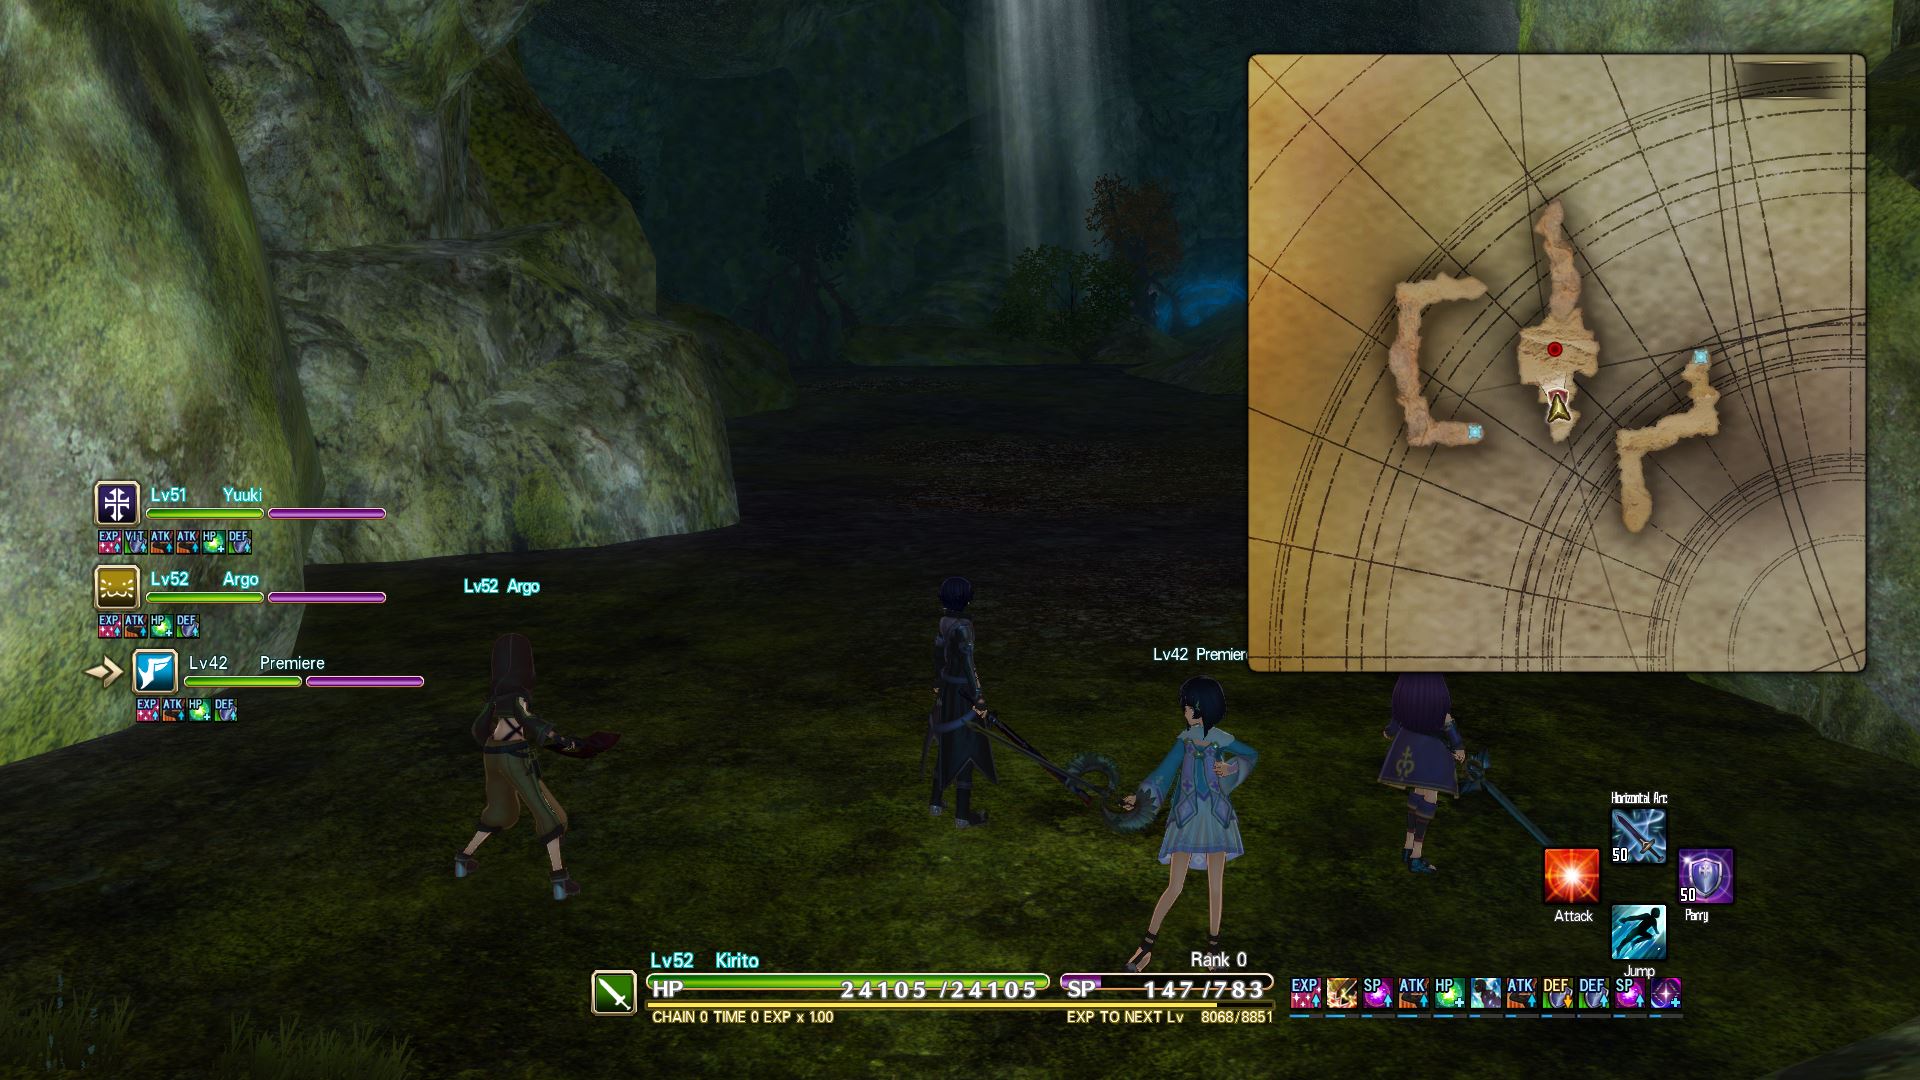
“The first one is a Blastweed Seed. You can find it growing in the gully just outside of the entrance to the mine.” I never got such a misplaced explanation, cause it definitely isn’t “just outside of the entrance.” Here is the location of the seed(where the playercursor is):

“The other one is a Dragon’s Talon. That’s a bit tougher to come by. You’ll have to fight the dragon to the west of the mine to get it.”
Aaaaaaaaaaaaand again another not rly accurate location from the game:

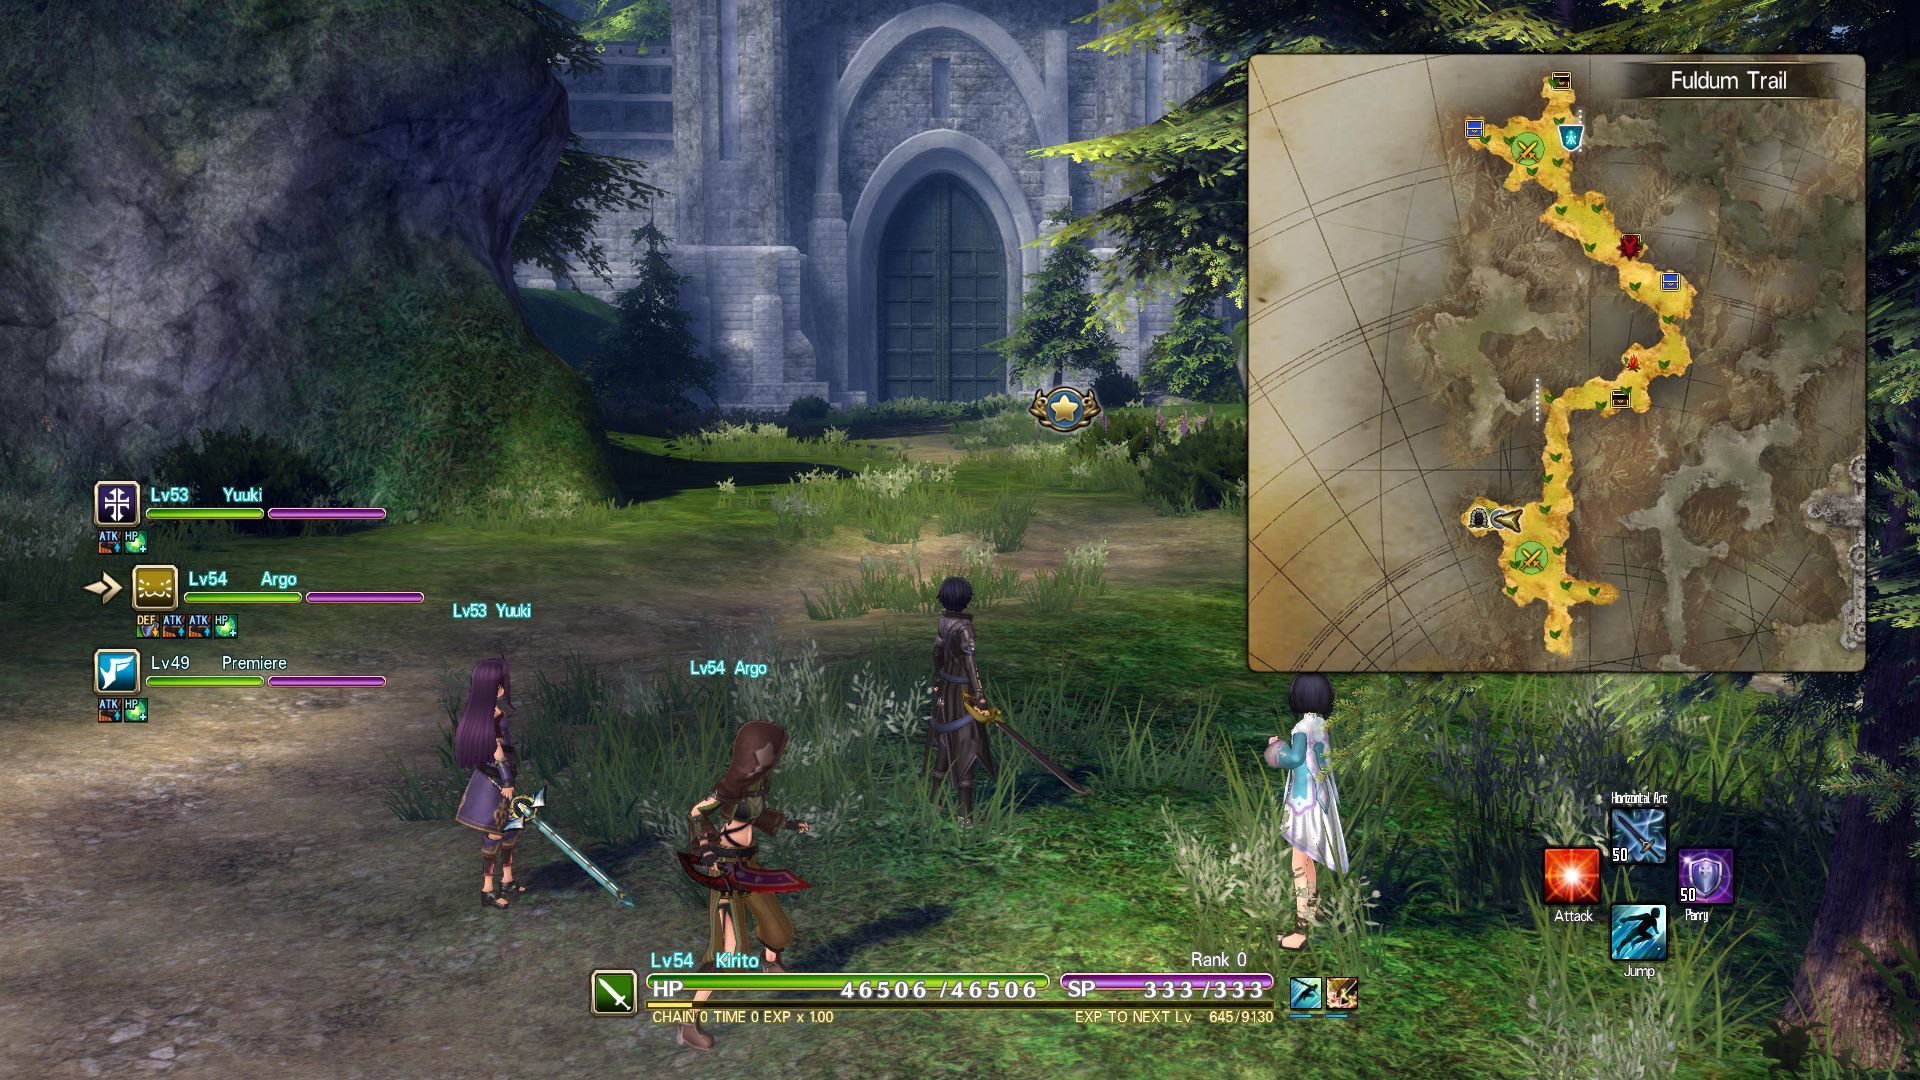
At least the directions to the areas were right, Fuldum Trail is west of the mine!
Now you can proceed to the castle. The last hurdle before you can encounter the region-boss(pretty much like a floor-boss from SAO) is to “Prove yourself”.
You get it from killing the Brutal Kobold Whelp and Elder at this location:

After this nothing seperates you from the region-boss. So now a quick explanation to the raid-options you usually get offered:
- Full Raid: You and 3 more parties
- 3 Person Party: You and 2 more parties
- 2 Person Party: You and 1 more party
- Solo: You fight the boss alone with your party
Note: You can fight the area-boss as often as you like so don’t bother with the last-hit for the achievement at your first try! Also, the boss is more like a tutorial-boss so he should be fairly easy.
Congrats, now you unlocked the 2nd region and another dialogue-hell awaits you :3
Oldrobe Forest
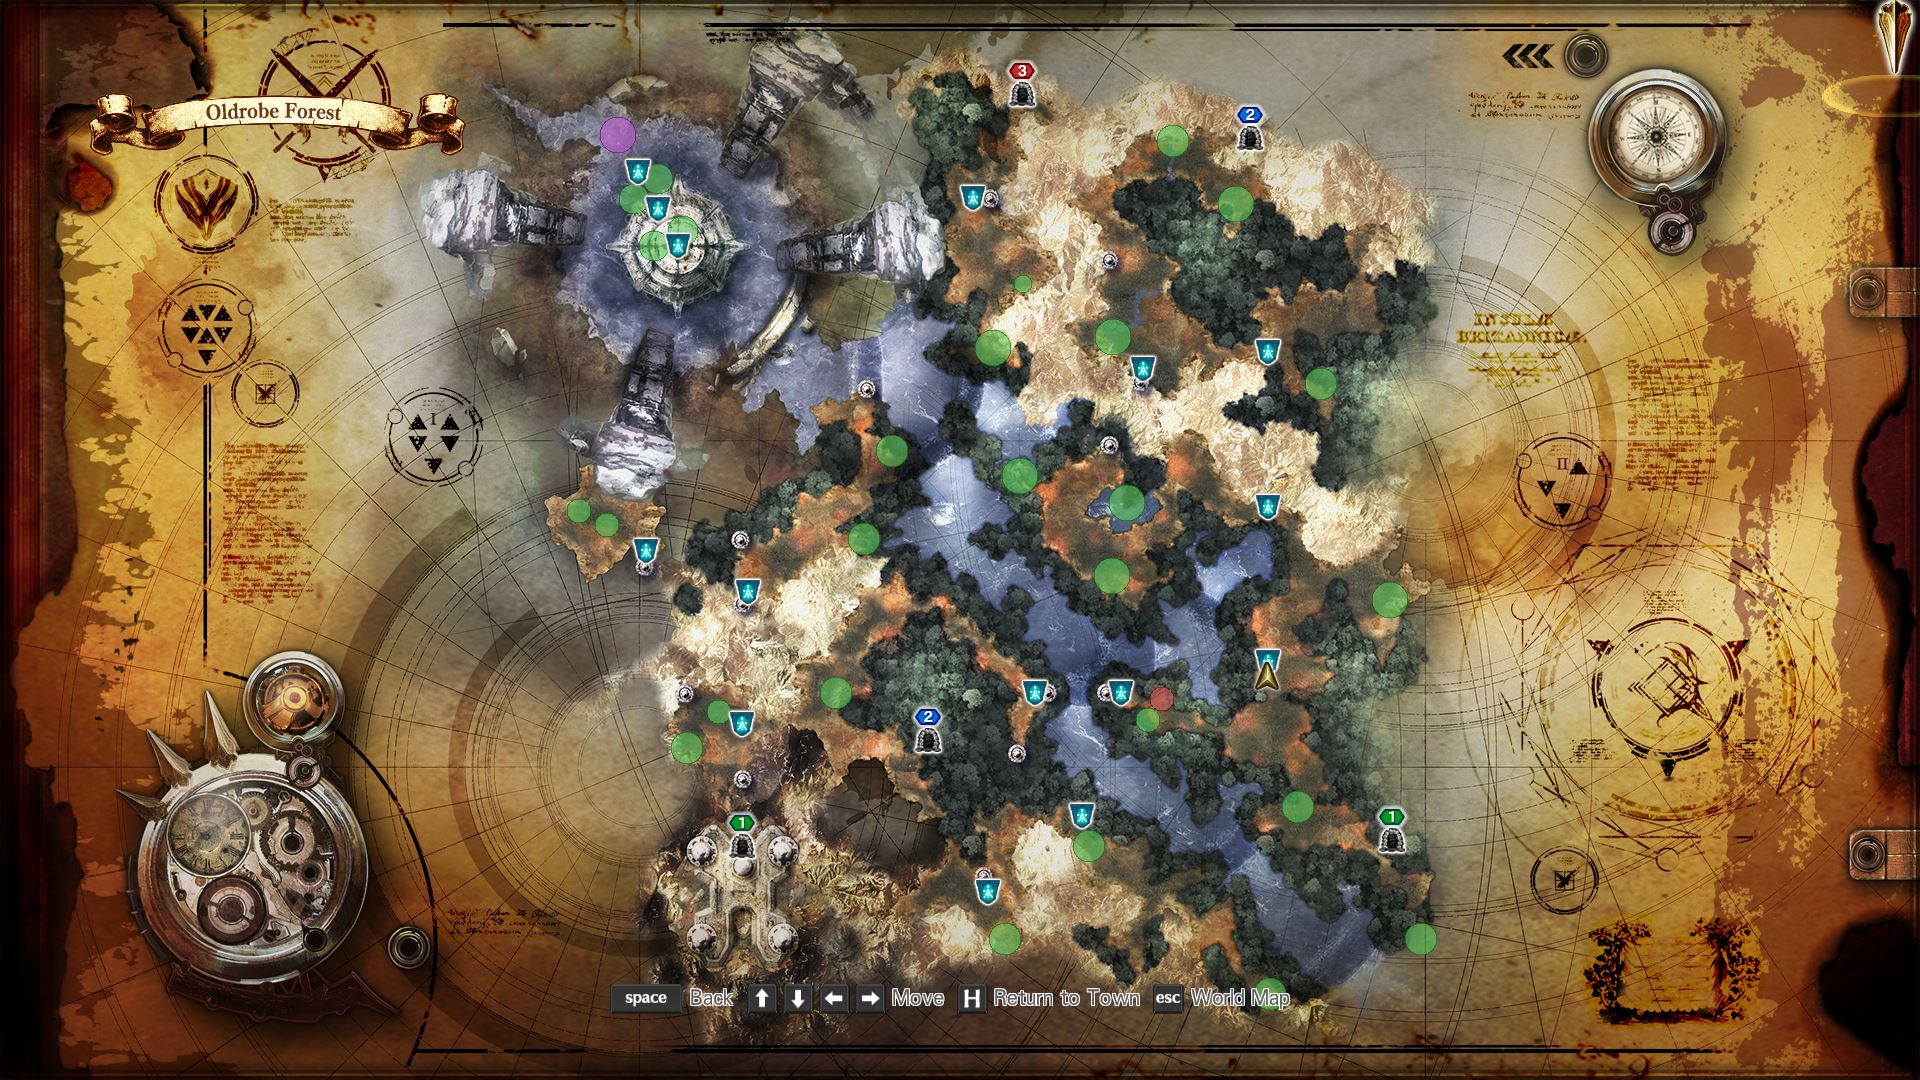
Welcome to the swampland. The first quest you get punished with is “to go downstairs”? Well the game is a bit unfair at this point ’cause you don’t see any marker, but don’t worry more, i will show you where to go to finish this quest and finally be able to proceed further!
You start at “Grilim Forest” and could see a little tower at the end of the cutscene for the area. After the cutscene your camera should be directed to the map:

Now if you turn around 180° you should see the tower again:

And if you look closely at the map there is another one at the other side of the river. These little guys are like shortcuts and you need them to proceed further to the region-boss. And this building is where you have to go to finish the first quest. After going downstaris a short conversation with “another player” will give you the information that some monster is blocking the path and you gotta interrupt a ritual somewhere to kill him and proceed. And now that you got the information about the ritual you can proceed to the next maps and you should be able to see your next quest-location on the map again!
If you aren’t good with those quest-markers here some pictures where you have to head to:

And as you hopefully already guessed, you have to return to town to proceed, and if the game tells you to return to town you gotta prepare that popcorn!
Now after surviving the dialogues you should be in the possession of a stone to clear the poison. After that you only need to interrupt the ritual:

The next quest is “Stop The Poison Rain” that you will encounter once you enter “The Ruins of Lufont”. To stop the poisonous rain just destroy the altar:
Now you should be able to proceed smoothly to the region-boss without any more problems!
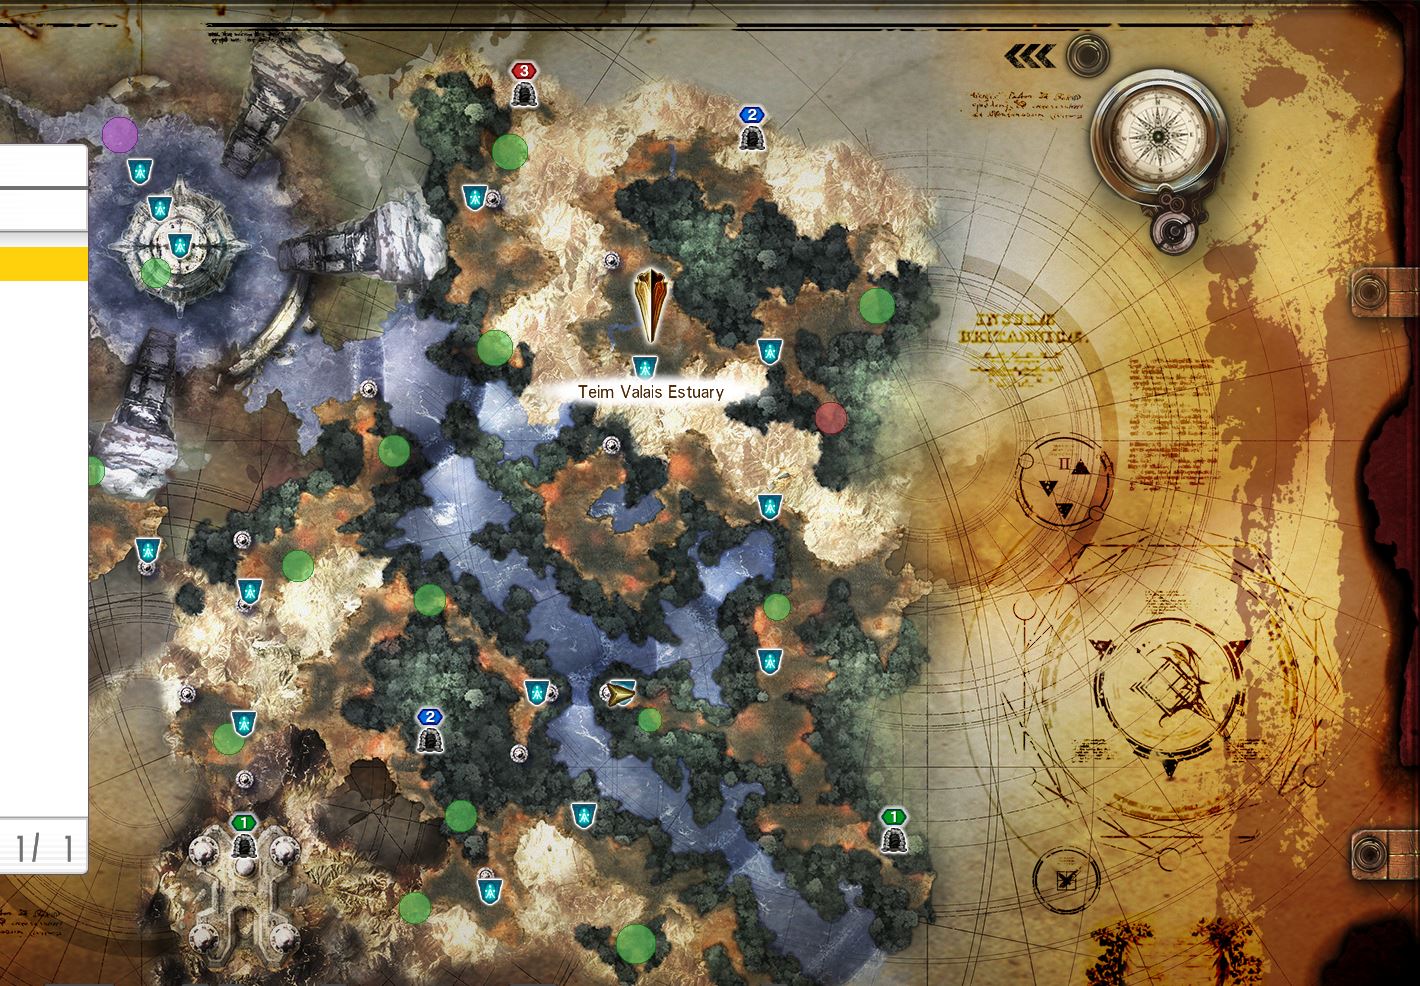
Jeweled Peaks Lakes
After wiping the floor with the 2nd region-boss we arrive at Jeweled Peaks Lakes. After a somewhat short conversation followed of Liz vanishing to open her shop you can take control of your character and either lvl a bit or get back to town first.
After entering the next area you will find a defect teleporter.
You have to find all 4 glyphs to activate it:


After that Yui will call you back to town so get your pizza rdy!
The next step is to activate and use the teleporter, after that keep exploring until you hit the next quest.
After you get the information that the “boss” already got defeated the game wants you to look for a secret path that you should easily find with the map:

Now you can finally proceed to the next area:

If it doesn’t show on the map here is the next teleporter to progress:
After using the teleporter to get to the new area you will get the chance to collect yet another glyph:
And with the new glyph comes a new teleporter to use:

Aaaaaaaaaaaand – time for some popcorn~
Now we ought to go to “La Fastille: Rear Gate”. To reach it start off at “Cranvede Path” and head east:

Here you will find a teleporter that will get you to our destination:

To activate you have to get another glyph first that can be found in the area south of Cranvede Path:

Now you should be able to proceed to the region boss without more problems. Good luck and don’t forget to prepare some popcorn~
Kurjiez Desert
Welcome to the desert. After you arrive you can proceed some maps until you get to quicksand. Just jump in:


The next stop will be a crystalwall that blocks your path until you find a dragon that ought to have an item to clear the way:

But you won’t have to fight the dragon but a skeleton that the dragon ate and is now in the posession of the crystal:

After that you can return to the crystals to destroy them. Our next stop is a teleporter (After using it you have to fight a small boss):

And now get your popcorn out we finally get some good information about the story :3
The next step will be to include Premiere into your party and head to the northern part of the desert:
(You will encounter another battle)

And we get another dialogue-train coming~
The next stop is the heart of the tornado:

To get through you first need a talisman from the reapers. Now this quest got quite some bad description ’cause you ought to kill reapers but the name of your target is a bit different:
By the way it took me 20 kills to finally get it so don’t get depressed if RNG hates u!
Now that you got the talisman u ought to clean it, but somehow Genesis is more important, you can find him at the camp:

Now we can get back to our stuff:
After you enter the tornado it will get a bit more complicated, but just a little tiny bit. Now there are 2 teleporters on the first floor and this one will get you to a small room with a small boss (for me lvl 82) and a single chest behind him(don’t expect much):

And like you can alrdy imagine the other teleporter gets you to the next floor:

Now I don’t want to bother you but after using the teleporter and arriving at the new map you will see the next marker and before entering the area better have some time for a quick combat!:

After clearing that small event we can proceed further:

Aaaaaand somehow this map got rly rly direct, the only thing holding us back from the teleporter is another quick event:

After this only the region-boss is left so have fun and get some popcorn to enjoy the dialogues afterwards!
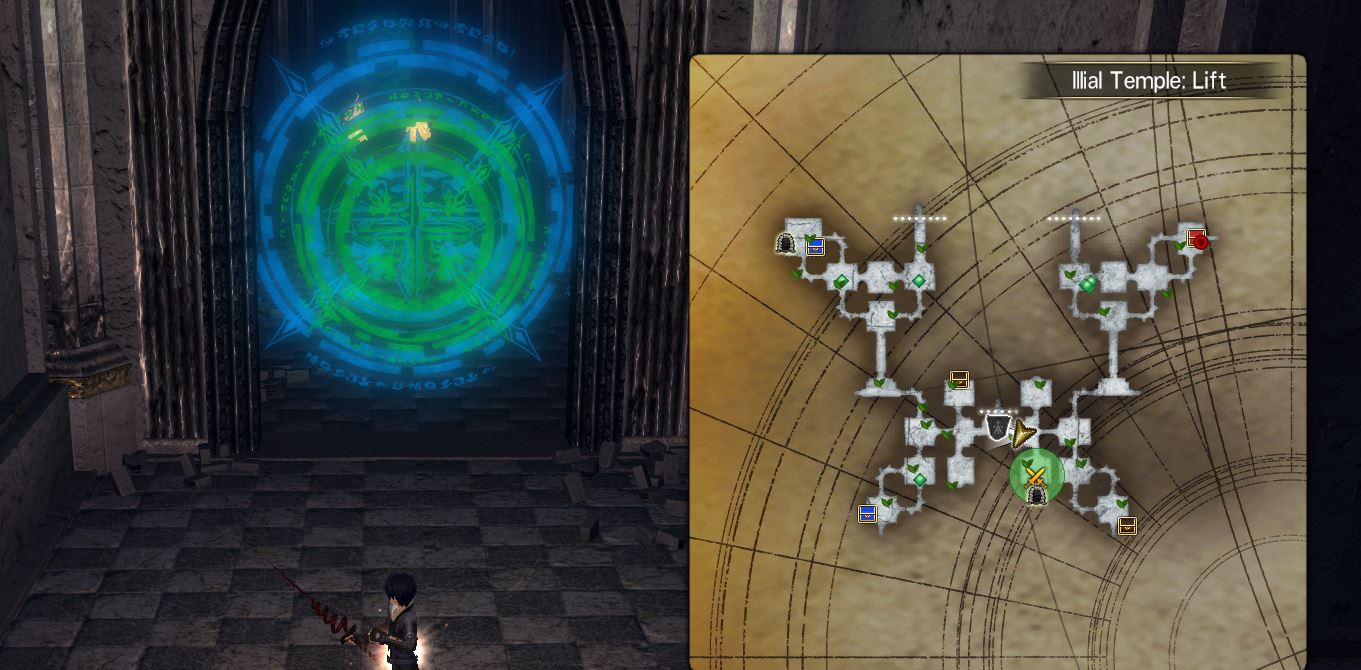
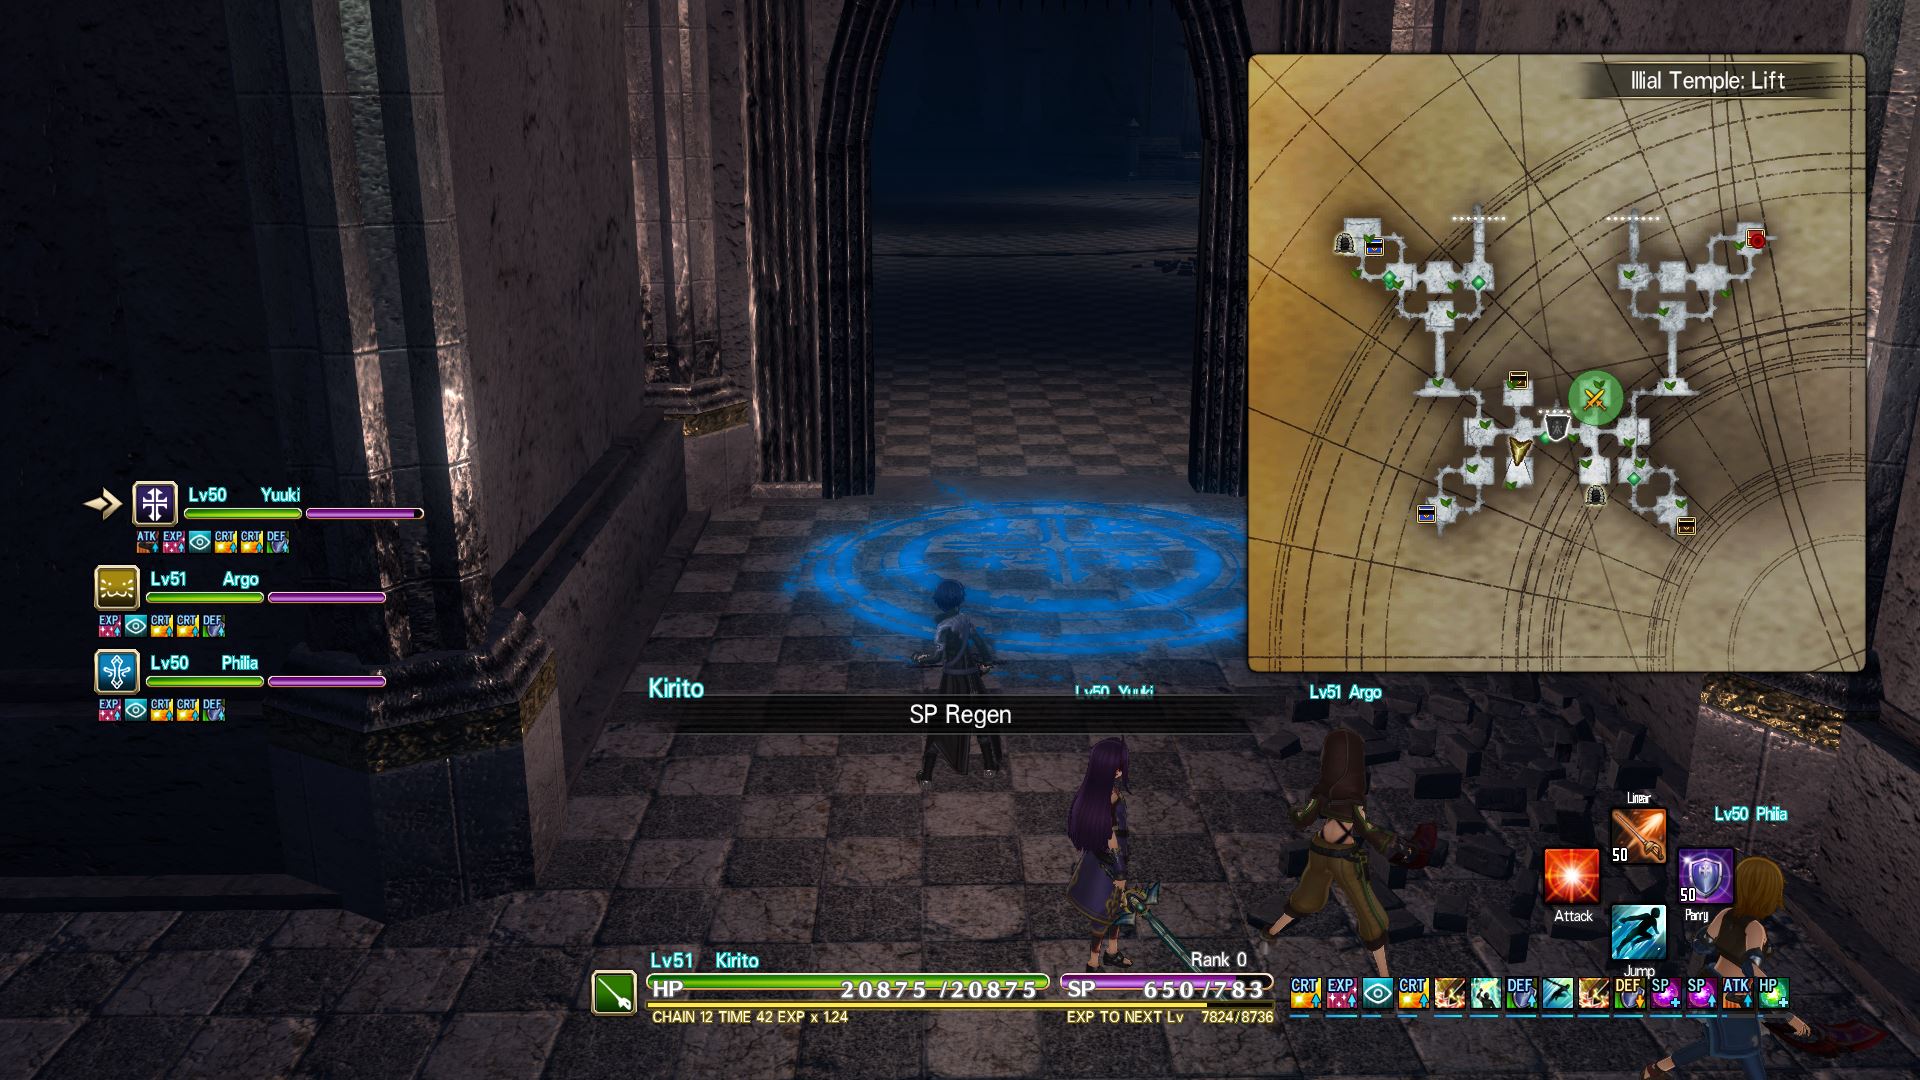
Oltrum Bastion


The path to the south is blocked so we have to head north.
This time the path to the west is blocked, we have to move north again:

This time we have to head east.
And now southeast:(mini-boss ahead!)
After we finally got rid of those statues we have to destroy the seal. Just in case you don’t see the markers you can see the location of all 5 switches here:


Now we can enter the temple:(mini-boss!)

~get your popcorn out~
Now after a short dialogue in town we can rush to the upper floors of the dungeon.
But the game gets a bit more demanding now. The questmarker is on the final floor, but you have to disable the seal on the 2nd floor first:
To do that you have to enter 2 specific rooms with a magical seal at their entrance, you will encounter a mini-boss in bouth rooms, after killing them you can proceed. Here are the locations of the rooms:

Sidenote: I don’t understand why they placed a teleporter at the END of the 2nd floor and one right at the beginning of the 3rd floor… Probably just decoration.
On the 3rd floor aren’t any seals blocking our way, in fact you can just move to the 4th floor that consists of 1 small room and our quest-destination:

After some fighting, talking and a pretty decent animation we are finished with this area(somehow rly fast!)
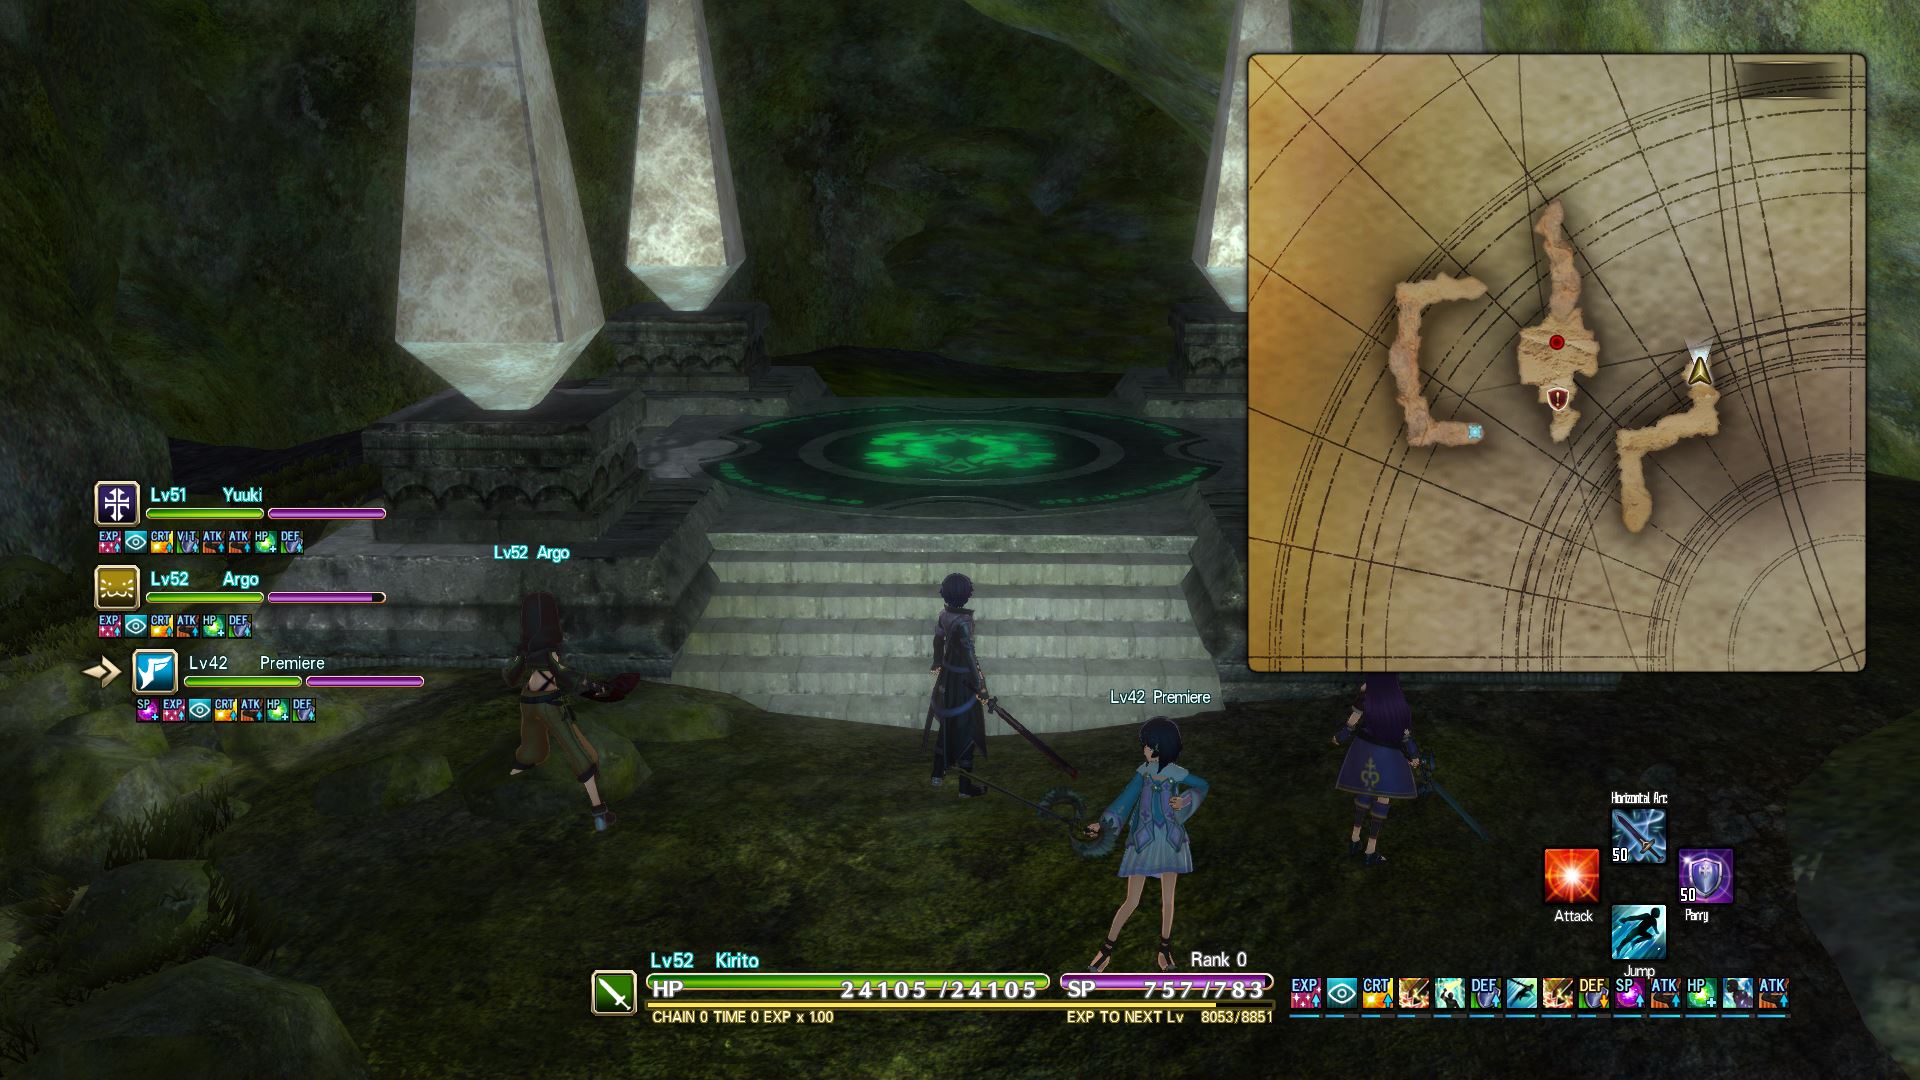
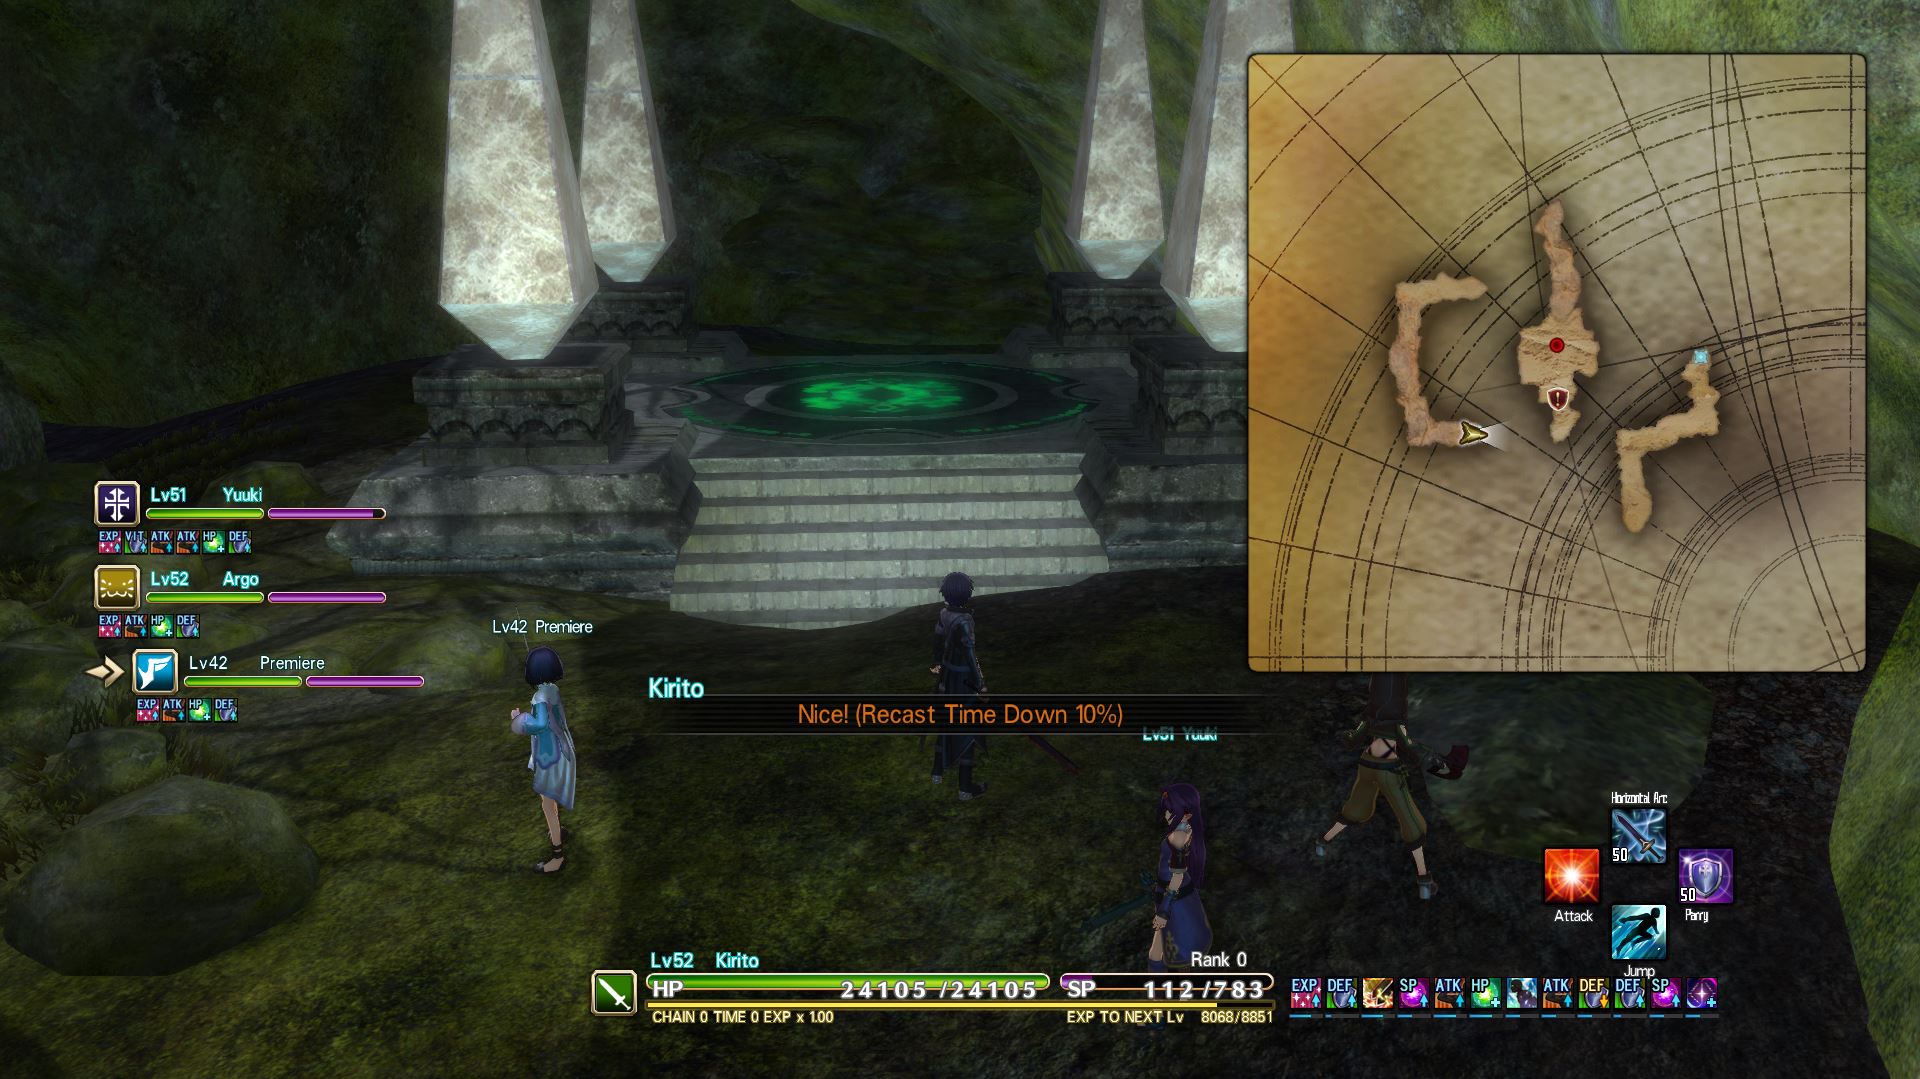
Aincrad & Tia
But that doesn’t free us from the storyquest! After Tia destroys part of the world and you return to town Premiere goes missing. Head to the Teleport Gate Plaza and you will be transported to the very first map. Sadly we have to walk with out 2 feets, on the way you could kill the vengeful tree spirit if he spawns (it is doable with lvl 50+ but it will take some mins), our destination is the next map.
After reaching the 2nd map you will see another well-made video-sequence and a dialogue and I rly don’t know how this appears if you don’t play kirito…
The next time you move out you will be on the way to Aincrad. Just use the teleporter at the end of the paths to reach the center:
After beating the mini-boss we unlock Aincrad on the map.
On the first floor awaits a small mini-boss.
The 2nd and 3rd floor are bigger, but there is only 1 exit and it is guarded by another mini-boss.
The 4th floor got multiple boss-fights.
1st stage
Don’t worry, you don’t have to clear whole Aincrad now, that was the last floor~
The coming bossfight is… annoying. Just focus on the structure in the center, the ads will respawn 24/7.
2nd stage
More ads 24/7, try to lock on the structure in the center again.
Now after a loooooooooong dialogue after which you will see editor notes that you can skip with the menu-button another dialogue starts~
With this we also unlock the “Gallery” and “Warriors of the Sky” (WotS)
4. Warriors of the Sky (WotS) – DLC 1
Congrats on finishing the storyline of SA:O and welcome to WotS!
After finishing the storyline from SA:O you can carry your safe-file over to WotS (recommended).
New content
With WotS multiple stuff gets added like the “Paradise Ticket” and the “Masked Blacksmith”. Sadly the dialogues aren’t supported with voice-lines anymore so it rly feels like reading a manga sometimes….
You get these from fighting any NM in WotS and can trade them at the Black Market for items.
There is a blackwing coat with high base stats and also the blackwing boots that you can get from opening the golden chest at the Shady Merchant, but I don’t rly know why you should spend your coins here…
There are also multiple other items you can get. What’s rly interesting for absolute end-game are the permanent stat-boosting potions u can buy from him and some materials for legendary weapons. Except that, I didn’t spend much time with this NPC.
This guy appears somewhere between DLC 1 and DLC 2. Just check the plaza every now and then. In ur first encounter with this guy, u should get all the material to craft any Tier 3 Legendary Weapon. Take note that this is the highest tier for legendary weapons at this point! U can get another legendary weapon of ur choice after reaching a sword skill of 500+ with every weapon. For information on how 2 craft a legendary weapon and where 2 get the base-weapon to start everything, either ask the masked blacksmith himself or just scroll further down to secction “7. Itemdrop locations, Gear and more”.
First of all in the first region on the southern part of “Fuldum Trail” you will find a tutorial for this:
The aim is to defend your own key points while completing tasks. The fastest way is to get straight to the boss and kill him. The boss-room is protected by a magic-barrier that can be undone by destroying the weaker boss standing in front of it. The more difficult invasions are best done with friends.
Note: If u plan 2 play the next DLC’s too(for example Abyss of the Shrine Maiden) I highly recommend finishing all Tier 1 sacrament invasions 2 unlock the tier 2 sacrament invasions. There are 2 reasons for that:
- one of the tier 2 sacrament invasions is perfect 2 rush the Skill Fusion Quest for the Attacker later
- the sacraments u get can be fused with ur gear (the empty slots under the name) – this won’t unlock until u finish all the tier 1 sacraments and the first tier 2 sacrament (which is more like a tutorial) so that Liz gets the necessary item. The base-stats of these sacraments isnt rly high, fair enough, but if u’re lucky u can get %-stats (for example +10% HP) which is actually insanely strong if u get enough of those 2 stack them – at least that’s my opinion!
How to speed-lvl
This requires some decent gear, so maybe you want to start it after getting some proper stuff.
You can use this method starting at lvl 15 on Hard difficulty but I think it’s a bit harsh and rly challenging and I didn’t want to mention it earlier this being a beginner-guide u know?
So here is how it’s done:
Note: I’m sorry that i redirect you to so many other stuff but I don’t wanna create my own parts if there are alrdy good guides for it~
I tried this method myself and it is quite easy even though i need a bit longer(~20 secs):

This is also a great opportunity to learn SSC! (sword skill connect)
Stalvatos Ruins
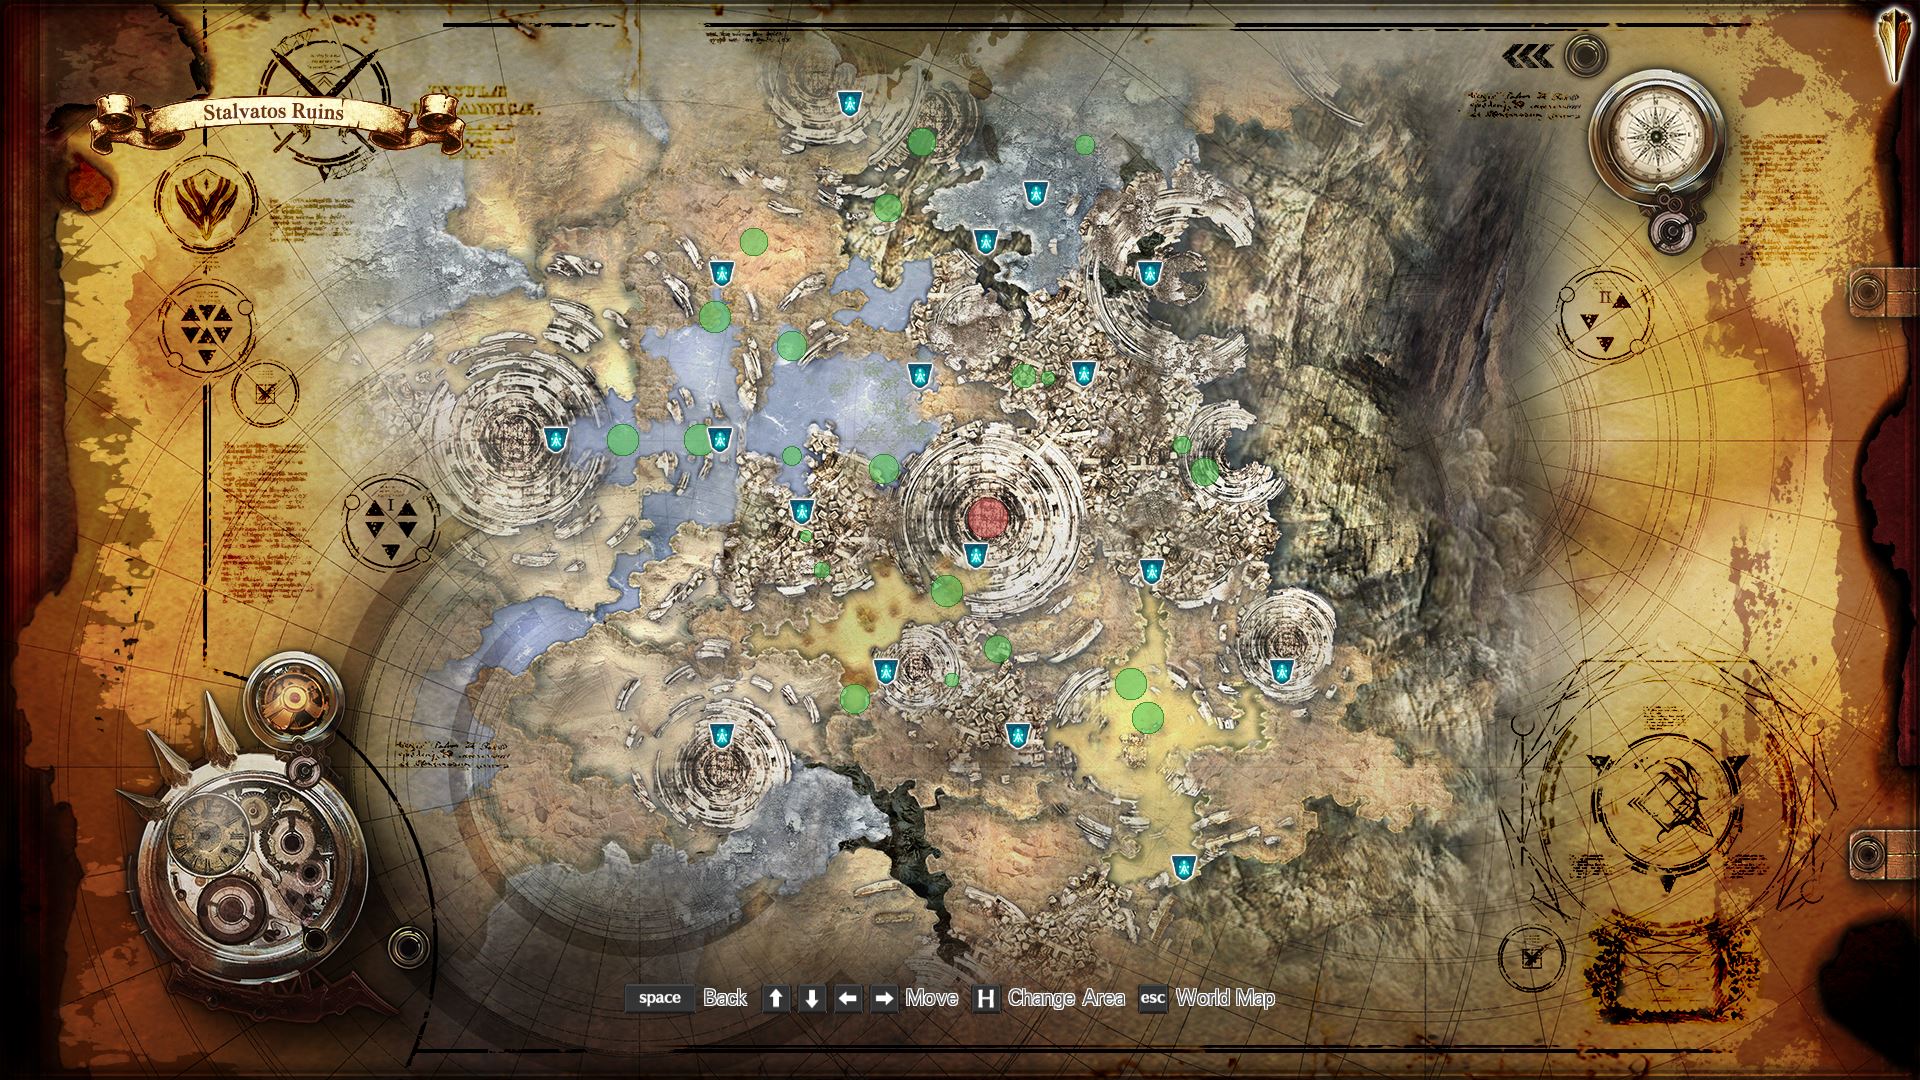
As you should realize pretty fast the monsters here are a tiny bite higher than us if you just finished the main storyline of SA:O. If you can’t handle the guys here better turn back and look into the “Speed-lvl” section of the guide!
First of all head east to “Gromarth Arena”
Our aim is to clear 4 trials, generally just doing an arena match(duel) against an NPC. They are actually a bit tough so I recommend taking your good weapons out. After the first arena and surviving the tutorial you can adjust the stupid pvp-palette over the menu that was locked until now!
Now after we cleared the first arena 3 are left. Simple math 😉
We can either head west or north after going back to the first map, i chose the latter.
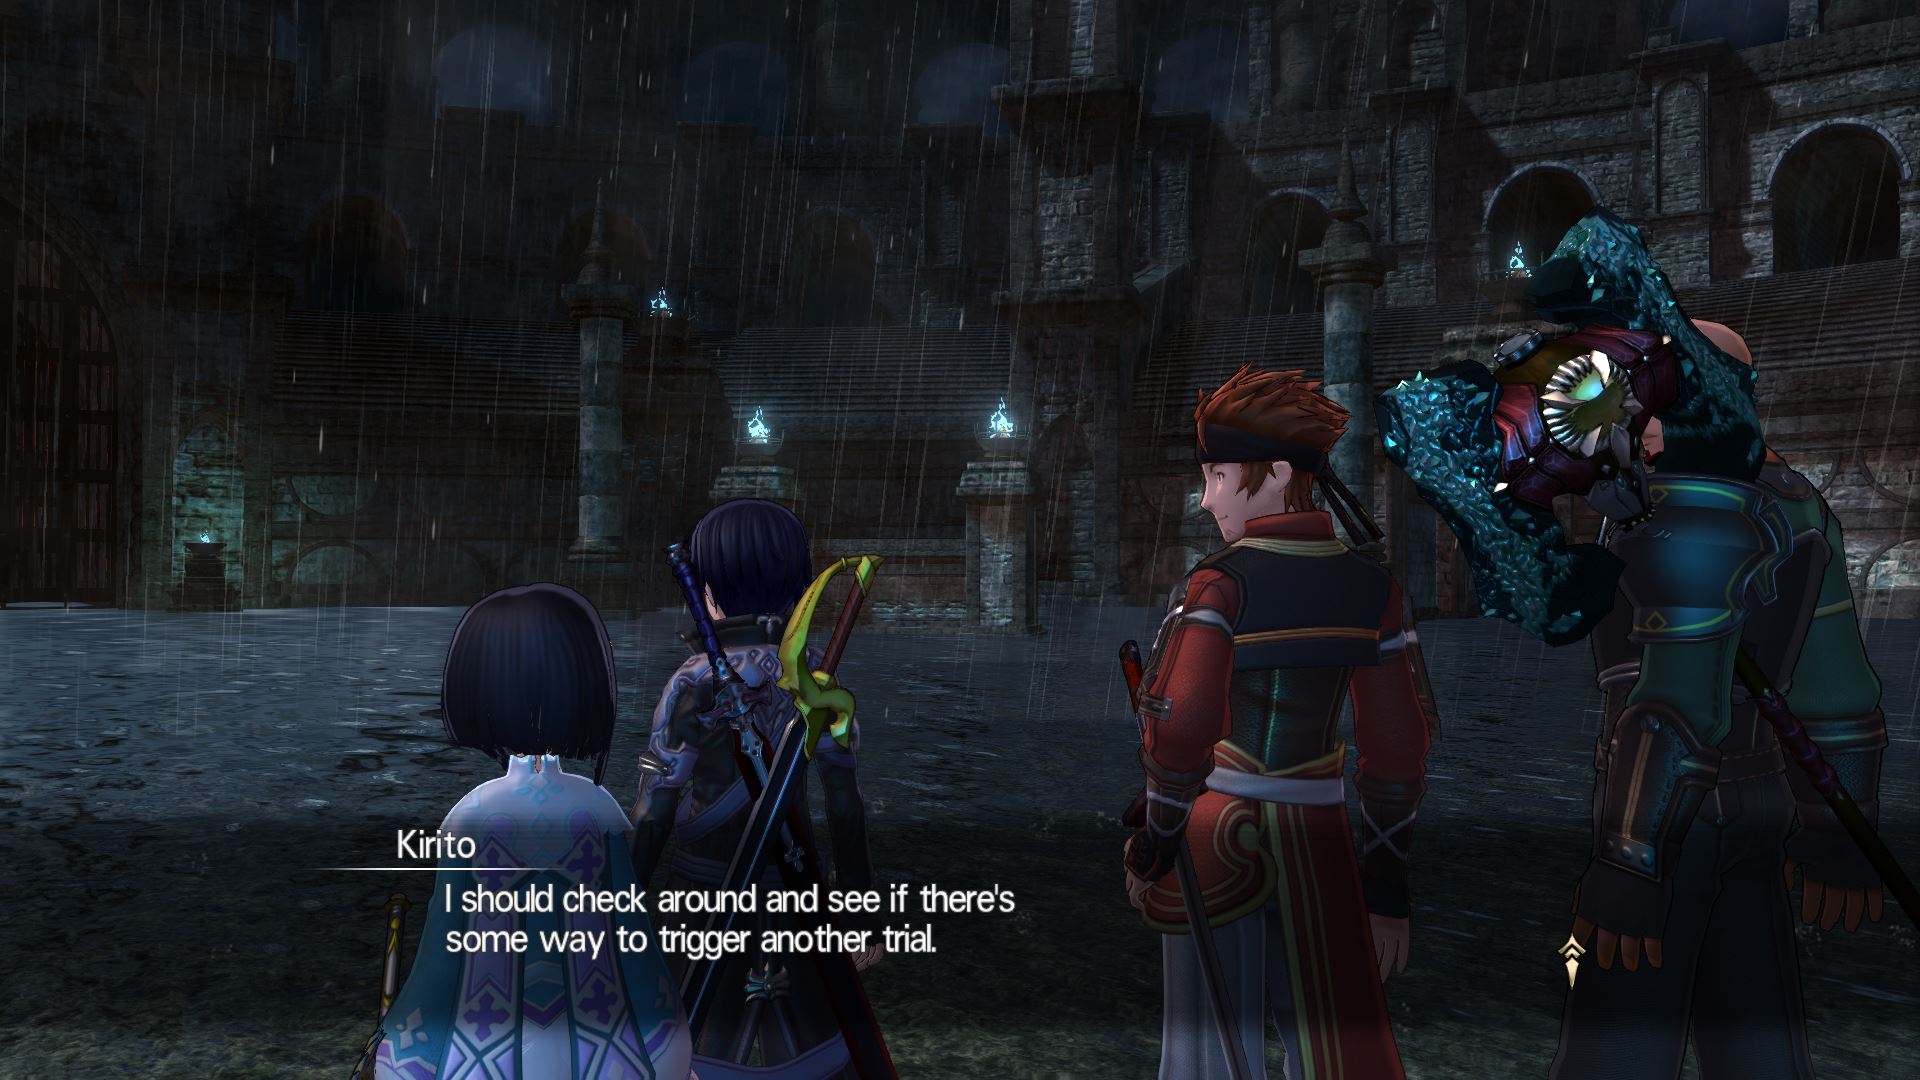
After you arrive in “Abyss Road” you will realize something pretty unpleasant:
You can’t see the map! Well at least nothing that is more than 20meters away from your cursor on the minimap! So i thought, with my rly bad skills with any photo-app, why not create one for you:

The next map is “Labyrinth of the Abyss” there are 3 exits here:
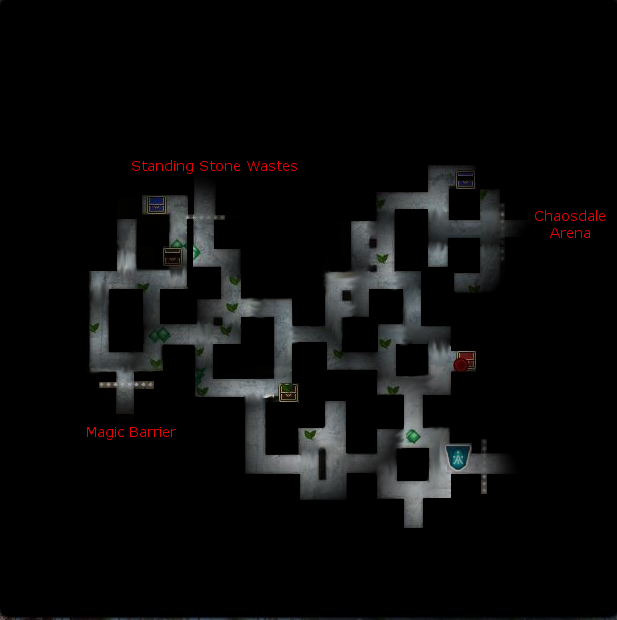
One of the exits is blocked though:
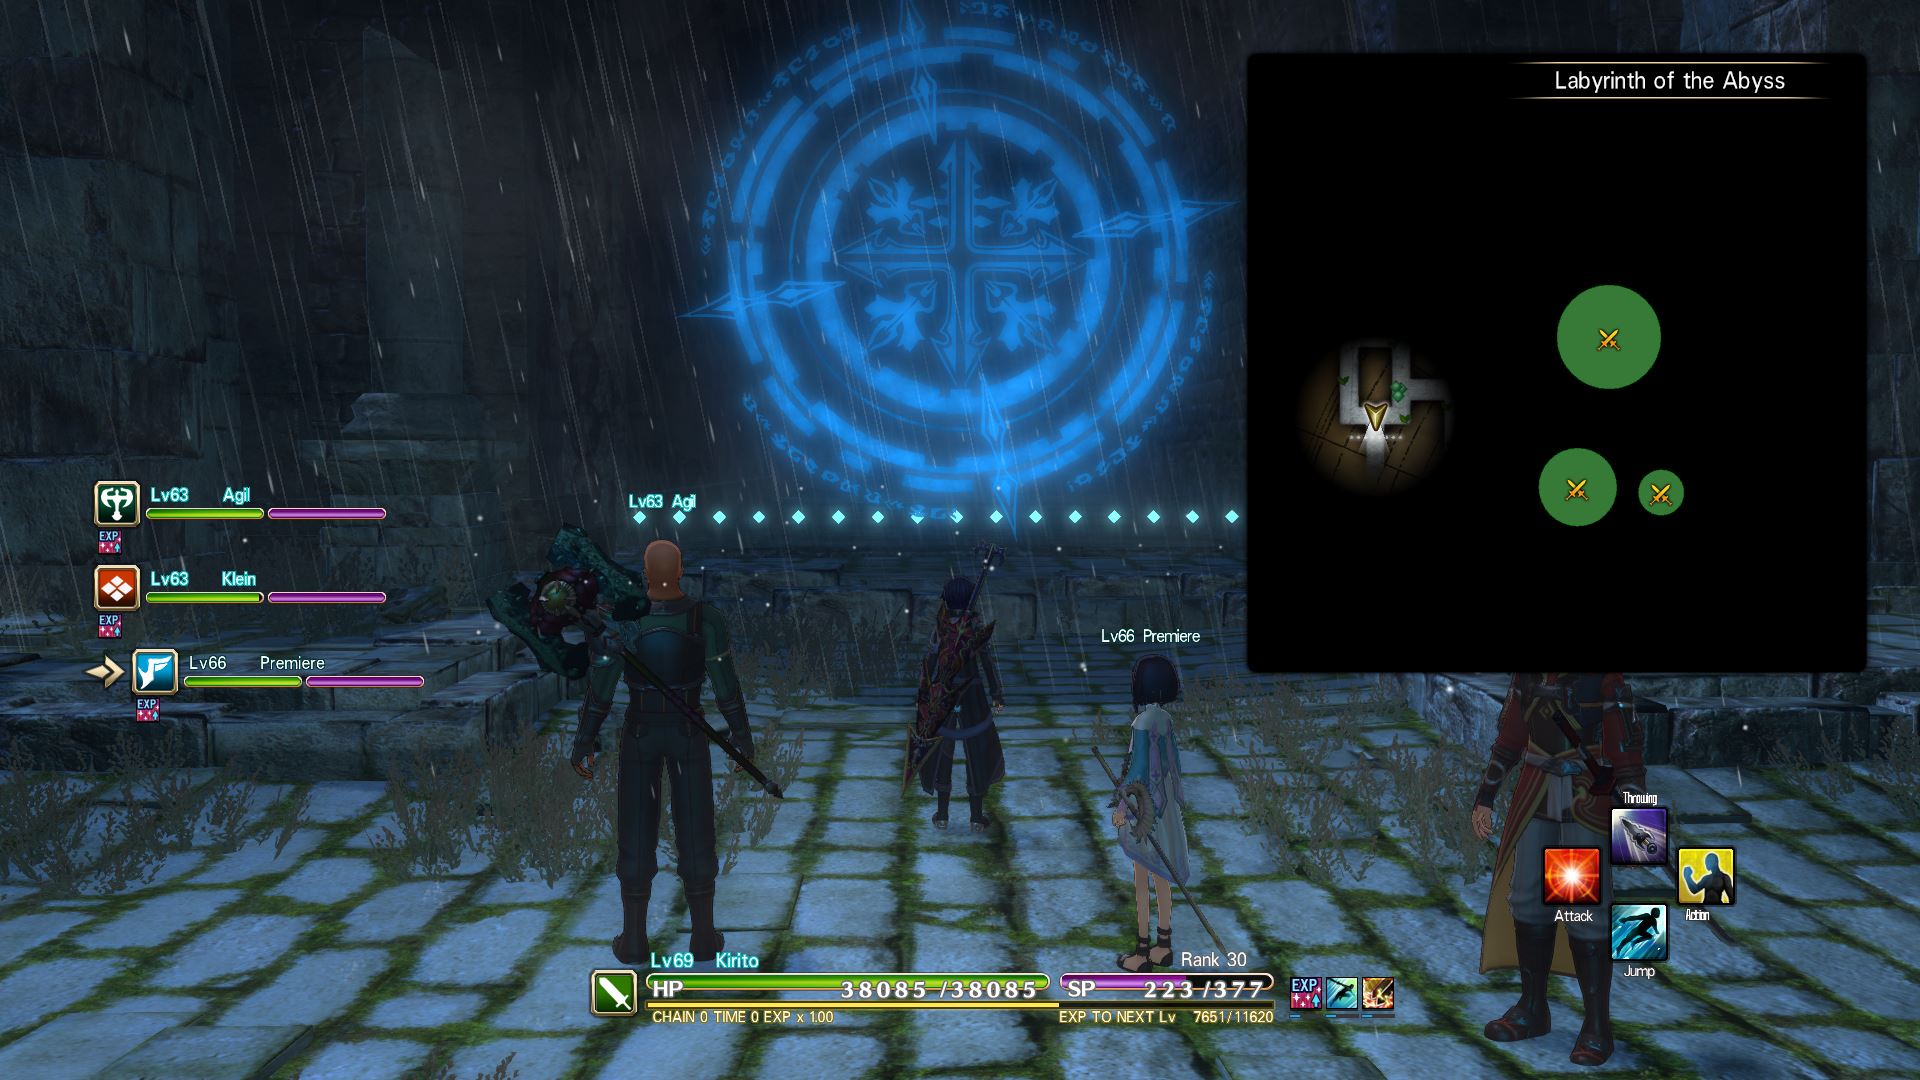
For now this one doesn’t matter, just keep it in mind! Head to “Chaosdale Arena”(eastern exit) and clear it. You should get another piece of the Sapphire Lindworm set. (Don’t sell these, keep them with you!)
Now head back to the labyrinth and go to “Standing Stone Wastes”. North from this map is the 3rd arena, “Gradeen Floating Arena”.
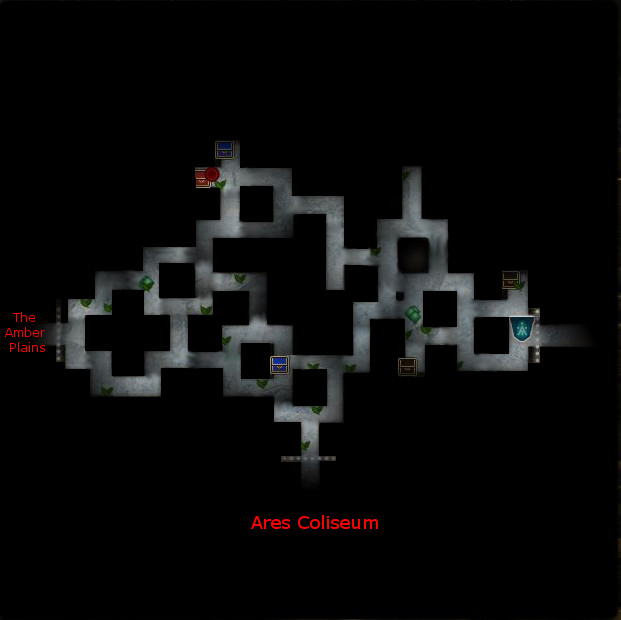
After this we are missing 1 more arena to clear: “Ares Coliseum”. To get there head back to the first map of the region, “The Riemanhills”. To the west you will reach “The Acropolis”, another map without much vision:
Take the exit to the south to get to the coliseum and clear it for the 4th equipment-piece.
With the 4th equipment-piece in posession we can return to the magic barrier in the “Labyrinth of the Abyss”:

But if we just try to get through it somehow doesn’t work. The solution is to equip all 4 parts of the set that we got:


With this we can proceed.
After arriving at “The Misty Wilds” we loose all quest markers again. The questlog states to find the last trial. After looking at the map for a while you can easily figure it out, we have to head to “Athenalogia Arena”, just head west until you reach it~
After you get there you will probably find yourself in this situation:
Well they just want to get you back to the town….
After returning to the inn you should get the information that there ought to be a soul-stealing monster in the “Gloomy Murk”. Don’t ask me what they want, you will find him in the top right corner of the “Abyss Road”:(boss fight)

After defeating this fella we can return to “Athenalogia Arena”.
With the necklace in our posession we can head to “Sanctum Antechamber”, it’s north of “The Amber Plains”. And yes, you have to wear the full set again, and you will be forced to do a last duel with the gear you got equipped!
5. Abyss of the Shrine Maiden – DLC 2
New content
This one gets unlocked after you cleared the first region of WotS, “Stalvatos Ruins”. Afterwards you will trigger a short conversation at the Teleport Gate Plaza regarding a stone statue of a goddess. It’s located in the center of the first map in Stalvatos Ruins. Here the tutorial-text for it:


I’ll be blunt here: It’s a nice feature if u wanna grind the hell out of the game but srsly, u won’t need any of this. If u need more information on what this actually does:
[link]
This is the real good stuff. Before starting with the actual AotSM-content, I highly recommend 2 get some of them. And while u’re at it anyway, why not work on ur achievements at the same time? Here a short list with all u need 2 know:
[link]
Vulcanus Citadel – Chapter I
Before u guys start 2 work on Abyss of the Shrine Maiden(2nd DLC) I highly recommend 2 get the following things done 2 guarantee a smooth playthrough:

- Sword Fusion for ur team (information to this in the “New content”-section prior to this one)
- full gear-set from the arenas from WotS (so that u can survive at least 1 hit from the new NM’s)
- Legendary Weapon (if u don’t know how to get it, move back to the “New content”-section of WotS)
Now this can be confusing but after the dialogue finally finished you will stay at the edge of the map:

To get to the first map of Vulcanus Citadel just jump down:

For everything else I recommend reading this guide:
[link]
Vulcanus Citadel – The 4 keys
Ok I know I posted a link 2 the guide for Vulcanus Citadel, but srsly, it was SO lacking! So…. I decided 2 implement a walkthrough for this part as well! But it would be awesome if u could still look into the link first, especially 2 grab those tips for lvl and gear-requirements and how 2 boost ur battle-power as fast as possible! :3
Pls note that i stopped playing for !!!more than half a year!!! so I won’t be as fast as I was with the first whole arc of the guide up ’til now, but I will try my best 2 give U very clear directions on what 2 do! Like always the game won’t give us any information 2 work with anyway so I think u will welcome it!
If I recall right, our journey will start in Magmatite Research Site. There are 2 exits, but the northern one is blocked:

So our only option is 2 take the eastern one to Seldona Laboratory:

Ignore the exit 2 the east for now and head south until U reach a closed door:
(I know on my screen it’s alrdy open)

To get past this door, we need 2 find a key. It should have been the grave right next to the door tho:

As I can’t recall everything here, just doublecheck the information with the one from the linked guide!
After u unlocked the door we can proceed 2 the southern exit and enter Blazerock Fortress:
Interacting with the stonetable will grant u the quest 2 find the four keys 2 unlock the door.
(This will be followed by a short cutscene)

Surviving the short cutscene, u will end up in Seldona Laboratory again. If u head to the ruins in the east u ought 2 find a green ghost. Interacting with it(yes, the interaction button won’t be shown?) gives u information on the location of the first key.

The grave we are looking for is shown in the picture below:

The 2nd key’s start-quest is located in Magmatite Research Site. U can teleport to Seldona Laboratory or just walk further north from the grave and take the west exit:

After calming the ghost we get the information on the whereabouts of the 2nd key.
The warehouse is located at the entrance of the map:

If u successfully retrieved the second key, teleport back 2 Seldona Laboratory and take the exit u ignored some time ago to Bardette City. Head north here and enter the well 2 find a hidden laboratory? with the 3rd key:

After exiting the well head east and take the exit 2 Blazerock Outer Wall. Here we will find the 4th and last key!
Right at the start of the map we get confronted with the first problem and, at the same time, a type of intro for this are – a closed door:
We have 2 interact with the lever 2 clear the path.

With that in mind, a closer look at the map will reveal quite some information for us 2 work with:
Our target will probably be either the exit 2 the south or the yellow point. As we are actually looking for ghosts 2 tell us where the keys are, i bet on the yellow point in the southeast corner of the map.
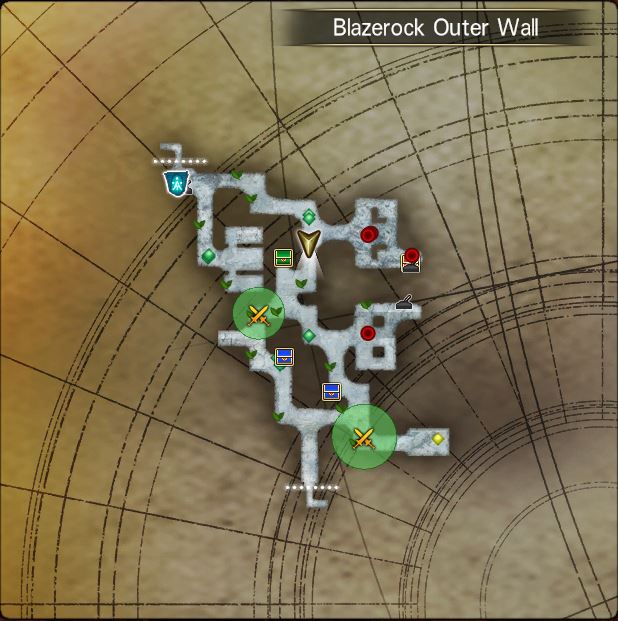
Additionally, there are 2 more levers on the minimap. As I’m an impatient guy, I would say let’s head straight for the first lever in the northeastern corner and look what it does, but that actually won’t work! We have 2 head further south for a cutscene 2 tell us that there is a locked gate:

Now we are allowed 2 head northeast to these guys:

Another cutscene triggers telling us something about feeling wind and stuff, just head north for a sec:
Just walk straight through the wall, i mean it! It will trigger a cutscene again anyway!

Now let’s head back south 2 the closed gates and on the way there also use the lever once, shouldn’t hurt, right?
(btw I actually skipped the boss in front of the lever behind the red chest due 2 the huge lvl-difference)
Another cutscene starts and boom, door opened!
Further south the path is blocked by boulders?:
If u cant reach it due to steel bars blocking the way, just head back 2 the first lever and use it again(I think the whole map gets resetted due 2 one of the cutscenes)

Just take the other path straight to the southeastern corner:
First of all, get the “[Event] Explosives Warehouse Key” from the shelve, then speak with the green spirit. The spirit gives us the information on the 4th key(he dropped it somewhere).

If u tried 2 reach the 2nd lever before, u would have realized that the door is locked. As we just aquired a key, we should be able 2 reach the lever and thus open a path 2 leave the area 2 the south.
But 2 reach the lever we have 2 kill the guardian in the room(red dot) as a magical barrier blocks our path:

Interacting with the switch will block the path though, and the other path is blocked by boulders. To get out of this dilemma, grab the Event-item on the other side of the room:

Now we can clear the boulders and head south to Kikoth Excavation:

Heading 2 the eastern exit boulders will block our path(yet again):
But thanks 2 the item “[Event] Mining Explosives” they won’t be a problem for us! Enter the area and activate the teleporter, then head back as we don’t need 2 do anything here yet.

Now teleport back to Blazerock Outer Wall. Use the lever and go straight 2 the south 2 find the 4th key:

Vulcanus Citadel – 3 Excavators
With this, we can go back to Seldona Laboratory and head south (cutscene triggers and we will be forced 2 fight some mobs) – ah and we will actually be forced back 2 town (thanks a lot) for another cutscene before returning 2 the same spot this all started again. (and is it just me or do we have actual voice lines again? Why did i miss them in the last DLC???)
Arriving in Blazerock Fortress we can find more levers on the map:
Use the first 2 levers right at the start and head west until a cutscene starts.

Ignore the southern exit for now and head west as it’s a bit troublesome to get through this barrier.

Here, a magical barrier will block our path. 2 get through, we have 2 kill the guardian in front of it(like always). Take note of the ranged guardians(flying eyes) which are freaking annoying!
Kill the guardian, enjoy a cutscene and enter the next area The Blazing Corridor.

Thanks 2 the map we know that our next target is Asham Extractor, just go west from The Blazing Corridor – maybe real fast due 2 the lava-dmg 😡
(I just used some MP-buffs and air-dashed through pretty much the whole area)

Right at the entrance awaits our current objective:

New objective: Find more information. First clue – behind the stone table:

Seems like we have 2 find something in Asham Extractor, Kikoth Excavation and Geogrand Deep Lake – Lets start with Asham Extractor!
For this one just head north:
After interacting with the table u have 2 “look around” to find what is draining the energy, tho an event will spawn right on ur spot and the monsters u ought 2 slay will stand pretty much right behind u(the bid trees)…
After u disposed of all enemies, get back 2 the stone table(Extractor) and activate it(I don’t know why this isn’t marked anymore D:)

Heading south we will encounter boulders blocking our path(yet again) which we can easily clear with the Mining Explosives:

After u unlocked the teleporter here, teleport back 2 Blazerock Fortress. This time, we will go for the southern exit. 2 clear the path there, use the first 2 levers right at the teleporter, then head for the one in the northern corner(u have 2 kill the boss guarding it 2 pass the magical barrier here!)
After u got that, head south and use the 2 levers there(ignore the on on the far right) 2 be able 2 reach the southern exit, which is, yet again, blocked by boulders:

Welcome 2 Clastdale Caves, doesn’t seem like anything important is here, so let’s head straight south!

Ok, doesn’t seem like it will be THAT easy….


So, let’s teleport back 2 Clastdale Caves(entrance)/walk back and head north 2 reenter Blazerock Fortress and look for the key(alrdy found it). First, use the lever which we ignored up unil now right in front of the southern exit(the one on the far right), it will open ALL steel bars.
With this, we can proceed to the east:

The key is in the southern room and u don’t even need 2 kill the boss – except u want the chests in the next room:

With the key we can go back 2 Clastdale Caves and open the door 2 the south 2 reach the 2nd extractor in Geogrand Deep Lake:

Now only the 3rd extractor is left. Teleport 2 Kikoth Excavation. Our objective is in the western part of the map, blocked by boulders(yet again):

Vulcanus Citadel – Last parts
With this, we can head back 2 The Blazing Corridor where a cutscene will position us pretty much right in front of our next target:

Last parts of Vulcanus Citadel
For this part just look up the explanation in Cakku’s Guide
Ashrael Infernos
It seems like we have 2 reach the other side and cant drop down.

U need 2 use ur air-dash 2 get over this obstacle, here the path i took:
First, jump and air-dash on the edge I am looking at. After u reach it, walk 2 the end of it and look at the next image.

This was my 2nd aim. I rly recommend SP-boosting buffs at this point!

This is our last aim. If u get on that edge, u can walk all the way 2 the end:


PS: In this region are 2 chests, bouth containing Ultana Gold Pieces:


Acropovale Ruins
Ignore the lever in the far south. The lever in the north, right at the start, is lever number 1. After this, they are numbered from left to right. This is the 4th lever u need to use first – and u need 2 take the western path to get here!:

After u used the 4th and after that the 1st lever, u need 2 get a key from this room:

After u get south, a door will block our path forward. 2 get the key u need to head east through another closed door. 2 open this one, u need 2 kill the guardian:

Gardens of Calamity
In Gardens of Calamity the boss in front of the entrance can be annoying. U have 2 run around and survive while killing the slimes. After they transformed into crystals, destroy those until the message comes that the target isn’t invincible anymore.

The Carven Road
As seen on the picture, we have 2 kill 4 mobs, they are marked as red dots on the map if u didn’t realize it until now :3

Northazrod Tundra – Chapter II

Just as the game should tell u, head 2 The Riemanhills. After greeting the Goddess Statue we have 2 jump down from the map again:


Northazrod Tundra – Getting started
Our journey starts at Whitebell Tundra. Heading south we will find Valenstar Center – but except getting the teleport-point we can’t do anything here yet:


Now following the story our only option is to head north 2 The Pearly Expanse. On the way there we can find a stone table which will get relevant later on:


Now just follow the story (it’s pretty direct) until u reach Greyfort: Middle Level at which a door will block our path:

To get through this door, u need 2 kill an invisible mob – u get this information from a “Passing Player” which also checks if u alrdy got the skill from the “Goddess Statue”:
PS: Just look around the corners, even with the skill u will only see a faint silhouette of the mob u need 2 kill.

As soon as u hit it, it will reveal itself completely and unlock a teleport-glyph in front of the blocked path:

If u head south first u will stumble over this room, but we can’t do anything with it yet as our objective is with Tia:

To get 2 the next area we have 2 look for the invisible enemies again – there are 2 options:
Greyfort: Upper Level – This is the one we need 2 progress with the story


Greyfort: Underground – This one isn’t important for the story, but i wanna unlock all areas


Arriving at Greyfort: Upper Level, it’s “Search and Destroy” yet again:
Note: From what i got, these 2 are only for the seals in front of the 2 chests – the invisible mob in the north is the guardian of the seal in the south, and the southern mob for the northern seal.


Exit the area soutwest 2 enter our next destination – Fiernia Sanctum
Here we will find a familiar door – At least if u follow my guide~:

Northazrod Tundra – Charms
Head back 2 Greyfort: Middle Level and return 2 the stone table I mentioned earlier:
A short bossfight follows awarding u with the Humanity Charm – a key item.

So now we got an important hint for the whole chapter: To progress, we need 2 get the right charms.

Now head back up to Greyfort: Upper Level 2 our next objective.
Our new aim is Valenstar Center – interacting with the door there and showing the “Charm of Humanity” will open the path – our new objective lies in the souteastern corner of the map:

Head souteast for the 2nd charm – The Snow Charm

With this, go into all 4 exits u can reach and search for the invisible guardians 2 loot their keys. I decided 2 move clockwise with the altar with the snow charm as start point:
Valenstar Deep Market (Teleporter) – [Event] Valenstar Deep Key 1 x1

Valenstar Deep: Zone 1 – [Event] Valenstar Deep Key 2 x1

Valenstar Deep: Zone 2 – [Event] Valenstar Deep Key 3 x1

Valenstar Deep: Zone 3 – [Event] Valenstar Deep Key 4 x1

Now with [Event] Valenstar Deep Key 4 x1 head back to Valenstar Deep: Zone 1 (2nd area we entered) and u should be able 2 get past the door and proceed east to Valenstar Deep: Zone 4:
This should get u to Valenstar Center – our current objective.

Don’t be confused after this cutscene – leave the area to the west 2 get 2 our new objective:

Just follow the story for a while, u should find all marks on the map!
So after u finished all the cutscenes and a ton of information that’s quite interesting (no i mean it, the story totally hooked me!) we will find ourselves back in town with some new content:

- the exact description for what to do now (new objective: Oldengard: Path of Purity)
- new content for Skill Fusion, one of the most important things for us – this unlocks lvl 4!
To get 2 our new objective, head 2 Fiernia Sanctum after u got the new stuff behind u and open the first door with the Humanity Charm:

Now just go east until u find the teleporter, u can ignore the other doors here as we can’t open them yet:
To get the teleporter working, use 1) Humanity Charm; 2) Snow Charm on the altar.


– use the teleporter and just follow the pictures


U need to get up here:

Our aim is this building:
This will grant us the 3rd cham – Sword Charm


The boss is, obviously, in Oldengard: Path of Purity. To get there we need 2 use the teleporter in the center of Sacrifia Sky Chapel – but this won’t work just yet:
If u followed the descriptions of all the altars u can guess which charm are needed:


- “Divine Guardian’s holy form” – the guardian is no human
- His sublime hue – well the only thing he gets described with is snow anyway, so it’s snow
- symbol of His power – a Sword
As u can guess, our Human Charm won’t do the job, so we have 2 do something about that:
Head to Oltado Cloister and jump on this pillar to head west:

Our target is in the west:

To reach it use the altar:
Use the combination 1) Sword Charm; 2) Snow Charm; 3) Humanity Charm for this.
After this, u need 2 jump over the platforms to the building at the top. There are 3 things that can make this easier:

- Skill: Fairy Dance – Grants one extra jumpo while in midair.
- Skill: Speed Master – Movement Speed Up +30%
- Air Dash – do one forth and one backwards right after, this way u will only travel half the distance
At this altar we can reverse a charm. Select Beast Charm – this should change ur Human Charm into it!

Now head back 2 the teleporter in Sacrifia Sky Chapel and use the combination 1) Beast Charm; 2) Snow Charm; 3) Sword Charm – the teleporter will take u 2 the boss-area
After walking a bit into the area quite annoying quest will appear:
Just kill the monsters that have a different name and then, if the map (red dots on it) looks the same as mine just walk into the red zone 2 finish it. (The exit 2 the south only leads 2 a blue chest)

The quest for the 2nd map is a bit more straightforward:
Check all corners that are in the circle and keep in mind that the swords respawn 2-3 times
(If u miss 1 sword in the end, check the corner right above the teleporter, it still counts as “in the circle”)

Now finally the last challenge before we can get to the boss:
The right order is 1) West; 2) East; 3) North; 4) South

After a cutscene we get thrown into the inn and the game is 2 stupid 2 give directions, dw the teleporter in front of the boss room alrdy got unlocked: Oldengard: Path of Worship – Beating the boss marks the end of Chapter II, well done Player!
The Elionward Dominion – Chapter III


The Elionward Dominion – Singularity
Welcome 2 The Elionward Dominion!
I actually don’t know if I ever mentioned it, but if u press “V” with default keymapping u will get the big minimap u see on all my screenshoots. This is incredibly helpful as u can see ur objective on those way earlier most of the time. Depending on the chapter and DLC u are working on, this can be completely useless tbh. For chapter III u won’t need much more than this though, if an objective gets unclear, u will get pictures for the regions anyway 😉
Starting at Ratluz Outskirts u will encounter teleporters on the maps. These are necessary 2 reach our objective so look out for them on the minimap:
(To reach our current objective, Unguis Peak u need 2 use the one here in Ratluz Outskirts)
Note: U may want 2 head west first and activate the teleporter 2 First Ouroboros Gate.

In Serpentia: West Side take note of new barriers that will get important soon:

U won’t be able 2 reach the objective that easily here:

Head southeast 2 find the key in a chest (u should be able 2 open the door here):


Take the teleporter:

This should get more important later – but the singularity comes first

Use this teleporter and unlock the teleport 2 Fourth Ouroboros Gate

Go back again and head further north 2 our destination:

We can’t progress any further here:
Head back 2 Siobhan Eyrie, there was a battleship (graphic just before this section) that is now important. Head there!

- the dungeon is randomly generated each time u enter
- u cant access the dungeon in multiplayer


These are the exit-gates u need 2 find after u got the key:

Clear First Ouroboros Gate, Second Ouroboros Gate, Third Ouroboros Gate & Fourth Ouroboros Gate, then head back 2 Siobhan Eyrie 2 shoot the cannons[/u] – if u followed the guide u should have all the teleporters unlocked alrdy.
This one is REALLY awkward. After u kill the golem, a cutscene kicks in in which he gets healed. After the cutscene(u retreat as u say it’s pointless if he keeps healing himself) u will stand in Serpentia: East Side near the exit to Third Ouroboros Gate. Now just go back there AGAIN and wreck the 4 golems before taking the big one down a 2nd time. I don’t know what 2 say 2 all the short monologues on this one though…
After interacting with the portal and afterwards clearing the event we are directed 2 look for the guardian in Orpharim Sky Fortress:
U will see the locations u have 2 head 2 marked on the map.

After u cleared the seal u have 2 fight a boss. This fight can be a bit tricky, as u won’t be able 2 do any dmg until the stagger bar is full. The fastest and easiest way I found for myself 2 achieve that was just staying in block in front of him and use “Banishment” all the time until the bar is full. Then just hammer him down.
As chapter III of AotSM is quite accurate and u can finish the whole chapter just with the global map and the extended minimap I wanna gather some pros/cons 2 chapter III of this DLC – Pls note that these are based on the thought that u used the guide 2 play this far and thus got at least 1 legendary weapon and know how 2 use SS-chains
pros
- extremely accurate quest-markers (first time ever) – u rly don’t need anything else (only chapter III)
- all the main-quests in AotSM are supported with voice-lines, I missed that in the last DLC
- the concept of Skill Fusion is something that i rly like, especially because it boosts the NPC’s too
- future Tia is quite hot – lmao
cons
- the map-design is horrible: especially in chapter I there are chests that are insanely hard 2 reach and the jump-challenges are more annoying than funny as the map is ill-designed for that
- chapter III is by far the shortest chapter of the whole DLC
- the DLC is way 2 unbalanced – if u don’t get a legendary weapon it can be insanely hard 2 gather some new gear depending on ur lvl and how much u grinded prior to this but the second u get ur hands on some gear from AotSM u can 1-shoot everything throughout the DLC – but the HNM’s will stay untouchable until u get stuff from the next DLC or absolute end-game setup for AotSM which I don’t hink is reasonable
- the story of AotSM was quite awesome but the turnaround in chapter III was so fast and strong that it killed my mood in seconds and I actually lost intereset 2 progress for the day~
- there are multiple maps where my game, with a PC which is able 2 play games like BDO on high-end if I may say so as well, will suffer in a huge fps-drop and a delay in commands. I do think this is part of poor map-design as well as a bad engine right here D:
6. Deep Data Domain (DDD) – DLC 3
After beating the mainstory behind AotSM u can talk with Yui 2 trigger a new event. This will lead 2 the last arc of the game: The Deep Data Domain (DDD) – U can access it through the console in Singularity: Center in The Elionward Dominion. At this point u should also unlock Skill Fusion Level 5, the last level u need 2 complete ur gallery.
All necessary informations 2 the DDD can be gained from the console. This is just an endless dungeon and as u don’t need anything here for any of the achievements I won’t write much 2 this either for soem time.
Look like Kirito
Now this only works after you finished the storyline completely! From the appearance section at the start of the guide u should know how to change the appearance of your armor but we still don’t have his nice swords, right?:
7. Sidequests
Emperor’s Sword
Now this will be the first little entry for a sidequest. If you are using a sword as weapon I recommend to do the quest for Philia. It’s just some dialogue every now and then, the questchain is called “Emperor’s Sword” and at the end you get a decent 1H-sword.
Quest start: Philia
Description: Finish Philia’s sidequest. (only conversations)
Quest end: Philia
Reward:

8. Itemdrop locations, Gear and more
For this part I want to refer a different guide that already worked on this:
[link]
If you want to craft a strong Legendary Weapon I recommend to look into this one:
[link]
9. Hidden achievements
Source:
[link]
10. Bugs
11. My personal comments
I am currently thinking about dividing my walkthrough into multiple parts? due to the huge amount of information I ended up gathering and I only find more to add…. Cause this guide is still new I don’t want to do that 2 early but I would like to get some feedback from other players about their thoughts about my guide and if it’s even necessary.
What I like about the game:
- I like how they just implemented Strea’s bold personality
- You can see pantsus, not every game supports that!
- The battle-system reminds me of Monster Hunter: Freedom Unite
- The storyline is rly interesting and the length reminded me of Final Fantasy VII
- The system allows me to farm waifu-points~
Sorry that i can’t update the guide that fast but next to working on it I have to study for my ongoing exams at university. Again, I am rly sorry 😡
Also, I DO know that my english sucks!