Overview
This guide aims to give a rough overview over the different soldiers, beasts, and vehicles the Tau Empire employs in its fight for the Greater Good. It does not offer any in-depth strategies or build orders, but is supposed to give players an idea what the different units in their army can and can’t do.
Foreword
Like no other army, the forces of the Tau Empire rely on a mix of mobility and devastating long-range firepower to reign surpreme over the enemies of the Greater Good.
Generally speaking, the Tau army can be divided into two sub-forces: Firstly, there are the Tau themselves, who are incredibly powerful at range yet fragile and poor in melee. In addition, there are the Kroot and Vespid units that can stand their ground in melee but require support from the cannons of the Tau to survive encounters with melee specialists.
Despite of the support from their Kroot allies, the Tau nonetheless stand and fall with their humble Fire Warriors, ranged specialists that can cut down enemies from afar but fall quickly should they be entangled in meele. To this end, superior mobility and the frequent and careful repositioning of your forces are the two key disciplines a Tau Commander should know. A well-positioned Tau army can deliver firepower equalling a wall of death – yet a poorly positioned one may be decimated to the last man.
Uniquely in Dawn of War, the Tau tech tree splits up into two mutually exclusive paths once they hit Tier 3: Players can choose to either follow the Path of Mont’Ka, which focuses on even more powerful ranged units from the Tau arsenal at the expense of durability in melee, or instead may follow the Path of Kauyon, which rewards the players with durable Kroot units and tougher Tau Units in general, but comes at the cost of mobility and anti-vehicle firepower.
This guide will use the follow schematic for unit statistics:
Name: The name of the unit
Role: A rough description of the unit’s role(s)
Cost: Cost and build time for the Initial purchase of the squad, cost and build time for reinforcements (if availiable), infantry/vehicle population cost. All costs in Requisition (REQ) and Energy (EN), build time in seconds (S)
Squad Size: Size in which the squad comes upon initial purchase and maximal squad size
Health: Health per individual unit in a squad and total health for a maxed-out squad.
Morale: Morale per squad. Vehicles and some infantry units have no morale and will never break.
Built in: The structure in which the unit is built in, as well as any prequisite buildings or technologies
Limit: How many squads of this units you may build, if applicable.
Upgrades: Lists all upgrades that can be purchased in the squad menu, i.e. special weapons or squad leaders.
Abilities: Lists all abilities this unit has. Abilities may either be availiable from start (Default), become availiable by researching a technology (Technology), or become availiable by adding a squad leader to the squad (Leader).
This guide will not offer damage statistics, as the damage of units against different targets varies wildly and would make the guide explode in size.
Tau Commander
Role: Commander, Interceptor
Cost: 255 REQ/ 55 EN/ 10S | N/A | 0IP
Squad Size: 1/1
Health: 1000/1000
Morale: 500
Built in / Requires: Tau Barracks
Upgrades
Custom Weapon: Flamer (50 REQ/ 20 EN/20 S)
Custom Weapon: Missile Pods (50 REQ/ 50 EN/ 20 S, requires Path to Enlightenment)
Custom Weapon: Fusion Blaster (50 REQ/ 50 EN/ 30 S, requires Path to Enlightenment, replaces Default Burst Cannon)
Custom Weapon: Plasma Rifle (50 REQ/ 50 EN/ 30 S, requires Fusion Blaster and Mont’Ka Command post OR Kauyon Command Post, replaces Fusion Blaster)
Abilities
Jump (Can fly over short distances) [Technology]
Snare Trap (Places a snare trap at the designated location that becomes infiltrated after 8 seconds. If enemy infantry units step within the trap’s area of effect, they will be snared, drastically decreasing their movement speed and rate of fire. The trap costs 10 EN and has a 10 second cooldown) [Default]
Target Aquired (Deals 200 points of damage against a non-vehicle, non-building target. 120 S cooldown) [Default]
Comments:
Fittingly for the Tau, their Commander unit is piss-poor in melee, but in return is highly mobile and boasts some impressive ranged firepower that allows him to gun down just about any enemy. To this end, the Commander is best described as a glass cannon ideally positioned with or behind your Fire Warriors, and as far away as possible from enemy melee specialists (or anything else that can produce a constant stream of pain).
Uniquely for any Commander , the Tau Commander has no availiable upgrades in a Tech Building but instead can be equipped with a variety of weapons.
The first of these, the Flamer, has a rather shortish range compared to the other availiable weapons, but in turn deals good DPS and also burns (heh) through enemy morale at rapid speed, especially if combined with the jump ability to get up close and personal.
The second weapon, the rocket pod, has a hilariously long range, surprisingly fast attack speed, and deals decent damage against vehicles (and a bit of knockback against infantry). While a single Tau Commander with Rocket Pods naturally can’t take on heavily armored tanks on his own, more lightly armored vehicles (i.e. IG Sentinels) are vulnerable to this long range attack.
The Fusion blaster replaces your commanders default weapon and gives him a bit of a punch against vehicles. The Plasma Rifle finally replaces the Fusion Blaster. It has twice the range of the former, and absolutely cuts through infantry and light to medium vehicles.
As far as abilities go, the Tau Commander’s Snare Trap, if correctly used, is an incredibly potent tool to reduce the danger posed by enemy melee infantry, not only slowing them down to a snail’s pace, but also decreasing their attack speed. It is best placed in front of your Fire Warrior gun lines, even more so if you have Kroot Carnivores waiting behind them to pick the crippled enemies apart.
The Commander’s other ability, Target Acquired, is best used against enemy commander units or, if necessary, one-squad units (such as the Necron’s Wraith). Apart from being a potent opener, it can also be used to execute fleeing enemies, especially if their HP is close or under the 200 points of damage it deals.
The Jump Ability is absolutely critical to unlock the Commander’s full potential. Apart from being a conventient method to get out of harm’s way, a skilled player can also use it to set up ambushes, conduct fast raids to destroy generators in the enemy base, or, if coupled with three Crisis Battlesuits from the Path of Mont’Ka, build a serious attack force of jump infantry. Just keep in mind that you can only jump twice in a row before the ability has to recharge.
Earth Caste Builder

Role: Construction/ Repair
Cost: 65 REQ/0 EN/ 10S / 0R/ 0IP
Squad Size: 1/1
Health: 250
Morale: 150
Built in / Requires: Cadre Headquarters
Upgrades
N/A
Abilities
N/A
Comments:
This little robot drone builds all structures of your base. It can also repair buildings and your vehicles at a cozy 30 hitpoints per second for 75% of their original cost (Krootoxen and Knarlocs excluded, as they technically count as Daemons).
As Earth Caste Builders are completely defenseless and lack special abilities, it is generally a good idea to keep them in your base. In the mid- to lategame, it can be reasonable to have one following your vehicles though, especially if you get your hands on Hammerhead Tanks.
XV-18 Stealth Team

Name: XV18 Stealth Team
Role: Scout / Anti-Vehicle
Cost: 85 REQ/0 EN/ 10S / 85|0|11R/ 1IP
Squad Size: 1/3 | 3/3
Health: 250 / 750 (1500 with Shas’Vre leader)
Morale: 300 (takes 40% more morale damage)
Built in/ Requires: Cadre Headquarter
Upgrades
Squad Leader: Stealth Suit Shas’Vre (75 REQ/25 EN/30 S, requires Path to Enlightenment)
+250 health for all squad members, adds EMP Grenade Ability
Custom Weapon: Fusion Blaster (50 REQ, 10 EN, 15 S)
Effective against light vehicles. Replaces Default Burst Gun.
Abilities
Infiltration (Invisible to most other units) [Default]
Jump (Can fly over short distances) [Technology]
EMP Grenade (Disables enemy vehicles) [Research]
Comments:
Like most Tau units, the XV18 sucks at melee, has a mediocre movement speed, and can be used to troll the dear ♥♥♥♥ out of the enemy. Though its stock burst cannons are so painfully bad that you can at best hope to annoy your enemies with it, the XV18 is excellent at taking strategic points, its invisibility and the jump ability allowing it to simply walk or fly past enemies (but keep in mind that capturing points held by the enemey briefly makes the XV18 visible!)
Once you’ve got the Path to Enlightenment, you can outfit the squad with fusion blasters, which can do wonders against light and medium vehicles (but lack the punch for heavy ones). Perhaps more importantly, the XV18’s squad leader not only adds a good chunk of health to the squad, but also gives you the EMP Grenade ability, which can temporarily disable enemy vehicles. As in, -all- vehicles. There are few things more satisfying than imagining the face of a Necron player when his Monolith gets shut down by a single XV18 Team, and pinning down a fleeing enemy tank while it gets pounded by your Hammerheads is nothing short of trolltastic. Did I mention multiple XV18 teams can practically permanently disable vehicles?
Despite of this, there a few things to keep in mind: Firstly, there’s a reason why the XV18 has to be invisible. If there’s a detector nearby, get them the hell away with the jump ability or watch them die. Second, all weapons on the XV18 (including the fusion blaster) are poor to piss-poor against infantry units, so don’t even bother to use it against them, even with the dedicated upgrade.
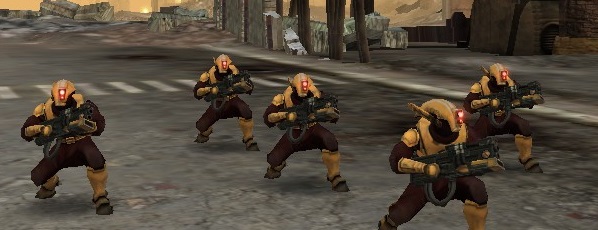
Vespid Stingwing Strain

A Stingwing Strain with a Strain Leader (recognizable by the orange helmet)
Name: Vespid Stingwing Strain
Role: Scout / Harassment
Cost: 150 REQ|30 EN| 18S / 50 REQ |10 EN |12S / 2 IP
Squad Size: 3/5 | 5/5
Health: 330 / 1650 / (3045 with Strain Leader)
Morale: 300
Built in/ Requires: Cadre Headquarters / Tau Barracks
Upgrades
Squad Leader: Vespid Strain Leader (75 REG/25 EN/30 S, requires Path to Enlightenment)
+50% health for all squad members
Abilities
Detection (Makes infiltrated units visible) [Default]
Destabilization (Damages a building and makes it take 50% more damage for 10 seconds) [Default]
Sonic Pulse (Knockbacks enemy units, also deals minor moral damage) [Default]
Jump (Can fly over short distances) [Technology]
Comments:
The Vespid Stingwing Strain is an extremely versatile unit. In the early game, it is an excellent harassment option, attacking early Tier 0 infantry (i.e. Eldar guardians or Imperial guardsmen) while it is capping (which becomes even more effective if used together with a flamer-equipped Tau Commander), or by launching raids on the enemy base, destroying unfortified listening posts or power generators with aid from their Destabilization ability. They (and their Sonic Pulse ability) can also be used as a (rather fragile) meat-shield for your Tau Commander and Fire Warriors early on as well.
In the middle game, Vespids retain their harassment role against light structures, especially when combined with fusion-blaster equipped Stealth Suits (both units can jump). Additionally, Vespids always are handy to snare enemy long-range specialists, but again, keep in mind that the stingwings are not particularly tough.
In the late game, the role of Vespids is largely reduced to that of highly mobile detectors against infiltrated units. While they share this role with Tau Pathfinders who have a larger vision range, the Vespids have the mobility advantage. While raids on the enemy base is possible, the presence of static base defense such as Heavy Bolter Turrets can put a quick end to the Stingwing Strain.
Fire Warrior Team

A Fire Warrior Team with a Shas’Ui and a Shield Drone
Name: Fire Warrior Team
Role: Ranged Infantry
Cost: 210 REQ| 0 EN| 24S / 70 REQ| 0 EN| 9S / 2 IP
Squad Size: 3/6 / 6/6
Health: 340 / 2040 ( +550 per Shas’Ui, +275 per Shield Drone)
Morale: 300
Build in/Requires: Tau Barracks
Upgrades
Squad Leader: Fire Warrior Shas’Ui (70 REG/20 EN/20 S, requires Path to Enlightenment)
adds Photon Grenade Ability
Squad Leader:Fire Warrior Shield Drone (40 REQ/40 EN/20 S, requires Path to Enlightenment)
adds Energy Shield Ability
Two squad leaders may be added.
Abilities
Photon Grenade (Deals medium damage, no knockback) [Squad Leader]
Energy Shield (Lowers incoming ranged damage by 50%) [Squad Leader]
Comments:
The Tau’s bread-and-butter unit. Fire Warriors may be fragile and terrible in melee, but pack some nasty firepower and have an almost absurdly long attack range. The latter actually exceeds their own vision range, so that Fire Warrior teams are highly dependent on spotters (such as Kroot Carnivores, Tau Pathfinders, etc.) for maximum efficiency.
As the pulse rifles of the Fire Warriors have a short set-up time (1 second), it is highly recommend to set them on the “Stand Ground” stance, which prevents them from chasing enemies unless directly ordered so.
A Fire Warrior Team can have two Squad Leaders. It is strongly suggested that you attach one Shas’Ui and one Shield Drone, as their respective abilities share a cooldown timer, so having two of either one won’t help you much.
While Fire Warriors initially may appear comparatively weak, their upgrade(s) and their sheer numbers in the mid/endgame can turn them into a walking wall of death. Just keep them away from melee specialists or jump troops, and they will mow down anything that might bother you.
Kroot Carnivores

A group of Kroot Carnivores, ready for the hunt.
Name: Kroot Carnivores
Role: Meatshield/ Skirmishers
Cost: 180 REQ| 0 EN| 24S / 45 REQ| |0 EN| 8S / 2IP
Squad Size: 4/10 / 10/10
Health: 310/3100 (6100 with maxed-out Cannibalism)
Morale: 300
Built in/ Requires: Tau Barracks
Upgrades
–
Abilities
Cannibalize (eats fallen enemies, restores health and increases maximum health of all Carnivore Squads of the player, up to +300/+3000) [Default]
Feral Leap (Leaps onto a target, causing 50 damage and knocking it back) [Technology]
Comments: Unlike the Tau, the Kroot do not die the second they enter melee and actually are quite good at it, combining decent speed and damage with a very reasonable price. That being said, don’t count on them to win the battle for you – the Kroot are only slightly tougher than your Fire Warriors, and while they make good meat-shields for them, they can rarely stand their own ground.
To help counteract the Carnivores’ fragility, you can use the Cannibalize ability. While it requires a supply of fresh corpses and keeps the Kroot busy for a moment, Cannibalize not only give the Kroot a drastic boost to health regeneration but can, at max, double their maximum health so that the initially fragile Kroot suddenly almost have as much health as unupgraded Ork Nobz or Space Marine Terminators (but unfortunately not their armor). To make it even better, the bonus is permanent – if one group of Carnivores uses Cannibalism, all groups get the health bonus, and it persists even if all of your Kroot are killed. Delicious!
The Feral Leap ability can be used in two ways – for one thing, it allows the Carnivores to jump right over melee units and snare enemy ranged specialists in melee. For another, it can also make for a nasty surprise when you position your Carnivores behind the lines of your Fire Warriors and have them jump at any enemy melee unit that gets all to close and personal to your shooty guys.
Pathfinder Team
A group of Pathfinders at the ready.
Name: Pathfinder Team
Role: Scout/ Fire Support
Cost: 150 REQ| 40 EN| 24S / 75 REQ| 20 EN| 12S / 2IP
Squad Size: 2/5 5/5
Health: 300 / 1500
Morale: 300 (takes 40% more morale damage)
Built in/ Requires: Tau Barracks / Path to Enlightenment
Upgrades
–
Abilities
Detector (Makes infiltrated units visible) [Default]
Mark Target (Marks a target, causing it to suffer 75% more ranged damage for 20 seconds) [Default]
Comments: Probably the most trolltastic unit in the Tau’s arsenal, the Pathfinder team is fragile and practically deals no damage of its own, but in turn has a sight range that expands just beyond the North Pole, allowing your (upgraded) Fire Warriors to snipe entire armies to death before the latter even remotely come in range to return the fire.
As if that wasn’t enough, the Mark Target ability almost doubles the damage your fire warriors and even tanks can do to a single enemy squad or vehicle. Enemy commander spotted? Mark Target! CSM Possessed Squad closing in? Mark Target! Your Hammerheads need help with the enemy Relic Unit? Mark-♥♥♥♥♥♥♥-Target. Enjoy the salty tears of your enemy while his most precious units get shot into a fine red mush.
Finally, the Pathfinders have an often overlooked ability: Whenever a Pathfinder fires upon an enemy, the entire enemy squad moves 8% slower for 2.5 seconds. The interesting part is where this is the effect of a single pathfinder shooting, so a full five-man squad can slow down an enemy squad by 40% – an extremely useful feature for keeping enemy melee specialists away from your firing lines.
It is generally recommend to have only one Pathfinder Team – while having access to two Mark Target abilities may be tempting, you always need more of those shiny Firewarriors to drown your enemies in plasma fire.
XV88 Broadside Battlesuit

Two Broadsides, the left of whom is entrenched.
Name: XV88 Broadside Battlesuit
Role: Heavy Fire Support
Cost: 240 REQ| 120 EN| 45S / NA / 3 IP
Squad Size: 1/1
Health: 2250
Morale: 1500 (Broadside Battlesuits take no moral damage)
Built in/ Requires: Tau Barracks/ Path to Enlightenment
Upgrades:
–
Abilities:
Entrench (Switches from mobile to stationary mode, takes 6.5 seconds) [Default]
Uproot (Switches from stationary to mobile mode, takes 5.5 seconds) [Default]
Comments: The XV88 is a somewhat situational unit – capable of switching between a mobile but poorly-armed mode and a stationary mode with immense long-range firepower, it strives to fill the some of the niches left open in the Tau army, but suffer from serious issues.
Let’s start with the good stuff: The Broadside has a metric ♥♥♥♥♥♥♥ of health for a non-Kroot Tau unit, it is completely immune against moral damage (although a moral bar is shown), it’s rocket-launchers deal a decent amount of knockback if they hit something, and its railguns can bring down a serious amount of hurt on both infantry and vehicles over long distances.
Unfortunately, these apparently fantastic qualities come with large downsides: For one, the XV88 takes a good amount of time to be trained, and its population cost of three means that two Broadsides are three squads of Firewarriors or even three Crisis Suits you don’t have.
For another, Broadsites are highly dependant on other units to function properly – their slow movement speed means that you should not even think about moving these things around without a Devilfish transport, and neither should you even remotely believe its guns in mobile mode will do so much as scratch the enemy. Even when entrenched and firing its railguns, the Broadsite suffers from four serious problems:
1. Minimum range: If any melee unit (especially jump infantry) gets close enough to your XV88, you -will- need other units to save its ass, heavily armored as the latter may be.
2. Short vision range: Though the railguns have a hilariously long range, the XV88 shares the Firewarrior’s problem of needing forward scouts to utilize it. Unlike the latter, the heavy battlesuit can not quickly relocate to react to enemy movement.
3. Low rate of fire: While the railguns are capable of killing individual units in most infantry squads with a single shot, each shoot has a four second cooldown. As a result, the XV88 is generally best used to snipe down vehicles, as killing infantry squads will simply take to long for it.
4. Single-unit squad: As a XV88 “Team” only has one battlesuit in it, it is extremely vulnerable to enemy snipe abilities, i.e. the “Strip Soul” ability of Imperial Guard Psykers or attacks by Space Marine Scouts equipped with sniper rifles.
Because of the above reasons, Broadsite Battlesuits are generally best used when you need some serious anti-vehicle firepower, and even then, said vehicles usually need to be goaded towards your entrenched XV88s. Nonetheless, the Tau’s lack of hard-hitting anti-vehicle specialists apart from Hammerhead Tanks may make the XV88 a necessary burden when facing very vehicle-heavy armies (i.e. Imperial Guard players).
Kroot Shaper
Name: Kroot Shaper
Role: Squad Leader
Cost: 180 REQ| 40 EN| 30S / NA / 2 IP
Squad Size: 1/1
Health: 2500
Morale: 600
Built in/ Requires: Kroot Shaping Center / Path to Enlightenment
Limit: 3

Upgrades:
–
Abilities:
Squad Improvements (When attached to either Kroot Carnivores or Kroot Hound Packs, the squad gets +25% movement speed, +10% maximum health, +25% health regeneration) [Passive]
Feral Leap (Same as Kroot Carnivore/ Kroot Hound Pack, but only if attached to either squad) [Passive]
Comments: A very useful utility unit, the Kroot Shaper can significantly increase the life expectancy and usefulness of your Kroot Carnivores (especially if the latter have already made full use of their Cannibalize ability) and turn the already deadly Kroot Hounds into an outright scary mob of claws and fangs that rivals the dreaded CSM Possessed Squad. In fact, if you do have Kroot Hounds in your army and do not attach two of the three availiable Shapers to your two Hound Packs, it is generally suggested to quit the game, take a deep breath, and wonder what went wrong in your life.
Though shapers generally are best left attached to your Kroot troops, they can shrug off a surprising amount of fire from basic Tier 1 infantry thanks to their Commander armor. When facing groups of enemy ranged specialists, it may therefore be a viable option to seperate your shaper from the squad it came with, and instead use both to tie two different enemy squads in melee. Naturally this trick doesn’t work with enemy melee specialists or ranged specialists that will simply gun down the Shaper before he can come to close (i.e. Ork Flash Gitz)
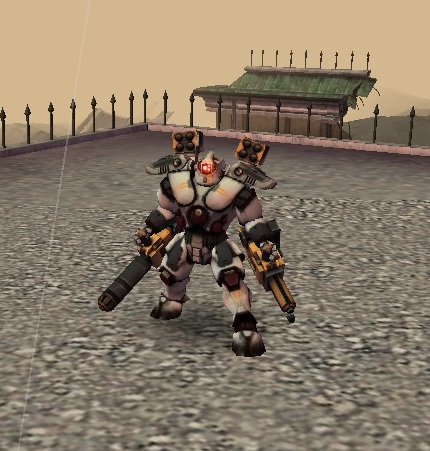
XV8 Crisis Battlesuit
A XV8, without any weapons upgrades.
Name: XV8 Crisis Battlesuit
Role: Interceptor/ Anti-Infantry / Anti-Vehicle
Cost: 100 REQ| 50 EN| 20S / NA / 0 IP
Squad Size: 1/1
Health: 850
Morale: 600
Built in/ Requires: Tau Barracks/ Mont’Ka Command Post
Limit: 3
Upgrades:
Flamer (15 REQ, 25E, 15S) [Custom Weapon, replaces Burst Cannon]
OR
Rocket Launcher (15 REQ, 45E, 15S) [Custom Weapon, replaces Fusion Blaster]
Abilities:
Jump (Can fly over short distances) [Technology]
Comments: Perhaps the most iconic Tau Battlesuit, the XV8 combines good armor, high health, enormous firepower, and high speed (when using it’s jump ability) into a single unit. Despite of this, you should not confuse it’s role with that of the bread-and-butter core infantry such as Firewarriors or Kroot Carnivores – instead, the XV8 is usually best held back until it can make a dynamic entry with its jump jets and shoot the dear life of whatever dares opposing the Greater Good. As the jump jets allow for two subsequent jumps, the XV8 also can quickly flee the scene or move on to the next target if necessary. It is the first of the two units in the Mont’Ka tech tree, the other being the Hammerhead Tank.
As one of few infantry units, the Crisis Battlesuit can use his ranged weapons even when in melee (and indeed has no melee attack in the first place). Coupled with its high health and armor, this allows the XV8 to play the role of a makeshift-tank for your Firewarriors, but do keep in mind that these one-man units are vulnerable against concentrated fire and abilities usually reserved for commanders (i.e. the Eldar Farseer’s Mind War). If necessary, let them jump out of the danger and relegate the tank role to the cheaper and more numerous Kroot Carnivores.
As they share the jump ability, the XV8 also synergizes very well with the Tau Commander, combining their own substantial health with the latter’s firepower.
As for the weapons upgrade, it is generally advised to pick the flamethrower over the rocket launcher in all cases, for the following reasons:
1. The flamethrower deals hilariously high DPS per second, literally melting through light infantry and even light buildings (especially with multiple flamer XV8s) and breaking enemy squad morale almost instantly. Meanwhile, the rocket launcher suffers from lackluster accuracy and a very slow firing rate (6s)
2. The flamethrower’s primary drawback (short range) is largely negated by the Crisis suit’s mobility and endurance, while the rocket launcher’s high range synergizes poorly with it.
3. The fusion-blaster (which the rocket-launcher replaces) already is a decent anti-vehicle weapon, while the burst cannon (which the flamer replaces) is far less potent than its upgrade
4. As obtaining the Crisis Suits requires the player to pick the Mont’Ka tech path, he or she will latter have access to the incredibly effective Hammerhead Tank anyway, making more dedicated anti-vehicle firepower obsolote.
Kroot Hound Pack

A pack of very angry and very hungry Kroot Hounds.
Name: Kroot Hound Pack
Role: Melee Specialists
Cost: 260 REQ| 60 EN| 30S / 50 REQ| 15 EN| 10S / 3 IP
Squad Size: 4/8 8/8
Health: 600 (4200)
Morale: 800
Built in/ Requires: Kroot Shaping Center/ Kauyon Command Post
Limit: 2
Upgrades:
–
Abilities:
Feral Leap (Leaps onto a target, causing 50 damage and knocking it back) [Technology]
Comments: Rabid bulldogs on steroids in space.
While they may be a little fragile compared to other dedicated melee specialists (such as SM Assault Terminators), the Kroot Hounds’ extremely high melee DPS allow them to tear through most infantry units with disturbing speed – especially when entangling ranged specialists in melee with their feral leap ability.
Things only get better when a Kroot Shaper is attached to the Hound pack – while the resulting health boost does not quite suffice to bring them on par with the aforementioned elite melee squads, it fully suffices to make the Hounds beat the CSM’s Possessed Squad in melee – and that is before you consider than you can train two packs of these beasts instead of one.
Generally speaking, the only thing the Hounds have to worry about are enemy vehicles (against which their beaks are not exactly effective) and massive, concentrated ranged fire – something that your Firewarriors hopefully have already taken care of by sniping enemy ranged specialists to death. Not to speak of the fact that the Hounds can do very, very ugly things with ranged specialists if they get close enough.
As mentioned in the Kroot Shaper’s entry, you generally should attach two or your three availiable shapers to the two Hound squads you can train, as anything else would be wasteful.
Devilfish Troop Carrier

Name: Devilfish Troop Carrier
Role: Transport
Cost: 75 REQ | 50 EN| 30S / N/A / 1 VP
Squad Size: 1/1
Health: 750
Morale: –
Built in:/ Requires: Vehicle Beacon
Upgrades:
–
Abilities:
Transport (The Devilfish can transport up to three squads of infantry). [Default]
Infiltration (Invisible to most other units) [Default]
Comments: Often overlooked (perhaps because it is invisible, *ba-dum-tsh*), the devilfish is is a nifty little vehicle that can fill a variety of roles within the Tau army.
It’s obvious primary role is that of a unit transport, which also reveals a major flaw: The Devilfish can neither carry jump infantry (as expected) nor Kroot units (for whatever reason), so if you had hoped to give your Tau Commander or your Carnivores a ride forget about that. Naturally, there still are plenty of viable passengers – the XV88 Broadside Battlesuit practically -needs- a Devilfish to get around, and storing an Etherial inside the invisible Devilfish can drastically increase the leader’s life expectancy, particularly when playing against the IG whose Vindicare Assassins -love- to go after Etherials. Even regular Firewarriors and Pathfinders can make good use of the Devilfish, particularly when it comes to fleeing from melee units that get overly close.
Apart from allowing it to transport units without being seen, the devilfish’s invisibility also can be (ab-)used for other tricks, one example being the “Fish of Fury”. Simply mentioning this name has a fair chance of making fans of the tabletop 40k froth at the mouth, and it’s DoW incarnation is only slightly less trolltastic. Simply put, you abuse the Devilfish’s relatively large size coupled with its invisibility to build an invisible wall for your Fire Warriors out of Devilfishes. It takes a good bit of micro to get your Devilfishes just right (and don’t forget to set them on hold position for hells sake!), but once they’re in place and the enemy has no detector, its melee units will frantically run against a wall of vehicles they can’t see. Even if the enemy has a detector at hand, the devilfish will usually buy your Firewarriors enough time to shoot any melee threats to kingdom come so long as they don’t get shot at by dedicated tank hunters like Eldar Fire Dragons.
Despite of its high utility value, the Devilfish naturally also has its drawbacks – its guns are flashy but deal little damage, it’s huge size makes it difficult to actually sneak it past the enemy if the latter is actively looking for it, and it’s extremely thin armor means that the Devilfish practically blows up the second an anti-vehicle unit gives it a mean look.
Skyray Missile Gunship
Name: Skyray Missile Gunship
Role: Disruption/ Long Range Support
Cost: 100 REQ| 225 EN| 30S / N/A / 3 VP
Squad Size: 1/1
Health: 1000
Morale: –
Built in/ Requires: Vehicle Beacon

Upgrades:
–
Abilities:
Missile Barrage (Bombards an area with 19 missiles, dealing severe damage and mild knockback. Takes roughly three seconds to fire after marking the area) (Technology)
Comments: The Skyray is not exactly a tank in the conventional sense, as it suffers from low health and very lackluster armor that makes it vulnerable against anti-vehicle units and even most heavy melee specialists. In return, it enjoys an extremely long attack range (being on par with fully upgraded Kauyon Fire Warriors and well above that of most tank hunters), decent damage against both infantry and (light) vehicles, and a mean knockback that can very effectively keep enemy infantry pinned. Additionally, Skyrays have a sight range equal to that of a Pathfinder Team, so they practically serve as their own scouts.
What really makes the Skyray shine is its Missile Barrage ability. Once triggered, the Gunship will take a short moment and then launch an entire payload made out of hurt and pain onto the targeted area. While the enemy can see the target beacon and thus may attempt to move its units out of the way, successfully landing a missile barrage inside a dense enemy formation or on a slow vehicle will result in utter carnage. This ability is especially useful against hordes of Necron Warriors, who simply move to slow as if they could escape the barrage before it is fired.
Should you choose to follow the Path of Kauyon (thus deriving you of Hammerhead Tanks), Skyrays will be your primary ranged vehicle, and one of your limited anti-vehicle choices, together with Stealth Suit Teams and the XV88 Broadsite Battlesuit.
Drone Squad

Two Drone Squads, one of whom is buried.
Name: Drone Squad
Role: Ambush/ Meat Shields
Cost: 105 REQ| 195 EN| 30S / 40 REQ| 20 EN| 20 S| 2VP
Squad Size: 3/5 5/5
Health: 325 / 1625
Morale: –
Built in/ Requires: Vehicle Beacon
Upgrades
–
Abilities:
Burrow (The Drone burrows into the ground and becomes infiltrated. If an enemy enters the area around the drones, they will rapidly unborrow, dealing minor damage and knockback).
Self-Destruct (If a Drone is destroyed, it explodes violently, dealing up to 300 points of damage and minor knockback to nearby enemies).
Comments:
The Drone Squad is a largely defensive unit, best used by having it burrow in front of your Fire Warriors where they can ambush enemy melee units trying to swamp your range specialists in close combat. Thanks to their vehicle armor, Drone Squads can take a surprisin amount of punishment my most melee units, and their self-destruct ability only furthers this effect, turning them into a squad that most enemies will want to avoid like the plague.
Unfortunately, their relatively high cost and especially their very long build/reinforce time drastically limits the use Drone Squads could see as offensive units – they effectively should be considered one-time tricks, not meatshields that you can continually reinforce like Kroot Carnivores.
It is extremely important to keep in mind that Drone Squads are extremely vulnerable against abilities with AoE damage, like the SM Librarian’s Smite or the CSM Sorceror’s Doombolts – their vehicle armor does nothing to protect them against it, and their base health is comparetively low.
The Improved Metallurgy upgrade from the Path of Kauyon somewhat increases the Drone Squad’s survivability, but given that the same Path also gives you the Krootox and Kroot Hounds, they effectively become obsolete. On the other hand, Drone Squads can be a rather useful tool if you choose to take the Path of Mont’Ka, assuming you still have a bit of free vehicle pop.
Drone Harbinger

A Drone Harbinger, surrounder by the Drones it produces.
Name: Drone Harbinger
Role: Support
Cost: 100 REQ| 200 EN| 30S | N/A / 5 VP
Squad Size: 1/1
Health: 750
Morale: –
Built in/ Requires: Vehicle Beacon
Upgrades
–
Abilities
Construct Drone (Spawns a drone with 325 health and a 40 second lifetime at the cost of 30 energy. There can only be 20 drones active at any time, regardless of the number of Harbingers) (Default)
Comment: Woefully rarely used, the Drone Harbinger can swamp enemies with a constant stream of trigger-happy drones at the expense of its own very large vehicle pop intake, and the enormous hunger for energy a Harbinger in full production develops.
Very simply put, the Harbinger is a very fragile production facility that produces almost the same drones as those you’d find in the standalone Drone Squad. While said drones only have a limited lifespan and lack the powerful special abilities of their larger brothers, they also lack their awfully long reinforce time (spawning in three-second intervals), and have identical HP and damage stats (Harbinger Drones actually deal slightly more damage to vehicle than regular ones).
Thanks to their vehicle armor, Harbinger Drones are surprisingly resilient to damage, and given their quick spawn rate, can potentially overwhelm enemy forces even if just a single harbinger is present. In order for this to happen, you need a considerably high energy income however – a Harbinger in automated mode will suck up 600 energy per minute (60/3S * 30E), so Harbingers are best used in the very late game (when you can spare the energy) or the mid game (when sacrificing all this energy can give you a decisive edge).
Hammerhead Gunship

Name: Hammerhead Gunship
Role: Tank Hunter
Cost: 165 REQ | 315 EN / 45S / N/A / 3VP
Squad Size: 1/1
Health: 4000
Morale: –
Built in/ Requires: Vehicle Beacon / Mont’Ka Command Post| Teachings of Mont’Ka
Upgrades
–
Abilities:
–
Comments:
Perhaps the most beloved vehicle in the Tau Forces, the Hammerhead can snipe down most enemy tanks (the IG’s Leman Russ being a notable exception) before the latter even have a chance to fire back. Atop of that, it’s twin burst cannons also shred through light infantry, and even can compliment its main gun in terms of anti-vehicle damage should the enemy tanks come to close.
In fact, if you want to make the most out of your Hammerheads, positioning is of the essence – its relative low health (compared to other dedicated tank hunters) makes it very vulnerable against said tank hunters, so if you send your Hammerheads against SM/CSM Predators and the like, try to keep them at maximum range, and behind a wall of Fire Warriors (which in turn should be behind a wall of Kroot Carnivores or Drones).
If, however, you face anti-infantry vehicles (i.e. IG Hellhounds or Eldar Falcons), you actually might want to close in with the Hammerhead, seeing how its Burst Cannons actually deal a surprising amount of damage to medium and light vehicles.
Finally: Keep in mind that the Pathfinder Team’s Marker ability also affects attacks by the Hammerhead – having to eat 75% more damage by a tank that already dishes out plenty of hurt by its own usually does the trick even for enemy relic units and indeed may be a necessity given that the Tau’s own relic unit is significantly better at taking damage than dishing it out.
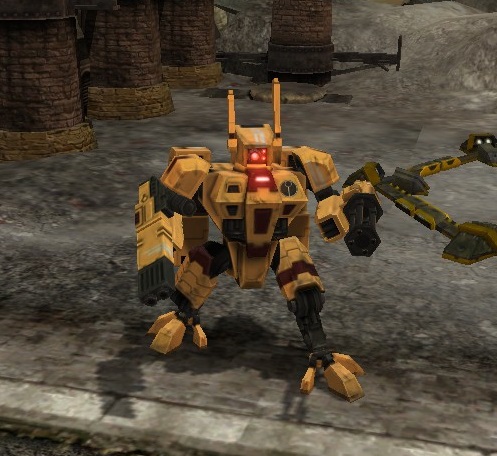
Krootox

Role: Heavy Meatshield
Cost: 150 REQ | 275 EN / 30S / N/A / 3VP
Squad Size: 1/1
Health: 6500
Morale: –
Built in/ Requires: Kroot Shaping Center / Kauyon Command Post | Teachings of Kauyon
Limit: 2
Upgrades
–
Abilities:
–
Comments:
Take a gorilla. Feed it growth hormones like crazy, mount a huge gun on its back, and add a Kroot rider to the mix to control the damn thing. Bang, Krootox.
The Krootox is the Tau T4 unit if you should decide to go for the path of Kauyon. Thanks to its high health (that even can be raised to a whopping 8775 points with Improved Metallurgy) and its Demon-class armor, the Krootox is incredibly resilient, having no hard-counter appart from enemy commander units and the SM’s Grey Knights. Naturally both can be disposed off with concentrated fire from your aptly-named Fire Warriors. To top it off, the Krootox is a killing machine in melee, simply punching through infantry and tanks alike if getting close enough.
As the Krootox moves very slowly, getting it within melee range of enemy units (and keeping the latter in range) can often be difficult. Because of this, it is often advisable to switch the Krootox’s attack mode from Melee to Ranged when fighting infantry, as the back-mounted gun of the beast actually dishes out a surprising amount of damage to non-vehicle units. However, as the gun is less effective against actual vehicles, you should switch back to Melee when you want to tear apart tanks instead of bodies.
It should be noted that Krootoxen synergize very well with Kroothounds – while the Hounds make up for the Krootox’s slow speed and (relatively) low damage, the Krootox in turn as supply an invalueable meatshield for the Tau – and naturally for the Fire Warriors that should follow in their wake.
Greater Knarloc
Jurassic Park in Space.

Name: Greater Knarloc
Role: Relic Unit Counter
Cost: 400 REQ | 500 EN / 30S / N/A / 5VP
Squad Size: 1/1
Health: 8000
Morale: –
Built in/ Requires: Kroot Shaping Center / Kauyon Command Post and Teachings of Kauyon OR Mont’Ka Command Post and Teachings of Mont’Ka | Captured Relic
Limit: 1
Upgrades
–
Abilities:
–
Comment: Sadly one of or even the least impressive relic units in the game, the sole and exclusive purpose of the Greater Knarloc lies in tackling enemy relic units such as the SM’s Land Raider, the Orkz’s giant Squiggoth, or the Eldar’s Avatar of Khain. For this purpose, the Knarloc provides an aboundance of melee DPS, but suffers from several major problems:
1. Much like the Ork Squiggoth, the Greater Knarloc suffers from its own size and an almost absurdly slow turning speed, frequently making it difficult to get this beast into close combat in the first place.
2. In addition to this, the Great Knarloc can only attack one unit at once. While it can usually dispatch said unit in a rather quick fashion, it is incredibly easy to swamp the Knarloc with thrash units, preventing it from reaching the enemy relic unit it is supposed to destroy.
Finally, the Greater Knarloc is surprisingly fragile for a Relic Unit, having only 8000 HP (as opposed to your regular old non-relic Krootox who have 6500). Because of this, the Knarloc (again, being a designated Relic Unit killer) actually will fall in a one-on-one fight with some relic units, particularly against the Bloodthirster fielded by the forces of Chaos.
To mitigate this effect, two chooses are availiable: If you take the path of Kauyon, the Improved Metallurgy technology raises the Knarlocs HP to 10800, allowing it to (barely) kill a Bloodthirsters in single combat.
If you choose the path of Mont’Ka instead, you do not have access to this technology and are stuck with a wimpy Knarloc. As with so many other problems facing Mont’Ka players, the solution to this problem comes in the form of two Hammerhead Tanks (ideally supported by a Pathfinder Team using the Mark Target ability), whose additional damage should suffice to win the battle in the favor of the Tau, even though the Knarloc might get severely bruised up in the process.
Outside of hunting relic units, the Knarlocs slow speed an inability to kill infantry en masse usually limits its role to that of a glorified meatshield.
Ethereal

Role: Support Commander
Cost: 175 REQ/ 200 EN/ 10S | N/A | 0IP
Squad Size: 1/1
Health: 950
Morale: 300
Build in/Requires: Coalition Center
Upgrades
–
Abilities
For the Greater Good (So long as the Ethereal is on the battlefield, all units of the player gain 200 additional health for squad member and have their maximum morale raised by 200. If the Ethereal is killed, all units of the player in a wide area around the Ethereal suffer 100 points of damage, 500 points of moral damage, and become radio-silent for ten seconds). [Default] [Passive]
Summon Shas’Ui Bodyguard (Summons a squad of Shas’Ui Bodyguards at the cost of two IP.
Only one Shas’Ui Bodyguard can be active at any given time. 120 S cooldown ) [Default]
Holographic Projection (Summons a holographic copy of the targetted infantry unit. The copy can not attack and takes 3x damage from all sources, but is indistinguishable from the original unit visually. 45 S cooldown.) [Default]
Air Caste Bombardment (Creates a a slowly expanding blast of energy at the targetted location, dealing severe damage and minor knockback to all targets caught within it. 110 S cooldown).
Comments: The Tau’s Space Pope. Just by being on the battlefield, the Etheral gives all units of the player a notable health and moral buff (keep in mind that the health buff is applied for each squad member, so large squads (i.e. Kroot Carnivores) gain more health (+2000) than smaller ones (+200 for Crisis and Broadsite Battlesuits). Naturally, it comes with a catch – if the Ethereal dies, all the Tau start crying like little girls (that is, your entire army safe for vehicles goes “Squad Broken!”), so keeping this guy out of harm’s way is a prime objective for Tau players.
Unfortunately, this is not quite as easy as it may seem. If you park the Ethereal in your base, you can not make use of his powerful special abilities, yet if he remains close to your army, you can bet your behind that the enemy will do his darndest to kill him with everything he has, be it by using Jump Infantry (i.e. Assault Marines) or snipers (particularly the dreaded IG Vindicare Assassin that was practically made for this role). To this end, the most viable solution usually is to hide your Ethereal in the infiltrated Devilfish Carrier. While the Etherial’s passive bonus becomes inactive once he enters the transport, you can quickly unload him when facing the enemy army, and the Devilfish’s infiltration ability and speed greatly help to increase the Ethereal’s life expectancy.
The Holographic Projection most commonly is used on the Ethereal itself, as it provides a handy decoy that might save the life of the actual Ethereal and can even goad the enemy into making extremely foolhardy attacks, giving you a tactical advantage. It can also, however, be used on you Tau Commander (for similar reasons) or on high-HP units such as the Krootox to create a disposable bullet sponge.
The Air Caste Bombardment deals a good amount of damage to units in its epicenter (including yours, so careful where you aim that thing), but keep in mind that the blast takes a whopping twenty seconds to fully spread out, making it more of an area denial weapon than a precision strike. It is, however. surprisingly effective at blowing up densely clustered energy generators (the damage against most other buildings is much lower).
For the Summon Shas’Ui Bodyguard ability, please see the dedicated entry.
Shas’Ui Bodyguard
Name: Shas’Ui Bodyguard
Role: Ranged Infantry
Cost: 0 REQ| 0 EN| 0 S / 75 REQ| 0 EN| 10S / 2 IP
Squad Size: 4/4 | 4/4
Health: 700 / 2800
Morale: 300
Build in/Requires: Created by Tau Etherial
Limit: 1
Upgrades
–
Abilities
–
Comments: These guys are the personal bodyguard of the Etherial and can only be “produced” by him. As you might expect, they are the elite of the Fire Warriors, which effectively means that they have a bit of additional health (which is negated by their smaller squad size and lack of shield drones) and and a longer attack range than both the Tau’s own Hammerhead Tank and the IG’s Leman Russ. No seriously, the only unit in the game that can outgun the Bodyguards in terms of range is the IG’s Basilisk artillery, and unlikely the latter, the Shas’Ui actually will hit their targets in more than one of ten cases (having a decent 70% accuracy).
Their long attack range actually nicely compliments their supposed role as bodyguards for the Ethereal – as you don’t want the latter near the front lines, you can nicely position the Shas’Ui and the Ethereal a good bit away from the battle, allowing you to keep the fragile Space Pope safe while the Bodyguards can still fire.
Before you get the idea of making an army of these guys, keep in mind that only one squad can be active at any given team. And just as with normal Firewarriors, having good scouts is an absolute necessity to get the most out of the Shas’Ui Bodyguard.
Addendum: Tau Buildings
Addendum: Tau Technologies
This section will offer some basic informatiom for the researchable abilities and upgrades of the Tau Empire. It is only meant to give a very brief overview.
Jump Packs Research
(50 REQ, 25 EN, 20S, Cadre Headquarters).
Allows XV15 Stealth Team Suits, Vespid Stingwing Strains, XV8 Crisis Suits and the Tau Commander to use the jump ability, also slightly increases the Tau Commander’s movement speed.
This research is crucial. If you do not get it right away, consider deinstalling the game.
Stealth Burst Cannons Enhancements
(50 REQ, 50 EN, 45S, Cadre Headquarters).
Triples the damage of the XV15 Stealth Teams’ burst guns in melee and range. As the damage of the Stealth Team is abysmal, even tripling it does next to nothing, so feel free to ignore this upgrade,
Target Lock
(75 REQ, 50 EN, 30S, Path to Enlightenment)
Increases the accuracy of the XV15 Stealth Team’s Burst Guns and Fusion Blasters by 200% (i.e., gives them a 100% accuracy at all times). Good if you want to rely on Stealth Teams against vehicle-heavy armies such as the IG, otherwise obsolete.
Advanced Pulse Rifles
(50 REQ, 100 EN, 25S, Path to Enlightenment)
Increases range and damage of Fire Warrior Teams (30% more dmg) and XV 15 Stealth Teams (35% more dmg). Being a straight upgrade to range and damage, this is a no-brainer, and should be the first technology you research from the PtE.
Missile Barrage Research
(100 REQ, 100 EN, 45 S, Path to Enlightenment)
Unlocks the Missile Barrage ability for the Skyray Missile Gunship. Mandatory if you plan to make use of the latter (especially if choosing the Path of Kauyon), obsolete otherwise.
Feral Leap Research
(75 REQ, 50 EN, 30 S, Path to Enlightenment)
Allows Kroot Carnivores and Kroot Hound Packs to use the Feral Leap ability. Absolutely mandatory if you take the Path of Kauyon, still good to have if you go Mont’Ka.
Improved Metallurgy
(150 REQ, 150 EN, 25 S, Path to Enlightenment, requires Kauyon Command Post)
+10% HP and increased armor for Fire Warriors, 30% HP for all Tau vehicles (except Devilfish Troop Carrier) / Krootox and Greater Knarloc, +200 HP for Tau Commander.
First part of the compensation for not having Hammerhead Tanks in Kauyon. Get it while its hot.
Targetting Optics
(100 REQ, 100 EN, 25 S, Path to Enlightenment, requires Kauyon Command Post)
Increased range and sight radius for Fire Warriors, increases range of XV15 Stealth Teams (Burst Cannons only). Second part of the compensation for not having Hammerhead Tanks in Kauyon. Another no-brainer.
Teachings of Kauyon
(450 REQ, 450 EN, 100 S, Kauyon Command Post)
Unlocks Krootox and Greater Knarloc. One of the Tau’s T4 choices.
Teachings of Mont’Ka
(450 REQ, 450 EN, 100 S, Mont’Ka Command Post)
Unlocks Hammerhead Tank and Greater Knarloc. One of the Tau’s T4 choices.
Escalate Engagement
(75 REQ, 250 EN, 60 S, Listening Post)
Increases REQ income by 15%. First of two possible upgrade. Use if you have to much energy but to little requisition.
Full Scale War
(100 REQ, 350 EN, 95 S, Listening Post, requires Escalate Engagement)
Increases REQ income by a further 20%. Rarely sees play as energy tends to be your main problem.
Strengthen Powergrid
(200 REQ, 40 EN, 60 S, Plasma Generator)
Increases EN income by 33%. As you will usually be short on energy, this is a reasonable research if you’e maxed out on generators.
Plasma Battery Storage
(350 REQ, 0 EN, 95S, Plasma Generator, requires Strengthen Powergrid)
Increases EN income by a further 20%. Usually overkill.
Acknowledgements
Most of the numbers and statistics presented in this guide were taken from the Dawn of War Player’s Guide. While the original site of the guide sadly has not stood the test of time, you can look up a mirror of the site here[warhammer-game.narod.ru].
Please keep in mind that this guide is intended for Dawn of War: Dark Crusade and not Dawn of War: Soulstorm. Apart from gaining a flying unit, the Manta, various Tau units have undergone minor balance changes in Soulstorm which are not considered here.