
Overview
This guide will walk you through ALL the secrets, plus reccommended weapons to deal with bosses and situations!
Introduction
Welcome, new cave explorer / cave expert! This guide aims to teach you how to deal with the various bosses, how to get all the secrets, and most importantly how to thrive all the way towards the end!
NOTE: This guide is no longer being worked on; it will walk you through the most optimal secrets and unlocks through the main game.
Walkthrough
This section will lead you from the file selection menu all the way to the credits, 100% of the way! Life capsules, secret weapons and the infamous Sacred Grounds can be obtained/reached by following this guide.
Section 1: Intro, and First Cave
Cave Story starts off with an introduction to a mysterious green-haired fellow on a computer, who appears to be on a chat room with someone named “Sue”. Later in this cutscene, you learn that the green-haired fellow is named “Kazuma”.
After the cutscene, you’re plopped right into time game immediately. To your main character’s right, you can see a health refill station and a save point. I recommend saving, because the spikes outside can kill you, if you’re not careful. After saving, head up to the door and go through it by pressing either the down arrow key if you’re using a keyboard, or down on the joystick if you’re using a gamepad.
Not even 30 seconds into the game, and you’re already presented with some danger. Head left down into the depths into the First Cave carefully, dodging the spikes and various bats along the way.
Once you head left enough, you’ll see an energy tank– err, I mean, a Life Capsule. Snag it with your down arrowkey / joystick and enjoy 3 more points of health.
After this, head right, decending even further, evading even more of the enemies. Eventually you’ll run across a lion door thing. Press down on its mouth to head in there. Inside, you’ll see a random guy sleeping, and your first chest. Press down on that bad boy and you’ll get your first weapon: the Polar Star!
Someone’s transmission is seen again, and you are brought back to Kazuma and his chat room. In thus cutscene you learn that Kazuma is Sue’s brother, whoever Sue may be.
With that over, head back through the door, and make your way back to the save point, collecting as many energy triangles as you possibly can. Once you save, head back out and head right this time.
No that you have a weapon, you can break those blocks with a star pattern on them. Shoot them up, kill the enemies, and kill the evil door to advance.
IMPORTANT: It’s HIGHLY recommended you level up the Polar Star to level 2, because there is a boss fight coming up! To do this, go back in and out the save point and keep killing monsters to get energy.
Once you go through the door, another cutscene will play out between Kazuma and his chat room. You learn that Kazuma is pretty desperate for some food. Also note that the line “Kazuma: but, just so you know, if I get to that point I’ll do it” is worth remembering, because it will show up sooner than later in the game.
Section 2: Rabbit People?!
–Mimiga Village–
Now that you’re out of the First Cave, a cutscene will play between two “Mimigas”, or two rabbit people, essentially. Eventually you’ll learn that the one in the green shirt is named “Toroko”, and she has a key. You’ll also be vaguely introduced to “The Doctor”, the main villain. Toroko apparantly has a key, and right when she’s about to hand it over…
CRASH! You land right in the middle of them. Toroko runs off to places unknown, and the Mimiga to the left gets knocked out. Talking to this Mimiga will reveal that his name is King. He says he is the head honcho of the town, but it doesn’t mean anything due to the low population. He also explains that Sue is an outsider, and doesn’t belong in the village.
With that over with, head right to the save point, save your game, exit, and get on top of the platform above the save room. From here, jump to your right onto the platform, head to the far right wall, and go through the door.
–Yamashita Farm–
In Yamashita Farm, head right, and nab the Life Capsule in the water. After this, Yamashita Farm becomes useless, so make your way back to the village.
UNOBTAINABLE SECRET: I you were to remove the block below the Life Capsule, you could obtain the Beast Fang, which is useless.
Back in the village, head back down to the save point and save again (Save often! You never know what’ll happen to you…). After that business is done, head right, drop down to the ledge on the wall, then drop down to the right. You should land on a platform, three blocks wide. From here, jump to the one block platform, then jump again to the chest. Open it, and you’ll get the Map System. Read the inspirational text, then climb back up to the save point. Save again, and this time head left, and drop down where the little puddle of water is, and go through the door.
–Reservoir–
In the Reservoir, head left, jump on the platforms, talk to the fisherman if you REALLY want to, drop down into the water on the far left, and pick up the sparkly stuff. You’ll obtain a useless item: the Silver Locket. After this, get out of the water.
ACHIEVEMENT CHANCE: That one fish in the water is the only one in the game. If you let it live, you’ll get an achievement at the end of the game for sparing it.
Once you finally make your way out of the water, Toroko will be standing at the entrance, and she will be frightened by you. She’ll run through the door, and you’ll want to do the same.
–Mimiga Village–
Back in the village, King will once again try to wrest the key from Toroko. Toroko refuses still, and plows right through King. Once the cutscene is over, Make sure you save, because an optional boss fight is coming up, should you choose to fight. Once you save, head to the ground floor, and into the building in the bottom right corner of the village.
–Shack–
In the shack, you’ll think it’s empty, but you’d be wrong. Head to the right wall, and Toroko will ambush you. Shoot her once, then talk to her. Once you do, she’ll explain that the Doctor has been taking her kind away for expirimentation, and she though you were a minion of his.
Toroko will then take notice of the pendant, and explain that Sue gave it to her. She’ll also explain that King disagrees with Toroko and Sue’s friendship.
*boom* *boom* *CRASH*
Oh no! A giant rectangle with eyes, feet, and triangle hands bursts into the shack, claiming that he has “Found you”! This mysterious suitcase thing also claims to have a nose of a clever Harrier!
Soon after this confrontation with the spooky suitcase with a giant face, a witch teleports in! The suitcase calls her “Misery”; a fitting name for a witch. Toroko exclaims that they’re with the Doctor, and Misery confirms that the Doctor has summoned them to take Sue away.
Wait a second… but that isn’t Sue, that’s Toroko! Misery doesn’t listen, and traps Toroko in a magical bubble. Misery then calls to “Balrog”, the spooky suitcase and tells him that “the rest is up to you.”
OPTIONAL BOSSFIGHT: This is the only time you’ll have a chance to pick whether you want to fight a boss in the game. Picking “no” will surprise Balrog, and he says he will go back home.
If you choose yes (which I recommend) Then prepare your Polar Star for an easy first fight.
Boss #1:
BALROG
HP: 60
RECOMMENDED WEAPON: Polar Star
BATTLE STRAT: Being the easiest boss in the game, Balrog will walk towards you and… hug you? To avoid being hugged, simply jump over him, keeping your Polar Star on him as much as you can.
After your victory with Balrog, he’ll remember what you did to him that faitful day in the shack. Pick up your energy triangles and head out the door.
In that shack, there was nothing but chaos! So much happened back there; Balrog and Misery were introduced, the Doctor is collecting Mimigas for some odd reason, and Toroko was kidnapped. Head back up to the save point and save. After that, head right past the Assembly Hall, and talk to the Mimiga infront of the door. You’ll tell him that Toroko has been kidnapped, and he’ll go report that piece of info to King right away. Now that he isn’t blocking the door, go through it to the Cemetary.
–Cemetary–
In the cemetary, your goal is to reach “Arthur’s Grave”, which is the only grave in this place. Clear out all the mushrooms on the ground floor. To kill the gravedigger, simply shoot him when he has his knife raised. Once the ground floor has been cleared, look closely in the grass for a moving tan pixel. Once you see it, go over to it and press down on it. You’ve discovered a little man, and he asks if he can help you. Store his location in your memory banks; we’ll come back for him later.
After all of that is done, climb up, defeat a few more mushrooms (Ignore the unreachable door for now, we’ll get to that later too) and nab the key off of Arthur’s grave.
–Mimiga Village–
Back in the village, jump down to the ground floor, and unlock the door to Arthur’s House.
–Arthur’s House–
Inside, use the save point, and go take a look on the computer.
“Kazuma: but, just so you know,if I get to that point I’ll do it…”
You’ve found the other end of the chatroom! Allow teleportation to the Egg Corridor, and use the teleporter just to the left of the computer. Select the Egg Corridor, and commence the teleportation!
Section 3: Traversing the Egg Corridor
–Egg Corridor–
As soon as you teleport in, a Life Capsule is visible. The green robot above the teleporter will tell you that contact with the white thing on the floor is instant death, so be careful. With that in mind, head down to the white thing’s path and nab the Life Capsule, which puts you at 12 health. Get back up to the teleporter, and start the long trek to the right.
Make sure that you upgrade your Polar Star to level three along the way. After a lot of jumping and shooting, you’ll come across a Mimigain a blue sweater, and a huge, almost a little scary Mimiga. A cutscene will play, where the blue sweatered Mimiga gets completely wrecked in the fight, and gets carried off. Give a short chase, and soon you’ll find a save point.
–Cthulu’s Abode–
Inside, save your game and talk to the man in a green monster costume. He explains you are a soldier from the surface, and also says that you have a “Blonde pal”, whoever that may be.
From here, jump up to the top door, and go through it.
–Egg Corridor–
Back outside, jump across the rather tricky platforming to the Life Capsule. This partiular one increases your health by 4 instead of 3, putting you at 16 HP. Afterwards, drop down, save your game again if you want, and head right. Make sure you keep track of the egg numbers along the way.
Once you see Egg 6, get down onto the ground floor, dodge the white thing, and hop inside the egg.
–Egg No. 6–
Open the cest inside the egg to obtain the ID Card. After that, exit the egg.
–Egg Corridor–
Back outside, resume your trek right. After a short walk, you’ll come across another save point. Head inside.
–Egg Observation Room–
Inside of the observation room, loads of terminals tell you about the status of a few eggs. Running by them will turn a terminal on, and from there you can check out egg conditions. More importantly, take the life to the top floor of the room. Open the chest, and inside you’ll obtain the Missile Launcher!
This is your first ammo type weapon. Sometimes enemies / a few map props will drop missiles.
After you get the Missile Launcher, Head down to the lower row and run by the terminals. Two will show red. One terminal says Egg No. 6 has an abnormal condition, and Egg No. 1 has the same type of condition. Since you already know that Egg No. 6 was hollow, this can only mean that Egg No. 1 is hollow as well. Take the lift back up, save, and head out the door.
–Egg Corridor–
Now that you have another weapon, it’s time to farm for energy crystals. Using your Polar Star, kill a few enemies, then switch to your Missile Launcher and nab the energy. Once it’s full, make your way inside Egg No. 1.
–Egg No. 1–
Walk over to the terminal in the egg and use the ID card on it. Nab the missile of you need it, and exit.
–Egg Corridor–
Once again in the corridor, head right, past the shield that is now disabled, and into another boss fight!
Boss #2
IGOR
HP: 300
RECOMMENDED WEAPON: Millsile Launcher, and once that’s empty, Polar Star
ATTACK STRAT: Igor is a fairly easy boss to take care of. He’ll first run at you and jump, then stop, and repeat. If you stand too close to him, he’ll attempt to punch you. Using the Missile Launcher is ideal for this first phase of his attack pattern.
Once he’s down to half health, your Missile Launcher should be out of ammo, and he’ll start to shoot a steady stream of ball energy at you. If you have a fast trigger finger with the Polar Star, he’s no match.
After your victory, head into the door on the left (not the save point yet).
–Egg No. 00–
Inside, you’ll see that blue sweater Mimiga. Talk to her. You’ll be asked if you saved her.
If you choose yes, she’ll say she didn’t need your help. If no, then she’ll say you’re no help. No matter what choice you pick, she won’t be happy with you.
After that nonsense, she’ll notice Eg No. 00, and will try to hatch it. The condition of the egg is normal. However, the egg incubation process is locked with a password. The Mimiga explains that if she had her brother there, the password could be cracked.
The Mimiga gives up, and starts to head out the door. Before she does, however, she says she’ll help you, if you help her. You have no choice but to agree; after all, you ARE a silent protaonist. After she walks out, you can’t do anything else in this room, so head back out to the Egg Corridor.
–Egg Corridor–
Now that the cutscene is over, the save point door magically unlocks. Save, then make the long trip back to Arthur’s House.
Section 4: A Caged Rabbit and Her Brother
–Arthur’s House–
Back at the house, that Mimiga you found back at the corridor is on her computer, chatting away. You’ll learn that the Mimiga you found is Sue Sakamoto, Kazuma’s brother. You’ll also learn that they plan to hatch Egg No. 00, which is a flying dragon egg.
After Sue disconnects, King barges in with that Mimiga guarding the entrace to the Cemetary (His name is Jack) behind him. Eventually King handles Sue and drags her out of the house.
After teleporting into Arthur’s House, save your game, and head outside.
–Mimiga Village–
Right when you walk outside, you’ll see that Sue has been locked up in a cage, and King plans to trade Sue for Toroko. After the cutscene, climb up to where they are, and talk to Sue. She’ll say to go in her place to ‘Bushlands’ to save her brother. Climb back down, enter Arthur’s House, and teleport to Bushlands.
–Bushlands–
As soon as you teleport in, you’ll notice a mimiga standing to the right of the teleporter. Talking to him reveals that he has lost his key. With that in mind, head right.
Once you get into combat, you’ll notice that the terrain is very hilly, and the Polar Star performs poorly in this area. Make your way right until you see a key. Nab it, and head back to Santa. He’ll notice you have his key right away, and he’ll ask you to enter his house.
–Santa’s House–
Once you enter, you’ll probably notice the red death spikes right away. Save, read the sign just to their right if you wish, and talk to Santa. He’ll express gratitude for finding his key for him, and he’ll hand over the Fireball! He’ll also tell you that you need to go through Chako’s fireplace in her house to advance further into the Bushlands.
After you have the Fireball, go back down, save, and leave his house.
–Bushlands–
Now that you have the Fireball added to your arsenal, make sure you level it up as soon as possible. The Fireball is a weapon designed for hilly areas, and Bushlands fits that description beyond well.
Back outside, make the trek right. A little distance after the key location, you’ll notice some breakable star pattern blocks. Climb them, and jump to your left. You’ll see a Life Capsule. The footing to reach the Life Capsule is a bit tricky. First, jump towards the high block, then drop down to the lower block. Jump up again to the high block (and not in the slot between blocks) and jump up to obtain the Life Capsule.
If you have gotten all the Life Capsules thus far, you should be at 21 HP.
After collecting this, drop down and continue your path to the right. Be careful though, for some grass that appears to be solid is not, and you’ll fall right into some death spikes. After a short walk, you’ll come across Chako’s House.
–Chako’s House–
Make sure you save at the top, and examine the fireplace. You can see an exit across the flames, but because of the flames, you can’t get through it. Chako will then tell you to go get some Jellyfish Juice from the big jelly.
SECRET: After Chako tells you to get the Jellyfish Juice, sleep in the bed right next to her. When you wake up, Chako will be sleeping on the bed you were resting on. How long were you asleep? Were you even asleep? What were you doing in that bed with Chako? You sly dog…
More importantly, you recieved Chako’s Lipstick. It must have either been dropped into your pocket, or it was given to you to remember a night with Chako. Either way, this item is useless, and just pretties up your inventory.
After the confrontation with Chako, save, and exit her house.
–Bushlands–
As soon as you leave her house, you’ll notice that an unknown enemy has spawned. These are the jellyfish Chako hinted at, but you’ll need to find the big jelly. To find it, head left. Once you arrive at the Santa’s Key location, the big jelly will be there, along with a lot of other jellies plus the enemies already there before the jelly invasion. And you thought this area couldn’t be more cluttered…
Defeating the Big Jelly is actually rather easy. That breakable block doesn’t have to be broken. Instead, stand just to the left / right of it so your Polar Star doesn’t hit it when you fire. After you have that set up, blast away. The jelly should die in a few seconds, and after it does, it should drop a chest. Opening it will reveal the Jellyfish Juice!
SECRET: After you obtain the Jellyfish Juice, head left, back to the teleporter, and take it back to Arthur’s House.
–Arthur’s House–
Back at Arthur’s House, save, and exit back to the village.
–Mimiga Village–
From here, you’ll want to climb up to the save point, then head right. Enter the Assembly Hall.
–Assembly Hall–
Once in the Assembly Hall, put out the fire with the Jellyfish Juice you obtained. You’ll recieve the Bubbler!
At first glance this weapon doesn’t seem too useful, but once it gets to level 3, it tends to be extremely helpful, especially in Bushlands, and in another area further along in the game. This is also your first ammo type weapon that recharges ammo, if you chose to get it.
After you obtain the Bubbler, head back over to Bushlands.
–Bushlands–
Back in Bushlands, head right, obtain the Jellyfish Juice again, and head over to Chako’s House.
–Chako’s House–
In here, save if you must, then put out the fire with your Jellyfish Juice.
–Bushlands–
This area is where the Bubbler becomes particularly useful, if you have it at level 3. Charge it up, then shoot it at the hoarde of bats hovering over each platform. Once all of them or most of them are gone, jump to the next platform. Take no chances with the bats; sometimes they can push you off into the spikes below. Continue this until you jump over the last gap.
Take care of the rest of the bats over the spikes, and feast your eyes over the ghost looking thing. When it takes damage, it’ll shoot a shockwave of unknown energy at you. You’ll have to counter this by jumping over the shockwave, and keeping pressure on it. Once it’s dead, drop down into the area below.
After this point, you’re about halfway done with Bushlands. Continue your trek right until you come across a house with a crack in the side. Examine the crack, and you can see someone inside. He’ll give you the Rusty Key. With this key, try to unlock the door. Unfortunately for whoever is in that house, the door has no keyhole, and is rusted shut. Go back to the crack and tell whoever is in there that you can’t unlock the door.
After this, head right a little ways and go in the tower with a skull on it.
–Execution Chamber–
CAUTION: Be extra careful when you follow this portion of how to get that Life Capsule. The presses on top of the breakable blocks will instantly kill you if they fall on you.
That said, break the block right above the door, and move out of the way. DO NOT KILL THE PRESS. Instead, stand on top of it, and jump to the left ledge. On this ledge, kill the press to your right. After that, stand on the block it was resting on, shoot up, jump up and nab that Life Capsule, which puts you at 26 health. After this, head back out into Bushlands.
–Bushlands–
With that business out of the way, head left, and enter the door in a cove-like structure, just to the left of where you dropped off into the Power Supply Room.
–Power Supply Room–
Inside, power up the generator in the left corner of the room. Once you do, the robot you passed by to turn the generator on will start freaking out. After it spots you, it’ll get crushed by Balrog. Balrog will then ask you if you knew the Mimiga he and Misery captured wasen’t Sue. Saying yes or no here does not matter, but saying yes will make the dialogue scroll faster. After this conversation, prepare for a fight!
Boss # 3
BALROG
HP: 240
RECOMMENDED WEAPONS: The Polar Star, Missile Launcher or a level 3 Bubbler will all work here.
ATTACK PATTERN: In this fight with Balrog, he’ll jump, fly a bit, and
Section 5: Bomb materials, and more Bushlands!
–Bushlands–
After this point, you’re about halfway done with Bushlands. Continue your trek right until you come across a house with a crack in the side. Examine the crack, and you can see someone inside. He’ll give you the Rusty Key. With this key, try to unlock the door. Unfortunately for whoever is in that house, the door has no keyhole, and is rusted shut. Go back to the crack and tell whoever is in there that you can’t unlock the door.
After this, head right a little ways and go in the tower with a skull on it.
–Execution Chamber–
CAUTION: Be extra careful when you follow this portion of how to get that Life Capsule. The presses on top of the breakable blocks will instantly kill you if they fall on you.
That said, break the block right above the door, and move out of the way. DO NOT KILL THE PRESS. Instead, stand on top of it, and jump to the left ledge. On this ledge, kill the press to your right. After that, stand on the block it was resting on, shoot up, jump up and nab that Life Capsule, which puts you at 26 health. After this, head back out into Bushlands.
–Bushlands–
With that business out of the way, head left, and enter the door in a cove-like structure, just to the left of where you dropped off into the Power Supply Room.
–Power Supply Room–
Inside, power up the generator in the left corner of the room. Once you do, the robot you passed by to turn the generator on will start freaking out. After it spots you, it’ll get crushed by Balrog. Balrog will then ask you if you knew the Mimiga he and Misery captured wasen’t Sue. Saying yes or no here does not matter, but saying no will make the dialogue scroll faster. After this conversation, prepare for a fight!
Boss # 3
BALROG
HP: 240
RECOMMENDED WEAPONS: The Polar Star, Missile Launcher or a level 3 Bubbler will all work here.
ATTACK PATTERN: In this fight with Balrog, he’ll jump, fly a bit, and when he lands, he’ll produce a few energy balls. After he reaches about 1/4 health, he’ll stop flying, and start jumping like normal.The Bubbler is a good choice for the first part of this fight, as you can produce a lot of bubbles and fire them all at him when he lands, like a big shotgun. After he starts to jump normally, switching to the Polar Star is a good idea. Use the Missile Launcher if you REALLY want to.
After his demise, go up to the robot that was crushed, and pull him out. He’ll thank you, and will want to repay you. You’ll mention that there’s a human stuck inside a building, and he’ll suggest making a bomb. He’ll list the materials, and you have to fetch them.
Start by going back to the beginning half of Bushlands and retrieving the Jellyfish Juice.
–Bushlands–
First off, it’s definitely a good idea to save, since the fans are now on.
TIP: Holding the jump button will make you go higher.
After saving, go ALL the way back to the big jelly, and kill it. Nab it’s juice, then head over to Stana’s place.
–Santa’s House–
In here, use your Jellyfish Juice to extinguish his fire, and nab the charcoal. After this head back outside.
–Bushlands–
Head right and nab the juice one last time. After this, head right, and when you get to Chako’s house, jump over it with the fan.
Run ALL the way back to the second part of Bushlands, save, and jump on the block to the right of the save point. Then, jump on top of the block to it’s left. After that, kill the critters and the frogs, and head right. Drop down onto the lower platform, jump onto the two block tall platform suspended in the air, and jump to the chest. Your missile cappacity is increased by 5. Once you collect that, jump down, and use the fan to your right to jump up to the building entrance.
–Bushlands Hut–
Get your fireball ready and open the chest. Your max missiles will be once again increased by 5.
Once you do that, face left and prepare for a fight against a common enraged mimiga. Spam fireballs at it, and it should die rather quickly. Once you’re done, head back outside.
–Bushlands–
Once all of that is over with, go back to the buildin with the crack in it, and talk to the guy inside. You’ll tell him you’re making a bomb, and as you say “Gum Base”, he says to wait a second, and gives you a key.
With this key, you’ll head as far right as possible, avoiding the spikes along the way. BE SURE TO SAVE AT THE SAVE POINT ALONG THE RIGHT WALL! Once you get to the rightmost door, unlock it with the Gum Key, and head inside.
–Gum–
Open the chest to obtain the Gum Base. When you do, Misery will pop in to say hello, and Balrog will also pop in to warn Misery that you’re a force to be reckoned with. Misery then turns to Balrog, casts a spell on him, tells him “Soldiers are YOUR responsibility,” and Balrog is turned into Balfrog!
Boss #4
BALFROG
HP: 300
RECOMMENDED WEAPONS: The Missile Launcher will be your main source of offence, and your Polar Star will be your defence, until later in the fight.
ATTACK STRAT: Balfrog will jump around the arena, dropping tiny frogs from the ceiling until you jump over him using the fans on either side of the room. Deal with the tiny frogs with your Polar Star, and once you jump over him, he’ll shoot red projectiles at you. Switch to your Missile Launcher and start spamming it. Eventually, Balfrog will jump high into the air, and when he lands, a bunch of frogs will fall from the ceiling. As he’s in the air, aim your Polar Star up, and shoot any frogs falling directly on you. After those are taken care of, shoot the remaining frogs that fell. If your Missile Launcher runs out of ammo, make you JUMP before shooting with your Polar Star. Otherwise, Balfrog will take no damage. Continue this process of attacking Balfrog, and he’ll be dead before you know it.
After the fight, head back outside.
–Bushlands–
Now that you have all the materials for the bomb, head back over to the Power Supply Room and have Malco make the bomb. Once you have it, head back to the trapped human’s building, and open the door.
–Shelter–
Inside the building, Kazuma was waiting for you to rescue him! He thanks you and asks you to lead him back to Mimiga Village to where Sue is, when the teleporter to his right springs to life. Professor Booster comes out of it, and is glad to see Kazuma alive and well. He explains the Doctor has gathered the Mimigas for the war he’s preparing for, and he needs you to come with him.
After the cutscene, save, and go back outside.
–Bushlands–
Kazuma and Prof. Booster will both hop on a hoverbike and ride all the way back to the teleporter. You, however, get to walk all the way back there. How thoughtful! Start heading left, and make your way back to Arthur’s House.
Section 6: A reunion, and the Sand Zone!
–Arthur’s House–
After you finally manage to get back to the beginning teleporter in Bushlands, a cutscene will play, where Sue explains to King and Jack that they’re “weapons of death.” If they were to consume some of this mythical red flower, they’d grow to be in an uncontrollable rage. King swears he’ll never let that happen to Toroko.
Back in the House, Kazuma and Prof. Booster emerge from the teleporter. Sue and king walk in, and they have a sort of reunion.
When you teleport in, talk to Sue. Another cutscene will play, explaining that the Doctor has found the location of the red flowers, and is preparing for war. The location of them is in the Sand Zone, and Prof. Booster asks you to go and burn them flowers up.
After this cutscene, save, and head on over to the trusty teleporter, and teleport to the Sand Zone.
–Sand Zone–
Once in the Sand Zone, head left. You’ll see a blonde haired robot. She’ll notice you, and walk off.
Once she does, head left a bit more, and clumb up the blocks, avoiding the enemies along the way. Once you’re at the top, head left, and into the door with a wine glass above the door.
–Sand Zone Residence–
In here, you’ll see that same blonde haired robot you saw a few seconds ago. Approach her, and prepare for a fight!
Boss #5
CURLY BRACE
HP: 320
RECOMMENDED WEAPONS: The Fireball works exremely well in this fight.
ATTACK STRAT: Curly will have four Mimigas as damage sponges, but your Fireball can take them out in one hit. Curly herself will have the Machine Gun that she charges, and fires at you. Jump over her shots, keeping the Fireball on her. Careful not to jump over her when she starts firing the Machine Gun, because she can shoot up too, and you can’t dodge her attack when you’re above her. It’s also worth noting that you can walk through Curly when she’s not shooting.
After the fight, choose no in the dialogue option. If you say yes, you’ll have to talk to Curly again and say no, you don’t plan on disposing of the Mimigas.
!!IMPORTANT!!: When Curly asks if you want to trade your Polar Star for her Machine Gun, SAY NO. The Polar Star is important later in the game, and you’ll kick yourself later when you find out why.
Now that the battle with Curly is over with, talk to the Mimiga in the far left corner of the room. He tells you that you’ll need to visit Jenka, and it’d be best if you took the dog in the save room.
–Small Room–
Take the puppy, Hajime next to the bed, just like the Mimiga said.
SECRET: Open up your Map System, and you’ll see that this room has a path around it. The block with the letters ‘F R’ clearly visible on it is not solid. Jump through it, and use your Polar Star to find your way to the right. Drop all the way down to the right, and jump one block up to your left once you do. Then press down. You’ll find Curly’s Panties! You perverted robot, you!
After this pantie raid, save, then head back out to the Sand Zone.
–Sand Zone–
Start heading right, and climb the breakable block tower to the Life Capsule, which will bring your HP to 31.
TIP: When crossing this area with towers and death sand in between, shoot out one block of breakable blocks to peek out, and shoot the giant spere things hile inside. They can’t fit through one block spaces.
With the death sand, get a running start, and run across it. The croc that comes up and tries to bite you will miss, and if you don’t shoot it, it’ll stay there until you load another map.
Once you reach the last tower with a heart on it, climb it, and shoot out the breakable blocks on the top column. Once this is done, jump on the platform, and jump through the block with the pawprint on it. These blocks are nonsolid, and you’ll see them later on in the Sand Zone. Save your game, then continue to head right.
Once you reach a wall of breakable blocks, shoot out the bottom, go into the sand arena, and prepare for a fight!
Boss #6
OMEGA
HP: 400
RECOMMENDED WEAPONS: The Polar Star, or the Bubbline will work here.
ATTACK STRAT: Omega will start in the ground, spewing red rocks and normal rocks into the air. The red rocks won’t be destroyed unless you shoot them, and the regular rocks can’t be destroyed until they touch the ground.The Polar Star or Bubbline both work great here. Use the Bubbline as your main offence, and use the Polar Star to fall back on if your Bubbline runs out of ammo. Note that you have to have the Bubbline out for it to regenerate ammo, so use the Polar Star if you need to cross the map without taking damage from red rocks.
Eventually, Omega will jump out of the ground, jumping around the arena while shooting rocks in the air. The Bubbline becomes handy here, because it’s projectiles can travel at a larger distance. The Polar Star is mainly your defence for taking out the red rocks around you.
Once Omega has been dealt with, the “curse on the sunstones has been lifted.” That said, head back left until you see some giant blocks with a huge sun with an angry face on them. They’ll open, and you can drop down.
If you’re observant, you’ll notice the pawprint block behind the breakable blocks. Don’t head that way yet, first you need to find Jenka. Continue your descent until you see a one block path to your left. Start that way, then enter the door.
Section 7: Puppy Hunter
–Jenka’s House–
By now, you’re about halfway done with the Sand Zone. Talk to Jenka, and give her the puppy riding on your head. Balrog will then show, and he’ll ask surprisingly politely for the warehouse key to the red flowers stored within. Jenka will play dumb, not knowing what warehouse key Balrog is referring to. Balrog will then jump away from the scene, and Jenka will ask you to find the rest of her pups.
–Sand Zone–
The first dog you’ll want to collect is the one you passed by on your descent down to Jenka’s House. Cimb back up, and look for a pawprint block. Walk through it, and head right. There will be a Life Capsule, which should bring you up to 36 HP, and a chest with Jenka’s puppy “Mick”. Head back to Jenka’s House, and return the puppy.
–Jenka’s House–
Each time you return a puppy, Jenka will give you a little background explaining the red flowers, and the history of the Mimigas.
–Sand Zone–
The next puppy that you’ll want to get will be a little annoying to catch. Descend all the way down, then go right. Make your way through the clutter of enemies until you get to the Skeleton. An easy way to get rid of skeletons is to jump and shoot with your Polar Star, since the bones they throw are a bit tough to dodge at times.
After that mini showdown, approach “Kakeru”, and he’ll start running. You have to press down on him at just the right moment in order to catch him. Once you do, return him to Jenka.
The next puppy is in approximately the same area as the last one. Descend to the same area, except this time, you’ll want to jump on the platforms. Head right, jumping on each one until you run across two pawprint blocks above you. Jump up to them, and jump through them. Jump one last time to the left, and pursue the puppy that went inside the dark building.
–Deserted House–
This is where the map system comes in handy. This map is a lot like how you retrieved Curly’s Panties. First, save your game, because if you fall in the croc pit, you can’t get back out. Use your Polar Star to look for solid platforms, and gaps.
On the platform with the save point on it, go to it’s left most edge, jump, and go right. Once you’re on an upper platform, jump again at it’s left most ledge, and go left. After that, jump on the higher platmor’s right most edge, jump, and head right. At this point, walk to the right, over to “Shinobu.” Once you retrieve him, go back the way you came through, save, and exit.
–Sand Zone–
At this point you know the drill, go back to Jenka, return her Puppy, and head back out.
Once you do that, this next and final puppy is the most annoying to get. Throughout your time in the Sand Zone, you’ve heard about this warehouse with red flower seeds in it, but you haven’t seen it yet. Well, unluckily, the last puppy decided to take a nap next to it. To get there, head right, across the platforms, through the barrage of skull walkers, across more platforms, through a flock of giant birds, and you’ll finally reach the warehouse. Once there, head right, jump on the blocks to your left, and retrieve “Nene.” If you shoot the breakable blocks where the puppy is sleeping, you’ll be ble to heal yourself and save your game. With Nene on your head, head all the way back to Jenka’s House.
–Jenka’s House–
The moment you enter Jenka’s House, Balrog will just be leaving with the warehouse key he mugged from Jenka. Jenka quickly realises the situation just got really desperate, and asks you to persue. She’ll also give you a Life Pot.
NOTE: The Life Pot can really save you in some situations. Don’t use it unless you REALLY, ABSOLUTELY have to!
Enough chatter, head over to the Warehouse asap!
–Sand Zone–
Just like as if you were going after Nene, head right, all the way to the Warehouse. Once you get there, SAVE. The boss ahead can be REALLY DIFFICULT.
–Warehouse–
You’ll find the Doctor and Misery casually talking about what they want to do with the flowers. Eventually it leads to Misery suggesting to test them out on a Mimiga. That test Mimiga just so happens to be Toroko. When she is summoned, she tries to escape, but Balrog intervenes, grabs her, and forces her to eat a flower.
Just then, King pops into the Warehouse, slices Balrog forcing him to retreat, and stares down the Doctor. He rushes for him, only to be struck by one of Misery’s lightning bolts. King is blown back to the left wall.
Finally, you pop in, and the Doctor retreats, trusting you to “take care” of Toroko+!
Boss #7
TOROKO+
HP: 500
RECOMMENDED WEAPONS: You have to really focus on dodging for this battle, so your Polar Star will work just fine!
ATTACK STRAT: Toroko+ is definitely a tough egg to crack. She’ll use a lot of high damage attacks, and if you’re hit by one your Polar Star will level down, no questions asked. Toroko+’s main attack is throwing a cube at you, whether she’s on the ground or in the air. When that cube hits a wall or the floor, it’ll release a little flower monster. These can be killed for hearts and energy triangles. The key is to keep her in your sights at all times, and put that Polar Star of yours on her as much as you possibly can without tking damage.
!!IMPORTANT!!: After the battle, MAKE SURE YOU TALK TO KING. He’ll give you his blade, and die…
The blade is a very interesting weapon. At level 1, it inflicts a good amount of damage, but it has a slower rate of fire. Level 2 increases that rate of fire and the damage, but the range is significantly less. Level 3 summons the spirit of King, creating an AOE effect. However, this level is actually the least useful level in my opinion, and I recommend you try to keep your blade at level 2 as much as you can.
After all of these events play out, head outside.
–Sand Zone–
Oh Yeaaah!!
*CRUSH*
Balrog crushes you, and Misery sends you to the Labyrinth, along with Balrog. How thoughtful!
Section 8: Is there hope?
–Labyrinth I–
Now that you’re in the Labyrinth, is there still hope for your friends? You seem to be trapped…
Start by shooting down the save point and saving. After that business has been taken care of, you’ll have to go through a rather long jump sequence. The blade will be your friend here, as it can one hit those purple critters on some platforms. Along the jump sequence, you’ll see a Life Capsule, which should bring you up to 41. Continue your journey upwards, and eventually you’ll run across moving blocks. Time your jumps correctly, and hop up to the terminal on the highest ledge. Activate it. The door all the way at the bottom will open.
Jump all the way back down (satisfying, isn’t it?) and save your game. Once you do that, go through the door.
–Labyrinth H–
Immediately to your left, you’ll see a cockroach-like enemy. Dispose of the “Gaudi” as they’re called, and continue onwards.
Once you’re directly above where the Gaudi was murdered, once you jump up, a moving block will start to move towards you. You have to run at it, jump into the notch in the ceiling, and drop down. As soon as you do, another moving block will try to crush you, so jump on top of it, and jump up to the door.
–Labyrinth W–
Hot diggity dog! Listen to that beat! I could really get down to this!
Unfortunately, we have no time to dance. Start by going right, killing the critters and Gaudis along the way. Once you see a door, head right on in.
–Labyrinth Shop–
Holy cow! Watch out for all the Gaudis in here– wait… they’re all friendly!
In the shop, there is a save point. Use it, and talk to the shopkeeper if you REALLY want to.
!!IMPORTANT!!: If you decided to talk to the shop keeper, he’ll want to trade your Polar Star and Fireball in for the Snake. DECLINE. The Polar Star has more of a use a little farther ahead in the game.
That said, head back outside. Be careful, the Gaudis next to the shop door have respawned, so you’ll want to kill them quickly. After they’re dead, head right some more, killing more Gaudis along the way. Eventually you’ll see another door below a ledge. Enter it.
–Camp–
Inside the camp, you’ll see Curly! Talk to the frog physician first. He’ll explain that Curly is in bad shape, and that there’s a Cure-All in his old clinic. Talk to Curly, and save.
Ignore the chest at the top of the Camp. For now, exit back out into the main part of the labyrinth.
–Labyrinth W–
Climb up so you’re on the topmost platform. You should see the door to the left. Ignore it for now, and draw your attention to the critter to your right. DO NOT KILL IT. Instead, jump in it’s direction. It’ll jump after you, and you’ll get hit. Continue to go right, and you’ll walk into a nonsolid wall. Continue down the hidden path, into the door.
–Camp–
You’ll be at the top part of the Camp now! Open the chest to recieve the Arms Barrier, which reduces energy loss when you take damage by half! Sweet!
–Labyrinth W–
It’s now time to go through that door we saw to our left before we went and got the Arms Barrier. Jump up to the door using the ramp (the jump is barely manageable) and head inside.
–Clinic Ruins–
Open the chest to find the Cure-All, and to fight Puu Black!
Boss #8
PUU BLACK
HP: 400
RECOMMENDED WEAPONS: Blade level 2 works wonders here, or the good ol’ Polar Star will work too.
ATTACK STRAT: Puu Black is a pushover. His only attack is to jump off screen and attempt to stomp you. All you have to do is shoot his bubbles, do as much damage to him as you can, and run out of the way when he tries to land on you.
Puu Black looked oddly familiar… sort of like a certain spooky suitcase you’ve encountered before… oh well. Back to the Camp for you!
–Camp–
Give the Cure-All to the physician, and afterwards, BE SURE YOU TALK TO CURLY. She’ll tell you that the labyrinth is the islands trash heap, and there’s only one way to escape, and that path is blocked by a giant arse boulder. Head on out after you talk to Curly, and after you save.
–Labyrinth W–
Climb up the platforms once more and head right. Jump onto the block that attempts to crush you, then ride the next one down. Kill all the Gaudis blocking your path, past Monster X and– wait, WHAT?
Boss #9
MONSTER X
MAIN SECTION HP: 700
UPPER BUBBLE TURRETS: 60
LOWER BUBBLE TURRETS: 100
RECOMMENDED WEAPONS: Phase one, use the Blade or Polar Star for the bubble turrets. After that, use the Bubbler + a level 2 Blade.
ATTACK STRAT: Not going to lie to you here, Monster X is really tough when you first fight him. When he first comes at you, he’ll attemps to run you over. If he does, kiss 10 HP goodbye. Jump on top of his treads, and make him switch directions. Continue this until he opens up. Using your Blade or Polar Star, shoot out the green bubble turrets.
Once you do that, phase 2 will commence! Monster X won’t change anything about his impulse to try and run you over, but when he opens, there will be no more turrets. This is his main section with 700 HP. Whip out your trusty Blade, and start spamming it right into his core. All the while you’re doing this, fish-like missiles will be shot all around you. Once he closes, switch to the Bubbline, and create a shield around you. They’ll never lay a gill on you! Be careful, however. Once your Bubbline runs out of ammo, use your Blade to pick off the fish, and recharge your Bubbline when you can.
Repeat this until Monster X jumps into the background, defeated.
NOTE: If you have taken a lot of damage from Monster X, DO NOT USE YOUR LIFE POT. Instead, you have two options: keep going to the room ahead and reload the boss room to respawn all of the enemies to farm for health, or if you’re *really* low, reload your save and fight him again to try and conserve as much HP as you can.
Section 9: Aw, He’ll Be Alright.
With Monster X dealt with, head right and through the door.
–Labyrinth B–
Professor Booster comes out of the sky and lands far below you! Unfortunately you’re forced to not care. Be sure to read ahead.
!!IMPORTANT!!: DO NOT GO AFTER PROFESSOR BOOSTER WHEN HE FALLS! Instead, jump up to the save point, and save. Jump back down, and look closely at the ledge. You’ll see a red mark. Run and jump at that mark, and you’ll make it to the other side just fine.
If you miss the jump, reload your save. You seriosuly don’t want to talk to Booster down there. Once you’re at the other side, head on through the door.
–Boulder Chamber–
Talk to Curly, and she’ll want you to help her with the boulder. Suddenly, Balrog appears, wanting another fight!
Boss #10
BALROG
HP: 500
RECOMMENDED WEAPONS: The Blade works fantastically here. The Polar Star works too, but it isn’t as effective.
ATTACK STRAT: Balrog will once again attack you, and you’ll have to deal with him… again. Start by running to the left, because he’ll also try to run after you. After he stops, he’ll run at you again, and fire missiles at you! The missiles can be destroyed though. Use your Blade on the missiles, and if you REALLY want to, you can use the Polar Star against them too. Use the same strategy against Balrog like you always have, which is to damage him in between his attacks.
Once you defeat Balrog for the last time (Yep, that was the last time you’ll ever have to duel that suitcase with a face. Yay!) He’ll agree to help you move the rock. Once he does that, he’ll jump away, and drop powered up missiles!
Along with this uprade, your Missile Launcher will drop back down to level 1. Once you get it to level 3, however, this weapon will prove more than useful at the end of the game.
Be sure to save, and head into the door.
–Labyrinth M–
At this point, you might be really low on health. The enemies ahead aren’t getting any easier, so be really careful. Progress through the linear labyrinth, taking the least amount of damage possible, also upgrading that Missile Launcher. Since the terrain is a bit rough, use every weapon in your arsenal that best deals with the current landscape!
TIP: If you charge the Bubbline behind a wall, the bubbles will peek over cover. Use this against the various fan enemies that block your path.
TIP: Since Curly joins you, she will help you out immensly with her Machine Gun. If you get to a point where you can’t kill the enemies ahead without taking hits, have Curly fight them for you.
NOTE: Eventually you’ll get to a point where you’ll see a random teleporter. DO NOT TAKE IT. It leads back to the Labyrinth Shop, and you’ll have to make the trek ALL THE WAY BACK THERE!
TIP: Once you see pink ball things with littler versions of them orbiting around, you can farm them for HP, energy, and missiles.
–Dark Place–
After the cutscene, save, restock on the enemies using the tip above, and head through the door on your right.
–Core–
The first blast door will be shut, so jump up to the terminal above you and release the door locks. It will say door four will be jammed.
Hop down, and head over to door four. Curly will be looking up at it. Shoot it, and it will break free. It won’t crush you, don’t worry. Instead it’ll retract back into it’s correct position. After this, head back over to the terminal.
Lower the lift, and drop down. Head right to another terminal. Activate that terminal, and open the blast door. Cross back over, and pass through the blast door.
!!IMPORTANT!!: Before you talk to Curly, head to the right corner of the room. You’ll see a sparkly patch. Activate it, and you’ll obtain the Tow Rope! This rope is VITAL for what we’re set out to do, so DONT MISS IT!
After you get that, walk back over to Curly, and psyche yourself up for one of the toughest fights in Cave Story.
Boss #11
THE CORE
HP: 600
RECOMMENDED WEAPONS: Use your Polar Star, Blade, and MAYBE Bubbline as your defence. Otherwise, use your newly upgraded Missile Launcher as your offence.
ATTACK STRAT: Right off the bat, you should know that this fight is going to be hard because of the music. It’s intense, and even though I’ve beaten this game countless times, it still makes my heartrate climb. Start by fending off the smaller cores around the main core. When he opens his eye, fend off the cores in your way, and give him all you got with your Missile Launcher!
Eventually he’ll try to attack you by blowing you off the ledge you’re standing on, and shooting three large projectiles at you. If you don’t dodge these, it’s GG, and you’ll take a whopping 20 damage. Once you dodge all three, hop back on the platform and fire away at him again!
NOTE: During this fight, it should be noted that you can easily drown. Try to stay on the middle section of the scaffolding at all times.
If you’re reading this, that probably means that you’ve beaten The Core. I’d first like to say: Congratulations! You beat one of the hardest bosses! Next I’d like to say that you’re going to drown. It’s innevitable.
You’re losing consciousness…
NOTE: If you have collected all the secrets thus far, you’ll get to read a little history explaining Jenka.
Suddenly, you can breathe.
Curly sacrafices herself for you. Well, you’re definitely not going to let this action go unpaid. Use your Tow Rope on Curly, and carry her out of the arena. After that, head back through the door on the left.
–Dark Place–
You’ll notice that the gate that was previously locked is now open. Save, and head through it.
–Waterway–
As a reward for going through one of the toughest bosses, you now get to go through the relaxing Waterway. The music here is soothing. The terrain, however, is not.
Head left, past all the cirtters and spikes. Once you’re back into deep water, shoot down the little hall to your right. Hidden hearts! Collect those if you’re low, and continue your trek through the waterway.
TIP: Whenever you are in a current, pay close attention to what you’re about to walk over. In the currents there are usually loads of spikes, so be careful.
TIP: Pay attention to current directions. Some currents won’t let you pass unless you take another current.
Whenever you get to a large current room with loads of jellies, kill as many as you can with the Bubbline, then aim for the top right corner of the room via currents.
!!IMPORTANT!!: If you miss the jump to the door on the right, reload your save. You HAVE to get in there no matter what, and you can’t leave the waterway without going in there first.
–Waterway Cabin–
In here, take a rest on the bed. When you do, Curly will be laying there instead of being on your back.
Walk over to the computer and read the text. After that, walk over to the right bookcase along the far right wall, and you’ll find a dusty notebook. Accept to read it, and you’ll learn how to service flooded robots!
Walk over to Curly, and drain her water. She’ll get up, and act very excited to see that you lived. She’ll then fall asleep.
!!IMPORTANT!!: Once Curly falls asleep, you have to try and talk to her TWICE. Once it gives you an option, say NO. Don’t leave the cabin without Curly!
After you do all that, read the computer again for a motivational phrase, save your game, and head back out into the wild.
–Waterway–
Drop down into the current, and KEEP YOUR EYES PEELED. There are loads of spikes, and you have to time your jumps just right in order to get across them. I suggest switching to a useless weapon, like the Fireball for this sequence.
Once you cross all the currents, something is headed your way!
Boss #12
IRONHEAD
HP: 400
RECOMMENDED WEAPONS: Polar Star for taking out the little fish, and Missile Launcher for Ironhead himself.
ATTACK STRAT: Right off the bat, let me tell you this: If you take no damage during this fight, you’ll be awarded with the useless Ai
Section 10: Back to Civilization! …?
–Waterway–
Drop down into the current, and KEEP YOUR EYES PEELED. There are loads of spikes, and you have to time your jumps just right in order to get across them. I suggest switching to a useless weapon, like the Fireball for this sequence.
Once you cross all the currents, something is headed your way!
Boss #12
IRONHEAD
HP: 400
RECOMMENDED WEAPONS: Use the Polar Star as defence, and Missile Launcher as offence.
ATTACK STRAT: Right off the bat, let me tell you this: If you take no damage during this fight, you’ll be awarded with the useless Alien Medal. That said, Ironhead himself is actually pretty easy. Dodging him, his fish minions, and the random blocks in the current, is not. Use your Polar Star for taking out the little fish, and Missile Launcher for Ironhead himself. An effective way to score hits with the Missile Launcher is to swim directly behind him, spamming rockets at his behind. Don’t swim too close, otherwise you’ll take damage. Keep up that strat, and Ironhead will turn into Sushihead.
After you defeat Ironhead, Curly will break away from you, separating you and her!
–Resevoir–
You’re back in the village. How can this be? The music is ominously quiet, too…
–Mimiga Village–
This is bad. Really bad. All the Mimigas are gone. The Doctor has them ALL, now. Head over to the save point, and save.
Head back outside, and go down to Arthur’s House.
–Arthur’s House–
Nobody’s in here either… where did everyone go? Approach the teleporter, and it’ll activate. Professor Booster will come through, and explain to you that if you see Sue, you’ll need to escape the island. He’ll also hand you the Booster 2.0!
This particular item is so incredibly handy. It’s a jetpack that allows you to control precisely where you go! With this newfound ability, head back outside, into the village.
–Mimiga Village–
Remember way back in the beginning of your adventure when you fell on top of King and Toroko? Well, now that you have the Booster 2.0, jetpack directly above the platform to the left of the save point where you fell, and climb the blocks. Head right through the door once you reach the top.
–First Cave–
Well, you haven’t been here in the longest time! You probably thought you wouldn’t ever return here either. Head down through the cave back to where you recieved your first gun, the Polar Star.
–Hermit Gunsmith–
Hey! He’s awake! Talk to the guy who you snuck past to get your Polar Star, and he’ll say someone stole his gun from him. He really should have kept it in his pocket–
Wait a second! YOU have his gun! He’ll angrily confiscate the Polar Star back from you, and tell you his belief on people using other people’s weapons. Then he’ll see the amount of wear and tear on it, and he’ll give it back to you… after it’s completed of course!
After his rant, you’ll obtain the best weapon in the game: The Spur!!
The Spur is the absolute most powerful weapon in the game, no questions asked. A normal level 1 shot is the level 3 Polar Star’s shot, and if you charge The Spur up, it’ll shoot lasers, according to how long you’ve charged it for!
NOTE: The Spur charges faster if you collect energy with it as you’re charging it.
With this mighty weapon in your arsenal, head back to the entrance of the First Cave.
–First Cave–
Holy cow! Loads of enemies spawned in there! Time to give The Spur a spin! Blast through whole lines of enemies and head back to the village.
–Mimiga Village–
Drop down, save, and head back to Arthur’s House.
–Arthur’s House–
Use the teleporter, and you’ll see that you can teleport to the Labyrinth. Select it, and prepare your newly aquired Spur for some Gaudi blood.
–Labyrinth B–
This was the room that Booster fell in. Climb back up, save, and head through the door on your left.
–Labyrinth M–
Right off the bat you’ll notice that there are more armored Gaudis around now. Charge right through them with your Spur. Keep heading left, and go inside the Labyrinth Shop.
–Labyrinth Shop–
Talk to the Labyrinth Shopkeeper, and he’ll tell you that you already posess the ultimate weapon. He’ll give you the Whimsical Star!
While the shopkeeper tells you that it’s only for decoration, it actially inflicts small damage, and can be useful, in a very small pinch. It auto equips when you get it, and to use it, charge up your spur to level 3. Stars will start to orbit you, and will begin to damage any enemy nearby!
With this chore out of the way, head back to Labyrinth B, and take the teleporter back to Arthur’s House.
–Arthur’s House–
Save if you feel like it, and check the computer. You’ll see a note from Kazuma. Head over to the Egg Corridor right away.
–Egg Corridor?–
Holy smokes! What happened here? Everything is in ruins!
Start making the trek right, keeping your Spur charged as much as you can. Watch out for falling spikes from the ceiling, as some can instantly kill you. Kill the zombified dragons quickly with a level 3 laser, and keep advancing.
Make sure you retrieve the missile expansion in the chest where Egg No. 12 should have been.
Eventually you’ll get to the save room where you found the Missile Launcher. Enter through the vent.
–Egg Observation Room?–
NOTE: In this room, you’ll see a chest. If you decide to open it, you’ll get more missiles, and The Sisters will appear!
Boss #13
THE SISTERS
HP: 500
RECOMMENDED WEAPONS: All you really need is your Spur.
ATTACK STRAT: The Sisters will spin around the center platform and attempt to shoot fire at you. All you have to do is laser them in the mouth when one of them opens up. When they both open, they’ll shoot continuous fire at you, so you’ll want to do a little bit of dodging. With the Spur, this fight is incredibly easy, and should be over before you know it.
After the fight, save, and exit through the vent on the far right of the room.
–Egg Corridor?–
Continue your trek right until you reach where you fought Igor. Save in the save point room, then head into Egg No. 00’s room.
–Egg No. 00–
Examine the computer, and it’ll display that the egg hatch was successful. Kazuma will then enter, and explain his plan.
Eventually he’ll ask you if you want to escape the island. Your choices are as follows:
IF YES: Kazuma will lead you out to the Outer Wall, you’ll hop on the dragon, and the two of you will escape, thus unlocking the BAD ENDING.
IF NO: The game will continue, Kazuma will open the door to the outer wall, and you’ll have your chance to get a better ending.
NOTE: At this point, I suggest you SAVE after the conversation with Kazuma if you picked no.
With that business taken care of, head out the door to one of the most memorable levels in the game.
Section 11: Sweet, Sweet Moonsong.
–Outer Wall–
The music here is what every veteran Cave Story player remembers prominently. It’s soothing, and is very catchy.
Start by heading right, jump off the edge, and boost onto the ledge below Kazuma and his dragon. After that, beware of that one tiny little gap in the scaffolding. Past that, enter the door.
–Little House–
Talk to the tiny person with the red shirt. She’ll explain that her husband has been gone for a very long time. With this information, head back to the Outer Wall, and start your ascent.
–Outer Wall–
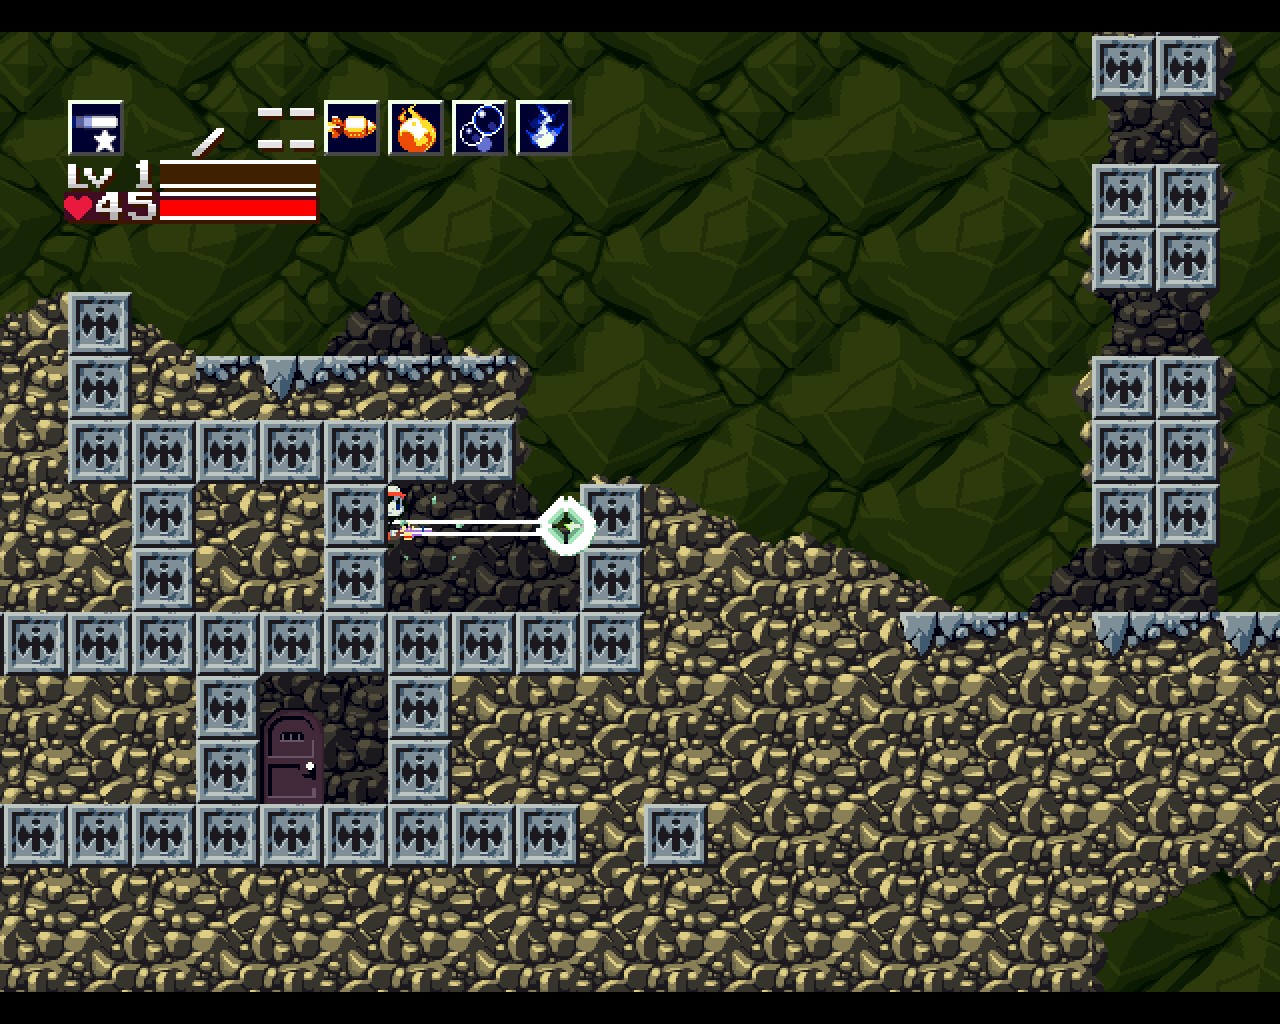
Shortly after you begin your ascent, you should run across an area that looks like this:
Examine the far left corner.

–Clock Room–
Inside, you’ll see a chest surrounded by a bunch of spikes. Open it, and you’ll obtain the 290 counter!
–Outer Wall–
Continue your ascent upwards. For kicks, look at your map system, and you’ll see just how big this area is. It can’t even fit on the map!
TIP: As you’re ascending, really try to focus on practicing with your Booster 2.0. You’ll need the practice.
After a long climb, head into the door at the very top.
–Storehouse–
Whoa! You scared a Mimiga! Talk to him twice, and he’ll reveal that his name is Itoh. Store that tidbit of info in the back of your head, save, and head through the door along the left wall.
–Plantation–
Welcome to the Plantation, where Mimigas are forced to grow the red flowers and work all day and night.
Start by heading left, passing the underground door, and head into the door in a little cove with a green plant enemy thing on the ground.
–Rest Area–
Talk to the fisherman, and he’ll have a sudden urge to go fishing. Once he walks out the door, do the same.
–Plantation–
Back outside, head all the way left, and start climbing up. Kill the swarm of dragonflies, and use your Booster to ascend, then boost to the right a little ways. Land on the platform, and nab the Life Capsule, bringing you up to 45 HP!
After that head right, and drop down when you can. Once you do, drop down in the little hole. You found Curly! Talk to her, and she won’t remember who you are… how sad. Talk to the green monster costume guy next to her, and he’ll say Curly lost all her memory, and can only be cured with a special kind of mushroom…
Keep heading left until you see the fisherman you spoke to moments ago. He’ll say he caught something that looked fishy (Get it?! FISHY?! HAHAHA– that wasn’t funny.) and says you can have it. He says to look in the bucket for it. Once you do, you’ll get the Teleporter Room Key!
Luckily, the Teleporter Room is just to your left, across the last little bit of the lake. Booster across it, and unlock the door.
–Teleporter–
Attempt to use the teleporter, but the guard to its right will shout “I FOUND YOU, KILLER ROBOT!” and then proceed to crush you. What a rude dude!
A short cutscene will play, which sounds like someone trying to wake you up by slapping you repeatedly.
–Jail No. 1–
When you come to, you’ll be locked up tight, with all of your weapons still in your arsenal. Talk about low security. Anyways, talk to the only Mimiga left in the jail, and he’ll say Sue tried to wake you up. Talk to him again, and he’ll say Sue slipped something in your pocket before she was dragged off.
Open up your inventory and read her letter. She’ll explain the Doctor’s scheme, and also tell you that the password for a safe hideout is “yrotS evaC” which, if read backwards, reads “Cave Story”.
After you talk to the Mimiga twice, a block will disappear, allowing you to break out of jail! Save your game, then make your way out of there.
–Plantation–
After your totally badass jailbreak, make your way back to the teleporter.
–Mimiga Village–
Now that you’re back at the village, go to the Cemetary.
–Cemetary–
Here, pick up the little man you talked to ages ago. Remember him? Well, now he becomes important. Pick him up in your inventory, and carry him with you.
Hold on, though. We’re not done yet! Green monster costume guy said that there’s a special type of mushroom that can be used to restore memory loss. That door you saw above the floating right platform is now accessible thanks to the Booster 2.0.
–Storage–
Talk to the blue mushroom standing alone in this room. He’ll ask if you have business with him. Say yes, and he’ll start putting up dialogue options for the Mushroom Badge. Answer in this order:
Yes, no, yes, yes, no.
Once you do that, he’ll fork it over. Open up your inventory, and use it. The description will reveal that it has no use.
Talk to the blue mushroom again, and he’ll say you found him out. He’ll also turn violent!
Boss #14
MA PIGNON
HP:300
RECOMMENDED WEAPONS: You can use whatever here, but DO NOT use the Blade, or the Missile Launcher!
ATTACK STRAT: As soon as the battle begins, Ma Pignon will start jumping around. Do as much damage as you can to him. Eventually he’ll stop, smile REALLY big, and charge at you. When he is flashing white, he is invincible. Once he hits the wall, rocks will fall from the ceiling that you cannot destroy.
Occaisionaly, Ma Pignon will attack you by casually walking over to you, and attempting to jump through you. Counter this by jumping over him. Once he drops back down, there will be multiple Ma Pignons, but only one is the real one. Shoot them all to find him.
Continue that until you win, and you’re carrying him in your inventory. Afterwards, head back to the Outer Wall ground floor, whether that be falling from the Plantation, or heading through the Egg Corridor again.
–Outer Wall–
Jump underneath Kazuma, and head inside the Little House.
–Little House–
Now that the little guy is home, talk to him (he has a green shirt, in case you forgot) and he’ll ask for your Blade. Trade it in to him, and he’ll exchange for the Nemesis!
The Nemesis is an interesting weapon. Upgrading it actually lowers its power, with level 1 being it’s most powerful state. It only takes one energy triangle to power it up, so be careful!
After you have it, head back to the Plantation by climbing the Outer Wall again, or by going through the Egg Corridor ruins backwards.
Section 12: Curly Remembers Everything!
–Plantation–
Make your way over to Curly, and stuff Ma Pignon into her mouth. She’ll then shout your true name, and explain how you got there. She’ll also explain your original mission, but failed.
!!IMPORTANT!!: After you have talked to Curly ONCE, talk to her ONE MORE TIME. She’ll then give you the Iron Bond, a required item for the best ending.
After all that running around has been taken care of, head over to the underground door, and jump through the nonsolid block, and enter the door using the password Sue gave you.
–Hideout–
Be ready to lose yor Booster 2.0 for a little while. Talk to Momorin Sakamoto, say you’re not busy, and she’ll explain to you that she has a plan to get up to the Doctor’s lair. Before she explains to you what it is, however, she confiscates your Booster 2.0! She then hands you a Mimiga Mask, and tells you to go look for an operational sprinkler.
–Plantation–
Head to the far left wall, and talk to the Mimiga nearest to said wall. He’ll exclaim that the sprinkler he was using broke again, and you, the “new guy” have to go fetch a new one. Take the broken one next to the right of another Mimiga, and head down to the Rest Area.
–Rest Area–
Talk to the Mimiga with the glasses in the far left side of the room. He’ll exchange your broken sprinkler for another fresh one.
Now that you have a working Sprinkler, go back to the hideout and show Momorin.
–Hideout–
Give Momorin the sprinkler, and she’ll ask you to track down Itoh and his controller.
–Plantation–
Head all the way to the right, and go through the door.
–Storehouse–
Talk to Itoh, and after a few lines of Dialogue, he’ll cough up the Controller. Go back to Momorin with it.
–Hideout–
Show Momorin the Controller, and she’ll tell you to go take a rest in the bed. Do so, and when you wake up, you’ll notice the rocket is gone.
–Plantation–
Talk to Momorin, and she’ll proudly say her rocket is finished. SHe’ll also give back the Booster 2.0 (which you’ll have to re-equip) and she’ll confiscate the Mimiga Mask.
!!IMPORTANT!!: As you’re riding the rocket up, LOOK TO YOUR LEFT. You’ll see a dog on the left platform. Jump off the rocket and talk to him. He’ll give you a Life Capsule, bringing you up to your semi-final 50 HP, and a Life Pot if you used yours previously.
Launch the rocket a second time, save your game, and head into the Last Cave!
–Last Cave–
Since you have collected all of the secrets thus far, you will have to trek through the dangerous Secret Last Cave! This version is a lot deadlier, and you’ll have to face a miniboss towards the end.
Unfortunately, this cave will drop all of your weapons down to level 1!
The Last Cave is fairly linear. Make your way through, and face the Red Demon with pride.
Boss #15
RED DEMON
HP: 300
RECOMMENDED WEAPONS: All you really need is the Spur.
ATTACK STRAT: The Red Demon is fairly easy. His attack pattern is simple to figure out, and he has fairly low health. First, he’ll throw three spinny blades at you. Jump if need be to dodge these, otherwise because of the terrain, all three should hit the ground. Next, he’ll jump and throw three more. Boost under him if you need to, otherwise boost out of the way. Keep your Spur on him and he’ll be as good as dead.
NOTE: An interesting fact about the Red Demon: If you talked to Jack back at the Mimiga Village, he’ll say that their great hero Arthur was killed trying to defend their village by a Red Demon. Coincidence? I think not.
With that fight out of the way, boost past the presses, and head to the Balcony.
–Balcony–
Go right, and head into the Prefab Building if you feel like saving. At this point, going through the Last Cave backwards is a pain, so this is pretty much the point of no return.
Fight your way through all the various enraged Mimigas while taking little to no damage, and boost up above the entrance to the large building all the way to the right. Boost all the way up until you see various supplies encased in breakable blocks. Upgrade whatever you feel like needs upgrading. I usually use the Spur and the Spur only for the upcoming final boss battles.
Once you’re supplied, head inside, and prepare yourself. You’re almost done with Cave Story.
Section 13: Get your Spur on!
–Throne Room–
Start charging up your Spur, walk to the right, and prepare for Misery!
Boss #16
MISERY
HP: 400
RECOMMENDED WEAPONS: All you need is your Spur!
ATTACK STRAT: As soon as the battle starts, Misery will levitate into the air. With your charged up level 3 Spur, stand under her, and shoot up at her. She’ll take a nice bit of damage. Now that you already have the upper hand, this fight is rather easy.
Misery will levitate in the air for a bit before shooting black energy at you. Every third time she attacks, she’ll drop a block on you. She’ll also summon dark balls that strike at you as lightning once you walk under them. Counter them by boosting under them so they all get set off consecutively.
Once you’ve lowered her health to a certain amount, she’ll summon two dark rings around herself that cannot be destroyed, and when she teleports, they’ll turn into orange bats that fly towards you, but they don’t follow you. Eventually she’ll summon four rings around herself. Shoot right in between the rings, and teach that witch what for!
After the fight, climb up the blocks to the Doctor!
Boss #17
THE DOCTOR
HP: 300
RECOMMENDED WEAPONS: Spur! Spur! Spur!
ATTACK STRAT: The Doctor will begin by immediately firing two red projectiles that orbit a center point. It fullens outward, so you can either boost away from it, or you can boost right over it. Keep your Spur on him as much as you can!
NOTE: All of his projectiles block shots, so time your shots carefuly!
Once you damage him enough, he’ll teleport into the air, and fire a ring of more red projectiles around the room. Boost away from him when he does so, and dodge the stragglers. Keep firing away at him, until you get to form 2!
BOSS #18
MUSCLE DOCTOR
HP: 300
RECOMMENDED WEAPONS: Spur! Laser that guy to death!
ATTACK STRAT: Form 2 is actually easier than the Doctor’s human form. He’ll jump at you, and charge at you. He’ll always teleport TOWARDS you, so keep moving about the room. Sometimes he’ll shoot a million bats from his hands about the room, which can all be defeated with one shot from the Spur.
Keep the pressure on him until he is no more!
After the fight, if you talk to caged Chako twice, she’ll mention Arthur. When she does, the surrounding Mimigas will produce hearts for you! Grab all of these, and head up the blocks.
–Black Space–
Head to the right, and a cutscene will play. The Doctor is actually still alive, in a weird spiritual blood mist form. He transforms Misery into a weird mutated version of her, and Sue gets transformed into a half human/Mimiga hybrid.
After this cutscene, prepare for a fight against the Undead Core!
Boss #19
UNDEAD CORE
CORE HP: 700
MISERY HP: 600
SUE HP: 500
RECOMMENDED WEAPONS: Put that Spur to good use!
ATTACK STRAT: First off, if you’re still a little low on HP from the past three fights, Misery will spawn minions that you can kill for energy triangles, missiles, and most importantly, HP. Leave Misery alive for a while until you’re in a good comfortable range. Sue however, has to go. Keep your Spur on her while you kill the minions Misery spawns. If you’re already good on HP, kill Misery and Sue first and foremost.
With the likes of them out of the way, it’s time to concentrate on the core itself. He hides his face in a set pattern, and occaisionally he sticks out his mouth and smiles at you! Shoot a level 3 laser into both of these.
After a while, the core will stick out his moth, except this time it’s open. He won’t hide his vulnerability spot any longer, so unload everything you have on him! Beware, though, because he’ll charge 3 giant sphere shots and fire them all consecutively. Stay on the ground when he fires these, and after these pass, unload on him again!
Once the core is defeated, the island will start to collapse! After the cutscene, you need to make your way to the Prefab Building ASAP!
–Balcony–
Once you’re here, DO WHATEVER IT TAKES TO NOT GET HIT BY THE FALLING ROCKS!!! You’re going to want all of your HP once you enter the Prefab Building…
Once you see it, enter it without hesitation.
Section 14: Welcome to Hell!
–Prefab Building–
!!IMPORTANT!!: Before you enter through the hole, SAVE YOUR GAME! You cannot go back outside the building anyways.
–Blood Stained Sanctuary–
This is it. This is the very area we have worked for since you dropped from the First Cave. THIS is your time to shine!
Now, since this area happens so quickly, here’s a video walkthrough on how to get through Sacred Grounds.
Video 1: Walkthrough
Video 2: My fastest Blood Stained Sanctuary time so far: 4’22″01
Don’t expect to get this on your first twenty tries. This area is TOUGHER THAN TOUGH. The only reason I can get through this area with ease is because I’ve had *lots* of practice. I also may or may not worship this game.
Eventually you’ll meet…
Boss #20
HEAVY PRESS
HP: 700
RECOMMENDED WEAPONS: Spur, along with Curly’s Nemesis.
ATTACK STRAT: See video
Once you get to the Corridor, pass by the ghost puppy, and enter through the door, to Ballos’ Seal Chamber!
–Seal Chamber–
Prepare for a nasty four part fight with Ballos!
Boss #21
BALLOS
FORM 1 HP: 500
FORM 2 HP: 800
FORM 3 ORBITING EYE HP: 100 per eye
FORM 4 HP: 1000
RECOMMENDED WEAPONS: The Spur, and Curly’s Nemesis as a combined effort, along with a level 3 Missile Launcher.
ATTACK STRAT: See video
Once you defeat Ballos, you’ll see a cutscene explaining the Demon Crown, and the credits will roll!
Congratulations! You’re done with Cave Story!