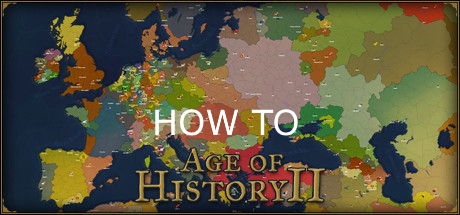
Overview
Have you ever wanted to create your own civilization? Make your own custom ideology? Change a flag or change a name for the hell of it? This guide explains all of it- welcome to the complete and total guide to civilizations and ideologies.
The Civilization Editor
So, first things first, the civilization editor. This doesn’t need much explanation as it’s practically so user-friendly that even your grandma could do it.
I’ll keep this brief since it doesn’t need a huge introduction, so this is what I’ll say.
Use the civilization editor as the basis of your custom nations, and then the rest will just be a bunch of file-editing and moving files around. That’s it.

Part A – Creating a Custom Ideology
Okay, now this is where things actually begin to get complex. Creating a custom ideology can be stupidly hard at first but once you get used to where you need to go you should get used to it. I’ll make this as simplified and user-friendly as possible because a lot of the other guides waste way too much time talking about stuff that doesn’t matter or barely touch up on how to do them.
Navigate to your AOH2 folder. This should be under this directory.

Locate the Governments.json file.

If you’re opening this for the first time, select notepad when it prompts you to choose a program to open it with.


Now that you know what all that jumbo, mumbo means, it’s time to actually create your ideology!
Copy one of the already existing ideologies from the list and paste it down at the bottom of the document. It should be within the ] and within the “age_of_civilizations: ideologies” thing.
Before you edit ABSOLUTELY anything, it is crucial that you make sure that your bracket is aligned!

After you’ve got that fixed, you can simply edit the values however you please! After you’re done, make sure to go ingame and test to see if the ideology shows up in the ideology selection screen. If the ideology doesn’t show up or breaks the game, check back on your ideology in the notepad file to see if you may have accidentally messed with the formatting.
Congratulations, you’ve created your ideology! Now it’s time to add icons to represent your ideology!
Part B – Making an icon for your ideology
Now that you’ve created your ideology, it’s time to use an icon to represent your ideology!
First, you need to actually get an icon for your ideology. You can make your own icon or use one from the internet. It doesn’t really matter. I recommend that you get paint.net for the following steps; it’s free to download.
Here, I’m deciding to goof off and use the AnPrim flag as my icon. You don’t need to use a flag but for simplicity I’m using one for myself.

Next, navigate to the directory shown, here we have icons, H, XH, XXH, XXXH, and XXXXH.
First things first, each folder has a “crowns” subfolder inside of them. This is where we’ll begin to drag files and start renaming things.
First off, if you haven’t already, save a copy of your ideology icon and then save it somewhere accessible. Now, it’s time to actually resize your image.

I’ll be using paint.net to do this, as it’s the easiest way for me to do it. If you’re also using paint.net, just click on “image” and then “resize” at the top of the screen.

For our first step, we’re going to resize this down to a scale of 16 by 16. When you’re finished resizing, save your icon as a new file. Keep your editing program open.
You want to save your file under the name “crown_” and then your ideology tag. For example, my ideology tag is “ap”, so my file would be named “crown_ap”. Save it as a PNG.
Next, go to the “H” folder and then the crowns subfolder inside of it. Copy and paste the file inside of that, next you want to go out of the “H” folder and into the “icons” folder and into the “crowns” subfolder inside of it. Next, open up your icon again. Next, go to image: canvas size, and select 16 by 22. Make sure that the anchor is placed at the bottom if you’re using paint.net.
After that’s done, download 
Now that you’ve gotten that out of the way, there’s… STILL MORE!
Once again, go back to your unedited, original icon file. There’s more resizing to do. This time, resize the image to 16 by 14. Save it under the same name as before, “crown_(ideology tag)”.
Next, go through XH, XXH, XXXH, and XXXXH and their respective crowns folders and copy and paste your 16 by 14 crown into each of them. When that’s done, you’re finished! Congratulations, you’ve made your custom ideology and icon!

Part C – Changing Ideology Flags
So you’ve made your custom ideology, yes, but is there a way to change a civilization’s flag based on their ideology? Yes! Yes there is, as a matter of fact! And trust me, it’s a lot more simpler than the previous steps.
First off, you want to go ahead and open AOH2 if you haven’t already. After that’s done, you want to go to Editor and then Game Editor.


Now that you’ve got your civilization tag (copy it down somewhere if you think you won’t remember it), it’s time to get a flag for your civilization! As previously, you can either make your own or use one from the internet. If you’re planning on making your own flag I suggest that you use flagmakerjr+ for quick and easy creation of flags.
Here, I’ve created my own anprim USA flag. Save your flag somewhere accessible.

As mentioned before, I recommend that you get paint.net for the following steps, as it really is the best software for this kind of stuff.
Once again, open up your AOH2 folder and click on the “game” subfolder inside of it, here we’ll see flags and flagsH.

For flags, we’ll be using a size of 27 by 18, and for flagsH, we’ll be using a size of 68 by 44. The steps to resize an image are in the previous section. When you’re finished resizing your flag in the two different formats, save them as two separate files as a png. Then, you want to save them both as the civilization tag you’re going to use, and then your ideology tag. For example, I would save mine as “usa_ap.png”. If you have to, save one with a “1” so the system can discern the two files.
Now that I have my two flags, it’s time to move them over!
Move the 27 by 18 flag over to the flags folder, and the 68 by 44 flag over to the flagsH folder. If you’ve saved one flag with a different name, (like usa_ap 1.png), make sure to delete the extra number or whatever that you put there.

After that’s done, restart your AOH2 and check and see if it works!
Here, I can see that it works! If it doesn’t work for you, check back to make sure that you used the right size, ideology tag, and civilization tag. Always make sure to double check!

Part D – Changing Civilization Names
COMING SOON