Overview
A comprehensive guide for new and returning players alike. It will provide a detailed explanation of game mechanics to supplement the in-game tutorial and make this game less frustrating and more enjoyable.
SHOP LAYOUT AND FEATURES
Welcome to Your Shop

Here, we will talk about what is in your shop and where to find it.
We will start upstairs and work our way down to the shop main floor where the magic happens.
*The Office
*Office Computer

When you first start the game, you will spend a lot of time in the office upstairs. At least, until you unlock the tablet to give you some more mobility. The office has your computer (which you will use to accept and complete pending jobs, check company stock information, access the garage, purchase/unlock specific modules/stations for your shop, and modify your company logo and the shop’s paint theme). All of these features will be covered in detail in later sections.
*Inventory/Shelves


Across from your desk (on the opposite wall) is a set of shelves. If you approach and access them by left clicking your mouse, you will be provided with a view of all of the parts and software in your inventory. This is helpful before you unlock the tablet. You can filter or search for specific parts by name. However, you are unable to sell them from here or do anything else. This is simply to check what you have in stock. It should be noted that an identical set of shelves with the same functionality is found downstairs across from the paint booth.
*Mission Table

On the right wall of the office (as you enter), is the mission table. This is unlocked toward the end of the game in the highest prestige levels. It allows you to send the mechs you purchased and renovated on various missions for rewards ranging from cash and reputation to raw materials and random mech parts. The mission table will be covered in detail in its own section below.
*The Android

This fellow is the first to greet you when you load into the game and proceeds to take you through a series of tutorials. However, he cannot be interacted with on your terms and there is no way to bring up past tips. He is a pretty useless prop in your shop 99% of the time and just walks around making nonsensical comments, trying to be funny. Luckily, his dialogue can be turned off in sound settings. I hope that at some point in the future, the developers will update the game to give the Android some functionality. At least, the ability to click on him and pull up a glossary of game mechanics to be able to look up a specific tutorial you may have missed.
*Shop Main Floor
This is where the “magic” happens and you will spend the majority of your time. The shop main floor includes the following:
*Assembly Station

When you first accept a job, the mech you are to work on will be lowered through a skylight down onto the assembly station (for detailed information on what can be done at the assembly station, skip to the specific section for it below).
*Work Benches

There are two work benches, each is able to hold one part which you removed from the mech to work on.
*Calibration Station

Once you pay to unlock this, it can be accessed near the paint booth behind the assembly station. Detailed discussion on this station and its mechanics will be provided in a separate section below.
*De-Corrosion Station


Once you pay to unlock this, it can be accessed through a doorway behind one of the work benches. This is used to remove rust from chassis and other metal parts. Detailed discussion on this station and its mechanics will be provided in a separate section below.
*Welding Station

Once you pay to unlock this, it can be accessed on the side of the shop opposite from the de-corrosion station. This is used to weld repair parts. Detailed discussion on this station and its mechanics will be provided in a separate section below.
*Electronics Station

Once you pay to unlock this, it can be accessed through a hallway past the two work benches and behind an automatic door on the right. This small room contains separate stations to repair modules, cables, and power components. Each has its own separate mechanic. Detailed discussion on this station and its functions will be provided in a separate section below.
*Crafting Station

Once you pay ($450,000) to unlock this at the highest prestige level, it can be accessed through an automatic door directly across from the electronics station. This area contains two connected stations. The one on the right is a smelter/refinery which you can use to break down spare parts in your inventory into raw materials. The one on the left is a production station which allows you to craft specific parts using the raw materials you have. Detailed discussion on this station and its functions will be provided in a separate section below.
OFFICE COMPUTER- PART 1 (INFO AND FEATURES)
The office computer allows you to do the following:
-Accept and finish jobs (this function can also be performed on the tablet)
-Access and modify your company’s information
-Modify your shop’s paint theme
-Purchase/unlock shop stations
-View and use the global stock market
-Access the garage (this function can also be performed on the tablet if one of your personal mechs is in the shop at the assembly station- the tablet only allows you to send it back to the garage and nothing else)
ACCEPTING JOBS AND JOB TYPES
The first tab you will see when you access the computer will show available/pending jobs.

There are several types of jobs…
1. CONTRACT– you enter into a contract with a specific mech company. During the contract, you will be tasked with working on between three and five mechs. After you complete half of the contract, you will receive a “milestone reward.” Once all of the contracted mechs are repaired as requested, you will be paid for the full contract. If you fail your tasks on one of the mechs, your reward will be reduced by 50%. If you fail two or more, you will receive a “significant” reduction to reward and reputation. ***If you are running low on cash and do not want to take out a loan, I suggest that you not accept contracts. You may find yourself in a pinch where you have run out of funds, but still need to buy new parts to fulfill the job and reach at least the milestone/halfway to get paid. Have at least $20,000 in your account before you take on a contract. Also, contracts do not receive a bonus for company stock like single jobs do.

2. SINGLE JOB– you agree to repair a single mech for one of the three main mech companies or the shady Cyb3r M3ch (black market faction). Each job will have main tasks and additional tasks. You only need to complete the main tasks to fulfill the job successfully. Additional tasks may be completed for increased reputation gain (and in my experience, do not give you more money). Additional tasks also result in you replacing parts that are not broken with brand new ones; therefore, you will have parts in your inventory which you can then use in other jobs. The higher your reputation and prestige rating (maximum prestige rank is 10), the more lucrative the jobs offered to you.
3. TIME-LIMITED JOB- single job in which you have a time limit. You will see a star and deadline on the page where you choose to accept the job. The progress bar/timer will be displayed in the top left corner of your screen. *Note: If you complete the job after the time runs out, you will not fail it or lose any money. You will simply not receive the bonus.


4. DYNAMIC TASKS JOB– same as single job except one or two more tasks are added the list of what you need to do while you are working on the mech. These begin to pop up later in the game and it’s easy to not realize that you are working on one. A small orange exclamation point will briefly appear in the top left corner of your screen when a new task is added. Just pay attention to the list of things required for your current job (TAB by default) before you submit it by clicking “finish.” You will get a nice bonus if you complete one of these jobs.

5. CYB3R M3CH JOB (black market)– same as single job except these will also give you Tier 0, Tier 1, or Tier 2 access codes or tokens to use for accessing the black market for parts or mechs (discussed further in the guide). Jobs for this faction appear as grayed out in the job selection list and the text of the job in the preview is jumbled up letters/numbers.


Each job will have main tasks as well as additional tasks. Additional tasks are optional. They require you to replace a part that is not broken with a brand new one. It may be 82-98% quality. In the early game, it is not worth it to do the additional tasks as you will be spending a lot of money on the new parts. Of course, you get to keep the part you removed, which can be used to fulfill another job later, but whether or not that is worth it, I will let you decide for yourself. Additional tasks do not give you any bonus money. What they do give you is added reputation (where a job with just the core tasks will give you 2-3 points of reputation, completing the additional tasks may give you one more reputation point per extra task. My suggestion is to hold off on doing additional tasks until you have about $200,000 worth of stock in the company you will be doing the job for. That way, your purchase of the new replacement parts will be covered by the 10% or roughly $20,000 you will receive as a bonus per contract. More on this in the stock market section later on in the guide. **If you feel like being a shady mechanic, you can also trick the customer into thinking you replaced the part with a new one by moving it over from the other side (for example, part off the left arm onto the right arm) of the same mech. The client doesn’t seem to care and checks off the checkbox. You end up not spending any money on new parts. Personally, I think that’s cheating.
OFFICE COMPUTER- PART 2 (COMPANY TAB)
COMPANY MANAGEMENT
In the COMPANY tab, you will purchase your business license during the tutorial. After that is done, you will be able to edit your company name and logo.

Most importantly, this tab allows you to buy/unlock stations for your shop.
Stations are locked behind prestige level requirements as well as a pretty hefty price (for later ones at least).


Things that you can unlock are: tablet, de-corrosion station, welding station, paint booth, electronics station, software station (not actually a separate station, but unocks a feature of the assembly station), calibration station, mission table, and crafting station. Each of these will be discussed in detail in their individual sections.
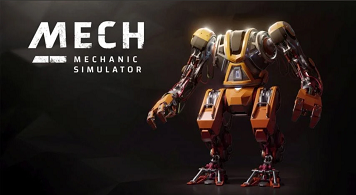
Global Market

In this tab, you have access to the in-game stock market. The three major players (companies) are Sakura Technology, Dauhasky, and VI-CO. Each specializes in specific types of mechs. VI-CO Corporation specializes in assault/combat mechs. Sakura Corporation specializes in exploration/multi-purpose mechs. Dauhasky Corporation specializes in mining mechs. Cyb3r M3ch can have mechs of any type. For obvious reasons, there is no official stock for the black market Cyb3r M3ch faction. You can see the trends in trading and the relative price history of the different stocks. As the real world saying goes, “Buy low, sell high.” That applies here as well, but generally speaking, you will not want to sell any stock you own unless you are in a pinch for cash and do not want to take out a loan.
By purchasing stock, you acquire shares of the three major companies. Then, when you complete jobs for that company (or companies), you will receive a bonus which correlates to the amount of stock you own. The greater your share of the stock, the higher the bonus.
I have calculated the bonus to be 8-10% of the value of the stock I own. In the example below, I owned roughly $50,000 in stock for the company and received a $4,500 (or roughly 9%) bonus for the job completion. If you own a lot of stock, the bonuses can be exponential, so do not neglect this aspect of the game. It can be difficult to find the money to put into stocks in the beginning of the game, but do so when you can and slowly build it up over time.

OFFICE COMPUTER- PART 4 (GARAGE/JUNKYARD)
Garage

The garage, along with your ability to buy your own mechs is unlocked automatically at prestige level 7. In this tab, you can purchase a storage space for your mechs. Each space costs $10,000 to unlock and you can only have a maximum of 10.
When you click “buy mech,” you are given two options: you can buy from the junkyard or from the illegal market.
*Junkyard

Here, you can purchase mechs for cash. The cheapest one I have seen was in the $70,000 range. Mechs come with one permanent pre-installed perk (more on this in the section on mech types). Depending on the type of mech and its function, they can cost in excess of $800,000.
Keep in mind that if you purchase a mech from the junkyard, it will have missing parts (this can range anywhere from 5 to more than 15) as well as damaged parts requiring repairs. See the example below. So, unless you have the funds to support such a restoration job, I would suggest that you continue to do corporate jobs and save up.

***Note: If you are thinking that flipping (buying broken mechs and reselling them for a profit) will be a good idea, you are in for a rude awakening. As soon as you purchase the mech, its value automatically drops down to about half of what you paid for it. Regardless of whether you installed all of the missing parts and repaired the broken ones, you will NEVER get back what you paid for it by selling it in one piece. HOWEVER, you can earn up to 150% of what you paid for it by stripping it down to individual parts, repairing the ones you can, and selling them.
*Illegal Market

Same as the junkyard except mechs cost 40-50% less in terms of cash. However, to make up for that, you will also have to pay using the black market tokens/access codes you earn from Cyb3r M3ch jobs. Depending on the mech you want, you may need to pay with Tier 1, 2, or 3 tokens/access codes. The mech I bought cost 10 Tier 3 tokens and a handful of cash.
After you buy a mech, you are given an option to “work on” it in the garage tab. Clicking that option transports the mech to the assembly station on the main shop floor for you to work on.

THE TABLET
TABLET
The tablet is the first thing you will be able to unlock after you have saved up $25,000. I recommend that you unlock this as soon as possible as it is a great quality of life improvement and will reduce the number of times you need to run upstairs to your computer.
**Note: The tablet will NOT allow you access to the company tab, global market tab, garage (unless you are actively working on one of your own mechs and it is at the assembly station), or the junkyard tab. For those, you will need to continue using the office computer.
Accepting/Finishing Jobs

Once unlocked, you will be able to pull up the jobs tab in the tablet to take on new jobs, check their progress, and finish completed ones by pressing ‘T’ on you keyboard.
Inventory Management
The tablet also allows you to access your inventory at any time by pressing ‘i’ on your keyboard.
The first tab you will see will be your parts inventory. Here, you can sort parts, search for a specific part, or sell what you don’t need (this can only be done using the tablet and not through the office computer or the inventory shelves referenced in the “shop layout” section above.
Bank/Loans
The second tab is where you can take out a loan and choose how quickly you want it to be repaid. Faster payments means less interest, but a greater portion of your profits for completing jobs will be deducted automatically until the loan is paid off.

Software
The third tab is where you can purchase software/operating system for your personal mechs or the mechs you work on as well as perks. Perks are buffs used to counter certain threats/hazards in the missions you send your mechs on through the mission table. There are a total of 14 perks and they all cost $5,000 each. You will never be installing perks on a mech you are working on for a job.


Black Market
The last tab in the tablet allows you to access the black market where you can purchase parts at rates cheaper than at the legal store. However, parts are separated into tiers and you will need to have the appropriate tier tokens/access codes to be able to view the black market inventory and buy items. You receive the tokens/access codes from completing jobs for the Cyb3r M3ch faction.

**Note: The game mentions that there may be consequences (assuming reputation loss) if you frequently use parts you bought off the black market on corporate jobs. I have not really experimented with this, but did use black market parts on the mech I bought from the black market.
MECH TYPES
MECH TYPES

There are nine (9) different mechs in the game. I like to group them into three different categories based on their function and the type of calibration that is needed for them. Those categories are: MINING, ASSAULT, AND PARKOUR. Each mech comes with one permanent perk installed which you cannot change. It is a perk that you cannot buy yourself and is specific to that particular mech. The perk depends on the mech’s function. If it’s a mining mech, there may be a 10% increased success chance on mining missions etc.
The mechs you buy and restore are not used for anything other than sending them on missions using the mission table. If you are not planning to run missions, the only other reason to buy mechs would be to completely strip them down for parts for resale. Selling a mech as parts can net you 150% of the amount you paid to buy it. Selling a fully assembled mech will result in a loss of approximately 50% and should be avoided at all costs.
MINING MECHS (identified by orange outline in image above)
*Argus – Dauhasky Corporation

PERK: Underground Navigation System V1-> +5% success chance in mining missions.
*Serenity – Dauhasky Corporation

PERK: Underground Navigation System V2-> +10% success chance in mining missions
*Artemis – Dauhasky Corporation

PERK: Dauhasky Plasma Cannon-> -10% time in mining missions
ASSAULT MECHS (identified by red outline in image above)
*Wrath – VI-CO Corporation

PERK: Threat Identification System-> -10% time in arena missions
*Centurion – VI-CO Corporation

PERK: Combat Optimized V2-> +10% success chance in arena missions
*Minotaur – VI-CO Corporation

PERK: Combat Optimized V1-> +5% success chance in arena missions
PARKOUR/EXPLORATION MECHS (identified by blue outline in image above)
*Ukiyo – Sakura Corporation

PERK: Pilot Prediction Program-> -10% time in distress missions
*Legacy – Sakura Corporation

PERK: Lightweight-> -10% costs of sending mech on mission
*Hana – Sakura Corporation

PERK: Multi-purpose weaponry-> -5% time in distress missions
ASSEMBLY STATION- WORKING ON MECHS PART 1
So you accepted a job and a mech has been lowered down onto the assembly station on the shop main floor. What now?
HINT: You can skip the majority of animations/cut scenes by right clicking. This includes the mech being shown coming down, the scanning ring going down over the mech from top to bottom, individual parts being pulled off after being detached during disassembly, etc. Just right click during the animation and move on. Although it’s all a matter of seconds, it adds up and you can save quite a bit of time.
1. Access the assembly station by clicking on the console. You will see four different features: cleaning, scanning, assembly (and disassembly all in one), and software (if you have already unlocked the software station).

If the mech is covered in dirt and one of the tasks of the job is to clean it (check job objectives by pressing TAB on your keyboard at any time), all options on the assembly station will be grayed out except for “cleaning.”
2. Go ahead and select “cleaning.”
**Keep in mind that in one way or another, all stations use fuel to perform their functions. You can see the fuel gauge on the right hand side of the station interface along with a %. If you are trying to use a station and nothing is happening, you may be out of fuel. Click the “buy fuel” option and it will refill all the way. The fuel prices/capacities are different for all stations and some stations use fuel at rates higher than others.
3. Proceed with cleaning the mech with the jets of water by holding down the left mouse button and rotating the camera around with W A S D on your keyboard. A progress bar will begin to fill up on the bottom and a prompt will pop up when you reach 100% clean state.

4. So you have cleaned the mech (if it needed cleaning). Now, you need to perform a diagnostic scan to determine which sections (limbs, core, etc.) have parts that need to be repaired or replaced. Select “scanning” in the menu and the following screen will be brought up.


In this mini game, you have to adjust the scanner frequency to match that being broadcast by the mech. I find it easiest to first adjust amplitude to be relatively the same size/height and then proceed to adjust the phase using the sliders with the left mouse button. Once they are completely in sync, the graph will look like this.

**As soon as you begin to see the animation of the scanner ring coming down over the mech, right click to skip it and save time.
5. Once you have scanned the mech, it is time to see which areas have issues and to begin disassembling it. Select “assembly.” You will see a screen like this one.

Let’s discuss what we are seeing in the above example.
On the left side, you have a representation of the two work benches where you will be working on individual parts you transfer there.
In the middle, you have a listing of all of the detachable sections that the mech is comprised of.
On the right is a visual representation/image of the mech you are working on.
Sections of the mech identified as orange only contain a part that the corporation wants you to replace with a new one as a part of the additional/bonus tasks for the job. If you do not intend on completing the additional/bonus tasks (viewed in the checklist you bring up by pressing TAB on your keyboard), save yourself the time and do not detach the orange section.
Sections of the mech identified as red contain parts that need to be repaired (and may also contain parts that are to be replaced with new ones as a part of the additional/bonus tasks). Sections in red with an additional crossed out cogwheel/gear icon are ones that have missing parts. This is helpful for checking your work. When you go to reassemble the mech and see one of these icons, you have forgotten to install a part. This can be something as small as a little cable or a tiny bolt. Do NOT reattach that section until you replace the missing part. Finishing an order with a missing part will result in a job failure, monetary penalty, and loss of reputation.
6. Click on an empty workbench and then on the section of the mech in the list you want to remove. As you only have two work benches, you can only have two sections removed at a time to work on. Once you click on a workbench and the section you are removing, follow the prompts/tool tips to detach it from the mech and skip the animation for it coming off. Let’s move on to software and the workbenches in the next sections.

ASSEMBLY STATION- SOFTWARE
After you pay to unlock the software station from the company tab of your office computer, you will have access to the software feature in the assembly station.
Random jobs will not ask you to update software on mechs until you unlock this station.
1. Click on “software”. This will bring the mech you are currently working on and its installed software version.

In the above image, the mech’s software version is 0. This is the lowest level of software. Software versions range from 0 to 3. You may have a job ask you to “upgrade” software from 2 to 1 or 0, which is not an upgrade at all, but just do what it asks.
2. Click on the current software version. An inventory box will open on the right. If you have no software in your inventory, it will be empty. You will have an option to select “search in shop.”


3. After you buy the software version you need, left click on it to install it. You will see a progress bar.

Once that is done, the new software version will be shown on the mech. Software is a physical item in this game. So if you replace a software version 0 with a 3, the version will be added to your inventory. You can sell it or keep it to use on future jobs.
PERKS
Perks are a subcategory of software and are only available to install on your own mechs, not ones you work on for corporate jobs. As mentioned in the section on mech types, all mechs come with one permanent pre-installed perk. You will purchase additional perks to install for countering various threats/hazards in missions. After you purchase and restore a mech, you can go into the software menu to add these. Here is how perks work:
Software version 0 gives you 1 slot to install a perk.
Software version 1 gives you 2 slots.
Software version 2 gives you 3 slots.
And Software version 3 gives you the maximum (4) number of slots.


Perks are also considered physical items. You can switch them in and out after you buy them and the ones you remove will be placed into your inventory. Different missions have different hazards/threats which can be countered by a specific perk (see mission table section for more information). As mentioned earlier, there are 14 perks and they all cost the same ($5,000 each). You can purchase them from the assembly station to be installed directly onto the present mech or through the software tab of your tablet to be added to your inventory.
WORKBENCHES- WORKING ON MECHS PART 2
Now that the sections with the broken/missing parts have been detached from the mech you are working on, walk over to the two workbenches.
1. Pull up your job checklist (with TAB) to keep track of what you need to do to fulfill the requirements of the job.
**Note: You do NOT need to complete the additional/bonus tasks to finish the job. The additional tasks give you a small boost to reputation (1-3 more reputation points than you would receive just for completing the main tasks) and do not give you any additional money as a reward. Further, additional tasks require you to replace a part that is not broken (most parts I have had to replace for additional/bonus tasks were normal quality between 82-98%). So you are paying for a whole brand new part and get to keep the normal part you take off. The part you keep can be used to replace parts you need to repair in other contracts. I suggest that you not do this until you have a significant ($200,000 or more) amount of stock in the companies you work for.
2. Walk up to one of the workbenches and activate it by clicking on the console. You will be taken to a closer view of the section of the mech you are working on. The parts that you need to repair or change out for new ones (if you are doing the additional/bonus tasks) will be highlighted and glow purple as shown below.

3. Left click on the part you want to remove. Most parts have dependencies and cannot be removed unless you remove additional parts that are blocking them. Dependencies are identified by red glow/highlighting. If you click on the part you want to remove and several other parts light up in red, they must be removed first. Of those parts, look for the one(s) that lights up green when you mouse over it. That part can be removed right away. Work your way through the parts until you get to the one you need to work on. When you left click on a green part to remove it, do NOT release the mouse button. Keep it depressed. Once unscrewing/wrenching animation/sound completes, you will see an arrow appear on the reticle. The way the arrow is pointing is the direction you need to pull your mouse to remove the part. It’s a little clunky, so I personally like to give it a nice wiggle back and forth in accordance with the arrow’s direction.

Notice that when you are hovering over a part on the section you are working on or in your inventory, it will have one of the following icons to indicate its state.

As indicated in the image above, the top green icon indicates that it is normal quality. The next green icon indicates that the part has been repaired by the player.
The “rusty” icon indicates that the part can be repaired using the de-corrosion station.
The “broken cable” icon indicates that the cable may be repaired using the electronics station.
The “broken” icon indicates that the part can be repaired at the welding station.
The red “unrepairable” icon means exactly what it says. The part is beyond repair and is trash. Just sell it for a few bucks.
4. When you are working on a section at the workbench, you can switch between disassembly mode and assembly mode by pressing ‘E’ on your keyboard.

This icon in the top left corner of the screen means you are in disassembly mode.

This icon means you are in assembly mode.
5. If the part you removed can be repaired, repair it at the corresponding station: de-corrosion, welding, electronics, etc. Refer to the specific sections for each of those stations below for detailed information. If the part cannot be repaired, you will need to buy a new one in the shop.
**Parts are generally broken down into the following categories: power, modules, chassis, cables, and hydraulics. Power, modules, and cables can be repaired at the electronics station. Chassis and hydraulics can be repaired at the de-corrosion and/or welding stations. When you mouse over a part, it will have an icon to indicate what type it is. You can also tell by the name of the part. All parts start with the mech model (Serenity, for example) and then M, CH, H, etc. followed by numbers. M stands for module, CH for chassis, and H for hydraulics.
6. Go into assembly mode and replace the parts you removed with those in your inventory that have been repaired. If no parts show up in the list on the right or only red “unrepairable” parts appear, select purchase from store at the bottom. That will automatically take you to the specific part in the store for you to purchase. Then click it in the list on the right and secure it in place. You will be using the store a lot if you are doing the additional/bonus tasks.

7. Once you have repaired/replaced all of the parts the job calls for, go back to the assembly station and reattach the sections to the mech the same way as you took them off. Verify that there are no red sections when you are reassembling. Then press ‘T’ on your keyboard to pull up the tablet and finish the job to collect your rewards.*

*If you have a job that requires the use of specific stations mentioned in this section (paint station etc.), please refer to the section of the guide dedicated to those individual stations.
DE-CORROSION STATION
When you have a part with quality as “rusty” (see image below for quality types), you can use the de-corrosion station near the workbenches to fix it. This station must be unlocked through the company tab of your office computer.
1. Walk up to the de-corrosion station.
2. Left click on the station to activate it. A menu will appear in which you have to select the part you want to repair. Left click to select the part and then press “confirm” on the bottom right corner of the menu. If you have a lot of parts in your inventory, the parts you took off a mech most recently will be at the bottom, so look for that and for the mech model name in the prefix of the part.

3. Rotate the part with W A S D keys on your keyboard while zapping the rust off of it with left mouse button. Do NOT hold down the left mouse button continually for a while. Use short bursts targeting the rust specifically. The intensity of the laser can be adjusted using Q and E keys. Q decreases the intensity and E increases it. You will see a meter/gauge on the bottom left side of your screen for the adjustment. Keep the arrow in the green section. As you are zapping away the rust, keep an eye out on the “overload” icon that pops up on the top right part of the screen. The longer that is lit up, the higher the chance you will damage the part and make it red/unrepairable. To avoid this, only zap the rust and try not to hit any bare metal with the laser. There will be a progress bar on the bottom to show you how close you are to repairing it.

4. Once you are done, you will be shown the final product. The icon for the part will change to green/repaired with a numeric value (see image below for example from welding station). Do not worry about this number. It does not matter. A repaired item is considered repaired for any jobs you do. It does not need to be anywhere near 100. Confirm and the item is back in your inventory to use.

WELDING STATION
WELDING STATION
Once you unlock the welding station using your office computer, you will be able to access it by the workbenches on the opposite side of the shop from the de-corrosion station. This station is used to repair “broken” quality parts (primarily CH- chassis, H-hydraulics, and other metal components).
1. Walk up to the welding station
2. Activate it by clicking the console.
3. Choose the part you want to work on from the list on the left. If you have a lot of parts in your inventory, the ones you took off of a mech most recently will be at the bottom. So look for that and the the mech model in the prefix of the part name. Left click the part and then “confirm”.

4. Rotate the part with W A S D keys on your keyboard as you hover over it with your mouse. You are looking for the target reticle (see image below for reference) to turn from blue to red. If it’s a pink/magenta color, you are close. Move the mouse around a little until it’s red. Red signifies that you found a spot that needs to be welded. Left click in that spot and it will be zapped with a beam. Look in the top right corner of your screen. It will show you how many spots need to be welded on that particular part and how many you have found. Repeat the process until you zap them all.


5. Once you are done, you will be shown the final product. The icon for the part will change to green/repaired with a numeric value. Do not worry about this number. It does not matter. A repaired item is considered repaired for any jobs you do. It does not need to be anywhere near 100. Confirm and the item is back in your inventory to use.

ELECTRONICS STATION
Once you pay to unlock the electronics station, it can be accessed through an automatic door on the right in the hallway past the two workbenches.
The electronics station consists of three separate stations:
–Module Station (used to repair modules; parts labeled as such and with M in the prefix of the name)

–Cable Station (as the name implies, used to fix broken cables)

–Power Station (used to repair power components which have a yellow lightening icon when you look at them in your inventory)

As any other station in the game, these use fuel. They also each have their own specific mini game which the player must pass/solve in order to repair the part. Those will be detailed below. Note: If you fail to solve the “maze”, you will only use up fuel. It will not result in a red (“unrepairable”) quality part like if you overdo it at the de-corrosion station.
Module Station
On the left side as you enter the door to the electronics station.
Click to activate, choose part you want to work on, confirm.
Your job here is to solve the “maze” by connecting the power flow from the start (green) node to the end (gold) node while also feeding the purple nodes with power along the way. Do this by unblocking the flow of current by clicking on the red blockages you want to remove. Pay attention to the number of actions you have available to you at the bottom of the screen. That number stands for how many red blocks you can move out of the way. Sometimes, it’s easier to start at the end and work your way back to the start. Take a look at the example below and the route I traced with a highlighter. I marked the start and finish as well as which red blocks need to be cleared to successfully feed the start, finish, and purple nodes. If you don’t succeed the first time, no big deal. Try it again and practice until you do.

Cable Station
Directly in the middle of the electronics station between module station and power station.
Click to activate, choose part you want to work on, confirm.
Your job here is to solve the “maze” by connecting the power flow from the start (green) node to the end (gold). Do this by unblocking the flow of current by clicking on the red blockages you want to remove. Pay attention to the number of actions you have available to you at the bottom of the screen. That number stands for how many red blocks you can move out of the way. Sometimes, it’s easier to start at the end and work your way back to the start. Take a look at the example below and the route I traced with a highlighter. I marked the start and finish as well as which red blocks need to be cleared to successfully feed the start and finish nodes. If you don’t succeed the first time, no big deal. Try it again and practice until you do.

Power Cell Station
On the right side as you enter through the automatic door to the electronics station.
Click to activate, choose part you want to work on, confirm.
This seems to be the one that people generally struggle with the most. But, once you have seen an example, it’s pretty easy. Your job here is to solve the “maze” by connecting the power flow from the start (green) node to the end (gold) WITHOUT allowing power to flow to the purple nodes. So unlike the other two stations above, instead of removing red blocks to allow current flow, you will be placing them on either side of each purple node to isolate them. Make sure that power is able to flow to the green and gold nodes, but does not touch the purple nodes at all. You can start by just putting red blocks around each purple node and then unblocking the start and finish nodes so they can get power. You generally only get 3 or 4 actions to make this happen, but clicking on red blocks does not use up the actions and you can click on them and move them to where you need them to be. Take a look at the example below and the route I traced with a highlighter. I marked the start and finish as well as where the red blocks need to be placed. If you don’t succeed the first time, no big deal. Try it again and practice until you do.

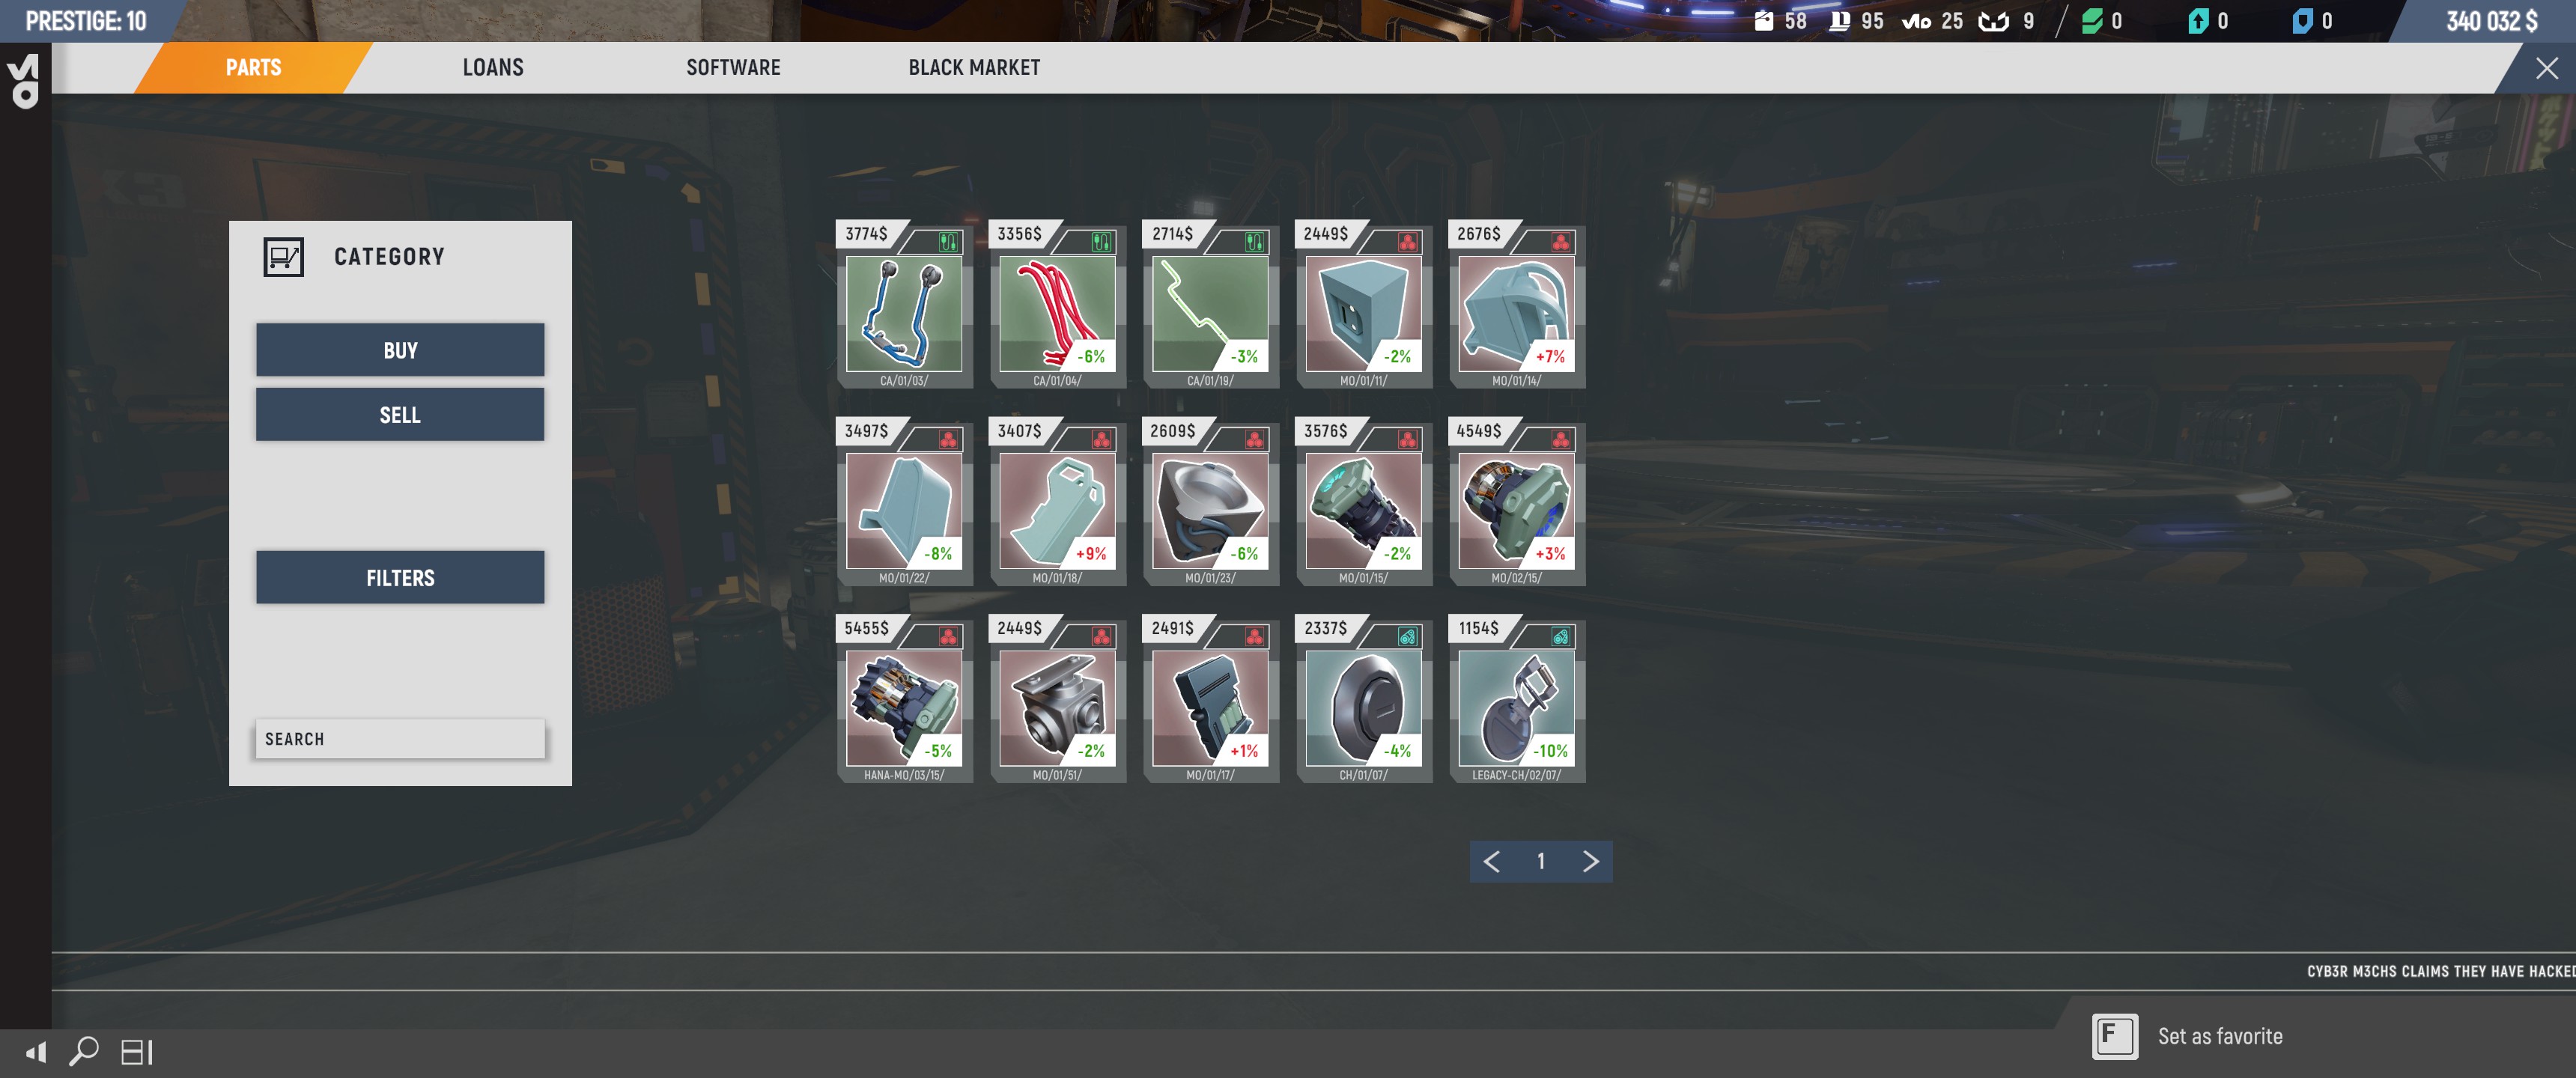
PAINTING STATION

Once you unlock the painting station using your office computer, you will be able to access it behind the assembly station where job mechs spawn. Unlocking this will enable you to receive corporate jobs that ask for mechs to be painted with certain colors. This mechanic is somewhat frustrating, especially, for perfectionists who want things to be neat. A job may ask you to paint a mech with two, three, or more colors from a specific pallet.
*Note: You cannot paint individual parts that are not attached to the mech. The mech has to be fully assembled before you can use the painting station.
1. Pull up your job checklist with TAB to be able to see which pallet you need to use and which colors from that pallet.
2. Walk up to the paint station and access it by left clicking on it. This menu will appear.

Here, you get to choose the pallet number the job calls for up on top by clicking the arrows. Once you have selected the correct color pallet, take a look at how many colors you need to use. Some jobs will call for only two colors while others will want you to use four or more.
If you only need to use three colors, but the menu appeared with four by default, you can click on the ‘X’ next to a color in the list to remove it. If you need to add more colors than what the menu started with, select ‘add color.’
Once you have the correct pallet and number of colors, click on each color line individually and choose the color you need from the pallet on the right to assign it.
Most of the prefixes coincide with the color. If the job calls for Y001, you know it will be a hue of yellow. G for green, R for red, etc.
3. Once you are happy with your selections on the menu, click ‘paint’. (again you can skip the animation of the mech being pulled into the paint station by right clicking.
4. Inside the paint station you have a few different options. On the top left, you will click the color you want from the pallet you pre-selected at the previous menu. On the top right, you have a checkbox to ‘fill’ and a bar for the brush width/size.
Do NOT use ‘fill’ as that will just paint the mech the single color you select.
With the ‘fill’ box unchecked, choose your desired brush width/size by dragging the bar left or right. Click on the color you want to use and begin painting parts of the mech by holding down the left mouse button. Rotate the camera with W A S D.
Click on another color to choose it and apply that as well.
It does not need to be neat or pretty for you to successfully complete the paint requirement. All that you need to do is apply some of each color to the mech. It does not matter where. You can paint the body one color and the arms and legs different colors. That will count.
5. Once done applying paint, click ‘next’ and you will be able to select and apply various different decals/vinyls (not required for any job).
6. Click on ‘confirm’ and you are done with the painting stage!
CALIBRATION STATION
And now… the FUN begins!…. just kidding!
Calibration happens to be the most frustrating mechanic in the game (well, at least part of it). I am sure it has caused many to punch a wall or slam a keyboard lol. However, it is not TOO bad if you know what you are doing. My job is to help make this as painless as possible for you.The calibration station, just as all other stations, is unlocked using your office computer. The station appears behind the assembly station, to the right of the painting station.
NOTE: Calibration is NEVER required as a part of any job. The Developers indicated that the features was added to bring some variety to tasks and get us out of the shop for a bit. The concept is neat, but the execution of that idea leaves a lot to be desired. Calibration does not give you anything except an extra $3,000 to $10,000+ extra per job (refer to example payout below).

If you have made it this far and plan on calibrating your mechs, let’s get right into it. Be warned: some basic math, logic, and problem solving is required.
1. After your mech is fully reassembled, walk up to the calibration station and click on it to activate.
2. At first, the screen you see will be a bit overwhelming if you are not familiar at all with basic programming. This is the math part. In the middle, you will see the sequence/equation, on the left you will see things that you can plug into that equation, on the right the ‘hint’ and ‘launch’ options, and on the very bottom an actual value and expected value.

The actual value before you press ‘launch’ will always be 0. The expected value is what you are aiming for as the final answer to the equation you will create.
If you click ‘hint’, the game will give you a freebie and automatically place one or two lines from the pool of choices on the left into the correct slot of the equation in the middle.
Let’s go over what each string on the left side of the screen does.
Loop= the simplest way to look at this is as multiplication. Loop=4 means that whatever action you attach it to will be repeated 4 times (in the case above). Click an empty line the equation and then which function you want to place there from the choices on the left.
The loop function is an action line. It will multiply/repeat whatever happens to be the line right below it. So if we want it to add 2 four times we would put it right above the VALUE.ADD2() command line in the equation.
The loop function will affect/repeat any functions/lines below it until it reaches the line where you place the LOOP.END command.
All command lines on the left must be used. In this example, we are trying to get the final value to be equal to 4. Think of how you would do that given the commands you have available to you.
In this case, we want X to equal 4. How do we do that? By setting up the equation this way:
4(2-1)= 4; 2-1= 1 and then that is multiplied by 4 to =4
Let’s set it up in the equation lines:
We will start with the loop command

Then we will add the lines which we want the loop command to repeat/multiply four times. That would be the VALUE.ADD2 and VALUE.SUBTRACT1 lines. We will put those in that order right below the loop line.

Lastly, we will add the END.LOOP command to stop the repetition/multiplication. And click on ‘launch.’
You will see the system run through the equation and the actual number change at the bottom until it is verified that it ultimately matches the expected number.
Once that is done, the calibration will be successful and you will move on to the next phase.
**Before we move on to that, we need to cover one more code/line variation. And that is the red ‘LOG.ERROR’ line that you see in the example below.

Leaving this error unchecked in the code will prevent you from completing the equation and passing the calibration. This particular line is neutralized/countered by the use of the ‘SKIPNEXTLINE’ command you see in the options on the left. This line must be placed right above the line you would like to skip/ignore in the equation. In this case, you would place it directly above the LOG.ERROR.
My advice to you is to play around with this and practice. With trial and error, you will become quicker and quicker at solving these. Do NOT get discouraged if you fail a few (or a dozen lol) times.
CALIBRATION TRIALS
Once you have successfully completed the first part of the calibration process described above, you will be taken to a calibration run. Each category of mech has it’s own specific trial.
**Combat/Assault mechs have a course in which they first need to destroy turrets on floating platforms and then fight off a swarm of drones that spawn as the mech stands in and controls a specific point on the floor (like capture the flag). This one is pretty easy.
First, destroy the turrets with your weapons. Use W A S D for movement, left mouse button for rockets, and right mouse button for mini/chain gun.

When all three are destroyed, walk over to and stand on the pulsating gold circle on the floor. Once you are in it, flying drones will begin to spawn. Not all of them will attack you. Focus on destroying the ones that are actively shooting at you. You will see red direction indicators on your screen to help you figure out where you are being shot from. Your weapons do overheat. Use the chain gun for the most part on single targets and rockets only if you can take out a cluster of two or more drones that are close to each other at once. You only need to survive for 30 seconds.

**Mining mechs have a course in which they need to find and mine red crystals/minerals while avoiding being overheated/blown up by flamethrower turrets mounted on the ceilings of the cave system they find themselves in.
Press the space bar to scan the environment for crystals. They will appear as light blue and you will be able to see them through walls. Go to them and begin mining them by firing your mining lasers holding down the left mouse button.


Most likely, there is a flame turret or two next to the crystals, so they will begin attacking you. Pay attention to the temperature reading on the right side of your heads up display. Do NOT allow it to get over 400 degrees or you will fail the calibration test. Right click to use your emergency vent/cooling system. This will drop the temperature gauge down to 0. Keep in mind that you can’t spam this and there is a bit of a cool down before you can use it again (a couple of seconds). So if it’s on cool down, move away from any turrets around you to avoid overheating.Once you collect the required number of crystals (15 to 26), you are done. Congratulations!
**Parkour/Multi-Purpose mechs well….Their calibration test is an obstacle course in which you need to jump, slide, and wall run. Sounds easy enough, but the mechanics and controls make this the MOST frustrating part of the game. 99% of the time, you will miss jumps or the wall running feature will not work, causing you to fail. I do not recommend that you calibrate these mechs.
MISSION TABLE
The mission table allows you to send the mechs you buy and restore from the junkyard/illegal market on missions. This is the only way that you can use these mechs.
The mission table is found in the office, on the right wall if you are facing away from the computer.
When you walk up to the mission table and active it with a left click, you will see the mission map.

There are six different mission types (although I have only seen four after completing more than 40 missions):
-Red – Arena (combat) – award reputation, mech parts, and/or black market tokens
-Yellow – Mining – award raw materials for use with crafting station (refer to that section)
-Blue – Distress – award money and reputation
-Purple – Illegal (I have never seen these in my play though)
-White – Covert (I have never seen these in my play though)
-Orange – Scavenger – award random mech parts (see below)
The mission rewards partly depend on the faction they are for. Distress missions for a corporation give you $22,000-$45,000 in cash and a large chuck of reputation. Scavenger missions give you random mech parts (a lot of them, but they come in different qualities and most often need to be repaired). Arena missions for Cyb3r M3ch give you reputation and black market tokens/access codes.


I do not yet know what the ‘mission size’ value represents as I have not found it to correlate to anything.
Nearly all missions last 23 minutes unless you have a mech with a perk that reduces mission time by 10% or another value.
Without a price lowering perk, starting a mission with one mech costs $4,000.
Starting a mission with two mechs costs $8,000, but there is not benefit to sending more than one as the mission time will not be lowered nor the rewards boosted. Later on, there may be missions that require four threats/hazards to be countered, but as of right now, one mech can handle each mission.

Just be sure to install the correct perk to counter the mission threat/hazard.

However, keep in mind that even if your mech is equipped to counter the mission threat, there is still a chance (although reduced) that they will come back damaged and will need to be repaired before being eligible for another mission. I had one come back with two missing parts even though the mission was a success and all threats were countered.
Like some other features in this game, this is just something for you to use your money on so that you do not feel like you are just sitting in the shop fixing mechs all day. Individual mileage may vary. If you dig it, you dig it. Have fun!
CRAFTING STATION
The crafting station is unlocked at prestige 10 and costs a whopping $450,000.
Once unlocked, it can be accessed through a set of automatic doors directly across from the electronics station.
The station consists of two pieces of equipment which are attached to each other.
On the right, you have the forge.

This allows you to break down any parts in your inventory into raw materials to be used to craft new parts.
The raw materials in this game are Ti- Titanium, Fe- Iron, and Si- Silicon (from left to right in the image below). The quantity you have of each is noted in the top right of your HUD on screen.


You can place several parts into the forge to be destroyed at once, but it has a limited capacity and will not accept more if full.
On the left side, you have the crafting station/production.

Here, you can select the part you want to produce (only one is produced at a time and any others are added to a queue) by searching for it by mech model, part name, etc. and use the raw materials you have to create it. The production process is fairly slow, but if you are in a hurry, you have the option to burn more fuel (which makes it a little more expensive) to speed up the process or even make it instant.


Once production has finished, the part will be added to your inventory.