Overview
This is meant to be the guide to all things Jackie. The goal is to give players a in-depth walk-through of Jackie, her mechanics, her weapons, her builds paths, and more!This Guide is made and owned by Saltygrease, but I will have help from other notable Jackie players such asBamorshaBanditBagelRATJAMMERAnd more!
Introduction
Welcome to the complete Jackie guide, within this guide you will find info about Jackie and how to play her. First lets introduce Jackie herself!
Jacquline “Jackie” Quilt was originally the first character everyone had in Eternal Return: Black Survival (noted as ER:BS from henceforth) and is a melee brawler most known for her relatively high mobility.

If at any time you feel the exact stats or info in this guide is behind, refer to the wiki, patch notes or another reputable information source
Table Of Contents
This section is purely to give a small description of other sections to provide better navigation
Different sections will contain different levels or layers of information as I collect and test different builds. Please keep this in mind throughout the guide.
Jackie’s Skills
– A overview of all of Jackie’s Skills & Weapon Skills
TL:DR Recommended Builds
– Quick suggestions for those who don’t want to sift through the guide for hours
Dagger Overview
– Description of the Dagger weapon type and playstyle
381054: Standard Bleeder Dagger
– In Depth Overview of said build
381055: Backup Bleeder Dagger
– In Depth Overview of said build
354533: Auto-Attack Dagger
– In Depth Overview of said build
Dual-Swords Overview
– Description of the Dual-Swords weapon type and playstyle
381075: Amp Dual-Swords
– In Depth Overview of said build
381076: Auto-Attack Dual-Swords
– In Depth Overview of said build
381077: Crit Dual-Swords
– In Depth Overview of said build
Two-Handed Overview
– Description of the Two-Handed weapon type and playstyle
381078: Standard Two-Handed
– In Depth Overview of said build
381079: Monohoshizao Two-Handed
– In Depth Overview of said build
381085: EXPERIMENTAL Crit Two-Handed
– In Depth Overview of said build
Axe Overview
– Description of the Axe weapon type and playstyle
381081: Standard Axe
– In Depth Overview of said build
381080: Crit Axe
– In Depth Overview of said build
381082: CDR Axe
– In Depth Overview of said build
Match-Ups/1v1s
– In depth theory about fighting every other character in a 1v1 in alphabetical order, it also lists the characters yet to be added from the original game
Farming Routes
– Tips about how to “farm” in ER:BS during downtime
Closeing Statements
– A little message from me
Credits
– Giving credit where credit is due
Jackie’s Skills
Jackie’s role is a “Brawler” meaning that she specializes in close range, elongated fights, and is vulnerable to ranged encounters. Let’s take a look at the skills that give her this role.
Main Skills
Hack & Slash (Q) 
Adrenaline Burst (W) 
Leaping Strike (E) 
Chainsaw Murderer (R) 
Bloodfest (Passive) 
Weapon Skills
Jackie has access to 4 weapon types, currently the most of any ER:BS character. Each different weapon type grants a different weapon skill which is unlocked at Level 7 Weapon Mastery, and is upgraded at Level 14 Weapon Mastery.
Dagger
Daggers are a small but fast weapon, typically granting decent attack power and movement speed bonuses. Currently dagger is the most consistent weapon type for Jackie to use, and as such is the most recommended for new players to use.

Dual Swords
Dual Swords are the “hidden” weapon type of ER:BS, as you cannot start the game wielding the weapon type, but you must instead start with a sword or dagger, and using both a sword and a dagger, crafting the base twin swords item. They are notable for hitting twice for every Auto-Attack, making them great as a Auto-Attack based weapon.

Two-Handed
Two-Handed weapons are a great balance between offense and defense for Jackie as she gains a blocking skill her kit lacks. Two-Handed is typically built using Auto-Attack based items and is used as a true brawler to rush down your enemies.

Axe
Axes are strong hitters, but are slow and the weapon skill sucks. At the moment they are the weakest weapon for Jackie, and possibly in the game. As with all things one can still win using Axes, but it is much more difficult than nessecary.

If you ever feel like these descriptions are outdated or confusing, refer to the wiki!
[link]TL:DR Recommended Builds
Currently these are the (in my opinion) strongest and most consistent builds for each weapon type. I personally would not recommend playing Axe. Axe is currently weak, and is outclassed by every other weapon.
TL:DR Take these builds if you are brand new and play around with them until you understand the mechanics of the game. These will give you a good idea of how the game plays as Jackie. They are in order of recommendation from top to bottom
381054: Standard Bleeder Dagger
– strong early and mid game, transition to Auto-Attack in late game
381076: Auto-Attack Dual-Swords
– strong early and mid game, weakens out in late game
381078: Standard Two-Handed
– even power throughout the game, focus on completing build, get more Auto-Attack as transition
381081: Standard Axe
– you already make your best in slot items for most cases, just focus on finishing build then taking fights
Dagger Overview
Dagger gives Jackie a great escape tool, greatly improving both her already high mobility. With Dagger, it is best to chase fights early, and avoid fights later on unless you are 3 or more mastery levels above the opponent. Late-Game is it preferable to switch to a full auto attack based build. Transition pieces should always be made in order to keep the power level up into late game, Fragarach is strongest dagger, with Vibro-Blade being the next in line for Late-Game.
381054: Standard Bleeder Dagger
– Build Routing

The idea behind bleeder is to well, bleed the enemy. Maxing out your Q skill lets you deal a true damage DOT that is very strong in early to mid game. Abuse it and kite your opponents until they are low health
– Food routing
(HP) Mocha Bread > Between Hospital and Cemetery grab 1 Coffee and 1 Alcohol to combine into Coffee Liquor, and use those along with your 2 starting Bread to make Mocha Bread.
(HP) Garlic Bread > A quick and easy solution to early game food, simply grab 2 Garlic from Cemetery and combine with your bread to make Garlic Bread. It won’t get you through the entire game, but it’ll get you through early fights
(HP) Other Options > It’s also possible to make Pound Cakes, First Aid Kits, Chocolate Chip Cookies, and Choco Pie Boxes along the route, however they require more time and inventory management to make. If you are absolutely lacking on food by the time you finish archery, you may want to go back and craft some. Just keep in mind your time is much better spent farming or chasing early kills.
(SP) Ice Water > Personally I take at least 2 Ice from Hospital or Cemetery and turn my Water into
Ice Waters. Any other extra SP items I will grab and slowly consume throughout the building process up until I finish archery to keep topped off on SP.
(SP) Other Options > There are a multitude of mid quality SP drinks you can make on the route, however Jackie does not need much SP once her build is complete, and the smaller pieces slowly consumed will sustain her through the crafting process.
– Extra Items
Feather – Taking an extra feather from Hospital/Cemetery not only denies one from other people who might be searching for one, but it also lets you craft a pair of Feather Boots when you reach Archery. Feather Boots are a direct upgrade for Bleeder so you should equip them as soon as you make them and dispose of the EOD Boots properly.
Gunpowder – If you missed the extra Feather you can instead use a Gunpowder and craft a set of 3 Fire Traps using the extra Oil Cloth. These traps can be of great use in fights where you have time to prepare, or a small disengage and the chance to bait the enemy. These have saved my early game multiple times and I highly advise you to make them.
Nail – If you missed the Feather, and don’t want to make Fire Traps you can at least take an extra Nail to craft a pair of White Rhinos for the bonus Movement Mastery.
– Backup Zones
If you are missing items along the route, personally I find that between Alley, Hotel, Dock and Uptown you can pick up any items you may be missing. However if you cannot find the 1 or 2 items you are missing between these 3 zones, you are already too late, or you picked Bleeder in a lobby that was too contested for the route.
– Transition Items
Transition Items are ordered in this way.
Best In Slot RNG Option(s) -> Best In Slot NON-RNG Option
This order can be broken up if the NON-RNG option is better than the RNG option
DISCLAIMER: There are always multiple ways of transitioning items, and this is just a small list of how 1 or 2 transitions might go. You cannot always force these transitions, but you can work towards them using similar items for similar effects.
AA Style:
Weapon: Fragarach -> Vibroblade
Chest: Mithril Armor -> EOD Suit
Head: Opera Mask/Halo/Mithril Helm -> Tac Ops
Arm: Cube Watch -> Radar
Leg: Feather Boots -> Red Shoes
Accessory: Laced Quiver -> Emerald Tablet
CDR Style:
Weapon: Fragarch -> Carnwennan
Chest: Mithril Armor -> EOD Suit
Head: Mithril Helm -> Helm Of Banneret
Arm: Cube Watch -> Sheath Of Shah Jahan
Leg: Tachyon Brace -> Boots Of Hermes
Accessory: Emerald Tablet/Sanguine Gunbai -> White Crane Fan
– Grief Timings
For Bleeder there are 2 main power spikes in which a Grief can occur
First is by the Chapel teleport, and while you don’t want to spend much time here so you can finish your build, you can take most fights that occur here if you must. You should have your Weapon and Chest fully build, your Legs half built, as well as 4 HP and 4 SP Items. More than enough to take a fight against other characters you typically find here with only a Weapon, Legs, and Accessories.
Second is right after finishing your build in Archery, here you automatically want to take a fight against anyone who might be in Archery, or a nearby zone. You want to run at any noise ping you see for roughly 2 minutes after this point. You should have 7 or close to 7 Weapon Mastery if you kill both wolf camps.
381055: Backup Bleeder Dagger
– Build Routing

The goal behind using the Backup Bleeder build is if the main route of Bleeder is too contested. This can mean 3+ other people starting in Hospital, Cemetery, or Chapel. This build can still function if 3+ people spawn in Archery within reason, if the zone literally all looted, of course it won’t work.
– Food Routing
(HP) Boiled Egg > Boiled Eggs are a solid food that are quick to craft between School and Archery with the abundance of boiling water you get from(2 Lighters and the starting Water. Personally I use 2 Eggs to make Boiled Eggs, leaving me with 4 HP and 4 SP items in total.
(HP) Mocha Bread > It is possible to craft Mocha Bread on this route as well, simply by taking an Alcohol from School through to Cemetery. It is a solid choice and while I personally do not bother with making it, I recommend others to.
(HP) Other Options > Choco Pie Boxes and other strong foods are possible to be made with items on this route, but they will clog your inventory or take longer to make. Make them only in an emergency.
(SP) Boiling Water into Purified Water > I strongly prefer to turn both my starting waters into Boiling Water with 2 Lighters from School. Between crafting food and consumption I should have at least 2 Boiling Water remaining by the time I reach Cemetery where I can easily take Ice and make Purified Water. This should last you well into Mid-Game.
(SP) Kaoliang Liquor > Using 2 Lighters and an Alcohol you make make 3 Kaoliang Liquors as well, which are slightly overkill for early game use, but are perfect once the build is complete to top off Jackie’s SP when she gets low. If you don’t like making Purified Water, I recommend this instead.
(SP) Other Options > Flower and Herbal Liquor are also options for making a good amount of decent quality SP items, and will almost never be difficult to craft once you reach Cemetery and Pond, but the amount of time where you must resist consuming the individual Baijiu makes it vulnerable to panic mistakes or desperation plays.
– Extra Items
Gunpowder > its possible to make fire traps on this route, but given the relative stress on your inventory in Cemetery it isn’t often viable to make and hold. Otherwise this build doesn’t have any items you want to grab extra of in the early game.
– Backup Zones
Forest and Hospital are going to be your main backup zones for missing items. Typically the only thing you will be missing is 1 or more of the 3 feathers the build requires, especially if 1 or more other Bleeder Jackies are in the same lobby.
– Transition Items
Transition Items are ordered in this way.
Best In Slot RNG Option(s) -> Best In Slot NON-RNG Option
This order can be broken up if the NON-RNG option is better than the RNG option
DISCLAIMER: There are always multiple ways of transitioning items, and this is just a small list of how 1 or 2 transitions might go. You cannot always force these transitions, but you can work towards them using similar items for similar effects.
AA Style:
Weapon: Fragarach -> Vibroblade
Chest: Mithril Armor -> EOD Suit
Head: Opera Mask/Halo/Mithril Helm -> Tac Ops
Arm: Cube Watch -> Radar
Leg: Feather Boots -> Red Shoes
Accessory: Laced Quiver -> Emerald Tablet
CDR Style:
Weapon: Fragarch -> Carnwennan
Chest: Mithril Armor -> EOD Suit
Head: Mithril Helm -> Helm Of Banneret
Arm: Cube Watch -> Sheath Of Shah Jahan
Leg: Tachyon Brace -> Boots Of Hermes
Accessory: Emerald Tablet/Sanguine Gunbai -> White Crane Fan
– Grief Timings
Cemetery and Pond are going to be your best Grief timings for killing other players as it is your biggest power spike.
354533: Auto-Attack Dagger
– Build Routing

This build was originally used in Korea to route quickly and get some kills early game. It starts with most of your best in slot non-rng items. It is very strong, however missing even a single item can mean staying in a zone much longer than you would like and as such it is not very strong when any zone is contested by 2 or more other players.
– Food routing
(HP) Hot Ramen > Turn both starting Water into Boiling Water using 2 Lighters. Grab 2 Ramen and make Hot Ramen. It’s a simple and quick food that will sustain you through the early fights, and is finished quickly as to not clog up your inventory.
(SP) Hot Chocolate > After making Hot Ramen, it is also incredibly easy to make Hot Chocolate with a single Chocolate from Uptown, giving you 2000 SP worth of beverages from a single craft.
Extra Options > it is possible to make Mocha Bread along this route using the alcohol from School, but it takes so long that it is not worth it in my opinion.
– Extra Items
Motorcycle Helm > Instead of going to School for the Crown, you can instead opt for making a Moto Helm, shortening the build path to just 4 zones, you will need a Stone and a Water, but you are still able to make (4) Hot Ramen and (4) Hot Chocolates from the single remaining Water.
– Backup Zones
You are most likely to miss feathers, gemstones, and hammers, making Pond and Hospital solid backup zones for picking up missing items.
– Transition Items
You already have most of the strongest base items for Dagger Jackie. For transition you mostly just want to grab RNG items, most importantly Fragarach, but Auto-Arms, Halo, and Mithril Chest are your typical options. Mithril Peices are welcome, but you need to make sure you have enough max HP to survive any burst characters.
Transition Items are ordered in this way.
Best In Slot RNG Option(s) -> Best In Slot NON-RNG Option
This order can be broken up if the NON-RNG option is better than the RNG option
DISCLAIMER: There are always multiple ways of transitioning items, and this is just a small list of how 1 or 2 transitions might go. You cannot always force these transitions, but you can work towards them using similar items for similar effects.
Weapon: Fragarach -> Vibroblade
Chest: Mithril Armor -> EOD Suit
Head: Opera Mask/Halo/Mithril Helm -> Tac Ops
Arm: Cube Watch -> Radar
Leg: Feather Boots -> Red Shoes
Accessory: Laced Quiver -> Emerald Tablet
– Grief Timings
Once you finish your items in cemetery you hit your main powerspike, and generally want to fight people in Hospital, Cemetery, and Factory. It is important to remember that this build is a little slower than bleeder, so the matchups aren’t as free as you may expect them to be.
Dual-Swords Overview
Dual-Swords give Jackie a very strong basis for DPS, either through the double strike auto attacks, or through the “Rampage” Skill that you gain at Weapon Mastery 7. Rampage causes you to slash 6 times in a small AOE in the direction you are facing. If you hit with at least 4 of the 6 slashes you may reactivate the skill within a timeframe to dash a considerable distance and strike anything in your path.
381075: Amp Dual-Swords
– Build Routing

The main idea behind Amp Dual-Swords builds is to stack as much Extra Skill Damage as you can. This is due to the nature of the Dual-Swords skill, Rampage, which does 6 quick slashes each of which is effected by the Extra Skill Damage. If you hit with any of portion of the first use, you gain a 2nd charge to use within a short duration, possibly letting you hit your target(s) for up to 12 instances of damage.
This build is currently under review and may be changed/removed due to shifts in meta or game balance.
– Food routing
(HP) Boiled Egg > Boiled Eggs are a solid food that are quick to craft between School and Archery with the abundance of boiling water you get from getting any extra lighters in school.
(HP) Chocolate Ice Cream > Easy to make with Ice and Chocolate, this is a solid food choice for when you don’t end up getting any extra lighters.
(HP) Other Options >
(SP) Boiling Water into Purified Water > I strongly prefer to turn both my starting waters into Boiling Water with 2 Lighters from School. Between crafting food and consumption I should have at least 2 Boiling Water remaining by the time I reach Cemetery where I can easily take Ice and make Purified Water. This should last you well into Mid-Game.
(SP) Kaoliang Liquor > Using 2 Lighters and an Alcohol you make make 3 Kaoliang Liquors as well, which are slightly overkill for early game use, but are perfect once the build is complete to top off Jackie’s SP when she gets low. If you don’t like making Purified Water, I recommend this instead.
(SP) Other Options > Hot Chocolate, Highball, and On The Rocks are all good options that are made before or at Hotel.
– Extra Items
Glacial Shoes > The most obvious choice, because Straight Jacket Sneakers builds off the same Repaired Slippers. This of course means you have to fight for the Tree of Life that spawns in Hotel, or take the extra risk that comes with fighting for the one that spawns 2 minutes later in Forest, still having weak boots.
– Backup Zones
The backup zones for this build are going to be Pond and Chapel. You are most likely to be missing gemstones, hammers, paper, and maybe your fan. All of which can be found within those two zones.
– Transition Items
Transition Items are ordered in this way.
Best In Slot RNG Option(s) -> Best In Slot NON-RNG Option
This order can be broken up if the NON-RNG option is better than the RNG option
DISCLAIMER: There are always multiple ways of transitioning items, and this is just a small list of how 1 or 2 transitions might go. You cannot always force these transitions, but you can work towards them using similar items for similar effects.
Weapon: Lloigor & Zahr -> Starsteel Twin Swords
Chest: Kabana -> High Priest Robes
Head: Mithril Helm -> Imperial Crown
Arm: Bracelet of Skadi -> Sheath of Shah Jahan
Leg: Glacial Shoes -> Straitjacket Sneakers
Accessory: Uchiwa -> Revenge of Goujian
– Grief Timings
Given the play style of Amp and it generally requiring level 7 Weapon Mastery, there aren’t many good grief timings. The most you can hope for is catching a player who is missing multiple items from their route.
381076: Auto-Attack Dual-Swords
– Build Routing

A simple build for simple people. Hitting things does damage, so why not hit them as fast as possible. The trick is to stick to people with your superior mobility and dps them down quickly.
– Food routing
(HP) Hot Ramen > Turn both starting Water into Boiling Water using 2 Lighters. Grab 2 Ramen and make Hot Ramen. It’s a simple and quick food that will sustain you through the early fights, and is finished quickly as to not clog up your inventory.
(SP) Hot Chocolate > After making Hot Ramen, it is also incredibly easy to make Hot Chocolate with a single Chocolate from Uptown, giving you 2000 SP worth of beverages from a single craft.
– Extra Items
Imperial Crown > instead of making Motorcycle Helm some players would rather opt into focusing on getting the Imperial Crown as it is just a flat upgrade, only having to enter school as the 5th zone in order to make it.
– Backup Zones
The only items you may struggle to get enough of are feathers, making Cemetery and Hospital your main backup zones.
– Transition Items
Transition Items are ordered in this way.
Best In Slot RNG Option(s) -> Best In Slot NON-RNG Option
This order can be broken up if the NON-RNG option is better than the RNG option
DISCLAIMER: There are always multiple ways of transitioning items, and this is just a small list of how 1 or 2 transitions might go. You cannot always force these transitions, but you can work towards them using similar items for similar effects.
Weapon: Starsteel Twin Swords -> Dioscuri
Chest: Mithril Armor -> Butler’s Suit
Head: Chinese Opera Mask/Mithril Helm/Elysian Halo -> Imperial Crown
Arm: Radar -> Sheath of Shah Jahan
Leg: Mithril Boots/Red Shoes -> Feather Boots
Accessory: Moonlight Pendant -> Laced Quiver
– Grief Timings
In Forest, you may run into other players who are also not complete build, if you are on a good pace, you are likely to have more complete items than them, and should be able to bully them out of the zone or kill them outright. This also applies to you, however, and showing up to forest on a slow run can easily lead to death.
381077: Crit Dual-Swords
– Build Routing

This build effectively is just a luke cosplay these days. You do alot of damage in melee brawls and have insane lifesteal but your max HP is effectively nothing. This means you are strong against characters without any burst capabilities, but are going to struggle vs anything that does chunks of damage every few seconds.
– Food routing
(HP) Mocha Bread > In Uptown grab Coffee, in Hospital grab Alcohol, simple and effective food.
(HP) Chocilate Ice Cream > Grab some extra Chocolate in Uptown and use it with Ice from Hospital to make some very quick food that should last until you find something better to eat.
(SP) Ice Water > Just grab some Ice in Hospital, its quite effective.
– Extra Items
There isn’t really any extra items you want while getting the build up and running.
– Backup Zones
Given the likelyhood to miss pens, feathers, and paper, and that these zones are all mutually exclusive, you have alot of options on where to go depending on what items you are missing.
– Transition Items
Transition Items are ordered in this way.
Best In Slot RNG Option(s) -> Best In Slot NON-RNG Option
This order can be broken up if the NON-RNG option is better than the RNG option
DISCLAIMER: There are always multiple ways of transitioning items, and this is just a small list of how 1 or 2 transitions might go. You cannot always force these transitions, but you can work towards them using similar items for similar effects.
Weapon: Starsteel Twin Swords -> Divine Dual Swords
Chest: Mithril Armor -> Butler’s Suit
Head: Chinese Opera Mask/Mithril Helm/Elysian Halo -> Imperial Crown
Arm: Radar -> Sheath of Shah Jahan
Leg: Mithril Boots/Red Shoes -> Feather Boots
Accessory: Moonlight Pendant -> Laced Quiver
Transition peices are almost as straight forward, but crit items are slightly more important here. Mithril Armor works great over Butler’s Suit, and Emerald Tablet makes for a decent accessory swap. Just make sure you have enough HP and attack speed to run opponents down.
– Grief Timings
Due to building Radar, and not finishing your boots until 4th zone, this build doesn’t have any good grief chances, avoid fights if you can until you finish your build.
Two-Handed Overview
Two-Handed weapons give a good mix of offense and defence. With relatively high base Attack Power stats, and the Parry skill granting a unstoppable block ability, it makes a great choice for someone who enjoys the one-on-one brawl playstyle. Two-Handed is relatively unpopular among Jackie players, because there are other characters who wield the weapon type with more strength, but that doesn’t mean she can’t make it work!
381078: Standard Two-Handed
– Build Routing

This build is mostly a tanky auto attack build. It is very straight forward, but it also isn’t quite as powerful as it used to be.
– Food routing
(HP) Hot Ramen/Garlic Ramen > Hot Ramen and/or Garlic Ramen is a great choice for food, making the Hot Ramen is quick in Alley with Boiling Water and Ramen, and you have the option to wait until Cemetery to bother taking Garlic to upgrade it to Garlic Ramen.
(HP) Baked Carp > Baked Carp is certainly an option for getting food at the end of the route, as long as you can manage the inventory space of carrying an extra lighter during the route.
– Extra Items
Feather Boots > Skipping making White Rhinos at Factory in favor of making Feather Boots in Cemetery is an option, especially if you are missing the nail needed. You are missing out on the anti-healing, but you do gain extra move speed and attack speed.
– Backup Zones
You are not likely to miss any items on this route, so the need for backup zones isn’t prevalent.
– Transition Items
Transition Items are ordered in this way.
Best In Slot RNG Option(s) -> Best In Slot NON-RNG Option
This order can be broken up if the NON-RNG option is better than the RNG option
DISCLAIMER: There are always multiple ways of transitioning items, and this is just a small list of how 1 or 2 transitions might go. You cannot always force these transitions, but you can work towards them using similar items for similar effects.
Weapon: Dáinsleif/Laevateinn/Monohoshizao -> Arondight
Chest: Mithril Armor -> EOD Suit/Amazoness Armor
Head: Elysian Halo/Chinese Opera Mask/Mithril Helm -> Helm of Banneret
Arm: Radar -> Sheath of Shah Jahan
Leg: Mithril Boots/Red Shoes -> Feather Boots
Accessory: Moonlight Pendant -> Laced Quiver
– Grief Timings
Cemetery and Pond are when you have your first powerspike, the option to take a fight against other players who are not quite built is there, but given the nature of Two-Handed being a scaling weapon type you need to be cautious when taking said fights.
381079: Monohoshizao Two-Handed
– Build Routing

Mono focuses on high lifesteal on hits, letting you tank through many opponents in melee range, and farm easily without fear of getting ambushed with low HP after every animal.
– Food routing
(HP) Healing Potions > Make Orchids in Pond with Flower and Oriental Herb, and grab glass bottles in Chapel/Dock. Very effective
(HP) Choco Pie Boxes > Make 2 Choco Pies in uptown, and use 2 Boxes from chapel to turn them into Chocho Pie Boxes, its less consistent than healing potions, but it should also work great.
(SP) Ice Water > Ice + Water in Hospital, its simple and it works to get you through the build phase.
– Extra Items
Dragon Dobok > Dragon Dobok is a good option as a swap for butlers. I would argue that DDobok is stronger in the early game due to the SP regen and attack range, and that butlers is stronger lategame for the lifesteal and movespeed. This is less an “Extra Item” and more of a “change the item in the build plan and do that instead”
– Backup Zones
Avenue is your best option for finding items you might be missing along the route.
– Transition Items
Transition Items are ordered in this way.
Best In Slot RNG Option(s) -> Best In Slot NON-RNG Option
This order can be broken up if the NON-RNG option is better than the RNG option
DISCLAIMER: There are always multiple ways of transitioning items, and this is just a small list of how 1 or 2 transitions might go. You cannot always force these transitions, but you can work towards them using similar items for similar effects.
Weapon: Dáinsleif/Laevateinn -> Monohoshizao
Chest: Mithril Armor -> Butler’s Suit
Head: Elysian Halo/Chinese Opera Mask/Mithril Helm -> Helm of Banneret
Arm: Radar -> Sheath of Shah Jahan
Leg: Mithril Boots/Red Shoes -> Feather Boots
Accessory: Moonlight Pendant -> Laced Quiver
Halo
Moonstone Pendent
Laced Quiver/Emerald Tablet in late game with enough HP
– Grief Timings
Given the time it takes to get fully built, and the nature of Two-Handed builds faring better into the late game due to its mastery scaling, there arent really any good timings to grief someone at.
381085: Crit Two-Handed
– Build Routing

This build focuses on dealing a very high amount of damage very quickly, however it suffers from extremely low max HP and movement speed.
– Food routing
(HP) Mocha Bread > Between Hospital and Cemetery grab Coffee and Alcohol to combine into Coffee Liquor, and use those along with your starting Bread to make Mocha Bread.
(HP) Garlic Bread > A quick and easy solution to early game food, simply grab 2 Garlic from Cemetery and combine with your bread to make Garlic Bread. It won’t get you through the entire game, but it’ll get you through early fights
(SP) Ice Water > Personally I take at least 2 Ice from Hospital or Cemetery and turn my Water into
Ice Waters. Any other extra SP items I will grab and slowly consume throughout the building process up until I finish the build to keep topped off on SP.
(SP) Other Options > There are a multitude of mid quality SP drinks you can make on the route, however Jackie does not need much SP once her build is complete, and the smaller pieces slowly consumed will sustain her through the crafting process.
– Extra Items
There aren’t many extra items to grab along the route, but keep in mind pieces that other players drop that may lead to solid transition items.
– Backup Zones
This build isn’t likely to miss any items, given the multiple zones to gather the feathers and scrap, which are the most contested items.
– Transition Items
Transition Items are ordered in this way.
Best In Slot RNG Option(s) -> Best In Slot NON-RNG Option
This order can be broken up if the NON-RNG option is better than the RNG option
DISCLAIMER: There are always multiple ways of transitioning items, and this is just a small list of how 1 or 2 transitions might go. You cannot always force these transitions, but you can work towards them using similar items for similar effects.
Crit Is very weak, I would argue that you need to switch to a HP/Tank based build as quickly as possible once you get your 1-2 grief kills.
Weapon: Dáinsleif/Laevateinn/Monohoshizao -> Aurora Longsword
Chest: Mithril Armor -> EOD Suit/Amazoness Armor
Head: Elysian Halo/Chinese Opera Mask/Mithril Helm -> Imperial Crown
Arm: Radar -> Sheath of Shah Jahan
Leg: Mithril Boots/Red Shoes -> Feather Boots
Accessory: Moonlight Pendant -> Laced Quiver
– Grief Timings
The whole idea is to grief people who are still stuck in Dock looking for items, or ambush players coming into Dock with a large crit burst.
Axe Overview
Axes are built around the idea that they finish generally quickly compared to other weapon types, and that they have high base Attack Power stats. They scale relatively poorly into lategame, and have a slow wind up before each attack to compensate. These downsides can be mitigated by building multiple attack speed items. The Axe skill allows you to dash forward to a target and swing in a small circle around you that deals a large amount of damage every 4 hits, this should be weaved into your auto attacks for increased DPS and burst capabilities.
381081: Standard Axe
– Build Routing
This build revolves around the heavy focus on attack speed and crit items to create a fast, hard hitting, and annoying to fight melee.

– Food routing
(HP) Cold Noodles > Make Ice Water in Hosptial and take Ramen from Temple. Its quick and doesnt take up too much inventory which the build can struggle with.
(HP) Garlic Bread > If you don’t make Cold Noodles you can often find 2 garlic in Temple and make this instead.
– Extra Items
You need everything in the build early game so getting something to swap early isnt very important.
– Backup Zones
Uptown is likely your best bet for finding items you are missing from coming to avenue so late.
– Transition Items
Transition Items are ordered in this way.
Best In Slot RNG Option(s) -> Best In Slot NON-RNG Option
This order can be broken up if the NON-RNG option is better than the RNG option[/b][/u]
DISCLAIMER: There are always multiple ways of transitioning items, and this is just a small list of how 1 or 2 transitions might go. You cannot always force these transitions, but you can work towards them using similar items for similar effects.
Weapon: Preference Pick -> Santa Muerte
Chest: Mithril Armor -> Dragon Dobok
Head: Opera Mask/Halo/Mithril Helm -> Tac Ops
Arm: Cube Watch -> Radar
Leg: Feather Boots -> Red Shoes
Accessory: Emerald Tablet/Sanguine Gunbai -> Laced Quiver
– Grief Timings
The build finishes around the 5 minute mark when Archery is generally uncontested. Start farming there and keep an eye out for weaker targets.
381080: Crit Axe
– Build Routing

– Food routing
(HP) Mocha Bread > Between Hospital and Cemetery grab (1) Coffee and (1) Alcohol to combine into (2) Coffee Liquor, and use those along with your (2) starting Bread to make (4) Total Mocha Bread.
(HP) Garlic Bread > A quick and easy solution to early game food, simply grab (2) Garlic from Cemetery and combine with your bread to make (4) Garlic Bread. It won’t get you through the entire game, but it’ll get you through early fights
(SP) Ice Water > Personally I take at least (2) Ice from Hospital or Cemetery and turn my Water into
(4) Ice Waters. Any other extra SP items I will grab and slowly consume throughout the building process up until I finish the build to keep topped off on SP.
(SP) Other Options > There are a multitude of mid quality SP drinks you can make on the route, however Jackie does not need much SP once her build is complete, and the smaller pieces slowly consumed will sustain her through the crafting process.
– Extra Items
No extra items along this route are useful due to inventory cramming.
– Backup Zones
This build already has multiple zones for things you need multiples of, so you are not likely to miss any items.
– Transition Items
Transition Items are ordered in this way.
Best In Slot RNG Option(s) -> Best In Slot NON-RNG Option
This order can be broken up if the NON-RNG option is better than the RNG option
DISCLAIMER: There are always multiple ways of transitioning items, and this is just a small list of how 1 or 2 transitions might go. You cannot always force these transitions, but you can work towards them using similar items for similar effects.
Weapon: Any other axe lategame -> Beam Axe
Chest: Mithril Chest -> EOD Suit
Head: Halo/Opera/Mithril Helm -> Tac Ops Helm
Arm: Auto Arms/Cube Water -> Radar
Leg: Mithril Boots -> Feather Shoes
Accessory: Sanguine Gunbai -> Laced Quiver
– Grief Timings
Right when you finish your build in Dock you are one of the strongest characters for a short time, use this time to get a few kills early then transition to a more tanky auto-attack based build.
381082: CDR Axe
– Build Routing

This build is effectively the bleeder axe version, where you focus on using Q to deal damage as often as possible. It also has the benefit of being one of the most ratty and mobile ones due to the CDR for your E.
– Food routing
(HP)Cold Noodles > Using Ice to make Ice Water in Hospital and combining it with Ramen from temple makes for quick and effective food.
(SP) Misc Drinks > Due to the nature of this route almost all using water based SP drinks, you should just take whatever SP items you find along the route and drink them as needed.
– Extra Items
The build doesn’t like to grab extra items due to the somewhat slow nature of already building most of the optimal items.
– Backup Zones
Beach and Pond can both provide the Gemstones and Hammers you may miss along the route.
– Transition Items
Transition Items are ordered in this way.
Best In Slot RNG Option(s) -> Best In Slot NON-RNG Option
This order can be broken up if the NON-RNG option is better than the RNG option
DISCLAIMER: There are always multiple ways of transitioning items, and this is just a small list of how 1 or 2 transitions might go. You cannot always force these transitions, but you can work towards them using similar items for similar effects.
Weapon: Parashu
Chest: Queen Of Hearts -> Dragon Dobok
Head: Mithril Helm -> Imperial Burginet
Arm: Cube Watch/Radar -> Sheath of Shah
Leg: Mithril Boots -> White Rhinos
Accessory: Emerald Tablet/Sanguine Gunbai -> Laced Quiver
– Grief Timings
This build is somewhat slow and as such doesn’t have any grief timings to catch any unbuilt players.
Matchups (A-B)
Adela
– Her main source of damage comes from her constant Q pokes, it is strongly advised to dodge them when possible. Adela possesses large burst capabilities with her W, and a wall jumping teleport with her E. Her R makes her invulnerable for a short time, and then deals massive damage nearby. Overall the trick to fighting an Adela is to run her down in close range so she cannot easily poke with Q, while sidestepping constantly as to avoid the possible W burst and empowered Q stun. It is reccomended you save your jump for her R, even if she Es away. I have fallen to that ult many times due to using my mobility right before she uses it.
Adrianna
– Adrianna is the queen of poking skills and you can easily misjudge the amount of damage you are taking. The key thing is to bait and avoid anything she places on the ground, and to sidestep when she uses her Q skill. Her E is a wall jumping dash so again you may want to save your jump to copy hers. Her R is the main issue, multiple charges of long range poke, knockback, and solid damage. You’d best be quick on your feet and dodge them if possible.
Alex
– Fighting Alex is a weird set of mindgames for Jackie. Alex has many skills and weapon skills at his disposal and an Alex that knows how to make use of each one can be dangerous even when you have a major advantage. There isn’t much to say about him other than avoid his melee W pull, melee E taunt, his R, and keep in mind his current weapon skill.
Arda
– This character has yet to be added to ER:BS
Aya
– Aya plays in a entirely ranged poke/dps style, no matter which weapon type she is using. As such the way to fight her stays the same, just the dps vs burst of damage difference you need to mind for your own hp. The best method is to get in close and stick to the Aya and force her to use her wall jumping E, then copy with your own. Generally that is enough to stick to them, and her R ability takes longer to charge than the root will be against you, still allowing you to stick relatively well.
Barbara
– Barb is an annoying fight to be sure. She excels in burst and poking between her Q turret and W double shot combo. Her normal E field can deal a surprising amount of damage if you get caught in it for long enough and her R leads to a variety of combos and bursts. The typical thing to do is to force her to drop a turret and place yourself so that s
Bernice
– Bernice is a “not very fun and very unskilled” matchup, in my opinion. It’s a stat check and you have to avoid his W traps, Q slows, his E counters dagger skill and ratting, to a degree, and his R is just a instant trap skillshot.
Bianca
– This character has yet to be added to ER:BS
Matchups (C-E)
Camilo
– This character has yet to be added to ER:BS
Cathy
– Very much a stat check matchup, as neither player has many burst or skills that can be avoided. The main thing is to make sure you have your E for when she uses her R, as she can attempt to jump over walls with it.
Celine
– This character has yet to be added to ER:BS
Chiara
– Chiara can be very scary due to the kiting nature of her kit. Her E can root at a large range if it hits you, her Q is either a close range burst, or a long range poke, and her W shield lets her either block some of your damage or deal extra to you. The main issue with fighting her is the threat of her R, however as a high mobility character you have a good chance to just E away and make the R useless. Make sure you get away before she hits you 4 times with the R as then she can teleport and deal large damage to you.
Chloe
– This character has yet to be added to ER:BS
Daniel
– This character has yet to be added to ER:BS
Eleven
– Elevens skills are mostly unremarkable at the moment, W taunt isn’t very strong, the Q is near useless, and the E takes a second to charge, making it obvious when she is going to try and jump away. Her E does have a large distance so she can somewhat easily escape, however the main issue is her R. Eleven basically only does good damage when she pops her R and is in melee range with a target. The best bet is to force her to R, then E away until the duration is over, then re-engage.
Emma
– Emma is a hard skill matchup for most players and results may vary widely depending on who you are facing. Personally I don’t have many issues with fighting an Emma, the Q and W are mostly predictable and baitable skill shots, and the E polymorph can only buy her so much time. Her two R charges let her jump away, but she can only do this for so long and I find that I can force both jumps and force her HP down quicker than she can mine. Just don’t stand in her range and let her poke you.
Eva
– This character has yet to be added to ER:BS
Matchups (F-J)
Fiora
– Fiora is an interesting fight due to the nature of her being a burst melee and Jackie being a DPS melee. There isnt much you can realistically do other than try your hardest to stack on top of her and stat check. If you have Two-Handed skill you can often predict her burst combo and block it. Otherwise your best bet is to not let her kite inbetween combos and try to force her to stand and fight.
Hart
– Hart is a interesting fight at the moment due to her almost exclusively being played as ranged AA character similar to AR characters. She has multiple jumps, two small and one larger that can cross walls, that let her kit a little more effectively than other characters, but she is still vulnerable to being run down by Jackie. The main things are that she can stall a fight with her unique D charm and her large range R that stops the fight for a short duration, making 3rd parties more likely.
Hyejin
– Hyejin fights mostly as a burst combo mage using her passive fear as a main CC to let her land R hits against targets. Often enough you can force her to use her Q charges while poking at you, and avoiding the W root on the floor is generally easy. The E is a large wall jumping teleport that can also apply 2 of the 3 stacks of fear to you so you need to be prepared for it to be used in a combo, or as an escape. The main trick for fighting a Hyejin is to force the fear before her R is out so that she cannot easily hit charges on you, and then E into her.
Hyunwoo
– Hyunwoo is always either a burst combo mage, or a AA brawler and both are fought very differently. For the AA version, its mostly just a stat check between both players, all you need to do is watch out for his E stuns really. Fighting the mage variant is a little more scary, as you can often get one shot with a single mistake. Dodging his E is TOP priority, and avoiding his Qs is perferable. his R is only ever used in a E-R true combo, so there isn’t much of a point in thinking about it, and Jackie’s general lack of CC means Hyunwoo’s W is effectively useless against you except for maybe stopping your E empowered slow.
Isol
– Isol is mostly a rat. He is either a pistol spell amp trap spamming rat, or a AR bullet spewing AA rat, and both can be scary. Generally Isol is just a skill matchup of sticking onto him before he can get to place a large amount of traps or DPS you down with his AR and making sure you have a camera so that you can track him through his stealth E dash.
Jackie
– Jackie is an interesting matchup due to the sheer variety of weapons and playstyles she can employ, but the general skills stay the same. Avoid thier Q and hit yours if possible, and make sure you use W only when they are bleeding for the extra bonuses. Try to fight when you have Passive up and they don’t, or when you have R and they don’t, preferably both. The best time to use R is when they have fully committed to a fight and before them so that you have the most options for when to end your R for burst damage.
Jan
– This character has yet to be added to ER:BS
Jenny
– This character has yet to be added to ER:BS
Johann
– This character has yet to be added to ER:BS
JP
– This character has yet to be added to ER:BS
Matchups (L-N)
Laura
– This character has yet to be added to ER:BS
Lenox
– Lenox can very extremely scary due to her tanky and kiting nature. Keeping close will prevent the majority of the Q damage, but the E can space you back into it. The main issue is her W, which not only silences you, but grants her bonus movespeed. Her only true combo is D-R and the R only does damage when you are moving. If you cannot keep up with her you need to disengage, otherwise the trick is to try and DPS them down quicker than they can poke you down.
Leon
– Leon has large burst capabilities, but the majority of his burst relies on you standing on one of his pools or being next to a wall for his R. You can use this to fight him like a melee version of Adrianna, where you position outside of his pools to try and deny him the buffs he gains and prevent his E knockups.
Li Dailin
– Dailin is another high mobility brawler but her damage comes in bursts compared to Jackie. Her Q is the main source of damage as it is 3 separate skill hits that each cause her next AA to hit twice when empowered with her W (aka always). Her E can silence you but Jackie often doesn’t care about being silenced unless you need to E or end R during that time. Her R is either a large burst of damage or a escape tool. Generally you want to force her to use all 3 charges of Q while avoiding them and the intermittent AAs as that is the main source of her damage. Otherwise be prepared for her R as finishing damage, and keep in mind that her last Q use is able to jump walls.
Luke
– Luke is another melee brawler who focuses on DPS instead of burst, however he is still capable of burst. His Q is a skillshot that lets him dash to you (even over walls) on a reactivation and is the main source of his damage and mobility, it is generally easy to dodge the skillshot as it is slow and predictable. His W makes him attack faster and his E makes him teleport behind you and does some damage, both of which have little outplay other than just waiting and knowing that he has those options. His R is the main source of burst he posses, however the small delay makes it generally easy to predict and dodge. Overall the fight is a stat check for both players and you both have skills that can be used to dodge or shift the fight.
Magnus
– Magnus is currently the largest rat in ER:BS. His current meta revolves around being impossible to catch, having high burst damage, and overall focusing on 3rd parties to get kills and high placements. The way to fight Magnus is to not fight or chase him, in most cases you won’t be able to secure a kill and just put yourself in a vulnerable position to 3rd parties or ambushes. If you must fight him, beware his main combo of E-AA-R-AA. It’s possible to avoid the combo by positioning yourself where his E will not knock you into a wall and stun you, however he can still do considerable damage.
Mai
– This character has yet to be added to ER:BS
Nadine
– Nadine loves hunting animals, in fact, thats what makes her incredibly strong in late game. Nadine’s R makes her AAs empowered for a duration that deal massive bonus damage, however this skill has a long cooldown making it possible to bait out the R then re-engage once it wears off. She isn’t completely vulnerable without her R though, make sure to avoid the massive damage that her charged Q can deal. If dealing with a Nadine in late-game your best bet is to make sure she is constantly running from something, this prevents her from setting up her W traps and controlling an area.
Nathapon
– Testing In Progress
Nicky
– Nicky is a tricky fight for Jackie. The burst damage and CC she outputs rivals Yuki and if not played right, you can easily lose to a obviously weaker Nicky. The most important thing is to avoid activating her W guard, as it lets her strike back with a retaliation that will lock you down. The main advantage you have over Nicky is being more mobile, as her Q cooldown is longer than your E due to it mainly being a damage skill.
Matchups (R-Z)
Rio
– Rio is another annoying bow character to Jackie. Her kit revolves around dealing multiple hits for solid ENAD damage or longer range pokes, both of which are strong against Jackie as a melee. The main trick to fighting Rio is to not be kited by thier multiple quick uses of E to jump walls/corners while they maintain ranged DPS. Rio is vulnerable to melee damage if she gets caught out and you can often out DPS them in a straight fight with out them kiting.
Rosalio
– This character has yet to be added to ER:BS
Rozzi
– Rozzi is yet another kiting ranged character to fight, with very similar fights to Rio. The only difference is that Rozzi has multiple ways to make small gaps, instead of one jumping E. Unless you get the drop onto a Rozzi you may want to steer completely clear of them or focus on 3rd partying to get them out of the way.
Shoichi
– Shoichi is a very free matchup for most Jackie builds. His absolute lack of straight fighting power, and his reliance on his easily avoidable R for most of his burst makes him a easy target for a brawler. Most of the time you can literally stand still AAing a shoichi while he does his ult, and just kill him outright before he can manage to deal enough damage to you. He has some amount of chase ability, but he struggles to run away from fights.
Silvia
– Silvia is a hard matchup for Jackie, however personally I find it to be one of the most entertaining. Silvia wants to keep you at a medium distance so that she can wear you down before using her R form combo to finish you off, however the only thing keeping you from smacking her in the face is her normal E dealing a knockback at close range. The entire matchup often revolves around whether or not you can avoid (or if Silvia can hit) their E in order to stay on top of them and deal enough damage. Oh also she can use her R to just bike away with high movement speed.
Sissela
– Testing In Progress
Sua
– Sua is a fun and entertaining matchup for Jackie in my opinion. The majority of the fight revolves around forcing her to use her blind W on you, and avoiding the stun lock combo from her Q-E. Outside of those two things, the only thing you generally need to pay attention to is her E dash skill, and her using R to copy it to cast it twice. You can easily block a Sua’s path because her E skill will stop when it hits you, making it possible to jump over her and stop her right there.
William
– Testing In Progress
Xiukai
– Xiukai is the fat man of ER:BS, he builds like a tank and no one enjoys fighting him. Thankfully he isn’t very strong at the moment and he is reliant on his R to do any considerable damage quickly. The trick to getting rid of a Xiukai is to catch him in the early game before he can stack his passive, preventing the massive health and damage buff he gets in the late game. Both his Q and W slow, his E is a wall jumping dash, and his R is a cone of flames that casts multiple times. Keep in mind your health when fighting and save your movement skill for when he pops his R in order to prevent the majority of his damage.
Yuki
– Yuki is a harsh matchup for Jackie due to his E-Q combo disarming then stunning back to back. Thid prevents you from attacking for a good duration while you are taking damage. The best way to deal with Yuki is to outscale him or 3rd party him. However if you must fight him try to stick on top of him and deal as much damage as possible while his cufflinks are consumed. Try to save your E for his R as it can easily make or break a fight.
Zahir
– Testing In Progress
Farming Routes
The main idea for farming routes is to kill as many animals as possible in order to gain a weapon mastery advantage over other plays. A good route has the maximum amount of Wolves and Bears on the route.
Wolves and Bears typically spawn around the outside ring of the map, or at least in those zones.
Good examples of this are:
Beach (Left Corner): 3 Bears
Alley (Top Corner): 3 Bears, 2 Wolf Camps
Hospital (Right Corner): 2 Wolf Camps
Dock (Bottom Corner): 3 Bears
The other 4 outer ring zones include either 2 Bears or 2 Wolf Camps within said zone.
The first “round” of Wolves and Bears cannot spawn RNG items as of this time, so it is more important to get the level 3 Wolves and the level 5 Bears killed so that thier timer resets.
Second round of animals occur when that specific animal/set of animals respawns.
Bears take 5 minutes
Wolves and Dogs take 4 minutes
Bats and Boars take 3 minutes 15 seconds
Chickens take 2 minutes 30 seconds
I recommend playing Nadine if you want to learn or at least get used to how the efficiently farm animals as you traverse Lumia Island.
Other Resources
Possible Future Nadine Guide Link?
Korean stats calculator: [link]
Closeing Statements
It’s important to remember that
Skill comes with time and practice.
Each person learns at a different pace.
Someone, inevitably, has to be the first to lose the game.
There are many things to learn about ER:BS but the most important thing to remember is that first, and foremost ER:BS is a game. Learn to have fun!
Credits
Thank you for reading my guide, if you have any questions feel free to comment on this guide so that all may see both the question and my ensuing answer.
This guide makes use of images from the wiki, official game icons, and fanart.
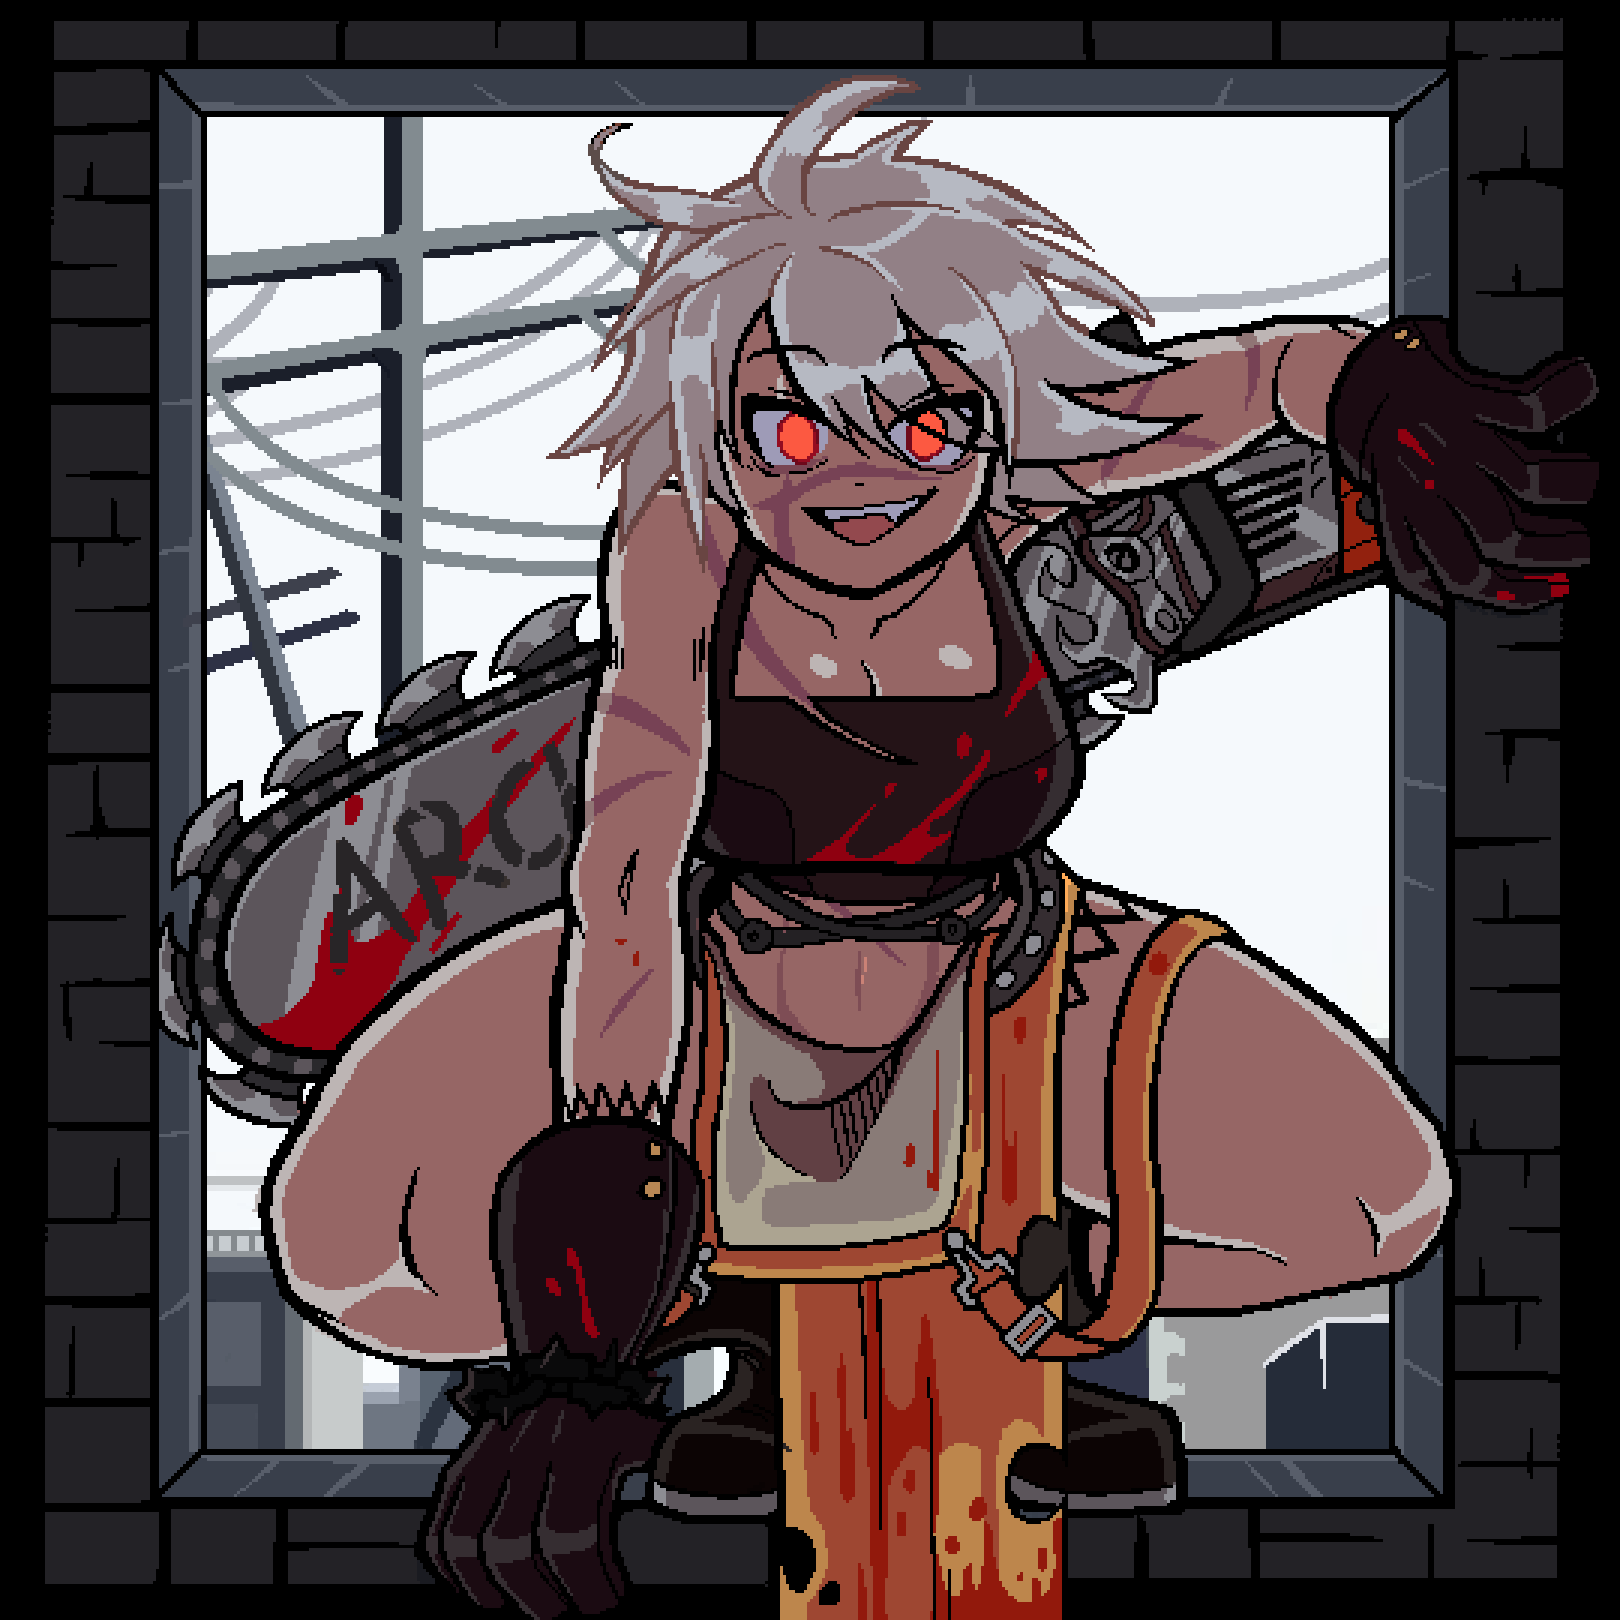
The guide title image is by ValmarDraws
[link]
Icons and Jackie models are from the wiki
[link]
Notable high rank Jackie Mains & contributors from the Jackie’s Jammers discord are
Bamorsha
BanditBagel – Currently #1 NA Jackie
RATJAMMER
FrankieDoodle
Shouix