The Definitive Glitch World Guide
Glitch Worlds, What About Them?
Stuck on a glitch world? Looking for a little help in unlocking those really weird achievements? Look no further! This guide will provide you thorough descriptions of what obstacles you will face on each glitch world, and give useful tips on how to get past them. You should always bear in mind that these levels are incredibly challenging the first time you try them, and intended to be so. Even with a guide to nudge you to the right direction, it will take practice to get your timing and routines right.
 You probably know this already but I would still like to provide some background. Glitch worlds are special hidden warp zones. They have the same 8-bit aesthetics and music the normal warp zones have but contain no bandages. They only have one level instead of three, and because you only get three lives, they are significantly more challenging than regular warp zones (except maybe Skyscraper). Unlike normal warp zones, which are unlocked by entering a portal on a level, glitch worlds are unlocked by rescuing Bandage Girl when she’s ”glitching” (more about that later). Once unlocked, glitch worlds appear as yellow ”minus levels” on the light world map of their respective chapter. There is one glitch world per chapter except Cotton Alley (fortunately), and beating each rewards an achievement with a strange name such as N#7*<1!23 (The Forest), ^**5%_=+12 (Hell) or N&8^2^%$1`` (The End).
As I stated above, entering a glitch world the first time requires you to beat a normal level with glitchy Bandage Girl on it. When she glitches, she twists around and makes weird noises, so when this happens it’ll be quite easy to notice. When she’s like this and you touch her, instead of Dr. Fetus popping up and taking her away, you get warped into a glitch world. Hooray! The Bandage Girl’s chance to glitch is based on a formula that takes into consideration your chapter completition percentage. Light and Dark worlds have an equal chance for her to glitch, it doesn't matter which you're in. You will also need to beat the chapter boss before you can unlock a glitch level. Many thanks to pointless[supermeatboy.com] for explaining the mechanism in detail.
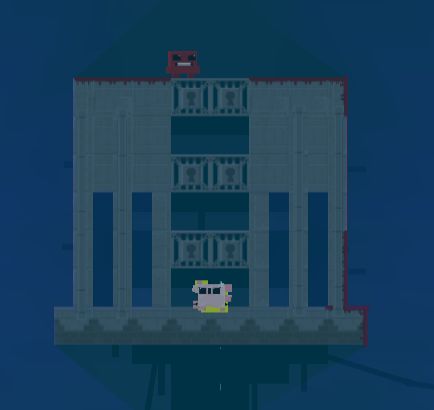 A good level to try and get Bandage Girl to glitch is a one where you can see her right after spawning, so you don’t waste time playing through a level only to find out she’s not glitching. Being able to kill yourself easily in case she’s standing there all normal is important as well, but considering the game we're talking about, that shouldn't be an issue. Later, at the beginning of each section I will give couple of suggestions for such levels. I’ve tried to take into consideration how easy the levels are to beat, since if you find glitchy Bandage Girl but the level is too hard to beat consistently, it’s not very helpful. If you’re A-ranking levels and collecting bandages you’re also quite likely to hit a glitch world without even trying. The first chapter where I had to actively look for glitchy Bandage Girl was either Hell or Rapture I think, so the level suggestions are there just in case you're having problems.
Unlocking glitch worlds is one thing, but you also need to be able to beat them. In the following sections I will explain how I think these levels should be completed, or at least how I am able to complete them consistently. In each section I will also include a video of myself completing the respective levels using the strategies described here. They should provide visual aid in case what I write here is complete gibberish. And remember that like warp zones, glitch levels don’t measure the time it takes you to complete a level, so take all the time you need planning your next move if you feel like you need to.
What Are They?
You probably know this already but I would still like to provide some background. Glitch worlds are special hidden warp zones. They have the same 8-bit aesthetics and music the normal warp zones have but contain no bandages. They only have one level instead of three, and because you only get three lives, they are significantly more challenging than regular warp zones (except maybe Skyscraper). Unlike normal warp zones, which are unlocked by entering a portal on a level, glitch worlds are unlocked by rescuing Bandage Girl when she’s ”glitching” (more about that later). Once unlocked, glitch worlds appear as yellow ”minus levels” on the light world map of their respective chapter. There is one glitch world per chapter except Cotton Alley (fortunately), and beating each rewards an achievement with a strange name such as N#7*<1!23 (The Forest), ^**5%_=+12 (Hell) or N&8^2^%$1`` (The End).Unlocking Glitch Worlds
As I stated above, entering a glitch world the first time requires you to beat a normal level with glitchy Bandage Girl on it. When she glitches, she twists around and makes weird noises, so when this happens it’ll be quite easy to notice. When she’s like this and you touch her, instead of Dr. Fetus popping up and taking her away, you get warped into a glitch world. Hooray! The Bandage Girl’s chance to glitch is based on a formula that takes into consideration your chapter completition percentage. Light and Dark worlds have an equal chance for her to glitch, it doesn't matter which you're in. You will also need to beat the chapter boss before you can unlock a glitch level. Many thanks to pointless[supermeatboy.com] for explaining the mechanism in detail.
A good level to try and get Bandage Girl to glitch is a one where you can see her right after spawning, so you don’t waste time playing through a level only to find out she’s not glitching. Being able to kill yourself easily in case she’s standing there all normal is important as well, but considering the game we're talking about, that shouldn't be an issue. Later, at the beginning of each section I will give couple of suggestions for such levels. I’ve tried to take into consideration how easy the levels are to beat, since if you find glitchy Bandage Girl but the level is too hard to beat consistently, it’s not very helpful. If you’re A-ranking levels and collecting bandages you’re also quite likely to hit a glitch world without even trying. The first chapter where I had to actively look for glitchy Bandage Girl was either Hell or Rapture I think, so the level suggestions are there just in case you're having problems.Unlocking glitch worlds is one thing, but you also need to be able to beat them. In the following sections I will explain how I think these levels should be completed, or at least how I am able to complete them consistently. In each section I will also include a video of myself completing the respective levels using the strategies described here. They should provide visual aid in case what I write here is complete gibberish. And remember that like warp zones, glitch levels don’t measure the time it takes you to complete a level, so take all the time you need planning your next move if you feel like you need to.
CH1: The Forest

Suggested level(s): 1-3 The Gap / 1-3X BZZZZZ
 Once the level loads, start running to the right. You don’t need to jump to avoid the first set of spikes, just be careful not to hit the ones next to the wall. Don’t be afraid of the saws coming down at you, but jump to the wall immediately after touching the ground. If you time it right, you should get on the wall without dying. Then just wall jump up the right side of the shaft making just a brief pause between each jump, so you don’t hit the blades. Mind the spikes on your left as well. You can have a break at the bottom of the second shaft once you’re there (should take three wall jumps, not counting the one that starts from the ground) but since you already have a good pace, why stop there? Instead, land your third wall jump on the left side of the second shaft, where there’s another saw shooter trying to kill you. Your fourth wall jump should land below the spikes on your right. There you can again jump back to the left side of the shaft. One final jump and you’ve passed the first section of the first glitch world. Hooray! The final wall jump might not have enough height to take you out of the shaft buy you can just slide up the wall to make it to the grass. Once you figure the right pace you’ll get past the saw shooters without having to stop even once.
The next obstacle is to get over a lake using three-block-high pillars, each with spikes on top. Yay, more wall jumping! There are four of these pillars but in order to get to the other side you will only need the upper two. Slide down the wall and jump to the left side of the first pillar. Jump over the spikes to the other side of the same pillar, repeat with the second one, and you’ll find yourself safe on the other side. There you’ll see some spikes on the ground and one last shaft with saws shooting down on both sides. Don't wait there too long or the saws will start hitting the ground simultaneously, making it more difficult to climb up.
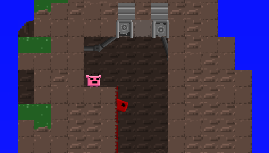 Jumping over the spikes is a bit tricky and you’ll probably die the first couple of times you get to this point, but with practice it should become very easy. Once you’re at the bottom of the shaft, watch the saws hitting the ground on your left. Just before a saw is about to hit the ground, jump up and to the left wall. Then just wall jump right-left-right-left-right-left your way up. Don’t think too much, just do it. Congratulations, you’ve just completed the glitch world -1.
CH2: The Hospital

Suggested level(s): 2-10 Johny’s Cage / 2-10X The Kracken
 Glitch level -2 begins in a room with some platforms and spikes. You need to get to the upper right corner where you can enter a corridor with two saw shooters on the left end, one shooting saws across the floor, another one across the ceiling. To get there, just ignore the platforms and jump to the wall on your right. Wall jump up avoiding the spikes, and you’ve passed the first room with very little effort. When entering the corridor, be careful not to get killed by the saws. At this point you will only need to mind the floor saws. There’s a small gap on ground-level that you need to get through so go near it, wait for a saw to pass and go through. You can try to go all the way to the left through another gap near the ceiling before another saw comes at you, but if you’re not fast enough and your timing is off, you’ll get killed by the ceiling saws. So once you have gone through the first gap, stand somewhere around the second and the third window. Wait for a floor saw, jump over it and then immediately jump again, this time higher, and go through the gap near the ceiling. Don't worry about the ceiling saws here, if you make it to the passage and keep running to the left you should get out of the way in time.
Now you need to climb a wall to get into another corridor which is a mirror of the first one. Wait for the saws to emerge, and immediately go after them and dash through the corridor as fast as you can. Annother set of saws will shoot out shortly behind you but if you time your jump right, you will get to the other end of the corridor before they reach you.
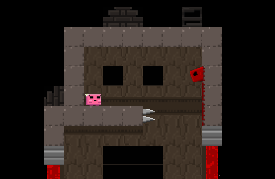 Next, you need to get over two pools of blood. The ceiling above the first pool is quite low so you need to make the jump from the wall. If you look at the wall you’ll notice some of the blocks are darker than the others. To get over the first pool you’ll need to make the jump from the block below the darker one. The second pool can be crossed with a wall jump as well, but it’s considerably more difficult. I suggest you get on the pool’s edge and jump from there. Jump to the opposite wall and climb to safety.
Finally you need to use three fans to propel yourself upward. Watch out for the streams/waterfalls of blood (bloodfalls?!). They will kill you. Get on the edge of the platform next to the first fan, and carefully walk on it. It will take you near the ceiling, and you can steer yourself to the next platform. Mind the spikes. The next fan requires you to jump above it. Stand on the darker block next to it, and jump. It should take you high enough so you can make a wall jump from right to left. Repeat with a third fan (again there are spikes to watch out for) and you’ve got Bandage Girl.
CH3: The Salt Factory

Suggested level(s): 3-3 Push / 3-3X The Red Room
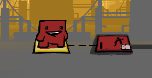 Fun with missiles! Things will get a little hectic here but don’t get discouraged. All the moving platforms and missile launchers make this level somewhat unpredictable, but I'll do my best to describe a strategy I find reliable.
Get down the shaft avoiding the spikes. You can either slide down the walls, or try to make a freefall. I don’t think I need to tell you which one is more safe. However, a successful freefall will allow you to complete the first part of this level with much less hassle, so I suggest learning how to pull one off.
Once you’re at the bottom, jump on the horizontally moving platform before the missile launcher has a chance to fire at you. Then jump to far right. You don’t need to ride the vertically moving platform, jumping up the wall next to it works just as well. You can safely climb the wall, the missiles won’t hit you as long as you keep moving. Once you’re high enough, jump as far to the left as possible. If you managed to pull off a freefall at the beginning, you should be able to land on another moving platform. If you used the walls getting down instead, you will have to wait for the platform to move closer. If this is the case, don’t worry. The missiles are easy to dodge while you’re on the wall. Once you’re on the platform, get the key and jump back to the right, again as far as possible. Climb the wall and enter another shaft. This one is filled with spikes so you must do a freefall.
NOTE! Leaving the vertically moving platform completely unused is obviously not how Team Meat intended this level to be completed. Whether you need to use them depends on where the horizontally moving platforms are when you jump off of them. In most cases my jumps reach the wall without the need to use the vertically moving platforms, and when I do land on them it's because they just happen to be there. However, I prefer to not deliberately use them.
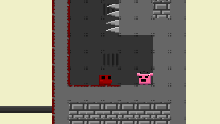 Once you’re at the bottom of the second shaft you are greeted with some missile fire. You can dodge by just jumping straight up each time a missile is about to hit you. Even if the horizontally moving platform is very close to you, it's safe to get on it because the missile doesn't fire immediately again. However, I suggest you get off the platform immediately when it does. On the video I have to land on the vertical platform, but if the first platform is in a good position that won't be necessary. When you reach the wall, it’s pretty much the same as the first part of this level. Climb up, get the key and go down one final shaft to reach Bandage Girl. The third shaft is similar to the first one so getting to the bottom shouldn’t be a problem at all. I recommend sliding down the walls since it's safer, and it would be a shame to die at this point.
CH4: Hell

Suggested level(s): 4-6 Leviathan
 Although Hell as a chapter starts to get pretty though, its glitch level is probably one of the easiest. The first part should be a no-brainer. Jump from platform to platform until you reach the highest one, then jump into the shaft with spikes covering both walls. Try to stay in the middle during the fall so you don’t hit the spikes. Also, if you’re too much to the left you will fall into lava.
Next, you’ll have to get past two narrow shafts with balls of magma bouncing up and down. Wait for a ball to emerge, and follow it. Jump to the right side wall, slide as high up as you can, then do the same on the left side and you’ll find yourself standing safely on a ledge. Gather your breath for as long as you want, then wait for a magma ball going down to pass you, before sliding up the right side wall to the top. You can start sliding up the left side wall of the ledge before the magma ball has passed you. This way you will have more time to get all the way up before the ball comes back. Getting back down on the other side is easy. Wait for a magma ball to start falling, then slide to the ledge below. Wait for a magma ball to bounce up before descending to a small platform below.
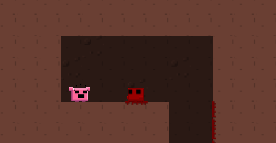 Now you need to pass three tunnels with magma balls rolling towards you. The first two only have one ball rolling at a time, so they are quite easy to get through. Enter the first tunnel after a magma ball has fallen into the pool in front of you (it will bounce from the edge of the platform you're standing on, so watch out for that). There will be another ball coming toward you shortly, just jump over it. If you’re fast enough, you might be able to enter the second tunnel before a magma ball has launched there. But if you don’t, be careful not to get killed when you enter. Watch the third tunnel, and when both balls of magma have fallen into a pool at the end, you can go in. Timing is crucial here. When you’re in the third tunnel, advance with caution. Dodge each ball with quick jumps. On the video I stand near the edge waiting for the balls before going forward, but if you feel confident, you can go forward right away. Just be ready to dodge the balls when they come. You’ll find Bandage Girl waiting for you in a small cave above the last tunnel.
CH5: Rapture

Suggested level(s): 5-7 The Fallen / 5-10 Grinding Mill
 Rapture’s glitch world is in my opinion the toughest one to beat. And exactly for this reason it's also the most fun when you learn how to get through it. It takes place in two abandoned skyscrapers filled with missile launchers and buzzsaws. I can’t give very thorough instructions, but I’ll try to give some useful insight on how to get through this mayhem. The most important thing to keep in mind is that you need to be precise. This level is pretty much just keeping momentum, wall jumping, and trying to not get killed by various things while doing so. You won’t have very much time to plan your next move, but don't get discouraged.
Start going up the first shaft from the left side wall, and keep jumping up. Not too fast, not too slow. The second shaft only requires three jumps. Start jumping from the right side wall, then slide up the left wall and jump to the corridor ahead. Before the next shaft, there is a threshold which you can hide behind, and prepare for the next trial. The next shaft has some saws on the walls and a missile launcher at the bottom. I find that if I focuse on getting through the saws as fast as possible, the missile practically never hits me. The next shaft has a missile launcher at the bottom as well, and this time it has more time to notice you as you approach it. Get into the shaft by wall jumping from far left, and be careful not to touch the spikes. Once you’re up, there’s one final shaft with a missile launcher waiting for you at the top. This one can still fire at you when you exit the shaft to the left, where there’s a formation of spikes similar to the one you went past before. Make a long wall jump to the left below the missile launcher. You’ll fly over the first spikes. Then slide up the wall on your left, and jump over the second spikes. You’re safe for the time being.
Now that you’ve made your way to the roof of the first tower, you need to get back down. Fortunately, the descent is simple. You only need to slide down a wall little by little, occasionally switching a wall when a buzzsaw blocks your way. There are several saws on both walls, and the space between them becomes narrower the further down you go. Once you’re almost at the bottom, a missile launcher will try to fire at you. Quickly get under a threshold where you’re safe until you start your second ascent.
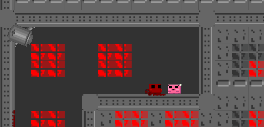 When you enter the platform, the missile launcher will fire at you. You can dodge the missiles by simply jumping up. I suggest you don’t stay there for very long, but proceed to enter the shaft as soon as you’ve dodged the first missile. This shaft has spikes which, at least for me, work the same way the saws previously. Focuse on dodging the spikes and the missiles coming up probably won’t hit you. Once you’re up you can already see Bandage Girl. She is guarded by one last missile launcher. A good way to get past this one is to continue wall jumping, but you need to be extra fast. You can also stand somewhere below the missile launcher, dodge couple of missiles on the floor, and then get up as quickly as you can.
That wasn’t so bad, was it?
CH6: The End

Suggested level(s): 6-2 Schism / 6-3X From Beyond
 Glitch level -6, the last gauntlet. Closely resembles the ship from Super Mario Bros. 3, don’t you think? The beginning is pure chaos, and that’s why you don’t even need to think. You are a juggernaut.
Jump over the first saw and land next to the smaller one, that also shoots out even smaller blades. If you jump right as the level loads and go far enough, you won’t hit the blades. If you jump immediately again, you’ll get out of the way before more blades fly out. Get down to the passage where there are three saw shooters. If you’re on time you don’t even need to stop there, just run forward. If you get stuck here and need to wait, start running when the two simultaniously firing saws have hit the floor. Then slide up the wall for a short while and jump over the saw. Steer as far to the right as you can. You should get past all the blades that are flying around. If you don’t, try again. Eventually you will succeed.
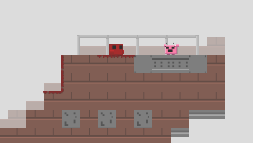 You can take your time with the platform. Wait for it to come near, and let it take you over the spikes. After the pit there is a passage with a single saw shooter, which is very easy to get past. Note that it's possible to fall off the boat when getting on the saw shooter so be extra careful there. In the video you see me use the wall behind it to get on top of it. It's safest that way. Last obstacle is a missile launcher. Get to far left and let it fire at you. Dodge the missile (or don't even wait for it), and you should have enough time to make a long wall jump all the way to Bandage Girl.
More Super Meat Boy guides
- Bandage and Character Unlock Locations Guide★ 5 (2.2k)41k views3.2k ♥3 minUpdated Sep 29, 2020
- Achievement Guide for Super Meat Boy★ 5 (1.1k)38k views1.6k ♥7 minUpdated Jan 4, 2020
- Hardcore Achievement Guide★ 5 (851)23k views932 ♥19 minUpdated Aug 1, 2017
- Все достижения (All achievements)★ 5 (1.1k)23k views1.4k ♥6 minRussianUpdated Sep 24, 2015
- Прохождение на 100% (100% Walkthrough)★ 5 (807)22k views1k ♥2 minRussianUpdated Dec 25, 2014
- Playable Characters and Their Special Abilities★ 5 (408)18k views430 ♥14 minUpdated May 4, 2015


This guide was created by its original author on the Steam Community. Are you the author and want it removed? Request removal.