
Overview
This guide shows the mechanics behind Gau, the Veldt itself, Leap and Rage, the outcomes of the Rages you use and learn which ones you should use to quickly slaughter any opposition that dares challenge you. It will also show strategies in how to spec Gau to be as overpowered as any character in the game.
Introduction
If you are reading this, you are either using Gau and want a little more information on how to use him correctly or you just got him and you want to get an idea of how he works. Or maybe you think: “Gau is crap. Why am I even using him!?” and then you notice there is an achievement called King of Beasts on the card (get all 253 Rages). Or maybe you are a returning fan and you are sick of using Stray Cat and want a new use for him. Whatever the reason, the Gau Bible is here for you.
After completing the game 5 times now, I used Sabin almost religiously. However, of the 5 playthroughs, I only did Gau once. At the time though (it was my 3rd playthrough), I didn’t fully grasp his usefulness and I mostly abused Stray Cat (Catscratch) and Tyrannosaur (Meteor). It wasn’t until I bought this version, started using him more and used the knowledge of Stat Maxing I got from my 4th playthrough. Eventually, I came to the revelation of his usefulness when I brought him to the Magitek Facility and plowed through all the formations with 2 Rages. It was then I really started to enjoy playing around with Gau and figure out everything I could about his mechanics. Eventually I was able to beat all the major bosses of the game with Gau’s assistance or Gau just flat out wrecks the enemy single handedly.
If used correctly, Gau can be one of the most adaptative and brutal characters in the game. His Rages have multiple advantages:
- Some have access to attacks that you don’t have at that point in the game, whether it would be from Magicite, Dances, or Lores. There are some attacks you have NO means of accessing and are exclusive only to him.
- They can carry Elemental defenses and Status defenses for tricky monsters.
- They can offer effects that can either hinder or greatly benefit Gau.
Although there are weaknesses, such as some rendering him Undead or making him more vulnerable to Fire. However, you can easily adapt with the correct Rage choices, put up safeguards through equipment, or use alternatives to maintain them in battle (eg. Death or Poison can heal Undead or you can utilize absorptions as an alternative to heal). If you want to be a Gau player, you will also need to have some general idea on which Rage does what and their general strengths and weaknesses. With 253 Rages in this game, this can definitely be troublesome to some players, especially those starting out or even late game when your Rage Menu gets massive and full of options.
I will warn you that this guide is not only for those who wish to acquire all 253 Rages, but it will also be more centralized on using Gau in actual combat and enjoying it rather than seeing him as a tedious chore to complete. If you wish to play to collect the Rages, you can still use this guide, follow the Walkthrough and use the provided checklist in the Appendix section. However, I suggest you still give a Gau a try when you can, even if you must use his OP Rages to do so. The guide’s length is both a side effect of being thorough and to prevent 20 questions from being asked later.
Also, if see any mistakes or have any suggestions to improve the quality of this guide, post them in the Comments section. This guide is indeed massive and it is a lot easier when multiple eyes pick up on mistakes.
On an off note, I call this the Gau Bible because I refer to him as God Emperor Gau and his teammates are nothing more than his disciples or librarians; smiting those who dare challenge the presence of the one, true God.
Finally, if you notice in my Attacks section and my videos that my font for the game is different from yours, this is because I changed the font to Book Antiqua Bold. You can download the font file and instructions to replace it here.
Acquiring Gau
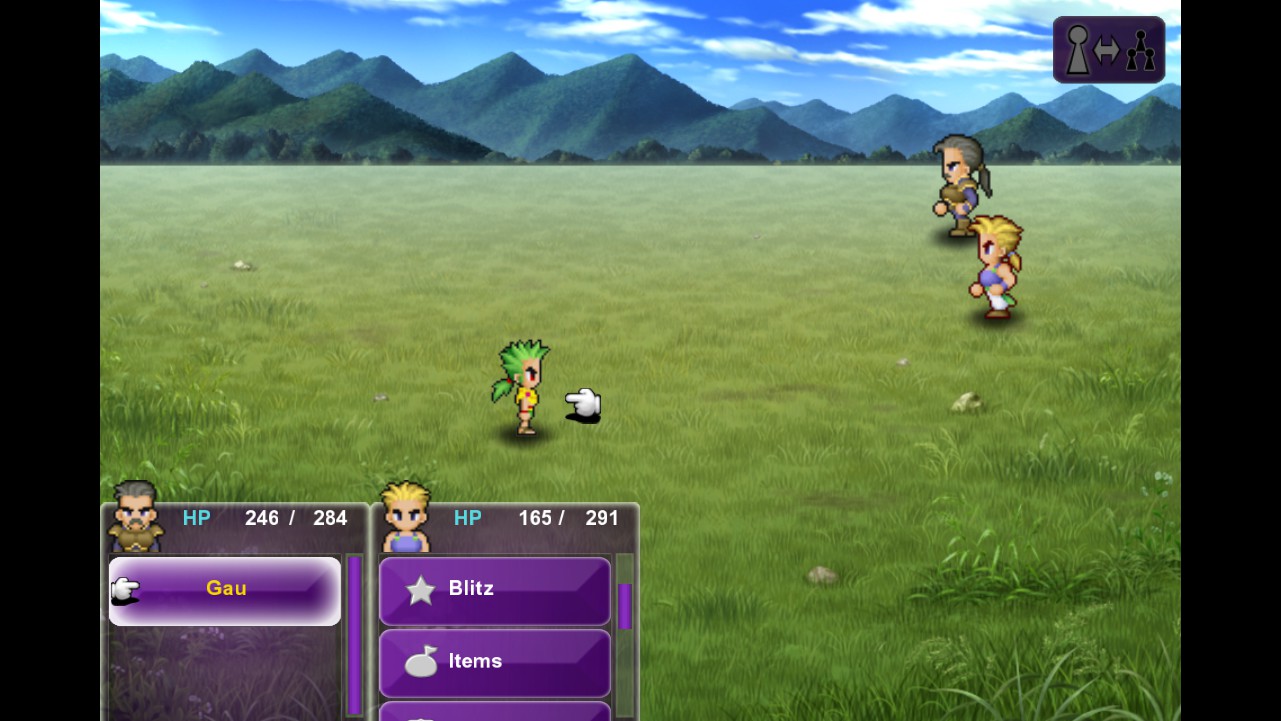
In Sabin’s Scenario, you will eventually have to face a series of Opinicus Fish and a Rhizopas boss. After surviving the encounter and washing up ashore in The Veldt, Gau will appear. You can name him whatever and he runs off to the Veldt Badlands.
The overworld theme will then change to Wild West while you wander the Veldt. The enemies you face will consist of previously encountered enemies and their formations (mechanics will be further explained in the Veldt Batlle Formations seection), including Surrounded and Pincer Attack formations. These also include enemies in areas are no longer accessible, such as the enemies on the Phantom Train or World of Balance World Map when you are in the World of Ruin.
When you slay all the enemies, there is a chance Gau will appear (See the Leap portion of the next section for more details). He will then say he is hungry and wants food. If you attack him by any means, he will Run Away. You will need to purchase Dried Meat from the town nearby and then feed it to him. When you select the Dried Meat from the Item command’s menu, you will need to press the Select button (Tab on keyboard or Back button on Xbox Controllers by default) so that you can target Gau, since he is classified as an enemy.
Once fed, he will join your party permanently. You will then get a brief tutorial from an Imp on how to use Rage and Leap. You can then head to Crescent Mountain or stay and get some Rages. I recommend doing the latter as his starting Rage pool doesn’t have much to offer.
Once you done with the Split Scenarios, you can easily get back to the Veldt at any time before acquiring the Airship. Doing so helps if you plan on bringing Gau to Zozo or the Magitek Research Facility. The con is it is a massive hike there and back.
- From Narshe, go south and go through the South Figaro Cave
- On the other side, go through Mount Kolts
- Go back into the Returner’s Hideout and head to where the Raft was, then jump onboard. Take the shortest route possible.
- After the raft ride, you will be at the Old Man’s House where you started Sabin’s Scenario. Head to the Phantom Forest
- Take the path you took to get through to where the Phantom Train was and you will end up at the other side
- Travel to Baren Falls then jump off again. You will then be back in the Veldt
- If you wish to return, go through Serpent’s Trench and hitch a ride in Nikeah to South Figaro. In South Figaro, a man will help you sneak out of the occupied city and you will be back on the world map again.
In order to get Gau back, you need the Falcon and at least 1 other character already acquired (Gogo, Mog and Terra are the easiest to acquire and require the least amount of work) or you fly to Kefka’s Tower, split your 4 party members across the 3 teams, then re-enter the ship. Either way, you can then switch party members around if there is at least 1 person below deck. With a blank slot in your team, wander around the Veldt and Gau will have a chance to return after a battle. You will not need Dried Meat this time.
Mechanics – Leap and Rage
Outside of Magic and being under Berserk, Gau cannot directly attack enemies. He must “attack” through the Rage ability. When you select Rage, a list of monsters will then appear, made up of all the Rages that you have learned. You simply select a monster, confirm it on Gau and you are done.
Once Gau commits to the first attack, he will then enter a Rage state and begin getting the Rage’s side effects: The side effects are:
- Purple, rising bubbles emit from Gau’s head
- Any elemental resistances and weaknesses the monster has, provided Gau’s gear doesn’t overwrite them (see the Stats and Raising Gau section).
- Any automatic status effects, be they positive or negative the monster had, provided Gau’s Relics don’t make him immune to them (see Rages with Benefits section).
- Gau’s typing will change to that of the monster. For example, if the monster was Undead, then Gau becomes Undead (see Rages with Curses section).
- Any status immunities the monster has. However, this will not remove any statuses Gau has beforehand if he becomes immune (eg. Intagir is Silenceproof and Gau enters the Rage with Silence, Gau will still be Silenced and he cannot cast Transfusion until cured of it).
Each turn, Gau can either do a standard attack or a special ability associated with the Rage. Each has an equal 50% chance of being executed. Some abilities are on the enemy’s attack or Confuse card (eg. Wyvern using Cyclonic or Behemoth using Meteor), while others are completely foreign to them and don’t exist (eg. Cirpius using Hastega or Io using Flare Star).
Once he starts Raging, the player forfeits complete control of Gau and he will attack on his own with random targeting when his ATB gauge fills. His targeting will work as follows:
- All attacks and special attacks that deal damage will be targeted at a random monster, regardless of Auto effects like Reflect or resistances.
- If the attack has the option to attack all targets, there is a chance he will do so.
- If the special involves buffing or healing, he will use these on random allies regardless of status. Cure-based spells also have a chance to be cast on your entire team.
- If Gau has been hit with Entice or Zombie, targeting is reversed towards your teammates. Confusion has no effect on Gau’s targeting.
- If Gau is under Berserk, then he will still have a chance to use the special attack, even if it is Magic-based. Gau’s physical power will still be amplified by Berserk’s effects.
- If Gau is Silenced and the Rage’s special is Magic-based (costs MP if standard cast) and isn’t a Mog Dance move, then Gau will not use it and just attack normally until Silence is removed.
- If Gau has turned into an Imp, then not only will Gau be unable to use any special attack outside of Dance attacks or Special Physicals but his physical power gets reduced. Luckily, most Rages are Impproof.
- If Gau has been hit with Overture and either him or another party member attacks the caster with a standard or an amplified physical Special, then the attack will be redirected towards Gau. The effect lasts until Overture is cast on someone else or the caster or target are killed.
The Rage continues until either Gau is KO’d, Petrified or the battle has ended. Upon KO or Petrify, all the benefits and negative effects the Rage bestows will be negated and Gau will return to normal typing if he was Undead. When Gau is restored, you can then control Gau again and either repick the Rage, do a different one or do different commands.
A helpful strategy to temporarily shut down Rage attacking in boss fights is attempt to Run Away. While running away, Gau will not fight back and will run away every chance he gets, but he will still maintain their benefits and disadvantages. This is a helpful strategy against bosses like Angler Whelk or Chadarnook who’s weak spot disappears and reappears. Be warned! This affects all party members as well, so make sure you are in good standing status and HP wise before you apply the leash.
There are 253 possible Rages in the game, all with their own combination of powers and defenses. The player will need to ascertain which Rages are good for which purpose based on:
- The skill the Rage has a chance of doing
- The enemies in play.
- The attacks the enemies are capable of
- The positive and negative effects of the Rage
- The equipment and stats of Gau himself.
In the World of Ruin, you will eventually meet Gogo the Mime. Gogo can have his command card set to whatever you wish and he can Rage like Gau. The difference with Gogo doing it is he can equip weapons (Flails, most Daggers and Rods) and certain armors that Gau cannot use himself. Gogo can also team up with Gau to do 2 different Rages at the same time and Gogo’s Rage selection is the same as Gau’s. See the Raging with Gogo section for more details.
To learn new Rages, Gau has to use the Leap command, which is only available in the Veldt. When Gau Leaps, he will be temporarily removed from the party and the battle will end in a draw. Leap cannot be selected under the following conditions:
- He is the only character on the team
- The rest of his teammates are under a combination of KO, Petrify or Zombie.
- If he is under an effect that forfeits control like Confuse, Berserk, Zombie, Entice or already Raging.
Afterwards, there is a 5/8 chance at the end of every battle that Gau isn’t there that he will return. After a few seconds, Gau will then say a few things and then he will rejoin your party again. If you attack him by accident during his speech, he will run off and you will have to repeat the process until he returns. Note that Gau will not return if:
- The battle started off with you Surrounded
- The battle started off or ends in an Ambush.
- You surround the enemy yourself.
- You run away.
- If you replace Gau with someone else from your party to make it a party of 4.
- Factoring in all conditions, the formation has a maximum of 6 enemies
When Gau rejoins your party, he will learn the Rages of the monsters that are learnable from the fight (in some fights, there are enemies you don’t learn Rages from) he Leaped and the battle he rejoins you. Both fights factor in the original combatants. He will not learn Rages from any monsters that appeared in between the fight he Leaped and the fight he comes back. If you whacked Gau by accident, the fight he appears in is void and doesn’t count.
It is wise to make sure that you spare the last monster in battles in the event any allies are under Berserk of Zombie. Purge the effects or put the character under Stop or KO them if you cannot remove it. If you fail to do so, there is a chance Gau will return and your Berserked character may attack him, forcing him to flee and you lose potential Rages.
Say you enter this hypothetical battle, in this case it is 2 Vector Hounds and a Commander. It is a fight from Locke’s scenario.

Then, after a few battles, Gau returns after defeating this party, a Valeor and a WIld Rat (Although Gau is here, I am using this battle as a hypothetical example).
Gau will learn the Rages for the Vector Hound (since they originally participated), Commander, Valeor AND Wild Rat if he has previously not done so and you can use them in future battles.

In either Leap or Rejoin scenarios, you will not get drops, Bestiary information, Gil or AP from either battles. However, you will keep any stolen or morphed items earned in battle.
Mechanics – Rage Menu (Part 1)
As you accumulate more Rages, you will find your Rage menu can get incredibly cluttered. This can be not only an incredible turn off. but it can quickly turn into a disadvantage when you are playing with Gau on the Active ATB setting. You can end up taking damage or even killed trying to find the Rage you wan or eat up a large amount of time on Wait. As time goes on and you use Gau more and more, you will get more comfortable with the menu and you can alleviate the disadvantages. Here are some tips I have found while dealing with the menu:
- When the battle starts, analyze the combatants and immediately decide a Rage before Gau or Gogo’s AT guage fills. This will save on browsing time.
- If you are at the top of your list, you can press Up to go to the bottom instantly. Make sure you browse for your Rages carefully so you don’t overshoot the one you want.
- Figure out patterns between their locations. For instance, General and Guard Leader and Covert all hang out together. Io and Baalzephon will always appear near the bottom of the list, etc.
- Set your Cursor to Memory. This will save the last selection you made for the next battle and will also keep your current position if you need to back out of the menu and see whats going on. Note that Gau and Gogo have separate selections when using Memory.
- If your time is set on Active and you see attacks going off, have someone stall for time by using a long animation attack, general commands or heal spells while you find the Rage you need.
- Consider picking a Rage for the attack and not for the side effects if necessary. Just make sure you know that Rage’s strengths and weaknesses when you select it.
- If you are about to face a Boss and your cursor is set to Memory, you can use a normal encounter to get the Rage you will use against that boss ready. That way, the moment the gauge fills in the boss fight, you can Rage immediately.
The Master Rage List is as follows (attack in parentheses):
(Critical)
(Fire)
(Fira)
(Water Scroll)
(Lullaby)
(Holy)
(Bio)
(Shock)
(Thundara)
(Cura)
(Thundaga)
(Stone)
(Level 3 Confuse)
(Tsunami)
(Gravity)
(Will O’ The Wisp)
(Banish)
(Break)
(Snare)
(Poison)
(Net)
(Megavolt)
(Snowstorm)
(Incisor)
(Cat Scratch)
(Chomp)
(Bite)
(Snowstorm)
(Tackle)
(Cyclonic)
(Aqua Breath)
(Aqua Breath)
(Meteor)
(Crawler)
(Fireball)
(Sandstorm)
(Holy)
(Northern Cross)
(Disaster)
(Meteor)
(Break)
(Featherdust)
(Shamshir)
(Cyclonic)
(Net)
(Level 3 Confuse)
(Iron Stinger)
(Berserk)
(Megavolt)
(Metal Cutter)
(Bio)
(Entice)
(Lifeshaver)
(Bio)
(Poison Barb)
(Ink)
(Pincer)
(Aqua Breath)
(Sticky Goo)
(Break)
(Quake)
(Sandstorm)
(Venomist)
(Imp)
(Magitek Laser)
(Magitek Laser)
(Sonic Boom)
(Gravity Bomb)
(Blaze)
(Sticky Goo)
(Lifeshaver)
(Poison)
(1000 Needles)
(Sticky Goo)
(1000 Needles)
(Self-Destruct)
(Haste)
(Blaze)
(Lullaby)
(Meteor)
(Blizzara)
(Magnitude 8)
(Break)
(Curaga)
(Meltdown)
(Dischord)
(Slowga)
(Gigavolt)
(Thundara)
(Traveler)
(Tail)
(Numb)
(Clamp)
(Sandstorm)
(Blizzara)
(Bad Breath)
(Digestive Acid)
(Death)
(Wind Slash)
(Swing)
(Cura)
(Wind Slash)
(Snowstorm)
(Holy)
(Holy)
(Thundara)
(Stone)
(Thundaga)
(Imp)
(Flare)
(Death)
(Bite)
(White Wind)
(Incisors)
(Cave In)
(Reraise)
(Raise)
(Blaster)
(Drain)
(Bite)
(Snowstorm)
(Tackle)
(Stop)
(Rasp)
(Avalanche)
(Firaga)
(White Wind)
(Cyclonic)
(Doom)
(Revenge Blast)
(Firaga)
(Death)
(Hastega)
(Aero)
(Shamshir)
(Aero)
(Net)
(Confuse)
(Sleepsting)
(Berserk)
(Rock Slide)
(Metal Cutter)
(Poison Touch)
(Venomist)
(Lifeshaver)
(Quake)
(Numbclaw)
(Mega Berserk)
(Shell Slam)
(Esuna)
(Sticky Goo)
(Break)
(Break)
(Magnitude 8)
(Flash Rain)
(Magitek Laser)
(Traveler)
(Magitek Laser)
(Plasma)
(Dischord)
(Cling)
(Transfusion)
(Lifeshaver)
Mechanics – Rage Menu (Part 2)
(Lifeshaver)
(Tsunami)
(Dread Gaze)
(Shell)
(Imp)
(Blaze)
(Doom)
(Revenge Blast)
(Osmose)
(Magnitude 8)
(Silence)
(Blaster)
(Gigavolt)
(Mighty Guard)
(Magnitude 8)
(Gigavolt)
(Flash Rain)
(Fire)
(Bio)
(Sticky Goo)
(Magnitude 8)
(Osmose)
(Quake)
(1000 Needles)
(Holy)
(Overture)
(Flash Rain)
(Drain)
(Shockwave)
(Protect)
(Cura)
(Gravity)
(Will O’ The Wisp)
(Gigavolt)
(Reflect)
(Landslide)
(Stone)
(Face Chomp)
(Gravity)
(Acid Rain)
(Imp)
(Snowstorm)
(Fira)
(Wing Snap)
(Libra)
(Wind Slash)
(Growl)
(Rock Slide)
(Snowstorm)
(Acid Rain)
(Level 3 Confuse)
(Cyclonic)
(Megavolt)
(Lifeshaver)
(Transfusion)
(Thundaga)
(Thundaga)
(Self-Destruct)
(Vanish)
(Meteor)
(Poison)
(Disaster)
(Magitek Laser)
(Aqua Breath)
(Fira)
(Shamshir)
(Haste)
(Stop)
(Sleep)
(Fireball)
(Poison)
(Cyclonic)
(Transfusion)
(Leech)
(Stone)
(Slowga)
(Death)
(Revenge Blast)
(Level 4 Flare)
(Scratch)
(Gouge)
(Venomist)
(Fira)
(Bodyslam)
(Meltdown)
(Blizzaga)
(Roulette)
(Death)
(Dischord)
(Flare Star)
The two empty slots are Siegfried (Flare) and Typhon (Tornado), but they are omitted as they never appear in the Veldt. Although you can learn them with a save file hack, they do not count towards the Master of Beasts achievement.
After Io (Flare Star) is also Tonberries (Knife). Although you can enable the bit for this Rage and they do appear in the Veldt, they will not be added to your selection in battle. If they could, it would be the game’s most fatal Physical Rage (Attack x8, Garm’s status immunities and absorbs Water).
The reason for this is all your Rages are stored in memory in a 255 Bit array (Bit 0 is Guard to Bit 255 is Io). When you learn a Rage, that bit will be flagged as 1 in memory and the Rage becomes available in the menu. Tonberries unfortunately takes up Bit 256, which is outside the bounds of the array. The game will give you Master of Beasts if your current Rage variable and the variable for the complete Rage list is the same [Current List & Finished List == 1 (And operation returns true)].
Mechanics – Veldt Battle Formations (Part 1)
The way the Veldt handles encounters are both fixed and random. All formations are stored in memory and are split up across 64 groups. The game will start by picking a random Group number and selecting a battle formation at random from within that group, provided that the player has encountered at least one formation in that group. The game will then go to the next group when you end the current battle (run, win, Leap or reclaim Gau) and pick another encounter from the next available group. If you haven’t encountered anything in said group and/or the group is completely empty, the group is skipped and it will keep skipping until a non-empty group is encountered or it reaches Group 64. At Group 64, it will return to Group 1 and repeat the process from the start.
In order for the formation to be available, it must be encountered and the outcome must be:
- You are victorious by any means.
- You escape or all hands get ejected
- You get defeated but you don’t get a Game Over (eg. dying to Heavy Armor in Locke Scenario).
Despite the randomness of the Group selection and the sequential flow of the Group rotations, there are methods to manipulate these mechanics in your favor. These 2 methods will greatly assist you in getting the Rages you want with minimal headaches and downtime.
If you Normal Save and reload the game, it will completely randomize the Group location and you won’t know what Group until you enter battle. This can be both a blessing or a curse. It is helpful when you want to skip a large number of Groups as it can potentially make huge leaps in a short time, However, you may end up moving as small as 1 group or completely skip your intended targets. Only do this method if you are either doing King of Beasts and the enemies you are missing are clumped together or if you don’t want to cycle through 50 battles again just to get to 1 enemy.
However, if you reload from a Quick Save, the next fight will always be the same. The game will save your Group location and current selected battle formation everytime. You can manipulate your current Group’s outcome by “rerolling it” with the following method:
- Quick-Save at the Group with the formation you want, then reload the save.
- Enter battle in Veldt. If the enemy isnt what you want, kill the game (Alt-F4) and run the game again.
- Reload your Quick Save and do a battle either in Bomb Forest (WoB) or Cave on the Veldt (WoR), then Quick Save after.
- Reload your Quick Save and fly back or walk out to Veldt. When you enter battle, you will find your current Group is the same, but it will random a new formation (At most 1/8 chance it won’t)
- Repeat the process until the desired formation appears.
The Quick Save Method is also helpful if you released Gau into the Veldt and you want him to come back on the current Group and pack you are facing. The steps are the same but you don’t refresh the Group. You simply do your battle in the Veldt. When you are victorious, check to see if Gau comes back. If Gau doesn’t return, kill the game and reload your Quick Save and keep trying until he returns. Just note the conditions of his return as stated in the Leap mechanics.
If you have to slug it through the Veldt, either because the Group you need is close by or you are just here for Gil and AP farming, then here are some helpful tricks to help accelerate the grind:
- Edgar is the ultimate Veldt companion. The Auto-Crossbow, Flash and Chainsaw tools will allow you to plow through all the weak enemies without fuss, MP, or long animations. Use Auto-Crossbow if you built Strength or Flash if you built Magic. Chainsaw is for enemies you can instant kill.
- Sabin is another solid choice. Rising Phoenix regardless of Magic Power can plow through most of the early enemies. Higher up the list you can use Razor Gale and Phantom Rush if your hands are fast enough and your Magic Power is high. If you did Physical, Raging Fist is effective against single targets later down the cue.
- Strago’s Grand Delta is also a swift, decent move at dispatching more tougher enemies in the Veldt where you think Auto-Crossbow or Sabin’s multi target Blitzes will fail. However, this is collected rather late, but it serves you well when you want to get King of Beasts at the end game. You may need to also slow down at some points to steal MP from your enemies via Osmose. Try to Osmose enemies that have MP 0 = Death effects (see Rages with Curses).
- If you have the Scrolls and decent Magic Power, Shadow can throw these to swifly eliminate enemies. Just make sure you factor in Elemental Resistances when tossing these. You may also need to purchase many scrolls for this. Shuriken and Fuma Shuriken are also effective against high health targets.
- Gogo can be specced to meet the above commands at any time, but you will have to put up with his low stats, which may make using Tools or even Throws and Lores not as effective as the actual character doing them could.
- Some Rages can help swiftly cut through the weaker enemies just as effectively with minimal animation time. Make sure you factor in resistances if you use an elemental attack and have a backup attack ready if you fail to roll the Special Attack. Examples include:
- Guard Leader or Covert (Wind Slash)
- Marchosias or Sprinter (Aero)
- Ninja (Water Scroll)
- Lesser Lopros (Fireball)
- Kamui (Snowstorm)
- Great Behemoth or Tyrannosaur (Meteor)
- Yojimbo (Shock)
- Do not use attacks and spells with long animations and/or large MP consumption without Celestraids such as Ultima, Espers, some of Strago’s Lores, Cyan’s Tempest and Master’s Scroll offense.You will be wasting MP and seconds on something that Auto-Crossbow could have killed just as efficiently. If an enemy has more than 10000 HP, then use multiple characters to focus attack, resort to Crowd Control like Petrify and Death or arm a Genji Glove on a character and do a simple Attack with 2 weapons.
- Wear an Alarm Ring on 1 character. This will prevent back attacks and getting surrounded so that you can waste enemies efficiently and have Gau return sooner. Be warned: This will not stop forced Surrounded like the Spitfires and 2 Tyrannosaurs.
- Do not use the following while in the Veldt, as you may accidentally hit Gau or take longer than usual:
- Jump
- Mog’s Dance
- Umaro (never bring him, period!)
- Rage on Gogo
- Ward Bangle or Molulu’s Charm
- Do not attempt to find Rages with the following Level conditions. These can mess up your rhythm:
- Divisible by 3 with no Confuseproofing
- Divisible by 4 or your Gil’s one digit without high health.
- Divisible by 5 with no Deathproofing.
- Make sure Gau and his teammates have Zombieproofing via Amulet or Ribbon. Some enemies apply Zombie and that can be the end of you in some cases.
- Try to limit the groups you face so that you get better draws in each Group and try to get groups that have a larger diversity. For example, Stray Cat, Aeopynris and Nettlehoppers together is 3 Rages on leap. If you want to keep your list small, try to aim with groups with less diversities. Like if you just wanted Stray Cat, but you didn’t want Nettlehopper or Aepyornis, you can aim for the 3 Stray Cats together. Note that some enemies only appear in one formation and are unavoidable (eg. Gold Bear always spawns with an Acrophies).
- The Monster-In-A-Box group or ones with good weapons worth Stealing like Holy Dragon are worth slaying as they drop their items again. This is helpful for making extra currency, getting helpful items (eg. Satellite drops Green Beret at beginning or Behemoth King dropping more Suits) and even ammo for Shadow’s Throw (Holy Lances, Sasuke, etc.).
Mechanics – Veldt Battle Formations (Part 2)
- Silver Lobo
- 2 Silver Lobo
- 2 Guard
- 2 Foper, Urok
- 2 Silver Lobo, Guard Leader
- 2 Hornet, 3 Foper
- Leaf Bunny
- 2 Leaf Bunny, Darkwind
- 2 Leaf Bunny, 2 Darkwind
- Sand Ray, 3 Alacran
- 2 Sand Ray
- 3 Alacran
- Sand Ray, 2 Alacran
- 2 Hornet
- 3 Were Rat
- Hornet, 2 Urok
- 2 Gorgias
- Megalodoth, Silver Lobo
- 3 Urok
- Belmodar
- Belmodar, 2 Mu
- 2 Mu, Unseelie
- Belmodar, Unseelie, 2 Mu
- 2 Unseelie
- 4 Mu
- 2 Imperial Soldier, Magitek Armor
- Bandit, Spiritzer
- Magitek Rider
- Trillium, Gorgias, 2 Cirpius
- 3 Cirpius
- 2 Trillium
- Gorgias, 3 Cirpius
- Silver Lobo
- 2 Zaghrem
- Zaghrem, Trillium, 2 Spritzer
- 2 Magitek Armor
- 2 Lesser Lopros
- 2 Zombie Dragon
- Nautiloid, Exocite, Lesser Lopros
- Lessor Lopros, 2 Exocite
- Empty
- Silver Lobo, 2 Guard
- Empty
- Empty
- WereRat, Bandit
- 2 WereRat
- 2 Doberman
- 3 Actinian
- Empty
- 3 Stray Cat
- 2 Nettlehopper, 2 Stray Cat
- 3 Nettlehopper
- 5 Chippirabbit
- Aepyornis
- 2 Aepyornis, Stray Cat
- Aepyornis, 2 Chippirabbit
- 3 Chippirabbit
- Aepyornis, Stray Cat, 2 Nettlehopper
- Empty
- Empty
- Empty
- Satellite*
- 3 Doberman
- Empty
* – Imperial Soldier reinforcements
- Heavy Armor
- Ghost
- 3 Ghost
- 3 Actinian, 2 Aspirer
- Ghost, 2 Poplium
- 2 Ghost, 3 Poplium
- 2 Angel Whsiper, Cloud
- 2 Spritzer
- 2 Bomb, 2 Cloud
- 2 Lich, 2 Provoker
- 4 Angel Whisper
- 2 Oversoul
- 3 Bomb
- Bomb
- Oversoul, 2 Living Dead
- Empty
- Angel Whisper, Living Dead, 2 Cloud
- Angel Whisper, 3 Cloud
- Anguiform
- 2 Anguiform
- 2 Guard, 2 Megalodoth
- 3 Living Dead
- Anguiform, Actinian, Aspiran
- Hell’s Rider
- Heavy Armor, 2 Corporal
- Fidor, Corporal
- Angel Whsiper
- 4 Corporal
- Hunting Hound, 2 Corporal
- Fossil Dragon
- 2 Bloodfang
- Paraladia, Iron Fist, Vulture
- 2 Iron Fist, 2 Rock Wasp
- 2 Bloodfang, Vulture
- 2 Paraladia, 3 Rock Wasp
- 2 Vulture
- Vulture, Iron Fist
- 4 Rock Wasp
- Hill Gigas
- Crawler
- 4 Gobbledygook
- Veil Dancer
- Veil Dancer, 3 Gobbledygook
- Harvester
- Veil Dancer, 2 Harvester
- Harvester, 2 Gobbledygook
- Hill Gigas, Harvester
- Magna Roader (Purple)
- Goetia, 2 Stunner
- 2 Goetia, 3 Stunner
- 4 Crawler
- 2 Belzecue, 2 Sergeant
- 2 Belzecue, Sergeant
- Magna Roader (Purple), Magna Roader (Red)
- 3 Trapper
- 2 General
- General, 2 Onion Knight
- 4 Onion Knight
- Chaser, 3 Trappers*
- Chaser, 3 Onion Knight
- Lenergia
- 3 Commanders
- Death Warden**
- Empty
* – Trappers spawn when Chaser is slain
** – You need to face this enemy in the Soul Shrine in order for this to be flagged correctly
- 2 Lukhavi
- Empty
- Empty
- Empty
- Baalzephon, Murussu*
- Empty
- 3 Desert Hare
- Bomb
* – Soul Shrine exclusive.
- 6 Bomb
- Io
- 3 Cancer
- 2 Fossil Dragon
- Fossil Dragon, 3 Bug
- 3 Bug
- 6 Bug
- 2 Don
- 2 Wvyern, Don
- Don, Wyvern, 2 Litwor Chicken
- 3 Grasswyrm
- Don, Joker
- 3 Joker
- 5 Litwor Chicken
- Dragon Zombie
- Dragon Zombie, 2 Outcast
- 3 Outcast
- 2 Provoker
- 3 Antares
- Antares, Lich, Provoker
- 3 Lich
- 3 Imperial Elite
- 3 Balloon
- 6 Balloon
- Briareus
- Chimera
- 3 Devourer
- Devourer, Briareus
- Adamankary, 2 Bonnacon
- 2 Adamankary
- 5 Bonnacon
- 3 Mandrake
- Mandrake, 2 Land Grillon
- 2 Venobennu
- Gigantos
- Empty
- Empty
- Empty
- 2 Gigantos*
- 2 Sky Armor, Spitfire
* – Soul Shrine Exclusive
- Sky Armor, Spit Fire
- Behemoth
- Apocrypha, 2 Misfit
- Apocrypha
- 2 Ninja
- 3 Platinum Dragon
- 3 Apocrypha
- Brainpan, Misfit, 2 Apocrypha
- 3 Brainpan
- Dragon
- Behemoth, 2 Misfit
- 2 Behemoth
- 2 Ninja, Platinum Dragon
- Grenade
- Chimera, 2 Devourer
- 2 Briareus
- 2 Peeper
- 3 Peeper
- 2 Peeper, Land Ray
- Black Dragon
- Daedalus, Ahriman
- 2 Fafnir
- 4 Fafnir
- Killer Mantis, Fafnir
- 2 Killer Mantis, Fafnir
- Murussu, 2 Gigantoad
- Rukh, Luna Wolf
- 2 Luna Wolf
- Rukh, Murussu, Gigantoad
- Cherry, 2 Ahriman
- 3 Ahriman
- 2 Zokka, Nightcrawler
- Empty
- 3 Scorpion
- Intangir
- 4 Nightwalker
- 2 Vector Chimera
- Devoahan
- Devoahan, 2 Delta Beetle
- 2 Vampire Thorn, Lizard
- 2 Vampire Thorn
- 4 Delta Beetle
- 2 Vampire Thorn, Delta Beetle
- Devoahan, Lizard
- 2 Cancer, 2 Desert Hare
- Cactuar
- 2 Sandhorse
- Sandhorse, 2 Cancer
- Oceanus
- Oceanus, 3 Desert Hare
- 2 Fiend Dragon
- Landworm
- 3 Humpty
- Cruller, 2 Humpty
- 4 Humpty
- 2 Neck Hunter
- Neck Hunter, Cruller, 2 Humpty
- Dante
- 3 Dropper
- 3 Tonberries*
- Marchosias
- Slag Worm
- Marchosias, 2 Deepeye
- 2 Bogy
* – Although appears in Veldt, Leap will not give you Tonberries Rage
- 5 Deepeye
- 2 Deepeye, Mousse
- 3 Mousse
- Mousse
- Borghese
- Borghese, 2 Cloudwraith
- Skeletal Horror
- Cloudwraith
- Cloudwraith, 2 Exoray
- 3 Exoray
- Malboro, Exoray
- Malboro
- Empty
- Tonberry
- 4 Knotty
- Illuyankas, Tzakmaqiel
- Tzakmaqiel, 3 Knotty
- 3 Illuyankas
- 2 Anemone, Onion Dasher
- 4 Anemone
- Illuyankas, 2 Onion Dasher
- 3 Luridan
- 2 Punisher, Devilfist
- Glasya Labolas
Mechanics – Veldt Battle Formations (Part 3)
- Glasya Labolas, Mugbear, Devil Fist
- Mugbear
- 6 Luridan
- Mugbear, Punisher
- Twinscythe
- 2 Twinscythe
- Gorgimera
- 4 Vector Lythos*
* – The Vector Lythos will be stacked on top of each other
- Primeval Dragon, Great Malboro
- 3 Garm
- Test Rider
- 2 Garm, Lukhavi
- 3 Wizard
- 2 Wizard, 3 Psychos
- 2 Garm, 2 Psychos
- 6 Psychos
- 2 Magna Roader (Yellow), Magna Roader (Brown)
- Magna Roader (Yellow), 2 Magna Roader (Brown)
- 2 Primeval Dragon
- Empty
- 2 Blade Dancer, 2 Crusher
- 2 Cakadrius, Coeurl Cat, 2 Crusher
- 2 Caladrius
- Blade Dancer, 4 Coeurl Cat
- 2 Misty
- 3 Rafflesia
- Still Life
- 2 Aspidochelon
- Mahadeva
- Aspidochelon, Moonform, Creature
- 3 Moonform
- Moonform, 3 Medusa Chicken
- Sorath, Warlock, Creature
- 2 Sorath
- Warlock, 2 Medusa Chicken, 2 Creature
- Great Behemoth, 2 Vector Lythos
- Fiend Dragon
- 2 Devil
- Devil, Figaro Lizard
- 2 Lunatys, 2 Figaro Lizard
- Lunatys
- Armored Weapon
- Enuo
- Enuo, Devil, Figaro Lizard
- 4 Lunatys
- 2 Al Jabr
- 2 Al Jabr, Samurai
- 2 Pluto Armor
- Coco, Alluring Rider
- 2 Pluto Armor, Schmidt
- 3 Parasite, Weredragon
- Alluring Rider, 3 Pandora
- Weredragon
- Coco, Samurai, Suriander
- Suriander, Pandora, 2 Parasite
- 3 Crawler
- 2 Tyrannosaur*
- Tyrannosaur
- Brachiosaur**
- Sprinter, Greater Mantis, 2 Lycaon
- 4 Leap Frog
- 2 Greater Mantis
- Leap Frog, Basilisk
- 4 Tumbleweed
* – This battle is forced Surrounded. Gau will not return to you here,
** – Be aware this enemy has a 33% chance every 3rd attack to Snort. If your team gets completely Snorted, the battle is lost.
- 2 Sprinter, 2 Lycaon
- Great Behemoth, Great Malboro, Vector Lythos
- 3 Great Malboro
- Vasegiatta
- Vasegiatta, Purusa
- Purusa, Gloomwind
- 3 Gloomwind
- Empty
- 2 Face
- 3 Clymenus
- Face, Necromancer, Zeveak
- 2 Clymenus, Necromancer
- 5 Seaflower
- Ouroboros, 2 Seaflower
- Chaos Dragon, Ouroboros, 2 Seaflower
- 2 Chaos Dragon, Galypdes
- Empty
- Empty
- 2 Kamui
- Covert, Kamui
- 2 Wartpuck
- 2 Shambling Corpse
- 2 Covert, Amduscias
- Amduscias, Baalzephon
- 2 Baalzephon, 2 Shambling Corpse
- Wartpuck, Kamui
- Empty
- 2 Magic Urn
- 6 Flan*
- 4 Flan
- Empty
- Empty
* – Flans come down in groups. Gau will not return in this battle.
- 2 Destroyer
- 2 Lenergia
- Empty
- Empty
- Empty
- Empty
- Empty
- Empty
- Empty
- Empty
- Empty
- Empty
- Empty
- 2 Vector Hound, Commander
- 2 Vector Hound
- Cartagra, 2 Acrophies
- Gold Bear, Acrophies
- 3 Cartagra
- 2 Acrophies
- 2 Darkside
- Darkside, Specter, 3 Eukaryote
- Valeor, Wild Rat
- 3 Valeor
- 2 Valeor, 3 Wild Rat
Nothing. This group is skipped
- Empty
- Empty
- Empty
- InnoSent, Fortis
- 2 Fortis
- Empty
- 2 Duel Armor, Death Machine
- Gamma
- 3 InnoSent
- 3 Junk
- Empty
- Empty
- Proto Armor, 2 Onion Knight
- 5 Onion Knight
- 2 Magna Roader (Purple)
- 4 Magna Roader (Red)
- Empty
- Empty
- 2 Templar, 2 Imperial Soldier
- 4 Balloon
- 2 Imperial Soldier
- Death Machine, 4 Metal Hitman
- 3 Metal Hitman
- Fortis, Duel Armor
- 4 Sergeants
- Empty
- Sergeants
- Empty
- Empty
- Empty
- Empty
- Empty
- Behemoth King (Undead)*
- 2 Dark Force
- 2 Yojimbo, Dark Force
- Demon Knight, Yojimbo
- 2 Outsider, Cherry
- 3 Mover
- Muud Suud
- 2 Daedalus
* – Does not spawn in this version. Learn from Group 57 (see note)
Nothing. These 2 groups are skipped
- Empty
- Empty
- Empty
- Empty
- Behemoth King*
- Empty
- Empty
- Empty
* – This is the living one. In order to learn the Undead Rage, you must Leap after you kill the living one. Drops spare Behemoth Suits to help wager at Coliseum for Snow Scarves.
Nothing. These 3 groups are skipped.
- Empty
- Holy Dragon*
- Empty
- Empty
- Empty
- Empty
- Cherry, 2 Outsider, Dark Force**
- Empty
* – Will not drop spare Holy Lances, but they can be stolen along with X-Potions.
** – Soul Shrine Exclusive
Nothing. These 3 groups are skipped
Mechanics – Stats and Raising Gau (Part 1)
If you plan on using Gau regularly for the game, you must get an understanding of how you want to use Gau. Either a Physical Gau (Strength-based) or Magic Gau (Magic-based). By default Gau has:
- 45 HP at Level 1. Ends with 9793 HP at 99.
- 10 MP at Level 1. Ends with 971 at 99
- 44 Strength
- 38 Speed
- 36 Stamina
- 34 Magic
The stats are pretty above Average compared to the other characters, but you will need to use your Espers and level ups wisely to improve his performance. The best method for controlled leveling is to figure out the average XP of the monsters in your area, then about 1-2 battles left, immediately switch in the Esper you want to use. If two people or more are fighting over the same Esper, either kill the others in battle and let that person level up or give him a +1 Variant.
As of the Advance port, Gau cannot use the Merit Award, which allowed him to equip weapons and any items that were mostly forbidden to him, so you can no longer do the Wind God Gau or Fixed Dice Catscratch setups. However, this doesn’t stop you from tempering Gau to fit your needs.
Note that there are times where Level Averaging takes place and if Gau is less than the level average, he will automatically be set to that level, skipping stat ups in the process. The points in the game this happens are as follows:
- You first get him. It will take the average level + 2 and set that to Gau.
- After the Magitek Facility
- After the events in Thamasa
- When you reclaim him in the World of Ruin for the first time
You can circumvent these Level Averaging points by having Gau leap in the Veldt when you hit these points. While in the Veldt, he is omitted from Level Averaging. This will allow you to keep Gau’s level low so you can milk more level ups for stat maxing or for LLP challenges.
Determines how much damage Gau can withstand before getting slain, This caps at 9999.
Raised by:
- Siren (+10%/level)
- Catoblepas (+10%/level)
- Midgardsormr (+30%/level)
- Bahamut (+50%/level)
- Diablos (+100%/level)
- Green Beret (+1/8th Max HP, Helmet)
- Muscle Belt (+50% Max HP, Relic)
- Red Cap (+25% Max HP, +3 Speed, +2 Stamina, +4 Strength, Helmet)
- Dueling Mask (+6 All Stats, +25% Max HP, +50% resist All, Helmet)
Siren, Catoblepas and the Green Beret are your only means of raising this in World of Balance.
When you are able to strike down Deathgaze, you get the superior Bahamut Magicite, about 3 levels of this and your HP should be 9999 at 99. However, you should also factor in the Red Cap and Dueling Mask into the equation as both can easily get you to 9999 without even raising HP at all.
Determines how many spells Gau can cast when he isn’t Raging or outside of battle. This stat caps at 999.
Raised by:
- Phantom (+10%/level)
- Fenrir (+30%/level)
- Crusader (+50%/level)
To be honest, you don’t need this stat to be maxed on anyone. Osmose already does a good job of restoring MP, Ethers become easier to acquire in the World of Ruin and the Gold Hairpin or Celestriad can reduce MP costs. The only time Gau should use MP is if Rages aren’t a good idea (like Skull Dragon in Dragon’s Den) or to heal outside of battle and you want to save the MP for your other teammates.
This will be factored alongside Gau’s level to determine how much damage Gau’s normal attack or his amplified physicals like Catscratch, Gouge or Growl do.The higher the number, the more damage dealt. This stat caps at 255.
Raised by:
- Ifrit (+1/level)
- Bismarck (+2/level)
- Raiden (+2/level)
- Gilgamesh (+2/level)
- Hyper Wrist (+50% Strength, Relic)
- Twist Headband(+1 Speed, +2, Stamina, +3 Strength, Helmet)
- Tiger Mask (+1 Speed, +2, Stamina, +3 Strength, Helmet)
- Circlet (+4 Magic, +1 Speed, +3 Stamina, +2 Strength, Helmet)
- Red Cap (+25% Max HP, +3 Speed, +2 Stamina, +4 Strength, Helmet)
- Dueling Mask (+6 All Stats, +25% Max HP, +50% resist All, Helmet)
You don’t get to buff Strength until the Magitek Facility. Once you get Ifrit you can begin to do so, but try to save it for when you escape as Bismarck becomes available as it doubles Ifirt’s effect. Later, you can get Gilgamesh from the Coliseum and upgrade Odin to Raiden. Both will help if another person is competing for Strength alongside Gau.
As your Strength builds up and gets closer to max, you will begin to start doing 9999 more and more, even without the aid of Stray Cat or Gold Bear and their high multipliers. This allows you to open more options for Gau. Although there are many (Attack x1.5) Rages, some of them either have absorptions and status defenses that can be beneficial (more covered in Physical Attacks section).
For items, there are some good ones that can make Gau pack an extra punch. The Hyper Wrist may sound nice, but the Hero’s Ring does a better job by buffing both Physical and Magic attacks in 1 slot. The Twist Headband is good if you plan on bringing him to the Magitek Facility, but with enemies there packing 180 to 220 Defense, even Catscratch won’t put a dent. Once you get past that dungeon, it becomes useful.
Once you get access to Thamasa or you pull off a Rare Steal on Dons, you can get yourself a Tiger Mask, which is the ultimate Stray Cat and Gold Bear support helmet you will get. Once you get the Snow Scarf, you can freely move the Red Cap to someone else if needed and wear the Tiger Mask all the time or get a Circlet to maintain balance.
The Red Cap is a nice solid choice but you only get 2 of them in the game. As stated above, the Tiger Mask with Snow Scarf gives you the option of freeing up a Red Cap slot.
Once you get access the Dragon’s Den, the Dueling Mask can be collected or you can get one earlier by gambling the Bone Wrist if you don’t like Umaro. Once you acquire it, it is the ultimate equipment for him. So use that!
This stat increases the amount of damage and healing Gau does if he uses a Magic-based Rage from both the non-elemental and elemental schools. Note that Fixed Damage attacks and status effects will not gain bonuses when this rises. This stat caps at 255, but the game will stop registering anything past 127 for damage calculations.
Raised by:
- Cait Sith (+1/level)
- Maduin (+1/level)
- Zona Seeker (+2/level)
- Valigarmanda (+2/level)
- Barrier Ring (+2 Magic, Relic)
- Circlet (+4 Magic, +1 Speed, +3 Stamina, +2 Strength, Helmet)
- Dueliing Mask (+6 All Stats, +25% Max HP, Helmet, +50% Resist All, Helmet)
Although there isn’t much that can buff Magic outside of Magicite, what makes Magic Power good in this game is it has a larger influence on offense than Strength does on physicals. Gau’s Magic Rages also gives him more adaptability at the cost of more planning.
However, as your Magic Power rises, your spells will get close to 9999. Much like Strength, this opens up options as you can even use downgraded versions of your elements (eg. using Templar or Devil Fist over Primeval Dragon for Fire) and still do max damage.
You should try to hold off on leveling Magic until you get the Airship, which is when you can purchase Zona Seeker at the Auction House. Use him to level Magic in the World of Balance and add on Valigarmanda to prevent competition between characters.
The Barrier Ring isn’t worth blowing a Relic Slot over. Until you get the Dueling Mask, the Circlet will be the ultimate Magic bonus item.
Mechanics – Stats and Raising Gau (Part 2)
This stat increases the amount of damage and healing you take from Sap and Regen ticks. It also provides resistance to Instant Death style attacks. The higher the number, the more you take and heal while Death works less often. Deathproofing can easily be done via Rages and Safety Bits.
Raised By:
- Ramuh (+1/level)
- Golem (+2/level)
- Lakshmi (+2/level)
- Leviathan (+2/level)
- Power Sash (+1 Speed, +5 Speed and Stamina, Armor)
- Twist Headband(+1 Speed, +2, Stamina, +3 Strength, Helmet)
- Tiger Mask (+1 Speed, +2, Stamina, +3 Strength, Helmet)
- Circlet (+4 Magic, +1 Speed, +3 Stamina, +2 Strength, Helmet)
- Dueling Mask (+6 All Stats, +25% Max HP, Helmet, +50% resist All, Helmet)
To be honest, Stamina is sort of the moot stat in the group. Sure you can buff it and utilize Auto-Regen to helpful effect. However, the ticks don’t happen too frequently and Regen is designed to be a support buff and not the means to fully resiore HP , which is what White Wind and the Cure line are much better at.
If you must use it, Golem can add a few levels and you get that after the Magitek Facility from the Auction House. Lakshmi and Leviathan can prevent competition amongst your teammates.
However, the same helmets that buff your other stats can be used to make Stamina better. The Power Sash also helps you in the World of Balance where Regen is a great addon. Use those instead.
Speed determines how fast his ATB guage charges or how fast his menu rises before you can select a command or he uses his Rage move. At high values, you can rely on Haste less, fight through Slow if necessary and you get better chances at getting your Specials faster (since you make more commands in less time).
Raised by
- Odin (+1/level)
- Cactuar (+2/level)
- Ninja Gear (+2 Speed, Armor)
- Power Sash (+1 Speed, +5 Speed and Stamina, Armor)
- Black Cowl (+6 Speed, Armor)
- Mirage Vest (+6 Speed, Auto-Blink, Armor)
- Twist Headband(+1 Speed, +2, Stamina, +3 Strength, Helmet)
- Tiger Mask (+1 Speed, +2, Stamina, +3 Strength, Helmet)
- Circlet (+4 Magic, +1 Speed, +3 Stamina, +2 Strength, Helmet)
- Red Cap (+25% Max HP, +3 Speed, +2 Stamina, +4 Strength, Helmet)
- Dueling Mask (+6 All Stats, +25% Max HP, +50% resist All, Helmetl)
Espers do not raise Speed until the World of Ruin. Odin should stay as Odin until you acquire the Cactuar Magicite from the Desert. Once you do, upgrade Odin to Raiden and use Cactuar instead. Even +1 speed is better than nothing and has a great influence in attacking with Gau.
Equipment truly assists Gau with Speed. There are a large variety of helmets to choose from until you get the Dueling Mask with Red Cap providing the best boost to Speed for the Helmet Slot. However, you only get 2 of these legitimately in the entire game (Kefka’s Tower and Mount Zozo).
If you don’t need the Snow Scarf, there are plenty of effective Speed increases on Chest Armor. You can strip Shadow of the Ninja Gear before he leaves your party in the Sabin Scenario to get things going. This armor also lasts a very long time, going as far as the Cave of the Sealed Gate.
Later, the Power Sash will allow Gau to dominate the World of Balance once Thamasa’s Armory opens to you. In the World of Ruin, you can easily purchase a Black Cowl until you start getting a supply of Thornlets going (be it steal or Morph) to gamble for the Mirage Vest, which adds the added effect of Image status at the start.
As the game progresses, Gau will acquire more Rages and sadly, some although powerful come with hindering elemental weaknesses. This can be a major downer in some battles. For example, you are facing the Red Dragon, but you want to use Baalzephon (Blizzaga) but it has a Fire weakness, or you want to use Aspiran (Gigavolt) against Ninja but it takes double from Flame Scrolls and Cloud (Thundara) won’t cut it.
This is where Armor and Shields come into play. Some equipment pieces can provide these resistances, which can give you tactical options and overcome deficits. For instance, a Flame Shield on Baalzephon can now have Gau absorb all but Holy and strike back with Blizzaga or using the Gaia Gear can safely deploy Litwor Chicken (Quake) without the need of Float.
Elemental Resistances are handled in the following order:
Force Field Cancellation > Absorption > Immunity > Resist (50%) > Weakness > Normal
For instance, if you wear a the Snow Scarf and use Killer Mantis (weak against Fire), it will now nullify Fire and absorb Ice as the Immunity overwrites Weakness. If Strago then casts Force Field (makes it so 1 element on the field does 0 damage) and it applies the effect to Ice, then the Snow Scarf’s absorption will heal 0.
Being able to work with elemental resistances is vital to both Gau and your allies, especially if you are fighting tough bosses or doing Low Level Playthroughs (LLP).
Resistances from Shields
- Force Shield (Resists Fire, Ice, Lightning, Water, Earth and Wind)
- Flame Shield (Absorbs Fire, Immune to Ice, Water Weakness)
- Ice Shield (Absorbs Ice, Nullifies Fire, Wind weakness)
- Thunder Shield (Absorbs Lightning, Nullfies Wind, Resists Fire and Ice)
- Aegis Shield (Can randomly block spells)
- Tortoise Shield (Absorbs Water)
- Paladin Shield (Absorbs Fire, Ice, Lightning, Holy, Nullfies Poison, Wind, Earth and Water)
The Force, Aegis and Paladin’s Shields help but it is only available in limited quantities and is better served on Gau’s support than Gau himself. But if you are doing Solo Gau challenges, then they are Godsends until you get the Dueling Mask.
The Flame and Ice Shield are entirely situational but you need to be aware of those weaknesses, especially if you fight any Casters, Ninja, the final bosses and Samurai Soul and low levels. You can also Metamorph Chimera and the Bomb genus into Flame Shields, then gamble them at the Coliseum for the Ice counterparts.
The Thunder Shield is a nice solid Shield that can give you good defenses, available in mass quantities (you find 2 legitimately, you can steal extra from Muud Suud and sacrifice your Genji Gloves or Gauntlets at the Dragon Neck Coliseum for spares), and can fix a lot of pesky weaknesses, especially since it covers the 3 major schools and Wind.
The Tortoise Shield should only ever be used in emergencies or when you you are facing a dominant Water attacker. But there are a few Rages that absorb Water anyways and fight back with a completely different attack or spell (especially Anemone and Aspiran who have a Lightning attack).
If you rely on swapping equipment. Make sure Gau has at least access to the 3 elemental Shields (Flame, Ice and Thunder) so he can equip them on the fly and I recommend always having a Thunder Shield or Genji Shield on him (Genji is no resistances but highest Evasion and Defense stats behind Paladin and Imp wielding Tortoise).
Resistances from Helmet
- Saucer (Absorbs Water)
- Dueling Mask (+6 All Stats, +25% Max HP, +50% resist All, Helmetl)
The Saucer is probably the safest Imp equipment item you can wear without heavily penalizing your defenses, as shields and armor make up about 80-90% of your Defense stats. If you need to face off against a dangerous Water-elemental attacker, here is your helmet. You should spare 1 anyways for the Cat Ear Hood at the Coliseum.
Once you get the Dueling Mask, it becomes the Best in Slot for Gau as it will overwrite any weaknesses, plus offer many benefits. Gau may not be able to equip weapons, but the sheer strength of the Dueling Mask is definitely not to be underestimated.
Mechanics – Stats and Raising Gau (Part 3)
Resistances from Chest Armor
- Gaia Gear (Absorbs Earth)
- Reed Cloak (Absorbs Water)
- Snow Scarf (Absorbs Ice, Nullfies Fire)
The Gaia Gear helps in the World of Balance as it allows you to make Lifeshaver work in reverse (big time screw overs for the Misfit genus) and will allow you to deploy Litwor Chicken (Quake) without fear of harming your team or reapplying Float. Cyan and Edgar cannot wear this armor without the aid of the Merit Award.
The Reed Cloak isn’t worth using unless you are an Imp as most of your character’s armor stats are determined by the Chest piece. If you need Water absorb badly, either use a Water absorbing Rage, Tortoise Shield or Saucer.
The Snow Scarf is Gau’s ultimate chest armor. It provides high amounts of Defense (128) and Magic Defense (90) while having a permanent Ice Shield without the Water downside. Some of the best Magic based Rage attacks (Blizzaga, Bio, Metal Cutter, Meteor, etc.) suffer from these weaknesses primarily and this Armor cancels them both. Also, if Gau is in the back Row, he will most likely take 0 damage from any physical attack.
The only cost is one of the Behemoth Suits you get from the Behemoth King boss. Once you defeat him and he appears in the Veldt, you can acquire more.
Some Rages come with various status immunities, usually associated with the Monster that had them. Some protect against very little (eg. Stray Cat or Gold Bear), while others protect you from a lot of different negative effects (eg. Tyrannosaur or Holy Dragon) and some sadly cost you some benefits as well (eg. Chimera cannot be made Invisible and anyone who resists Slow cannot be Hasted).
Relics can provide Gau with immunities to compensate for these deficits, especially you plan on doing a Strength based Gau and you get virtually no protection from status effects, unless you use Bogy (Stoneproofing, Auto-Protect, Attack x2) or Garm (large status defense pool, Attack x1.5, Holy Weakness).
- Silver Spectackes (Blind)
- Star Pendant (Poison)
- Jeweled Ring (Petrify)
- Fairy Ring (Poison, Blind)
- Peace Ring (Berserk, Confusion)
- Amulet (Blind, Poison, Zombie)
- White Cape (Imp, Silence)
- Ribbon (Blind, Zombie, Poison, Imp, Petrify, Silence, Berserk, Confuse, Sap, Sleep)
- Safety Bit (Zombie, Petrify, Doom, Death, Gravity-based Attacks)
Everything Peace Ring onward you definitely want to have. The Peace Ring is nice for blocking Confusion, but Berserk is a helpful effect for Gau since it increases Physical damage and Gau can still use Special abilities as Rage acts independently from that effect. The only reason you want defenses against these 2 is so you dont get slammed by these effects before you Rage.
White Cape is also extremely helpful as both those effects hamper Gau’s combat effectiveness. Imp prevents Gau from using any special abilities except for Wind Slash and Imp, while reducing his stats to a natural state. Silence will prevent Gau from using any Special Abilitiy that would normally cost MP for your characters or the monster to cast. Luckily, most Rages are immune to both these things, but some are not and you can still enter a Silenceproof Rage under Silence.
Amulet protects against 2 annoyances (Poison and Blind) and a very dangerous one called Zombie. Not only does Gau flagged as Dead, but while Zombie, he will use Rage specials on your own teammates. This can be extremely dangerous if you rely heavily on Rages like Marchosias or Sprinter (Aero), Antares (Magnitude 8), Tyrannosaur (Meteor) or Yojimbo (Shock). If Gau does get Zombified, immediately purify him or just always wear an Amulet and ignore the issue.
Safety Bit is your only method of stopping instant death moves and it also stops Gravity based attacks like Shamshir and Cyclonic from ripping Gau to critical levels. However, there are only 2 legit Safety Bits that can be acquired and 1 has to be rare stolen. To compensate for this, you can use Ragnarok on any jester enemy (Clymenus, Baalzephon and their Level 60 and 90 Magic counterparts), Holy Dragon or Alluring Rider and have a 1/32 chance of making a Safety Bit if it succeeds. I recommend using Holy Dragon to make spares as you can Silence it to render it helpless, steal a X-Potion and it always appears at the end of the Group Cycle (always after Behemoth King).
The Ribbon protects you from all major harmful effects. Make sure you have at least a Ribbon at all times. You get 3 throughout the course of the main game from chests, a few more in the Dragon’s Den and you can make more by using Ragnarok on any Woman Caster (Coco, Misty, Cherry and Level 80 Magic) or Pandora in the Dreamscape. Like the Safety Bit, it has a 1/32 chance of yielding one.
Be warned! Some effects cannot be stopped, such as Entice, Freeze, Physical Death (Yojimbo’s Eye For an Eye, Great Malboro’s Infernal Kiss, etc.). You may also want to consider the monster’s status immunities so you can spread around your Relics as well.
The Hero’s Ring can buff all of Gau’s damage by 25% after calculations. This is especially handy since even Gau’s Magic rages still have a chance to physically strike instead. You can also get one as early as your trip to Zozo (inside pot at Dragon Neck House).
The Miracle Shoes can bestow Gau with Auto-Haste, Protect, Shell and Regen all in 1 Relic slot. You not only get to make more commands quickly, but you get Slowproofing, cut most damage in half and getting constant healing. Be aware that Regen becomes Sap when Gau goes Undead Rages.
The Alarm Earring prevents your team from being Back Attacked or Surrounded by most formations. This can be incredibly helpful if you are Solo Gau or LLP.
If you do not have Mog with you, Gau can use the Ward Bangle (earned from maximum performance at Vector dinner) to cut down the encounter rate by half. This can be incredibly helpful if you are not using Mog or maintaing a LLP. Just remember you still need to encounter enemies to make them appear in the Veldt at least.
The Genji Glove will still let Gau attack twice, but it will come at the cost of the Shield slot and Defense. If you use a Rage that has an amplified or status inducing physical, then the attack will be done twice. However, I recommend getting at least the Snow Scarf and Dueling Mask or applying Protect to compensate for the armor loss.
The Master’s Scroll allows Gau to attack 4 times back to back but at the cost of random targeting and 50% strength each hit. This effect also applies to amplified or status inducing physicals. It does stack with the Genji Gloves, but you sacrifice a lot of potential Status Immunity (unless you use Garm) and your Shield slot to do so. I would recommend you pick one or the other and just stick with that, but as stated above: Compensate for the weakness.
Mechanics – Raging with Gogo
After you acquire Gogo, he can be outfitted with the Rage command. This is helpful for a few scenarios:
- If Gau is specced for Physical and has poor Magic or vice versa.
- You are in Phoenix Cave, Dragon’s Den and Kefka’s Tower, where you cant have Gau be in 3 places at once.
- Gau and Gogo are together and you think 2 Rages are better than 1. Eg: You can have 1 go Peeper or Vector Lythos (White Wind) while the other attacks or both do Tyrannosaur (Meteor) or Yojimbo (Shock) to deal untold devastation.
Gogo, at the cost of Stats and being unable to use Magicite has two definite advantages: He can equip weapons and use any Command setup for battle. This is also helpful as some characters, like Locke can be difficult to reacquire at the early parts in World of Ruin.
Being able to equip weapons along with the Rage command can have benefits. For instance, if you use the Flame Rod and attack, all your physicals and Special Physicals will do Fire elemental damage and there is a chance either of these attacks will set off a Fira on the enemy you attacked. Resistances still apply, so you can potentially do double damage to enemies through weakness or spell your doom through their absorptions or buffs like Auto-Reflect. On top of this, Special attack multipliers stack onto the triggered spells. So if you use Stray Cat’s Catscratch on a Poison Rod and smack Yojimbo with it, you will do 8x damage (Attack x 4 (Catscratch multiplier) x 2 (Poison weakness) and the Poison that is triggered will also do 8x damage thanks to the same multipliers, for a total of 16x across 2 hits in 1 attack!
Unlike Gau, there is a chance Gogo can use his Desperation Attack (or Blitz) if his health meets the criteria at any time. The attack is called Punishing Meteor (pictured above). It has a Spell Power of 146 and deals unavoidable, Defense-ignoring Magic damage to 1 enemy. If this attack is done upon initialization of a Rage, it will count as the start of the Rage. Punishing Meteor can override an attack or special ability at any time during the Rage if the criteria is met afterwards. Gogo will not use Punishing Meteor if under Zombie, Vanish, Image or doesn’t have the Attack Command equipped before battle.

Note: For the sake of simplicity, I will use the Knives at the World of Ruin.
Daggers
- Man-Eater (146 Attack, Double vs Humans)
- Swordbreaker (164 Attack, 30% Evasion)
- Gladius (204 Attack, Holy-elemental)
The Man-Eater has potential against women casters, Ninja, Samurai, Dancers and some of the final bosses as it will do double damage to these enemies. However, the Man Eater can be turned on you if Gogo gets Confused, Enticed or Overtured. Some Rages will overwrite the Human typing but it won’t protect you from harming your allies.
The Swordbreaker (bought in Maranda or bet Assassin’s Dagger) is a helpful knife as it does reliable damage and it stacks on a 30% Evasion bonus, making it the Main Gauche for the World of Ruin. This should be your Bread and Butter knife for non-elemental Strength Gogos or enemies who rely on heavy physical offense by stacking with a Shield.
The Gladius can cause untold devastation to anything Undead or fearing Holy Power. Although the Holy Rod can potentially outdamage this knife when the spell triggers, this only happens 25% of the time where as the Gladius always does it’s full damage on hit. There are also times using the Gladius overall trumps the Holy Rod. Examples are if the enemy has Reflect, high Magic Defenses, you are using Runic or if the enemy has a counter to Magic attacks.
Staves and Maces
- Mythril Rod (60 Attack, +2 Magic)
- Flame Rod (79 Attack, Fire-Elemental, 25% chance to cast Fira)
- Ice Rod (79 Attack, Ice-Elemental, 25% chance to cast Blizzara)
- Thunder Rod (79 Attack, Lightning-Elemental, 25% chance to cast Thundara)
- Poison Rod (86 Attack, Poison-Elemental, 25% chance to cast Poison)
- Punisher (111 Attack, consumes MP for Auto-Critical)
- Gravity Rod (120 Attack, Earth-Elemental, 25% chance to cast Graviga)
- Holy Rod (124 Attack, Holy Elemental, 25% chance to cast Holy)
- Magus Rod (158 Attack, +7 Magic, +30% Magic Evasion)
- Healing Rod (200 Attack, Heals target and damages Undead)
- Scorpion Tail (225 Attack, Poison Elemental, 25% chance of casting Bio, +4 All Stats, Ignores Row Configuration)
The Flame, Ice, Thunder, Gravity, Holy and Poison Rods may have low damage, but when they strike the weakness, they can be as fatal as any weapon you can find in the World of Ruin. Gravity also has the added bonus of being able to strike a Float enemy for full damage if they aren’t Earthproof. The spell effects can also be just as devastating as the staff strike itself if paired with high powered Phyiscal Rages like Stray Cat, Gold Bear or Bogy. One should capitalize off the Debilitator to open more options with these weapons. Just be aware that all these magic effects succumb to Runic, Reflect and will trigger counter conditions that involve Magic attacks. Gravity also fails on the target if the enemy is Deathproof.
The Swordbreaker outclasses the Punisher. The Healing Rod is better served for manual attacking, gambling in the Coliseum or damaging weak Undead. These two aren’t worth equipping on Gogo.
The Magus Rod allows you to buff Magic by +7, which can let Gogo do Magic Rages should Gau be doing physical or worse Magic than Gogo. Plus, it is the magic version of the Swordbreaker, when you need Magic Evasion over Physical Evasion. By giving up the Healing Rod in the Coliseum, you can make a spares for your other characters.
His ultimate weapon, the Scorpion Tail is basically the Poison Rod on steroids and Gogo can sit in the Back Row and still do full damage. However, this weapon is ill advised against Undead or enemies resistant to Poison (which in the Dragon’s Den and with Kaiser Dragon, are pretty frequent).
If you wish to have Gogo do physical based rages, have the following weapons at the ready in some fashion when you select Equip, then begin your Rage:
- Gladius
- Swordbreaker
- All elemental Rods
- Magus Rod
- Scorpion Tail
Gogo can also use various Magic bonus armor through the Magi Hats and Robes, which makes up for Gau’s inability to use these items and instead buff Strength.
- Magus Hat (+5 Magic)
- Circlet (+4 Magic, +1 Speed, +3 Stamina, +2 Strength)
- Red Cap (+25% Maximum HP, +3 Speed, +2 Stamina, +4 Strength)
- Mirage Vest (+6 Speed, Image Status)
- Black Garb (+6 Speed)
- Magus Robe (+5 Magic)
The Magus Hat is outclassed by the Circlet when you get it as it gives you other stats at the cost of 1 Magic. The Black Garb is outclassed by the Mirage Vest as you get stacks of Blink at the cost of some Defense. The Magus Robe is the best Robe he can equip for Defense and 5 magic.
The Red Cap is arguably his best helmet here. Since it makes up for him unable to max out HP with Magicite. It also improves performance with Physical Rages against enemies.
However, Gogo will have to rely on Shields for elemental resistances as he cannot use the Snow Scarf. He can however wear the Gaia Gear for Earth protection.
Gogo benefits from the same Relic draw as Gau, plus he can use Ability modifier ones like the Fake Moustache and Brigand’s Armlet.
Another potential Relic is the Gauntlet. This adds 5 Defense and forces Gogo to use the Daggers and Staves with 2 hands for double hitting power. But he will lose the Shield slot to do this.
Mechanics – Rages with Benefits (Buffs, Part 1)
Some Rages give buffs to Gau or Gogo when they enter the Rage. These buffs start applying after the first attack and are considered Auto effects. These effects cannot be removed or dispelled in any fashion with the execption of the Rage ending via Death or Petrify. If Gau or Gogo are targeted by Dispel or Rippler, the buff is immediately reapplied with the exception to Vanish, which is reapplied on the next attack. Knowing which Rages have these buffs is key for all playstyles, be they common or especially LLP or Solo Gau.
Glow Color (color the character’s black edges flashes): Red.
- Harvester (Haste)
- Vector Hound (Bite)
- Intangir (Transfusion)
- Unseelie (Shell)
- Neck Hunter (Imp)
- Magna Roader (Red) (Silence)
- Outsider (Holy)
- Coco (Overture)
- Desert Hare (Cura)
- Devil Fist (Will O’ The Wisp)
- Punisher (Thundaga)
- Magna Roader (Brown) (Level 4 Flare)
Increases the rate at which your ATB guage charges. In tandem with high speeds, this can allow Gau or Gogo to execute more attacks faster and have a better chance at getting Special attacks faster. Auto-Haste will help save on a Haste cast until you get Hastega from Queztalli, but this version can be dispelled by Slow or Dispel.
Also, while under Auto-Haste, you are completely Slowproof (even if the Rage isn’t naturally Slowproof) and Stop wears off at half the speed, making up for the lack of Slowproof and Stopproof from equipment.
Another nice thing about Auto-Haste is that there is quite a nice spread of attacks here. You have a physical attacker, a healer, 3 very effective attack spells and an effective defense against both magic and physical attackers. Just note that when these enemies are fought, they also have Haste themselves.
You can mimic the same effect on all Rages if you wear Hermes’ Sandals or Miracle Shoes. Try to aim for Miracle Shoes when you get Morphing going (morph the Veil Dancer genus) as this gives you Regen, Protect and Shell with it as well.
Glow Color: Yellow
- Templar (Fira)
- Magna Roader (Purple) (Bio)
- Zokka (Net)
- Cartagra (Poison Barb)
- Nautiloid (Ink)
- Magitek Armor (Magitek Laser)
- General (Cura)
- Destroyer (Reraise)
- Murussu (Stop)
- Devourer (Shell Slam)
- Heavy Armor (Magitek Laser)
- Intangir (Transfusion)
- Land Ray (Mighty Guard)
- Imperial Elite (Protect)
- Illuyankas (Gigavolt)
- Knotty (Stone)
- Bogy (Growl)
- Lukhavi (Snowstorm)
- Adamankary (Acid Rain)
- Platinum Dragon (Cyclonic)
Protect will cut any incoming physical damage in half. The buff helps against enemies with high physical potential either due to high attack stats or high multipliers for their Special attacks.
Quite a few nice Rages are blessed with Auto-Protect and most of them are effective at the early game (Fira and Cura) and even throughout the game (Reraise, Cyclonic, Acid Rain and especially Gigavolt). You can also scrap half of Stray Cat’s power for Bogy’s Growl if you want to physically harm enemies but want some defense. It maybe a small price to pay, but you will be thankful Auto-Protect is there.
You can also apply this effect with Protect or Mighty Guard, but these effects can be dispelled. Wearing the Guard Bracelet or Miracle Shoes also applies the same effect.
Glow Color: Green
- Exoray (Venomist)
- Intangir (Transfusion)
- Mousse (Transfusion)
Shell will cut any incoming magical damage in half. Which helps against abusers of high powered Black Magic, Lores or Enemy Abilities. However, note that some spells like Hyperdrive, Meteor or Ultima will pierce this effect and Magic Defense in general, so be ready for them.
The problem with this beneficial effect is that only 3 Rages have them and 2 of them have an attack that kills Gau. You can apply Silence before you Rage, but then you would just be mindlessly attacking. If you wanted to do this, you could have used Stray Cat, Gold Bear or Bogy.
Exoray is Undead and Venomist isn’t exactly a worthwhile attack in the World of Ruin. However, if it gets struck with a Fire or Holy attack, then the weakness damage is set as if you took normal damage. This is a good point to consider if you are using a Rage that has a weakness to your attacker, you can null some of it off with Shell.
Shell can be applied by the spell, Zona Seeker or Mighty Guard but these can be dispelled. The Guard Bracelet, Miracle Shoes and Force Shield are your best bets at keeping Auto-Shell on at all times.
Glow Color: Blue
- Armored Weapon (Gravity Bomb)
- Flan (Sticky Goo)
- Lunatys (Meteor)
- Devil (Thundaga)
- Figaro Lizard (Dischord)
- Enuo (Tsunami)
- Clymenus (Fira)
Reflect causes any Reflectable spell (most known Magic and a few enemy skills) to bounce back and target the caster’s team at random. It is also the only means of attacking someone who already has Reflect with Magic as you can bounce spells off your own Reflect to target them.
2 Rages really stand out here, Lunatys and Enuo. Not only do they have Auto-Reflect, but have an anti-Reflect spell with Meteor being able to pierce Magic Defenses for direct damage.
Just know this: You cannot heal someone under Reflect without using an enemy’s Reflect or using White Wind. items, certain skills or exploit an absorb effect. Also as stated above, you cannot dispel this effect by any means outside of ending the Rage. You can achieve the same effect on Reflect Rings, but only do so if you do an area that relies heavily on Magic, like Cultist Tower.
Mechanics – Rages with Benefits (Buffs, Part 2)
Character hovers above ground.
- Ninja (Water Scroll)
- Al Jabr (Thundaga)
- Angel Whisper (Gravity)
- Lesser Lopros (Fireball)
- Fiend Dragon (Northern Cross)
- Darkwind (Break)
- Vulture (Shamshir)
- Vasegiatta (Cyclonic)
- Trapper (Level 3 Confuse)
- Hornet (Iron Stinger)
- Nettlehopper (Berserk)
- Satellite (Sonic Boom)
- Sky Armor (Magitek Laser)
- Spitfire (Magitek Laser)
- Spritzer (Blaze)
- Outcast (Lifeshaver)
- Humpty (Poison)
- Brainpan (1000 Needles)
- Harvester (Haste)
- Bomb (Blaze)
- Lunatys (Meteor)
- Mover (Meltdown)
- Aspiran (Gigavolt)
- Ghost (Thundara)
- Darkside (Blizzara)
- Joker (Thundara)
- Provoker (Imp)
- Cloudwraith (Flare)
- Cirpius (Hastega)
- Lenergia (Shamshir)
- Marchosias (Aero)
- Rock Wasp (Sleepsting)
- Grasswyrm (Berserk)
- Luridan (Rock Slide)
- Schmidt (Mega Berserk)
- Chaser (Plasma)
- Poplium (Cling)
- Intangir (Transfusion)
- Misfit (Lifeshaver)
- Grenade (Blaze)
- Pandora (Revenge Blast)
- Parasite (Gigavolt)
- Moonform (Flash Rain)
- Face (1000 Needles)
- Zeveak (Flash Rain)
- Caladrius (Acid Rain)
- Land Grillon (Wing Snap)
- Platinum Dragon (Cyclonic)
- Psychos (Lifeshaver)
- Balloon (Self-Destruct)
- Lich (Fira)
- Rukh (Shamshir)
- Bug (Stop)
- Galypdes (Cyclonic)
- Junk (Transfusion)
- Necromancer (Death)
- InnoSent (Venomist)
- Clymenus (Fira)
- Baalzephon (Blizzaga)
- Death Machine (Death)
Float prevents the target from taking Earth damage with the exception of the Gravity Rod or Lifeshaver. It doesn’t seem like much, but you will find out quickly that Earth is a very dangerous and powerful element and some of it’s best spell powers are over 100. Not to mention the only Earth Magic the player can cast will harm your teammates as well as your enemies. Also, some bosses use 50 Gs to try and dispel it, but the Float Rages will just re-apply it right after the attempt. Another nice thing about Float is that it will stay on after battle except when a player uses a Tent or Inn, has it dispelled or gets KOed. However, the Float that applies after battle and before a Float Rage is not Auto.
Quite a few enemies grace this list and some of them have attacks you need. Keep a mental note on these species if you rely on Gau or Gogo for Earth attacks. If you encounter any of these enemies, utilize a different weakness, primarily Fire, Ice or Wind affect these enemies.
You can also bestow Float through the spell, but this can be dispelled. You can also use the Angel Wings accessory to always have it or you can skip this altogether and wear Gaia Gear and absorb the attack, but the Defense value doesn’t really protect you from everything else. Just remember: Float doesn’t stop Lifeshaver, you need Earth absorption or immunity (Gaia Gear or any Rage that absorbs Earth (see Earth Defense)) to protect yourself from this move.
All but outline of character can be seen.
- Intangir (Transfusion)
Vanish helps against heavy physical abusers who have either no spells or have been sent into a mindless rage by Berserk. The Vanish effect is broken upon getting hit by a spell but Auto-Vanish will recharge once you attack.
However, the issue here is the Rage that has it. In order to keep Gau on the field, you have to apply Silence and then enter this Rage (it is Silenceproof), then you will always attack with a mass collection of buffs and full absorbs. But as I said before, you are better off using a Physical Rage instead of doing this and using Vanish as a spell when needed. Like Float, Vanish will stay until you use a Tent or dispel it via Magic or Dispel.
Note that this port’s Vanish/Death has been fixed (a brutal bug from the SNES era that allowed you to apply any status effect, even Death to anyone who was Deathproof by causing Vanish to override all effects), so there is no more cheap instant kill strats that work on all enemies.
Mechanics – Rages with Benefits (Status Immunity, Part 1)
As with any Final Fantasy game, you must watch not only your HP and MP, but any negative effects that impair your characters. They can range from sheer annoyance to downright dangerous. Luckily, some Rages come with Status Immunities that are activated once Gau commits his first attack in that Rage. Some Rages have none and some have many defenses. Gau is also the only character who can get natural Stop and Slowproofing (outside of Auto-Haste items).
Note that status immunities will not cancel existing effects before entering them (eg. being Silenced when entering a Silenceproof Rage).You can also wear Relics that provide immunities and these effects will carry into the Rage.
While Raging, you should be aware of the following while choosing a Rage:
- KO (Death) – You can’t fight back as you are dead. This is also a Game Over effect. If you are not immune to Death, you also succumb to the effects of Dischord, Doom and Gravity-based spells. Magical Death has no effect on Undead Rages.
- Petrify (Stone) – You can’t fight back as you are a stone statue. This is also a Game Over effect.
- Zombie – Your Rage targeting is flipped (you heal enemies or damage your own team). This is also a Game Over effect.
- Stop – You are completely helpless for ~30 in game seconds. You cannot fight back and your Evasion stats are 0. If you are hit with Blaster, this attack will ignore Evasion. Only Rages can provide this immunity, Dispel can destroy it and Auto-Haste cuts the downtime by 1/2.
- Slow – Your speed builds up at half rate, which can make doing anything a chore. Only Rages and Auto-Haste can block this.
- Imp – Gau cannot use certain Special Attacks while an Imp. His attack and defense stats are also reduced to base, as if he has no equipment (exceptions are elemental and status resistances). Imp Equipment will maintain full power.
- Silence – If Gau’s Special irequires MP if not cast through Rage (Magic, Lore or Enemy Skills that cost MP), then Gau will not be able to cast them. He will instead attack every turn unless the move is a Special Physical, Dance, Water Scroll or Shock.
- Sleep – Like Stop except can be broken if the target is physically attacked. Also wears off on own after a duration.
- Poison and Sap – Gau will take constant damage and it increases as the battle continues. Poison will continue after battle, but if Gau is Undead or absorbs Poison, Poison becomes Regen If weak against Poison, the damage is doubled per tick. Sap is non-elemental.
- Blind – If Gau relies on a Strength-based Rage like Gold Bear or Stray Cat, then he will have a harder time landing hits. He will also dodge less often.
- Confuse – Has no effect on Gau while Raging as he will always target the enemy. However, you cannot select a Rage if Gau is not raging under this effect.
- Berserk – Has no effect on Gau while Raging as he will always have a 50% chance to use his special ability, even if it is Magic. He gets the enhanced attack power bonus that comes with Berserk for his amplified physical Specials. However, this is undesirable effect before Gau rages.
There are also 3 effects that cannot be blocked regardless of what you do, but you must find a way to either work around them.
- Overture – If affected, any standard attack made against the Caster by anyone will be intercepted by the affected. This can be fatal for people who rely on Ultima Weapon/Valiant Knife combos.
- Frozen – Exactly like Stop except twice as long but can be dispelled by taking any Fire damage
- Entice – Basically Confusion but it cannot be dispelled until either the caster or the affected are killed by any means. This can be fatal for people who rely on the overpowered combos or spells like Ultima.
Key
X – Immune to that effect. For Death, it only applies to Magic based Death, not physical ones (eg. Yojimbo’s Eye for an Eye). Will also factor in Auto abilities (eg. Auto-Haste cancels Slow).
U – (Death and Poison Only) If exposed to Death or Poison, it will heal instead (Poison becomes Regen and Death is a full HP recovery).
W – (Poison Only) If exposed to Poison, the damage output will be doubled due ot Poison weakness.
N – (Silence and Imp Only) Not immune but won’t affect Gau’s ability to cast the special attack associated with it.
A – Carries that effect once the Rage begins. Can be cancelled with immunity Relics.
No text – Without Relics, the Rage has no defense against that effect
Mechanics – Rages with Benefits (Status Immunity, Part 2)
Key
X – Immune to that effect. For Death, it only applies to Magic based Death, not physical ones (eg. Yojimbo’s Eye for an Eye). Will also factor in Auto abilities (eg. Auto-Haste cancels Slow).
U – (Death and Poison Only) If exposed to Death or Poison, it will heal instead (Poison becomes Regen and Death is a full HP recovery).
W – (Poison Only) If exposed to Poison, the damage output will be doubled due ot Poison weakness.
N – (Silence and Imp Only) Not immune but won’t affect Gau’s ability to cast the special attack associated with it.
A – Carries that effect once the Rage begins. Can be cancelled with immunity Relics.
No text – Without Relics, the Rage has no defense against that effect
Mechanics – Rages with Benefits (Status Immunity, Part 3)
Key
X – Immune to that effect. For Death, it only applies to Magic based Death, not physical ones (eg. Yojimbo’s Eye for an Eye). Will also factor in Auto abilities (eg. Auto-Haste cancels Slow).
U – (Death and Poison Only) If exposed to Death or Poison, it will heal instead (Poison becomes Regen and Death is a full HP recovery).
W – (Poison Only) If exposed to Poison, the damage output will be doubled due ot Poison weakness.
N – (Silence and Imp Only) Not immune but won’t affect Gau’s ability to cast the special attack associated with it.
A – Carries that effect once the Rage begins. Can be cancelled with immunity Relics.
No text – Without Relics, the Rage has no defense against that effect
Mechanics – Rages with Benefits (Status Immunity, Part 4)
Key
X – Immune to that effect. For Death, it only applies to Magic based Death, not physical ones (eg. Yojimbo’s Eye for an Eye). Will also factor in Auto abilities (eg. Auto-Haste cancels Slow).
U – (Death and Poison Only) If exposed to Death or Poison, it will heal instead (Poison becomes Regen and Death is a full HP recovery).
W – (Poison Only) If exposed to Poison, the damage output will be doubled due ot Poison weakness.
N – (Silence and Imp Only) Not immune but won’t affect Gau’s ability to cast the special attack associated with it.
A – Carries that effect once the Rage begins. Can be cancelled with immunity Relics.
No text – Without Relics, the Rage has no defense against that effect
Mechanics – Rages with Benefits (Status Immunity, Part 5)
Key
X – Immune to that effect. For Death, it only applies to Magic based Death, not physical ones (eg. Yojimbo’s Eye for an Eye). Will also factor in Auto abilities (eg. Auto-Haste cancels Slow).
U – (Death and Poison Only) If exposed to Death or Poison, it will heal instead (Poison becomes Regen and Death is a full HP recovery).
W – (Poison Only) If exposed to Poison, the damage output will be doubled due ot Poison weakness.
N – (Silence and Imp Only) Not immune but won’t affect Gau’s ability to cast the special attack associated with it.
A – Carries that effect once the Rage begins. Can be cancelled with immunity Relics.
No text – Without Relics, the Rage has no defense against that effect
Mechanics – Rages with Benefits (Status Immunity, Part 6)
Key
X – Immune to that effect. For Death, it only applies to Magic based Death, not physical ones (eg. Yojimbo’s Eye for an Eye). Will also factor in Auto abilities (eg. Auto-Haste cancels Slow).
U – (Death and Poison Only) If exposed to Death or Poison, it will heal instead (Poison becomes Regen and Death is a full HP recovery).
W – (Poison Only) If exposed to Poison, the damage output will be doubled due ot Poison weakness.
N – (Silence and Imp Only) Not immune but won’t affect Gau’s ability to cast the special attack associated with it.
A – Carries that effect once the Rage begins. Can be cancelled with immunity Relics.
No text – Without Relics, the Rage has no defense against that effect
Mechanics – Rages with Benefits (Status Immunity, Part 7)
Key
X – Immune to that effect. For Death, it only applies to Magic based Death, not physical ones (eg. Yojimbo’s Eye for an Eye). Will also factor in Auto abilities (eg. Auto-Haste cancels Slow).
U – (Death and Poison Only) If exposed to Death or Poison, it will heal instead (Poison becomes Regen and Death is a full HP recovery).
W – (Poison Only) If exposed to Poison, the damage output will be doubled due ot Poison weakness.
N – (Silence and Imp Only) Not immune but won’t affect Gau’s ability to cast the special attack associated with it.
A – Carries that effect once the Rage begins. Can be cancelled with immunity Relics.
No text – Without Relics, the Rage has no defense against that effect
Dragon
♥♥♥♥
Dragon
Mechanics – Rages with Benefits (Status Immunity, Part 8)
Key
X – Immune to that effect. For Death, it only applies to Magic based Death, not physical ones (eg. Yojimbo’s Eye for an Eye). Will also factor in Auto abilities (eg. Auto-Haste cancels Slow).
U – (Death and Poison Only) If exposed to Death or Poison, it will heal instead (Poison becomes Regen and Death is a full HP recovery).
W – (Poison Only) If exposed to Poison, the damage output will be doubled due ot Poison weakness.
N – (Silence and Imp Only) Not immune but won’t affect Gau’s ability to cast the special attack associated with it.
A – Carries that effect once the Rage begins. Can be cancelled with immunity Relics.
No text – Without Relics, the Rage has no defense against that effect
- As stated in the Key, take advantage of Relics to add more status immunities to your favorite attacks. For instance, Auto-Haste from Hermes’ Sandals or Miracle Shoes can make you Slowproof and Ribbons can make ones like Stray Cat be more effective.
- If you want the status immunities but can’t stand the associated attack (eg. Intangir), then apply Silence BEFORE Raging and make sure Gau isn’t Silenceproof via Relics. However, you will end up forfeiting casts of Esuna as it will dispel the Silence effect. Some attacks ignore Silence checks (as stated by N or XN).
- As stated in Part 1, Deathproofing also makes you Doomproof and prevents Gravity effects and Dischord. If any enemies have access to these kind of attacks, take in a Deathproof one (Undead won’t protect you from Dischord or Gravity).
- If an enemy is Deathproof but not Stoneproof, Break or Catoblepas will not affect you or the enemy, but Dread Gaze and Delta Attack will. You will get access to Dread Gaze via the Deepeye Rage, so you can exploit this for yourself.
- Note that if a Rage is Undead, Poison (if the Rage absorbs Poison) and Regen reverse effects. Sap is unaffected.
Mechanics – Rages with Curses (Part 1)
Just as there are positive effects, there are some negative ones. Some are a mere annoyance and can be fixed with a Ribbon or correct Relics, while others can drastically change the way you fight. A true Gau user must learn to either avoid these Rages or adapt to them if you desperately need to use them in battle.
- Borghese (Holy)
- Angel Whisper (Gravity)
- Oversoul (Will O’ The Wisp)
- Skeletal Horror (Banish)
- Fossil Dragon (Sandstorm, doesn’t absorb Poison)
- Vampire Thorn (Bio)
- Spritzer (Blaze, doesn’t absorb Poison)
- Outcast (Lifeshaver)
- Humpty (Poison)
- Brainpan (1000 Needles)
- Cruller (Sticky Goo)
- Ghost (Thundara)
- Darkside (Blizzara, doesn’t absorb Poison)
- Provoker (Imp)
- Cloudwraith (Flare)
- Mahadeva (Death)
- Behemoth King (Undead) (Firaga, weak against Poison)
- Zombie Dragon (Doom)
- Dragon (Revenge Blast, Deathproof, doesn’t absorb Poison)
- Exoray (Venomist)
- Poplium (Cling)
- Misfit (Lifeshaver)
- Pandora (Revenge Blast)
- Moonform (Flash Rain)
- Specter (Fire)
- Living Dead (Osmose)
- Death Warden (Quake)
- Nightwalker (Drain)
- Aspidochelon (Landslide)
- Eukaryote (Fire)
- Dante (Level 3 Confuse, weak against Poison)
- Shambling Corpse (Thundaga, Deathproof)
- Lich (Fira)
- Necromancer (Death)
- Daedalus (Meltdown)
Undead Rages cause Gau or Gogo to take damage from healing items or Cure-based magic and instant kills them if they are hit with Life, Arise or Phoenix Downs. Regen also becomes like Sap status, making it difficult to summon Kirin and use Regen bestowing Relics. These effects apply to enemies as well. This can be a problem if you need to mass heal your team after a devastating attack. Also, most Undead Rages have a weakness to Holy or Fire to watch out for.
However, being Undead does have positives. For starters, most of them have large status defense pools. Most of them absorb Poison damage (turns Poison status into Regen as well). If targeted by Drain, Osmose or Lifeshaver, the effect is reversed; the target gets the healing and the caster takes the damage (limitations still apply, you cannot overshoot your Maximum HP or MP if you are the target and your enemy cannot drain more than what he has). Also, if they are targeted by magical Death spells (Death, Roulette (enemy only), countdown on Doom hits 0), the target is fully healed. If you need to heal an Undead Gau or Gogo, cast Bio or Death on them. Note that some Undead are Deathproof (Death will not heal them) and absorb Poison (Poison does normal damage instead, so be aware of these points when you start using Undead Rages.
Also note that these Death effects will still kill Gau, Gogo or the monster, bypassing Undead checks. Except for the first one (which you need to dodge or block the strike), these effects can be blocked by natural Deathproofing or Safety Bits.
- Physical Death attacks (Megaton Punch, Eye For An Eye, Rest’s Repose, etc.)
- Oblivion Bushido
- Snare
- Banish
- Blaster
- Roulette if cast by Lore or Ahriman Rage
- Chainsaw and Air Anchor Tool
- 7-7-7 and 7-7-Bar slots
- Odin or Raiden Summon
Despite the Undead downsides, some of the Rages are quite effective. For instance, your earliest Holy user is Undead (Borghese) and 3 of them (Misfit, Outcast and Nightwalker) all have a spell that drains HP and heals the caster, which is the only other way outside of Bio and Death you can heal Undead. Plus, a lot of Undead in the World of Ruin utilize Death or Zombie style spells and you can have their positives turned against them with these Rages, especially if you use Borghese.
You can also make any Rage or any character Undead by having them equip the Lich Ring Relic.
- Guard (Critical)
- Imperial Soldier (Fire)
- Templar (Fira)
- Ninja (Water Scroll)
- Samurai (Lullaby)
- Borghese (Holy)
- Yojimbo (Shock)
- Cloud (Thundara)
- Misty (Cura)
- Al Jabr (Thundaga)
- Zaghrem (Stone)
- Dark Force (Tsunami)
- Commander (Break)
- Hell’s Rider (Venomist)
- Onion Knight (Imp)
- Bandit (Self-Destruct)
- Harvester (Haste)
- Veil Dancer (Blizzara)
- Hill Gigas (Magnitude 8)
- Guard Leader (Wind Slash)
- Corporal (Swing)
- General (Cura)
- Covert (Wind Slash)
- Kamui (Snowstorm II)
- Warlock (Holy)
- Cherry (Holy)
- Joker (Thundara)
- Iron Fist (Stone)
- Test Rider (Flash Rain)
- Onion Dasher (Traveler)
- Neck Hunter (Imp)
- Alluring Rider (Doom)
- Blade Dancer (Osmose)
- Gigantos (Magnitude 8)
- Specter (Fire)
- Living Dead (Osmose)
- Death Warden (Quake)
- Outsider (Holy)
- Coco (Overture)
- Zeveak (Flash Rain)
- Demon Knight (Shockwave)
- Imperial Elite (Protect)
- Wizard (Gravity)
- Devil Fist (Will O’ The Wisp)
- Sergeant (Reflect)
- Dante (Level 3 Confuse)
- Punisher (Thundaga)
- Gobbledygook (Vanish)
- Amduscias (Slowga)
- Valeor (Stone)
- Glasya Labolas (Revenge Blast)
- Clymenus (Fira)
- Baalzephon (Blizzaga)
Human is the base modifier for all your characters, several enemies and some bosses. This may seem harmless, but it can be an issue if any of your characters are using Man Eater knives and they get Confused, Enticed, Overtured or Zombified. The Man Eater does double damage to these kinds of enemies and can be pretty painful depending on the Strength stat that person has.
Any Rage not mentioned on this list will remove the Human modifier, allowing Gau and Gogo to be to take normal damage from these knives. But if you face these enemies in battle, consider equipping a Man Eater before going a Physical Rage on Gogo. Even some of the final bosses (Power, Magic, Rest, and Kefka himself) suffer from this Human typing. Note that Throwing the knife will still do double damage to these opponents and ignore Defense.
- Cloud (Thundara)
- Al Jabr (Thundaga)
- Misty (Cura)
- Apocrypha (Level 3 Confuse)
- Dark Force (Tsunami)
- Skeletal Horror (Banish)
- Fiend Dragon (Northern Cross)
- Vampire Thorn (Bio)
- Humpty (Poison)
- Brainpan (1000 Needles)
- Cruller (Sticky Goo)
- Still Life (Lullaby)
- Lunatys (Meteor)
- Magic Urn (Curaga)
- Mover (Meltdown)
- Sandhorse (Sandstorm)
- Warlock (Holy)
- Cherry (Holy)
- Devil (Thundaga)
- Cloudwraith (Flare)
- Mahadeva (Death)
- Dropper (Confuse)
- Test Rider (Flash Rain)
- Intangir (Transfusion)
- Misfit (Lifeshaver)
- Alluring Rider (Doom)
- Pandora (Revenge Blast)
- Blade Dancer (Osmose)
- Parasite (Gigavolt)
- Moonform (Flash Rain)
- Face (1000 Needles)
- Coco (Overture)
- Zeveak (Flash Rain)
- Nightwalker (Drain)
- Illuyankas (Gigavolt)
- Dante (Level 3 Confuse)
- Mousse (Transfusion)
- Shambling Corpse (Thundaga)
- Lich (Fira)
- Magna Roader (Yellow) (Haste)
- Amduscias (Slowga)
- Necromancer (Death)
- Clymenus (Fira)
- Baalzephon (Blizzaga)
Gau or Gogo while Raging as these enemies or facing said enemy in combat can be killed not only if their HP goes to 0, but if their MP is 0 as well. This effect also bypasses Deathproofing. This can be an issue if the enemy knows Rasp, Osmose, attacks like it or you accidentally do something like give an Ether to an Undead Gau or Gogo.
When Gau or Gogo don’t have MP pools (pre-Zozo for Gau or if Gogo isn’t using Magic or Lores on his command card), these Rages will not kill them. If you enter the Rage with 0 MP post-Zozo, then Gau or Gogo will immediately die once the Rage fires off an attack. Make sure you have at least 1 MP before you Rage.
The enemies affected by this often have tiny MP pools, so Rasp or Osmose become devastating tools against them. Be aware of the limits on both (low power and cannot exceed enemy MP or your own difference respectively).
Mechanics – Rages with Curses (Part 2)
- Zaghrem (Stone, Auto-Berserk)
- Angel Whisper (Gravity, Auto-Sap)
- Anguiform (Aqua Breath, Auto-Blind)
- Actinian (Clamp, Auto-Blind)
- Cruller (Sticky Goo, Auto-Blind, Auto-Poison (becomes Regen due to Poison absorption))
- Devoahan (Slowga, Auto-Sap)
- Darkside (Blizzara, Auto-Sap)
- Provoker (Imp, Auto-Sap)
- Cloudwraith (Flare, Auto-Sap)
- Peeper (White Wind, Auto-Sap)
- Dropper (Confuse, Auto-Sap)
- Enuo (Tsunami, Auto-Sap)
- Land Ray (Mighty Guard, Auto-Sap)
- Aspidochelon (Landslide, Auto-Sap)
- Black Dragon (Snowstorm II, Auto-Sap)
- Mandrake (Leech, Auto-Confuse)
These Rages (and their associated enemies) have these negative effects when entering the Rage. These effects also cannot be dispelled or cured by Esuna as they will just be reapplied again on the next hit. However, if you enter the Rage wearing equipment that renders you immune to said effect, it will be canceled upon entering the Rage. This is helpful primarily on Peeper until you get Vector Lythos for White Wind (who isn’t under Sap).
Berserk and Confuse are ruled out as Berserk and Confuse do not hampering the targeting for Rages. However, Berserk is beneficial as this offers a 50% attack boost while you Rage, making users of Stray Cat, Bogy or Gold Bear more vicious. Note that some Rages become Berserkproof upon activation.
Auto-Sap is the one you should be worried about as you constantly lose HP at a rate, which is increased with Haste, high Stamina and over time. Auto-Blind can also be a problem because the Blind lingers after battle and it could make using other rages (especially if you rely on Anguiform early on or Actinian for the Water absorption) difficult to use. However, both attacks quickly get outclassed (Anguiform gets replaced by Chimera for Aqua Breath and Actinian already has Exocite to do damage and absorb Water).
- Samurai (Lullaby)
- Chimera (Aqua Breath)
- Holy Dragon (Holy)
- Tyrannosaur (Meteor)
- Rafflesia (Entice)
- Satellite (Sonic Boom)
- Armored Weapon (Gravity Bomb)
- Cactuar (1000 Needles)
- Still Life (Lullaby)
- Magic Urn (Curaga)
- Mover (Meltdown)
- Dropper (Confuse)
- Cancer (Esuna)
- Gamma (Dischord)
- Bonnacon (Sticky Goo)
- Coco (Overture)
- Imperial Elite (Protect)
- Io (Flare Star)
Once you enter these Rages, you cannot apply Fenrir’s Esper effect or Shadow’s Image Scroll on Gau or Gogo, rendering Image useless. Fenrir will still bestow Image stacks on your other characters. This can be a problem if you fight Physical Death (Eye For An Eye, Megaton Punch, Repose) or high powered physical fighters (Tonberry’s Knife or Kaiser Dragon’s Last Breath) and you use Fenrir as a safeguard. To add insult to injury, some of the high quality Rages are on this list, such as Holy Dragon, Rafflesia, Tyrannosaur and especially Io for LLPs.
If you plan on using this effect, you must summon Fenrir before you commit to Raging. If you wear the Mirage Vest then Rage, you keep your stack of Image while you Rage.
- Al Jabr (Thundaga)
- Mugbear (Net)
- Suriander (Aqua Breath)
- Chimera (Aqua Breath)
- Rafflesia (Entice)
- Hell’s Rider (Venomist)
- Satellite (Sonic Boom)
- Armored Weapon (Gravity Bomb)
- Cactuar (1000 Needles)
- Still Life (Lullaby)
- Magic Urn (Curaga)
- Guard Leader (Wind Slash)
- Dropper (Confuse)
- Gigantos (Magnitude 8)
- Bonnacon (Sticky Goo)
- Coco (Overture)
- Imperial Elite (Protect)
- Mandrake (Leech)
- Io (Flare Star)
Once you enter these Rages, you cannot apply Vanish, use an Invisibility Scroll or summon Phantom on Gau or Gogo. Phantom will still work but Gau or Gogo will not get the benefit. This is also a problem if you rely on Vanish to dodge incoming physical attacks for the same reasons you would use Image. It also puts a dent into quite a few enemies here, especially if you use Hell’s Rider in Zozo (where Vanish helps you a lot here) or rely on Chimera, Guard Leader or Io in constant battles.
If you must use Vanish, apply it before Raging so it stays on when you Rage. Just remember that Healing and Buffing Rages are ill advised to stack Vanish on as ANY magic will break the effect.
Mechanics – Rages with Curses (Part 3)
Character appears fatigued. Gau will be on all 4s with a worried expression and Gogo will kneel.
- Ninja (Water Scroll)
- Magna Roader (Purple) (Bio)
- Yojimbo (Shock)
- Misty (Cura)
- Al Jabr (Thundaga)
- Apocrypha (Level 3 Confuse)
- Dark Force (Tsunami)
- Muud Suud (Snowstorm)
- Chimera (Aqua Breath)
- Holy Dragon (Holy)
- Fiend Dragon (Northern Cross)
- Tyrannosaur (Meteor)
- Zokka (Net)
- Rafflesia (Entice)
- Lizard (Break)
- Satellite (Sonic Boom)
- Armored Weapon (Gravity Bomb)
- Cactuar (1000 Needles)
- Still Life (Lullaby)
- Lunatys (Meteor)
- Magic Urn (Curaga)
- Mover (Meltdown)
- Devoahan (Slowga)
- Malboro (Bad Breath)
- Kamui (Snowstorm II)
- Covert (Wind Slash)
- Cherry (Holy)
- Sorath (Cave In)
- Wartpuck (Rasp)
- Dragon (Revenge Blast)
- Sprinter (Aero)
- Marchosias (Aero)
- Dropper (Confuse)
- Ouroboros (Quake)
- Cancer (Esuna)
- Medusa Chicken (Break)
- Test Rider (Flash Rain)
- Gamma (Dischord)
- Intangir (Transfusion)
- Enuo (Tsunami)
- Blade Dancer (Osmose)
- Magna Roader (Red) (Silence)
- Coco (Overture)
- Demon Knight (Shockwave)
- Imperial Elite (Protect)
- Desert Hare (Cura)
- Illuyankas (Gigavolt)
- Luna Wolf (Face Chomp)
- Tzakmaqiel (Imp)
- Greater Mantis (Wind Slash)
- Purusa (Rock Slide)
- Adamankary (Acid Rain)
- Mousse (Transfusion)
- Shambling Corpse (Thundaga)
- Scorpion (Poison)
- Chaos Dragon (Disaster)
- Vector Chimera (Aqua Breath)
- Rukh (Shamshir)
- Amduscias (Osmose)
- Garm (Bodyslam)
- Baalzephon (Blizzaga)
- Ahriman (Roulette)
- Io (Flare Star)
When an ally drops below 1/8th of their maximum HP or an enemy drops below 1/20th of their maximum HP, they enter Critical status. If something is Criticalproof, then the Critical flag is locked and cannot be changed from it’s current value. You are probably asking, why is this important?
Being unable to enter Critical state hampers a few mechanics that can be useful to Gau or Gogo, especially if you are playing LLP style runs. If the Critical flag cannot be turned on, then Gau or Gogo have the following issues:
- You cannot have an ally with Knight’s Code take a hit for Gau or Gogo.
- Relics that activate effects upon reaching Critical HP won’t react or enable (Eg. If Gau or Gogo have the Knight’s Code equipped).
- Gogo will not have a chance to fire off Punishing Meteor while he is Raging.
- You will not get a bonus 25% Evasion while at Critical HP
However, if you enter these rages while at Critical status, then you will be effectively under Auto-Critical status until the rage ends either by battle victory or the character gets a Game Over effect (KO, Zombie, Petrify, etc.). You can also use Gogo to steal Critical from an enemy via the Rippler spell if he is equipped with the Lore command. Being under Auto-Critical can be exploited to allow Gogo to use Punishing Meteor every turn or to stack another 25% Evasion on your defenses when you need it.
If you work Critical into strategies, you will have to steer clear of these Rages or activate them when you are at Critical already so that the Critical status can stick.
Non-Elemental Physicals
As stated before, Gau has a 50% chance to attack 1 random enemy with all Rages. The attack animation changes based on Rage but regardless they all have the same power and no extra effects. The exception to this rule is if Gogo is using an elemental weapon, which will overwrite the Non-Element attack with the element of the weapon. For example, Gogo Rages with a Flame Rod, it will make all standard attacks Fire Elemental, which will be affected by elemental resistances. In this case, Gogo smacking a Trillium (weak vs Fire) with a Fire Rod will deal double damage or attacking a Bomb (absorbs it) will heal it. Make sure you use the Equip command to swap Rods if necessary before you Rage.
However, some Rages have a Special Attack that will amplify the power of the Normal attack by a multiplied factor. For instance, Bogy’s Growl (Attack x 2) is a standard attack with twice the attack power of a standard strike. This multiplier also influences the spell effect Gogo’s Rods have. For instance, if you use Growl on a Trillium with a Fire Rod and it triggers the Fira, then both the Fira and the Growl that triggered it will be amplified by a factor of 4 (x2 for Growl and x2 for Fire weakness). On both of these characters, these multipliers can compensate for damage deficits, especially since Gogo cannot use Espers to power up his Stats. For the SNES fans, this was the staple to understanding the Wind God Gau build (equipped Kazekiri with a Merit Award and used Stray Cat).
What can make these attacks more dangerous is they are affected by Genji Gloves and Master’s Scrolls. Genji Gloves will cause all standard and augmented attacks to hit twice at the cost of a Shield. The Master’s Scroll will cause either attack to hit 4 times with half strength and random targeting. The Master’s Scroll’s penalty has no effect on the triggered spell effects from Gogo’s weapons. Both Relics can be combined.
What makes Gau a good candidate for these Relics is that some of these Rages provide defenses from status ailments and elements that other characters must sacrifice equipment or Relic slots in order to perform this overpowered combo. However, some Rages, especially the strongest ones don’t have ANY protection at all. I would suggest only using one of the Relics, preferably the Master’s Scroll if you wish to fight this way. The Shield slot is too important to give up as there are shields that can help Gau compensate for elemental weaknesses and Defenses.
- Stray Cat (Catscratch, x4) – Fields North of Veldt (WoB)
- Gold Bear (Gouge, x2.5) – South Figaro Cave (Locke’s Scenario, WoB)
- Corporal (Swing, x2) – Narshe Cliffs (Defense of Valigarmandr, WoB)
- Bogy (Growl, x2) – Kohlingen (Fields, WoR)
- Guard (Critical, x1.5) – Narshe (Start Mission, WoB)
- Wild Rat (Scratch, x1.5) – Narshe (Mines, WoB)
- Silver Lobo (Chomp, x1.5) – Narshe (Start Mission, WoB)
- Leaf Bunny (Incisors, x1.5) – Narshe (Fields, WoB)
- Sand Ray (Tail, x1.5) – Figaro Desert (WoB)
- Hornet (Iron Stinger, x1.5) – South Figaro Cave (pre-Locke’s Scenario, WoB)
- Exocite (Pincer, x1.5) – Returner’s Hideout (Raft, WoB)
- Vector Hound (Bite, x1.5) – South Figaro (Basement, WoB)
- Fidor (Pounce, x1.5) – Narshe Cliffs (Defense of Valigarmandr, WoB)
- Hunting Hound (Bite, x1.5) – Narshe Cliffs (Defense of Valigarmandr, WoB)
- Actinian (Clamp, x1.5) – Serpent’s Trench (WoB)
- Stunner (Incisors, x1.5) – Opera House (Rafters, WoB)
- Don (Tackle, x1.5) – Southern Continent (WoB)
- Doberman (Bite, x1.5) – Magitek Research Facility (WoB)
- Devourer (Shell Slam, x1.5) – Thamasa (Fields and Forest, WoB)
- Garm (Bodyslam, x1.5) – Narshe Cliffs and Town (WoR)
Stray Cat, Gold Bear, Corporal and Bogy break the mold by having their multipliers exceed 1.5, making these the most damaging physicals. However, most Gau players that utilize Strength builds use Stray Cat over the rest as it has the highest physical damage multiplier. Except for Corporal (weak against Poison) and Bogy (Auto-Protect and Stoneproof), the multipliers that exceed 1.5 have no status or elemental resistances and must use Relics and Equipment to compensate.
However, the player shouldn’t dismiss the non-Stray Cat Rages as some have advantages that can assist you on certain battles:
- Gold Bear has easy access near the bottom of the Rage list. It is useful if you are on Active, have a lot of Rages and you can’t find Stray Cat in time. It can be acquired at the same time as Stray Cat when needed.
- Bogy has nearly Gold Bear’s strength and both are close together on the list. It also has Auto-Protect and Stoneproofing, giving it an edge against heavy physical hitters and Petrify abusers without Relics.
- Stunner and Wild Rat both absorb Poison and Poison status becomes Regen.
- Exocite and Actinian both absorb Water. Actinian will need Blindproofing as it comes with Auto-Blind
- Hornet has Auto-Float, making it Earthproof outside of Lifeshaver
- Leaf Bunny absorbs Ice
- Vector Hound has Auto-Haste, making Gau or Gogo attack faster and Slowproof
- Devourer has Auto-Protect until you get Bogy
- Garm has the largest status immunity pool of the melee group (Blind, Poison, Petrify, Death, Doom, Silence, Berserk, Confuse, Sleep, Slow, and Stopproofing), freeing up a Ribbon and Safety Bit for other effective Relics when needed.
All these defenses and buffs largely come at the cost of a Fire (all but Devourer and Garm), Lightning (Devourer and Exocite) or Holy (Garm) weakness. The Flame/Thunder/Paladin Shields and smart uses of Reflect and Runic can negate these issues if needed until you get the Dueling Mask.
If you plan on maximizing the effects of these Rages, you will have to use your level ups on Bismarck, Raiden or Gilgamesh (Strength +2) and Ifrit (Strength +1). Since Strength has less influence on physical than Magic Power does on magic, it will take more level ups with Strength bonuses to get 9999 loadouts, even with high Special multipliers and especially against enemies that have high Defense stats. You may also need to consider equipping the Sniper Eye relic to ensure that your physical attacks never miss against enemies with high Evasion stats.
Stray Cat is all you will really need if you want to physically slaughter enemies. Bogy is good if you want Protect at the cost of half of Catscratch’s power. Gold Bear is a nice substitute for Catscratch, especially if you can’t get to Stray Cat in time on Active Time setting (Gold Bear is a few rows from the bottom of the list while you have to dig for Stray Cat and Bogy). Garm is helpful if you want to fight tooth and claw against status effect abusers.
Once Gau’s Strength reaches 100 or more and you start doing close to 9999 a hit, pick your favorite attack. At this point, I recommend Bogy if you aren’t using Protect bestowing Relics or Garm to free up Status defense Relics for offensive ones. Or just get keep ripping apart enemies with Stray Cat.
Non-Elemental Magic – Single Target
If Stray Cat spam isn’t your fancy, you have a large array of elemental and non-elemental magic at your disposal. Some of these attacks you have heard of, while others are foreign and only monsters can use them. Non-elemental attacks can be as helpful as Elemental attacks since the player doesnt need to memorize weaknesses or immunities and only has to worry about Magic Defense and Evasion, or not even those in some cases.
Black Magic
Spell Power: 10
Only Targets One
Vulnerable to Runic and Reflect
Acquired from
- Shiva (x4) – Magitek Research Facility (WoB)
- Zona Seeker (x20) – Jidoor Auction House (WoB)
Rages:
- Wartpuck – Zone Eater’s Belly (WoR)
Although Rasp is better served for manual casting, using the Wartpuck Rage does provide you with Deathproofing and other helpful status defenses while attacking the enemy’s MP supply. Plus, it can still have a 50% chance to attack the enemy normally. Just watch for Fire attacks!
Spell Power: 25
Enemy Ability
Only targets One
Unaffected by Reflect or Runic
Rages
- Demon Knight – Kefka’s Tower (WoR)
Spell Power: 26
Black Magic
Only Targets One
Unaffected by Reflect
Affected by Runic
Acquired from
- Shiva (x4) – Magitek Research Facility (WoB)
- Zona Seeker (x15) – Jidoor Auction House (WoB)
Rages
- Living Dead – Phantom Train (WoB)
- Blade Dancer – Owzer’s Mansion (WoR)
However, using it as a Rage is pointless as Gau doesn’t consume MP unless you bring him to Cultist’s Tower, fight the Skull Dragon in the Dragon’s Den or you use him outside of battle for White Magic so that your other characters can save the MP for offense. In these cases, you are better off manually casting it or using Wartpuck (Rasp) to directly attack the MP supply without heavy restrictions.
Spell Power: 38
Black Magic
Only Targets One
Vulnerable to Runic and Reflect
Acquired from
- Level Terra to 12
- Ifrit (x1) – Magitek Research Facility (WoB)
Rages
- Bloodfang (Drain) – Western Continent (Fields, WoB)
- Mandrake (Leech) – Esper Caves (WoB)
- Nightwalker (Drain) – Tzen (Burning Mansion, WoR)
Leech has a Spell Power of 40, but cannot be stopped by Reflect or Runic. It suffers from the same catches as Drain (cannot exceed difference, enemies’ current HP pool and reverses on Undead).
The issue with using either Rage is that you can easily learn Drain as a Black Magic and you will always have someone with Cure spells or Hi-Potions ready. Not only that, there is an Earth version called Lifeshaver that is far stronger and has the same strengths as Leech (cannot be stopped by Reflect or Runic), at the cost of it working in reverse on Earth absorbers as well.
However it is worth noting that Bloodfang is acquired before you get Ifrit for Drain. If you are also doing a Solo Gau run, this Rage will allow you maintain health in battle with living targets while still fighting back with fists. If you desperately need Drain, use Bloodfang till you get Ifrit or Lifeshaver.
Black Magic
Spell Power: 60
Only Targets One
Vulnerable to Runic
Vulnerable to Reflect
Acquired from
- Level Celes to 81
- Bahamut (x2) – World Map (Slay Deathgaze, WoR)
Rage
- Cloudwraith – Darill’s Tomb (WoR)

In terms of Rage, Flare is only found on 1 enemy and it renders Gau Undead, which many players find undesirable in battle. Plus, Rock Slide also has 5 more Spell Power and both Rages keep Gau amongst the living. Finally, you can easily give any character this spell once you get the Bahamut Magicite or just switch to Meteor and Ultima.
Mog Dance
Spell Power: 65
Always targets One Enemy
Unaffected by Reflect and Runic
Pierces Magic Defense and Evasion
- Luridan – Mount Zozo (Cliffs, WoR)
- Purusa – Thamasa Island (Fields, WoR)

Rock Slide is basically Flare with the added effect of piercing Magic Defenses and cannot be dodged, which helps against enemies that either put up Auto-Reflect, Shell or high Magic Defenses (eg. Ancient Castle enemies or Ouroboros in the Phoenix Cave) or have ridiculously high Magic Evasion (eg. Cactuar and Glutturns). Plus, both Rage creatures don’t render Gau Undead like the lone Flare one does. Because of the mechanics behind Rock Slide, this can be considered the bread and butter Rage for all Gau loadouts, whether you are a Magic, Solo or even Strength Gau in the event you face an enemy with a ridiculously high Physical Defense stat.
Both Luridan and Purusa are effective, but each have a weakness. Luridan gets more status resistance than Purusa and Floats to negate most Earth attacks, but has to contend with a Fire and Wind weakness. Purusa has no elemental problems, but only has Confuse and Stoneproofing vs Luridan’s Blind, Imp, Berserk, Confuse, and Sleepproofing. Choose either one and use equipment to negate weakness.
Enemy Ability
Spell Power: 120
Targets One or All
Unaffected by Reflect or Runic
- Killer Mantis – Southern Continent (Kefka Tower/Maranda Region, WoR)
- Twinscythe – Cave on the Veldt (WoR)
However, both Rages carry a crippling Fire weakness, which can be negated by the Flame Shield or the Snow Scarf. Twinscythe absorbs Ice without the need of a Snow Scarf but also gets a Wind weakness. Also, if you face an enemy with high Magic Evasion or Defenses, this attack loses effectiveness. In this scenario, you are better off using Rock Slide.
Once you get the Snow Scarf, Twinscythe becomes the best Rage for this. Just use a Thunder Shield to negate it’s Wind Weakness.
Non-Elemental Magic – Multi Target
Black Magic
Spell Power: 36
Always Targets All Enemies
Ignores Reflect and Runic
Ignores Split Damage
Ignores Magic Defense and Evasion
Acquired from
- Level Celes to 98
- Odin (x2) – Ancient Castle (WoR)
- Crusader (x10) – Slay all 8 Dragons (WoR)
Rages
- Behemoth – Floating Continent (WoR)
- Lunatys – Ancient Castle (WoR)
- Great Behemoth – Kefka’s Tower (WoR)

Plus, you can acquire the Rage in the World of Balance by fighting a Behemoth and bailing on the Floating Contient. When you gain the airship, you can get Great Behemoth, which drops the Ice weakness and gets Death and Stoneproofing, which it’s lesser cousin lacked (at the cost of Stop and Slowproofing). Lunatys is acquired later but it’s Auto-Reflect ability can make it effective against spellcaster enemies.
Strago Lore
Spell Power: 40
Targets One or All
Ignores Reflect and Runic
Ignores Split Damage
Acquired from
- Zaghrem – Mount Kolts (WoB)
- Valeor – Narshe Mines (Terra’s Scenario, WoB)
- Iron Fist – Western Continent (WoB)
- Ultros – Esper Caves (WoB)
- Gilgamesh – Colisseum (Bet Excalipoor, WoR)
- Dark Force – Kefka’s Tower (WoR)
Rages
- Zaghrem – Mount Kolts (WoB)
- Valeor – Narshe Mines (Terra’s Scenario, WoB)
- Iron Fist – Western Continent (WoB)
- Knotty – Yeti’s Cave (WoR)

The spell can be accessed the moment you enter the Veldt with Zaghrem or Valeor. Although Zaghrem gives Gau Berserk, it will not affect Gau’s ability to fire off Stone. Plus, Zaghrem has one advantage that Valeor doesn’t: Absorption to Poison. Just be careful around Ice attacks. The Ice resistance is removed once you get access to Iron Fist.
However, as Gau and any other character’s Spell Power rises, there are far better spells at your disposal. At late game, the only saving grace is the attack spreads mass Confusion without the need of the Noiseblaster or Cait Sith.
Enemy Ability
Spell Power: 60
Ignores Reflect and Runic
Ignores Split Damage
Ignores Magic Defense
Rages:
- Tyrannosaur – Dinosaur Forest (WoR)

Despite the drawbacks, this attack can be quite effective if you want to add more punch to your armor piercing offense and your enemy doesn’t have the Magic Evasion to avoid the strike. Plus, it is more efficient then having to switch around Behemoths for a couple of status immunity changes. Tyrannosaur has immunity to every negative effect in the game except Slow and just has to contend with an Ice weakness, which both can be negated by equipment (Auto-Haste Relics and the Snow Scarf respectively).
Strago Lore
Spell Power: 66
Ignores Reflect and Runic
Ignores Split Damage
Ignores Defense
Acquired from
- Trapper – Magitek Research Facility (WoB)
- Apocrypha – Floating Continent (WoB)
- Devil – Ancient Castle (WoR)
- Dueller – Kefka’s Tower (WoR)
Rages
- Magna Roader (Brown) – Narshe Mines (WoR)
The sole provider of the Rage isn’t that impressive and Strago can easily acquire it for himself when needed. Plus, there are other Gau Rages that can hit all enemies, both elemental and non-elemental without the annoying level restrictions.
Ally Command
Spell Power: 128
Always targets all enemies
Ignores Reflect and Runic
Ignores Magic Evasion
- Yojimbo – Kefka’s Tower (WoR)

With high enough Magic Power, Gau can utilize this Rage to great effect, causing untold devastation to any enemy configuration, even when Surrounded. This Rage is a decent subtitute for casting Ultima and Meteor when handling groups. It isn’t surprising when people get Yojimbo going, this and Rock Slide (which is better for single targets that have higher Magic Defense) become their bread and butter Magic offense.
The only drawbacks are it doesn’t pierce Magic Defenses and has to worry about Split Damage. The Rage itself also renders Gau weak against Poison. However, there aren’t too many Poison attackers at end game, high Magic Power can solve the Defense problem and Yojimbo gets Deathproofing and a host of other status defenses.
Non-Elemental Magic – Fixed Damage (Part 1)
Fixed damage may not seem like much, but it helps when you are dealing with heavily armored enemies that could have low health or your doing a Low Level Playthrough (LLP) and your damage can’t cut it. However, once you start getting better options, most of these spells are outclassed by other Defense ignoring moves.
There is also Flare Star, but I cover this one in the Fire Elemental Attacks – Flare Star section as there is some science involved in using this one correctly.
Gravity – Black Magic
Shamshir – Enemy Ability
Gravity Bomb – Enemy Ability
Cave In – Mog Dance
Reduces target’s current HP by 50% (1/2)
Cave In reduces target’s current HP by 25% (1/4) and adds Sap
Acquired from
- Phantom (x5) – Magitek Research Facility (WoB)
Rages
- Angel Whisper (Gravity) – Initial
- Vulture (Shamshir) – Western Continent (Fields, WoB)
- Belzecue (Gravity) – Magitek Research Facility (WoB)
- Lenergia (Shamshir) – Magitek Research Facility (WoB)
- Rukh (Shamshir) – World Map (Albrook and Tzen, WoR)
- Wizard (Gravity) – Narshe Mines and Cliffs (WoR)
- Armored Weapon (Gravity Bomb) – Ancient Castle (WoR)
- Sorath (Cave In) – Ebot’s Rock (WoR)
- Any attack or amplified Physical special by chance while Gogo is wielding the Gravity Rod (Graviga)
Fractional damage attacks like Gravity can be effective for crippling enemies. Some of the Rage selections can be used long before you learn Gravity and Cyan’s Tiger Bushido. The spell will fail against enemies that are Deathproof. Gravity is also the only fixed damage spell vulnerable to Reflect and Runic. If you execute Graviga via the Gravity Rod’s special effect, it is unaffected by any attack multipliers.
Gau also starts with the Angel Whisper Rage already learned, but this Rage makes Gau Undead. Vulture is the soonest living creature that learns Shamshir; Gravity that can’t be interecepted by Runic or Reflect. Lenergia drops Vulture’s Wind weakness. The rest either have elemental weaknesses that make them not so useful or gained long after you get Phantom.
Because these spells don’t work on Deathproof enemies, it’s effectiveness is limted. Also, if an enemy is not Deathproof, you are better off killing them through Rages that deal damage or utilize Death enmasse. You can also use the Cyclonic Rage to inflict it on multiple attackers, where all 4 methods only work on 1 enemy.
Also, you also learn Graviga from Midgardsormr at a Rate of x1 and does 25% more damage (50% more than Cave In) in the World of Ruin, making Gravity less effective by then. After you beat Kaiser Dragon and get Diabolos and Gravija, these Gravity attacks trump all forms as these bypass Deathproofing.
Strago Lore
Deals 1000 damage
- Brainpan – Floating Continent (WoB)
- Cactuar – Maranda Desert (WoR)
- Face – Phoenix Cave (WoR)

However, 1000 damage isn’t exactly a whole lot of damage when you get it and the earliest possible monster that has it is Undead.
Strago Lore
Deals Current HP of Caster in Damage, then KOs Caster.
- Bandit – Narshe Mines (WoB)
- Balloon – Thamasa (Burning House, WoB)
Strago Lore
Deals (Maximum HP of Caster – Current HP of Caster) in damage.
- Dragon – Floating Continent (WoB)
- Pandora – Cyan’s Soul (Cyan’s Dream, WoR)
- Glasya Labolas – Mount Zozo (WoR)
Strago Lore
Deals (# of Steps Taken/32) damage
- Fafnir – Southern Continent (WoR)
- Crawler – World Map (Islands, WoR)
- Onion Dasher – Yeti’s Cave (WoR)

Even if the player hasn’t walked the necessary steps, it can assist Gau when your damage is lacking. This attack shines in Low Level Playthroughs since all you need to do to improve it’s damage is walk around in towns (32 steps = 1 damage). It also assists Strago by having 2 casters fight enemies with this.
Fafnir and Crawler are the best Rages to use if you wish to use Traveler in battle. Both Rages carry a single weakness which is negated by the Snow Scarf (weakness to Ice) and Ribbon (they have no status immunities except Crawler is Poisonproof) and you can get both Rages on the World Map. Onion Dasher has crippling Water and Lightning weaknesses and gained later than usual, but has standard Mechanical status defenses (Zombie, Poison, Imp, Petrify, Sapproofing).
Non-Elemental Magic – Fixed Damage (Part 2)
Mog Dance
Deals 37.5% of Maximum HP as Damage and inflicts Sap
Ignores Evasion
- Satellite – Imperial Camp (Monster-In-A-Box)

Having this form of Gravity has a cost: Satellite renders Gau weak against Lightning and Water. Also like Gravity, this spell doesn’t work on Deathproof enemies. Plus, this Rage is more suited towards high health targets (such as the Dragon’s Den monster lineup) since most characters can outdamage Sonic Boom’s potential on low health targets easily.
Enemy Ability
Reduces all affected enemies to 1/16th of Current HP
- Wyvern – Southern Continent (WoB)
- Briareus – Thamasa Plains (WoB)
- Platinum Dragon – Floating Continent (WoB)
- Vasegiatta – Thamsa Plains (WoR)
- Galypdes – Pheonix Cave (WoR)

Other than failing to work on Deathproof, the only other con to this spell is it has a Hit Rate of 75; making it is prone to missing. However, you will get at least 1 or 2 targets affected if cast on large groups. It eventually gets outclassed by Tornado ocne you Deathproof your team and then once again when you get Gravija and the Diabolos Magiicite (both work on Deathproof enemies).
Wyvern and Briareus are your earliest Cyclonic Rages. Prioritize over Briareus as you don’t get the weakness to Ice and lack of Status Immunities Wyvern has. You can also sub out both for Platinum Dragon if you need Auto-Protect and Float while you use this spell.
Once you are able to find Galypdes (which is the rarest monster there), you can get Fire absorption and get status defenses of the first 3 along with Stoneproofing and it’s only weakness is cancelled out by a Snow Scarf. Between Galypdes or Briareus, you have all the Rages you need to abuse Cyclonic against your opposition for the game.
Fire Elemental Attacks
Fire is commonly used to smite most plant types, Ice attuned monsters and especially Undead early game until Holy becomes more widespread outside of Sabin’s Aura Cannon Blitz. Fire also has a plethora of abilities you can use for many different combat situations.
There is also a Flare Star Rage, but I uncover the science on it’s deployment in the next section as it requires more information to deploy properly.
Note: Gogo can cause any attack or amplified physical special to deal Fire damage if equipped with the Flame Rod.
Black Magic
Spell Power: 21
Targets One or All
Affected by Reflect by Runic
- Imperial Soldier – Imperial Camp (WoB, Sabin Scenario)
- Spectre – Narshe Mines (WoB, Checkpoint Maze)
- Eukaryote – Narshe Mines (WoB, Checkpoint Maze)
Enemy Ability
Spell Power: 50
Targets All Enemies
Unaffected by Reflect by Runic
Affected by Split Damage
- Lesser Lopros – Returners’ Hideout (WoB, Lenne River)
- Fortis – Kefka Tower (WoR)
Fireball can decimate or significantly cripple groups of non-Fire resistant enemies. Plus, you can acquire Lesser Lopros once you get access to the Veldt for the first time. Once you acquire it, it is an extremely helpful spell for quickly plowing through weaker enemies in the Veldt to get to the Groups that you want to face.
The only con is you will have to watch for Fire attacks as Lopros unless you are wearing a Fire protection (weak against Fire) and it will need Deathproofing and maybe even a Ribbon in some cases.. Fortis is acquired too late to be of use and has 2 weaknesses (Water and Lightning), but makes up for it by being Zombie, Stone and Poisonproof.
As the game progresses, this spell loses efffectiveness against World of Ruin enemies, unless your Magic Power is high and you cast them on small groups. However, this doesn’t dismiss it as an effective Veldt formation clearer.
Black Magic
Spell Power: 60
Affected by Reflect by Runic
Targets One or All
- Templar – Imperial Camp (Sabin’s Scenario, WoB)
- Lich – Cave of the Sealed Gate (WoB)
- Clymenus – Phoenix Cave (WoR)
- Any attack or amplified Physical special by chance while Gogo is wielding the Flame Rod
Although Undead, Lich has the added bonus of absorbing Fire itself. However, the Blaze users have the same absorption and non Undead at the cost of 2 weaknesses Clymenus is gained too late to be of use.
This attack can be supremely dangerous if you use Gogo and the Flame Rod while Raging. The damage potential can be devastating if it goes off while raging as Stray Cat, Gold Bear or Bogy.. Just be careful against Reflect barriers.
Enemy Ability
Spell Power: 68
Unffected by Reflect and Runic
Targets One or All
- Spritzer – Narshe Mines (WoB)
- Bomb – Phantom Train and Forest West of Veldt (WoB)
- Grenade – Bomb Forest (WoB)

Both Bombs absorb Fire and Spritzer eats Lightning. However, they suffer from crippling weaknesses: Spritzer is Undead and hates Fire and Holy. Bomb and Grenade can’t stand Ice and Water.
The real reason to use Blaze is primarily for Bomb and Grenade’s Fire absorption until you get Fire resistant equipment going. Afterwards, this attack loses effectiveness to Firaga itself.
Mog Dance
Spell Power: 72
Unaffected by Reflect and Runic
Always targets One
- Oversoul – Phantom Train (WoB)
- Devil Fist – Mount Zozo (WoR)

The earliest caster is unfortunately Undead and gets 2 weaknesses (Fire and Holy). The Devil Fist is the polar opposite. Gau keeps the Holy weakness but gains Auto-Haste and Death, Doom and Stoneproofing, allowing for quicker, less restricted Fire attacks with assurance you won’t be killed.
Black Magic
Spell Power: 121
Targets One or All
Affected by Reflect and Runic
- Behemoth King (Undead) – Cave of the Veldt (WoR)
- Primeval Dragon – Kefka Tower (WoR)
Primeval Dragon is a better choice for Firaga as the only issue to worry about is the Ice weakness, which the Snow Scarf overwrites as an absorption. Only use the Behemoth King if you want to take advantage of the Undead positives for certain fights.
Black Magic
Spell Power: 138
Dual Elemental: Fire and Wind
Always Targets All Combatants
Unaffected by Reflect or Runic
Ignores Split Damage
Ignores Magic Evasion and Defense
- Mover – Kefka’s Tower (WoR)
- Daedalus – Kefka’s Tower (WoR)
Of the 2 Rages, pick Mover. It is isn’t Undead, has no weaknesses (absorbs Poison) and still maintains a decent amount of status defenses, but you will have to equip Deathproofing (even though it is Doom and Stoneproof).
- When you get to Veldt for first time, acquire Lesser Lopros, Bomb and Templar
- Once you get the Airship in the World of Ruin, get Primeval Dragon from Kefka’s Tower
- When you do Cyan’s full content, acquire Io (covered in next section on Flare Star)
Templar, Bomb and Lesser Lopros will serve you well for the World of Balance, while Templar can go further if Gau’s Magic Power remains high.Later, equip the Snow Scarf. Later on, Primeval Dragon and Mover when setup correctly will be more than a match for anything you face. Devil Fist should be considered if you want to bypass Reflect.
Fire Elemental Attacks – Flare Star
Targets all Enemies (1 Side)
Ignores Magic Evasion
Unaffected by Reflect or Runic
Deals [80 x (Lowest Level of Affected Target(s))] / # of affected targets] as Fire damage to each affected enemy.
Rages
- Io – Dreamscape (Mines Section, WoR)
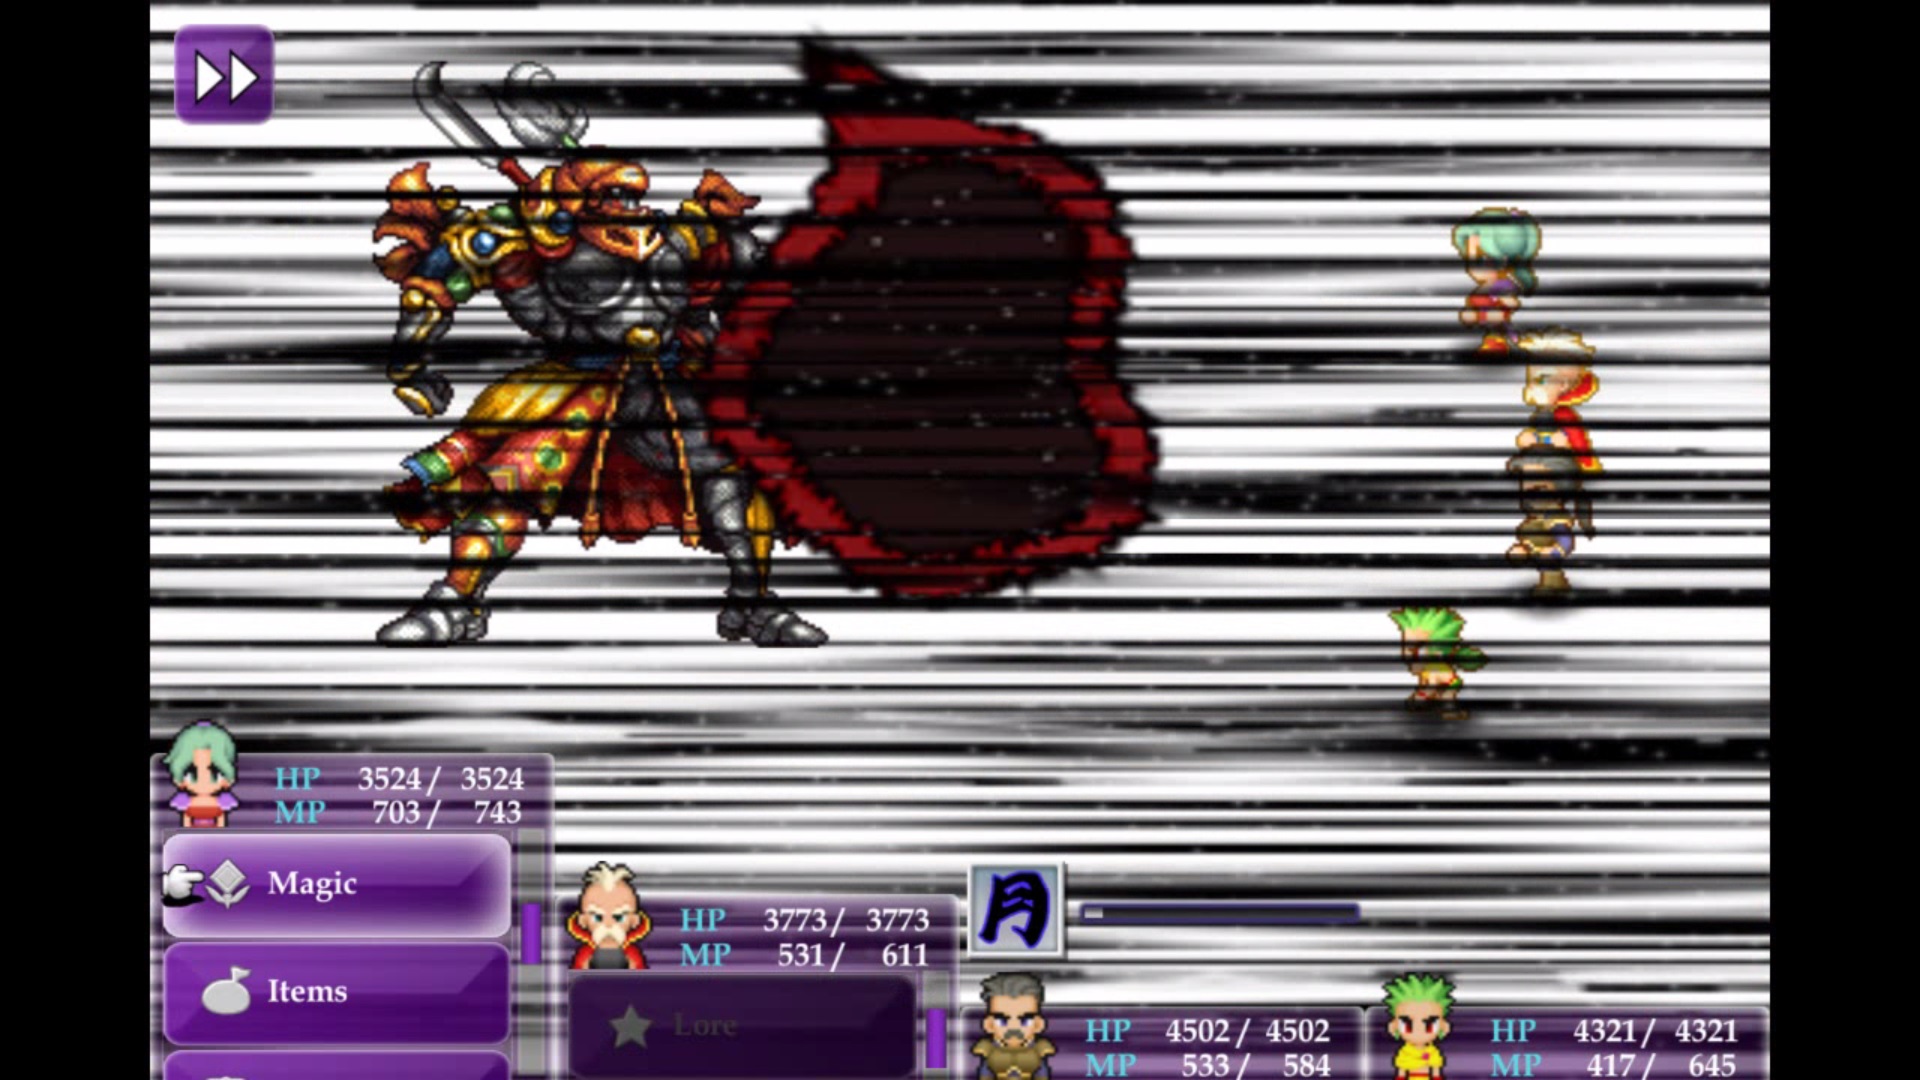
What also makes this spell good for strong enemies is you can double the output of this attack through the Debilitator Tool (cycles a random weakness to an enemy) and roll the Fire element. If an enemy is already weak against Fire, then you don’t need to do this. Note the Debilitator cannot overwrite Immunity or Absorption (as covered in the Elemental Resistance section of Raising Gau). Flare Star always does 0 if Strago or Fiend use Force Field and it rolls Fire, regardless of enemy Fire resistance, In the case of multiple enemies, they will all share the same incoming Fire damage after division is applied, but their individual resistances still play a factor in how much damage it will exactly do to them.
Another concern is that Gau gets an odd setup of elemental resistances. He gets immunity to Poison, Earth and Wind, but takes double from Water, Lightning and Holy. Force, Paladin and Thunder Shields or a piece of Imp Equipment can fix this until you get he Dueling Mask. For status resistance, he gets everything but Death, Stone, Doom and Slow. You also cannot apply Fenrir or Phantom under this Rage. Better get yourself a Safety Bit!
The following chart will show the damage output of the World of Ruin bosses and Dragon’s Den enemies. Note that if the resistance states Normal, you can apply the Debilitator to apply weakness. If so, double the number and cut off at 9999 if 10000 or higher. The numbers factor in default conditions and is sorted by damage output. Bosses that are either immune to or absorb Fire (be it from Barrier Change or natural) or faced before you learn the Io Rage are omitted from the list.
7760 (2 Dragons)
5173 (3 Dragons)
3840 (4 Dragons)
7360 (2 Malboro Menace)
4907 (3 Malboro Menace)
3680 (4 Malboro Menace)
7280 (2 Flan)
4853 (3 Flan)
3640 (4 Flan)
2912 (5 Flan)
5680 (With 1 Monster)
0 (Shell Regardless)
880 – 3560 (With 1 Monster)
3440 (1 Erebus)
2292 (2 Erebus)
1720 (3 Erebus)
1376 (4 Erebus)
5920 (Goddess)
720 – 3240 (With 1 Monster)
480 – 2160 (With 2 Monster)
3080 (With 1 Monster)
0 (After Force Field on Fire)
2000 – 2880 (With 1 Monster)
1333 – 1920 (With 2 Monsters)
2840 (With 1 Monster)
Fire Elemental Defense
- Bomb (Blaze) – Phantom Train, Bomb Forest (WoB)
- Grenade (Blaze) – Bomb Forest (WoB)
- Outcast (Lifeshaver, Undead) – Cave of the Sealed Gate (WoB)
- Provoker (Imp, Undead) – Cave of the Sealed Gate (WoB)
- Lich (Fira, Undead) – Cave of the Sealed Gate (WoB)
- Antares (Magnitude 8) – Cave of the Sealed Gate (WoB)
- Intangir (Transfusion) – Triangle Island (WoB)
- Balloon (Self-Destruct) – Thamasa Burning Mansion (WoB)
- Psychos (Lifeshaver) – Narshe Mines and Caves (WoR)
- Zeveak (Flash Rain) – Phoenix Cave (WoR)
- Chaos Dragon (Disaster) – Phoenix Cave (WoR)
- Sea Flower (Sleep) – Phoenix Cave (WoR)
- Galypdes (Cyclonic) – Phoenix Cave (WoR)
- Magic Urn (Curaga) – Cultist’s Tower (WoR)
Bomb and Grenade are the earliest Fire absorbers you can acquire and are good for fighting Fire with Fire. The only difference is status defenses (Bomb is Zombieproof, Grenade is Stoneproof). Afterwards, Antares has a good attack and only 1 weakness vs Bomb’s 2, but it comes at the cost of being unable to strike Floating targets.
In the World of Ruin, Zeveak has the best attack of the Fire absorbers, which does both Water and Ice damage, a common element most Fire attackers are weak against or take full damage from. Psychos also is good for Solo Gau games in the event you are facing a Fire attacker mixed with other damage sources as Lifeshaver can stack on more healing.
- Wererat (Poison)
- Silver Lobo (Chomp)
- Megalodoth (Snowstorm)
- Spritzer (Blaze, Undead)
- Darkwind (Break)
- Leaf Bunny (Incisors)
- Urok (Digestive Acid)
- Hornet (Iron Stinger)
- Foper (Death)
- Trillium (Bio)
- Cirpius (Hastega)
- Gorgias (Snowstorm)
- Lesser Lopros (Fireball)
- Nautiloid (Ink)
- Exocite (Pincer)
- Wild Rat (Scratch)
- Eukaryote (Fire, Undead)
- Specter (Fire, Undead)
- Darkside (Blizzara, Undead)
- Vector Hound (Bite)
- Nettlehopper (Berserk)
- Aepyornis (Featherdust)
- Doberman (Bite)
- Poplium (Cling, Undead)
- Ghost (Thundara, Undead)
- Living Dead (Osmose, Undead)
- Angel Whisper (Gravity, Undead)
- Oversoul (Will O’ The Wisp, Undead)
- Actinian (Clamp)
- Aspiran (Gigavolt)
- Fidor (Pounce)
- Hunting Hound (Bite)
- Hell’s Rider (Venomist)
- Rock Wasp (Sleepsting)
- Paraladia (Poison Touch)
- Stunner (Incisors)
- Grasswyrm (Berserk)
- Flan (Sticky Goo)
- Magna Roader (Purple) (Bio)
- Zombie Dragon (Doom, Undead)
- Mandrake (Leech)
- Bonnacon (Sticky Goo)
- Brainpan (1000 Needles, Undead)
- Misfit (Lifeshaver, Undead)
- Black Dragon (Snowstorm II, Undead)
- Nightwalker (Drain, Undead)
- Zokka (Net)
- Scorpion (Poison)
- Luna Wolf (Face Chomp)
- Killer Mantis (Metal Cutter)
- Delta Beetle (Megavolt)
- Vampire Thorn (Bio)
- Devoahan (Slowga)
- Humpty (Poison, Undead)
- Deepeye (Dread Gaze)
- Skeletal Horror (Banish, Undead)
- Borghese (Holy, Undead)
- Malboro (Bad Breath)
- Exoray (Venomist, Undead, canceled by Auto-Shell)
- Cloudwraith (Flare, Undead)
- Tumbleweed (Lifeshaver)
- Greater Mantis (Wind Slash)
- Mugbear (Net)
- Luridan (Rock Slide)
- Necromancer (Death, Undead)
- Twinscythe (Metal Cutter)
- Death Warden (Quake, Undead)
- Behemoth King (Undead) (Firaga)
- Rafflesia (Entice)
- Still Life (Lullaby)
- Crusher (Lifeshaver)
- Coeurl Cat (Blaster)
- Baalzephon (Blizzaga)
- Shambling Corpse (Thundaga, Undead)
- Wartpuck (Rasp)
- Anemone (Gigavolt)
- Illuyankas (Gigavolt)
- Knotty (Stone)
- Tonberry (Break)
- Weredragon (Death)
- Pandora (Revenge Blast, Undead)
- Mahadeva (Death, Undead)
- Aspidochelon (Landslide, Undead)
- Great Malboro (Bio)
- Daedalus (Meltdown, Undead)
As you can see, quite a few Rages (and the enemies you get them from) suffer hard due to Fire weakness. Most of them are also Undead but there are a couple of living ones you don’t want to have a Fire weakness on. Primarily it attacks most of your earliest casters and plagues some of your most devastating moves like Gigavolt, Bio, Blizzaga, Rock Slide, Holy, and especially Metal Cutter (high powered attack), Fireball (best spell for destroying early enemies) and Dread Gaze (only way to Petrify a Deathproof/non-Stoneproof enemy for an instant kill). Also, 2 of the top 3 elemental absorbers in the game, Baalzephon and Great Malboro all suffer a Fire weakness.
This proves that Fire is one of the most dangerous elements in this game, given the amount of enemies that are on this list.
Luckily, it is an easy resistance to fix as there are plenty of defenses to it:
- Dueling Mask (halves Fire)
- Thunder Shield (halves Fire)
- Force Shield (halves Fire and Auto-Shell)
- Ice Shield (nullifies Fire at the cost of Wind)
- Snow Scarf (nullifies Fire)
- Paladin Shield (absorbs Fire)
- Flame Shield (absorbs Fire at the cost of Water)
Any of these items will do. The Snow Scarf is the most helpful since you get high defenses and absorb Ice along side it. The Dueling Mask also enhances Gau’s overall performance.
Ice Elemental Attacks
Ice beats mostly Fire elemental creatures and scaled enemies. The only cons to Ice is that most of the Ice based Rages are dominated by All target skills, which is a problem when you fight mixed absorptions and it takes awhile before you start getting the good Ice attacks.
Note: Gogo can cause any attack or amplified physical special to deal Ice damage if equipped with the Ice Rod.
Enemy Ability
Spell Power: 25
Targets All Enemies (1 Side)
Unaffected by Reflect and Runic
Rages
- Megalodoth – Narshe Caves and Mines (Invasion, WoB)
- Gorgias – Mount Kolts (WoB)
- Lukhavi – Narshe Region (WoR)
- Muud Suud – Kefka’s Tower (WoR)

In the World of Ruin, this Rage loses effectiveness as the low Spell Power can’t keep up with the increasing values in HP. At that point, there are other Ice moves at your disposal that can do the job.
Mog Dance
Spell Power: 55
Targets All Enemies
Unaffected by Reflect and Runic
Unaffected by Silence
Unaffected by Split Damage
Rages
- Gorgimera – Cave on the Veldt (WoR)
Gorgimera is also easy to access since the Cave is near where you get Gau, but the encounter rate is low. It will be well worth the grind to get once you acquire it. Gorgimera also drops the weaknesses all the Snowstorm users have, gains a Ribbon and Safety Bit’s worth of status resistances, including Slow and Stopproofing.
With Gorgimera’s advantages, Avalanche can be an effective, general purpose attack for taking down enemies without fear of status effects, especially if they happen to have an Ice weakness.
Enemy Ability
Spell Power: 60
Targets All Enemies
Unaffected by Reflect or Runic
Dual Element: Water and Ice
- Test Rider – Narshe (WoR)
- Zeveak – Phoenix Cave (WoR)
- Moonform – Ebot’s Rock (WoR)
Flash Rain is basically Avalanche but adds the Water element. This can be effective as it can deal double damage if an enemy has either weakness. However, you must also factor in immunities or absorptions into either element when you use it, so don’t use this attack if an enemy has resistance to either element.
All 3 have individual absorptions and weaknesses, but Moonform is crippled by Undead typing. Zeveak absorbs Fire, but can’t take Ice (which is an easy issue to fix), Test Rider is only weak against Poison. Another issue is all 3 casters have MP 0 = Death, making it an ill-advised attack against Rasp and Osmose abusers.
If you wish to work Flash Rain into your plans, use Zeveak or Test Rider. Zeveak has an easy resistance to cancel and has Slow and Stopproofing. Test Rider has Death, Stone and Doomproofing for when you need that, which can make the Factory section of Kekfa’s Tower a joke.
Black Magic
Spell Power: 62
Targets One or All Enemies
Affected by Reflect and Runic
- Darkside – Narshe Mines Checkpoint (Trip Alarm, WoB)
- Veil Dancer – Zozo (Interior, Both)
- Any attack or ampified physical attack by chance while Gogo wields the Ice Rod

Darkside is the earliest form of it, but Gau turns Undead and gets Bomb’s weaknesses. Also, if you did Sabin’s Scenario before Terra and Locke, you will have to acquire it after the Narshe Invansion. After the events in Zozo, you can go back through the raft ride and acquire Veil Dancer, which doesn’t come with the Undead weakness, but you will now have to watch for Poison attacks.
Enemy Ability
Spell Power: 100
Always targets All Enemies
Unaffected by Runic or Reflect
Unaffected by Magic Evasion
- Black Dragon – Solitary Island (Desert, WoR) and Serpent’s Trench (WoR)
- Kamui – Zone Eater’s Belly (WoR)

You can use Black Dragon if you can suck up the Undead typing, but you are better off getting Kamui.
Kamui has 2 crippling weaknesses: Lightning and Poison. Until you get the Dueling Mask, your best bet to combat at least the Lightning weakness is to use a Thunder Shield or use Baalzephon.
Despite the drawbacks, this attack has potential to decimate enemies, especially if there are enemies weak against Ice mixed into the groups or you get surrounded.
Black Magic
Spell Power: 120
Targets One or All Enemies
Affected by Reflect and Runic
- Baalzephon – Zone Eater’s Belly (WoR)
Blizzaga is devastating and is effective in many scenarios. The Rage has easy access as you just need the Airship and have your entire party swallowed by the Zone Eater.

This Rage helps in a few ways. You get the best Ice attack in the game and it comes with 6 Absorptions and bestows Auto-Float. The only thing Gau will need to fear is Holy (normal damage), Fire (Weakness) or MP gets to 0 (KO). You can mitigate the Fire weakness with either the Snow Scarf or the Flame Shield. If you want to maintain magic offense but save on elemental resistance equipment, this Rage is for you. Just don’t deply against Ice absorbers.
- When you get to the Veldt for the first time, get Megalodoth or Gorgias or Darkside
- If you plan on taking Gau to Magitek, get Veil Dancer. Otherwise, save it for the Blackjack.
- In the World of Ruin, prioritize for Baalzephon, Kamui and Gorgimera.
Veil Dancer will be your main Ice elemental attacker within the Woirld of Balance. You can also use a Snowstorm Rage if you want an Ice version of Fireball.
In the World of Ruin, Baalzephon is going to be extremely effective, but having Flash Rain, Snowstorm II and/or Avalanche can be effective when needed.
Ice Elemental Defense
- Leaf Bunny (Incisors) – Figaro Plains (WoB)
- Magna Roader (Purple) (Bio) – Magitek Facility (Minecart Ride, WoB)
- Intangir (Transfusion) – Triangle Island (WoB)
- Baalzephon (Blizzaga) – Zone Eater’s Belly (WoB)
- Twinscythe (Metal Cutter) – Cave on the Veldt (WoR)
- Great Malboro (Bio) – Kefka’s Tower (WoR)
- Behemoth King (Undead) (Firaga) – Cave on the Veldt (WoR)
- Magic Urn – Cultists Tower (WoR)
The Ice defense list is small. For the World of Balance, all you have is a Bio caster and a Rage for Strength Gau at the cost of Stray Cat and Gold Bear’s multipliers.
The better options are in World of Ruin as Baalzephon, Great Malboro and Magic Urn can absorb multiple elements (all but Fire and Holy, all but Fire and everything respectively). The only catch is that these carry Magic. Twinscythe, although only absorbs Ice, has a high powered non-elemental magic attack which can be used in any situation, provided the enemy doesn’t have high Magic Defenses to compensate.
- Al Jabr (Thundaga)
- Zaghrem (Stone)
- Behemoth (Meteor)
- Fafnir (Traveler)
- Brachiosaur (Disaster)
- Tyrannosaur (Meteor)
- Lizard (Break)
- Litwor Chicken (Quake)
- Leap Frog (Sticky Goo)
- Slagworm (Sandstorm)
- Cactuar (1000 Needles)
- Bomb (Blaze)
- Figaro Lizard (Dischord)
- Crawler (Traveler)
- Sand Ray (Tail)
- Sandhorse (Sandstorm)
- Alacran (Numb)
- Darkside (Blizzara)
- Provoker (Imp)
- Peeper (White Wind)
- Vector Lythos (White Wind)
- Wyvern (Cyclonic)
- Primeval Dragon (Firaga)
- Gloomwind (Net)
- Ouroboros (Quake)
- Cancer (Esuna)
- Gigantoad (Sticky Goo)
- Basilisk (Break)
- Medusa Chicken (Break)
- Landworm (Magnitude 8)
- Grenade (Blaze)
- Magna Roader (Red) (Silence)
- Antares (Magnitude 8)
- Face (1000 Needles)
- Zeveak (Flash Rain)
- Tzakmaqiel (Imp)
- Goetia (Libra)
- Psychos (Lifeshaver)
- Balloon (Self-Destruct)
- Chaos Dragon (Disaster)
- Rukh (Shamshir)
- Bug (Stop)
- Seaflower (Sleep)
- Galypdes (Cyclonic)
Quite a few Rages suffer from Ice, especially considering 2 of the Meteor users, both White Wind and Traveler users, the most effective Stoppers and the best Firaga caster are on this list. However, like Fire, this is an extremely easy element to your protect yourself from.
- Thunder Shield (resists Ice)
- Dueling Mask (resists Ice)
- Force Shield (resists Ice, Auto-Shell)
- Flame Shield (nulls Ice at the cost of Water)
- Ice Shield (absorbs Ice at the cost of Wind)
- Snow Scarf (abosrbs Ice)
- Paladin Shield (absorbs Ice)
Gau’s ultimate armor resolves this issue easily, plus you get Fireproofing. Once you get the Dueling Mask, you can change the Snow Scarf to a stat improving armor if you wish.
Lightning Elemental Attacks
Lightning is designed to destroy robotic and aquaitic enemies. However, you will have to put up with largely single target attacks under this element.
Note: Gogo can cause any attack or amplified physical special to deal Lightning damage if equipped with the Thunder Rod.
Enemy Ability
Spell Power: 21
Always hits One Enemy
Unaffected by Reflect
Affected by Runic
- Magitek Armor – Default
- Heavy Armor – South Figaro (Occupation), Narshe (Defense) (WoB)
- Sky Armor – Floating Continent (First Trip, WoB)
- Spitfire – Floating Continent (First Trip, WoB)
- Pluto Armor – Cyan’s Dream (Dreamscape, WoR)
Magitek Laser is a weak attack. However, this attack has only 2 advantages. The attack cannot be interrupted by Reflect and all the Grounded units have Auto-Protect status at the cost of being weak against Lightning and Water (for ground based ones) or Wind (Sky Armor).

Second, it is worth noting that this Rage can help Celes recover MP as she gains 20 MP for every Magitek Laser interception. This can help you when you do the Magitek Facility and you rely on Cure/Cura a lot or if you are lacking Ethers. Once you gain Osmose or an ample supply of Ethers, this strategy is rendered useless.
Enemy Ability
Spell Power: 21
Targets One or All Enemies
Affected by Reflect and Runic
- Belmodar – Initial
- Delta Beetle – Serpent’s Trench (WoR)
- Duel Armor – Kefka’s Tower (WoR)
Once you acquire Ramuh or get Thundara or Gigavolt, the attack loses effectiveness. The absorption itself can either be replicated by the Thunder Shield or 2 of the Gigavolt Rages you find in the World of Ruin.
Black Magic
Spell Power: 62
Targets One or All Enemies
Affected by Reflect or Runic
- Ghost – Phantom Forest (WoB)
- Cloud – Phantom Train (Inside, WoB)
- Joker – Vector Plains (WoB)
- Any attack or amplified Physical by chance if Gogo uses the Thunder Rod
What gives this Rage over it’s other strong counterpart, is that the Holy weakness it has isn’t shared by any enemies in the World of Balance. Aspiran has to contend with a Fire weakness.
Once Gigavolt and Thundaga becomes mainstream in the World of Ruin, this attack loses effectiveness. However, note that it can be made effective again when you use Rages like Stray Cat, Bogy or Gold Bear and Gogo is armed with the Thunder Rod. Just beware of using it against Reflected enemies.
Mog Dance
Spell Power: 70
Always Targets One Enemy
Unaffected by Reflect or Runic
Unaffected by Silence
Ignores Magic Evasion
- Chaser – Vector (After Mine Cart Escape, WoB)
Plasma is only useful if your enemy is weak against Lightning and you want to pierce their Reflect status and Magic Evasion to do it. The enemy itself is also easily missed by many players. Other than that, you will have to contend with a Water and Lightning weakness.
Enemy Ability
Spell Power: 112
Targets One or All Enemies
Affected by Reflect and Runic
- Aspiran – Serpent’s Trench (WoB)
- Anemone – Narshe (Yeti’s Cave – WoR)
- Illuyankas – Narshe (Yeti’s Cave – WoR)
- Parasite – Cyan’s Dream (Dreamscape, WoR)

For defenses, Aspiran and Anemone also absorb Water, which is a common attack element on Lightning weak creatures. Illuyankas and Anemone also absorb their own element. Illuyankas also comes with Auto-Protect and Deathproofing. There isn’t much special about Parasite.
You will most likely be using Aspiran for awhile until you get access to Illuyankas and Anemone.
Black Magic
Spell Power: 120
Targets One or All Enemies
Affected By Reflect and Runic
- Shambling Corpse – Zone Eater’s Belly (WoR)
- Devil – Ancient Castle (WoR)
- Punisher – Mount Zozo (WoR)
- Al Jabr – Cyan’s Dream (Dreamscape, WoR)

Devil and Punisher are probably the best of the 4. Devil, although weak against Holy, comes armed with Auto-Reflect to bounce Holy spells back. Punisher is weak against Poison but makes up for it with Auto-Haste, allowing you to smite enemies relentlessly.
For offense:
- When you get to the Veldt, get Cloud
- If you are taking Gau to the Magitek Facility, acquire Aspiran. Otherwise, get at Blackjack.
- In the World of Ruin, get at least Illuyankas, Anemone, and Punisher. Use these from now on.
Cloud and Aspiran can devastate the World of Balance with electricity.
The World of Ruin, you can replace both with Anenome, Devil or Illuyankas for defenses or go all out offense with Punisher’s Auto-Haste.
Lightning Elemental Defense
- Belmodar (Megavolt) – Initial
- Spritzer (Blaze, Undead) – Caves of Narshe (WoB)
- Destroyer (Reraise) – Magitek Facility (Containment Room, WoB)
- Intangir (Transfusion) – Triangle Island (WoB)
- Baalzephon (Blizzaga) – Zone Eater’s Belly (WoR)
- Anemone (Gigavolt) – Narshe (Yeti Cave, WoR)
- Illuyankas (Gigavolt) – Narshe (Yeti Cave, WoR)
- Great Malboro (Bio) – Kefka’s Tower (WoR)
- Magic Urn (Curaga) – Cultists Tower (WoR)
What makes Lightning Protection so good here is that a few of the rages have either a completely different elemental attack or can fight aqautic enemies back with Lightning themselves. This is good to know when you challenge Leviathan or Blue Dragon in the World of Ruin.
Belmodar and Spritzer can shrug off early Lightning attacks. In the World of Ruin, Great Malboro, Baalzephon, Illuyankas and Anemone can be effective in combat.
- Ninja (Water Scroll)
- Apocrypha (Level 3 Confuse)
- Trapper (Level 3 Confuse)
- Nautiloid (Ink)
- Exocite (Pincer)
- Anguiform (Aqua Breath)
- Onion Knight (Imp)
- Magitek Armor (Magitek Laser)
- Sky Armor (Magitek Laser)
- Satellite (Sonic Boom)
- Armored Weapon (Gravity Bomb)
- Brainpan (1000 Needles, Undead)
- Tonberry (Break)
- Actinian (Clamp)
- Kamui (Snowstorm II)
- Warlock (Holy)
- Joker (Thundara)
- Murussu (Stop)
- Dragon (Revenge Blast)
- Sprinter (Aero)
- Dropper (Confuse)
- Acrophies (Numbclaw)
- Schmidt (Mega Berserk)
- Devourer (Shell Slam)
- Cancer (Esuna)
- Pluto Armor (Magitek Laser)
- Onion Dasher (Traveler)
- Heavy Armor (Magitek Laser)
- Chaser (Plasma)
- Gamma (Dischord)
- Creature (Lifeshaver)
- Oceanus (Magnitude 8)
- Wizard (Gravity)
- Sergeant (Reflect)
- Belzecue (Gravity)
- Duel Armor (Megavolt)
- Spitfire (Magitek Laser)
- Seaflower (Sleep)
- Fortis (Fireball)
- InnoSent (Venomist)
- Death Machine (Death)
- Junk (Transfusion)
- Io (Flare Star)
Luckily, the Lightning weakness isn’t exactly too troublesome like the other elements are. The only problem areas are 2 effective Stoppers, 1 of your Aero users (the other one is weak vs Wind), and more importantly, your best Water and Ice attackers and the only carrier of Flare Star for Low Level Playthroughts.
Like with the two previous element, this is an easy element to cancel
- Force Shield (resists Lightning, Auto-Shell)
- Dueling Mask (resists Lightning)
- Thunder Shield (absorbs Lightning)
- Paladin Shield (absorbs Lightning)
The Thunder Shield is one of the easiest shields to acquire mass quantities once you start stealing from Muud Suuds in Kefka’s Tower, It also provides a host of other defenses, while still blocking most attacks. The Dueling Mask can allow you to upgrade to Genji Shield when you need more Evasion and Defenses.
Poison Elemental Attacks
The Poison arensal is extremely limited and not as potent. There are only 4 attacks (1 is a dual elemental) but there aren’t many living enemies that resist it. Most humanoid enemies like Imperial infantry, Women Casters and the Samurai genus are weak against it. Almost all the Undead and poisonous species of plants and animals absorb it. However, being able to spread Poison and Sap when needed can be effective in some cases.
Note: Gogo can cause any attack of amplified physical special to deal Poison damage if equipped with the Poison Rod or the Scorpion Tail.
Enemy Ability
Spell Power: 20
Targets all Enemies (1 side)
Unaffected by Reflect and Runic
Can inflict Poison
- Hell’s Rider – Narshe Cliffs (Invasion Scenario, WoB)
- Exoray – Darill’s Tomb (WoR)
- InnoSent – Kekfa’s Tower (WoR)
If you plan on using this attack, do not go beyond Hell’s Rider as the latter 2 enemies are acquired too late for this attack to be helpful. With the help of Edgar’s Bioblaster, Venomist can completely ruin most of the formations in Zozo with little to no effort. That is if you are willing to make a trip to the Veldt after the Narshe Invasion.
Exoray is Undead, but you get Auto-Shell to cut down some of the Fire and Holy damage. InnoSent has standard robotic weaknesses to Thunder and Water. However, you will either be using Acid Rain or Bio by the World of Ruin.
Black Magic
Spell Power: 25
Always targets One Enemy
Affected by Reflect or Runic
Can inflict Poison
- Wererat – Narshe Mines (WoB)
- Venobennu – Esper Caves (WoB)
- Scorpion – Tzen (Burning Mansion, WoR)
- Humpty – South Figaro Cave and Basement (WoR)
- Any attack or amplified Physical special by chance while Gogo is wielding the Poison Rod

and doing some minor damage. However, it is worth noting that both Wererat and Humpty absorb Poison.
You can also utilize the Poison spell through Gogo’s Poison Rod while Raging. If this spell goes off during an amplified physical, it can be as potent as Bio itself. Stray Cat and Gold Bear are good contenders for this Rod. Bogy helps if you need to Auto-Protect while whacking.
Other than the Poison Rod during Raging, you are better off using Bio once you get it.
Enemy Ability
Spell Power: 26
Always Targets All Enemies
Ignores Split Damage
Unaffected by Reflect and Runic
Dual Elemental: Poison and Water
Can inflict Sap
- Adamankary – Esper Caves (WoB)
- Caladrius – Owzer’s Mansion (WoR)

When casting this, make sure your target(s) don’t absorb Poison and/or Water. However, this is a benefit as it can strike at 2 weaknesses. This makes it incredibly devastating against mixed groups, especially if Humanoids and Machines mix together (which the Imperials are prone to doing). If your Magic Power also gets high enough, this can be a solid choice as your Poison bread and butter over Bio when fighting groups.
Adamankary is the best caster of this as Gau will get no weaknesses and gain Auto-Protect status. Caladrius is acquired too late and gets a Fire weakness.
Black Magic
Spell Power: 53
Targets One or All Enemies
Affected by Reflect and Runic
Can Inflict Poison
- Trillium – Mount Kolts (WoB)
- Magna Roader (Purple) – Magitek Facility (Mine Cart, WoB)
- Vampire Thorn – Serpent Trech (WoR)
- Great Malboro – Kefka’s Tower (WoR)
- Any attack or amplified Physical special by chance while Gogo is wielding the Scorpion Tail.
In the World of Ruin, Bio does reliable damage and can still destroy quite a few humanoid enemies or anything hit with the Debilitator and it rolls Poison. However, all Bio Rages are then outclassed by the Great Malboro, who gets 7 absorptions (all but Fire, which it is weak against), making it effective to combat elemental attackers that aren’t Poison resistant.
Once you get Gogo’s ultimate weapon and Rage with it, Bio can become quite deadly if it goes off during an amplified physical. The sheer force of Stray Cat, Gold Bear or Bogy can match or even surpass the strength of elemental Agas.
- The moment you reach the Veldt, acquire Trillium.
- If you take Gau to Zozo, get Hell’s Rider if you wish.
- When you get Terra back, get Magna Roader (Purple).
- In the World of Ruin, acquire Great Malboro and use this from now on.
Use Trillium and Hell’s Rider if you wish to employ Poison based offense and the Poison ailment, until you get the Great Malboro from Kefka’s Tower.
Poison Elemental Defense
- Wild Rat (Scratch) – Narshe Mines (WoB)
- Zaghrem (Stone, Berserked) – Mount Kolts (WoB)
- Wererat (Scratch) – Narshe Mines (WoB)
- Ghost (Thundara, Undead) – Phantom Forest and Train (WoB)
- Angel Whisper (Gravity, Undead) – Phantom Train (WoB)
- Oversoul (Will O’ The Wisp, Undead) – Phantom Train (WoB)
- Living Dead (Osmose, Undead) – Phantom Train (WoB)
- Iron Fist (Stone) – Kohlingen and Jidoor Region (WoB)
- Stunner (Incisors) – Opera Hall Rafters (WoB)
- Goetia (Libra) – Opera Hall Rafters (WoB)
- Outcast (Lifeshaver, Undead) – Cave of the Sealed Gate (WoB)
- Provoker (Imp, Undead) – Cave of the Sealed Gate (WoB)
- Zombie Dragon (Doom, Undead) – Cave of the Sealed Gate (WoB)
- Lich (Fira, Undead) – Cave of the Sealed Gate (WoB)
- Intangir (Transfusion) – Triangle Island (WoB)
- Brainpan (1000 Needles, Undead) – Floating Continent (WoB)
- Misfit (Lifeshaver, Undead) – Floating Continent (WoB)
- Black Dragon (Snowstorm, Undead) – Solitary Island and Serpent’s Trench (Deserts, WoR)
- Nightwalker (Drain, Undead) – Tzen (Burning Mansion, WoR)
- Lizard (Break) – Serpent’s Trench (WoR)
- Humpty (Poison) – South Figaro Cave (WoR)
- Cruller (Sticky Goo, Undead, Regen from Poison) – South Figaro Cave (WoR)
- Skeletal Horror (Banish, Undead) – Darill’s Tomb (WoR)
- Borghese (Holy, Undead) – Darill’s Tomb (WoR)
- Cloudwraith (Flare, Undead) – Darill’s Tomb (WoR)
- Exoray (Venomist, Undead) – Darill’s Tomb (WoR)
- Devil Fist (Will O’ The Wisp) – Mount Zozo (WoR)
- Death Warden (Quake, Undead) – Cave on the Veldt (WoR)
- Shanbling Corpse (Thundaga, Undead) – Zone Eater’s Belly (WoR)
- Baalzephon (Blizzaga) – Zone Eater’s Belly (WoR)
- Covert (Wind Slash) – Zone Eater’s Belly (WoR)
- Necromancer (Death, Undead) – Phoenix Cave (WoR)
- Face (1000 Needles, Undead) – Phoenix Cave (WoR)
- Outsider (Holy) – Kefka’s Tower (WoR)
- Mover (Meltdown) – Kefka’s Tower (WoR)
- Great Malboro (Bio) – Kefka’s Tower (WoR)
- Daedalus (Meltdoww, Undead) – Tower of Kefka (WoR)
- Io (Flare Star, Immune) – Dreamscape (Cyan’s Dream, WoR)
- Pandora (Revenge Blast) – Cyan’s Soul (Cyan’s Dream, WoR)
- Magic Urn (Curaga) – Cultist Tower (WoR)
- Moonform (Flash Rain, Undead) – Ebot’s Rock (WoR)
- Mahadeva (Death, Undead) – Ebot’s Rock (WoR)
- Aspidochelon (Landslide, Undead) – Ebot’s Rock (WoR)
Poison has the largest amount of absorbers in the game. However, the problems with defending against Poison is that most of the lineup is Undead and not many enemies exactly employ Poison based offense. It is worth noting that the Poison status ailment will turn into Regen while you absorb Poison.
If you must go Poison absorption, choose something that isn’t Undead or has a Drain attack like Lifeshaver. Just make sure that you use Bio and Death if you want to heal Gau in Undead state.The earliest Poison absorbers are the Rat monsters. For end game, Covert, Devil Fist, Great Malboro, Mover, Io and Baalzephon are your best options amongst the non-Undead.
- Guard (Critical)
- Templar (Fira)
- Imperial Soldier (Fire)
- Samurai (Lullaby)
- Yojimbo (Shock)
- Misty (Cura)
- Hell’s Rider (Venomist)
- Bandit (Self-Destruct)
- Harvester (Haste)
- Veil Dancer (Blizzara)
- Hill Gigas (Magnitude 8)
- Guard Leader (Wind Slash)
- Corporal (Swing)
- General (Cura)
- Warlock (Holy)
- Cherrry (Holy)
- Joker (Thundara)
- Test Rider (Flash Rain)
- Unseelie (Shell)
- Neck Hunter (Imp)
- Blade Dancer (Osmose)
- Gigantos (Magnitude 8)
- Coco (Overture)
- Dante (Level 3 Confuse)
- Punisher (Thundaga)
- Gobbledygook (Vanish)
- Valeor (Stone)
- Glasya Labolas (Revenge Blast)
As stated before, Poison isn’t a common element, but it can be a problem if you are facing off against Hidon or Kaiser Dragon’s Poison attack pattern. The strongest attack, Bio, although has a spell power of 53 can hit has hard as Metal Cutter if you deploy these Rages. But this can work in reverse as a lot of these enemies can be hit just as hard or even destroyed by Bio with enough Spell Power.
The Poison weakness Rages are primarily humanoid enemies, and amongst the worst of the suffers are your first Fira, Magnitude 8, Wind Slash, first non-Unded Holy and Blizzara users. It also becomes an annoyance when your best Thundaga caster and your only user of the dreaded Shock command are weak against this element.
Canceling the Poison weakness can only be done 2 ways. Auto-Shell will cut half of the damage down so it will make the Poison damage feel like you have no resistance at all.
- Force Shield (Auto-Shell)
- Dueling Mask (resists Poison)
- Paladin Shield (absorbs Poison)
However, as stated above, it isn’t a common attack element in enemies, so you may not have to worry about this Element when you play.
Wind Elemental Attacks
Wind is primarily made up of attacks that strike at all enemies. Also, there aren’t many enemies that resist or absorb it, making Wind one of the most unrestrictive and adaptable elements in the game.
Mog Dance
Spell Power: 45
Unaffected by Reflect and Runic
Always targets all enemies
Ignores Split Damage
- Fossil Dragon – Kohlingen, Southern Continent (WoB)
- Sandhorse – Figaro and Kohlingen Region (Desert, WoR)
- Slagworm – Maranda Desert (WoR)

The problem with Sandstorm is not really the fact it is the weakest Wind attack, but odds are you have Wind Slash before you get this one. The weaknesses of the 3 Rages can be resolved with the Snow Scarf but there isn’t much you can do about Fossil Dragon’s Undead typing.
Only use this attack if you haven’t gotten Guard Leader yet.
Mog Dance
Spell Power: 48
Unaffected by Reflect or Runic
Always targets all enemies
Ignores Split Damage
Ignores Magic Evasion
- Guard Leader – Narshe Caves (Defending Terra, WoB)
- Greater Mantis – Forests North of Jidoor (WoR)
- Covert – Zone Eater’s Belly (WoR)
You can get the Rage the moment you find it in the Veldt through Guard Leader but it is one of the most rarest encounters there. Many people will go through hundreds of battles and have no luck. When you do acquire it, it will be well worth the effort as it becomes your bread and butter Wind and WoB Rage until you acquire Aero, Shock or Meteor. Just watch for Poison attacks.
In the World of Ruin, you can acquire Covert if you face off against Poison attackers. Both also appear near each other on the Rage menu, so it is easy to switch when necessary. Just watch for Holy attacks in Covert. If the Holy weakness sounds too much trouble, you can get the same Deathproofing and status defenses from Covert on Greater Mantis, plus with a much more easier weakness to cancel (Fire). The choice is yours.
Strago Lore
Spell Power: 71
Unaffected by Reflect or Runic
Always targets all enemies
Affected by Split Damage
Dual Element: Water and Wind
- Anguiform – Serpent’s Trench (WoB)
- Chimera – Forest near Thamasa (WoB)
- Suirander – Ancient Castle and Dreamscape (Cyan’s Dream, WoR)
- Vector Chimera – Tower of Kefka (WoB)

Anguiform is the earliest caster and absorbs Water, but gets a Lightning weakness. You also need Silver Specs or Amulet to cancel the Blind it inflicts. Once you get Chimera from Thamasa, it will be your prime Aqua Breath user as it becomes immune to all status effects (including 2 positive ones, Image and Vanish) and has no weaknesses or resistances. Suriander gets outclassed due to Holy weakness.
If you use Vanish and Image a lot, then switch to Vector Chimera when you acquire it as he isn’t immune to these buff spells.Otherwise, keep Chimera. Later on, you can opt this out for Tsunami, Water Scroll or Aero.
Strago Lore
Spell Power: 125
Unaffected by Reflect or Runic
Always targets all enemies
- Marchosias – World Map (Coliseum Region, WoR)
- Sprinter – World Map (Jidoor and Dinosaur Forest Regions, WoR)

Either Rage is fine, but Marchosias has the added bonus of Auto-Float, Deathproofing and a not-so common weakness (Wind) vs Sprinter (Lightning). However, this is rendered moot with a Thunder, Force or Paladin Shield.
Spell Power: 138
Dual Elemental: Fire and Wind
Always Targets All Combatants
Unaffected by Reflect or Runic
Ignores Split Damage
- Mover – Kefka’s Tower (WoR)
- Daedalus – Kefka’s Tower (WoR)
As stated in the Fire section, use Mover as it won’t render Gau Undead.
- When you first get to the Veldt, try to acquire the Guard Leader
- After Terra flies to Zozo, try to acquire Anguiform if you plan on taking him to the Magitek Research Facility. Replace it with Chimera later.
- Use Chimera or Guard Leader till World of Ruin. Then acquire Sprinter or Marchosias for Aero.
Use either one for the rest of the game.
Wind Slash and Aqua Breath will allow Gau to handle most multiple enemy scenario with ease throughout any point in the game. Once you get Aero off Sprinter or Marchosias, you can swap out Aqua Breath and Wind Slash.
Wind Elemental Defense
- Flan (Sticky Goo, Immune) – Magitek Facility (Trash Room, WoB)
- Intangir (Transfusion) – Triangle Island (WoB)
- Mousse (Transfusion, Immune) – Kohlingen Region (WoR)
- Baalzephon (Blizzaga) – Zone Eater’s Belly (WoR)
- Great Malboro (Bio) – Kefka’s Tower (WoR)
- Io (Flare Star, Immune) – Cyan’s Dream (Mines, WoR)
- Magic Urn (Curaga) – Cultist’s Tower (WoR)
As stated in the introduction, there isn’t much defense against Wind. You will not have viable Rage options to fight properly with until World of Ruin where Baalzephon, Great Malboro and Io will fight back and Magic Urn will keep all hands alive to do it for Gau.
In the World of Balance, only Flan will keep Gau alive along enough as Transfusion will remove Gau from play. Your only other option to keep Gau from using Transfusion is to Silence him before he Rages.
- Vulture (Shamshir)
- Nettlehopper (Berserk)
- Sky Armor (Magitek Laser)
- Rock Wasp (Sleepsting)
- Luridan (Rock Slide)
- Grasswyrm (Berserk)
- Marchosias (Aero)
- Twinscythe (Metal Cutter)
- Schmidt (Mega Berserk)
- Land Grillon (Wing Snap)
- Spitfire (Magitek Laser)
Although there aren’t many enemies weak against Wind, 3 enemies stand out on this list. You have half of your Metal Cutter, Rock Slide and Aero users on this list and they have advantages you want to keep them for (absorbs Ice, has more status defenses, Earth and Deathproofing over their counterpart respectively). Plus, this can also be a problem for Ice Shield users too as you get Wind weakness on any Rage.
Wind is a somewhat common element as the battles continue. However, it is also an easy element to cancel.
- Force Shield (resists Wind, Auto-Shell)
- Dueling Mask (resists Wind)
- Thunder Shield (nullifies Wind)
- Paladin Shield (nullifies Wind)
Thunder Shields are the way to go here as you can mass produce them (steal from Muud Suud) to cancel Wind’s damage, plus it protects you from other elements. Once you get the Dueling Mask, you don’t need to worry about Wind too much and you can replace the Shield slot with something else.The Paladin Shield should be saved for someone else.
Earth Elemental Attacks
Earth is much like Wind. It primarily has attacks that hit multiple attackers (all except 1) and not many enemies absorb or resist it. However, any floating enemy becomes immune to most Earth based offense. To add insult to injury, there are quite a few Auto-Float enemies in the game. However, if enemies are grounded, their sheer power can rival or even surpass Wind’s best offense.
Note: Gogo can cause any attack or amplified physical special to deal Earth damage if equipped with the Gravity Rod. This weapon ignores Float checks on hit.
Enemy Ability
Spell Power: 75
Always Targets All Enemies
Unaffected by Reflect or Runic
Unaffected by Silence
Misses on Float status
- Aspidochelon – Ebot’s Rock (WoR)
Also, due to the lateness of this Rage, you are most likely using the other attacks long before then.
Enemy Ability
Spell Power: 84
Always Targets One Enemy
Unaffected by Reflect or Runic
Ignores Float status
- Outcast – Cave of the Sealed Gate (WoB)
- Misfit – Floating Continent (WoB)
- Tumbleweed – World Map (Fields, WoR)
- Psychos – Narshe Cliffs and Caves (WoR)
- Crusher – Owzer’s Mansion (WoR)
- Creature – Ebot’s Rock (WoR)

It is an effective attack for Solo Gau playthroughs as not only do you get a high powered attack that almost works on every living enemy, but you can easily keep your health topped off as long as the attack goes off every once in awhile.
However, you cannot exceed the enemy’s current HP or your Maximum HP minus Current HP. For example, if you have 1000/2000 HP and you cast Lifeshaver on an enemy that has 520 HP left. The most damage you can heal is 520 damage, so Gau will have 1520 HP afterwards. Also, if you cast on an enemy that absorbs Earth or is Undead, Gau will take damage and heal the target instead. In the previous scenario, Gau will be left with 480 HP and then enemy will return to 1040 HP.
Any Lifeshaver caster except Crusher (only weak against Fire) will do as they all carry assorted elemental absorptions and weaknesses. If you want to keep Gau non-Undead, Tumbleweed (absorbs Water and weak against Fire) and Psychos (weak against Ice and absorbs Fire) are the best ones. Outcast is the best one for defenses (Absorbs Fire, Poison, heals off Death, but weak against Holy and makes Gau Undead).
Enemy Ability
Spell Power: 100
Targets All Enemies (1 side)
Unaffected by Reflect or Runic
Ignores Split Damage
Misses on Float Status
- Hill Gigas – Zozo (Outside, WoB)
- Antares – Cave of the Sealed Gate (WoB)
- Gigantos – Floating Continent (Monster-In-A-Box, WoB)
- Oceanus – Forests near South Figaro (WoR)
- Landworm – Kefka’s Tower (WoR)
(The screen rumbles and enemies shake as they take damage from it)

Hill Gigas or Antares are the best Magnitude 8 Rages. Hill Gigas is only weak against Poison, which isn’t common amongst enemies and can absorb other Earth attacks. Antares is weak against Ice, but absorbs Fire, which is a far more common element. The weakness is also easy to fix in the World of Ruin once you get the Snow Scarf.
The previous 2 outclass the last 3. Gigantos is really just Hill Gigas. Landworm has Antares’ weakness but Hill Gigas’ absorption. Oceanus is only weak against Lightning and carries no defenses. Not to mention you have acess to the first 2 Rages long before you face the rest.
Black Magic
Spell Power: 111
Unaffected by Reflect or Runic
Always Targets All Combatants
Misses on Float Status
- Litwor Chicken – Southern Continent (Forests, WoB)
- Ouroboros – Phoenix Cave (WoR)
- Death Warden – Soul Shrine (WoR)

This Rage attack can be helpful if all characters are armed with Gaia Gears as it will be a combination of Magnitude 8’s sheer strength with the healing power of Curaga for your allies. However, Edgar and Cyan cannot wear Gaia Gear, so you must either supply them with Float or get a Merit Award for them. You can acquire Gaia Gears en masse in the Thamasa region in the World of Balance.
In the World of Ruin, Litwor Chicken gets outclassed by Ouroboros who gains 1 absorption: Fire. Both Rages are weak against Ice, so wear a Snow Scarf or don’t fight Ice casters. Death Warden isn’t worth using as Gau turns Undead.
Once you get the Migardsormr Magicite, the Quake Rages lose effectivenes since everyone can cast it. Also, Magnitude 8 is a better option when your Gaia Gears get obsolete and you have difficulties maintaining Float.
- After the events in Zozo, acquire Hill Gigas.
- Once you steal up some Gaia Gears, you can use Litwor Chicken over Hill Gigas if you wish.
- Get Antares and Outcast from the Cave of the Sealed Gate before going to World of Ruin.
- In the World of Ruin, replace Outcast with Psychos for Lifeshaver. Use Magnitude 8 if nobody is under Float, otherwise Quake.
Earth is devastating against grounded targets. Hill Gigas and Antares will pretty much plow through these kinds of monsters via Magnitude 8. Only use Quake if your allies are safeguarded from it via Float or Gaia Gears.
If you need to maintain Gau’s health for long battles or heal him without using MP, use Lifeshaver Rages. Primarily, Tumbleweed or Psychos. Outcast and Misfit still have potential despite being Undead.
Earth Elemental Defense
- Any Rage that bestows Auto-Float (check Rages with Benefit section)
- Hill Gigas (Magnitude 8) – Zozo (Outside, WoB)
- Flan (Sticky Goo, Immune) – Magitek Research Facility (Trash Room, WoB)
- Intangir (Transfusion) – Triangle Island (WoB)
- Mousee (Transfusion, Immune) – Kohlingen (Fields, WoR)
- Baalzephon (Blizzaga) – Zone Eater’s Belly (WoR)
- Io (Flare Star, Immune) – Cyan’s Dream (Mines, WoR)
- Landworm (Magnitude 8) – Kefka’s Tower (WoR)
- Great Malboro (Bio) – Kefka’s Tower (WoR)
- Magic Urn (Curaga) – Cultist’s Tower (WoR)
Defense against Earth suffers from the same problem as Wind: There aren’t many absorbers and there isn’t much equipment you can use to make your other Rages safe from it.
Hill Gigas is the earliest Earth absorber you can acquire. However, most Earth attackers either absorb it or have Float themselves to negate it. Although some Rages have the capacity to Float, it won’t protect them from Lifeshaver abusers like Primeval Dragon and the Misfit genus.
Io is an effective one against bosses who deploy Earth attacks and there are quite a few. However, this Rage is more suited for destroying tough enemies or bosses and not really for general combat.
This is where Baalzephon and Great Malboro come in. Not only do both absorb Earth (Baalzephon has Auto-Float) but if they are targeted by Lifeshaver, it will work in reverse.
Otherwise, just get Gau off the ground with Float from the spell or a Rage that bestows it. Just remember that Float will not protect you from Lifeshaver unless you are Undead, absorb Earth or the caster has max health already.
None
Earth is the only element that Rages (and most enemies) are safe from. However, because of the sheer strength of the Earth element, some enemies can still rob you of HP in high numbers and very quickly. This is very apparent if you face enemies like Earth Dragon or Ultima Weapon and Buster and you aren’t using Angel Wings, Float or don’t have neither yet.
Luckily, there is a armor and a few shields that can help mitigate this problem.
- Force Shield (Resists Earth, Auto-Shell)
- Dueling Mask (Resists Earth)
- Paladin Shield (Absorbs Earth)
- Gaia Gear (Absorbs Earth)
Gaia Gear is the only armor that can be collected en masse, but this should be done while you are in the World of Balance. If you don’t, you have to steal from Brarieus in the Veldt. This armor is helpful in the Cave of the Sealed Gate when you are fighting Outcasts and their Lifeshaver abuse. However, this armor loses effectiveness in the World of Ruin as it has low defense values. The Paladin Shield can absorb it but it is only available to 1 person at a time.
The Dueling Mask Can cut all Earth in half as well as a host of other defenses, so you won’t need to worry about Earth too much then. Just remember: There is always Float! Just watch for Lifeshaver abusers.
Water Elemental Attacks
Water elemental attacks are an underhanded means of dispatching mechanical enemies and fire attuned monsters. Like Wind, Water primarily attacks all enemies and it can be deployed to generally wipe out enemies, even if they don’t resist it. Unlike Wind, you have to worry about dual elements more as there are only 2 pure Water attacks. You also need to worry about aquatic enemies as they tend to absorb Water and there are more of these absorbers than Wind.
Enemy Ability
Spell Power: 26
Unaffected by Reflect or Runic
Targets all enemies (1 side)
Ignores split damage
Dual Elemental: Poison and Water
- Adamankary – Esper Caves (WoB)
- Caladrius – Owzer’s Mansion (WoR)
Adamankary is the best caster of this as Gau will get no weaknesses and gain Auto-Protect status. Caladrius is acquired too late and gets a Fire weakness.
Strago Lore
Spell Power: 50
Always Targets All Enemies
Unaffected by Reflect or Runic
Ignores split damage
- Enuo – Ancient Castle (WoR)
- Dark Force – Kefka’s Tower (WoR)

Either Rage will work fine, but you will need to be careful around Holy attacks. Enuo however makes up for this with Reflect status, at the cost of Sap.
Enemy Ability
Spell Power: 60
Unaffected by Reflect or Runic
Targets all enemies (1 Side)
Dual Element: Water and Ice
- Test Rider – Narshe (WoR)
- Zeveak – Phoenix Cave (WoR)
- Moonform – Ebot’s Rock (WoR)

All 3 have individual absorptions and weaknesses, so any of them can be used. Zeveak absorbs Fire, but can’t take Ice, Test Rider is only weak against Poison and Moonform is Undead (hates Fire and Holy and absorbs Poison). Make sure you don’t use this attack if your target absorbs 1 of the elements. Gau also gets KO’ed if his MP is 0 in any of these forms, so be careful if you fight any MP attackers.
Strago Lore
Spell Power: 71
Unaffected by Reflect or Runic
Targets all enemies (1 Side)
Affected by Split Damage
Dual Element: Water and Wind
- Anguiform – Serpent’s Trench (WoB)
- Chimera – Forests near Thamasa (WoB)
- Suirander – Ancient Castle and Dreamscape (Cyan’s Dream, WoR)
- Vector Chimera – Tower of Kefka (WoB)
Anguiform is the earliest caster and absorbs Water, but gets a Lightning weakness. You also need Silver Specs or Amulet to cancel the Blind it inflicts. Once you get Chimera from Thamasa, it will be your prime Aqua Breath user as it becomes immune to all status effects (including 2 positive ones, Image and Vanish) and has no weaknesses or resistances. Suriander gets outclassed due to Holy weakness.
You can either use this attack alongside Water Scroll as your dominant Water elemental Rage. Just remember to factor in the Wind portion of this damage.
Thrown Weapon
Spell Power: 100
Targets All Enemies (1 Side)
Unaffected by Reflect or Runic
Affected by Split Damage
Ignores Evasion
- Ninja – Floating Continent (WoB)

The Rage itself can be utilized well for general combat and clearing out formations in the Veldt that don’t have Water resistance. The only drawback is you will have to worry about Lightning and Holy attacks. Make sure you have a Thunder Shield on if you use this Rage on a regular basis. You may also need to consider Tsunami if you are facing large groups of enemies who take full damage from Water or if you get Surrounded as Water Scroll’s split damage might not cut it.
- If you plan on taking Gau to Magitek Facility, get Anguiform.
- Replace Anguiform with Chimera and get Adamankary for Acid Rain.
- In the World of Ruin, use Vector Chimera, Enuo or Dark Force, or Ninja.
Water’s dual element attacks are both a blessing and a curse. Try to factor in the other element when doing your Water damage. If you want to aim for pure Water, use Ninja’s Water Scrol and Tsunami.
Water Elemental Defense
- Trillium (Bio) – Mount Kolts (WoB)
- Nautiloid (Ink) – Returner’s Hideout (Raft, WoB)
- Exocite (Pincer) – Returner’s Hideout (Raft, WoB)
- Anguiform (Aqua Breath) – Serpent’s Trench (WoB)
- Aspiran (Gigavolt) – Serpent’s Trench (WoB)
- Actinian (Clamp) – Serpent’s Trench (WoB)
- Flan (Sticky Goo, Immune) – Magitek Research Facility (Trash Room, WoB)
- Intangir (Transfusion) – Triangle Island (WoB)
- Tumbleweed (Lifeshaver) – World Map (Fields, WoR)
- Vampire Thorn (Bio, Undead) – Serpent’s Trench (WoR)
- Mousse (Transfusion, Immune) – Kohlingen (Fields, WoR)
- Malboro (Bad Breath) – Darill’s Tomb (WoR)
- Baalzephon (Blizzaga) – Zone Eater’s Belly (WoR)
- Rafflesia (Entice) – Owzer’s Mansion (WoR)
- Seaflower (Sleep) – Phoenix Cave (WoR)
- Tonberry (Break) – Yeti’s Cave (WoR)
- Anemone (Gigavolt) – Yeti’s Cave (WoR)
- Great Malboro (Bio) – Kefka’s Tower (WoR)
- Magic Urn (Curaga) – Cultist’s Tower (WoR)
Water has a large array of defense against it and plenty of the Rages have an attack that isn’t Water elemental itself. Anemone and Aspiran can be used against Water creatures with great efficiency as Gigavolt is a high powered attack and most Water users are either weak against it or take normal damage from it, If you rely heavily on a Physical Gau and you fear Water will kill you as Stray Cat, Actinian gives up a large amount of multiplier but can still get the job done.
The classic Baalzephon and Great Malboro can also be used with great effect since they cover multiple elements as well. You can use Magic Urn to keep your other party members alive with Curaga.
- Al Jabr (Thundaga)
- Apocrypha (Level 3 Confuse)
- Leaf Bunny (Incisors)
- Zokka (Net)
- Trapper (Level 3 Confuse)
- Slagworm (Magnitude 8)
- Onion Knight (Imp)
- Armored Weapon (Gravity Bomb)
- Satellite (Sonic Boom)
- Outcast (Lifeshaver, Undead)
- Cruller (Sticky Goo, Undead)
- Cactuar (1000 Needles)
- Bomb (Blaze)
- Devoahan (Slowga)
- Sand Ray (Tail)
- Alacran (Numb)
- Sandhorse (Sandstorm)
- Darkside (Blizzara)
- Peeper (White Wind)
- Chippirabbit (Cura)
- Coeurl Cat (Blaster)
- Vector Lythos (White Wind)
- Dropper (Confuse)
- Schmidt (Mega Berserk)
- Cancer (Esuna)
- Pluto Armor (Magitek Laser)
- Onion Dasher (Traveler)
- Heavy Armor (Magitek Laser)
- Chaser (Plasma)
- Gamma (Dischord)
- Grenade (Blaze)
- Lycaon (Blaster)
- Parasite (Gigavolt)
- Land Ray (Mighty Guard)
- Desert Hare (Cura)
- Sergeant (Reflect)
- Belzecue (Gravity)
- Duel Armor (Megavolt)
- Bug (Stop)
- Fortis (Fireball)
- InnoSent (Venomist)
- Death Machine (Death)
- Io (Flare Star)
Quite a few enemies suffer from the Water weakness, primarily in the Magitek Facility and machine type enemies as it is a second weakness for them. However, it hurts to find both non-Undead Blaze users, all the White Wind users and some of the best Crowd Controllers for Death, Stop and Berserk are weak against Water. To add insult to injury, LLP players can be horrified to learn that your only source of Flare Star on this list. Luckily, thanks to Io’s immunities, Aqua Breath (half Wind) and Acid Rain (half Poison) do nothing, which leaves Flash Rain and pure Water attacks to contend with.
Another threat to consider is how devastating Water attacks can be in power. Moves like Water Scroll, El Nino and Tsunami can leave you in a bad spot, regardless of Rage. There is also an issue for Flame Shield users as they now get a weakness to Water as well. Luckily, there are quite a few ways to cancel this horrible weakness:
- Force Shield (resists Water, Auto-Shell)
- Dueling Mask (resists Water)
- Paladin Shield (nulls Water)
- Saucer (Absorbs Water, no Defense as non-Imp)
- Reed Cloak (Absorbs Water, no Defense as non-Imp)
- Tortoise Shield (Absorbs Water, no Defense as non-Imp)
Regardless of which form you take, the Imp Equipment will allow you to absorb Water. However, if you are not in Imp form, then the physical defense takes a massive nosedive. Because Gau gets most of his Defense from Shields and Chest pieces, your safest option is to use the Saucer.
The other shields and Dueling Mask are also effective Water defense.
Holy Elemental Attack
Holy smites demonic enemies and the Undead with ease. There are only a few monsters that absorb it as well, as there are Rages. However, the Rages can only be accessed in the World of Ruin.
Although you got other means of Holy damage (earliest being Sabin’s Aura Cannon), the Holy Rages are still not to be underestimated in battle.
Note: Gogo can cause any attack or amplified physical special to deal Holy damage if equipped with the Gladius or Holy Rod. The Gladius is stronger per hit but the Holy Rod has a chance to fire off Holy on hit.
Black Magic:
Spell Power: 108
Attacks only 1 enemy
Affected by Reflect and Runic
- Borghese – Darill’s Tomb (WoR)
- Warlock – Ebot’s Rock (WoR)
- Cherry – Kefka’s Tower (WoR)
- Outsider – Kefka’s Tower (WoR)
- Holy Dragon – Cultist’s Tower (WoR)
- Any attack or amplified Physical special by chance while Gogo is wielding the Holy Rod
Although Borghese is your first shot at Holy, Gau becomes Undead while casting it and also gets a weakness to the same element and Fire. However, this isn’t necessarily a bad thing as a lot of the Holy weakness enemies in WoR utilize Death, Zombie and Poison spells, which Borghese can absorb easily. You also should have the spells Bio and Death, which you can manually cast these on Gau to heal (Bio) or fully restore him (Death, but you can’t use a Safety Bit). Just be careful how you cast Cure spells.
As you complete more of the World of Ruin, you will get the non-Undead versions and they will outclass Borghese. Warlock suffers from 2 crippling weaknesses: Lightning and Poison. Although Cherry drops the Lightning weakness, she maintains the Poison one and she can be acquired at the same time a better version can be collected (she pairs with Outsiders).
Outsider and Holy Dragon are your best bets. Outsider although gets weak against Holy, gains Auto-Haste and Poison absorption. Holy Dragon eats Holy and spits it back. Both get helpful status immunities. Pick either one of these for casting Holy.
For more effective heavenly smiting, you can arm Gogo with the Holy Rod and hope Holy goes off during an amplified Physical special. The sheer force of this spell when combined with Stray Cat, Bogy or Gold Bear is not to be underestimed. You also get the added bonus of using the Gladius should you face a Holy weak enemy that is hiding under Reflect or has high Magic Defenses.
- Use Borghese or Warlock if you need Holy desperately
- Later replace them with Outsider or Holy Dragon
Holy is powerful, but you really need to work for it. Holy Dragon and Outsider are your best means of attacking back with Holy. However, I feel that you should switch to conventional means for Holy offense via Alexander, Holy magic and attack weapons. But if there is a time you need a Holy Rage, you got them ready.
Holy Elemental Defense
- Flan (Sticky Goo, Immune) – Magitek Research Facility (Trash, WoB)
- Intangir (Transfusion) – Triangle Island (WoB)
- Mousse (Transfusion, Immune) – Kohlingen (Fields, WoR)
- Great Malboro (Bio) – Kefka’s Tower (WoR)
- Magic Urn (Curaga) – Cultist’s Tower (WoR)
- Holy Dragon (Holy) – Cultist’s Tower (WoR)
There aren’t many defenses against Holy, but when you are fighting the Holy Dragon in the Dragon’s Den or anyone with a high damage potential via Holy or Lv? Holy, you will be thankful you can spread your Cat Ear Hoods, Minerva Bustiers and Paladin Shields across without having to worry about Gau (at least until you get his ultimate helmet).
Flan is the earliest protection to Holy you have, but it comes with a not-so awesome special power. You have to silence Gau before he goes Intangir or Mousse to prevent him from commuting Transfusion.
Your best options are the Great Malboro if you don’t want Holy as an attack, Holy Dragon to fight Holy with Holy and Magic Urn to keep other people alive.
- Ninja (Water Scroll)
- Borghese (Holy, Undead)
- Cloud (Thundara)
- Al Jabr (Thundaga)
- Apocrypha (Level 3 Confuse)
- Dark Force (Tsunami)
- Angel Whisper (Gravity, Undead)
- Oversoul (Will O’ The Wisp, Undead)
- Skeletal Horror (Banish, Undead)
- Muud Suud (Snowstorm)
- Suriander (Aqua Breath)
- Spritzer (Blaze, Undead)
- Outcast (Lifeshaver, Undead)
- Humpty (Poison, Undead)
- Brainpan (1000 Needles)
- Lunatys (Meteor)
- Ghost (Thundara, Undead)
- Covert (Wind Slash)
- Devil (Thundaga, Auto-Reflect)
- Provoker (Imp, Undead)
- Cloudwraith (Flare, Undead)
- Mahadeva (Death, Undead)
- Sorath (Cave In)
- Zombie Dragon (Doom, Undead)
- Weredragon (Death)
- Exoray (Venomist, Undead, Auto-Shell)
- Poplium (Cling, Undead)
- Enuo (Tsunami, Auto-Reflect)
- Misfit (Lifeshaver, Undead)
- Pandora (Revenge Blast, Undead)
- Specter (Fire, Undead)
- Moonform (Flash Rain)
- Living Dead (Osmose, Undead)
- Death Warden (Quake, Undead)
- Face (1000 Needles)
- Outsider (Holy)
- Nightwalker (Drain, Undead)
- Aspidochelon (Landslide, Undead)
- Eukaryote (Fire, Undead)
- Black Dragon (Snowstorm, Undead)
- Shambling Corpse (Thundaga, Undead)
- Lich (Fira, Undead)
- Necromancer (Death, Undead)
- Clymenus (Holy, Auto-Reflect)
- Garm (Bodyslam)
- Daedalus (Meltdown, Undead)
- Io (Flare Star)
The Undead resurface on this list from the Fire section, except there are ones that absorbed Fire but still take double damage from Holy. Holy is arguably the Undead’s worst nightmare. There are also a few Rages you honestly wish weren’t weak against it. However, this also proves just how effective Holy and Fire really are in this game if you want to exploit weaknesses.
The biggest punishment Holy delivers is it cripples your Water offense as all the Pure Water-elemental attackers, most of your Holy users and the best Physical Attack Rage for status immunities are all weak against it. For LLP players, being unable to use Flare Star in boss fights for fear of Holy damage is something to be concerned about.
To add insult to injury, the Holy spell has a high spell power and hits like a bus if you get slammed with it, even without resisting Holy. Imagine what having a weakness to it means! Plus there are still accidental Aura Cannons (if Sabin or Gogo get Zombified or Confused during the channel) and a few Reflect piercing Holy attacks like Lv? Holy and Saintly Beam to worry about. You also may need to be concerned if your own Magic Gau’s Holy get shot back and you are using one that is Holy weak.
The defense pool isn’t that great for Holy either, as only 3 items resist it and it may cause competition towards other characters.
- Force Shield (resists Holy, Auto-Shell)
- Dueling Mask (resists Holy)
- Paladin Shield (absorbs Holy)
Once you get the Dueling Mask, things get more manageable for Holy defense as you can then split up your Minerva Bustiers, Force Armors and the 2 shields without fear of taking Holy damage for Gau. Until then, there is always Great Malboro (Bio), Holy Dragon (Holy), or use a different Rage altogether.
Support Rages – Healing
Support Rages can be used to turn Gau into a healer and buffer when needed. Be warned that Gau’s targeting is completely random with these spells. He may heal or restore someone that has full health already, Esuna people that don’t have status effects or constantly reapply the same buff on people who already have it. He can even go through an entire battle not using the healing or buffing spells at all. Because of this, it is often prefered to manually cast these yourself.
However, these Rages have some distinct advantages. Some of the support spells, especially buffs can be learned before Magicite and Lores can make it easier. Not only that, Gau gets immunities and absorptions that will help and none of these cost any MP to cast.
Acquired through:
- Leveling Terra and Celes
- Maduin (Cura x1) – Zozo (WoB)
- Unicorn (Cura x4) – Magitek Facility (WoB)
- Golem (Cura x5) – Jidoor Auction House (Both Worlds)
- Seraph (Cura x8) – Tzen (After Magitek Facility, Both Worlds)
- Lakshmi (Cura x16, Curaga x1) – Owzer’s Mansion (WoR)
- Phoenix (Curaga x2) – Kohlingen (After saving Locke, WoR)
Rages
- General (Cura) – Magitek Research Facility (Containment Room, WoB)
- Desert Hare (Cura) – Serpent’s Trench (WoR)
- Misty (Cura) – Owzer’s Mansion (WoR)
- Magic Urn (Curaga) – Cultist’s Tower (WoR)

General gives Gau Protect status while he casts Cura. This one is helpful when you enter the Cave of the Sealed Gate for the first time as almost every enemy here is Undead and MP draining via Osmose or Ethers are limited. Also, no enemy has a Poison elemental attack to exploit it’s weakness. You will still need some status safeguards.
Misty also carries the same Cura and Poison weakness, but it is acquired too late to be of use and carries no buffs. The Desert Hare gets a Water weakness but Gau goes into Haste to speed up healing. But in both cases, you will have more reliable Curas at your disposal via manual cast.
Once you get the Magic Urn, all the Cura users are moot. Magic Urn not only gets a spell that takes 50 AP to master but Gau will absorb all 8 elements and complete status immunity. This will help you when you fight battles where survival is crucial or you just want to top up health without using your menu.
Strago Lore
Acquired from:
- Venobennu – Esper Caves (WoB)
- Peeper – Solitary Island (WoR)
- Sprinter – Serpent’s Trench (WoR)
- Marchosias – Colisseum (Fields and Forests, WoR)
- Storm Dragon – Cave on the Veldt (Boss, WoR)
- Kamui – Zone Eater’s Belly (WoR)
- Curlax – Cyan’s Dream (Boss, WoR)
- Vector Lythos – Kefka’s Tower (WoR)
- Dark Force – Kefka’s Tower (WoR)
Rages
- Peeper – Solitary Island (WoR)
- Vector Lythos – Kefka’s Tower (WoR)
The Rage is good if you want to keep all hands alive and you aren’t using Strago in your party.
Although you can get White Wind in the World of Balance off Venobennu, Strago doesn’t truly shine until the World of Ruin where all his Lores can be acquired. Even if you want to start getting Black Magic with him, your other characters have a plethora of spells until he gets up to spec. Not to mention Gau is easier to reclaim to the party than Strago is (Veldt and Dried Meat vs getting Relm then bringing her to Cultist’s Tower).
The only thing you have to worry about is that both Rages carry a brutal Ice and Water weakness. Peeper also has Sap status and you have to be swift with the Leap as it has 1 HP on it’s own. The Vector Lythos loses the Sap effect and carries a lot more status defenses. However, the Ice weakness can be countered with the Snow Scarf and Imp Equipment can help against Water until the Dueling Mask.
Strago Lore
Acquired Through
- Intangir – Triangle Islands (WoB)
- Mousse – Kohlingen Area (Fields, WoR)
- Junk – Kefka’s Tower (WoR)
Rages:
- Intangir – Triangle Islands (Triangle Island, WoB)
- Mousse – Kohlingen (Fields, WoR)
What really is a kick to the balls to these Rages is that 2 of them have a good defensive lineup. Mousse are immune to many elemental attacks. Intangir not only absorbs all 8 elements, but it blocks most status effects and provides Gau with every single buff spell in the game. You can however, Silence Gau before using these Rages and maintain a constant attack while keeping their defenses, but smart choices with Equipment and the Physical Rages is more simpler and effective.
Acquired Through:
- Unicorn (x3) – Magitek Research Facility (WoB)
- Seraph (x5) – Tzen (After Magitek Facility, Both Worlds)
- Alexander (x15) – Doma Castle (After Cyan’s Dream, WoR)
- Lakshmi (x20) – Owzer’s Mansion (WoR)
Rages:
- Cancer – South Figaro Desert (WoR)
Acquired from:
- Leveling Terra to 18
- Bismarck (x2) – Magitek Research Facility (WoB)
- Seraph (x5) – Tzen (After Magitek Facility, Both Worlds)
- Phoenix (x10, Arise x2) – Kohlingen (After saving Locke, WoR)
Rages:
- Chippirabbit – North of Veldt (WoB)
The Chippirabbit Rage has its flaws. A few battles in the Veldt and you can have the Gil to purchase Phoenix Downs and not get XP for Low Level Playthroughs until Raise. Later in the game, this Rage loses effectiveness as Raise is easy to access and Arise can be acquired.
Vector Lythos or Peeper (White Wind), General (Cura) and Magic Urn (Curaga) are probably your better means of healing. However, know that you can manually do these through other characters, but having access to White Wind when needed helps tremendously. The choice is yours.
Support Rages – Buffing
Rages
- Goetia – Opera House (WoB)

Why is it in the buff section? Because Intelligence can be the greatest buff in the right hands.
Acquired from
- Leveling Celes to 32 and 52 respectively
- Equipping Hermes’ Sandals and Miracle Shoes
- Carbuncle (x2) – Magitek Research Facility (WoB)
- Quetzalli (x10, Hastega x2) – Solitary Island (Acquiring Airship, WoR)
Rages
- Cirpius (Hastega) – Mount Kolts (WoB)
- Harvester (Haste) – Zozo (Both Worlds)
- Magna Roader (Yellow) (Haste) – Narshe Caves (WoR)

It is also helpful for Celes in the Magitek Research Facility as you get back 46 MP if you intercept Hastega with Runic, allowing you to save on Ethers. Just find an enemy group you can easily destroy before resorting to this recovery method.
Once you get Queztalli and have a non-Gau learn it, this Rage loses effectiveness.
Acquired from
- Summon through Carbuncle (Reflect), Zona Seeker (Shell)
- Level Celes to 22 (Protect)
- Various Relics such as Reflect Ring and Miracle Shoes
- Unicorn (Protect and Shell x1) – Magitek Research Facility (WoB)
- Carbuncle (Protect and Shell x2, Reflect x5) – Magitek Research Facility (WoB)
- Golem (Protect x5) – Jidoor Auction House (WoB)
- Zona Seeker (Shell x5) – Jidoor Auction House (WoB)
- Alexander (Protect and Shell x10) – Doma Castle (After Cyan’s Dream, WoR)
Rages
- Unseelie (Shell) – South Figaro (Fields, WoB)
- Sergeant (Reflect) – Magitek Research Facility (WoB)
- Imperial Elite (Protect) – Vector (Emperor’s Palace, WoB)
Protect and Shell reduce incoming physical and magic damage by half (with the exception of armor piercing attacks). Reflect bounces spells back to caster. They are helpful to cast when needed, but devoting a Rage to them is ill advised. 2-3 summons and some Relics like Miracle Shoes can deploy them efficiently. There is also Mighty Guard which does Protect and Shell together on all hands. Reflect can also be applied efficiently through Carbuncle, Reflect Rings, certain Rages (see Rages with Benefits section) or manual casting. Some Rages also apply these effects automatically once you enter them (see the Rages with Benefits section).
However, Unseelie can be acquired the moment you enter the Veldt and having early access to Shell will help against early magic users like Veil Dancers, Hill Gigas, and Kefka (Narshe). The Rage will lose effectiveness once you get Magicite and the alternative options going.
Acquired from
- Phoenix (x1) – Kohlingen (After saving Locke, WoR)
Rages
- Destroyer – Magitek Research Facility (Containment Room, WoB)
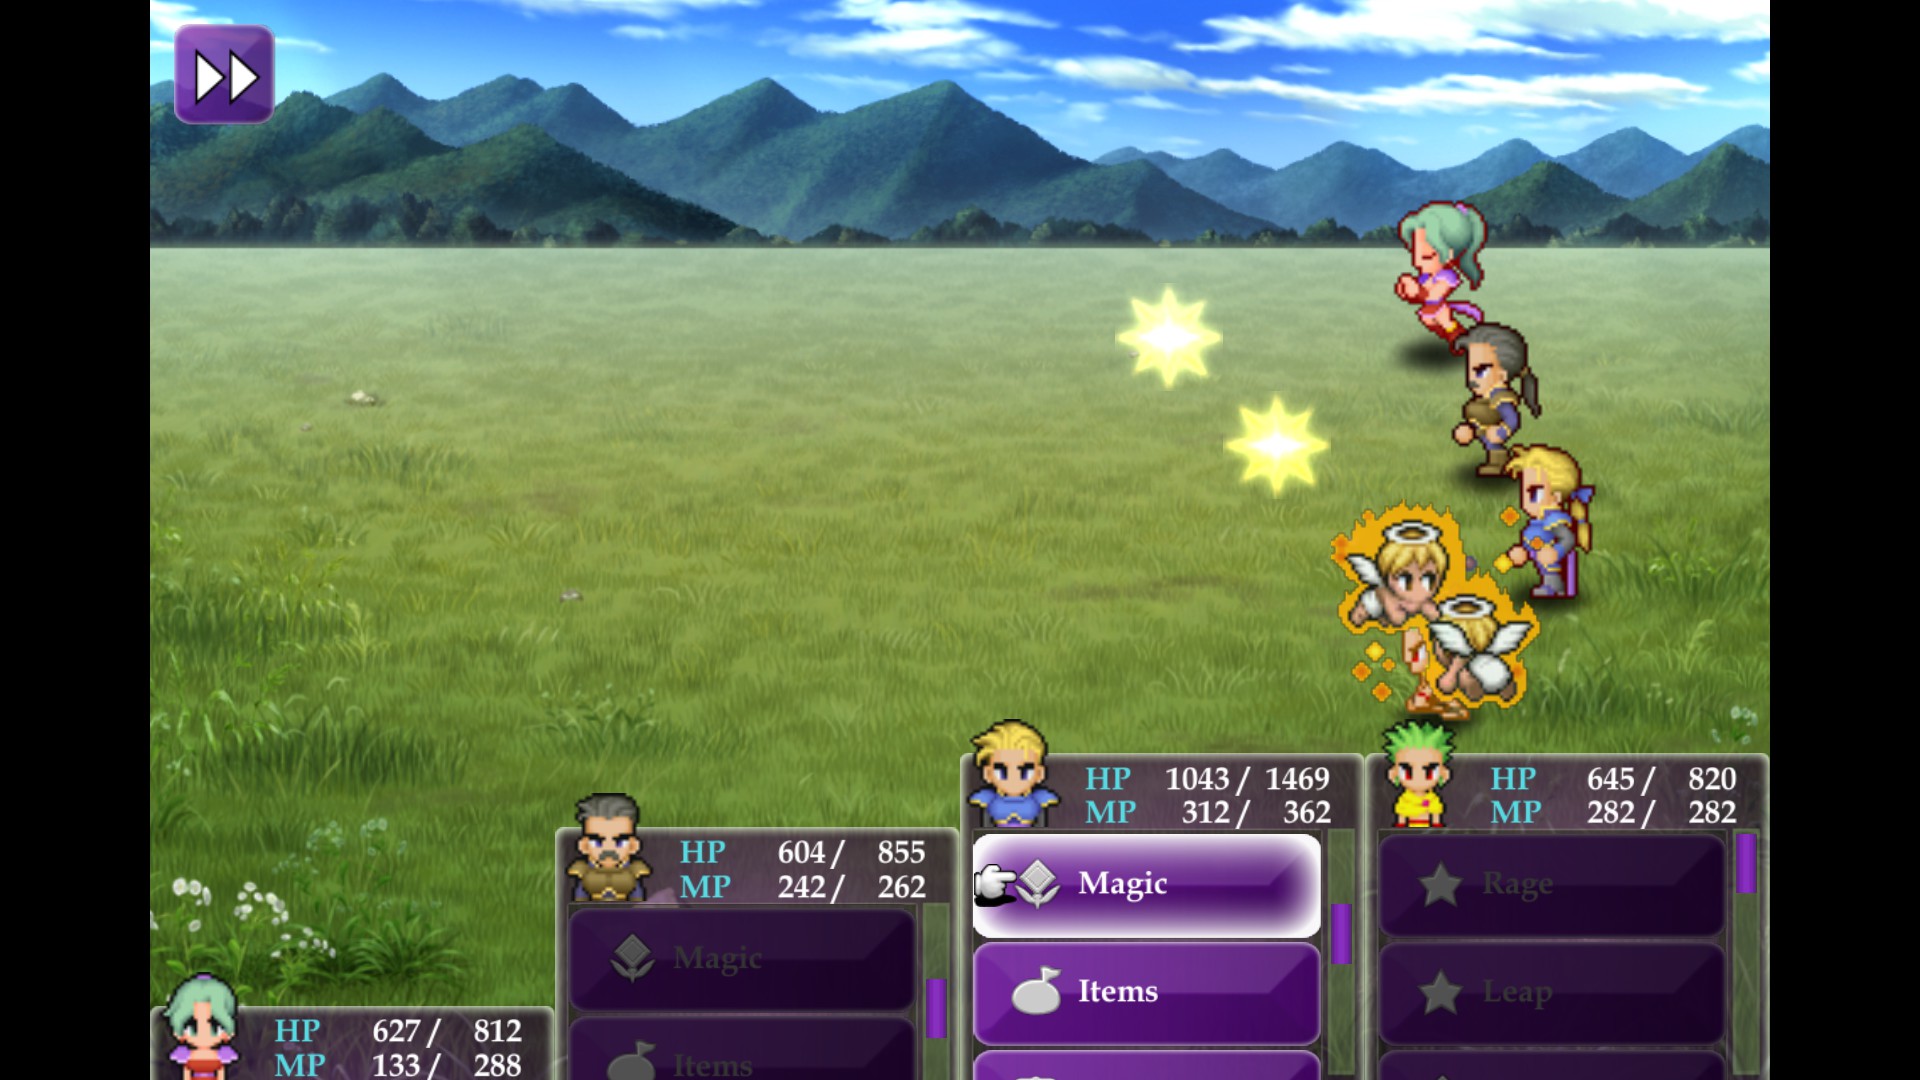
However, Reraise still falls to random targeting and the Rage is mostly effective for Low Level Playthroughs when you need to utilize it. Once you get Phoenix, then anyone can apply it manually. However, it doesn’t mean it is useless by then.
Acquired from
- Summon Phantom
- Level Celes to 48
- Phantom (x3) – Magitek Research Facility (WoB)
Rages
- Gobledygook – Zozo (Both Worlds)
You are better off using Phantom or manual casting of Vanish if you wish to utilize this spell.
Strago Lore
Acquired from
- Land Ray – Solitary Island (Sketch, WoR)
- Mover – Kefka’s Tower (WoR)
- Guardian – Kefka’s Tower (Boss, WoR)
Rages
- Land Ray – Solitary Island (WoR)

First off, the enemy listed only has 1 HP and has Sap, so you have to be quick with Leap. Second, Gau will either go through the entire battle casting this or not casting it at all, when you only need 1 application. Third, some people don’t mind the inconvenience summoning Zona Seeker, Golem and manually using Protect can mimic this. Finally, it is more efficient to bring Strago or Lore Gogo into battle and do it for you as they have other Lores and spells at your disposal once Mighty Guard has been cast.
Use buff spells at your own risk. Some like Unseelie, Destroyer and Cirpius can make the early game easier when needed.
Support Rages – Status Ailments Part 1
Part 1: Death, Petrify, Stop, Slow
Part 2: Confuse, Imp, Sleep, Berserk, Silence
Part 3: Poisons, Blind, Dischord, Overture, Dischord, Bad Breath
Part 4: Northern Cross, Entice
Status Ailments can be utilized to dangerous effect if you know who isn’t immune to them. In general sense, most people ignore these, but some can have benefits such as bypassing Reflect, Runic, multiple targeting or early access before Magicite get involved. If used correctly, these effects can be incredibly helpful when dealing with enemies at any point or regardless of playstyle.
Acquired from
- Catoblepas (Death x2) – Magitek Research Facility (WoB)
- Fenrir (Banish x5) – Mobliz (Slay Humbaba, WoR)
Rages that use Death
- Foper (Death) – South Figaro Cave (pre-Locke Scenario, WoB)
- Mu (Snare) – South Figaro (Fields, WoB)
- Skeletal Horror (Banish) – Darill’s Tomb (WoR)
- Lycaon (Blaster) – World Map (WoR)
- Coeurl Cat (Blaster) – Owzer’s Mansion (WoR)
- Necromancer (Death) – Phoenix Cave (WoR)
- Alluring Rider (Doom) – Cyan’s Dream (WoR)
- Weredragon (Death) – Cyan’s Dream (WoR)
- Mahadeva (Death) – Ebot’s Rock (WoR)
- Death Machine (Death) – Kefka’s Tower (WoR)
- Ahriman (Roulette) – Kefka’s Tower (WoR)
Death allows the player to instant kill enemies as long as they aren’t Deathproof. Each method has it’s share of strengths and weaknesses. Note that the Death spell itself and Doom will heal Undead while everything else will kill them.
Doom is Death with a timer. When the Timer hits 0, Death is inflicted. However, the timer can range from 20 to 60 seconds and is affected by Speed modifications (Speed stat and Haste/Slow/Stop)
Mu’s Snare is the most effective and earliest form of Death. Not only do you get an instant kill LONG before Catoblepas or Fenrir, but it cannot be stopped by Reflect or Runic, still castable if Gau gets Silenced or Imped, works on Undead and Mu carries no negative side effects to Gau. It also prevents enemies from executing Final Attacks (eg. Dark Behemoth Meteor/Ultima or Hill Gigas Magnitude 8) if killed via this method. Another advantage is you don’t have to put up with the randomness of Mog’s Dance command to use it.
In the World of Ruin, Snare is still effective, but you can now mass kill enemies with Skeletal Horror’s Banish and Lycaon’s Blaster. Both methods have their charms.
- Banish has the higher Hit Rate (85 vs 70), cancels Final Attacks and counters, cannot be stopped by Runic. However, the Rage enders Gau Undead and provides the general strengths and weaknesses that come with it.
- Blaster ignores Magic Evasion if the target is under Stop and doesn’t have Skeletal Horror’s Undead typing. It has less elemental weaknesses than Skeletal Horror and Coeurl Cat, but also less status protection than the Horror.
Ahriman’s Roulette, unlike Strago’s version eliminates your team from the random targeting, giving you assurance you will target an enemy. This Death cannot be dodged except by Deathproofing and will also work on Undead types. However, it will not stop Final Attacks or Counters and cannot be used under Silence.
Any of these 4 Death Rages are effective, so choose whichever strikes your fancy. I personally use Snare and Blaster more often, but Roulette can replace Snare when needed. Just know the strengths and weaknesses of each before making a choice!
Acquired from
- Catoblepas (Break x5) – Magitek Research Facility (WoB)
Rages that use Petrify
- Darkwind (Break) – Narshe (Fields, WoB)
- Commander (Break) – South Figaro (Basement after Locke Scenario, Both Worlds)
- Lizard (Break) – Serpent’s Trench (WoR)
- Deepeye (Dread Gaze) – World Map (WoR)
- Tonberry (Break) – Yeti Caves (WoR)
- Medusa Chicken (Break) – Ebot’s Rock (WoR)
- Basilisk (Break) – World Map (Jidoor and Narshe, WoR)
Petrify is basically Death. You kill the enemy by turning them to Stone. This form of instant kill bypasses Undead typing as long as the enemy isn’t Stoneproof. It is worth noting that there are some monsters that are Deathproof, but not Stoneproof.
Although Darkwind and Commander are your earliest shots at Petrification, Mu (Snare) does a better job of instant killing without their crippling weaknesses to Fire and Poison respectively.
However, the issue with using the Break spell is that it will check both Death and Petrify resistance. If the target is immune either Death or Petrify or both, then Break fails. It is also vulnerable to Runic and Reflect. Unfortunately, Catoblepas also suffers from this same problem of checking both.
To workaround this targeting issue, enter Deepeye! Dread Gaze ONLY checks for Stoneproofing at the cost of a Hit Rate of 75. Dread Gaze also bypasses Reflect and Runic. The only thing you need to put up with on Deepeye is a Fire weakness, which quite a few items in the World of Ruin negate. I recommend acquiring this Rage for those pesky Deathproof/non-Stoneproof enemies you may encounter in the World of Ruin.
Acquired from
- Golem (x5) – Jidoor Auction House (WoB)
- Fenrir (x3) – Mobliz (Slay Humbaba, WoR)
Rages that use Stop
- Alacran (Numb) – Figaro Desert (WoB)
- Acrophies (Numb Claw) – South Figaro Cave (Locke’s Scenario, WoB)
- Bug (Stop) – Southern Continent (Desert, WoB)
- Zokka (Net) – Tzen (Burning House, WoR)
- Gloomwind (Net) – World Map (Thamasa, WoR)
- Murussu (Stop) – World Map (Albrook and Tzen, WoR)
- Mugbear (Net) – Mount Zozo (WoR)
Stop is a good status effect as it locks enemies and prevents them from attacking, counterattacking and dodging incoming attacks. This is handy on enemies like Ahriman if you use Magic or Dragons when you don’t want to lose people to Snort.
Until you get to Golem, you have access to Alacran and Acrophies for Stop abusing. Since these Rages are considered Physical attacks, they cannot be blocked by Runic or Reflect and quite a few pre-Magitek Facility bosses and monsters lack Stopproofing. Just be careful around Ice, Water and Lightning attacks.
The effectiveness of these Rages dims down when Stop and Eclipse become available, but will help again when enemies start using Auto-Reflect or if you don’t use Cyan. You can then outclass your non-Magic Stoppers with Gloomwind (Net, bypasses Reflect/Runic), which has the most status defenses and only 1 weakness (Ice), which Gau’s best armor easily remedies.
Acquired from
- Siren (x7) – Zozo (Meeting Terra, WoB)
- Queztalli (x20, Slowga x2) – Solitary Island (After Airship, WoR)
Rages that use Slow
- Poplium (Cling) – Phantom Forest (WoB)
- Flan (Sticky Goo) – Magitek Research Facility (Trash Room, WoB)
- Bonnacon (Sticky Goo) – Esper Caves (WoB)
- Cruller (Sticky Goo) – South Figaro Caves and Figaro Castle Basement (WoR)
- Gigantoad (Sticky Goo) – World Map (Fields, WoR)
- Leap Frog (Sticky Goo) – World Map (Fields, WoR)
- Amduscias (Slowga) – Zone Eater’s Belly (WoR)
- Devoahan (Slowga) – Serpent’s Trench (WoR)
Slow is extremely useful as it slows down the rate which enemies attack you. It works on plenty of monsters and bosses.
Sticky Goo and Cling allows you to pierce Reflect and Runic to apply Slow. Poplium. although Undead is the earliest user of Slow and Flan provides some useful immunities and Reflect, making the best Slow Rage available.
However, it is more efficient to cast Slowga or Slow through learned Magic. So use those methods to apply Slow.
Support Rages – Status Ailments Part 2
Acquired from
- Level Celes to 32
- Summoning Cait Sith
- Cait Sith (x7) – Zozo (Meeting Ramuh, WoB)
Rages using Confusion
- Trapper (Lv3 Confuse) – Magitek Research Facility (Trash Room, WoB)
- Apocrypha (Lv3 Confuse) – Floating Continent (WoB)
- Dropper (Confuse) – Figaro Castle (WoR)
- Dante (Lv3 Confuse) – South Figaro Cave, Figaro Castle (WoR)
Confuse causes enemies to use their Confuse and Control attacks with swapped targeting. Some enemies have very useful attack and magic skills that can be exploited for great effect. While under the cover of Confusion, you can Steal, get healing and buffs going, or watch enemies kill themselves in derpy fashion.
The issue with Confuse Rages is that Edgar and Cait Sith can spread this status efficiently across all enemies without the need of math and Dischord. Plus, Gau’s physical attacks or the victim’s own moves can snap enemies out of it. Also, there is a version of Confusion that surpasses all these: Entice (see Part 4) and it will render these versions obselete.
Acquired from
- Level Celes to 13
- Cait Sith (x5) – Zozo (Meet Ramuh, WoB)
- Reed Cloak, Saucer or Tortoise Shield (Imp Equipment, x1)
Rages using Imp
- Onion Knight (Imp) – Magitek Research Facility (WoB)
- Provoker (Imp) – Cave to the Sealed Gate (WoB)
- Neck Hunter (Imp) – Figaro’s Castle, South Figaro Caves (WoR)
- Tzakmaqiel (Imp) – Yeti’s Cave (Imp)
Imp is basically FF6’s version of Frog. It shuts down all abilities except Imp and reduces defenses and attack strength to the character’s natural state. Some enemies when Imped always make critical hits when they attack, so be aware of this when using the effect.
It isn’t worth using Imp Rages as you are better off using the Imp spell to turn enemies or allies into Imps accordingly. Not only that, the Imp spell can dispel Imp that you already place on enemies and you will no control over Gau’s targeting to stop this.
Acquired from
- Siren (x10) – Zozo (Meet Ramuh, WoB)
Rages using Sleep
- Rock Wasp (Sleep Sting) – Kohlingen (Forests, WoB)
- Still Life (Lullaby) – Owzer’s Mansion (WoR)
- Samurai (Lullaby) – Cyan’s Dream (WoR)
- Seaflower (Sleep) – Phoenix Cave (WoR)
Sleep is a poor man’s Stop. The enemy is unable to take action until physically attacked. It is not worth using Sleep Rages as Gau will most likely physically attack and wake it up. Against single targets, use the Sleep spell.
But when you fight multiple attackers, you can inflict Mass Sleep with Lullaby from the Samurai and Still Life Rages. Still Life has an easier weakness to cancel out (Fire vs Poison). However, by then, you are either using Stop or Freeze if you want to keep enemies from fighting back.
Acquired from
- Level Celes to 40
- Phantom (x3) – Magitek Research Facility (WoR)
Rages using Berserk
- Nettlehopper (Berserk) – Fields North of Veldt (WoB)
- Grasswyrm (Berserk) – Southern Continent (WoB)
- Land Grillon (Wing Snap) – Esper Caves (WoB)
- Schmidt (Mega Berserk) – Dreamscape (Mines, WoR)
Berserk sends enemies into a mindless rage. They are unable to cast spells or use special attacks, but their attack power is higher to make up for this.
If this effect is under or Gau while Raging, then you will still be able to use special abilities but the physical damage bonus stays, Note that some Rages render Gau Berserkproof.
Of all the Berserk users, Schmidt and Land Grillon are the most reliable as they both cannot be Reflected (Mega Berserk can be stopped by Runic). Land Grillon inflicts this physically and Schmidt spreads this across all enemies. You will need a Thunder or Force Shield to cancel their crippling weaknesses if you plan to use these Rages.
If you are dealing with enemies that have high offense capaibilites, I recommend either Blinding the enemy, getting your Evasion up or casting Protect on your allies before using.
Acquired from
- Summon Siren
- Siren (x8) – Zozo (Meet Ramuh, WoB)
Rages using Silence
- Magna Roader (Red) – Magitek Research Facility (Mine Cart, WoB)
Silence shuts down enemy spellcasting without Berserk’s side effects. However, very few enemies are actually hindered by this and the sole Silence rage is acquired after you get Siren. You are better off manual casting this or using Siren.
Support Rages – Status Ailments Part 3
Acquired from
- Edgar’s Bioblaster Tool (Figaro Castle, WoB)
- Ramuh (Poison x2) – Zozo (Meet Ramuh, WoB)
- Catoblepas (Bio x8) – Magitek Research Facility (WoB)
Rages using Poisons:
- Urok (Digestive Acid, Sap) – South Figaro Cave (pre-Locke’s Scenario, WoB)
- Cartagra (Poison Barb, Poison) – South Figaro Cave (Locke’s Scenario, WoB)
- Aepyronis (Featherdust. Poison) – North of Veldt (Fields, WoB)
- Paradelia (Poison Touch, Poison) – Jidoor and Kohlingen (Forests, WoB)
Poison and Sap are the opposite of Regen; they do damage at regular intervals instead of heal you. The difference between Poison and Sap is Poison lingers after battle and the ticks are Poison damage while Sap is non-elemental and wears off after battle. You can turn Poison into Regen if you are in a Poison absorbing Rage. The problem with these Rages is although all of them bypass Reflect and Runic, they do not deal damage.
If you wish to spread these ailments, use Bioblaster, Bio and Acid Rain.
Acquired from
- Edgar’s Flash Tool – Figaro Castle (post-Narshe defense, WoB)
Rages using Darkness:
- Nautiloid (ink) – Returner’s Hideout (Raft Ride, WoB)
- Luna Wolf (Face Chomp) – Southern Continent (WoR)
Darkness adds a 50% accuracy penalty to all attacks and drops Evasion of the affected by 25%, which can help in some battles. There is no means outside Rages and Tools to inflict Blind.
However, Edgar’s Flash is the most reliable means of inflicting this ailment, higher end Shields do a better job blocking attacks than Darkness does and enemies utilize higher Hit Rate attacks as the game goes on. The Evasion issue is not a problem as some weapons always hit and the Sniper Eye can allow any weapon to do this.
- Coco – Ancient Castle or Dreamscape (WoR)

Overture may not sound like much, but when you are facing enemies with either high physical multipliers or counter attacks, you can redirect all that potential damage from yourself to them. In some cases, this can be the difference between life and death. This can be helpful when combatting Armadullahans and Death Riders and their vicious counters in the Dragon’s Den.
For more hilarious applications, enemies like Earth Eater (as seen above), Yojimbo, Rest and Neslug’s shell all have instant kill moves that bypass Deathproofing. These moves can be turned on themselves to make them commit suicide. Try it out! I sure did.
Acquired from
- Satellite – Imperial Camp (Sabin’s Scenario, Monster-in-a-Box, WoB)
- Chaser – Vector (Escape Facility, WoB)
- Crawler – World Map (Fields, WoR)
- Lizard – Serpent’s Trench (WoR)
- Figaro Lizard – Ancient Castle (WoR)
- Gamma – Ancient Castle (WoR)
- Dark Force – Kefka’s Tower (WoR)
- Metal Hitman – Kefka’s Tower (WoR)
Rages using Dischord
- Metal Hitman – Kefka’s Tower (WoR)
- Gamma – Ancient Castle (WoR)
- Figaro Lizard – Ancient Castle (WoR)
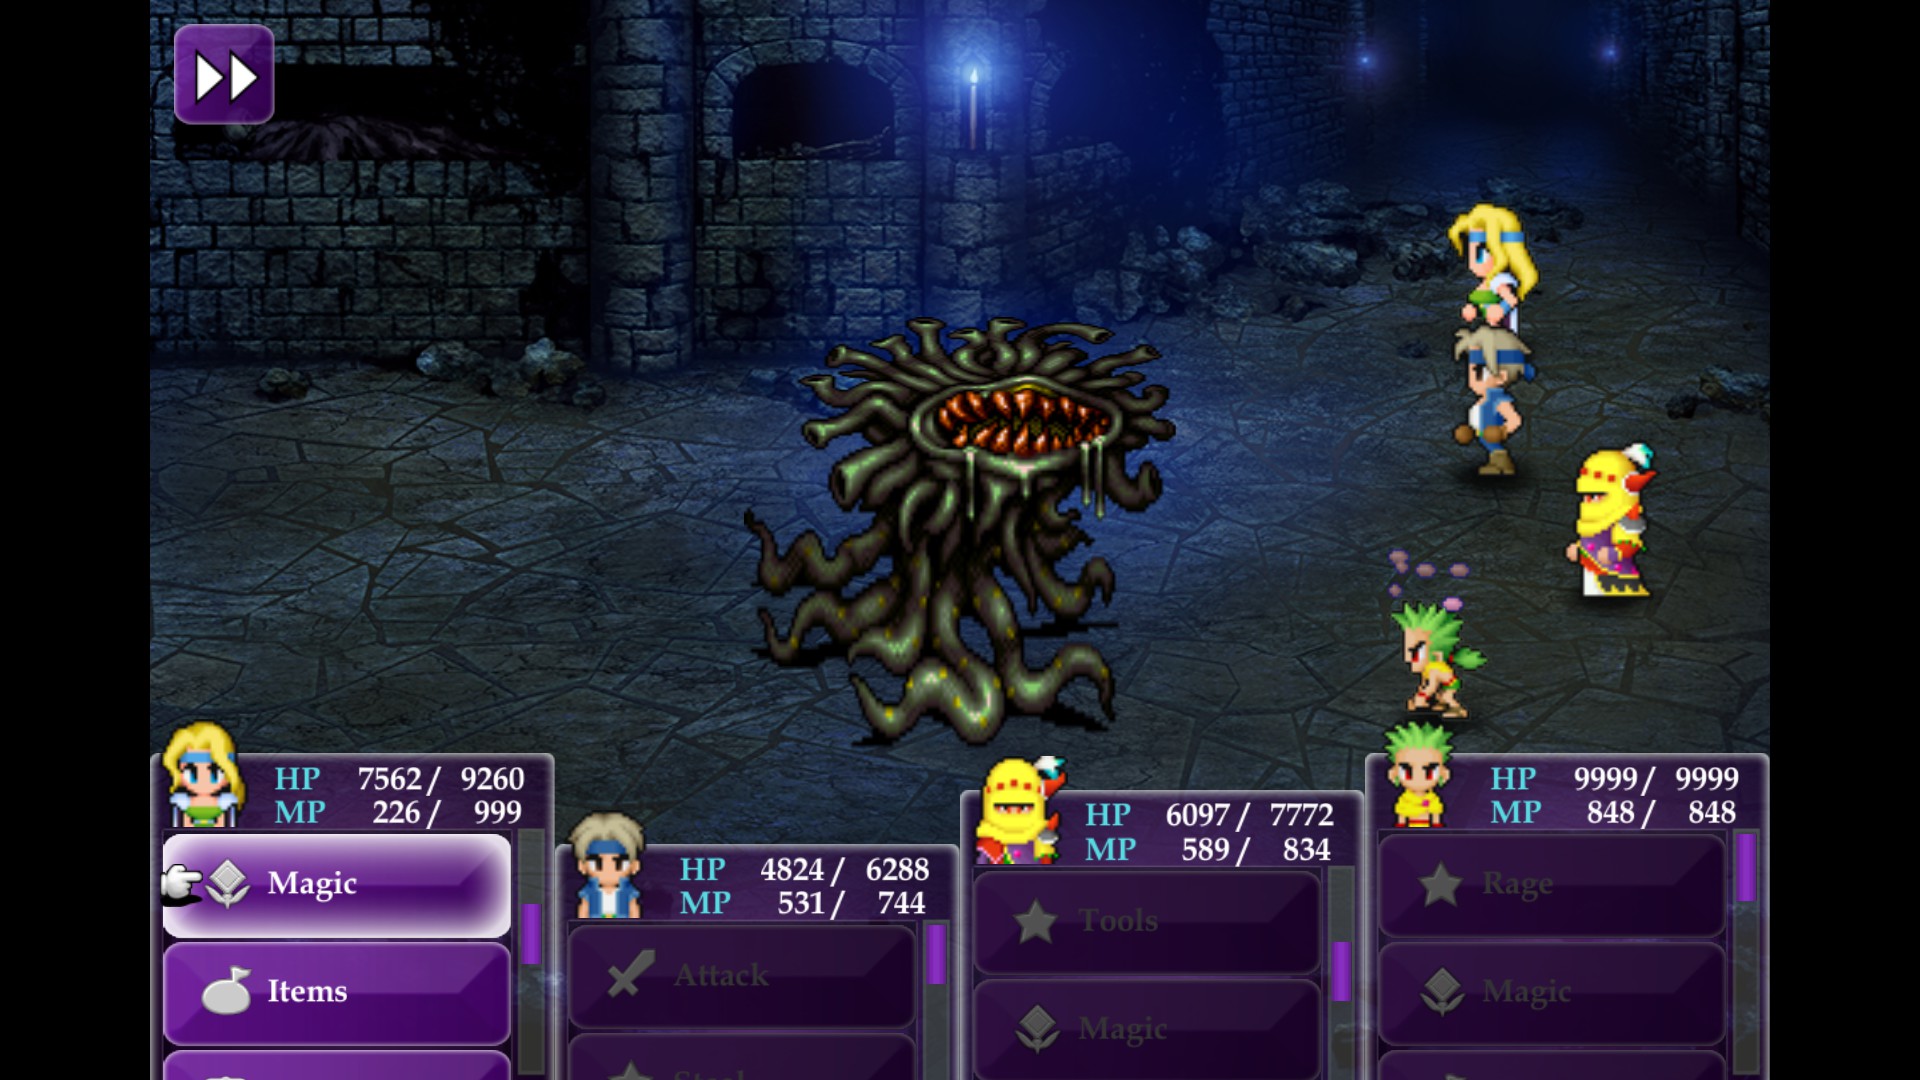
Not many people use this attack as defenses can make up for enemy power. Plus the fact it doesn’t work on bosses is a real let down. Also, Strago can easily learn this from the Veldt from Chasers and Satellites and equip the Celestriad to make the 68 MP cost 1.
- Chaos Dragon – Phoenix Cave (WoR)
- Brachiosaur – Dinosaur Forest (Rare, WoR)

However, due to a programming oversight, this spell will not work on any Impproof enemy. So if you want to apply any of the effects that Disaster invokes, use their individual spells.
Acquired from
- Malboro – Darill’s Tomb (WoR)
- Dark Force – Kefka’s Tower (WoR)
- Great Malboro – Kefka’s Tower (WoR)
Rages using Bad Breath
- Malboro – Darill’s Tomb (WoR)

Malboro also comes with Poison and Water absorption while spreading these effects and the Fire weakness can be countered with Flame Shields; allowing for 3 absorptions. Utilize this Rage if you rely on status effects, especially in Low Level Playthroughs.
However, due to a programming oversight, this spell will not work on any Impproof enemy. So if you want to apply any of the effects that Bad Breath invokes, use their individual spells.
Support Rages – Status Ailments Part 4
- Fiend Dragon – Kefka’s Tower (WoR, First Tean Only)

There are only 3 issues with this spell. First, you get the Rage at the end of the game from one of the most tedious monsters (Fiend Dragon has a chance to cast Heartless Angel when struck by anything). Second, you won’t know that Northern Cross works until the enemy hasn’t taken action for some time. When you were struck by Freezing Dust or Northern Cross, the game would say Frozen!, but that only applied to you, not them. Finally, this spell has a high chance of missing and may not always work if the target absorbs or is immune to Ice.
If you decide to cheese your way to victory with this spell, refrain from using Fire attacks and use other elements or physicals. Just be careful with your Fire elemental weapons (Flametounges, Flame Rods, etc.). Fiend Dragon also has a full status immunity pool and no elemental weaknesses, so you can Freeze enemies with minimal risks.
- Rafflesia – Owzer’s Mansion (WoR, Flower Painting)
The example shown can show just how devastating this effect can be. By simply Enticing an Outsider, I was able to Banish one of them (one of Outsider’s Confuse skills), Dispatch the Yojimbo (Death attack that bypasses Deathproofing), which in turn caused it’s Eye for an Eye to kill the Outsider that I had Enticed, killing each other in the process. I could have also enticed the Yojimbo to force it to Eye for an Eye or Doom the Outsiders and then end itself with Eye for an Eye as well.
Note that the spell’s effect ends when either the Caster or the Target are killed. If the enemy has any final attacks in their scripts, they will perform them within the script’s parameters. If Entice is cast on another monster, the previous Entice is ended as well. The caster will also have to watch for Fire attacks while maintaining the link from other sources as Rafflesia renders the caster weak to it, but you get complete status immunity coverage.
I also recommend only using this spell for ♥♥♥♥♥ and giggles or if you are extremely desperate to gain an edge on your opponent. This Rage tends to sap the fun out of the end-game.
Walkthrough Part 1 – Narshe to Ultros
WARNING: SPOILERS AHEAD!
This walkthrough will give you an idea of when you should acquire Rage and how you should use Gau to his fullest potential. Note this guide is based on my personal opinion and is centered more around always having Gau in your party and having him participate in some fashion. If you feel you have more efficient means, by all means use them, or share them so others can learn.
Note that I will be assuming you are going for the 253 Rages Achievement. In the event you are not, I will bold the ones that you should acquire. If you don’t like the attack it offers, then leave it for later when you are working for Master of Beasts.
You can also find a checklist on Appendix B at the bottom of the guide to keep physical tabs on the enemies and Rages you face. Use these sections together and you should have no problem getting Master of Beasts.
- Guard (Critical)
- Silver Lobo (Chomp)
- Megalodoth (Snowstorm)
- Spritzer (Blaze)
- Bandit (Self-Destruct)
- Wild Rat (Scratch)
- Guard Leader (Wind Slash)
Guard Leader will be an invaluable Rage as it allows you to wipe out groups with an element not many have resistance to.
The first few enemies are forced encounters. Terra should be able to meet the other ones on her way to or the part after the first boss. Be aware that Spritzers absorb Fire and Wild Rats absorb Poison when using Magitek offense. Try to avoid using Terra’s MP while in Magitek. The only real threats are Bandits with their Wrench (Attack x1.5) and Megalodoth can open with Snowstorm.
When fighting Whelk, fire Tek Missiles with Terra and use Fire Beam with Biggs and Wedge on the head. When the Whelk retreats, use Healing Force to patch up any wounded. If any attack strikes the shell, Whelk will counter with Megavolt, which does heavy Lightning damage for this point in the game.
When you get into the Locke portion, use the Moogle parties to dispatch the support enemies to conserve Potions and Locke’s HP. Be careful of Megalodoth’s Snowstorm opener as it can take a significant chunk of HP from them. Mog’s Dance for this region has a chance to cast Snare, which can instant kill any of the monsters, including the upcoming boss.
Guard Leader is the boss of this section. When he is with at least one Silver Lobo, he has a chance to throw a Net every other turn, which inflicts Stop. By itself, it has a high chance to use Charge (Attack x 2). This attack is pretty much fatal to Moogles in the front row. If your party gets wiped out, they get sent back to the start with 1 HP.
The safest option is to slay 1 Lobo and leave the other alive. If you fight him with Locke, try to steal his Mythril Knife. You can also rack up multiple Knives if you constantly steal and get wiped out. If you do this battle with Mog, Snare can instant kill the Guard Leader but you will have to put up with random targeting. Don’t forget to un-equip Mog’s Mythril Spear for Edgar when you get him.
- Leaf Bunny (Incisors)
- Darkwind (Break, Forest)
- Alacran (Numb, Desert)
- Sand Ray (Tail, Desert)
- Magitek Armor (Magitek Laser, Boss)
Note: Magitek Armor is a default Rage.
Leaf Bunny is helpful for Strength Gaus when you need to absorb Ice before damage. Alacran is one of the two early methods of applying Stop in the World of Balance. You will get a better instant kill Rage 2 areas from now.
The enemies overall are still no trouble but Alacran’s Numb can be annoying to deal with. Make sure your trek through the desert to Figaro Castle is a short one.
The Magitek Armors aren’t too difficult if you bought the Noiseblaster from Figaro Castle. Magitek Laser will not break Confusion, but their attacks will. Note they have Auto-Protect and you are back row.
- Urok (Digestive Acid)
- Foper (Death)
- Hornet (Iron Stinger)
WARNING: While you are here, you must encounter all 3 enemies in order for them to appear in the Veldt. Failure to do so before you do the Split-Up Scenarios will prevent you from getting all the Rages in this playthrough.
Note: Hornet is a default Rage
Foper is another Death user but the next area has a Death spell that will outclass it. You will start with Hornet and it is the only amplified Physical that bestows Gau with Auto-Float, making it useful for Earth-based attackers.
The Auto-Crossbow tool and follow up attacks will plow through all the enemies here. If you are lucky with your stealing, you may get Remedies from Uroks.
- Belmodar (Megavolt)
- Mu (Snare)
- Unseelie (Shell)
Note: Belmodar is a Default Rage.
All 3 Rages are incredibly useful. Belmodar is a default Rage but is your earliest Lightning absorber. Mu will teach you the best instant kill in the World of Balance while Unseelie gives you early access to Shell for early boss fights. The Forest Area has a formation with all 3 in it.
Make sure you get the Hyper Wrist and Hermes’ Sandals from the dungeon in the basement of the South Figaro Mansion. These will help you now and especially in the Split Scenarios. If you don’t know where they are, this video will help you get them (I acquired them during the Occupation, but you can acquire them the moment you come here).
With the Hyper Wrist and Hermes Sandals on Edgar, you will plow through everything quickly. You can also give the Hermes Sandals to Locke to accelerate your Stealing.
- Zaghrem (Stone)
- Gorgias (Snowstorm)
- Trillium (Bio)
- Cirpius (Hastega)
Trillium and Cirpius are the most important Rages here. The former allows access to Bio and the latter is Hastega long before you get their associated Espers (Catoblepas and Queztali respectively). You can encounter all the non-Zaghrem monsters in formations on the screen where you face Vargas. Trillium can also Poison you, so watch yourself.
When you face Zargas, you must slay his Ipoohs before you can target him directly. They will fall easily to Auto-Crossbow, standard attacks and Fire. Watch for Zargas’ Gale Cut as it can be quite damaging. Use Cure if needed and give the Hermes Sandals to Locke or Edgar. You can switch to Bioblaster to do double damage on Vargas when solo.
When Sabin arrives, use the Raging Fist Blitz before the Doom Counter hits 0 to end him.
- Nautiloid (Ink)
- Exocite (Pincer)
- Lesser Lopros (Fireball)
Note: You should try to encounter all these enemies at least once during your ride. If you must, there is a point you either go Left or go Up. Choosing Up loops around over and over until head left. Take advantage of this for quick levels or if you fail to encounter them all in 1 pass. You can still flee from battles if necessary.
All but Nautiloid are effective Rages. Exocite is 1 of the 2 Physical Rages that absorbs Water and Lesser Lopros has a very destructive Fire attack that can plow through low level and low HP enemies, especially if you are doing Veldt farming or grinding.
The only threat here is the Lesser Lopros. It can use Fireball against you after 3 attacks and can spell your doom if you have a low HP Banon. However, this attack can be turned on your enemies if you abuse the Noiseblaster on them, saving on MP and attacks.
If you have problems with Ultros, put all your teammates in the back row to reduce the damage Tentacle does. Spam Auto-Crossbow, Pray, Fire and Raging Fist or Aura Cannon. Be careful with Fire as Ultros will hit Terra with Ink attacks, which can Blind her. Slay him quickly as he not only has attack chains, but is programmed to cast Tentacle on Banon, which can be a OHKO if you are low leveled.
Walkthrough Part 2 – Split Up Scenarios to Veldt
After you defeat Ultros, do Terra or Locke’s scenario first, then vice versa and finish up with Sabin. This will ensure you get all the necessary Rages at the start of the game and save on headaches in the future when you encounter more enemies.
- Valeor (Second Cave. Stone)
- Wererat (Second Cave, Poison)
- Eukaryote (Light Puzzle, Trap, Fire)
- Specter (Light Puzzle, Trap, Fire)
- Darkside (Light Puzzle, Trap, Blizzara)
WARNING: Eukaryote, Specter and Darkside only appear if you trigger the trap at the Light Puzzle in Narshe. Simply walk off course and touch a white star. Try to encounter all 3 together. Failure to do so in her scenario will not allow these 3 to appear in Veldt.
WARNING: Inside the Moogle’s home, there is a chest here. Do not open it yet! Failure to do so will prevent you from getting a Ribbon from this chest later in the game. You will get a Rune Blade if you do it now.
Darkside can be a useful Rage as it is your earliest Blizzara user until you get Veil Dancer later.
Be careful with the enemies as you still need to keep Banon in one piece for this scenario. This can be an problem if you engage the Light Puzzle enemies or you get pincered by Wererats.
Before you enter the house, make sure you remove the Sprint Shoes and/or Hermes’ Sandals from Terra and/or Edgar so Locke or Sabin can use them in their scenarios.
- Heavy Armor (Town Only, Magitek Laser)
- Commander (Secret Passage, Break)
- Vector Hound (Secret Passage, Bite)
- Cartagra (Default, Poison Barb)
- Gold Bear (South Figaro Cave, Gouge)
- Acrophies (South Figaro Cave, Numbclaw)
Note: Heavy Armor must be challenged at least once. Talk to any soldier on a Magitek unit as Normal or Merchant Locke. You do not have to slay it (as a Game Over will send you back to start), but you can try to steal Iron Helmets. Failure to do so now will force you to fight 1 at the Invasion of Narshe, which has a chance to not spawn at all.
Note: Don’t forget the Ribbon in the 2nd Basement where you encounter Vector Hounds and Commanders. You will need this for Sabin’s encounter with Satellite and Phantom Train. Failure to acquire it now will prevent you from getting it until South Figaro is liberated.
WARNING: If you didn’t pick up the Hermes Sandals and Hyper Wrist from the dungeon, do so now before you leave town. The video of their location is back in Part 1. Failure to do so will prevent you from getting them until you liberate the town later in the game.
Gold Bear and Acrophies are good Rages. Gold Bear has the second highest attack modifier (Attack x2.5) of the Physical Rages and Acrophies allows Gau to absorb Water and inflict Stop. The Vector Hound can also be useful for Strength Gaus as it gives you Auto-Haste and Slowproofing, saving on the Hermes Sandals.
The standard enemies aren’t too much trouble, slay them as you see fit. Vector Hounds will run away if they are the only monster left.
Before you face Tunnel Armor, unequip the Sprint Shoes and Ribbon so Sabin or Terra can use them. Simply use Runic every turn and re-apply it when the effect is consumed. Under Runic, a dual wield or Gauntlet wearing Locke will destroy Tunnel Armor solo. Use Potions and Hi-Potions to heal.
You can also open the chest on the 2nd Floor of the Caves for a Thunder Rod. You can sacrifice it using Items command to OHKO, the boss. Don’t use Runic when you do this! You also cannot do this if you opened the chest already and you forfeit getting a Hero’s Ring later if you do this.
Imperial Camp and World Map
- Nettiehopper (World Map. Berserk)
- Stray Cat (World Map, Catscratch)
- Chippirabbit (World Map. Raise)
- Aepyornis (World Map, Featherdust)
- Doberman (See Warning, Bite)
- Satellite (See Warning, Sonic Boom)
- Templar (Camp, Fira)
- Imperial Soldier (Camp, Fire)
WARNING: In the first screen of the Camp, there is a locked chest. This chest MUST BE KICKED! This provokes a Doberman attack. Failure to do so will make Doberman not appear in the Veldt.
WARNING: In the second screen of the Camp, after you face Kefka once, there is a Monster-in-a-Box chest in one of the tents. You must open this chest and defeat Satellite for the Green Beret before you encounter Kefka 3 times. Failure to do so will make Satellite not appear in the Veldt.
Note: Try to keep Shadow under your employ during this part. After every battle, he has a 6.25% chance of leaving the party. This check is ignored if he is the only character without a Game Over effect or your battle is on the Phantom Train itself. Don’t forget to buy Shurikens and Scrolls for the Throw command.
Templar will be your best Fira caster and Gau also gets Auto-Protect. The Stray Cat is the game’s most devastating Physical Rage (Attack x 4). Satellite is helpful for 2 reasons: It is a Gravity attack that works on Maximum HP instead of current HP and will allow you to get free Green Berets in the Veldt, an effective helmet for your party members.
The only annoyance here is Satellite, which will use Scintillation if you try to vanish Shadow and counters any Blitz with Mega Berserk on Sabin. Every few seconds, it also calls in more Imperial Soldiers to fight along side it. If you brought the Ribbon from Locke’s Scenario and put it on Sabin you can spam Blitzes without being Berserked for heavy damage. Otherwise, Throw things. You will get a Green Beret for slaying it.
Phantom Train and Forest
- Ghost (Thunder)
- Poplium (Cling)
- Angel Whisper (Gravity)
- Bomb (Blaze)
- Cloud (Thundara)
- Living Dead (Osmose)
- Oversoul (Will O’ the Wisp)
WARNING:Cloud, Living Dead and Oversoul MUST be encountered at least once in any formation before facing the Phantom Train. Oversoul and Living Dead can only be encountered inside the train cars. Failure to do so will prevent these 3 from appearing in the Veldt.
Note: Apparition, Angel Whisper and Siegfried are not necessary unless you are aiming for Bestiary. Angel Whisper is a default Rage and the other 2 aren’t learnable Rages as they don’t appear in the Veldt.
Note: Bomb can only be encountered on the Outside of the Train and in the Forest. However, you can also encounter them in Bomb Forest (West of Veldt) when you acquire the Blackjack Airship. It is best to do it now while you can!
Bomb is your earliest Fire absorber and carries a Fira-like attack called Blaze. Cloud is also an effective Lightning elemental attacker until you get Gigavolt. Try to face these two while you are here.
Bombs, Ghosts and Oversoul are the most dangerous enemies here. The first 2 have devastating Fire attacks and Oversoul can Petrify characters this early in the game. Luckily, there is a car for free healing and you can buy Gold Needles and Potions off some of the Ghost shopkeeps on the train.
If you want to slay the bosses fast, throw a Phoenix Down at them (use Tab or Start button on Xbox Controller to change targeting). You can also hire a Ghost on the Train and use Possess to slay Apparition in the Monster-In-A-Box for a OHKO. If you don’t like fighting dirty, Fang (or Tiger as first attack if possible), Aura Cannon (mostly every enemy here has a Holy weakness) and tossing Shurikens does full damage. You can also Meteor Strike (or Suplex for the SNES players) the train to death if you want to see some iconic, silly animations.
After the Forest, make sure you have encountered the World Map monsters, especially Stray Cat before you jump off the falls to the Veldt.
At the falls, Shadow will leave you and you must then face Opinicus Fish (each has 10 HP) for 30 seconds before a Rhizopas attacks you. Try to kill Rhizopas fast as El Nino can be fatal to low HP parties.
Walkthrough Part 3 – Acquiring Rages and Narshe Invasion
Once you get Gau (Go to the Acquiring Gau and mechanics sections for details), begin collecting Rages. Completionists should acquire everything and Low Level Playthrough (LLP) or Standard Players should only require the necessary Rages.
Also, from this point onward, I will be giving Rage suggestions for fighting the enemies in that area and I will be assuming you are using Gau and/or Rage Gogo for those areas. How you build your Gau is up to you, but I will give suggestions for Magic, Strength and Crowd Control Gaus.
Don’t leave the Veldt until you have:
- Acquire at least the Follwoing Rages by Leap (if you need them):
- Guard Leader (Wind Slash)
- Leaf Bunny (Incisor, absorbs Ice)
- Alacran (Numb)
- Mu (Snare)
- Unseelie (Shell)
- Trillium (Bio)
- Cirpius (Hastega)
- Lesser Lopros (Fireball)
- Gold Bear (Gouge)
- Acrophies (Numbclaw, absorbs Water)
- Stray Cat (Catscratch)
- Templar (Fira)
- Satellite (Sonic Boom)
- Cloud (Thundara)
- Bomb (Blaze)
- You have a Green Beret for the following characters (slay Satellite and Gau doesn’t return):
- Terra
- Sabin
- Locke
- Gau
- Cyan
- Celes
- You have at least 20,000 Gil for Low Level Playthroughs
- You have about 30 Hi-Potions and necessary Phoenix Downs
Once you do, head into Crescent Mountain and jump into the Serpent’s Trench.
Enemies
- Anguiform (Aqua Breath)
- Aspiran (Gigavolt)
- Actinian (Clamp)
Note: If you are planning on bringing Gau to the Magitek Research Facility, try to face all 3 in one trip. Failure to do so will force you to do multiple trips through the Trench and this wastes time.
Once you return to the Veldt, you can get the strongest attack in the World of Balance (Gigavolt) and a very effective attack that hits all enemies for Water and Wind damage. However, the carriers of these attacks are also the most dangerous enemies here.
Anguiform has a chance to use Aqua Breath on Last Stand, which is devastating on LLP and it can also appear alone in a formation. Try to slay it as fast as possible.
Aspiran has a chance when struck by any non-Attack skill to retaliate with Gigavolt, which is basically Thundaga. This check is also done as a Final Attack if necessary. To avoid this counter completely, have Sabin or Cyan use a standard attack against them before Gau goes into Rage.
Fighting
- Lesser Lopros (Fireball) or Templar (Fira) can reduce Aspiran and Actinian to ash in 1 cast at the risk of Gigivolt. They also don’t have any weaknesses these monsters can exploit. Fira will need to be single casted in order to OHKO an Anguiform.
- If you face 2 Anguiforms, Cloud (Thundara) can smite them easily. Just quickly dispatch the last one should it single target or 1 survives the all-cast.
- Belmodar (Megavolt) although weak can absorb Gigavolt counters
- All 3 enemies can be reliably damaged by Guard Leader (Wind Slash). However, this skill can trigger a Gigavolt counter.
- Stray Cat or Gold Bear can also do heavy damage. You can use Exocite to absorb Aqua Breath if needed, but it can take double from Gigavolt. Note that any physical specials WILL trigger Gigavolt counter checks.
- Crowd Control can be very useful here:
- Death via Mu (Snare, prevents Aspiran Gigavolt):: All enemies
- Stop via Alacran (Numbclaw, absorbs Water): All enemies
Enemies
- Corporal (Any Soldier, Swing)
- Hunting Hound (Green Soldier, Bite)
- Fidor (Brown Soldier, Pounce)
- Heavy Armor (Brown Soldier, Magitek Laser)
- Hell’s Rider (Venomist, Boss)
- Kefka (Boss)
WARNING: All enemies fought here must be encountered at least once. Failure to do so prevents them from being encountered in the Veldt. If all the soldiers are slain and you missed an enemy, restart the campaign. The exception to this rule is Hell’s Rider as the soldier will continue to patrol, even if you skip it.
Note: I will assume you put Gau with backup. Otherwise, give Gau the Hermes’ Sandals and place him in the Back Row so he can solo combat anything he faces. The best characters to do Solo teams with are Edgar with his Bioblaster, Noiseblaster and Flash Tools and Sabin if he has Rising Phoenix.
Note: Ifyou didn’t face the Heavy Armor in Locke’s Scenario like I suggested, this is your last chance. Be advised that the encounters are not fixed formations, so there is a chance you might not face a Heavy Armor in that unit.
The only effective Rage here is Hell’s Rider, which will be of great use if you plan on bringing Gau to the next destination. Check the Acquiring Gau section for instructions on how to return to the Veldt if you don’t know how.
All the enemies have mostly standard and amplified attacks. Corporal has a chance to counterattack when struck, even as a Final Attack. Both dogs have high vitals but have crippling Fire weaknesses. Hunting Hounds will Flee if they are the only enemy standing. which helps in LLP. Heavy Armor may put up Magitek Barrier now, which will place it under Reflect status. Be aware when using Rages.
Fighting the Small Fry
- Guard Leader (Wind Slash) or Lesser Lopros (Fireball) can mass cripple or kill multiple enemies at once.
- Templar (Fira) or Bomb (Blaze) can waste both dogs with ease. It also cripples unprotected Heavy Armors. Trillium (Bio) can slaughter Corporals with ease.
- If you can get it off before Heavy Armor casts Magitek Barrier or Laser, Cloud (Thundara) can turn them into scrap metal. Otherwise, Magitek Armor or Heavy Armor (Magitek Laser) can pierce it. Belmodar (Megavolt) can absorb Magitek Lasers if needed.
- Stray Cat and Gold Bear can be used to devastating effect, but note that Heavy Armor has Auto-Protect, so damage will be halved.
- Crowd Control can make life easier in this Scenario:
- Death via Mu (Snare, prevents Corporal counterattacks): All enemies except Heavy Armor
- Stop via Alacran (Numb, no exploitable weaknesses): All Enemies
Fighting Hell’s Rider
Silver Lance is capable of OHKOs, which he uses by chance and if Locke steals the Mythril Vest. Venomist can also be a problem as it spreads Poison damage across all allies and causes Poison. If Gau is under a human rage like Templar, he will take double damage.
- Cloud (Thundara) and Bomb (Blaze) can do significant damage and don’t have a Poison weakness for Hell’s Rider to exploit.
- If you wish to play it safe, Oversoul (Will O’ The Wisp) and Zaghrem (Stone) all absorb Venomist and can fight back. Magitek or Heavy Armor (Magitek Laser) can reduce Silver Lance’s damage.
- Crowd Control Gaus can exploit Alacran (Numb) or Acrophies (Numbclaw) to Stoplock this boss while you steal his Survival Vest or kill him. You can also instant kill him with any Death or Petrify Rage.
- Stray Cat and Gold Bear can physically mutilate this boss. Wild Rat or Wererat have the added bonus of absorbing Venomist if needed.
Fighting Kefka
The worst spells Kefka uses are Blizzara and Confuse. Other than that, he just attacks. Bringing Celes for this one is a recommended course of action to intercept his Magic with Runic. Kekfka is also immune to Poison damage.
- If you are operating under the Cover of Runic, Oversoul (Will O’ The Wisp) or Guard Leader (Wind Slash) are the most effective Magic attacks you have.
- If you didn’t bring Celes, Templar (Fira) is the safest means of damaging him.
- Strength Gaus can use Stray Cat, Gold Bear or Leaf Bunny (absorbs Ice) to beat down Kefka.
- If you wish to play it safe, Kefka isn’t Stopproof. Acrophies (Numbclaw) can stoplock Kefka without crippling weaknesses (Thunder vs Alacran’s Ice).
- Unseelie (Shell) can help reduce damage.
Once you are done, continue on towards Zozo.
Walkthrough Part 4 – Western Continent and Zozo
Note: When you appear in Kohlingen, head north from Figaro Castle and you will find a small cabin. This is the future site of the Coliseum. Inside the house is a Hero’s Ring, which is helpful for Gau’s offense. There is also a Chocobo Stable nearby in the woods if you want to get a cheap ride to Zozo.
Enemies
- Bloodfang (Kohlingen Region Only, Drain)
- Fossil Dragon (Desert Only, Sandstorm)
- Vulture (Shamshir)
- Iron Fist (Stone)
- Rock Wasp (Sleepsting)
- Paraladia (Forest Only, Poison Touch)
The Rages are a hit and miss for you, but Vulture is good for a Gravity clone and Iron Fist is a Stone user without Zaghrem’s Fire weakness. Bloodfang is helpful for Solo Gau games as it’s your first source of Drain until you get Lifeshaver later.
The enemy difficulty picks up quite a bit as enemies rely on status effects. Vulture, Fossil Dragon and Iron Fists are the most dangerous.
Vulture abuses Shamshir a lot, which halves HP and can make it easier for other monsters to tear you apart. Fossil Dragon can inflict Zombie through Bone and Sandstorm can hit like a truck for over 200 damage to all party members. Iron Fist casts Stone as a Last Stand, which can cause mass Confusion and deals 8x damage to anyone Level 15, spelling Game Overs.
Fighting the Enemies
- Guard Leader (Wind Slash) or Anguiform (Aqua Breath) can destroy Vultures with ease as they are weak against Wind. Both attacks can cripple or kill everything else. Don’t use Anguiform on Paraladia as it absorbs Water.
- Except for Vulture and Iron Fist, everything is weak against Fire. Templar (Fira), Oversoul (Will O’ The Wisp, Zombieproof) or Bomb (Blaze) can destroy lone Iron Fists and Fossil Dragons with ease. Lesser Lopros (Fireball) can handle groups of everything else.
- IIf you paid a visit to the Veldt after Narshe, Aspiran (Gigavolt) can cause devastation to any enemy here as well
- Crowd Control can be a useful ally, both here and in Zozo:
- Death via Mu (Snare, ignores Undead checks): All Enemies
- Stop via Alacran (Numb) and Acrophies (Numbsting): All Enemies
- Stop shuts down Shamshir counters, Iron Fist Last Stands and makes Fossil Dragon a LOT easier.
- Stray Cat and Gold Bear are also vicious against the enemies of this region. Try to use Crowd Control or Magic attacks for the Fossil Dragons if you are low level.
Once you are done, proceed to Zozo by any means necessary. If you got to Zozo via Chocobo, make sure you remember to face these monsters later.
Enemies
- Gobbleygook (Vanish)
- Harvester (Haste)
- Hill Gigas (Outside Only, Magnitude 8)
- Veil Dancer (Interior Only, Blizzara)
- Dadaluma (Boss)
WARNING: If you paid Shadow to help you, he will leave your party upon entering this hive of scum and villainy. Make sure you un-equip him before entering town. Most players don’t bother bringing him anyways because of this.
The two biggest threats are sadly the best Rages here: Veil Dancer and Hill Gigas.
Veil Dancer when left alone begins casting Ra-Level spells until she is slain or runs out of MP. There is also a possible battle formation where she is alone. Celes can intercept these spells with Runic. Once Runic is up, immediately kill her as fast as possible. If she is with other enemies, slay her first! Do not use Rages that use Magic if you must rely on Runic.
Hill Gigas has devastating physical attacks. If slain, there is a 33% chance that this enemy will cast Magnitude 8 as a final attack, doing Earth damage to all non-Grounded foes. Try to steal a Gigas Glove if you plan on playing a Physical Gau.
Harvester can also throw weapons which can be OHKO for LLPs. They do this if the battle drags out too long. They also steal Gil if Locke steals from them. Make sure they don’t Escape with it.
Fighting the Standard Enemies
- Everything is weak against Poison! Trillium (Bio) will OHKO everything that isn’t a Hill Gigas. If you went to the Veldt after the invasion, you can use Hell’s Rider (Venomist) in tandem with Edgar’s Bioblaster to wipe out groups of Gobbleygooks and Harvesters.
- Another option is Guard Leader (Wind Slash) or Anguiform (Aqua Breath) if you went to the Veldt. Both can dispatch groups if you are skeptical of Bio’s targeting or Venomist’s damage. Note that Aqua Breath succumbs to split damage. Both moves also cancel Gobbleygook Vanish. Prioritize on Wind Slash if you are fighting under the cover of Runic.
- Bomb (Blaze), Darkside (Blizzara) and Ghost (Thundara) can provide you with an offensive option while maintaining Float status against Hill Gigas. Do NOT use these Rages against Veil Dancer.
- If you are forced to use Runic on Veil Dancer, use non-Runic spells against her so that Celes doesn’t stop your own attacks. Lesser Lopros (Fireball), Oversoul (Will O’ The Wisp), Hell’s Rider (Venomist), Anguiform (Aqua Breath) and Mu (Snare) also work under the cover of Runic.
- Crowd Control is extremely effective here:
- Death via Mu (Snare, cannot be intercepted by Runic and cancels Hill Gigas’ Magnitude 8 Final Attack): All Enemies
- Stop via Alacran (Numb) or Acrophies (Numbsting): All Enemies. Both fail on Vanished enemies.
- If Celes has access to the Imp spell, this can prevent Hill Gigas from using Magnitude 8, but every physical attack from Hill Gigas will now be a critical hit.
- Stray Cat and Gold Bear can viciously mutilate monsters here. Just remember these attacks fail on Vanished foes, so have Celes, Sabin (non-Physcal Blitzes) or Edgar (Bioblaster or Flash) reveal them. Iron Hornet can bestow Gau with Auto-Float for Hill Gigas if needed.
- If you are desperate for MP on Celes and don’t want to take the risk on Veil Dancers, face a weak party, have Gau use Cirpius (Hastega) and use Runic to absorb the cast for a 40+ MP Recovery. This will save on valuable Ethers!
Dadaluma isn’t too difficult, but he can be vicious. If he is struck 4 times physically or 2 times magically, he will toss weapons at you and Jump if it was through magic. At 1920 HP or less left, he heals himself a few times then applies Protect status. Every 30 seconds, he will call for 2 Iron Fists to back him up if none are on the field.
- Hell’s Rider (Venomist) is this boss’ worst nightmare. Not only does Venomist do double damage to this boss, but the attack will not add on to the counters. However, this move will heal Iron Fists as these guys both absorb Poison. If you need damage and are willing to take the gambit, Trillium (Bio) can waste Dadaluma quickly.
- Bomb (Blaze), Guard Leader (Wind Slash), Anguiform (Aqua Breath), Lesser Lopros (Fireball) can effectively damage Dadaluma and the Iron Fist reinforcements without adding on to the counters as all mentioned skills are Enemy Skills.
- Stray Cat and Gold Bear’s special physicals not only do high damage, but they do not count towards the physical or magic counters that cause him to throw weapons. Much like Tools, Bushido and Blitzes.
- If you wish to play it safe, especially in LLP then fight dirty, Dadaluma isn’t Stopproof. Alacran (Numb) or Acrophies (Numbclaw) will paralyze him and make him unable to act at all. Be warned that 4 attack rolls will cause Dadaluma to counter should Gau fail to use either move or when Stop ends.
Once Dadaluma falls, head up to Ramuh, get your Magicite going and get ready for the next Chapter, which will be Gau’s time to truly shine.
Walkthrough Part 5 – Opera House and Southern Continent
If you plan on taking Gau to Vector, you must first take a trip back to the Veldt. The castle will let you travel 2 ways. Follow the Acquiring Gau section on Pre-Blackjack for Directions. If you missed any Rages, get them now.
Note: For LLPs, if you want to level up your Magicite spells you got 2 options with minimal experience gain. Either you save it for the Veldt, which you get 0 XP and 1-3 AP based on enemies. Or you go to Phantom Forest and only fight Solo Ghosts. 1 Ghost nets about 40 XP for 1 person and 3 AP. Use the Veldt if you are trying to maintain low levels.
Note: If you are about to Level up, give Gau Cait Sith (Magic +1). Every bit of Magic helps, but try to keep his levels low until you acquire Bismarck and/or Zona Seeker after this Part.
Once in the Veldt, acquire at least the following:
- Veil Dancer (Blizzara)
- Anguiform (Aqua Breath, if you haven’t already)
- Aspiran (Gigavolt)
- Hill Gigas (Magnitude 8)
- Hell’s Rider (Venomist)
These Rages will upgrade your Lightning, Ice and Wind arsenals (Aqua Breath is part Wind). You will get your first Earth and Water attacks as well. You are going to be using these attacks very soon. Make sure you give Gau either the Ribbon or something to block Darkness for Anguiform (inflcts Blind). Hell’s Rider can be decent when you are fighting Imperial forces.
If you are aiming for all 253 Rages, acquire the following:
- Any Rages you missed up till Narshe
- Corporal
- Heavy Armor
- Fidor
- Hunting Hound
- Hell’s Rider
- Vulture
- Bloodfang
- Iron Fist
- Rock Wasp
- Paraladia
- Bone Dragon
- Veil Dancer
- Hill Gigas
- Harvester
- Gobbledygook
Once you are done, take the Serpent’s Trench back to Nikeah (constantly going Left will speed you through the trench) and take a boat to South Figaro. Afterwards, go to the Opera House (southeast of Jidoor).
Enemies
- Stunner (Poison)
- Goetia (Libra)
- Ultros (Boss)
WARNING: When the timer starts and you get access to the rafters, you must challenge at least 1 Rat group to a battle. Make sure that Goetia (Gold rat) and Stunner (Grey Rat) have been fought at least once. Failure to do this before you attack Ultros will prevent you from getting all the Rages.
Goetia is a problem as it can call for Stunner reinforcements if there are none on the field. Slaying the Goetia first will cancel this effect. Make sure you have enough time to get to Ultros.
Fighting the Rats
- Lesser Lopros (Fireball) and Templar (Fira) can decimate Stunners as they are weak against Fire. If you wish to focus on Goetia, Veil Dancer (Blizzara) will strike at it’s weakness to Ice.
- Anguiform (Aqua Breath), Hill Gigas (Magnitude 8) and Guard Leader (Wind Slash) although don’t do weakness damage, will hurt all enemies easily. Prioritze over Guard Leader if you are surrounded as Wind Slash is the only attack you have that hits all enemies regardless of formation right now.
- You can also use Stray Cat and Gold Bear to slaughter these vermin in virtually one attack, especially if Goetia gets nailed by one of these hits.
- Any Death or Petrify Rage and Acrophies (Numbsting) can shut down or slaughter both Rats with ease and can prevent Goetia from calling for help.
Fighting Ultros
Ultros is a joke. However, if the battle drags on too long, he begins abusing status effects like Confuse via Level 3 Confuse, Imp via Imp Song and Ink to Blind. Tentacle also can be a hard hitting attack and so can Fire and Megavolt. He can also inflict Sap through Acid Rain. Also, every few moves he changes location and it fully heals him each time. Try to slay him quickly before he gets to these dangerous attacks.
- If you can, make sure your party has a level that isn’t divisible by 3. Otherwise, you will need Peace Rings or Ribbons to block Confusion.
- Aspiran (Gigavolt) will quickly decimate Ultros in record time. This Thundaga-like spell deals double due to Ultros’ Lightning weakness. Aspiran also bestows Gau with Imp and Confuseproofing, absorbs Acid Rain but you have to put up with a Fire weakness and Sap.
- Oversoul (Will O’ The Wisp) can strike at Ultros’ second weakness to Fire while still being Impproof and absorbing Acid Rain. You can still get sapped and have a Fire weakness. Use Poison to heal Gau.
- If you have neither of those Rages, you can use Bomb (Blaze) or Cloud (Thundara) to strike a weakness, but you will need to watch for Acid Rain and Megavolt. Bomb can absorb Fire and both are Impproof.
- If Ultros has his back turned to Gau, you can go Stray Cat or Gold Bear instead. Their enhanced physicals can severely cripple or OHKO Ultros if struck in the back.
- If you wish to play it safe, Ultros isn’t Stopproof. Acrophies (Numbclaw) or Alacran (Numb) will shut down Ultros and prevent him from attacking. This also keeps him from moving around on the battlefield.
Enemies
- Wvyern (Cyclonic)
- Grasswyrm (Berserk)
- Don (Pounce)
- Litwor Chicken (Forest Only, Quake)
- Joker (Thundara)
- Bug (Desert Only, Stop)
- Fossil Dragon (Desert Only, Sandstorm)
Like in Zozo, the two biggest threats have the best Rages here: Wyvern and Litwor Chicken.
Wyverns will cast Cyclonic as a Last Stand, which reduces everyone’s HP to 6.25% and can spell your doom or leave you with a nasty healing bill. Only Deathproof Rages can protect you from this, which you don’t have too many of right now. SLAY THEM FIRST!
Litwor Chicken has a tendency to cast Quake if Confused or alone, which hurts themselves and your team for heavy damage. SLAY THEM FIRST AND DON’T USE CONFUSION! If you must, get everyone off the ground with Float before engaging in battles in the Forest.
The rest of the enemies are mostly nuisances.just watch for Zombie and Berserk statuses and Joker can cast Acid Rain (Poison/Water damage + Sap). The Peace Ring, Ribbon and Amulets from Tzen will help.
- In the desert, Anguiform (Aqua Breath) can lay waste to Bug groups and severely damage Fossil Dragons. Bomb (Blaze) also works well on these enemies and has Zombieproofing.
- Wvyerns can be blasted out of the sky by Veil Dancer (Blizzara) for a quick kill. Be careful of groups if there is 1 left standing.
- Litwor Chicken groups can be destroyed by Veil Dancer or Megalodoth (Snowstorm). Using the latter will be enough for another character to finish off, especially if you bring Edgar and use Auto-Crossbow or leveled Sabin enough for Rising Phoenix.
- Hill Gigas (Magnitude 8) is Litwor Chicken’s worst nightmare. Not only does it do full damage but it allows Gau to absorb Quake.
- Joker falls to Trillium (Bio) or Aspiran (Gigavolt). Both also absorb Water so Acid Rain will heal Gau.
- Dons can be destroyed by Templar (Fira). Protect also cuts down on their damage. If they pair with Wyverns or Litwor Chickens, destroy them last as they have no special abilities during Last Stand.
- Guard Leader (Wind Slash) is a good generic attack for the region, especially if used against Grasswyrm groups or if you get surrounded.
- Stray Cat or Gold Bear are good for physical damage in this region. Just be aware of Last Stands from Litwor Chickens and Wyverns. Wear an Amulet if you plan on fighting Fossil Dragons.
- Crowd Control can be helpful in this region to quickly dispatch of annoyances
- Death via Mu (Snare, works on Undead): All except Wyverns and Litwor Chickens
- Stop via Alacran (Numb) or Acrophies (Numbsting): All enemies
- Stop can be helpful in shutting down Litwor Chickens and Wyverns if they are the only enemy left.
Once you are ready. Head to Vector, heal at the Old Woman’s Hut (the Inn will rob you) and break into the Magitek Facility.
Walkthrough Part 6 – Magitek Research Facility
The facility is designed to get the player acquainted to Espers, Magic and spellcasting. All enemies have approximately 180 – 200 physical defense. You must either use Magic you have been learning from your new Magicite, summon your Espers or use unconventional attack skills that either bypass physical defense (Raging Fist, Drill, Chainsaw, Fang) or use magic stats (Aura Cannon, Biobaster, Flash, Sky if Cyan is struck physically). Gau will be using Magic or Crowd Control Rages to assist your teammates here.
WARNING: Unless stated otherwise, every enemy except Sergeants are missable in this dungeon since this is a one time trip. Make sure you fight every monster at least once to ensure they appear in the Veldt, especially at the Escape portion.
- Sergeant (Reflect)
- Belzecue (Gravity)
- Onion Knight (Imp)
- Proto Armor
- Ifrit – Boss
- Shiva – Boss
- Flan (Sticky Goo)
Note: You can ignore Sergeants and Belzecue if you fought a group in Vector. Onion Knights will also appear again Outside.
Most of the enemies here are jokes, but they can be an annoyance when they start using Programs to Silence, Confuse and Imp your team. A lone Flan formation will call for reinforcements when slain. Use your healing items and magic wisely.
The biggest threat is Proto Armor. If struck physically or left alone, it has a 33% chance to fire a Missile, which reduces HP by 25% and inflicts Sap if you are not Deathproof. It can also Blind your entire party with Scintillation. If you want to play it safe with these, manual cast Thundara.
However, everything is essentially robotic. They all suffer from Lightning and Water weaknesses except Flan (immune to Water) and the bosses (immune to everything but opposite element).
Fighting the Enemies
- Anguiform (Aqua Breath) and Aspiran (Gigavolt) can leave untold devastation against ANY formation. Both are Impproof and Aspiran gets complete immunity to all Program effects.
- If Proto Armor appears in pairs or with other monsters, prioritize over Aspiran to ensure they are destroyed in 1 strike. If you use Aqua Breath, make sure someone can finish them off right after the cast to avoid Missile strikes.
- Hill Gigas (Magnitude 8) and Guard Leader (Wind Slash) are also effective against groups and still do full damage.
- Flans are weak against Fire. Burn them with Templar (Fira), Bomb (Blaze) or Lesser Lopros (Fireball).
- Crowd Control can be an effective alternative to slaying enemies in this region:
- Death via Mu (Snare): All enemies
- Stop via Alacran (Numb): All enemies. Acrophies takes double from Magitek Laser.
- If Mu is used on the last Flan, it will prevent reinforcements from coming down.
Fighting Ifrit and Shiva
Ifrit and Shiva can be incredibly nasty with their Ra and Ga spells. If one of them is struck 6 times by any attack, they will tag in the other one. If struck by anything, they will counter with their Ra spell (Shiva with Blizzara and Ifrit with Fira). If hit with Magic twice, they use their Ga version.
All their attacks can be interecepted by Runic.
Shiva absorbs Ice and is weak against Fire. Ifrit absorbs Fire and is weak against Ice. Both of them nullify everything else. If either of them hit 0 HP, the battle is over and you get their Magicite.
- If you want to fight by Magic, pick the one you want to destroy first. If you want to go Shiva, use Templar (Fira), otherwise do Veil Dancer (Blizzara). You will have to scrap Runic if you do this.
- Lesser Lopros (Fireball), Bomb (Blaze), Oversoul (Will O’ The Wisp) and Megalodoth (Snowstorm) can bypass Runic, but you run the risk of getting smoked by either Ifrit or Shiva.
- Another option is to use Cirpius (Hastega) to speed up the rest of the team. Once everyone has Haste, silence Gau and start spamming Runic. Although this reduces Gau’s damage output for the battle, it will allow Edgar, Sabin and Cyan to spam their armor piercing skills faster.
- If you want to play it safe, Gold Bear and Stray Cat can still fight under the cover of Runic. Runic will intercept the counters. But their 200 armor will make these attacks pretty weak.
Once you have Ifrit and Shiva’s Magicite, you can now upgrade Gau’s Strength through Ifrit.
- Trapper (Staircase only, Level 3 Confuse)
- General (Cura)
- Destroyer (Reraise)
- Lenergia (Shamshir)
- Number 024 – Boss
WARNING: Do not under any circumstances do this part if your entire party’s level is divisible by 5. Trappers can cast Level 5 Death and spell Game Over if you do.
WARNING: The Point of No Return begins after you beat Number 024 and enter the next room. Make sure you get all the enemies before then. The exceptions are Sergeants, Onion Knights and Trapper. The first one appears in a later event and the last 2 have a last chance when you are outside.
The enemies here are pretty easy to trash. General and Destroyer have the best support Rages. The former will help you in the next dungeon and the latter is your only means of Reraise until you get Phoenix later in the game.
Trapper is the largest threat based on level division. It can mass confuse (level 3), mass heavy damage (level 4 Flare) or mass instant kill (Level 5 Death). They can also apply Program 18 to stack Reflect on themselves, making it dangerous to use Thunder and Thundara against them.
Lenergias can also use Shamshir against you. Generals can also heal other monsters with Cura. Try to slay these enemies quickly to avoid dragged out confrontations.
Fighting the enemies
- Trapper falls to Anguiform (Aqua Breath) for quick OHKOs. The attack also bypasses Reflect. Anguiform is also good for handling groups as none of the enemies have Water resistance.
- General falls to Trillium (Bio) or Hell’s Rider (Venomist). The latter will allow an armor piercing attack to finish them off.
- Lenergia and Destroyer can be slain by any Ra-level spell Rage (Templar, Veil Dancer, Bomb, Aspiran). Just don’t use Aspiran on Destroyers.
- Guard Leader (Wind Slash) also work wonders against groups if needed.
- Like in the previous area, Crowd Control is helpful:
- Death via Mu (Snare): All except Destroyer
- Stop via Acrophies (Numbclaw) or Alacran (Numb): All enemies
- These moves are unaffected by Program 18, so you can go free range on Trappers with either.
Fighting Number 024
Number 024 can be incredibly easy or incredibly annoying. It mostly attacks physically with his swords, but the nuisance comes from his gimmick.
After a few seconds, it will Barrier Change, bestowing it with a Weakness, nullify an element, then absorb everything else. If it is struck with the weakness, it will change it again. If this happens 3 times, it will overload and either Libra itself or do a set of powerful attacks.
- If you must work with the Barrier Change, wait until he casts it, then Libra him. If the weakness is exploitable, you can lock it with Imp. Then use the following Rages based on outcome:
- Fire – Templar (Fira)
- Ice – Veil Dancer (Blizzara)
- Lightning – Aspiran (Gigavolt)
- Wind – Guard Leader (Wind Slash)
- Earth – Hill Gigas (Magnitude 8)
- Poison – Trillium (Bio)
- Holy or Water – Stray Cat or Gold Bear. Aqua Breath is dual elemental and only Sabin has a Holy attack through Aura Cannon at this time.
- Stray Cat or Gold Bear won’t do much damage, but it is better than nothing if you don’t want to play the Barrier Change game. You can also augment your entire team with Cirpius (Hastega) to speed kill this boss.
After the battle, strip anything useful from Celes and continue to the next room. Watch the scene and save the game.
Walkthrough Part 7 – Magitek Research Facility (Part 2)
- Magna Roader Purple (Bio, Minecart Ride)
- Magna Roader Red (Silence, Minecart Ride)
- Number 128 – Boss
- Chaser (Plasma, Outside)
- Trapper (Level 3 Confuse, Outside, See Warning)
- Onion Knight (Imp, Outside)
- Left and Right Cranes – Boss
WARNING: Both Magna Roaders must be encountered at least once on the mine cart ride. Failure to do so by the time Number 128 attacks you will prevent you from getting all the Rages.
WARNING: Before you leave and talk to Setzer, make sure you encounter a Chaser outside. It is also your last chance to encounter Onion Knights as they can spawn with them. Failure to do so will prevent you from getting all the Rages.
WARNING: Do not under any circumstances slay lone Chasers if your levels are divisible by 5. Slaying it will call Trapper reinforcements and they know Level 5 Death. Run or slay the Chaser with Mu (Snare) if you meet those conditions.
Note: If you wish to do Wind God Cyan to support Gau, you must steal Kazekiri from Number 128. You get another inside the next dungeon, but you can dual wield if you steal this one. Be warned, it’s a Rare Steal (12.5% chance).
As stated in the Warnings, these are some of the most easily missed Rages in the game. Only Magna Roader Purple is worth keeping as it gives Bio with a more common element to absorb, Ice. Chaser can also be effective as Plasma is an unrestricted (cannot be Reflected, stopped by Runic and castable under Silence) spell at the cost of a crippling Water and Lightning weakness.
For the most part, the basic enemies aren’t too rough. However, you will need to be wary of Chaser and the bosses. Chaser has Plasma, Magitek Laser, can put itself under Shell status with Program 17 and can call for reinforcements based on it’s grouping. If with 3 Onion Knights, it will construct more if all them are slain, if by itself, it will call 3 Trappers as a final attack.
Fighting the Enemies
- Magna Roaders can be damaged by any means necessary, except Ice. Use your best attacks to slaughter them. Anguiform (Aqua Breath) and Guard Leader (Wind Slash) can do this job nicely.
- Lesser Lopros (Fireball), Bomb (Blaze) and Templar (Fira) do double damage to Purples. You can use Lesser Lopros to fight groups of Reds if you wish.
- Aspiran (Gigavolt) can not only do double damage to all the Outside monsters, but they are also immune to Onion Knight’s Imp programs. Just be aware of Trapper Reflect.
- Belmodar (Megavolt) although a weak Lightning spell, allows Gau to absorb Chaser’s Plasma and it’s own reflected spell and still does double damage to everything outside.
- Anguiform (Aqua Breath) can also work outside, but you run the risk of taking double damage from Chaser’s Plasma. Make sure you are able to dispatch it quickly if it survives the first cast.
- Crowd Control can help you escape with minimal damage if needed:
- Death via Mu (Snare): All except both Magna Roaders
- Stop via Alacran (Numb): All enemies
- If you slay lone Chaser with Mu (Snare), it won’t call down Trapper reinforcements, but the formation will still be added to the Veldt.
Number 128’s difficulty is dependant on if you want to steal Kazekiri or not. If you plan on doing it, you must quickly steal it or else Number 128 will either throw a Net at Locke (Stopping him) or fires off Blaster (mass Death). Worst case it kills your entire team. It also knows Shock Wave, Atomic Rays (Fire damage) and Blizzard. It will also apply Haste if both it’s arms are destroyed for the first time.
It’s arms attack you with various attacks and will respawn if destroyed. If the body is attacked and it has no arms, there is chance it will start stealing HP from your teammates. Slaying the body destroys the boss.
- If you want to steal Kazekiri effectively, give Locke the Hermes Sandals before getting on the minecart. This will not only give you more Steal chances with less time but if he does get Stopped, it wears off faster.
- If you want to speed kill this boss, use your strongest all hitter attacks, Guard Leader (Wind Slash), Hil Gigas (Magnitude 8) and Anguiform (Aqua Breath) will destroy the arms and damage the body easily.
- The Ra spells also work well. Templar (Fira), Bomb (Blaze) and Aspiran (Gigavolt) can do considerable damage. Aspiran runs the danger of taking double from Atomic Rays. Bomb absorbs this attack but takes double from Blizzard to compensate.
- If you want to play it safe, use Gold Bear or Stray Cat. The physical attacks will only hit 1 enemy and have a 33% chance to attack the body if both arms are still up.
- Another safe option is Magitek Armor (Magitek Laser). Gau gets Auto-Protect status and cannot be slain by Blaster. This can be a problem if it kills the other 2.
The Cranes can be dangerous if the battle drags too long, plus you are caught in one bad Pincer. The Cranes attack wth their respective Ra element, use Wrecking Ball and regular attacks.
Every 3 times it is struck, they will hit themselves with their Ra element, which will heal themself and charge energy. If this is done 3 times, they will target your entire party with Firaga or Gigavolt and most likely OHKO your entire team. Every 60 seconds, they also shake the deck and cast Magnitude 8. Using 1 or 2 of your characters to get them off the Ground helps.
If one is left standing, it will put up Magitek Barrier, putting the survivor under Protect and Reflect statuses.
- Guard Leader (Wind Slash) is an effective Magic attack for this battle. Not only does it do full damage to both Cranes but the attack will hit both sides at the same time.
- Hill Gigas (Magnitude 8) although can hit only 1 crane at a time, it can absorb Magnitude 8 the Cranes use against you without the need of Float.
- Although you are taking a risky gambit with it’s Lightning weakness, Anguiform (Aqua Breath) can OHKO a Crane if Gau’s Magic is strong enough. All 3 aforementioned attacks can bypass Reflect.
- Using Templar (Fira) and Aspiran (Gigavolt) is ill-advised! Not only can they both heal a Crane, but it will speed up their charging to Gigavolt and Firaga and spell your doom. Plus, even if you destroy the one that damages it, Magitek Barrier will reflect these attacks back at you.
- This also applies to most Lightning and Fire absorbers at this time, as they carry attacks that are most likely the same element they absorb.
- Stray Cat and Gold Bear can do considerable damage to either Crane. However, Protect status from the Magitek Barrier will cut all physical damage by half. You will also trigger Fira and Thundara counters every 3 whacks.
- Another option is go Unseelie (Shell) to cut down on spell damage. Do not summon Carbuncle as the cranes may absorb the reflected attacks and drag the fight needlessly.
Once you get back to Terra, she will rejoin you. You will now have free control over the Blackjack and you can fly all over the World of Balance.
Walkthrough Part 8 – World of Balance Side Jobs
Now that the Blackjack is under your command. There are some things we can do to make Gau and your other characters more effective at the Cave to the Sealed Gate. Before you head to the Veldt and acquire more Rages, there are some things you will need.
Note: Now that most of the Magicite is recovered, your other characters can assist in Crowd Control (Stop, Death, Petrify, etc.). My guide will still assume that you are using Gau to apply these things.
The Jidoor Auction House is now open. Amongst the items you can buy here are the Zona Seeker and Golem Magicite, especially the former since it can bestow Magic +2 on level up, which can make Gau’s Magic Rages more stronger. You also need both if you want to get the Espers achievement.
Zona Seeker and Golem together will run you 30,000 Gil. If you do not have it yet, slay enemies in the Southern Continent or at the Veldt until you do.
Monsters
- Bomb (Blaze)
- Grenade (Blaze)
West of the Veldt and South of Phantom Forest is an island with a giant forest, this is called Bomb Forest. The battles here are all Bomb formations. However, there is a chance you can encounter a lone Grenade here.
Grenade has 3000 HP and will Self-Destruct if it has taken any physical damage.To add insult to injury, it will try to bait you into attacking it with Mesmerize (applies Berserk). Self-Destruct will most likely OHKO at this point in the game if you don’t do enough damage to it on the first hit.
- Veil Dancer (Blizzara) and Anguiform or Chimera (Aqua Breath) can severely damage Grenade without triggering a Self-Destruct, allowing another character to finish it off.
- Bomb groups can be destroyed by Anguiform or Guard Leader (Wind Slash) easily.
- Both Bomb species can be pacified by either Stop or Death. Mu (Snare), Alacran (Numb) and Acrophies (Numbsting) work wonders here. You can also silence Grenade to shut down it’s Self-Destruct spell.
- Once Grenade has been Stopped or Silenced, Gold Bear and Stray Cat can slaughter it without fear of Self-Destruct counters.
Monsters
- Briareus (Cyclonic)
- Chimera (Aqua Breath, Forest Only)
- Devourer (Shell Slam)
Note: Thamasa will not conduct business with you at this time. Esper Caves cannot be acessed at this time either.
Note: Try to steal Gaia Gears from Briareus. These will help you in the Cave of the Sealed Gate and will allow Litwor Chicken to be a viable Earth rage. This armor cannot be worn by Cyan and Edgar, so you will need to Float them via Angel Wings or Float spell. Do not Rage Gau until you have stolen the Gaia Gear.
Thamasa is directly east of the Veldt. Land your ship on the field patches along the East coast.
Thamasa has 2 upgrades. Briareus is the best Cyclonic user in the World of Balance. It has no weaknesses and has Protect status, while Wyvern is weak against Ice. Chimera is Anguiform with more status immunities, no elemental weaknesses but also doesn’t absorb anything (Water isn’t common in WoB). Although Devourer offers Auto-Protect for Strength Gaus, you will get a better Rage with this in the World of Ruin.
However, Briareus has massive allergies to offense. If alone, it has a 33% chance to countering any offense or Steal attempt with Snort, ejecting the character from battle. This can be a problem if you are either controlling your leveling or trying to steal Gaia Gears.
Chimera is immune to all status ailments except Berserk. To compensate for this, it is has no elemental resistances. It’s worst attacks are done solo as it can cast Aqua Breath, Fireball and Cyclonic against you. If with other monsters, the worst it can do is Aqua Breath. Make sure you slay them quickly if they are alone.
Fighting the Monsters
- After Briareus is under Stop, any strong attack Rages can decimate it. If it teamed up with Devourer, use Aspiran (Gigavolt) or Cloud (Thundara) to exploit their Lightning weakness. You can also use Bomb (Blaze), Templar (Fira), Veil Dancer (Blizzara) to do full damage to both species.
- Chimera can be countered by your hardest hitting Rages. Aspiran can absorb Water and fight back with Gigavolt (watch for Fireballs). Hill Gigas (Magnitude 8) and Guard Leader (Wind Slash) can do good damage if Chimera is backed up by Devourers and don’t feel safe using Aspiran.
- If you want to play it safe, Anguiform (Aqua Breath) absorbs Water and does full damage to all monsters here.
- Stray Cat and Gold Bear will be hard to use here as both Briareus and Devourer have Auto-Protect. They will do full damage to Chimera however.
- Crowd Control is a bit limited here, but there are 2 effects that can help you:
- Stop via Acrophies (Numbsting, shuts down Briarieus counters) or Alacran (Numb): All Enemies except Chimera.
- Berserk via Grasswyrm or Nettiehopper (Berserk) causes Chimera and Briareus to lose their special abilities but will deal increased physical damage.
- All enemies are Deathproof, so Mu (Snare) here is useless
- If you have gone to the Veldt before here, you can use Destroyer (Reraise) and General (Cura) to support your team while they hack at Chimera.
- Intangir (Transfusion)
Note: I recommend putting this job aside until near the end of the World of Balance, unless you have Destroyer (Reraise) or you got at least 2 party members with 1000+ HP.
North of Thamasa is Triangle Island. Amongst the Leaf Bunnies and Darkwinds that roam the fields, there is a chance you can face the super enemy of the World of Balance: Intangir.
Intangir starts off Invisible. It also absorbs all elements and is protected from many status effects. If attacked by anything that disrupts its cloaking, it will re-appear, bomb your entire party with Meteor for approximately 1000 damage, then cloak itself again with Sleep. Unlike the Black Magic Meteor, this version can be dodged if your Magic Evasion is high enough. The process is repeated until it is slain, which it will cast Meteor on the character that killed it as a Final Attack or when it goes below 1280 HP and survives, which it will run away and you get nothing. You are awarded 10 Magic Points for it’s destruction and you can also steal Magicite Shards from it.
Since the Vanish-Death trick no longer works, your best option is to cast Stop on it and then you will have 38 seconds to do as much non-elemental damage as possible. Once the Stop wears off, it will cast Meteor and then reapply it’s cloak with Sleep.
- If your party has less than 1100 HP, Destroyer (Reraise) is extremely helpful. Reraise will revive anyone who has been slain by Meteor. Not only that, any physical attacks against a cloaked Intangir won’t trigger the Meteor script. Once at least 1 or 2 people are under Reraise, apply Stop and begin your assault with armor piercing non-elementals
- In the World of Ruin, Twinscythe or Killer Mantis (Metal Cutter), Purusa or Luridan (Rock Slide), Tyrannosaur or Behemoth (Meteor) and Yojimbo (Shock) can do extreme damage to this boss regardless of cloaking and you should have the vitals to shrug off the damage easily.
- If Gau’s Strength is high, Stray Cat, Gold Bear and Bogy should be enough to pierce his defenses for decent damage. If you are using Gogo, make sure he has a non-elemental weapon. The best weapon is the Magus Rod (Extra 30% Magic Evasion against Meteor).
Once you have acquired Grenade and some Gaia Gears, continue the story at Narshe, go get Mog, and head to the Veldt once more.
Walkthrough Part 9 – Cave of the Sealed Gate and Palace
Now that you have Bismarck and Zona Seeker, you must now use them to temper Gau’s stats. There are Magic Gaus and Physical Gaus (Get Magic to ~90-100 or Strength to 127 respectively). It is wise to maintain a balance between the two. If you do Magic, Gau may have a chance to still physically attack. If you do Physical Gau, there maybe a situation where you may have to use Magic to dispatch enemies faster.
Before you head to the Veldt, I recommend you have done the following:
- Got Golem and Zona Seeker (see previous part)
- Stolen 3-4 Gaia Gears off Briareus (see previous part)
- Got Terra’s spells setup. She will be mandatory for 2 chapters.
- Acquired the following Rages, if you want them:
- Wyvern or Briareus (Cyclonic)
- Litwor Chicken (Quake)
- Chimera (Aqua Breath)
- Flan (Sticky Goo)
- General (Cura)
- Destroyer (Reraise)
Wyvern or Briareus (preferably Briiareus) can mass cripple entire groups of non-Deathproof enemies to save on Mu (Snare) uses. If you stole the Gaia Gears from earlier, you can turn Litwor Chicken’s Quake into a mass heal spell, but you will have to get Cyan and Edgar off the ground with Float as they cannot wear it. Chimera is a direct upgrade to Anguiform. Flan has many elemental immunities that will help Solo Gaus tank until World of Ruin. General and Destroyer will allow Gau to keep party members alive without burning through MP.
If you are aiming for the 253 Rages, you should be able to acquire the following:
- Goetia
- Stunner
- Joker
- Bug
- Wyvern
- Don
- Grasswyrm
- Litwor Chicken
- Sergeant
- Belzecue
- Onion Knight
- Flan
- Trapper
- Lenergia
- General
- Destroyer
- Magna Roader Red and Purple
- Chaser
- Grenade (optional, see Part 8)
- Chimera (optional, see Part 8)
- Briareus (optional, see Part 8)
- Devourer (optional, see Part 8)
- Intangir (optional, see Part 8)
Once you are ready, bring Gau, Terra and any 2 characters of your choosing and head to the Cave of the Sealed Gate.
Enemies:
- Provoker (Caves Only, Imp)
- Lich (Caves Only, Fira)
- Antares (Caves Only, Magnitude 8)
- Zombie Dragon (Lava Rooms Only, Doom)
- Outcast (Lava Rooms Only, Lifeshaver)
- Ninja (Scripted Fight, Water Scroll)
WARNING: After the events of Thamasa, this dungeon becomes inaccessible. You must encounter all the enemies except for Ninja at least once before then. Failure to do so will prevent you from getting King of Beasts on this playthrough.
Note: The divider for Lava Rooms and Caves is the disappearing bridge puzzle.
Note: The Ninja encounter will not appear in the Veldt. You will encounter this monster in formations later on.
Except for Antares, every enemy is Undead. However, all enemies except Zombie Dragon and Ninja absorb Fire, which means you must exploit their other weakness of Holy. Your only source of Holy at this time is Sabin’s Aura Cannon, so bring him along if you wish.
Antares and Outcasts are the best Rages to acquire here. Antares is another Magnitiude 8 user but it has Fire absorption at the cost of taking more from Ice. Outcast is the only Undead Rage at this time that can allow Gau to be self sufficient with healing as Lifeshaver can heal Gau. Plus it is one of the only two Earth attacks that does damage to Floating enemies (Attacking with the Gravity Rod is the other).
The enemies carry their share of annoyances, but can easily shrugged off now that you have a larger array of Relics. Provoker can Imp Song, but White Cape and most Gau rages prevent this and Zombie Dragon’s Bone can be blocked by Amulets and some Rages. If you stole some Gaia Gears, Outcast”s Lifeshaver will work in reverse because it does Earth Damage (heals you and harms it).
The biggest threat here is Lich as it has a high chance to cast Firaga when it is alone. In groups, they are prone to Confusing your party members with Insanitouch. However, if you destroy their 90 MP, they are slain (Death at 0 MP enemy).
Ninja can be exceptionally dangerous as it can throw the Flame, Water and Thunder Scrolls that Shadow uses. Plus it can Vanish itself when struck with an attack. These can be dangerous to Gau if he enters one with a weakness.
Gau can capitalize on quite a few things with these enemies. He can work with all kinds of strategies to win, primarily Magic and Crowd Control.
Fighting the Enemies
- Antares and Provoker fall quickly to Veil Dancer (Blizzara). It also does full damage to everything else.
- Zombie Dragon solo or pairs can be destroyed by Bomb (Blaze). Bomb is Zombieproof while Templar (Fira) needs an Amulet.
- If you wish to exploit Ninja’s weakness to Lightning, use Aspiran (Gigavolt) ONLY when Ninja has been Berserked. This will prevent Ninja from throwing Scrolls at you. Otherwise, use Cloud (Thundara). Aspiran and Cloud does full damage to everything else here.
- Other reliable spell attacks for handling groups are Guard Leader (Wind Slash) and Chimera (Aqua Breath). The latter does double to Outcasts.
- Stray Cat and Gold Bear can be effective, just make sure Gau is wearing Relics that protect him from status effects, primarily Zombie and Confusion.
- Crowd Control can be used with great effect throughout this dungeon
- Death via Mu (Snare): All enemies
- Stop via Alacran (Numb) or Acrophies (Numbsting): Dragon Zombie, Antares, Outcast
- Briarieus or Wyvern (Cyclonic) can also be used to severely cripple all enemies so the next attack can finish ithem off.
- As stated above, Berserk can shut down Ninja’s Scroll spam if you want to cut down damage.
- If you wish to play it safe, use General (Cura) and Destroyer (Reraise) to undo any damage enemies can deal. This is especially helpful in the Lava portion as no enemy can be Osmosed in this region.
- If you don’t have any Gaia Gears. you can use an Undead Rage to reverse the effect of Lifeshaver and block Zombie. Darkside (Blizzara) does double to Antares and Provoker, while full damage the rest. Gau can be healed with Death if needed.
Once you make it to the Gate, proceed back to your Airship and continue the story. Then head to Vector.
Enemies
- Sergeant (Reflect)
- Mega Armor
- Imperial Elite (Protect)
WARNING:This is your only chance to get the Imperial Elite. Failure to do so will prevent him from appearing in the Veldt.
Gesthal surrenders and lets you in for dinner and crumpets. Gau can still be brought along for the ride to help with the timed portions. You will have to first talk to the 24 Soldiers all over the Palace, some want to fight you.
At dinner, you can face Imperial Elites. Take a break and talk to any guy on Gesthal’s side and accept their offer.
This video will help you find all the rewards. I use Gau to destroy the Imperial Elites.
Fighting the Monsters
- Aspiran (Gigavolt) or Cloud (Thundara) should be able to destroy Sergeants and Mega Armor with ease. Make sure you have someone cast Thundara or use an armor piercing attack should Gau fail to cast.
- The Imperial Elites fall to Hell’s Rider (Venomist) or Trillium or Magna Roader Purple (Bio), especially if this is cast on all 3 of them. Use Terra to help if Gau single targets.
- Mu (Snare) only works on Sergeants but the animation wastes time. Stray Cat and Gold Bear also do low damage to all 3 enemies. Don’t use them!
Once done, you will board a ship to Thamasa, but our friend Gau will be left behind! DAMN YOU LOCKE!
Walkthrough Part 10 – Thamasa and Esper Caves
Note: Thamasa will now be open for business. So you can buy things from them.
Note: If you explored the island while you had the Airship, you can skip the monsters on the World Map. Check Part 8 for more information under Thamasa Region.
Enemies
- Balloon (Self-Destruct)
- Flame Eater – Boss
One you enter town, meet Strago and Relm and purchase whatever you may need. You may not need to buy Gaia Gears if you stole them from Briareus already. Walk around town after you meet Strago and sleep in the Inn. Eventually you will find out an idiotic child set his house on fire and you have to save Relm.
If you have any Ice Blades or Ice Rods, they will destroy Balloons with ease. Start teaching Strago basic Black Magic.
When you fight the Flame Eater, morph Terra and use Blizzara or attack with the Icebrand. Either method should be enough to severely damage the boss. Strago’s Aqua Breath can also destroy any Balloon or Grenade reinforcements it creates. It’s adorable how he is trying to be Gau.
WARNING: Once you fight the Flame Eater, you cannot come back to this burning house (why would you anyways?). Malke sure you challenged a Balloon group to a battle (make contact with the walking flames). before you slay the boss. Failure to do so will prevent Balloon from appearing in the Veldt.
Once you are done, head out to the Esper Caves to the west of Thamasa.
Enemies
- Adamankary (Caves Only, Acid Rain)
- Bonnacon (Caves Only, Sticky Goo)
- Mandrake (Outside Only. Leech)
- Venobennu (Outside Only, Poison)
- Land Grillon (Outside Only, Wing Snap)
- Ultros – Boss
The enemies are more annoying than menacing. It is worth noting you can learn White Wind off Venobennu for Strago and you can steal Golden Shields from Adamankary, to improve Gau’s Defense stats and survivability.
Adamankary carries the best Rage of the group, Acid Rain is essentially an upgrade to Hell’s Rider’s Venomist, but without the weakness to Fire and Poison. It also hardly misses and deals Water damage with the Poison. However like Briareus, Adamankary can Snort off characters by chance when struck. Apply Stop or Berserk first before you attempt and damage or steals.
All of them except for Adamankary are weak against Fire, so Fire/ra from Strago or Terra and Flametongue cuts can easily slaughter enemies.
Once you reach the Warring Triad statues, you will fight Ultros. Ultros can be a problem if you constantly hit him with the same Magic. 3 casts of the same element will tick him off and he will retalliate with the Aga of what you are using. Spread out your elements to avoid this.
He will also move closer to you. If he gets too close, he fires off Magnitude 8, Aqua Breath or throws Stones at you, make sure you are not Level 25.Every 60 seconds, he drops a Hailstone on you (deals damage equal to 75% (3/4) of current HP). If you take off 7k HP, he will apply Protect and Haste.
Once he has lost half his HP, Relm appears. You can Sketch him and win. You can also kill him if your Magic attacks are high, just don’t enrage the boss.
Once Relm joins you, find the Espers and you will return to Thamasa. Play out the story and watch more Imperial trickery go down.
Before you leave Thamasa. Make sure you go back to the Esper Caves if you missed any enemies and head back to where you found the Espers. There is a Tabby and Chocobo Suit you can find here that Strago and Relm can use. They are also used in the Coliseum to make 1 possible ultimate armor (Genji Armor) for your support characters.
Now before you head off to the Floating Continent, there are some things that must be done! Get Gau back and get ready for war!
Walkthrough Part 11 – Pre-World of Ruin Preparations
WARNING: My guide will be assuming that you will not be turning back, even though there is a way to return to the Blackjack 3/4 into the Continent. Once you slay the Ultima Weapon and progress forward, you will NOT be coming to the World of Balance in this playthrough of the game. Make sure that you have encountered all the enemies in the following locations:
- Narshe Mines
- World Map
- South Figaro Caves
- South Figaro Basement
- Mount Kolts
- Returners Raft Ride
- Imperial Camp
- Phantom Forest and Train
- Castle Doma (World Map)
- Serpent’s Trench
- Western Continent
- Southern Continent
- Thamasa Region
- Esper Caves
- Cave to the Sealed Gate
- Bomb Forest (see Part 8)
- Triangle Island (See Part 8)
- All One Time Locations (Opera House, Magitek Facility)
Failure to do so will prevent the player from finding all 253 Rages.
If you want to go by Rage List, you should have access to the following from Top to Bottom, Left to Right:
- Guard
- Imperial Soldier
- Templar
- Magna Roader (Purple)
- Zaghrem
- Angel Whisper
- Oversoul
- Commander
- Mu
- Wererat
- Belmodar
- Leaf Bunny
- Stray Cat
- Silver Lobo
- Doberman
- Megalodoth
- Fidor
- Briareus
- Chimera
- Lesser Lopros
- Fossil Dragon
- Darkwind
- Aepyornis
- Vulture
- Trapper
- Hornet
- Nettlehopper
- Trillium
- Cartagra
- Nautiloid
- Exocite
- Anguiform
- Litwor Chicken
- Hell’s Rider
- Onion Knight
- Magitek Armor
- Satellite
- Spritzer
- Flan
- Outcast
- Bandit
- Harvester
- Bomb
- Veil Dancer
- Hill Gigas
- Aspiran
- Ghost
- Sand Ray
- Alacran
- Actinian
- Darkside
- Urok
- Foper
- Guard Leader
- Corporal
- General
- Joker
- Iron Fist
- Provoker
- Vector Hound
- Stunner
- Destroyer
- Chippirabbit
- Bloodfang
- Hunting Hound
- Gorgias
- Don
- Wvyern
- Zombie Dragon
- Cirpius
- Lenergia
- Rock Wasp
- Grasswyrm
- Paraladia
- Acrophies
- Devourer
- Heavy Armor
- Chaser
- Poplium
- Intangir
- Unseelie
- Magna Roader (Red)
- Antares
- Specter
- Bonnacon
- Living Dead
- Imperial Elite
- Sergeant
- Belzecue
- Eukaryote
- Land Grillon
- Goetia
- Adamankary
- Balloon
- Gobbledygook
- Lich
- Bug
- Venobennu
- Mandrake
- Valeor
- Wild Rat
- Gold Bear
If you do not have these Rages, double check your Bestiary and Checklist. If you have at least an entry on any monsters you missed, then it means you can go to the Veldt and claim them later.
However, Doberman, Eukaryote, Specter and Darkside don’t have bestiary entries. Hopefully, you have acquired these Rages as you were playing (which is also why I suggested the checklist as your double check). If you don’t remember facing them and you want all 253 Rages, then you either may need to restart the game or save it for the 2nd Playthrough.Use Ctrl+F and the enemy’s name to ascertain the enemy’s location.
If you are planning on taking Gau with you to attack the Floating Continent. Make sure you know how his best Rages work, especially if Celes is accompanying you and you need to use Runic.
If you want to use Gau for Magic or Espers, then you should consider teaching him the following:
- Cure
- Cura
- Esuna
- Life
- Stop (Optional)
- Slow (Optional)
- Osmose (Optional, only if you don’t use or have Living Dead)
- Zona Seeker Esper
- Golem Esper
- Phantom Esper
Use Zona Seeker to prepare Mass Shell. Golem and Phantom can counter physical strikes. Cure, Cura, Esuna and Life will allow Gau’s MP to be used outside of battle for quick healing and status curing. Stop and Slow will help with some annoying monsters before Gau goes Rage, or you can do a Rage with these or use a character to cast them. Osmose or Living Dead (Osmose) will help recharge Gau’s MP batteries to keep healing.
If you aren’t using Gau, then bring a replacement that is just as capable of combat. Make sure you pack some Shurikens and Scrolls as you will be forced to use Shadow on the Floating Contient.
When you are ready, select the first option on the Airship and begin your assault! FOR GLORY!
Walkthrough Part 12 – Floating Continent (Part 1)
Enemies
- Sky Armor (Magitek Laser)
- Spitfire (Magitek Laser)
- Ultros (Boss)
- Typhon (Boss)
- Air Force (Boss)
Your assault to stop the Imperial forces begins with breaking one hell of a blockade. You will be attacked by Imperial fliers that will always Pincer you and you must slay all aircraft as escape is impossible. These attacks won’t stop until Ultros boards your ship.
The Sky Armors have low health and constantly barrage you with Magitek Lasers. They can also Silence you with Reverse Thrusters. If left on their own, they will have a chance to fire Missiles at you (25% of current HP as damage + Sap). Spitfires can cast Absolute Zero, which does Ice damage to your party. If left alone, they can bomb your entire party with Diffractive Laser, which is Lightning damage to all allies. To compensate, both armors are weak against Lightning and Wind.
All Lightning attacks fired from both mechs can be stopped by Runic.
Fighting the Aircraft
- If your vitals are low, it would be wise to summon Zena Seeker off the bat.
- Guard Leader (Wind Slash) can not only strike both monster types for double damage, but the attack hits every enemy around you, has no weaknesses that can be exploited and Reverse Thrusters cannot stop this attack.
- Chimera (Aqua Breath), Aspiran (Gigavolt) and Cloud (Thundara) are also effective but you will only be able to hit 1 side.
- Stray Cat and Gold Bear can also shred individual ships if you have been building up Strength.
- Neither air unit is Stopproof or Deathproof. Mu (Snare) can be very effective here. However, it would be wise to manually cast Stop as all of Gau’s Stop Rages are weak against at least 1 of their elemental attacks.
- You can also cripple them with Briareus (Cyclonic, no weaknesses) so that your other 2 characters can finish off the infected. Make sure you try to slay them all at once or within a few seconds of each other to avoid Last Stand attacks.
- If you wish to play it safe, General (Cura), Destroyer (Reraise) can help heal and bring people back while your other characters blast them out of the sky.
Once Ultros boards the ship, he will try one last time to stop your efforts. Ultros fights the same way he did in the first fight, attacking you with Tentacle (high damage), Octopus Ink (Blind) and attacking normally.
After he goes below 12800 HP, he will call for Typhon to assist. Typhon will either attack or rain Fireballs on you. When Typhon’s 10000 HP is lost, he will Snort your entire party off the ship. If you kill Ultros, the battle continues.
Ultros is weak against Fire and Lightning but absorbs Water. Typhon is weak against Ice and Water, but absorbs Fire. Ice and Lightning are your safest options for Magic Gau.
Fighting the Dumbass Duo
- Both enemies can be Slowed and Typhon isn’t Stopproof. Exploiting these time effects will make this fight easier.
- Another vile strategy to exploit for LLP is neither are Berserkproof. You can Berserk Ultros, then summon Phantom to make the party invisible, then do the same to Typhon before he attacks with Fireball. You cannot take damage and you can fight back unabated.
- Veil Dancer (Blizzara) and Cloud (Thundara) are your fastest options of getting rid of these vermin. Aspiran is ill advisd as Gau will take double from Fireball when Typhon comes (unless you Stop Typhon or compensate with high health). Lightning will kill Ultros faster and Ice will kill Typhon faster. The other takes full damage from the other’s weakness.
- Another reliable option is Antares (Magnitude 8). Neither of them have Float status, no Earth protection and Gau absorbs the Fireball attacks.
- Stray Cat and Gold Bear can do good damage if you have been building up Strength.
- General (Cura) and Destroyer (Reraise) can help if you feel your allies can decimate the pair together.
Once you get sneezed off, you freefall to the continent as an aerial battlecruisder designed by a 10 year old attacks you, the Air Force.
Air Force attacks you with 2 attachments, a Missile Bay (Left) and a Laser Gun (Right). All 3 rely primarily on Lightning based offense.
The Missile Bay is the largest threat as it primarily attacks with Missile (Reduces HP by 25% and inflicts Sap) and uses Launcher when weakened (8 hits of Gravity with random targeting).
Both spells fail on Deathproof Rages.
The Laser Gun uses Atomic Rays when at high HP (Fire Damage to all party members), when busted up, it swaps to Diffractive Laser (Lightning damage to all party members). Both spells can be intercepted by Runic.
If 1 attachment gets destroyed, Air Force sends out a Bit and begins counting down from 6. The Bit has Auto-Runic and will intercept and absorb certain spells, making them useless. At 0, the ship fires a Wave Cannon, which does devastating Lightning damage, scraps the Bit and resets the countdown to 3. At this point, Air Force MUST be destroyed. If the body is destroyed, the entire boss is slain.
All components are weak against Water and Lightning. Gau has 1 Rage that can turn this aerial reject into scrap metal.
Destroying the Air Force
- Before you Rage, if Gau has Zona Seeker, have him summon it before going Rage. Shell will be invaluable in this fight.
- A recommended tactic (especially for LLPs) is to exploit the attachment’s lack of Stopproofing. Have your non-Gaus cast Stop on both of them, shutting down their offense.This will cut the attack frequency of the entire ship by 66%. The main ship itself is immune to all status effects.
- When the Bit comes out, DESTROY IT ASAP If Gau can’t get to it, use an Armor Piercer (Sabin, Edgar, Cyan or Setzer) and have them do it for you.
- Chimera (Aqua Breath) is the ultimate Rage for this fight. It is Deathproof (Missile Bay is helpless), has no weaknesses, Aqua Breath does double damage AND Bit/Runic cannot stop this attack. The only con is it succumbs to split damage, which will be remedied quickly as you destroy bays.
- Lightning can be usable against this boss, but all 3 come with a curse that you need to consider:
- Aspiran (Gigavolt) has the highest damage output, but Laser Gun’s Atomic Rays will deal double and Bit can stop this attack.
- Cloud (Thundara) has no weaknesses but Bit can stop this attack.
- Chaser (Plasma) can bypass the Bit for damage, but you must disable the Laser Gun before it fires a Diffractive Laser. You also must do everything to stop Air Force from firing Wave Cannon or it will OHKO Gau.
- Stray Cat and Gold Bear are ill advised. They do not have any Deathproofing and their upgraded attacks suffer hard from random targeting. Plus, Air Force’s hull has high defenses. Only do so if your Strength is high.
Once you have survived the blockade, you land on the Floating Continent and begin your push to Gesthal and Kefka. Shadow will then join your 3 man team to make it 4.
Walkthrough Part 13 – Floating Continent (Part 2)
Monsters
- Ninja (Water Scroll)
- Platinum Dragon (Cyclonic)
- Misfit (Lifeshaver)
- Apocrypha (Level 3 Confuse)
- Behemoth (Meteor)
- Brainpain (1000 Needles)
- Dragon (Revenge Blast)
- Gigantos (Monster-in-a-Box, Magnitude 8)
- Ultima Weapon (Boss)
- Naude
- Nelapa (Boss)
WARNING: All enemies listed before Ultima Weapon must be fought at least once. Failure to do so by the time you face Ultima Weapon will prevent these enemies from appearing in the Veldt.
WARNING: Once you slay Ultima Weapon and meet Kefka and Gesthal, there is no turning back to the World of Balance. Make sure you are 100% ready when you approach them.
Note: If you jump off the island, you cannot take Shadow with you. After you beat Ultima Weapon, unequip Shadow of anything useful.
3 of the Rages are well worth it. Behemoth is your earliest access to Meteor. Ninja has the ultimate Water damage skill in the game. Platinum Dragon is another good Cyclonic user as it has no weaknesses, Protect and Float. However, this Continent can be pure hell. So be prepared to go to war!
Misfit is basically Outcast but without the Fire absorption. Lifeshaver also works in reverse if you are using Gaia Gears or if Gau goes an Undead Rage (Lich (Fira) is the best one for them). It is the easiest enemy here.
Ninjas can throw Scrolls out at an alarming rate, dealing massive damage to the entire party. If struck, they have a chance to go Invisible. They also can attack in pairs and with a Platinum Dragon.
Platinum Dragon, Apocrypha and Brainpan aren’t too much trouble, Apocrypha can Silence and Brainpan can Stop, but they can get dangerous quickly when they are alone. Their Last Stands are:
- Platinum Dragon casts Cyclonic with a 33% chance, effectively crippling your entire team
- Brainpan can fire off 1000 Needles with a 33% chance, doing 1000 damage.
- Apocrypha counters all attacks with either Level 3 Confuse, Level 4 Flare or Level 5 Death. Strago can learn these spells.
Behemoth can be dangerous as Take Down (Attack x 3) can hit like a bus. If you attack them with any offensive Esper, they retaliate with Meteor, which does heavy non-elemental damage and pierces Magic Defense. If by itself, it will get desperate and counter any damage with Take Down. Both these counters will work as Final Attacks if the criteria is met.
Dragons are basically Briareus but more dangerous. They can Freeze party members (Stop but cancelled with Fire) uses Revenge Blast (7000 – Dragon’s current HP as damage) and Tail (Attack x 5) hits like a truck. If struck with anything, it has a 33% chance to Snort the attacker. They have Genji Gloves that can be stolen.
Gigantos only appears as a Monster-In-A-Box gets very spammy with Throat Jab (Attack x 5). This attack can be used 3 times in a row every other turn. It will counter with 2 attacks and Throat Jab if it is struck with anything. To compensate for it’s power, it has low Defense stats and weak against Poison.
Defeating pre-Ultima Weapon Enemies
- Lightning is a powerful element here as Ninja, Dragon, Brainpan and Apocrypha are all weak against it and everything else takes full damage. Aspiran (Gigavolt), Chaser (Plasma) and Cloud (Thundara) can make short work of these fiends, just be careful deploying Aspiran or Chaser on non-Berserked Ninjas.
- For Dragon, have someone manual cast Stop before Gau goes a Lightning Rage. This will prevent Dragon from Snorting. Be warned: If Gau gets Frozen under Aspiran, the Fire melt will deal double damage. Reserve a low Magic character for thawing if necessary.
- Misfit and Brainpan fall to Templar (Fira) or Grenade (Blaze). Oversoul (Will O’ Wisp) can strike at Misfit’s weakness to Fire and causes Lifeshaver to work in reverse without Gaia Gears.
- Chimera (Aqua Breath – Water) can rip apart groups with Apocrypha in them. Chimera is also Deathproof and Confuseproof so Gau only has to fear Level 4 Flare and 1000 Needles as Last Stands.
- Guard Leader (Wind Slash) can also effectively damage groups, especially if you are surrounded.
- Stray Cat and Gold Bear are effective for Strength Gaus. Just be ready for Last Stands and Ninjas going invisible.
- If someone summons Phantom or applies Vanish before the Gigantos fight, Gigantos is completely helpless. You can then use Trillium or Magna Roader Purple (Bio) to exploit his weakness to Poison or instant kill it with Mu (Snare) unabated.
- Crowd Control can be a helpful ally when battling these potentially dangerous foes.
- Death via Mu (Snare, works on Undead): All except Dragon.
- Stop via Alacran (Numb) or Acrophies (Numbsting): All except Behemoth and Ninja
- Briareus or Wyvern (Cyclonic) can mass cripple all non-Deathproof enemies to make fights easier.
- Berserk can shut down Ninja’s scrol spam, Platinum Dragon’s Cyclonic, Behemoth’s Meteor and Take Down abuse.
- Confusion can cause Platinum Dragons to turn Cyclonic against their own comrades and Ninja to throw Scrolls at each other. Both moves won’t break Confusion if they connect.
Ultima Weapon is the final boss of the World of Balance and a testament to your battle skills. It is split into 3 phases based on his current HP. It has 24K HP.
Phase One: (12800 – 24000 HP)
It primarily attacks with normal attacks. Every turn it has a 33% chance to attack with Flare and has the same chance to use Blaze every 2 attacks. Flare is vulnerable to Runic.
Phase Two (6145 – 12799 HP)
This form is when the heat picks up. Try to break this form as quickly as possible.
It immediately casts Bio, Quake or Meteor, the latter 2 can do some serious damage and Quake won’t harm Ultima Weapon (Auto-Float). It will then either Attack normally or use Full Power (Attack x 2).
Afterwards, it will Fira the entire party and Mind Blast four times at random, each Mind Blast causes random status efffects. Having status protection blocks some of these effects. Some of Gau’s Rages can do this as well.
If you fail to break this form fast enough, it will Haste/Protect/Shell and begin channeling for Flare Star, which deals (80 x Lowest Party Member’s Level / # of Active Characters) in Fire damage. Afterwards, it repeats the pattern.
Phase Three (0 – 6144 HP)
It gets desperate and tries to abuse Tornado (cripples entire party), Rasp (MP damage) and Graviga (damage equal to 75% of HP) or just attacks each turn. If struck, it has a 33% chance to attack with Flare.
These strategies will allow Gau to crush Ultima Weapon across all 3 phases.
Fighting Ultima Weapon
- If Gau has Zona Seeker, immediately summon it! Shell will be invaluable here. Have other teammates bestow Haste status.
- Have a party member or Gau cast Slow on this boss off the bat. This will reduce his vicious attack frequency. Once Flare Star begins charging, immediately Dispel all the buffs then re-apply Slow.
- Bomb or Grenade (Blaze) absorb Fira, Blaze and Flare Star, take nothing from Quake and still fight back just as hard. Bomb and Grenade also come with a few status immunities, especially if stacked with Amulets.
- Outcast (Lifeshaver) is effective at staying alive as long as it goes off every once in awhile. It also gets Bomb’s resistances, absorb Bio and blocks most of Mind Blast naturally, but Gau becomes Undead.
- If you are afraid Tornado, Graviga and Mind Blast will do a number and you gave your Ribbon to someone else, Chimera (Aqua Breath) is also a good option as he gains status resistances and still deals full damage to the boss.
- Stray Cat or Gold Bear can do heavy damage as well if you specced Gau for Strength. Be warned as Gau will need defense Relics for Mind Blast.
- General (Cura) or Destroyer (Reraise) will help keep all hands alive, especially the latter if you are doing LLPs.
Walkthrough Part 14 – Floating Continent (Part 3)
After beating Ultima Weapon, Shadow leaves and the party tries to stop Kefka and Gesthal, only for Kefka to betray the Emperor and toss him off the continent. Then, Kefka screws up the world by messing with the alignment of the Warring Triad, causing the shift in the world known as the World of Ruin.
After the scene you have 6 minutes to get back to your ship or end up as Emperor Smear on the ground below. What makes part truly annoying is that you will be constantly attacked by Naudes.
These jesters have a habit of Freezing party members with Freezing Dust and using Ice elemental attacks. If struck with Magic, they will attempt to Silence you, but this variant bypasses Reflect and Runic checks. They are also absorb Ice and are immune to Holy, Poison, Wind, Water and Earth, but take double from Fire and Lightning. To add insult to injury, you cannot flee from them and they carry Auto-Protect, making physical Rages work at half power.
Before the ship, there is a star which will force the player to fight the Nelapa, another jester that is designed to waste time. It immediately opens up with mass Doom, forcing you to killl it in 60 seconds, It then attacks you with Fire based spells. It has the same elemental resistances as Naude except trades Fire for Ice. It also comes with Auto-Reflect.
Defeating these Jesters
- There is no Rage that can stop Freeze. If Gau gets Frozen and he doesn’t absorb Fire, don’t bother thawing him out or use a low Magic attacker to Fire him out.
- Templar (Fira) or Cloud (Thundara) can decimate Naude without having a crippling Fire or Ice weakness. If you don’t care about Frozen, Aspiran (Gigavolt) can do the job as well.
- An underhanded and quick option of getting rid of Naude is to Imp it via Onion Knight (Imp) or the spell itself. If Imped, Naude will dispel it and flee in terror. This is a good strategy for LLPs as you get no experience using this method
- Naude also has MP 0 = Death and only carries 195 MP. You can use Rasp, Osmose or Living Dead (Osmose) to drain it’s MP swiftly.
- For Nelapa, Chaser (Plasma) and Magitek Armor or Heavy Armor (Magitek Laser) not only do double damage due to it’s Lightning weakness, but both spells bypass Reflect. All 3 of these Rages are also effective for Naude as well.
- An underhanded trick is to use Flan (Sticky Goo). Although Flan gets a Fire weakness, it immediately sets up Gau with Reflect, allowing your magic users to bounce Blizzaras off him and bypass Nelapa’s Reflect. Be warned as Fireball pierces this and Nelapa heals from his own spells.
- Your best bet to slaying Nelapa without any mess is to use Mu (Snare). The boss isn’t Deathproof and it cannot be stopped by Reflect.
- Both enemies can fall pretty quickly to Gold Bear or Stray Cat.
Once you are done, immediately wait near the ship for the last 4 seconds and Shadow will come back aboard the Blackjack. Once he comes back, jump off and join your friends… at least for what time you have left with them.
And on that day, the world changed forever.
Walkthrough Part 15 – Solitary Island and South Continent
Enemies:
- Land Ray (Desert Only, Mighty Guard)
- Peeper (White Wind)
- Black Dragon (Desert Only, Snowstorm II)
WARNING: If you didn’t leap Gau before going to the Floating Continent, Level Averaging will be taking place while you gain experience unless you leaped Gau prior to the Floating Continent (see the Stats and Raising Gau Part 1 section for more details). It is recommended to limit your fights as much as possible and try to get everyone back as quick as possible to avoid wasted level ups.
WARNING: Do not engage in battles in the Desert if you are lacking a Ribbon or an Amulet. Black Dragons have the ability to zombify you via Bone Powder by chance every 2 attacks. If you must engage them without these Relics, either Life or Stop them before they execute their 2nd attack.
Note: The non-sand tilesets (the rocks and pale green grass) count as Fields.
All the Rages here may sound cool, but they come with either Undead or Sap status. The Black Dragon’s Snowstorm is the 100 Spell version as mentioned in the Ice Elemental Attacks section. However, all 3 of their spells are either available on better Rages and/or Strago can learn them for manual casting.
When you regain control, you will be controlling Celes and you will wake up a year later in a cottage on a tiny island. If you leave the cottage, you can fight Peeper and Land Rays, both have only 1 HP and Sap status. Kill them as you see fit. Later on when you plan on Leaping them in The Veldt, you will need to cast Stop on them before Sap does damage or quickly select the Leap command before the battle ends.
After you play out saving or letting Cid die (it doesn’t matter which one, but kill him if you are speed running), then you will be given a raft and you can set sail for the Southern Continent. Once there, head to Tzen.
Enemies:
- Killer Mantis (Field and Forest Only, Metal Cutter)
- Fafnir (Field and Forest Only, Traveler)
- Murussu (Field Only, Stop)
- Gigantoad (Field Only, Sticky Goo)
- Rukh (Field Only, Shamshir)
- Luna Wolf (Field Only, Face Chomp)
- Black Dragon (Desert Only, Snowstorm II)
- Land Ray (Desert Only, Mighty Guard)
- Peeper (Desert Only, White Wind)
WARNING:: If you don’t have a Ribbon or Jeweled Rings, do not fight Rukhs (Vultures) or slay them as soon as possible. If you fail to slay them by their 3rd attack, they will use Beak and Game Over you via Petrify.
WARNING: As mentioned in the previous section, avoid Black Dragons if you lack an Amulet or Ribbon as they can Zombify you via Bone Dust. If you must, cast Life or Stop before it’s 2nd turn.
Note: There is a plus shaped forest nearby. If you walk around here, you can also fight Darkwinds and Leaf Bunnies. If you forgot them, you get another chance here.
The enemies start picking up and 3 of them have good Rages to help Gau. Murussu is a great crowd controller, gets Protect and Safety Bit protection (Petrify, Death) and no weaknesses to worry about. But you will be getting a better Stop spell once you get the Airship, so the choice is yours. Fafnir is your first chance at Traveler, which is great for LLP or heavily armored forces and Metal Cutter is one of the most devastating Physical spells in the game.
Your raft will land near Albrook, the port town you came to when you landed in the Southern Continent for the first time. You can head in and grab some supplies. Afterwards, limit your combat and head into Tzen.
If you must fight, the regular enemies are easy for a lone Celes to destroy. Fira (Killer Mantis), Blizzara (Fafnir, Gigantoad, Rukh) and Thundara (Murussu) can do heavy damage. The other enemies have no resistances to these magics. Rukh has a 33% chance of returning your Magic attack with Shamshir (halves HP).
Enemies
- Scorpion (Poison)
- Zokka (Net)
- Nightwalker (Drain)
WARNING: You must face these 3 enemies at least once and within the time limit. Failure to do so will prevent these enemies from appearing in the Veldt. This is the 2nd last One Time Trip dungeon left in the game.
Note: The Monster-in-a-Box formations count towards the Veldt.
Note: You acquire Sabin here. Try to also get the Healing and Holy Rods from the dungeon. The latter will be helpful when you acquire Gogo.
None of the Rages are useful, except for Net, which is an unrestricted Stop spell. However, you will get a better version of this Rage once you get an Airship going again.
Kefka has setup base at a tower between this town and Albrook and he uses his death laser to punish the town for harboring Celes. This is why we can’t have nice things!
The laser causes a house to start collapsing and Sabin helps hold it up. You then have 6 minutes to break in and save a child left inside before Sabin drops the house and Celes’s new name is General Pancake. I recommend wearing Sprint Shoes for this part, so you can fight all the enemies, claim the treasure and escape with time to spare.
The standard enemies have extremely low vitals and appear in separate formations (You either fight 3 scorpions or 2 Nightwalkers with a Zokka). The biggest threat hands down here is Zokka.
Zokka is a problem for 2 reasons. It can throw a Net (inflicts Stop and Ribbon cannot stop this) and will counter any attack made against it with Rock (which Petrifies). If you have no Stoneproofing, then run. Otherwise, smite the entire group with Fira.
The Scorpion has high magical defenses but can be slain by conventional weapons. However, they can hit you with Doom via Lethal Sting followed by a normal attack. However, most players can slay them long before Doom claims Celes.
Once you save the kid and escape in one piece, Sabin will rejoin you. Now head towards Serpent Trench and to see the Wizard of Mobliz.
If you don’t want to walk there or you just want to go straight to Nikeah and face the enemies on the trench later, there is a secret Chocobo Stable in the square shaped forest between the Phoenix Cave Mountains (mountain range north of Tzen) and Tzen. You can rent a Chocobo for 100 Gil here and ride to either destination. If you go to Mobliz, there is another Chocobo Stable in the area to ride to Nikeah, so there is no real punishment for your choice.
Walkthrough Part 16 – Serpent’s Trench (Mobliz and Nikeah)
Enemies:
- Killer Mantis (Field and Forest Only, Metal Cutter)
- Fafnir (Field and Forest Only, Traveler)
- Murussu (Field Only, Stop)
- Gigantoad (Field Only, Sticky Goo)
- Rukh (Field Only, Shamshir)
- Luna Wolf (Field Only, Face Chomp)
- Black Dragon (Desert Only, Snowstorm II)
- Land Ray (Desert Only, Mighty Guard)
With Sabin, you will have an easier time destroying these enemies and acquiring Rages. You get some breathing room with Rukh and Black Dragons as the other party member can dispel the Petrify and Zombie respectively.
Try to acquire the first 2 Rages. Metal Cutter and Traveler are effective attacks. You can acquire Murussu if you wish, but you will be getting a better Stop spell once you get the Airship back.
Once you have what you need. Start walking the Serpent’s Trench and head to the tail, where Mobliz lies.
Enemies
- Vampire Thorn (Bio)
- Lizard (Break)
- Delta Beetle (Megavolt)
- Devoahan (Plains Only, Slowga)
- Black Dragon (Desert Only, Snowstorm)
None of these Rages are useful. Although Dovahan has the best Slow application in the game, you will get Gau back at the same time you can get the Magicite that teaches it to you.
These enemies are also not very threatening. However, their vitals are now on par with those from the Floating Continent, but they can be trashed by 2 people easily. The only real annoyance is the hike to either city without the aid of Chocobo.
Vampire Thorn and Delta Beetles have incredibly thick Defenses. Sabin’s Raging Fist or Celes with Ultima Weapon can pierce it’s defenses for a OHKO. Delta Beetles however have low Magic Defense, so Sabin’s Rising Phoenix or Celes with Fira can melt groups. Vampire Thorn also has the capacity to Zombify characters with Life Drain.
Devoahan has an extremely annoying habit of using Sunbath to heal his fellow monsters. This has a 33% chance of happening when struck with Magic and acts as a Final Attack. This will not save Devoahan from Death.
If a battle with a Lizard drags too long, it can Imp your entire party with Imp Gaze. Make sure you have either White Capes or Ribbons on to block this or slay them first.
Every enemy is weak against Fire except Lizard (weak against Ice). Vampire Thorns are also Undead.
Note: You can do this any time, but most players tend to come here when they acquire the Airship again. This is the first half of getting Terra back.
In Mobliz, you find out the Light of Judgment and the geological damage the world took has damaged the town severely. The only survivors are 2 teenagers and the rest are children. Terra has also taken refuge here as the town is constantly being attacked by Humbaba.
Humbaba eats Lightning and attacks with it. It has a Poison weakness. Terra tries to fight it alone but gets KO’ed as the beast takes 0 damage from all her attacks. Then the beast attacks your party.
If you came from Tzen when you did this, Celes can use Bio while Sabin uses his strongest Blitz moves. You can also keep Runic constantly channeled to cancel his Thundara and Thundagas. If Gau is with you, the Magna Roader and Trillium Rages (Bio) can do crippling damage. If you are using Runic, Adamankary (Acid Rain) can still damage him.
After enough damage, he flees. Terra loses the will to fight as she is trying to come to terms with the new feelings she has, plus it doesn’t help the old self-esteem by getting your butt kicked either. When finished, head to Nikeah.
If you faced all the enemies from the Serpent’s Trench and don’t want to hike back, there is a secret Chocobo Stable inside the forest just south of this town. Walk around the west side of this forest and you will eventually enter it. You can rent a Chocobo to ride to Nikeah for only 100 Gil and no battles. Still much faster than walking I think!
Note: Make sure you finish up your purchases here as you won’t be returning to this island until you get the Airship. I suggest buying an Enhancer for Celes (+7 Magic and Runic).
In Nikeah, you will find the city of trade is still in one piece and still thriving during the bad times.
You will find a man that resembles Edgar, or at least him with different armor colors. He has made a deal with some thieves and will deny knowing you. You will sneak on a boat with him and head towards South Figaro in the Northern Continent.
Walkthrough Part 17 – Northern Continent and Figaro Castle
Note: There is also a man outside the Chocobo Stable who will bring up a shadowy serpent that appeared in the ocean as of late. Make sure you talk to this guy now, this will allow you to fight Leviathan after you get the Airship.
In South Figaro, Gerad will take his team into the South Figaro Caves. Follow him.
Enemies
- Oceanus (Forest, Magnitude 8)
- Desert Hare (Cura)
- Cancer (Esuna)
Desert Hare has potential for healing. Gau gets a Water weakness but it bestows Haste. You already have 2 better Magnitude 8 users and having a Rage for Esuna is stupid.
The enemies here aren’t too much trouble. Oceanus is the biggest threat as it can not only use Magnitude 8 quite often, but it is also one of the 2 formations that can Pincer you solo. The other enemy is Magic Level 90. Casting Float before you walk into the Forest or using Gaia Gears helps.
The Desert Hare is also a friendly monster who will heal you if struck with an attack. It will still do this as a Final Attack. Take advantage of this to save on Curas.
Every enemy hates Lightning so Thundara can easily smite any opposition. But try to attack the Desert Hares normally first before you smite the rest.
Once you are done, head into the South Figaro Caves.
Enemies
- Neck Hunter (imp)
- Cruller (Sticky Goo)
- Humpty (Poison)
- Dante (Level 3 Confuse)
- Dropper (Confuse)
- Tentacle (Boss)
Note: You will get Edgar back at the end of this part
Note: If you didnt take any of the treasures from South Figaro Cave in the World of Balance, there will be new treasures. The one upstairs will now have a useful Hero’s Ring.
None of the Rages are useful. However, all enemies are capable of abusing the Confusion effect against you. Wear Peace Rings and Ribbons to ensure the duo aren’t turning against each other.
The biggest threat is Dante as his Crystal Lance hits hard and has a 33% chance of countering Magic with Level 3 Confuse. If Dante is an annoyance, you can Petrify him for an easy OHKO via Break.
Neck Hunter and Dante fall quickly to Bio. Cruller and Humpty fall to Fire. All except Neck Hunter are Undead as well, so drain their MP with Osmose before killing them off if you need it. All 4 can be destroyed swiftly by Sabin’s Aura Cannon.
As you travel through the Caves, you will follow Gerad and eventually end up at the spring, which is now useless. You find out Sandworms recently dug out a new cave and the Turtle that was there will help you access the new cave. The cave will then take you to Figaro Castle.
You will find out that Figaro Castle went underground when Kefka began using the Light of Judgement against the people, but a monster has jammed the diving mechanism and is keeping Figaro from resurfacing. You then find out Gerad was Edgar all along and he only used the thieves to help break into Figaro Castle so that he can get it back up.
When you reach the engine room, you will find a mass of tentacles has clogged the mechanism. The battle is an annoyance and each has different absorptions and weaknesses and they also carry an extremely annoying mechanic.
If any character has been Slowed by Stun or Entwine, a Tentacle will grab that character and strangle them. While strangled, the character is unusable and they lose HP and MP at a constant rate. This can be a disaster for LLP as you might end up getting Game Over’d by this effect alone.
To counteract this, equip Celes and Sabin with Hermes’ Sandals so that Auto-Haste makes them Slowproof. You then just need to worry about the melee attacks and Bio. Golem helps immensely.
For damage, each tentacle has different weaknesses and immunities, but there 3 elements that are unrestricted: Poison, Wind and Holy. Sabin’s Aura Cannon and Razor Gale can do high damage as can Celes with Bio. Edgar is better off using Drill or Auto Crossbow if physical or Bioblaster or Flash if Magic.
If you don’t have enough Hermes Sandals, another safe option is all 4 tentacles are NOT Stopproof. Using Stop will help you control the attack spam long enough for you to smite them off one and at a time.
Once you cleansed the engine room, claim the Soul Saber from the statue in the treasure room and head back to the surface.
Walkthrough Part 18 – Kohlingen and Darill’s Tomb
Enemies
- Bogy (Plains Only, Growl)
- Marchosias (Plains and Forests Only, Aero)
- Deepeye (Plains and Forests Only, Dread Gaze)
- Mousse (Plains and Forests Only, Transfusion)
- Cancer (Desert Only, Esuna)
- Sandhorse (Desert Only, Sandstorm)
The three best Rages here are extremely helpful to Gau when you get him back. Aero is the most devastating Wind attack in the game. Dread Gaze is the Mu of Petrify and will solve your dilemma of Break checking for both Stone and Deathproofing before working as Dread Gaze just checks for Stoneproofing. Both however have Fire weaknesses, which will be remedied quickly.
Bogy’s Growl (Attack x 2) may not look effective, but Gau gets Protect status and Stoneproofing, which helps if you do Physical Gau against hard hitters and Petrify abusers. This gives Bogy an edge when competing with Stray Cat (high damage) or Gold Bear (near bottom of list and easy to select).
Sandhorse can be a problem as it spams Sandstorm frequently. Ice attacks should end it quickly.
Marchosias if left unchecked, can cause devastation with the Aero spell, the strongest Wind attack in the game. Sabin’s Razor Gale can OHKO it. Drill, Chainsaw or a Ra spell also work.
Deepeyes have a habit of abusing Petrify and Sleep and can attack in groups of up to 6 in the Forest or support other monsters. So make sure your team has Jeweled Rings or Ribbons on. Fira all casts, Rising Phoenix and Auto-Crossbow/Flash can devastate groups.
Mousse and Bogies are not much of a threat. Kill these however you see fit.
To the north of the desert is the Dragon Neck Coliseum. The Old Man who lived here is thankful Kefka brought chaos and destruction to the world and is capitalizing off of it through his Coliseum. It works by making the player offer up items and then a representative of your team fights to the death to slay the enemy for a different item. However, you forfeit complete control over your attacks! Gau is ill advised here as he will use Rages and Spells at random, even if they don’t fight well against the enemy. Ignore this place for now.
When you have conducted your business, head into Kohlingen.
In Kohlingen, nothing much as changed, except people are still hopeless and Locke’s first squeeze is still dead. You will now find Setzer in the bar, drinking his problems away now that the Blackjack has been destroyed. Speaking to him will reinvigorate him with hope once more and he will show you where Darill now rests. Darill has a replacement Airship the party can use. More importantly, it is all that stands between you and Gau! Head over there!
- Skeletal Horror (First Room Only, Banish)
- Borghese (First Room Only, Holy)
- Cloudwraith (Flare)
- Exoray (Venomist)
- Malboro (Bad Breath)
- Angler Whelk (Monster In a Box, No Rage)
- Dullahan (Boss)
Note: This dungeon has the Growth Egg Relic involving a Tombstone puzzle. Collect phrases and input ERAU SQQI DLRO WEHT (The World is Square). You will get a clue to find the Egg in the dungeon. Don’t leave the Tomb without it! You will also be able to replicate more when you get Ragnarok and morph the Marchosias enemies you fought before. There is also a Genji Helmet here, which is a very powerful helmet for Gau.
What really makes the Rage list a problem here is that some of these attacks are good, but are bogged down by crippling Fire and Holy weaknesses and are all Undead (except Malboro). Borghese, at the cost of making Gau Undead, is your earliest source of Holy until you get Alexander or a living Holy Rage. Malboro canl allow you to Crowd Control enemies by applying multiple status effects in 1 cast, plus gets Poison and Water absorptions. Skeletal Horror is your only source of Banish and is an effective attack for mass-killing monster formations that aren’t Deathproof and ignores Undead typing when applying it. The rest of them you have better living counter parts already or you will get better versions of these attacks off living enemies once you get the Airship and side jobs going.
Aside from the map getting pretty easy to get lost in and the lack of living enemies, but you will also have to contend with some really brutal status effect abusers. Most enemies can inflict Zombie, so bring Amulets.
Malboro when left alone can abuse Bad Breath to great effect on your party. Amulets cancel 2 of the effects (Poison and Darkness). The Ribbon and White Cape (due to a programming error, Bad Breath fails under Impproofing) will render Bad Breath harmless. Since Malboro is the only living enemy here, save your Osmose and Drain spells for these.
Everything falls to Fire and Holy, except for Malboro (just Fire). Aura Cannon, Rising Phoenix and Fira can scorch through every opposing normal monster.
Note: The Angler Whelk is destroyed if either the shell or head are killed. You get a Dragon Claw if you slay either part. If you drop both to 0 HP at the same time, you can score 2 Dragon Claws. This can make Physical Sabin builds very powerful with Genji Gloves at this point.
The Angler Whelk is two parts: The head and the Shell.
The head attacks with Megavolt, El Nino (heavy Water damage) or Petriblast (Petrifies character). If the skull is struck twice, it will hide in the shell and the shell will begin to send out Magnitude 8 bursts.
The shell itself also has Megavolt and can fire 1000 Needles. The shell has a 33% chance to counter any damage with Gigavolt. All Lightning attacks are vulnerable to Runic.
If you want to claim 2 Dragon Claws at the same time as suggested in the Note, use attacks that hit both enemies (Fira, Rising Phoenix, Auto-Crossbow/Flash and Slots like 3 Diamonds. Chocobos or Bahamut) at the same time and only attack when both body parts are sticking out.
WARNING: Before you engage Dullahan, check your character’s Levels against the ones digit of your Gil. Make sure the levels aren’t divisble by it.
Dullahan may look Undead, but it abuses Holy and Ice attacks to devastating effect. It opens the battle with Level ? Holy, which deals Holy damage to anyone who’s Level is the same as the one’s digit of your Gil. This can spell Game Over for LLPs.
He has two phases. His first phase is Holy, Blizzara and Blizzaga casts. All these attacks are interceptable by Runic. After he has been struck 8 times, he will go to his Second Phase.
The Second Phase’s Holy becomes Level ? Holy again and he begins using Morning Star (Attack x 2). He swaps out Blizzaga for Absolute Zero, doing heavy Ice damage to all party members. Try to slay him fast before the damage piles up.
Every 4 turns, he will heal himself with Cura if he has less than 10240 HP. Using Reflect is also ill advised as he absorbs his own Ice attacks and will cast Reflect??? on anyone under its protection (Causes Silence, Slow and Blind to the party member). He is weak against Fire.
Fira, Rising Phoenix and Drill can easily rip this boss apart. Slowing the boss also helps cut down on the attack frequency. Summoning Zona Seeker over Carbuncle is wise.
If you are having problems with this boss, there is a way to at least protect Celes. If you pick up the Regal Gown in this dungeon, you can bring it to the Dragon Neck Colisseum (north of Kohlingen) and gamble it against a Death Machine for a Minerva Bustier. Simply equip a Reflect Ring and let it kill itself with Death and restart the game if you get killed by something else. The armor will allow Celes to nullify Ice and halves Holy damage.
With the boss slain and the acquistion of The Falcon. It is time to reclaim Gau and search for your friends.
Walkthrough Part 19 – Gau and the World of Ruin
WARNING: Now that the Airship is claimed, there is a sector of the sky that is inhabited by Deathgaze, who has the potential to slaughter your entire team with Death spells. At this time, you will be greatly underpowered. Make sure you Save your game before taking off to avoid any lost progress to a humiliating Game Over. When you are ready, the Magiciite Carriers section has information on how to deploy Gau against this beast.
Now that you have the Falcon, it is finally time to claim Gau, your friends and get the end-game Magicite and Rages.
From this point onward, the Guide will be writing in terms of improving Gau as the main priority. You can choose to acquire the characters how you see fit, but you will need to make the best use of whatever Rages you have until you get improvements. I will also mention any items or equipment that will benefit Gau and your other party members as a part of this.
Let’s start off by doing some simple pre-Gau progress that will help your current team.
With the Airship, head back to Solitary Island first and go back to Cid’s House. Head to the beach and you will find Magicite there. This is Queztalli and it will teach Gau and friends Hastega and Slowga, which are great opener spells and a good defense against Final Attacks. This will also render Cirpius (Hastega) and any Slow rages useless.
North of Nikeah and East of Narshe there is an island with a set of trees in the shape of a plus sign. Land the Falcon here and head inside the center. You will find out this is Duncan’s House (The Old Man who lived near South Figaro in the World of Balance). If Sabin is in your party, you will learn his ultimate Blitz move, Phantom Rush. This move has a Spell Power of over 150 and pierces Magic Defense.
Land near Jidoor (North of Solitary Island) and head into the Auction House. Talk to the man with the purple vest outside the Auction House and he will tell you a rare sword is up for Auction. If you have 500K Gil, you can purchase Excalipoor now and get it out of the way. Otherwise, keep a mental note of this and do some World of Ruin work until you are able to afford it.
You will need this later to face Gilgamesh at the Coliseum. Check the Magicite Carriers section for details on how to face him.
Note: You reclaim Mog here
Fly to Narshe and land here. You will find out the entire town is abandoned to the monsters, except for Mog (and later 2 people) and every house is mostly locked (a problem you will resolve later). Head to the Moogle Cave through Arvis’ house and you will find Mog is all alone now. Talk to him and he will join or rejoin your cause. Once he leaves, examine his spot and you will find the Molulu Charm. If given to Mog, you will encounter no monsters. This will help keep you from overleveling if you are planning on Stat maxing or doing LLP so that level averaging doesn’t harm you.
If you didn’t open the chest at the Moogle’s home in the World of Balance (like my Warning made hurtfully clear to you), you can claim your 2nd (or 3rd if you got one off Ultima Weapon) Ribbon here.
The enemies will be discussed in the Narshe session. Dispatch them anyway you see fit. Whether or not you claim the charm, take 1 character out (talk to Mog under the deck to do so) and set a course for The Veldt.
Head to the land mass north of Mobliz. This is the new Veldt. The mechanics are still the same as well as the music. Wander around and slay enemies until Gau reappears. Gau doesn’t need to be fed Dried Meat but he will have standard behavior (5/8 chance of spawning after battle and won’t come back after Back Attacks or Pincers).
Now that we have Gau back, it is time to temper him for World of Ruin standards. You have faced a lot of enemies since the Floating Continent, so now is the time to pick up Rages.
My personal recommendations from Floating Continent to now are:
- Behemoth (Meteor)
- Ninja (Water Scroll)
- Peeper (White Wind)
- Fafnir (Traveler)
- Killer Mantis (Metal Cutter)
- Murussu (Stop)
- Desert Hare (Cura)
- Marchosias (Aero)
- Deepeye (Dread Gaze)
- Malboro (Bad Breath)
- Borghese (Holy)
- Bogy (Growl)
Behemoth is a poor man’s Ultima until you get Ragnarok. Marchosias and Ninja are attack upgrades for Wind and Water elements. Metal Cutter and Traveler with enough steps are the Stray Cat of Magic attack. Borghese is your earliest user of Holy at the cost of being Undead, until you find a living vessel for it or get Alexander.
Peeper although has Sap has the best healing spell in the entire game, behind Curaga. You will get a better White Wind user at Kefka’s Tower. Desert Hare will allow you to use Cura faster than General if you still rely on Cura.
Murussu is one of the best Stoppers in the game as it has Protect status and no weaknesses, which made Alacran (Numb) and Acrophies (Numbclaw) harder to use.
Deepeye’s Petrification will only check for Stoneproofing and not Deathproofing and Stoneproofing together (some enemies have this annoying check and I will bring up which ones when I discuss Crowd Control strategies) and Malboro’s Bad Breath can make some enemies ridiculously easy.
Bogy although has half the strength of Catscratch, it comes with Auto-Protect to help you fight hard hitting physical attackers.
If you are going for the Completionist approach, you can acquire the following Rages now:
- Any World of Balance Rages you missed but still encountered.
- Sky Armor
- Spitfire
- Apocrypha
- Platinum Dragon
- Brainpan
- Ninja
- Misfit
- Dragon
- Behemoth
- Gigantos
- Peeper
- Land Ray
- Black Dragon
- Rukh
- Murussu
- Killer Mantis
- Fafnir
- Gigantoad
- Luna Wolf
- Scorpion
- Zokka
- Nightwalker
- Vampire Thorn
- Lizard
- Delta Beetle
- Devoahan
- Black Dragon
- Oceanus
- Desert Hare
- Cancer
- Neck Hunter
- Cruller
- Humpty
- Dante
- Bogy
- Marchosias
- Deepeye
- Mousse
- Sandhorse
- Skeletal Horror
- Borghese
- Cloudwraith
- Exoray
- Malboro
Once you are caught up with Gau. We will now begin systematically disect the World Map before we really work towards getting your teammates back.
Walkthrough Part 20 – World Map Stuff
Now that we have Gau back, it is time to begin exploring the World Map. If you bring Mog along, do not use the Molulu Charm.
Note: Narshe is the region where Narshe is. Jidoor is the region around Jidoor and Dinosaur is the fields outside of Dinosaur Forest (north of Veldt, forest is shaped like Dinosaur head). Check both forests and barrens for the enemies. Jidoor has the most variance to acquire the Rages the fastest.
Land your ship near Jidoor (south of Zozo and north of Solitary Island) and wander this Island. This is the only other land mass besides the new Triangle Island you haven’t explored yet. There are some Rages here for you.
Enemies
- Lycaon (Jidoor, Dinosaur, Blaster)
- Greater Mantis (Jidoor, Dinosaur, Wind Slash)
- Crawler (All 3 Locations, Traveler)
- Leap Frog (Jidoor, Narshe, Sticky Goo)
- Basilisk (Jidoor, Narshe, Break)
- Sprinter (All 3 Locations, Field Only, Aero)
- Tumbleweed (Dinosaur, Lifeshaver)
The main reason we are here is Lycaon. Blaster is like Banish except you don’t need to worry about being Undead and it always connects on Stopped enemies, except if they are Deathproof. Sprinter is Marchosias except with 1 swapped Elemental weakness (Weak against Lightning instead of Wind) and 1 status immunity (Stoneproofing for Deathproofing). If you prefer Wind Slash, Great Mantis has an easier to nullify weakness (Fire via Flame Shield) than Guard Leader and has an array of status immunities. Tumbleweed absorbs Water and is the first Lifeshaver user that isn’t Undead.
Everything else is crap. Sticky Goo is available on other Rages and simply cast Slow while Crawler is just a Fafnir clone.
Enemy wise, they are quite pathetic and can be slaughtered with relative ease. But there is one major threat to watch out for: The Greater Mantis.
Greater Mantis can hit like a bus with attacks (doing upwards as high as 2000 damage) as it holds the highest attack stat in the game, even ahead of Kefka himself. Both it and Sprinter have Osmose attacks, which can be a problem for Gau’s Death at 0 MP Rages. Greater Mantis can also attack you in pairs if you wonder the Narshe region.
Leap Frog has a habit of Jumping, making it invulnerable until it lands. If you fail to slay it by the 3rd attack, it will use Rippler. The Rippler Bug is non-existent, so you will be fine using Shadow and Terra.
Tumbleweed is only found in 1 area (near Dinosaur Forest) and has a habit of countering any damage taken with Lifeshaver. If you are Undead or absorb Earth, this effect is reversed.
Slaughtering these vermin
- Very few enemies here have Magic attacks. Phantom, Golem or Vanish can be helpful, especially against Greater Mantis.
- Lycaons can be eradicated by virtually any attack. They have only 250 HP after all, but try to get them with a Fire or Lightning attack rage since Greater Mantis and Sprinter are weak against these elements.
- Greater Mantis can be smote by Bomb or Grenade (Blaze) without fear of 0 MP Death. Later on, Primeval Dragon (Firaga) can also obliterate them and any other monsters paired with them.
- Sprinter can be smote by Aspiran (Gigavolt) without fear of 0 MP Death.
- Leap Frogs, Crawlers and Basilisks can be slain by Veil Dancer (Blizzara) quite nicely. Baalzephon (Blizzaga) or Black Dragon and Kamui (Snowstorm) also pose a major threat to them.
- Killer Mantis (Metal Cutter), Marchosias (Aero), Ninja (Water Scroll), Behemoth or Tyrannosaur (Meteor), and Chimera (Aqua Breath) can also be deployed to mass damage or eliminate groups.
- Stray Cat, Gold Bear and Bogy can do some serious harm here. Bogy is more recommended against Greater Mantis groups for the Protect status. Gogo should use any of the elemental Rods based on the combatants you are fighting or Swordbreaker to help block Greater Mantis attacks.
- Crowd Control may not be 100% necessary here, but there are some options available:
- Death via Mu (Snare) or Skeletal Horror (Banish): All except Greater Mantis and Lycaon
- Petrify via Deepeye (Dread Gaze): All except Great Mantis and Basilisk
- Stop via Murussu (Stop, Protect Status): All enemies.
- Anything not Deathproof can be mass crippled by Platinum Dragon or Briareus (Cyclonic).
- Great Mantis’ high attack stat can be utilized to painful effect with Confusion
Once that is complete, there are 2 more optional Rages we can acquire that will be helpful, but there are some serious risks involved with acquiring 1 of them.
Thamasa is nothing more than an island all by itself in the bottom corner. It has it’s share of Rages too.
Enemies:
- Vasegiatta (Cyclonic)
- Purusa (Rock Slide)
- Gloomwind (Net)
The Rages are just secondary options, but the main one we want is Purusa’s Rock Slide. This is essentially Flare but armor piercing and cannot be dodged. This is a good Rage against high Magic Defense enemies when you don’t have Ultima and Metal Cutter can’t cut it. Gloomwind’s Net is an improvement from your unblockable Stops as this one only has an Ice weakness and a few helpful status immunities. You already have better Cyclonics than Vasegiatta.
The biggest threat is Vasegiatta, which has a chance to cast Aero on it’s 2nd attack of it’s 3 attack cycle. If you hit it with Magic, there is a 33% chance it will cast Cyclonic and cripple your non-Deathproof party. If it casts Aero right after this, it can spell your doom.
Gloomwind also has a 33% chance on any attack to throw a Rock and petrify you. Purusa isn’t much of an issue in battle.
Fighting These Enemies
- Gloomwind can be trashed by Veil Dancer (Blizzara), Baalzephon (Blizzaga) or Kamui or Black Dragon (Snowstorm II). Snowstorm II is better served for groups.
- Purusa and Vasegiatta have no resistances so any high powered attack Rages can shred them: Killer Mantis (Metal Cutter), Aspiran (Gigavolt), Marchosias (Aero), Ninja (Water Scroll), Chimera (Aqua Breath) can kill and not trigger Cyclonic. Use a Deathproof Rage is possible.
- Stray Cat, Bogy or Gold Bear can be physically painful. Bogy is also unaffected by Gloomwind’s Rock and all 3 can damage Vasegiatta without triggering Cyclonic. Gogo should equip the Ice Rod to beat down Gloomwinds, but be aware the triggered effect can be met with Cyclonic.
- Anything not named Vasegiatta isn’t Deathproof. Lycaon (Blaster), Skeletal Horror (Banish) or Mu (Snare) can do instant kills if your damage is lacking. All enemies are Stoneproof so Deepeye (Dread Gaze) is ineffective.
- Briareus or Platinum Dragon (Cyclonic) can cripple non-Vasegiatta’s as well.
- If you want to play it safe against Aero, Flan (Sticky Goo) is immune to Wind and can Slow down the bird.
- General or Desert Hare (Cura), Peeper (White Wind) and Destroyer (Reraise) can keep people fighting fit.
Now there are two more optional locations you can try. First head to Maranda Desert.
Walkthrough Part 21 – More World Map and Preparations
- Slagworm (Sandstorm)
- Cactuar (1000 Needles)
- Gigantuar (Boss)
Note: For more information about Gigantuar, read the Magicite Carrier Bosses on how to Rage against this boss and defeat it.
Near Maranda, there is a small desert to the south you can walk around. There are only 2 enemies here but both can be incredibly brutal. Remember that you just need to encounter them. If you think you aren’t ready, you can always Run, use a Smoke Bomb or come back here later.
Slagworms have a lot of HP compared to the Field locals (12000+ HP) and mostly attack with Crush (Attack x5) or regular attacks. Every 3 turns, they can Snort a character out. If struck by anything, they have a chance to attack with Sandstorm up to 2 times (66% chance first time, 33% chance second time). If you get defeated but 1 character is Snorted, then you will go back to the World Map with a hefty repair bill.
Cactuars are the opposite in vitals (3 HP), but they make up for it with insanely high Evasions (250 both) and Defenses (255 both). Every 2 turns, they will fire 1000 Needles (1000 damage, undodgable) and build up power every odd turn. If not slain by the 8th turn, they will unleash 10 1000 Needles attacks back to back, leaving your party in a brutal mess. If you slay 10 of these and have spoken to the man inside Maranda, you may face a Gigantuar for the Cactuar Magicite. You also get 10 AP for slaying one of these elusive creatures.
Slaying these Desert Fiends
- Baalzephon (Blizzaga) can ruin Slagworms. It absorbs Sandstorm counters and does double damage because of Ice weakness. If you don’t have Baalzephon yet, Veil Dancer (Blizzara) is your best option.
- Chimera (Aqua Breath) and Ninja (Water Scroll) can attack Slagworm and Cactuar’s secondary weakness to Water. Ninja is safe from Slagworm’s Earth offense thanks to Auto-Float. You may need to stop Cactuars in order to inflict Water damage.
- Killer Mantis (Metal Cutter) can do heavy damage to the Slagworm without any exploitable weaknesses. This attack will often miss Cactuar.
- Brainpan or Face (1000 Needles), Fafnir or Crawler (Traveler), Purusa or Luridan (Rock Slide) and Behemoth or Great Behemoth (Meteor) will bypass Cactuar’s defenses and evasion for a 1 hit kill.
- Stray Cat, Bogy and Gold Bear with a Sniper’s Eye can handle both enemies here. Although Cactuar’s defenses are high, you should have enough damage with your standard attacks to OHKO a Cactuar if your Strength is high enough, Gogo should use the Ice Rod (double damage) or Swordbreaker (helps dodge Crush) against both. Bogy can provide Auto-Protect to reduce Crush damage by half.
- There are only 2 Crowd Control effects that will work around here
- Death – Ahriman (Roulette) always works and wont target your team. Lycaon (Blaster) always hits if Cactuar has been hit with Stop. Any Death method works on Slagworm.
- Stop – With a Sniper’s Eye, Alacran (Numb) and Acrophies (Numbsting) can inflict this without Cactuar dodging it.
- Briareus or Platinum Dragon (Cyclonic) both do heavy damage to Slagworm’s HP and both have Auto-Protect for Crush. Any hard hitting attack afterwards should be enough to kill it.
When finished, head to Dinosaur Forest.
North of the Veldt, there is a section of forest in the shape of a dinosaur’s head. This forest is dubbed by fans as Dinosaur Forest. 2 types of dinosaur live here, 1 of them has a Rage we need. The other is the game’s most dangerous normal monster, but its rewards are well worth the risks.
Enemies:
- Tyrannosaur (Meteor)
- Brachiosaur (Disaster)
The Tyrannosaur Meteor is twice as strong as the Meteor spell used by Behemoth and it also pierces Defenses. This spell is good for handling mass groups if resistances and immunities are all over the place. Brachiosaur is the game’s most dangerous monster and Disaster can be collected off a more easier foe later (unless you Leap at it first move).
Tyrannosaur fights you solo or surrounds you in a Pincer that Alarm Earrings cannot thwart. It has devastating physical offense via Bite (Attack x 7) and can cast Meteor. It is also immune to most Crowd Control powers outside some special cases.
Brachiosaur is the apotheosis of pure evil. It can either attack or use Disaster (mass status effects to all party members), Meteor, Snort (ejects a party member(s) and Ultima (pierces Magic Defense and pretty much Game Overs you if you don’t Runic it or have 5000+ HP). On the 5th turn, it will hit with Spin (Attack x 6) then attack 3 more times. If a character has been Snorted and Braciosaur annihilates you, you will return to the World Map.
Fighting the Dinosaurs
- Kamui (Snowstorm) will bring the ice age to both dinosaurs for double damage. The attack also cannot be dodged by Brachiosaur and will hit both Tyrannosaurs if you get pincered. The Rage also provides defenses from Disaster. If you don’t have him, Veil Dancer (Blizzara) or Baalzephon (Blizzaga) are your best bets.
- Purusa or Luridan (Rock Slide) or Great Behemoth (Meteor) pierce Brachiosaur’s Defenses and Evasion for direct damage. The latter is weaker but has natural defenses from Disaster.
- Io (Flare Star) will always do 4560 (Tyrannosaur) – 6160 (Brachiosaur) to both dinosaurs. Brachiosaur cannot dodge this. The Debilitator can double this output if needed.
- Stray Cat or Bogy are good physical Rages. The former hits hard against Brachiosaur’s thick skin and the latter has Auto-Protect for Tyrannosaur. Both will need Sniper’s Eye to work on Brachiosaur effectively.
- There are only 4 crowd control methods and 3 require some Dungeons finished first:
- Slow is the only status effect that works on both. This especially helps against Brachiosaur, but you may need to use Flan or Leap Frog (Sticky Goo) to apply it (50 Magic Evasion).
- Rafflesia (Entice) can shut down both dinosaur’s offense and turn it on itself. Fiend Dragon (Northern Cross) is also effective to keeping them frozen. However, both have a difficult time connecting on Brachiosaur due to it’s Magic Evasion.
- Coco (Overture) can turn their physical attacks, Bite and Spins against them, doing significant damage if the attacks land.
- Destroyer (Reraise) and Peeper or Vector Lythos (White Wind) can be invaluable against both beasts.
Once you got at least the Tyrannosaur, head to the Veldt and claim your Rages.
Head to the Veldt and claim your new Rages. It may take some battles to get to your new ones, but try to claim at least the following from your adventures:
- Lycaon (Blaster)
- Tyrannosaur (optional, Meteor)
- Purusa (Rock Slide)
- Greater Mantis (Wind Slash)
You can also claim the entire package with it as well for the achievement lists.
- Leap Frog
- Crawler
- Tumbleweed
- Vasegiatta
- Gloomwind
- Basilisk
- Sprinter
- Brachiosaur
- Slagworm
- Cactuar
From this point onward, it is open sailing for you with Gau to find your friends. I will post my suggested order for getting your teammates back and acquiring the Rages needed to help your team further. You don’t have to follow along but you can use the sections to help find what Rages work where and which Rages you can acquire. I will be writing my Attack Plans based on the Rages available from all parts, but provide suggestions if you don’t. However, I do recommend that you do Part A first as you can get some helpful Rages and a Minerva Bustier for Celes (or Terra if you converted the Regal Gown) to make doing the sidejobs a lot easier.
Walkthrough Part 22A – Kefka’s Tower Quickie
This part of the guide is to help gain some extra beneficial Rages that will allow Gau to have a definitive edge over the enemies throughout the subquests. This part is optional but I recommend you do it if you plan on using Gau a lot to clear the game. Otherwise, save this part for after you complete everything.
- The Great Malboro has the 2nd most Absorptions (absorbs 7 elements) in the Rage List and will help with most elemental attackers.
- You get Firaga before Valigarmanda and Phoenix.
- You get some upgrades to your spells with more resistances and less weaknesses.
- If you can survive a bit with Team 2, you can get a 2nd Minerva Bustier. Including gambling the Regal Gown, you don’t have to compete with Celes and Terra (You get a 3rd later in Yeti’s Cave to remake the Gown).
When you form your party for this, put Gau and 2-3 members on Team 2 and 1 person each on Team 1 and 3. The reason being is Team 2 has the earliest access to the Palace and Caves section, which has the startup Rages you will need. When you spawn in the tower, take Team 2 and head to the 2nd room, this is the Caves. Your mission here is to acquire the 6 monsters in battle, you don’t have to slay them if you don’t want to. But for safety, enter the Caves with Float status.
Enemies
- Great Behemoth (Meteor)
- Vector Lythos (White Wind)
- Great Malboro (Bio)
- Primeval Dragon (Firaga)
- Vector Chimera (Aqua Breath)
- Landworm (Magnitude 8)
Note: If you are a risk taker, you can try to acquire Yojimbo (Shock), Dark Force (Tsunami), Mover (Meltdown) and if you can reach the Gold Dragon’s room, Ahriman (Roulettte) and Cherry (Holy). These Rages are also invaluable, but you will be facing off against some tough enemies and some are big time Death abusers. You will need to abuse Crowd Control to get an edge on them. My Guide will assume you will not go beyond the Scrapyard at this time.
As you can see from the list, I am not kidding. These Rages will help start you up in the end game content easily. Great Behemoth is an upgrade to Behemoth (Meteor) with no weaknesses and many status immunities and can be just as effective as Tyrannosaur in some battles. Vector Lythos is Peeper (White Wind) without the Sap. Great Malboro absorbs EVERY element except Fire at the cost of only 2 status immunities (Blind, Silence) and Primeval Dragon is your 2nd Aga (Gigavolt is Thundaga) without Valigarmanda. Vector Chimera has the same effects as Chimera but you can make Gau invisible and Image him now (Chimera couldn’t be buffed by these) and Landworm is Hill Gigas except trade the weaknesses for one that can be easily eliminated (Ice).
However, to reflect this, the enemies might be a bit brutal. The only easy one is Vector Lythos as all it does is attack and has a chance to do Fireball every 2 turns. This is only a problem if you happen to fight 4 stacked on top of each other and they all begin Fireball spamming.
Great Malboro absorbs everything except Fire and only attacks normally. But the danger comes from a 66% chance to counter any Magic with Infernal Kiss (Instant Kill, bypasses Deathproofing) and uses Bad Breath as a Last Stand every turn (a myraid of status effects to 1 person). Ribbons and other status defenses will help.
Great Behemoth has quite a bit of health, Haymaker (Attack x 3) and has a 33% chance every 2 turns to cast Meteor, doing ~1000 damage to everyone. As a Last Stand, it can counter any attacks with Haymaker by chance. To add to the severity, this monster’s presence prevents your party from Escaping. You must slay this beast first before an attempt can be made.
Primeval Dragon has as much HP as Great Behemoth. The biggest threats it has are Heave (Attack x 5) and Atomic Rays (Fire damage to all party members) if the battle drags too long. It is also prone to using Lifeshaver, which can do upwards as high as 1300 damage.
Landworms abuse the hell out of Magnitude 8 and Hailstone (deals damage equal to 75% of the target’s current health). It can also attack with Constrict (Attack x 2).
Vector Chimeras can get dangerous as they use various elemental attacks: Blaze, Gigavolt, Aqua Breath and Snowstorm to do mass damage to your party, plus fight in pairs. They are also immune to every effective status effect. But to compensate, they got no elemental resistances, weaknesses andonly 7500 HP each.
Fightiing the Enemies
- Chimera (Aqua Breath – Water) or Ninja (Water Scroll) will drown Vector Lythos and severely damage anything that isn’t named Great Malboro.
- Great Malboro isn’t so great against Bomb or Grenade (Blaze), Oversoul (Will O’ The Wisp), Killer Mantis (Metal Cutter) or high powered Lesser Lopros (Fireball) against groups. Both will not trigger an Infernal Kiss as they are all Enemy Abilities, not Magic. Killer Mantis and Oversoul have much protection against Bad Breath.
- Veil Dancer (Blizzara) is your only means of exploiting Primeval Dragon, lone Vector Lythos and Landworm’s weakness to Ice for the time being. At high enough Magic, Blizzara can be as devastating as Blizzaga.
- Black Dragon (Snowstorm) and Darkside (Blizzara), although Undead can not only do double damage to Primeval Dragons, but cause Lifeshaver to work in reverse. However, you will need Fire protection for Atomic Rays.
- Great Behemoth or Vector Chimeras will have to be handled with any of your hardest hitting Rages available. Killer Mantis (Metal Cutter), Behemoth (Meteor), Aspiran (Gigavolt), Marchosias (Aero) or Guard Leader (Wind Slash). Just be careful when using elements with Great Malboros mixed in.
- Stray Cat, Gold Bear or Bogy are also good contenders to fight hand to hand against these beasts. Use Bogy over Stray Cat if your vitals aren’t top notch at the moment.
- Crowd control will be a godsend if you resort to that fighting style, especially Stop:
- Death via Mu (Snare), Lycaon (Blaster) or Skeletal Horror (Banish) – Great Malboro, Landworm
- Petrify via Deepeye (Dread Gaze) – All except Great Behemoth and Vector Chimera
- Stop via Murussu (Stop) or Gloomwind (Net) – All except Vector Chimera and Lythos
- Imp can shut down Primeval Dragon and Great Malboro spells and counters.
- Confusion can cause Great Malboros to Bad Breath or Snort their own comrades with a 25% chance to use either one. Snort helps against Great Behemoths.
- Platinum Dragon or Briareus (Cyclonic) can make Great Malboro groups mangable to stop Bad Breath Last Stands. It also doesn’t trigger Infernal Kiss counters.
- If you think the magic attacks are going to be a problem, Use Peeper (White Wind) to keep the party healthy before and after these attacks. Destroyer (Reraise) and General (Cura) also help. Use General if you fight Vector Chimera as it has 2 moves that can cripple Gau hard under Peeper (Snowstorm and Aqua Breath).
Once your objective is complete, switch to any team and return to the ship via the crane or cast Teleport if you have learned it. Then acquire the Bolded Rages.
Walkthrough Part 22B – Reclaiming Terra
In this section, you will reclaim Terra (and the Fenrir Magicite if you didn’t come here).
- She is the next easiest character to claim and most players have fine tuned her stats quite a bit.
- Her Magic stat is invaluable if you don’t like using Celes and Trance jacks up her strength.
- With the Rages you own now, Gau can easily trash Humbaba, together with a Morphed Terra.
Note: If you didn’t visit Mobliz yet, you must do the first part before you can come here. Simply enter town, play the events and then walk out. You will get Fenrir if you haven’t done so here.
With the Airship, head back inside and you will find out Humbaba has come to dine on manflesh once more. Your team will have to stop him as Terra is still too sad to help you again.
Humbaba
Humbaba will attack primarily with Thundara and Thundaga, which Runic can intercept.
He can also use Solar Plexus (Attack x 3). He has a 33% chance to attack with this every 1st and 3rd turn in his attack loop. On his 3rd attack, he can also hit with 1000 Needles.
In the 3rd battle, he will eject 2 random party members at half health and the battle ends. Make sure that every character is able to adapt to the party changes.
In the 4th battle, Terra joins with the 2 remaining characters and leads an assault to slay the beast herself. She will be Morphed for this fight and finally have equipment (taken from Optimal) to slay the beast and her Trance never ends. The only difference here with Humbaba is he has a 33% chance to counter any damage with Thundara.
- If Gau learned Hastega from Queztalli and/or has Zona Seeker, use these first before you Rage. Hastega will allow you to attack faster and Zona Seeker will halve the incoming Lightning.
- If you have any Thunder Shields in your inventory, it would be wise to equip them on as many people as you can.
- Great Malboro (Bio) is Humbaba’s worst nightmare. Not only does Bio do double damage, but all of Humbaba’s Lightning will be naturally absorbed. You can also use Trillium or Magna Roader Purple (Bio) if you didn’t go to Kefka’s Tower.
- If you rely on Celes’ Runic, then Adamankary (Acid Rain) can still do Poison damage without it being stopped.
- If you have gone to Zone Eater’s Belly and acquired Baalzephon (Blizzaga), this Rage can strike at Humbaba for normal damage and also absorbs Lightning.
- Stray Cat, Gold Bear or Bogy can be potent against this boss if Gau built up Strength. Bogy can halve any incoming Solar Plexus attacks with Protect. If you are using Rage Gogo, make sure he has a Poison Rod equipped before doing so.
- For non elemental magic, Killer Mantis (Metal Cutter), Purusa (Rock Slide), Tyrannosaur (Meteor) can hit for heavy damage.
- If Solar Plexus is becoming a problem, you can use Luna Wolf (Face Chomp) or Edgar’s Flash to Blind him, adding a 25% miss chance to the move, set up Protect or summon Fenrir.
- Destroyer (Reraise) and Desert Hare or General (Cura) can help keep Terra alive. The former also absorbs Lightning, has Protect status and Reraise can bring back KO’ed people. Desert Hare is a fast healer while General can halve incoming Solar Plexus attacks. Both of these are helpful in LLPs.
Once Humbaba has been slain, Terra will rejoin your cause and Fenrir will be yours if you haven’t gotten it already.
Walkthrough Part 22C – Zone Eater’s Belly
This section is to help acquire Gogo, a useful piece of equipment and some very dangerous Rages to use against the rest of the enemies.
- Gogo is the most adaptable character on the team. All of his commands can be modified to do whatever you wish. Mimic is his personal command and he cannot use Espers.
- Gogo can be your earliest and easiest form of Lore, Steal and Sketch at this time.
- You can teach him Rage and have a second Gau at your disposal. Having Gogo as a second Rager has many advantages.
- There are quite a few Rages here, two of them are Agas (Baalzephon and Shambling Corpse) before Valigarmanda and 1 of them has 6 absorptions (Baalzephon).
- You get a Thunder Shield here, which lets any Rage become immune to Wind and Absorb Lightning if they cannot do so.
- You get a Genji Armor here. This armor will augment a few of your characters, making them better Gau supporters.
- For your other teammates, you get Fake Moustache (allows Relm to mind control) and Red Jacket (improves Sabin and Edgar’s stats and nullifies Fire).
Head to Triangle Island (north of Veldt, island shaped like a Triangle) and land on the sole island. Then get attacked by a Zone Eater, a giant sand worm monster. Every turn, it has a 66% chance to Inhale a party member. It also has a 33% chance of doing this when struck with Magic. Have all 4 party members get eaten to enter the dungeon. The worm itself is incapable of killing your party as the only damaging attack it has is Gravity, which does 0 on Deathproof characters or people with 1 HP left. If anyone takes damage during the devouring process, save the healing for after you enter the Belly.
Enemies
- Baalzephon (Blizzaga)
- Covert (Wind Slash)
- Shambling Corpse (Thundaga)
- Amduscias (Slowga)
- Wartpuck (Rasp)
- Kamui (Snowstorm)
For Rages, Baalzephon, Kamui and Covert are the primary reasons we are here. Baalzephon is the best Ice Rage in the game and has absorptions to 6 elements (takes normal from Holy and weak against Fire) or 7 if you get a Flame Shield on. Covert is an alternative Wind Rage if you are facing Poison or Wind attackers (Guard Leader and Marchosias respectively). Kamui has 4x the hitting power of the first Snowstorm you got from Megalodoth or Gorgias.
The enemies can range from dangerous to incredibly annoying based on your tactics and strength.
Every enemy has some form of counter attack when struck in some fashion and employs a status effect against you. It can become an issue when these monsters mix and match with each oither as some status combos (like Berserk and Imp) can make life hazardous.
- Kamui uses Zombie attacks rapidly and counters any attack with physicals and Bio if Magic.
- Amduscias can Confuse and throws weapons if she is hit with Thrown weapons.
- Wartpuck employs Sleep and can eject players with Snort when struck. Unlike the previous abusers, this frog is Stopproof, but not Sleep or Stoneproof.
- Baalzephon uses Berserk only and only attacks when you attack it normally. This beast also absorbs 6 elements and only takes damage from Holy and Fire.
The worst threats are Shambling Corpse and Covert. Shambling Corpse can Imp with Figaro Melt and will counter any physical with Lifeshaver. Any magic will be countered with Thundaga, Break or Flare with 33% equal chance of using any spell instead. The Coverts can throw all 3 elemental scrolls and will throw Shurikens if hit with a Throwing weapon. If struck physically, they can cloak themselves. You also cannot run away from Coverts until they are all slain.
Fighting the Enemies
- Templar (Fira) and Primeval Dragon (Firaga) can roast Wartpuck, Baalzephon and Shambling Corpse with ease if your Magic is high enough. If you wish to avoid Shambling Corpse counters, either Silence them or use Bomb or Grenade (Blaze) and Devilfist or Oversoul (Will O’ The Wisp) instead.
- Great Malboro, Trillium and Magna Roader Purple (Bio) or Adamankary (Acid Rain) can slay or cripple Amduscias and Kamuis. If Kamui is with any Poison absorbers, exploit their Lightning weakness with Cloud (Thundara) and Aspiran, Anemone or Illuyankas (Gigavolt).
- With a Flame Shield on, you can use Aspiran or Anemone against Coverts with minimal risks. Aspiran only takes damage from Flame Scrolls while Anemone will absorb everything under these conditions.
- Another option to destroy Shambling Corpses is to use Borghese (Holy). If Gau (or Gogo) hit it physically, Lifeshaver works in reverse. If you have Fire protection, you can also use this Rage or Warlock (Holy) to smite Coverts and everything else.
- Chimera (Aqua Breath) and Marchosias (Aero) also levels any monster not named Baalzephon. Both have status immunities that will protect you from various monsters here.
- Killer Mantis or Twinscythe (Metal Cutter), Purusa or Luridan (Rock Slide), Behemoth or Tyrannosaur (Meteor) can be used your weakness spells aren’t cutting it. These moves don’t trigger as Magic counters but you will need Fire Protection for the Metal Cutter rages.
- Stray Cat, Gold Bear, Bogy or Garm (status resistance) are good physical non-elemental Rages. Their special attacks don’t trigger Attack based counters either.
- Crowd control is a bit all over the place, but the following effects will work on each monster
- Death via Mu, Lycaon and Skeletal Horror: Baalzephon and Amduscias
- Stop via Murussu (Stop) or Gloomwind (Net): All except Wartpuck (Sleep works instead).
- Petrify via Deepeye (Dread Gaze): Shambling Corpse and Wartpuck
- If you wish to play it safe, General or Desert Hare (Cura), Peeper or Vector Lythos (White Wind), or Destroyer (Reraise) can keep party members alive. Destroyer can absorb Lightning from Shambling Corpses.
Once you got Gogo on your team, get him going however you wish. If you wish to bring him along for Raging, you can start making more options.
Walkthrough Part 22D – Cave on the Veldt
This section will help you fight the enemies in the Cave on the Veldt. It is located along the left side of the Veldt land mass.
Note: You either get the prerequisite to get Shadow or Relm back here. If you didn’t stop for Shadow in the Floating Continent, Relm will be here and you must do this location first before you can access Owzer’s Mansion. If you did save Shadow, Shadow will be here and then you can claim him at the Coliseum when you are done.
- Ichigeki can be found here. If Shadow was spared, you can get him back immediately after.
- Twinscythe (Metal Cutter) one of the best Rages to fight Deathgaze with. It is Deathproof and absorbs Ice without gimmicks if you want early Bahamut.
- If you never went to Kefka’s Tower (see 22A), Behemoth King (Undead) is a Firaga alternative. It also drops 2 Behemoth Suits, good armor for Relm and Strago. You can sacrifice one at the Coliseum to make a Snow Scarf, Gau and Mog’s ultimate armor.
- The Monster-in-a-Box here has Tiger Fangs for Sabin if you use him with Gau. This is his ultimate weapon until Godhand from Dragon’s Den.
Enemies:
- Twinscythe (Metal Cutter)
- Gorgimera (Avalanche)
- Death Warden (Monster-in-a-Box, Quake)
- King Behemoth (Boss)
- King Behemoth (Undead) (Boss, Firaga)
Note: Because of a programming error, Death Warden doesn’t appear in the Veldt when you slay him inside the Box. However, if you fight him in the Soul Shrine, he will be added to the card. So you will need to beat the game first to get all 253 Rages.
Twinscythe is Killer Mantis but can absorb Ice and can be effective at fighting Deathgaze if you want him early. Gorgimera is also effective if you don’t have Kamui (Snowstorm II) yet.
Gorgimera is pretty harmless, but if you fail to kill it within 4 moves (it also has a 33% chance to skip a move), it goes on a Rampage and begins slamming you with a combination of Fireball, Gigavolt, Snowstorm, Aqua Breath and Magnitude 8. Slay him or Crowd Control him before then.
Death Warden likes to spam Death, Doom and Death attacks. Without Deathproofing, this fight can be a problem. If you fail to slay this boss in 60 seconds, he casts 6 Atomic Rays in a row.
Twinscythe is no Great Mantis and easily falls to most Fire and Wind attacks. You will just have to put up with Draining Sickle (drain attack).
Fighting the Enemies
- Twinscythe falls to Bomb or Grenade (Blaze), Templar (Fira), Devil Fist (Will O’ The Wisp) or Primeval Dragon (Firaga) with ease. Lich (Fira) and Oversoul (Will O’ The Wisp) can also be used to make Draining Sickle work in reverse.
- Marchosias or Sprinter (Aero), Guard Leader or Covert (Wind Slash if surrounded) can attack Twinscythe’s 2nd weakness to Wind if needed.
- For Death Warden, use any hard hitting Undead or Deathproof Rage available. Borghese (Holy) or Lich (Fira) can strike at his weaknesses and be fully healed by his Death attacks. Lich has the added bonus of absorbing Atomic Rays. Devil Fist (Will O’ the Wisp) and Primeval Dragon (Firaga) are Deathproof.
- Use you hardest hitting attacks against Gorgimera as it has no weaknesses. Killer Mantis (Metal Cutter), Ninja (Water Scroll), Behemoth or Tyrannosaur (Meteor), Marchosias or Sprinter (Aero) or any of the Twinscythe counters are viable options. Just slay him before he goes on a Rampage.
- Stray Cat, Gold Bear, Bogy or Garm (Deathproof) can easily ransack the Cave with physical force. Gogo should be equipped with the Flame Rod as it does double damage to Death Warden and Twinscythe. The Gladius is also another option.
- Crowd Control can be helpful here:
- The normal enemies are not Stopproof: Murussu (Stop) or Gloomwind (Net) work wonders, especially if you pull this off before Gorgimera goes on a Rampage or Death Warden begins attacking.
- The Death Warden isn’t Deathproof or Stoneproof. Mu (Snare), Skeletal Horror (Banish) or Deepeye (Dread Gaze) are the only ones who can OHKO this trap monster. Skeletal Horror has the added bonus of absorbing Death Warden’s Death attacks.
The Behemoth King has 2 Phases. It is also a simple boss that even fresh World of Ruin players can defeat.
First Phase
It uses Blizzara, Blizzaga and Holy spells as it’s main form of offense. However, it does have some… interesting tricks.
If under Imp, it will attack twice per turn (which the attack will always Critical Hit) and then remove the Imp off himself back to Beast mode.
If you try to keep yourself safe via Reflect (which is ill advised for it absorbs Ice), it will counter attack with Devil Claw and shatter the barrier.
If you also hit it with any form of Magic, it will counter attack with the monster Meteor, which does 1100 damage and will bypass any Magic Defenses or Shell you have. If your vitals are low, refrain from using Sorcery or be ready to immediately Cura(ga) your entire party.
Second Phase
Once slain,, your team will be back attacked as the beast ambushes you as an Undead monstrosity. It drops the Ice Absorption for Poison Absorption and gains a Holy weakness with the Fire it already had.
In this form, it casts Death and Sleeping Gas. The latter can be a problem as if anyone is asleep, the King will attack 4 times back to back to make that Sleep permanent (as in dead).
When using Gau, you must use a Rage that will work on both forms. When the living form is slain, Gau will maintain his current Rage.
- Bomb or Grenade (Blaze), Lesser Lopros (Fireball) and Devil Fist (Will O’ the Wisp) will do Fire damage and not trigger Meteor counters. The former 2 need Ice protection and the latter 2 are Deathproof. Oversoul (Will O’ the Wisp) although Undead, has a Holy weakness.
- If you must use Magic, Primeval Dragon (Firaga), Templar (Fira) or Warlock (Holy) can also work, but you must immediately do a Cura all after the cast for the Meteor. Do not use Black Magic Rages if your max HP is less than 1500.
- If you went outside and got Twinscythe (Metal Cutter), you can do unrestricted non elemental damage, have Ice protection, Deathproofing for the Undead Form and won’t trigger Meteor.
- Killer Mantis (Metal Cutter), Marchosias (Aero), and Chimera (Aqua Breath) also do reliable damage and have no exploitable weaknesses in both forms. None of these spells will trigger Meteor either.
- If you want an easy wins. Crowd control helps.
- Living – it can be stopped with Murussu (Stop) or Acrophies (Numbclaw) without worrying about weaknesses. You can also Imp this form to prevent it from using Magic and Meteor counters, but it will always critical hit with his physicals.
- Undead – Mu (Snare), Skeletal Horror (Banish), Lycaon (Blaster) or Deepeye (Dread Gaze) can OHKO without using Phoenix Downs.
- Stray Cat, Bogy, Gold Bear, Garm and Leaf Bunny can be effective for Strength Gaus. Leaf Bunny naturally absorbs Ice, Bogy’s Auto-Protect can cut down the physical damage and Garm is Death and Sleepproof, but you will need to watch for Holy attacks. Gogo should use the Gladius if you have it. Otherwise, use the Flame and Holy Rods, but be ready for Meteor counters (spells triggered by weapons count as Magic).
Once the Behemoth King has fallen, claim your Behemoth Suits (Strago and Relm’s Ultimate Armor) and head over to Relm or Shadow. If you found Shadow here, go to the Dragon Neck Colisseum and reclaim him with the Ichigeki wager. If you found Relm here instead, go to Owzer’s Mansion and reclaim her there.
Walkthrough Part 22E – Owzer’s Mansion (Part 1)
This section will help you combat the enemies in Owzer’s Mansion. This place is located in the back of Jidoor.
Note: You will reclaim Relm here. If you didn’t spare Shadow, you will have to go through the Cave of the Veldt before she comes here. Check Section 22D of the walkthrough to survive there. She is required to get Strago back from the Cultist’s Tower and access Ebot’s Rock.
- You will be able to secure Relm’s aid for the rest of the game.
- With her in the party, you can get Strago back earlier and access Ebot’s Rock.
- You can get one of the most underhanded and diabolical Rages available: Rafflesia. Once it is in the Veldt, you can also steal the Nutkin Suit, which is 1 step away from making Genji Armors (the best armor in the main game for your other characters) in the Coliseum.
- Every enemy has a chance to steal Suits to help get to the Nutkin Suit if needed. Bring Locke and/or Gogo to steal them.
- You get the Lich Ring here. This allows Gau to apply Undead status to any Rage, which has potential if you fight Doom and Death abusers.
- You get the Lakshmi Magicite from Owzer when finished. This will allow your teammates to cast Curaga, cutting down on the use of your Cure-based Rages to mass heal.
Head to Jidoor and go to the mansion in the back of the town. You will find that Owzer the Hutt has hired a painter to create a protrait of the Esper, Lakshmi, but you will find out the house is possessed by all kinds of evil.
Enemies
- Rafflesia (Flower Painting, Entice)
- Misty (Woman Painting, Cura)
- Caladarius (Acid Rain)
- Blade Dancer (Osmose)
- Crusher (Lifeshaver)
- Coeurl Cat (Blaster)
- Still Life (Suit of Armor Painting, Lullaby)
- Chadarnook (Boss)
WARNING: You must interact with the flower painting in the first room in order to be attacked by Rafflesia. This must be done before you slay Chadarnook inside the Mansion. Failure to do so will prevent Rafflesia from appearing in the Veldt. The rest of the paintings are forced encounters as you need to do them to progress.
The main reason we are here is obvious: Rafflesia. Entice bypasses Confuseproofing and cannot be snapped out of unless the caster or target are killed. This can make bosses or 1 monster fights ridiculously simple to handle. Still Life is also decent if you want to mass Sleep an enemy party that is Stopproof but not Sleepproof (I tend to use Stop since Sleep is too easy to break with Gau). The rest just open up extra options.
The enemies themselves utilize some underhanded tricks that can spell your doom if you are not careful. Be ready for them!
Rafflesia can be dangerous if it Entices your best attackers, especially if Gau is already Raging something. This is also amplified by the fact you face 3 at once and there is still a chance all 3 can Entice on Turn 1. Either slay the Enticed character or slay the monster to break them free.
Misty hampers your ability to fight with Eyeshadow (Blind) and Silence. She also uses Blizzara and Thundara to inflict damage. If struck, she may heal your party members. Celes can stop most of her offense with Runic.
Blade Dancer can toss weaponry at you, which gets progressively worse as the battle drags. If struck with anything, she has a chane to steal HP from you with Blood Dance.
Stil Life when struck with anything will cast Doom. They can also mass sleep your party with Lullaby to drag the fight.
Coeurl Cat, Crusher and Caladarius are extremely frail but have Last Stands.
- Coeurl Cat can cast Fireball every turn it makes
- Crusher will use Lifeshaver if struck with anything
- Caladrius will begin Petrifying characters with Beak
Fighting the Enemies
- Fire is extremely brutal in this area! Templar or Lich (Fira, latter absorbs Doom from Still Life), Bomb or Grenade (Blaze), Devil Fist or Oversoul (Will O’ the Wisp, former is Deathproof, latter absorbs Doom) and Primeval Dragon (Firaga) can wipe out all opposition either by weakness or normal damage.
- Prioritize over Lesser Lopros when fighting large groups as most enemies in this dungeon have low health. Use the more stronger Fire rages against single targets.
- Misty and Blade Dancer fall to Trillium, Magna Roader Purple or Great Malboro (Bio). The latter of the three is recommended as Misty’s magic is completely helpless to this Rage (Absorbs both elements and is immune to both status effects).
- If you plan of fighting Rafflesia, try to use your more weaker Rages. Powerful attacks like Metal Cutter and Aero may spell your doom if Gau gets Enticed.
- Behemoth, Great Behemoth and Tyrannosaur (Meteor), Marchosais (Aero), Guard Leader, Great Mantis or Covert (Wind Slash) and Ninja (Water Scroll) can mass eliminate large groups as well. Great Behemoth, Tyrannosaur, Twinscythe or Killer Mantis (Metal Cutter) are Doomproof for Still Life.
- Stray Cat, Bogy and Gold Bear can lay waste to these frail enemies. Gogo should use either the Flame Rod or Poison Rod before going into Rage mode. You can also use Garm if you need Doomproofing for Still Life.
- Crowd Control is a bit limited here, so you are better off slaying these enemies by damage.
- Death via Mu (Snare), Lycaon (Blaster) and Skeletal Horror (Banish): Coeurl Cat, Caladrius
- Petrify via Deepeye (Dread Gaze): Coeurl Cat, Caladrius
- Stop via Murussu (Stop) or Gloomwind (Net): Coeurl Cat, Blade Dancer, Caladrius.
- Caladrius can be Confused to turn Beak or Acid Rain on it’s comrades.
- Blade Dancer can turn on her friends with Fira and Drain.
- Briareus and Platinum Dragon (Cyclonic) isn’t 100% necessary since the two enemies affected have very low HP.
Chadarnook is a severe threat to Gau players because of the mechanics it employs. It comes in two forms: A woman and the demon.
Woman Form
The Woman Form takes a page out of Rafflesia and Still Life and employs their status attacks against you (Sleep via Lullaby, Doom via Last Kiss and Entice). If struck with anything, it has a chance to inflict Poltergeist, which inflicts mass Sap and bypasses Sapproofing.. If slain, it will restore itself back to full life. Every 1-3 attacks, it swaps into the Demon form. It has no real damage dealing attacks outside of these moves.
Demon Form
The demon fights more directly. It utilizes Thundara and Thundaga along with physical attacks against you. As the Demon takes more damage, it will begin using Flash Rain, which deals Water and Ice damage to your entire party. If slain, this boss is destroyed. If either the Demon form takes 4 hits or 40 seconds have been elapsed as a Demon, it is replaced with the Woman. However, any damage dealt to the Demon is permanent.
Battle Tactics are covered in the next section.
Walkthrough Part 22E – Owzer’s Mansion (Part 2)
Fighting this Boss
- If Gau or Gogo Rage this battle, you must try to Run while the Woman is out. You cannot run away but this stops your Ragers from attacking the Woman. Once the Demon starts coming, stop running and unleash your fury. Unfortunately, this also makes your party helpless if Woman does attack, but it is a small price to pay to avoid her counters. Immediately initiate healing or cleansing while the Woman and Demon swap places.
- In the event Gau or Gogo become Enticed or if you fear it will happen, pick an elemental Rage that your party has resistance or absorption too. If Gau or Gogo refuse to help, you might as well make them heal you by force. Your alternative is to kill them with Death or 0 HP. Your best element to do this with is Fire (does double to Demon and easily canceled by Flame Shields. Flash rain will still do half damage due to Ice resistance).
- Once the Demon form appears, smite it with Templar (Fira), Devil Fist (Will O’ The Wisp, Auto-Haste), Bomb or Grenade (Blaze) and Primeval Dragon (Firaga). The last 2 will need Ice protection to cut down on Flash Rain damage.
- Io (Flare Star, wear Force Shield) always does 6560 damage to Demon. No status effects except Phantasm and Entice will work on Io. This, along with Fafnir or Crawler (Traveler) are good attacks for LLPs.
- Borghese or Warlock (Holy, latter needs a Thunder Shield) can strike at the boss’ second weakness to Holy. Note that Borghese can only be healed by Bio and Death as Gau or Gogo go Undead.
- Anemone (Gigavolt), Great Malboro (Bio) and Baalzephon (Blizzaga) can all do full damage and absorb all of Chadarnook’s elemental attacks.
- Stray Cat, Gold Bear and Bogy can hit Chadarnook hard. Gogo should use the Holy or Fire Rod or Gladius for full
- If your Magic Power is high enough between your party, Rasp and Wartpuck (Rasp) can directly attack Demon’s MP supply of 7600. When depleted, the boss is slain as it has MP 0 = Death.
- If you want to shut down Chadarnook’s swapping, Rafflesia (Entice) can be used against the Demon form to shut down it’s swap scripts. This also causes it to attack itself.
After the painting has been purified, Owzer the Hutt will give you his Lakshmi Magicite and Relm will rejoin the cause. You can then fly to Cultist Tower and reclaim Strago if she is in your party.
Walkthrough Part 22F – Phoenix Cave
This section will show you how to utilize Gau in the Pheonix Cave. Note you will have your party split in 2, so make sure you get 6-8 characters back before you attempt this dungeon.
The dungeon is located northwest of Tzen in the mountains. There is a small grass patch in the center of the mountains. You land your ship here to access Phoenix Cave.
Note: At the end of this part, Locke will rejoin your cause.
Note: The Red Dragon, one of the 8 Dragons lives here. See the boss section on how to combat him with Gau.
Note: If use utilize Rage in your strategies, it is recommended to get Gogo before coming here so you can have 2 Ragers across both teams. Check Section 22C (Zone Eater’s Belly) on how to acquire him.
- You get Locke back sooner. Which allows you to begin Stealing from enemies without the need to use Gogo.
- Locke can pick the locks in Narshe, allowing you to acquire the Ragnarok Esper for Morphing and Cursed Shield for unsealing
- You get the Phoenix Magicite, which teaches you Arise and Reraise. This helps Gau cut on the use of Destroyer (Reraise) in battle. It also allows your teammates to learn Firaga without Valigarmandr’s help.
- You get another Ribbon. This helps Gau and the other characters make up for Status Immunities.
- You get the Dragon Horn here. Combined with the Dragoon Boots, you can do insanely powerful Jump builds.
- You get the Wind Edge here. This weapon is Locke’s most devastating Boomerang Attack wise, buffs all his stats (primarily Speed and Strength by 7) and has a 25% chance to instant kill targets.
- If you slay the Red Dragon, he drops the Murakumo, one of Cyan’s most powerful weapons.
Upon entering Phoenix Cave, put Gau in one party of 3 or 4 and Gogo (if you have him) in another party of 3 or 4. This will allow you to utilize Rages in both parties. Only combine their powers if you are going to take the Red Dragon’s head.
Enemies
- Clymenus (Fira)
- Face (1000 Needles)
- Necromancer (Death)
- Chaos Dragon (Disaster)
- Zeveak (Flash Rain)
- Galypdes (Cyclonic)
- Ouroboros (Water Floor Only, Quake)
- Seaflower (Water Floor Only, Sleep)
- Red Dragon (Boss – See Boss Section)
Zeveak (Flash Rain) is helpful as it does both Water and Ice damage. An elemental shield or Snow Scarf can cancel the Ice weakness. When used correctly, it can waste groups of Water and Ice weak enemies with little fuss. Clymenus has more status resistance than any of the Fira users. Chaos Dragon is a safer to learn version of Disaster. Other than that, you got better Rages to serve these roles.
This area is a hit and miss with difficulty. Some enemies are incredibly dangerous while others are incredibly easy to fend off. The biggest threats lie in the gimmicks some monsters have, especially from Chaos Dragons and Necromancers. It is also worth noting that all enemies not named Clymenus absorb Fire here.
Necromancers are incredibly brutal on Last Stand. Every turn, they will try to slay party members with Banish or Death and will attack with Flare. With others, they will try to Zombify your party members. This can be an issue if they are paired with Zeveaks (cause Confusion and call down Flash Rain) or Faces (Can fire off 1000 Needles alone or inflict Stop in groups). Faces also prevent you from running away from battle.
Chaos Dragons rarely attack at all, but when they do, you feel it. Incinerate bypasses Deathproofing for an instant killer and Disaster puts a load of awful status effects across your own teammates.
Clymenus are tricky. It has Auto Reflect and will strike at your party by bouncing Fire magic off itself. If it sees you have Reflect up, it will bounce buff and healing spells of them and support it’s allies. It is also one of the few enemies in the game to absorb Holy.
Galypdes can use Cyclonic at random, leaving your team in a bad spot. Luckily, it is only paired with Chaos Dragons, which rarely attack. However, Disaster can cause Confusion and Galypdes has it’s own melee attacks, so don’t count out the threat. It can also counter attack any damage dealt to it with Shamshir (halves HP). This encounter is also one of the most rarest in the game.
Seaflowers and Ouroborus aren’t threatening. Ouroboros has heavy defenses.
Fighting the Enemies
- Everything that isn’t Clymenus is weak against Ice, Baalzephon (Blizzaga), Veil Dancer (Blizzara), Test Rider (Flash Rain), Kamui (Snowstorm) and Gorgimera (Avalanche) can lay waste to mostly any enemy here. Flash Rain, Snowstorm and Avalanche are the only Ice moves that can pierce Clymenus’ Reflect. Gorgimera is also Deathproof.
- Seaflower and Face also get struck hard by Aspiran (Gigavolt)
- Borghese and Warlock (Holy) are effective at smiting Necromancers and doing full damage to everything else. The former absorbs Death, but not Banish and the latter is Deathproof to both. Be careful when using these Rages around Clymenus.
- Tyrannosaur (Meteor), Chimera (Aqua Breath), Gorgimera (Avalanche), Ninja (Water Scroll), Marchosias (Aero) and Covert (Wind Slash) can handle groups of Clymenus without having to worry about their Fire attacks or Reflect nonsense. The Wind and non-elemental attacks can also be used against other enemies as well. All but Ninja are Deathproof as well.
- Ouroboros can be slaughtered by Fafnir or Crawler (Traveler), Purusa (Rock Slde) and Tyrannosaur (Meteor) as these attacks bypass the heavy Magic Defenses it has. The last of the 3 also shreds the allies and is Deathproof.
- Stray Cat, Bogy, Gold Bear and Garm (Status immunities) can devastate everything here. They are especially handy as one doesn’t need to worry about Clymenus’ Reflect to harm them.
- If Gogo melee Rages a Clymenus, use the Magus Rod or Swordbreaker as the spell effects will bounce off Reflect and hit your team. The Gladius is also ill advised against this monster. On everything else, do it with Ice, Thunder or Holy Rods and Gladius.
- Crowd Control can be effective here, considering the annoyances these enemies can provide.
- Death via Mu (Snare), Lycaon (Blaster) or Skeletal Horror (Banish): Seaflower, Ouroboros, Zeveak, Necromancer
- Petrify via Deepeye (Dread Gaze): Seaflower, Clymenus
- Stop via Murussu (Stop) or Gloomwind (Net): Everything except Clymenus and Zeveak.
- Confusing Zeveak (Flash Rain, El Nino) and Necromancer (Death, Flare, Banish) can make fights easier. Just be aware of Death and Flare being affected by Reflect.
- General (Cura) and Destroyer (Reraise) can help against more annoying enemies. Do not use Peeper or Vector Lythos (White Wind) if there is a Zeveak on the field as both take double from Water and Ice.
Once you meet up with Locke, he will leave and head back to Kohlingen. Meet up with him there and Rachel’s soul will repair the cracked Phoenix Magicite. After this, Locke will rejoin your cause and you can then bring him to pick the locks on the houses in Narshe. You can then begin unsealing the Cursed Shield and acquire the Ragnarok Sword (Can be traded at the Coliseum for the Lightbringer) or Esper (Teaches Ultima and morphs enemies into Items).
Walkthrough Part 22G – Mount Zozo
This part will show you how to effectively combat the enemies up on Mount Zozo. To get access here, head to Zozo and there will be a man who will sell Rust-Rid for 1000 Gil. Purchase it and then clmb up the building marked Pub. At the end is a door that was formally locked due to rust, which can now be fixed using the Rust-Rid you just purchased.
WARNING: The man will also warn you that everything on this mountain has ridiculous Evasion stats, upwards as high as 150. This will make physical attacks outside of Ultima Weapon and abilities completely miss. If you plan on bringing Gau or Rage Gogo here, equip them with the Sniper’s Eye. You should have 1 from the Phantom Train long ago. The other option is use Magic Rages.
- You get Cyan back here. Once you have him, you can head to Doma Castle and do his Dreamscape to acquire Masamune, all his Bushidos and Alexander, which teaches your party Holy.
- Devilfist and Punisher are very deadly Rages to help with World of Ruin.
- You get a Thunder and Ice Shield, which will allow you to compensate for various weaknesses in the Rages you use.
- You get an Aegis Shield, which basically turns Gau or anyone into a Magic tank.
- You get a Red Hat here, a very effective helmet based armor for Gau and your other characters.
- You fight Storm Dragon here, one of the 8 dragons. However, he drops nothing.
- If you didn’t bring Mog to the Floating Continent, this is the only place to teach him the Earth Blues (cliffs).
Enemies
- Mugbear (Net)
- Punisher (Thundaga)
- Glasya Labolas (Revenge Blast)
- Devil Fist (Cliffs Only, Will O’ The Wisp)
- Luridan (Cliffs Only, Rock Slide)
- Storm Dragon – (Boss, see WoR Bosses Section)
There are 3 good Rages here. Punisher gives you Thundaga if you haven’t gotten Valigarmandr yet and Devil Fist is basically Oversoul without the Undead typing. Both of them come with the amazing Auto-Haste effect so you can spam these attacks frequently and gain Slowproofing. Luridan is one of the two Rock Slide users and has more status defenses than Purusa does, but you will need a Thunder Shield to cancel it’s weaknesses.
The enemies aren’t too threatening, but as stated in the Warning, if you don’t have a Sniper’s Eye, you are better off using Magic or unblockable attacks. The only enemy that doesn’t have high evasion is Luridan, but he makes up for it with heavy Physical Defenses instead.
Mugbear and Punisher can rob Gil from you. The latter only does it if you try to steal a Rising Sun from him. Make sure you kill them before they flee next turn to reclaim your Gil.
Glasya Labolas is the only real physical threat here. Uppercut (Attack x 5) can hit like a bus, especially if you come here the moment you get the Falcon.
Fighting the Enemies
- Adamankary (Acid Rain), Trillium, Magna Roader Purple or Great Malboro (Bio) can punish anything here not named Devil Fist (absorbs it). Plus, no amount of Physical evasion can dodge these moves.
- Templar (Fira), Grenade or Bomb (Blaze) or Primeval Dragon (Firaga) can lay waste to Mugbears and Luridans as they are weak against Fire. Lesser Lopros (Fireball) also helps handle Luridan groups if Gau’s Magic is high enough.
- Other options for wasting groups includes Marchosias (Aero), Ninja (Water Scroll), Zeveak (Flash Rain), Tyrannosaur or Behemoth (Meteor), Gorgimera (Avalanche) and Chimera (Aqua Breath). These attacks are unrestricted here by strengths or weaknesses for good solid damage.
- Do not use Stray Cat, Bogy or Gold Bear if you don’t have a Sniper’s Eye. Gogo should be armed with a Flame Rod or Poison Rod before going into these Rages. Just be careful with the latter if Devil Fists get mixed in the groups.
- Crowd Control can help you with the thieves and Labolas when needed:
- Death via Mu (Snare), Lycaon (Blaster) or Skeletal Horror (Banish): Punisher, Mugbear and Luridan
- Petrify via Deepeye (Dread Gaze): All except Devil Fist
- Stop via Murussu (Stop) or Gloomwind (Net): All except Punisher
Once you get to Cyan’s house in the mountains, talk to him, see what he has been doing over the last year and he will rejoin your cause. You can then head to Doma Castle for the Dreamscape Sequence.
Walkthrough Part 22H – Doma Castle and Dreamscape (Part 1)
This part of the guide will show you how to combat through Doma Castle and the Dreamscape. You must complete the events at Mount Zozo and have Cyan in your party in order to do this part. I would also recommend completing the Phoenix Cave, have the Ragonarok Esper and acquired Gogo from the Zone Eater’s Belly before doing this part.
Note: This area has valuable Morphs for the player. This is why I suggested bringing Ragnarok and Gogo can do repeating casts should it fail via Mimic. You can make Ribbons from Coco and Pandora, Genji Gloves from Samurai and Safety Bits from Alluring Rider. All enemies here have no Stealables.
Note: Terra can be helpful here. There is a portion where you forced to ride Magitek Armor and having Terra in the party will have access to her full attacks from the Narshe Invasion. This is especially helpful for Magitek Missile and Banisher. Gogo will also be able to use her expanded Magitek pool if they are together. Note that Gau and Rage Gogo cannot do Rages while on Magitek units, but you can still call Ragnarok to Morph or use Magic if Magitek is too slow for you.
Note: An enemy called Alluring Rider is the easiest source of Lv? Holy. If you wish to acquire it, bring Strago here.
WARNING: Your party will be split up, with your 3rd character being alone until you reclaim your teammates. I recommend putting your Ragnarok on Character 3 and put Cyan on Character 4. This way, you can begin Morphing right away. If you wish to begin Raging off the bat, Gau or Gogo should go here. Make sure your characters can handle solo fights!
WARNING: The Dreamscape is a one time pass. Make sure you encounter every possible enemy group. I will provide you with the background they appear in to make it less confusing. Failure to do will prevent some of these monsters from appearing in the Veldt.
- If you are a Cyan player, you get all his Bushido before Level 70 and Masamune, one of his ultimate weapons.
- You also get Alexander Magicite, which allows you to manually cast Holy.
- Io (Flare Star) and Coco (Overture) are valuable assets if you are attempting a LLP.
- There is some great Morphing potential if you got the patience
- If you failed to remove the occupation of Doma Castle at the Dinner, now is the time to collect items.
- You can acquire a Flame and Ice Shield in the Dreamscape, both allow Gau and Gogo to compensate for weaknesses that some of your favorite Rages may have.
Enemies
- Weredragon (Dreamscape Only, Death)
- Parasite (Dreamscape, Castle, Gigavolt)
- Coco (All but Mines, Overture)
- Alluring Rider (Dreamscape Only, Doom)
- Pandora (All but Mines, Revenge Blast)
- Pluto Armor (Mines Only, Magitek Laser)
- Schmidt (Mines Only, Mega Berserk)
- Io (Mines Only, Flare Star)
- Al Jabr (Train and Castle, Thundaga)
- Samurai (Train and Castle, Lullaby)
- Suriander (Train and Castle, Aqua Breath)
- Laragorn, Curlax and Moebius (Boss)
- Wrexsoul (Boss)
Note: Coco, Samurai and Suirander also appear in Ancient Castle, but only in 1 formation. Best encounter them here while you are here to improve frequency in Veldt.
Note: Dreamscape is considered the tripply, multicolored area with the crystal flooring.
Most of the Rages are garbage as you already have these attacks on more managable choices. However, the 2 that really stand out here and should be acquired are Coco and Io.
Coco (Overture) will put the enemy under Cover status. If Gau is about to be struck physically, the monster under Overture will take the attack for him. This can be helpful in areas like Kefka Tower where Yojimbo’s Eye For An Eye can be redirected. Io (Flare Star) will allow a low level and poorly equipped party be able to match harder threats by doing (80 x Lowest Level Monster / # of enemies) as Fire damage. Resistances still apply.
However, this dungeon has some of the most lopsided gimmicks imaginable, making this level not only a personal hell for Cyan, but you as well.
Coco can be a complete pest and Gau’s worst nightmare without a Ribbon. She can Imp you, counter attack with Slap (Silence, shutting down your Magic Rages) and use the brutal Overture against you, which can be a problem if you rely on physical rages like Stray Cat. The last thing you want is to strike down your own people with Cat Scratch.
Pandora can be a total pain as well as it knows Diabolic Whistle, putting every character under a Random status effect, the worst of these being Confusion and Doom. It also attacks with Absolute Zero (ice damage to all party members) and Revenge Blast (most it can do is 1521). It can also counterattack anything with a Sleep attack. All this is amplified by the fact you face these in groups.
Alluring Rider can apply Doom, Roulette and use Lv? Holy against you, doing Holy damage to anyone who’s Level is divisible by your Gil’s one digit. Make sure this isn’t 1. If you must, Setzer’s Coin Toss can manipulate the Gil counter.
Samurai is also a problem as this guy can use Slay every 2 turns. This attack will instant kill and ignores Deathproofing from Rages, Relics and Undead status. Only shields and Vanish can block the strike.
Suriander and Parasite both abuse Paralysis style statuses (Sleep and Stop respecitvely) and both are counter attacking pests. Suriander can eject via Snort and Parasite has prone to Gigavolting if struck by anything. To compensate for this, both enemies have small HP amounts and can be paralyzed by their own status effect.
Al Jabr can use Flash Rain every 2 turns. He gets more dangerous on Last Stand as he can spam Thundaga every turn he gets. To make up for this, he has 3 weaknesses (Ice, Water and Holy).
Weredragon isn’t too threatening, but any Human rages are ill-advised as it knows Venomist.
The Mines enemies are a hit and miss in terms of difficulty. Anything not named Io can use Missile (reduces HP by 75%) as a Last Stand and both can use Magitek Laser. Pluto Armor in the Veldt also abuses Missile if hit with Attack. Io isn’t too threatening, but if left out too long, it can shred your party with Wave Cannon or Diffractive Laser.
Fighting these Enemies
- The mines enemies are all fought on Magitek Armor. Use Thunder Beam or your own Thundagas to strike for maximum damage. All mines enemies can be instantly killed by Death or Terra’s Banisher.
- All the human enemies fall to Great Malboro or Magna Roader Purple (Bio) while still absorbing Absolute Zero. The former can also absorb Lv? Holy.
- Devilfist (Will O’ The Wisp) and Borghese (Holy) are Weredragon’s worst nightmares. These not only absorb Poison but they hit Weredragon for its two weaknesses. Borghese also exploits Al Jabr and Pandora’s weakness to Holy for quick smiting. Use Death and Bio to heal Gau if he goes Borghese.
- Parasite and Pandora groups can be eradicated with Lesser Lopros (Fireball, wear Ice protection) with high enough Magic Power. Templar (Fira), Bomb or Grenade (Blaze), Primeval Dragon (Firaga, wear Ice protection) and Devil Fist (Will O’ The Wisp) are other options.
- Suriander should be struck down with Devil Fist (Will O’ the Wisp), Bomb or Grenade (Blaze) or Primeval Dragon (Firaga) before they become a problem. Do not deploy the last 3 if they are paired with Pandora without Ice Protection.
- Baalzephon (Blizzaga) is the safest method of dispatching most enemies here as it absorbs all castable elements except Fire (wear Snow Scarf or Flame/Thunder Shield) and Holy. It also deals double damage to Al Jabr.
- Bogy, Stray Cat and Gold Bear also lay waste to enemies here. Switch your weaponry accordingly before engaging with Gogo
- Flame Rod: Suriander, Pandora, Weredragon, Parasite
- Poison Rod: Coco and Samurai, but heals Pandora
- Holy Rod or Gladius: Pandora, Al Jabr, Weredragon
- More tactics on next Part.
Walkthrough Part 22H – Doma Castle and Dreamscape (Part 2)
- If all that sounds too confusing. Marchosias (Aero), Chimera (Aqua Breath), Twinscythe (Metal Cutter) and Covert (Wind Slash) can hit every enemy for full damage and don’t have exploitable weaknesses to worry about
- Crowd Control can be helpful when needed, especially against Last Stands and Counters.
- Death via Lycaon (Blaster), Skeletal Horror (Banish) or Mu (Snare): All except Coco, Suriander and Samurai
- Petrify via Deepeye (Dread Gaze): Suriander and Io
- Stop via Murussu (Stop) or Gloomwind (Net): All except Suriander and Alluring Rider
- Confusing Al Jabr can cause it to turn Flash Rain against itself for double damage.
The Dream Stooges are all fought together in a boss fight and must be slain in order to progress. What makes these 3 dangerous is every 30 seconds, they will use Delta Attack and Petrify 1 character, this also cannot be blocked except with Stoneproofing. If one of them is slain, this attack is disabled.
Each Stooge fights a different manner. Curlax (the pink skined one) loves to abuse status effects and will use Arise if any one of his brothers have been slain. He will resort to Fira or Firaga if he is struck or if one of his brothers has been slain. He eats Fire, but takes double from Ice and Water.If attacked with too much Magic, it will put Reflect on itself. SLAY THIS FIEND FIRST!
Laragorn is Ice/Wind attuned and has a Fire weakness. He will be more direct and use Blizzara and Blizzaga when one of his brothers is dead and if struck with anything. If struck 4 times when alone, he will flee like a coward. He is also the only one of the 3 who isn’t Deathproof.
Moebius (has his eyes closed) is Lightning attuned but has no weaknesses. He resorts to buffing his party members with Protect, Shell and Haste. He also likes to get direct with Thundara and Thundaga when he takes damage or one of his brothers is slain.
Fighting the Stooges
- Because of the elemental weaknesses all over the place, the best elements to attack with are Non-elementals, Poison, Holy and Water. Having attacks that hit them all also helps.
- Ninja (Water Scroll, wear Lightning protection), Twinscythe or Killer Mantis (Metal Cutter, wear Fire protection) and Behemoth or Tyrannosaur (Meteor, wear Ice protection) are the only heavy hitting attacks that will strike at all 3 Stooges for full damage.
- Chimera (Aqua Breath) can slay Curlax faster and damage Moebius for a good chunk of damage at the cost of healing Laragorn per cast (absorbs Wind). If the damage of your other characters exceeds Aqua Breath, you can get away with slaying 2 of the 3. Chimera also protects you from a large amount of statuses the Stooges deploy.
- If you wish to play it safe, Great Malboro (Bio) can do full damage to all 3 stooges and not take any damage from their elemental spells. Dispel any Reflects if they are applied.
- Bogy, Stray Cat and Gold Bear can trash these fools easy. Gogo should wield the Holy or Poison Rods if he wishes to do full damage and have a spell effect. Otherwise, stick to Magus Rod or Gladius. Make sure you Dispel any active Reflects before using elemental rods!
Once these fools are slain, continue your quest.
Wrexsoul is the embodiment of Cyan’s worst nightmares and must be slain to free him from the guilt. Once this boss is challenged, you cannot turn back. So make sure you have faced everything before doing so.
Wrexsoul uses a very dastardly trick called Fury against you. He will disappear and possess one of your characters. You will then be forced to slay one of your teammates by KO or Petrify to have him respawn. He does this as his opening move and with a 66% chance every 3 turns afterwards.
Wrexsoul attacks with 2 Soul Savers. These Soul Savers will apply Reflect to themselves and start spamming Agas off themselves and hit your team if Wrexsoul is possessing someone, otherwise, they will heal Wrexsoul with Cure. If their MP supply is low, they will steal MP from your party members once each. If slain, they will instantly come back to life.
All 3 targets absorb Fire and have Holy resistance (Wrexsoul absorbs while Soul Savers are immune), but all 3 suffer an Ice weakness. Wrexsoul himself also has over 200 Magic Defense.
Gau and Rage Gogo can defeat this boss, but make sure you are ready to slay them if one of them gets possessed and make sure your party member(s) are able to revive.
Slaying Wrexsoul
- Save your high powered Agas, Flares or Death spells to instantly incapacitate an ally faster. Make sure all allies don’t have high Magic Evasion or Shell effects when doing this method. Otherwise, bring characters with high powered physicals and arm them with Sniper Eyes to bypass Shield evasions, Once an ally is slain and Wrexsoul returns, immediately revive them.
- Do not under any circumstances have more than 1 character under Rage. Either Gau or Gogo can Rage but not both at the same time. Make sure Gogo’s commands have the capacity to Raise a person either by Item (Phoenix Down) or Magic (Raise or Arise on an ally that has it). Failure to do so might throw you into an endless loop and you will have to restart the fight.
- Gorgimera (Avalanche), Kamui (Snowstorm) and Zeveak (Flash Rain) can strike at all 3’s weakness to Ice and the spell bypasses Reflect and Runic. Wear Ice protection if necessary.
- Do not use Veil Dancer (Blizzara) or Baalzephon (Blizzaga), the Soul Savers will reapply Reflect if it is missing.
- Because the boss has high Magic Defense, another option is to go Purusa or Luridan (Rock Slide) and Tyrannosaur, Behemoth or Great Behemoth (Meteor). These attacks will ignore Reflect, Runic and Magic Defenses to do so.
- Stray Cat, Gold Bear and Bogy also work here, especially since Wrexsoul lacks Defense (70 Physical). You can arm Gogo with a Frost Rod for double damage, but watch for the Blizzara triggers bouncing back. Either wear Ice Shields, use the Magus Rod or Swordbreaker or make sure Celes always has Runic to cancel this effect.
- The most underhanded way to slay this boss is Mu (Snare) or Skeletal Horror (Banish, wear Fire protection). When Wrexsoul uses Fury, all you need to do win is Snare or Banish his 2 Soul Savers. The revive portion of their script is delayed a turn because of this instant kill and that turn never comes around. However, you lose the Guard Bracelet drop Wrexsoul has. .
Once Wrexsoul falls, head back to the Throne Room and claim Alexander, your only source for Holy. Then continue your quest.
Walkthrough Part 22I – Ancient Castle (Part 1)
This portion will help you fight in the Ancient Castle. To come here, once you get the Airship, head to Figaro Castle and ask the man to take you to the next continent. Halfway in the trip, the castle will get stuck at a location and the man will ask if you want to check it out or head to the next location. Tell him to wait. Afterwards, enter the hole that was made in the dungeon that you used to enter Figaro Castle. Travel through this cave and you will be at the Ancient Castle.
Once inside, you will get dialogue about what this castle truly is and the disaster that befell it as you explore the dungeon. I won’t spoil this part because this is my favorite side story in the game.
- You can get Odin here. This Esper allows you to save on Blaster Rages, Banish casts or charging Cyan’s Bushido to Oblivion by instant killing entire legions of non-Deathproof enemies. It is your only source of Meteor until you get Crusader from the Dragons and your only Speed buff on level until Cactuar.
- You can upgrade this summon to Raiden, which replaces Meteor with Quick. This spell will allow you to make 2 free turns without fear of retaliation. The possibilities with this one are endless. However, this spell has a huge MP cost. Raiden is more accurate than Odin with dispatching foes and you lose the Speed upgrade for another Strength on level bonus, saving on competition for Bismarck and Gilgamesh.
- You can get a Wind Edge for Locke in the Caves. A very powerful Long Range weapon.
- You can get the Death Tarot for Setzer, a Card that can instant kill enemies by chance.
- You can get the Gladius here. This is a powerful Holy-elemental dagger that quite a few characters can use. It is Gogo’s hardest hitting weapon until Scorpion Tail.
- You can get the Master’s Scroll at the castle. This allows Gau or anyone to attack 4 times per weapon, but only at half strength and with random targeting against groups.
- You can fight the Blue Dragon in the room where you upgrade Odin. If you just got here, you can slay this boss almost immediately. See the World of Ruin Boss section for details.
- You can get Coco (Overture) here without going to the Dreamscape or get it here is you missed her.
- Devil is an early Thundaga user without the need of Valigarmanda.
- Devil (Cave and Outside, Thundaga)
- Enuo (Caves only, Tsunami)
- Figaro Lizard (Caves and Inside, Dischord)
- Lunatys (Inside Only, Meteor)
- Coco (Outside Only, Overture)
- Suriander (Outside Only, Aqua Breath)
- Samurai (Outside Only, Lullaby)
- Armored Weapon (Inside Only, Gravity Bomb)
- Samurai Soul – (Inside, Monster-in-a-Box)
- Master Tonberry (Caves, Monster-in-a-Box)
Note: Cave means on the way to the Castle. Outside means the Castle yard. Inside means inside the castle itself.
WARNING: Do not attempt this dungeon if the level of all your party members is divisible by 5. Otherwise, Devil can spell your doom as he knows Level 5 Death.
The biggest annoyance is that the exclusive enemies (excluding Coco, Suriander and Samurai) have ridiculously high Magic Defenses and Auto-Reflect, but come at 2 costs: Everything has some form of weakness (primarily Holy) and low physical defenses. Both Physical and Magical Gau loadouts have countermeasures for this downside, so you will be using those. Other than that, the biggest threats are Devil, Lunatys and Armored Weapons.
Devil is basically Apocrypha from Floating Continent. As a Last Stand, he will use the Level 3, 4 and 5 Lores until he is slain. If you want these Lores for Strago, bring him with a level that isn’t divisible by these numbers (Prime Numbers help).
Armored Weapons abuse two of the most vicious Gravity attacks available (Launcher and Missile) and can use Diffractive Laser against you (Lightning Damage to entire party). To compensate for this, Safety Bits/Memento Rings negate most of the attacks and this enemy doesn’t have absurdly high Magic Defenses.
Lunatys on Last Stand abuses Freezing Dust (freezes 1 character) and can use Meteor (Monster Version), doing almost 1100 damage to all party members. With decent enough Magic Evasion, Meteor can be dodged.
Coco and Samurai can also be problems. Coco has a habit of using Overture to redirect your physical attacks against you while Samurai has a chance to use Slay every 2 turns (instant kills target and bypasses Deathproofing, only Vanish and Shields can stop this).
Fighting the Enemies
- Behemoth, Great Behemoth or Tyrannosaur (Meteor), Fafnir or Crawler (Traveler) and Purusa or Luridan (Rock Slide) pierce Magic Defenses for full damage and bypasses all Reflect checks.
- Chimera or Vector Chimera (Aqua Breath) is the Armored Weapon’s worst nightmare. Not only does it do double damage thanks to Water weakness, but it also makes Gau Deathproof, making all it’s Gravity attacks worthless.
- The Dreamscape group is open season for magic. Trillium, Great Malboro or Magna Roader (Purple) (Bio) can waste the humans and still do full damage to Suriander. Primeval Dragon (Firaga), Bomb or Grenade (Blaze), Templar (Fira) or Devilfist (Will O the Wisp) can scorch Suriander and still do full to the humans. Use a Poison or Flame Rod for Gogo against these guys. But to keep things simple, use the Rages you use against the standard enemies.
- Stray Cat, Bogy and Gold Bear don’t have to worry about Auto-Reflect to deal their brutal damage. Garm can be used to protect Gau or Gogo from Missile and Launcher attacks. Use the Magus Rod, Swordbreaker or Gladius (when you get it) with Gogo as the Elemental Rods’ effects will bounce back.
- Crowd Control is very doable, but you must use Reflect piercing variants against these enemies.
- Death via Lycaon (Blaster), Skeletal Horror (Banish) or Mu (Snare): All enemies except the Coco, Suriander, Samurai group.
- Petrify via Deepeye (Dread Gaze): All except Samurai, Coco and Armored Weapon
- Stop via Gloomwind (Net, wear Ice protection): All except Suriander, Coco and Enuo
- Vulture (Shamshir), Satellite (Sonic Boom) and Platinum Dragon or Briareus (Cyclonic) can also cripple non-Deathproof enemies if needed.
The Monster in a Box enemies continue on next part.
Walkthrough Part 22I – Ancient Castle (Part 2)
The Master Tonberry is the apotheosis of pure evil like in every FF it appears in. Every 15 seconds, it will move a step towards you. After 8 steps, it will stab one character with Knife (Attack x 8), which hits like a freight train and then steps back 4 steps. Any attacks made against it can be countered by Traveler, which deals the number of Steps you have taken / 32. This attack counter can be incredibly fatal at any point in the game.
This monster has another trick up it’s sleeve. Every step, it will cast Barrier Change to change around his elemental weaknesses. However, unlike Number 024, it is a lot easier to ascertain the weakness. But it carries the threat of hard hitting spells and these are cast every turn with a high chance:
- Fire: Uses Blizzaga
- Ice: Uses Firaga
- Wind: Uses Thundaga
- Lightning: Uses Tornado
- Water: Uses Quake
- Holy: Uses Bio
- Poison: Uses Holy
- Earth: Uses Tsunami
The bolded ones are the most dangerous as either the character has virtually no defenses to any of the listed spells or they cannot be stopped by Runic.
Smiting this Tonberry
- Zona Seeker and Slow will be invaluable in this fight. The latter will reduce the number of spells he bombs you with every 15 seconds. It will not slow down the rate he walks however.
- An underhanded tactic that doesn’t involve Rages is to Sleep this monster before or after he Barrier Changes (preferably before). Once asleep, bomb him with whatever Magic attacks you have to slay him without waking him up.
- With proper armor countermeasures (Saucers, elemental shields, Snow Scarf), Killer Mantis or Twinscythe (Metal Cutter), Tyrannosaur or Behemoth (Meteor), Yojimbo (Shock) or Purusa (Rock Slide) can tear this boss apart while being unaffected by the Barrier Changes.
- Bogy (Auto-Protect vs Knife), Stray Cat, Gold Bear and Garm (Tornado and Poisonproof, watch for Holy) are effective for Strength Gaus against this boss. Gogo must use the Magus or Swordbreaker for maximum damage without fear of Barrier Change.
- Destroyer (Reraise) can help with the Traveler counters if you don’t have Phoenix yet.
- Another dark strategy is use Raffelsia (Entice) to stop it dead in it’s tracks and then unleash your full assault. It is suggested to do this when the boss doesn’t have an Ice weakness.
Once slain, claim the Gladius and continue your journey. If Gogo is with you, you can equip to him and start using a safer Holy attack.
Samurai Soul isn’t as gimmick based as Master Tonberry is, but he is a very real threat with his direct offense. He has a habit of throwing the elemental scrolls, 1000 Needles and using Gale Cut (Wind damage that cannot be blocked) along with his standard attacks every turn.
However, if struck too much with regular attacks or Magic, it begins getting more dangerous.
If struck 6 times physically, it counters with Assassin’s Blade, which is instant kill and ignores Deathproofing. If hit 3 times with Magic it will throw an Ashura or a Kunai, then throw Gil at you for massive, armor piercing damage. Any attack made against him also has a chance of being counterattacked.
If you fail to slay the boss in 40 seconds, it gets Blink, Haste and Reflect, increasing it’s onlsaught against you. These effects can be dispelled and Blink disappears after 2 attacks.
Dispering this Soul
- Great Malboro (Bio) is this Soul’s worst nightmare. Not only does it do double damage with Bio, but with a Flame Shield, but the poison ailment can do ridiculous amounts of damage and no elemental attack can harm Gau. If you lack Great Malboro, Trillium with a Flame Shield is as effective but you will still take damage from Gale Cut.
- If you want to go Non-elemental, Killer Mantis (Metal Cutter), Purusa (Rock Slide) or Tyrannosaur (Meteor) with a Thunder Shield and/or Snow Scarf are also viable. Twinscythe is ill-advised as it takes double from Gale Cut.
- Adamankary (Acid Rain) is another viabloe option. This attack still does double damage but doesn’t increase the counter on both of his counters. The boss is also not Sapproof either.
- Stray Cat, Gold Bear and Bogy are also painful against this boss. Gogo should equip a Poison Rod before going into these Rages for double damage. The specials also don’t up the counters.
- Rafflesia (Entice) is a very underhanded and diabolical way to dispatch this boss. It will make Samurai Soul have a 50% chance to off himself with Assassin’s Blade, for an easy win.
- Destroyer (Reraise) can help raise people in the event the offense gets too problematic. It also allows Gau to absorb the Thunder Scrolls.
Upon defeating this boss, you are awarded with the Master’s Scroll, the ultimate physical attacker Relic. You can also get more in the Soul Shrine later on. Continue your quest once finished.
Walkthrough Part 22J – Narshe Cliffs and Mines
This portion will show you how to fight off the enemies in Narshe and the Cliffs, including all 3 bosses. It is recommended to bring Mog for this one as you can accomplish this all in 1 pass. If you didn’t claim Mog yet, see Part 19 for details on how to acquire him.
Note: If you brought Locke, claim the Ragnarok Esper and Cursed Shield from the locked houses. Do not use the latter until you return to the World Map. The best place to unseal it is Solitary Island as all the enemies have 1 HP and can off themselves with Sap.
Why come here first?
- You get 2 characters: Mog (if you haven’t already) and Umaro.
- You get 3 Espers from this: Valigarmandr (teaches the Aga spells), Migardsormr (teaches you Quake) and Rangarok (Morph and Ultima). All 3 are invaluable to your cause.
- You can get some Rage upgrades, primarily to Gigavolt and your Strength Builds (Garm has a large status immunity pool at the cost of attack multiplier).
- You can fight the Frost Dragon at the cliffs. Check the boss section for details on how to slay this with Gau.
- If you didnt open the chest in the Moogle Cave, you can claim another Ribbon for free.
- If you have Locke, you can get the Cursed Shield to begin unsealing it.
- A monster-in-a-box has a shot at the Minerva Bustier, which is a good Celes and Terra armor. If you gambled for one at Darill’s Tomb, you can get a 2nd at Kefka’s Tower and the Behemoth Suit is a better armor for Relm than the Regal Gown is.
- You can get one of the 3 Gauntlets in this game for Two Handed combat.
Enemies
- Garm (Bodyslam)
- Lukhavi (Snowstorm)
- Test Rider (Flash Rain)
Test Rider presents a good Flash Rain rage (Ice and Water damage to entire enemy group) if you haven’t found Zeveak in the Phoenix Cave yet and Garm has a large status immunity pool for the Physical Rages. Amongst the effects are Death, Doom, Stone, Confuse and Stopproofing at the cost of a Holy weakness. Test Riders are the only real threat here.
Fighting these Vermin
- Lesser Lopros (Fireball), Devilfist (Will O’ The Wisp), Templar (Fira) or Primeval Dragon (Firaga) can melt anything not named Test Rider. These 3 will still do decent damage to it.
- Trillium, Magna Roader (Purple) or Great Malboro (Bio) can devastate lone Test Riders with ease.
- Killer Mantis or Twinscythe (Metal Cutter), Marchosias or Sprinter (Aero), Ninja (Water Scroll), Behemoth or Tyrannosuar (Meteor), Purusa or Luridan (Rock Slide) can decimate most opposition here with Magic if needed.
- Bogy, Stray Cat and Gold Bear are also solid choices for dispatching these fiends. If Gogo is Raging, either the Flame, Poison or Holy Rods or the Gladius will be effective here.
- Crowd Control is ill advised as only Lukhavi can be harmed by an instant kill (Deepeye (Dread Gaze)). Test Rider can be Stopped if necessary.
Enemies
- Magna Roader (Brown) (Outer Mines, Level 4 Flare)
- Magna Roader (Yellow) (Outer Mines, Haste)
- Garm (Inner Mines and Cliffs, Bodyslam)
- Psychos (Inner Mines and Cliffs, Lifeshaver)
- Wizard (Inner Mines and Cliffs, Gravity)
- Ice Dragon (Cliffs, Boss)
- Valigarmanda (Cliffs, Boss)
Note: Inner Mines is the entrance from Arvis’ house. Outer Mines is where you met Valigarmanda the first time. Cliffs are the outdoor portions at the summit of Narshe.
Note: Check the 8 Dragons section for information on how to beat Ice Dragon with Gau.
A lot of these new Rages are relatively pointless. Psychos is the only worth while one as it can use Lifeshaver and not be Undead like Outcast and Misfit were.
Like outside, these enemies aren’t a threat. Psychos and Wizard both have MP damaging attacks, which can be a problem should Gau be using an MP 0 = Death Rage.
Fighting these Vermin
- Gorgimera (Avalanche), Kamui (Snowstorm) or Test Rider (Flash Rain) can destroy these monsters will relative ease, especially since it does double to Psychos and they also appear large groups. Zeveak is ill advised as it has 0 MP = Death.
- Guard Leader or Covert (Wind Slash), Chimera (Aqua Breath), Marchosias (Aero), Behemoth or Tyrannosaur (Meteor) can also devastate mass groups for unrestricted damage.
- Crowd Control is ill advised as only the Magna Roader species can be instantly killed by Death or Petrify. You are better off slaying enemies the hard way.
- Stray Cat, Bogy and Gold Bear are good here. Any Rod or weapon can be used, but be aware that Psychos absorb the Flame Rod.
Valigarmanda is still up here, trapped in his prison of ice, but he isn’t all too happy being stuck up there for an entire year. Examining his body will instigiate a boss fight, with his Magicite up for grabs.
Because of the layer of ice, he takes 0 damage from any physical attacks, except from Armor Piercing moves. Do not use Bogy, Stray Cat or Gold Bear here. Although this boss’ offense is lackluster (only using Blizzaga as his main form of damage), there are in face two issues that can make him a problem, especially for LLP.
He can use Rasp frequently, which does direct MP damage to the target, this is especially a problem if Gau is using a Rage with the MP 0 = Death effect. Second, any attack outside of using Attack with armor piercing calculations (Fixed Dice, Valiant Knife, etc.) gives the boss a 33% chance to use Freezing Dust to freeze the character. You must use Fire to thaw the person or wait over a minute to remove it and it cannot be blocked.
The boss is immune to all elements except Ice (absorbs) and Fire (weakness). Fire attacks are also met with a 33% chance of the boss using Rasp on the caster as well.
Fighting this Frozen Chicken
- Io (Flare Star) or Primeval Dragon (Firaga) with Ice protection can both slaughter this boss quickly. Io always does 9920 to this boss, which is good for LLP runs.
- Templar (Fira) and Devil Fist (Will O’ The Wisp) can do heavy damage without either MP 0 = Death or Ice and Fire weaknesses to worry about. These options are good if you don’t have elemental shields available or you haven’t gotten the first 2 mentioned yet.
- If you have an Ice Shield, Bomb or Grenade (Blaze) can be this boss’ worst nightmare. Not only do they do double damage but if they do get Frozen, Fire will heal them and melt the Ice. Bomb and Grenade are unaffected by MP 0 = Death either.
- Twinscythe (Metal Cutter) with a Flame Shield is another solid choice, It absorbs Ice and Fire with this combination and does full damage to the boss.
- Another non-elemental choice is Purusa (Rock Slide). You don’t need elemental shields with this one and the attack ignores Magic Defense.
Once slain, Valigarmanda will finally calm down and turn into Magicite. Now you can begin teaching your main characters how to use Aga-based spells. But we are not done yet! Walk up to where he was and you can get the option to jump down into the Yeti Caves. Make sure you take Mog with you for this.
Yeti’s Cave continues on the next section.
Walkthrough Part 22J – Yeti’s Cave
Enemies
- Anemone (Gigavolt)
- Illuyankas (Gigavolt)
- Tzakmaqiel (Imp)
- Knotty (Stone)
- Onion Dasher (Traveler)
- Tonberry (Break)
- Tonberries (Monster-in-a-Box)
- Yeti (Boss)
Aside from the rewards, we are here for Illuyankas and Anemone. These 2 are direct upgrades to the famous Aspiran as they now both absorb Lightning. The former also absorbs Water like Aspiran did and the latter has Auto-Protect status and Deathproofing. Everything else is either pointless or you have a Rage that does the job already but better.
Tonberry is a very dangerous and very real threat here. Not only will this monster use Traveler every turn it can (# of steps / 32), but it will counter any damage with a Knife (Attack x 8) and Traveler right after, pretty much instant killing the target.
Outside of the bosses and Tonberry, every enemy abuses the Imp status effect through special attacks, which can be an annoyance if you aren’t wearing White Capes or Ribbons and Imp builds. Make sure Gau has Impproofing if you aren’t using an Impproof Rage. Anemone also spams Gigavolt at Last Stand.
Fighting these Vermin
- Lesser Lopros (Fireball) can annhilate groups of Anemone, Illuyankas and Knotty without having to worry about Imp status (innate Impproofing). Bomb and Grenade (Blaze) also are Impproof and work as well. Primeval Dragon (Firaga) will need a White Cape or Ribbon.
- Gorgimera (Avalanche) and Test Rider or Zeveak (Flash Rain) can wipe out Tzakmaqiel and Illuyankas/Onion Dasher packs without worrying about Impproofing. Veil Dancer (Blizzara) or Baalzephon (Blizzaga) also are Impproof and work as well. Get Impproofing if you want to use Kamui (Snowstorm).
- Although Onion Dasher is weak against Water and Lightning, using these Rages are ill advised as they pair up with Illuyankas and Anemones that absorb 1 or both. Use the weaknesses of their companions to do full damage instead.
- If you are lucky, Primeval Dragon (Firaga) or Bomb and Grenade (Blaze) can OHKO Tonberry if your Magic Power is high enough.
- Any group can also be trashed by Marchosias or Sprinter (Aero), Antares (Magnitude 8), Tyrannosaur or Behemoth (Meteor) and Greater Mantis (Wind Slash) for full damage and they all have Impproofing.
- Bogy, Stray Cat, Gold Bear or Garm can trash enemies physically. Gogo can use any weapon except the Thunder Rod to ensure full damage against any monster. Flame Staff is the best choice for this dungeon. Except for Garm, all of them need Impproofing Relics to function well here.
- Crowd Control can be helpful as well when you need it:
- Death via Lycaon, Skeletal Horror, or Mu: All except Illuyankas and Tonberry
- Petrify via Deepeye (Dread Gaze): Tonberry, Knotty, Anomone
- Stop via Murussu (Stop) or Gloomwind (Net): All except Tonberry
- Platinum Dragon or Briareus (Cyclonic) can also soften up non-Deathproof enemies for any attack to finish them off.
- Imp can shut down Tonberry’s Traveler and Knife counters, but you will have to deal with Auto-Criticals while it is in Imp form.
- Destroyer (Reraise) can help you against the Traveler and Knife counter combo if needed
One of the chests forces you into a fight with the Tonberries Trio. Every turn, they will advance 1 pace towards you. After 8 paces, it will stab you with Knife (Attack x 8) and then return to the back. After 2 steps, if they have been hit 3 times by Attack, they will go back 1 pace. Sounds simple right?
However, there are 2 annoyances with these monsters. The first is they have 150 Evasion each, so without a Sniper’s Eye, you are going to barely hit for damage. Make sure Gau or Gogo have one if they use Physical Rages in battle. Second, any Magic done is immediately countered with Holy, which can be devastating and there aren’t many means of protecting yourself from it outside of Runic.
Each of them has a Minerva Bustier up for stealing, the game’s ultimate armor for Celes and Terra. They will always drop at least 1 and spares can be collected via drops as well. They are weak against Fire and absorb Water.
Fighting the Trio
- For LLPs, it is recommended to cast Slowga to apply Slow to all 3. This will increase the time you have before they advance 1 pace.
- Smite them with Fire skills! Lesser Lopros (Fireball), Devilfist (Will O’ the Wisp) and Bomb or Grenade (Blaze) will not only do double damage, but won’t trigger Holy counters as these skills are both Enemy and Dances and won’t be stopped by Runic. These especially help when paired with Sabin’s Rising Phoenix, Cyan’s Eclipse and Edgar’s Flash and Auto-Crossbow at speedkilling all 3.
- Marchosias and Sprinter (Aero), Antares (Magnitude 8) and Guard Leader (Wind Slash) can also do full damage and not trigger Holy.
- Great Malboro (Bio) and Holy Dragon (Holy) can do full damage to these beasts and absorbs the Holy counters. The former has the added effect of being able to Poison them.
- Although Lunatys (Meteor) is considered Magic, it’s Auto-Reflect will reflect Holy back at the Tonberries. You will need to use Items or White Wind to heal.
- Bogy is the safest option as it takes half damage from Knife. Stray Cat and Gold Bear can work for speed killing. Make sure Gau and Gogo have Sniper Eyes and a Flame Staff is on Gogo before Raging.
- Silence and Imp are also good status effects. Both shut down Holy counters and the latter stops the Knfe attack at the cost of Auto-Criticals.
Once slain, claim your Minerva Bustier(s) and continue your quest.
WARNING: Make sure Mog is in your party for this. Failure to do so will force the player to do a second trip through the Caves to claim Umaro. Mog is required to recruit his aid.
Yeti isn’t really threatening, but usually either Tackles you, whacks you normally or sends out a Snowstorm. If struck with Fire, it will either Tackle or Snowstorm your team. It can also Tackle if attacked by anything.
The only surprises to worry about are he will jump if he has been struck 3 times. He will also gain Protect, Shell and Haste if he consumes a Green Cherry, which he does after taking 4000 or so damage. He can also cause an Avalanche and drop a Hailstone (deals damage = 75% of current HP) when there are only 2 people left standing. These surprises can be a problem in LLPs.
Yeti is weak against Fire and Poison, but absorbs Ice.
Fighting Umaro
- LLP teams should apply Slow and Blind to Umaro to cut down on damage. Summoning Zona Seeker helps for Snowstorm.
- Great Malboro or Magna Roader (Purple) (Bio) are this Yeti’s worst nightmare. Not only does Bio do double damage, but none of Yeti’s Ice attacks will damage Gau in these Rages. Plus, Bio doesn’t trigger extra Snowstorms.
- Templar (Fira) and Devil Fist (Will O’ The Wisp) both do good Fire damage and don’t carry exploitable Ice weaknesses. Primeval Dragon (Firaga) also works if you have the Ice Shield.
- Twinscythe (Metal Cutter) is vicious against this boss. It won’t tally up Jump counters, do full damage and none of Yeti’s special attacks work on this boss (Ice absorption and Deathproofing for Hailstone).
- Bogy, Gold Bear or Stray Cat also wreck the Yeti beast to beast. If Gogo uses these Rages, make sure he is armed with either a Flame Rod or a Poison Rod.
Once Yeti has been knocked out, have Mog wake him up from his short nap and he will join your cause. Examine the skull totem to claim the Midgardsormr Magicite, which will let you learn Quake and employ a safer Earth attack against grounded targets.
Although Umaro has a Snow Scarf on him (which is Gau’s ultimate armor too), you cannot strip him of it as you cannot change his equipment. Fortunately, you can go to the Cave of the Veldt and get 2 Behemoth Suits, then gamble 1 to make one for Gau.
Use the cave near Umaro’s room to return to the surface and continue your quest.
Walkthrough Part 22K – Ebot’s Rock
This guide will show you how to fight through Ebot’s Rock for Strago’s subquest. This area can be accessed anytime but you will need Strago and have spoken to Gungho at Thamasa in order to face the boss.
Ebot’s Rock is located on a small island north of Thamasa in the World of Ruin. There was a tiny point north of it in the World of Balance, but now it has surfaced, opening a cave.
- Hidon is the only enemy in the main game that casts Grand Delta, Strago’s ultimate Lore spell. This boss can also be challenged multiple times as well by speaking to Gungho each time. You can also steal Thornlets from Hidon to wager them for Mirage Vests without Morphing off Ahriman and Daedalus.
- It has the earliest access to a non-Undead Rage with Holy: Warlock
- It has easy access to Teleport Stones from all enemies if you didn’t bother learning Teleport.
Enemies
- Mahadeva (Death)
- Aspidochelon (Landslide)
- Moonform (Flash Rain)
- Creature (Lifeshaver)
- Medusa Chicken (Break)
- Sorath (Cave In)
- Warlock (Holy)
- Hidon (Boss)
As stated above, the only Rage worth collecting here is Warlock. Although you get a Lightning and Poison weakness, this is one of the few Living rages that uses Holy. Other than this, the Rages here are ineffective to your cause. The monsters aren’t a threat unless LLP.
Warlocks can be a problem as it can drain MP and they use Holy. Holy is cast against you by chance every 2 turns and spammed every turn as a Last Stand. Make sure you aren’t using MP 0 = Death Rages. It also has incredibly high Magic Defenses, so either use Physical attacks or Magic Defense piercing Magic.
Moonform and Aspidochelons can be serious threats. Moonform can counter attacks with Flash Rain (Water and Ice damage to all) or Acid Rain (Water and Poison) depending on how it is attacked. Aspidochelon uses Wind Slash if struck with Magic and can do 3 attacks in a row if not stopped after it attacks 4 times. However, both suffer from Undead Typing.
Medusa Chicken can also be a serious problem as it can use Quake as a last stand or Confused like the Litwors did.
Medusa Chicken, Creature and Mahadevas can also abuse some of the most dangerous status effects in the game against you. Petrify, Confusion and Zombie respectively. Make sure you bring status protection for this one! Mahadeva is also Undead.
Slaying these Vermin
- Borghese or Holy Dragon (Holy) can smite all the Undead enemies and Sorath with great effect and have plenty of status immunities. If you go the former, Magic Drain will work in reverse, but you will need to use Bio or Death to heal.
- Medusa Chicken groups can be destroyed by Gorgimera (Avalanche), Kamui (Snowstorm) and Baalzephon (Blizzaga). If you go Baalzephon, you will need Stoneproofing and there is a chance it will single target. All 4 are largely ineffective against Warlock.
- Devil Fist (Will O’ The Wisp) and Primeval Dragon (Firaga, wear Snow Scarf) can decimate Undead as well. They also don’t need to worry about the Moonform counters. The former absorbs Poison and it doesn’t trigger Rains. The latter can absorb Flash Rain with the Snow Scarf. If you don’t have these yet, Templar (Fira) is still reliable.
- Anemone and Aspiran (Gigavolt) are good options for smiting Lightning weak enemies and Moonform. Both Rain spells are absorbed but you will need to worry about Sap effects.
- Behemoth, Great Behemoth or Tyrannosaur (Meteor) and Purusa or Luridan (Rock Slide) can pierce Warlock’s thick Magic Defenses for full damage and reliably damage everything else.
- Other elemental options that work here are Marchosias and Sprinter (Aero, former is Death and Stoneproof), Antares or Landworm (Magnitude 8) and Chimera or Vector Chimera (Aqua Breath, complete status protection). Some of these Rages may require Safety Bits.
- Bogy (Stoneproof), Stray Cat, Gold Bear and Garm (Confuse, Death and Stoneproof) also work nicely here. Flame, Thunder and Holy Rods or Gladius are the best options when attacking with Gogo. The multipliers might give you an edge against Warlocks.
- Crowd Control can be helpful when handling these enemies, especially the counter and Last Stand absuers:
- Death via Mu (Snare), Skeletal Horror (Banish, Holy weakness) or Lycaon (Blaster): All except Warlock and Sorath
- Stop via Murussu (Stop) or Gloomwind (Net): All enemies
- Most enemies here are Stoneproof. Use Death or Damage to slay.
As you traverse the dungeon, you will find chests with Coral. After collecting 22 units of Coral, feed them to the Treasure Chest that speaks to you so that it can move and you can fight Hidon.
Hidon attacks you alongside 4 Erebus. These Erebus are incredibly weak but will come back to life if they have all been slain 80 seconds later. The Erebus have the following characteristics:
- Bottom Left: Absorbs all elements and has Auto-Reflect. Can Confuse party members.
- Bottom Center: Poisons and is vulnerable to Crowd Control
- Bottom Right: Weak against all elements, but can do high damage with Mega Claw
- Upper Right: Can inflict Zombie status
The boss resorts to Poison based offense (Bio, Poison with 33% chance if hit by anything and Venomist if alone) and steals HP through Leech. This boss can also raise Zombies from KOed party members using Crypt Dust, but it is a free revive if you have Amulets, Safety Bits or Memento Rings on.
If by himself, he will cast Grand Delta against your entire party the first chance he gets. It doesn’t do a whole lot of damage (1500), but LLP or busted up teams may have something to worry about.
Slaying this Abomination
- For LLPs, Slow Hidon (use Slowga if the Reflect Erebus is dead or your team has Haste equipment) and cast Mighty Guard.
- Borghese (Holy) can be this boss’ worst nightmare. Gau gets protection from all the status effects used by this boss, absorbs Poison and can do double damage to Hidon himself. Make sure the Reflect Erebus is gone if you use this Rage. Use Death or Bio if you want to heal Gau.
- If you have gone deeper into Kefka’s Tower, you can use Outsider (Holy) as a substitute for Borghese. It absorbs Poison, does double to Hidon but isn’t Undead. Still has Holy weakness.
- Devilfist (Will O’ the Wisp) is also this boss’ worst nightmare as it matches the above criteria and has Haste status. Plus this spell won’t be Reflected back, but the Erebus will heal off it. Primeval Dragon (Firaga) is also helpful, but this has the threat of being bounced back at you.
- Behemoth or Tyrannosaur (Meteor), Killer Mantis or Twinscythe (Metal Cutter) or Purusa (Rock Slide) can do considerable damage and also kill the Reflect Erebus safely when needed.
- Covert (Wind Slash) and Ninja (Water Scroll) also do full damage to the boss, absorb Poison and can keep the Erebus under control (except for the Reflect one). This also helps if you want to avoid getting hit by Grand Delta as Hidon has to be alone in order for the attack to go off.
- Stray Cat, Gold Bear and Bogy, especially with a Flame or Holy Rod can do significant damage to Hidon and his Erebus cronies. Slay the Reflect Erebus first so Fira and Holy triggers don’t bounce back at you. The Gladius is a safer option if you wish to avoid spell reflects.
- Physical Gau or Gogos can also use Stunner or Wildrat. At the cost of a smaller multiplier (x1.5), both naturally absorb Poison and Regen off the ailment.
Once Hidon falls, continue your quest. If you wish to challenge Hidon again, go back to Thamasa and keep talking to Gungho until he brings up that Hidon has returned. This is a useful way to amass Thornlets (Rare Steal) from Hidon to bet for Mirage Vests at the Coliseum.
Walkthrough Part 23 – Cultist’s Tower (Part 1)
Now that you have cleared the optional content. Let’s get to the real challenges. Beginning with Cultist Tower. Cultist Tower is located at the heart of Serpent’s Trench, surrounded by a mountain. If you climb to the top, you face a boss called Magic Master and you can walk away with the Soul of Thamasa when you beat him, which is a Relic that allows the player to Dualcast. You also acquire the Air Anchor (ultimate tool) and the game’s only easy Safety Bit (Death, Doom and Zombieproofing; basically Memento Ring but universal).
In Cultist Tower, every enemy uses Magic against you. They have standard spells for attacking per turn and different spells for when you harm them with any spell. You also must follow the same rules, so your Attack, Rage and Special Commands (Steal, Runic, etc.) are disabled and you can only fight back with Magic. The only non-Magic Commands that are not sealed are:
- Defend
- Item
- Equip
- Mimic if Gogo is present
Of course you can always bring Mog and use the Mololu’s Charm to reach the top. But by doing so, you forfeit your chance of encountering the Magic Urn for the Rage list as it can spawn at any time. Not only this, but you need all Magic Levels encountered and slain for the Bestiary completion. Mog may also have a disadvantage if you haven’t been using him often or you raised him Strength based for the bosses.
- Magic Level 10 – 90
- Magic Urn (Curaga)
- Holy Dragon (Holy, Boss)
- Magic Master (Boss)
The Rages here are very helpful despite the risks. Magic Urn absorbs all 8 elements, has complete status immunity and uses Curaga to keep your other characters alive. As an enemy, it will Raise or Arise any KO’d characters and use Gold Needles on any Petrified people. Then they administer various medicinal items to keep party members healthy. Each time they use an item or you hit them with anything, they have a 33% chance of Fleeing. Do nothing and let them do their business. If you want to morph them into Megalixirs, you can try but it is difficult (1/64 chance to succeed).
The Holy Dragon is the only member of the 8 dragons that can appear in the Veldt. It eats Holy and spits it back with devastating force, plus has many status immunities and no real weaknesses. It is the ultimate anti-Undead! Plus, once in the Veldt, you can start stealing Holy Lances for Mog, Edgar, Merit Award users and ammo for Shadow’s Throw. See the Bosses section on how to defeat Holy Dragon.
As stated above, the regular enemies do nothing but use magic against you, either every turn or when struck with an offensive spell. Their difficulty and abilities are also all over the place and some can be difficult for the wrong reasons. Each Magic Level has spells you should be on the lookout for as they can spell your doom if left unchecked. The enemies are as follows:
- Weak against Fire, Holy
- Absorbs Poison
- Banish every 2 attacks by chance.
- Gravity and Graviga every turn by chance.
- Rasp or Confuse when struck
- Weak against Poison
- Absorbs Holy
- Weak against Lightning
- Absorbs Poison
- Break every turn by chance
- Silence when struck
- Weak against Fire, Holy
- Absorbs Poison
- Can attack you at any Treasure Room
- Death by chance every odd turn
- Targets all allies and uses Esuna or Dispel to undo effects every even turn
- Hastega on allies and Berserk when struck
- Weak against Fire
- Absorbs Ice
- Quake, Tornado or Holy every turn
- Osmose, Slowga or Regen when struck
- Pairs up with Level 90
- Weak against Water, Ice
- Absorbs Fire
- Aga-level elements every turn
- Rasp when struck
- Pairs with Level 90
- Actively adapts to Reflect status
- Bounces Cure class, Reraise (when struck), Haste and Esuna (normal attacks) off your Reflect
- Bounces Aga-class spells (normal attacks), or Holy, Dispel and Stop (struck) off allies’ Reflect
- Nullifies Water, Holy and Earth
- Absorbs Wind
- Can Surround you solo
- Can attack you at any Treasure Room
- Can pair with Level 60, 80 or 90 for devastating combos
- Meteor, Meltdown and Flare every turn
- Heals thousands off own Meltdown, may kill allies.
- Dispel and triplecast Flare every 4 turns
- Stop, Thundaga or Reraise when struck
To add insult to injury, all Magics have high physical defenses and 100 Evasion, so your Strength workarounds will be limited and you cannot run once you enter battle. You must fight to win or die!
Combating the Magi
- Any enemy not named Magic Level 90 or Magic Urn takes full or weakness damage from Water. Flood (learn from Leviathan) can bypass Reflect and does direct damage to any monster group.
- Meteor and Ultima also bypass Reflect and Magic Defenses to deal full, non elemental damage.
- Espers can also bypass Reflect but you will need to factor in elemental resistances. Of the summons, Leviathan (deals Water) and Bahamut (non-elemental) are the best choices.
- If you need MP, save it for after battles with Ethers. Only use Osmose if you are facing a Magic Level that has poor Magic Counters or ones you can easily handle.
- All enemies have MP 0 = Death flags, so Rasp can be effective. High magic power casts can easily deplete 1000s of MP. However, it will get more tedious to deplete MP this way beyond Monster Level 50.
- Prioritize on destroying enemies who can heal or buff their allies, such as Level 50 and 80 Magics. If they manage to pull off a buff, either destroy that enemy or use Dispel on the affected monster.
- Utilize the Crowd Control methods provided, especially if you lack the spell power for OHKOs. You may need to bounce spells off yourself if necessary.
- A vile way to bend the rules is to bring a character who can wield Defense ignoring weaponry (Ultima Weapon, Valiant Knife or Fixed Dice) or Status Weapons like Ichigeki (Death) and the Kagenui (Stop), arm that character with a Sniper’s Eye to bypass the Evasion and Berserk the character in combat.
- A risky, but effective ploy is to bring Umaro armed with a Berserker Ring. Umaro’s Body Blow and Ally Toss (which you get with the Ring) bypass Evasion and Defenses.
- Be ready with Arise and Reraise when you reach the higher floors. Level 60 onward will not be a cakewalk.
Walkthrough Part 23 – Cultist’s Tower (Part 2)
Once you reach the top, the Soul of Thamasa is yours. However, trying to leave with it will tick off the Cultists and their leader will try to take back the Soul by force.
He knows all the Ra and Gas attack spells and uses Bio, Silence and Death against you. Some turns, he can dualcast these spells and they can get dangerous, especially with his high level and Magic Power. All these spells can be Reflected back. However, this boss comes with 3 annoying tricks.
The first trick is he has Auto-Reflect, some turns he will bypass your Reflect status by bouncing Agas off himself if necessary. In order to harm him with Magic, you must use Barrier piercing spells like Meteor or Ultima, or bounce spells off a Reflect character back at him.
The second trick is he copies the move from his predecessor Number 024: Barrier Change. It will cycle his absorptions, nullification and weakness, Any bounced back spells do not affect his counter. However, if he is hit by any Magic attack from your party, he will counter by casting Barrier Change, even Libra. Because of this, the fight can not only drag on but it makes it difficult for people who lack non-elemental spells.
The final trick is a vicious one. If slain, he will use Ultima as a Final Attack, which can only be dodged by calling Queztalli. If you do not have 6000 or more HP and/or Queztalli is no assistance to you, Reraise is your only hope of survival. This gimmick also cannot be shut down by Berserk status as Berserk is removed when the enemy gets 0 HP.
Defeating the Magic Master
- Opening with Zona Seeker is priority one, even if you have Reflect Rings.
- Make sure all party members have as many elemental resistances and status defenses as possible. Safety Bit and Amulets/Ribbons help. The Soul of Thamasa should be reserved for someone who has the most elemental resistances or the Paladin Shield as a Last Resort.
- Meteor, Ultima and bouncing Flare off your Reflected teammates are your only hopes of damaging Magic Master without dealing with his Barrier Change. Use X-Potions to heal your Reflected teammate if they are taking damage.
- Like with the normal enemies, you can Berserk a person with armor piercing weapons and have them go into a blood crazed frenzy on Magic Master. You will still need to use a Sniper’s Eye in order to reliably hit him.
- If you want to cheese most of this battle, bounce Berserk off yourself as this boss isn’t Berserkproof. You will then have to put up with a physical attacker. You can then make all his attacks useless by either summoning Phantom, Golem or bouncing Vanish off his Reflect. You will still need to worry about the Ultima Final Attack as Berserk is dispelled on Death.
- Once Berserked, you can safely Libra it and ascertain it’s weakness for double damage. If you have learned every Black Magic spell in the game, you will have access to every element possible except Wind.
- Another option, although very time consuming is to drain his 50000 MP using Osmose and Rasp as often as possible. You will need high Magic and Levels to drain at least 500 – 1000 MP per cast. At 0 MP, the enemy is slain and Ultima cannot be cast.
Once slain, head back down safely (you cannot Teleport while you are here) and continue to Kefka’s Tower to end this!
Walkthrough Part 24 – Kefka’s Tower (Part 1)
With all the necessary Rages in hand, your teammates together and the Soul of Thamasa at your command, your assault on Kefka’s Tower can finally begin. Although you may have taken a quick trip here earlier to acquire a few Rages, you will now be fighting your way through the opposition and slay Kefka and end this.
Make 3 teams of 4, splitting Gogo and Gau apart for 2 teams to matain Rage across 2 teams. Note that all 3 teams will have their share of monsters and challenges, so make sure your 12 representatives are capable of combat. Having 3000 or more HP on each character is definitely recommended and make sure before you face Kefka that your best characters (minimum of 6) have at least 4000.
WARNING: When you form your teams, you MUST put Strago on a team that will face Fiend. Fiend is the only monster in the game that uses Force Field. Failure to bring Strago into this fight and/or witness casting Force Field will force you to learn it in the Soul Shrine at the end of the game. To set yourself up correctly, put Strago on Team 1 and then have this party push the left weight down FIRST. If your party formation is incorrect, you can use Teleport and do the dungeon again to setup correctly. See the Final Assault portion to learn when Fiend does Force Field.
WARNING: Once the weights are slammed down and all 3 hands enter the palace and you slay the Warring Triad, it is the Point of No Return. Whatever Rages you have acquired at this point is all you will have. If you want to acquire some Rages from this place, do so before all 3 teams enter the Palace. My guide will assume you gain Rages on the fly if necessary. Once you slay the final boss, you will return outside to acquire anything you missed.
Note: For the boss section, I will assume Gogo or Gau will be fighting that monster, despite the fact some might be safe from the wrath of Rage. Only read boss sections that apply to you, but I will mention which Team will be facing that boss.
I will be splitting up the monster formations in terms of environment with bosses at the end section.
Enemies
- Great Behemoth (Both, Meteor)
- Great Malboro (Both, Bio)
- Vector Lythos (Both, White Wind)
- Primeval Dragon (Both, Firaga)
- Landworm (Caves Only, Magnitude 8)
- Vector Chimera (Caves Only, Aqua Breath)
- Fiend Dragon (See Note, Northern Cross)
Note: I will assume you have come here before, so my Rage tactics will reflect that.
Note: Caves are defined as Scrapyard tileset but inside structures. Outside is the opposite.
Note: After leaving the Containment Room on the Party 1, there is a U-Turn style cave, this is the only area where Fiend Dragon can be fought. It can also be fought on the way to Devil.
If you have been here before, you should have these Rages. If not, they are essentially upgrades to what you have. Great Malboro is the best Bio user as it can absorb 7 elements (all except Fire), Vector Lythos is Peeper without the Sap effect and Primeval Dragon is your best source of Firaga. The other enemies are optional as you have Rages who accomplish this by now. However, you can now access Fiend Dragon, which has one of the most broken attacks in the game: Northern Cross. If this connects, you can Freeze an enemy so they cannot move for almost 80 seconds or until you smack them with a Fire attack. This attack WORKS ON BOSSES!.
However, to compensate for this, the Dragon is a very real and dangerous threat. It primarily either attacks you or uses Southern Cross (heavy Fire damage). If you fail to slay it by it’s 5th attack it can either Northern Cross (Freezes entire party) or can use Flare Star (80 x Lowest Level / # of Party Members). Afterwards, it will cloak itself. but that is just half of it. If struck, it has a 33% chance to counter with Heartless Angel, reducing all characters to 1 HP, which can spell your doom if none of your party members absorb Fire. It can also be fought in pairs.
As stated in Kefka’s Tower Quickie section, there are various tricks each enemy is capable of. So be ready for them. If you wish to not go back, the short form of what you need to look out for is this:
- Great Behemoth has Meteor and counters with Haymaker (Attack x 5). You also cannot run from this monster while it is on the field.
- Great Malboro uses Infernal Kiss (Death, bypasses Deathproofing) if struck with Magic and uses Bad Breath as Last Stand.
- Vector Lythos abuse Fireball and can stack up to 4 in one group (literally stack)
- Landworm abuses Earth spells, primarily Magnitude 8
- Primeval Dragon hits hard physically with Heave (Attack x 5) and uses Lifeshaver a lot. It can also use Atomic Rays (Fire damage) if the battle drags.
- Vector Chimera can use various elemental offense against you, primarily the 3 major elements (Fire, Ice, Lightning) and Water.
Fighting These Foes
- Great Malboro can be scorched by Bomb or Grenade (Blaze) or Devil Fist (Will O’ the Wisp) without triggering Infernal Kiss. Devil Fist has the added bonus of being Deathproof and Bomb or Grenade can absorb Vector Lythos Fireballs. Be ready for their Bad Breath Last Stands. Primeval Dragon (Firaga) also works if you can OHKO them.
- Baalzephon (Blizzaga) can smite Vector Lythos, Landworms and Primeval Dragons like flies. It also has the added benefit of turning Lifeshaver on Primeval Dragons by reversing it’s effect. Darkside (Blizzara) although weaker can also cause Lifeshaver to work in reverse while striking at all these enemies for an Ice weakness.
- Great Malboro (Bio) can also be deployed to suck up Landworm’s and Primeval Dragon’s Earth based offense and still do full damage to it without the need of Float.
- Kamui (Snowstorm), Chimera (Aqua Breath), Adamankary (Acid Rain), Zeveak or Test Rider (Flash Rain) and Gorgimera (Avalanche) can destroy groups of Vector Lythos quickly. Just be careful when using this in Great Malboro groups as they absorb Ice.
- Great Behemoth, Vector Chimera and Fiend Dragon have no elemental weaknesses. Slaughter them with your hardest hitting Rages. Purusa or Luridan (Rock Slide), (Great) Behemoth or Tyrannosaur (Meteor), Killer Mantis or Twinscythe (Metal Cutter) or Yojimbo (Shock) can do the job. Be ready to counter Heartless Angel when it goes off.
- The aforementioned Rages do well against everything else. Just be careful when using Behemoth as Meteor will cause Great Malboro to counter with Infernal Kiss.
- Crowd Control can still be of assistance, especially if you want to cut down on damages.
- Death via Mu (Snare), Lycaon (Blaster) or Skeletal Horror (Banish): Great Malboro, Land worm
- Petrify via Deepeye (Dread Gaze): Primeval Dragon, Great Malboro, Vector Lythos, Landworm
- Stop via Murussu (Stop) or Gloomwind (Net): Primeval Dragon, Great Malboro, Great Behemoth, Landworm
- You can turn Primeval Dragons into Imps to cut down on their Lifeshaver and Atomic Rays abuse.
- Effective Confusion: Great Malboro (Sneeze, Bad Breath). Sneeze can help you Eject enemies you do not like, including themselves.
- Rafflesia (Entice) can spell Fiend Dragon’s doom. This can allow you to turn the Dragon’s Heartless Angel and Cross spells against itself, allowing for swift kills. It can also be used on Great Behemoths to turn Firaga on Great Malboros and Meteor on the enemy party. You can also mind control Great Malboros into Snorting other monsters out of battle. This effect also works on Deathproof enemies.
Walkthrough Part 24 – Kefka’s Tower (Part 2)
Note: The battle background for the Palace will be exactly the same as it was in the Vector Palace during the World of Balance when you talked to the soldiers. The earliest point you will access to region is on Team 2, where you face Ultima Buster (4 rooms in).
Enemies
- Yojimbo (Shock)
- Demon Knight (Shockwave)
- Dark Force (Tsunami)
- Ahriman (Roulette)
- Daedalus (Meltdown)
- Cherry (Holy)
- Outsider (Holy)
WARNING: Daedalus and Dark Force have Level 5 Death. Do not enter these areas with your entire party that has a level divisible by 5 without Deathproofing!
This is arguably my favorite place in the game for a couple of reasons. For starters, the Rages. You can turn Gau into General Leo through the Yojimbo Rage. Plus, Outsider is Holy Dragon with the added bonus of Auto-Haste at the cost of being weak to Holy instead. Ahriman’s Roulette has the added benefit of ignoring allies and Magic Evasion for it’s targeting, allowing you to always affect an enemy if it isn’t Deathproof.
Second, these normal enemies are some of the most dangerous enemies in the game (one of which happens to be my favourite enemy of this game) and can often spell doom to any type of playstyle, especially to those who focus too heavily on offense and/or didn’t prepare their characters properly. As you probably guessed by now, I tend to focus on using cunning and being clever with my fights, which is a tactic you must learn to master Gau correctly. You must do the same to not only Gau, but all hands to avoid burning through items and MP, especially if you are speedrunning.
My favorite enemy, Yojimbo is primarily a physical attacker. He can either slash you or bide time. If the battle drags, he will use Wind Slash against you. However, the real fun begins when you slay him. If slain, he will use Eye For An Eye on the person who killed him as a Final Attack, which will instant kill the target and ignores Deathproofing. Only blocking it with shields and Vanish will protect you from this strike. You can face up to 2 of them in battle, so if you kill them both at the same time, the next Eye for An Eye will target a random target should the first attack connect.
Ahriman is the embodiment of living Death. All of his attacks focus on Instant killing you, either by Dread Gaze (Petrify) or Doom (Death at 0) each turn. If struck with Magic, it has a high chance of using Roulette (instant kills a random target). Make sure you pack Memento Rings, Jeweled Rings or Safety Bits for this one.
Outsider is basically an upgrade to the Blade Dancer from Owzer’s Mansion. He throws weapons every turn and they progressively get worse as the battle drags. If not slain by the 6th attack, they have a high chance of committing seppuku via Dispatch on themselves. If struck by an attack, they throw Shurikens, the worst being Pinwheels if hit by non-physicals. All throwing weapons pierce physical defense and Protect, but can be blocked by Blink or Vanish. They are also always in pairs and have Auto-Haste, making them a very dangerous enemy with their relentless offense.
Another brutal monster is Cherry herself. She often pairs with Ahriman and Outsiders. She knows a large array of attack and defense Magic and often dualcasts spells past her first spell. The major spells to watch out for are: Holy, Flare, Reraise (you have to slay the enemy again when killed), Protect and Shell, Haste (speeds up enemies), and the Aga class spells (she casts these after she uses a buff or healing spell). If struck by anything, she will Cure herself and Meteor your team, doing upwards of 1500 damage to the entire party. To compensate for this, she has MP 0 = Death at 900 MP.
Dark Force knows mostly every Lore attack spell in the game and can use them every turn he gets. If Strago missed anything, now is the time to get it. The worst threat of his Lore list is Quasar (heavy damage to entire party, piercing Magic Defense to do so), Aero (if you have no Wind Protection) and Roulette (randomly kills a person). Learning Lores can also be a problem if they Self-Destruct or Roulette themselves.
The Demon Knight, much like his fellow 6 armed brethren abuses Zombie via Crypt Dust and can Sap your characters when hit. Crypt Dust can be incredibly annoying if this is done after Yojimbo uses Eye For An Eye. As a Last Stand, he can use Shockwave (low magic damage) up to 3 times straight.
Daedalus outside of his Level 5 Death isn’t too threatening. However, be careful when using Humanoid rages as he knows Bio, Venomist and Gravity. If struck physically, it has a chance to counter with Dancing Flame (Fire damage). It is the only Undead enemy in Kefka’s Tower.
How to Fight Smart
- Great Malboro (Bio) or Adamankary (Acid Rain) can strike at Yojimbo’s weakness to Poison and still do full damage to Dark Force and Demon Knights. Be ready for the Eye For An Eye attack. Great Malboro has the added benefit of absorbing any elemental Lores.
- Both are Cherry’s worst nightmare if she is paired with Ahriman. Ahriman don’t have Poison resistance. Adamankary cannot be killed by Roulette and also doesn’t trigger Roulette counters. Great Malboro will absorb every elemental attack Cherry has. Choose accordingly.
- Holy Dragon, Outsider or Borghese (Holy) can decimate everything here. Daedalus, Outsiders and Dark Forces all can’t stand the light while everything else takes full damage. Borghese and Outsider renders all of Daedalus’ and Ahriman’s Death magic useless (former absorbs, latter is Deathproof). Plus, the spell always targets 1 enemy, so you can easily control the ensuing counters.
- Marchosias or Sprinter (Aero, wear Thunder Shield), Chimera (Aqua Breath), Ninja (Water Scroll, wear Thunder Shield), Guard Leader or Covert (Wind Slash), Tyrannosaur (Meteor), Killer Mantis or Twinscytthe (Metal Cutter, wear Fire protection) and Purusa (Rock Slide) can also take down groups quickly without triggering Ahriman Roulettes. Be warned when facing Yojimbo and Outsider pairs and their counters.
- Bogy (Stoneproof vs Ahriman), Stray Cat, Gold Bear and Garm (Death and Stoneproof) with can be devastating here. Gogo should use the Holy or Poison Rod (depending on enemies) or the Gladius to maximize damage. The Swordbreaker can also help block Yojimbo’s Eye For An Eye with it’s 30% bonus evasion.
- Crowd Control can be helpful at staying alive in this region. Use it if necessary!
- Death via Mu (Snare), Lycaon (Blaster), Ahriman (Roulette) and Skeletal Horror (Banish): Outsider, Daedalus
- Petrify via Deepeye (Dread Gaze): Outsider
- Stop via Murussu (Stop, Deathproof, no elemental weaknesses): All enemies
- Stop also shuts down any active counters, including Outsider’s throwing attacks and Cherry’s Meteor abuse. However, Stop is dispelled on Death, so Yojimbo will still fire off Eye For An Eye.
- Imp is invaluable in this region! Yojimbo cannot do Eye For an Eye and Cherry is completely helpless while in Imp form. Use this spell as your opening move against them!
- Schmidt (Mega Berserk) also shuts down Ahriman and Cherry magic. It will not stop Yojimbo’s Eye For An Eye when slain as Berserk is dispelled on Death.
- A fun strategy for Yojimbo groups is Coco (Overture). If Yojimbo gets slain by Gau, Eye for an Eye can be intercepted by another monster, killing 2 birds with 1 Stone. Deathproofing is ignored on enemies as well.
- Raffelsia (Entice) can turn Yojimbo’s Eye For An Eye on other monsters, including itself. The same can be done on Outsider through his Dispatch attack. Both attacks are also on Relm’s Sketch card.
- Destroyer (Reraise), Magic Urn (Curaga) and Vector Lythos and Peeper (White Wind) can help save on MP for healing in battle and ensure survival. The first one helps against Yojimbo’s Eye For An Eye.
Walkthrough Part 24 – Kefka’s Tower (Part 3)
Note: The battle background will be the same as the Magitek Research Facility.
Enemies
- Duel Armor (Megavolt)
- InnoSent (Venomist)
- Death Machine (Death)
- Fortis (Fireball)
- Metal Hitman (Dischord)
- Mover (See Notes, Meltdown)
- Junk (Transfusion)
- Muud Suud (See Notes, Snowstorm I)
- Prometheus
- Gamma (Dischord)
Note: Muud Suud and Mover can only be fought by Team 2. They only appear in the room directly after the Prison Cells where you fought Ultima Buster. The battlefield will be Palace, so dont get thrown off by it.
Note: Prometheus has No Rage and won’t appear in the Veldt.
WARNING: Death Machine and Duel Armor have Level 5 Death. Make sure your entire party doesn’t have levels that are divisible by 5 without Deathproofing.
The Rage selection is pretty bad outside of Mover. Mover is the best source for Meltdown, which can be effective if you deal with Entice abusers (you will be facing one shortly) and you are able to apply Fire and/or Wind protection to all your party members.
Except for Muud Suud and Movers, every enemy here is essentially robotic. The enemies overall here aren’t too difficult, but some of them can have some underhanded tricks that can make them incredibly annoying.
Death Machine is by far the worst of them. It is essentially the mechanical version of Ahriman and primarily uses instant kill spells. After it’s Level 5 Death opener, it can use Mind Stop (inflicts Stop) or Death spells. If struck by any ability outside of physical attack, it will counter with up to 4 casts of Blaster (each has a 33% chance of going off). Blaster can be incredibly fatal if any one of these casts hits your entire party or all 4 are cast and connect. Blaster also ignores Evasion on Stopped characters. Bring Deathproofing!
Duel Armor not only has Level 5 Death, but Level 4 Flare and can hit hard with Mindshock (Attack x 4). If struck by anything, he will have a 33% chance to retalliate with Metal Cutter (high non-elemental damage against 1 or all party members).
Fortis and Gamma abuse Gravity based spells a lot. Fortis halves HP with Snowball and Missile while Gamma uses Launcher (8 strikes of Gravity with random targeting) and Gravity Bomb. Fortis also uses Fireball and will attack twice if struck by Lightning. Gamma opens with Gamma Rays (inflicts Doom on 1 person) and uses Atomic Rays (Fire damage to 1 person) and Wave Cannon (Lightning damage to all hands) as well. If slain, it will cast Atomic Rays as a final attack. Fire, Lightning and Death protection can make these guys a joke.
Promethus uses Metal Cutter and Drill (Attack x 1.5) as it’s common attacks, but it brings out it’s true annoyance when struck. If hit by a standard attack, it can (33% chance) Freeze your entire party with Northern Cross. If hit by Magic, it can (33% chance) hit your entire party for Fire damage with Southern Cross. If you have fire protection, the counters can be used to thaw out Northern Cross and free healing.
Muud Suud tends to abuse Gigavolt, Snowstorm (the 25 power version) and Body Slam (Attack x 3). However, it also has the capacity to Freeze party members with Freezing Dust and Northern Cross if the battle drags out too long. They also have the rare Thunder Shield for stealing, so bring Locke or Gogo into Team 2 to acquire them. They will be helpful in the boss fights to come and you can wager spares for Genji versions.
InnoSent can be a problem as it knows Level ? Holy (Holy damage to all party members who’s level = your Gil’s one digit). It too can Freeze party members with Freezing Dust and strike at enemies with Plasma (Lightning damage). It always opens with Brainblast (Confusion), which can be a problem if fought in groups of 3.
Junk are extremely unstable and are prone to blowing themselves up with Self-Destruct and sacrificing themselves to heal each other with Transfusion. They can do up to 2000 damage. If they are spared from their kamikaze style tactics, they can cloak themselves with Parallout.
Metal Hitman are the easiest enemies here and often get killed in one hit, but the Dischord spell can make smiting Death Machines difficult in 1 strike, opening yourself up to Blasters.
Movers are also an easy enemy as all they do is either attack you or use Silencing Touch, plus all 3 only have 120 HP. As a Last Stand, they will either apply Mighty Guard or fire 1000 Needles at you. The only annoyances with Movers are all 3 have 220 Physical Evasion and 254 Magic Defense. You will need either undodgable physicals or armor piercing Magic attacks to gun them down.
Fighting These Machines
- Chimera (Aqua Breath) or Test Rider (Flash Rain) can devastate every Mechanical enemy here. Both can exploit their weakness to Water and both carry Deathproofing for the Death spells and Dischord. If you have a Safety Bit on, you can also use Ninja (Water Scroll).
- Dark Force or Enuo (Tsunami) are also effective if the split damage on Aqua Breath or Water Scroll are inhibiting damage. Enuo has the added bonus of Auto-Reflect to bounce back Death spells from Death Machine.
- Illuyankas (Gigavolt) is also a dangerous Rage here as it is Death, Doom and Confuseproof, deals double with Lightning and can absorb Gamma’s Wave Cannon and InnoSent’s Plasma without the need of a Thunder Shield. Since this is also an Enemy ability, Prometheus can never counter with Southern Cross when struck with it. It will still trigger Fortis’ melee attacks.
- Baalzephon (Blizzaga, wear Fire protection) can also be handy as it has Deathproofing and can absorb almost all the elemental attacks deployed here, while still doing full damage.
- Borghese, Holy Dragon or Outsider (Holy) can smite Muud Suud without fear of exploitable weakness. Borghese however gains Undead effects. Holy Dragon can also absorb InnoSent’s Level ? Holy.
- Twinscythe and Killer Mantis (Metal Cutter), Behemoth or Tyrannosaur (Meteor), Marchosias or Sprinter (Aero, wear Lightning protection), Covert (Wind Slash) and Yojimbo (Shock) can decimate enemies while maintaing Deathproofing. Use armor piercing options against Movers.
- Stray Cat, Bogy, Gold Bear and Garm (Death and Confuseproof) can inflict serious damage here. Gogo should use either the Thunder (double damage) or Magus Rods (30% dodge against spells). Gladius can waste Muud Suud. Non-Garms need Deathproofing!
- Crowd Control can be helpful if used correctly.
- Death via Mu (Snare), Lycaon (Blaster), and Skeletal Horror (Banish, absorbs all Death moves except Blaster): All enemies except Promethus, Gamma and Muud Suud
- Stop via Murussu (Stop, Deathproof): All except InnoSent
- Stop is invaluable as it also shuts down Death Machine Blasters, Prometheus Cross abuse, double melee strike from Fortis and Muud Suud’s attacks while you steal.
- All enemies are Stoneproof, rendering Deepeye (Dread Gaze) useless.
- Briareus and Platinum Dragon (Cyclonic) can be helpful at crippling groups of mechs if your damage is lackluster.
- Noteable Confusions: Death Machine (Death) can cause it to slay it’s bretheren or itself. Junk kamikaze attacks can be turned on each other as well. Transfusion will heal you.
- Rafflesia (Entice) can be helpful when fighting off one enemy parties, especially since Prometheus have the capacity to Freeze themselves with Northern Cross.
- Destroyer (Reraise) can help against Death Machine if you want assurance nobody will fall. Vector Lythos or Peeper (White Wind) can also keep party members healthy on the fly.
Walkthrough Part 24 – Kefka’s Tower (Part 4)
Team 2 will eventually reach the prison district where Kefka was locked up in the WoB. Inside the cell that Kefka was in is now an evolved, more devastating form of Ultima Weapon, called Ultima Buster. Communicating with him will trigger a battle.
Ultima Buster is much like Ultima Weapon, resorting to an overall magic offensive against you. Except he will primarily focus on elemental magic, Unlike Ultima Weapon, he absorbs everything except Fire, Ice and Lightning (takes normal damage). To compensate for the elemental protection, it’s actual defenses are garbage (75 Physical and 70 Magic) and he is still vulnerable to Slow.
Attack Phase One (HP > 32640)
It will cast all 3 Aga attack spells each turn. It also has a chance to use Northern and Southern Crosses against you. Northern Cross can be a problem as it can freeze while Southern Cross can hit hard if you lack Fire protection.
Attack Phase Two (HP < 32641)
It drops Thundaga, Blizzaga and the Cross spells and substitutes them in for Quake (Earth damage to all party members and heals itself due to Earth absorption), Flare Star (80 x (Lowest Level in Party) / # of Active party members), Tsunami (Water damage to entire party) and the worst being Meteor (non elemental damage to entire party).
In both attack phases, it will counter attack (33% chance) if struck by anything. If the player fails to slay Ultima Buster in 12 attacks, it will begin charging. After 2 attack turns of charging, it will unleash Ultima, doing catastrophic damage to your entire party if you fail to intercept this spell with Runic. Either slay him in 12 moves or bring Gogo or Celes with Runic capabilities.
Gau or Gogo are more than capable of combating this beast, if used correctly. Make sure when you select your Rage, your elemental resistances are working with the Rage to ensure maximum potential. The last thing you want is to take double from Flare Star or an Aga.
Busting Ultima Buster
- If you are doing a LLP, it is imperative to cast Slow on this beast and setup Zona Seeker or Mighty Guard as soon as possible. This will help when he is charging Ultima so you can end him before the cast.
- During the first attack phase, try to get everyone off the ground with Float, or do so before the battle begins. This will help negate Quake later.
- If you use the Debilitator, try to aim for Lightning, Fire or Ice. All other elements will give it double absorption. If you roll one of those elements, use that element against him to ensure maximum damage.
- With Fire protection equipped, Baalzephon (Blizzaga) is this beast’s worst nightmare. In this Rage with Fireproofing, no elemental attack can harm Gau or Gogo and they can do full damage to the beast. The only attacks that can inflict damage are physicals, Meteor and Ultima.
- Anemone (Gigavolt) with a Flame Shield is just as effective. You get defense from Agas and Tsunami. You will need to get Gau off the ground for Quake.
- With a Snow Scarf on, Bomb or Grenade (Blaze, Auto-Floats) or Primeval Dragon (Firaga) can be helpful. If Gau or Gogo get Frozen, a Fire spell will not only thaw them out, but heal them. Bomb and Grenade also cancel Quake.
- Io (Flare Star) always does 5360 to this boss (80 x Level 67 / 1) and 9999 if the Debilitator rolls Fire. This helps in LLPs immensely. It also can stay on the ground as it is Earthproof. You will need a Force Shield to cancel the weaknesses to Lightning and Water.
- If you want to go non-elemental magic, Yojimbo (Shock), Behemoth or Tyrannosaur (Meteor), Purusa (Rock Slide), Twinscythe or Killer Mantis (Metal Cutter) also do devastating damage. Make sure Gau or Gogo are wearing at least a Thunder Shield and/or Snow Scarf before Raging. All these Rages also have the benefit of still going off even if Celes is channeling Runic.
- Bogy, Gold Bear or Stray Cat can inflict severe physical harm to this boss. Gogo should use the Swordbreaker (maximum damage and 30% Evasion for counters) or Magus Rod (30% Magic Evasion) before Raging. The Thunder, Ice and Fire Rods can also work if the Debilitator rolls that element.
- Magic Urn (Curaga) or Destroyer (Reraise) can help keep party members from falling. The former has the added advantage of absorbing all elemental offense without shields. Vector Lythos and Peeper (White Wind) also work if you are wearing a Force or Paladin Shield.
Once slain, the boss will be replaced by a Save Point, allowing Team 2 to save the game and utilize the Save Tent Glitch at any time while they stand on the point.
In one of the factory regions, Party 3 will eventually be ambushed by Inferno while trying to climb down a staircase. You must slay this bio-weapon in order to continue progress.
Inferno is basically a rematch with Number 128 from the Magitek Facility, except it’s attack pattern changes. It now primarily attacks with Lightning and Fire spells (Gigavolt, Atomic Rays, Thundara) and can do a non-elemental Shock Wave. The arms themselves just physically slice at you..
Like Number 128, it has 2 arms. Ketu (right arm from player’s perspective) can hit hard with Metal Cutter to 1 or all party members. Rahu (other arm) can use Rapier and hit physically. To compensate for this, both arms are weak against an element (Ketu is Fire, Rahu is Ice) and both can be instant killed by Death or Petrify. These arms will be repaired if inactive for 40 seconds.
Every 30 seconds, it will fire off Delta Attack if both Ketu and Rahu are intact. This attack will automatically Petrify the target if they are not Stoneproof. It can also cast Thundaga and Meteor under these conditions, Make sure you keep those arms slain! If the main body is slain, the entire boss will be destroyed.
Fighting this Bio-Weapon
- For LLPs, it is imperative to slap down Slowga on the first move so that you can inflict Slow on all 3 parts. Mighty Guard is also recommended. The arms are also not Stopproof if you want to keep them under wraps. Blinding the boss with Flash also adds on another 25% Evasion to all players for Sobat and Rapier.
- Anemone or Illuyankas (Gigavolt) with a Flame Shield can be this monster’s worst nightmare. Not only does this boss strike at the body’s weakness to Lightning, but cannot be damaged by any elemental offense. Aspiran (Gigavolt) and Punisher (Thundaga) will need at least a Thunder Shield.
- Great Malboro (Bio, wear Fire Protection) can also be effective as it absorbs all elements and can do full damage to all 3 parts when needed.
- Marchosias or Sprinter (Aero, wear Lightning protection), Ninja (Water Scroll, wear Lightning protection), Covert (Wind Slash), Chimera (Aqua Breath), Antares (Magnitude 8, absorbs Fire), Twinscythe and Killer Mantis (Metal Cutter, wear Fire protection), Tyrannosaur or Behemoth (Meteor) and Yojimbo (Shock) can effectively damage all 3 parts for full damage.
- Bogy is a dangerous physical Rage for this boss as Gau or Gogo get Auto-Protect for Rapier and Sobat and Stoneproofing for Delta Attack without Relics. Stray Cat and Gold Bear work too. Gogo should equip a Thunder or Magus Rod, Gladius or Swordbreaker before Raging.
- Lycaon (Blaster) may not look like much, but it gives you an attack that can instant kill both arms so you can focus on the body when necessary.
- Vector Lythos or Peeper (White Wind) can keep all hands alive during the battle. Destroyer (Reraise) can also be of assistance in LLPs.
Once slain, Team 3 can continue their descent.
2 of the 8 Dragons also live in Kefka’s Tower. Gold Dragon is fought by Team 2 and Skull Dragon is fought by Team 3 and they are almost impossible to miss. Check the Optional Bosses – 8 Dragons section on how to slay them via Rage. Do it now so you can get the Crusader Magicite for Meteor and Meltdown.
Walkthrough Part 25 – The Warring Triad (Part 1)
Once you have made it to the Palace and Team 2 and 3 have held down the switches to allow Team 1 to enter. You must make crucial decisions with your teams. Team 1 will always either choose the Right or Left Path. The 2nd team to enter will be taking the path Team 1 didn’t take. The last team will head up the center.
WARNING: Make sure Strago faces Fiend here. Do whatever manipulation of switches is necessary to ensure his team faces him. Failure to do so will prevent you from learning Force Field until the Soul Shrine. Team 1 should have Strago and that team should go left when they enter the first time.
Whoever takes the Central path will have to face off against Guardian first, the indestructible Magitek weapon that was developed to guard Vector and the Palace. Except, this time, you can actually destroy it. If you have been defeated by this mechanized horror, now is the time to get your long waited vengeance.
The Guardian will fight differently than it did the 3 times before this. It uses 5 different Battle Programs against you, each with their own share of dangers. the longer the battle drags, the worse the programs get. It will change programs when it completes the final attack of the current program. When a non-default program is complete, it will return to default. When default is complete, it will move to the next available program.
Default Program
It uses various Magitek style offense against you, ranging from the cruddy Magitek Laser to as high as the Atomic Rays (Fire damage) or the dangerous Missile (reduces HP by 75% to non-Deathproof). This program ends after 2 attacks
Ultros Program
This program is annoying with Entwine (Slow) and Stone (possible Confusion and does 8x damage if the target is Level 67). Tentacle can hit has high as 2000 damage if this attack connects. The program always ends after 4 attacks. It always ends with Entwine.
Dadaluma Program
This program isn’t too bad, but it gets problematic at the end when it throws a Dagger-class weapon at you (pierces defenses), use up to 3 Hi-Potions and cast Magitek Barrier on itself, applying Protect and Reflect to itself. Try to dispel this immediately, especially if Gau is using a Lightning based Rage outside of Chaser (Plasma). The program ends after Magitek Barrier.
Air Force Program
It will amplify it’s Lightning based offense by using Diffractive and Magitek Lasers. The worst attack it can do is Launcher (8 hits of Gravity with random targeting). If you fail to slay this boss after 3 attacks, it will begin charging Wave Cannon and unleash Lightning damage on your entire party. Except for Wave Cannon, all these attacks can be stopped by Runic and all attacks can be shut down by Lightning and Death Resistance. The program ends after Wave Cannon fires.
Ultima Weapon Program
This program is extremely dangerous as the boss can now cast Flare and Meteor against you, both doing catastrophic damage to your party. If you fail to stop it after 3 attacks, it will cast Flare Star against you (80 x lowest level of party / # of active party members as Fire). The program ends after Flare Star is cast. Most players tend to have the boss slain long before this, but it should still be considered a threat if you are doing a LLP run or a challenge.
Destroying this Boss
- Before you send this boss to the scrapyard, try to steal the Force Armor (Common Steal). This armor will help you greatly for the other battles yet to come. If Gogo has Rage and Steal, steal before Raging.
- LLPs should try to cast Slow on this machine as soon as possible. This will stall the amount of time it takes to go through it’s programs. The last thing you want is to be struck with Ultima Weapon’s attacks.
- Mighty Guard, either by Sketching it or casting it via Lore can help reduce damage immensely, especially if the fight drags into the Ultima Weapon and Air Force programs.
- Punisher (Thundaga, Auto-Haste) should be able to destroy this boss long before it goes beyond it’s default or Ultros programs. If you fear it will go beyond that, Anemone (Gigavolt) and Illuyankas (Gigavolt, Deathproof) both absorb Air Force and Default’s Lightning offense. The latter has added defense from Launcher. You will need to watch for Magitek Barrier.
- (Vector) Chimera (Aqua Breath) can strike at this boss’ secondary weakness to Water. It also has Deathproofing for Air Force’s Launcher. Ninja (Water Scroll, wear Lightning protection) also gets the job done, plus as Auto-Haste. Water offense also bypasses Magitek Barrier.
- Marchosias or Sprinter (Aero, wear Lightning protection), Killer Mantis or Twinscythe (Metal Cutter, wear Fire protection), Behemoth or Tyrannosaur (Meteor), and Purusa (Rock Slide) can do some effective damage as well. Make sure your elemental resistances are in order before Raging.
- Stray Cat, Bogy and Gold Bear can turn this machine into scrap metal no problem. Garm can also scrap some physical bonus for Slow and Deathproofing. Gogo should equip the Thunder Rod before going into a physical Rage for maximum damage. Just watch out if you fire off an amplified Thundara while it still has Magitek Barrier.
Once this mechanized horror has been destroyed, it will reveal a Save Point and this party can proceed to face Devil.
Now is your fight with the first of the three in the Warring Triad, the Demon. Coming into contact with it’s statue will trigger the battle. The boss itself absorbs Wind and Fire, but has a crippling weakness to Poison. To compensate for the weakness, it has Auto-Protect and Haste. The boss also attacks you in two phases based on it’s current health pool.
Phase One (HP >= 32640)
It mostly uses Non-elemental attacks. It will either slash you physically, use Tyrfing (Attack x 2) or slash one or more party members with Metal Cutter, doing heavy Magic damage. The most dangerous attack this phase it can do is cast Stop every 2 turns. If a character is under Stop, Demon will immediately fire a Blaster at the person, instant killing him or her if they aren’t Deathproof. Stopproofing also allows the same defense.
Phase Two (HP < 32640)
The boss changes his non-elemental offense for elemental based attacks, primarily Aero, Flare Star and Southern Cross (Fire damage to entire party). The worst attack in this phase is Meteor (the monster version, deals up to 2000+ damage).
During both phases, if this boss is struck 8 times, he will immediately fire a Wave Cannon (Lightning damage to the entire party). Any time he is struck, there is also a 33% chance he will cast Firaga on the attacker.
Defeating Demon
- Great Malboro (Bio, wear Fire protection) is Demon’s worst nightmare. Not only does Bio strike for double damage, but no elemental attack can harm Gau or Gogo once the Fire issue is resolved. Just watch for Blaster combo.
- Baalzephon (Blizzaga, wear Fire protection) also does solid damage while meeting the above criteria. It also cannot be targeted by Blaster due to Stopproofing.
- Tyrannosaur (Meteor) is also effective. Not only does this attack do full damage and ignore defenses, but Tyrannosaur is both Stop and Deathproof, making Demon’s instant kill strategy useless.
- Yojimbo (Shock, Deathproof), Killer Mantis (Metal Cutter, Deathproof), and Purusa (Rock Slide, wear Deathproofing) can be effective, you will just need to watch for Stop slowing you down.
- Bogy, Stray Cat and Gold Bear can hit hard physically. Gogo should wield a Poison Rod before going Rage. Make sure you have high Strength before doing Physical rages.
- Murussu (Stop, Deathproof) or Fiend Dragon (Northern Cross) can cut down this boss’ attack frequency by applying Stop or Freeze. Due to Auto-Haste, the effects last approximately 20-40 seconds, so make your damage count.
Walkthrough Part 25 – The Warring Triad (Part 2)
The team on the right will face off against Goddess. Touching the statue will initiate the battle. Of the 3, she is arguably the most annoying to destroy. The only saving grace is the party always attacks her in a Pincer Strike. The direction her one wing is pointing in will determine which direction she is facing in. However, she has Auto-Haste and Shell, absorbs Lightning and Holy and cannot be affected by any status effects.
Like Devil, she has two phases, based on her current HP pool.
Phase One (HP >= 32640)
She will primarily use Thundara/ga against 1 side. However, she has two very dangerous status effect attacks: Lullaby (applies Sleep to 1 side) and Entice. The latter is extremely dangerous as that character will have reversed targeting (attacks you or heals her) until she is slain or the party member is slain. If Gau is under a Rage such as Yojimbo (Shock) or Tyrannosaur (Meteor) and then struck with this move, it could very well spell disaster for you.
Phase Two (HP < 32640)
She will drop Thundara in favor for Flash Rain (Water/Ice damage to one side) and Quasar (non-elemental damage that pierces Magic Defenses). Quasar can be incredibly painful if you are doing a LLP or Entice has done some dents to the party members.
The worst of her tricks come from actually attacking her. If struck with standard physicals, she has a 33% chance to cast Overture on the attacker, causing all future physical attacks to be intercepted by the afflicted and that character will take the hit instead. This can be catastrophic for Physical Gaus using Stray Cat, Bogy or Gold Bear as you can either make Gau kill himself or kill someone else. Anything else will cause her to strike you with Thundara.
If you strike her 8 times in any fashion, she will cast Cloudy Heaven. This field spell will inflict Doom on all party members and overwrite the Death mechanics in the battle. Now, if any character is slain, either by the Doom timer hitting 0 or getting KO’ed at 0 HP, they will immediately become Zombies. Only the Safety Bit and Doomproofing can block the Doom timer, but the Zombie effect will always happen despite any proofing and it cancels Reraise. Try to keep all hands alive and slay her as soon as possible.
Gau or Gogo will have to be used strategically. You may have to resort to using elemental or weaker Rages if you fear the battle will drag, especially if she entices or overtures Gau or Gogo. My tactics will give you safer options to deploy to avoid killing yourself damaging her. But make sure Gau or Gogo aren’t the last characters standing.
Smiting the Goddess
- If you need it, you can steal a Minerva Bustier from Goddess.
- Slap down Mighty Guard and/or Golem as soon as the battle starts. This will cut down the overall damage you will do to yourself and her attacks
- Consider wearing Mirage Vests or summoning Fenrir to help cut down on the Overture damage.
- Try to aim towards Elemental Rages for this fight. If you set up your resistances correctly via Shields, then an Enticed Gau can at least provide heal support for the team. This is especially important if the fight drags to Cloudty Heaven.
- Luridan (Rock Slide, Sleepproof, wear Ice protection) can be incredibly fatal to Goddess. This attack pierces Shell and in the event Gau or Gogo get Enticed, the attack will always hit only 1 person, allowing for manageable recovery.
- Mover (Meltdown) can be incredibly effective here. If everyone is wearing a Thunder or Flame Shield, then Meltdown will do nothing or heal your teammates and does Magic Defense/Shell piercing damage to the Goddess. This is a good Rage to choose if you are worried about Entice.
- Io (Flare Star) always does 5440 (80 x Level 68 / 1) to this boss or 9999 if you roll Fire on the Debilitator. If Gau gets Enticed, the damage will be (80 x Lowest Level on 1 side / 2). Flame Shields can turn Flare Star into healing if Gau gets Enticed.
- Devil Fist (Will O’ The Wisp), Primeval Dragon (Firaga) and Baalzephon (Blizzaga) also have controllable attacks and do full damage to the boss (but still get halved by Shell). If all hands have Fire and/or Ice protection or absorption, you will have nothing to fear if Gau gets Enticed. All Rages mentioned are Doomproof.
- If you must use Stray Cat, Bogy or Gold Bear, be aware of Overture. Although it can do double damage if Gau or Gogo attack her back side, you may run the risk of harming your own team. Use Bogy, Protect or an elemental weapon that your party absorbs!
Once slain, claim Excalibur (Holy elemental sword) and leave the team on the switch in the next room.
Finally, on the left side, they must face off against Fiend, the last of the Triad. Communicating with the statue will trigger the battle. It’s two phases are basically the polar opposite to Demon, starting with Magic and ending physically. Fiend absorbs Ice and Poison, no Auto effects and is weak against Holy and Slow.
First Phase (HP >= 32640)
The boss will rely on a heavy Ice based offense, using Blizzaga and Absolute Zero against your party. It also has a chance to use Northern Cross, which inflicts mass Freeze. Ice protection and Magic Evasion can cancel this, mass Fire on a low magic character can thaw all hands at once.
Second Phase (HP < 32640)
He drops the Ice magic and begins a physical onslaught. He first applies Reflect, Haste and Image statuses then begins physically striking you normally or sets up Targeting and uses Devilish Rage to deal massive damage (Attack x 4). Every 20 seconds, he will cast Force Field, a field spell that completely nullifies any elemental damage of that type for all hands. This can overwrite his Holy weakness and be troublesome if you rely on an Elemental based offense. Repeating casts can stack on multiple elements.
On both phases, if struck by anything, he will most likely counter with his own physical attack. If he is struck 8 times, he will reverse the party’s Row Configuration with Reverse Polarity.
Gau and Gogo can strike this fiend down easily. Just remember to prolong the battle a bit so you can gain Force Field for Strago. He must be active when the spell goes off and when the battle is won to learn it.
Slaying the Fiend
- Try to steal the Safety Bit from this boss, it will be helpful against Goddess and the final bosses
- Slow and Mighty Guard help immensely. Slow will need to be reapplied for Second Phase after Dispel.
- Holy Dragon, Warlock, Borghese and Outsider (Holy, wear Ice protection) can smite this boss for it’s Holy weakness. Outsider gets the added benefit of Haste status. You will have to use Death and Bio to heal Borghese. However, you must dispel the Reflect on Phase Two and pray the boss doesn’t roll Holy on Force Field.
- Io (Flare Star) always does 5840 damage (80 x Level 73 / 1) to this boss or 9999 if you roll Fire on the Debilitator. The Debilitator cannot overwrite Force Field once it rolls Fire. This attack is helpful in LLPs.
- Purusa (Rock Slide), Twinscythe (Metal Cutter), Behemoth or Tyrannosaur (Meteor), or Yojimbo (Shock) can do full damage to this boss and don’t have to worry about Force Field effects. Twinscythe has the added bonus of natural Ice absorption.
- Stray Cat, Bogy and Gold Bear can also do full damage to this boss regardless of Force Field. Before then, the Holy Rod or Gladius can do bonus damage. Once Phase Two begins, you must dispel the Reflect and Protect to ensure maximum damage.
- Vector Lythos or Peeper (White Wind, wear Ice protection) and Magic Urn (Curaga, absorbs Ice) can keep party members alive if you wish to resort to defense.
Once slain, claim your Force Field Lore (if Strago is with you) and Mutsunokami (ultimate Cyan weapon) and leave the party on the switch in the next room.
If all 3 parties are on switches, you will be transferred over the Kefka for the final showdown.
Walkthrough Part 26 – The Final Assault (Part 1)
The time has finally come. After doing one massive friendship speech against a psychotic God of Magic, you will now face off against him. The battle mechanics here are a bit different and you must factor this into your team construction.
- Make sure at least 6-7 people have 3500 – 4000 HP or more and outfitted with reasonable to best gear possible. If Gau is with you, make sure you know which Rages do what and you overcome any weaknesses if any.
- Make sure at least 3-4 people in your representatives have access to Cura/ga, Reraise, Arise, Raise, Esuna, Haste(ga), Slow(ga), Stop and Death (both optional). The more the merrier. Magic Power on these characters are recommended.
- Anything that protects from the 3 primary elements helps immensely. Fire, Thunder, Ice and Wind protection can easily be covered with a Thunder Shield.
- Having a character with Steal helps immensely, either bring Locke or arm Gogo with it.
- Make sure all hands have either Ribbons on. If you don’t have enough, White Caping your Mages and Amulets for your physical attackers helps. Safety Bits are recommended!
The 12 character order will now be set. The first 4 selected will be deployed first. The Game is Over if all available or active characters are slain. If a party member(s) gets Petrified, KO’d or Zombified when the tier is destroyed, they will be swapped by the next available characters. For example, if you face Lady and Rest (3rd Tier) and Repose Final Attack claims your 3rd and 4th characters, the 1st, 2nd, 5th and 6th character go on the slay Kefka.
A lot of players have been known to resort to reckless offense and/or only buff a specific few characters. If you know you will lose people, make sure you have backup options, otherwise, slow down your offense and get everyone healed up before the next tier, especially after leaving Lady and Rest to Kefka. The last thing you want is your precious dual Valiant Knife Locke or Ultima casters struck down by low blow moves.
However, if all hands survive and you move to the next tier, you will retain any HP/MP you had. Gogo and Gau will end their Rage and you can pick a new one for the next tier. Try to predict when the boss will be slain so you can do a quick Curaga to enter the next phase will full health. Don’t be afraid to use Drain and/or Osmose against the tiers to save on items.
For my suggestions, I will pitch not only which Rages do help, but overall tactics to ensure maximum damage, minimal loss of life and failsafes in the event these sucker punches cannot be avoided. I will also factor in all possible playstyles when doing so. Despite the fact most consider Kefka and friends to be some of the easiest bosses, I have mostly found that people tend to say that because they either use the most overpowered spams (Ultima, Master’s Scroll, Quick, Valiant Knife/Ultima Weapon etc.), got incredibly lucky or are overleveled for the occasion.
- Celes – Runic will help you against the Magic, especially against Kefka. She can also double as a Mage and a good contender for the Soul of Thamasa.
- Strago – Mighty Guard can setup Protect and Shell quickly. Quasar and Grand Delta can also be effective. White Wind can save lives. Force Field if you get lucky can cut down overall damage. Also works well with Soul of Thamasa.
- Edgar – Debilitator can cycle a weakness for Gau to exploit, especially against Kefka, allowing more attack options for you and your team to open. Can also be painful with Drill and Chainsaw or Flash.
- Locke – Every tier has Elixirs for easy steals. When you hit Lady and Rest, you can steal Ragnarok and Ultima Weapon for the Dragon Den. The former can be gambled for Lightbringer at the Coliseum. You can also steal a Megalixir off Kefka to counter the Heartless Angel opener. When he isn’t stealing, there are many weapon combos that will allow you to shred each tier quickly.
- Sabin – Razor Gale, Rising Phoenix and Phantom Rush can be devastating against the bosses on the way up. Raging Fist is good if you have been raising Sabin’s Strength.
- Shadow – Throwing Fuma Shuriken as always is painful. Man Eater knives can do double damage to Kefka, Lady, Rest, Power and Magic when thrown at them. Both save on Impartisans.
- Gogo – Can be adapted to take on the roles of multiple characters. You need a Celes and Locke at the same time? No problem! Equip Gladius, Steal and Runic!
The other teammates hold merit so you don’t have to follow my suggestions. But make sure you know 100% know how to use them and adapt to the changes.
Once your party is setup, confirm your select and begin the assault.
Walkthrough Part 26 – The Final Assault (Part 2)
The first tier is a giant top half of a demon with a muscular build. This portion is primarily built around whacking at you physically. The attacks can be a bit troublesome.
Long Arm (Arm on your Left, 33000 HP)
It primarily does normal attacks and Shockwave (low magic damage). Once it’s HP goes below 10240, it will attack up to two times in a row (66% chance each time). As a Last Stand, it will attack up to 3 straight with Shockwave (66% chance each time). To compensate for this, this hand can be slain by Instant Death moves and is weak against Wind.
Short Arm (Arm on your Right, 27000 HP)
It primarily attacks or does nothing. At 10114 HP or less, it will either attack or Gale Cut your party (low Wind damage). If struck by any offense, it will counter with an attack of it’s own. This hand is weak against Water.
Visage (Head, 33000 HP)
This can be both a nuisance and a threat. Every turn, it will mess with your formation with Reverse Polarity and inflict Sap via Sapping Strike. If you fail to slay it by it’s 5th turn, it will begin using Protect or Haste on it’s hands to speed them up. This can be a problem if the Long Arm gets Haste and is the last one standing.
The threat picks up when it goes below 10240 HP as it will now begin using Dread Gaze along with Sapping Strike. If not slain by the 4th turn, it has a chance to cast Magnitude 8 to deal Earth damage to the entire party. Dread Gaze can be extremely dangerous if you slay this boss too quickly.
As a final attack, it will cast Quake as a last ditch effort to end your game or kill a party member. This attack is skipped if Visage is slain first or second. This attack does about 2200 or so damage.
The head is weak against Fire and nullifies Earth.
Raging can be tricky, but it can blitz this part, just be ready if the head is the last to be destroyed.
Recommended Kill Order: Visage, Long Arm, Short Arm
- Summoning Golem can cut down the overall damage the hands do and block Sapping Strike as it is a physical Special. Getting everyone off the ground with Float is also imperative. Any offensive Rage that bestows Float also helps.
- Casting Slowga also helps as it cuts down the attack frequency, especially the amount of Dread Gazing Visage can do.
- As stated above, you can use Death or Break to instant kill the Long Arm.
- If your entire party is outfitted with Fire and Wind protection (Flame, Thunder and Paladin Shields), Mover (Meltdown) will strike at the Head and Long Arm’s weakness to Fire and Wind respectively, while still doing full damage to the Short. It is also Stoneproof, rendering Dread Gaze harmless. If your entire party is using Fire absorption, it doubles as a powerful Curaga substitute.
- If you want something that doesn’t harm your team, Chimera or Vector Chimera (Aqua Breath) can easily decimate this form. Not only does it do full damage to Visage, but Aqua Breath also does double damage to both arms since it does Water and Wind damage together. Both are also Stoneproof, rendering Dread Gaze useless.
- Devil Fist (Will O’ The Wisp, Auto-Haste), Grenade (Blaze. Floats), and Primeval Dragon (Firaga) also can be devastating to all 3 parts and do bonus damage to Visage. The first 2 have the added bonus of being Stoneproof without Relics.
- Io (Flare Star) can be helpful to limit damage for controlled killing or improve it if you are doing a LLP. It will always do 1946 to both arms (Level 73 x 80 / 3) but does 3892 to Visage. As parts begin getting destroyed, the damage will increase. Visage on it’s own always takes 9999 and the arms take 5840 if solo. Io is also Earth and Windproof.
- Great Malboro (Bio, wear Petrify protection) and Hill Gigas or Landworm (Magnitude 8) can do reasonable damage and save on a Float cast by absorbing Magnitude 8 and the Quake Final attack. The Magnitude 8 users are more suited at breaking the arms faster as they cannot damage Visage and Magnitude 8 doesn’t attack your team. All 3 lack Stoneproofing however.
- Yojimbo (Shock), Great Behemoth or Tyrannosaur (Meteor), Marchosias (Aero, Floats and wear Wind protection), and Purusa (Rock Slide, Stoneproof) can also do catastrophic damage to all parts while still getting Stoneproofing.
- Bogy, Stray Cat and Gold Bear can smash this form easily. Gogo should use a Flame Rod to ensure double damage on Visage. Bogy is recommended due to Auto-Protect and Stoneproofing for LLPs. Hornet also has Auto-Float if you want to avoid the Final Attack of Visage.
- Destroyer (Reraise), Vector Lythos and Peeper (White Wind) and Magic Urn (Curaga) can keep hands alive. Magic Urn has the added bonus of absorbing Earth and Wind.
Once slain, you will continue at the next form. If any characters got killed by Quake, last minute attacks or petrified by Dread Gaze, they will be swapped out.
Walkthrough Part 26 – The Final Assault (Part 3)
The next tier is a malgamation of various poorly clothed humanoids, a tiger head, and robotic constructs. They all have various attack strategies and things will pick up in difficulty in this tier. Extra caution must be considered for this assault, especially with the Last Stands.
Tiger (The Tiger Head, 30000 HP)
The biggest offensive threat on this tier. At high health, it will abuse both Northern and Southern Crosses (Freezes all party and Fire damage to party respectively) and will use Flare Star against you (80 x Lowest Level of Party / # of Active Members). To compensate for this, the Tiger attacks every 2 turns.
When it’s HP goes below 11520 HP, it will drop the laziness and attack every turn with the aforementioned spells every other turn. On the turn it doesn’t do this, it will attempt to Zombify party members with Zombie Fang (33% chance of doing this) or nothing at all.
The beast is weak against Ice, but is Immune to Earth. It can also be Poisoned.
Power (The Blue Man, 28000 HP)
Power just whacks you physically every turn. However, it’s true danger comes from when it gets slain.
On death, he will use the 10 hit combo. The first hit has Attack x 1.5, but is then followed up with 9 normal attacks with random targeting. This can be a problem if your party is LLP or at critical health following the destruction of the other parts. All attacks can be evaded however.
Power is weak against Poison.
Magic (Man in the Back, 41000 HP)
Magic knows a large array of Magic spells to attack you with. To compensate for this, all the spells cast can be stopped dead by Runic and he isn’t Silenceproof either.
IF you decide not to use those underhanded tricks, be ready to deal with the following spells each turn. Haste is defintely an issue here.
- Haste or Hastega or Imp
- Firaga or Confuse
- Poison or Drain or Bio
- Attempts a double Dispel
When his HP goes below 30720, his spells get a tad bit worse. Be careful if Reraise is applied on Power as you will have to put up with another 10 Hit Combo. Reflect and Slowga can Slow down your offense as well.
- Reflect or Stop or Reraise
- Blizzaga or Firaga or Thundaga
- Holy or Flare or Slowga
Below half health, he drops the buffing as goes full offense. These spells aren’t too trouble to handle, However at 10240 or less, he will counter any attack with Graviga (75% of Current HP as damage, 33% chance counter), followed by a potential double Dispel at below 5120. The counter also behaves as a Final Attack. This can be incrediblt dangerous if you slay both him and Power at the same time. Silence will also not stop this counter if its a Final Attack since Silence is dispelled on Death.
- Thundaga or Silence
- Holy or Flare or Rasp
- Firaga or Blizzara or Thundaga
It is weak against Earth, but because of Auto-Float status, only Gravity Rods and Lifeshaver Rages can strike at this boss’ weakness.
Machine (Gears next to Woman in Red, 24000 HP)
Machine primarily uses Magitek offense against you and the attacks are some of the worst ones. To compensate for this, it is sensitive to Stop and Instant Death and has no Last Stands or Final Attacks.
It’s attack potential includes Diffractive Laser (Lightning Damage), Gravity Bomb and Missile (halves HP and reduces it by 75% + Sap to non-Deathproof respectively). Atomic Rays (Fire Damage) and Magitek Laser (cruddy Lightning damage). The worst attack it can do is Delta Attack (Petrifies and cannot be blocked except by Stoneproofing). Delta Attack can be an issue if you do a swift offense.
At below 11520 HP, it will drop Atomic Rays for Absolute Zero (heavy Ice damage to entire party).
The Machine is weak against Lightning.
Gau or Gogo can easily break down these constructs, but some caution should be considered if you go all out offense, especially with the status effects and Power’s Final Attack combo.
Recommended Kill Order: Magic or Tiger, Tiger or Magic, Power, Machine
- If you need any Elixirs, each of them have 1 Elixir for stealing. Swipe them if you need the extra healing.
- It is imperative to slap down Mighty Guard and have Fenrir, Phantom or Golem ready if Power is the last man standing. Zona Seeker is ill advised as Magic can easily Dispel the one time Shell.
- Casting Slowga helps immensely to cut down the offense Machine and Power are capable of. Both can also be shut down for 40 seconds with Stop. As stated above, Machine can also be instantly killed and Magic can be shut down with Silence to end 2 threats. Have Dispel ready for the Haste.
- Both Magic and Tiger can be inflicted with Poison and/or Sap, causing thousands of damage over time and both ticks won’t trigger counters. If Edgar is with you, it would be wise to open with Bioblaster to tag them both. If his Magic Power is high, it is a dangerous weapon against Power.
- Vector Chimera (Aqua Breath) and Great Behemoth or Tyrannosaur (Meteor, latter must wear Ice Protection) can strike all 4 parts without fear of status effects, Gravity based attacks or Reflect or Runic interception. Chimera (Aqua Breath) cannot be buffed by Fenrir or Phantom if you use that.
- If you wish to work elemental weaknesses into your all attacks, Zeveak (Flash Rain, wear Ice Protection respectively) and Gorgimera (Avalanche) can do normal damage to everything and deal double to Tiger. Adamankary (Acid Rain, Auto-Protect) can also deal constant damage, deal double to Power and places Magic and Tiger under Sap.
- If Magic has been Silenced, Yojimbo (Shock) is also effective at destroying all 4 parts. Bio and Poison can be dangerous if Gau or Gogo get hit by it under this Rage.
- Baalzephon (Blizzaga) and Great Malboro (Bio) with Fire protection from the Snow Scarf can unleash untold fury without fear of being damaged by Machine and Magic’s elemental attacks. Baalzephon can smite Tiger fast and Great Malboro can make Power powerless quickly. Baalzephon will take full damage from Holy however and must watch out for Rasp (Mp 0 = Death). Both also need Zombieproofing from Tiger.
- IIf you were able to get away with it on the previous form, Mover (Meltdown) is just as effective here. It will do full damage to all parts.
- If you want more controlled offense, Luridan or Purusa (Rock Slide), Holy Dragon (Holy) and Devil Fist (Will O’ The Wisp, Auto-Haste) will always hit 1 enemy and are immune to Magic’s Status Magic, although all 4 need Zombieproofing for Tiger.
- Bogy, Stray Cat and Gold Bear can also pack a devastating punch. Bogy is also helpful to cut down the damage of Power’s 10 hit Combo and it cannot be dispelled by Magic. Gogo should use either Swordbreaker or Magus Rod to stack on some extra Evasion.
- Coco (Overture) can help block the 10-Hit Combo and Zombie Fang by having these attacks redirected. All parts are Zombieproof.
- Magic Urn (Curaga), Vector Lythos or Peeper (White Wind) and Destroyer (Reraise) can ensure maximum survival.
Once this tier has been fully slain, you will ascend to fight Lady and Rest. If anyone has been slain or Zombied, they will be replaced by the next in line.
Walkthrough Part 26 – The Final Assault (Part 4)
Lady and Rest stand between you and Kefka and are arguably the most dangerous of the bosses before Kefka himself. Lady and Rest are the ultimate tag team and you must do what you can to disrupt this symbiosis. Beware that most players take casualties here, especially since most slay Lady first then Rest.
Lady (Woman, 9999 HP)
Although Lady can be slain by 1 maximum damage attack, she compensates for this by having double absorption to all elements. She also has Auto-Regen and Float.
She mostly casts White Wind, which heals herself and Rest for the HP she currently has. Without any damage, she can undo 1 full attack per turn. She also can strike your characters with Repose, which will send them to dreamland (Sleep).
If Rest has been slain, she will cast Arise on Rest and bring him back to 9999 HP and will quickly undo the damage with White Wind.
Rest (Man, 40000 HP)
Rest can be incredibly dangerous at high health as he will unleash Meltdown or Tornado against you every odd turn (each has 33% chance of occuring or nothing happening). Although these attacks affect all targets, Lady and Rest are both Tornadoproof and Lady can undo the damage from Meltdown with 1 cast of White Wind, while getting double healing from it herself. On his even turn, he will either punch you or cast Doom, which will kill if the person isn’t Deathproof.
At low HP (10240 or less), he changes his attack towards Meteor (monster version), which can do 1800 damage to all party members and pierces Magic Defense. He will also counter any attack with Meteor (33% chance) or Trine (causes Blind and Silence to all party members, 33% chance).
If slain, he will immediately use Lady’s Repose twice as a final attack. Except his version instant kills and ignores Deathproofing instead of putting characters to Sleep. Most players usually end up losing 1 or 2 characters to this final attack. However, if you slay him first then Lady, you get a chance to quickly undo any instant kills Rest may have done, but you will have to do it fast before Lady casts Arise.
Rest takes full damage from any elemental attack done against him except Earth via Float.
This is where the player must make a decision, you can either slay Rest first and quickly slay Lady right after or stop Lady as soon as possible and pray that double Repose doesn’t strike you down. Most people aim towards the latter but there are ways to make both work safely.
- Before you go blood crazy on the duo, try to steal the Ragnarok (Lady) and Ultima Weapon (Rest) from them. The former can be upgraded at the Coliseum to the game’s ultimate weapon: The Lightbringer. When you beat the game, you can go through the Tower again and face them as many times as you wish for more Ragnaroks.
- Mighty Guard will not work here, but Thunder Shields will shut down Meltdown. Use them!
- Summoning Fenrir before Rest is slain is recommended as a stack of Image will be consumed to block Repose. Summoning it too soon may cause Lady to take some cracks at it.
- Yojimbo (Shock) and Tyrannosaur or Great Behemoth (Meteor) can easily slay Lady in 1 strike at max damage while still being immune to Tornado.
- If you want to control your offense, Purusa (Rock Slide), Killer Mantis or Twinscythe (Metal Cutter, wear Fire/Wind protection) and Fafnir or Crawler (Traveler with enough steps) will always strike 1 enemy Just be aware that Gau or Gogo may attack Lady or Rest at random. The Metal Cutter users are also immune to Tornado but you may run the risk of hitting the both of them in 1 attack.
- If you want assurance that Lady will fall last, use any elemental attack Rage. This will hurt Rest but heal Lady. You will need to make sure you can compensate for the healing with your own damage if you do this. Baalzephon (Blizzaga), Devil Fist (Will O’ the Wisp, Auto Haste), Holy Dragon or Outsider (Holy), Primeval Dragon (Firaga) and Vector Chimera (Aqua Breath) are viable options. These are all Tornado proof and Baalzephon will heal off Meltdown due to Wind absorption and can still be saved by Image and Vanish (Chimera cannot).
- Mover (Meltdown) can be effective if your party has Fire and Wind protection. With Fire absorption, it will help you recover from Rest’s Meteor abuse when he gets low on life. This spell will always heal Lady, so you would need to slay her or drain her MP first. You will need a Safety Bit to protect yourself from Tornado.
- Io (Flare Star) will always do 2120 – 5680 (4240 – 9999 if Debilitator rolls Fire) to Rest; slay Lady for maximum damage. Io is also Windproof (immune to Meltdown) but cannot be buffed by Vanish or Image. You will need to high Evasion to block Repose.
- An underhanded tactic to help kill them safely is to deplete their MP supplies with high powered Rasp or Wartpuck (Rasp, Tornadoproof). Without MP, Rest cannot abuse Meteor or Tornado and Lady cannot heal or revive Rest.
- Bogy, Stray Cat, Gold Bear and Garm (Sleep and Tornadoproof) also are effective at thrashing the pair. Gogo should use the Swordbreaker to do full damage and add another 30% chance to block both Reposes. The Magus Rod can help dodge Meteor and Tornado. The Man Eater deals double damage to Rest as he is classified as a Human target.
- If you want to be incredibly dirty, Rafflesia (Entice) can spell their doom. Both of them have Repose on their Confuse/Control card (the set of moves that determines what Entice does). Lady’s will keep Rest asleep while Rest can instant kill himself or Lady. Rest will still unleashing his Repose against you when slain since Entice breaks on Death.
- If you Coco (Overture) Lady when you slay Rest, 1 Repose will be interecepted by Lady and she will end up being slain in the process. This is both a handy offensive and defensive strategy if you go for Rest first. If you control Rest, you can protect yourself from Sleep by having him take the hit and get knocked out. You can then safely bomb him with Magic without fear of Trine or Meteor counters.
- Fiend Dragon (Northern Cross) can freeze one or both of them solid, allowing you to safely mess up Rest and keep Lady from healing him. Just don’t use Fire attacks on Rest.
- Destroyer (Reraise) is invaluable if you fear Rest’s Repose will hit. Once the attacks are finished, Reraise will bring that person(s) back to life.
- Vector Lythos and Peeper (White Wind) can help, but you will need to be careful if you get struck with Tornado under this Rage or use a Safety Bit.
Once the pair have been slain, the final ascension begins to Kefka himself. Anyone who has been slain by Repose will be swapped out.
Walkthrough Part 26 – The Final Assault (Part 5)
After you ascend to the heavens, Kefka will come down in his Angel form and try to smite you himself, crushing your hopes and dreams in the process. He can be incredibly easy or incredibly difficult depending on your playstyle and playthrough.
He comes with a couple of phases based on his current HP value. Each phase has their dangers, but they also have exploitable means to avoid these attacks, either by swift offense or crafty timing of attacks.
First Phase (HP >= 32640)
He will immediately open up with Heartless Angel, reducing all characters to 1 HP. You must immediately heal with Curaga or use a Megalixir (he has one on him, so you can steal a spare if needed). This spell is repeated every 7 turns during this phase.
Every turn after this, he can punch you, slash you with Havoc Wing (Attack x 4), cast any Aga spell with random targeting or Trine (causes mass Blind and Silence). He also sometimes does nothing (2 or 4 attacks after Heartless Angel, he always attacks).
Second Phase (HP < 32640)
A severed head will appear and the screen will say “The End Draws Near”. Next turn, he will fire off Forsaken, which does non-elemental damage to the entire party. Although this spell is the strongest in the game, it suffers from split damage and Magical Defense penalties, so keeping everyone alive under Shell will reduce the damage significantly. Afterwards, he will begin attacking you up to twice per turn with Havoc Wing, Trine and Vengeance (mass Dispel). Vengeance can be a serious problem for LLPs as it can dispel the Reraise effect and Shell/Protect for Forsaken and Havoc Wing.
Third Phase (HP < 7680)
After he fires Forsaken, he will drop all his previous attacks and will cast Meteor (black magic version). He will only alternate between these 2 attacks until you slay him once and for all. Most people usually avoid this phase due to extreme damage but LLPs should be aware. At this point, it is safe to keep using Reraise to avoid being Game Over’d.
Counters
Another serious problem with Kefka is he has counter attack capabilities. He will start doing so when his HP drops below 30800 and any attack can trigger it. He has a 33% chance of either doing nothing, attacking you normally or 2 very dangerous spells. Between 10240 and 30080 HP, he can use Hyperdrive, which has a spell power of 118 and pierces Magic Defenses. This attack, paired with high offense will most likely KO the person. Below 10240 HP, the spell upgrades to Ultima, doing about 2500 HP of armor piercing damage to all party members.
To compensate for the severity of the spells, both attacks can be stopped by Runic, so having Celes or Gogo setting this up is a recommended course of action. While channeling and casting Forsaken, Kefka cannot counter attack, so you can unleash your full fury then.
Kefka is immune to Poison and all crowd control effects.
- It is imperative you slap down Mighty Guard and Golem as soon as possible to cut down the overall damage he can do. Mighty Guard can easily be reapplied when Vengeance goes off.
- Try to roll a viable weakness with the Debilitator if you can, remember that Poison cannot be overwritten. This will help if you don’t have many Ultima users or you rely on an Elemental Style of combat.
- LLPs or Solo Gau players may have to use the Run Away Tactic and only damage Kefka when he is channeling Forsaken to avoid Hyperdrive and especially Ultima counters once the battle leaves Phase One. Solo Gaus should use Tumbleweed or Psychos (Lifeshaver, wear elemental protection) or Mover (Meltdown, wear Fire absorption) to damage and heal from the attacks.
- Use your favorite attack Rage to take this clown down, factoring if the Debilitator was used. My personal recommendations are as follows. Note that ones armed with buffs cannot be stripped of them via Vengeance:
- Non-elemental: Yojimbo (Shock), Tyrannosaur (Meteor), Purusa (Rock Slide), Killer Mantis and Twinscythe (Metal Cutter, wear Fire protection). All moves will work under Runic.
- Fire: Primeval Dragon (Firaga, wear Ice protection), Devil Fist (Will O’ The Wisp, Auto-Haste)
- Ice: Baalzephon (Blizzaga, wear Fire Protection, absorbs all elements), Gorgimera (Avalanche) or Kamui (Snowstorm). The latter 2 work under the cover of Runic.
- Lightning: Punisher (Thundaga, Auto-Haste) or Illuyankas (Gigavolt, absorbs Lightning, Auto-Protect)
- Water: Ninja (Water Scroll, wear Lightning protection) or Vector Chimera (Aqua Breath) or Enuo and Dark Force (Tsunami, former has Auto-Reflect). All moves bypass Runic.
- Wind: Marchosias or Sprinter (Aero, wear Lightning protection). Aero bypasses Runic.
- Earth: Antares, Landworm or Hill Gigas (Magnitude 8, wear Ice protection), Litwor Chicken (Quake, use Float first, reapply if Vengeance hits) or Psychos (Lifeshaver, self-sufficient healing). All moves bypass Runic. Consider Lifeshaver for Solo Gau runs.
- Holy: Holy Dragon or Outsider (Holy, latter has Auto-Haste)
- For LLPs, Crawler and Fafnir (Traveler with eneough steps, wear Ice protection) and Io (Flare Star) can easily make up for lack of damage with unrestricted damage. Flare Star will always does 5680 (Level 71 x 80) damage to Kefka and 9999 if you roll Fire with Debilitator.
- If you equip Flame and Paladin Shields and you roll Wind or Fire under the Debilitator, Mover (Meltdown) can devastate Kefka while also healing your entire party in the process. It can help substitute for a Megalixir when you get struck with Heartless Angel, Forsaken, Meteor or survive Ultima. Just watch out for Hyperdrives and Ultima counters.
- Stray Cat, Bogy and Gold Bear can thrash Kefka physically. Gogo should either use the Swordbreaker (extra evasion for Havoc Wing), Man Eater (deals double damage to Kefka) or any elemental Rod that matches the Debilitator roll you made. Bogy’s Protect cannot be removed by Vengeance.
- If you use Coco (Overture), you can have Kefka’s Havoc Wing and normal attack counters turned against him. Overture will not stop his magical attacks.
- Rafflesia (Entice) can completely shut him down and force him to kill himself. It is an embarassing way to win, but it can be hilarious!
- Vector Lythos (White Wind) can help keep all hands alive once you healed up after Heartless Angel. Magic Urn (Curaga) has the added benefit of absorbing all Aga spells.
- Destroyer (Reraise) can help apply Reraise when needed. You will need to reapply it if Kefka casts Vengeance.
When slain, the music stops, the background goes dark and Kefka will dissolve into the screen below. Watch the cinematics, save your game and take solace in the fact you destroyed Kefka with Gau like a boss! Next up is the end-game content.
Optional Bosses – Magicite Carriers (Part 1)
Once you get the Falcon, there are 4 possible bosses you can face for Magicite. You can challenge them anytime but I recommend acquiring the Rages mentioned in the Battle Tactics and have approximately 2500 or more HP when combating these foes. As you acquire Elemental Shields, these become more managable.
Reward: Bahamut Magicite.
As you fly around, you may get attacked by a sky demon called Deathgaze. He appears at a random sector in the sky and will fight you if you intercept with his location. As the name implies he is an abuser of Death.
He starts up with Auto-Shell and Protect and opens the battle with Level 5 Death, which will instant kill any characters who are divisible by 5. Afterwards, he will cast Aero, Blizzaga, Death or attack for 2 turns. After this, he has a 33% chance to repeating the pattern or he will flee. He can also counter attack with claw swipes.
If he flees, he will retain his HP and hide at a different sector of the map, then attack you again when you intercept him.
Defeating Deathgaze
- Io (Flare Star, wear Ice and Death protection) can be Deathgaze’s worst nightmare. Not only will Gau be Windproof, but it always deal 9999 to this boss [80 x Level 79 x 2]. With the mentioned defense criteria, Death and Blizzaga will do 0 damage.
- Primeval Dragon or Behemoth King (Undead) (Firaga, wear Ice Protection), Devil Fist and Oversoul (Will O’ The Wisp, former has Auto Haste) all do respectable Fire damage while maintaining Deathproof. Behemoth King (Undead) and Oversoul in fact get fully healed by Death as these render Gau Undead.
- Borghese, Holy Dragon or Warlock (Holy) are also effective here. They strike at his second weakness to Holy (although Shell will make it deal normal) and the non-Borghese rages are Deathproof. Borghese is Undead so Gau will fully heal from it, but you can use Bio or Death yourself if necessary.
- Twinscythe (Metal Cutter) is the ultimate standard non-elemental fighter to take on Deathgaze. It absorbs Ice, Deathproof, has enough power to pierce a good deal into Shell.
- Purusa (Rock Slide), Tyrannosaur (Meteor) and Fafnir or Crawler (Traveler) can do armor piercing damage too. Bring Deathproofing for the non-Tyrannosaur rages and Ice protection for the non-Purusas.
- If you have to fight through Protect as a Strength Gau, Stray Cat is the way to go. You can also use Bogy to cut down the counter attack damage. Gogos should use a Flame or Holy Rod or Gladius while Raging to do maximum damage.
- If you want to ensure you slay him in one pass, you can lock him into Confusion with Rafflesia (Entice). This will prevent him from running away and you also have nothing to fear from his offense.
Once slain, Bahamut’s magicite is now yours and you can sail the skies safely.
Reward: Leviathan Magicite
WARNING: If you didn’t take Mog to the Serpent’s Trench in the World of Balance, this is your ONLY fight where you can learn the Water Rondo dance. Failure to do it at both times will prevent Mog from learning all his dances.
To challenge Leviathan, head to South Figaro and talk to the man outside the Chocobo Rental and he will tell you about a shadow in the water. Then head to the ferryman and ask for a ride to Nikeah. Halfway there, Leviathan will attack you.
Leviathan’s most dangerous moves are El Nino (which is a counter to any magic) and Tsunami (first attack and uses it twice every 20 seconds). Aqua Breath can also sting but he rarely uses it.
Leviathan can also slow down characters with Entangle (his counter to physical attacks) and attack normally.
What makes this boss hilarious is that Gau can beat this thing 1on1. You just need some initial HP to survive the first Tsunami attack.
Defeating Leviathan
- Hermes’ Sandals or Miracle Shoes will render Entangle ineffective. Wear one!
- Anemone and Aspiran (Gigavolt), Tumbleweed (Lifeshaver), Baalzephon (Blizzaga) and Great Malboro, Vampire Thorn, or Trillium (Bio) all absorb Water without Equipment and can fight back against Leviathan’s Water based offense. Note that Vampire Thorn is Undead. Try to use the Debilitator to roll an element that Gau can exploit for more damage.
- Tumbleweed (Lifeshaver) can stack up faster healing. It absorbs water so it can heal off El Nino and Tsunami while Lifeshaver will heal you in the event Leviathan goes physical.
- If you have Water protection and your damage is low, Io (Flare Star), Purusa or Luridan (Rock Slide), Behemoth (Meteor, Slowproof), and Fafnir or Crawler (Traveler) can do some great damage here. Flare Star will always do 7280 to this boss.
- Rages that have Slowproofing or Auto-Haste can also be used to save on Haste casts as Entangle cannot stop this. The strongest Magic Rages with this are Punisher (Thundaga), Outsider (Holy) and Devil Fist (Will O’ Wisp). You will need to wear a Saucer if you do these two.
- Gold Bear, Stray Cat, Bogy (Auto-Protect), Garm and Vector Hound (Both Slowproof) are only helpful if you got a Saucer on, but this comes at a cost of Defense. If you must use physical, Exocite (Pincer) or Actinian (Clamp) both absorb Water.
- Gogo users can use any weapon. The elemental Rods help trigger bonus effects and the Swordbreaker can help block Leviathan’s physicals. Try to use the Debilitator first!
Slay the boss and the Leviathan Magicite is yours. You can now learn Flood, a very effective and undodgable Water attack.
Rewards: Cactuar Magicite
The Gigantuar hangs out at the desert near Maranda. To get him to start appearing, you must:
- Have the Falcon
- Spoken to the man inside Maranda about the Giant Cactuar monster
- Slain 10 Cactuar up until now
Once this criteria has been met, you can face Gigantuar in a fixed spot within the desert.
The Gigantuar is a very dangerous and evasive foe (200 in both Evasion stats, Magic Defense and 77 Speed). It is Fireproof and absorbs Water. Every turn, it will cast 1000 Needles twice, doing 1000 damage. Every 3 turns, it turns into 4. It has a high chance (66%) to counter any attack with Knockdown (Attack x 5). If slain, it will use 1000 Needles 10 times as a final attack.
It is suggested to challenge this boss when you have 5000 HP and have done most of the end-game content. Gau can play the role of Damage Dealer or Supporter in this fight.
Defeating this Giant Cactus
- Fafnir or Crawler (Traveler) with enough steps, Great Behemoth or Behemoth (Meteor) and Purusa or Luridan (Rock Slide) are your only means of hitting the boss for magic damage. All attacks specified ignore Magic Defense and Evasion.
- This boss has virtually no physical defense outside of it’s 200 Evasion. With a Sniper Eye equipped, Stray Cat, Bogy, or Gold Bear and go postal on this boss. Gogo should use either a Swordbreaker (30% extra chance to dodge Takedown counters) or any non-Fire weapon if you have applied the Debilitator.
- Destroyer (Reraise) or Peeper and Vector Lythos (White Wind) with high health can help keep characters alive, as long as everyone’s sufficiently leveled.
Once slain, claim your Cactuar Magicite. The Magicite provides the largest Speed boost at level up and helps if you turned Odin into Raiden.
Optional Bosses – Magicite Carriers (Part 2)
Rewards: Gilgamesh Magicite, Genji Helm or Armor Win, Genji Shield or Glove Steal.
To fight Gilgamesh, you must first purchase Excalipoor from the Jidoor Auction House in the World of Ruin. To get it up for auction, talk to the man with the purple vest outside the house, then start the auction until it appears. It will run you 500k Gil, so make sure you got the funds (kill Leap Frogs or sell your useless junk nearby if you are lacking). Once purchased, head to the Coliseum and wager this sword to face an Onion Dasher.
To speed things up, make sure the person has Impproofing and has been specced to slay this monster quickly. Also, make sure the representative taking the wager is also capable of fighting Gilgamesh as well. Once you beat Onion Dasher, Gilgamesh will appear and challenge you for the wager with the other 3 characters. However, this time you can control your team.
Gilgamesh is fought in two phases. Both with their share of dangerous tricks that you must watch out for. Both phases will cause Gilgamesh to counter attack (66% chance) if struck with anything.
Phase One (HP > 25600)
Gilgamesh will either attack or use various Lore spells. The worst of the bunch being Aero (without Wind Protection), Dischord (halves Level if you aren’t Deathproof), Revenge Blast (can be OHKO as the phase drags) and the worst of it being Quasar (heavy Magic Defense piercing Magic damage to entire party).
Phase Two (HP > 0 and <= 25600)
Gilgamesh will Haste/Protect/Shell himself and begin a relentless physical onslaught. He will then open up with a Jump. Once he lands, immediately try to Dispel his buffs, especially the Haste.
After he lands, he will relentlessly attack you 4 times straight, the 1st being a Blade Dance (Attack x 1.5) with random targeting. Then for 2 turns, he will toss high end weaponry at you: Lightbringer, Ragnarok, Zantetsuken and Mutsunokamis. Any of these weapons can be devastating to your teammates.
Gau or Gogo can easily deploy Rage, but you will need to be aware of his high defenses and Evasion stats (45% physical and 30% magic), He also has no elemental weaknesses and is immune to all status effects.
Fighting Gilgamesh
- Summon Zona Seeker or casting Mighty Guard for the First Phase is definitely helpful. Be warned that Shell has no effect on Quasar. Mighty Guard is better as you get Protect for the Attacks and Second Phase.
- Vanish, Phantom, Fenrir or Golem can help greatly for the Second Phase as GIlgamesh’s Second Phase is physically dominant.
- Io (Flare Star) can be incredibly effective against this boss. It will always do 7790 to this boss [Level 97 x 80 / 1] and is unaffected by Dischord. Plus, you get Windproofing for Aero and Aqua Breath (part Wind). If you use the Debilitator and it rolls Fire, Gilgamesh will take 9999 instead.
- Great Behemoth or Behemoth (Meteor) and Purusa or Luridan (Rock Slide) are also effective as they pierce Gilgamesh’s high Magic Defense and Evasion for full damage. Great Behemoth also has natural Deathproofing against Dischord.
- If your Magic Power is high enough, Yojimbo (Shock), Killer Mantis or Twinscythe (Metal Cutter) can also hit hard and all 3 have Deathproofing. Twinscythe will need a Thunder Shield to cancel Wind Weakness and Metal Cutter doesn’t ignore Evasion.
- Elemental attacks are ill-advised due to the 210 magic defense and 30% Magic Evasion, unless you roll one via the Debilitator. If you do roll an exploitable weakness, use your hardest hitting Rage of that element. Try to aim for anything except Poison (Bio’s power is 53 compared to the 100s in the others).
- Fire: Primeval Dragon (Firaga) or Devil Fist (Will O’ the Wisp, Auto-Haste) or Io (Flare Star does 9999) or Mover (Meltdown, bring Fire and/or Wind protection)
- Ice: Baalzephon (Blizzaga) or Kamui (Snowstorm)
- Lightning: Aspiran or Anemone (Gigavolt, absorb Water) or Punisher (Thundaga, Auto-Haste)
- Wind: Marchosias or Sprinter (Aero, wear Wind protection) or Mover (Meltdown, bring Fire and/or Wind protection)
- Holy: Holy Dragon or Warlock (Holy, Deathproof)
- Earth: Antares, Landworm or Hill Gigas (Magnitude 8). Tumbleweed (Lifeshaver) can also be effective. Litwor Chicken (Quake) will require the party be Floated first.
- Poison (if you must): Great Malboro (Bio, absorbs elementals)
- Bogy can be an effective for it’s Auto-Protect. Stray Cat and Gold Bear also work with Protect. Wear a Sniper’s Eye to ensure the attacks always connect. Gogo should use Swordbreaker to stack on 30% evasion for added defense or any of the elemental Rods if you roll something usable with the Debilitator.
- If you are doing a LLP and/or don’t mind fighting dirty, Rafflesia (Entice) can shut down his offense completely and force him to attack himself over and over. This effect can be dodged so it could be awhile before Gilgamesh gets affected by it.
Once slain, claim your Giglamesh Magicite and Merit Award (your reward for slaying Onion Dasher) and continue your quest.
Optional Bosses – The 8 Dragons (Part 1)
Along with the aforementioned bosses, there are 8 dragons scattered across the world. Each of them are attuned to a specific element and carry different strengths and weaknesses. They all range from incredibly easy to challenging, depending on their AI and when you fight them. Slaying all 8 will net you the Crusader Magicite, the only Magicite that can teach you Meltdown and Meteor if you gave up Odin.
These dragons can be challenged at any time and in any order you see fit. You can save them for later or you can face them the moment you enter said dungeon. The order on my list doesn’t reflect the order you should fight them in.
Rewards: Nothing, drops Crusader if last Dragon slain.
On Mount Zozo, there is a switch in one of the caves on a tiny platform.near the Save Point. Pressing this button opens a box and reveals the Storm Dragon. He isn’t too happy you woke him from his nap, so he flies into you and attacks you.
The Dragon is the apotheosis of Wind damage; He employs powerful Wind attacks and absorbs the element as well. Of the 8 Dragons, it has the largest health pool at 42000 HP. The boss itself is weak against Lightning.
When his health is above 15360 of 42000 HP, he primarily uses Wind Slash and Leaf Swirl against you, the former is a Wind elemental attack that bypasses Magic Evasion and the latter does non-elemental damage to the entire party.
Once you go past 15360 HP, he picks up the offense by replacing Wind Slash with Aero (heavier Wind Damage) and has a 33% chance of casting Cyclonic every 2 turns (reduces all non-Deathproof party members’ HP to 1/16th). Cyclonic can be incredibly dangerous if he gets lucky and uses Aero next attack.
Smiting this Dragon
- The Thunder Shield from this dungeon or the Paladin Shield makes Gau or Gogo immune to Wind, use them! Force and Aegis Shields can cut down on Wind damage as well. Use Mighty Guard or at least Shell to cut down on overall damage.
- Storm Dragon is Slowproof. Counter this by speeding up your characters with Hastega.
- Illuyankas (Gigavolt) is Storm Dragon’s worst nightmare. Not only does this Rage exploit the beast’s weakness to Lightning with a Thundaga style attack, it also comes with Protect for Wing Saber counters and is immune to Cyclonic via Deathproofing.
- Aspiran or Anemone (Gigavolt) and Punisher (Thundaga, Auto-Haste) are also acceptable Rages. However, both don’t have Deathproofing for Cyclonic without Safety Bit aid.
- If you wish to play it safe, Baalzephon (Blizzaga) and Great Malboro (Bio) both absorb Wind without the Thunder Shield and both do respectable damage to the boss. Wear Deathproofing.
- Io (Flare Star) always does 5920 to this boss (9999 if Debilitator rolls Fire) and also Windproof, but not Deathproof.
- Killer Mantis or Twinscythe (Metal Cutter) also hit like trucks and carry Deathproofing for Cyclonic. Just make sure you have Wind protection, especially if you use the latter one.
- Bogy, Stray Cat, Gold Bear and Garm (Deathproof) can be incredibly effective Strength Rages. Gogo should be equipped with the Thunder Rod for maximum damage. Non-Bogy Rages need may need Protect assistance.
- Destroyer (Reraise) can be effective at bringing back people in the event the Cyclonic/Aero combo happens.
Once slain, continue your quest.
Rewards: Magus Rod, Crusader Magicite if last dragon slain.
Head to the Opera House. In the World of Ruin, Impresario is upset that he cannot perform plays since a Dragon has decided to setup his new home on stage. He asks you to get rid of it for him.
The Dragon deploys some of the most dangerous Earth attacks in the game: Quake, Magnitude 8 and Landlside. It also has a chance to counter attack any damage with Honed Tusk (Attack x 5), which can be devastating without Protect.
It also doesn’t like people floating. Every 20 seconds, it will cast 50 Gs on anyone still Floating. Angel Wings and Auto-Float Rages cannot be dispelled. You can also wear Gaia Gears to heal off the Earth attacks at the cost of armor to protect yourself from Honed Tusk. 50 Gs can also be interecepted by Runic.
Slaying this Dragon
- Slow and Zona Seeker will be helpful in this fight as it will reduce the overall damage Earth Dragon can dish out.
- Image from Fenrir or Protect can protect Gau and your team from Honed Tusk. You can also wear the Snow Scarf and crash in the Back Row to significantly reduce the damage
- Marchosias (Aero), Zeveak (Flash Rain) and Ninja (Water Scroll) are the ultimate Earth Dragon destroyers. All 3 strike at the Earth Dragon’s weaknesses to Water or Wind and they all bestow Gau with Auto-Float. This cannot be dispelled by 50 Gs.
- Baalzephon (Blizzaga) and Great Malboro (Bio) can do respectable damage to Earth Dragon and be protected from his heavy Earth offense. The former has Auto-Float and the latter absorbs it
- Io (Flare Star) always does 4240 (8480 with Debilitator rolling Fire) damage to this boss and makes Gau Earthproof without Float.
- Stray Cat, Bogy, Gold Bear and Hornet (Auto-Float) are good Physical Rages. Non-Bogy Rages need Protect for Honed Tusk counters. Gogo can use any weapon except for the Gravity Rod against this boss.
- Destroyer (Reraise) can be invaluable if you’re doing this battle with low vitals and no Earth protection.
Once slain, claim your Magus Rod and continue your quest.
Rewards: Zantetsuken, Crusader if last dragon slain.
The Blue Dragon lives in the secret passage at Ancient Castle along with the statue that turns Odin into Raiden. Talking to it forces you into a battle.
Blue Dragon is the apotheosis of Water; it absorbs it and fights back with it. It will open the battle with Tsunami, doing Water damage to the entire party and ignores Split damage right off the bat. This attack is then repeated every 40 seconds.
It primarily attacks with Acid Rain at high health (HP > 16834), which can be a problem as it also does Poison and Inflicts Sap. Once it goes below that value, it changes the Rain from Acid to Flash (Water and Ice) and starts using Aqua Breath (Water and Wind) against you. It can also attack instead of using these Water moves.
What makes this boss also annoying is if it detects 1 of your allies has Haste on, it will bestow Slow on itself and use Rippler to swap status effects. The Rippler Bug is non-existent this version, but you don’t want to supply Blue Dragon with Protect, Shell or Haste now do you?
The dragon isn’t too bad, but a lack of Water defense items can make it difficult for Low Level Playthroughs. Luckily, Gau and Gogo can remedy this situation.
Smiting This Dragon
- Zona Seeker and Slow are invaluable for this fight. Use them!
- Imp equipment (except for Impartisan) and Paladin Shield provides Water absorption!
- Aspiran or Anemone (Gigavolt) are this dragon’s worst nightmare. Not only do they both absorb Water, but they both have no Haste effects and have a Lightning attack that deals double to this boss.
- Baalzephon (Blizzaga) or Great Malboro and Trillium (Bio) are also good options. They will do full damage to the boss and still absorb Water. The latter has the added bonus of applying Poison, which can rack up into the thousands over time. Rolling Ice or Poison on the Debilitator helps even more.
- Io (Flare Star, wear Water protection) always does 4400 (or 8800 if Debilitator rolls Fire) to this boss. Io is Poison and Windproof for the dual elements.
- Exocite (Pincer) or Actinian (Clamp) are good Physical rages for this one. Both carry Water absorption and still maintain physical attack. Bogy, Stray Cat and Gold Bear are also effective, but need Water protection. Gogo should use a Thunder Rod with these Rages.
- Destroyer (Reraise) can help bring back fallen party members if you don’t have Phoenix yet.
Once slain, claim Zantetsuken and continue your quest.
Optional Bosses – The 8 Dragons (Part 2)
Rewards: Force Shield, Crusader Magicite if last Dragon slain.
The Ice Dragon hangs out on Narshe Cliffs where you fought Kefka in the World of Balance. Simply talk to it and you will engage in a battle with it.
Ice Dragon absorbs Ice and is weak against Fire. It may look small, non-threatening and have a very small health pool (only 24,000), but this Dragon is a very real threat.
Not only does it do heavy Ice damage with Avalanche and Absolute Zero, but it has a chance off the bat and every 3 turns after it to cast Northern Cross, which attempts to freeze your entire party. This can be a problem if most of your party gets Frozen and he constantly uses Absolute Zero against you afterwards. It also has a chance when slain to try and end you with Avalanche.
Gau can work well, despite the threat of Northern Cross.
Slaying this Overgrown Lizard
- Slowing the Dragon, summoning Zona Seeker and Mighty Guard help immensely with this Boss! Use them!
- All controllable hands should have at least access to Fire to help thaw out your frozen party members. Haste can also reduce the duration of it by half.
- With a Snow Scarf or Ice Shield on, Primeval Dragon (Firaga) and Devil Fist (Will O’ the Wisp) are this Dragon’s worst nightmares. Both hit hard for Fire damage, absorb Ice and take 0 damage from any Fire attack to thaw.
- For LLPs, Io (Flare Star) always does maximum damage to this boss (9999).
- Twinscythe (Metal Cutter) with a Flame Shield can also do full damage to this boss and have the above mentioned critera; absorbs Ice and Fire.
- Great Malboro or Magna Roader Purple (Bio) can also do full damage and absorb the Ice. A Flame Shield will be necessary to absorb Fire if you use these.
- Bogy, Stray Cat and Gold Bear hit hard if they have a Snow Scarf. Leaf Bunny (Incisor) with a Flame Shield is a good alternative at the cost of damage. Gogo should use a Flame Rod before Raging.
- The programmers also neglected to add Berserkproofing to this boss, use Berserk if you think the Ice and Freezing offense is getting too problematic.
Once the Dragon is slain, claim your Force Shield and continue your quest. The Force Shield is a decent substitute to the Aegis Shield for magic tanking.
Rewards: Holy Lance, Crusader Magicite if last Dragon slain.
Note: The Holy Lances can get repeated drops in the Veldt. You can also steal spares there as well with Locke or Gogo.
At Cultist’s Tower, one of the treasure rooms has the Holy Dragon flying around in it, talking to it instigates a battle. Note that the restrictions of Cultist Tower still apply as you can only use Magic. Rages can be used against it while you are in the Veldt.
The Holy Dragon is pretty tame compares to the other 8 dragons as all it does is double or triplecast Holy each turn. The only problem is since most people use Reflect Rings here, the Holy will bounce back and heal him for thousands. Unless you can match or overshoot the healing, you won’t be doing damage to this boss. If you try a manual application of Reflect, it will try and Dispel it when it is struck with Magic.
Once slain here, it will appear at the end of every Group Cycle in the Veldt, so you will be able to fight it as often as you like. While at the Veldt, the boss fights the same way, but you can fight it however you see fit. The Rages listed are recommendations in the Veldt.
Slaying this Dragon
- Minerva Bustiers, Cat-Ear Hood on Relm, Force (Auto-Shell) and Paladin Shields cut down on Holy damage, spread them out across your teammates before engaging. Force and Aegis Shields have a better chance of blocking Holy than any shield.
- If you aren’t using Reflect Rings, Slow down the boss. Zona Seeker runs the risk of being dispelled when you strike it with Magic. If you have Tools, use the Debilitator to try and apply a weakness. Note that Holy weakness will not work here.
- You can fight incredibly dirty! The boss is also not Silence or Stopproof. Use the former as it never wears off in battle. Both will render the boss harmless.
- In Cultist Tower, use your hardest hitting spells against this monster. Any-Aga class, Flood, Flare and Ultima do full damage easily.
- Great Malboro (Bio) is this Dragon’s worst nightmare. Bio does full damage to the Dragon and any Holy attack made against Gau or Gogo will be absorbed. You pretty much won if you use this Rage!
- Io (Flare Star) always does 5680 to this boss (9999 if you roll Fire on Debilitator). You will need a Force Shield or Reflect Ring to negate the Holy weakness.
- Killer Mantis or Twinscythe (Metal Cutter), Yojimbo (Shock), Marchosias or Sprinter (Aero), Chimera (Aqua Breath), Antares or Hill Gigas (Magnitude 8) and Purusa (Rock Slide) all do reliable damage without having a Holy weakness to worry about.
- Bogy, Stray Cat, and Gold Bear can physically decimate this Dragon. Any weapon can work except for the Holy Rod and Gladius. The Magus Rod adds 30% Magic Evasion if you want protection.
- Flan (Sticky Goo) can apply Slow to the boss and attack normally while being immune to Holy itself.
Once slain, claim your Holy Lance(s, if you stole); one of Mog and Edgar’s best weapons. Then, continue your quest.
Rewards: Murakumo, Crusader Magicite if last dragon slain.
The Red Dragon flies around the Phoenix Cave. It will not attack you unless you communicate with it. Since the team splits up for this one, make sure the party that combats the Dragon is setup to do so before going into the dungeon itself.
The Dragon is the apotheosis of Fire; it will absorb Fire and retalliate with it as well. It will utilize Fira and Fireball every turn it can at high health, then switch towards using Firaga and Flare when it is on it’s last legs (10240 HP or less).
Every 40 seconds, it willl use either Level 4 Flare, Flare Star (80 x Lowest Level Char / # of Living Characters) or Southern Cross (heavy Fire damage to team)
If you try and put up Reflect to block these spells, it will shatter the Reflect with Eraser and it has a chance to counter any attacks done to it with an attack of it’s own.
Slaying the Dragon
- Zona Seeker and the Slow Status will be invaluable in this fight as both will reduce the effectiveness of his offense.
- Zeveak (Flash Rain) is the ultimate Red Dragon destroyer. Not only does it absorb Fire, but Flash Rain always deal double damage and Runic cannot stop this attack. You will have to claim the Rage first before you face this Dragon if you plan on using it since Zeveak is fought in Phoenix Cave.
- If you have a Flame Shield on, Baalzephon (Blizzaga) can lay waste to this boss in a few casts.
Veil Daner (Blizzara), Kamui (Snowstorm) and Gorgimera (Avalanche) are other Ice based options. Use Gorgimera and Kamui only if you are using Runic. - Ninja (Water Scroll) and Chimera (Aqua Breath) are also effective at striking at his second Water weakness. Both also don’t carry Fire weaknesses and both attacks cannot be stopped by Runic. These 2 help if you want to challenge Red Dragon right away when entering.
- Antares (Magnitude 8) and Outcast (Lifeshaver) also absorb Fire and Red Dragon has no resistances to Earth. The latter will render Gau Undead, but can maintain HP if the attack is constantly done.
- Stray Cat, Gold Bear and Bogy can hit hard physically. Gogo should do these Rages with the Ice Rod in hand for maximum damage.
After the Dragon has been slain, claim Murakumo and continue with your business.
Optional Bosses – The 8 Dragons (Part 3)
Rewards: Crystal Orb, Crusader Magicite if last dragon slain.
As you travel through Kefka’s Tower, 1 of your 3 teams will encounter the Gold Dragon. Coming into contact with it triggers the battle. Of the 8 dragons, this one is considered one of the easier ones considering you have beaten most of the game by now.
The Dragon is the apotheosis of Lightning; it eats Lightning and spits it back with force. Every turn, it will cast Thundara, Thunder or Gigavolt (Thundaga-style attack). It does however come with 2 tricks:
The first is if it sees you have at least 1 person with Reflect, he will Reflect himself and begin bouncing Thunder or Thundara every other attack and physically whack you when he doesn’t.
The second is if he is struck enough times, he will begin charging energy. If struck two more times after this message, he retalliates by casting Thundaga on your entire party.
If you are wearing Lightning protection, this battle is virutally won with no damage if nobody has Reflect on your team.
Beating this Dinosaur That looks like a Dragon
- Vector Chimera or Chimera (Aqua Breath) can easily drown this boss by striking at it’s weakness to Water, cannot be stopped by Runic defense and has no exploitable weakness to Lightning. With a Thunder Shield on, Ninja (Water Scroll) also behaves the same, but with Auto-Haste.
- Baalzephon (Blizzaga) and Great Malboro (Bio) can do full damage to the boss and save on a Thunder Shield as both absorb Lightning
- Yojimbo (Shock), Behemoth or Tyrannosaur (Meteor), Purusa (Rock Slide), Marchosias (Aero), Antares or Hill Gigas (Magnitude 8) or Primeval Dragon (Firaga) can also do considerable damage with Lightning protection equipped.
- Bogy, Stray Cat, or Gold Bear can tear this Dragon to shreds. Any weapon that isn’t a Thunder Rod should be used with Gogo.
- If you do not have enough Lightning protection, you can also Berserk this dragon to completely shut down it’s Lightning spells.
Rewards: Muscle Belt, Crusader Magicite if last dragon slain.
Also in Kefka’s Tower is another dragon that 1 of the 3 party members must fight: The Skull Dragon. The boss will challenge you the moment you make contact with it. Like Gold Dragon, this one is a bit easier, but fights differently.
This dragon abuses status effects in most of it’s offense. Primarily it will use Doom and Apparition (Confusion) on it’s first 3 turns. It also can strike you physically and use Will O’ The Wisp (Fire damage). Every 4 turns, it will use Disaster to apply Blind, Imp, Doom, Silence, Confuse and Float. With an array of Safety Bits, Momento Rings and Ribbons, most of these effects will fail. Reraise can also counter Doom.
Gau or Gogo can easily wreck this boss and free up slots for status defense gear.
Fighting this pile of bones
- Fight the dragon with another dragon! Primeval Dragon (Firaga) and Holy Dragon (Holy) both have adequate protection from the status effects and both do double damage to this boss.
- Borghese or Warlock (Holy), Behemoth King (Firaga) or Devil Fist (Will O’ the Wisp) are also effective as they have many status defenses, do double damage and have Doomproofing. Borghese and Behemoth King heal from Doom at 0.
- Io (Flare Star) always does 9920 to this boss [(80 x Level 62 / 1) x 2]. This is extremely helpful for LLP runs. Wear Doomproofing or beat quickly.
- Behemoth or Tyrannosaur (Meteor), Killer Mantis or Twinscythe (Metal Cutter), Yojimbo (Shock), Chimera or Suriander (Aqua Breath) and Marchosias (Aero) can also full damage and have adqueate defenses for Skull Dragon, including Doomproofing.
- Wartpuck (Rasp) may seem like an odd choice, but it has defenses, Doomproofing and can easily destroy the dragon’s small MP pool with enough Magic Power (1999). This dragon has MP 0 = Death. If you go this path, wear Fire protection.
- Stray Cat, Bogy, Gold Bear and Garm (status defenses) can thrash this boss physically. Gogo should use either the Flame or Holy Rods or the Gladius.
Once slain, claim your Muscle Belt and continue your quest.
Walkthrough Part 27 – Dragons’ Den (Part 1)
Now that you have beaten the main game, a new challenge has opened up: The Dragons’ Den. This area is home to some of the most dangerous enemies, both normal and boss. The rewards are well worth it, considering the game’s ultimate equipment is up for grabs. Gau and/or Rage Gogo can be utilized well here, but note that you will have to exercise caution as some can spell your doom if you are not careful.
North of the Dragon Neck Coliseum is a series of small islands. 1 of them is in the shape of a C and has a lone tree in the middle. Land the airship here.
Once again, like Phoenix Cave and Kefka’s Tower, you will work in 3 teams of 4 to complete this dungeon. All 12 character must be capable of combat in any situation, even if you have to split up items between inactive and active characters. You can switch around parties, but only when all 3 teams are in the same room with a Red Star. If you feel you need more supplies or levels, do so before hand. It also helps to bring 1 or 2 Lightbringers (Steal from Lady and then gamble at Coliseum, refight her if you need spares) as the stats gains trump the ultimate weapons for Edgar, Celes, Terra, Locke or anyone using the Merit Award.
There are also areas that cannot be accessed due to barriers. Only as the Dragon bosses fall will the ways open. However, they have been amped up in power and now come with gimmicks that can be a problem for conventional players. Once slain, they will not only give you an ultimate item, but a seal will fall. There are other boss enemies as well that will give ultimate items that aren’t Dragon, but can be as dangerous.
Once you have slain all the enemies, you can access Kaiser Dragon, the game’s superboss. Slaying him nets the Diablos Magicite for 1 acheivement. Afterwards, you can face Omega Weapon at Kaiser’s location for another achievement. All the bosses will be covered in the Dragons’ Den Bosses section.
- Dark Force (Tsunami)
- Great Behemoth (Meteor)
- Great Malboro (Bio)
- Primeval Dragon (Firaga)
- Vector Lythos (White Wind)
- Vector Chimera (Aqua Breath)
- Chimera (Aqua Breath)
- Yojimbo (Shock)
- Outsider (Holy)
- Landworm (Magnitude 8)
- Vilia
- Great Dragon
- Magic Dragon
- Zurvan
- Armodullahan
- Crystal Dragon
- Maximera
- Dinozombie
- Abaddon
- Dragon Aevis
- Shield Dragon
- Hexadragon
Note: None of these formations, even if mixed with Kefka Tower enemies will not appear in the Veldt. If you missed the Rageable enemies, you will have to go Kefka’s Tower and get their formations there. The new roster cannot be encountered in the Veldt.
WARNING: Do not attempt this dungeon with a party of characters that have Levels divisible by 5. Armadullahan has Level 5 Death.
Some list huh? It is essentially a combination of enemies you faced before and some new faces that are pallete swapped from the originals you faced before. The new monsters have well over 18000 HP and shouldn’t be taken lightly. They can also do teamups with some creatures of old, but they shouldn’t be too much trouble if you have been fighting them in Kefka’s Tower properly. In general sense, get an ample supply of Safety Bits, Ribbons and elemental-proofing Shields.
Vilia is amongst the worst of them. She carries both forms of Entice (standard Confusion and unbreakable flavors) and counters any standard attack with Overture, causing the affected to Cover for any future physical attacks made against her. She can also cast all the Aga-class spells and Imp your characters. Her severity picks up as she can also pair with Dark Forces and Outsiders.
Another dangerous one to deploy Rages on is the Dragon Aevis. Although it’s normal attacks aren’t very threatening, it has a 66% chance to retalliate any standard Magic attack with Cyclonic, which reduces the HP of your entire party to 1/16th of their current HP. This can be disastrous if you get slammed with Wind Slash next attack and you lack Wind protection.
Hexadragon has a heavy Fire-based offensive line up (Firaga and Flare Star) and can petrify party members with Breath, but the real danger comes when slain. It has a 33% chance to fire off Meltdown as a Final Attack, which can flat out be dangerous if you lack Fire and Wind protection. It also speeds up its degradation to Meltdown by starting off Auto-Poisoned.
Like Hexadragon, Great Dragon deploys a heavy Fire-based lineup (Blaze, Atomic Rays and Southern Cross), but can also smash a character hard with Devastate (Attack x 4) and has a chance to deploy a nasty Final Attack, except Great Dragon’s version is Quake. Unlike Hexadragon, this monster has a 33% chance to counter any attack made against it with Snort, ejecting a character from battle. It is recommended to Stoplock this enemy and get everyone off the ground before attempting an attack.
Zurvan also casts Magic like Vilia does (Agas, Drain, Osmose, Gravity), except is more direct with it. If struck with any magic, he will put up Reflect on himself to protect himself from future spells. He can also Reflect??? anyone under it. To compensate for this, it has a terrible MP pool (300) and dies when it goes to 0.
Armadullahan can also be a problem as it knows 4 instant kill spells: Death, Roulette, Level 5 Death and Blaster. It will always use Blaster every 3 attacks. If hit by any attack, it will Spear you twice (Attack x 2). Because it is Undead, Roulette will heal itself if it is selected.
Death Riders also have access to Death based spells, but can also Freeze your party members with Freezing Dust and hit hard with Metal Cutter and Poltergeist (mass Sap, bypasses Sapproofing). If not slain within 3 turns, he can unleash Hyperdrive against you, which can hit for up to 8000+ damage and it can only be stopped by Runic. Any attack done against Death Rider is met with a double Pox (Attack x 2) counter attack.
Crystal Dragon attacks 2 to 3 times straight. Although it only does attack and Needle Breath (Attack x 2), the 3rd attack can be Cyclonic. If Cyclonic infects your entire party, the next triple combo can spell your doom. It is also immune to most Crowd Control effects but can be Blinded to stack up some Evasion.
Maximera can either attack or use elemental offense to wreck you (Blaze, Aqua Breath, Absolute Zero). It’s threat comes from it’s Stone Gaze counter if hit by anything (33% chance of happening).
Dinozombies have 5 crippling weaknesses (Fire, Ice, Holy, Water and Undead), but make up for it with Zombie (Bone, Crypt Dust) and Petrify (Dread Gaze) capabilities. If struck by anything, it has a 33% chance to Blaze your entire party.
Abaddon can abuse many different status effects and can use Disaster every 3 turns to stack on more. It can physically rake you if you strike it. However, it too is Undead.
Shield Dragons are physical powerhouses that also have the capacity to Zombie you with Soul Extraction. If struck, they can retalliate with Jarring Blow, which can Confuse the attacker.
Magic Dragons aren’t too threatening, but their White Wind can undo all your hard earned damage thanks to their massive HP pool. They also can strike at you with Aero and Lv? Holy, which are easily avoidable (Wind protection and don’t have a level divisible by your Gil’s one digit).
Of the old monsters, the only real threatening ones are Outsider (tosses weapons with increasing strength, throw shuriken on counters and can kill himself every 6 turns) and Yojimbo (will use Eye For An Eye on the person who killed him as a Final Attack, which inflicts Death and bypasses Deathproofing). Except here, both monsters can pair up together and Outsiders can also pair with Vilia to form an even more destructive party than the Cherry/Outsider pair from Kefka’s Tower.
Land Worms can also be a problem with their Magnitude 8 abuse but now can pair up to double their offense.
Battle Tactics continue on Part 2.
Walkthrough Part 27 – Dragons’ Den (Part 2)
- Vilia’s Confusion battle tactics can be a nuisance, but there are ways to work around it to achieve victory.
- Remember that unbreakable Entice ends when she is slain or the infected is slain. Do either tactic to immediately break the spell. Raise the character if you do the latter.
- If she is paired with Outsiders, you can Sketch, Control or Rafflesia (Entice) these guys and hopefully Dispatch will target her for a swift OHKO.
- If she applies Overture, cast Vanish or apply Fenrir/Golem on the infected character so no future Attack commands will deal damage to that person, Multi-hit attackers should try to attack her solo first and then resort to other damage methods if they get Overtured and fail to kill her.
- if she applies the unbreakable Entice, summoning Carbuncle will bounce back any spells towards her.Just be careful if someone has Ultima or Meteor. Summoning Golem, Fenrir or Mighty Guard can cut down physicals.
- You can also Confuse the Enticed character if they aren’t Confuseproof. This will overwrite the targeting back to enemies, but with random commands. Physical attacks will end this effect.
- Gau or Gogo can use Litwor Chicken (Quake) or Mover (Meltdown) with the correct countermeasures (mass Float or Fire/Wind immunity) and they will still do full damage to her and her support without damaging your team.
- Fire is the most destructive element in this region! Many enemies here are weak against it and the rest aren’t resistant to it. Deploy your Fire-based Rages carefully:
- Primeval Dragon (Firaga) has Deathproofing and hits the hardest
- Grenade (Blaze) has Stoneproofing, absorbs other Fire attacks (anti-Hexadragon) and cannot trigger Cyclonic (anti-Aevis).
- Devil Fist (Will O’ The Wisp) has Auto-Haste, Death and Stoneproofing and doesn’t trigger Aevis’ Cyclonic, but only hits 1 enemy. This attack also bypasses Zurvan’s Reflect and Runic.
- Oversoul (Will O’ The Wisp) and Behemoth King (Undead) (Firaga) absorb Death spells and are Zombie and Stoneproof, but you will need to use Death or Bio to heal them. Undead rages are ill advised against Magic Dragon, Zurvan and Vilia.
- Mover (Meltdown) with Fireproofing and Fire absorptions across the board can annihilate most to all opposition while doubling as a mass Curaga for your side. This Rage also carries many status immunities, but you still need Deathproofing and it will still triger Dragon Aevis Cyclonics. You also get a strong countermeasure against Vilia’s Entice using this Rage.
- Io (Flare Star) can deal 5680 (Shield Dragon) to 7120 (Crystal Dragon) damage when solo. The ones weak against it take 9920 (Dinozombie) to 9999 (Hexadragon, Abaddon, Death Rider, Dragon Aevis and Armodullahan). You also gain Wind and Earthproofing (anti-Hexadragon and Dragon Aevis), Zombieproofing and Stoneproofing while in this Rage. This Rage can be helpful against Solo targets if the above Rages aren’t doing maximum damage.
- Holy is also an effective attack against enemies here (Abaddon, Hexadragon, Dinozombie, Death Rider, Outsider, and Dark Force are weak against it). Just be careful not to use it against Dragon Aevis or it could trigger Cyclonic and Zurvan as he can Reflect himself.
- Holy Dragon has Death, Stone and Zombieproofing. It also absorbs it’s own Holy if cast on a Reflected Zurvan.
- Borghese absorbs Death and has Stone and Zombieproofing at the cost of being Undead. It will also take double from Hexadragon’s Fire based offense and reflected Holy.
- Outsider is Stone and Deathproof and has Auto-Haste. However, takes double from his own Holy.
- The Dueling Mask will render all weaknesses moot once collected.
- Wartpuck (Rasp) or manual casting Rasp can be effective against quite a few enemies here. With high enough Magic Power, their MP can be drained in 1 to 2 casts. Wartpuck has the added bonus of Death, Confuse and Impproofing and can still attack physically. Utilizing Rasp can be disastrous to the following:
- Zurvan (300, MP 0 = Death, will apply Reflect if survives)
- Dragon Aevis (500, cannot counter with Cyclonic if struck with Magic)
- Dark Force (700, MP 0 = Death)
- Hexadragon (750, cannot hit you with Firaga or Meltdown as Final Attack)
- Death Rider (1200, MP 0 = Death)
- Vilia (1800, MP 0 = Death)
- Maximera (2000, cannot use any elemental attacks)
- Great Dragon (2200, cannot Quake as Final Attack)
- Illuyankas, Anemone or Aspiran (Gigavolt) or Chaser (Plasma) can smite Great Dragon and Zurvan’s weaknesses to Lightning without having to worry about Reflect counters (Gigavolt is an enemy attack, not Magic). Make sure Great Dragon is under Stop before unleashing your electrical fury.
- Chimera (Aqua Breath) has a large array of status defenses and does bonus damage to Magic Dragon groups and Dinozombies. No enemy is resistant to Water or Wind here either.
- Non-elemental attacks still inflict serious harm here. Yojimbo (Shock), Tyrannosaur (Meteor), Purusa or Luridan (Rock Slide) and Twinscythe or Killer Mantis (Metal Cutter) are all effective. For safety, do not deploy these Rages without Zombieproofing (only Tyrannosaur is immune to it).
- Stray Cat, Bogy and Gold Bear can be incredibly painful to any opposition, but it is recommended to not deploy these Rages against Vilia as Overture can intercept Specials, but you can still block or dodge them unless the attacker has a Sniper Eye. Use the Holy and Flame Rods, Gladius and Swordbreaker when needed. Do not use Rods on Zurvan as he will Reflect if struck with a spell effect.
- Crowd Control can be incredibly helpful in this region, especially since these enemies need more that 1 full damage attack to kill:
- Death via Mu (Snare), Skeletal Horror (Banish), Lycaon (Blaster) or Ahriman (Roulette): Zurvan, Dinozombie, Death Rider, Dragon Aevis, Hexadragon. Hexadragon won’t use a Final Attack if slain by the first 2 methods.
- Petrify via Deepeye (Dread Gaze): Magic Dragon, Dinozombie
- Stop via Murussu (Stop) or Gloomwind (Net): Magic Dragon. Dinozombie, Dragon Aevis, Shield Dragon, Great Dragon
- Anyone not Deathproof really succumbs to Briareus or Platinum Dragon (Cyclonic) due to the massive health pools. In most cases, the first hit usually does 9999. Satellite (Sonic Boom) also does high damage every hit to these enemies.
- If Vilia is paired with 2 Outsiders, you can Sketch or Rafflesia (Entice) an Outsider and their Dispatch attack can slay Vilia in one strike (ignores Deathproofing). Just make sure nobody has been Overtured when doing this or Dispatch will be turned against you!
- Coco (Overture) can protect you from the hard hitting physicals some of these monsters deploy, especially the double Pox from Death Rider, double Spear from Armodullahan and Great Dragon’s Devastate.
- If single enemies become a pest, Rafflesia (Entice) can maintain control while protecting your team from harm. Be warned that Hexadragon and Great Dragon will still have a chance to fire off their Final Attacks when slain as Entice dispels on Death.
- Fiend Dragon (Northern Cross) can shut down enemies effectively, especially Magic Dragons. Just make sure to not use Fire attacks against enemies. Switch to Holy or physicals for the Undead.
- As always, Magic Urn (Curaga), Vector Lythos or Peeper (White Wind) and Destroyer (Reraise) can save lives. Just be careful when deploying these against Vilia as your healing can be turned against you.
Dragons’ Den Bosses (Part 1) – Ice and Storm Dragon
The bosses in the Dragons’ Den almost all come with gimmicks that must be factored into your Rage selection. This is especially true in the fights with the Dragons. They will be ordered by appearance.
Note: All but Dark Behemoth, Gargantua, Abyss Worm, Malboro Menace and Earth Eater are required to be slain. These 5 are fought in the event you botch the jump puzzle and get pushed off.
Any team can fight any boss, but I will post videos to show how to get to the boss from the previous fight to the next fight.
From Start to Ice Dragon
Reward: Final Trump (Setzer’s Ultimate Weapon), shatters Ice Seal
The Ice Dragon’s gimmick is ripped off from the Vector Lythos from Kefka’s Tower. It will create 3 copies of itself, all with the same attacks and stats. All 4 must be destroyed for this boss to be slain properly. As you destroy Dragons, although their attack frequency gets reduced, but their attack selection gets more ferocious.
4 Dragons
All 4 will either attack, cast Blizzaga or use Freeze (inflicts Stop, physical attack). Freeze can get annoying if all 4 do it at once and infect multiple targets. Dispel can cancel this effect. All 4 have a 66% chance to counter attack if struck by anything.
3 Dragons
They will start using Freezing Dust (inflicts Freeze) and Snowstorm (low Ice damage to entire party). They will still counter normally. Use low power Fire to thaw Frozen characters.
2 Dragons
Same AI as 3 but now they will no longer sit around and do nothing by chance each turn (33% chance in previous forms) and will now have a chance to counter damage with Freeze.
Last Stand
Will either attack you with Freeze or hit you with Northern Cross, Avalanche or Absolute Zero (mass Ice damage). Counters the same way as he did with a partner.
The boss absorbs Ice and is weak against Fire.
Slaying these Overgrown Lizards
- Equipping Ice resistance is recommended. Otherwise, use Mighty Guard to cut down the overall damage.
- Using attacks that hit all enemies is ill advised if you lack Ice defenses. If you do, odds are all 4 Dragons could attack at once and can spell a KO to a party member if not careful. Focus your attacks 1 at a time to ensure controllable counters and victory. If you have Ice protection, you can go all out, just remember to heal and Dispel Stop when necessary.
- Devil Fist (Will O’ The Wisp, Auto-Haste) can be their worst nightmare. Not only does this attack do double damage, but Gau or Gogo get Auto-Haste (which will reduce the duration of Freeze and Stop) and you will have assurance you only hit 1 enemy is hit at a time.
- If Gau has the Snow Scarf on and you don’t care about the counters, Mover (Meltdown) can be devastating here. Not only does this do double damage to all 4, but everyone with Fire immunity (Ice Shields, Minerva Bustiers) will take 0 damage and be thawed out if Frozen.
- Primeval Dragon (Firaga, wear Ice protection) and Bomb or Grenade (Blaze, wear Ice protection) can also be dangerous. The latter has the added bonus of healing off Fire damage. Just be aware of the fact these spells can hit all targets.
- Io (Flare Star) always does 3840 (4 dragons) to 9999 (1 dragon) damage and completely Stopproof. But you also run the risk of counters early on. As the fight continues, it becomes more effective.
- For non-elemental, Purusa (Rock Slide) is your safest option as it only hits 1 enemy. If you don’t care, Tyrannosaur and Behemoth (Meteor, Stopproof, wear Ice protection) and Yojimbo (Shock) are also effective.
- Stray Cat, Bogy, Gold Bear and Garm (Stopproof) can also wreck havoc on these Dragons. Gogo should use either the Swordbreaker (adds 30% evasion to block counters) or the Flame Rod (more damage). If you don’t have Ice protection, Leaf Bunny (Incisors) can be deployed for natural Ice absorption.
- Vector Lythos or Peeper (White Wind, wear Ice protection), Magic Urn (Curaga, Stopproof and absorbs Ice) and Destroyer (Reraise) can ensure survival.
Once the last dragon is slain, claim your Final Trump and continue your quest.
From Start to Wind Dragon
Rewards: Longinus (Edgar’s Ultimate Weapon), Wind Seal broken
The Storm Dragon has two gimmicks. First off, the beast has incredibly high Evasion (200 physical and 80 Magic), making it difficult to use offense outside of undodgable attacks (Ultima, Sniper Eye attacks, physical skills, etc.). Second, it has two phases. Regardless of phase, he has a 33% chance to counter attack physically and this is calculated twice per hit (worst case, you get hit twice).
Phase One (HP >= 25600)
It opens up it’s 3 turn loop with Cyclonic (33% chance), reducing your entire party’s HP to 1/16th. This can be dangerous as the next couple of attacks can kill you quickly. The other 2 turns are double attacks. It can attack you physically with a standard or Icarus Wing (Attack x 3) attack. Then it will attack twice or attack one and use Leaf Swirl (Non elemental damage to party) and Wind Slash (Wind damage to party).
Phase Two (HP <= 25600)
It gets extremely dangerous here as it will Haste itself (with it’s 90 speed, this is a huge issue) and unleash double attacks every turn it gets. It’s first turn it has a chance to cast Aero (heavy Wind damage to entire party) and Cyclonic. Second turn it can slice you with Icarus Wing and use Tornado (reduces everyone to 6.25% of current HP, but is Death and Criticalproof itself). Finally, it will double Icarus Wing you. Each special has a 33% chance of going of, otherwise, it attacks normally. You can still dispel this Haste.
The beast is weak against Lightning and absorbs Wind. However, most Lightning offense succumbs to accuracy checks, so it will be hard to use his weakness against him.
Fighting this Speed Demon
- It is imperative to arm Wind (blocks Wind Slash and Aero) and Deathproofing (blocks Cyclonic and Tornado) and slap down Hastega and Mighty Guard to combat this beast. Fenrir, Golem and Zona Seeker are good summons to call on.
- Try to use attacks that cannot be dodged in any fashion, both physical and magic. Standard attacks will require a Sniper’s Eye to ensure they land.
- Chaser (Plasma) is the only attack that will bypass Storm Dragon’s Evasion and deal double damage through it’s Lightning weakness. However, this Rage will need Deathproofing from Cyclonic and Tornado. If you need Deathproofing, you can sacrifice the Evasion bypass and use Illuyankas (Gigavolt). Illuyankas also comes with Auto-Protect for Icarus Wing and the standard attacks.
- Purusa (Rock Slide), Behemoth or Great Behemoth (Meteor), and Fafnir or Crawler (Traveler with enough Steps) ignores Magic Evasion and Defense and will always hit the Dragon for full damage. Yojimbo (Shock) also cannot be dodged but succumbs to Magic Defense reduction.
- Io (Flare Star) will always hit and deal 7760 damage (or 9999 if you roll Fire on Debilitator) against this Dragon. This attack also bypasses Evasion checks and grants Windproofing. You will need Deathproofing via Relics.
- With a Sniper’s Eye, Bogy, Stray Cat or Gold Bear can be incredibly painful. Bogy is recommended for his Protect status to cut down on Icarus Wing and counters. You can also use Garm if you want Deathproofing at the cost of damage. Gogo should equip the Thunder Rod for maximum damage. Swordbreaker or Magus Rod can stack on Evasion to protect him from Cyclonic and Tornado.
- Vector Lythos and Peeper (White Wind), Magic Urn (Curaga, absorbs Wind) and Destroyer (Reraise) can assist your party and keep them alive. Just watch if you get hit with Cyclonic or Tornado for White Wind.
Once this beast is slain, claim your Longinus and continue your quest.
Dragons’ Den Bosses (Part 2) – Earth and Blue Dragon
Storm Dragon to Earth Dragon
Rewards: Godhand (Sabin’s ultimate weapon) and Earth Seal broken
This dragon has 2 gimmicks. First off, it has 2 phases, both with radically different offense. Second, this beast really makes you pay the price if you dare use Float against him. He will try to remove it with 50 Gs then follow up with 2 straight Earth attacks: Magnitude 8 and Quake. Another problem is the beast no longer Floats like he did in the previous battle and will heal thousands off his own Quakes. This Float check is made every turn instead of every 20 seconds like it did in the first fight. The 50 Gs can be stopped by Runic if necessary.
Phase One (HP >= 25600)
The dragon either attacks normally or uses Quake, Magnitude 8 or Landslide like it did in the first battle. If struck with anything, it has a 33% chance to counter attack normally.
Phase Two (HP <= 25600)
He drops his Earth based spells and gets enraged. While in a rage, he will attack up to 4 times straight each turn. Amongst his physical rampage, he has a chance to use Savage (Attack x 4). He will also counter attack regardless, but it has a 33% of being Savage.
This beast absorbs Earth, but is weak against Wind and Water.
Slaying this Dinosaur again
- If you wish to protect everyone against Earth, it is best to equip Angel Wings instead of using Gaia Gears. Gaia Gear’s defense is too low to hold up to his standard attacks, especially when you enter Phase Two. If you are staying on the ground without Gaia Gears, make sure Gau or Gogo don’t enter a Rage that bestows Float, or the Float check could kill you.
- Slapping down Mighty Guard and Hastega is imperative. When you enter Phase Two, start using Vanish or summon Phantom to protect yourself from damage. Just remember that the Float check can dispel this.
- Applying Float on Earth Dragon is a good idea. This will prevent it from healing off his own Quakes.
- Vector Chimera and Chimera (Aqua Breath) or Sprinter (Aero) can devastate this dragon’s weakness to Water and Wind for high damage. The Rages also don’t bestow Float if you want to keep to the ground.
- If you want to stay in Auto-Float so 50 Gs doesn’t dispel it, Ninja (Water Scroll), Marchosias (Aero) and Zeveak (Flash Rain) can allow you to do this while striking at the boss’ weakness to Water and Wind.
- Io (Flare Star) can be this dragon’s worst nightmare. Not only do you get Earthproofing and stay on the ground, but this attack will always do 7760 (or 9999 if you roll Fire on the Debilitator) damage to the boss.
- Great Malboro (Bio) can deal decent damage and absorbs any Earth offense, saving on a Gaia Gear. It also doesn’t bestow Float.
- Purusa (Rock Slide), Yojimbo (Shock), Killer Mantis or Twinscythe (Metal Cutter) or Tyrannosaur (Meteor) can punish this Dragon for non-elemental fighters. Just deploy a countermeasure for the Earth attacks as none of these have Float.
- Bogy, Stray Cat and Gold Bear can be incredibly painful against this boss. Gogo should use the Swordbreaker to stack on 30% more evasion. If you want to get him off the ground, Hornet bestows Float status for the cost of the multiplier.
- Coco (Overture) can help you redirect its counters and is especially helpful in Phase Two.
- Vector Lythos or Peeper (White Wind), Magic Urn (Curaga, absorbs Earth) and Destroyer (Reraise) can help you stay alive.
Earth to Blue Dragon (also opens Red Dragon)
Rewards: Save the Queen (Celes’ Ultimate Weapon) and Water Seal broken.
Note: The Rippler Bug is non-existent in this version, so Shadow and Trance Terra are safe to use.
This dragon’s gimmick is more annoying than it is serious. Every turn, it will check your allies to see if they have any form of Haste, Protect, or Shell. If it detects a party member has any of them, it will give itself Blind, Poison, Slow and Stop (since it is Stopproof, this fails) and then swaps these effects with Rippler, giving you those effects and buffing itself.
Other than this, it attacks twice every turn with a mix of standard attacks, Blue Fang (inflicts Stop) and Water spells: Flash Rain (Water and Ice damage), Aqua Breath (Water and Wind damage), Tsunami and El Nino (pure Water damage). The dragon also has a 33% chance to counter any attack with an attack of it’s own.
The dragon absorbs Water and is weak against Lightning.
Slaying the Dragon
- Do not under any circumstances use buff spells or buff Relics as Blue Dragon will constantly Rippler you every turn, dragging the fight. Instead, apply Slow to this boss to drop his attack frequency (the only boss that isn’t Slowproof).
- If Edgar is with you, opening with Bioblaster is a good idea as it will take several thousand damage every few seconds. Otherwise, use Bio. As long as you don’t buff, the Poison will stick.
- Anemone and Aspiran (Gigavolt) are this dragon’s worst nightmare. Both do double damage with Gigavolt, have Water absorption and no buffs that will trigger Rippler checks.
- Baalzephon (Blizzaga) and Great Malboro or Trillium (Bio) all absorb it’s Water attacks. Baalzephon has the added bonus of being Stopproof.
- If you have Water protection, Io (Flare Star) will always do 7760 to this boss (9999 if you roll Fire with the Debilitator). It is also Stopproof.
- Of the non-elemental users, Behemoth or Tyrannosaur (Meteor) are Stopproof. Yojimbo (Shock), Purusa (Rock Slide) and Twinscythe or Killer Mantis (Metal Cutter) are still effective and don’t provide swappable buffs.
- Stray Cat and Gold Bear can shred this dragon physically. Bogy is ill advised as Auto-Protect will trigger Rippler checks. Gogo should wield the Thunder Rod to do maximum damage or the Swordbreaker to have a chance to block Blue Fang and counters. You can also sacrifice some multiplier for Actinian or Exocite if you need Water absorption naturally.
- Magic Urn (Curaga, absorbs Water, Stopproof), Destroyer (Reraise), and Vector Lythos (White Wind, Stopproof, wear Water protection) can keep people alive, especially if you get struck by Water attacks that hit everyone.
Once slain, claim your Save the Queen and continue your quest.
Dragons’ Den Bosses (Part 3) – Red Dragon, Earth Eater, Gargantua
Blue to Red Dragon
Rewards: Apocalypse (Terra’s Ultimate Weapon), Fire Seal broken
The Red Dragon’s gimmick is as the HP read out states: It is invulnerable. However, the Dragon begins burning through it’s life force to maintain this effect. You must survive until it’s life force (or internal timer) expires.
This dragon is capable of multiple attacks per turn and it’s attack turns are vicious:
First Attack Turn: It attacks 3 times, either doing a normal attack, Red Fang (instant kills and bypasses Deathproofing) or casts a spell: Firaga, Flare or Meltdown. Each move has a 33% chance of being used (Spell will pick a random one).
Second Attack Turn: It will attack you normally 8 times straight with random targeting.
Third Attack Turn: It will cast Blaze and Flare Star against you (Fire damage and 80 x your party’s lowest level / # of active party members).
You will get no breaks until the chain is finished. This is especially a problem if it rolls Red Fang multiple times on the First Attack.
It also has an ace up it’s sleeve. When 100 seconds have passed, its life force burns out and it will slay itself. However, it will try to take you with it with Ultima (does about 7000 damage to all hands) and casts Flare on a survivor. Runic, Queztalli or Reraise are helpful countermeasures here.
Surviving the Beast
Note: Raging is optional. If you feel unsafe or insecure about it, then stick to manual casting of healing and defense spells. I will still cover options if you decide to do so. Otherwise, just have Gau or Gogo use Curaga, Arise, Reraise or Espers when needed.
- It is imperative to slap down Mighty Guard, Hastega, and Reraise at all times! Calling Golem to block some physicals is also a good idea. Fenrir should be saved for near the end.
- Arm all characters with Fire and Wind protection and the only magic you will need to fear is Flare and Ultima.
- Bringing Celes for Runic is incredibly helpful as this will stop Flare, Ultima and Firaga. Begin channeling Runic before or after the second time Blaze/Flare Star and you should be able to intercept Ultima, This strategy is better served for Active Time Setting.
- Gau will need a Snow Scarf and Gogo will need either a Thunder, Paladin or Flame Shield to survive this. Do not use an attack Rage that absorbs Fire unless it is Magic Urn (Curaga), which despite random targeting will heal people.
- An option to keep all hands alive is to give everyone Earth or Fire absorption and use Litwor Chicken (Quake) or Mover (Meltdown) respectively. Although these attacks do 0 to Red Dragon, they will both heal your entire party instead.
- Using a Rage that bestows Reflect (Enuo (Tsunami), Devil (Thundaga), etc.) can block Flare and Firaga casts and send them back. You will have to use healing items or White Wind to heal Gau or Gogo in this state.
- Vector Lythos or Peeper (White Wind) and Magic Urn (Curaga, absorbs Fire) can be effective at keeping people alive. Land Ray (Mighty Guard) and Destroyer (Reraise) are also viable options to keep buffs applied should someone fall to Red Fang.
After the beast drains the last of it’s energy and you survive, claim your Apocalypse and continue your quest.
On your way to Skull Dragon, should you get knocked off the bridges by the conductors, you will be forced to fight a chain of bosses to get back up. To engage them, touch the moving flames. The first of these bosses is Earth Eater, who is a palette swap of Humbaba.
This boss just attacks twice every turn, however it will counter any attack made against it with Megaton Punch (Instant Kill, ignores Deathproofing). To compensate for this, it’s defense stats are terrible (10 physical and 40 magic). Make sure you space out your attacks every turn to avoid your entire team getting killed by Megaton Punch.
Slaying the Eater
- Immediately slap down Phantom or start getting Vanish going. Once this is fully applied, this boss cannot inflict any harm to you. Do not engage in offense until this is done. Fenrir can also block Megaton Punch at the cost of an Image stack.
- A very hilarious and efficient way to slay this boss is to turn Megaton Punch on itself for an instant kill. To invoke Megaton Punch, there are only 3 methods:
- Sketch it with Relm or Gogo and there is a chance it will happen.
- Rafflesia (Entice) and it has a 50% chance to punch itself every turn
- Coco (Overture) and then the caster must land a physical attack after inflicting it (Overture itself doesn’t trigger counters). This will provoke a Megaton Punch counter directed at the caster. but Earth Eater will intercept it’s own attack and kill itself thanks to Overture’s effect.
- This boss is also not Stopproof. Any Stop-based Rage can keep the beast Stoplocked to prevent Megaton Punch counters.
- It has no elemental resistances either. Use your favorite, hardest hitting Rages against it. Try to roll an elemental weakness with the Debilitator and work with it if you wish to use elemental offense.
- Bogy, Stray Cat or Gold Bear can punish Earth Eater for heavy damage. Gogo can use the Swordbreaker to have another 30% chance to block Megaton Punch.
Once slain, continue your quest.
Rewards: Growth Egg
Gargantua is the next boss in your gauntlet and he isn’t as annoying as Earth Eater was. It will still attack twice per turn, but it’s physical attack can hit like a bus (33% chance of doing first attack and 66% chance second attack). It can also use Evil Eye (inflicts Slow), Quake (Earth damage to everyone, but it’s Magic Power is 0 so it won’t do much damage) and Graviga (reduces HP by 75% to non-Deathproof). Graviga can be a problem if Gargantua lands a physical blow next attack on that person.
It has no weaknesses or immunities, but it does have 55 Evasion to physical attacks.
Toppling the Giant
- The cheapest defense against this boss is to Berserk it and Vanish or Phantom yourself. This will prevent your party from taking any damage.
- Outsider (Holy, Deathproof and Floats), Punisher (Thundaga) and Devil Fist (Deathproof, Will O’ The Wisp) are all Slowproof through Auto-Haste and do full damage to the boss. Deathproof also prevents Graviga from working. Try to roll one of those weaknesses with the Debilitator.
- Great Malboro (Bio) can be extremely brutal. This boss has no Poison protection or Poison effect proofing. The latter can stack up thousands of HP as damage every few seconds. Edgar’s Bioblaster can also achieve the Poison effect.
- Marchosias (Aero) is also effective. You get Death, Slow and Auto-Float, which shuts down all of Gargantua’s special attacks, only having to fear physicals.
- Io (Flare Star) always does 6800 (or 9999 if you roll Fire via Debilitator) damage to this boss, plus Earthproofing.
- Tyrannosaur or Behemoth (Meteor, latter is Slowproof), Killer Mantis or Twinscythe (Metal Cutter), Yojimbo (Shock) and Purusa or Luridan (Rock Slide) are good non-elemental options as always.
- Bogy (Auto-Protect), Stray Cat, Gold Bear will need a Sniper Eye to combat the 55 Evasion. Gogo should equip the Swordbreaker to add on a chance to block any incoming attacks. If you want Slowproofing for Physicals, Vector Hound (Auto-Haste) and Garm (Slow and Deathproof) both provide it.
- If you think Slow is becoming a pain, you can use Cirpius (Hastega) to combat it. Should anyone be slowed, it will be immediately dispelled with an application of Hastega.
- Coco (Overture) can turn his devastating physical and Evil Eye attacks against him for defense.
- Vector Lythos or Peeper (White Wind), Magic Urn (Curaga, Deathproof and absorbs Earth), and Destroyer (Reraise) can keep all hands alive.
Once slain, claim your Growth Egg and press on.
Dragons’ Den Bosses (Part 4) – Malboro Menace, Abyss Worm, Dark Behemoth
The 3rd boss on the way out is Malboro Menace. This boss is one hell of a status effect abuser. It opens with Bad Breath to try and inflict as many status effects it can onto 1 person. It can also Tentacle (causes Poison) and casts the dreaded Diabolic Whistle against you (inflicts a random status effect out of Blind, Poison, Imp, Doom, Berserk, Confuse, Sap, and Slow on all party members). Repeated casts can get dangerous if you dont have Ribbons.
After it has been slain, it will spawn 2 more and finally 4 more. Once it divides, it has a less of a chance (from 100% down to 33%) to use Bad Breath. However, if struck, it has a 33% chance to target the person who hit it with Blaster (attempts instant kill). If there is more than 1, it adds Tentacle or an attack to the counter pool.
It is only weak against to Fire. Any other element will heal it.
Slaying These Plants
- Make sure at least 1 or 2 people have Esuna in the event you don’t have enough Ribbons to go around. Arm your Ribbons and/or White Capes (Impproofing cancels Bad Breath) on these people to ensure quick removal of status effects.
- Banish, Oblivion, Raiden or Odin can be used at any time to slaughter the Malboro Menance and cancel the reinforcement check. If you want max rewards, save this for when 4 spawn.
- Primeval Dragon (Firaga, Deathproof) has a large defense pool against Bad Breath and Diabolic Whistle and will strike at it’s weakness to Fire. Devil Fist (Will O’ The Wisp, Deathproof, Auto-Haste) is also effective.
- Io (Flare Star) always does 9999 to 1 Malboro. As the beast divides, the damage doesn’t drop by much, going as low as 3680 damage to 4 at once. Io is also resistant to the more harmful statuses, but will need Deathproofing for Blaster.
- Yojimbo (Shock), Tyrannosaur (Meteor) and Twinscythe (Metal Cutter) all have plenty of status defenses, including Deathproofing to slay these beasts with non-elemental offense.
- Bogy, Stray Cat, and Gold Bear also hit like trucks against their small HP pools. Garm is also effective if you want more status defenses and Deathproofing. Gogo should use the Flame (bonus damage) or Magus Rod (more Evasion against the status effects) before Raging.
- Malboros aren’t Deathproof! Mu (Snare), Ahriman (Roulette), Skeletal Horror (Banish), and
Lycaon (Blaster) can effectively destroy single to multiple Malboros in 1 hit. Ahriman and Skeletal Horror are Deathproof and various status defenses. Banish and Snare will cancel reinforcement check scripts on contact. - If instant death isn’t your fancy, Briareus (Cyclonic, Deathproof) can mass cripple Malboro Menance(s) so that any attack that does max damage can finish them off for swift kills.
Once slain, continue your quest.
The Abyss Worm isn’t too bad. Like it’s fellow worm bretheren, it deploys Earth attacks but has terrible Magic Power to work with. However, it attacks in chains.
Every other attack, it will bring anyone who is floating to the ground with 50 Gs and casts Magnitude 8. When it doesn’t do this, it will just attack, use Landslide then Acid (inflicts Sap).
If struck by anything, it will counter attack with a normal attack, Shockwave (low Magic damage) and Gravity Bomb (same as Gravity but Runic cannot stop it).
The worm can only be harmed by Holy power. It is immune to everything and absorbs Ice.
Slaying this Worm
- Outsider (Holy) can smite this beast easy. You become Deathproof (making Gravity Bomb do nothing) and gains Auto-Float and Haste, canceling out all it’s Earth moves and 50 Gs cannot dispel the Float. Holy Dragon (Holy) is also effective, but you lose the Float and Haste bonuses.
- Yojimbo (Shock), Great Behemoth or Tyrannosaur (Meteor), and Killer Mantis or Twinscythe (Metal Cutter) are all Deathproof and can deal heavy damage without having to worry about elemental resistances.
- Stray Cat, Bogy and Gold Bear can physically wreck him, especially if Gogo is armed with the Gladius or Holy Rod. Garm (Deathproof) and Hornet (Auto-Float) are also good choices.
- If you must, Vector Lythos or Peeper (White Wind) can heal the damage the Earth moves make.
Once slain, continue onward.
The last boss in the gauntlet for escaping is a doozy. It opens the fight with Mighty Guard, halving all physical and magic damage and then proceeds the attack you normally or with Heave (Attack x 4). Every 4 moves, it can attack twice. Any attack made against it has a 33% chance of being countered by Heave.
The real threat comes from when you kill it. When slain, it will either cast Meteor or Ultima. Although Meteor will do about 2200 damage, Ultima has the capacity to be fatal if you don’t have high HP values.
The beast is weak against Fire and Holy attacks.
Slaying this Beast
- It is imperative to get Reraise and Protect going on all hands to prepare for the Final Attack.. Shell won’t help against both final spells as they pierce Magic Defense.
- If you get everyone under Vanish after applying Reraise, you can make yourself immune to Dark Behemoth’s offense until his Final Attack.
- Edgar’s Flash can stack on 50% Evasion to your entire team by blinding this boss. This helps if you want to slap down buffs with extra protection.
- If Celes or Gogo with a Swordbreaker or Gladius are in your current party, they can apply Runic at any point, preferably after you have Vanished all your party members. In the event Dark Behemoth rolls Ultima as a final attack, you will take 0 damage. Just make sure you got the HP for Meteor since Runic can’t stop this option.
- Mu (Snare) and Skeletal Horror (Banish) can spell this creature’s doom. Not only is the beast not Deathproof, but killing it this way will shut down its final attack, saving you from getting struck down by Meteor or Ultima. If a Rager is not with you, Cyan’s Oblivion, Odin/Raiden or Mog’s Darkness Dance and using Snare, or casting Banish will replicate the effect.
- Primeval Dragon (Firaga) or Devil Fist (Will O’ The Wisp, Auto-Haste) can fry this beast easily. Just watch for Heave counters.
- Io (Flare Star) will always hit this boss for 9999 due to Fire weakness. Satellite (Sonic Boom) also always does 9999 to this boss.
- Holy Dragon and Outsider (Holy, latter has Auto-Haste) can strike its second weakness to Holy just as hard as the Fire Rages can.
- If you want defense against Heave, Illuyankas (Gigavolt) can hit the boss for normal damage and has Auto-Protect.
- Purusa (Rock Slide), Behemoth or Tyrannosaur (Meteor), Killer Mantis or Twinscythe (Metal Cutter), or Yojimbo (Shock) are also effective.
- Bogy, Stray Cat, and Gold Bear, especially if Gogo is armed with Holy Rod or Gladius can be effective at destroying this beast. Bogy is helpful for the Auto-Protect against Heave.
- Rafflesia (Entice) can force it to cast Meteor on itself and protect your team, allowing you to buy time to slap down your Reraise for the final attack. The final attack will still go off against you as Entice is dispelled on Death.
Once slain, continue onward and you should return to before you fell down. Try to navigate the bridges properly so you don’t have to face these fiends again.
Dragons’ Den Bosses (Part 5) – Skull and Holy Dragon
Red Dragon to Skull Dragon (3 Parts, Part 1 and 3 are mandatory, Part 2 is if you fall off).
Rewards: Scorpion Tail (Gogo’s Ultimate Weapon), Darkness Seal broken
WARNING: This boss has Level 5 Death, make sure you have Deathproofing for anyone who’s level is divisible by 5.
WARNING: Despite the effectiveness of the Scorpion Tail, this weapon is ill advised for Raging against Undead unless you are using Magic.
This boss’ gimmick is a tedious one: You must completely drain its entire MP supply to destroy it. Since Rasp has a low spell power and Osmose cannot drain more than the difference of your MP, this will take awhile to pull off, unless your team has high Magic Power users. If slain by reducing it’s HP to 0, it will come back to full heatlh. Like it did in the first fight, it will try to strike you down with status effects.
It’s other attacks include Will O’ the Wisp (Fire damage to 1 person), Bio, Fear (inflicts Zombie), Level 5 Death, and the worst being Disaster (Blind, Imp, Doom, Silence, Confuse, and Float to 1 or all party members). Every 4 attacks, it will inflict Disaster on Terra in the event she is in the party in an attempt to prevent Morph Terra from draining larger quantities of MP. Everything except Will O’ The Wisp and Fear consumes MP to help speed up the degradation. Bio and Disaster can be shut down by Runic, but you cannot Rasp or Osmose while this is channeled.
If struck with anything, it will either attack or use Fear.
Draining this Dragon dry
- Having Ribbons and/or Safety Bits and Memento Rings is mandatory to ensure these status effects don’t inflict serious harm or disrupt your MP damage.
- Using the Soul of Thamasa helps but you run the risk of losing Doom and Deathproofing. Make sure the non-Soul user has a revive method if needed.
- Strength based Gaus are ill advised here. If you are forced to bring a Strength Gau to this fight, use him to provide healing or manual cast Rasp to speed up the murder.
- The only Rage that can assist you on offense is Wartpuck (Rasp, wear Fire protection). Gau or Gogo have a 50% chance of doing Rasp but also become Poison, Imp, Death, Doom, Berserk, Confuse, Slow, and Stopproof; shutting down most of Disaster and Level 5 Death. You will still need at least an Amulet to protect yourself from Fear.
- Only use Wartpuck if Gau or Gogo have high Magic Power and low Strength. If your physicals are low, then you can fry his MP supply long before your Rage’s physical penalty kills the boss for you. Gogo should be armed with the Poison Rod or Scorpion Tail equipped if you traded it at the Coliseum for the Final Trump as both do Poison damage and Skull Dragon will absorb it.
Once slain, claim your Scorpion’s Tail and continue onward.
Skull to Holy Dragon
Rewards: Zanmato (Cyan’s Ultimate Weapon), Holy Seal broken
This Dragon is NOTHING like the Holy Dragon you probably cheesed your way to victory up in the Cultist’s Tower. It is now a very real and dangerous threat thanks to it’s gimmick. It has Auto-Regen and it has a 66% chance to counter any attack by healing itself with Curaga (~6500 HP recovered), followed by a 33% chance to strike your party with Heartless Angel (reducing all HP to 1). Because of the latter, you must space your offense out carefully or you may end up spelling your own demise when it fires off Heartless Angel and then it’s other attacks.
It alternates between 0 to 3 Saintly Beam casts (Holy damage to all party members) in 1 chain and using a mix of standard attacks and Heavenly Wrath (Attack x 3) 0-3 times against you in another. Each individual attack in both chains has a 33% chance to do nothing.
If the battle drags beyond 20 seconds, the Holy Dragon will begin adding Holy to it’s Saintly Beam chain, with at least 1 Saintly Beam attack and a maximum of 3 attacks per chain. It’s physical attack chain upgrades to up to 4 attacks straight, with a minimum of 1 normal attack.
The beast has no weaknesses but absorbs Holy.
Slaying this Dragon
- Make sure all party members have some form of Holy protection. The Minerva Bustier, Cat Ear Hood, Force Shield, Paladin Shield and Dueling Mask are your best bets.
- To be safe, have the Paladin Shield user wield the Soul of Thamasa, so you can get 2 Arises going in the worst case. Also, unequip any Holy weapons you might be using if you are going to Attack!
- Try to get Reraise, Shell and Protect up as soon as possible. Mighty Guard helps greatly.
- If you manage to roll Holy with Strago’s Force Field, this will shut down Saintly Beam and Holy. This is incredibly helpful to prevent the Heartless Angel/Saintly Beam combo from killing you. However, you may end up shutting down an element that could be beneficial to your cause (eg. Fire if you are doing Mover (Meltdown) or Io (Flare Star)).
- I recommend putting Reflect on the Holy Dragon, so you can attack it without fear of it undoing your damage with Curaga. You will have to use Reflect piercing attacks instead, which isn’t a big deal if you have physical skills or attacks, Meteor, Ultima, Quasar, Grand Delta, Traveler or Flood/Aqua Breath/Tsunami if the Debilitator rolled Water.
- If you are not using Rages, then you must execute commands in batches. The moment you see Holy Dragon attack (doesn’t matter which pattern), immediately begin command execution and finish before the Dragon’s final attack in the chain. The first one should be Reflect (if it hasn’t been applied yet, otherwise attack), followed up by any 2 attacks and then end it with a Curaga (If Dualcast, attack spell then Curaga) on everyone. This will allow you to do as much damage as possible and counter the potential Heartless Angel cast at the end of it without Holy Dragon making an attack move within your command order. Reflect lasts about 1-3 attack chains (based on Active Time setting). Do not use Jump, charge Bushido past Fang, use Umaro, or Dance or it could throw your rhythm off.
- Great Malboro (Bio) is the only Rage that can attack Holy Dragon for full damage and absorbs Holy power without protection. If you use this Rage, you forfeit using Reflect on Holy Dragon.
- If you have Holy protection, Io (Flare Star) always does 7760 damage (or 9999 if the Debilitator rolls Fire) to this boss and bypasses Reflect if you put it up.
- Behemoth or Tyrannosaur (Meteor), Yojimbo (Shock), Purusa (Rock Slide), Ninja (Water Scroll), Kamui (Snowstorm), Marchosias (Aero), Antares (Magnitude 8) and Killer Mantis or Twinscythe (Metal Cutter) can all bypass Reflect and do heavy damage.
- If your entire party is armed with Fire absorption, Mover (Meltdown) can do heavy damage to Holy Dragon and heal the party for thousands of HP. The attack also bypasses Reflect and defenses. Do not use Meltdown in place of Curaga if you use it in the chian.
- Bogy, Stray Cat and Gold Bear can inflict serious harm to this boss. Gogo should use either his new Scorpion Tail or an evasion improving weapon to ensure survival. Just don’t use a Holy weapon.
- A dirty way to help control this beast is to use Fiend Dragon (Northern Cross). If the attack connects, the Dragon will be frozen for roughly 80 seconds and unable to fight back. You can then bomb him however you see fit, provided you don’t use Fire. Rafflesia (Entice) is ill advised as it has a 75% chance to cast Holy on itself, dragging the fight needlessly.
- Magic Urn (Curaga, absorbs Holy) and Destroyer (Reraise) are better served for keeping party members alive. White Wind is ill advised due to Heartless Angel.
Once you have finally slain this beast, claim your Zanmato and continue your quest.
Dragons’ Den Bosses (Part 6) – Gold Dragon
Holy to Gold Dragon
Rewards: Zwill Crossblade (Locke’s Ultimate Weapon), seal to Kaiser Dragon broken
The Gold Dragon is very different from when you faced him last time. It’s gimmick is also a very dangerous one: Just like Air Force’s Bit, it always channels Auto-Runic, absorbing most black magic and your protective magic. You must use Lores, Dances, Chakra or items to keep people healthy in battle.
The dragon also doesn’t make this easy for you, it will primarily attack you physically, use Mighty Claw (inflicts Confusion) and uses Plasma (Lightning damage to 1 party member, cannot be dodged). It uses a combination of these attacks twice per turn.
When it falls below 25600 HP, it will gain Protect status and immediately smack someone with Mighty Claw. Afterwards, every other turn it will fire off a Wave Cannon, doing heavy Lightning damage to your entire party.
Regardless of HP standing, it has a chance to counterattack with a normal strike (66% chance) and Mighty Claw (33% chance) if struck by anything.
The beast still maintains it’s weakness to Water.
Slaying the Golden Beast
- Make sure you bring Strago, Sabin or Mog for this battle. All of them have a means of healing that bypasses Runic (White Wind, Chakra and Sunbath respectively). Gogo can also work if you set commands correctly. If it isn’t possible, use Vector Lythos (White Wind). You will need reliable healing without having to consume Elixirs.
- Because of Runic, you cannot apply Reraise in this fight. You will also have to use Phoenix Downs if someone gets slain. Try to avoid Death as best as possible. If you must, give Phoenix to a person armed with the Paladin Shield.
- Use Meteor or Flood if you rely on spell offense. Physical attackers can attack however they wish, but note the Auto-Protect status halfway in.
- Thunder Shields can turn Plasma and Wave Cannon into Curagas for the team. Use them!
- Chimera or Vector Chimera (Aqua Breath) and Ninja (Water Scroll, wear Thunder Shield) can strike this boss for double damage, cannot be stopped by Runic and have Confuseproofing for Mighty Claw.
- If everyone has Paladin or Flame Shields on, Mover (Meltdown) can not only damage Gold Dragon for full damage, but mass heal your team as effectively as 2 Curagas. This spell also cannot be stopped by Runic.
- Behemoth or Tyrannosaur (Meteor), Purusa (Rock Slide), Yojimbo (Shock), Twinscythe and Killer Mantis (Metal Cutter), Marchosias (Aero), and Devil Fist (Will O’ The Wisp, Auto Haste) all have high powered attacks that can bypass Runic for direct damage.
- Io (Flare Star, wear Lightning protection) always does 7760 damage (or 9999 if Debilitator rolls Fire) to this boss. This attack also cannot be stopped by Runic.
- Stray Cat, Bogy, Gold Bear and Garm (Confuseproof) are good to fight claw to claw with this monster. Gogo should use the Swordbreaker to apply physical block chance.
- Coco (Overture) can cause it to intercept it’s own physical attacks and Mighty Claws when needed. It is Confuseproof so Mighty Claw will always miss. Better him than you right?
- Rafflesia (Entice) causes it to beat itself to death without it harming you. Use this if you just want this Dragon beaten.
- Vector Lythos and Peeper (White Wind) can be effective at keeping people alive in this battle. Especially if they team up with Strago or Mog to ensure high survival chance.
Once slain, claim your Zwill Crossblade and the final barrier will fall. With this barrier down you can now fight Kaiser Dragon as the Seal of Thunder blocks all 3 entrances to the boss. However, you can also access a treasure room for the remaining items, one of which is Gau’s ultimate item: The Dueling Mask. You would be a fool to pass up this piece of headgear (+6 all stats, +50% resist all elements, 25% bonus HP).
Dragons’ Den Bosses (Part 7) – Neslug and Plague
Gold Dragon to Neslug and Plague
Rewards: Gungnir (Mog’s Ultimate Weapon)
Neslug is basically a Whelk species monster, except this time the shell is flagged as Invulnerable, making it immune to ailments and damage. In order for the beast to be destroyed, the head’s HP must be reduced to 0. The head will retract and re-appear every couple of seconds.
The head is relatively harmless. It opens with Slowga and then attacks you with it’s maw, reapplies slow with Sticky Goo and often counters with Tongue Bath (inflicts Stop) to stop you dead in your tracks. To compensate for the crappy attacks, it has high defenses (180 physical, 195 Magic and 50 Evasion to both attacks). The real threat of this boss comes from the shell itself.
The Shell has only 3 attacks. While the head is out, it can use White Wind to heal it for 9999 HP. To compensate for the high healing, White Wind can only be cast once and the head has to go back and reappear for it to heal again. However, if the head is inside the shell, it will attack you normally or hit you with Megaton Smash, which instant kills the target and ignores Deathproofing. Megaton Smash can be blocked or dodged, but it is an issue if you are Stopped. Any standard attack or magic spell that hits the shell will cause it to retaliate with Megaton Smash.
The head is weak against Fire, but absorbs Lightning, Poison, Water and Ice.
Slaying the Slug
- After Slowga, counter it with Hastega. You can also aid your survival by Vanishing your entire party and reapplying the cloak if anyone gets hit by Sticky Goo. Megaton Smash cannot hit vanished people.
- Like with Holy Dragon, execute your commands in batches to make the most of every head appearance. When the head resurfaces, immediately target all 4 attacks against the head and you should be able to execute all your moves before the head recedes. Do not use any attacks with random targeting such as Blitz, Bushido and especially Master Scroll attacking or you may end up attacking the shell by accident. Do not do Attack with Zwill Crossblades or Scorpion Tail either!
- Raging is ill advised as the 50% chance of using a normal attack can trigger Megaton Smash if you are not careful. However, if you setup the Vanish countermeasure(s), you can protect yourself. If you do consider Raging, you can apply a leash to Gau or Gogo by running away while the head is gone to keep them from attacking the shell. However, this will prevent you from doing other moves.
- If you aren’t Raging with Gau, then have him Firaga or Flare the head or keep other party members alive with White Magic or healing.
- Devil Fist (Will O’ the Wisp, Auto Haste) can both do heavy damage and strike at the head’s weakness to Fire, has the added bonus of not triggering Megaton Smash, cannot be disrupted by Sticky Goo and Tongue Bath’s recovery speeds up.
- Purusa or Luridan (Rock Slide) and Tyrannosaur (Meteor) both hit the head for full damage, don’t trigger Megaton Smash counters since both moves are enemy skills. Rock Slide ignores Evasion and Tyrannosaur is Stopproof.
- Io (Flare Star) always does 7760 damage to the head. The attack ignores Evasion, Megaton Smash checks and you get Slow and Stopproofing. However, you cannot apply Vanish or Image.
- Yojimbo (Shock) and Killer Mantis or Twinscythe (Metal Cutter) both are effective at damaging the head and both don’t trigger Megaton Smash counters.
- If you want to go physical, use Stray Cat, Bogy (Auto-Protect), Gold Bear or Vector Hound or Garm (Auto-Haste and Stop/Slowproof respectively). If you want to do this with Gogo (although not a good idea due to low Strength), equip a Flame Rod. Note that specials will trigger Megaton Smash counters. You will also need a Sniper’s Eye to land hits properly.
- Another vile way to win this fight is Coco (Overture) the head and then let Gau or Gogo trigger an attack against the Shell. If you do this within the duration of the head’s appearance, Megaton Smash will be intercepted by the head and the attack has a chance to connect for an instant kill. The 55 Evasion unfortunately is factored in.
Once the slug has been slain, claim your Gungnir for Mog and continue on.
Rewards: Angel Brush (Relm’s Ultimate Weapon)
If you ever played Final Fantasy IV, this boss should be familiar to you. It will immediately open up the battle by applying Doom to all 4 of your teammates. If attacked physically, it will speed up the timer with Haste. If attacked magically, it will counter with Roulette (randomly kills a target, except itself due to Deathproofing). You have less than 20 seconds before Doom claims your teammates.
Every turn, it will either attack, use Trine (mass Blind and Silence) or Gaze (Blind, Silence and Confusion). Gaze is dangerous as these effects bypass status immunities.
This boss has no elemental resistances, so any attacks will work to full effect.
Slaying this FF4 Knockoff
- It is recommended to inflict Stop on this boss. This will prevent your team from being Hasted and you can use Magic without fear of Roulette. If you don’t like winning this way, inflict Slow on it instead.
- If your Active Time settings are set to Active, try to use quick animation attacks like Fang, Tools, standard attacks or Raging Fist and spells like Thundaga and Firaga to deal damage. Ultima and Meteor will eat up necessary time and speed up the timer. The physical specials have the added effect of triggering no counters. When selecting a Rage, pick the closest one so that you don’t waste time finding a specific one.
- Safety Bits and Momento Rings help considerably. This will prevent people from being slain by Roulette and Doom will fail on that person. All 4 characters with these makes this boss easy pickings.
- If you fear that anyone will die, get Reraise going on all your teammates and have Esuna ready for Gaze. Should anyone die, you will then have to immediately Curaga your team when they are raised to ensure Plague’s physicals don’t rip you to shreds.
- Oversoul (Will O’ The Wisp), Shambling Corpse (Thundaga), Borghese (Holy) and Behemoth King (Undead) (Firaga) all do heavy damage and absorb Doom and Roulette as this is still magical Death. All but Oversoul will trigger Roulette however.
- Tyrannosaur (Meteor), Yojimbo (Shock), Killer Mantis and Twinscythe (Metal Cutter) all do quick damage and have Deathproofing in the event they are targeted for Roulette or the timer hits 0. All 3 also don’t trigger Haste or Roulette counters as they are enemy abilities.
- For elemental offense, Holy Dragon (Holy), Illuyankas (Gigavolt), Marchosias (Aero), and Baalzephon (Blizzaga) all do respectable damage and don’t carry Auto-Haste. All moves will trigger Roulette, but these 4 are Deathproof.
- Io (Flare Star) always does 6320 to this boss (or 9999 if you use the Debilitator and roll Fire). The attack doesn’t trigger counters either. You will need Deathproofing.
- Stray Cat, Bogy, Gold Bear and Garm (Deathproof) are good physical attack Rages to quickly dispatch this foe. The Scorpion Tail or Holy Rod should give you the edges you need against this fiend. Both attacks can trigger Haste, so be careful.
- Coco (Overture) can turn Plague’s own attacks against it, especially since Gaze pierces it’s own status immunities. Confusion can buy time to quickly get everyone back up. However, once the person who cast it gets slain, Overture must be reapplied.
- Rafflesia (Entice) is ill advised. It wastes time and it has no real attacks that can help you against it. It is immune to Doom and Roulette and Gaze isn’t as spectacular as you think.
Once slain, claim your Angel Brush and continue the game.
Dragons’ Den Bosses (Part 8) – Flan Princess and Preparations
Neslug and Plague to Flan Princess
Rewards Oborozuki (Shadow’s Ultimate Weapon)
This boss isn’t too difficult, but you must fight 5 of them at once and each has 250 Physical Defense. To utilize this strength, each of them abuses Imp Song (mass Imp), Lullaby (Mass Sleep) and Mega Berserk (inflicts Berserk) against you. If your attacks don’t pierce armor, then you will have a problem.
Another issue is they each have a 33% chance to use Entice against the last person that attacked them. Without proper protection, you will essentially be watching your own Berserked Imps kill each other until you are completely dead. Another situation to watch out for is all it takes for you to be Game Over’d is have an Enticed character wipe you out with Banish, Ultima, Meteor, etc.
They are also immune to anything that isn’t Ice or Lightning and take double from Fire.
Slaying these FF4 Knockoffs
- Wear as many Ribbons, Peace Rings and White Capes as you are able. Elemental shields also help.
- Edgar’s Chainsaw and Air Anchor are extremely effective here as both have the capacity to instant kill a Flan Princess quickly. Raiden and Cyan’s Oblivion can mass slaughter all 5 at once.
- These enemies aren’t Berserkproof. If they are Berserked, you can damage them freely and they cannot Entice when struck. However, if they Enticed already, the effect will still stay.
- Entice can be dangerous but there are ways for Gau or Rage Gogo to still operate under it’s effect without having to kill off your own teammates
- Equip Fire absorption equipment and use Rages like Primeval Dragon (Firaga), Templar (Fira), Bomb or Grenade (Blaze, natural Fire absorption) or Devil Fist (Will O’ The Wisp) as they will do double damage to Flan Princess. If Gau or Gogo get Enticed, you will heal your teammates.
- Fira and Firaga can be bounced back with Reflect to ensure they damage a Princess if needed.
- If you must use Non-Elemental options, your safest option is Cloudwraith (Flare) as you can Reflect the move back at them. Moves like Tyrannosaur (Meteor) or Yojimbo (Shock) are ill advised.
- If you use Death attacks (none of the Flan Princesses are Death and Doomproof). make sure everyone is Deathproof via Safety Bits/Memento Rings/Deathproof Rages to prevent wiping out your teammates.
- Because they are Windproof and Earthproof, you cannot use Mover (Meltdown) to damage them. But it can still support you by healing your team if you are fully armed with Flame Shields.
- Io (Flare Star) can be effective as it will deal 2912 to 9999 damage to them. This will most likely trigger Entice counters, but you get Berserk and Impproofing.
- Baalzephon (Blizzaga), Kamui (Snowstorm), Illuyankas and Anemone (Gigavolt), and Harvester (Thundaga, Auto-Haste) can do full damage as well. You will need to employ the correct Entice countermeasures if you use thse Rages, just as you do if you use Fire.
- Wartpuck (Rasp) can be brutal if your magic attack is high enough. They only have 1000 MP each and have MP 0 = Death. If turned against you, the spell can be Reflected and can be countered with Ethers.
- None of these Princesses are Deathproof. Mu (Snare), Ahriman (Roulette), Lycaon (Blaster), and Skeletal Horror (Banish) can be effective at dispatching them.
- Physical Rages are ill advised due to their near max defense. Entice also adds a threat of your amplified attacks being turned on you. Healing Rages are also not suggested as your buffs and heals will be turned against you.
Once these pink blobs have been melted, claim your Oborozuki and prepare for the ultimate test.
Treasure Room to Kaiser Dragon
The time has come to stand up to the final 2 bosses of this game. If there are any characters you feel that will be necessary, get all 3 teams together or Teleport out and make a Team that can challenge Kaiser Dragon effectively. You will need at least:
- 6000 or more maximum HP
- Armor that provides resistances:
- Thunder Shields (Absorb Lightning, Null Wind, Resist Fire and Ice)
- Red Jacket (Sabin and Edgar Null Fire)
- Cat-Ear Hood (Resists all except Poison and Water)
- Minerva Bustier (Null Fire, Ice, Lightning and Wind, Resists everything else)
- Paladin Shield (Absorbs Fire, Ice, Lightning, Holy, Nulls everything else)
- Force Shield (Auto-Shell, Resists all except Holy and Poison)
- Aegis Shield (Allows near perfect Spellblock)
- Dueling Mask (Resists all elements for Gau)
- Ribbon and/or Safety Bits are a definite bonus
- A person with either the Paladin Shield or Minerva Bustier has the Soul of Thamasa Relic and high Magic, so that this person can keep up maintenance and buffing when needed.
- All controllable hands must have:
- Curaga
- Arise and Reraise
- Hastega
- Protect and Shell if you don’t have Lore going in
- Osmose (if necessary)
- Have the Ultimate weapons or whichever provide the best stats equipped. Some attacks ignore weapon strength like Tools, Bushido and Blitzes and some attacks (like with Valiant Knife or Ultima Weapon) outrank the ultimate weapons.
Once the conditions have been met, have the non-Kaiser teams hold down the buttons to spawn the portal to allow the Kaiser team to enter the chamber where the dragon resides. Talk to him and he won’t be super happy that you have been slaughtering his brethren and that your existence is a disease against life. Then the real battle begins. Get ready to go to war!
Dragons’ Den Bosses (Part 9) – Kaiser Dragon (Part 1)
The dragon is the apotheosis of offense and defense in this game. Off the bat, he will immediately Barrier Change (nullifies all elements except 2, which 1 carries a weakness and an absorption). He will cast this every time you drop his HP to 0 or enough time passes. The outcome of his weakness determines what pattern he will use.
Casting Barrier Change afterwards will consume a life. After 4 lives have been consumed, he goes to his Last Stand pattern. Until then, he will pick from one of 9 patterns at random:
Fire Pattern
It will attack you with Firaga, Flare Star (80 x Lowest Level of Team / # of active teammates) and Meltdown as Fire attacks. He also has non-elemental attacks through Meteor (Monster version) and Flare. Meteor and Meltdown if you don’t have protection are the problems.
If struck by anything, he has a 66% chance of bombing the attacker with Southern Cross. Fire resistance and Shell can manage this form.
Ice Pattern
Ice can be incredibly annoying as Kaiser Dragon can now use Northern Cross or counter with Freezing Dust (66% chance on anything) to try and freeze your characters. Make sure you have someone with a low strength Fire ready to thaw out your characters.
Other than that, he does Ice attacks that hit your party: Avalanche, Blizzaga and Absolute Zero. Ice Resistance can help you get through this, even if you have to swap Ice Shields in combat.
Lightning Pattern
Kaiser Dragon primarily attacks with Gigavolt, Thundaga, and Plasma. The latter of the 3 cannot be stopped by Runic. If struck with anything, it has a high chance of using Wave Cannon on the person who attacked it, causing OHKOs to anyone without Lightning proofing.
Lightning isn’t incredibly dangerous if everyone has Thunder Shields on.
Poison Patterm
This is arguably one of the most dangerous forms because it can ruin a major defensive strategy for any team.
If you fail to break this form by the 3rd attack, it will use Cloudy Heaven, which applies a Doom counter to all non-Deathproof characters and if anyone dies, they become Zombies, even if they are wearing Ribbons or Amulets and have Reraise. You must dispel the Zombie with Holy Water in order to save someone. To compensate for this, it has the weakest counter attack of all the forms: Bio.
Other than that, it just attacks with Status effects primarily Blind (Scintillation), Zombie (Crypt Dust, works on 0 HP characters), Doom, mass Poison and Sleep (Venomist and Lullaby) and Disaster (Blind, Imp, Doom, Silence, Confuse, and Float}. The combined Ribbon and Safety Bit Relics can protect you from everything. If you needed the time to go all out waste him, now is the chance. If you cannot slay him before it casts Cloudy Heaven, either restart the fight or learn to start using Runic.
Water Pattern
The Water Pattern uses Water attacks that target your entire party: El Nino, Tsunami, Flash Rain and Aqua Breath. It will have a chance to counter any damage with Acid Rain. Note that Flash Rain, Acid Rain and Aqua Breath are all dual elemental (Ice, Poison and Wind respectively).
Keep Shell up and you should be fine. Tortoise Shields can be used to slug through if needed.
Wind Pattern
It will use a combination of physical attacks and use Aero. However, the biggest threats in this form are Tornado and Cyclonic, both of which can reduce you to extremely low HP and can spell your doom if one of these attacks affects your entire party and you get slammed by Aero or it’s Wnd Slash counter.
Deathproofing and Thunder Shields will handle this easily.
Earth Pattern
This one can get incredibly dangerous for low Defense characters (especially dual wielders) and it’s Quake counter when struck. If you think you are or know you are on the Earth Pattern, get Float going ASAP!
When it isn’t countering, it will drop it’s magic attack and try to destroy you physically with it’s own physicals and Last Breath (Attack x 8).
If your Evasion is high and you put all hands in the Back Row, you should be able to shrug through this form. Otherwise, get Vanish going or summon Golem and/or Fenrir if necessary.
Holy Pattern
This is also another annoying pattern as it begins to buff itself with Protect, Shell and Haste. It will also make it harder on you by Reflecting your team and then using Reflect??? to apply negative effects under it. These buffs must be Dispelled as soon as possible.
Afterwards, it will attack you normally or use Holy and Level ? Holy (Holy damage to anyone who’s level is divisble by your Gil’s one digit). If struck by anything, it has a high chance of flat out wrecking that character with Hyperdrive. Only Runic can block this strike. Dispel will trigger a counter attack, so make sure you are ready when you do it. The buffs will not carry over if Kaiser Dragon is slain with them.
Make sure you raise anyone slain by Hyperdrive and have Holy Resistances and you should be fine. Otherwise, just don’t attack.
Non-Elemental Pattern
Much like Earth, it uses mostly non-elemental attacks here, except it mixes in some Magic against you. It can use Shockwave and Metal Cutter to do non-elemental damage, the latter being more dangerous. It can also attempt to flat out instant kill or Blind and Silence your entire party with Blaster and Trine.
If you attack it, there is a high chance it will counter attack normally. Maintain characters as best as possible and you should be fine here.
The Last Stand
The Last Stand is when Kaiser Dragon gets more vicious than ever. Off the bat, if struck with anything, it has a chance to now use Last Breath (Attack x 8), literally making it your last if you don’t have Protect or block the strike. It also has the same chance to use Revenge Blast, which can pretty much instant kill you if he has taken 10000 or more damage.
Second, it uses are large selection of multi-target attacks to try and end you. Primarily Absolute Zero, Quake, Meltdown, and Gale Cut. It can also use Last Breath and Hyperdrive on a normal basis. With proper defenses, only Hyperdrive, Last Breath and the counters will have to be feared.
Third, every 15 seconds, it will strike you with Heartless Angel or Mind Blast or both. These moves will reduce all hands’ HP to 1 and put them under some bad effects. The Ribbon should be able to block Mind Blast but you must immediately consume a Megalixir or mass Curaga after Heartless Angel or the next all attack will spell your death.
Finally, if slain for good, it will try to take you to the grave with it by casting Ultima as a FInal Attack. This attack will deal approx 7000 to all hands, so you will either need to predict the Runic, call Queztalli or mass Reraise. The former is your only means of saving you if he has applied Cloudy Heaven on the Poison Pattern. After this, the beast is slain for good.
- Because of its 200 defenses, it’s wise to use armor piercing attacks.. These non-Rage attacks pierce armor:
- Raging Fist and Phantom Rush (Physical and Magic Blitz)
- Drill and Chainsaw (Tools)
- Fang, Sky and Tempest (Bushido, all but Sky are physical)
- Quasar and Grand Delta (Lore)
- Ultima or Meteor (Black Magic)
- Hyperdrive (25% chance of casting when Sketched)
- Chocobo Stampede (3 Chocobos, Slots). Lucky 7s can consume 1 life if successful.
- Any Limit Break attack
- Throwing any weapon. Make sure they are non-elemental like Impartisans, Swordbreakers, Fuma Shuriken, etc.
- Attacking with Ultima Weapon or Valiant Knives. Make you understand their HP criteria (former does more damage if you have higher health and the other is vice versa)
- Continues on next section
Dragons’ Den Bosses (Part 9) – Kaiser Dragon (Part 2)
- It is imperative to get all your buffs up as soon as possible. Using moves like Mighty Guard, your Espers and Hastega will help immensely. A person with the Soul of Thamasa can easily keep people alive with Curagas or do double Arises when necessary. The Soul of Thamasa weilder is the best candidate for the Paladin Shield.
- Gau or Mog with a Snow Scarf, Dueling Mask (Gau only), and a high end shield or a decked out Imp in Imp Equipment are the only 3 characters that can have 255 Defense. With this, you can equip any of them with a Knight’s Code and they will take 0 damage from any physical or Last Breath if they are in the Back Row (1 if they are in the front). This is helpful if you wish to redirect attacks from your more squishy characters during the Final or Earth Patterns. You will however have to factor in Criticalproofing if you do this with Gau (check the Rages with Curses section for more details).
- Remember that when Cloudy Heaven goes off, you will have to use Holy Water to cleanse the Zombie infestation. Reraise will also be rendered useless as Zombie takes effect before Reraise. If there are multiple zombies, feel free to use Quick and quickly administer double Holy Water. If you reach the Last Stand, you will need to time a Runic channel to cancel Ultima (9999, 6 times and before the attack that will kill him), completely drain it’s 60000 MP or get someone off the ground with Jump or Queztalli then slay the boss.
- If Gau is Raging, it will be difficult, but managable to slay this boss. The issue with Rage Gau is that he can execute commands instantenously and may mess up your turns by causing counter attacks when you aren’t ready. This is made worse if you have been buffing his Speed with Cactuar or Odin. However, with high enough attack stats (mainly Magic Power), you can get away with him being your only damage dealer in the fight while the other 3 do White Magic/Support aid.
- If Gau is NOT Raging, then make sure at least 2 characters can execute a command before attacking so that they can undo the damage of any potential counters, or raise someone if slammed with Revenge Blast.
- Purusa or Luridan (Rock Slide) and Great Behemoth or Tyrannosaur (Meteor) are the only 3 Rage attacks that ignore Magic Defense and are non-elemental for Gau:
- Rock Slide reliably hits Kaiser Dragon and never misses. However, both Purusa and Luridan lack Deathproofing and some major status defenses.
- Great Behemoth is weaker than Rock Sllide (36 power vs 65 power), but frees up a Ribbon and Safety Bit combo. You can then use items like Knight’s Code, Hero’s Ring or Miracle Shoes to buff Gau.
- Tyrannosaur is the strongest of the 3 (power 80), has Great Behemoth’s status resistance but this Meteor has a chance of missing (Hit Rate 75). Kaiser Dragon however has 0 Evasion.
- If you think your Magic Power is high enough despite the 200 Defenses, Killer Mantis or Twinscythe (Metal Cutter) and Yojimbo (Shock) can put some dents into the boss, ignore the Barrier Change nonsense and still have the necessary status defenses to hold out (primarily Death, Doom, Confuseproofing).
- If you are max level and have max strength, then Stray Cat, Gold Bear, Bogy (Auto-Protect) and Garm (Status Immunities) have potential to hit hard physically, despite the 200 defenses.
- Rafflesia (Entice) can permanently pacify this beast for that life. However, if slain, Entice will break it’s hold and it will still do Ultima as a Final Attack.
- Destroyer (Reraise), Magic Urn (Curaga, absorbs all elements) and Peeper or Vector Lythos (White Wind) can assist your healer in keeping people alive. Just remember that Destroyer is rendered moot once Cloudy Heaven goes off and odds, Gau may attack more than actually use these moves and you will have to plan your Runic defense carefully for Curaga and Reraise.
Once the vile dragon has been slain by your hands, heal up the damage, claim Diabolos in the next room and use Teleport to leave. The Soul Shrine is now open, but there is still 1 more boss you must slay. Head back in and get your Kaiser party back to the room you faced Kaiser Dragon. You will now have a new threat to face: Omega Weapon.
Dragons’ Den Bosses (Part 10) – Omega Weapon
WARNING: Do not, under any circumstances challenge this boss with levels divisible by 3, 4, 5 or your Gil’s one digit. If you do so with 3 or 5, bring Confuse and Deathproofing. Omega Weapon knows ALL the Level Lores.
The equipment and item recommendations from Kaiser Dragon still follow against Omega Weapon. You can pretty much heal up and use the same configuration you had on Kaiser and still beat this fiend. Except this time, Safety Bits and Momento Rings are more of a priority due to amount of skills that work on non-Deathproof allies.
Omega Weapon has higher defenses, faster, has higher attack strength and now has 55 in both Evasion stats, at the cost of losing 2 lives and having no Barrier Change. Unlike Kaiser Dragon, the beast must have it’s HP reduced to 0 in order for a life to be consumed. It will use Final Attacks on it’s first 2 lives but nothing on it’s 3rd.
The only similarity each life shares is that every 20 seconds, a message will display that it is “Focusing Energy” and it will gain Protect, Shell and Haste status. On it’s next turn, it will unleash a devastating spell against your entire party.
It will use Level 3 Confuse, Level 4 Flare, Level 5 Death, Tsunami and Aero Lores against you. It can also use Flare, Tornado, Quake spells and Flare Star (80 x Lowest Level in Party / # of Active Characters). Tornado can be incredibly dangerous as the next attack will most likely kill your entire party if the full move connects. It can also cast both versions of Meteor, with the monster version doing up to 7500-8000 damage if the move hits.
When it falls below 32000 HP, it drops the Level spells and swaps out Flare Star for Southern Cross (fire damage to all party members).
To add to the annoying factor, if struck, it can use Dischord (halves level) or Freezing Dust (always Freezes) the attacker. Luckily, Deathproofing blocks Dischord, Level 5 Death and Tornado.
Every 20 seconds, it will channel Grand Delta, which does about 5500 damage to the entire party.
If slain, it will cast Vengeance and destroy all your buffs, including Reraise.
It will use the cutting edge in Magitek offense against you now. It has access to Atomic Rays (Fire damage to 1 person), Wave Cannon (Lightning damage to all), Absolute Zero (Ice damage to all), Gravity Bomb (Gravity that Runic cannot block), Magnitude 8 (mass Earth damage) and the dreaded Metal Cutter (hits 1 or all party members for heavy non-elemental magic). The worst attack is Launcher, which is basically 8 hits of Gravity with random targeting.
It also has access to Delta Attack (Petrifies target and only Stoneproofing can stop it), and Blaster (attempts to kill 1 or all party members). Deathproofing will nullify these moves and Launcher.
If struck by anything, it will counter attack twice with a combination of a normal attack, Blaster or Missile (halves HP and inflicts Sap). Safety Bits will block Blaster and Missile.
Every 20 seconds, it will channel Mind Blast, causing a myriad of negative status effects against you. The Ribbon and Safety Bit should be able to block most of this effect.
If slain, it will mass cripple your entire party with Heartless Angel. Use a Megalixir or Curaga as soon as possible to counter the attack.
It will combine the offense from both previous lives and also double attacks every turn it gets, giving you no breaks in between attacks to counter the damage. Make sure you have someone with Curaga ready after it attacks. It swaps out Flare Star/Southern Cross for Level ? Holy now.
If struck by anything, it will attack you twice with a combination of Omega Drive (Attack x1.5, but with a strength of 111 and Level 97, this attack will hit like a truck), Blaster and Freezing Dust.
Every 20 seconds, it will channel Forsaken. It has stronger Magic Power than Ultima, but succumbs to split damage and Magic Defense effects. If you have Shell and all hands alive, you should be able to shrug this attack off (about 3600 damage if everyone is alive), but it will still be brutal to your health. Don’t take it lightly!
- Because of the 225 Defenses and 50 Evasions, you must not only use armor piercing attacks, but add on undodgable moves. Luckily, most armor piercing attacks bypass Evasion checks. If you rely on the Attack command, equip a Sniper’s Eye to that person.
- Gau or Mog with the correct equipment are the only 2 characters that can achieve 255 Defense. With a Knight’s Code and Back Row, they can protect your critical characters from Omega Drive in the 3rd Life as it will do 0 damage.
- Protect, Shell, Golem and Fenrir are more helpful than ever. Mighty Guard is recommended. Just remember to reapply buffs after Vengeance.
- Only 3 Rage attacks can bypass Magic Evasion and Defenses for non-elemental damage:
- Purusa and Luridan (Rock Slide) have higher power than Meteor (65 Power vs 36 power), but will need Safety Bit and Ribbons to protect Gau from Mind Blast and Dischord.
- Great Behemoth (Meteor) has less power, but you free up status defense Relics for potent Relics like Hero’s Ring, Knight’s Code and Miracle Shoes.
- If you have walked 320k steps, Fafnir or Crawler (Traveler) will always do 9999 damage to this boss regardless of Dischord. You will still need a Safety Bit and Ribbon for status protection.
- Io (Flare Star) is the best Elemental attacker for this boss, for a couple of reasons:
- Flare Star cannot be dodged and always does 7760 (or 9999 if you roll Fire on Debilitator) damage to this boss. Note that when Omega Weapon loses a Life, the weakness still stands.
- It is also naturally Earth and Windproof. The Dueling Mask will counteract the other elemental weaknesses.
- Dischord counters have no effect on Flare Star’s output if you lack Deathproofing (naturally non-Deathproof). You will still have to be aware of Blaster.
- If Flare Star isn’t your thing or you rolled an element that your Gau has high levels and into the 100s for Magic stats, you can take the gambit with Omega’s Defenses and try these moves. All suggestions are Deathproof (unless specified)
- Fire – Primeval Dragon (Firaga), Devil Fist (Will O’ The Wisp, Auto-Haste, Always Hits)
- Ice – Kamui (Snowstorm, Always Hits), Baalzephon (Blizzaga, non-Deathproof)
- Lightning – Illuyankas (Gigavolt, Auto-Protect), Chaser (Plasma, Always Hits)
- Wind – Marchosias (Aero), Covert or Great Mantis (Wind Slash, Always Hits)
- Water – Ninja (Water Scroll, non-Deathproof, Always Hits)
- Poison – Great Malboro (Bio, absorbs all non-Fire attacks, wear Fire and Death protection)
- Holy – Holy Dragon or Outsider (Holy, former absorbs Lv? Holy, latter has Auto-Haste)
- Omega Weapon floats, so Earth magic is useless outside of Lifeshaver rages and Gravity Rod Gogo.
- If you believe your Strength Gau can punish this boss hard, give him a Sniper’s Eye and use Stray Cat, Gold Bear, Bogy (Auto-Protect) or Garm (Deathproof) try and put a dent in his defenses. The Sniper’s Eye will ensure the attack never misses. Make sure he has a Safety Bit if you don’t use Garm.
- Coco (Overture) and Rafflesia (Entice) can help but it is difficult to land these skills due to the Magic Evasion. Both moves are also canceled when Omega Weapon loses a Life.
- Destroyer (Reraise), Vector Lythos and Peeper (White Wind), and Magic Urn (Curaga, Deathproof, absorbs all elements) can have Gau or Gogo assist in keeping people alive.
Once slain, claim your achievement and head over to the Soul Shrine. There is 1 last thing you must do to get Gau’s Achievement!
Walkthrough Part 28 – The Soul Shrine (Part 1)
The Soul Shrine is another test of how well you know the game and how good your characters are. You must do this challenge for 2 reasons:
- There is an achievement if you survive to the end and win the final battle here
- Because of sloppy programming, the encounter for the Death Warden is only added to the Veldt if faced here. Once you face it here, you can head to the Veldt and claim the Death Warden Rage, giving you the long and well deserved achievement, Master of Beasts.
One party of 4 will meet a Ghost in here. Once you speak to the Ghost, you will have to engage in battles, one after the other with enemies you have faced throughout the game. Some are ridiculously simple, others can have incredibly dastardly tricks and it will eventually end with a battle with the Warring Triad, both forms of the 8 Dragons and Kaiser Dragon again. You will have no time to heal in between battles until you reach a check point. Make sure your vitals are in order before you slay the final enemy in a formation. You can exit the Shrine at any time during the breaks, but you will have to restart the battle chain from the fne beginning. To ensure you make it to the end, you must bring the 4 people that will be able to work together and handle any opposition properly.
Although the enemy list is preset. There is a chance you can get attacked by Glutturns (explained in the next section) or any monsters you have faced from the Dragons’ Den in-between fights.
- Celes – Runic can help you against quite a few enemies here and Minerva Bustier covers a lot of resistances.
- Locke – Steals items from Glutturns and can use both armor piercing weapons (Valiant Knife and Ultima Weapon) and Lightbringer.
- Shadow – Thrown weapons pierce defenses and always hit. Oborozuki with a high end shield can make hitting him physically incredibly difficult for some monsters, especially Glutturns.
- Terra – Effective with Magic and keeping people alive. Save Trance for the last bosses. She can also wear the Minerva Bustier.
- Edgar – Flash and Auto-Crossbow can slay all the weak enemies without having to bear long animations. Chainsaw and Drill are effective against single targets. He can use Ultima Weapon and Lightbringer for catastrophic damage.
- Cyan – Fang pierces armor and always hits. Flurry and Tempest can be devastating, the latter also ignores defenses at the cost of a long chargeup. Dragon can save on Elixirs. Eclipse and Oblivion can have their moments when you need mass Stop and Death.
- Sabin – Raging Fist and Phantom Rush both pierce defenses and hit hard depending on how you raised Sabin. Rising Phoenix or Razor Gale both mass kill low HP enemies.
- Strago – Mighty Guard helps tremendously. Quasar and Grand Delta are as effective as Meteor or Ultima when needed.
- Relm – Cat Ear Hood is a makeshift Minerva Bustier. Also effective with Magic Power.
- Gogo – Can fit multiple roles when necessary. Need a Thief and Runic user? No problem! Note that Scorpion’s Tail cannot channel Runic or Bushido.
Added to the Soul Shrine are Glutturns. Like in previous Final Fantasy games, they will ask for an item. If you give them enough of said item, they will leave you in peace. If you can, you can attempt to steal from them and score some helpful Relics and items, which can help you down the road in the Soul Shrine or with Omega Weapon if you hven’t challenged him yet.
But if you refuse to play by their rules by either attacking them or don’t satisfy their lust in 10 seconds, they will call you out for being stingy and start punishing you for it. Be warned as all of them have a Final Attack. They also have 255 in both defenses and both evasions, so undodgable, armor piercing attacks are the only way to go.
- 33% chance to flee after fed 3
- 100% chance to flee after fed 5
- 33% chance to flee after fed 1
- 100% chance to flee after fed 2
- Mega Berserk and Overture
- Entice and Cloudy Heaven
Diabolic Whistle and Disaster
- 33% chance to flee after fed 1
- 100% chance to flee after fed 2
- 33% chance to flee after fed 1
- 100% chance to flee after fed 2
Combating the Glutturns
- If you want to play it safe, make sure you have enough items to feed these guys. Ethers can be bought at shops while the rest are stealables or dropped from various enemies. Only fight if you are 100% sure you can win. 2 Elixirs can make a difference between you leaving alive, being reduced to 1 HP or getting killed by Ultima or the next monster.
- If you are playing on Active mode, it is wise to rearrange your item inventory so these items are at the top of the list. This will save valuable seconds searching for an item to feed Glutturns.
- If you plan on fighting the Glutturns, Safety Bits are recommended. It cancels Cloudy Heaven’s Doom and makes you Deathproof for Blaster. Ribbons also protect you from the status effects the Yellow ones use. If someone gets enticed by Yellow, either kill them and immediately restore them or work around it with Reflect (if the spell can be Reflected). Do not attack physically if someone has been Overtured.
- Vanish can allow you to fight the Green and Blue Glutturns without taking damage. Summoning Phantom off the bat against these fiends is a good idea.
- Celes or Gogo can constantly use Runic to block Ultima and it can block Blaster and Disaster. Once Ultima goes off, immediately execute another Runic channel to ensure that Ultima never does damage. Time your Runic for the final attacks so you can intercept them. Be warned! This move doesn’t stop Heartless Angel or Diabolic Whistle, so be ready to immediately heal next battle.
- Having someone devoted to multiple, armor piercing attacks is recommended. A Master’s Scroll user that does 9999 each hit can instant kill Green with 1 weapon and the rest with 2 weapons. However, you will have to sacrifice all your status immunity Relics to do this, which might be a disaster when you slay the Yellow and Blue Glutturns.
- Purusa or Luridan (Rock Slide), Fafnir or Crawler (Traveler) and Great Behmoth (Meteor) are the only spells that can bypass both Magic Defense and Evasion and do full damage to all Glutturns. Just make sure you got Ribbons and Safety Bits for the non-Meteor Rages.
- Io (Flare Star) is also brutal against non-Yellow Glutturns (Yellow absorbs Fire). It will always deal 7280 (or 9999 if Debilitator rolls Fire) damage and cannot be dodged. It also gains some helpful status immunities against Yellow and Blue’s abilities.
- Due to all species of Glutturn having maximum Defense and Evasion, all Physical and Crowd Control Rages are useless, even if you have the Sniper’s Eye and a high Strength Gau. If your Gau is built for Strength, have him use items or heal.
The enemy roster will be explained in the next section.
Walkthrough Part 28 – The Soul Shrine (Part 2)
Now the fun part. I will explain what to watch for in each section. You must also be prepared if a Glutturn or a formation from the Dragons’ Den injects itself into the formations. In general sense, you should by now be able to know which Rages work and which ones don’t.
- Imperial Soldier x2, Magitek Armor
- Zaghrem, Trillium, Spritzer x2
- Nautiloid, Exocite, Lesser Lopros
- Satellite
- Oversoul, Living Dead x2
- Opinicus Fish, Rhizopas
- Angel Whisper, Living Dead, Cloud x2
- Hell’s Rider
- Heavy Armor, Corporal x2
- Paraladia, Vulture, Iron Fist
- Veil Dancer, Gobbledygook x3
- Hill Gigas, Harvester
- General, Onion Knight x2
- Chaser, Trapper x3
- Death Warden
- Murussu, Baalzephon
- Bomb x6
- Io
- Fossil Dragon, Bug x3
- Zombie Dragon, Outcast x2
These enemies can practically fall to any attack that hits all targets. Just remember that Baalzephon absorbs everything but Fire and Holy. If Murussu Snorts your last party member out, then you will continue onward, Win or Lose. Death Warden if fought here will allow it to appear in the Veldt to get the achievement.
Heal up, get everyone off the ground with Float, equip status defense Relics and speak to the Ghost again.
- Balloon x6
- Adamankary, Bonnacon x2
- Mega Armor, Proto Armor
- Gigantos x2
- Brainpan x2, Misfit, Apocrypha
- Behemoth, Misfit x2
- Ninja x2, Platinum Dragon
- Grenade
- Land Ray, Peeper x2
- Black Dragon
- Daedalus, Ahriman
- Intangir
- Vector Chimera x2
- Lenergia x2, Destroyer
- Glutturn
- Landworm
- Neck Hunter, Cruller, Humpty x2
- Dante
- Dropper x3
- Borghese, Cloudwraith
- Tonberries x3
Remember, Intangir appears invisible at the start, the best way to slay it fast is to Stop it, then unleash your non-elemental fury against it. You will be forced to face a Glutturn after Lenergia, so be ready to feed it or fight it. The reason I suggested you Float your party is because you can enter the Landworm battle with mass-Float and save yourself from Magnitude 8 in the event you get Heartless Angel’d by a Red Glutturn. The status defense relics are in the event you face a Yellow Glutturn and blocks Death and Confuse effects.
Heal up, keep the status defenses and speak to the Ghost again.
- Skeletal Horror
- Malboro, Exoray OR 2 Shield Dragons
- Knotty x4
- Punisher x2, Devil Fist
- Glasya Labolas, Mugbear, Devil Fist
- Gorgimera
- Primeval Dragon, Great Malboro
- Test Rider
- Purple Magna Roader, Red Magna Roader
- Yellow Magna Roader x2, Brown Magna Roader
- Blade Dancer x2, Crusher x2
- Rafflesia x3
- Mahadeva
- Sorath, Warlock, Creature
- Armored Weapon
- Enuo, Devil, Figaro Lizard
- Pluto Armor, Schmidt
- Weredragon, Parasite x3
- Alluring Rider, Pandora x3
- Coco, Samurai, Suriander
These aren’t too bad. Just watch out for Rafflesia Entices, Samurai instant kills and Coco using Overture. Gau’s more higher powered Rages can smash through these enemies easily.
Heal up, get Safety Bits, Memento Rings and Elemental Defenses ready, then talk to the Ghost again.
- Tyrannosaur x2
- Greater Mantis, Sprinter, Lycaon x2
- Basilisk x2, Leap Frog
- Great Behemoth, Great Malboro, Vector Lythos
- Purusa, Gloomwind
- Face, Zeveak, Necromancer x2
- Clymenus x2, Necromancer
- Chaos Dragon, Ouroboros, Seaflower x2
- Amduscias, Covert x2
- Baalzephon x2, Shambling Corpse x2
- Wartpuck, Kamui
- Level 10 Magic, Level 20 Magic
- Level 30 Magic x3
- Level 60 Magic, Level 30 Magic, Level 10 Magic x2
- Level 70 Magic, Level 50 Magic, Level 40 Magic
- Level 90 Magic, Level 80 Magic
- Glutturn
Things get serious here as you start off pincered between 2 Tyrannosaurs. Their Bite attack can be brutal, even with high defenses. Slay them as quickly as possible or use Coco (Overture) to have their attacks turned on each other.
The Level Magics after 30 can also be a pest, especially the final formation where Level 90 has the capacity to Meteor and Meltdown while 80 will bounce spells off her to hit you, even if you put up Reflect. Gau’s Yojimbo (Shock) or Tyrannosaur (Meteor) can flatten the entire Magic Level line without fearing Reflect or resistances.
There is a Glutturn at the end. Try to squeeze in a Curaga before 80 and 90 fall in the event you face a Red one.
Once done, heal up, arm your best physical attacker with a Sniper’s Eye if necessary and talk to the Ghost again.
- Angler Whelk
- Dadaluma
- Crane x2
- Number 024
- Number 128, Left Blade, Right Blade
- Glutturn
- Air Force, Laser Gun, Missile Bay, Bit
- Master Tonberry
- Brachiosaur
You are now facing bosses. The real threats here are the Glutturn before Air Force and the Brachiosaur at the end. The Glutturn can leave you in a bad spot (especially if it is Red) for the Air Force. Brachiosaur can flatten you with Ultima if you don’t kill it fast or Runic the cast. If one or all teammates get Snorted out, then you move on with a free pass. The early bosses should fall to any method of attack, but use caution when necessary.
Heal up and talk to the Ghost when you are ready.
- Gamma
- InnoSent x3
- Junk x3
- Demon Knight, Yojimbo
- Muud Suud
- Prometheus, Fortis
- Duel Armor, Death Machine, Fortis
- Outsider x2, Dark Force, Cherry
- Mover x3
- Fiend Dragon x2
Enemies are a bit forgiving here, but remember that Yojimbo will Eye For An Eye if killed. Use Imp to stop this. You cannot afford to have anyone killed with the threat of Glutturns and Dragons’ Den enemies. Fiend Dragon can be dangerous if you get nailed by Heartless Angel and stuck by an elemental attack you didn’t protect yourself from (it uses Fire and Ice).
Heal up and speak to the Ghost again.
-Continued on Next Section-
Walkthrough Part 28 – The Soul Shrine (Part 3)
- Ice Dragon
- Storm Dragon
- Earth Dragon
- Gold Dragon
- Skull Dragon
- Holy Dragon
- Blue Dragon
- Red Dragon
You will face all 8 Dragons from the main game again (their 1st encounters). By now, they shouldn’t be too much trouble, but you should still be cautious as you may end up facing an unlucky Glutturn in between and it can leave you in a spot that another Dragon can capitalize off of. If you use your Elemental resistance gear smart, you should be able able to circumvent that issue. Gau should try to use Rages that exploit their weaknesses and still maintain strength (eg. using Aspiran or Anemone (Gigavolt) against Blue Dragon).
Do the usual when you get through this.
- Tentacle x4
- Dullahan
- Humbaba (4th battle script)
- Malboro Menace
- Curlax, Laragorn, Moebius
- Samurai Soul
- Magic Master
- Hidon, Erebus x4
- Deathgaze
Some of the most brutal gimmick bosses are here, so watch out for them. Deathgaze will still have a 66% chance to flee like a coward in his battle but it would be wise to have Deathproofing. Samurai Soul will give you another Master’s Scroll if you need it.
Tentacles can also drain vitals from you at a brutal rate if not controlled properly. Remember: They can only snatch you if you aren’t Slowed. Switching to a Slowproof rage will ensure Gau won’t get snagged.
- Inferno, Ketu, Rahu
- Guardian (vulnerable battle script)
- Demon
- Goddess
- Fiend
Your rematch with the Warring Triad and some bosses from Kefka’s Tower are here. If you missed getting Force Field from Fiend, you can get it here. Be aware that since you are superpowered now, Goddess might be more dangerous with her Overture and Entice moves.
Heal up, arm yourself with Safety Bits, Ribbons and maybe the Soul of Thamasa. The final wave will be very brutal. Speak to the Ghost when you are ready.
- Ice Dragon (Dragons’ Den version)
- Storm Dragon (Dragons’ Den version)
- Earth Dragon (Dragons’ Den version)
- Gold Dragon (Dragons’ Den version)
- Skull Dragon (Dragons’ Den version)
- Holy Dragon (Dragons’ Den version)
- Blue Dragon (Dragons’ Den version)
- Red Dragon (Dragons’ Den version)
- Kaiser Dragon
You have your rematch against the 8 Dragons’ Den Dragons and Kaiser himself. The worst part here is you get no breaks between the action, so your overall equipment choices must be able to adapt to ALL 8 DRAGONS! So make sure you fight with caution and smart.
If you brought Celes, try to stop the Red Dragon’s Ultima with Runic so you dont enter the fight with Kaiser Dragon with virtually no health. There is still a chance you can face a Glutturn here. It is wise at this point just to feed it. The last thing you want is to get slammed with Heartless Angel going into the next dragon, especially the last 4, who can open up with an attack that hits the entire party.
Once you have claimed Kaiser’s head again, you get the Soul Shrine achievement and return to the World Map. Once done, fly over to the Veldt, claim Death Warden and any Rages you missed and that is it! You beat FF6 using Gau like a boss (hopefully you did)!
Appendix A – Video Collection (Gau and Bosses)
Here are some helpful videos of my personal boss fights with Gau and how I worked some of my suggestions into them. It should visually give you an understanding of what some of your Rage choices can do. I have more on my channel, but I decided to share my personal favorites on the guide itself. You can check out more videos in my Anti-Norm compilation
I am sincerely sharing this to provide more of a visual aid for people on how to use Gau and/or Rage Gogo than I am advertising my own channel. Plus, it is more fun to watch cool things happen on your screen besides blue glowy swords, giant and ugly blue semi-circles go off isn’t it?
Rage used: Anguiform (Aqua Breath).
It pretty much one shots a Crane with no fuss. I consider this Rage to be the Magitek Facility version of Ultima. Gigavolt is also nice too.
Rage used: Bomb (Blaze)
Provides Fire absorption for Blaze, Flare Star and Fira while doing a half decent attack against it. It shows that sometimes even the attacks is not what matters, but the defenses associated with them. I also follow my suggestion of Slowing the boss to reduce the damage frequency.
I also show off my Book Antiqua UI modification. If you wish to get it, download it here
Rages used:
- 3rd fight – Primeval Dragon (Firaga)
- 4th fight – Marchosias (Aero, Gau) and Stray Cat with a Poison Rod (Gogo)
This shows how effective Gogo can be when equipped properly for Raging and using the Debilitator to your advantage. It also shows both guys are just as deadly as a Tranced Terra. This video also took 8 takes because I wanted Gogo and/or Gau to be spared and look cool doing it! I eventually got this.
Rage used: Borghese (Holy)
I didn’t have Io (Flare Star) or and Purusa (Rock Slide) is near the bottom mid of the list, plus when you are on Active Time, it is a race against the clock and pray he doesn’t flee. So I went with Borghese (Holy) as you get Death absorption and Holy’s double damage will do normal damage thanks to Shell. Notice how I healed him about halfway in. This video proves that even Undead rages have their merit.
Rages used: Aspiran (Gigavolt, Gau) and Actinian (Clamp, Gogo)
Shows just how effective absorbing Water truly can be in battle in tandem with smart Rage selection. Plus, it was pretty hilarious watching Gogo left with 2 HP.
The only mistake I make here is I could have swapped to the Gravity Rod on Gogo after I saw the Debilitator rolled Earth.
Rage used: Io (Flare Star)
I wanted to show just how effective this Rage truly is and this boss is a good candidate for it, given the fact he is Level 97 and has 200+ Defenses and Evasion stats.
Rages used:
- Cactuar – Ahriman (Roulette)
- Gigantuar – Purusa (Rock Slide)
The former is to help speed kill Cactuars since this instant kill always hits an enemy and only Deathproofing can stop it (which Cactuar sadly doesn’t have). I use this and Fang to get the 10 kills fast.
The latter I consider to be Gau’s ultimate Magic attack against single targets. It basically works like Phantom Rush but with half the attack strength and has a 50% chance of going off instead of doing a full clockwise rotation of arrows. So if you want a Magic attack version of Catscratch (Attack x 4, Stray Cat Rage), this and Tyrannosaur (Meteor) are for you.
Plus it just shows how effective the Snow Scarf is as a chest piece. I recommend getting one with your spare Behemoth Suits from the Veldt. You will have to put up with an Outsider for it (Sketch Dispatch with a Gogo only using Sketch before it Dispatches you).
Rages used:
- First Part – Chimera (Aqua Breath), double to arms (Water and Wind weaknesses) and full to Visage with full status protection.
- Second Part – Killer Mantis (Metal Cutter), random choice, but has large status immunity pool
- Third Part – Kamui (Snowstorm), rolled Ice on Debilitator and Baalzephon (Blizzaga) was too far down. Also Deathproof.
- Kefka – Yojimbo (Shock). For revenge!
Shows most of what Gau can do to the end game bosses when used correctly. These are just but one of the ways to beat each tier. Locke isn’t the only cheap mofo at end game (notice where I put him on the battle order).
Rage used: Purusa (Rock Slide)
Proves that not only do you not need that overpowered spam stuff everyone does (Quick, Ultima, Valiant Knives, etc.) but it also proves a raging God Emperor Gau CAN stand up to Kaiser Dragon, give you the damage you need and still win. Although it isn’t the safest of ideas, considering he executes his commands immediately and can ruin your rhythm with counter attacks. You may need to provide a leash (Run away) to coordinate your attacks properly. But considering him and Shadow were all I needed for damage, this wasn’t as bad as I thought.
Also, the Dueling Mask and Snow Scarf combined will make Last Breath do 1 damage cause of Max Defenses.
Rage used: Io (Flare Star)
For some reason, my Deathproofing wasn’t working the way it was supposed to and Dischord was taking it’s toll the first try, so I was forced to use Io (Flare Star) after I managed to roll Fire on the Debilitator (making the attack do 9999) and Shadow assisted as well to slay this fiend.
To be honest, this boss is more difficult than Kaiser Dragon is, mostly because of the Frozen spam and the fact Forsaken and Grand Delta can do 5500 damage easily, even with protection up (Grand Delta sadly pierces defenses, Forsaken doesn’t) and an unlucky Meteor can spell your death on Form 1. But it still proves Gau and everything my guide has hopefully shown you can work even on this boss.
Appendix B – Rage Checklist (Part 1, Narshe to Esper Caves)
I have decided to also include a Rage Checklist to help people keep tabs on their Rages and enemy encounters. This portion is essentially the TL:DR version of my Guide. Although the Bestiary can help with encounters, the problem is it won’t register unless you kill the target and there are a few enemies that don’t appear on the list. Plus the list is organized by enemy size and from earliest to latest, not earliest to latest completely.
The first checkbox is for enemy was encountered and the second is for you learned the Rage. Use the Rage Command Menu section to ascertain it’s location. For Formation, use the Veldt Battle Formation section for more information on when you can encounter these enemies.
Use the Walkthrough sections in tandem with this Checklist to make sure you don’t miss any enemies (I want you to at least read the guide, try using Gau a bit and as well as use the checklist. I’m sorry for the extra work but efficiency is one thing, laziness is another in my books).
I recommend either printing this or using Notepad and then cut out lines as you encounter them.
In lieu of mine, you may also use:
- this Google Doc[docs.google.com] written by Balrogfan
- this Google Doc[docs.google.com] written by RJBabiyes
Both however will need to be modified to for your save file.
Note: Both Silver Lobo (Chomp) and Wererat (Poison) are omitted as they are default Rages
- [ ] [ ] Guard (Critical)
- [ ] [ ] Megalodoth (Snowstorm)
- [ ] [ ] Spritzer (Blaze)
- [ ] [ ] Bandit (Self-Destruct)
- [ ] [ ] Guard Leader (Wind Slash)
Note: Magitek Armor (Magitek Laser) is omitted as it is a default Rage
- [ ] [ ] Leaf Bunny (Incisor)
- [ ] [ ] Dark Wind (Break)
- [ ] [ ] Sand Ray (Tail)
- [ ] [ ] Alacran (Numb)
Note: Hornet (Iron Stinger) is omitted as it is a default Rage
- [ ] [ ] Urok (Digestive Acid)
- [ ] [ ] Foper (Death)
Note: Belmodar (Megavolt) is omitted as it is a default Rage
- [ ] [ ] Mu (Snare)
- [ ] [ ] Unseelie (Shell)
Note: Zaghrem (Stone) is omitted as it is a default Rage
- [ ] [ ] Gorgias (Snowstorm)
- [ ] [ ] Cirpius (Hastega)
- [ ] [ ] Trillium (Bio)
Note: Exocite (Pincer) is omitted as it is a default Rage
- [ ] [ ] Nautiloid (Ink)
- [ ] [ ] Lesser Lopros (Fireball)
- [ ] [ ] Wild Rat (Scratch)
- [ ] [ ] Valeor (Stone)
- [ ] [ ] Eukaryote (Fire)
- [ ] [ ] Specter (Fire)
- [ ] [ ] Darkside (Blizzara)
Note: Cartagra (Poison Barb) is omitted as it is a default Rage
- [ ] [ ] Heavy Armor (Magitek Laser)
- [ ] [ ] Vector Hound (Bite)
- [ ] [ ] Commander (Break)
- [ ] [ ] Gold Bear (Gouge)
- [ ] [ ] Acrophies (Numbsting)
Note: Apparition doesn’t count and Angel Whisper is omitted as it is a Default Rage.
- [ ] [ ] Imperial Soldier (Fire)
- [ ] [ ] Templar (Fira)
- [ ] [ ] Doberman (Bite)
- [ ] [ ] Satellite (Sonic Boom)
- [ ] [ ] Stray Cat (Cat Scratch)
- [ ] [ ] Nettlehopper (Berserk)
- [ ] [ ] Aepyornis (Featherdust)
- [ ] [ ] Chippirabbit (Raise)
- [ ] [ ] Ghost (Thundara)
- [ ] [ ] Poplium (Cling)
- [ ] [ ] Bomb (Blaze)
- [ ] [ ] Cloud (Thundara)
- [ ] [ ] Living Dead (Osmose)
- [ ] [ ] Oversoul (Will O’ The Wisp)
- [ ] [ ] Anguiform (Aqua Breath)
- [ ] [ ] Aspiran (Gigavolt)
- [ ] [ ] Actinian (Clamp)
- [ ] [ ] Corporal (Swing)
- [ ] [ ] Hunting Hound (Bite)
- [ ] [ ] Fidor (Pounce)
- [ ] [ ] Heavy Armor (Magitek Laser)
- [ ] [ ] Hell’s Rider (Venomist)
- [ ] [ ] Bloodfang (Drain)
- [ ] [ ] Fossil Dragon (Sandstorm)
- [ ] [ ] Vulture (Shamshir)
- [ ] [ ] Iron Fist (Stone)
- [ ] [ ] Rock Wasp (Sleepsting)
- [ ] [ ] Paraladia (Poison Touch)
- [ ] [ ] Gobbleygook (Vanish)
- [ ] [ ] Harvester (Haste)
- [ ] [ ] Hill Gigas (Magnitude 8)
- [ ] [ ] Veil Dancer (Blizzara)
- [ ] [ ] Stunner (Incisors)
- [ ] [ ] Goetia (Libra)
- [ ] [ ] Wyvern (Cyclonic)
- [ ] [ ] Grasswyrm (Berserk)
- [ ] [ ] Don (Pounce)
- [ ] [ ] Litwor Chicken (Quake)
- [ ] [ ] Joker (Thundara)
- [ ] [ ] Bug (Stop, Desert Only)
- [ ] [ ] Fossil Dragon (Sandstorm)
- [ ] [ ] Sergeant (Reflect)
- [ ] [ ] Belzecue (Gravity)
- [ ] [ ] Onion Knight (Imp)
- [ ] [ ] Flan (Sticky Goo)
- [ ] [ ] Trapper (Level 3 Confuse)
- [ ] [ ] Lenergia (Shamshir)
- [ ] [ ] Destroyer (Reraise)
- [ ] [ ] General (Cura)
- [ ] [ ] Magna Roader (Purple) (Bio)
- [ ] [ ] Magna Roader (Red) (Silence)
- [ ] [ ] Chaser (Plasma, Outside Only)
- [ ] [ ] Grenade (Blaze)
- [ ] [ ] Intangir (Transfusion)
- [ ] [ ] Chimera (Aqua Breath)
- [ ] [ ] Devourer (Shell Slam)
- [ ] [ ] Briareus (Cyclonic, Fields Only)
- [ ] [ ] Lich (Fira)
- [ ] [ ] Provoker (Imp)
- [ ] [ ] Antares (Magnitude 8)
- [ ] [ ] Outsider (Lifeshaver)
- [ ] [ ] Zombie Dragon (Doom)
- [ ] [ ] Sergeant (Reflect)
- [ ] [ ] Imperial Elite (Protect)
- [ ] [ ] Balloon (Self-Destruct)
- [ ] [ ] Adamankary (Acid Rain)
- [ ] [ ] Bonnacon (Sticky Goo)
- [ ] [ ] Mandrake (Leech)
- [ ] [ ] Venobennu (Poison)
- [ ] [ ] Land Grillon (Wing Snap)
Appendix B – Rage Checklist (Part 2, Floating Continent and Beyond)
By this point, everthing from Part 1 should be at least encuntered. If not, make sure you finish any unfinished business before taking off to the skies.
- [ ] [ ] Sky Armor (Magitek Laser)
- [ ] [ ] Spitfire (Magitek Laser)
- [ ] [ ] Ninja (Water Scroll)
- [ ] [ ] Platinum Dragon (Cyclonic)
- [ ] [ ] Misfit (Lifeshaver)
- [ ] [ ] Apocrypha (Level 3 Confuse)
- [ ] [ ] Behemoth (Meteor)
- [ ] [ ] Brainpan (1000 Needles)
- [ ] [ ] Dragon (Revenge Blast)
- [ ] [ ] Gigantos (Magnitude 8)
- [ ] [ ] Land Ray (Mighty Guard)
- [ ] [ ] Peeper (White Wind)
- [ ] [ ] Black Dragon (Snowstorm II)
- [ ] [ ] Killer Mantis (Metal Cutter)
- [ ] [ ] Fafnir (Traveler)
- [ ] [ ] Murussu (Stop)
- [ ] [ ] Gigantoad (Sticky Goo)
- [ ] [ ] Rukh (Shamshir, Field Only)
- [ ] [ ] Luna Wolf (Face Chomp)
- [ ] [ ] Scorpion (Poison)
- [ ] [ ] Zokka (Net)
- [ ] [ ] Nightwalker (Drain)
- [ ] [ ] Vampire Thorn (Bio)
- [ ] [ ] Lizard (Break)
- [ ] [ ] Delta Beetle (Megavolt)
- [ ] [ ] Devoahan (Slowga)
- [ ] [ ] Black Dragon (Snowstorm II)
- [ ] [ ] Oceanus (Magnitude 8)
- [ ] [ ] Desert Hare (Cura)
- [ ] [ ] Cancer (Esuna)
- [ ] [ ] Neck Hunter (Imp)
- [ ] [ ] Cruller (Sticky Goo)
- [ ] [ ] Humpty (Poison)
- [ ] [ ] Dante (Level 3 Confuse)
- [ ] [ ] Marchosias (Aero)
- [ ] [ ] Bogy (Growl)
- [ ] [ ] Deep Eye (Dread Gaze)
- [ ] [ ] Mousse (Transfusion)
- [ ] [ ] Cancer (Esuna)
- [ ] [ ] Sandhorse (Sandstorm)
- [ ] [ ] Skeletal Horror (Banish)
- [ ] [ ] Borghese (Holy)
- [ ] [ ] Cloudwraith (Flare)
- [ ] [ ] Exoray (Venomist)
- [ ] [ ] Malboro (Bad Breath)
Note: From this point onward, the Rages can be acquired in any order you wish!
- [ ] [ ] Tumbleweed (Lifeshaver)
- [ ] [ ] Lycaon (Blaster)
- [ ] [ ] Sprinter (Aero)
- [ ] [ ] Greater Mantis (Wind Slash)
- [ ] [ ] Crawler (Traveler)
- [ ] [ ] Leap Frog (Sticky Goo
- [ ] [ ] Basilisk (Break)
- [ ] [ ] Slagworm (Sandstorm)
- [ ] [ ] Cactuar (1000 Needles
- [ ] [ ] Tyrannosaur (Meteor)
- [ ] [ ] Brachiosaur (Disaster)
- [ ] [ ] Vasegiatta (Cyclonic)
- [ ] [ ] Purusa (Rock Slide)
- [ ] [ ] Gloomwind (Net)
- [ ] [ ] Baalzephon (Blizzaga)
- [ ] [ ] Covert (Wind Slash)
- [ ] [ ] Shambling Corpse (Thundaga)
- [ ] [ ] Amduscias (Slowga)
- [ ] [ ] Wartpuck (Rasp)
- [ ] [ ] Kamui (Snowstorm II)
Note: Death Warden won’t count here. You need to face it at Soul Shrine for it to count.
- [ ] [ ] Twinscythe (Metal Cutter)
- [ ] [ ] Gorgimera (Avalanche)
- [ ] [ ] Rafflesia (Entice)
- [ ] [ ] Misty (Cura)
- [ ] [ ] Caladarius (Acid Rain)
- [ ] [ ] Blade Dancer (Osmose)
- [ ] [ ] Crusher (Lifeshaver)
- [ ] [ ] Coeurl Cat (Blaster)
- [ ] [ ] Still Life (Lullaby)
- [ ] [ ] Clymenus (Fira)
- [ ] [ ] Face (1000 Needles)
- [ ] [ ] Necromancer (Death)
- [ ] [ ] Chaos Dragon (Disaster)
- [ ] [ ] Zeveak (Flash Rain)
- [ ] [ ] Galypdes (Cyclonic)
- [ ] [ ] Ouroboros (Quake)
- [ ] [ ] Seaflower (Sleep)
- [ ] [ ] Mugbear (Net)
- [ ] [ ] Punisher (Thundaga)
- [ ] [ ] Glasya Labolas (Revenge Blast)
- [ ] [ ] Devil Fist (Will O’ The Wisp)
- [ ] [ ] Luridan (Rock Slide)
- [ ] [ ] Weredragon (Death)
- [ ] [ ] Parasite (Gigavolt)
- [ ] [ ] Coco (Overture)
- [ ] [ ] Alluring Rider (Doom)
- [ ] [ ] Pandora (Revenge Blast)
- [ ] [ ] Pluto Armor (Magitek Laser)
- [ ] [ ] Schmidt (Mega Berserk)
- [ ] [ ] Io (Flare Star)
- [ ] [ ] Al Jabr (Thundaga)
- [ ] [ ] Samurai (Lullaby)
- [ ] [ ] Suriander (Aqua Breath)
- [ ] [ ] Devil (Thundaga)
- [ ] [ ] Euno (Tsunami)
- [ ] [ ] Figaro Lizard (Dischord)
- [ ] [ ] Lunatys (Meteor)
- [ ] [ ] Coco (Overture)
- [ ] [ ] Suriander (Aqua Breath)
- [ ] [ ] Samurai (Lullaby)
- [ ] [ ] Armored Weapon (Gravity Bomb)
- [ ] [ ] Garm (Bodyslam)
- [ ] [ ] Lukhavi (Snowstorm)
- [ ] [ ] Test Rider (Flash Rain)
- [ ] [ ] Magna Roader (Brown) (Level 4 Flare)
- [ ] [ ] Magna Roader (Yellow) (Haste)
- [ ] [ ] Garm (Bodyslam)
- [ ] [ ] Psychos (Lifeshaver)
- [ ] [ ] Wizard (Gravity)
- [ ] [ ] Anemone (Gigavolt)
- [ ] [ ] Illuyankas (Gigavolt)
- [ ] [ ] Tzakmaqiel (Imp)
- [ ] [ ] Knotty (Stone)
- [ ] [ ] Onion Dasher (Traveler)
- [ ] [ ] Tonberry (Break)
- [ ] [ ] Mahadeva (Death)
- [ ] [ ] Aspidochelon (Landslide)
- [ ] [ ] Moonform (Flash Rain)
- [ ] [ ] Creature (Lifeshaver)
- [ ] [ ] Medusa Chicken (Break)
- [ ] [ ] Sorath (Cave In)
- [ ] [ ] Warlock (Holy)
- [ ] [ ] Magic Urn (Curaga)
- [ ] [ ] Holy Dragon (Holy)
Appendix B – Rage Checklist (Part 3, Kefka Tower and Soul Shrine)
- [ ] [ ] Great Behemoth (Meteor)
- [ ] [ ] Great Malboro (Bio)
- [ ] [ ] Vector Lythos (White Wind)
- [ ] [ ] Primeval Dragon (Firaga)
- [ ] [ ] Landworm (Magnitude 8)
- [ ] [ ] Vector Chimera (Aqua Breath)
- [ ] [ ] Fiend Dragon (Northern Cross)
- [ ] [ ] Yojimbo (Shock)
- [ ] [ ] Demon Knight (Shockwave)
- [ ] [ ] Dark Force (Tsunami)
- [ ] [ ] Ahriman (Roulette)
- [ ] [ ] Daedalus (Meltdown)
- [ ] [ ] Cherry (Holy)
- [ ] [ ] Outsider (Holy)
- [ ] [ ] Duel Armor (Megavolt)
- [ ] [ ] InnoSent (Venomist)
- [ ] [ ] Fortis (Fireball)
- [ ] [ ] Metal Hitman (Dischord)
- [ ] [ ] Mover (Meltdown)
- [ ] [ ] Junk (Transfusion)
- [ ] [ ] Muud Suud (Snowstorm)
- [ ] [ ] Gamma (Dischord)
- [ ] [ ] Death Warden (Quake)
Conclusion
And there you have it: One massively long guide/bible (I called it a bible because it is a recurring joke amongst my friends we refer to Gau as God Emperor Gau and his teammates are his Librarian underlings) on how to use one character properly and get a single Achievement! Sure it could have been a lot shorter, but I want to make sure that you were completely informed and have all your 20 questions answered so that you can use Gau effectively. Plus, it will save GameFAQ searches since you can have this guide on your Steam feed at any time when you need it.
As I stated in the introduction, Gau can be just as dangerous and overpowered as the characters you have control over, if you know which Rage to surrender Gau too. As you keep using Gau, your Rage choices will become more clearer, even as the list gets longer and longer. Just remember: Some Rages have the same attack and appear at different spots on the list. This can save on headaches and problems, especially if you are like me and play on Active Setting.
Hopefully I changed your mind about Gau being useless as well. If not and you prefer to beat the game with your Ultima/Quick spam or Valiant Knife abuse, that is fine too. However, I feel that both methods rob the player of creativity and don’t always work (eg. Ultima against Gold Dragon’s 2nd battle or use it against Neslug and see what happens!). Plus, the game is a journey, not a destination. There are many paths you can do to slay monsters, survive or whatever, but they will all end in victory.
Also, I have learned from watching videos on YT that Ultima spam or using Ultima Weapon/Master’s Scroll abuse gets you some pretty angry comments. I will admit, I happen to be one of those guys who does the commenting. I am also displeased at the lack of Gau videos too. Of all the boss fight videos I have seen, only 2 used Gau with Rages properly. The first was a guy who took down Deathgaze and used Io (Flare Star) to ensure maximum damage. The second was a guy who used only Gau (used Stray Cat), Gogo (used Destroyer), Mog and Umaro and used Rage and Dance to slay all the final bosses in the SNES version.
As stated before, my suggestions are not the be all, end all of Gau combat, they will help you make the correct decisions with minimal risks and maximum advantage.
Try to make Gau a part of a team and if you treat him right, there are some pretty insane things you can do to your enemies that your other characters WISHED they could, especially if you are doing an LLP or Solo Gau challenge!
Everything in this guide is written with my own words and I have not cut or pasted anything from other pages, except the Master Rage list (Went through the FF Wiki Rage List and converted it to readable Chart Form using Table tags) the Veldt Battle Formations (used FF6 Encyclopedia, then used FF Wiki to translate their names to Steam standards), the Soul Shrine lineup (FF Wiki Soul Shrine entry, converted to list form) and the information about monsters and bosses posted on FF Wiki in tandem with my own suggestions. I would prefer if you ask me if you want to host this guide on your site, so drop a comment off for permission.
If you are on a forum or in a discussion thread and link people to this guide, you are welcome to do so, provided that only the link is used. DO NOT STEAL CREDIT FOR MAKING THIS GUIDE!
MINDS[www.minds.com]
https://www.youtube.com/channel/UCMqV3qHJz6jWO47P-be5jUg