Overview
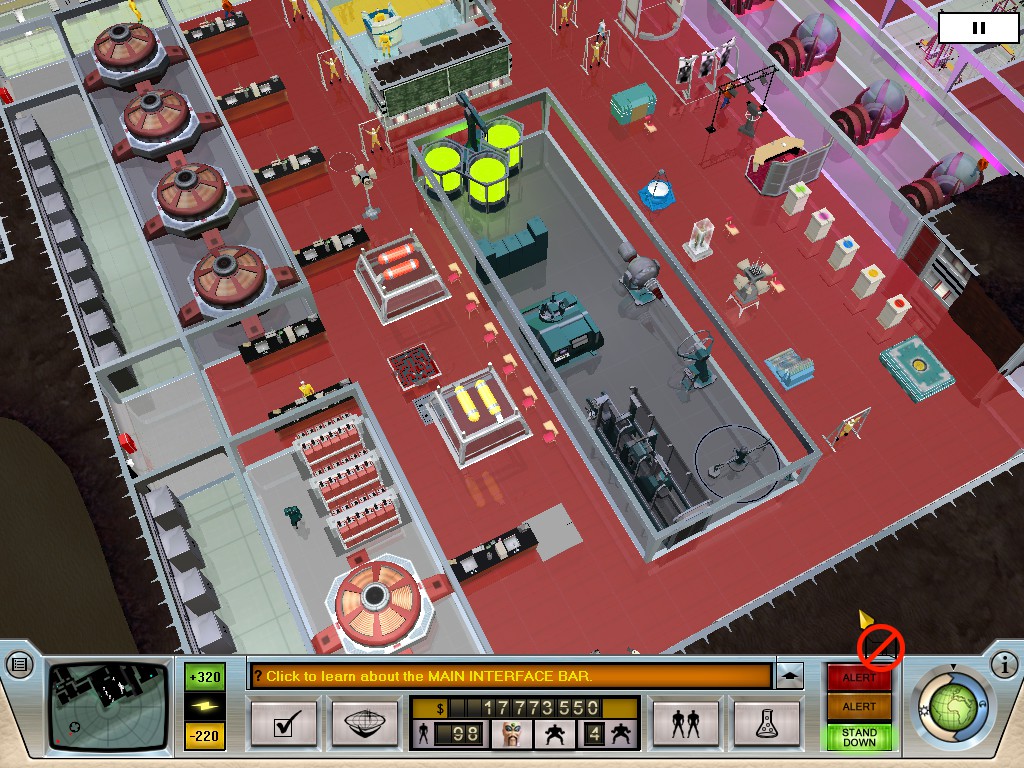
The important stuff
Evil Genius
Maxamilian
Pays smaller cash incentives for research (possibly bugged)
Starting henchman – Jubei
Alexis
Minions have a loyalty bonus
Starting henchman – Eli Barracuda
Shen Yu
Agents have a shorter mission time
Starting henchman – Lord Kane
Handy Keys
P to pause the game so you can built in peace
F5/F8 – Quick save/load
Tab – Cycle through henchmen
Ctrl+Number – Bookmark a location on the island
Number key – Jump to bookmarked location
F12 – Take a screenshot
Right click on your henchman to select them without zooming to them
Double-click an object or henchman to see their properties. You can see an object’s properties even before it’s built, to see how much power it will consume.
CTRL+Click an enemy to apply the tag to all their allies at the same time, even ones that are still landing/climbing onto your island.
Hold SHIFT when you place an item and it’ll let you place another one without having to select the option.
Base Building tips
Start small, going bankrupt is pretty easy early on, get the escential money making machine in place befor expanding.
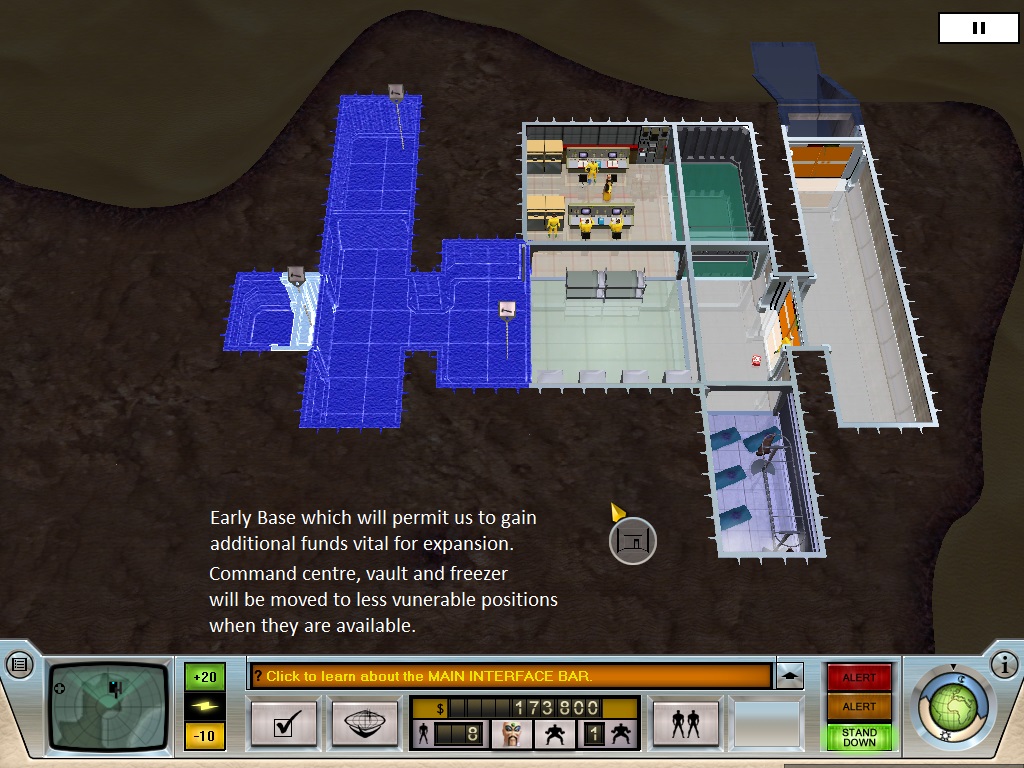
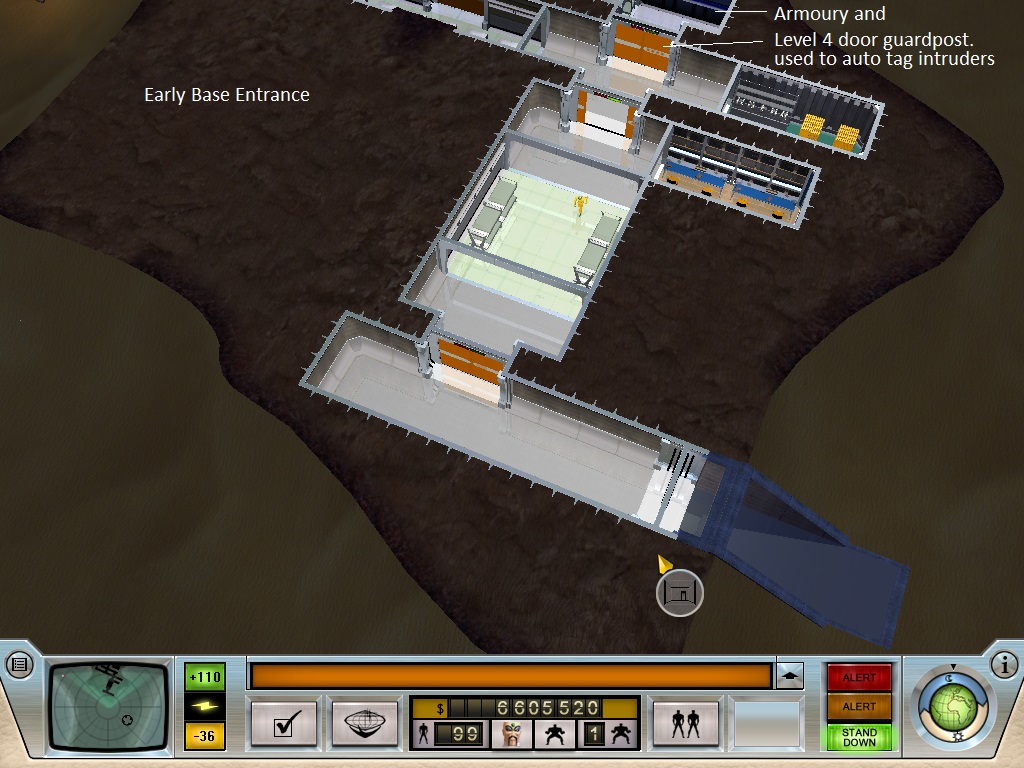
A basic entrance
After getting a bit of cash you can move your command center to an internal base location far from prying eyes
Early security

A basic power plant. Remember to place fire extinguishers near by
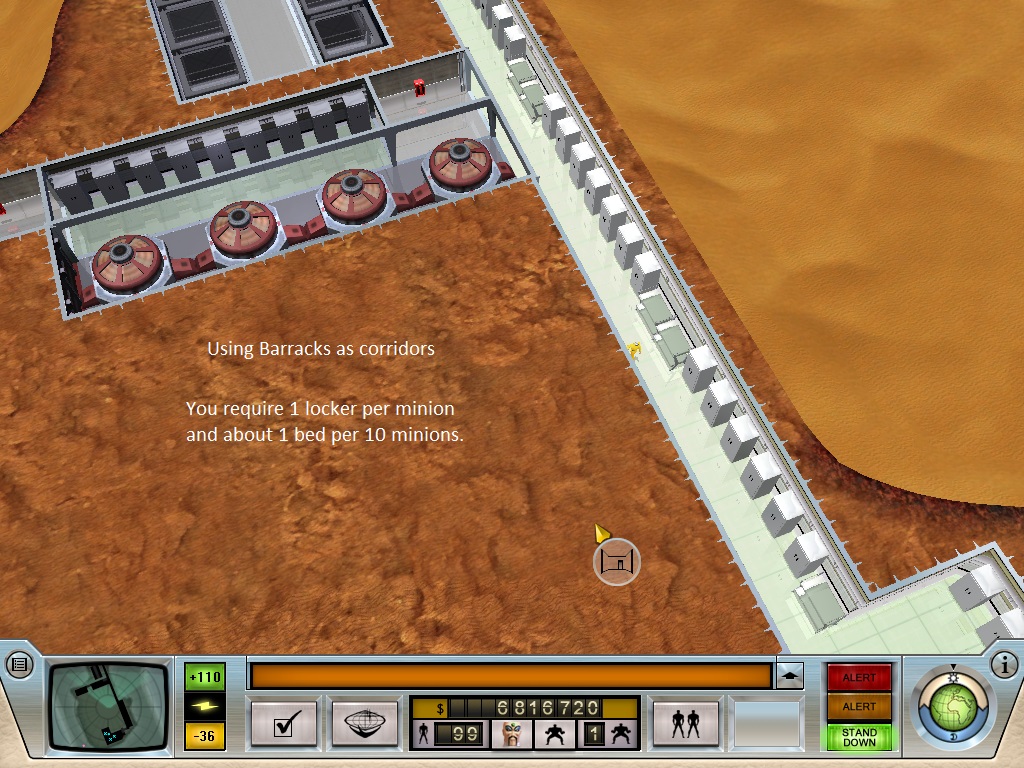
Instead of building corridors I tend to build long barracks which I can use as corridoors as well as storing lockers. You will NEED 1 locker per minion.

Science, these are the four primary science object you will need for research.
I tend to place them in my main corridoor so all my minions can get a moral boost as they walk arround.
Likewise with uberloot, share the experience.
Later base development
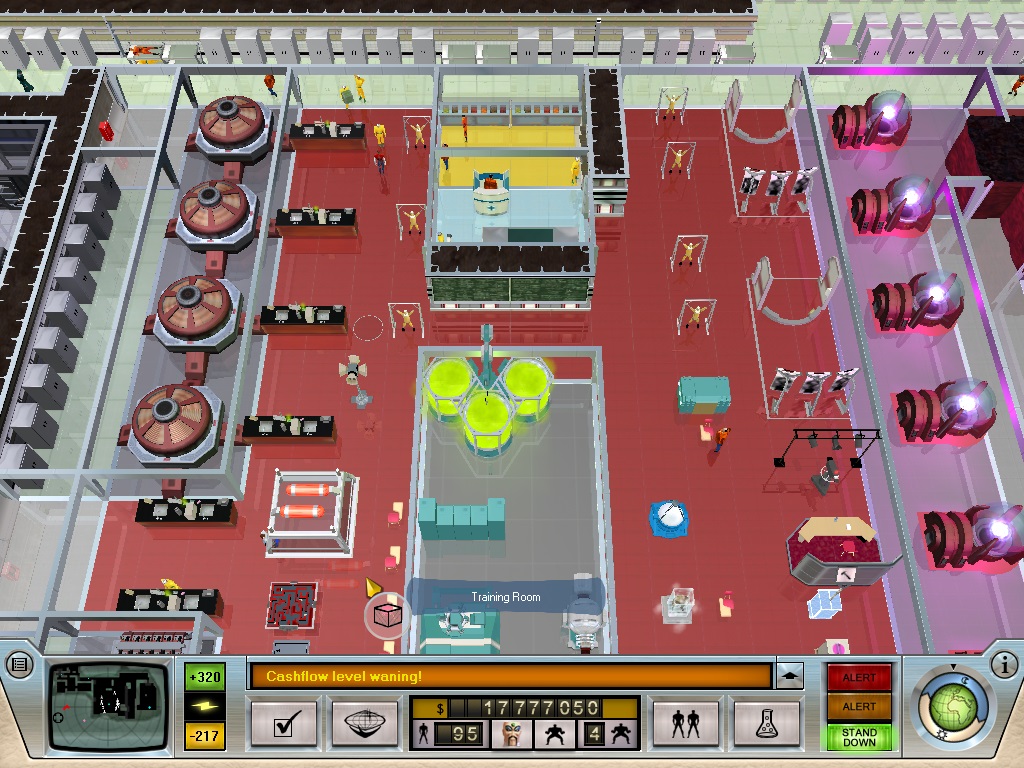
Training of minions is vital. I tend to build fairly open plan as in make minion pathing so much easier
Place lab benches / technicians near power plants so that there always maintained. There is no need to hide your powerplants away, it just makes maintaining them harder.
Place fire extinguishers near power plants
Streamline your minion training
Punching bags near rifle ranges.
School desks near tv stages.
Labs near chalkbords.
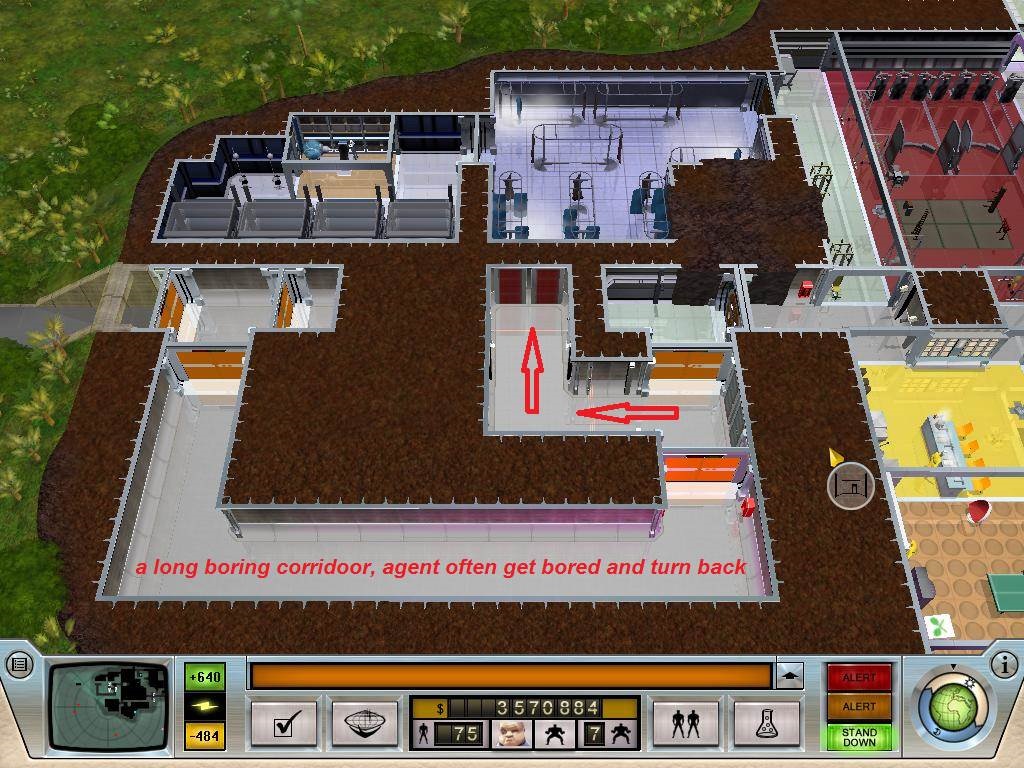
Island 1 – entrance
Place only low HEAT items near the entrance as investigaters often get bored and just go home.
A mess hall with a time clock will ensure that you can nintercept agent breaking in.
A training area for valets will hopefully mean there are valet to bamboosle agents and lead them away or put out fires after commando team blow your stuff up.

Security central along with its mice maze to keep everyone alert.
After the low HEAT entrance I place some level 4 doors which henchman and guards will man. They will take care of any one getting too far into my base. It also keep Ivan under control (sort of) Cameras detect intruders, you tag them and all the guards will pounce.
If there is a super agent infultrating your base you may want to move your henchman elsewhere to avoid their untimly death.
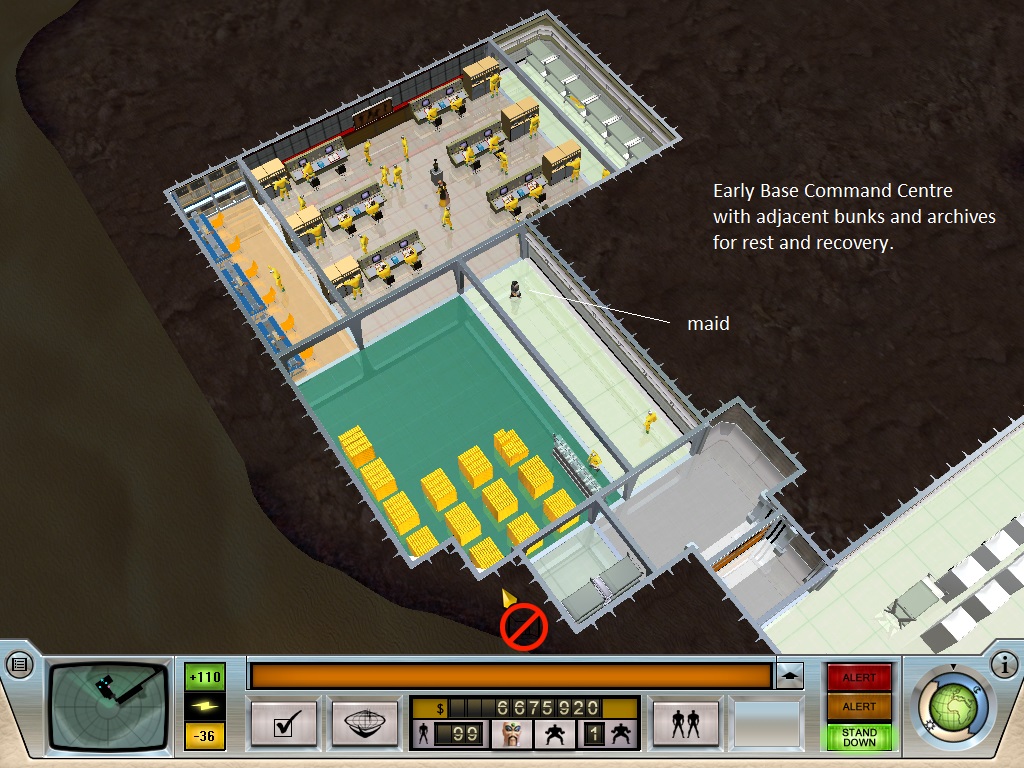
Note the vault in green, it has two doorway, a level 4 for guards and an area for a suitcase rack which allows minnions to get cash without compromising the security of the vault.
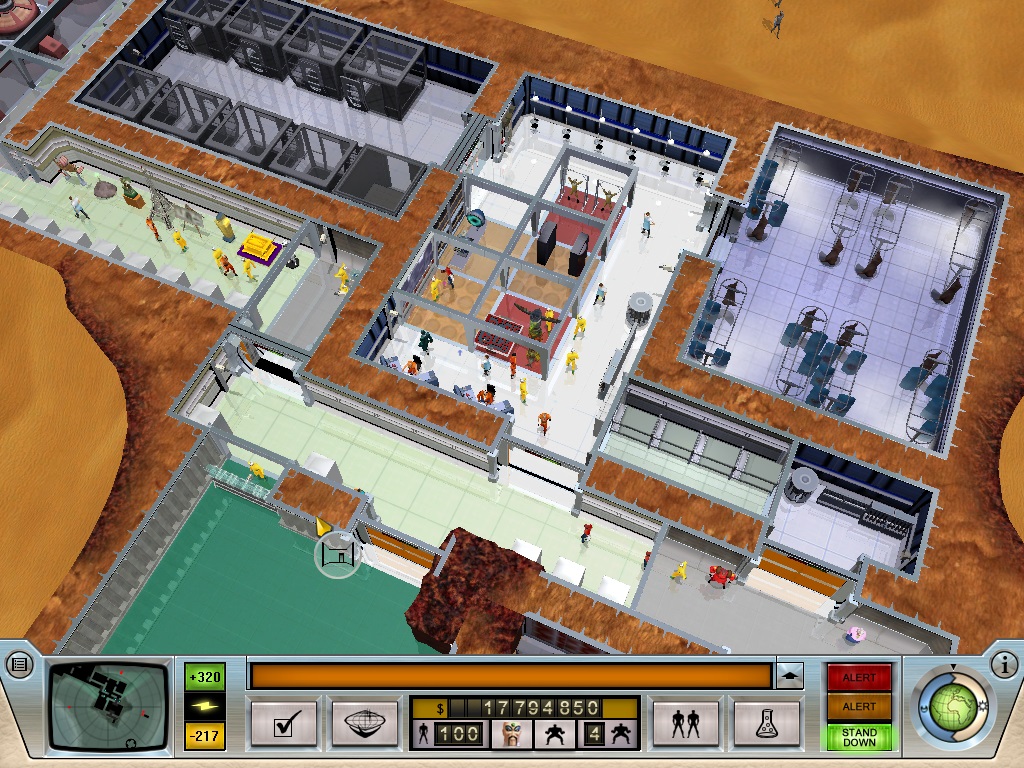
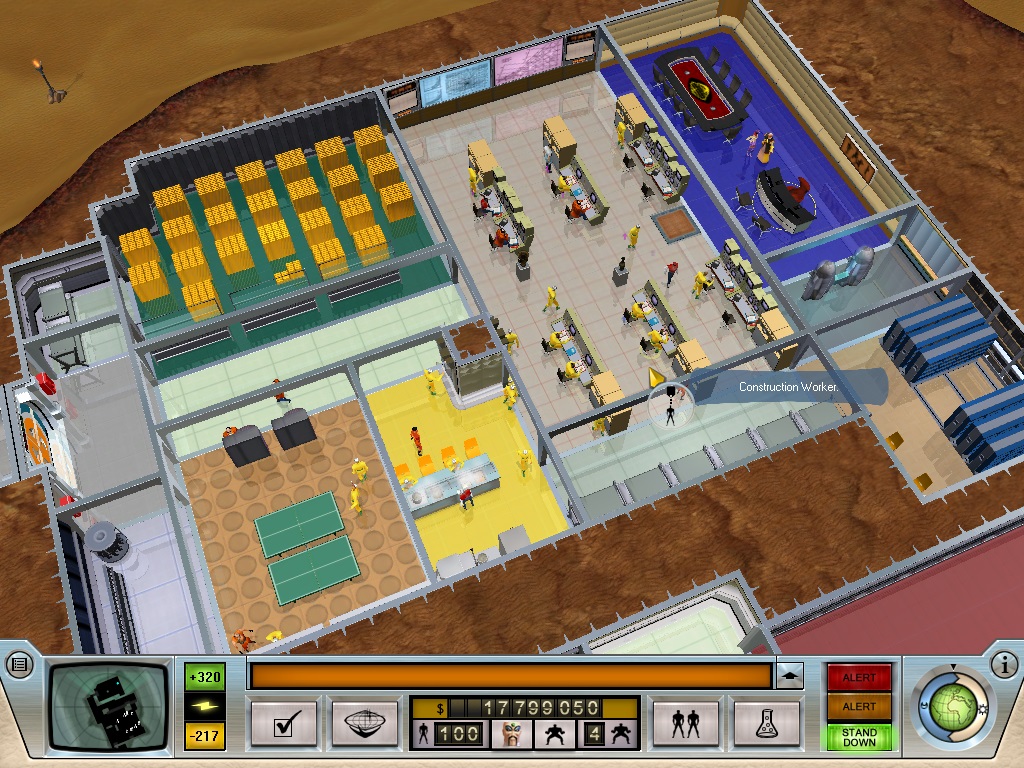
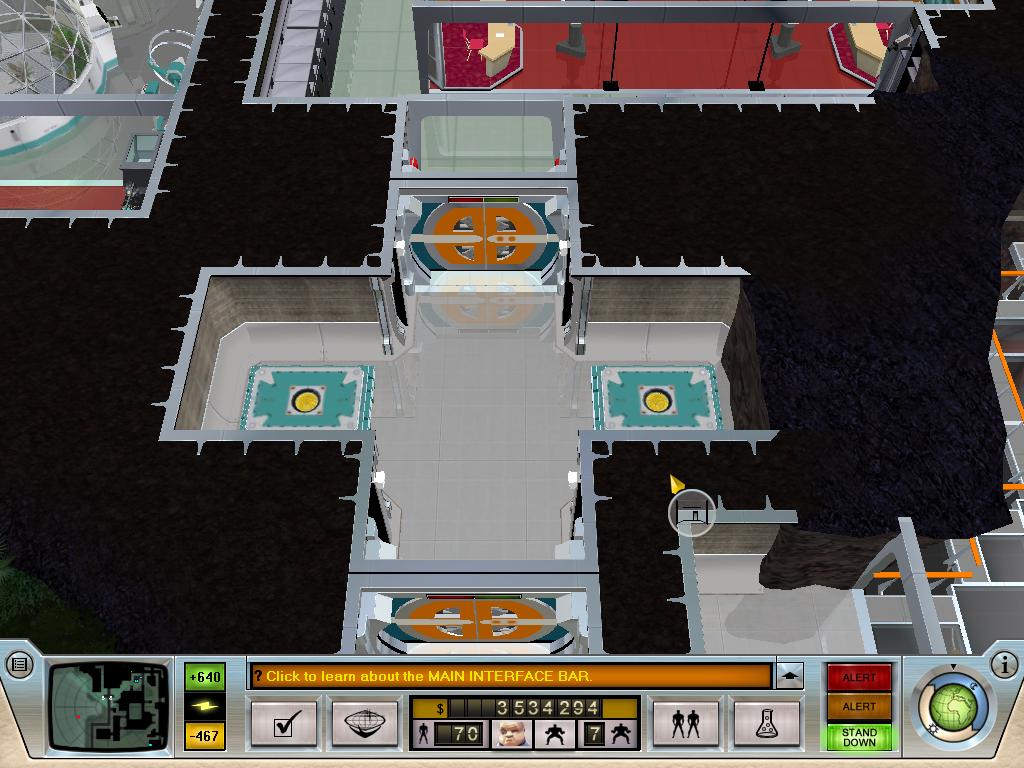
Island 1 – my fully developed command center
amenities like food, rest and entertainment keep my minions wandering far and keep them attentive all the time. Make sure to place a time clock in the control room set at max

Traps
My favorite trap – the double trigger wind / fire trap. When triggered the first set of wind machines blow agents down the side corridoor where a second set of detectors activate the side wind machines blowing the agents into firery death. Inatentive minions have to accidentally trip two different sets of sensors before being incinerated, which is unlikely hence it keeps down the friendly fire. Agents just get incinerated as normal.

The cyclone, good for generating money but can be a bit hard on your minions
For each trap after the first that takes effect, you’ll see a combo rating;
2nd trap – ‘Nefarious’, instant +$100 cash
3rd trap – ‘Malevolent’, +$200 cash
4th trap – ‘Villainous’, +$300 cash
5th trap – ‘Heinous’, +$400 cash
6th or higher trap: ‘Genius’, +$500 cash


The double Tesla because 1 is never enough
Rooms
ROOMS
Enable rooms:
Archives – West Coast; Library Blueprints [Available at start]
Laboratory – Japan; Steal Research Machine [Objective mission]
Casino – South Africa; Gambling Payoff [250 notoriety needed]
.
Time clocks can go in Control Rooms, Mess Halls, Infirmaries, Armouries and all hotel room-types.
Corridors – cheap, only place you can stick fire extinguishers
Ensure you have extinguishers near power plants and the entrance
Barracks – I tend to make them long and 2-3 wide and use them as default corridors
1 locker required per minion
1 bunk bed per about 10 minions, place near their workplace
Cryo chamber act like bed but 2.5x faster with science minions
Multi-Gym act like bed but 2.5x faster with military minions
Mess Hall – Enabled once you interrogate the Maid
Counter – Minions eat from these; recovery rate = same as a bunk bed
Mess Hall counter – Same as counter, but can be used as a torture device
Salad Bar – 20% weaker than a counter, but requires no staff to man it.
Automats are the best – Minions recover endurance 2x as fast as a counter
Staff Room: – replenish your minion’s attention stats. Available after Maid
Ping-Pong/Table, drink machines & pinball all recover at the same rate.
Egg chair is 50% faster
Arcade game is 75% faster
Widescreen TV 2.5x faster with construction workers
Archives – replenish your agent’s smarts
Reading Table: Social minions recover 50% faster than other minions on this
Multimedia TV: Social minions recover 66% faster. Placed on wall
Brainiac: Science minions recover 2.5x as fast
Brainwasher: Military & workers recover 2x as fast.
Infirmary – replenish health
Pharmacy Booth, need to be manned to use
Exam Chair (+25%)
X-Ray (x2 vs booth)
Auto-Surgeon (x2 vs booth)
Control Room:
This room is your key to ripping off the world & committing acts of infamy.
Always use a timeclock to keep this room staffed.
Place amenities close by so minions don’t have to wander off too far
Control Panel – This takes 2 minions to run.
Memory Bank – This is like a capacitor for the world map;
Control Station – Half the size of a panel, needs only 1 minion to run it
Stock Market Watchdog – Decreases time it takes to steal cash by 20%
Schematic Station – Supposedly decreases time for techs to repair things;
Comms Array – Increases the time for Agents of Justice to show up
Big Screen – Looks cool, boosts attention
Armoury: Base Security
Security Desks – part of your security network. Always man this or you cameras wont work
Gun racks – Arms for different types of minions
Handgun cabinet – workers (Also used in research to get Sentry Guns)
Rifle cabinet – guards (disguised version available for less heat)
Heavy Rifles – mercenaries
Flamethrowers – mercenaries (caution; these are AE incendiary weapons)
Armoury: Prison
Suggest putting in a time clock so this is manned all the time so that any escaping prisoner is automatically recaptured.
Holding Cell – Holds 1 prisoner.
Death Chamber – doesn’t require a minion to kill a prisoner
Interrogation chair – Your first interrogation device
Lethal torture devices: Interrogation Chair, Bookcase, LL, ISA & EC
Nonlethal devices will drain an agent’s smarts or attention.
Mess Hall: Mixer – slowest method of draining smarts
Biotanks – drains smarts very quickly
Brainiac or Brainwasher drains smarts
AI computer, Centrifuge and Greenhouse drain attention
Freezer
This room is where you keep your dead enemies. Dead bodies sap the loyalty of your minions who walk past them and they’ll desert if surrounded by piles of them.
Suggest building near your cells
ALL effect radiuses are disabled in the freezer, including the negative effects of the unassembled totem pole.
Freezer racks – lets you store 6 bodies
Training room
All the objects that go in this room are used to convert your minions from one type to another. 1 minion can be trained at a time on each item, and requires 1 trainer to do it.
Mouse regenerates loyalty and attention
See section on minions to find what is required to train them
Place mouse mazes near security consoles so you men will always be alert
Laboratory:
The lab is where you research all the cool gadgets
In order to enable research, you need the research machine, a databank, and an experimental gadget. All the other stuff that goes in the lab are used in the research process to create new technology.
Power Room
Power Generator, +15u of power
Disguised Power Generator, +15u of power, agents may not try to blow it up
Nuclear Power Station, +35 of power in a smaller space
Capacitor – Like a UPS
High Density Capacitor – Lasts longer than a capacitor
Techs need access to generators in order to repair them, suggest building a training room close by to train techs so they are always available
Inner Sanctum
This is the only place your avatar can go to recover his stats
Impressive Desk – You can sit down at it & replenish your stats
Conference Table – Used to entertain other villains
Hotel
Casino – South Africa; Gambling Payoff [250 notoriety needed]
may as well wait untill island 2
Personally I rarly ever build one as commandoes just keep blowing it up for no reason.
Its not like the piano was threatening or anything
Stats
All minions, henchmen, agents, investigators etc have 5 stats
The in game tuttorial will explain this
Minions will stop working / faint / desert if stats get too low
Use equipment, loot, gold and your evil genius aura to keep your people healthy and loyal.
See ROOM for equipment details
Health (red) – die
Infirmary
Loyalty (blue) – desert
evil genius aura
loot
Smarts (yellow)
Archive
Attention (purple) – wander about
Staff Room
Mice maze
Endurance (green) – faint
Bunk
Mess Hall
you can attack agents in the same way, gas traps, killer bees are all color coded for effect
ALL effect radiuses are disabled in the freezer, including the negative effects of the unassembled totem pole.
NOTORIETY TIMELINE
NOTORIETY TIMELINE
70 – International Arms Crime Lord appears in Egypt
75 – New secondary henchman [Ivan, Neurocide or Matron]
100 – Research Machine appears
105 – Bodyguard attracted
125 – 1st totem piece appears in Polynesia
130 – Super-Agent: Mariana Mamba appears
135 – 2nd totem piece appears in Central Russia
145 – 3rd totem piece appears in Middle East
155 – 4th totem piece appears in West Coast.
160 – Cloning Chamber appears in Antarctica, Martial Artis, Biochemist & Diplomat become available
175 – New secondary henchman [same as 75 + Moko, Butcher, Montezuma]
180 – Super-Agent: Jet Chan appears
200 – Can now move to a New Island
220 – Easier missions to capture top-tier trainers unlocked
225 – New primary henchman [Jubei, Eli or Kane]
240 – Super-Agent: Katerina Frostonova appears
250 – Many new missions unlocked on world map
290 – Super-Agent: Dirk Masters appears
300 – Last AOI Missions unlocked on world map,
300 – New secondary henchman
340 – Super-Agent: John Steele appears
360 – New primary henchman
365 – 2nd Bodyguard attracted
480 – Evil Rating: ‘Evil Genius’
Training
Trainers: …………… Easy mission ………. Hard mission ………….. Training Room
x2 ——————————————————————————————————
Guard ……………….. – Central Russia ….. South America ….. Punching Dummy
Valet ……………….. – Middle East …….. Polynesia ………… School Desk
Technician ………… – Japan ……………… North China ……… Workbench
x3 ——————————————————————————————————
Mercenary ………… – Mid-West ………… South America ….. Rifle range
Spindoctor ………… – Europe ……………. Mid-West …………. Studio
Scientist ……………. – Antarctica ……….. Central Russia ….. Chalkboard
X 3.5 —————————————————————————————————
Marksman ………….. – Europe …………… East Bloc……….. Sniper Range
Martial Artist ……….. – West Coast …….. Central China …Dojo
Diplomat …………….. – East Bloc ……….. Middle East ….. Diplo Dummies
Playboy ………………. – Europe ………….. West Coast ….. Playboy Equip
Quant. Phys…………. – Europe …………… Mid-West ……. Electron Micro
Biochemist…………… – Europe …………… South America ..Bio Bench
Away missions
Military minions are best at stealing missions
Social minions are best at limiting heat
Science minions are best at plotting missions
x2,x3, x3.5 refers to how much more effient a minion is compared to a worker at performing a task
At home
Workers build new rooms and install new equipment
Valets put out fires and confuse guests
Technicians repair stuff
Guards guard level 4 doors
Easy missions become available once notoriety reaches 220
New trainers will make their presence known as your notoriety increases
Objects in the training room become available when you capture the appropriate trainer
for efficiency place one training device near other training devices along the same path
ie
School Desk near the Studio, near the Playboy Bed and Diplo Dummies
etc
Its always handy to have a few punching bags near your cells,
tech benches near you powerplants so that their maintained,
school chairs near the entrance to put out fires
LOOT
LOOT
Loot used in Research – Island 1
Mercury Mirror – Australia (Field Barrier Door, Multimedia Education Zone)
Pete Bog (Ice Man) – Antarctica (X-ray, Salad bar, Gas, Bees)
Sonic Generator – Central Russia (Hvy loudspker, Widescrn TV, Brainwasher)
Chameleon cloth – Central Asia (Disguised rifle rack & Disguised cell)
Loot used in research Island 2
JetPack – Mid-West (Flame Thrower)
Aztec Amulet – South America (Stock market watchdog)
Giant Diamond – South Africa (Radio load speaker)
Antique Cannon – East Bloc (Schematic station)
Crown Jewels – Europe (Gold enhancer)
Codebreaker – Europe (Communication array)
Oliver (Chimp) – Europe [No loot radius, research looks broken]
Totem Pole – Polynesia, Central Russia, Middle East, West Coast
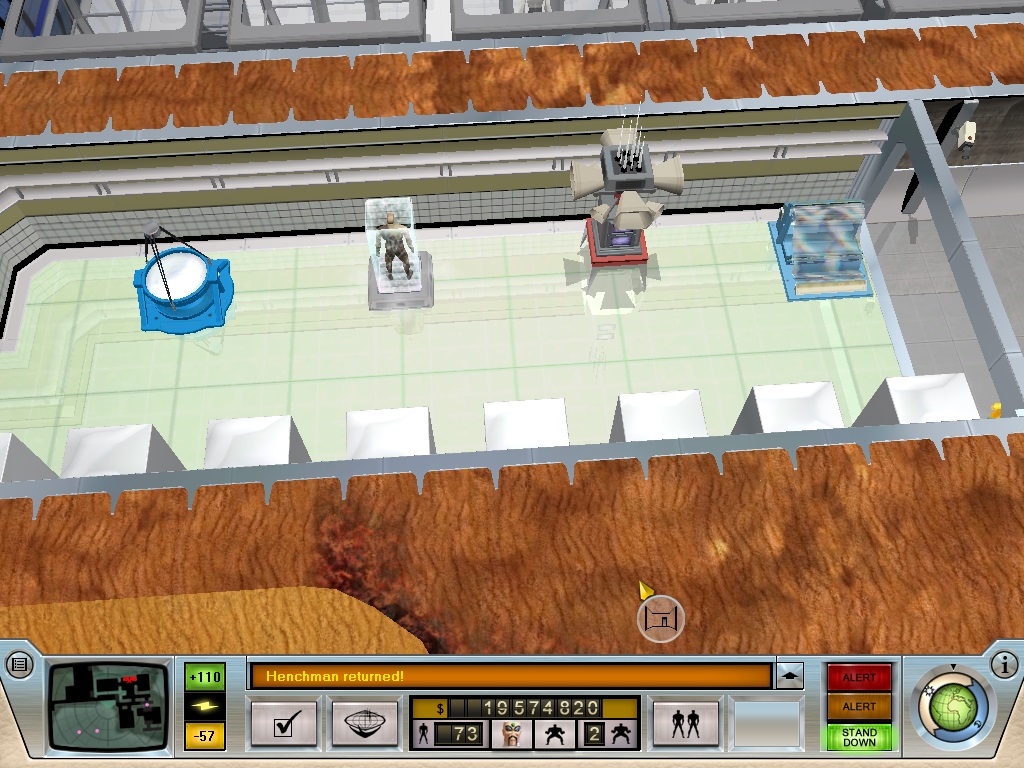
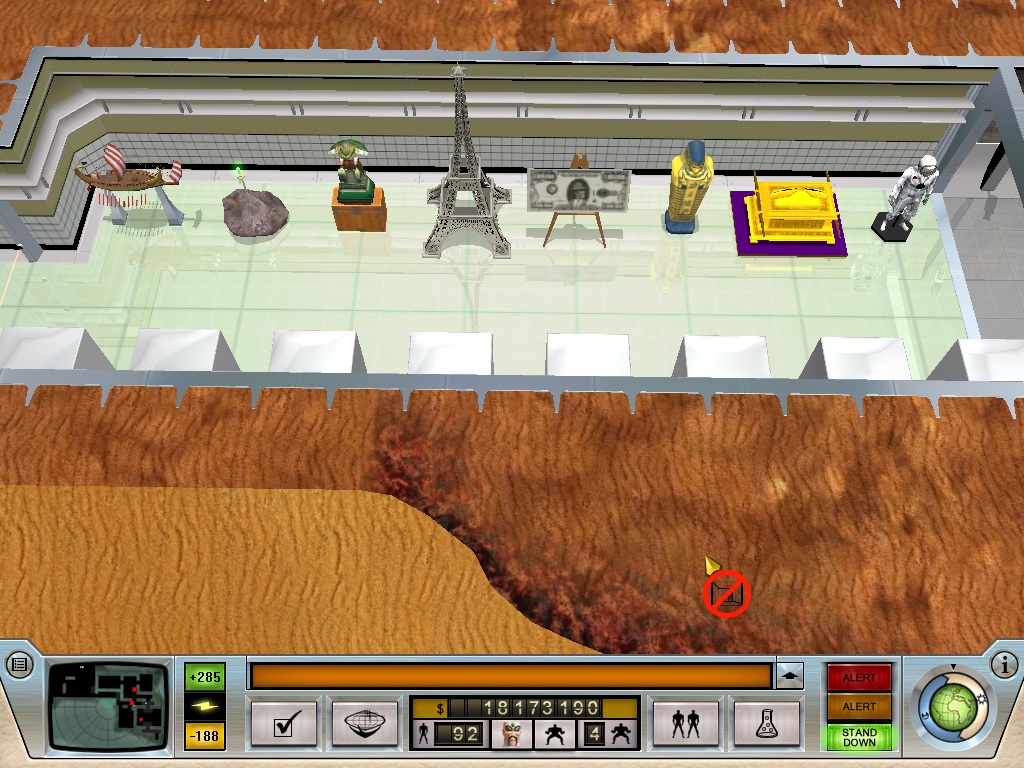
Uber Loot – Island 1
Roman Galley – India (not actual uber loot item)
Excalibur – Europe
Samurai Armour – North China
Eiffel Tower – Europe
Million $ Bill – East Coast
Sarcophagus – Middle East
Covenant Ark – Central Russia
Space suit – Mid-West (not actual uber loot item)
Impressive Loot – Island 1
A Marvellous Masterpiece. – Cuba
A Beautiful Grecian Urn – North China
A Beautiful Babylonian Vase – Central Asia
Persian Rug – Middle East
Space Suit – Mid-West
Roman Galley – India
Impressive Loot – Island 2
Etruscan Vase – SE Asia
Lovely Painting – Japan
Stolen Throne – East Bloc
Classical Girl – North China
Research
Once you have completed the Better living through chemistry mission you can buld a laboratory.
Stock it with a research machine, databank and one of the three basic peices of science – Large laser, Centrafuge or Impact stress analyser.
Scientists the basic generic scientist will then carry the sample container from the research machine and sample variouse pieces of equipment to see what new items they can discover.

Items used in research – Island 1 (Steal one and research the others)
(ISA) Impact Stress Analyser requires Standard Door + C
(C) Centrifuge requires Power Generator + ISA or LL
(LL) Laboratory Laser requires Security Camera + C or ISA
(BT) Laboratory Bio Tanks requires Multimedia E-Zone + C + ISA +LL
Items used in research – Island 2 (free once you get to Island 2)
(EC) Environment Chamber
(AI) AI Supercomputer
(GH) Greenhouse
The research screen where you decide what items you wish to combine to unlock new discoveries.
Below is a list if the new items you can unlock.

NEW OBJECTS – Island 1
Arcade Cabinet = Security Desk + LL
Big Screen = TV Studio + LL
Bookcase = Archive Reading Table + ISA
Brainiac Machine = Archive Reading Table + BT
Control Station = Chalkboard + LL
Death Cubicle = Security Holding Cell + C
Disguised Door = Standard Door + BT
Disguised Generator = Power Generator + C
Disguised Holding Cell = Chameleon cloth + BT
Disguised Rifle Rack = Chameleon cloth + ????
Disguised Security Camera = Chameleon cloth + LL
Disguised Sentry Gun = Sentry gun + ISA + LL
Egg Chair = Multimedia Education Zone + BT + C
Equipment Storage Rack = Heavy Shooting Range + ISA
Examination Chair = Pharmacy Booth + LL
Freak Production = Freezer Rack + BT + C + ISA
Field Barrier Door = Mercury Mirror + ISA
Heavy Door = Standard Door + ISA
Heavy Rifle Rack =
Heavy Duty Loudspeaker = Sonic Generator + C
High Density Capacitor = Disguised Power Generator + LL + C
Multi-Gym = Table Tennis + ISA
Multimedia Education Zone = Mercury Mirror + LL
Nuclear Power Station = Chalkboard + ISA
Salad Bar = Pete Bog + BT
Sentry Gun = Handgun Cabinet + C
Widescreen TV = Sonic Generator + ISA
X-ray Machine = Pete Bog + C
Zoom Lens Security Camera = Security Camera + LL
NEW OBJECTS – Island 2
Automat = Pete Bog + BT +EC
Auto Surgeon = Examination Chair +BT + GH
Brainwasher = Sonic Generator + ISA +AI
Communication Array = Code Breaker + AI
Cryo-cubicle = Pete Bog + C + GH
Flamethrower = Jetpack + C + BT + (EC,AI,GH)
Stock Watchdog = Aztec Amulet + AI
Gold Enhancer = Crown Jewels +EC
Pin Ball Machine = Roulette Table + LL (250)
Schematic Station = Antique Cannon + EC
Security radio Loudspeaker = Diamond + GH
Research – traps
TRAPS – Island 1
Pressure Sensor
Laser Beam Sensor (i) = Capacitor + LL
Motion Sensor (io) = Heavy Rifle Shooting Range + LL
Poison Gas Cage (red) (i)
Knockout Gas (green) (i) = X-Ray Machine +ISA + C
Loyalty Gas Cage (blue) (i) = Pharmacy Booth + BT
Laughing Gas (purple) (i) = Loyalty Gas Cage + ISA + BT
Stupid Gas Cage (yellow) (i) = TV Studio + ISA
Dreadmill (i) = Egg Chair + LL + ISA + C
Bee Hive Trap (io) = Salad Bar + BT + LL
Electroshock Cannon (io) = Nuclear Power Station + LL + ISA + C
Pit Punisher (io) = Pinball Machine + ISA
Satan’s Chimney (io) = Chalkboard + C
Prothemius Revenge (i) = Satan’s Chimney + LL + ISA + C
Venus Man Trap (o) = Biochemists Workshop + BT
TRAPS – Island 2
Piranha Tank (i) = Venus Man Trap + GH + ISA
Saw Blades (i) = Mercury Mirror + ISA + EC
Giant Magnets (i) = Nuclear Generator + C + EC
Do Not Press (i) =
Money Madness (io) = Stockmarket Watchdog + LL + EC
Damned Damsel (o) = Chameleon cloth + LL + AI
Explosive Palm Tree (o) = Flamethrower + LL + GH
Misdirection (o) = Communications Array + C + AI
Monkey in a Box (o) = Monkey +BT + AI
For each trap after the first that takes effect, you’ll see a combo rating;
2nd trap – ‘Nefarious’, instant +$100 cash
3rd trap – ‘Malevolent’, +$200 cash
4th trap – ‘Villainous’, +$300 cash
5th trap – ‘Heinous’, +$400 cash
6th or higher trap: ‘Genius’, +$500 cash
Aside from traps you can use psychology to get rid if investigators.
Investigators love doors, eaither make a maze of doors where they waste all their time investigating or have long boring corridoors without a door in sight which they can’t be bothered walking down.
Henchmen
HENCHMEN
Moko
Rating: D
Ability 1: Feral Roar — Alert all minions in range to tagged enemies
Ability 2: Monkey Pound — Stun everyone in range
Available at: 175 notoriety, 300 notoriety on Island 2, 400
Jubei
Rating: A
Ability 1: Wind Walk — Teleport to any location
Ability 2: Eviscerate — Single target mega-damage
Available at: 225 Notoriety [Max starts with him], 360 + Island 2
Eli Barracuda
Rating: B
Ability 1: Super Headshot — Mega ranged damage
Ability 2: Ghetto Posse — Entice agents to dance with Eli
Available at: 225 notoriety [Alexis starts with him], 360 + Island 2
Red Ivan
Rating: C
Ability 1: Cossack Dance — Massive area-effect damage around Ivan
Ability 2: Minefield — Lay down a trap
Available at: 75, 175 notoriety, 300 notoriety on Island 2, 400
Motezuma
Rating: B
Ability 1: Voodoo Puppetry — Make agents attack each other
Ability 2: Voodoo Mind Fog — Make agents forget what they’ve seen and leave
Available at: 175 notoriety, 300 notoriety on Island 2, 400
The Matron
Rating: A
Ability 1: Motherly Love — Recharge another henchman’s special abilities
Ability 2: Electro-Shock treatment — Proximity Enemy-only high damage
Available at: 75,175 notoriety, 300 notoriety on Island 2, 400
Lord Kane
Rating: A
Ability 1: Psychic Terror — Area effect: Panic agents.
Ability 2: Smooth Operator — Cause agent to lose all heat
Available at: 225 notoriety [Shen Yu starts with him], 360 + Island 2
The Butcher
Rating: C
Ability 1: Facade of Normalcy — Lets him approach hostile targets
Ability 2: Terror Tactics — Nearby minions ignore low stats and fight
Available at: 175 notoriety, 300 notoriety on Island 2, 400
The Great Mesmero
Rating: B
Ability 1: Telepathic Mind Control — Take control of agent
Ability 2: Willpower Drain — Saps loyalty/health or endurance of agents
Available at: 300 notoriety on Island 2
Dr Neurocide
Rating: D
Ability 1: Hallucinogen Powder — Temp. Reduces heat of items in area
Ability 2: Poisonous Perfume — Area-effect endurance drain
Available at: 75, 175 notoriety, 300 notoriety on Island 2
Agents
Agent come in different flavours with different objectives
Agents & Investigators – they look evidence of anything generating heat
Burglars & Thieves – will try to steal back loot.
Saboteurs & Infiltrators – blow your stuff up, eg power plants
Sildiers & Veterans – attack in groups of 1-8
Super Agents
Super Agenent represent each political blocks greatest agent, they even have their own theme music
They make their first appearance when your Notoriaty reaches a particular threshold, see below
Apart from the regular death and destruction they bring they are the only agent which can rival your henchman and can actually kill them, taking 1 of their 3 lives.
@ 130 Infamy
Maria Mamba – acts like a saboteur and a thief
special attack: Allure which causes your minnions to abandon their posts
@ 180 Infamy
Jet Chan – attacks like a soldier and steals like a thief
special attack: bursts of speed and can dodge hand-to-hand attacks
@ 240 Infamy
Katerina Frostanova – attacks like a soldier and acts as an investigator
special attack: Assassination
@ 290 Infamy
Dirk Masters – attacks like a soldier and breaks things like a saboteur
special attack: suppression fire with dual machine guns
@ 340 Infamy
John Steele – Acts as an investigator and saboteur
special attack: base mayhem, triggers alarm, opens doors
refer to walkthrough optional missions on how to defeat these super agents once and for all
Tips
– You’ll get a bodyguard at 105 notoriety; they’ll defend your avatar from attackers, but their health does not regenerate. You get another at 365.
– Demolishing a room inside your base returns it to pristine rock, like it was before you built it.
– Despite the glossary entry about the ‘demolish’ tag, you do get cash back from destroying stuff: 90% of the purchase cost of the item!
– You can’t recall minions who are in the middle of their mission, but you can click them all so they’ll return as soon as it’s over.
– If you need a large force of minios to take care of some agents, goto the world map and send a bunch of them on a mission but cancle it before they take the chopper. The selected minions will run to / out your base entrance. When you terminate the mission they will be there to fight agents, put out fires, befuddle agents etc
– Tag a minion who’s deserting for capture. After a short stint in a cell, they’ll be happy to work for you again. If you have a hard time catching them before they run away, keep double-clicking on them to make them keep stopping to salute you.
– If you decide to build Death Cells, you can position them so they dump the prisoner out directly into a freezer.
– If you’ve lost a lot of minions due to soldiers, super-agents or the world map, you can temporarily increase the number of workers to bring the count up closer to 100, then lower it back to normal.
– Ivan the mad Cossak, he is good at taking out squads of soldiers but when you not looking you will find him blowing up half your base in his zeal to kill an intruder.
Lock him in a room some place, preferably outside of have him guard a level 4 door somewhere.
– levelling henchman
Capture someone, place them in a cell. Place your henchman just outside the cell and release the agent for you henchman to capture. Do this a few times and your henchman will level up fairly quickly.
Minion screen
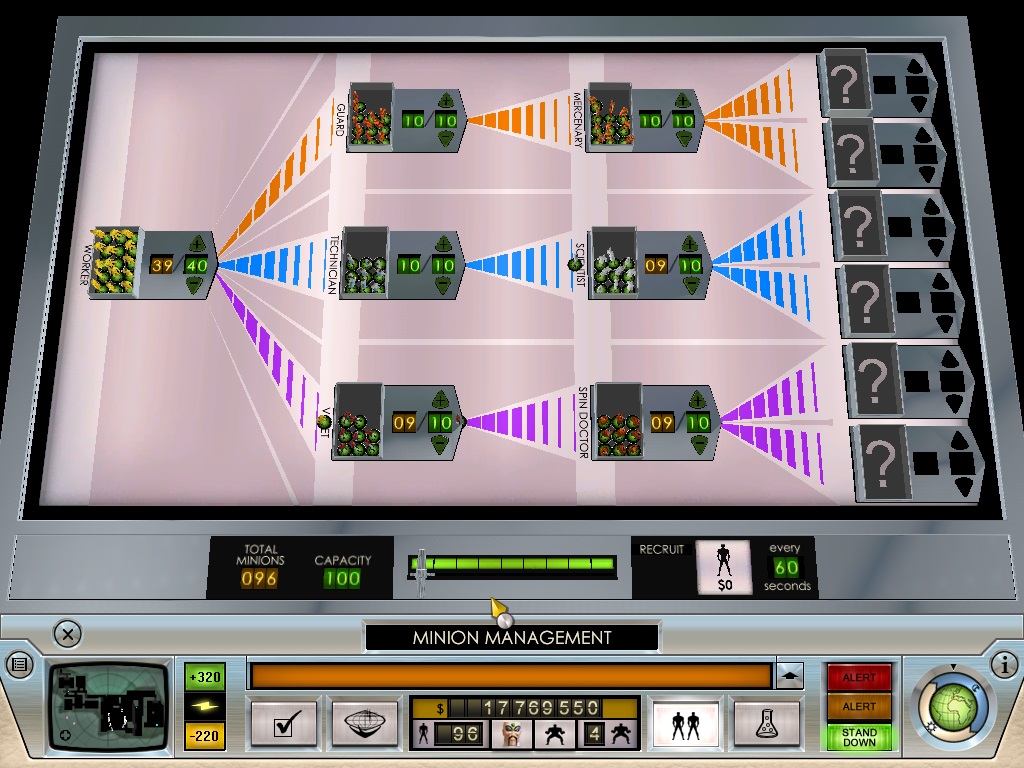
here is where you control how many minions you have and what specialities they have
Walkthrough (spoiler alert)
Missions


Option missions


READ the missions
Often people get stuck because they havent read the mission details and the game is waiting for them to do something specific before it continues.
ie second mission you need to interogate Nakita Leonov using the Mess Halls Counters mixing bowl.
Make sure you watch the fun and laugh manically.

Cheat
So where did I get all the gold from?
I cheated.
First mission
Kill an investigator to unlock freezers.
Capture the maid and then let her go, this will unlock jail cells.
Do not interogate the maid.
Prior to interogating the very first maid you can run missions to obtain money without the nations of the world replying with lethal force. I just left my PC running money collection missions in high value areas like central USA overnight. (only do one area because you don’t want every faction hating you at the same time.
Be warned This will generate a lot of HEAT so you may like to stop running missions for a period to let some of that heat bleed off before interogating the maid becase as soon as you do the Fed will come a callin, with rocket launchers.
After you have the cash go ahead and interrogate the maid so you can get more objectives etc
