
Overview
Meta strategies for professional dwarven space miners
Introduction

Since Deep Rock Galactic (DRG) came out of Early Access, some profound meta strategies have surfaced. If you see players embracing one or more of the following strategies, you can be sure to have a professional DRG veteran on your team!
This guide aims to present some interesting ways to play the game and to maximize your competitive edge over other dwarf teams. These advanced meta strategies aim to offer greatly improved teamplay and to provide a highly sophisticated endgame gameplay for the most skilled of players.
Feel free to try out these strategies and share your experiences with the community. We will keep a close eye on the development of DRG and will continue to develop and share new meta strategies as they emerge.
IMPORTANT NOTE: For these meta strategies to work best, we assume that the class needed for the corresponding meta(s) is fully upgraded and you have some experience under your belt.
Gunner Metas

~ The Triggerman
–Mobile-Turret-Meta
This meta is especially useful on Salvage, Point Extraction and Elimination missions, where you have to defend a fixed area for a certain amount of time or need to kill some Glyphid Dreadnoughts. The Gunner uses his ziplines to create a strategic net of ziplines around the defending area. It is ideal to make sure that the ziplines cross each other, so you can easily hop from one zipline to the next one.

As opponents emerge, the Gunner (or any other class) hangs from a zipline and shoots at the enemies while riding it. By moving back and forth, the opponents can’t land melee attacks. Special attention must be paid to opponents with ranged attacks (especially on missions with Mactera Plague), so that they do not shoot you off the zipline in case of a hit. Also, due to the increased shooting position, it’s often easier to hit the weak points of the opponents.

Meta complexity:

–Like-Shooting-Bugs-In-A-Barrel-Meta
This meta is a variation of the Death-From-Above-Meta, which needs a Gunner on the team. Throwing his Shield Generator at the enemy, he uses it to trap the enemy within the shield and fix it in one place. Meanwhile, supply drops can be called in within the shield for an easy kill. Of course, you can still use conventional firepower to kill the Dreadnought with this meta, in case you don’t have enough Nitra for supply drops.

Meta complexity:
–Zipline-Mining-Meta
This meta is especially aimed at players who prefer the One-Class-Only-Meta with the Gunner class. It’s about eliminating the lack of Engineer platforms and Scouts and instead using the Gunner’s ziplines to reach the resources.
The zipline should always be placed a bit above the resources to be reached. Now you travel to the end of the zipline, look down a bit and start mining the minerals. If enemies should appear during the mining, just go back a little on the zipline, kill them and then continue to mine once again in peace.
Experienced players can jump from the zipline into the small cavities created by mining the resources in the walls and can further mine from there.
Meta complexity:


–Drive-by-Mining-Meta
Another meta strategy for collecting resources for a Gunner-only team is the Drive-by-Mining-Meta. But even with a heterogeneous team composition, this strategy is often very useful!
Resources on pillars and on the side of long junctions and islands are the preferred uses for this meta. The Gunner shoots a zipline as close as possible to the resource. After that he uses the zipline to approach the resources and starts to mine them. By skillfully moving back and forth on the zipline with the use key, the Gunner can almost stop dead at the resource and mine very quickly.


Meta complexity:
–Minigun-Mining-Meta
This meta-strategy is especially useful when using the Gunner-only Meta.
Hard-to-reach resources on cave walls and ceilings often present a problem for a Gunner-only-team. But not anymore! As you’ve probably already noticed, the bullets of the minigun tear small holes in the landscape. You can take advantage of this fact and simply fire at the hard-to-reach resources! With some stamina and sufficient accuracy, pieces of resources soon start to fall down and can easily be picked up.


Meta complexity:
–Spinup-Meta
Unknown to many players, this meta is extremely effective in the midst of the fray. In order to keep the spinup time of the Gunner’s Minigun as short as possible, the reload button (probably “R” for most players) should be pressed before firing in order to spin the Minigun’s barrels manually. The Minigun can then be fired almost instantly without any spinup time, i.e. significantly sooner than without manual pre-turning. With this meta the spinup time of the Minigun can be reduced by 0.2s and in combination with the “Lighter Barrel Assembly” even further.

Meta complexity:
–Cooling-Meta
Similar to the Spinup-Meta, the reload button fulfills another practical function with the Minigun: If the Minigun is in the red area in terms of heat, pressing the reload button ensures that the Minigun is turned manually and helps with a faster cooldown. It is important to note, that this meta only works as long as the Minigun is not completely overheated.. Using this meta temporarily adds +0.2 cooling rate for the duration of the animation to the Minigun.
Meta complexity:
Driller Metas

~ The Digger
–Max-Fuel-Meta
This meta strategy focuses on the Driller class. As the Driller, you may only use your pickaxe to dig during the round to keep your drill fuel at maximum capacity until the end of the round. As soon as the drop pod lands, you have to aim for its exact location and drill all the way to it, no matter how far away it is.
It is important to keep a close look at the temperature of the drills in order to keep them working. At around 90-95% you have to stop and wait until the temperature drops to 10% and start drilling again.
This gives you the advantage to bypass any difficult terrain and every single obstacle with ease, plus time savings of up to 5%.


Meta complexity:
–Double-Driller-Meta

Meta complexity:
–Overheat-Meta
This meta is the opposite strategy of the Gunner’s Cooling-Meta. When using the Driller’s drills for extended periods, i.e. when using the Max-Fuel-Meta, always let the drills overheat and wait for them to un-jam. In combination with the “Streamlined Integrity Check” modification this method of drilling is faster than letting the drills get to 99% and waiting for them to naturally cool off with the “Magnetic Refrigeration” modification.

Meta complexity:
–Free-Space-Meta
A meta-strategy for Salvage missions, which aims to make the most of the area to be defended. Very useful for this is a Driller on the team, but other classes can still use this strategy, even if it takes a little longer.
If the Uplink or the Fuel Cells are in unfavorable positions, e.g. much of the area is inside walls or generally obstructed terrain, then this meta strategy should be used. The Driller extends with its drills the area to be defended, so that the full extent of the green defense area can be used. Especially in connection with the infamous Roof-Meta a versatile meta strategy.
A highly-experienced team both using the Roof- and Free-Space-Meta!

Meta complexity:
–Trench-Meta
If an object is to be defended, e.g. For example, the uplink and the fuel cells in salvage missions or the Mine Head in Point Extraction missions, this meta comes into play. First the Driller builds a deep trench for defense around the object. The trench should be about two dwarfs deep and at least three dwarfs wide. It is very important that the trench is built as evenly as possible. Once the trench is built, the team gathers around the object to be defended and starts the event.

The trench delays the enemies significantly when approaching the object or even stops them completely. To increase the defense even further, the Driller can throw his neurotoxin grenades evenly into the trench. Approaching enemies must inevitably pass through the gasified trench and often times die before they can even get close to the team.
Meta complexity:
–Melee-Meta
With the right perks, equipment and strategy, the Driller can be transformed into a near unstoppable self-healing melee class.
First thing to do is to take the “Breathing Room” armor upgrade granting temporary invulnerability after being revived, which allows you to heal yourself for a few precious seconds to get back on your feet when you have been downed. Take the following perks: Berserker, Vampire, Iron Will. When you are able to proc Vampire while Iron Will is active, you will heal up and won’t go down. If available at the Abyss Bar, a cold Skull Crusher Ale will give you a welcome additional 10% melee damage boost.
As far as weapons go, the Cryo Cannon has great crowd control and renders enemies frozen, giving you plenty of time to axe them and regain health, synergizing nicely with the Vampire perk. Modify the Cryo Cannon to have plenty of ammo and freeze enemies as fast as possible.
The power drills should be upgraded with the melee damage upgrade (“Barbed Drills”) and the cooling ability when drilling enemies (“Bloody Cold Drills”). The pickaxe damage upgrade is also useful, as well as taking Impact Axes with you, which curiously count as a melee attack and can be used from a fase distance.

Keep in mind when using the Vampire perk, there are a few things that will not proc it: Swarmers, Loot Bugs, Brood Nexus, Q’ronar Shellbacks, Spitball Infectors, Hatchlings and Shockers, and non-hostile wildlife in general don’t give you Vampire health when you kill them with melee, throwing axes, and drills. And yes, you can melee a Bulk Detonator… theoretically…
So, basically: Freeze medium and large enemies with your upgraded Cryo Cannon and lay into them with your numerous melee attacks (Power Drills, Pickaxe, Impact Axes), triggering your Vampire perk. Frozen enemies take triple damage, and are especially vulnerable to kinetic (melee) damage, making this meta very useful strategy.
Meta complexity:
–C4-Traversing-Meta
In this meta, the Driller uses his Satchel Charges only to blow up the passages to the nearest caves. Instead of laboriously checking the minimap in which direction the next cave is in order to then switch to the drills and finally drill, one Satchel Charge is sufficient and the passage is free.


When blowing up, it must of course be ensured that there are no other players in the blast radius who could be injured as a result. This meta is particularly effective with the Max-Fuel-Meta and using the “Rock Mover” modification for the Satchel Charges.
Meta complexity:
–C4-Mining-Meta
The secret way of the C4-Mining-Meta is a legendary technique that only the smartest dwarfs really mastered and that has been well guarded over the millennia and passed on to only a few selected dwarfs. This meta strategy is particularly useful when the One-Class-Only-Meta is used and also when minerals need to be mined quickly. Use the “Rock Mover” modification for the Satchel Charges for best results.

The Driller throws one of his Satchel Charges at the resource to be mined, ensures that both he and his teammates are at a safe distance outside the blast radius and finally ignites the load. It should be noted that due to the force of the explosion some resource chunks might fly through the area and don’t fall directly to the ground below, so watch out for those.

Meta complexity:
–Plasma-Mining-Meta
The Plasma-Mining-Meta, the Holy Grail of mining as the Driller. Some dwarfs have tried it, a lot have failed, but a select few have seen the light and bath in its glory. Basically it evolves around shooting a charged shot at the resources you want to mine and sending a regular shot right after to detonate the charged shot at just the right place. The resulting explosion is not only glorious and deals a lot of damage to enemies, it also carves a huge sphere into the landscape and thus mining the resources. Especially useful when using the One-Class-Only-Meta with a team of Drillers, but it generally saves a lot of time when mining compared to using your trusty pickaxe instead.
But before running around the caves all jolly and frolicking shooting at precious minerals, you first must modify your Experimental Plasma Charger accordingly. Try to max ammo and get the lower charged shot ammo consumption perk and overclock, which gives you a total of 184 ammo. Each mining try costs 5 ammo (4 for the charged shot and +1 for the regular shot after).

21122 is a rather forgiving build and gives you a lot of fuel to work with. Since you have 168 ammo with this build, you get 33 charged shots out of it, which is plenty and should suffice quite some time down in the mines. Now all that is left is to learn the proper timing when trying to detonate the charged shot at the perfect place.
Meta complexity:

Engineer Metas

~ The Machinist
–Engi-Only-Ammo-Meta
For this meta strategy, you only need one determined Engineer, the rest of the dwarfs are free to pick their classes.
The crucial part is, that only the Engineer is allowed to take any ammo from the supply drops. The task of the Engineer is to take out all the enemies all by himself by using his turrets while the other dwarfs are mining.
This gives a huge time advantage, because of the faster mining, and even the Engineer can help mining, while his turrets are doing all the work.
The other three dwarfs are not allowed to get supplies, because:

- They won’t need them anyway, as they won’t have to shoot any enemies.
- The Engineer needs as much ammunition as possible to maintain the defense for the whole team.
This meta strategy is especially useful in combination with the Early-Drop-Meta, to guarantee that the Engineer always has enough ammo to refill the Sentry Gun(s).
Meta complexity:
–Roof-Meta
Everyone knows the problem: Salvage missions inevitably get you to the point where you have to defend the Uplink and a short time later the Fuel Cells. The area to be defended is fixed, offers little freedom of movement, and to top it all, the things to defend are often located in already cramped places.
Therefore, to get the most out of the given area, the Roof-Meta has established itself among the experienced players. Prerequisite for this is an Engineer on the team. It places its platforms above the objects to be defended in such a way that below them the other players can still comfortably walk around and act. By juxtaposing platforms, the Engineer creates a second level, which is another effective way to defend the area. In addition, placing Sentries on these platforms significantly increases their effectiveness due to the expanded field of view. The platforms can also function as a protection measure against enemies with long-range attacks and to limit the area in which enemies can appear and attack, so that they are exposed to the concentrated firepower of the whole team.


Meta complexity:

–Protect-Doretta-Meta
This meta makes the final battle against the Ommoran Heartstone in Escort Duty missions easier. In the second phase of the fight, the Ommoran Heartstone will attempt to destroy Doretta with flying rocks. If the team does not focus its firepower specifically on the rocks, the round can quickly be lost since the rocks cause enormous damage. The Engineer can prevent this by using one of the surrounding stone formations, after the first round of combat and thus after the angry shock wave of the Ommoran Heartstone, to build a ceiling over Doretta with his platforms. Since the shock waves destroy the platforms, they should only be built (quickly) at the beginning of the second round. Should a flying rock not be destroyed in time, it shatters harmlessly on the platforms and Doretta remains completely unharmed. This allows the team to concentrate primarily on the bugs during the fight without having to worry about the flying rocks.


Meta complexity:
–Pancake-Meta
The Pancake-Meta is one of the tastiest metas that exist. It should be used wherever an area is to be defended over a longer period of time (e.g. Point Extraction).
The Engineer uses his Platform Gun to fire some platforms on the ground while jumping. As a result, the Engineer quickly builds a tower, which can vary in size depending on the environment.
Once the tower is up, the Engineer can set up his sentry gun(s) and cover his teammates from above. In particular, the Grenade Launcher gains enormous efficiency from up there.

Important in this meta is that the Platform Gun is equipped with the Tier 3 upgrade “Repellent Additive”, so that the bugs practically do not climb on the tower and the Engineer can thus calmly manage his tasty defense tower. You still need to watch out for flying and/or shooting enemies!
Meta complexity:
–Stairs-Meta
The Stairs-Meta allows smart Engineers to easily and quickly reach valuable resources without the annoying help of inattentive and lazy Scouts. When using the One-Class-Only-Meta with Engineers, this meta is essential and ensures full pockets.

The Engineer uses its Platform Gun to build a convenient staircase to the resources. It must be ensured that the individual platforms can be easily reached by jumping and are not built too close to one another.

If the staircase is built correctly (see examples of possible staircase types), the Engineer can reach and mine the resources. Additionally, foresighted Engineers put their Sentry Gun(s) in the direction of the resource beforehand, so that the Engineer gets covered when mining the resources.
Meta complexity:
Scout Metas

~ The Pathfinder
–Double-Flare-Meta
The goal with this meta strategy is to maximize the light output of the flares of the Scout class. In order to get the brightest light possible, you will have to shoot two flares within a radius of 5 meters (16,4042 feet) of each other.
The flares will buff each other up to 50%, depending on the relative distance to each other and the angle to the sources of the lights.
This gives a huge advantage during swarms, in larger caves and helps immensely during the search for every single mineral source.

Meta complexity:
–Piercing-Flare-Meta

Meta complexity:
–Shiny-Exit-Meta
This meta is both a reversal of the Stealth-Meta and a variant of the Leave-All-Dwarves-Behind-Meta. Instead of illuminating the cave system, the Scout player saves the Flare Gun’s ammunition for the entire round, only to use them all at once at the end.
After the drop pod has been called (see Instant-Escape-Pod-Meta), the Scout tries to reach the drop pod as fast as possible (see Leave-All-Dwarves-Behind-Meta). Once there, he lights up the entire area around the drop pod with his saved flares, as well as the inside of the drop pod, firing the flares around the entrance door. Additionally, his throwable flares can be used to further brighten things up.

On the one hand, this strategy ensures that at least one player escapes and thus ensures the success of the mission. On the other hand, the other players can find the way to the drop pod much easier, as it is brightly visible from afar and illuminates the cave impressively, like a shining monolith of rock and stone.
Meta complexity:
–Scout-Leech-Meta
The Scout-Leech-Meta uses the Scout class as bait. As the Scout player your task in this strategy is to use your grappling hook to get around the area or cave as fast as possible. You are not allowed to get distracted by mining minerals or doing anything else, that’s what the rest of the team is for.
The genius point is, that you are the bait for all the cave leeches in the area. By moving fast through a large area via the grappling hook, you will inevitably get caught by some cave leeches and:
- keep the rest of your team save by occupying the leech
- you can easily find and mark the leeches for your fellow dwarfs
- it is much faster to find the leeches this way, than looking at the ceiling and wasting flares to brighten up every single cave
After you get downed by a cave leech, your team is going to kill it, revive you and the whole process starts again.


Meta complexity:
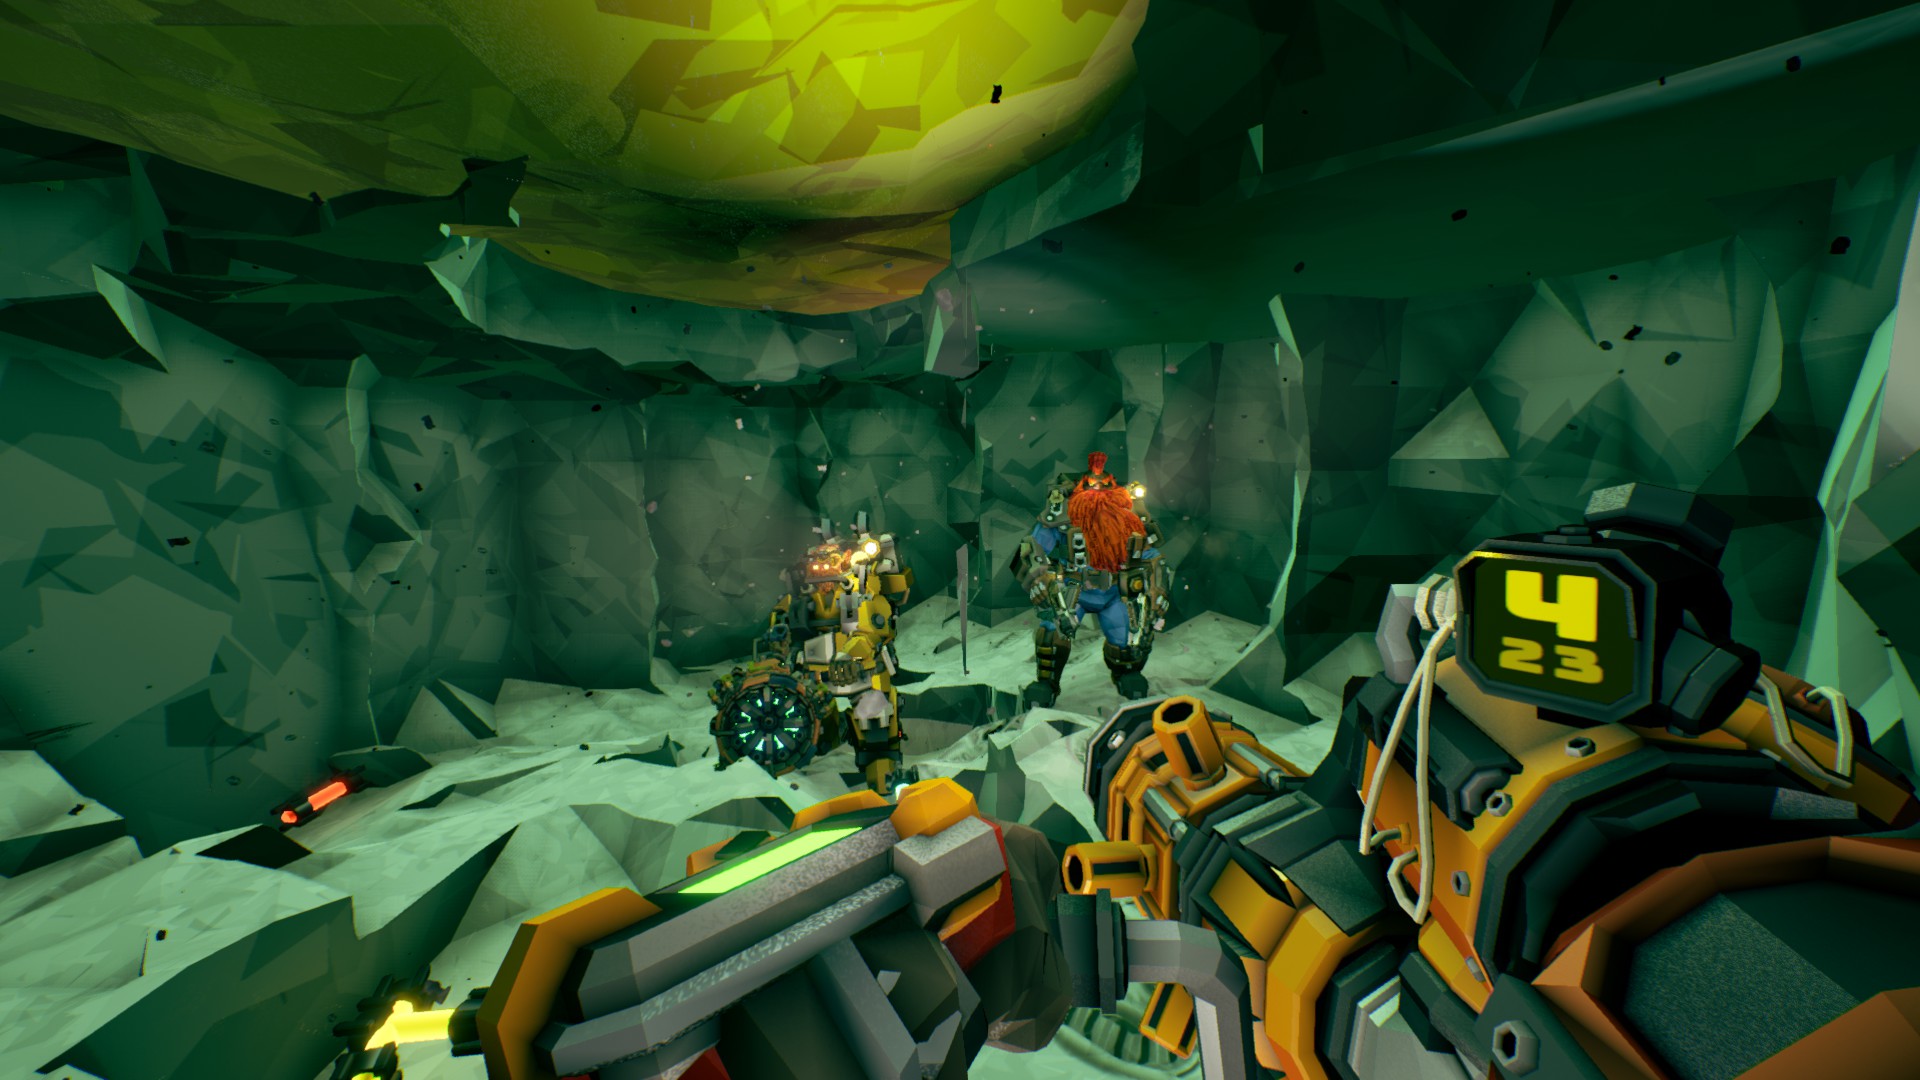
–Scout-Bait-Meta
The Scout-Bait-Meta is a variation of the Scout-Leech-Meta. Two Scouts are using their grappling hooks and weapons to act as bait for the enemies. Larger groups and big enemies are the main targets.
One of the Scouts has to grapple near the enemies in order to distract them, while the other Scout goes all-in for their weak spots. While the two Scouts are doing so, the other two dwarfs are going for the minerals.
This meta provides a perfect use of the grappling hooks and therefore speed of the Scouts. They can get around the caves fast enough to distract every incoming group of enemies.
Since this meta strategy consumes a lot of ammunition for two of for the four players, we recommend using the Early-Drop-Meta at the same time.
Two scouts using the Scout-Bait-Meta to distract a group of enemies, while the other two dwarfs can work in complete safety!


Meta complexity:
–One-On-The-Run-Meta
This meta strategy is only applicable to Salvage missions and is similar to the Scout-Bait-Meta. Once the mission step is reached where the Uplink needs to be set up and defended, three players remain in the perimeter of the Uplink, while one player acts as a distraction to the enemies.
Due to the fact that there are three players in the circle, the mission bar still increases quickly. The player who serves as a distraction (ideally a Scout) on the one hand tries to move so far away from the rest of the team that the emerging opponents do not attack the teammates and on the other hand still is so close to them that the enemies attack him instead of the team members, so he can bait and kite them.

Finding out the optimal distance requires a lot of time and practice, but clearly relieves the other three team members in their task. When booting up the Fuel Cells, this strategy can be used too.
Meta complexity:
Miscellaneous Metas

~ Quest Supervision
–One-Class-Only-Meta
It is widely known among the community, that the most successful team compositions in DRG consist of only one class. By having your entire team committing to one class only, you increase your effectiveness to previously unknown heights.
Which class-team suits your purpose best comes down to the biome you will want to visit, the type of mission and which kind of resources you aim to extract the most. A few things you should consider before choosing the only class for your team:

- Best mobility out of all other teams (Leave-All-Dwarfs-Behind-Meta)
- Best visibility out of all other teams (Double-Flare-Meta, Shiny-Exit-Meta)
- Your team can quickly cross large distances
- You can escape enemy waves and bigger enemies very easily
- Your team can bait enemies very easily (see Scout-Bait-Meta, Scout-Leech-Meta)
- Every resource is reachable without any problems because of Grappling Hooks
- Best team for Dense Biozone because of Grappling Hooks

- Second best firepower out of all teams
- Can easily dispatch any enemy, including Glyphid Dreadnoughts (Mobile-Turret-Meta)
- Very good mobility due to an abundance of ziplines (Zipline-Meta, Drive-by-Mining-Meta)
- Shield generator allows for safely reviving downed teammates during swarms
- Best team for Crystalline Caverns and Glacial Strata because of ziplines
- Very useful team for Magma Core because of explosion resistance

- Very good mobility due to drills (Free-Space-Meta)
- Can easily escape during the run to the drop pod due to Max-Fuel-Meta
- Flamethrower and Cryo Cannon get rid of trash mobs, pistol for medium-sized and distant enemies and satchel charges for heavy enemies, Plasma Charger is an all-rounder, Melee-Meta possible
- Buried resources are easy to reach (Satchel-Mining-Meta)
- Safe descend into deep pits by drilling a downward tunnel
- Circumvention of deep pits by drilling a tunnel around them
- Best team for Magma Core because of fire resistance

- Best firepower out of all other teams (8 standard turrets or 4 advanced turrets)
- Very effective weapons for both trash mobs and single, heavy enemies
- Platforms allow the building of additional layers in combat (King-Of-The-Hill-Meta, Roof-Meta, Pancake-Meta)
- Platforms allow for a safe descend into deep pits and easy and fast crossing
- High-up resources can be reached by building stairs with the platforms
- Can use platforms to block enemy paths (Bunker-Meta)
- Best team for Fungus Bogs because of poison resistance
Meta complexity:
–Loading-Screen-Meta
This meta is applied in the loading screen, so even before the actual mission has started. Usually all sorts of important things are done in the Space Rig, e. g. drinking beer and dancing, but a sensible tactic for the next mission is rarely discussed.
As soon as the Drop Pod has started and all the players are in the loading screen, one of the players tabs (ALT + Tab) from the game onto the desktop and, e. g. watches some random videos on YouTube, downloads other games etc. A really slow PC and an even slower Internet connection help enormously in the application of this meta.
The absolute highlight: The loading is significantly delayed, and all players stay much longer in the loading screen. This leaves enough time to come up with good tactics for the upcoming mission. It is also advisable to consult this meta guide for further metas at this point. As soon as the tactic has been discussed for a long enough time, the corresponding player tabs back into the game and the mission can begin.
–Early-Drop-Meta
This meta strategy aims to have as many supply drops as possible on the battlefield at any time. As soon as you reach 80 Nitra, you have to call a supply drop. At this point it doesn’t matter if everyone is still stocked up on ammo, you just call in the drop. You never know, when it might come in handy, so better be safe!
Another plus of this strategy is that once you go back to the drop pod to escape, you will find numerous supply drops along your way, where you can easily refill your ammo without having to wait for a supply drop in the middle of the enemy spawns.


Meta complexity:
–Half-Mineral-Meta
This meta strategy focuses on the player, who is tasked to mine the minerals. You are only allowed to mine half of the minerals in order to fulfill the mission requirements exactly in the last cave of the system.
By only mining half of the minerals, you will be a lot faster than mining it all and at the same time still get enough minerals to complete the mission in the last cave. This means only minerals like Nitra, Morkite, Gold and so on shouldn’t be mined completely. You are allowed to mine Bismor, Umanite and other optional, yet rare minerals completely.
This gives you the fastest possible completion of a mission with the necessary amount of minerals and the highest amount of optional minerals at the same time. This meta strategy allows for a time saving of up to 50% if done right. It takes some practice to get enough minerals, but not too much to save the optimal amount of time.


Meta complexity:
–No-Nitra-Meta
This meta strategy is an advanced technique, and we only recommend it for the most experienced players (Miner rank 20+) and short missions (e.g. NOT Salvage).
The whole team is forbidden to collect Nitra in order to complete the mission as fast as possible.
By ignoring Nitra you gain a huge amount of time, but on the downside you are restricted to the ammunition from the beginning. Therefore, you need to aim carefully and try not to waste any unnecessary ammunition on enemies. Use the pickaxe and its power attack as much as possible to finish off wounded enemies, thus saving precious ammo. If the meta is applied correctly, the benefit is a huge time saving of up to 40%.

Meta complexity:
–No-BET-C-Meta
Inexperienced players often tend to attack and repair an emerging BET-C immediately. In missions with many long tunnels, however, BET-C, especially together with Molly, is often a kind of self-made death trap and mostly not much help for the team due to their weak AI.
First of all, BET-C costs the team a lot of ammunition when fighting the Xynarch Charge-suckers to defuse it. For inexperienced teams, a fight against BET-C on often means a complete wipe of the mission on higher difficulties. But even when BET-C is finally on the seemingly own side, it often causes headaches: BET-C tends to hurt players when attacking opponents and one or more players happen to be in the way. This damage can often be very significant. Furthermore, the team has absolutely no control over BET-C because it does what it wants. One of the worst “features” of BET-C is being in the way when players kite enemies behind them, often blocking players, resulting in unnecessary damage or even a down.

Therefore, BET-C should be avoided and ignored whenever possible. If a fight simply cannot be avoided, BET-C should at least not be repaired afterwards.
Meta complexity:
–All-Along-The-Watchtower-Meta
When the team faces an Omen Modular Exterminator at a machine event, this meta comes into play. Before the event starts, a player stops on the surface of the tower. As soon as the event is activated, the tower rises from the ground as usual and the corresponding player stays on the tower for the duration of the event and supports his teammates by looking after the wave while his teammates destroy the cooling tanks. With this meta, three players can concentrate fully on the tower and can defeat it faster and more efficiently than in the conventional way.


Meta complexity:


–Bunker-Meta
This infamous strategy should only be used on Salvage missions, and it’s best to have a Driller and an Engineer on the team.
First, the Driller digs a small cave underneath one of the objectives (Uplink, Fuel Cells), but in such a way that all players are counted as still being in the green circle once the objective is activated. After that, the team members activate the objective as per usual and jump down into the cave.
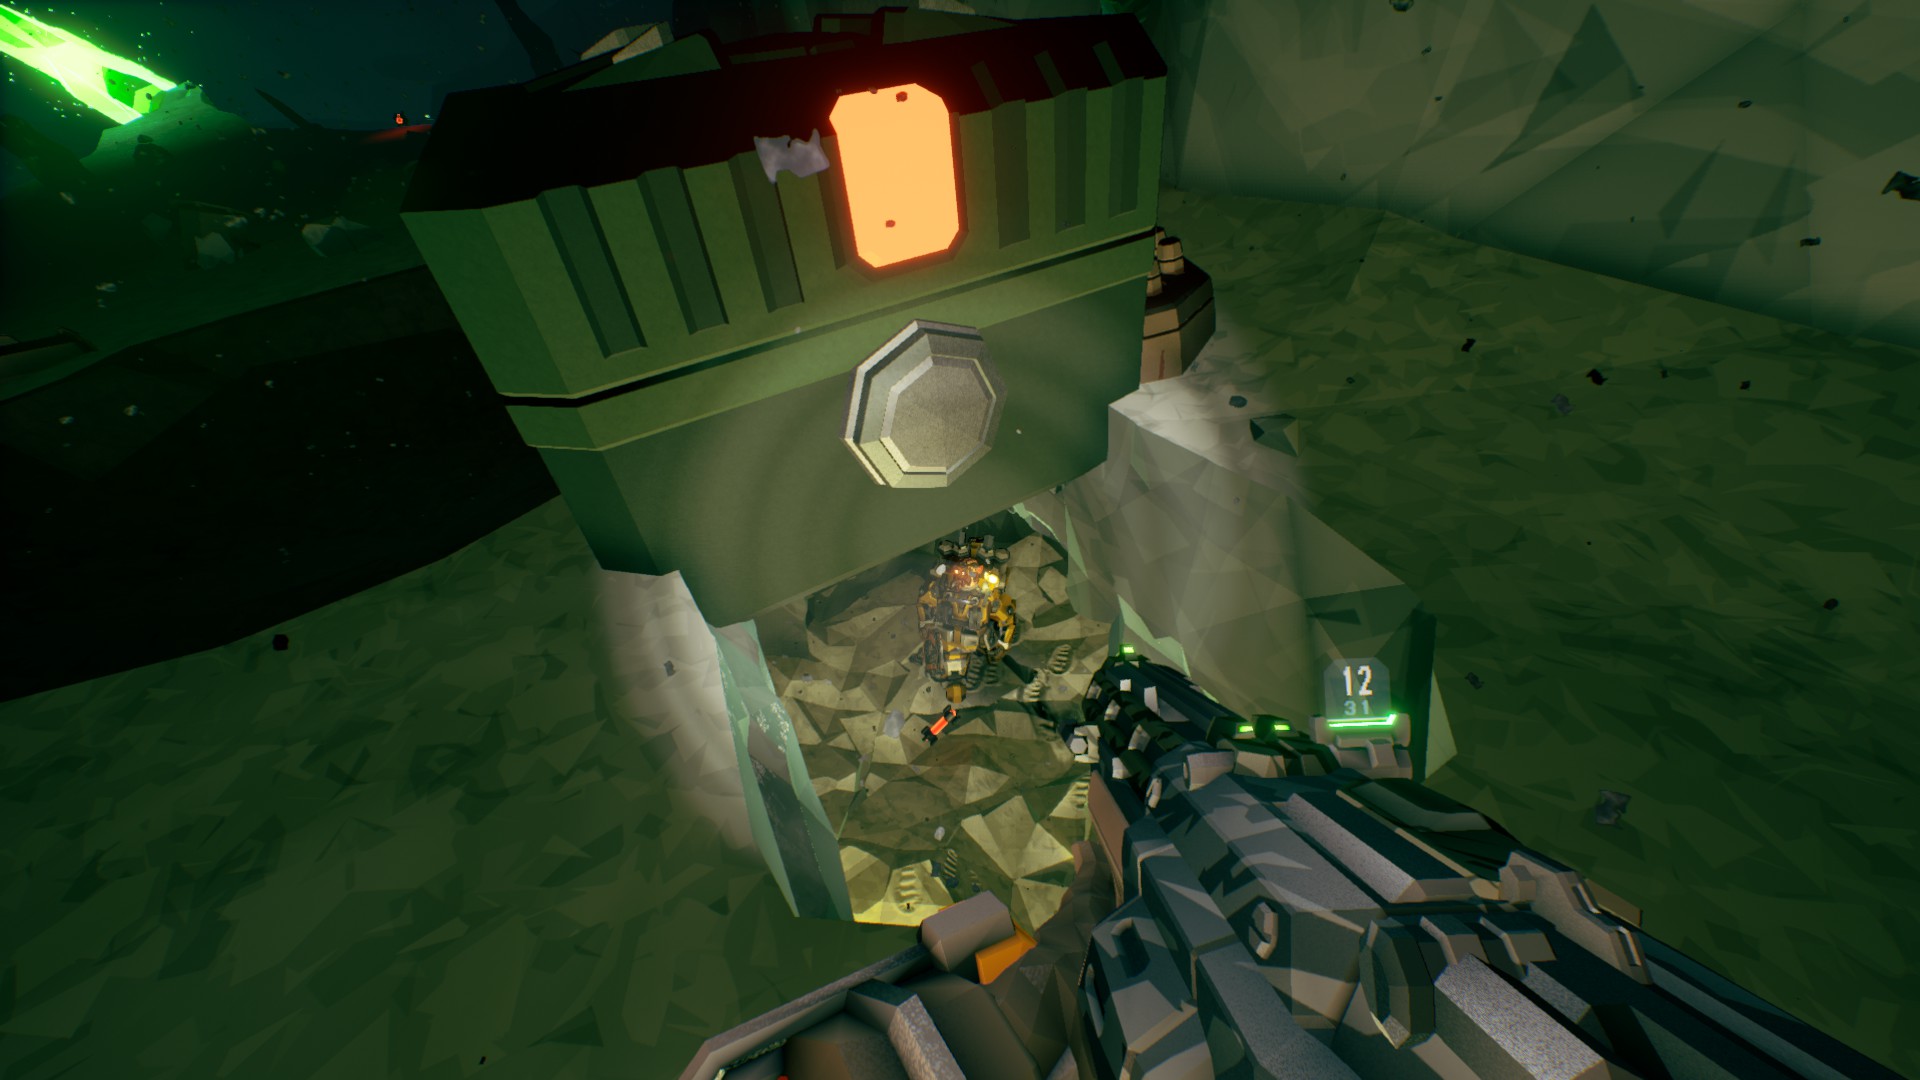
Once the team is assembled in the cave, the Engineer seals the entrance with his platforms so that no enemies can get in. Time is of the essence here, to prevent enemies from entering the cave before it’s fully sealed.
Once the objective has been successfully completed, the team prepares for the “breakout” to leave the cave and adequately deal with the accumulated enemy masses. Helpful are Shields Generators, Satchel Charges and lots of grenades. The team can also decide to let the cave sealed and instead let the Driller dig a tunnel towards the Escape Pod once it’s fully powered up.
Warning: If Bulk Detonators are part of the spawn list in your current mission, then you should think twice about using this strategy. Bulk Detonators have the nasty habit of digging through dirt towards your team, with the chance of royally messing up your neat bunker in the process, if your team is not careful and doesn’t kite the Bulk Detonator away from the bunker. This is also the case with a randomly appearing Dreadnought, so watch out.
Meta complexity:
–300-Meta
This meta is a variation of the Bunker-Meta. Do exactly as described in the Bunker-Meta and have your Driller drill a lengthy tunnel below the objective (or to the side, if the objective is right next to a wall). Instead of sealing off the entrance, call in a supply pod inside the cave (be sure to make it big enough in the beginning) and let the Engineer seal off the small tunnel it made when arriving.

One player activates the objective as usual, gets back in the cave, and the whole team focuses on the entrance to fight off the bugs. Funneling all the enemies through one narrow path lets your team dispatch them with ease, and the supply pod makes sure that your team has enough ammo for the entire duration of the objective. Weapons with blowthrough rounds, and grenades are especially effective and usually should be enough to keep most enemies at bay. The Gunner can also use his shield in critical moments to prevent the team from being overrun, if enemy spawns should get too crazy.

Unlike the Bunker-Meta, you won’t have to deal with all the enemies when leaving your cave, since you slaughtered them all during the timer. Both metas have their respective pros and cons, so use whichever suits your team best!
Meta complexity:
–Six-Feet-Under-Meta
The Uplink and/or the Fuel Cells are often in unfavorable positions that are difficult to defend. Instead of building a neat bunker (see Bunker-Meta) or using the 300-Meta, it can often make more sense to only bury the Uplink/Fuel Cells. Digging them in can be done easily with the pickaxe. As soon as it is completely buried, one of the players activates it and the Engineer seals the hole with a platform so that no one falls into it. The advantage of this meta is that the team now has more space to defend and a better view of the opponents.

Meta complexity:
–King-Of-The-Hill-Meta
This meta strategy is a reversal of the One-On-The-Run-Meta. Depending on team composition, personal preferences and the circumstances of the mission, one of the two strategies may be more useful and it should be considered before starting the defense part of the mission which of the two strategies will be used.
In this meta strategy, one player remains in the circle to defend (ideally a Gunner or an Engineer) for the progress bar to recharge, albeit slowly. The other three players move freely outside the circle and use their mobility, weapons and wits to keep the incoming opponents away from the defending player. If necessary, Field Generators or Sentries will help the defender, though he normally does not need to fear an attack if this strategy is properly executed.

Meta complexity:
–Death-From-Above-Meta
Big glyphids are hard to beat? Wrong! With this meta strategy you defeat Praetorians and even Dreadnoughts with ease without breaking a sweat and with minimal risk. This meta strategy uses supply pods as a deadly weapon against large glyphids. It can be done in several variants, depending on team composition, mission type, available resources, etc.
A direct hit with a supply pod takes off one full health bar, so Glyphid Praetorians are killed instantly. If Glyphid Dreadnoughts get hit while still having at least some armor (yellow bar), the armor gets destroyed, and they get some additional health damage. Otherwise, it’s a one-hit-kill too. Two called in supply drops on a Dreadnought are an instant kill as well. In summary, you always need one hit for Praetorians and one or two hits for Dreadnoughts, depending on the preliminary work that was done.
In Elimination missions, where the Dreadnoughts are still in cocoons at the start of the round, a simple variant of this meta strategy can be applied: Two players call a supply drop below the cocoon. Right before the first supply drop is about to hit the cocoon, the team destroys it so that the Dreadnought spawns. Now the two pods hit him in quick succession, and he’s done. The Scout’s IFG grenades can help to prevent him from moving too far when he hatches.
Meta complexity:


–Safe-Room-Meta
After landing, one player always stays within the drop pod to prevent it from disappearing. This player remains in the drop pod throughout the entire round and can also be replaced by another player, as long as there is at least one player in the drop pod at all times, so that it doesn’t disappear. The player in it can of course shoot from the inside at the enemies outside and thus support his team.
Another advantage of this strategy is that some opponents are distracted by the player remaining in the drop pod and are focused on attacking him, while the other players are not attacked or recognized as valid targets.
Once the mine head has been launched and the timer for the escape pod begins ticking down, all players retreat inside the initial drop pod, which now serves as a shelter to wait out the timer. When the timer expires and the escape pod finally lands, all players leave the drop pod at the same time and rush to the escape pod.


This meta works best in Point Extraction missions, but can also be used to great effectiveness in all other mission types.


Meta complexity:
–Stealth-Meta
This meta strategy is only known to very few hardcore DRG players, which is very surprising, because it is extremely effective when used correctly.
The Stealth-Meta requires that no flashlights are to be used under any circumstances during the entire mission. Since they are automatically activated when a mission is started, they must be deactivated immediately by holding down the F key after the loading screen (preferably already in the drop pod) to ensure the maximum efficiency of this meta strategy. The Scout’s Flare Gun may not be used for the entire mission as well.
The whole team now moves carefully through the mission and tries to avoid any enemy. Be careful not to run, as fast movements can attract the attention of the bugs and, depending on the surface, can cause loud noises. Also, no supply pods should be called because they usually alert all bugs in the current part of the cave. The use of the pickaxe is generally possible without any problems, but the drills of the Driller usually cause too much noise, so pickaxes should be used when breaking through compacted dirt to the next section of the cave.

In general, it must be ensured that enemies are circumvented carefully and are not startled by quick movements and loud noises. For example, the sticky goo in Fungus Bogs can dampen the noise of movements. With this strategy, large parts of a mission can be completed without fighting, as long as the team coordinates, bypasses enemies and simultaneously eliminates nearby opponents so that no alarm is raised. However, as soon as supply pods or the Escape Pod are called in, logically, pretty much all bugs in a cave get alerted and the mission turns loud.
Meta complexity:
–Leave-All-Dwarfs-Behind-Meta
This meta strategy aims at saving the collected resources at all costs and with minimal risk.
When the drop pod is called, one player, ideally the Scout, is the only one going back to the drop pod. All other players stay in place and bait and kill the spawning enemies, so the Scout can reach the drop pod unharmed.

The Scout can also concentrate on reaching the drop pod without having to look out and possible rescue downed players with the risk of compromising the whole operation by doing so.
Once the Scout has safely reached the drop pod, all other players use satchel charges and/or grenades to down themselves, so the drop pod can leave immediately.
Since at least one player escaped, all players will receive 100% of the collected resources. The bonus for all players being alive is minimal and can safely be ignored in the big picture.
Meta complexity:
–Instant-Drop-Pod-Meta
This meta is based on the realization that it makes the most sense to press the escape button on Molly immediately as it becomes available. As soon as you hear the words “Good Job, mission complete!” instantly hit the button to call in the drop pod. Experienced players are so good at calling the drop pod, they press the button while Mission Control is still talking.

This is especially true for mission types like Egg Hunt, Point Extraction, Salvage and Elimination, which either consist of a plethora of funless tunnels or you can see the entire map right from the beginning anyway. Even in Expedition the extra stuff is negligible, as you only get minor extra XP and/or minerals.
This also applies to meeting secondary objectives. Going past the primary objective for credits or XP just isn’t worth it, unless they are easy to reach and can be quickly grabbed and deposited into the M.U.L.E. Since most of the stuff required for secondary objectives is often hidden in annoying spots (especially fossils), extracting ASAP is always a good idea. If you missed some secondary stuff, try to get them on your way back if it’s not too much of a hassle, otherwise concentrate on escaping first and foremost.
In summary, one can say that there is little point to staying. Don’t waste an hour on every round so people can search every nook and cranny and wait for them to dig everything they can. It’s a huge waste of time and the longer you spend looking for something the higher the chance of another swarm and the further the way to the drop pod. The meager yield of some materials and XP is not worth the extra 30 minutes in which you can easily finish another mission and probably get a lot more rewards.
Meta complexity:
Conclusion
It is clear, that not every strategy might work within your current team setup, so some adjustments of the described meta strategies may be necessary in order to fully embrace said advantages.
Feel free to try out these meta strategies and share your experiences with the community. We will keep a close eye on the future of DRG and will continue to develop and share new meta strategies as they surface.
This is especially important for those people, who play DRG on a competitive level at official e-sports tournaments and/or doing official speedruns.
When the upcoming “Beard Royale” and/or “Barrel Royale” gamemode(s) finally drops, we will be adding a corresponding PvP meta section to this guide, so make sure to stay up to date!
Minerals and Sediments!