Overview
Can’t quite get your juggling down? Need help getting all the weapons? This guide is for you! Level up faster, find all items, unlock all achievements, and maybe even 100% the game!
Controls
Before you start anything you need to know how to move your character. There are a few sources of controls. Including, but not limited to:
- Keyboard and Mouse
- Xbox One Controller
- Xbox 360 Controller
- PS4 Controller
- PS3 Controller
- Steam Controller
I’ve experienced all of these and can tell you that your best option is probably the keyboard and mouse. It’s completely configurable, and very convienent.
Here are the different buttons and what they do:
Move – Essential feature for all games except Five Nights at Freddy’s.
Jump – Guess what this does.
Light Attack – Deals a small amount of damage but is fast.
Heavy Attack – Large amount of damage but slower then light attack.
Use Item – Use the current item in your inventory.
Cycle Item – Cycle through you inventory. The items could be Health Potions, Bow and Arrow, Bombs and more.
Shield – Press and hold this button to block enemies! When in use, you are immune to damage. But, you are slower and once you unshield or excute an attack you are vunerable.
Magic – Hold this to activate a magical dust. When activated you can press other buttons such as Y to cast a spell.
Push-to-Talk – Used for communication, obviously.
You might be asking yourself, how do you use these attacks? Well here’s your answer, it’s longish shortish… yep that’s a thing.
Xbox One, 360, PS3, PS4, and similar Gamepads – This does not include this Steam Controller, it’s a catagory by itself. These controls are the most comfortable and straightforward ones out there. They are not configurable, so in most guides people will use them when explaining combos. Here’s a quick translation:
The one on the left is Xbox One and 360, the one on the right is PS4 and PS4.
- A(One/360)/X(PS3/PS4) – Jump
- X/Square – Light Attack
- Y/Triangle – Heavy Attack
- B/Circle – Use Item
- Left Stick – Movement; Press it to activate Push-to-Talk
- DPad – Alternative Movement
- Right Stick – Does nothing
- Left Bumper/L1 – Item Cycle
- Right Bumper/R1 – Item Cycle
- Left Trigger/L2 – Shield/Block
- Right Trigger/R2 – Magic
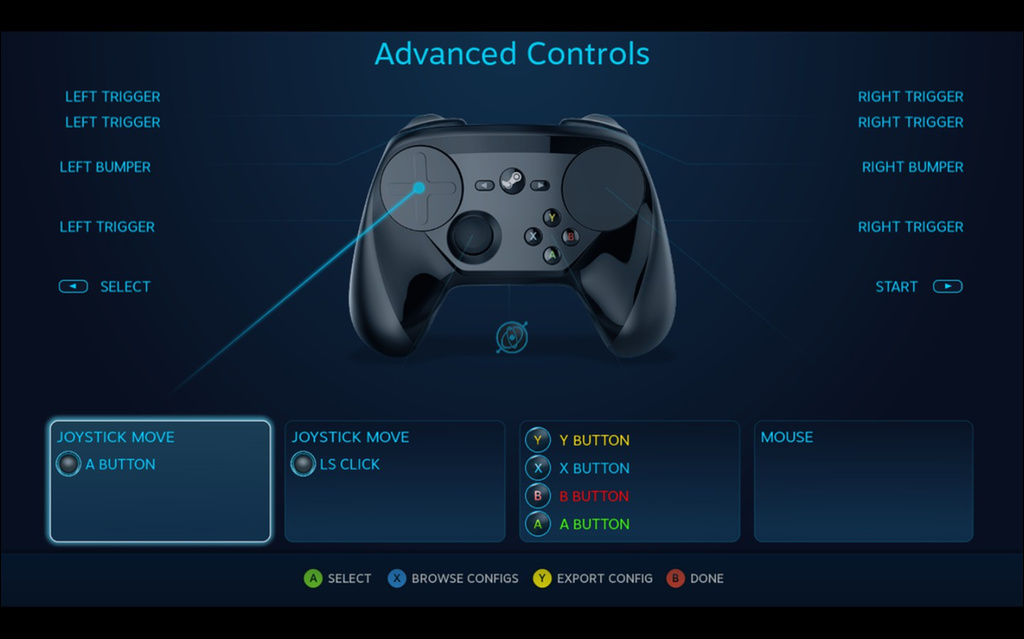
Steam Controller – As a whole, the Steam Controller acts like any other gamepad. The controls are just about the same as an Xbox 360 Controller upon bootup. But, it can be configured, making for many powerful bindings.
Here are your starting controls:
- A – Jump
- X – Light Attack
- Y – Heavy Attack
- B – Use Item
- Joystick – Movement; Press it to activate Push-to-Talk
- Left Trackpad – Does nothing, but can be configured
- Right Trackpad – Also does nothing, and can be configured.
- Left Bumper – Cycle Item
- Right Bumper – Cycle Item
- Left Pedal (or Trigger) – Shield/Block
- Right Pedal (or Trigger) – Magic
- Left Grip – Alternative Light Attack
- Right Grip – Alternative Jump
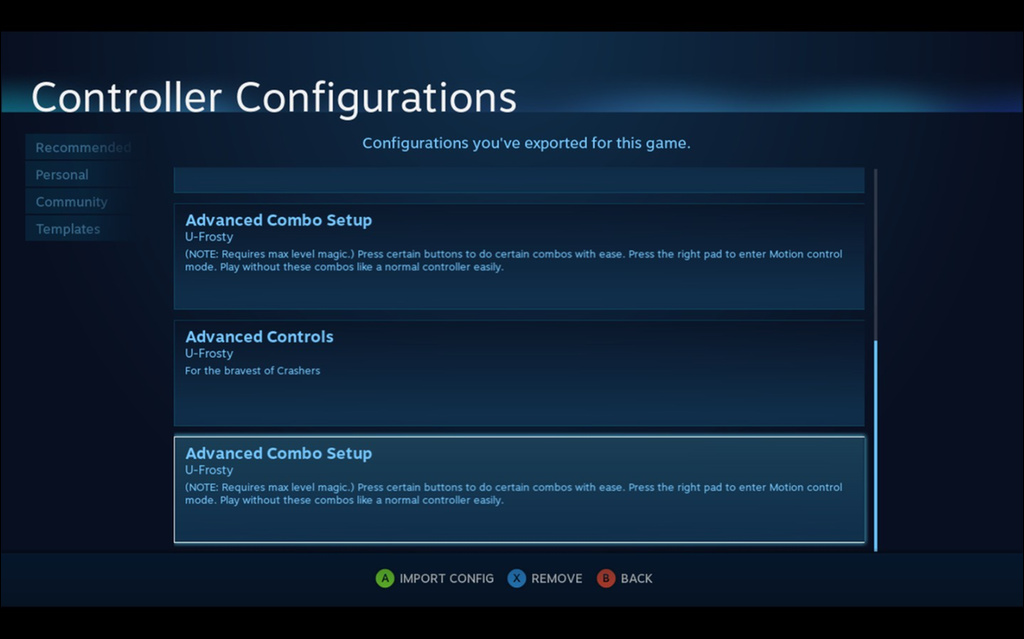
Custom Steam Controller Bindings:
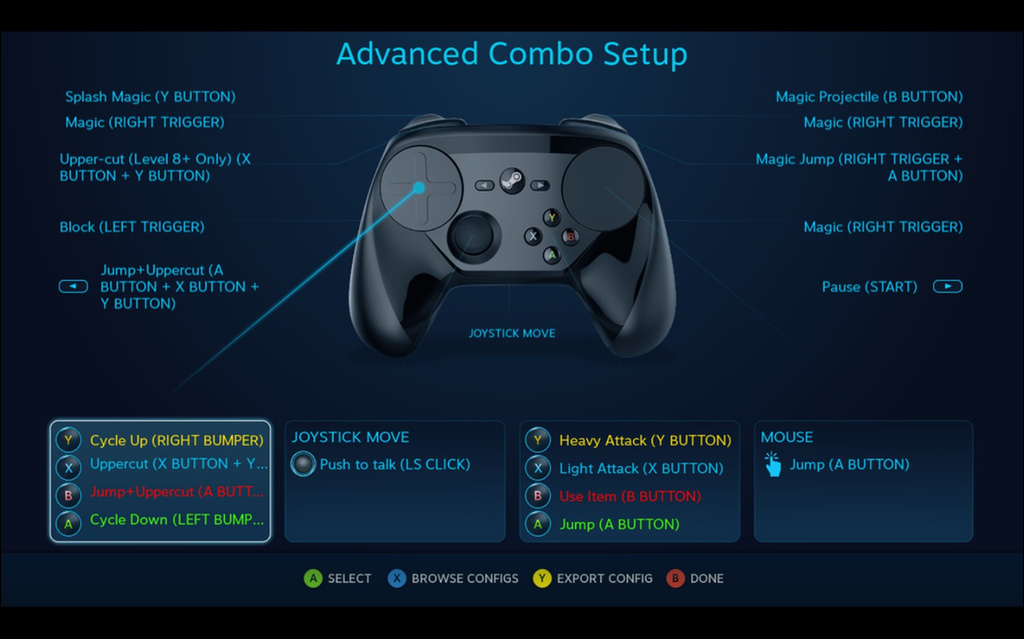
You can find my bindings here:
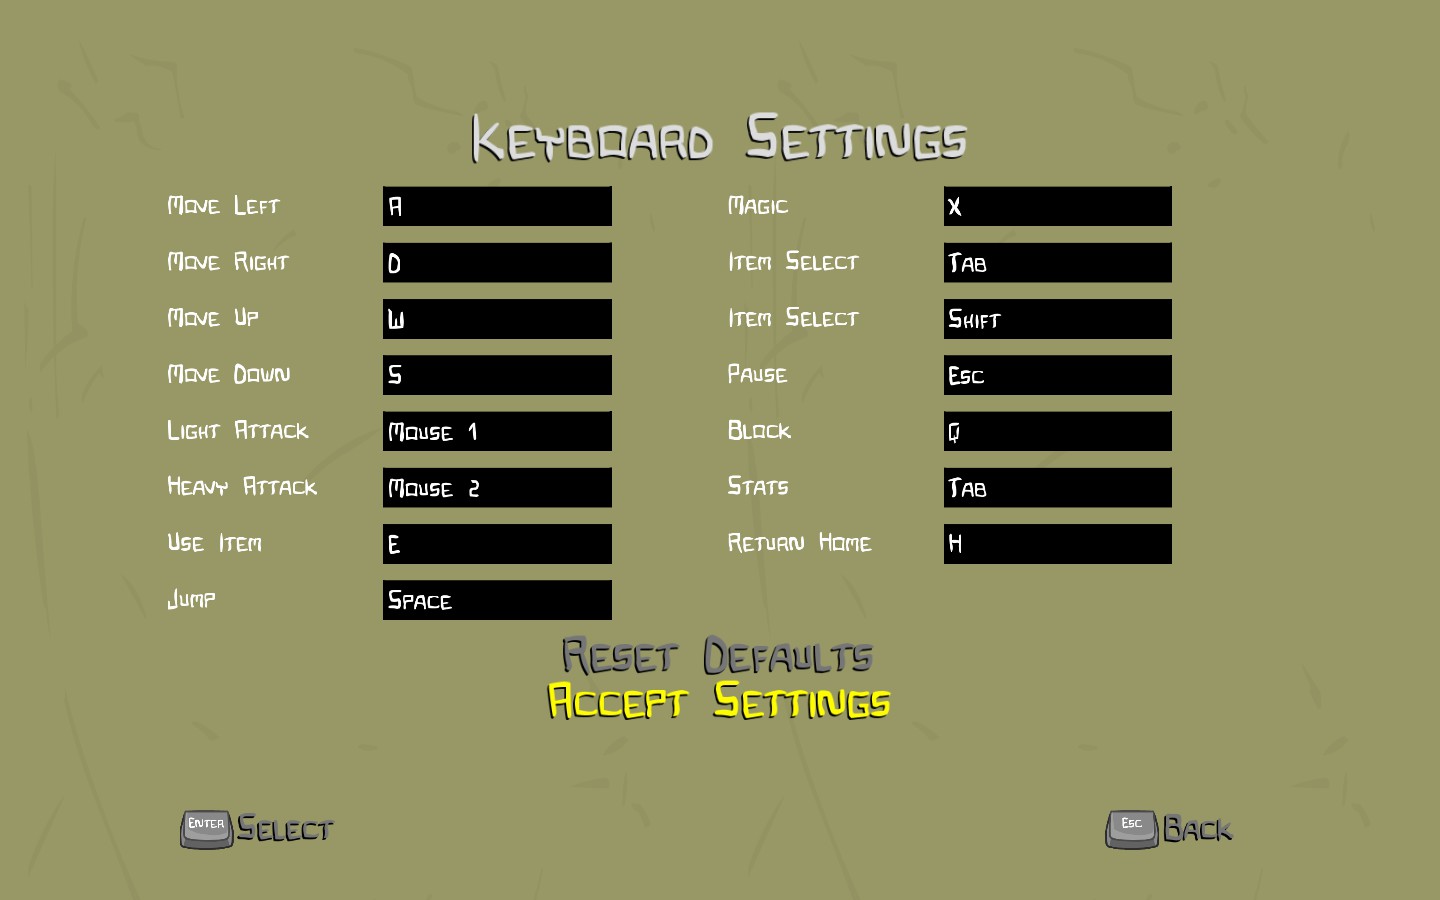
Keyboard and Mouse – The most configurable and efficent way to play the game, the Keyboard and Mouse is unbeatable. To edit it, you just need to go to the main menu, then go to Help and Options, Game Settings, then Keyboard Settings. If you haven’t configured your controls yet, you will get this default screen with the default controls.
Here are my keyboard controls. They might not be for everyone, but they are very efficent for combos and are compatible with both laptops and desktops, so you won’t even need to touch your mouse.
But, if you do happen to have a mouse handy, there is a much more convenient configuration.


Computer Specs
Since we’re covering just about EVERYTHING in Castle Crashers, how about we go over your specs? You don’t need a pimped out gaming rig to play it, but you can’t run it on a 1989 Windows 98 machine. Let’s go over it all.
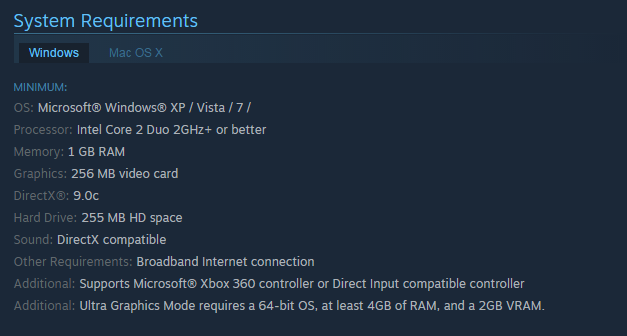
Operating Systems:
Windows XP / Vista / 7 and above
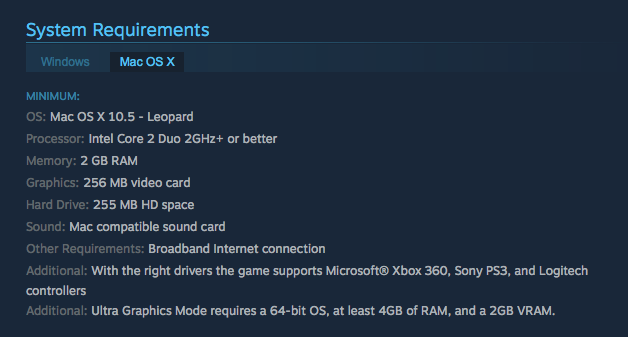
Mac OS X 10.5 and above (Although steam only supports 10.7 and above.)
So there are your minimal specs for Windows. I would recommend running something with at least 2 gigs of ram and maybe a better video card. The game runs best on a desktop with a keyboard and mouse, and supports controllers.
There are your Mac OS X requirements. Like I said you’re going to need 10.7 or above to run the game as steam does not support 10.5/10.6. 4 gigs of ram makes the game run very smoothly even at the ultra graphics setting. The most ideal setting for this would be on your laptop. You can use an iMac but the only advantage would be a mouse, and macs lack a secondary click on their mouses making it useless. Unless of course you bought a mouse with a secondary click, which is a whole different story.
Check below for a keyboard configuration for Keyboard and Mouse. (Or just keyboard.)
Levels
This section covers in-game campaign levels you play. If you are looking for XP levels, please check the “Attributes” section.
There are three gamemodes in Castle Crashers. Campaign, Arena, and Back off Barbarian. In this section we will cover the main gamemode, campaign. Campaign is the main story, where you go through various levels, collect gold, and defeat enemies and bosses.
Structure
There are 11 chapters (some consider 12) in Castle Crashers, with 36 levels within of them. A level is one area, introduced by a fade-in from black, and concluded by a fade-out to black. You can enter one by selecting it from the map, entering the exit from the previous level, or entering the enterance from the levels predecessor. Certain levels are “Checkpoint levels”, which will save your game, so you can safely exit the game and launch it again without losing your progress. Levels that are not “Checkpoint levels” can be skipped. (See section “Level Skipping”.)
A collection of levels can be put into a chapter. The amount of levels ranges from 1-7. Each 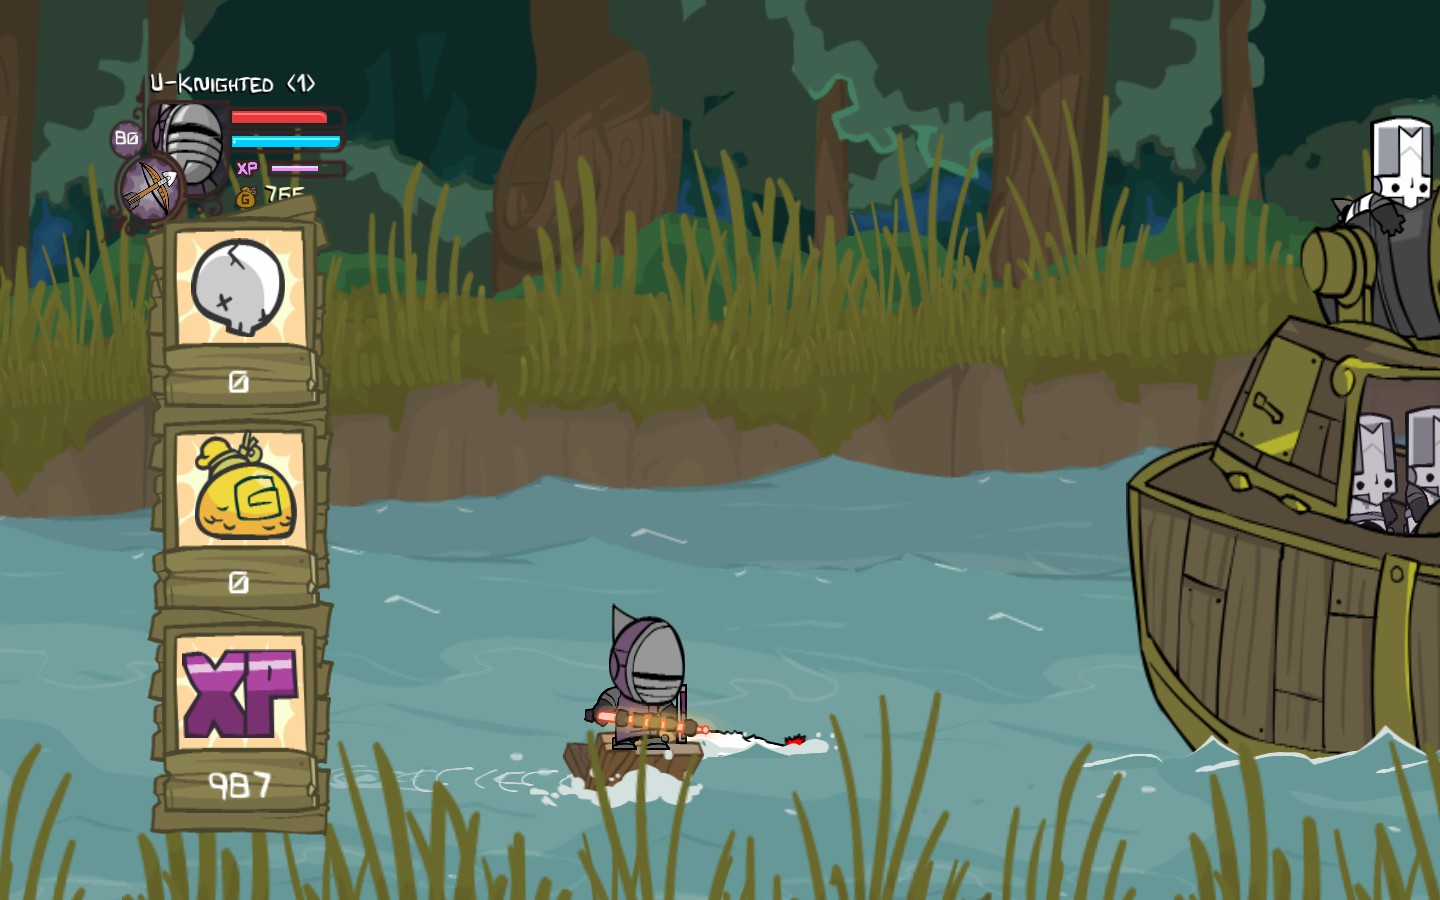
Levels consist of waves of enemies that attack the player with melee, magic, and special items. At certain points of certain levels you’ll be faced with a boss, who has a red health bar that appears at the bottom of the screen. Four special levels have a large boss at the end, with your reward being the kiss of a princess. If there are two or more players, you will need to fight for the princess.
Walkthrough (Part 1)
The game is very easy and straightforward, this part of the guide will merely just give descriptions of the levels/chapters as well as items inside of them.
Chapter 1 – Home Castle, Castle Keep, Barbarian War, and Barbarian Boss
The first few levels of Castle Crashers are fairly easy and consist of Barbarians and Thieves. There are two bosses, a mini-boss and a normal boss.
Animal Orbs
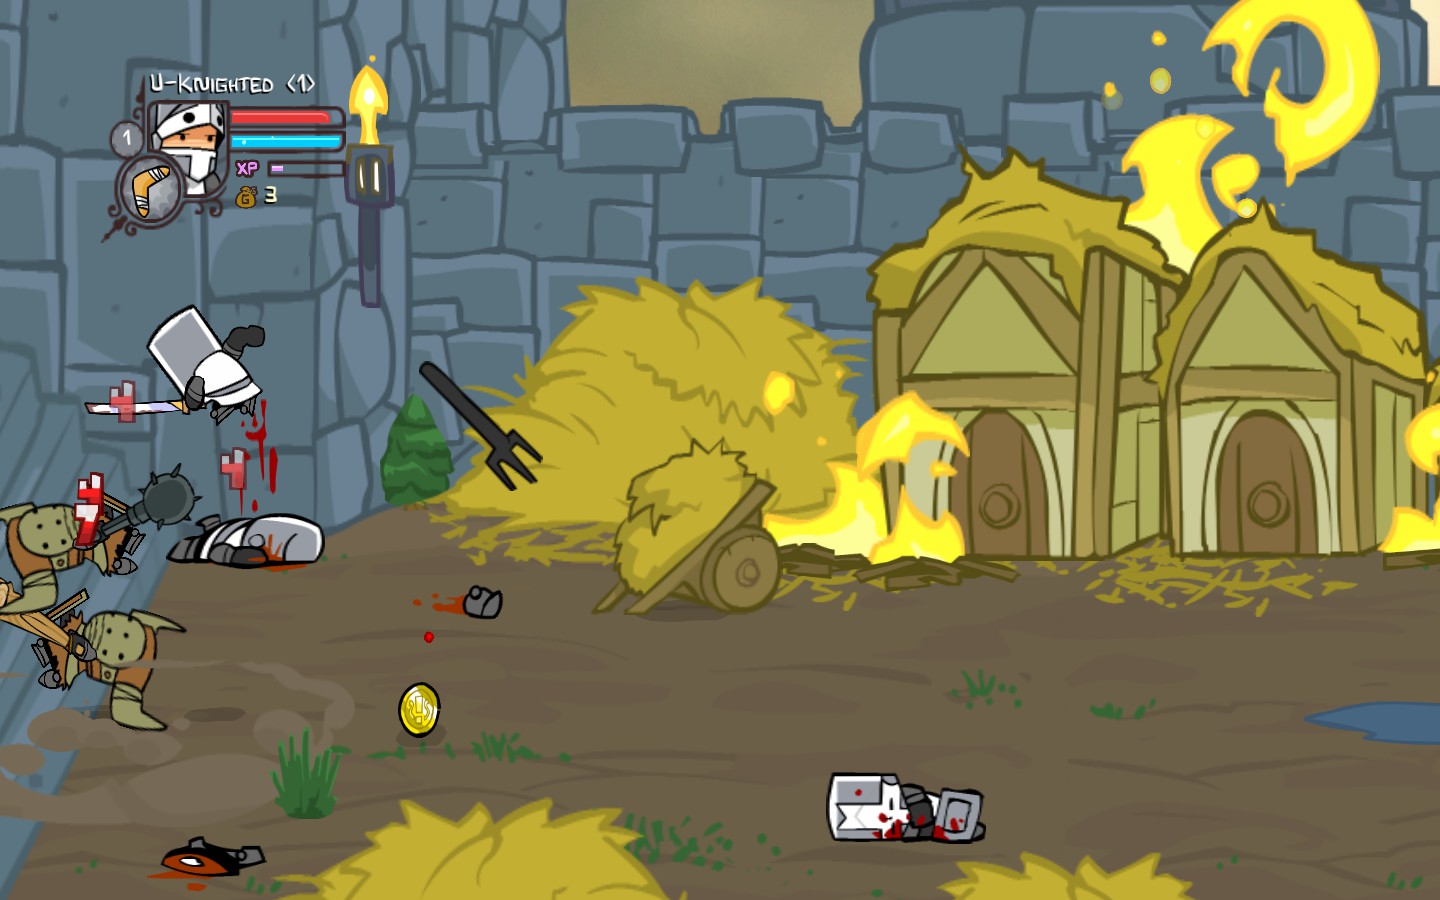
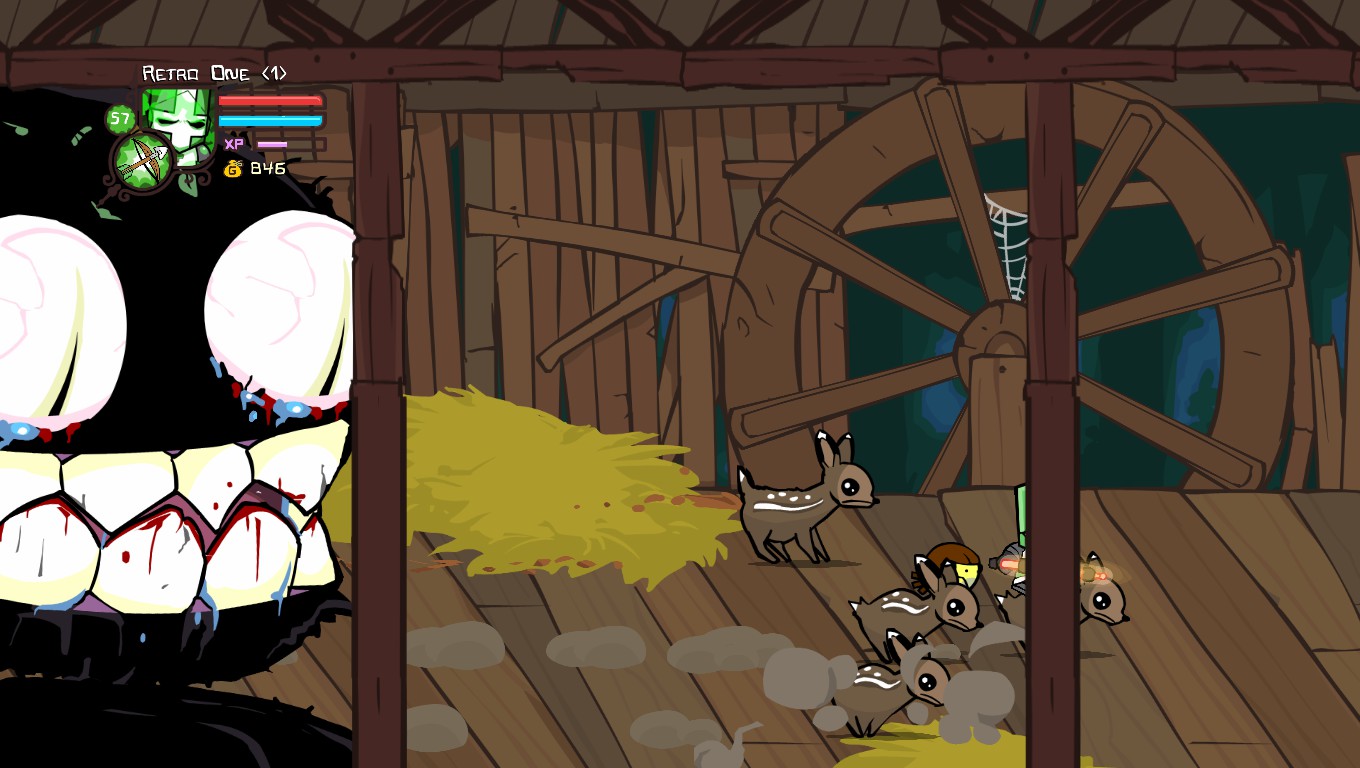
If you have a shovel, you can dig up Mr. Buddy at the back of the barracks (the first room you start in).
Weapons
- There should be a pitchfork in a haystack in the background, after the first wave of barbarians. Go walk over there to collect it.
- If you happen to have the shovel, there is a digspot near the middle of the level where you can dig up the Carrot.
Castle Keep – A quick level where you fight a wave of barbarians, which reveals a small shop. It is considered a shop level to some.
Enemies
Barbarians, of course.
Enemies
This level has many barbarians and two thieves.
Items
The thieves are almost guaranteed to drop a Bow. If not, you will get one in the levels to come.
Weapons
The Thief Sword and Barbarian Axe randomly drop from their respective owners in this level.
Mini-Bosses
War Machine (also known as the Battering Ram) – This is a mini-boss that has 350 health on normal mode and 3500 health on insane mode. It will ram anything that gets in it’s way, and fires out bombs that target players. At random points, it will open up and release a barbarian. If any barbarians that are released from the War Machine are killed, they are almost garunteed to drop fruit. When the boss itself is killed, it drops no items and kills all currently alive enemies.
Tip
If you advance on you can go into the castle, where you will encounter more barbarians. Eventually you will reach the gate. The gate can be attacked with any type of weapon and does not give the player XP. It can be instantly destroyed with the boomerang.
Barbarian Boss – This level is includes the first boss in the game, and is decent for grinding for gold.
Enemies
This level has some barbarians.
Boss
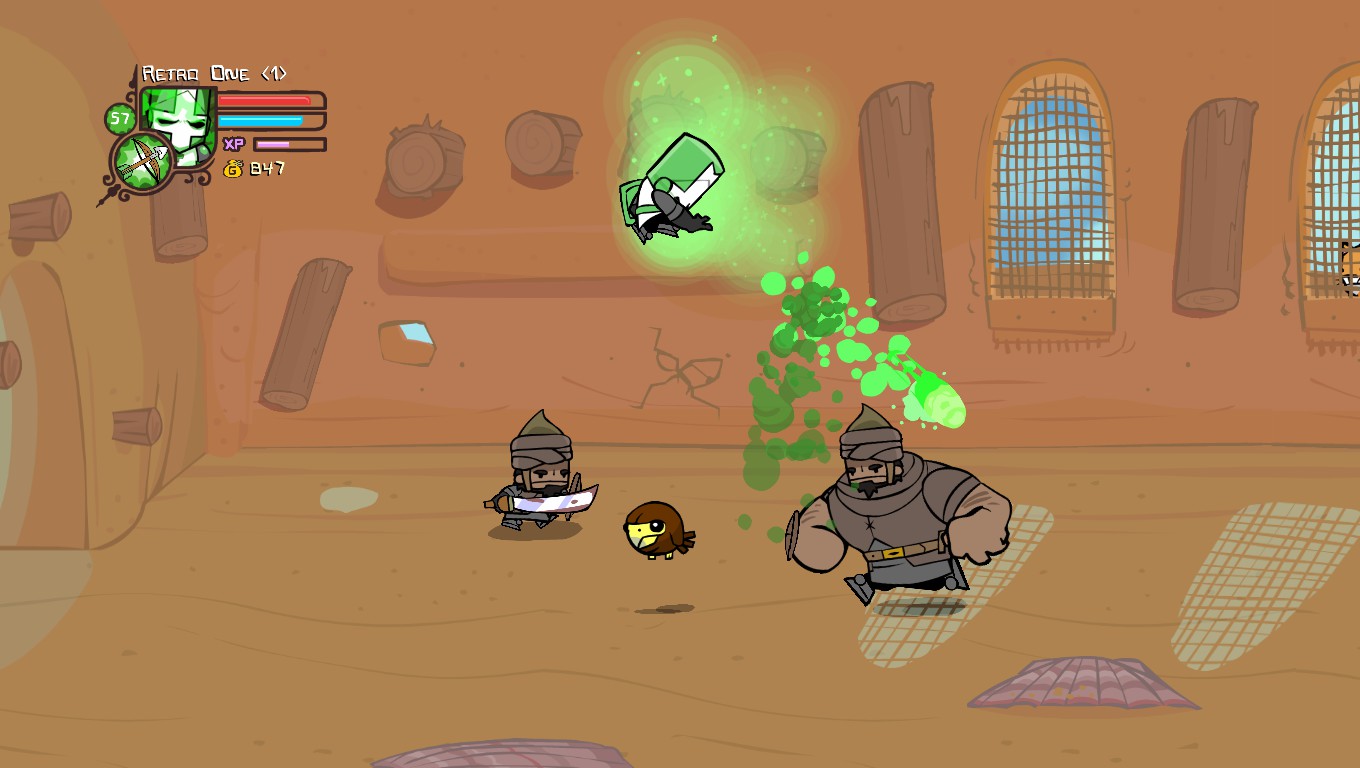
Barbarian Boss – He is fairly easy, and has 350 health on normal and mode and 3500 health on insane. He has a few attacks, including, but not limited to, punch, shield spikes, shield slam, and toxic bleach. When his health is under 75%, barbarians will start to join the fight. They will drop fruit upon kill.
Video Tutorial:
Chapter 2 – Forest Entrance, Thieves’ Forest, Abandoned Mill, Rapids Ride, and Catfish
Chapter 2 is slightly more difficult then the last. It has multiple enemies, including Thieves, Barbarians, Trolls, Bats, and Big Fishes. It has two bosses, the Troll Mother and Catfish. It also has the only chase level in the game, where you run away from the Giant Troll on a deer.
Enemies
You will encounter barbarians and thieves, as well as one beefy thief.
Weapons
There is one sword in this level, the leaf sword, it is found in the digspot at the 3/4 way point. It requires the shovel. Pazzo will help you find the digspot easier.
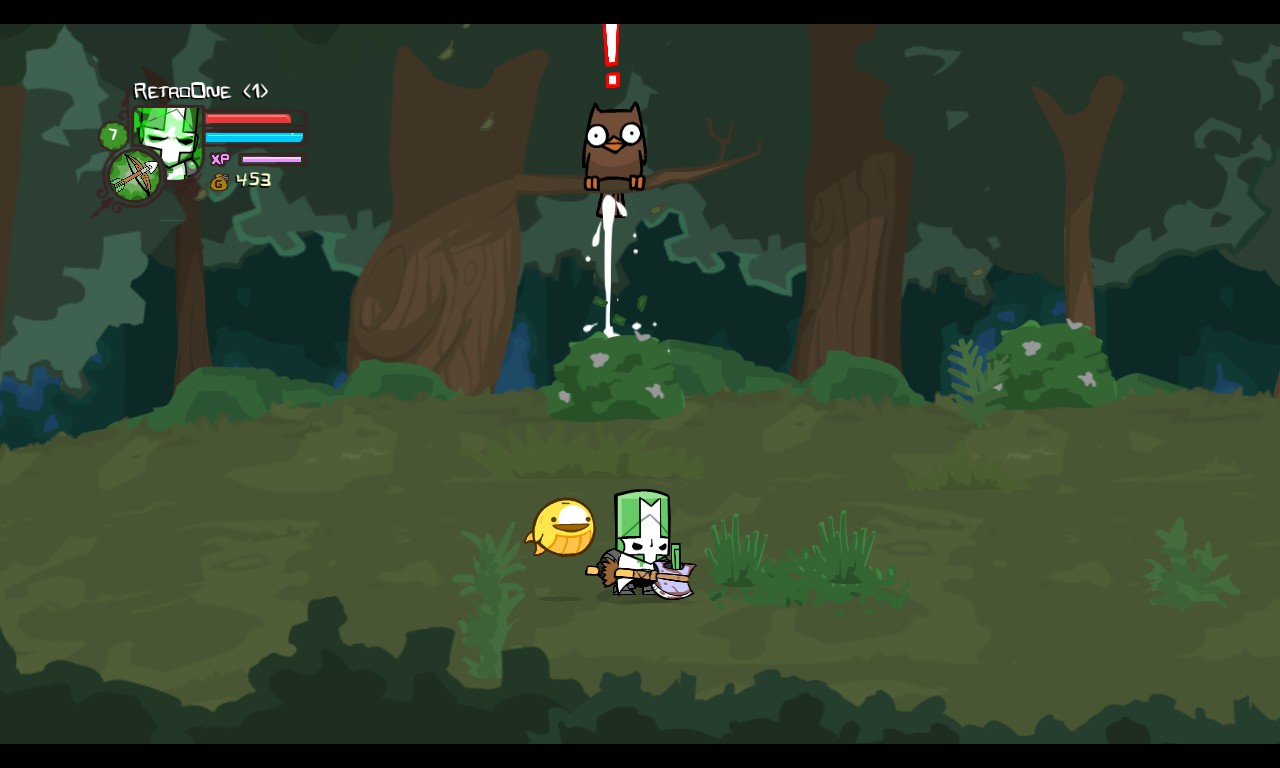
Animal Orbs
There is also one animal orb, Owlet. At the exit, you will see some floating notes. Go behind the exit and you should find him.
Enemies
This level only has Thieves and Trolls.
Weapons
- The Meat Tenderizer, or Hammer, is found in a chest at the beginning of the level.
- After fighting the first group of trolls, you’ll find the Wrapped Sword, it’s behind the broken pillar near the gate.
- The Leafy Twig is found in a chest in the ruins. It is fairly easy to spot.
Items
If you bring the cardinal, he will find you the boomerang at the beginning of the level.
Animal Orbs
- The first animal orb is Seahorse, who can be easily spotted near the river.
- When you get bombs, return to this area and look for a pair of white eyes peaking out of a crack in the ruins. Stand right in front of it, and use your bombs. The bombs will explode the wall, revealing the Troll pet.
- Twigs and Thief Swords are dropped from Trolls and Thieves in this level, respectively.
Bosses
Troll Mother – She has 400 health on normal mode and 4000 health on insane mode. It is the only confirmed Female character in the game, other then Medusa. She does not attack the player, but constantly shoots out normal trolls which will attack the player. This could be used for easy XP grinding.
Rapids Ride – Rapids Ride is one of the two levels in the game where you swim, as appose to walking over shallow water.
Enemies
In this level you defend off against Big Fish and Bats. If a bat catches you, all you have to do is spam X to get rid of it. They have 1 health, but they can be difficult as they have small hitboxes. Big Fish have 60 health on normal mode and 600 health on insane mode. There are no items in the level.
Bosses
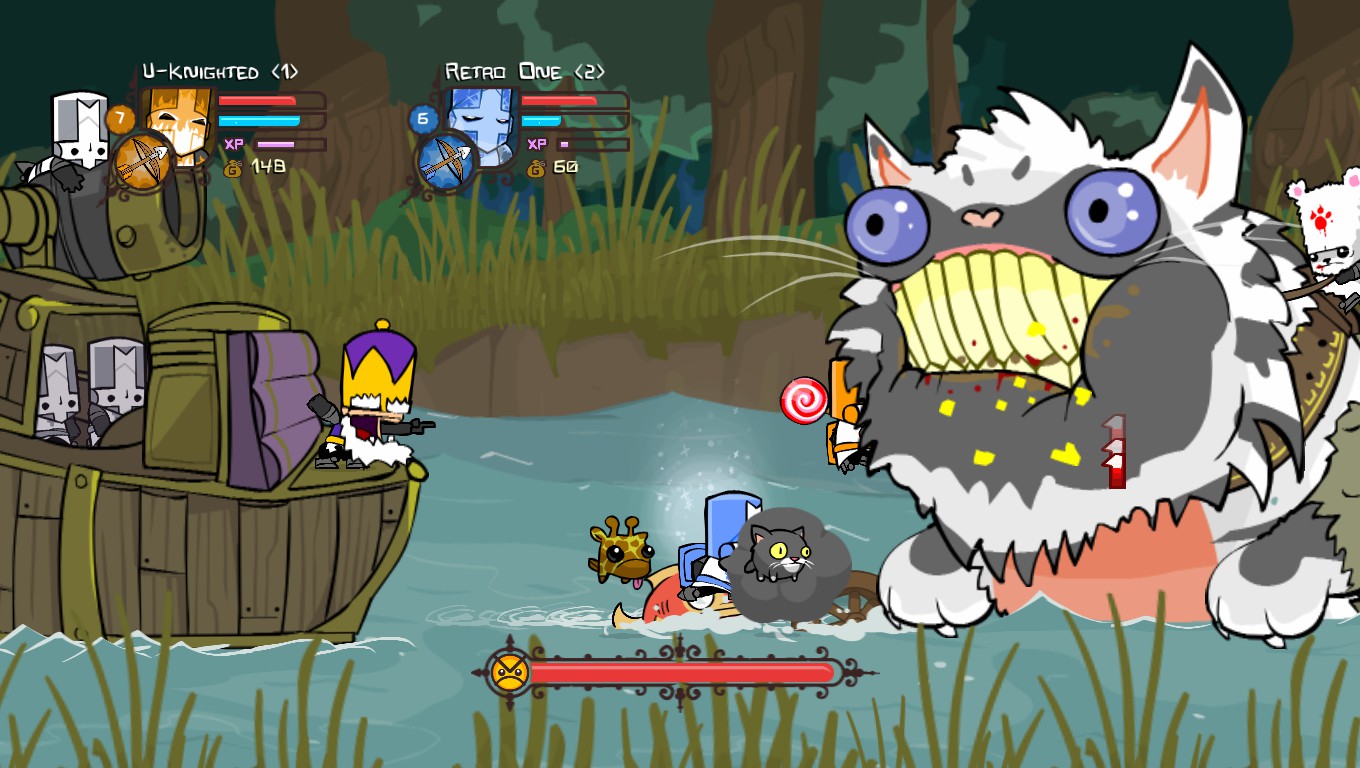
Catfish – He has 600 health on normal mode and 6000 health on insane mode. You damage on him is reduced unless he is hit by a cannon from the King’s ship. There are no special items to collect on this level.
Walkthrough (Part 2)
Steam Guides have Character limits for each section, so we need to divide this into parts.
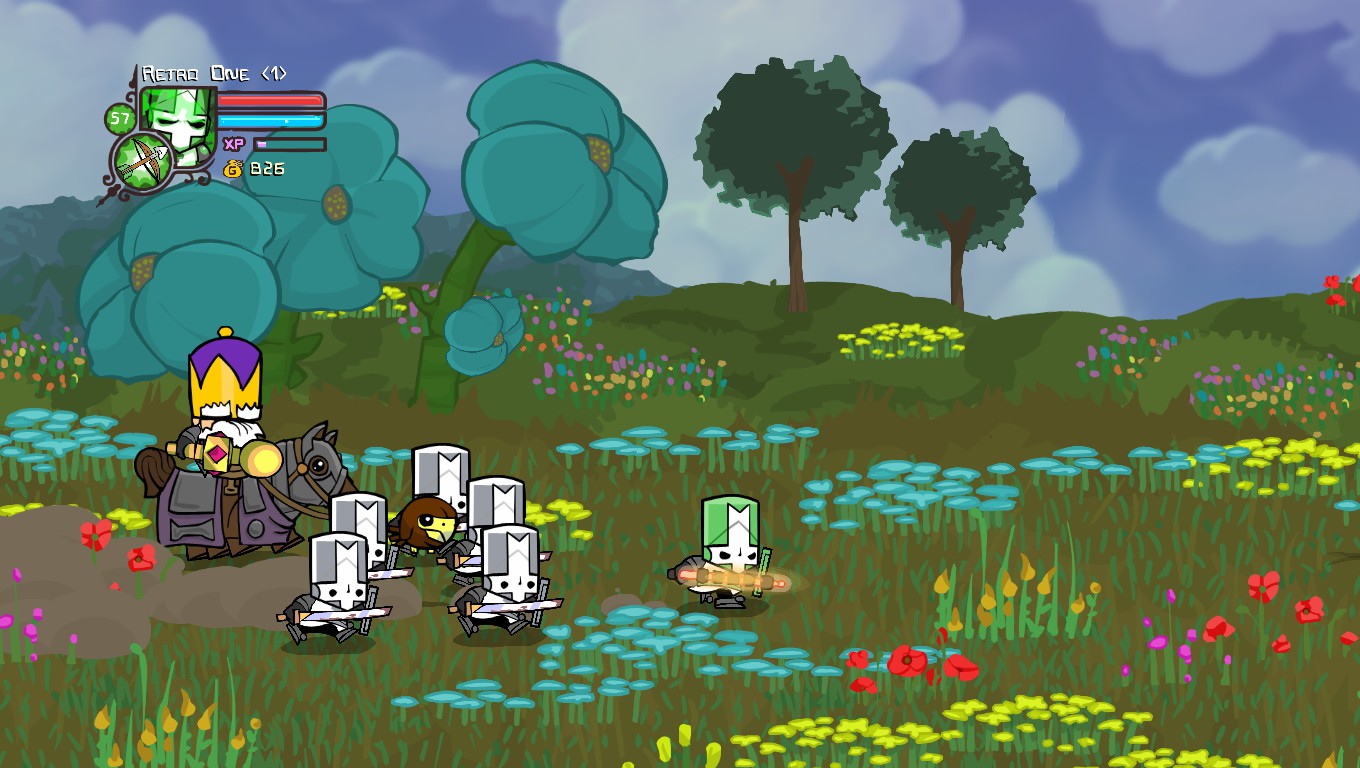
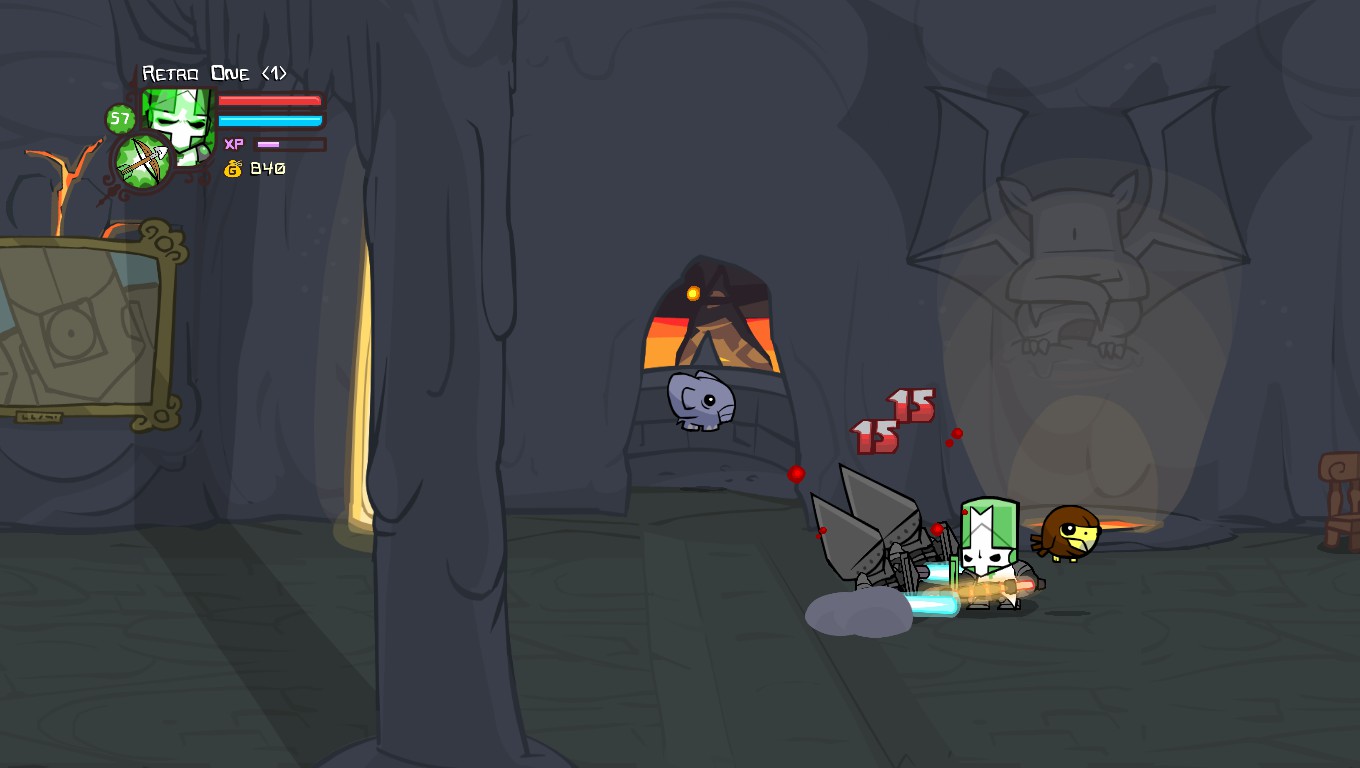
Chapter 3 – Tall Grass Field and Pipistrello’s Cave
Chapter 3 consists of four unique enemies, one mini-boss, and one normal boss. It has five weapons and four animal orbs.
Enemies
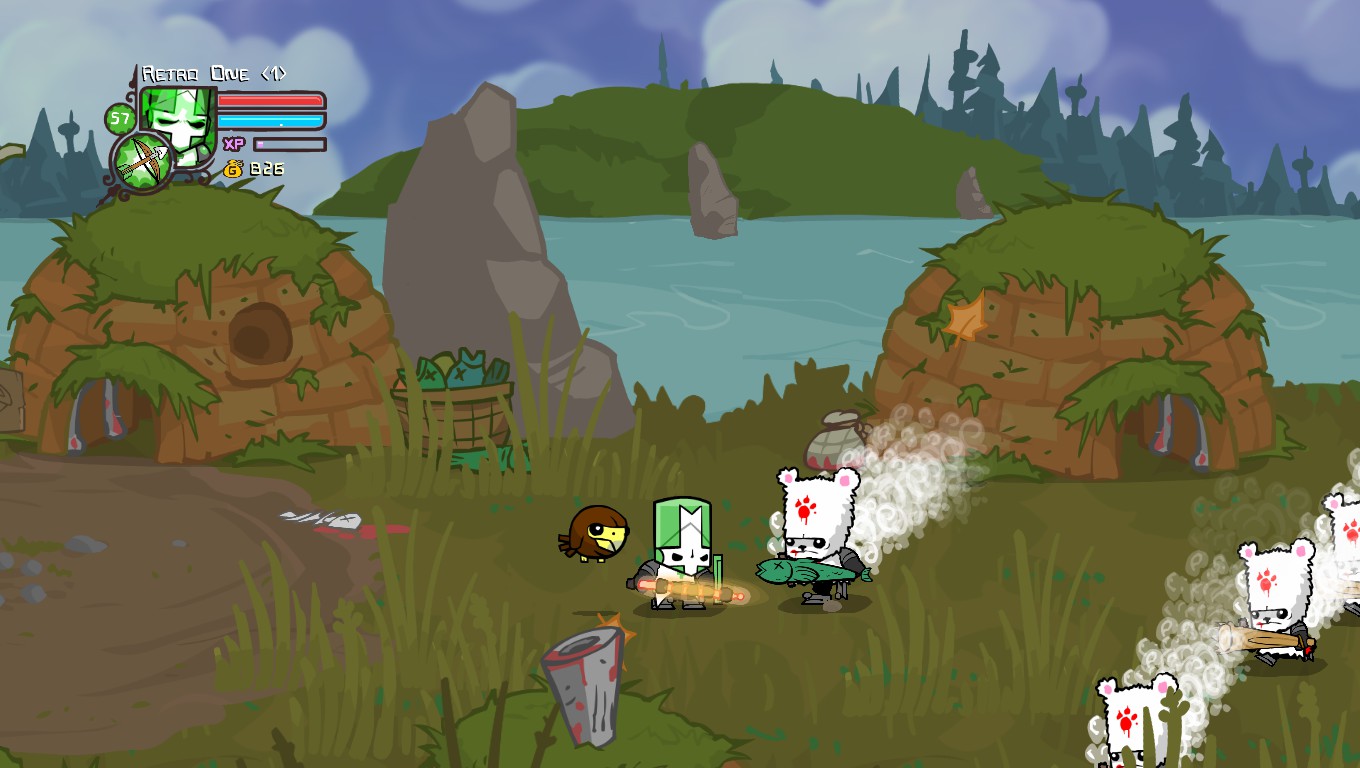
This level has many enemies, including Thieves, Bears, and Bats.
Weapons
- The Lobster Weapon is found in the digspot on the shore.
- The next weapon is the Wrench, which is found behind the catapult that a Grey Knight appears to be repairing.
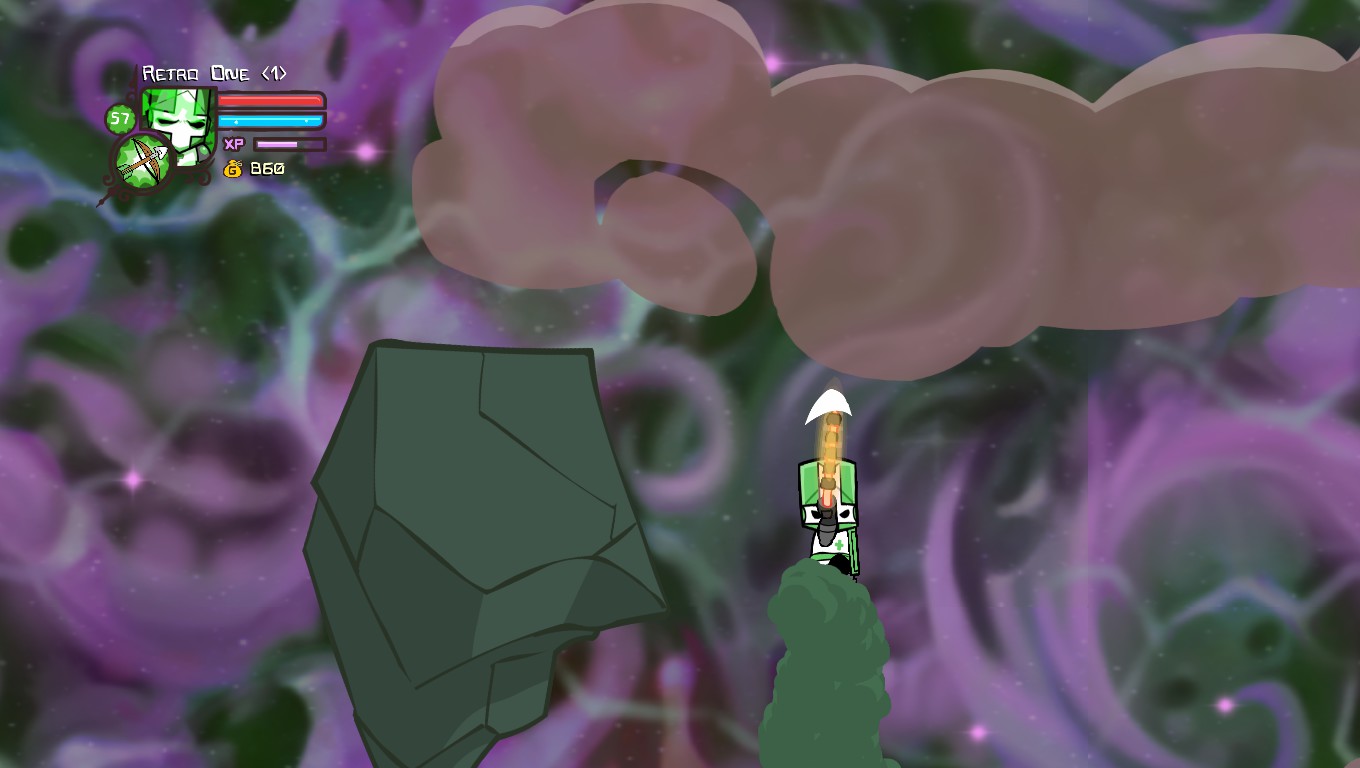
- Near the middle of the level you will find a giant boulder in front of a cave entrance. If you have any sandwiches, use them to lift up the boulder and enter the cave. In there, you will find the Fish Weapon.
- The next weapon is the Umbrella, which is found in a digspot near the bear boss.
- Clubs are dropped from bears in this level.
Animal Orbs
Once you defeat the Bear Boss, (see below) he will let you grab his pet, also known as Rammy.
You can find Burly Bear in the secret cave along with the Fish weapon (see above for a tutorial on how to get to the cave).
Hawkster is also found in this level, and can be obtained by blowing the horn item at the hut with the horn sign. The horn cannot be obtained until later in the game, though.
Mini-Bosses
There is one mini-boss in this level, who has just been dubbed as the “Bear Boss”. It is simply a normal Bear but with a Flag on its back, and a packed HP bar. He has 350 health on normal mode and 3500 health on insane mode. He also can use his tornado attack, which has an electricty effect. He is the only boss to have an animal orb, Rammy, which will attack you for as long as the boss is alive. Once the boss is killed, you can equip Rammy.
Enemies
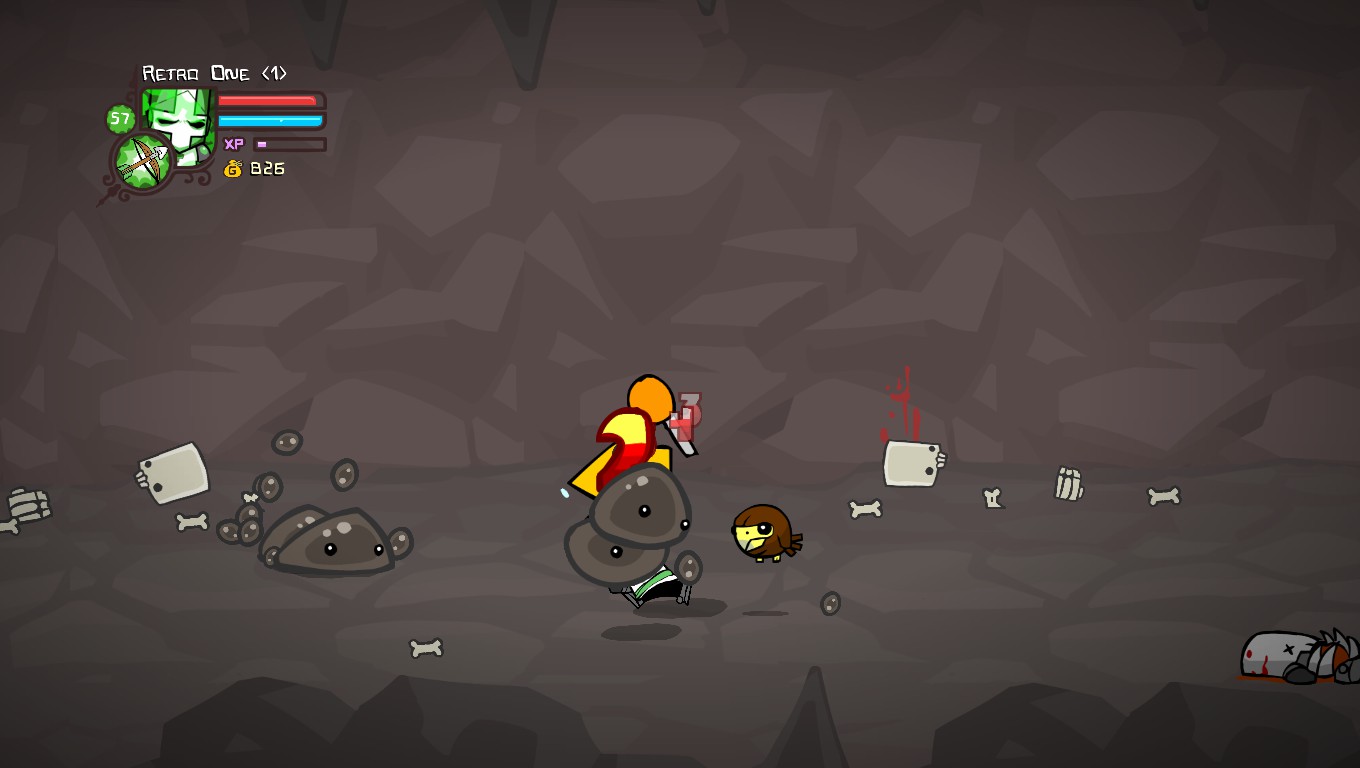
This level only has two enemies, slimes and bats.
Animal Orbs
Batty is an animal orb that is obtained by defeating Pipistrello.
Bosses
Pipistrello – He has 600 health on normal mode and 6000 health on insane mode. He has various attacks, but is generally a quite easy boss. But, his lick can be devasting on insane.
Chapter 4 – Flowery Field, Wedding Crash, Parade, Cyclops’ Cave, Cyclops’ Gate, and Cyclops’ Fortress.
Chapter 4 is one of the more difficult ones. It has 3 bosses, 6 unique enemies, and many different weapons.
Enemies
It consists of Bees, Killer Beekeepers and Coneheads. It also has one Beefy Conehead.
Weapons
- You can find the Refined Mace in the digspot after the first wave of bees.
- The Rat Beating Bat is rarely dropped from Killer Beekeepers.
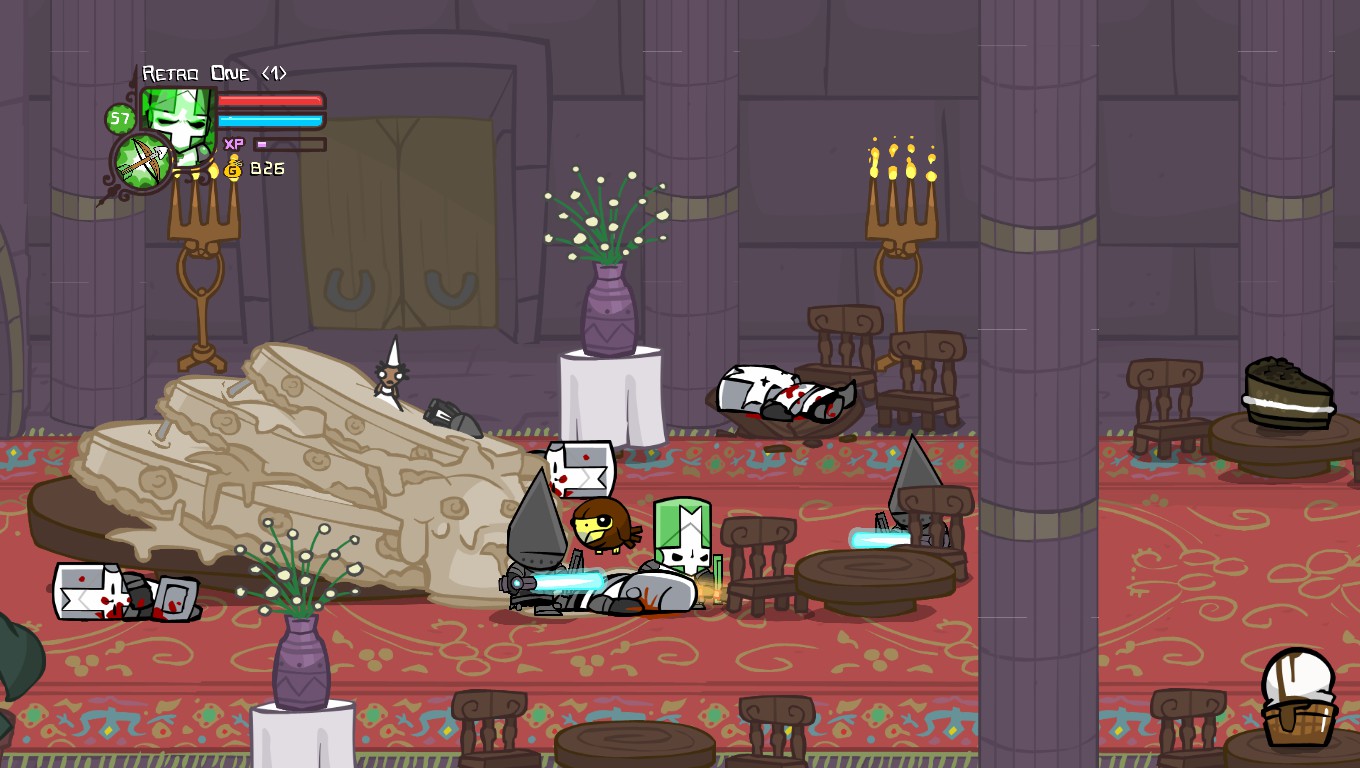
Enemies
There are only Coneheads on this level.
Weapons
- The Apple Peeler can be found in the digspot in the carpet.
- The Light Sabre is randomly dropped from Coneheads on this level.
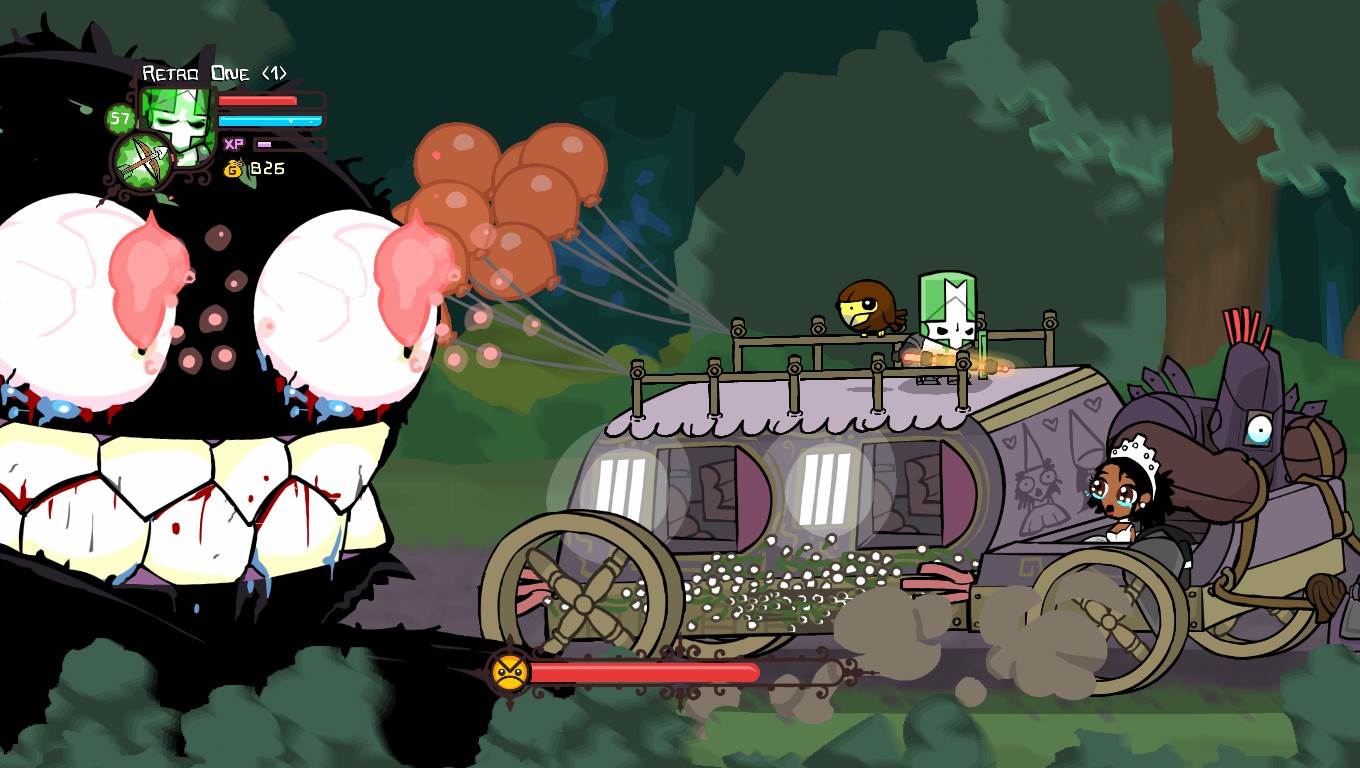
Bosses
The Conehead Groom – He has 400 health on normal mode and 4000 health on insane mode. He plays his organ which shoots out bombs that normally go in special patterns, and will sometimes exit his organ to attack the player. He is a decently difficult boss.
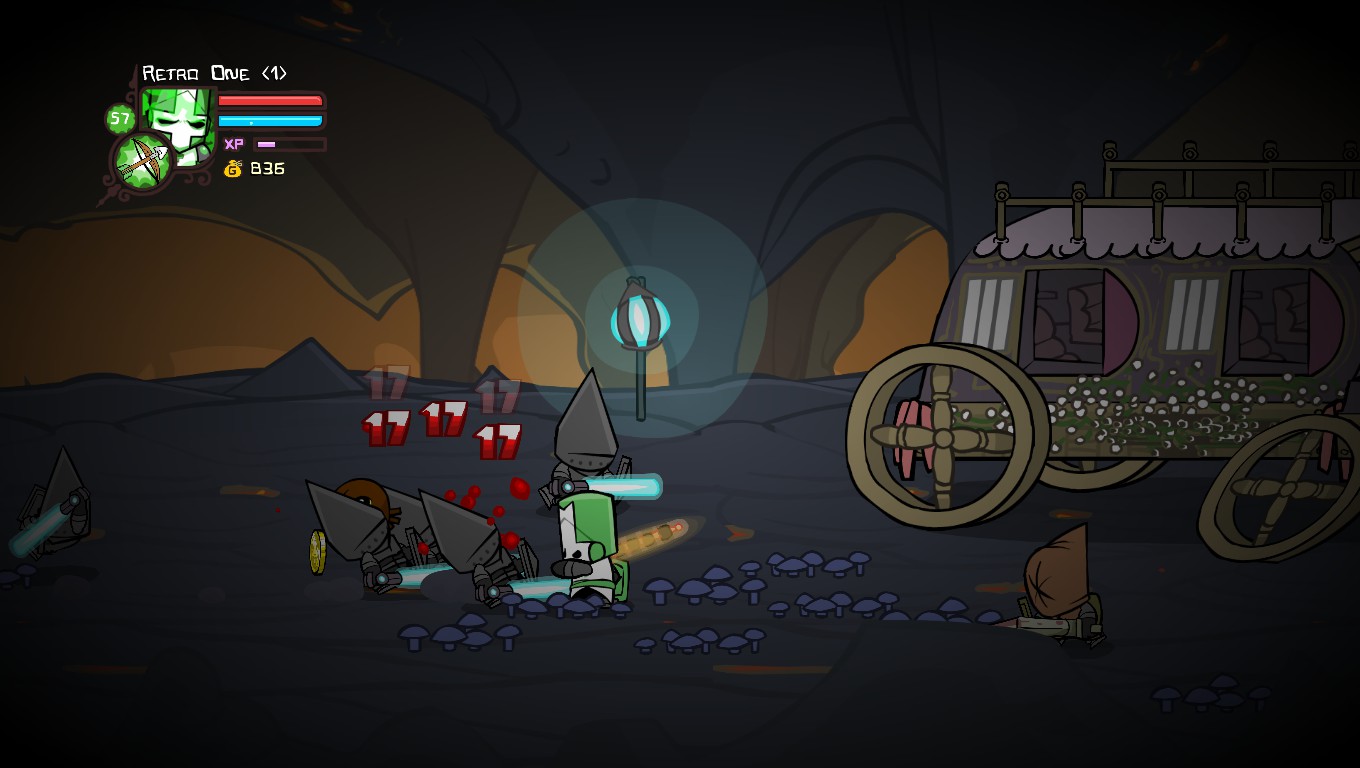
Enemies
You will only encounter Coneheads and Thieves in this level.
Animal Orbs
Once the Giant Troll is defeated, you smash into the top of the cave. If you enter the cave then go back into the level, Meowburt will be waiting for you.
Bosses
Giant Troll – Before he was just something you would run from, now has attacks and a health bar. He has 500 health on normal mode and 5000 health on insane mode. He only has one attack, where he shoots lasers out of his eyes, and it can be easily blocked with your shield.
Enemies
In this level you will only find three groups of enemies, Coneheads, Slimes, and Thieves.
Tip
There are no items in this level, but there is a great amount of fruit and gold.
Cyclops’ Gate – It has no enemies or items, just a gate that you need to destroy. The gate does not give XP and can be instantly broken with a boomerang.
Enemies
This level consists of Coneheads and one Fire Demon.
Weapons
The only weapon you can get in this level is the Light Sabre, as it is almost guaranteed to drop from the Elite Conehead.
Animal Orbs
There is only one animal orb, Snoot. He is found after Wave 2 after the Cyclops and Groom photo inside a crack in the wall. The crack can be completely destroyed using bombs.
Mini-Bosses
The Elite Conehead – This boss is a large conehead with high damage and defense, as well as a unique flag. His health and other stats are currently unknown. He also lacks a health bar, leading some players to not consider him a mini-boss.
Bosses
The Cyclops – This is a strong boss with 800 health on normal mode and 8000 health on insane mode. He has a high movement speed and even throws knives, creating a tough challenge for the player. When he is killed a boss chest drops out of the sky and you can then kiss or fight for the princess.
Chapter 5 – Lava World
Chapter 5 only has one level. It has two unique enemies, one mini-boss, and one boss.
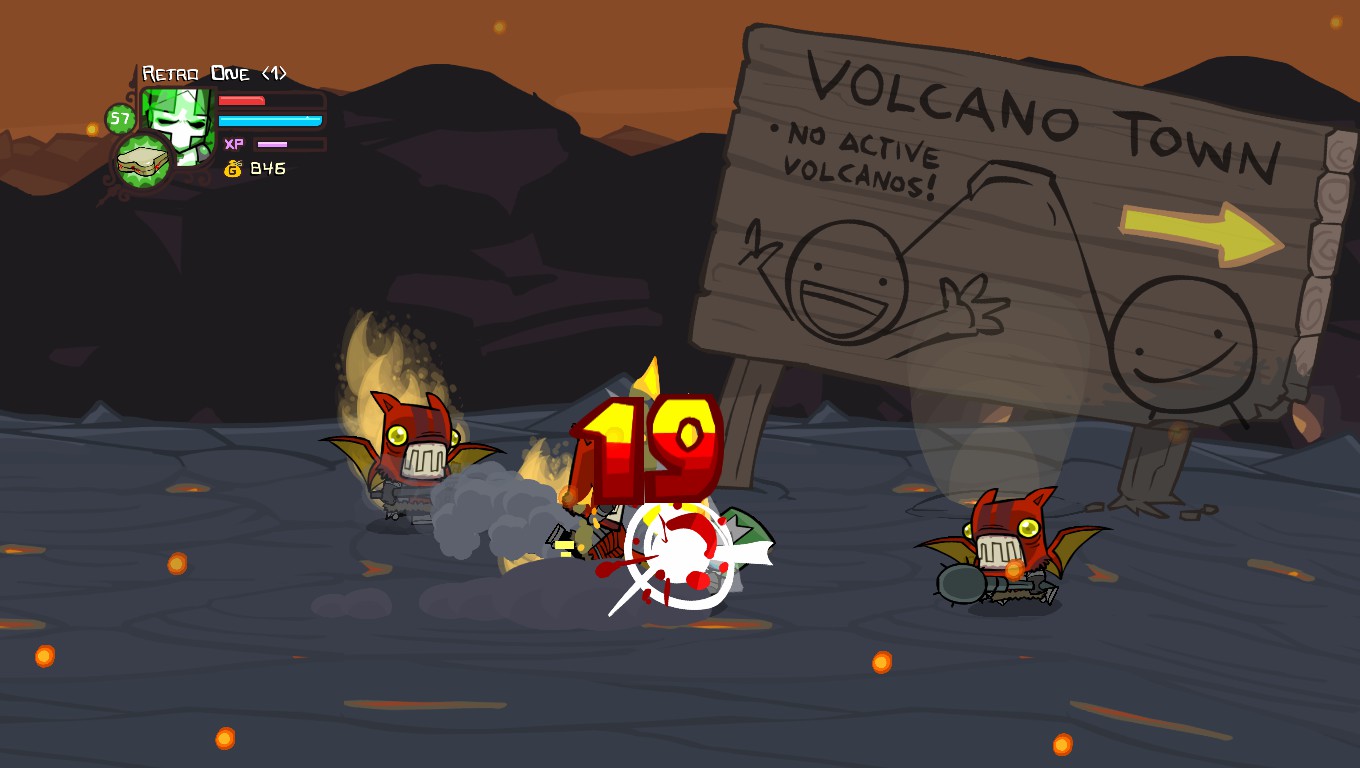
Enemies
This level only consists of Fire Demons and Skeletons.
Weapons
The only weapon found in this level is the Round Mace, which is dropped from Fire Demons at random.
Items
The Wheel is obtained after defeating the Dragon and Sock Puppet boss.
Mini-Bosses
Volcano – This boss is immune to normal hits. You need to kill the fire demons wandering around him to get sandwiches which you need to use in order to actually damage him. Unlike normal enemies, his health is measured in hits, and is the same in insane in normal mode. He takes 75 hits to die.
Bosses
Dragon and Sock Puppet – They have 1000 health on normal mode and 10000 health on insane. They shoot fire and throw boulders on the player, making them an extremely difficult boss. Once they are killed you can get the Wheel relic.
Walkthrough (Part 3)
Chapter 6 – Industrial Castle
Chapter 6 only has one level, much like chapter 5. It has three unique enemies, and many items inside. It also has one boss.
Enemies
The only enemies in this level are Industrialists, Fencers, and one beefy Brute.
Weapons
- Once you first enter the level, you will see a door. You need to use a sandwich to break it down, but don’t do it yet! There’s a bush next to the castle, and behind that you’ll find the Utility Blade.
- When you do enter the castle, near the beginning of the level, you’ll see a digspot. Dig that up with the shovel to get the Zigzag weapon.
- If you bring the cardinal along (he is actually found in this level.) and you bring him to the end of the level, he will find you the pointy sword near the end of the level.
- The Ugly Mace and Fencer Foil drop from Industrialists and Fencers at random.
Animal Orbs
The cardinal is found following a beefy brute, and if you kill that brute you will be able to use the cardinal. He is the only animal orb in this level.
Items
You can get the Telescope relic by defeating the Industrial Machine.
Bosses
Industrial Machine – It is operated by the Industrial Prince, and has 1900 health on normal mode and 19000 on insane mode. Multiple turrets and other things will attack the player. Attack those to take damage to machine. After it is defeated, you can grab the Telescope, one of the final relics.
NOTE: Before advancing, you need to collect the compass at the blacksmith.
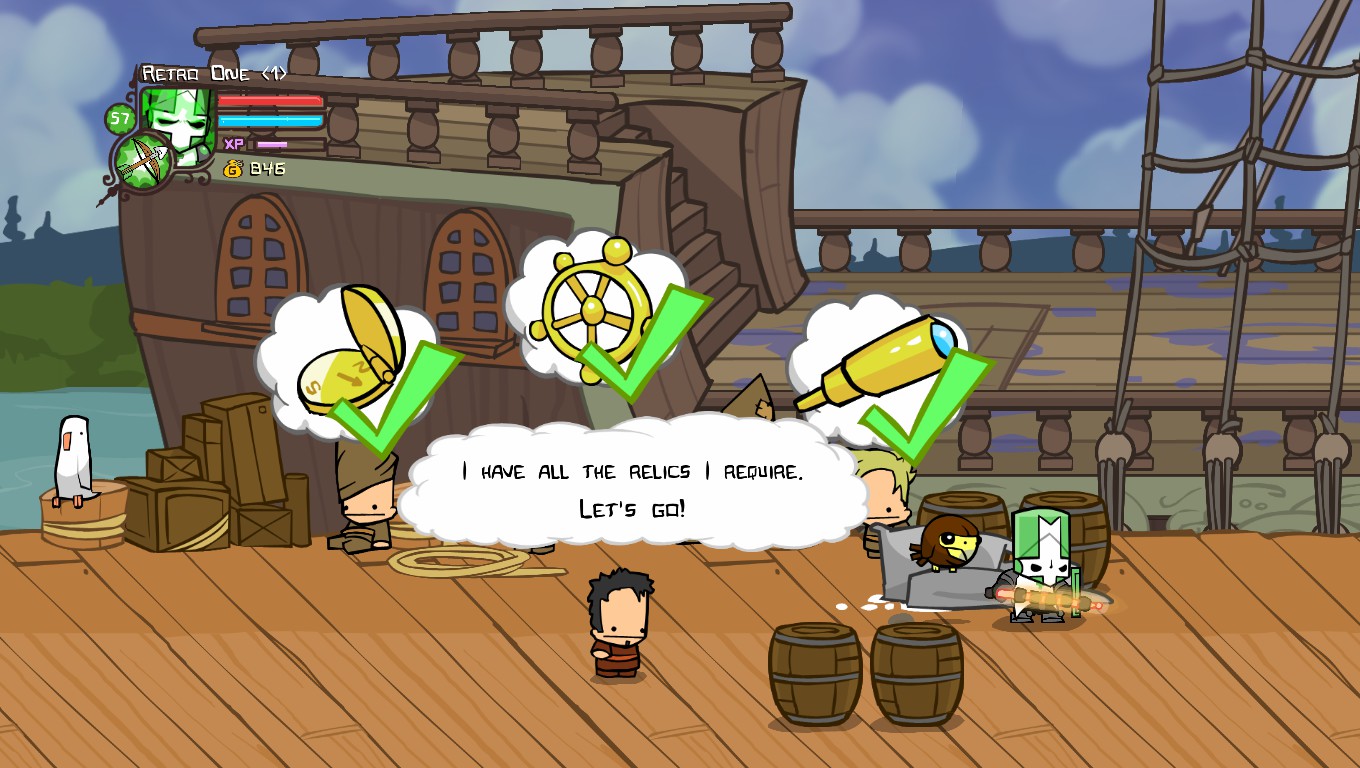
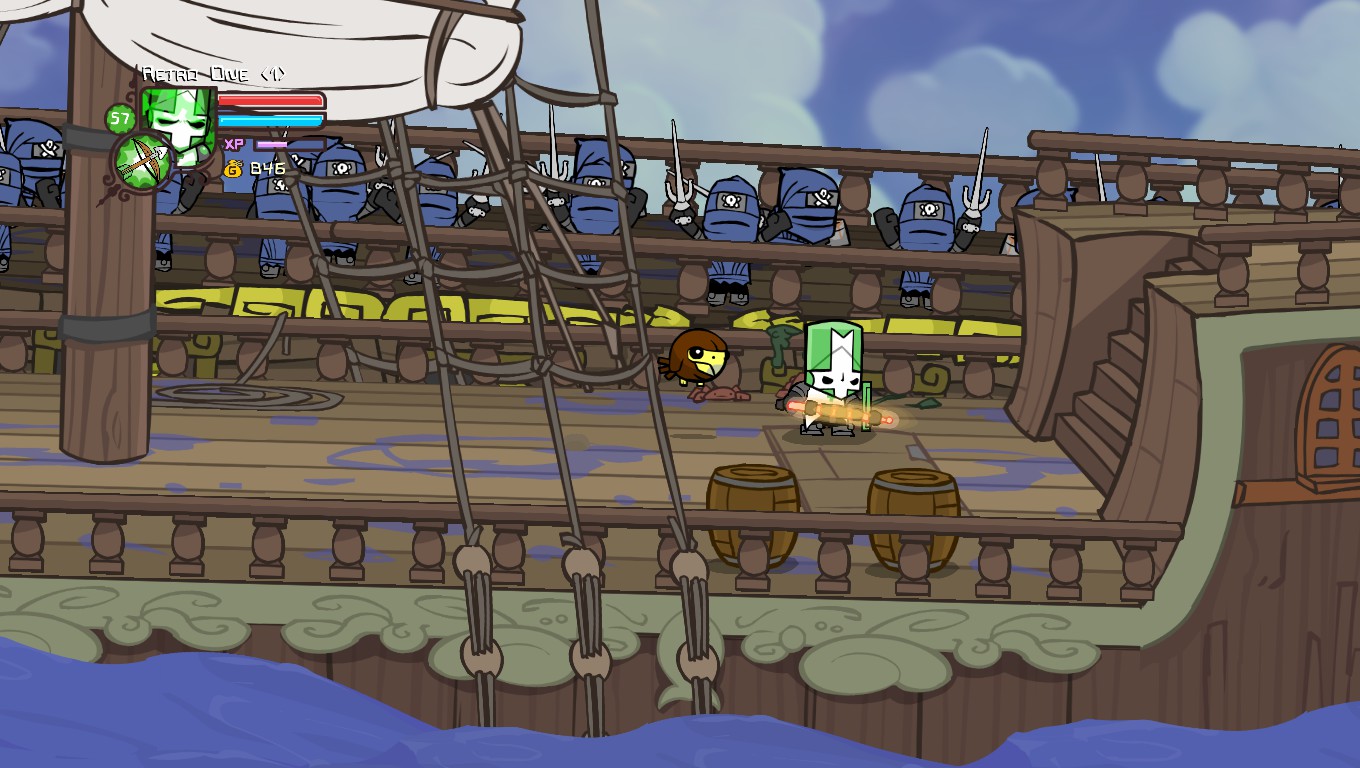
Chapter 7 – Dock, Pirate Ship, Desert, Alien Ship, Desert Chase, Sand Castle Interior, and Sand Castle Roof
Chapter 7 is the longest chapter in the game. It has many unique enemies, two mini-bosses, a timed level, and a mini-game.
Dock – To pass this level, simply ensure that you have all three relics (Compass, Telescope, and Wheel.) and walk towards to Sailor and then you’ll set sail.
Enemies
This is the only level that you encounter Ninjas.
Weapon
The only weapon obtainable in this level is the Sai, which is randomly dropped by Ninjas.
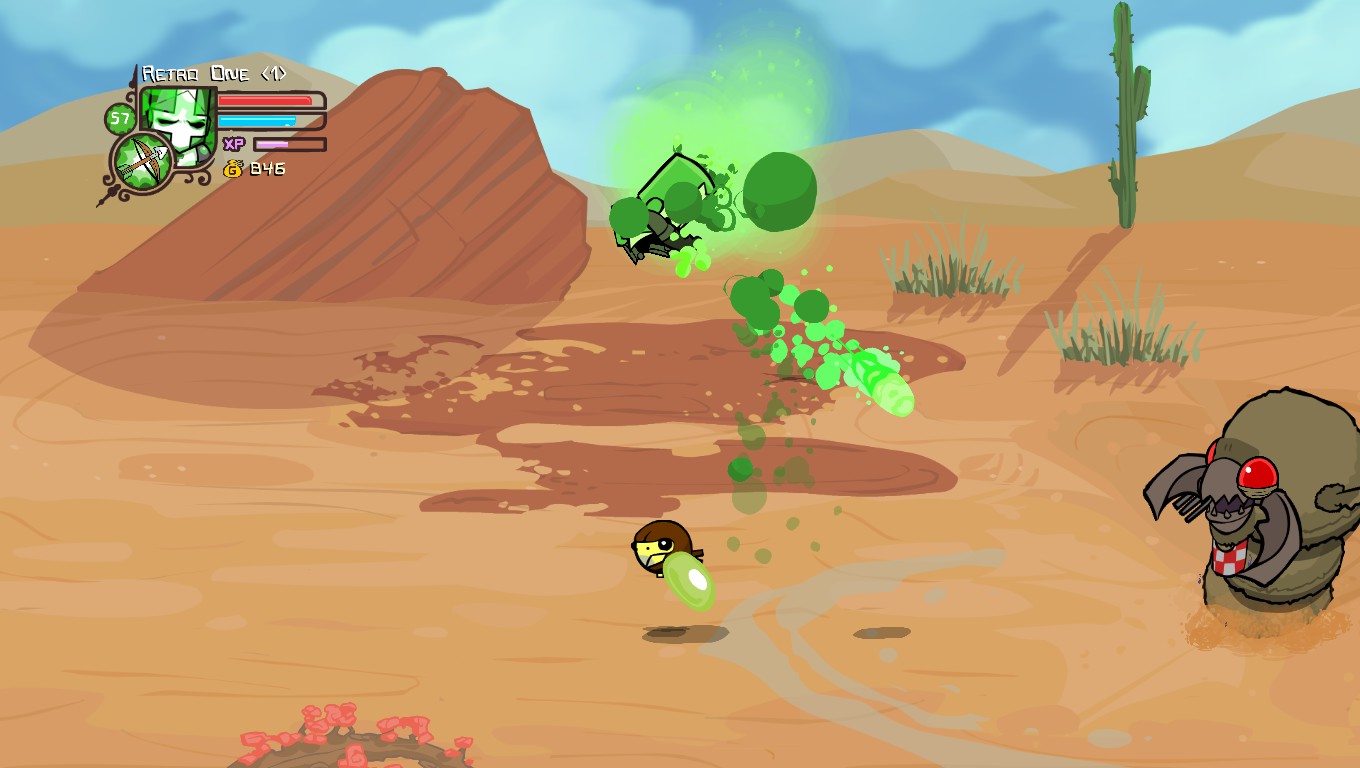
Enemies
This level is inhabited by Scorpions, Antlions, Scarabs, Royal Guards, and Aliens.
Weapons
The only weapon found in this level is the saracen sword. It is found in a digspot near the first Antlion.
Animal Orbs
The only animal orb found in the level is Girrafey. He is found in the digspot before the alien ships.
Items
At the very beginning, a shovel will be found in the sand. Pick it up, it is very useful. Using it, you can dig up items at digspots. (These digspots look like Xs.)
Mini-bosses
Eventually you will encounter an alien ship. It has 400 health on normal mode and 4000 health on insane mode. It will randomly drop out aliens and sometimes pick up stones to smash the player. There are two of them, so if you defeat the first one, another one appears. After the second one is defeated, the player will be abducted.
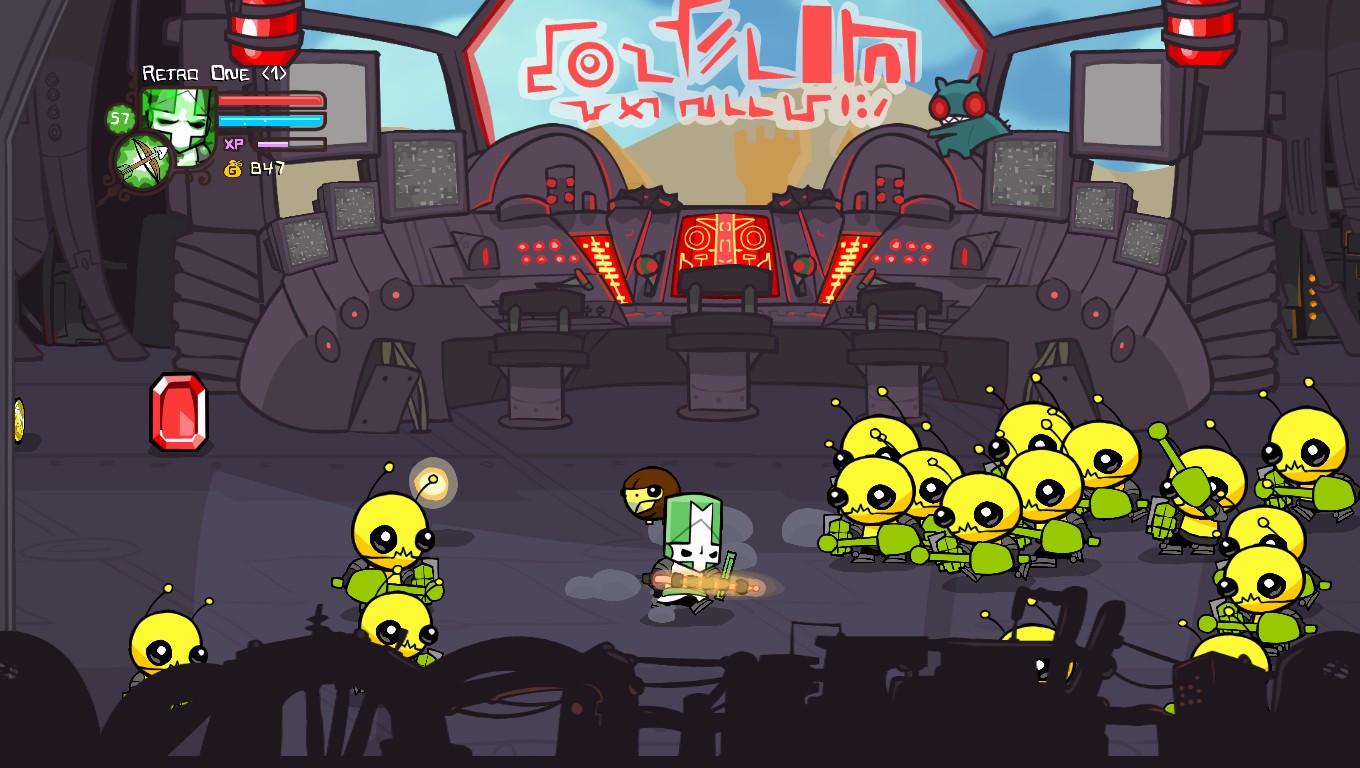
Enemies
Aliens are the only enemies found in this level.
Animal Orbs
The only orb found is the Install Ball. To find it, wait for the the Alien Prisoner to activate self destruct, then destroy the first set of lasers. After that, walk to the top of the screen to find the hidden area. Start walking to the right and you will find the Install Ball.
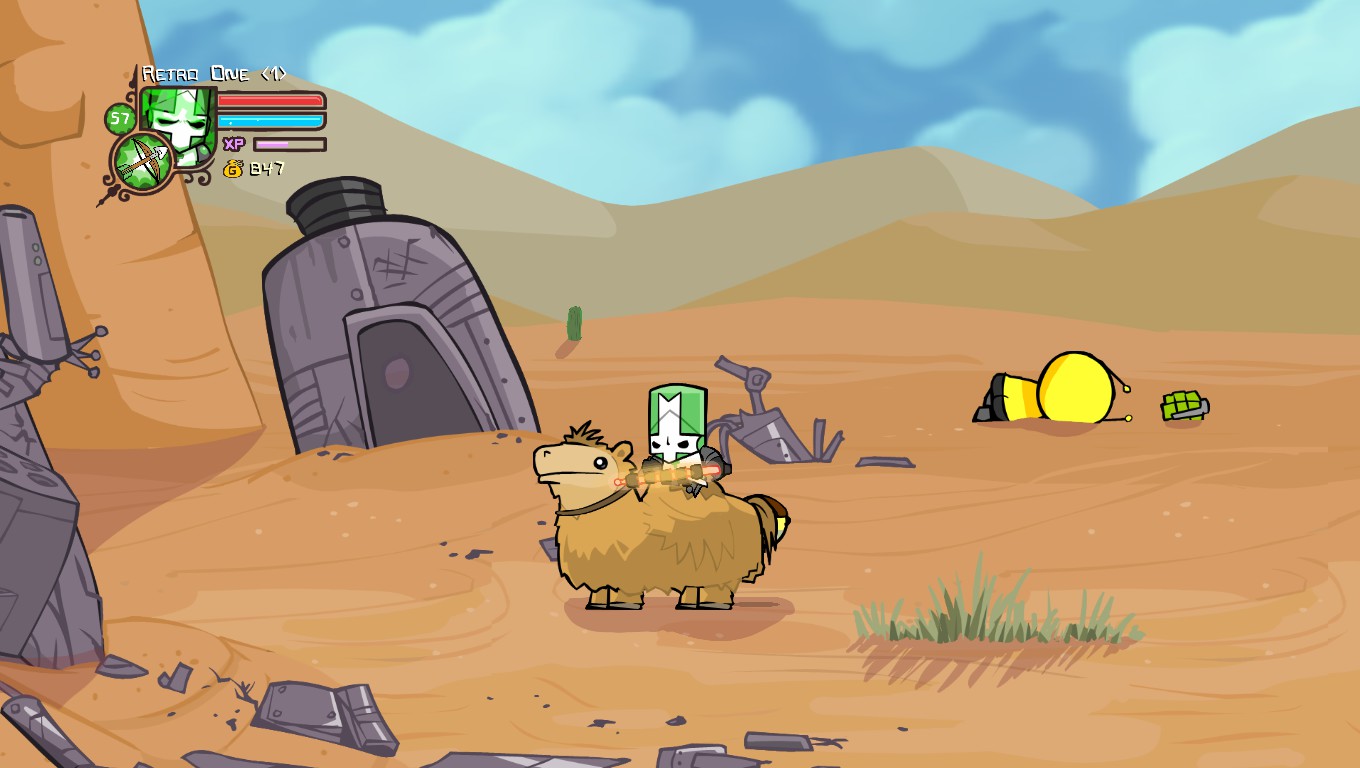
Enemies
In this level, you will find Scorpions, Saracens, and Royal Guards.
Weapons
Once you defeat the running away Saracen, backtrack until you find two “Xs”. Dig that up with your shovel to get the Sausage/Pumpkin Peeler weapon.
Animal Orbs
If you defeat the Saracen on the camel, you can take his animal orb, also known as Zebra.
Enemies
This level has Royal Guards, Saracens, both of the normal and beefy variety.
Animal Orbs
If you go to the crack in the wall and throw two bombs, it will open up an entrance, letting you get Scratchpaw, a tiger animal orb.
Enemies
This level only consists of Saracens.
Weapons
The only sword found in it is the Crescent Sword, found in a digspot after the third wave of enemies.
Items
The Map is obtained once you beat the volleyball minigame (see below).
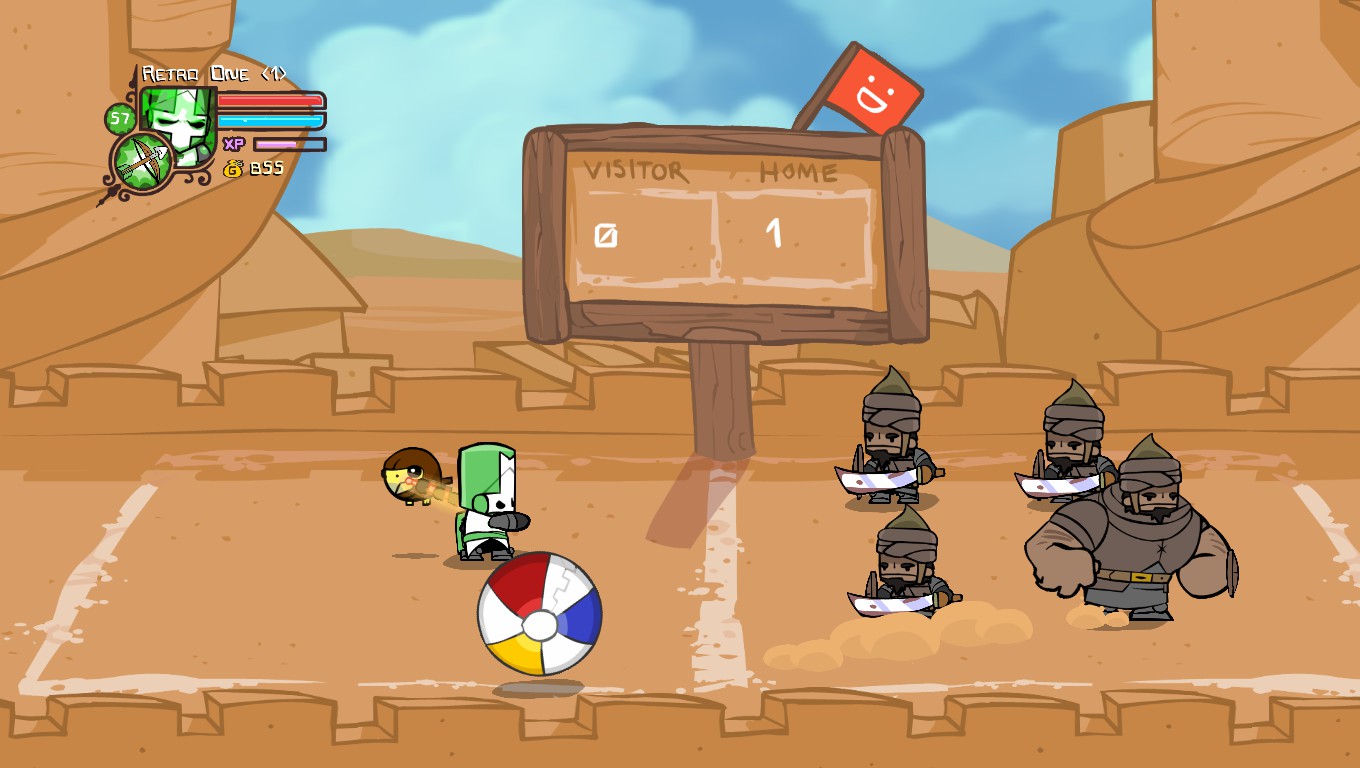
Minigame
At the end there is a small volleyball minigame, where you and some enemies play to 10. The reward is a map, which reveals more levels to the player.
Chapter 8 – Marsh and Corn Boss
Chapter 8 is a decently short chapter. It has three unique enemies, one mini-boss and one boss. It only has two levels.
Enemies
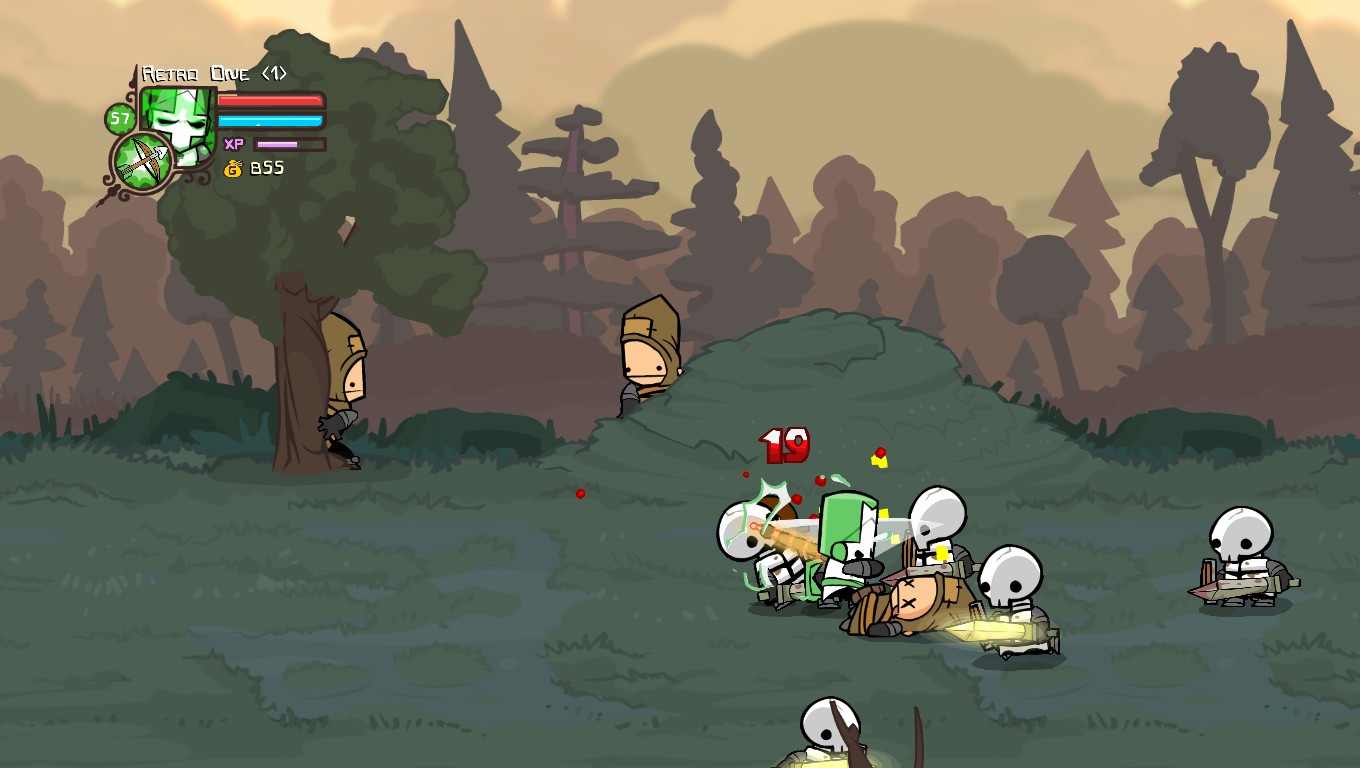
In it you’ll find Snakies, Skeletons, and Trolls.
Weapons
- The panic mallet can found in the graveyard, if you break the gravestone that is slightly hidden behind a hill.
- If you bring Cardinal along, he’ll give you the fishing rod, somewhere near the place Necromancer summons all the skeletons.
- After Wave 1 of the Snakies, you’ll see a large Fortress-like structure. In front of it there should be a digspot. Dig it up to get the Candlestick.
- Near that same place, there is a set of houses. Go behind them, and near the center, there should be a digspot. (You can’t see it, so you need to guess.) Inside that there’s the Gold Sword.
Animal Orbs
- You can find Froglet under the digspot at the third door at the beginning of the level.
- The second animal orb, Snailburt, is found in plain sight near the end of the level.
Mini-boss
Troll Mother – This mini-boss isn’t considered a mini-boss by some, as it lacks a health bar. The Troll Mother returns, health bar-less. It is unknown if the Troll Mother has the same health as she did before or if it’s amplified. Her behaivor is the same as before.
Items
When you defeat the corn boss, you will be given the horn.
Bosses
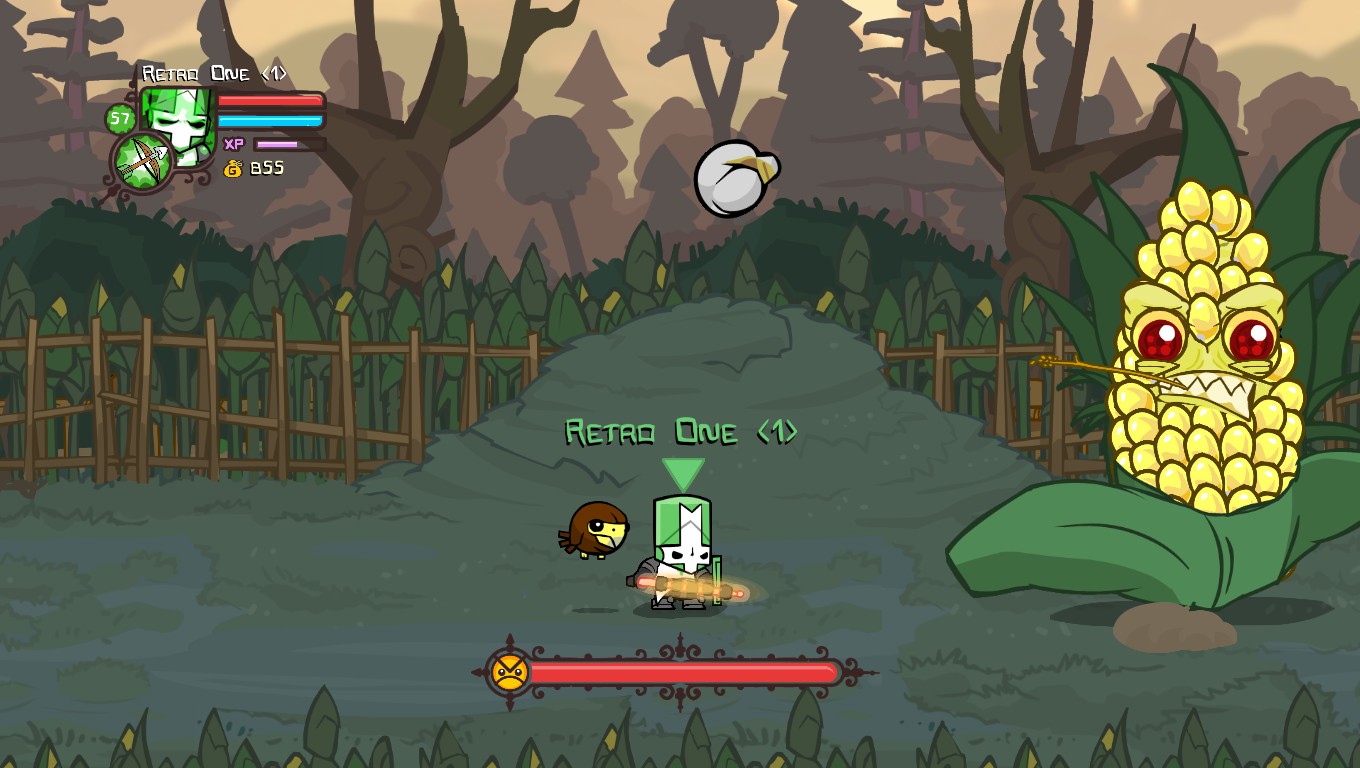
The Corn Boss has 5000 health on normal mode and 50000 health on insane mode. He shoots out small bits of popcorn, which revive one health, when he’s hit. Once defeated, you will get the horn.
Walkthrough (Part 4)
Chapter 9 – Flooded Temple and Medusa’s Lair
Chapter 9 is a challenging chapter, with two unique enemies and one boss.
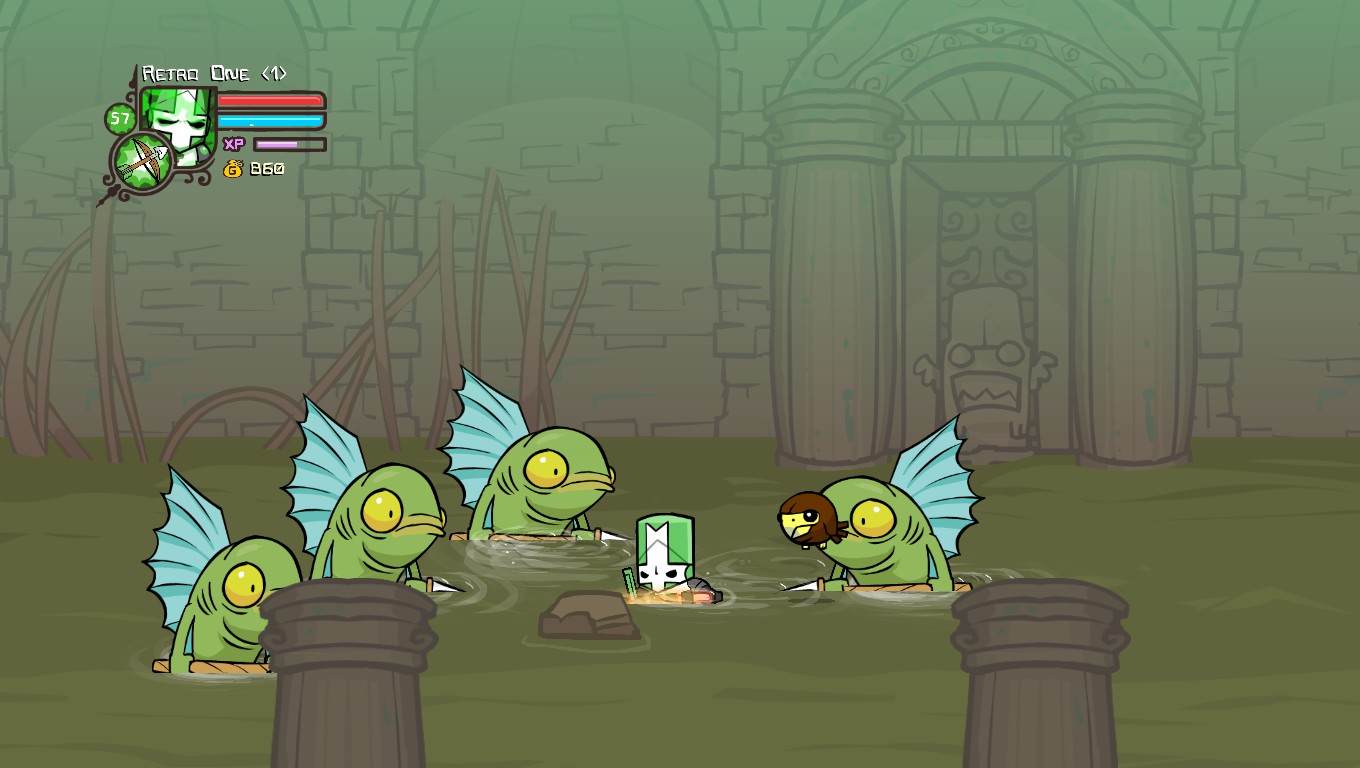
Enemies
Inside of the gate, you will find multiple fishmen.
Tip
The Seahorse is useful in this level.

Enemies
This level is inhabited by snakies and fishmen.
Weapons
- The spear can be obtained by breaking a statue of a fishmen.
- The Chewed Up Sword is found at a digspot near two staircases.
- You can get the Hole Sword by breaking Medusa’s statue when she turns into stone.
- The snakey staff is randomly dropped from snakies on this level.
Animal Orbs
At the beginning of the level, an “X” should be visible. Dig it up with the shovel to get the chicken.
Bosses
Medusa – Medusa is a boss with 2250 health on normal mode and 22500 health on insane mode. When she is defeated, she turns into stone. If you break her in her statue form, she will drop the Hole Sword. She is the only character to have the element of stone, possibly implying that a stone character was originally planned.
Chapter 10 – Full Moon, Snow World, and Ice Castle
Chapter 10 is a difficult chapter consisting of powerful enemies and bosses, but can be very rewarding with lots of items and loot.
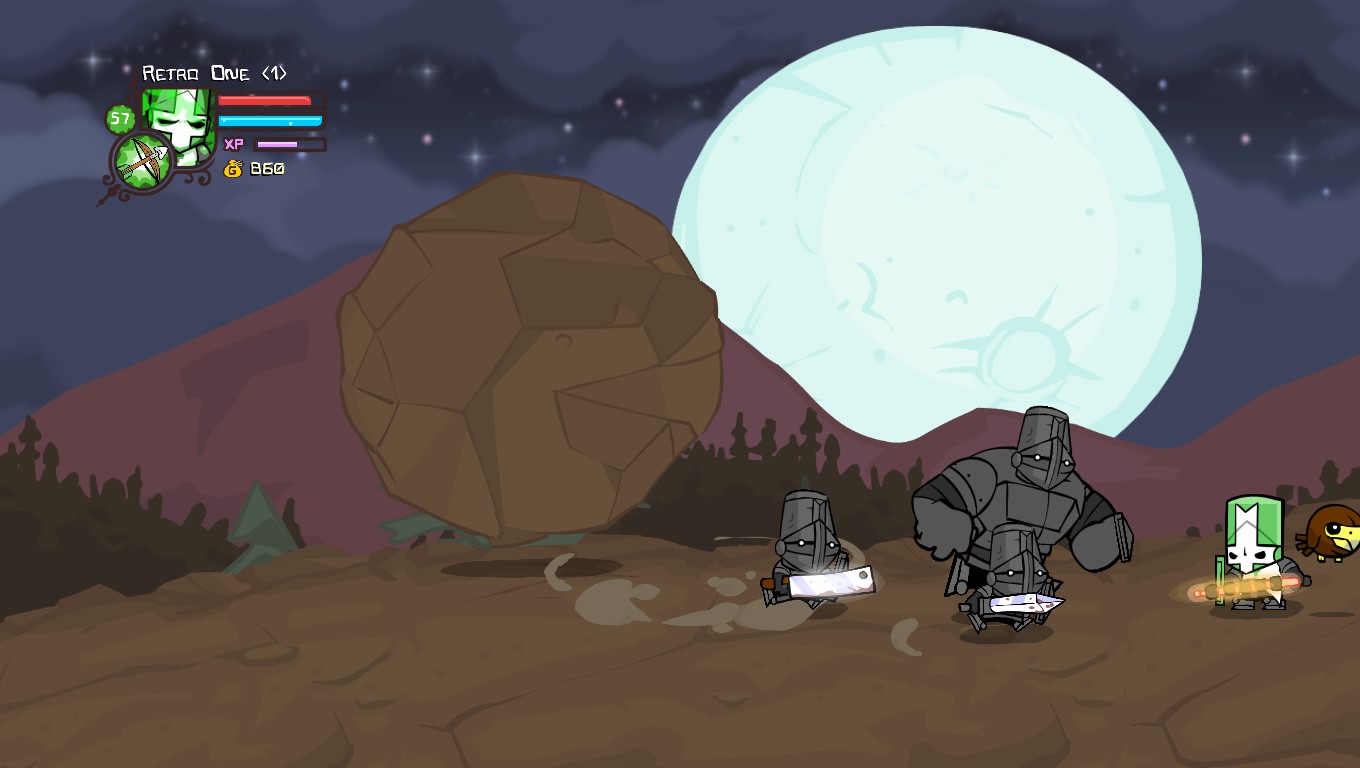
Enemies
In this level you’ll be attacked by Stovefaces and Icekimos.
Weapons
If you bring cardinal along with you, he’ll retrive the Key Sword for you. You can use that to get the Beholder in the animal ark.
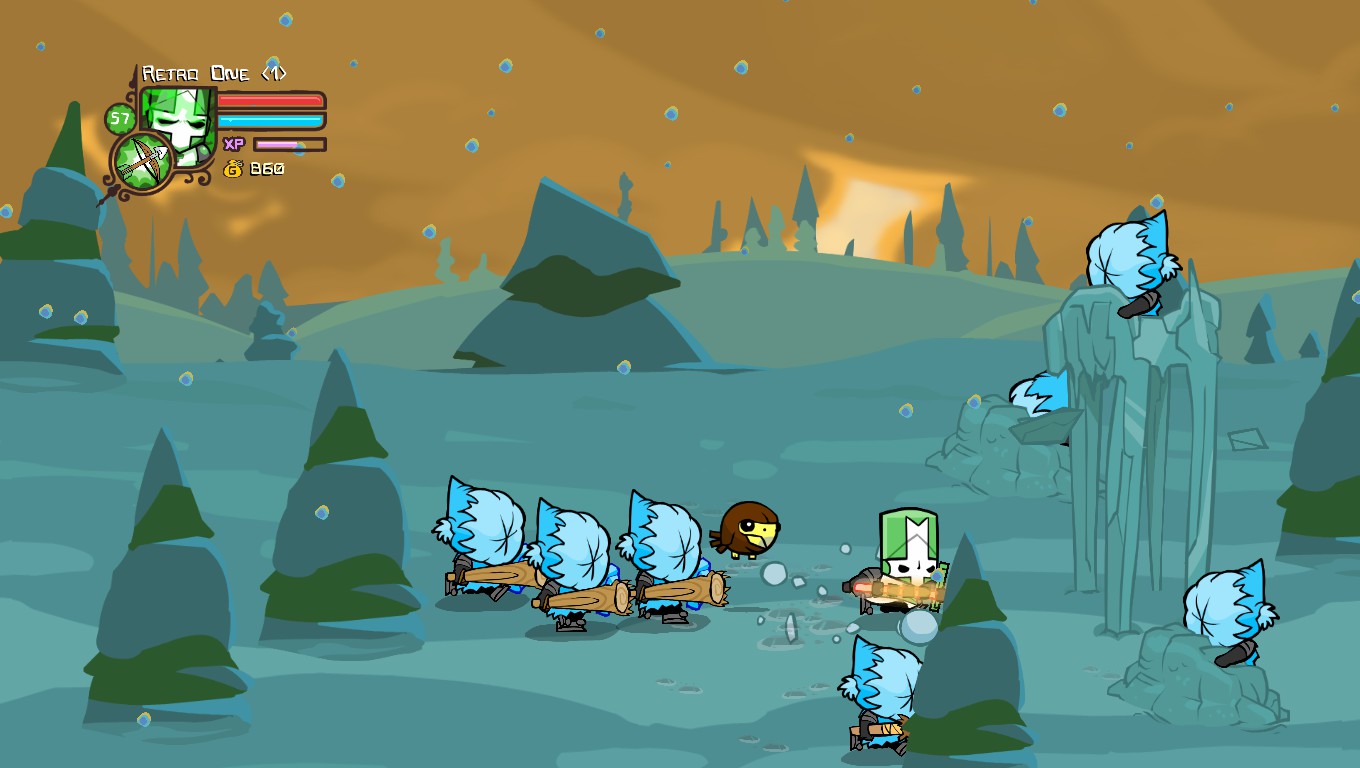
Enemies
In the level you will find some no-so-friendly Icekimos.
Weapons
When you reach the candy village, look out for an “X” on the ground. Digging it will give you the Frozen Chicken Weapon.
Animal Orbs
- When you reach the end of the level, you’ll see a path to go into the mountain. Instead, walk forward, and behind the house there you’ll find the Yeti.
- Before you enter the mountain, blow your horn, you’ll summon BiPolar bear.
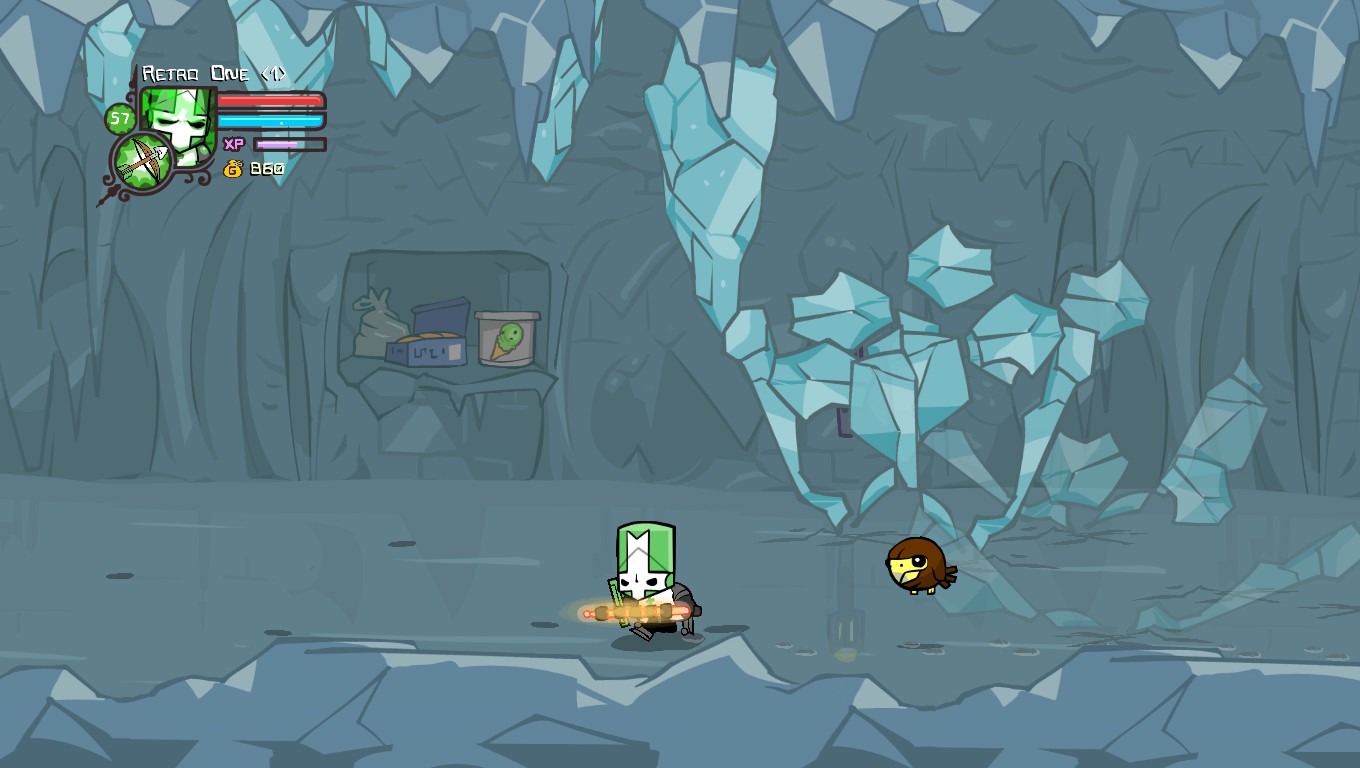
Enemies
Much like the previous chapter, this level only has Icekimos
Weapons
Near the entrance at the gate, there is an invisible X in the ground. Use Pazzo to locate and dig up the Ice Sword. Once you enter the castle, there should be a piece of steak hanging up on the wall. Press X near it to equip the Ribeye.
Bosses
Ice King – The Ice King is the hardest boss in the game, he has 5000 health on normal mode and 100000 health on insane mode. Once you beat him, you’ll get a boss chest with some great loot, and then you’ll have to fight for the blue princess.
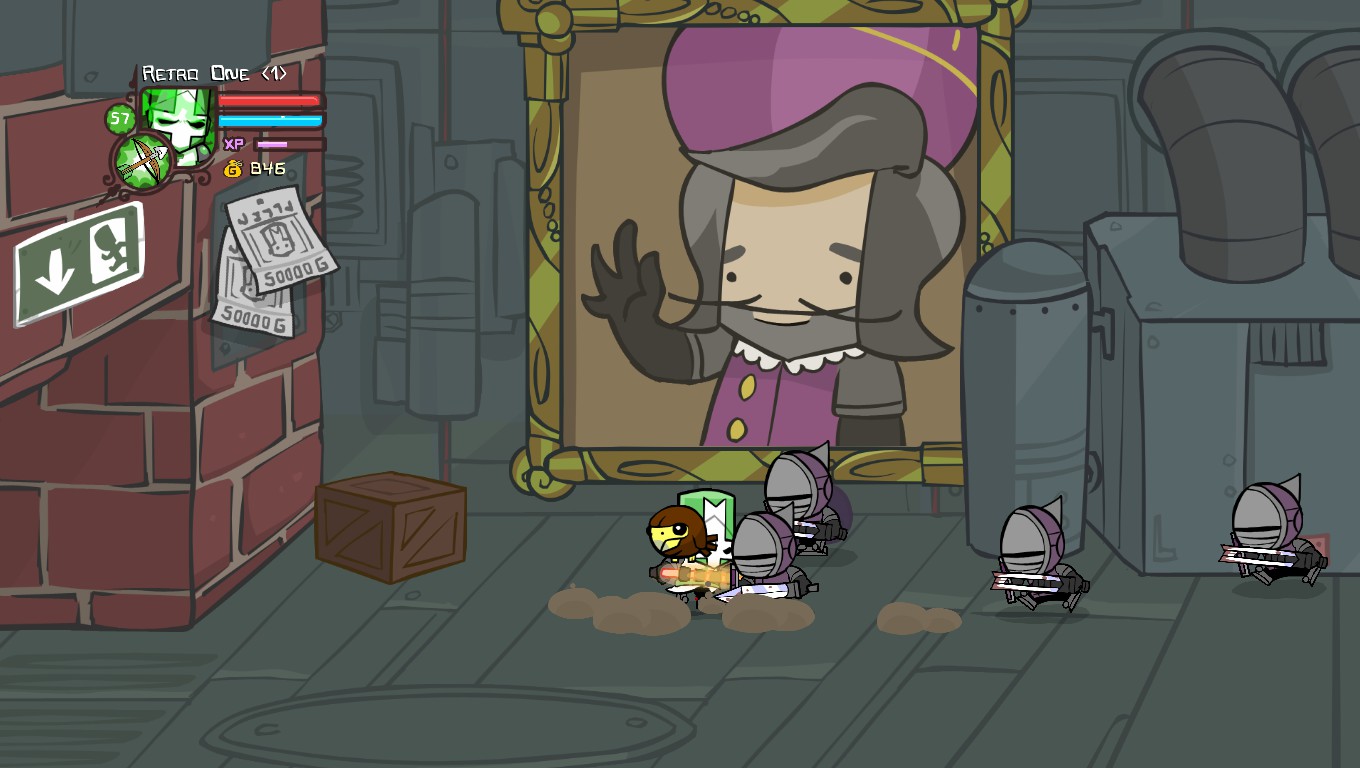
Chapter 11 – Wizard Castle Takeoff, Wizard Castle Interior, and Final Battle
The last chapter in the game! It has almost all of the enemies in the game, and four bosses.
Wizard Castle Takeoff – This is a little intro level to the final one. It consists of no enemies or loot.
Enemies
Pretty much all of them. It also includes the Cult Minion for the first time.
Weapons
- If you kill the painter when a unicorn painting is on the screen, you’ll get the “Unicorn Horn” weapon.
- When you are the Undead Cyclops’ chamber, this is a small “X” made out of bones on the ground. That’s actually a digspot! Dig it up to get the Wooden Mace.
- The Evil Sword is dropped from the Necromancer.
Bosses
Painter Boss – He has 2500 health on normal mode and 25000 health on insane mode. He paints pictures to attack you, and never personally makes an attack.
Undead Cyclops – He has 3000 health on normal mode and 30000 health on insane mode. He also has a friend with him, the Undead Groom.
Necromancer – He has 4500 health on normal mode and 45000 health on insane mode. He summons enemies from your past so you’ll encounter bears, barbarians, ninjas, and brutes while fighting him. When you kill him he drops the Evil Sword.
Final Battle – The last level of the game. It is surprisingly not very difficult.
Weapons
The Rubber Handled Sword can be obtained at the end of the level. Find out how in this video:
Items
There’s a secret item in the game called Heart Relief, about 0.1 seconds after you beat the level, you will obtain a large feeling of relief from finally beating the game. It normally only happens the first time, and is amplified on insane mode.
The Final Boss
Evil Wizard – He has multiple forms, but has 1000 health on his final stage on normal mode and 10000 on insane mode. His final form is his most difficult one.
Level Skipping
Despite what you may have heard, it is possible to skip some levels. All you’re going to need is a friend that has beaten the game. This tactic also works on insane mode.
The Castle Crashers save system works where only certain levels will save the game. These are called “Checkpoint Levels”. For instance, Thieves’ Forest is a checkpoint level, but Forest Entrance, the level before it, is not. Thus, if you beat Forest Entrance you’ll have Thieves’ Forest on the map, but if you leave the game and come back in, Thieves’ Forest will be locked. To unlock it and save the game, you need to beat the level and exit to the map.
Levels that aren’t “Checkpoint Levels” can be skipped. If you play a co-op game with a friend that has beaten the game, all you need to do is beat Checkpoint Levels to get your white/gold skull. This will help you beat the game in half the time and even grind characters.
This is a list of the required levels in order to get a skull:
Castle Keep
Barbarian Boss
Thieves’ Forest
Catfish
Pipistrello’s Cave
Parade
Cyclops’ Fortress
Lava World
Industrial Castle
Dock
Desert Chase
Sand Castle Roof
Corn Boss
Medusa’s Lair
Ice Castle
and Final Battle
Tips:
- Sometimes you need to defeat the final boss twice.
- You can skip the credits by exiting to map. It’s also a good idea to wait a while before skipping the credits, to unsure you can get a white skull.
- If a level isn’t working, make the person that is level skipping (not the one providing the levels) play the level in singleplayer.
This can be achieved with level skipping:
Characters
Castle Crashers has a wide number of characters to unlock and play as. (31, to be exact.) Almost all of them have unique magical abilities, while only one of them have a different set of melee attacks.
There are five different magical attacks, (see section “Magic”) some of these attacks are shared between characters, some are character exclusive, and then there are reskins. Reskins are characters that have the same exact magic attacks as someone else. For example, The Industrialist has the magic attacks Saw Trap, Buzzsaw, Armor Pierce, and Smog Rise. (He only has four as his air projectile and normal projectile are shared.) The Fencer has these same attacks, making the only differences between the two visuals and starting weapons.
Each character has its own unique starting weapon. No two characters have the same one. Their starting weapon is, like its name implies, given to them at the start of the game. Their starter weapon can be wielded regardless of its level or the player’s level. So, the Cult Minion can wield the Glowstick, his starter weapon, (which requires level 20 to wield) even if he is below the level 20 because it’s his starting weapon. Starting weapons normally do not effect a character’s overall score in tier listings.
Characters can be unlocked by these six methods (the highest being the easiest):
- Default, beginning of the game characters.
- DLC
- If you own BattleBlock Theater, you will be given an exclusive character.
- Beat a singleplayer arena and you will be rewarded a character
- Beat the game with a character
- Beat certain normal or insane levels
Unlock Paths
The most common way to unlock characters is the fifth method. Play with a character on every level and you will unlock another one. (You can skip certain levels, see the the “Level Skipping” section.) Not all characters unlock new ones.
An easier way of putting this is with the “Unlock Path.” For example, if you beat the game with Blue Knight, you unlock Industrialist. If you beat the game with Industrialist, you unlock Fencer. But, if you beat the game with fencer, you don’t unlock anything, as it’s the end of the path.
Blue Knight -> Industrialist -> Fencer
Some characters, such as DLC and certain level characters, do not have any unlock paths, so they do not unlock any characters, nor do they get unlocked by a character.
Here are all the unlock paths:
Blue Knight -> Industrialist -> Fencer
Red Knight -> Skeleton -> Bear
Green Knight -> Royal Guard -> Saracen
Orange Knight -> Fire Demon -> Ninja
Grey Knight -> Stove Face (Sometimes known as “Black Knight”.)
Barbarian -> Killer Beekeeper
Thief -> Snakey
Peasant -> Civilian
Iceskimo -> Brute
There are nine unlock paths in the game. Four of them are three characters long, (4×3=12) and the rest are only two characters long. (2×5=10) Four unlock paths can be started at the beginning of the game using the four default knights, and five others can be done by beating certain arenas and levels. There are nine characters that do not participate in character paths. (9)
So, 12+10+9=31. There’s 31 characters in total, so you’ve got work to do! But, instead of beating the game 26 times or so, there are simpler ways to unlock them.
Beat Certain Levels
This is very self explanatory. Here’s the list:
- Beat the Barbarian Boss level to unlock Grey Knight
- Beat the Alien Mothership level to unlock Alien
- Beat Catfish on insane mode to unlock Open-faced Grey Knight
- Beat Pipistrello’s Cave on insane mode to unlock King
- Beat Industrial Castle on insane mode to unlock Necromancer
- Beat Ice Castle on insane mode to unlock Cult Minion
Grey Knight is the only character on this list to have an unlock path.
Beat Arenas
Beat arenas on singleplayer mode to unlock certain characters. Note these must be played on the campaign map.
- King’s Arena – Barbarian
- Thieves’ Arena – Thief
- Volcano Arena – Conehead
- Peasant Arena – Peasant
- Icy Arena – Iceskimo
All of these characters except Conehead have unlock paths.
DLC
There are two DLC characters currently, each come in their own packs, which cost 0.99 USD.
None of these characters have unlock paths, and their packs include lots of bonus weapons.
Own BattleBlock Theater
Buy BattleBlock Theater from the steam store for 14.99 USD and you’ll get Hatty Hattington, an exclusive character. He comes with the Golden Whale pet and Emerald Sword weapon.
[link]
Unlock Table
Character Tiers
Not all characters are equal. Some have advantages and some have disadvantages. This list will rate characters on an objective scale of best to worst. If you aren’t sure what objective means, it means looking at something factually without bias. For instance, you might love Hatty and he might be your favorite character, but objectively, he is one of the worst. If you personally like something without factual reason, it’s called a subjective opinion. Looking at things subjectively will draw you away from what is actually good and what is actually bad.
Originally, this section had just listed our personal character tiers. Instead, we as a community have changed the system to account for EVERYONE’s opinions. Everyone makes their own tier lists, and the points are accumulated together into one large community tier list. You can view or add to the tier list on the Castle Crashers wiki discord server.[discord.gg]
Singleplayer Arenas
There are five arenas in the Castle Crashers campaign mode, all of which can be found on the map, and are unlocked by playing certain levels. Unlocked arenas do not transfer throughout characters. In an arena, you need to do defend off hordes of enemies using various tactics such us juggling or magic. Enemies come in waves, each wave adding 1 more enemy. There are 10 waves per round. Certain arenas will unlock you characters. (See the characters section.) If an arena is entered with more then one player, you will fight each other as appose to enemies, and you will not unlock a character upon winning. Playing these levels on insane mode multiplies enemies’ damage and health.
General Strategies
- Juggling is obviously the best choice for dealing with crowds. Be careful on thieves’ arena, though. As thieves arrows can interrupt combos, making your shield vital.
- Shield bashing can help quite a bit in this mode. See the special strategies section for more information.
- Use your magic frequently, but do not rely on it. It can be helpful to stun or knock-back enemies, but melee is the key to getting real damage.
- You can use health potions in these fights, but they do not work automatically. Taking 5 potions can usually result in an instant win, but you need to be quick on timing when using them.
- Bring lots of bombs into the fight. Eventually you will get swarmed making them a great plan B.
As established earlier, there are five different arenas in Castle Crashers. Each of them are different and have different enemies/unlocks.
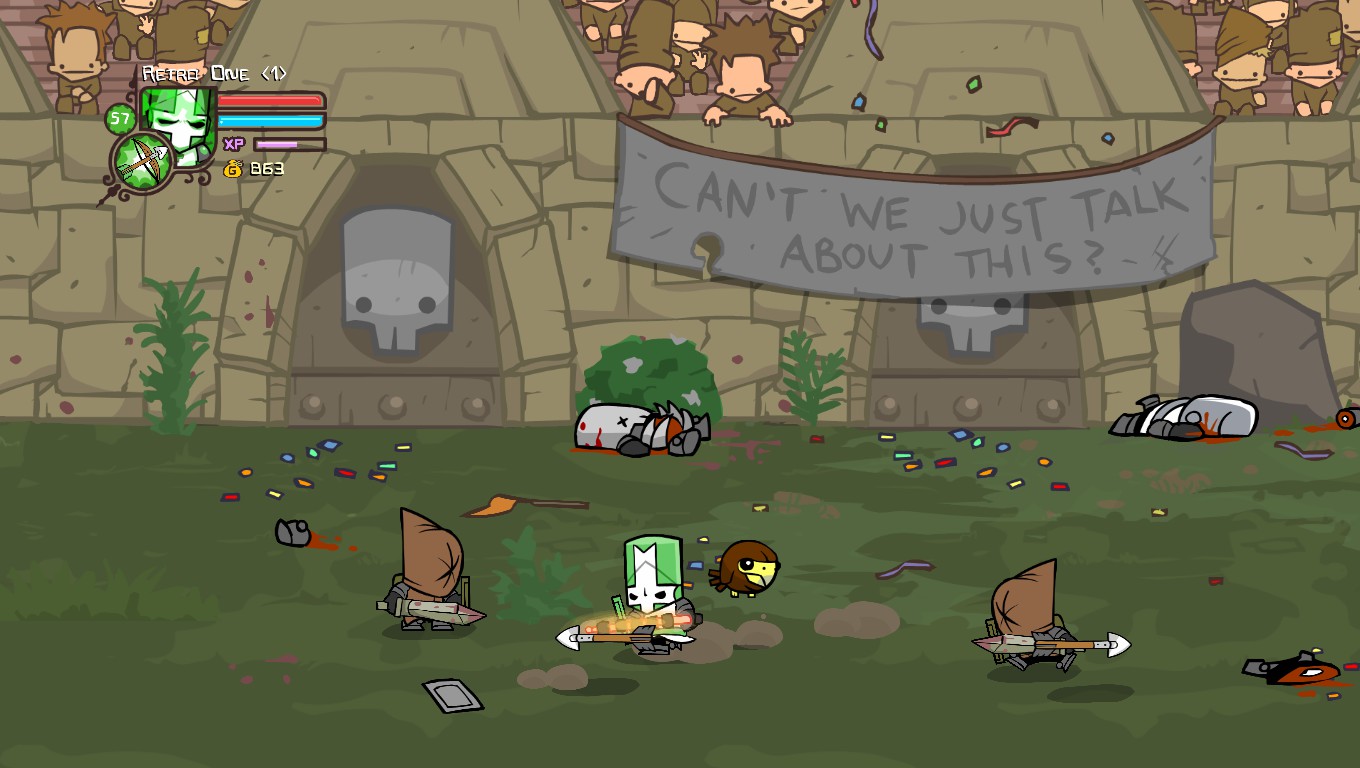
King’s Arena
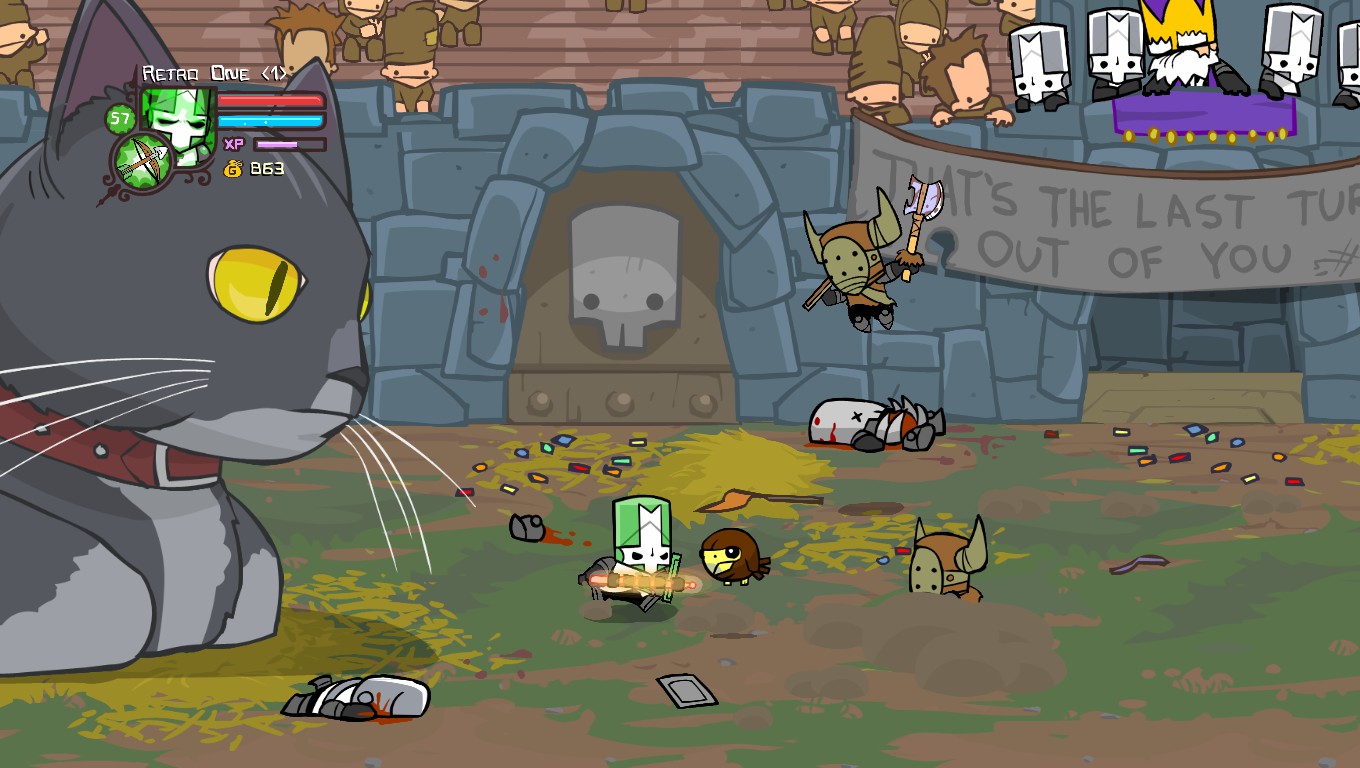
The King’s Arena is the easiest in the game and can be quickly beaten with any level character. In it, you will be swarmed by many Barbarians. They have weak health, damage, and arrow range. If you have a good amount of magic, you can go to the bottom left corner and then walk upwards until you are touching the cat. You can then simply spam your splash magic until you beat the arena. Melee and arrows work fine too, just not as good. The Barbarian is unlocked upon completion.
Thieves’ Arena
While not the easiest arena, the Thieves’s Arena isn’t all that challenging. The thieves are trigger happy with their arrows, your best bet is to use your magic jump and your shield and time your attacks just right. However if you are crafty you can use a sandwich and plow through the enemies like it’s nothing. Also while you are in beefy mode, arrows don’t cause knock-back so you won’t have to worry about dodging attacks. The only downside to this arena is that there is no stage hazard to make the thieves run into, but there is a camel that the player can ride which is a million times better. The Thief is unlocked upon completion.
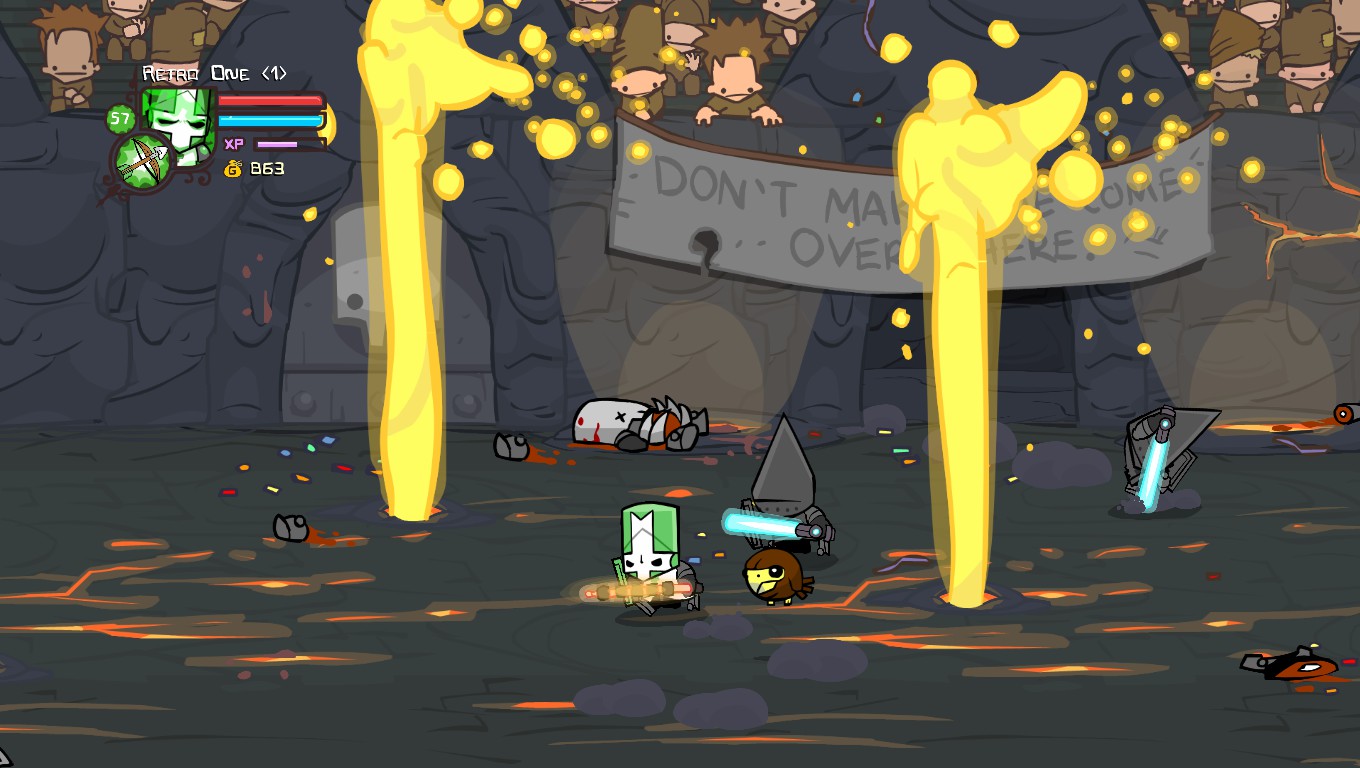
Volcano Arena
The Volcano Arena can also be beaten very easily. This arena is populated by Coneheads, while not the easiest enemy they certainly aren’t the hardest. Simply spam your magic and you’ll live. There are lava geysers in the level which the coneheads will occasionally run into taking damage. There are no rideables in this arena. As you’ve probably guessed you unlock the Conehead when upon completion.
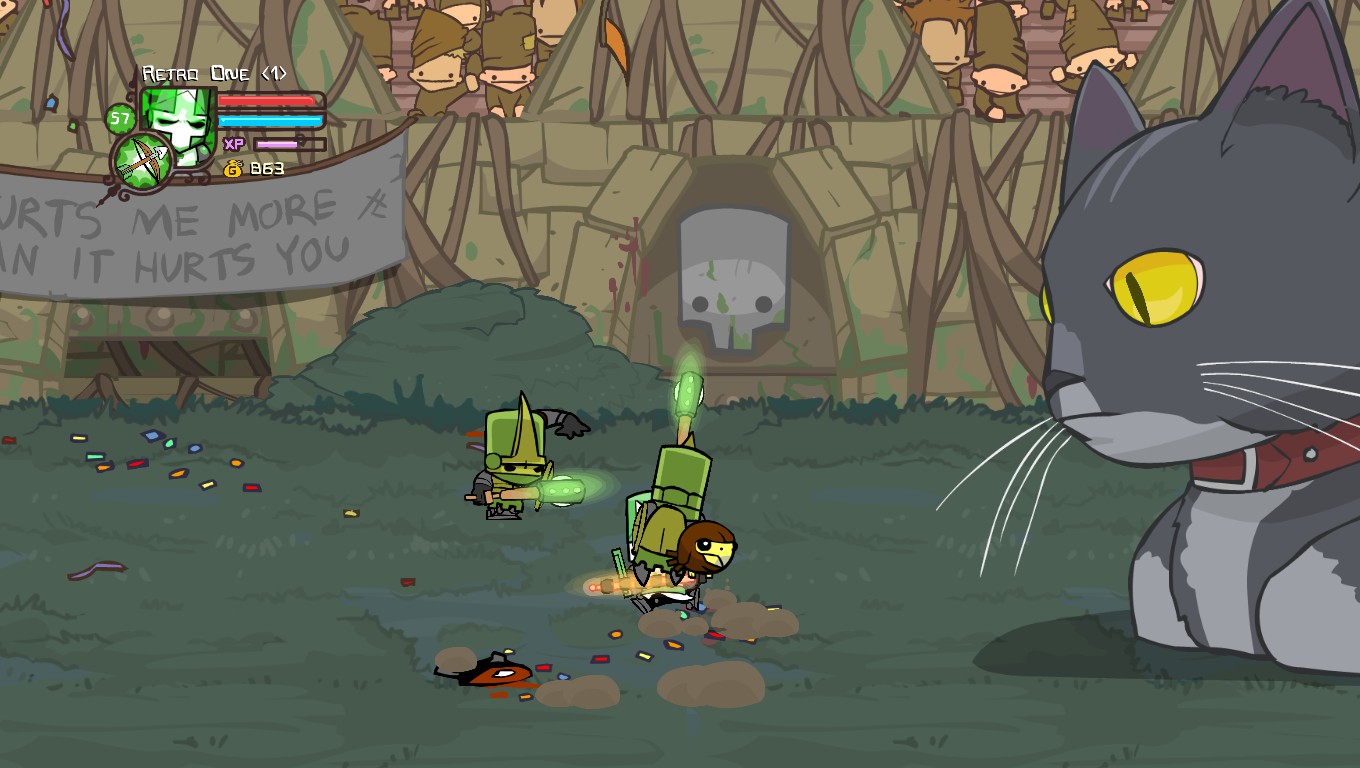
Peasant Arena
Now this is where things get a bit difficult. The Snakey’s and their arrows will drain your health quickly. That’s not to mention that you have to fight ten waves of them. Don’t forget that the cats from the King’s Arena make a return. You are better of using sandwiches on this one so the Snakey’s arrows don’t knock you back or if you’re low on cash use your magic. Upon completion you unlock the Peasant.
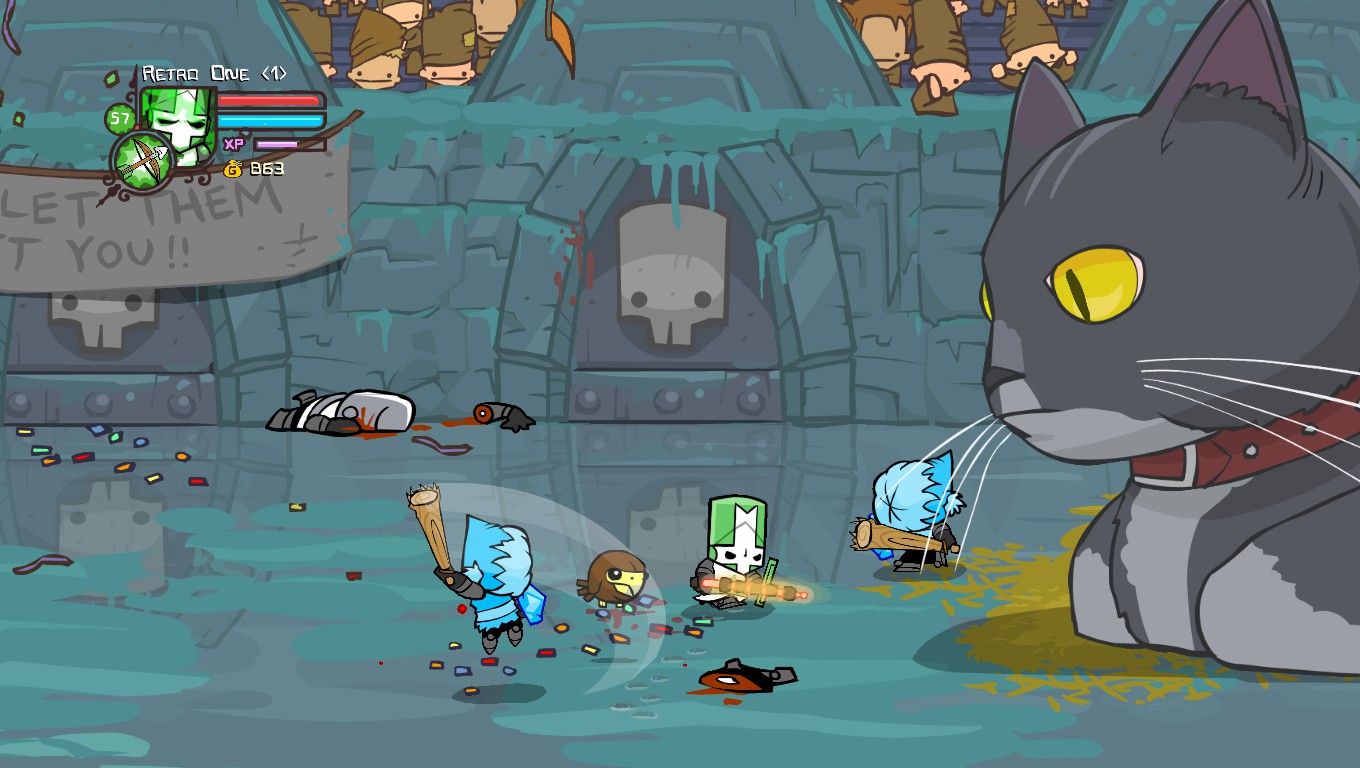
Icy Arena
The Icy Arena can prove to be quite the challenge thanks to the slippery floor, you’ll end up sliding into the cats more than once. This arena is populated with the Icekimos and they can easily be taken out with your magic, but there isn’t anything that a good ol’ sandwich can’t fix. Upon completion you unlock the Icekimo.
PVP Arena
Melee is as easy as it sounds. You simply attack opponents using melee, magic, and arrows. All characters will be balanced with the same stats. The only thing that can effect your character’s stats are weapons and animal orbs, which can be only equipped prior to the game in story mode.
This are the default arena stats:
18 Strength
18 Magic
25 Defense
7 Agility
(These are confirmed by a glitch where, you’re are booted to the main map in arena, and you can view the stats.)
Going by this, you can tell that you have sufficent agility. Thus, weapons such as the Sai and Snakey Staff are extremely useful.
Helpful Characters
(Uses the same rating system as our tier list.)
- Fencer/Industrialist – Splash magic is great as it lingers, so you can cast it in one position, and your enemy could accidently run into it. Also, the splash magic is cast from behind, so it works as a knockback/damage shield.
- Blue Knight/Icekimo – Although icekimo was lower then blue knight on the normal tier list, they’re on par for this one, because the Blue Knight’s slightly better crowd control doesn’t make much of a difference. Blue Knight and Icekimo can be overpowered in arena, depending on who your fighting. If your enemy is using the Yeti, you magic will absolutely useless. If your enemy knows how to escape ice fast, (see the “Special Techniques” section.) your magic is not as useless, but still pretty bad. So if you’re fighting a pro, they’re probably not your best option.
- Orange Knight/Pink Knight – These characters are tied for the highest splash magic range in the game, making them very useful for arena. The pink knight is especially useful as his splash will lock players as appose to the orange knight, who simply does 1 hit.
- Blacksmith – He can use his splash in the air, it’s great for starting juggles and catching your opponent of guard.
- Conehead/Royal Guard/Gray Knight – Bombs are the most overpowered projectile in story mode, and they still hold up in PVP. If you spam your bombs, your enemy will not be able to shield them. They also have fire damage. If used right, you can completely destroy in arena. Also note, Gray Knight’s XXXY is the worst in the game, so he’s slightly worse then RG or Cone.
Helpful Weapons
- Snakey Staff – Extremely balanced, only negates defense (which is one of your highest stats), and has a poison chance.
- Ninja Claw – Insane amount of agility and magic, as well as a poison chance.
- Sai – Gives the most amount of agility in the game, and only negates defense, which you don’t have much of.
Helpful Animal Orbs
Tip – Pets like Hawkster and Rammy are useful in campaign, but terrible in arena. Use your judgement.- Scratchpaw – Balanced with strength and agility, important stats for arena.
- Meowburt – Great amount of agility, helping you with your juggles and arrow spamming.
- Rammy – Knocks down enemies, which can interrupt their combos.
- Yeti – You are immune to all of the Blue Knight’s attacks.
General Strategies
- Juggling. Enemies can’t easily escape your combos, so you’ll be able to quickly take an advantage.
- Use your magic frequently, as it can help setup juggles and do some damage.
- Arrow spamming is your last resort, and requires a high level agility weapon/pet. Even then it may not do you any good.
- Always stay in the air. Constantly use your magic jump and air projectile, it will slow your enemy down.
- Different characters have different tier listings for arena. Check out the “Arena Tiers” section for info.
- If you time it right, you can magic jump your opponent right as they get up from being downed so they can’t hurt you. It only takes 2 strong and lasting juggles to beat your opponent in PvP.
- Running in a certain pattern is good too because your enemy won’t know what you’re going to do next if you already have a plan.
Other Multiplayer Arena Modes
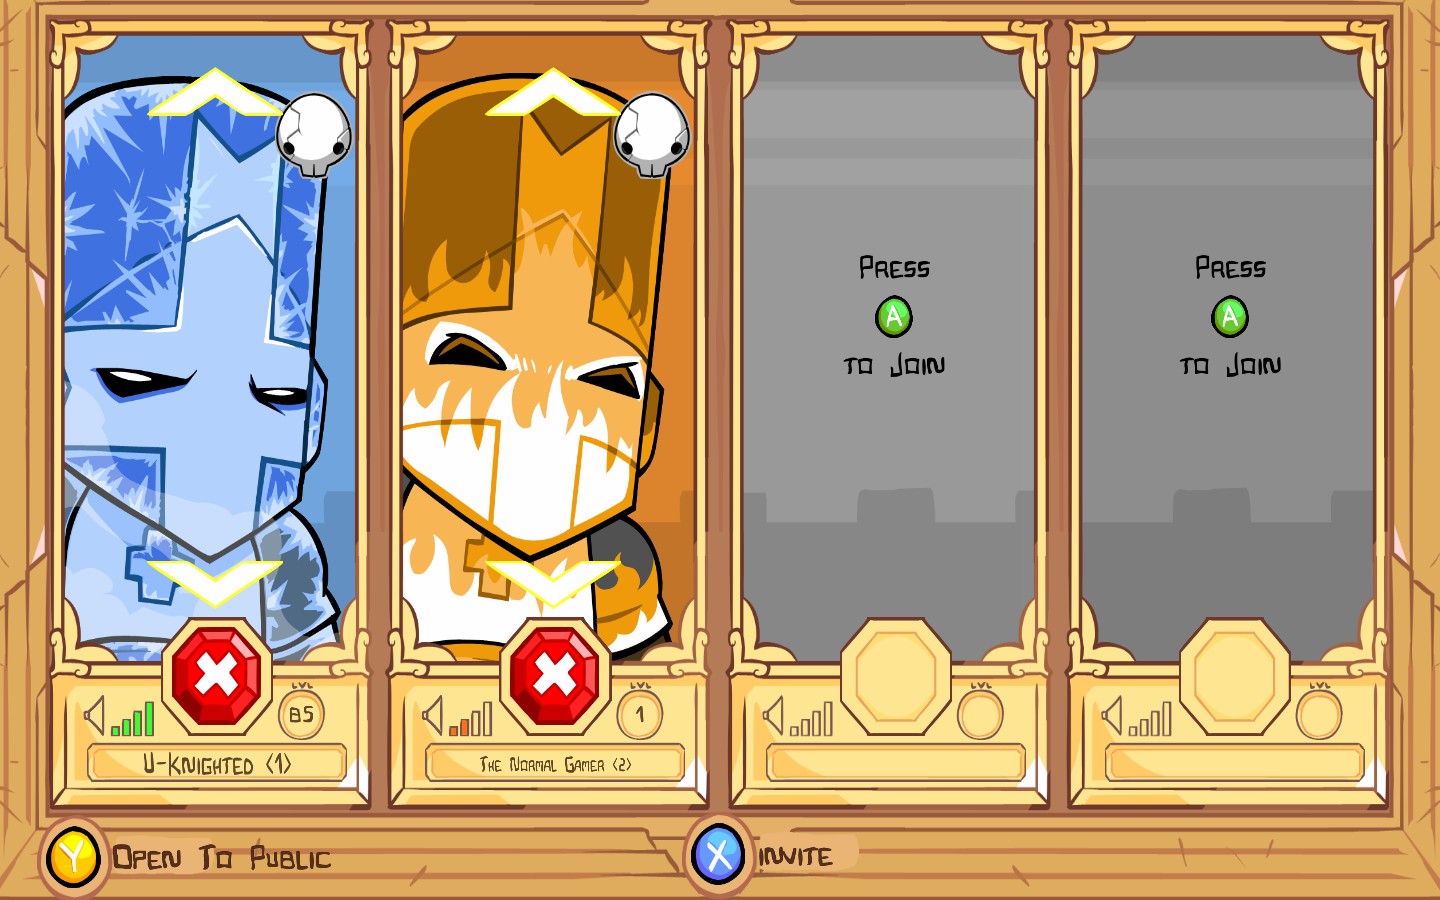
Multiplayer Arena Modes are small minigames found in the “Arena” gamemode. You can access them on the mode selection screen. There are four modes, Melee, Quickdraw, Treasure, and Beefy. Melee is not covered in this section, you can find it the PVP Arena section. In each of these modes, you go against a player-controlled opponent with special rules. If there are three or more players, you can join teams. Change your team by pressing Y on the mode selection screen. You can play as any character you have unlocked in the game.
Dubbed to be the most enjoyable gamemode by many players, quickdraw is a fun and simple game where speed is key. In it, players are each given bows and cannot use any melee attacks except throw. At first, their arrows will have little range and damage but can be enhanced by picking up flaming arrows of the ground. These flaming arrows also increase your agility stat, helping your character move faster. Fruit will also appear on the ground, healing the player.
General Strategies
- Speed is the name of the game in this mode. Whenever an arrow appears, you should run to it immediately. You cannot give your opponent any advantages.
- Fruit can save your life, quite literally. Grab it as fast as possible.
- Arrow spamming is extremely efficient, but, you can easily block arrows with you shield. If you walk up the a shielding player and press Y (or strong attack), you will break his shield and throw him. You can also magic jump them or splash magic attack them since neither can be blocked.
- Even if you have the highest possible amount of agility, you should still gather arrows. The less your opponent has, the better.
- Don’t be afraid to run behind cover if your being arrow spammed. You might be hit a few times, but if you shield, it could end up even worse for yourself.
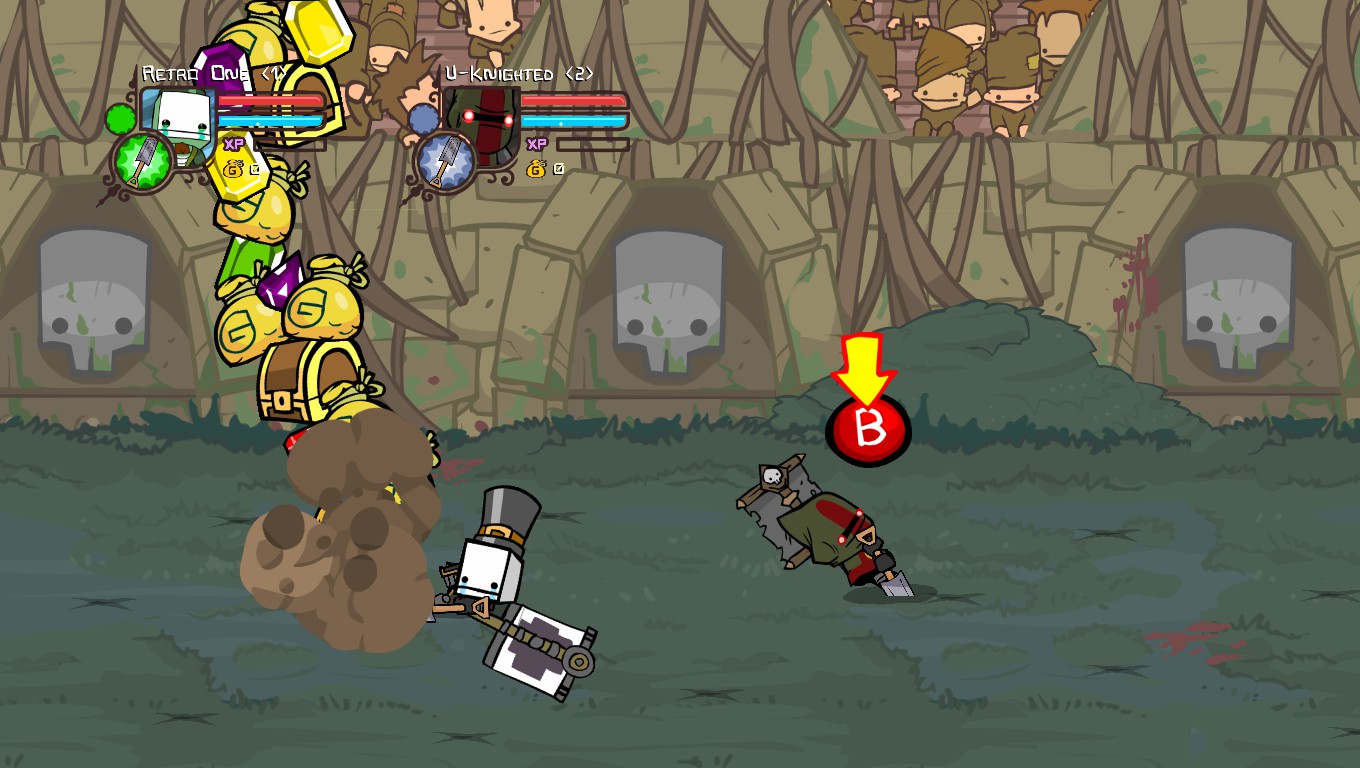
This game is infamous for being the most frustrating out of all of them. It’s pretty much a competition on who can be the biggest jerk. You spawn in an arena are there are many digspots around you. Digging them up will reveal a gold coin, bag, gem, or statue. Their values ranging from 1-17. The gold you collect does not effect your campaign balance. For each piece of gold you collect, it will take damage on the other player, one less then the gold you collected. So, if you collect a 5 coin gold bag, your opponent will take 4 damage, if you collect a 17 gold statue, your opponent will take 16 damage. If you collect a gold coin worth one gold, your opponent will take 1 damage. You can also damage your opponent by shoveling at them. At certain points, digspots will shoot out hundreds (well, more like 10s) of gold coins, bags, gems, and rarely statues. They are scattered across the arena, so any old player could take them.
General Strategies
- While someone is digging up a digspot, you have a small window of time to hit them with your shovel.
- If someone is in front of you while you’re digging up a digspot, and you fully dig, it will hit the other player. This is efficient to ward off coin thieves.
- Speaking of coin thieves, being one is probably the easiest way to win the game. When a player digs up a coin, they have a second or so before they can get up and collect it. In this time, you can quickly steal the coin.
- If both players are refusing to dig in fear of their coins getting stolen, you can result in hitting each other with your shovels. It’s slow, unefficient, and boring, but it’s the least-frustrating way to settle things.
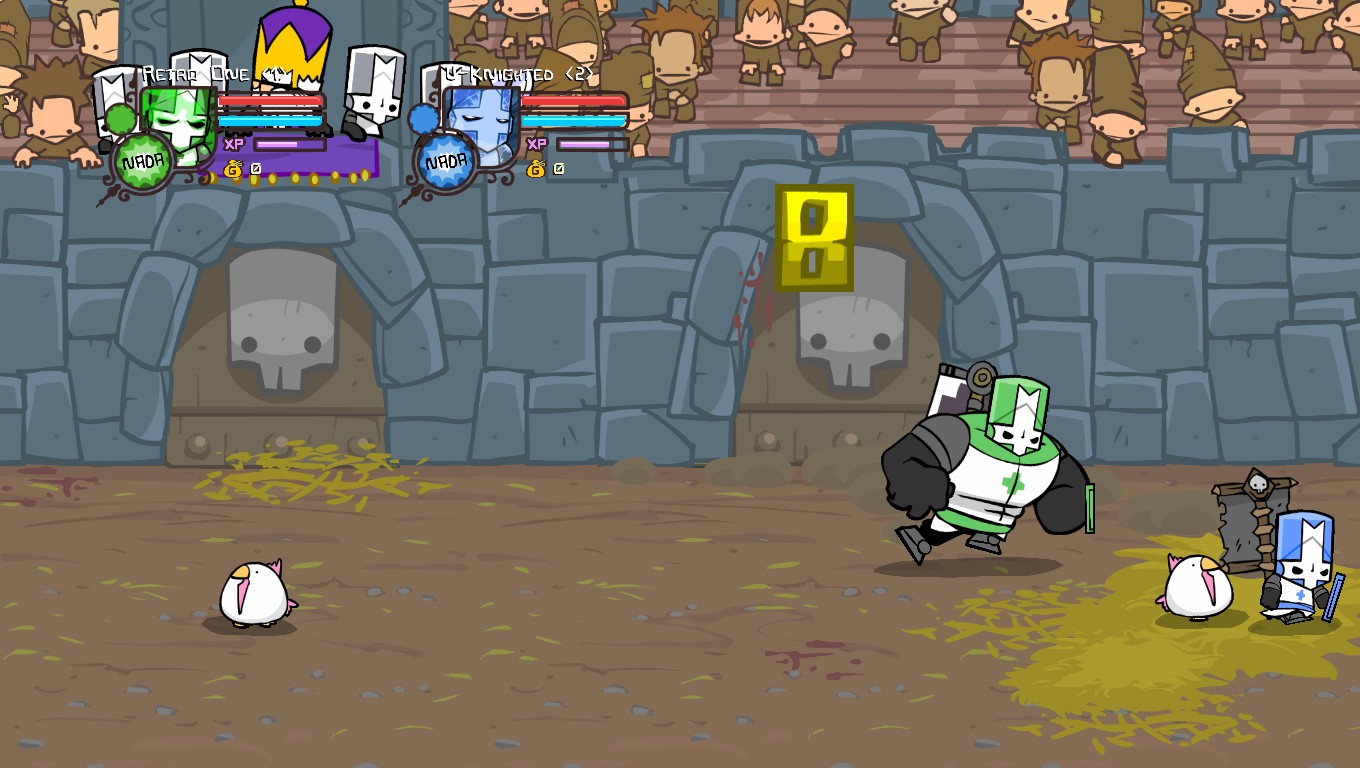
This game is very simple and fun. In it, players are by default in their normal form without a weapon or animal orb. They can use their shield, but they cannot attack. There are chickens walking around the arena, if you walk up to one and press an attack button, you will eat it and become beefy. In beefy mode, you can shield and attack. Last man standing wins.
General Startegies
- Just grab a chicken and spam your attack buttons to juggle them. Sometimes, you can end the whole match in one juggle. When you’re being chased by someone who has a beefy on them, you can definitely out run and out smart them. Make them think you’re going to be where they want you when really you won’t. Go at the top of the stage as they follow you and move directly down while moving to the right or left.
- Shielding is inefficent against beefy characters.
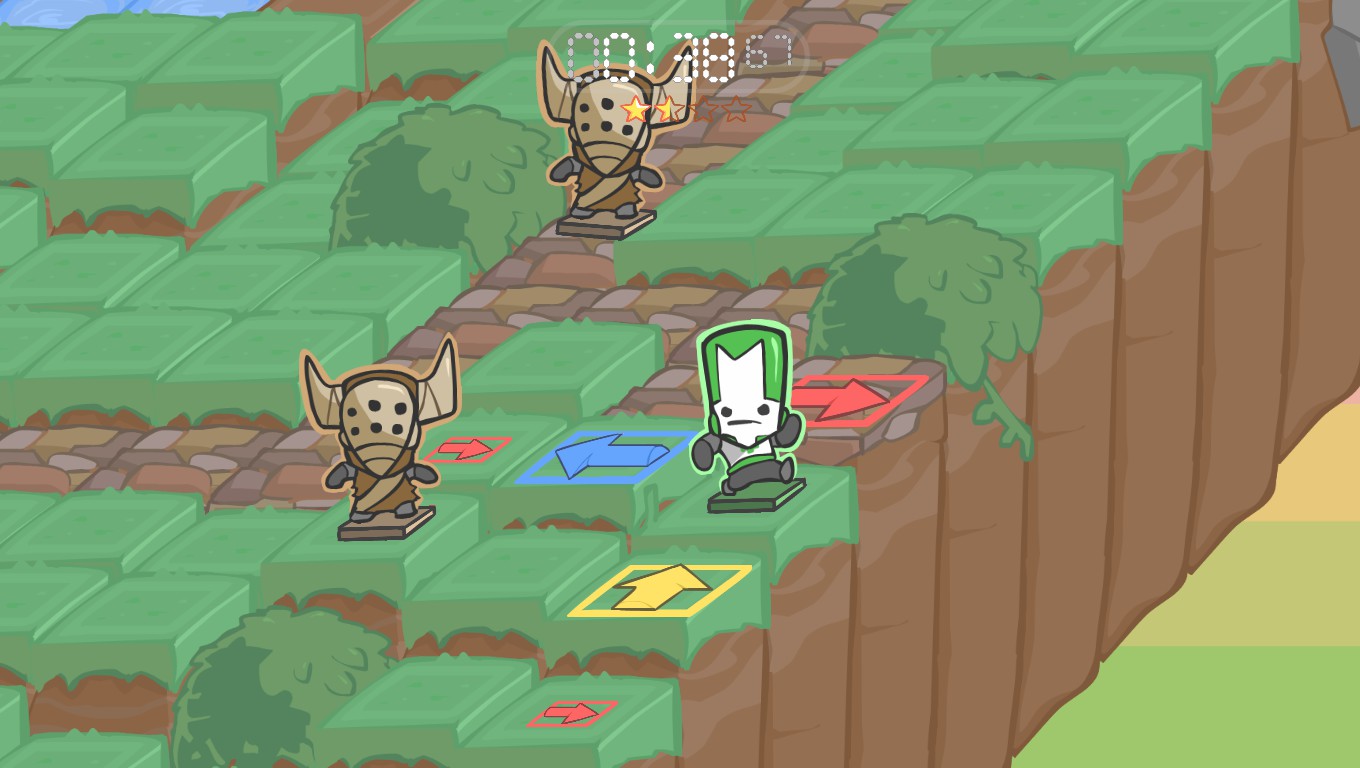
Back Off Barbarian
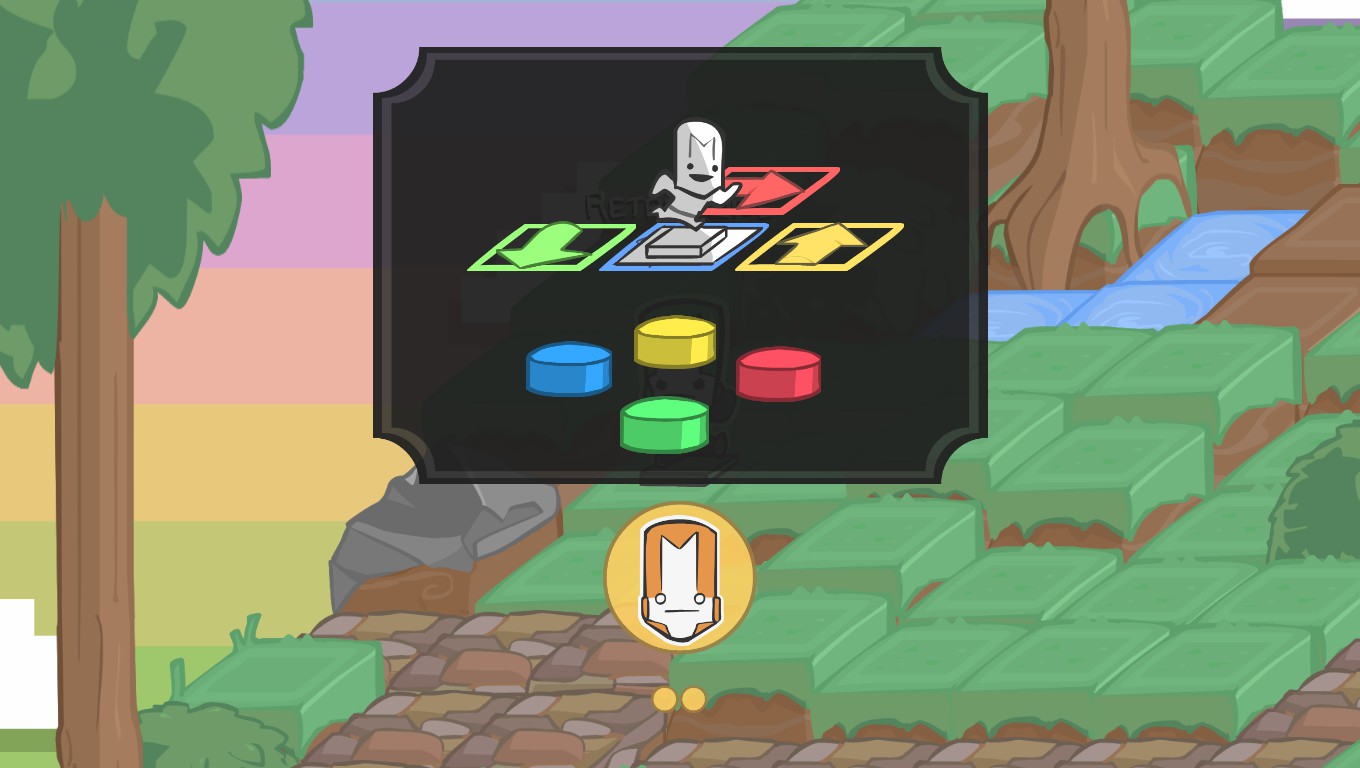
Back Off Barbarian or “BOB” is a game mode in which players must avoid the oncoming onslaught of enemies for as long as they can (or 2:30 for an achievement (see Achievements Section)). This mode was introduced in the “Castle Crashers Remastered” update which replaced “All You Can Quaff”. In BOB you can either control your character using the D-Pad, Analog Stick, or Face Buttons (Analog Stick is highly not recommended for maximum enjoyment). You can’t just simply just move around the stage freely, you move to the direction that the tile under you has. So if you want to move down and the tile under is ↑ then you have to move ↑ on the d-pad to go down.
Think of it as DDR but in an even more stressful situation as hordes of enemies come on the screen quicker than you can say “Seventh Son of a Seventh Son”. There are no attacks of any kind you simply have to prance around the stage hoping you don’t encounter an enemy. You can also find Red Potions in the stage which can revive one of your fellow players. You will need to do this as your players Sad Meter will rise due to loneliness. Once the Sad Meter reaches the top you’re dead.
Items
Sometimes you just need a pat on the back, an extra boost to help you out. That’s where these items come in handy. They can help you out of any situation and even help you endure through some of the later stages.
You can switch between your items using LB or RB and use B to use the item (or the keyboard or Steam Controller equivalent).
Here are all the items you can get in the game (In order of most useful to least useful)


Magic and Mana
To start off a magic combo, press and hold Shift. (RT on controllers.) Dust should rise from your Knight. Now, if you perform a combo, you need to press a certain button whilist holding RT. If you perform a combo, that blue bar right below your health should go down. This bar is called “The Mana Bar.” If you perform magic attacks, your mana bar will go down. But, this bar slowly recharges overtime. If you upgrade your magic stats, you will learn new magic attacks (also known as “spells”) and your mana bar will charge faster. If your mana bar runs out, you will not be able to perform any attacks until you have enough mana to do so. Most attacks will become cheaper as you upgrade your magic.
Magic Combos
RT + Y – Splash attack – A simple attack that varies on the character. As you level your magic up, you will have more range and damage with this attack. – Level 1 magic needed. (You have 1 magic be default.)
RT + B – Projectile Attack – Shoots a projectile, that has infinite range, that deals high damage. – Level 5 Magic needed.
RT + A + B – Midair Attack 1 – Shoots your magic projectile in the air. – Level 5 Magic needed.
RT + A + Y – Midair Attack 2 – Shoots your magic projectile downwards. Some characters have special secondary midair attacks. – Level 10 Magic needed.
X, X, X, Y – Elemental Infusion – Does high damage, and for some an elemental effect. Does not require RT to be held down. – Level 15 Magic needed.
RT + A – Magic Jump – Jump higher then normal, as well as damaging anyone around you – Level 20 Magic needed.
Types of Magic
Four Main Elements
Fire: Orange Knight, Fire Demon, Alien
Poison: Green Knight
Electricity: Red Knight
Ice: Blue Knight, Icekimo
Effects
Fire: Does 1 damage over time.
Poison: Does 3 damges over time. Better then fire, except that most enemies are immune to it.
Electricity: Shocks an enemy for a splitsecond. Pointless elemental effect.
Ice: Freezes an enemies for few seconds. The best elemental effect.
Normal Elements
Basic: Peasant, Civilian, Thief, Stove Face, Open Faced Gray Knight, Barbarian
Money: Hatty Hattington
Physical: Bear, Saracen
Buzzsaw: Fencer, Industrialist
Nature: Brute, Snakey
Dark: Skeleton, Cultist
Healing: King
Bees: Killer Beekeeper
Shadow: Ninja
Death: Necromancer
Fabulocity: Pink Knight
Effects
Basic: Knockback
Money: Knockback
Physical: Knockback
Buzzsaw: Best Knockback
Nature: Knockback
Dark: Knockback
Healing: Heals himself and anyone around him.
Bees: Knockback
Shadow: Knockback
Death: Throws enemies upward. (knockback)
Fabulocity: Stunlocks enemies for 1-3 seconds, doing crazy damage.
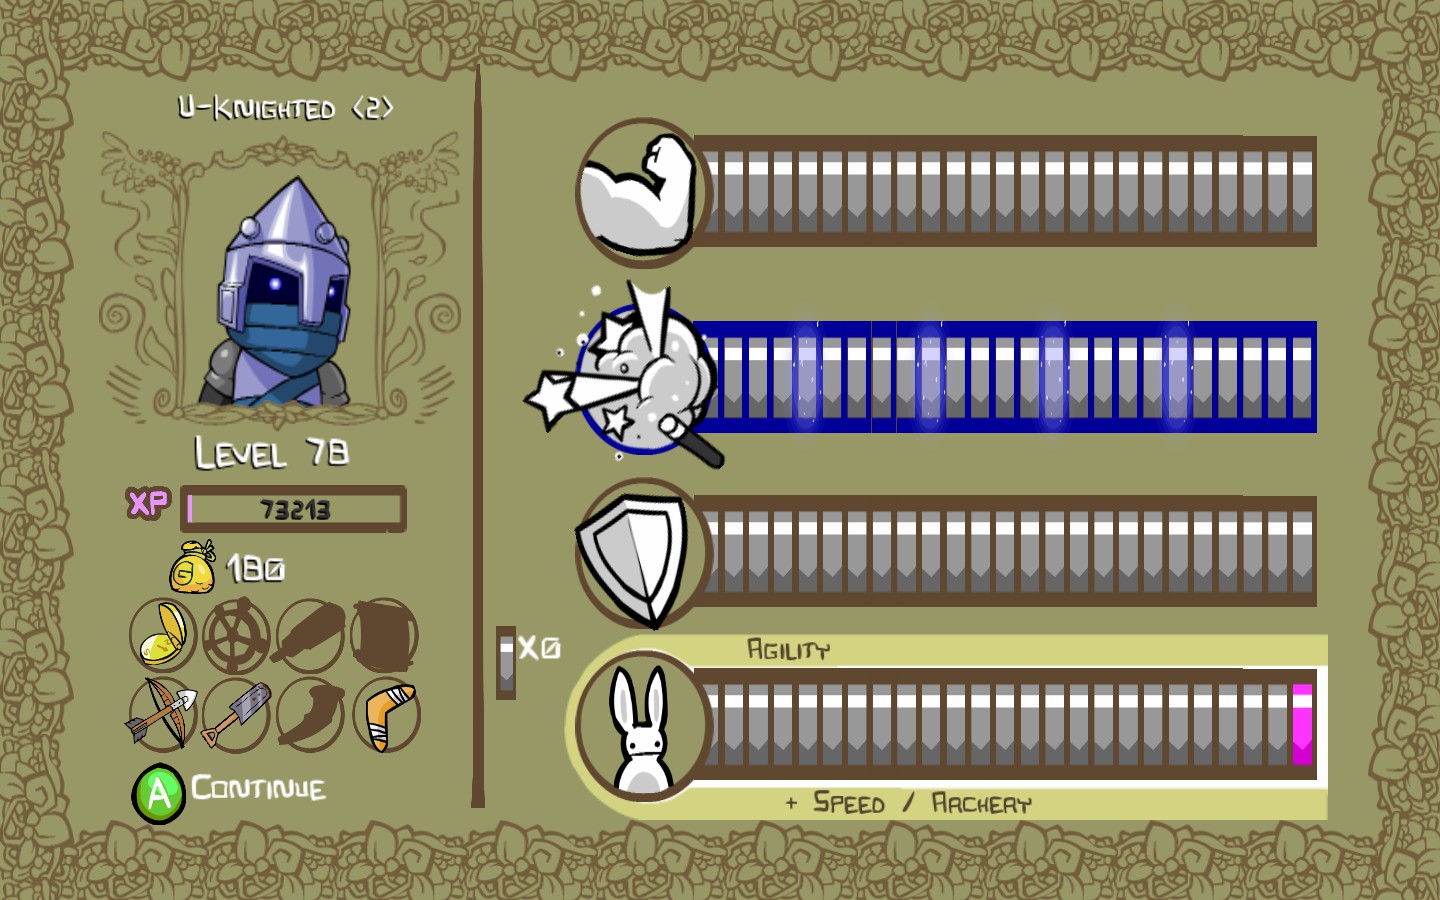
Attributes


To level up, you need to fill your pink XP bar. To do so, you have to have a certain amount of XP. You don’t get 1 XP per kill, you get 1 XP per hit. (Unless you have Giraffey, who gives you a bonus 0.1 XP per hit.) Thus meaning, if you take a more to kill an enemy, it will give you more XP. If you have less strength, you will have more hits. Which means more XP in the bank.
Here’s a preview at the screen for a character with max stats:
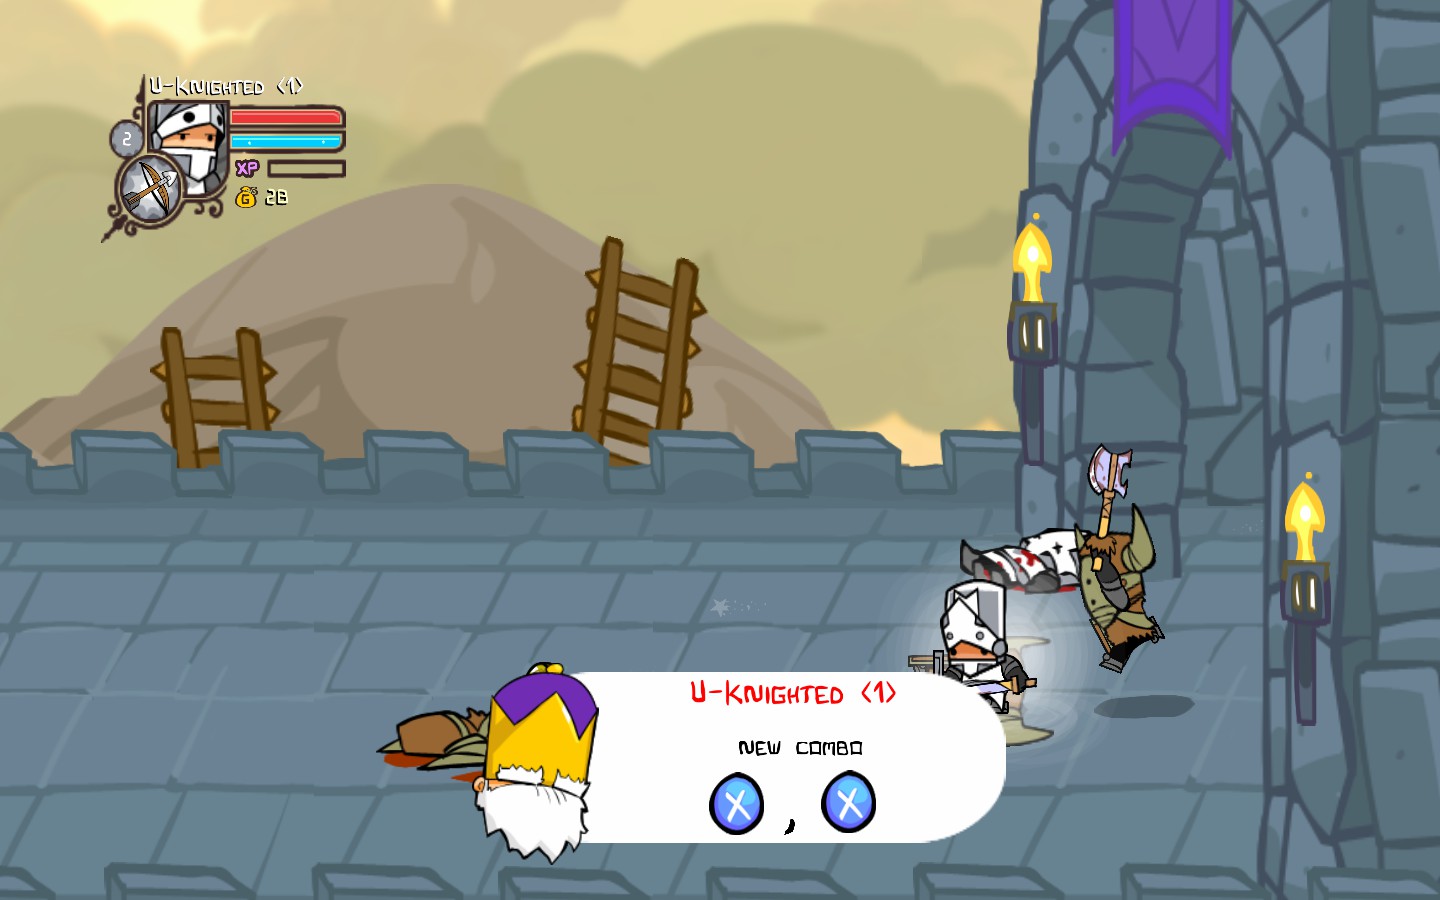
Combos
A majority of information taken from U-Knighted’s “Castle Crashers – Down to the Basics” guide.
To efficiently kill an enemy, you need to perform a combo. Combos are a certain combonation of buttons that do either extra damage, or are quicker then normal. There are combat combos, and magic combos. We will cover magic combos in the next section, but for now, lets get into combat.
Also note that I will be saying controls that go to an Xbox/Steam controller. Here is a quick translation:
X (Light Attack) – A (Default Keyboard), Square (PS4)
Y (Heavy Attack) – W (Default Keyboard), Triangle (PS4)
B (Use Item) – A (Keyboard), Circle (PS4)
A (Jump) – S (Keyboard), X (PS4)
RB/LB (Switch Items) – Z/C (Keyboard), R1/L1 (PS4)
RT (Magic) – E (Keyboard), R2 (PS4)
Some of the combos include:
X – Light attack – Does damage.
Y – Heavy Attack – Does more damage then quick attack.
A – Jump – Does not do damage
X, X, X, X – Quick strikes – Does a slightly more damage then quick attack.
Y (Near a standing enemy) – Throw – Throws an enemy
Y (Near a knocked down enemy) – Stomp – Stomps on an enemy
Y, Y – Heavy Spin – Does a heavy attack and then spins
A, X, X, X, Y (Repeat) – Juggle – Throws an enemy in the air, stunning them as well as doing damage – Level 8 is optional, but works better (Check the juggling section for more advanced combos.)
A, A – Double jump – Does a tiny bit of damage – Level 2 required
Sprint (Gain speed), X or Y – Dive – Does a bit of damage will falling into an enemy – Level 4 required.
X, Y – Uppercut – Performs an uppercut – Level 8 Required
X, Y, X – Flip – Flips your character – Level 8 Required
X, X, Y – Headbutt – Slams into enemies, stunning them – Level 16 required
X, X, Y, Y – Slashing Headbutt – Slams into enemies, stunning them, then slashing – Level 32 required
X, X, Y, Y, Y – Advanced Slashing Headbutt – Slams into enemies, stunning them, slashing, then slamming into the ground – Level 32 required
X, X, X, Y, Y – Spin Move – Dives into enemies, spinning – Level 50 required
Juggling
What would you call the best way to attack in Castle Crashers? Magic? Arrows? Nope! Melee! Not just melee, but Juggling! Juggling the process where you jump up and do certain combos to stun, damage, and carry enemies. Not all enemies are the same weight, some are heavier, making the juggle harder.
The Different Weights of Enemies
Extremely Heavy Weights – Elite Conehead, Conehead Groom, and Stovefaces.
Heavy Weights – Royal Guards and Coneheads (Coneheads are only heavy weight on Cyclops’ Cave and Cyclops’ Fortress.
Medium-heavy Weights – Necromancer and Beefies.
Medium-light Weights – Fire Demons and Snakies
Slimey Weight – Slimes, of course.
Light Weights – Everyone else.
Combos
The main juggle for light weights is X X Y Y (repeatedly). START ALL OF YOUR JUGGLES WITH JUMPS. You’ll be using gamepad controls.
For keyboard, it is A A W W repeated.
For slimes, it’s a bit more complicated. You can’t really juggle them, the best you can do is XYY. If you manage to get them against a wall, you can spam XXXYY.
For medium-light weights (Fire Demon and Snakies), the juggle is Y Y X YY X YY.
For keyboard, the juggle is W W A WW A WW. (This is the most used juggle in Arena Mode and you can use it for hovering or flying) To hover, just do X YY (A WW) repeatedly.
For medium-heavy weighted enemies, the combo is XYY. (Repeat XYY.) If done right on Necromancer, you can juggle him infintely.
For heavy-weighted Coneheads and Royal Guards, you dive at the with the Y attack once you catch enough speed. Then, you use the medium-light weight juggle on them.
For extremely heavy-weighted enemies, you can do the same thing as heavy weights, it’s just less effective.
Another juggle that is kind of useless and may not be using a whole lot, but I’ll just put it here anyways.
RT + A X Y X (X Y X repeated). It is also a flying juggle and really isn’t meant for arieal combat.
For keyboard, it is E + S and then A W A ( A W A repeated).
And last but not least is the alternative juggle for the Green Knight.
It is the most simple juggle. It is X X X X Y (repeated).
For keyboard, it is A A A A W (repeated).
Here’s a video demonstration on Green Knight’s Juggle:
Special Techniques
There are special melee techniques formed by the community.
Shield Bashing
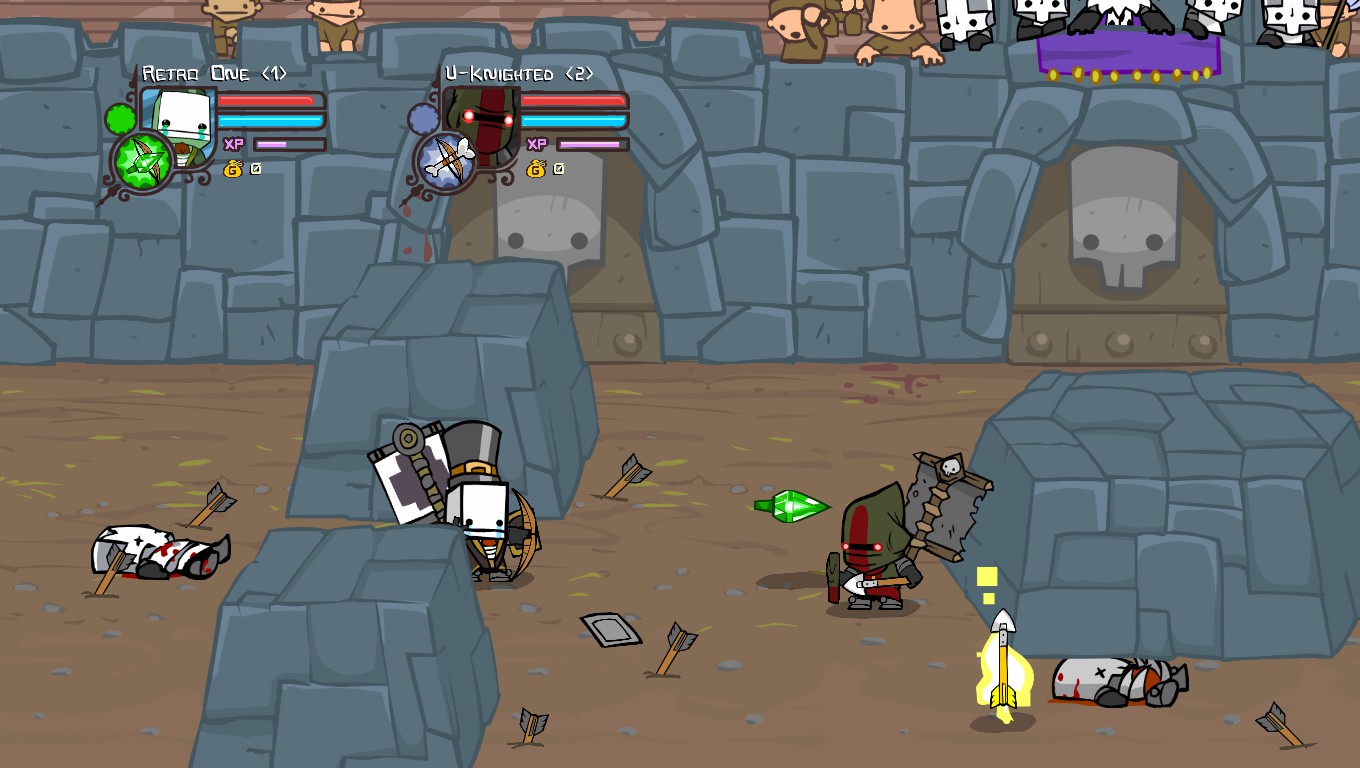
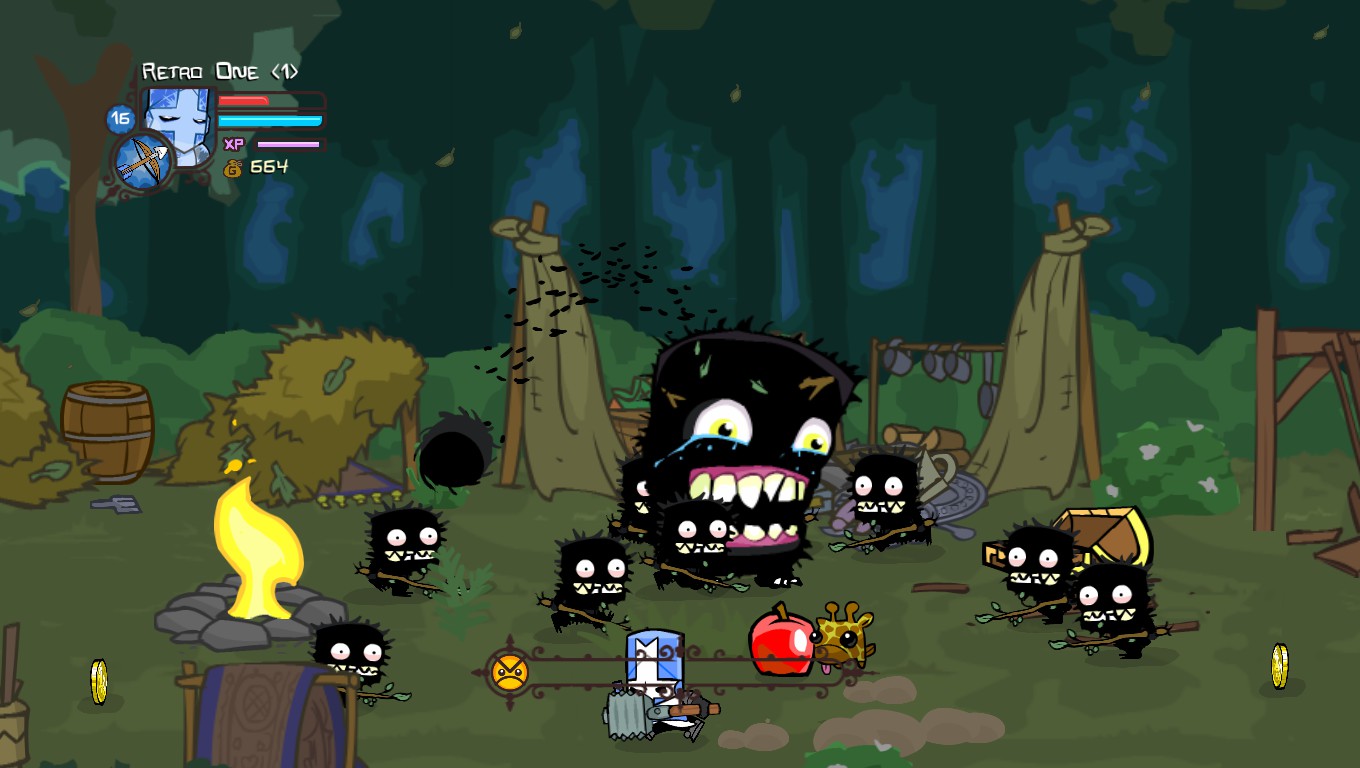
Shield bashing is the process of using knocking back enemies with your shield. It can’t be done easily, and takes precise timing to perform. To do it, you need to put up your shield whilist an enemiy is in the middle of an attack.
As you can see on the right, the Barbarian is in the process of attacking me, so, if I facing the right way. I could easily perform a shield bash. (Also note that the “X, X” combo does not exist. This was a bug that is now patched.)
Juggling
See the “Juggling” section.
Arrow Spamming
Arrow spamming is as easy as it sounds. You simply spam your arrows as fast as you can to take down enemies. With max agility, you can shoot about one arrow per half second, with 26 damage and infinite range. This strategy, if performed right, can constantly knockback enemies, and shoot them the instant they get up. It can be frustrating on arena mode, and helpful on insane. This gives agility even more value. Also, it’s much more efficient to play with two players, and have them both attack from different sides. Quick tip: Arrows can transfer crit/elemental chances from weapons.
Bomb Spamming
Much like arrow spamming, but you have a limit amount of bombs. Thus, you need to know the right time to use them. If you’re getting swarmed by lots of strong enemies, it might be a good time to whip out the bombs. If the last boss in the level is on low health, it should be safe to attack him with bombs. Conehead, Grey Knight, and Royal Guard are great characters as they can use their bombs as projectiles, giving you an infinite amount.
Combo Locking
This strategy can be executed on any character, but is best done with Blue Knight/Icekimo. Simply repeat XXXY on a group of enemy(s). When you do the Y attack at the end, you’re doing a strong attack, and that gives enemies a small window of time to attack you. If you have Blue Knight/Icekimo you’ll freeze, revoking that window of time for them to attack. This makes the Blue Knight/Icekimo’s XXXY the best in the game. Also, don’t worry about overkill; enemies will be decapitated when they’re dead, with exception of Trolls, who can’t be decapitated, so you can infinitely combo lock them. (Which isn’t a good thing.)
Flying
In Castle Crashers, it’s always a good idea to stay in the sky. Up there, you can get hit by magic, arrows, or basic melee. Plus, in the air you can do lots of powerful juggles. When flying, you can use bombs and air projectiles to do insane damage to enemies.
Flying combo:
RT + A X Y X (X Y X repeated)
Ice Escape
This is a little trick to help you escape when you’re frozen or stuck in the ground. (This only works with gamepads.) Simply press Left DPad and hold your joystick to the right, and you’ll exit almost instantly. This is extremely good for PVP, as you’ll be essentially immune to the Blue Knight’s attacks, without using the Yeti.
Weapons
Weapons are items in the game Castle Crashers that can be wielded by the player and are collected/bought throughout the campaign. They add various buffs to stats, such as strength, magic, defense, and agility. Some weapons also negate stats from the player, giving more balance. Weapons can also provide elemental chances, fire, poison, ice, and electricity. The chances range from 1-5%. You can also get critical hits from weapons, with chances ranging from 1-3%, and when they happen, they do extra damage.
There are 81 weapons in Castle Crashers, not including the glitch sword, which is an Xbox 360 exclusive. (And you can’t even legitimently get it.)
Instead of listing out all the weapons and their stats you can watch this nifty little video right here:
Here are some noteworthy weapons out of all of these:
Snakey Staff – Possibly the most overpowered weapon in the game, the Snakey Staff is powerful and deadly. It adds agility and magic, the agility helping for juggling and the magic helping for boss clearing, both of which are essential for insane mode. It negates two defense, which pretty much does nothing, and has a 2% poison chance. (The 2% is not yet confirmed.)
Glowstick – Amazing defensive and mage style weapon. It has low strength, which means more efficient XP grinding. (See the XP Grinding section for more.) It also gives you a lot of magic, assisting in boss clearing.
Ninja Claw – Great agility as well as a nice poison chance. Arguably the best weapon for arena.
Lolipop – The best level 1 weapon, the lolipop adds a handy +5 agility, speeding you up at the start of the game. Use it until you can get the Glowstick or Snakey Staff.
Rubber-Handled Sword – Although it’s not a particularly useful weapon, the sword is very mysterious. Prior to the Barbarian Makeover update, there was no way to obtain the sword unless you hacked the game. Hackers would share the sword with non-hackers making it spread like a virus. A good one, though, because if you had the sword that meant you’re really good at the game. Which of course doesn’t make any sense because any old fool could trade for the weapon.
Now, The Behemoth released a new update giving players a way to obtain the weapon without hacking. It’s explained in the video:
Animal Orbs
Animal Orbs are small little animals that will follow you around and give you various buffs. They are found throughout the game in hiding spots and even sometimes out in the open. You can also buy them from different stores, and one can be unlocked by buying BattleBlock Theater from the steam store. They can be accessed at anytime by visiting the “Blacksmith” level and going inside the animal ark. You can only have one animal orb at a time.
Unlocking
You will find them in various stores for 325-1,100 gold. They can also be found in levels, check the Walkthrough sections for detailed tutorials on how to unlock all of them, but you can also find basic information in the table below.
All Orbs
*This list is missing hawkster, due to a character limit on sections.


Insane Mode
Insane mode is a gamemode in Castle Crashers that is extremely difficult. To access it, you need to enter campaign mode with a character that has beaten the game once (indicated by the “white skull” on the selection screen.) and then go to the insane mode location on the map, location under “Barbarian Boss”. In here, you will play the game normally, but enemies will have increased damage and health. It takes a Castle Crashers expert to beat it, and is rewarded with a “Gold Skull” instead of a white one on the character selection screen.
10x Rule
In insane mode, almost all enemies will have 10 times the amount health and damage then they normally do, with the exception of the Frost King, who has 20 times more health/damage. This rule makes insane an extremely challenging task.
Useful Weapons
You can find some more specificly interesting weapons in the weapons section of this guide, but for now, let’s talk about what’s and what’s not good about a weapon.
Weapons with high strength are normally said to bad as they lower the amount of XP consumed, but when you get max stats, it doesn’t even matter. High strength lets you go through levels much faster.
Agility is vital to juggling and arrow spamming. It can be very helpful.
Defense is worthless, negated or added, so ignore it.
Magic is great for boss clearing so a decent magic weapon is recommended.
Weapons with elemental chances are powerful, but ignore ones that have shock chances. Shock is absolutely useless and does nothing to help you.
Crits are also very valuable. They’re more valuable then elemental effects, in fact. A %1 crit chance can be better then a 2% poison.
In the end it’s basically down to just the Snakey Staff, Sai, Ninja Claw, and Gold Skull Mace, so just use those.
Useful Animal Orbs
Animal Orbs that gives more health can be very useful for people that are having trouble avoiding attacks, but stay away from defense pets such as snailburt or spiny. Defense is powerful in numbers, but a +4 normally doesn’t do much.
- Hawkster – Gathers fruit from dead enemies and pecks knocked down ones.
- Meowburt – Great amount of agility, which is helpful.
- Scratchpaw – Adds +2 to the most helpful stats in the game, agility and strength.
- BiPolar Bear – Prevents overkill and mauls bosses under 11% health.
- Piggy – Makes fruit give you 2x the amount of health, and chicken legs and hamburgers give you 1.5x more health.
- Cardinal – Uselessly funny.
- Rammy and Bitey Bat – Helpful for keeping enemies away from you, but sometimes will interrupt your combos.
General Strategies
- Much like arena, juggling is the only possible way you’ll be able to defeat insane mode. You need to know each enemies weight, and what combo to do on each weight. Check the juggling section for more information.
- Although lots of professionals look down upon it, arrow spamming can help you out a lot when you’re in a bind. Low health, no potions, only one wave left, simply spam your arrows. More in the “Special Techniques” section.
- You need to know the enemies’ AI and timing to precisely know when to attack or retreat. Use your head and watch out for incoming attacks.
- Bombs are great if your getting swarmed, just know when to throw them, and remember, you are still vulnerable when you’re throwing them.
- Low strength weapons/stats are normally recommended to XP grind, but XP won’t help you in insane mode. High strength can be your saviour.
- Insane really can be beaten at any XP level, but 35+ is a good start.
- Practice all your combos in normal mode.
- Try not to attack on the ground unless using XXXY or splash attack. On the ground enemies can target you easier.
- An alternative to shielding is to “zig zag”, a tactic where you simply zig zag across the screen. With max agility, you shouldn’t be caught by enemies. With no agility, it could be your demise.
- Get a good loadout for each level. If you’ve got a level with a challenging boss, get a good magic weapon and BiPolar bear. If you’ve got a level that’s easy and you can XP farm from it, grab Giraffey and the Glowstick.
- Always stalk up on max health potions and bombs.
- Don’t ever use beefies unless dealing with enemies that rapidly shoot arrows. When using a beefy, you can’t be knocked by, so more enemies can hit you in less time.
- Don’t waste your time digging up or finding weapons/animal orbs. You can get them later on normal mode.
- If you ever have trouble, don’t be afraid to ask a friend for help. More players means reviving and auto potions, but it can also mean more enemies spawn at some points in certain levels like Marsh so be careful and make sure you have good players on your side.
XP Grinding
A majority of information taken from U-Knighted’s XP guide.
Video
Here’s a nifty video by yours truly for those who prefer to see pretty much everything here in action.
Getting Started
Before we begin, we need to establish how the Castle Crashers XP system works. You can view more about this in the “stats” section. Despite what you might know and think, you don’t get XP for every kill you get. XP is measured in the amount of hits you deal on an enemy. For every hit you do, you get 1 experience point. Thus, to increase the amount of XP you gain, you need to do more hits on enemies.
For instance, if I had a sword that did 15 damage per hit, and I attack an enemy that had 75 health, it would take me 5 hits to kill him, leaving me with a total of 5 XP. But, if I had a weaker weapon that did 7 damage per hit, it would take about 11 hits to kill the enemy, leaving me with 11 XP. If I combine a weaker weapon with a weaker strength stat, I would do about 4 damage per hit, depending on how weak my strength was. Then, it would take me 18 hits to kill the enemy, giving me 18 XP. See that? We didn’t just double our XP count, but we tripled it. A low strength bar is the key to XP.
Also, you’re going to need to learn how to juggle. Check the Juggling Section for more information.
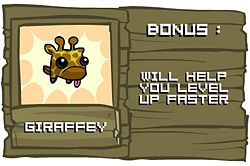
This is an obvious one. As appose to the normal 1 XP per hit you get 1.1 XP per hit, making you level up 10% faster.
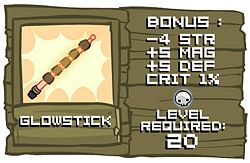
Using the glowstick, you’ll also get +5 Magic, (Great for boss clearing characters) +5 Defense,(Making you a tank) and -4 Strength. (Helping you level up faster.) Along with all this, you get 1% electricity chance.
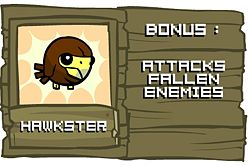
Hawkster is the secret pet of XP. Not many players know about his powerful abilities. Once an enemy is knocked down, hawkster will peck him, doing 1 damage, which is the smallest amount of damage that can be possibly done. This is overrall a great method for farming XP. Despite popular belief, he only gives 1 XP per peck. (See the “Myths” section.)
Best Places to Grind
Catfish boss
How to:
Go to the Catfish Boss on insane mode, and spam your magic. You’ll do about 4-6 damage per hit, raking in lots of XP. Avoid hitting him when he’s hit by the cannon ball, as you’ll do more damage, which means less XP. Repeating this process can get you to a great level.
EXTRA DETAILS: You might level up 2 times in one run at first. But after a while it goes down to 1 time and sometimes you won’t level up at all. This works well until maybe level 68, then you’re going to have to play it a few more times to level up. But with the Industrialist/Fencer, it shouldn’t be a problem.
Thieves Forest
How to:
If you’re at a high level (26+) and looking for XP, then simply go to the Thieve’s Forest on insane mode.
When you get to the Troll Mother Boss, wait until she shoots out about 10 mini trolls. After that, start hitting ONLY the mini trolls, not the boss. Doing this will make you last for a while and farm in a lot of levels.
Be careful! The Trolls can deal out deadly damage to an adventurer with a low Defense bar!
Make sure to juggle them or you’ll die!
Pipistrello’s Cave
How to:
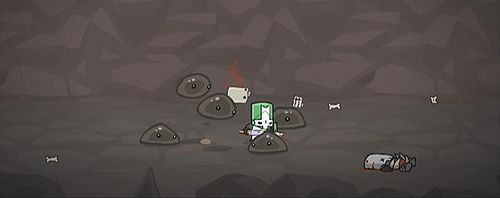
Take rammy (along with a weapon without a crit chance, as rammy can transfer that effect onto his attacks) into Pipistrello’s Cave but do not attack the slimes. Simply drag Rammy over them and he will start to damage them 1 hit point. You can do this until they die then attack the next wave of slimes. Instead of fighting the Pipistrello, the giant boss, simply exit to map and repeat.
EXTRA DETAILS: Normal mode is okay with levels below 20 or so but over that you’ll need to do insane mode. The thing about insane mode is that slimes do the same amount of damage, but with more health, making it easier.
Gold Grinding
There are powerful weapons and animal orbs that can only be achieved by gathering gold, mostly in hundreds, but sometimes thousands. To get this much, you need to find the right places to grind and how to do so.
Barbarian Boss
Required: Decent stats.
Efficiency level: Medium
Yep. Doesn’t take a genius to think of this one. Simply battle the barbarian boss over and over again until you get the desired amount of gold. Any character with a decent magic or even strength bar can take down the boss in seconds, and leave with 150ish gold. Characters such as Fire Demon or Fencer can take the boss down in a few splashes of their magic. If you have a friend with you, it’s best to let one person take the gold and the other stay on the side. When you get in a dual with your friend, simply exit to map and enter the level again.
Undead Cyclops and Painter
Required: Boss clearers with high magic levels
Efficiency level: Extremely high with Fencer/Industrialist, other wise, Medium-high.
Simply go to the Wizard Castle Takeoff level and fight the bosses Undead Cyclops and Painter over and over again. You’ll walk away with 200-300 gold per fight, and once you break the crystal and exit the portal, enter it again to fight the boss again. I recommend painter over cyclops, but if the paintings get annoying, you can switch.

Achievements
Getting all of the achievements in Castle Crashers isn’t a hard task but more of a grind. Most of these can be missed on a blind play-through but can easily be achieved in the end-game.

Defeat any end boss without using any magic.
How to: Simply put don’t touch RT for a boss battle. Go to the Barbarian boss since he is the easiest.

Using a catapult, fling a knight with maximum power.
How to: Go to the level Flowery Field and make it up to the part in which you have to launch yourself of a catapult. In order to achieve, tap X when the bar is a max power. This will take you a couple tries to get the timing right but an easy “achieveo” non the less.

Navigate the Abandoned Mill without hitting any obstacles.
How to: As description states go to the level “Abandoned Mill” and clear the troll chase sequence without hitting a single obsticle. This includes logs, drywall, and even the troll himself. Simple hang back (not to far or you will hit the troll) and wait for the other deer’s movement and follow them. Also be on the lookout for beams of light coming out of the doorway of the drywalls, these will help you navigate to the doorway easier so you don’t get hit. Soon you will have the level memorized by heart!

Complete the game using any character.
How to: Simply beat Castle Crashers. Hope you enjoyed an amazing game by The Behemoth!

Find and dig up ten buried items.
How to: In the Desert level make sure you obtain the shovel (it will come in handy later trust me). Continue through out the level and everytime you see a “x” on the ground, scoop it up with your shovel. Do this 10 times and your golden. Use RB to switch to your shovel and B to dig.

In a 4 player game, resuscitate each of your fallen comrades at least once.
How to: This is one of those “grindy” achievements I talked about earlier. You will need 3 other friends for this achievement. They can be your Steam friends or you can use 3 other controllers. Go to Lava World and have three other people stand in front of some fire. Once they die head over to them and press Y to revive them. Do this for all three of your fellow knights and you will get another shiny achievement.

Defeat any boss by playing one of his own minions.
How to: Head over to the Kings Arena and defeat all 10 waves of enemies that appear. If you survive all of the waves you will unlock the Barbarian Knight. Exit and re-enter a new game with the Barbarian Knight. Play up to the Barbarian boss and defeat him.

Collect all 4 princesses’ kisses in a multiplayer game.
How to: Simply plug in a second controller and beat boss battle. After you defeat the boss you will be prompted to battle with your fellow knight to fight for a kiss from one of the four princesses. Win against player 2 and get the kiss! You will have to repeat this process in all four major boss battles. Those include Barbarian Boss, Cyclops’ Fortress, and Final Battle.

Complete the Home Castle through Barbarian Boss areas without attacking any foes.
How to: You will need a friend for this achievement. You have to make it all the way to the barbarian boss without attacking a single enemy. Even the slightest tap of the X button will ruin your chances for this achievement. This requires a second player as they will have to attack all of the foes while you just hang back and chill.

Collect all the animal orbs.
How to: Not the toughest achievement but it will more than certainly take a bit of grinding. You will need to collect all of the animal orbs including the one in shop (also includes the insane store). See the Animal Orbs Section for more info

Win 40 Arena Online Matches.
How to: There are two ways to get this achievement.
Easy way: Have a very generous friend allow you to repeatedly win in a private lobby
FaZe MLG way: Do it legit online.
Unless you like waiting in lobbies for eternity, Do it the “Easy way”. Also pick melee mode since it is the easiest mode to quickly grind off of. This doesn’t have to be done in one sitting, but it DOES have do be done with the same character as your lifetime wins are preserved for that character only.

Survive until 2:30 in a Back Off Barbarian match.
How to: This achievement has changed since it was known as the good ol’ Glork! achievement. This achievement requires you to stay alive for 2:30 in the Back off Barbarian mode. There isn’t much too it, it can only be done legit. Practice makes perfect!
Myths and Rumors
Ninja has augmented Melee speed.
False
Ninja does not have a faster attack rate. You’d assume that this rumor likely arose from the fact that Ninja’s typically attack quickly, but its likely orgins probably come from the PS3 bug. In the PS3 edition, attack rates are considerably faster, which is probably where the confusion of certain characters having slower/faster attack speeds came from.
https://www.youtube.com/watch?v=tSQBP-nm8qw
Fencer has a cheaper Mana cost than Industrialist.
False
Industrialist and Fencer are reskins. Their magic attacks are indentical in every way, and the only differences between them are their character models and starting weapons. Fencer, however, is harder to unlock than the Industrialist, so some players likely started this rumor to make it seem like he’s worth unlocking.
https://www.youtube.com/watch?v=8s2e74tehN8
Some projectiles move faster than others.
True, to an extent.
After a few tests, I’ve concluded that certain projectiles do indeed have a faster movement speed than others. These projectiles are usually non-elemental ones. However, be cautious, and don’t believe everything you read, as only the ones on this list I can guarantee move faster.
Incomplete list of Quick Moving Projecitles:
- Dark Shot
- Shuriken
- Skeleton (this one moves extremely fast)
Hawkster’s Peck grinds bonus XP.
False
I even believed this one at first. It was a widespread belief that Hawkster was the best pet for XP grinding. Whenever an enemy was knocked down, he’d peck them, doing micro amounts of damage, but also gaining 4x the XP. However, after some tests, I’ve concluded that Hawkster harvests only 1 XP for pecking, instead of the rumored 4-5.
Red Knight’s Splash does not harvest XP from bosses.
True
I’ve seen this pop up a few times. It is, unfortunately, true. Due to some sort of bug, Red Knight’s splash doesn’t gain XP on bosses. This makes him very ineffective for grinding XP on bosses like Painter and Catfish.
For Further Info
Castle Crashers may be an old game, but the fanbase is still growing. This chapter is going to be your ultimate Castle Crashers resource.
That’s right, you’re on the ultimate Castle Crashers resource. Sure, there are more options, but more or less this is all you need to know about the game, and more.
The wiki is probably one of the best choices for information. U-Knighted is an admin there, so he can help you out easily! It covers some things that we didn’t in the guide, so it’s worth reading.
Check it out here.[castlecrashers.wikia.com]
We now have a discord! Meet players, arrange to play, compete in tournaments, find guides, get free weapons and level help, join giveaways, contribute to the official tier list, and more! Join it here.[discord.gg]
The Castle Crashers Army is one of the fastest growing Castle Crashers groups on steam. Join the group here.
Sometimes the best resources are just other users. Any player that helped create this guide (view them on the right in the collaborators list) is a great resource. Just add them and ask if they would like to play!
Meet The Writers
- I like to grind achievements, play shovel knight, and eat ravioli.
- Crashing since 2014!
- Green Knight Main
- http://www.youtube.com/user/GameGangEliteForce
- Guides
- You probably won’t ever meet someone who hates Castle Crashers as much as I do.
- Crashing since 2013!
- Blue Knight Main
- https://www.youtube.com/channel/UCO9DtxabZWZpv_k-rsUx7FA
- Guides
- I have all gold skulls mate. Proof –
- Crashing since 2013!
- Open Faced Grey Knight Main
- https://www.youtube.com/channel/UCmPAmNzcfsq2AcO74Y7Ub_A
- Guides
The End
Well this is the end. We hope you found all of the information in the guide useful and maybe learned a thing or two. If you found some missing or incorrect information, please contact RetroOne to get these changes made. We strive to have the ultimate resource for everything Castle Crashers.
Sincerely, The Writers
Copyright 2019 TF. This item is not authorized for posting on Steam, except under the Steam account named RetroOne.
For Comments, Complaints, and Concerns
If you are an experienced Castle Crashers player and would like to contribute to this guide, please add Retro One and the changes will be made.
If you have any comments, complaints, or concerns for bad or missing information in the guide, please compile all your thoughts onto one big comment or contact the staff. Don’t be a ignorant little ♥♥♥♥ and spam the comments section (We won’t reply if you don’t follow these rules).
Thanks, The Team 🙂