Overview
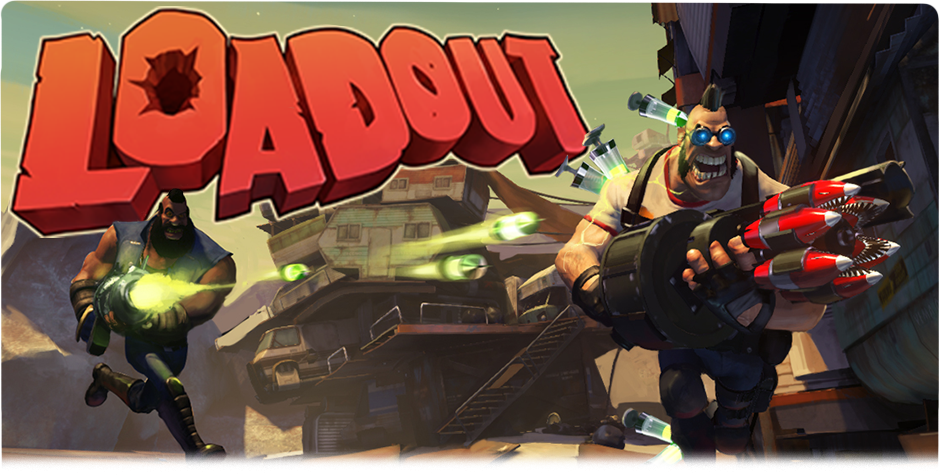
Everything you need to know about Loadout from start to finish right here!Enjoy!
About the game:
Loadout is an outrageous new multi-player shooter that’s all about the guns, baby! Build a massive variety of absolutely insane weaponry – billions of combinations – totally customized, totally unique, and totally deadly.
The robust and modular Weaponcrafting system allows players to make their own weapons from a wide variety of weapon parts, and then modify their entire arsenal to suit their play style. There are no defined classes in Loadout. You define your own class through the weapons you create.
Loadout is also loaded with over-the-top comedic violence, stylish character models, and crazy player animations. EOR aims to add a fresh, new look to the shooter experience that gives players a full-adrenaline rush that is totally different from the vast array of modern combat titles. From their hilariously gory damage system, to their wacky character customizations, Loadout will appeal to the lunatic in us all. But don’t let the demented humor fool you. At its core, Loadout is a fast-paced shooter that’s easy to learn, but hard to master.
PLAYER PROGRESSION
Loadout is free to play, but definitely not pay to win. No one can buy power in Loadout. All players will earn experience for playing matches, level up and unlock additional Loadout and weapon slots for free. Players also earn Blutes as they play matches. Blutes are earned only by playing—they can never be purchased. Blutes are used in the Tech Tree to unlock and upgrade weapon parts, payloads, and equipment. Players can optionally purchase Spacebux, which are spent in the Outfitter to customize their character with outfits, taunts, and extra Loadout and weapon slots.
Controls:
Firstly, here are the controls for the game. Learn these as best you can & they will become second-nature in time. Then you won’t have to ask in game,…”how do you throw a grenade?”…….or……”how do you pick up blutonium?”…..’casue you’ll already know!

Now, should you feel a bit uncomfortable with these controls, you can always go into the settings, under “options”, & change the keybindings yourself, to something you like.

The Menus:
When you first start the game, you get taken straight to the menus, when you can either start a game or customise your settings or whatever.

Moving from left to right:
Firstly is the home tab. Which is the screen you are currently on.
Second is the the “Fight” tab, which is where you can start a game with either bots, other human players, start a private game or start a game of Annihilation (Ranked match).
Next is weaponcrafting.
This is where you need to go to create those wonderful guns that do wonderful damage!! Here you can customise existing weapons & test them out before using them too.
Fourth is Loadouts.
This is where you put all those wonderful “creations” together by choosing 2 weapons & a piece of equipment to use as a particular loadout.
Next is the outfitter.
Here you can customise what your character wears, looks like & behaves. You can select the clothes, hair, & the taunts your character will do. Be aware that the majority of clothes & taunts in the outfitter cost “Spacebux” to use. Only a very small ammount are free & can also be picked up in game through the “Daily Prize”. (Which usually gives away blutes & not many outfits.)
Next is the locker.
This is where you can see your stats & change your avatar icon.
Next is the Tech tree.
This is where you can see what XP you have gained on each weapon part & (if you have enough blutes), upgrade them. Equipment can be bought here also, providing you have enough blutes!
Next is the store.
Here you can buy more “Spacebux”, blute or XP boosts, or even more weapon slots or loadouts. It’s up to you.


Lastly in the top right hand corner of the screen are four little icons, they are in order;
Credits, Friends list, Settings & Exit Game.
Credits is self-explanitory. Friends list shows you who’s online & in-game, & is also where you can search for other players to make friends with. Settings controls the games settings, such as region, language, key bindings etc… & well Exit game,….you know what that one does!
The bottom right-hand corner of the screen shows you your “Blutes” total & your “Spacebux” total.
And that’s it for the menus.
Weaponcrafting:
Here’s a short vid to explain:
CUSTOMIZE
Designing your perfect weapon in Loadout is easy. First pick the Chassis to determine what type of projectiles your gun fires. Second, customize the chassis with parts to modify the behavior of the gun to your precise design. Finally, select a Payload to imbue your gun with an additional attribute.
CHASSIS
The chassis determines how you deal death to the other team. Rifles shoot bullets with near-instantaneous travel time. Launchers fire a variety of self-propelled rockets with great damage potential. The Pulse chassis fires a barrage of fast-moving projectiles, and Beam unleashes a continuous stream of death.
PARTS
Select each Part to fine-tune the performance of your weapon until it kills just the way you like. Tinker with the barrel, scope, trigger, stock, magazine, and more to create the exact tool for the job at hand.
Start with a Pulse chassis then add an X-Ray scope and Bouncy Dynamics to see your enemies through walls, then harass them by banking shots at them from around corners. Or customize a Launcher with Scuttle Propulsion, Sticky Shells, and Quad Cluster to fire mines that crawl along the floor, stick to walls or enemies, and then explode setting off additional secondary explosions. The parts refine your weapon into a work of death-dealing art.
PAYLOADS
Last, but not least, the Payload imbues your weapon’s projectiles with an incredible additional property. Loadout has five distinct Payloads to choose from, ranging from dealing extra damage over time, to healing, to buffing.
SLUG:
The Classic. Perforate, dismember, and explode your opponents with direct fire projectiles like bullets, shells, and rockets. Slug is for the traditionalist, who appreciates the crack of a sniper shot over newfangled gizmos.

TESLA:
Like the hum of electricity? Like it better when it’s coursing through someone else’s body? Then the Tesla payload is for you. Tesla has all the predictability of a lightning bolt, and might just arc to nearby targets for double the fun—shocking!

HEALTH:
Everyone loves someone using Health. Except the other team. They’ll try and mercilessly murder you at every opportunity because of how important you are. But they’ll have a tough time with that, since Health lets you Overheal your teammates to 150% health before the fight, and keep them topped up during.

PYRO:
Let’s set the world on fire—or at least the other team. Pyro puts all of your burning needs in the palm of your hand, literally. Use Pyro to incinerate your foes, causing burning damage over time. Laugh as they crumple into small pyres to your glory.

THE JUICE:
Need a pick-me-up? Feeling a bit down? Then Juice is for you! Use it on yourself or teammates to move faster and deal more damage. Does the idea of pounding your opponents into pulp appeal to you? Then grab some friends and Juice up. Your opponents won’t believe what hit them—or how good you looked doing it.

Equipment:
Before going into battle, you make sure you’ve got the right weapons yeah? Well what about equipment? With every Loadout you create, you have two slots for your chosen weapons, & one slot for an equipment piece. So make sure you choose the right piece of equipment for the right job.
In every map you play in Loadout, you will find health packs, (left), & equipment crates, (right), scattered around the map. A health pack will fully restore your health to full, & an equipment box will replenish your stock of chosen equipment.


Other items that you can choose for your equipment are;
*Hand grenades *Healing grenades *Buff grenades *Tesla grenades & *Fire grenades. All these grenades when thrown & explode will do the same thing as their weapon counter-part. ie: Healing grenades heal, Tesla grenades electrocute etc etc…


*The Personal Shield: When activated, this shield will surround your body & protect you from enemy bullets for a short period (about 20 seconds or so), but beware is vulnerable to tesla fire, which will destroy it, & you!
*The Jump Boots: These will make you feel like you can fly & give you that “added boost” when jumping across large distances. If you activate these when you jump, you will be able to make it across larger gaps that you usually would not be able to make. However, they only have a short burst, so use wisely!
*The Disguise: This will “disguise” you as one of the enemy when you activate it. So to the enemy, you will look & appear as one of them, that is until you start shooting at them! (Kind of a give-away!) Again, when activated, will only last for a short period of around 20-30 seconds before reverting back to your usual ugly self!
*The Turret Buddy: My personal favorite! This is a deployable sentry gun & will “mimic” whatever gun you are currently holding at the time. It’s just like having two of the same gun! So if I’m holding a pulse healer when I deploy the turret buddy, it will deploy as a pulse healer. If my other weapon in that very loadout was a sniper rifle, then if I switch to that weapon before deploying the turret, & then deploy it, the turret will deploy as a sniper rifle sentry. But remember, that rfiles with scopes, will narrow the field of vision of the turret buddy when deployed. For best results use a weapon with “Iron Sights”. Unlike grenades where you can carry two, your equipment slot can only accomodate one turret buddy at a time. So once you’ve deployed it, you’ll need to fetch another equipment crate to deploy it the next time.
*The Spawn Point: This little puppy does exactly what it says. It is a mobile spawn point that lets you choose where you want to spawn from when you die, instead of the same usual place all the way at the other end of the map! Every time you die you will spawn on this point (wherever you decide to put it), until your point is destroyed, then your spawn will return to the default place.

*The Faux Health Pack: Packed with a deadly surpsise! Definately not health! Great for baiting enemies that don’t look carefully at what they pick up, as this will do the opposite of the health pack & take all the health of the person who collects it with a big BOOM!
*Equipment crate: This is a great support item to help your team-mates. Funny how there’s never an equipment crate around when you need one, well now there can be. Just drop a few of these babies around your team’s stronghold, & they’ll never run out of grenades & the things they need!
*Faux Equipment crate: Same as faux health pack, makes an unsuspecting enemy go BOOM!
*Deployable Shield: As the name suggests, deploys a shield in front of you to stand behind & shoot through from cover. Unlike the Personal shield, this one will fix itself to the ground where you deploy it & cannot be moved until it’s destroyed. It is big enough for two or three players to stand behind, but much more comfortable when there’s only one. Again, watch out for enemies carrying Tesla, as Tesla will eat through the shield in no time flat.
Loadouts:
The term “loadout” simply refers to the combination of weapons & equipment you have chosen, combined with a selectable character.
So once you’ve created several weapons, you can choose which ones to pair together in a loadout, choose the equipment, then choose the character & you’re away. You can even re-name the loadout to make it easier for you to find in the heat of battle. You do this by clicking on the little red square with 3 white dots in it next to the loadout in question. Then type your new name for it & hit save!
If you need more loadout slots later on, don’t worry, you can always unlock more in the store.
If you want to swap a weapon for another because you made a mistake or want a change, no problem. Just click on the weapon you wish to change, select the one you want from your library of weapons, then hit “OK”. Or you can simply double-click on the one you want & that will automatically fill that weapon in the place of the one you don’t want. Loadout changed! Easy!

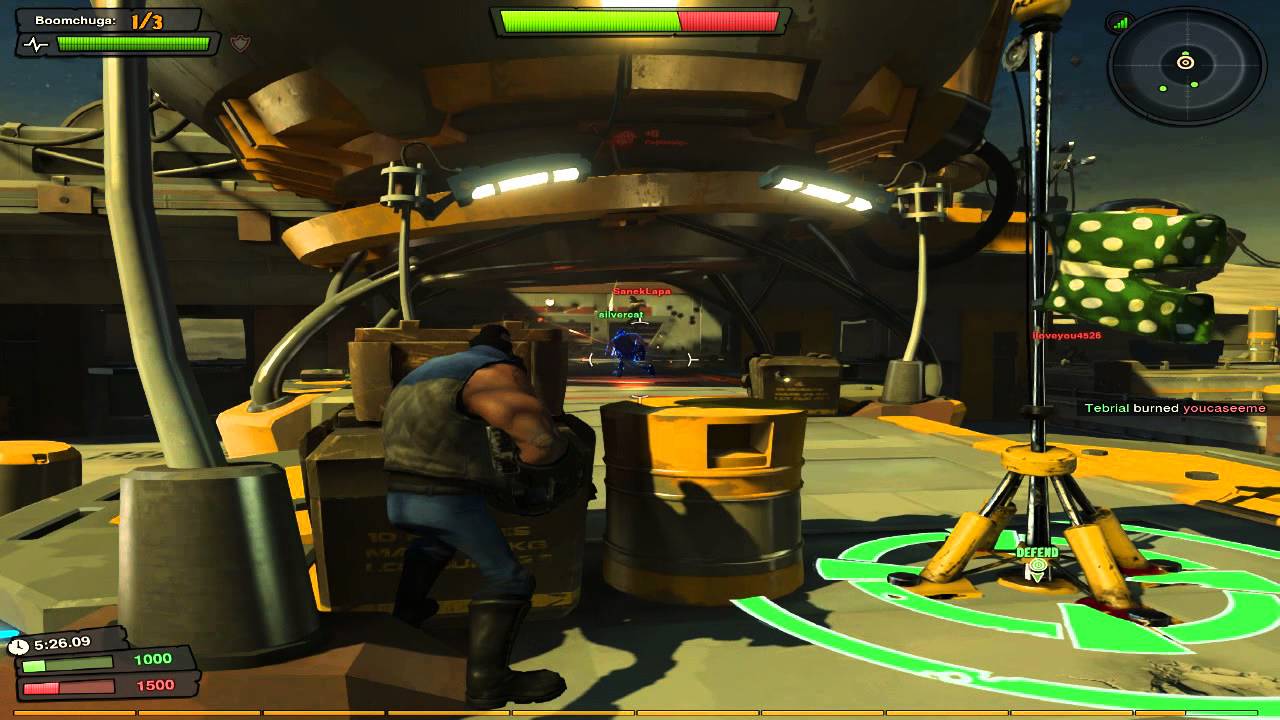
The Game Screen:

Make sure you keep an eye on your health & make sure this is full before attacking the enemy head-on. Always re-load weapons as soon as your finshed firing, & be sure to keep your equipment stocked up too. Watching these small things can help you alot & keep you out of trouble.

In the bottom left-hand corner of the screen is the timer & the scoreboard.
The timer always counts down to zero, & is when the game ends.
The score is shown underneath it, & displays your team’s score in green & the enemy’s score in red.
The centre-bottom of the screen will display flash messages that are non-critical, like the name of the person you just killed, & your current kill-streak, or who just killed you etc…
Lastly in the top right-hand corner is the radar.

The Radar:
Next, is one of the most important things on your screen,…..the radar.

You, or the enemy, will show up on radar when you fire your weapon, run (sprint), or dive-roll.
However, if you use a silencer, (see the tech tree), on your weapon of choice (except launchers), you will not be visible to enemy radar, and same if you are standing still. This however does not make you visually invisible! (Meaning the enemy can still see you if they are looking at you. You just won’t show up on their radar). Be sure to keep an eye on your radar during the match as it can alert you to potential threats & guide you to objectives!
Timer:
This game is pretty straight forward, but one of the few things that players seem to over-look is the timer, which always counts down to zero.

Now, what they don’t tell you, is that if you finsh the game before this timer runs out, you may inadvertatly be “robbing” players of valuable points, XP & blutes. By this I mean, that the longer you & everybody else plays, the more points, XP & blutes everybody gets. So don’t be in such a hurry to finish the damn game! Let’s face it, you want to level-up those weapons quick as possible yeah???? Well in order to do that you need blutes to buy them, & those very blutes come from your time spent in-game. And those weapon parts need XP to get them ready for upgrade with your blutes, & that XP comes from usage of those weapons.
So in short,……the longer you spend in game,……the quicker you level up your weapons.
So when you see a bunch of players just sitting there taking pot shots at the enemy & in no particular hurry, don’t be so quick to call them “campers” or “farmers”. Even though that’s exactly what they may be (myself included!), their score & rewards are going to be much higher than yours!
So learn from them, & do as they do. Who knows, you may even learn a trick or two, or a nice hiding spot or something…..
In conclusion: TAKE YOUR TIME & RUN THE CLOCK DOWN!
Team-play:
This section is reasonably self-explanitory. Unless you’re a pro & are capable of multi-tasking on your own, then stay with your team! And by this I don’t mean literally stand on them, in front of them or get in their way. Be mindfull of where your team/players are, & what their objectives are.
For instance, if one of your team-mates has a sniper rifle & is parked WAY back from the action, chances are he is using that rifle,…SO DON”T STAND IN FRONT OF HIM!!!!! HE NEEDS TO SEE THROUGH HIS SCOPE!!!!! And don’t go setting up pissy turrets in front of him either, be mindful & respectful to others, by placing turrets to the side & standing to one side also.
Take note of who has a healing/juice weapon in the team, & remember that when they are using those weapons…..THEY ARE VULNERABLE!!!! If you have an offensive weapon (one that does damage), you need to cover these players with covering fire while they are healing/buffing.
When you need health yourself, don’t do running around like an idiot, It makes it alot harder for your team-mates to heal you. You should already know who has a healing weapon, & if you need health, make it easy for them by standing in-front of them & they’ll do their job of healing you, as you should for them.
Don’t worry if you die or have the wrong loadout or something, just do your best at helping the team win the objective as much as you can. Trust me, you’ll get more respect from your team for trying & failing, than trying to be a Rambo-wanna-be!
Communication is the key to success also. If you have a mic & headset,…..use it! Otherwise type.
Let your team know your’re going for health, or need an ammo crate, or are going to try a flanking manoevere, whatever! Keep them informed & the team will function as one!
Remember what your team’s objective is, & what part you have in it!

Deathsnatch:

This game mode is reasonably self-explanitory. Kill the enemy, & collect the blutonium he drops when he dies. The first team to reach a score of 3500 (35 captures), wins. However, you don’t always have to get every vial that is dropped.
Here’s a pro tip; stay with your team in a defendable postion, & keep killing the enemy. Only one player should venture forward to collect the vials, other wise keep shooting from a safe distance.
The reason I say this is because at the start of the game, you know where the enemy are spawning from & therefore are predictable & make easy targets,….hence lots of points!
As soon as everyone tries to rush in & get the vials of blutonium, the spawn point changes, & before you know it, the enemy is killing you from behind, spawning from a new point.
Not alot of people realise, that you don’t have to keep on picking up the vials until the game is won.
All you have to do, is make sure that your team has enough (just one or two), more than the enemy team at all times to guarantee victory.
Here’s another pro tip; if you leave several vials out there, they act as “bait” for the enemy, who will be drawn in to try & recover them.
Remember,….the enemy dosn’t score for collecting a vial from their own side, all your team has to do is stop the enemy from getting yours to score! So if your team already has a lead on the enemy with several vials, then all you have to do is make sure no-one dies where an enemy can get their vial of blutonium. Simple!
Then it’s just a matter of running the clock down & watching the points, XP, & blutes rack up!
Blitz:
This game mode is basically like capture the flag, only here it’s to raise the boxers up the flagpole on the control point!
In this game mode various control-points are randomly activated across the map, where you & your team-mates need to capture them before the enemy does. Each control point is worth 500 points when captured, & the game is won by which team reaches 3500 points, (7 captures of 500 points each) first, or until the timer runs out, whoever has the most at that point.
Pro tip for this game mode; Make sure you take a healing weapon & a damage weapon.
The reason for this is so when your team-mates arrive on the control point, you use your health weapon to heal everyone first, & then go on the offensive with your damage weapon to keep enemies at bay! Any control point will capture faster when there are more team-mates on the point at one time! This is why you need to heal fellow team-mates, to have as many “bodies” on the point as possible. The enemy will capture a control point even with you standing on it, if you are outnumbered.
Here’s another pro tip; control points will “capture” 10% faster if you use your “taunt” when upon them.
Domination:

Domination is very similar to Blitz, except there are 3 control points in any map. These points are designated “A, B, & C”, and are shown on the top-centre of your screen. When you & your team dominate a control point, it will change to green, indicating friendly capture, & when the enemy dominates a point, it turns red, indicating enemy capture.
Instead of capturing 6 control points to win like in Blitz, you & your team only have to “dominate” as many control points as possible most of the time to win the game.
Here is a common “rookie” mistake when playing Domination; new players running around like idiots, trying to capture & hold all 3 control points. This is a waste of time & only gets you killed more quickly. You & your team only need to make sure that at least 2 control points are dominated by your team at any given time & you will win the game! Sure, if you’re able to get all 3 of them, that’s a bonus, & will win the game quicker, but it’s not dire essential that you hold all 3 of them.
Here’s a pro tip for this game mode; same as Blitz, it’s advisable to take a healing weapon as a secondary weapon to heal your team mates. Also if you unlock or buy the turret buddy from the tech tree, using one here can provide useful in helping to hold a control point.
Also, try & pick the 2 points that are the closest to each other to dominate, & leave the furthest one for the enemy. Having 2 points close together will minimise travel between the 2, & save time that you ultimately need to capture. Sometimes you may also find a spot half-way between the 2 points that your team are holding, where you can shoot into both points without moving, to provide covering fire or healing. Ultimately, if you work as a team, you will win.
Extraction:

Extraction is avery simple game mode that can be quite frustraing to veteran players, who have a team-full of noobs that don’t know what they’re doing!
In this game mode, the map is scattered with chunks of blutonium all over the place, which your team needs to collect, & take to one of the collection points, which will be visible on your radar. This is the job of the Collector. You will know who this is because the game will tell the player who is made the collector & display the message “You are the collector” on the top centre of the collector’s screen. For everyone else, both the friendly & enemy collectors will have what looks like a nuclear symbol above their heads wherever they go,…..once again, the friendly collector will have a green symbol & the enemy will have a red one.
In case you’re asking; “how do I collect the blutonium?”……which I’ve seen a hundred times in-game, it’s very easy. Just press “E” when you’re running over the top of a chunk & your character will pick it up. To dispose of it, all you have to do is run past the collection point & your character will automatically throw it in,….you don’t even have to stop running, just get close enough to it!
For everybody else who is not collecting, it is your job to protect your team’s collector & try & kill the enemy’s collector. Again, it can provide useful here to take a healing weapon as a secondary, to heal your collector if he needs it, as well as a damage weapon for killing the enemy collector.
This game mode can be quite short, as the object to win the game is to be the first team to get 30 captures of blutonium. Now bear in mind, that if you’re made the collector, you only have about 20 seconds or so to get a chunk of blutonium into the collection point, before you will “self-detonate” or explode! Once you get that chunk into the point, the timer will reset again, so you can get the next chunk, but it dosn’t leave you alot of time to go running around like a Rambo-wanna-be shooting everythiing in sight, concentrate on collecting if you’re the collector, & leave the killing to your team mates. Once you die, the game will randomly select another collector.
If you’re not the collector, then it’s a free-for-all to shoot whatever enemy you like, but remember to keep an eye on your collector & if he’s taking fire, help him out by shooting the attacker & then healing your collector, so he can continue doing his job. If the enemy is gaining a lead, then target the enemy’s collector as priority.

Here’s a pro tip; those chunks of blutonium the collector carries are actually explosive! If you want to take down an enemy collector REAL quick, then shoot his blutonium he’s carrying & watch him explode! But remember, if you’re too close to the blast, you will die too!
Jackhammer:
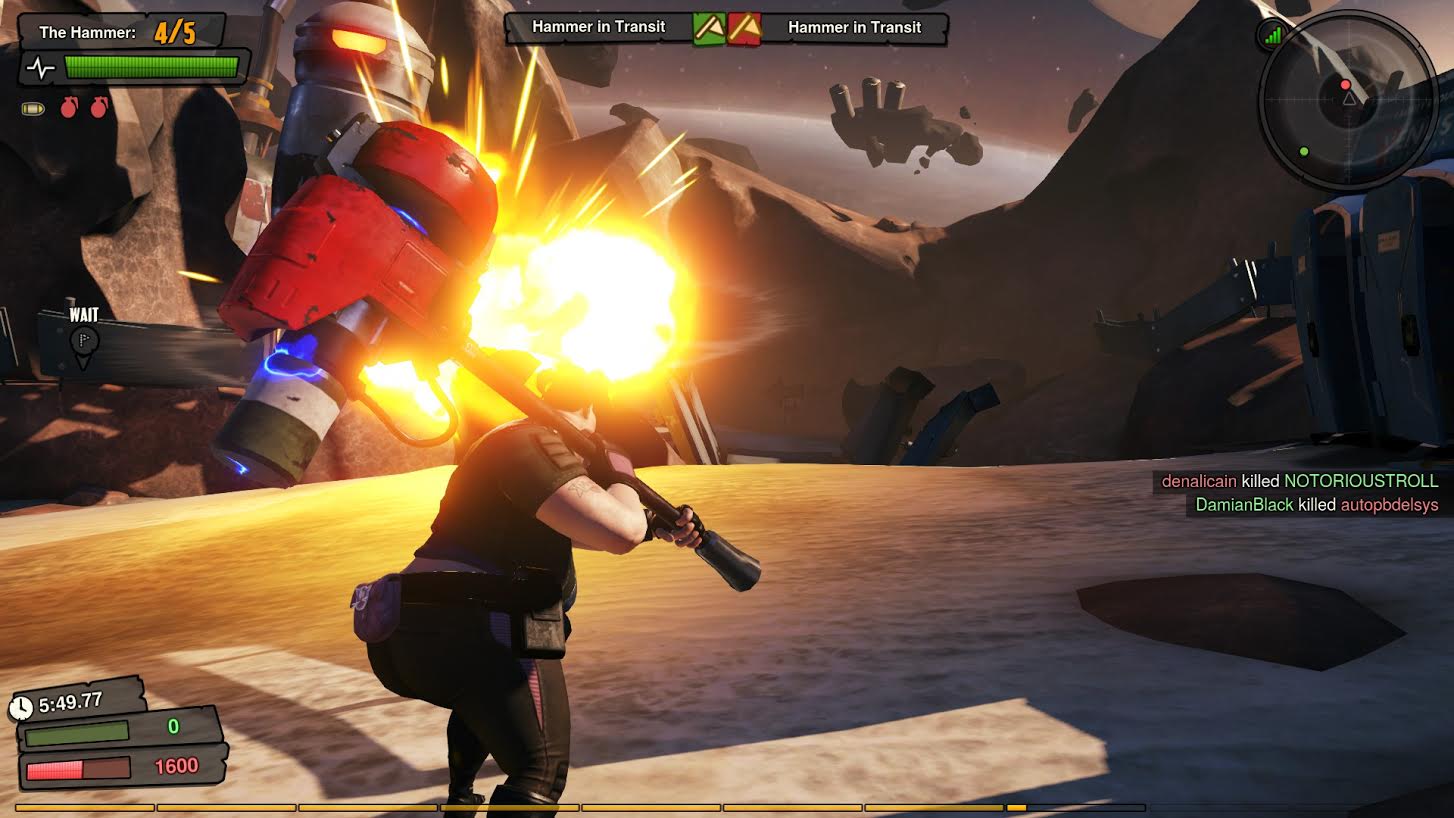
Jackhammer is very easy. It’s just like capture the flag again, only with hammers!
Each team has their own “hammer” at each end of the map. The object of the game, is to capture the enemy’s hammer by stealing it from their base, & bringing it back to yours, while stopping the enemy from doing the same.
The enemy cannot score with your hammer if their’s has been stolen, just like you cannot score with the enemy’s hammer if your’s has been stolen too. In order to score in this game, your hammer must be in it’s place at your home base when you or your team mate arrive with the enemy’s hammer to score, & vise-versa for the enemy.
A good tip for playing this game is to have 2 players go on the attack with damage weapons after the enemy’s hammer, have 1 player in support with a healing weapon taking care of the team, & have 1 player guarding home base from attack. This strategy dosn’t always work, but shows you the fundamentals of what needs to be done to score in this game mode.
Here’s another pro tip; you can score big in this game if you take your time & run the clock down, just like I said in the section on “Timer”.
Either side will win once the hammer has been captured 6 times, but what alot of new players don’t know, is that once the timer runs out, the team with the most captures still wins! So as a new player, you don’t have to keep running back & forwards getting the hammer & bringing it back, once is enough! Then just play a game of “keepings off”. If the enemy manages to capture the hammer & make the score level, then go & capture their hammer again to give your team the lead, then go back to playing “keepings off”.
All you need is ONE hammer capture to get the lead, & win the game, & make sure the enemy dosn’t get your’s until the timer runs out! So that gives you plenty of time to go killing enemy & getting more points, XP & of course blutes!
Money for jam! Easy!
Annihilation:
Firstly I’m goanna say that I wouldn’t be playing this game mode if I were you, at least not until I’ve gotten a fair bit of experience in-game & have leveled-up several of my weapons.
This game mode is Ranked! Meaning that the score you get here goes on the Loadout leaderboards & is played by alot of hard-core players & pro’s. If you don’t know what you’re doing here, then prepare to have your butt kicked many multiple times & made to look like the true noob you are. Do not attempt this game mode until you are comfortable that you know what you are doing & have some skill, & some good weapons to match!
That said, this game mode is a combination of 3 other game modes: Blitz, Deathsnatch & Jackhammer. The object of this game, is to ultimately destroy the enemy dropship, which is parked exactly where the hammer would be if you playing Jackhammer. Your dropship is in the same place, but on the other side of the map, naturally!
To do this, you will need to score enough points (10,000 to be exact!), by capturing control points, collecting vials of blutonium, capping the hammer etc… to eventually move to the next stage & steal their hammer inside. Once you do this, you need to return it to your ship where you will “charge” it with electricity from your ship’s power supply, then go back to the enemy ship & smash their power supply inside!

When you start the game, you will spawn inside your dropship & have 3 funny looking machines in front of you that you can activate. All make your weapons/body behave differently.

The red skull on the left does a damage boost to enemies, the blue shield makes you more resilient to damage, & the green cross means you give a health boost to teammates. So depending on whether you’re going to go on the offensive or defensive, you can take a boost accordingly.
There are various control points around the map that activate & you need to control as much as possible. When captured these will give you a damage buff for a short period to inflict max damage on the enemy, and give your team more points toward the 10,000 you need for the next stage.
All while this is going on your team needs to be stealing the hammer, killing enemy & collecting the blutonium vials, & capturing control points to get to that magical 10,000 points, all while stopping the enemy from doing the same. Sounds hectic? It can be!
Pro tip: Don’t bother trying to join this game mode on your own either. There are not enough players playing this game at the moment, so unless you form a team of about 7 or 8 players, you won’t get a game & will be waiting a very long time! Trust me!
Achievements:
Most of the achievements in this game will unlock on their own as you naturally progress through the game. Such as complete level 1, complete level 5 etc etc….
But there are 3 achievements that you new guys are going to have trouble with, & they are;

Damage Denied;
Kill an enemy who has a damage boost in Annihilation.
Get Off My Lawn;
Use the hammer to destroy the enemy dropship in Annihilation.
A Bro Among Bros;
Refer a friend with the Bro program.
The first 2 achievements here are going to be a problem for you, due to the fact about you being a new guy & all, & if you read my section on Annihilation, who will know what I’m talking about.
The last one, (A Bro Among Bros), may not be that difficult if you have lots of friends who play this game. If you don’t, then it will be rather hard indeed!
In order to get it, you must go to Loadout.com & create an account by joining. Once you do, it will give you a “bro code” in your account details. You then need to give this code to a friend & tell him to do the same, (create his account), but using your code you’ve just given him. Once the system at Loadout.com. registers that your friend has created his account using your “bro code”, it will unlock the achievement for you, but unfortunately not for him. He will need to do the same thing you just did, but with another of his friends, to create their account with his code & so on…….
As for the rest of the achievements, they unfortunately just take a bit of time! But you will get them. If you need to find out which ones you have or need, just click on the game title from your games library in Steam, & select achievements from the right-hand side of the screen, which will be the 2nd heading underneath the title “Links”. This will bring up your achievement screen & show you your progress. Good luck.
EDIT: I think the DEVs will be deleting the “Bro Among Bros” achievement shortly for those who don’t have it. But will remain for those that already do.
Blutes:
Some facts about blutes:
Earn only by playing
Affect your Power
Unlock Weapons
Unlock Payloads
Unlock Equipment
Upgrade Parts
Used on the Tech Tree!

You can purchase a “blute-boost” from the store with spacebux if you wish to earn a double-dose of blutes every time you play.

Spacebux:
Some facts about Spacebux:
Purchasable
Affect Cosmetics & Customization
Unlock Clothing Options to look cool
Unlock Taunts to show off
Unlock Boosts to speed leveling
Extra Weapon Slots & Loadouts
Used in the Outfitter!
To purchase spacebux, you simply need to go to the store & find the tab that says “Get Spacebux”.
You can use your Steam Wallet Funds to buy them too.
Click “Get Spacebux” (the red tab), then you will get this screen:


Once you have purchased Spacebux, your new total will be displayed next to the blutes total in the bottom right-hand corner of your screen.

XP & XP boosts:
XP is very straight forward. It is the experience you gain for using a weapon part. The more you use that part, the more you gain. Once you have gained enough XP on a particular part, it becomes ready for upgrade, to buy the next level part with a set amount of blutes.
The amount of XP you have acquired, can be seen in the tech tree by looking at the yellow bar for each weapon part. Once a part is fully “maxed-out” with XP, the red tab underneath it saying “Upgrade” will be highlighted red, indicating that the part is ready for upgrade. (Provided you have enough blutes for that of course! If you don’t, the red “Upgrade” tab won’t light up.
If you’re after an XP boost, then you need to go to the store & buy which one you want with your Spacebux.


Once you have bought a boost, as with a blute boost, the 2x symbol will appear in the bottom right-hand corner of the screen, next to the blute-boost symbol, only difference is the XP boost symbol will be gold or yellow in colour.

This means you will earn twice as much XP on all your weapons you use during the period of boost. But once it runs out, you’ll go back to earning only the minimal amount. The number in front of it, shows how many days the boost is active for, in this case one day.
The Outfitter:

DRESS TO IMPRESS!
The Outfitter is all about options, character customization, and personality. But not power—power is all in the Tech Tree. The Outfitter has three categories of items: Boosts, Loadout slots, and Cosmetics. Boosts grant a bonus modifier to the amount of Blutes and Experience gained while playing. Loadout slots are for players who really, really like Weaponcrafting and want more options—but remember: a player can only have one Loadout equipped at a time. Most importantly, the Outfitter is where all the character customization and personality happens!
Loadout has three characters to pick from: Axl, T-Bone, and Helga. After a hard day annihilating one another, they hang out in the Outfitter with all their clothing options. And there are a ton. Each character has a variety of categories ranging from hats and facial hair to belts, shirts, and pants—or lack thereof! T-Bone feels divine in a tiger-print thong; Axl loves to flaunt his guns in the Black Tux Jacket. And Helga, well, she just loves it all: from the badass military fatigues to the ever sultry sweatpants. Grab a character and go wild! There are options from the comical to the badass, and everything in between.
Here I show off all the available taunts you can use in the game.
Last, but certainly not least, players can use Spacebux to unlock Taunts in the Outfitter. Taunts are great for showing off after a great kill or objective capture—or just to celebrate being awesome. Each character can have four taunts equipped, and there are way more than we could list. From the ever-sarcastic Golf Clap to Twerking to Playing Air guitar on the equipped weapon, Taunts are the final piece of the personalization and customization puzzle. And when you’re first place and your character is center stage for the post match victory screen, you’re gonna want to show off with some choice Taunts.
More pro tips:
Still want more tips????? See down in the bottom righ-hand corner of this screen, you can see a dialog box with the heading “Pro tip” in it?
That’s what you want to read. There are 34 different tips to read that will help you even more with your game. Don’t be afraid to give some of them a try. Use the left & right red arrows to scroll through all of them.

Reporting abusive behaviour:
(Taken from Loadout.com)
If you encounter a player in-game that is not following the Code of Conduct, please use the F7 button to report them. It is a much better way for us check into the actions of reported users.

How We Handle Abuse:
Whenever anyone files an F7 report for player abuse, it goes into a log
We can then look at the chat and game logs to see what’s going on
In most cases, we decide that one or more people need an official warning
In some cases, like extreme abuse or a continued pattern of behavior, we put the account on timeout, or outright perma-ban
Mark Nau also spend some of my time fishing through chat logs to look for unreported jackasses. That’s obviously not 100% effective because I’m not going to catch everything.
But F7 is reliable. We look at ALL of those.
Please use F7 to report jerks. I promise you we take care of every one of them.
Respect:
Lastly I want to remind you new players, that YOU are the new guys!
Don’t come into this game & try & throw your bad comments around like you own the place, & then complain about the response you get when you do!
Stop accusing us of “hacking” or “cheating” just because we are good at this game & know what we are doing! It’s not our problem that you can’t play as good as us & then get beaten easily! Show us the respect we deserve & we will gladly return it, & help you play better. Otherwise get used to seeing your name on the bottom of the scoreboard every time!
We appreciate that you’re new, & if you want to learn, great, we’ll teach you, but don’t dis-respect the people that are trying to do just that!
If you’re not sure of something……ASK!
If you have a problem & need help….ASK!
If you can’t play as part of a team & don’t like it when other better players beat you, then this is probably not the game for you.
But if you’re willing to learn & can respect other players, then you’re welcome!
Play fair, & play as a team, & most of all,…..have fun!
Help & Support:


Should you have any problems or queries with the game, here is the official Loadout forum where you can go to for help & FAQ:
[link]Here is the Steam forum for bugs & crashes:
[link]Here is the Steam forum for general discussions:
[link]
Please be sure to be as specific as you can when describing a problem, as there are alot of players out there who can help, but they can’t do so, if they don’t know what the problem is. Please be patient & courteous & you’ll get a reply.
Happy gaming!
P.S: Please feel free to rate/favorite this guide if you like it. Thank you. 🙂
The End.