The Ultimate Modding Guide
Introduction
From curiosity and research, I found a very simple way to mod this awesome game. What does this mean? Well, you can modify a character, a sound or a background! How? Continue reading!
Before we start, you might want to make a backup folder for the game and a folder for the modding stuff.
Join Randll on his Discord Server!! https://discord.gg/htx9pK4
Before we start, you might want to make a backup folder for the game and a folder for the modding stuff.
Join Randll on his Discord Server!! https://discord.gg/htx9pK4
Tools Needed
Compilers
Files to XNB - https://randll.com/rebox
-----------------------------------------------------------------------------
Extractors
XNB to PNG - http://www.cl.ly/3D0X0l3M3m0e2X2q3N3q
XNB to WAV - http://www.gluevault.com/download/file/fid/323
-----------------------------------------------------------------------------
Editing Software
you only need one
Photoshop - http://www.adobe.com/products/photoshop/free-trial-download.html (Trial)
Affnity Photo - https://affinity.serif.com/en-us/photo/ (49.99 USD)
Pixlr - https://pixlr.com/editor/ (Needs Flash Player)
Gimp - https://www.gimp.org/downloads/ (Free)
-----------------------------------------------------------------------------
Audio Converter - http://media.io/
-----------------------------------------------------------------------------
Support
Note
Files to XNB - https://randll.com/rebox
-----------------------------------------------------------------------------
Extractors
XNB to PNG - http://www.cl.ly/3D0X0l3M3m0e2X2q3N3q
XNB to WAV - http://www.gluevault.com/download/file/fid/323
-----------------------------------------------------------------------------
Editing Software
you only need one
Photoshop - http://www.adobe.com/products/photoshop/free-trial-download.html (Trial)
Affnity Photo - https://affinity.serif.com/en-us/photo/ (49.99 USD)
Pixlr - https://pixlr.com/editor/ (Needs Flash Player)
Gimp - https://www.gimp.org/downloads/ (Free)
-----------------------------------------------------------------------------
Audio Converter - http://media.io/
-----------------------------------------------------------------------------
Support
- Windows 10
- Windows 8
- Windows 7
- 64 Bit & 32 Bit
- Microsoft .Net Framework 4.6.1 or Better
Download Link for those who do not have it
https://www.microsoft.com/en-us/download/details.aspx?id=49981
Note
- All Credits go to the developers of each program used in this Guide.
- All of these Programs has been tested by Me and collaborators to verify the legitimacy and the simplicity of of each one of them.
Content Files
Decompiling
Step 1 - Put desired XNB files into the "import' Folder in XNB to PNG Converter Folder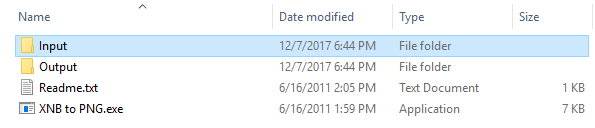
Step 2 - Run XNB to PNG Converter.exe to Decompile those files and now they are located in the "Output" Folder
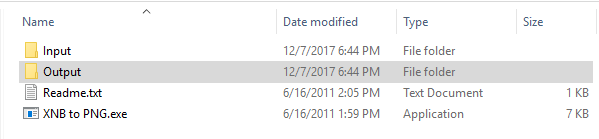
-----------------------------------------------------------------------------
Editing
Step 1 - Open your image editing software and click File > Open or Drag and Drop the image file that has been decompiled-----------------------------------------------------------------------------
- SIMPLE RECOLOR FOR PHOTOSHOP USERS -
Step 2 - in Photoshop click "Image > Adjustments > Hue/Saturation
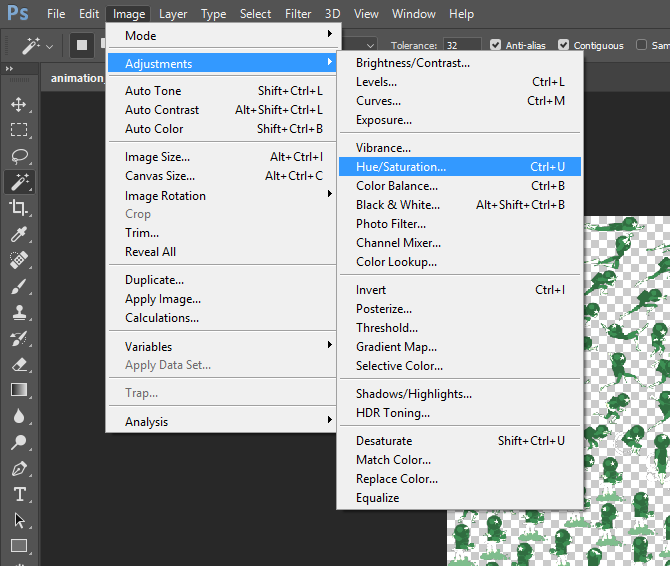
Step 3 - Adjust the Colors how you like now
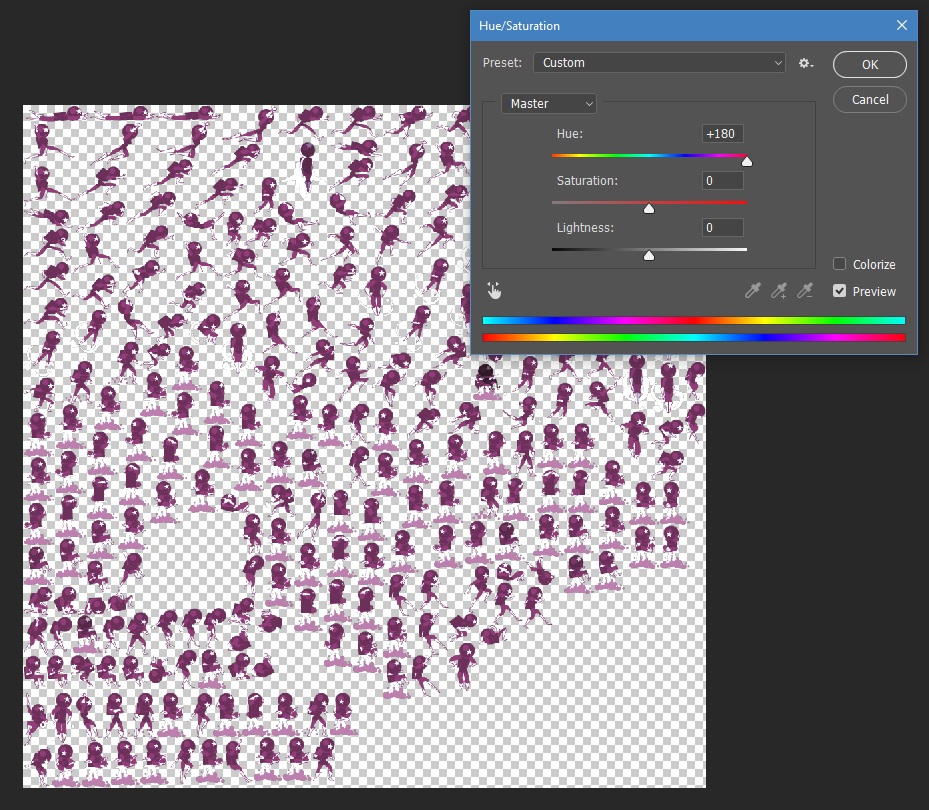
-----------------------------------------------------------------------------
Step 4 - Save the Image As a PNG and make sure to keep the file name that its replacing with
-----------------------------------------------------------------------------
Compiling
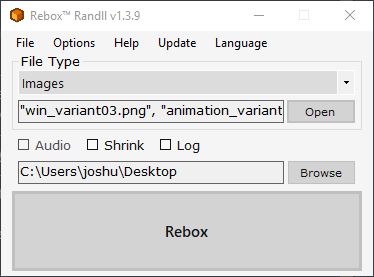
Step 1 - After you extracted the Rebox.zip Open Rebox and go forth with the installation of the required files for Rebox to function.-----------------------------------------------------------------------------
Step 2 - "Image" Is by default the selected item in the ComboBox if you wish to change the Format to use click the Combobox to select a different one.
-----------------------------------------------------------------------------
Step 3 - Click "Open" or Drag and Drop your selected files to add to Rebox.
-----------------------------------------------------------------------------
Step 4 - Now You can Click "Rebox" Button to Recompile the files into Dot XNB format.
-----------------------------------------------------------------------------
Note You will get a message telling you whether it succeeded or failed. If everything went correctly you can now go to the location that you chose to save the files (Default Is Desktop)
-----------------------------------------------------------------------------
Step 5 - Copy or Cut the Dot XNB files into the directory where the original files you want to replace are currently located (Ex. /Content/Characters/JesseCox)
Audio Files
Custom Map Backgrounds
Step 1 - Open "Rebox"
-----------------------------------------------------------------------------
Step 2 - Click "Open" and choose a picture that you want to use it in-game
-----------------------------------------------------------------------------
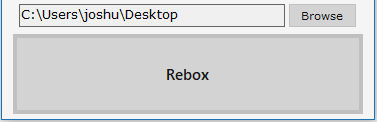
Step 3 - Click "Rebox" when you see the chosen picture’s name next to "Open"
-----------------------------------------------------------------------------
-----------------------------------------------------------------------------
Note: Your converted files will be located on your Desktop or elsewhere
-----------------------------------------------------------------------------
-----------------------------------------------------------------------------
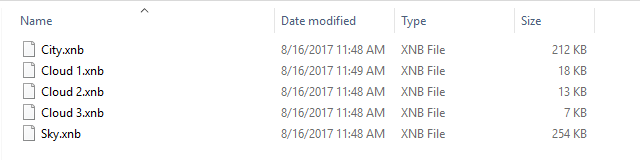
Step 4 - Open this folder: C:\Program Files (x86)\Steam\steamapps\common\SpeedRunners\Content\Backgrounds\ENV_Prototype
-----------------------------------------------------------------------------
-----------------------------------------------------------------------------
Step 5 - Make sure that the compiled files retain the same names as the ones that are in the speedrunners folder so that it replaces the files Ex. (C:\Program Files (x86)\Steam\steamapps\common\SpeedRunners\Content\Backgrounds\ENV_Prototype)
-----------------------------------------------------------------------------
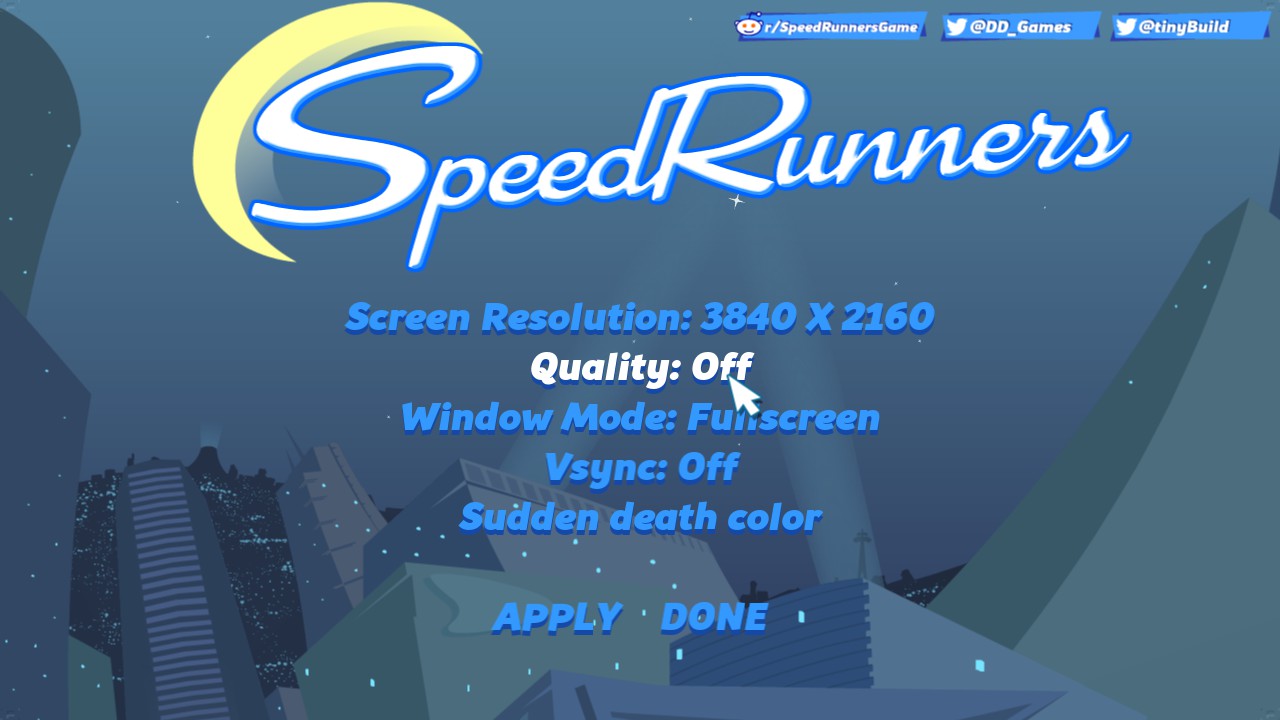
Step 6 - Now open SpeedRunners and Turn Graphics Quality to "Off". Now if you did this you will see your custom background in-game, but if you don't want to see your custom background just turn quality back on and then the normal speedrunners backgrounds are back.
-----------------------------------------------------------------------------
-----------------------------------------------------------------------------
-----------------------------------------------------------------------------
Step 2 - Click "Open" and choose a picture that you want to use it in-game
-----------------------------------------------------------------------------
Step 3 - Click "Rebox" when you see the chosen picture’s name next to "Open"
-----------------------------------------------------------------------------
-----------------------------------------------------------------------------
Note: Your converted files will be located on your Desktop or elsewhere
-----------------------------------------------------------------------------
-----------------------------------------------------------------------------
Step 4 - Open this folder: C:\Program Files (x86)\Steam\steamapps\common\SpeedRunners\Content\Backgrounds\ENV_Prototype
-----------------------------------------------------------------------------
-----------------------------------------------------------------------------
Step 5 - Make sure that the compiled files retain the same names as the ones that are in the speedrunners folder so that it replaces the files Ex. (C:\Program Files (x86)\Steam\steamapps\common\SpeedRunners\Content\Backgrounds\ENV_Prototype)
-----------------------------------------------------------------------------
Step 6 - Now open SpeedRunners and Turn Graphics Quality to "Off". Now if you did this you will see your custom background in-game, but if you don't want to see your custom background just turn quality back on and then the normal speedrunners backgrounds are back.
-----------------------------------------------------------------------------
-----------------------------------------------------------------------------
How to make Trails
Step 1 - Watch the video to give you an idea on your own custom trail(s).
-----------------------------------------------------------------------------
Note : - When you making a new trail (by clicking Create a new), click to "Open Image Folder" and the game will like "Alt Tab" and opens a folder. Now there put any picture you want to make a trail of it and then close it and get back in-game.
-----------------------------------------------------------------------------
Some tips:
- You can change the Size if you click to "Size" and write a number in and test it out
- If you click to "Taper" it's will give it a nice effect like it's getting smaller
- You can set the fading and the fading speed
- With "Noise" you can make it look a cooler but not many people using it (i do)
- If Noise is on you can set up the "Wave Frequency"
-----------------------------------------------------------------------------
-----------------------------------------------------------------------------
Note : - When you making a new trail (by clicking Create a new), click to "Open Image Folder" and the game will like "Alt Tab" and opens a folder. Now there put any picture you want to make a trail of it and then close it and get back in-game.
-----------------------------------------------------------------------------
Some tips:
- You can change the Size if you click to "Size" and write a number in and test it out
- If you click to "Taper" it's will give it a nice effect like it's getting smaller
- You can set the fading and the fading speed
- With "Noise" you can make it look a cooler but not many people using it (i do)
- If Noise is on you can set up the "Wave Frequency"
-----------------------------------------------------------------------------
Conclusion
Speedrunners is probably one of the easier games to mod without effecting your fellow players. We sincerely hope that our guide was useful and if it was please rate us up and follow the guide to show support!
Good Luck & Have Fun modding!
Good Luck & Have Fun modding!
More SpeedRunners guides
- The official SpeedRunners controller guide★ 4 (111)99k views87 ♥5 minUpdated Sep 26, 2019
- SpeedRunners - All Secret Characters★ 5 (555)47k views656 ♥1 minUpdated Jun 19, 2015
- Hidden Characters★ 5 (865)44k views1.1k ♥1 minUpdated Jun 3, 2015
- The Ultimate Guide To Unlockable Characters★ 5 (235)27k views339 ♥2 minUpdated Nov 2, 2015
- Secret Characters★ 5 (378)25k views481 ♥1 minUpdated Dec 26, 2017
- Megamen in SR [UPDATED!]★ 4 (121)15k views66 ♥1 minBulgarianUpdated Aug 5, 2017




This guide was created by its original author on the Steam Community. Are you the author and want it removed? Request removal.