Overview
Tips on the animatronics, lore, strategy, and more all on the #1 rated UCN guide! Endorsed by Christopher McCullough!
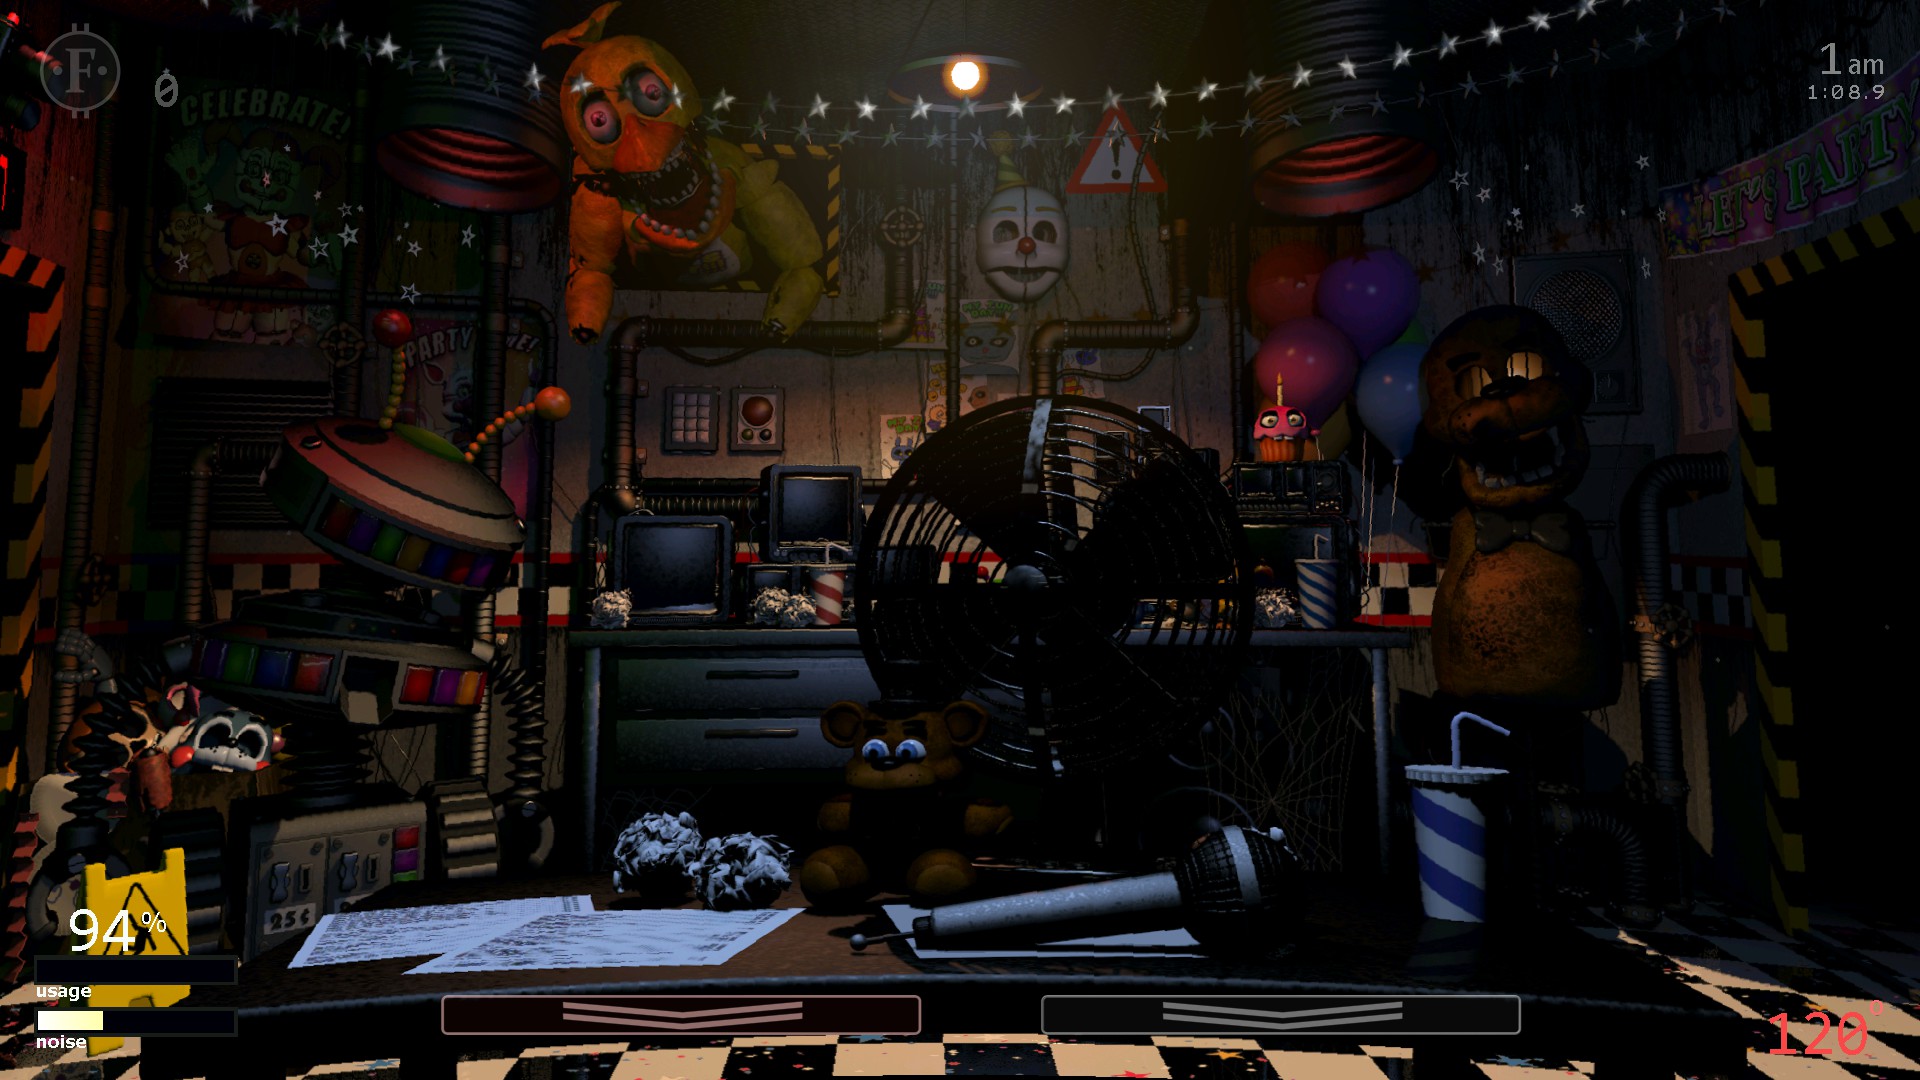
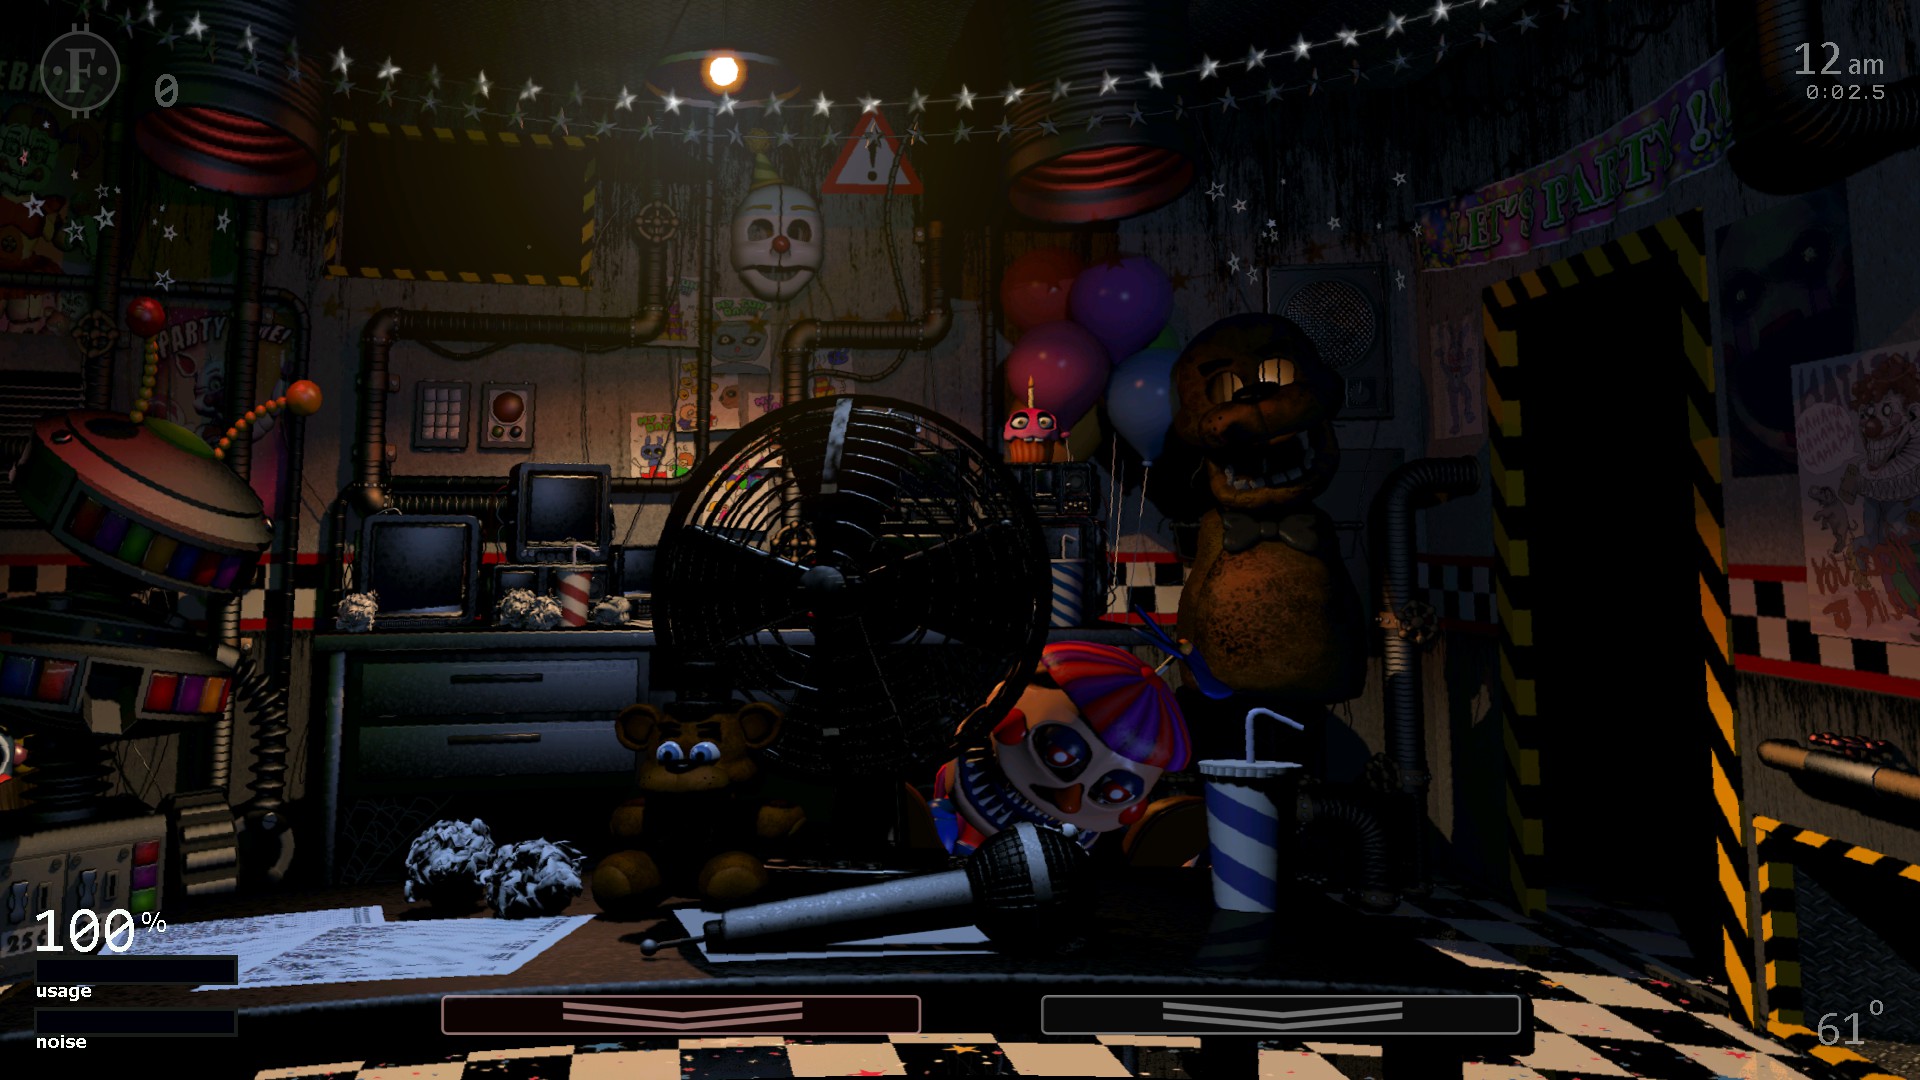
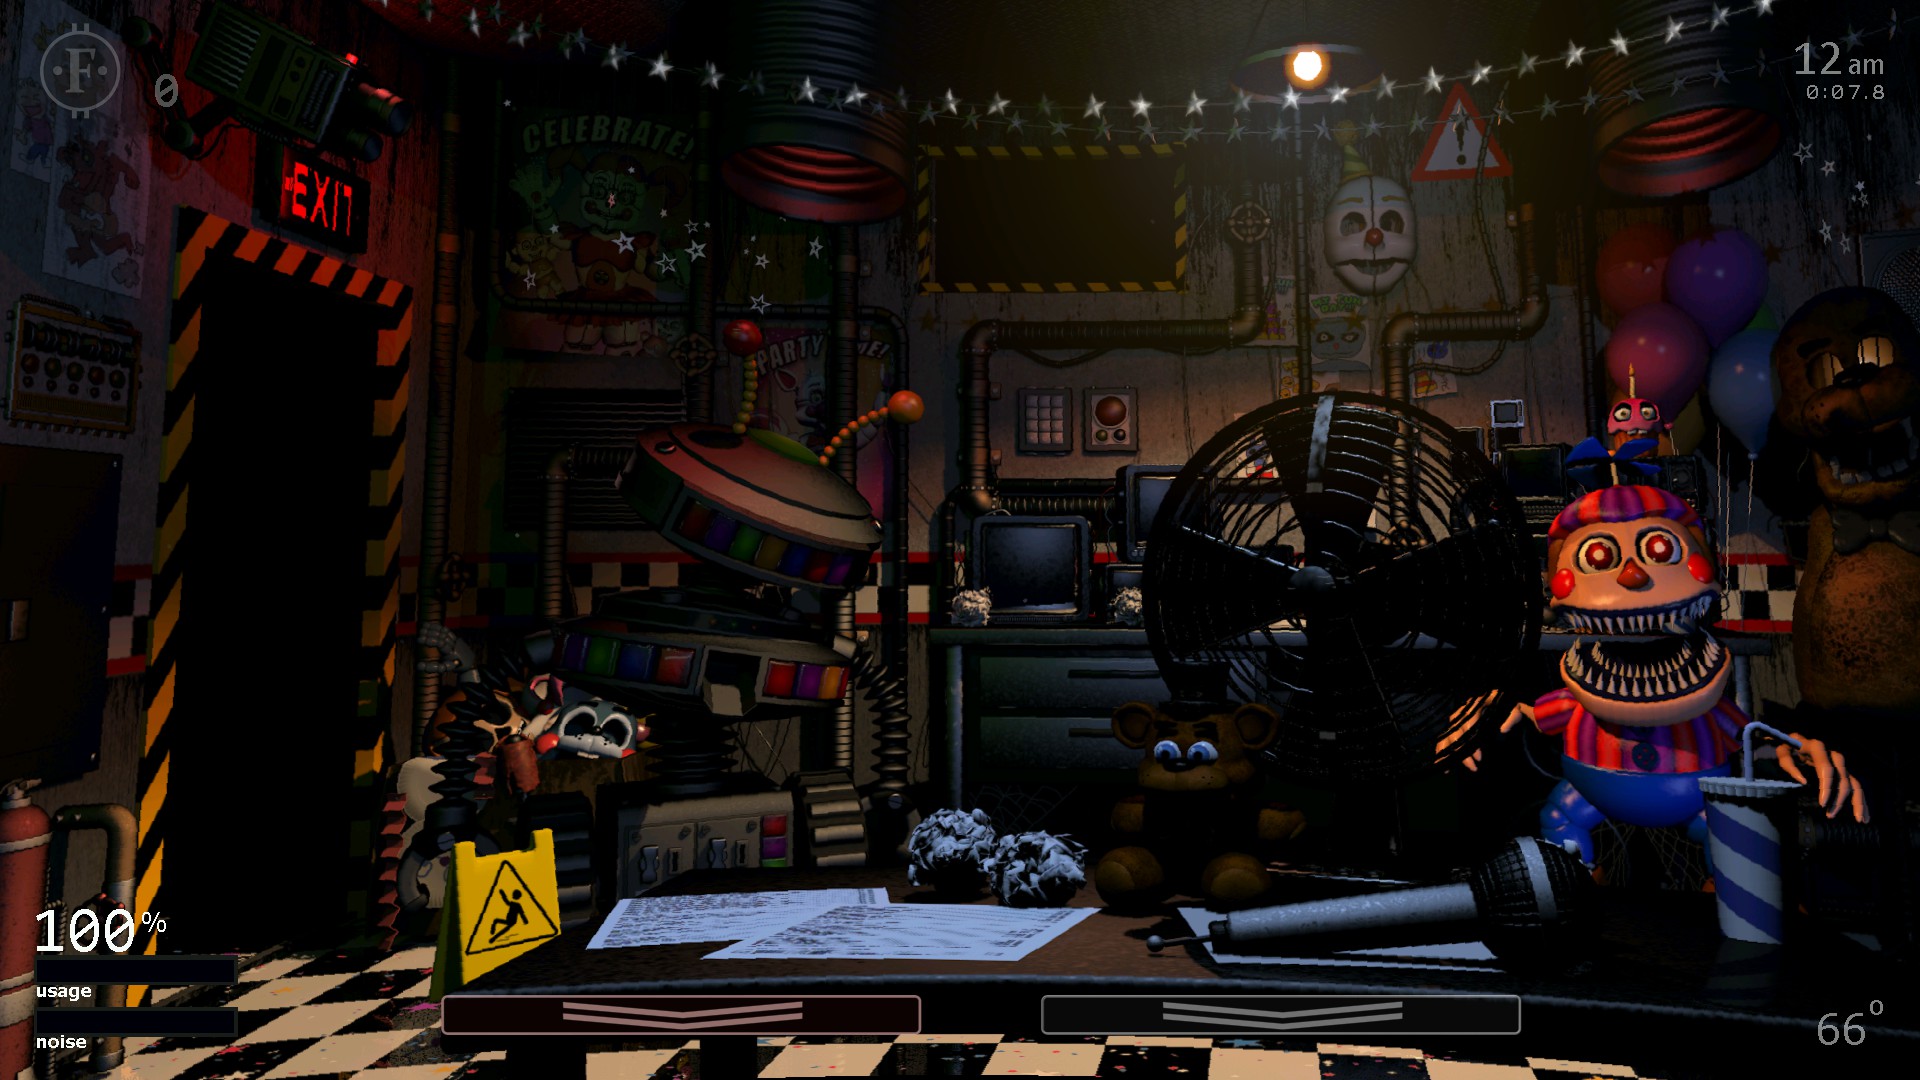
The Basics
This section will teach you the bare basics.
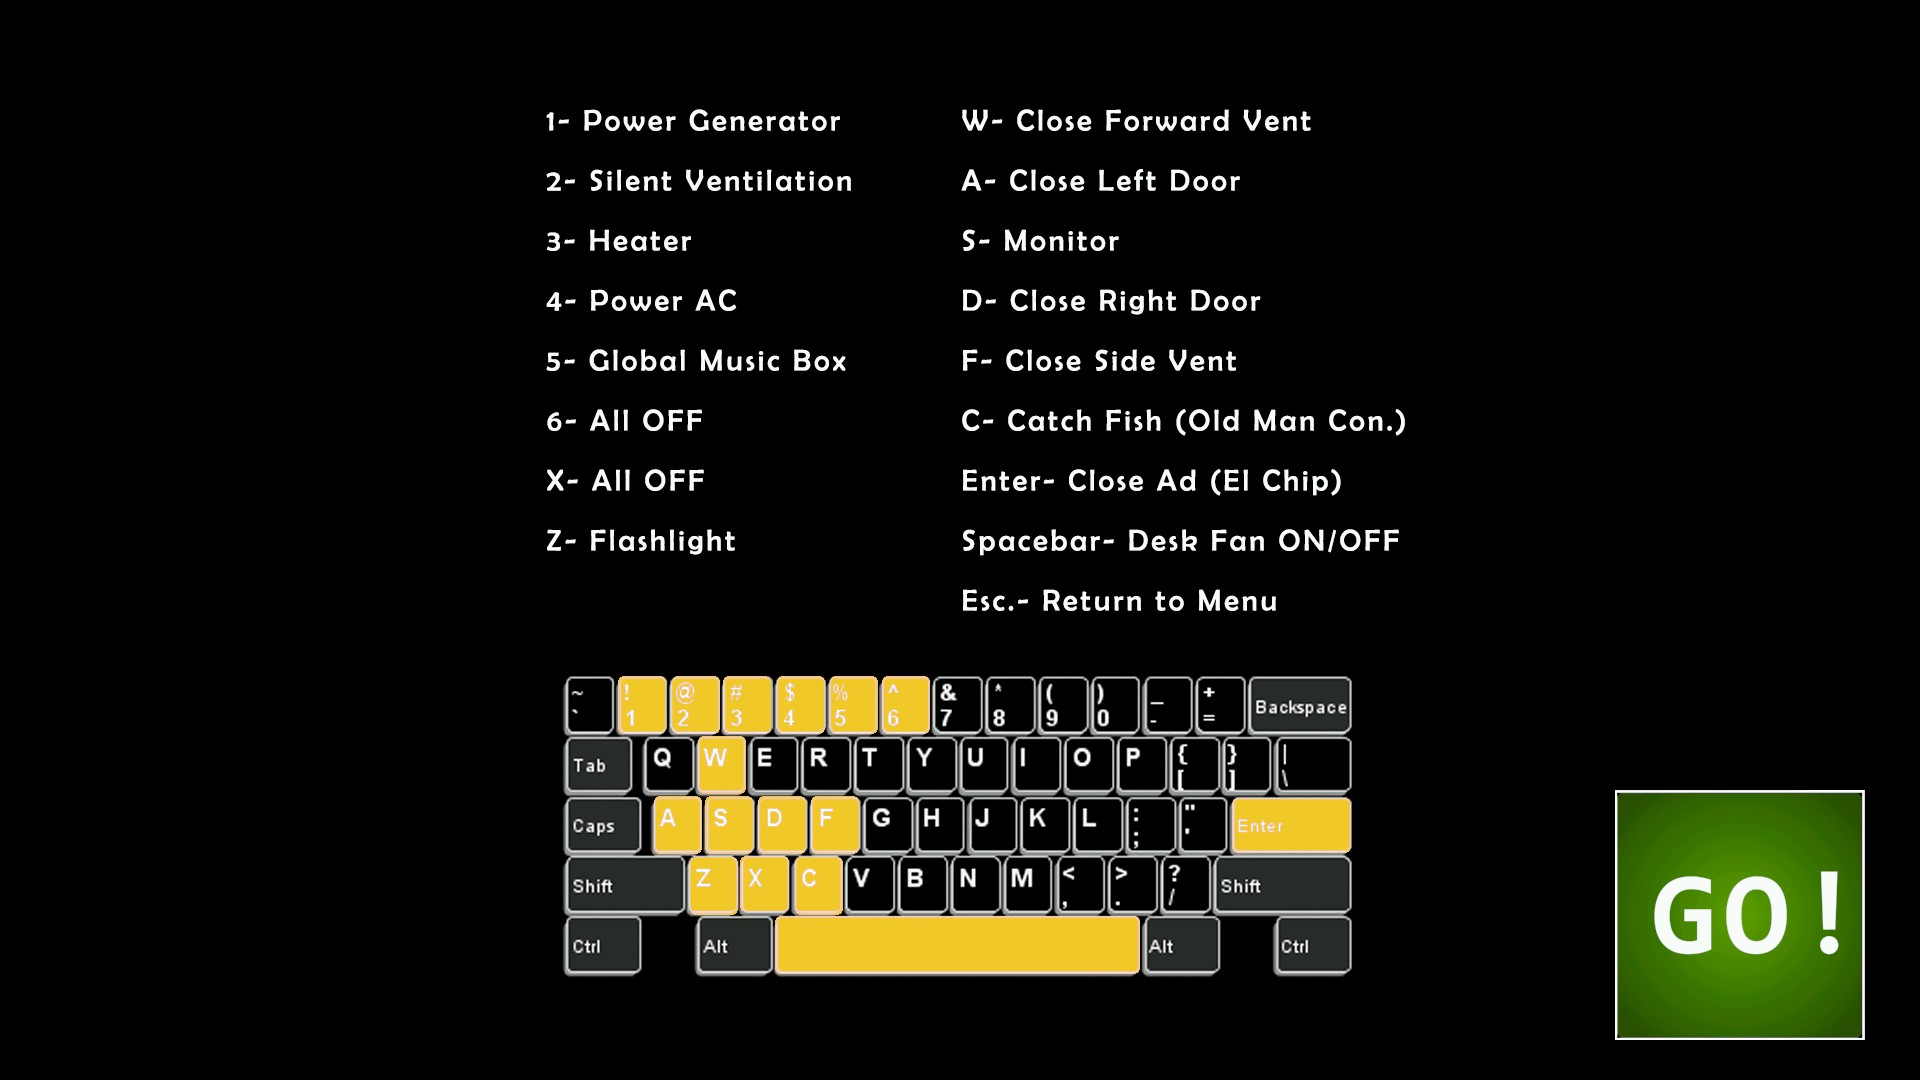
There are 8 different entrances to the Office.
The Left Door- A
The Front Vent- W
The Right Door- D
The Right Vent- F
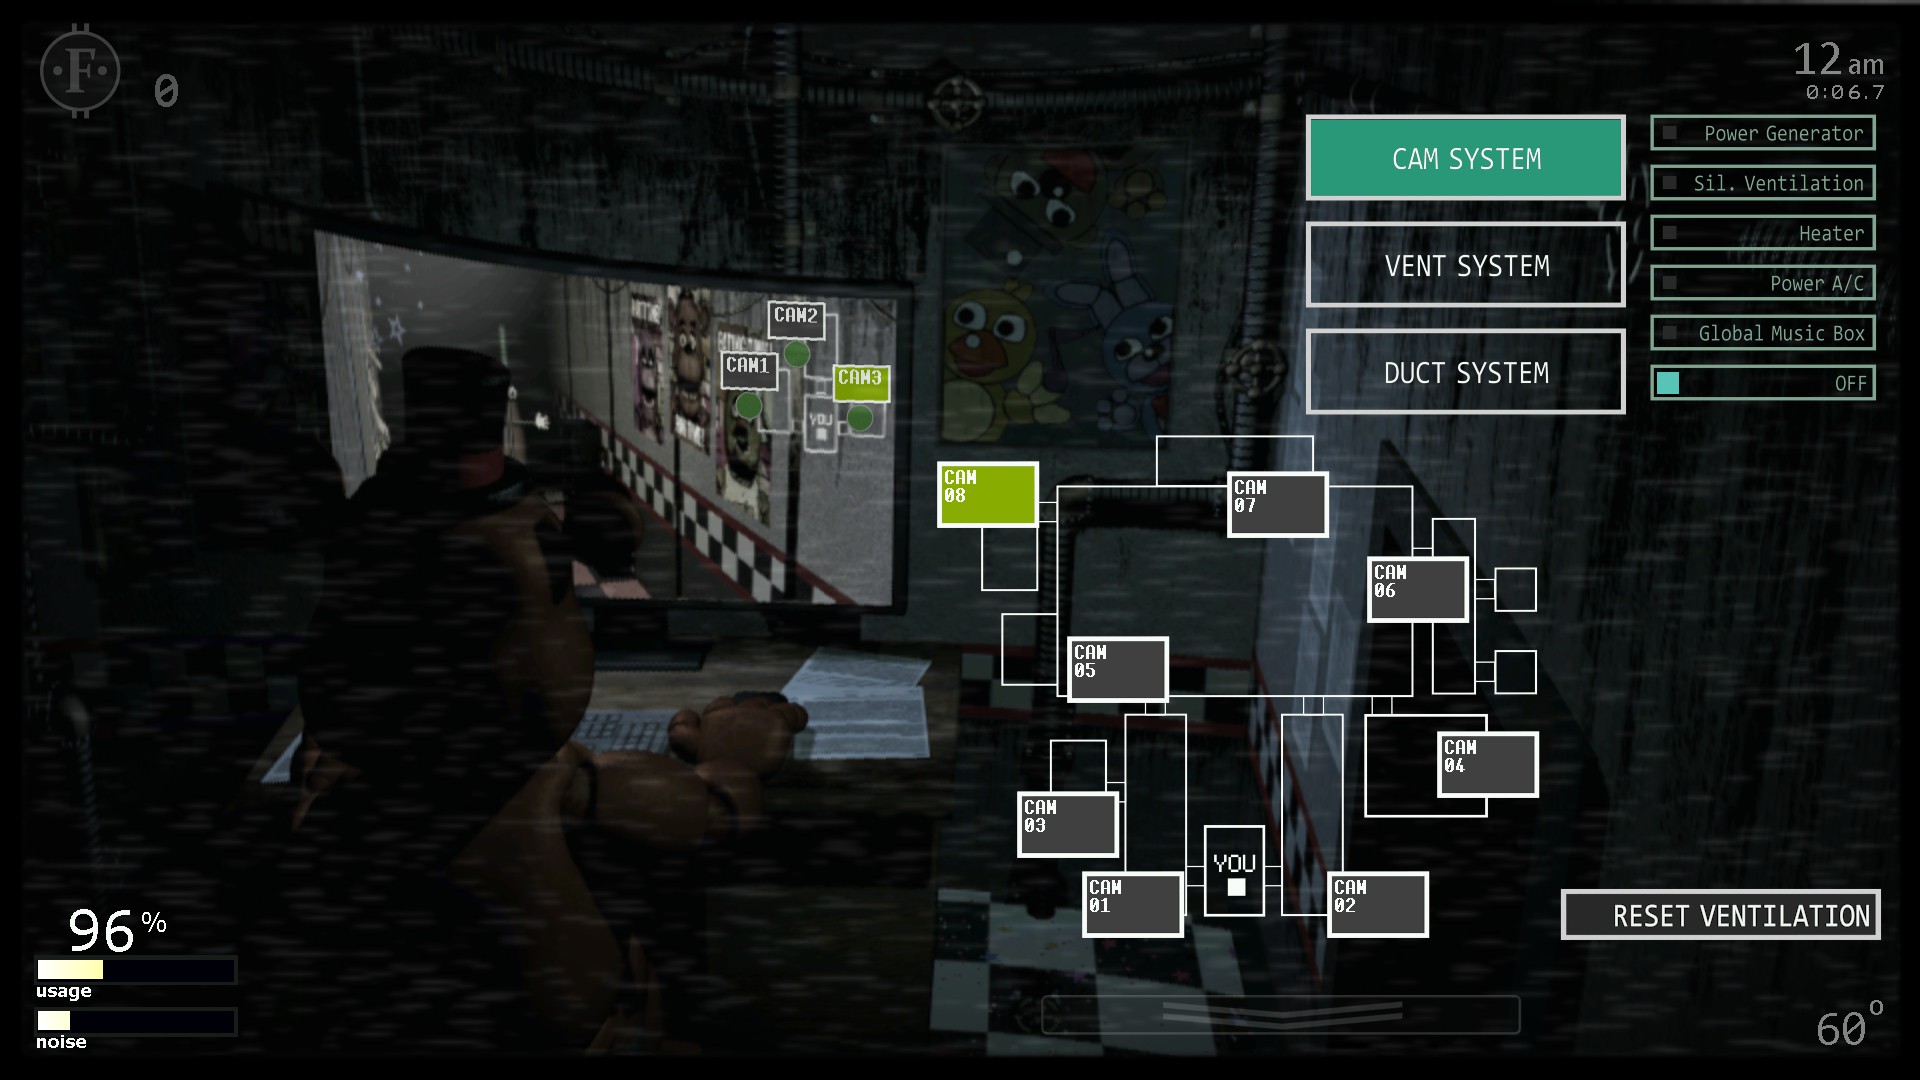
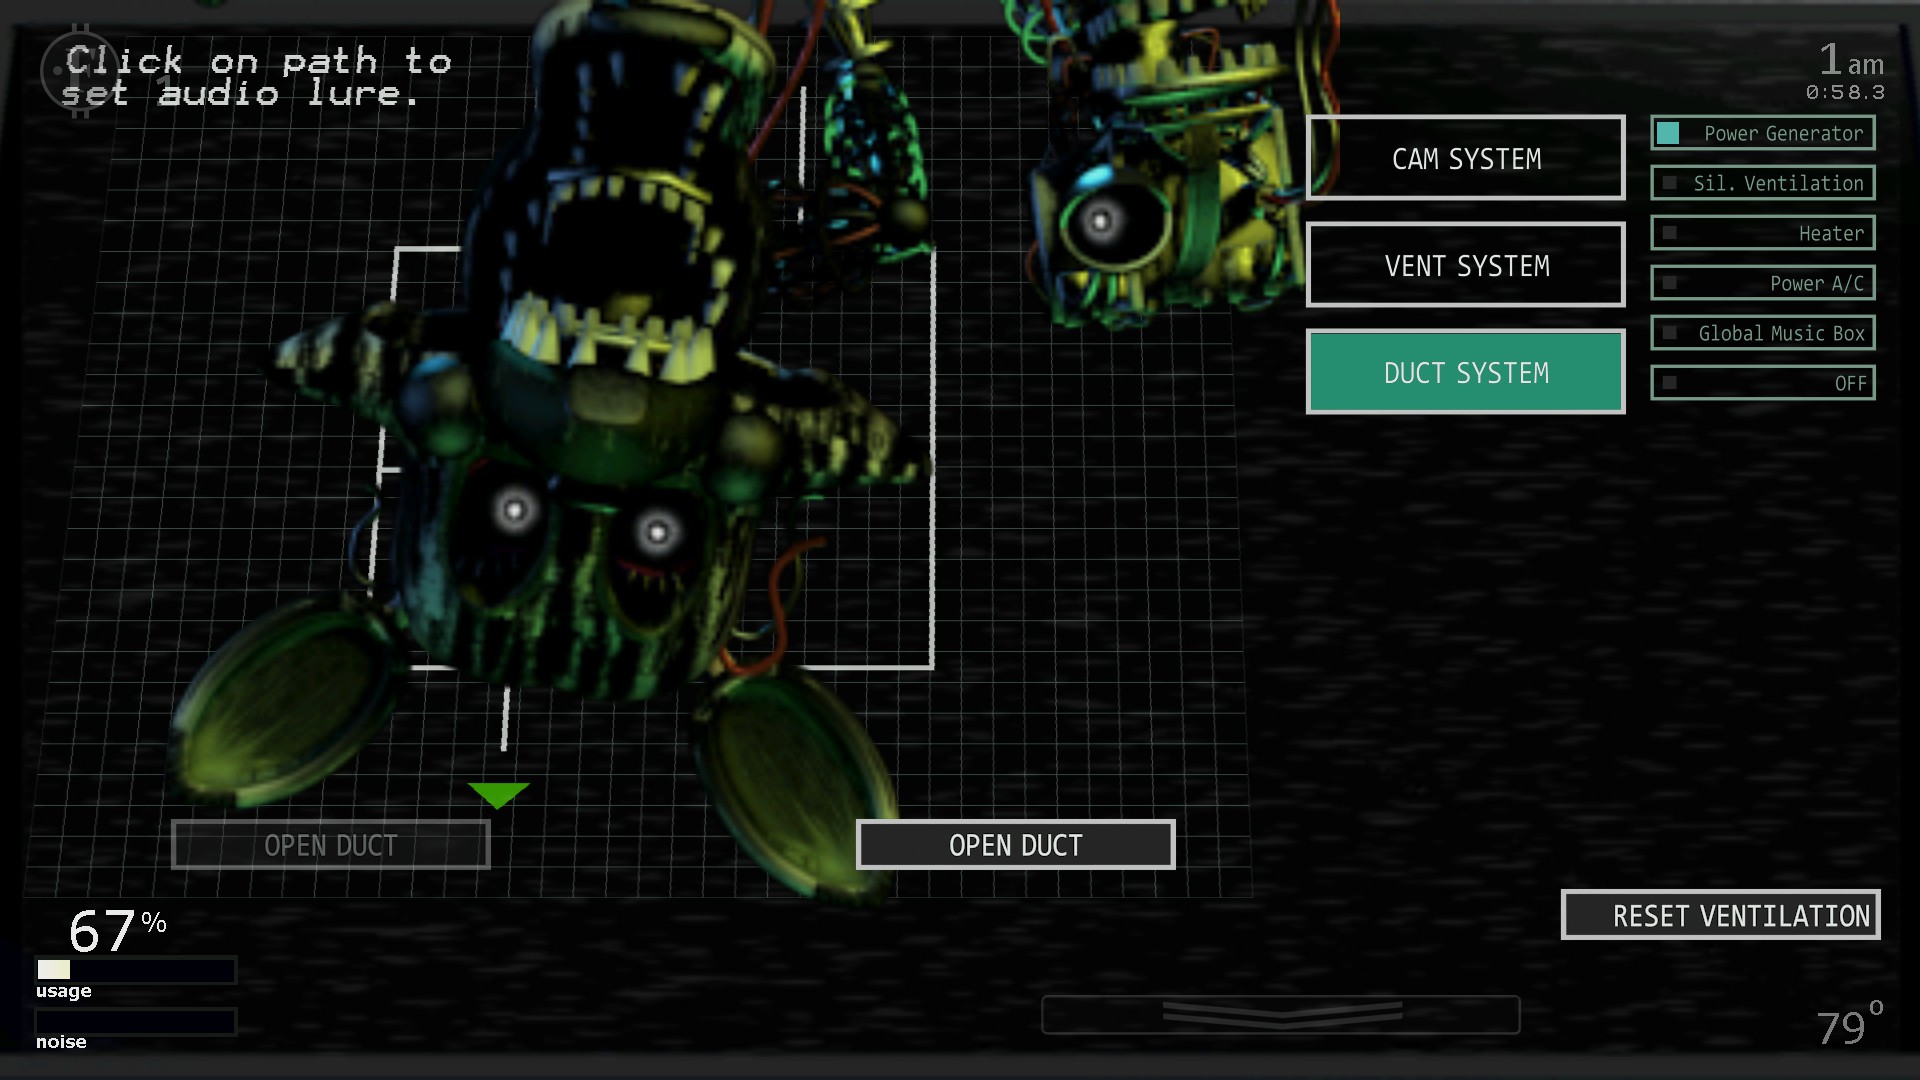
The Two Tubes (Or the Duct System)
The Trapdoor
Here is a list of every entrances each character uses:
Left Door: Freddy Fazbear, Nightmare Fredbear, Jack-O-Chica, Ballora and Rockstar Chica.
Front Vent: Mangle, Withered Chica, Springtrap, Ennard, and Molten Freddy.
Right Door: Nightmare Bonnie, Nightmare, Jack-O-Chica, Nightmare Mangle, Circus Baby, Ballora, and Rockstar Chica.
Right Vent: BB, JJ, and (William) Afton.
Duct System: Happy Frog, Mr. Hippo, Pigpatch, Nedd Bear, and Orville Elephant.
Trapdoor: Toy Bonnie, Toy Chica, and Withered Bonnie.
Cameras: Bonnie, Chica, Foxy, Toy Freddy, Marionette, Phantom Mangle, Phantom BB, Funtime Foxy, Trash and the Gang, and Lefty.
Office: Golden Freddy, Phantom Freddy, Nightmare Freddy, Nightmarionne, Nightmare BB, Trash and the Gang, Helpy, Rockstar Freddy, Rockstar Bonnie, Rockstar Foxy, Music Man, and Scrap Baby.
Appears at all: Old Man Consequences, El Chip, Funtime Chica, and Phone Guy.
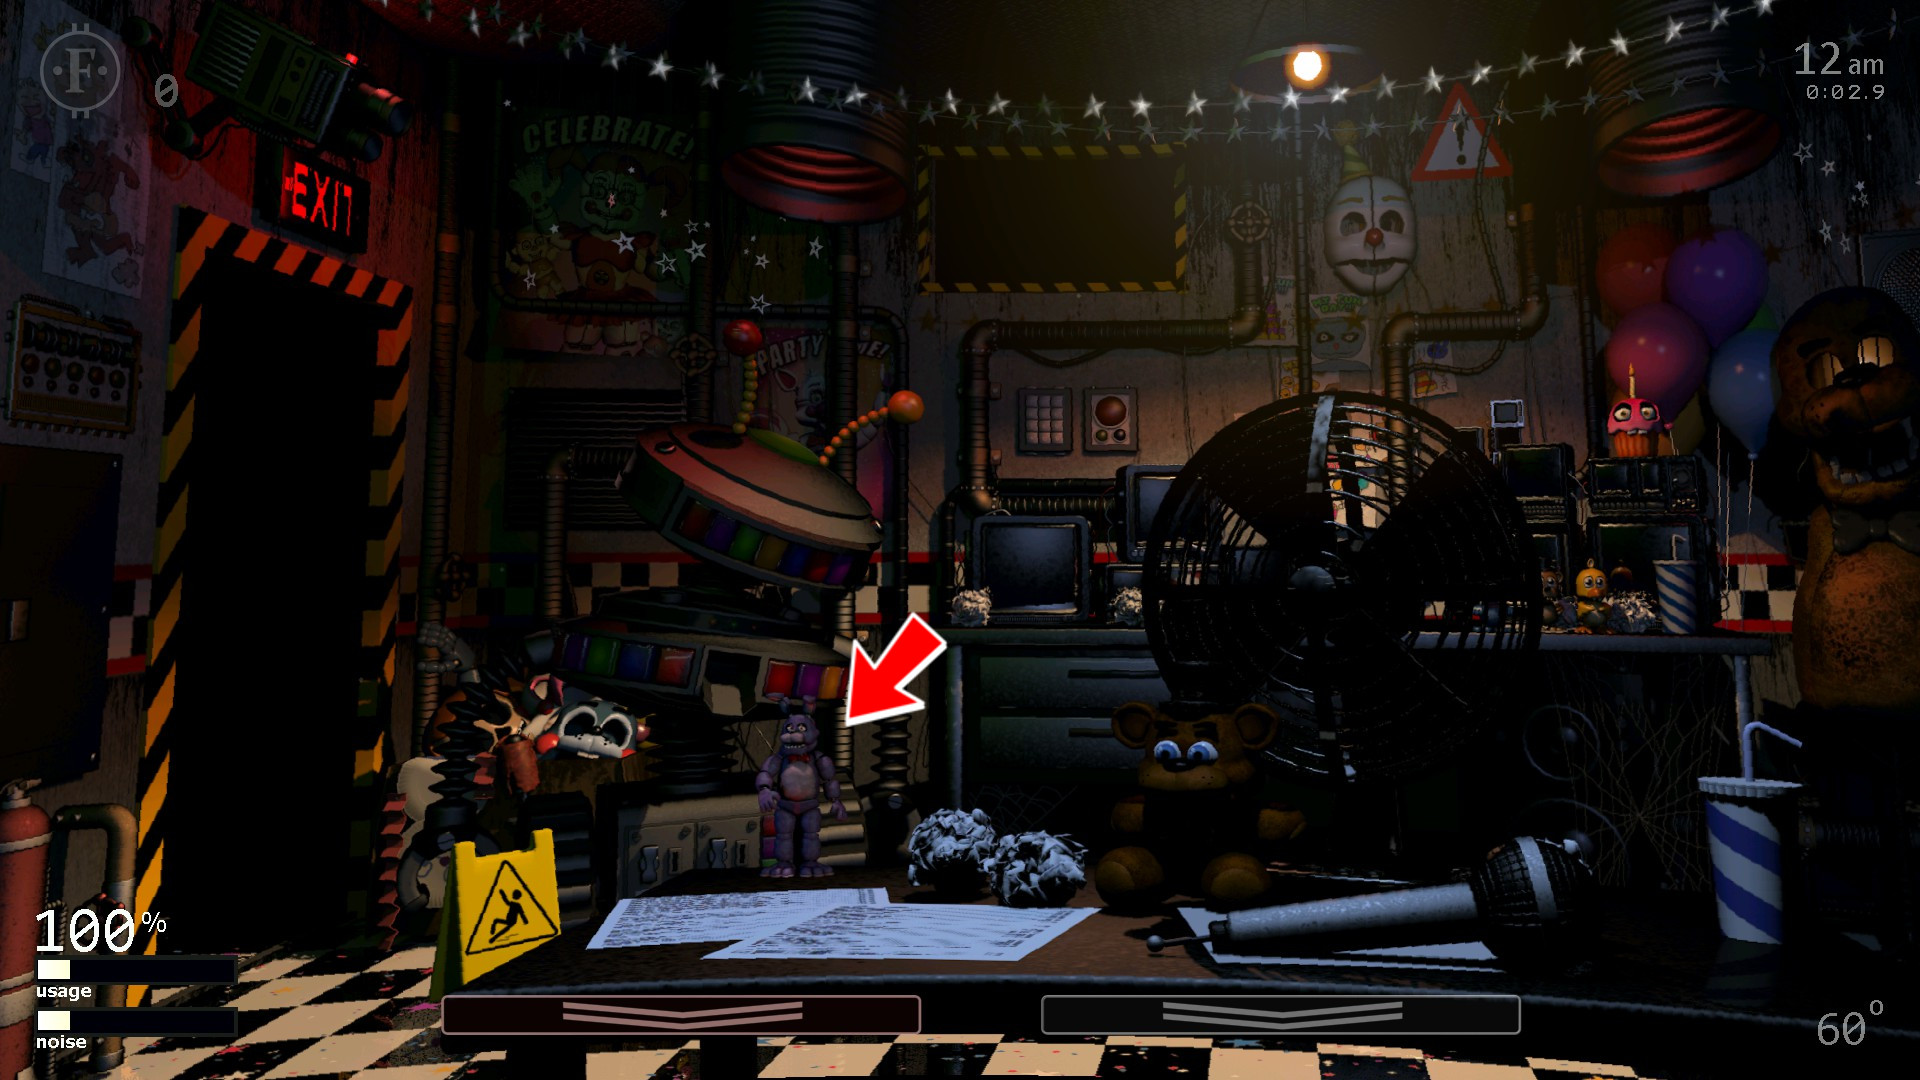
The Freddy mask is activated by swiping down on the left, reddish arrow. It prevents jumpscares from Toy Bonnie, Toy Chica, Withered Bonnie, and Golden Freddy.
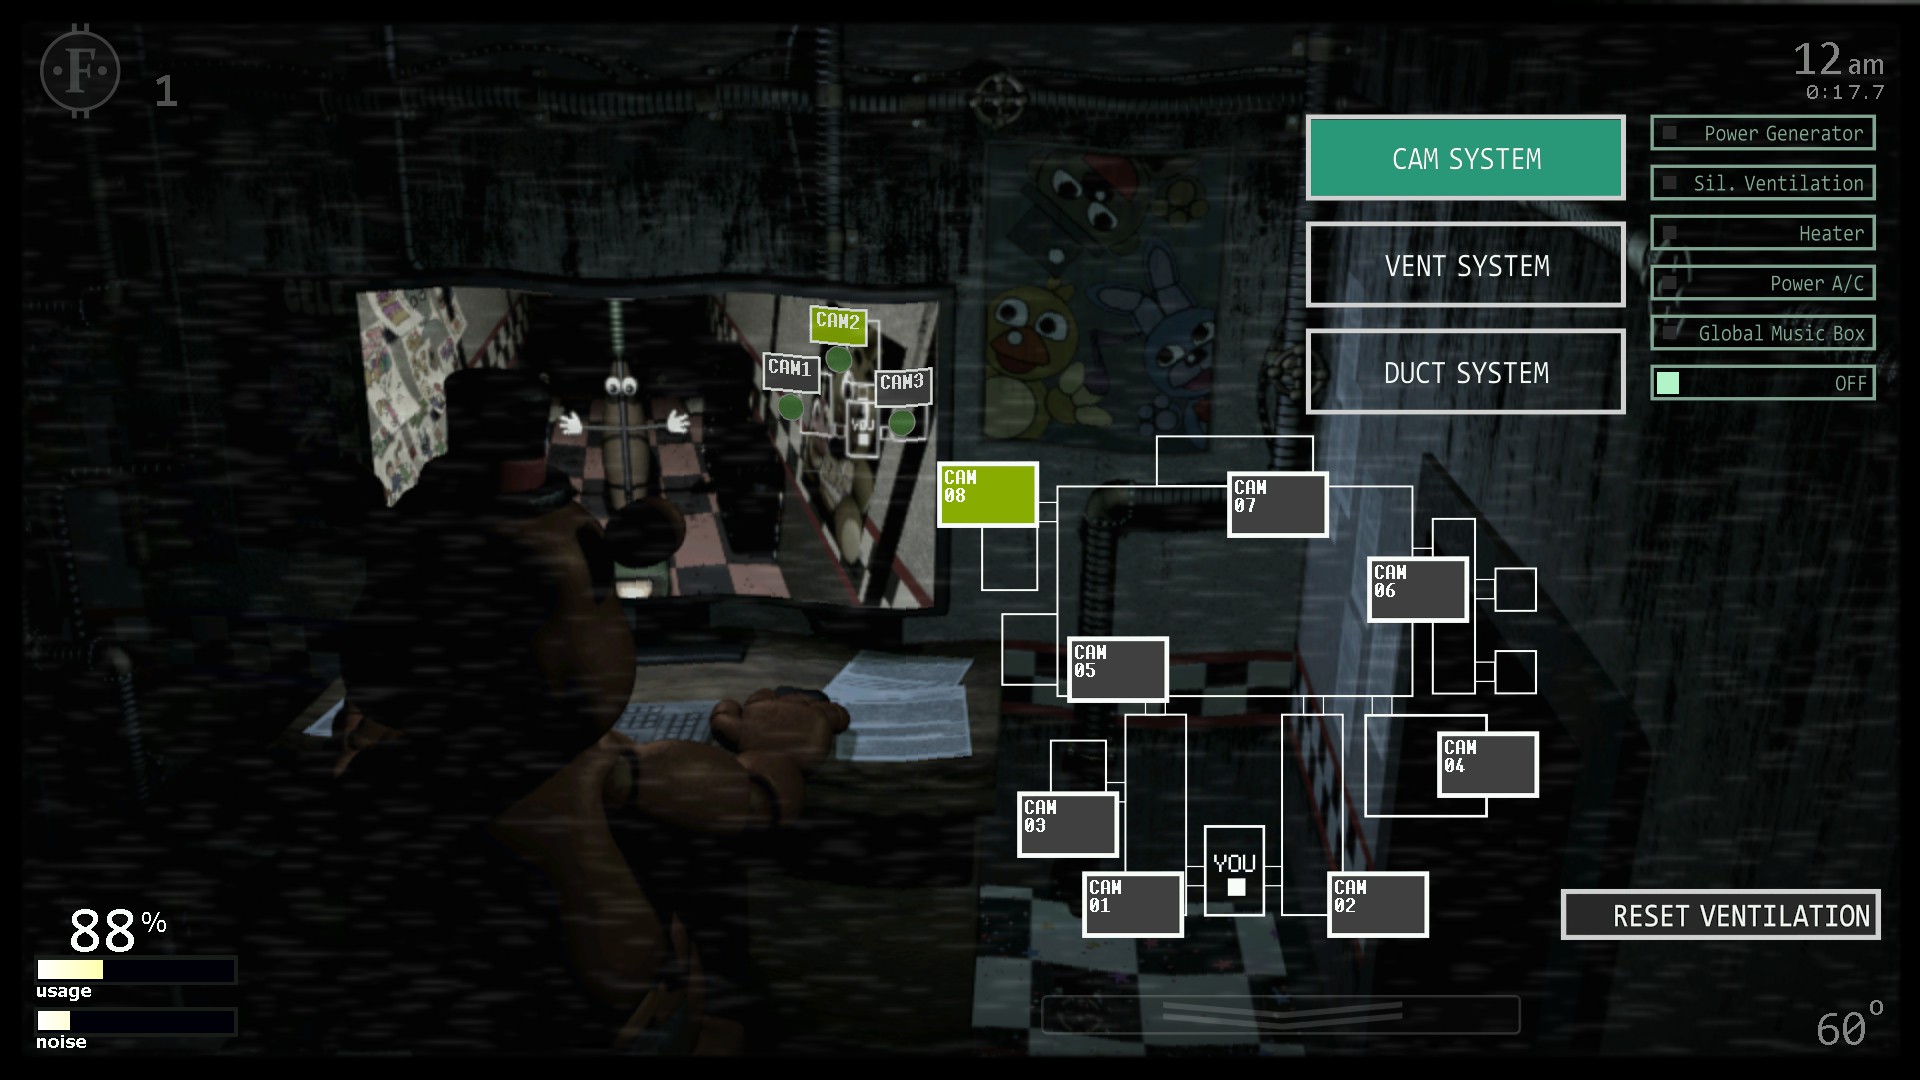
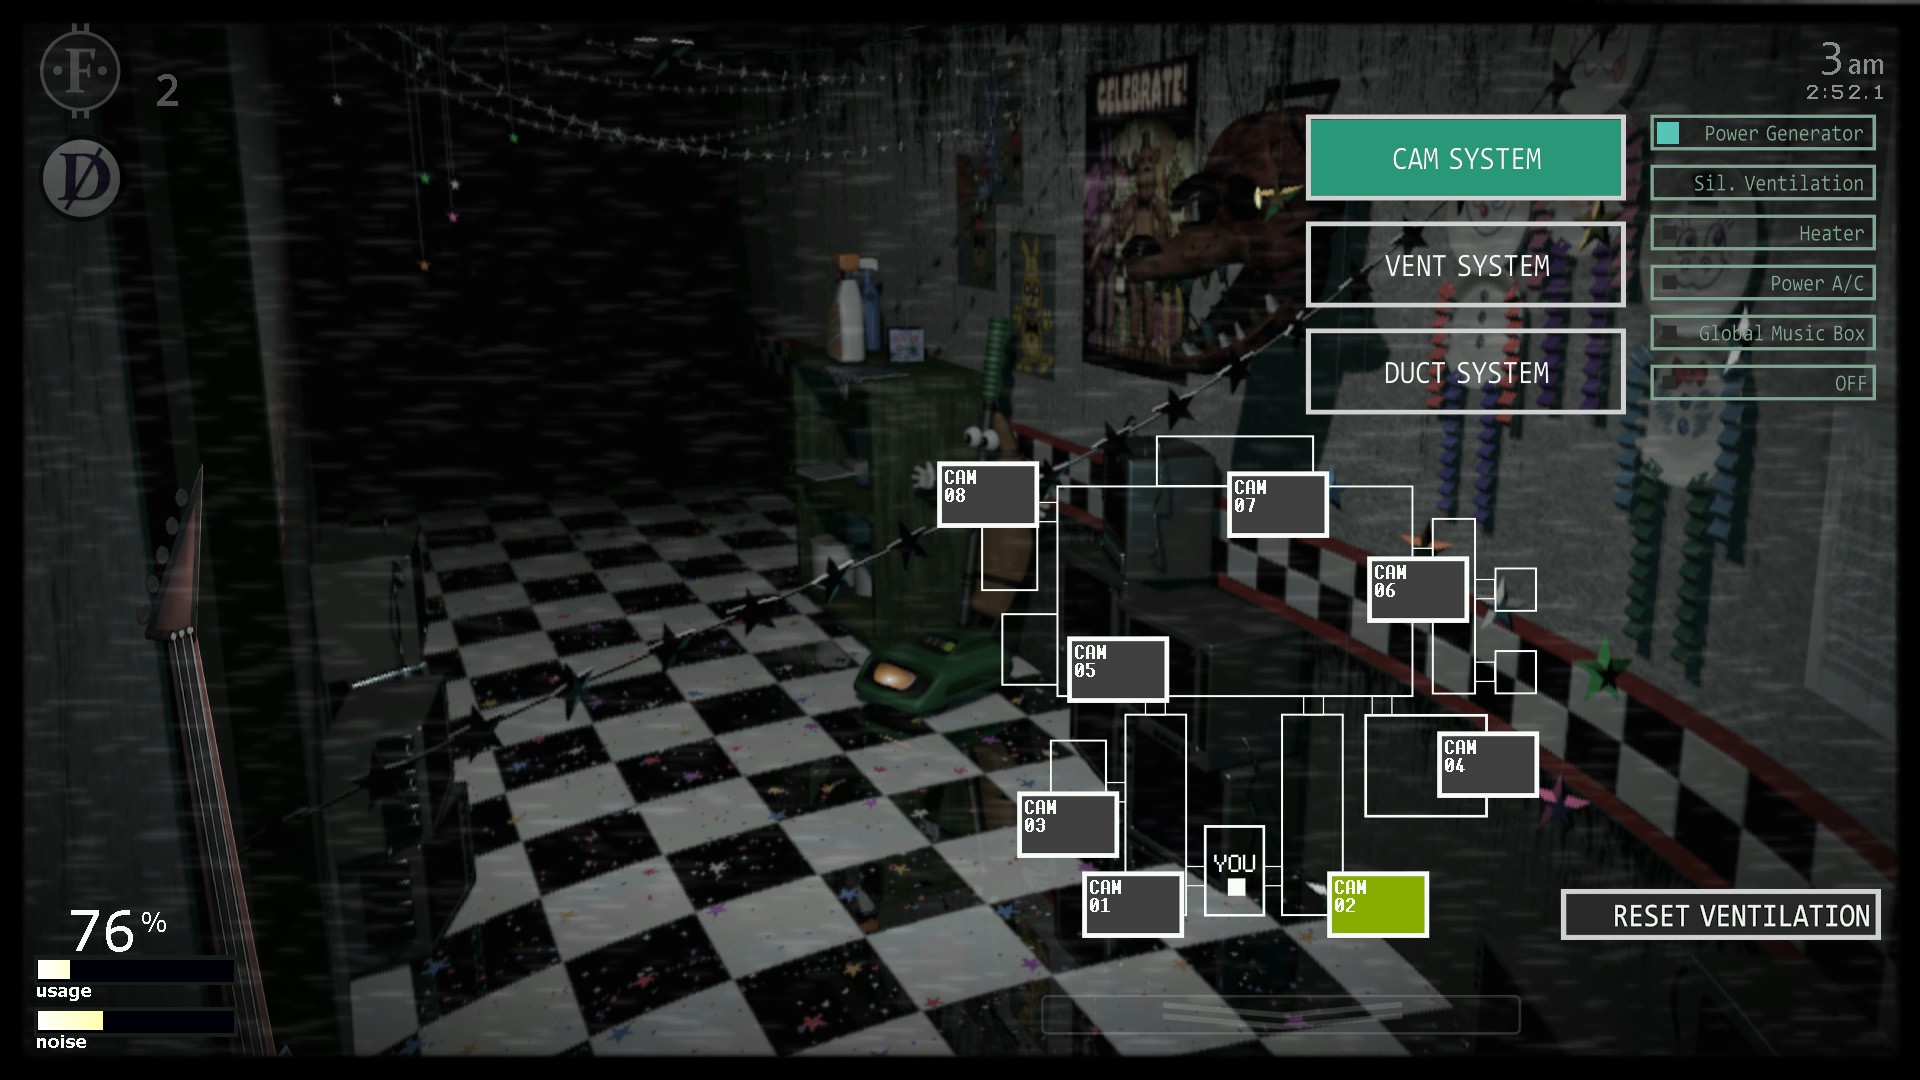
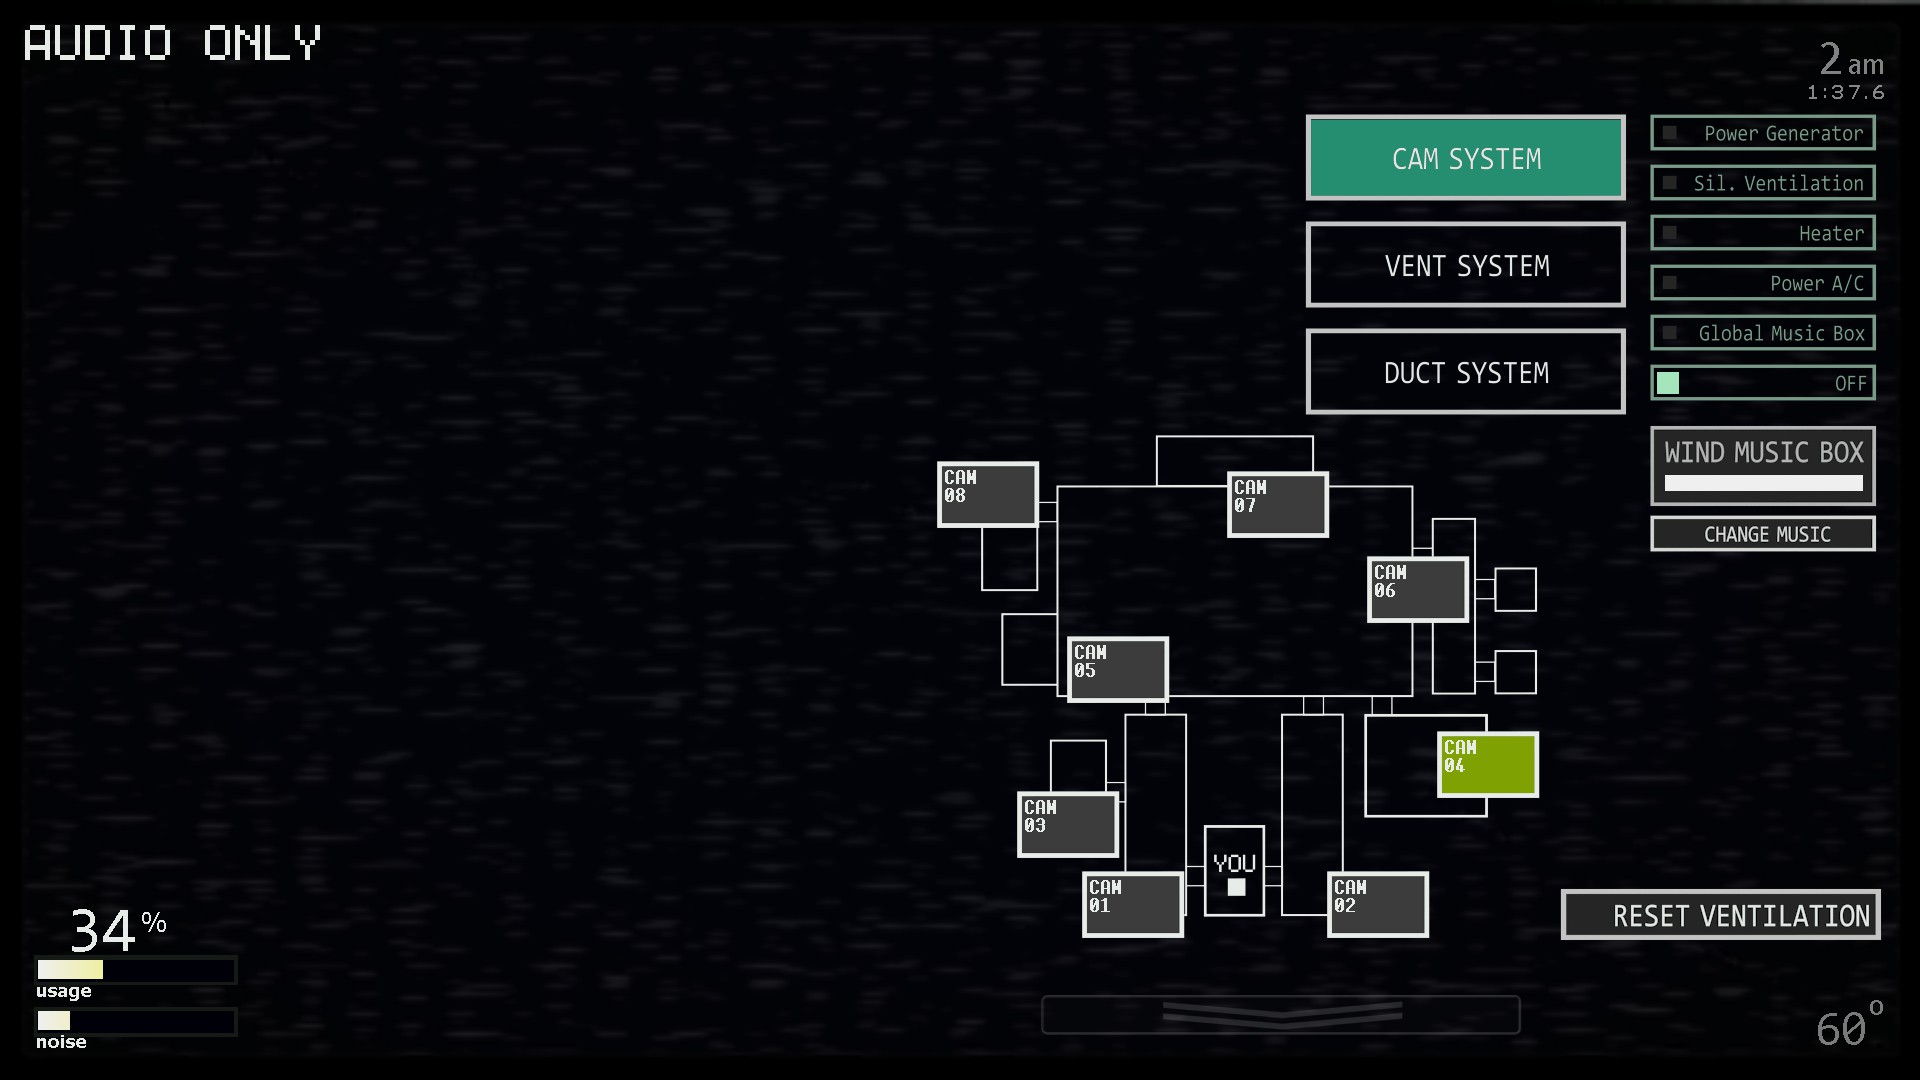
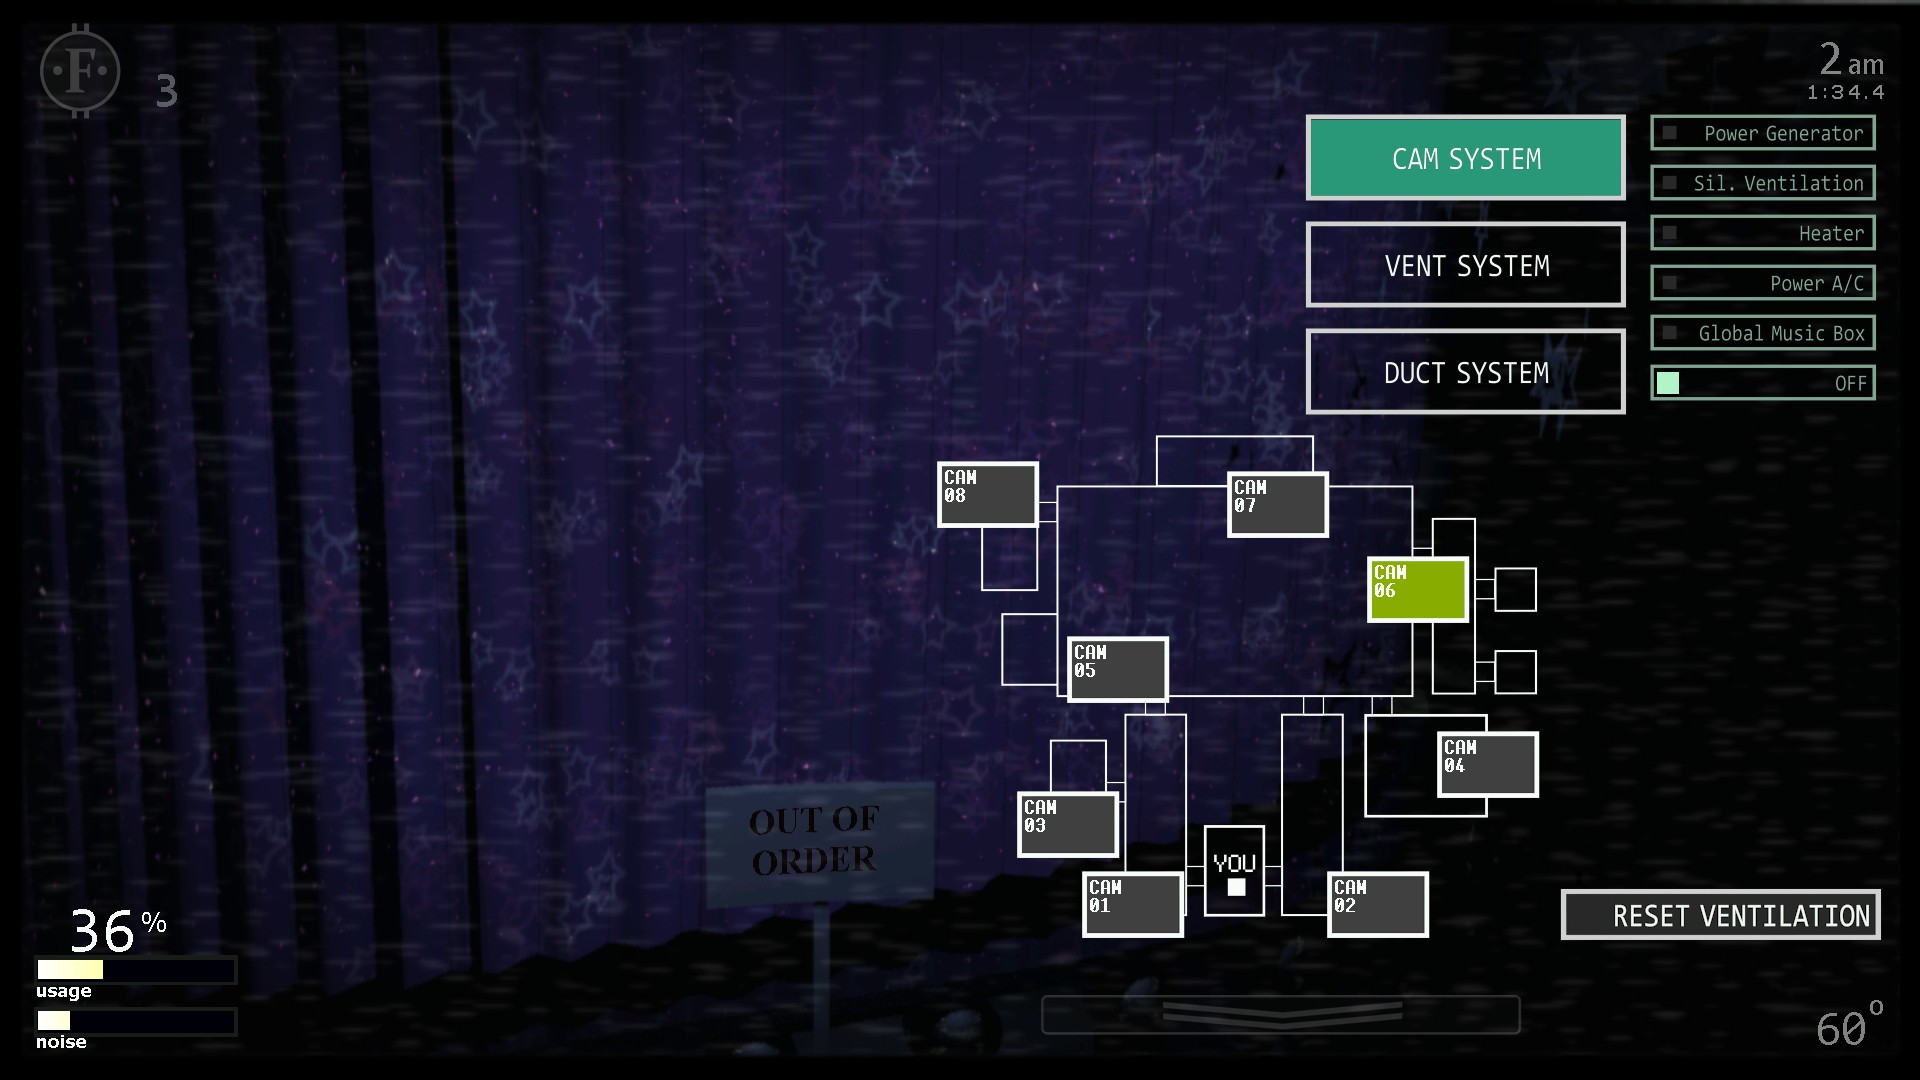
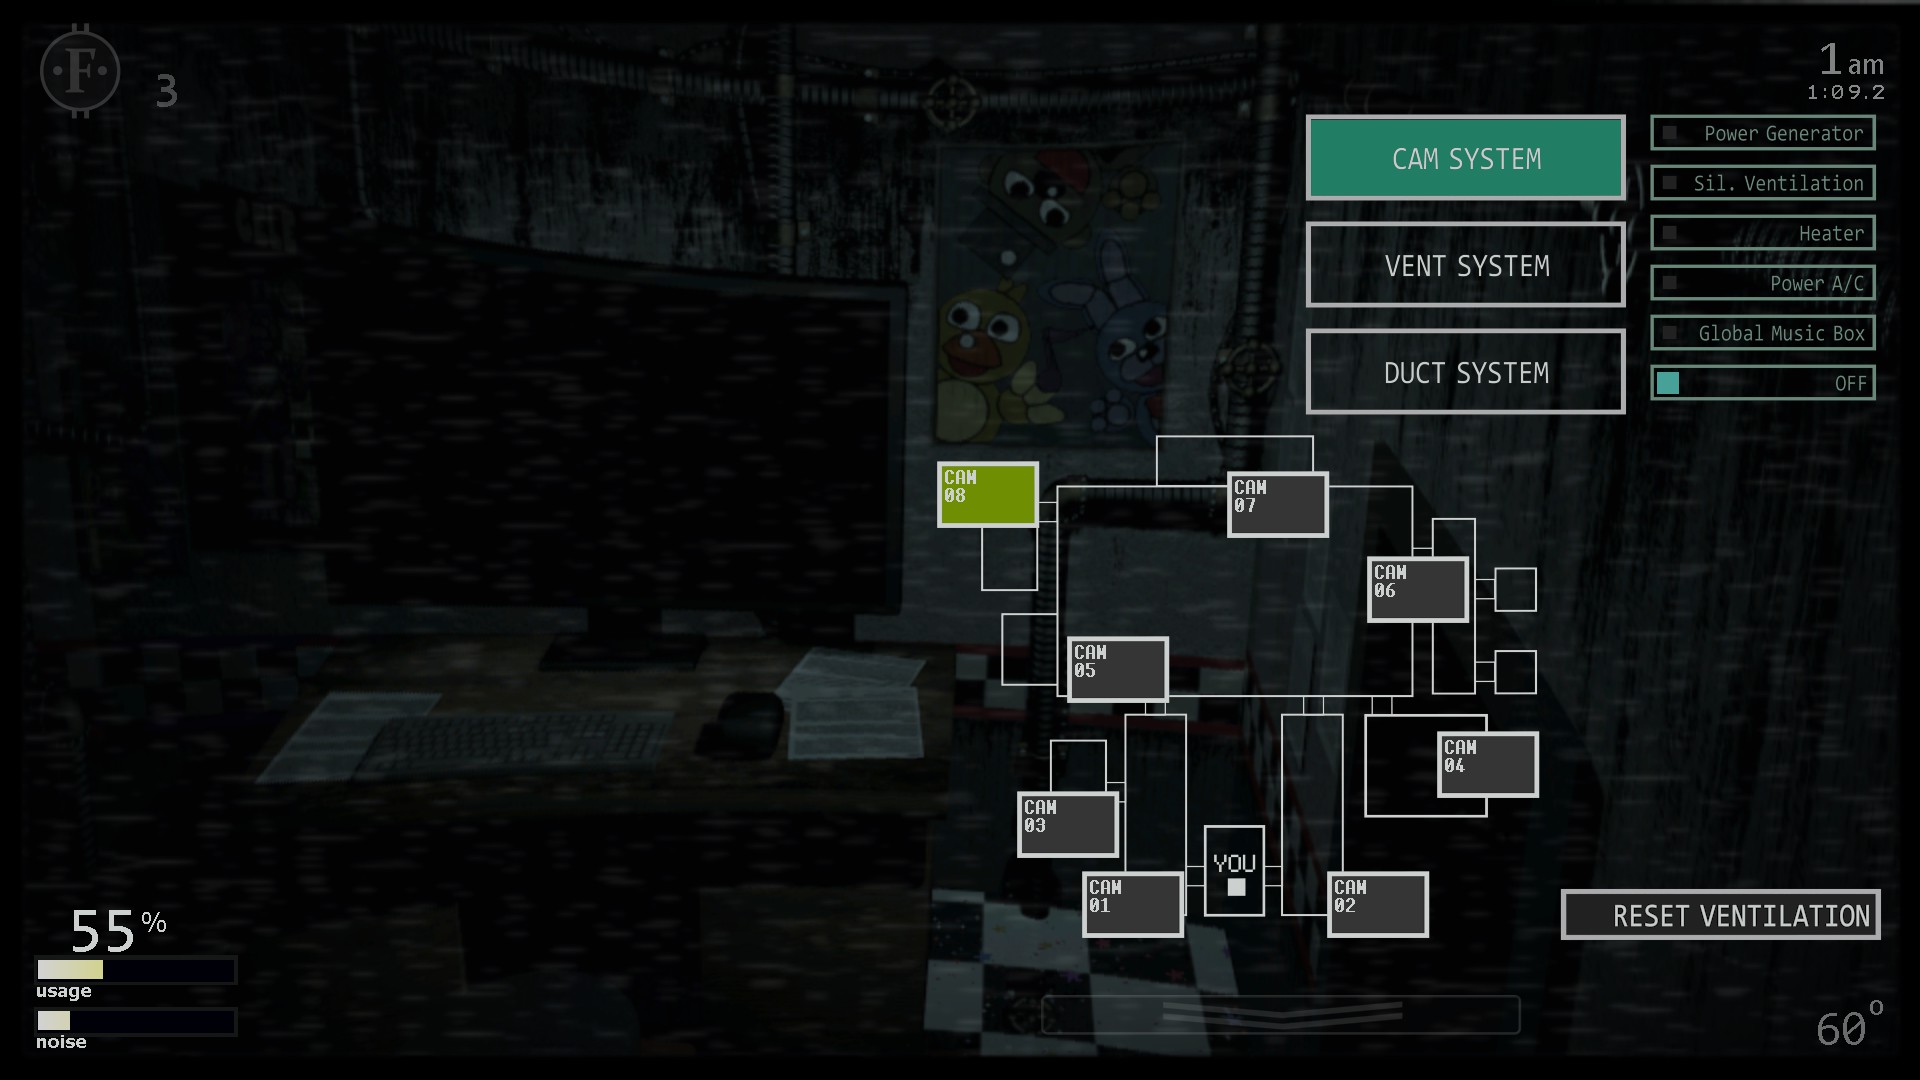
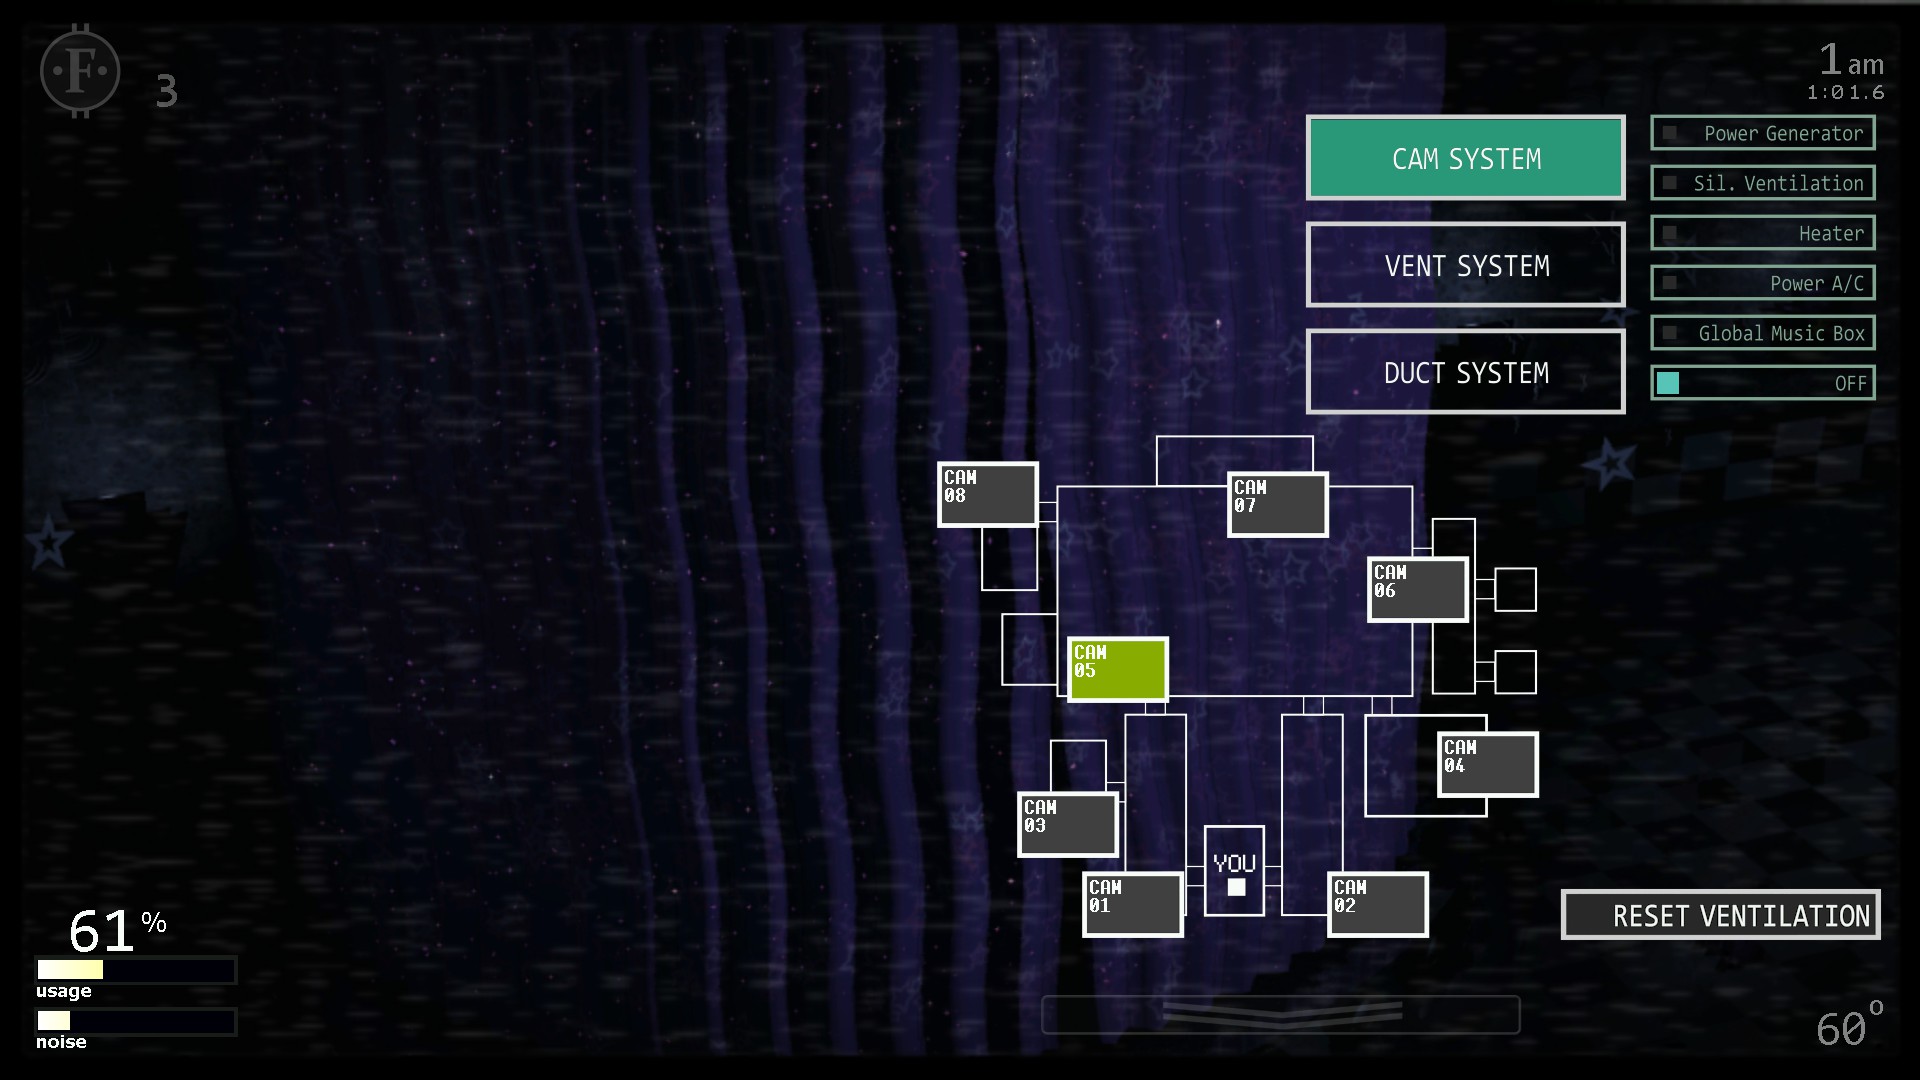
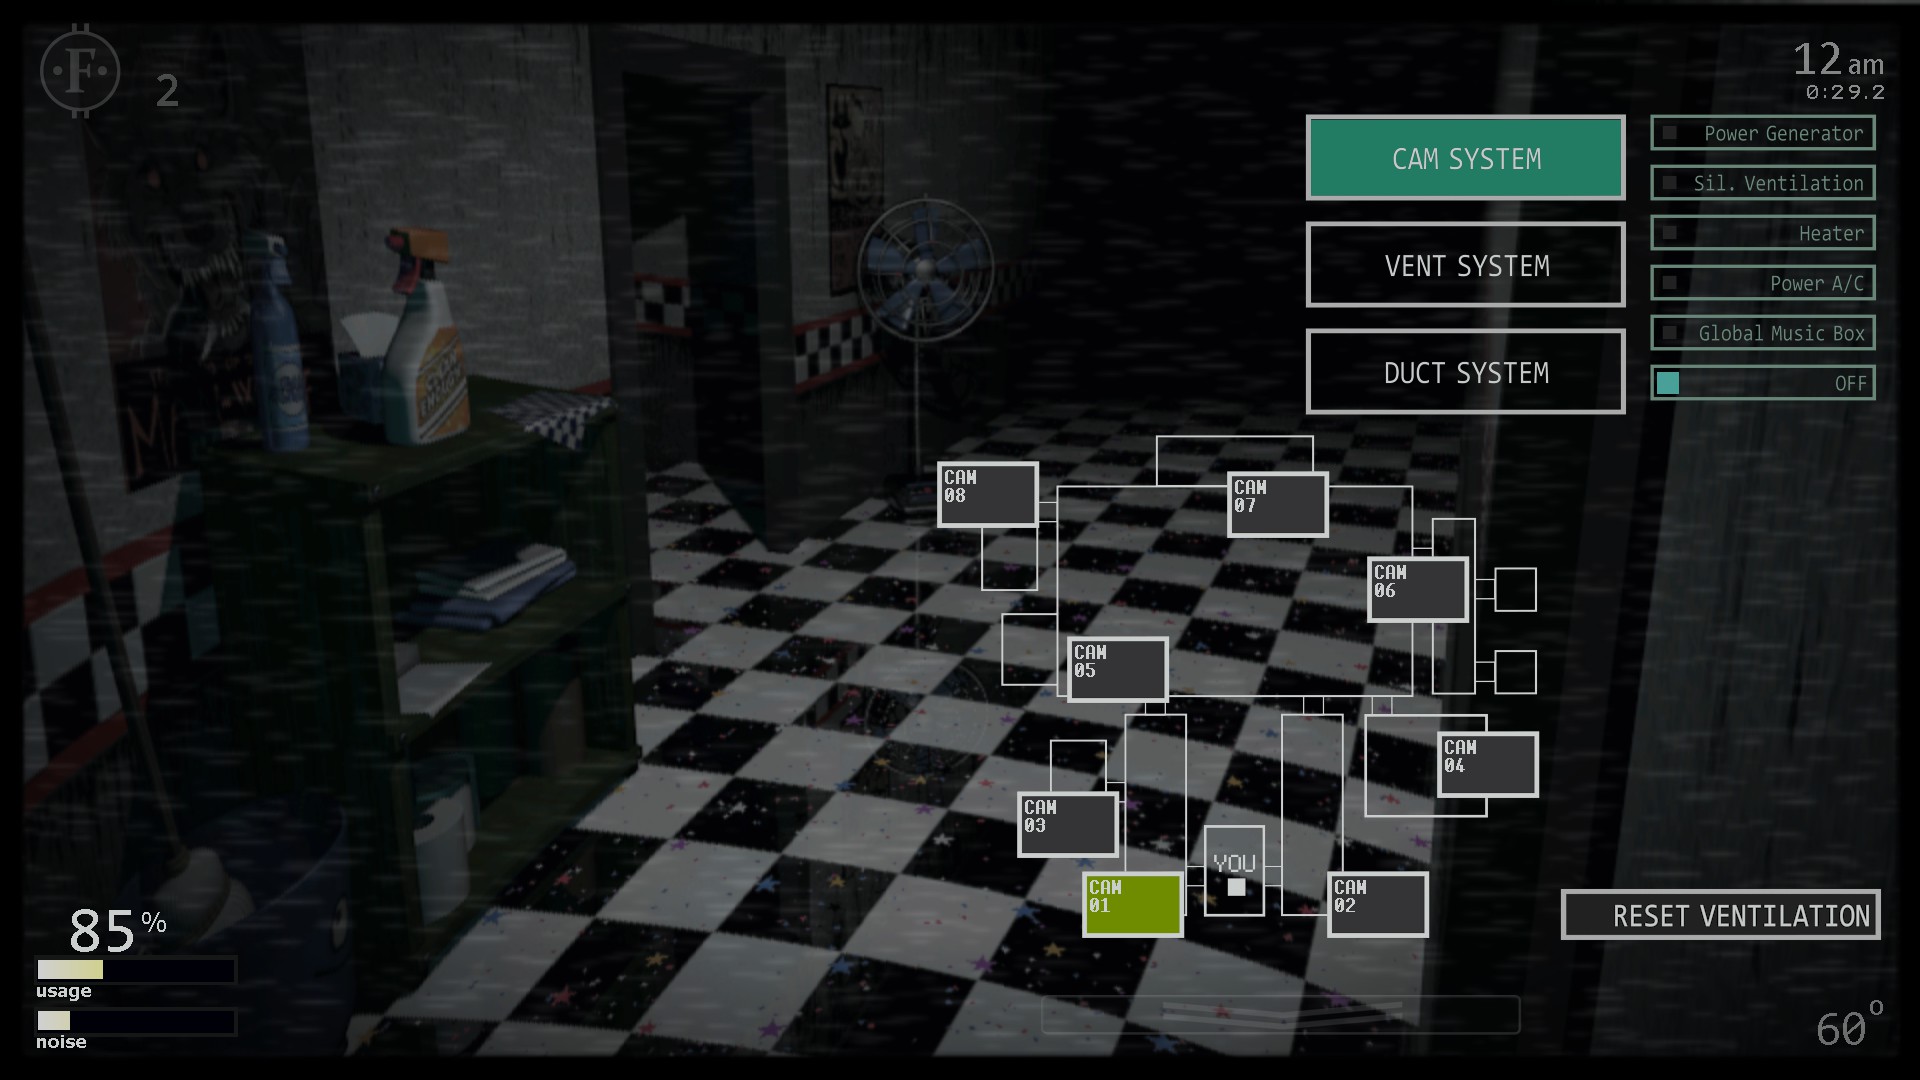
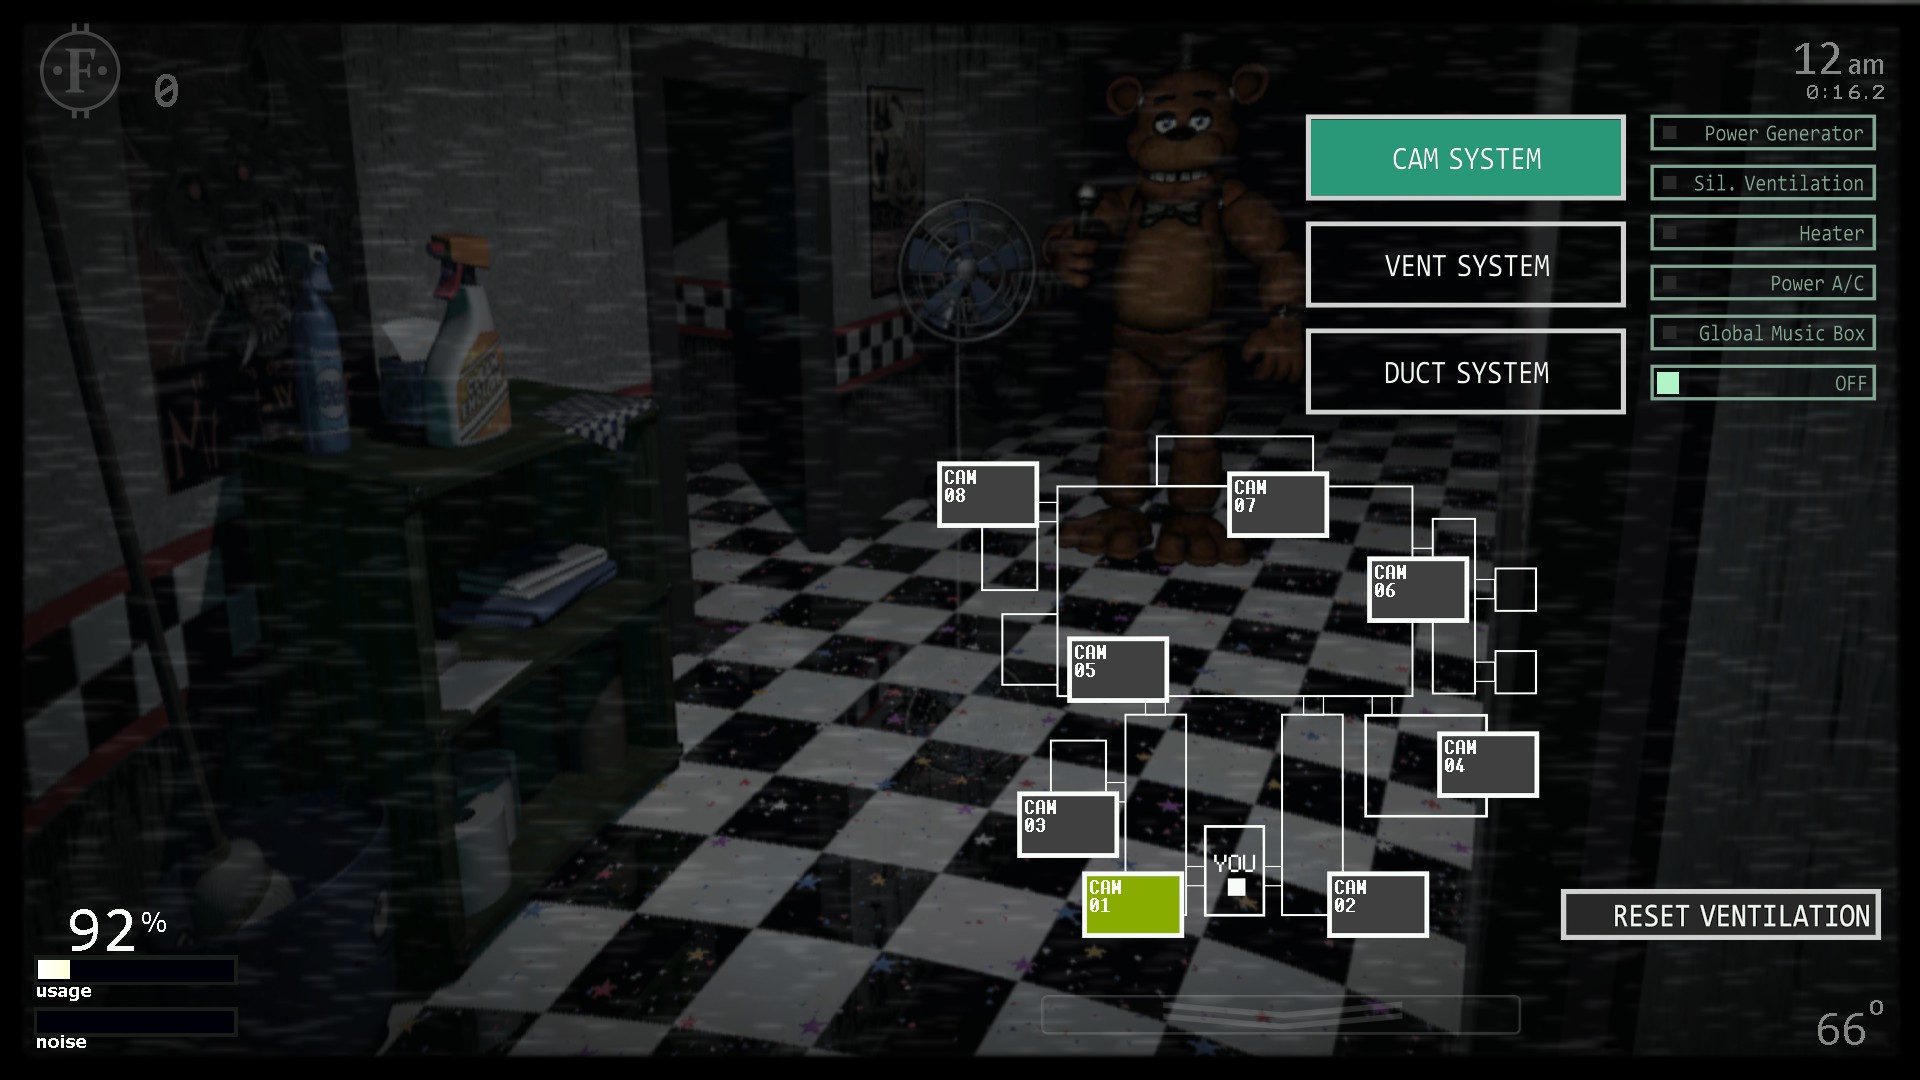
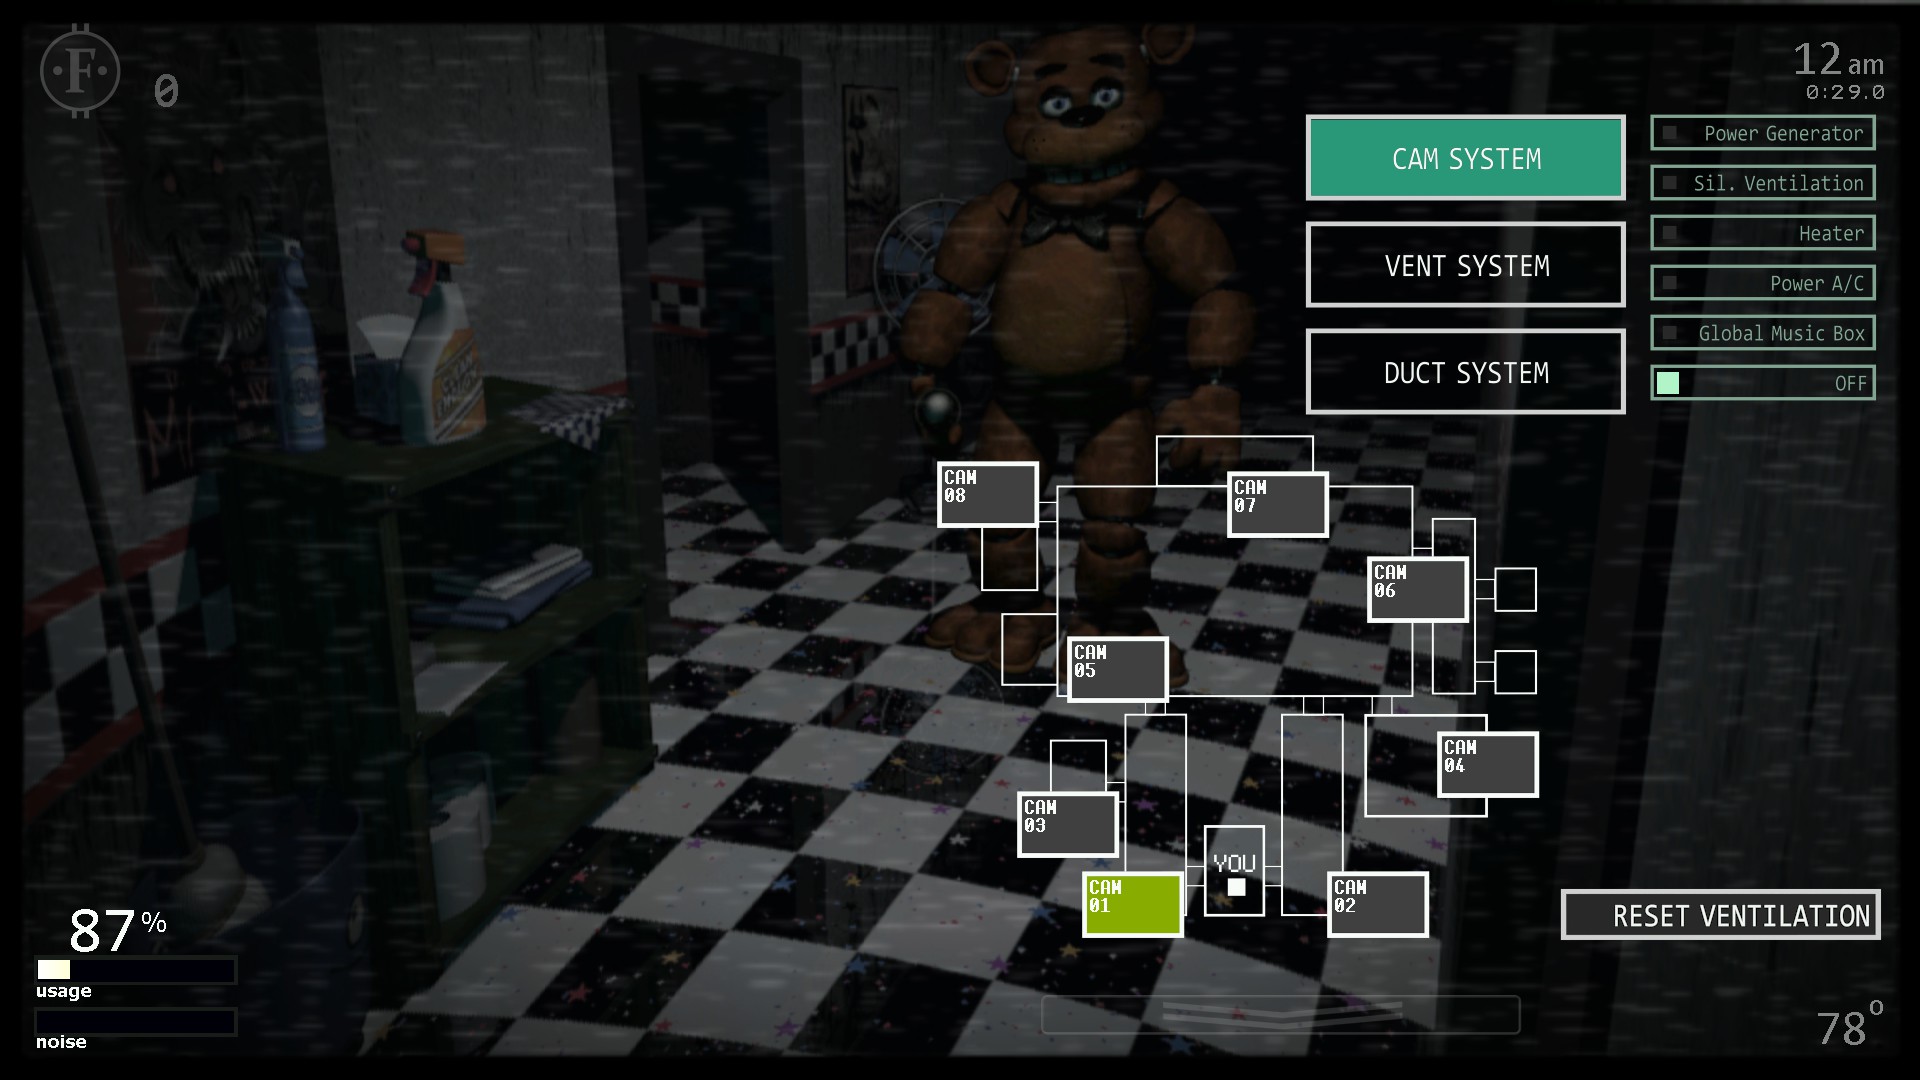
The cameras are activated by swiping down on the right, white arrow. Pictures of all cameras are provived below.
The Right Hall
This is where the plushie-demanding animatronics appear, as well as Ballora and Rockstar Chica.
The Kitchen
This is where the Marionette’s Music Box can be found, as well as Chica.
Funtime Cove
This is where Funtime Foxy can be found.
The Prize Corner
This is where the plushies for Nightmare Mangle, Nightmare Bonnie, and Circus Baby can be bought. It also is where the death coin can be bought.
Fazcoins are acquired by blocking an animatronic by shutting it out, or by hovering over a Fazcoin logo found on the cameras.
The Death Coin can disable an animatronic it is used on. The animatronics susceptible to the Death Coin are Bonnie, Foxy, Lefty, Toy Freddy, Funtime Foxy, Marionette, and Rockstar Bonnie.

The Computer Room
This is where Toy Freddy can be found playing Five Nights With Mr. Hugs.
Pirate’s Cove
This is where Bonnie and Foxy hang out.
Supplies Closet
This is where Lefty appears.

Left Hall
This is where Freddy Fazbear, Rockstar Chica, Ballora, and Jack-O-Chica appear.
There are 5 vent Crawlers: Mangle, Withered Chica, Sprintrap, Ennard (who only breifly appears on the cameras), and Molten Freddy.
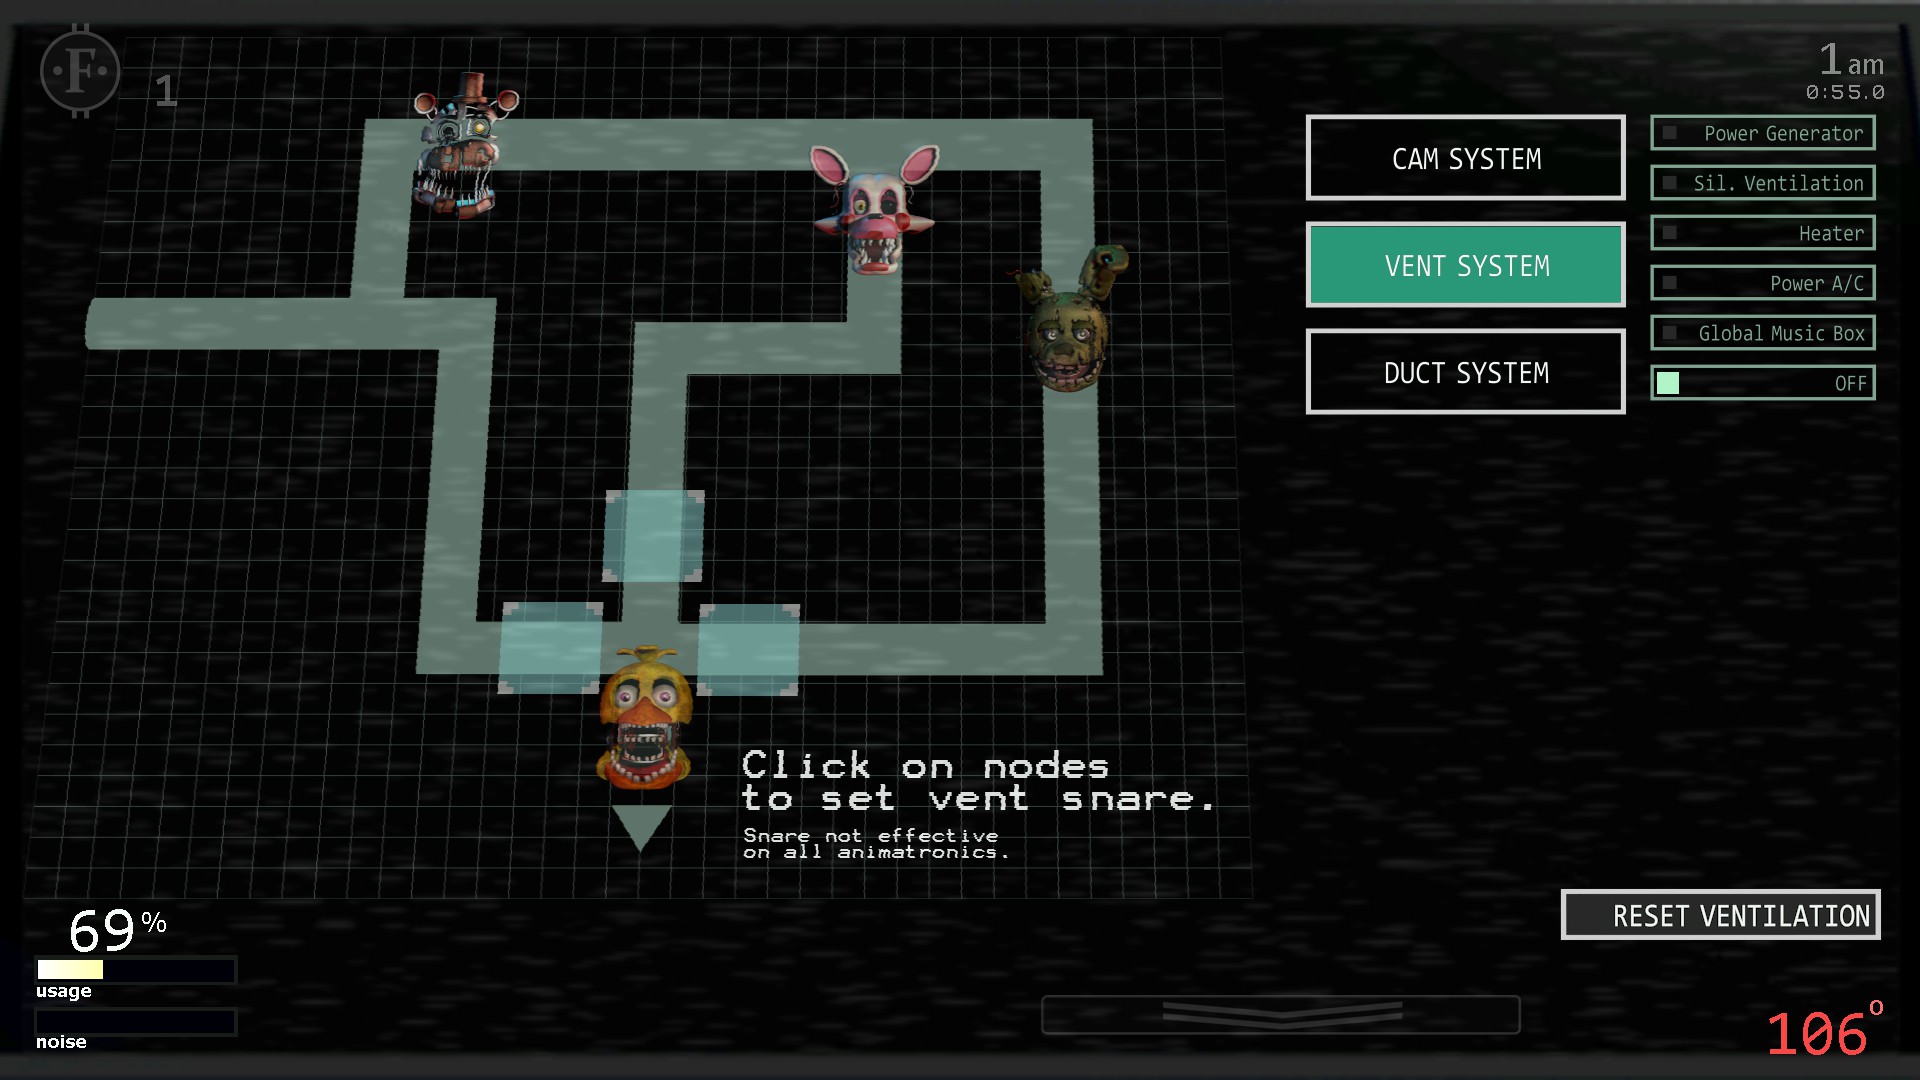
Vent Snares can be used on Withered Chica and Mangle. Think of them like doors that only work on those two characters.
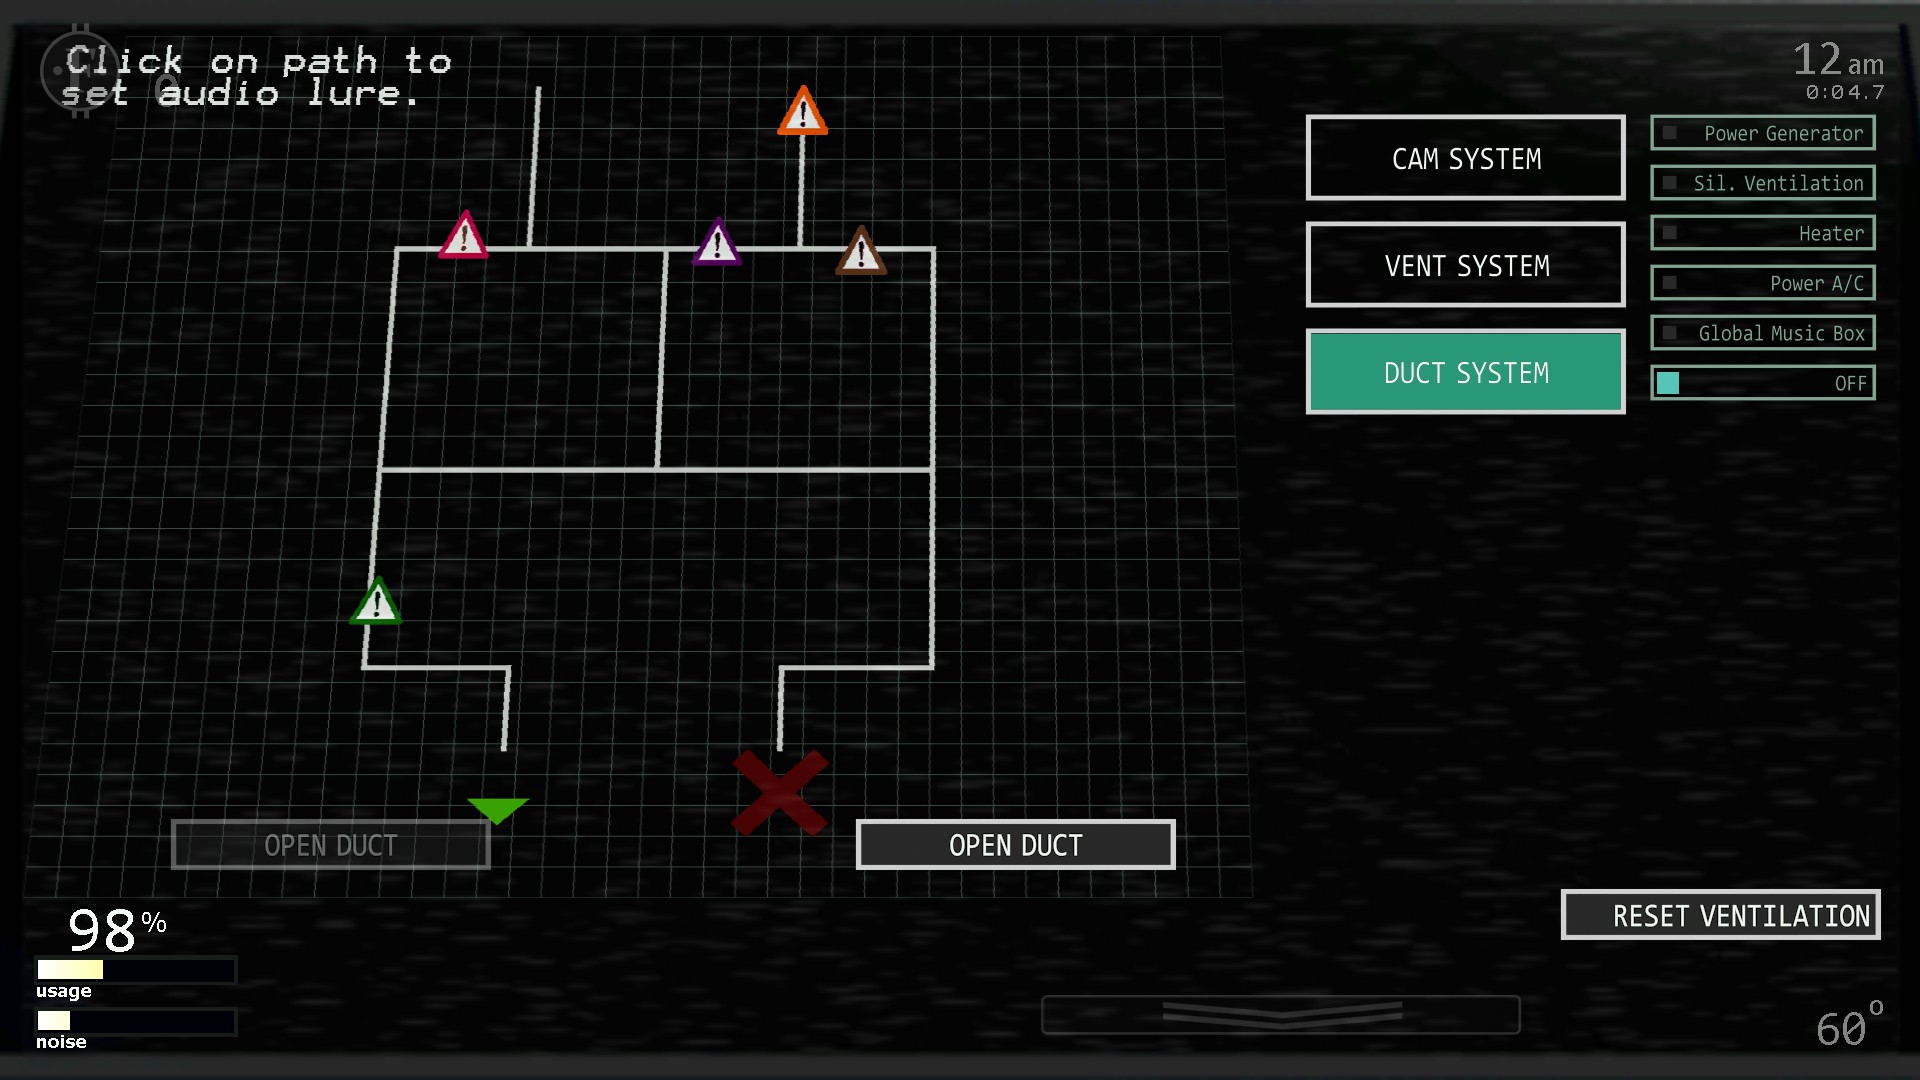
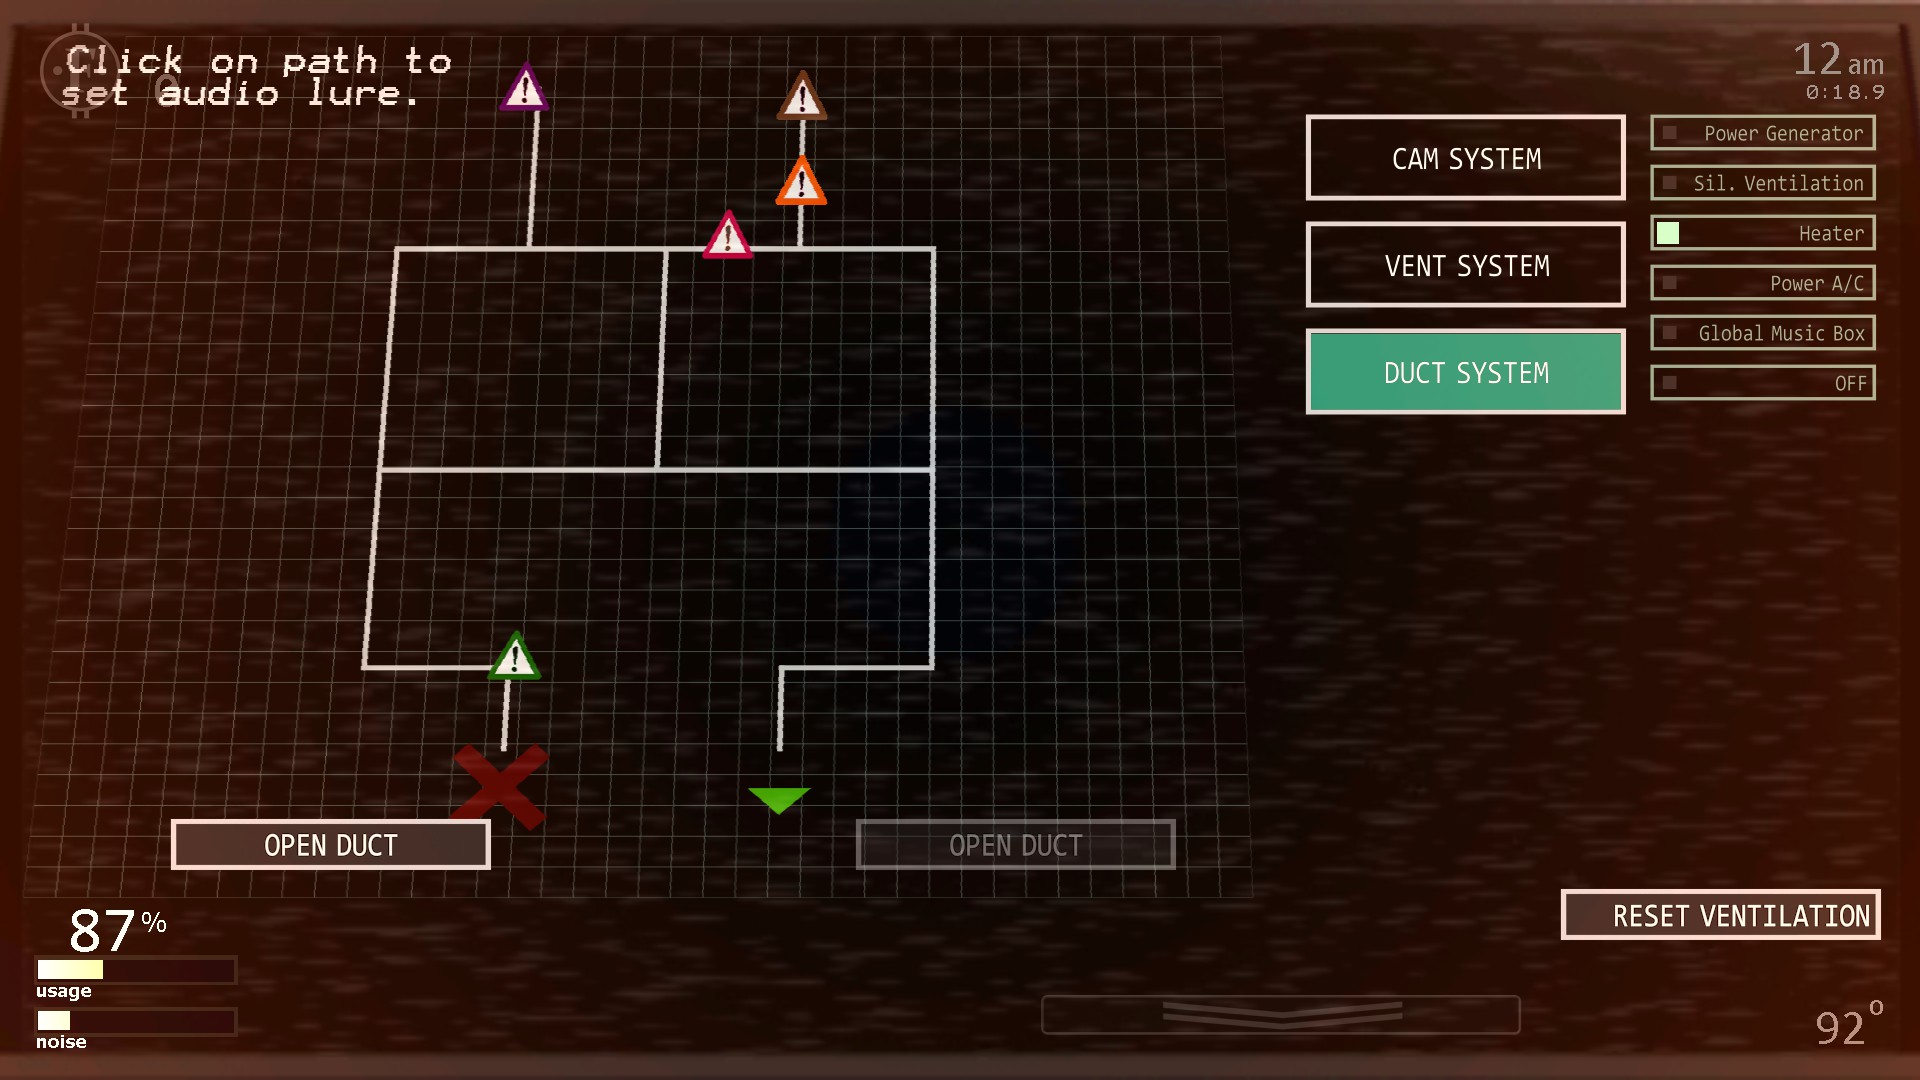
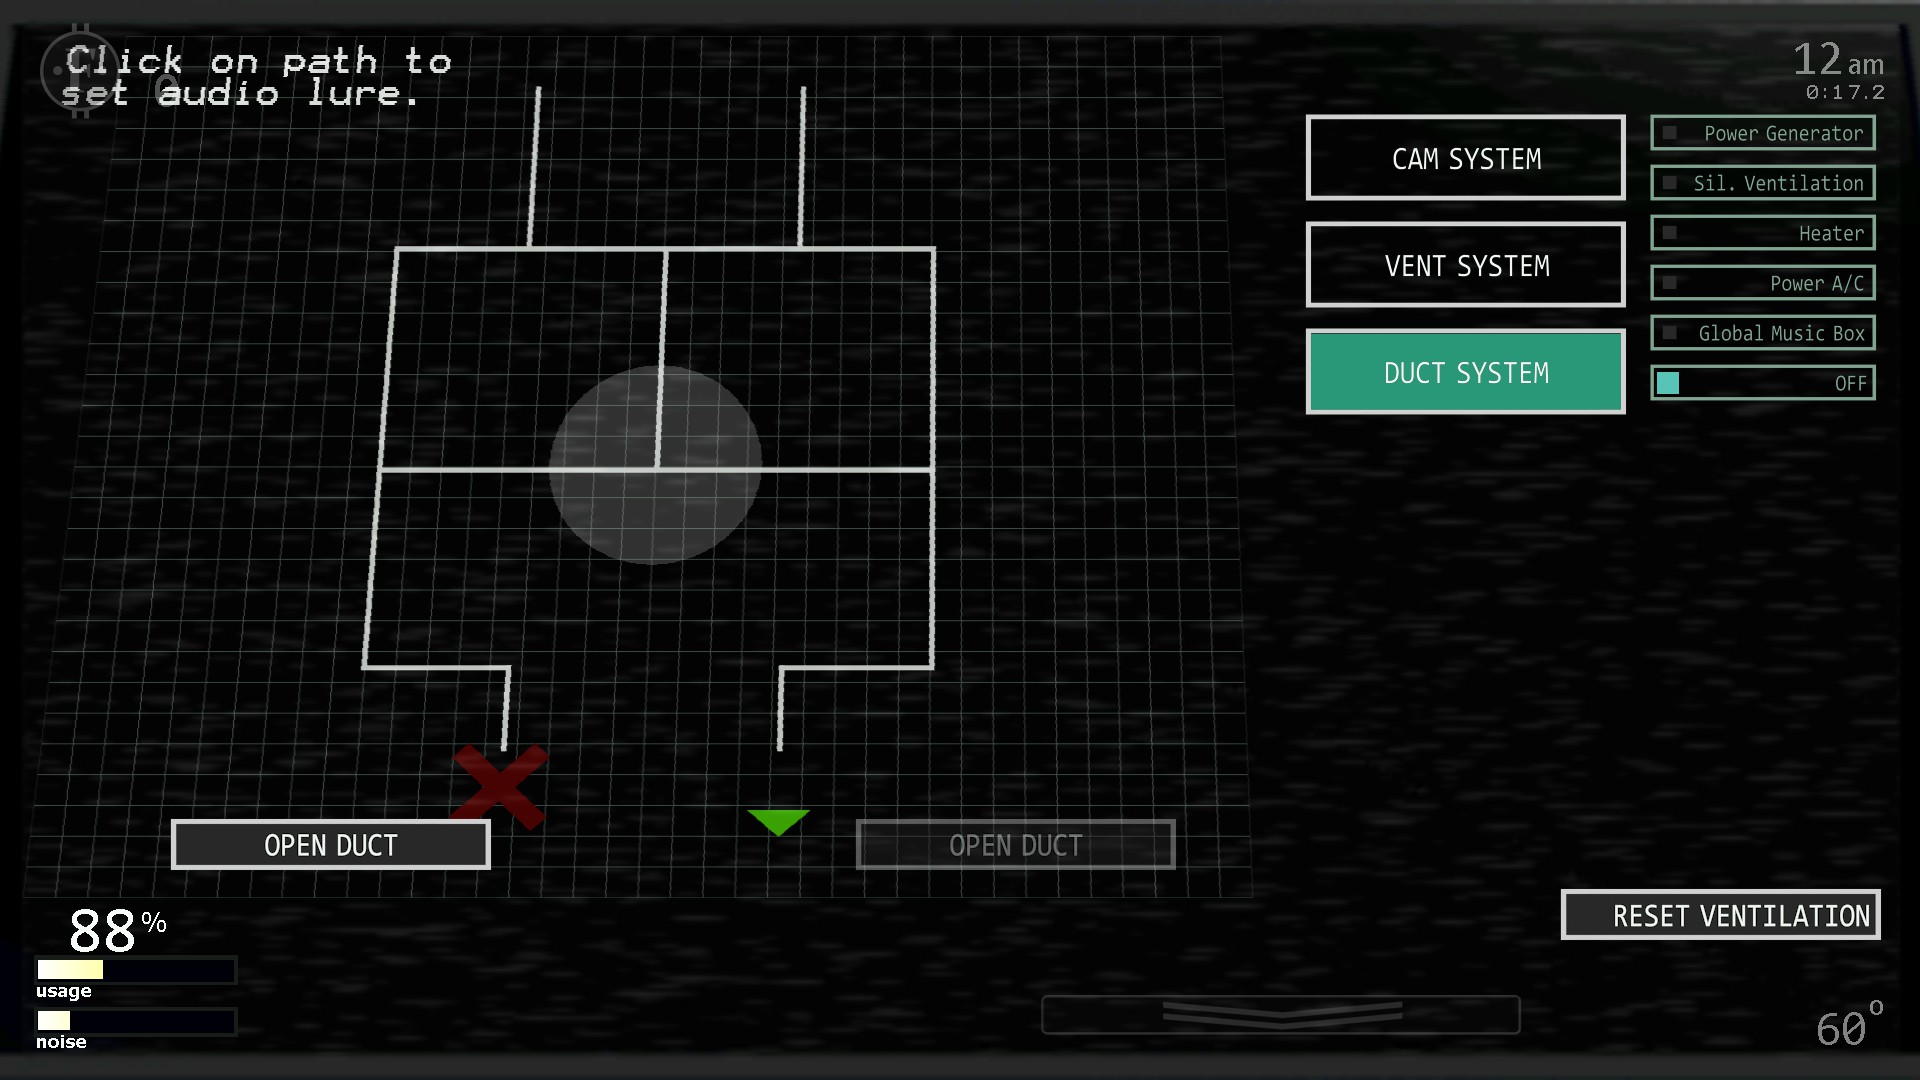
The Duct Dwelers are: Happy Frog (The Green !), Mr. Hippo (The Purple !), Pigpatch (The Red !), Nedd Bear (The Brown !), and Orville Elephant (The Orange !)
The Heater can be used to push the Mediocre Melodies back, except for Happy Frog, who is immune to it.
The Audio Lure can be used to, well lure them!
The “Open Duct” button will cause whatever duct you push the button on to open.
1am- 0:45
2am- 1:30
3am: 2:15
4am: 3:00
5am: 3:45
6am: 4:30
These are pretty self explaniatory…
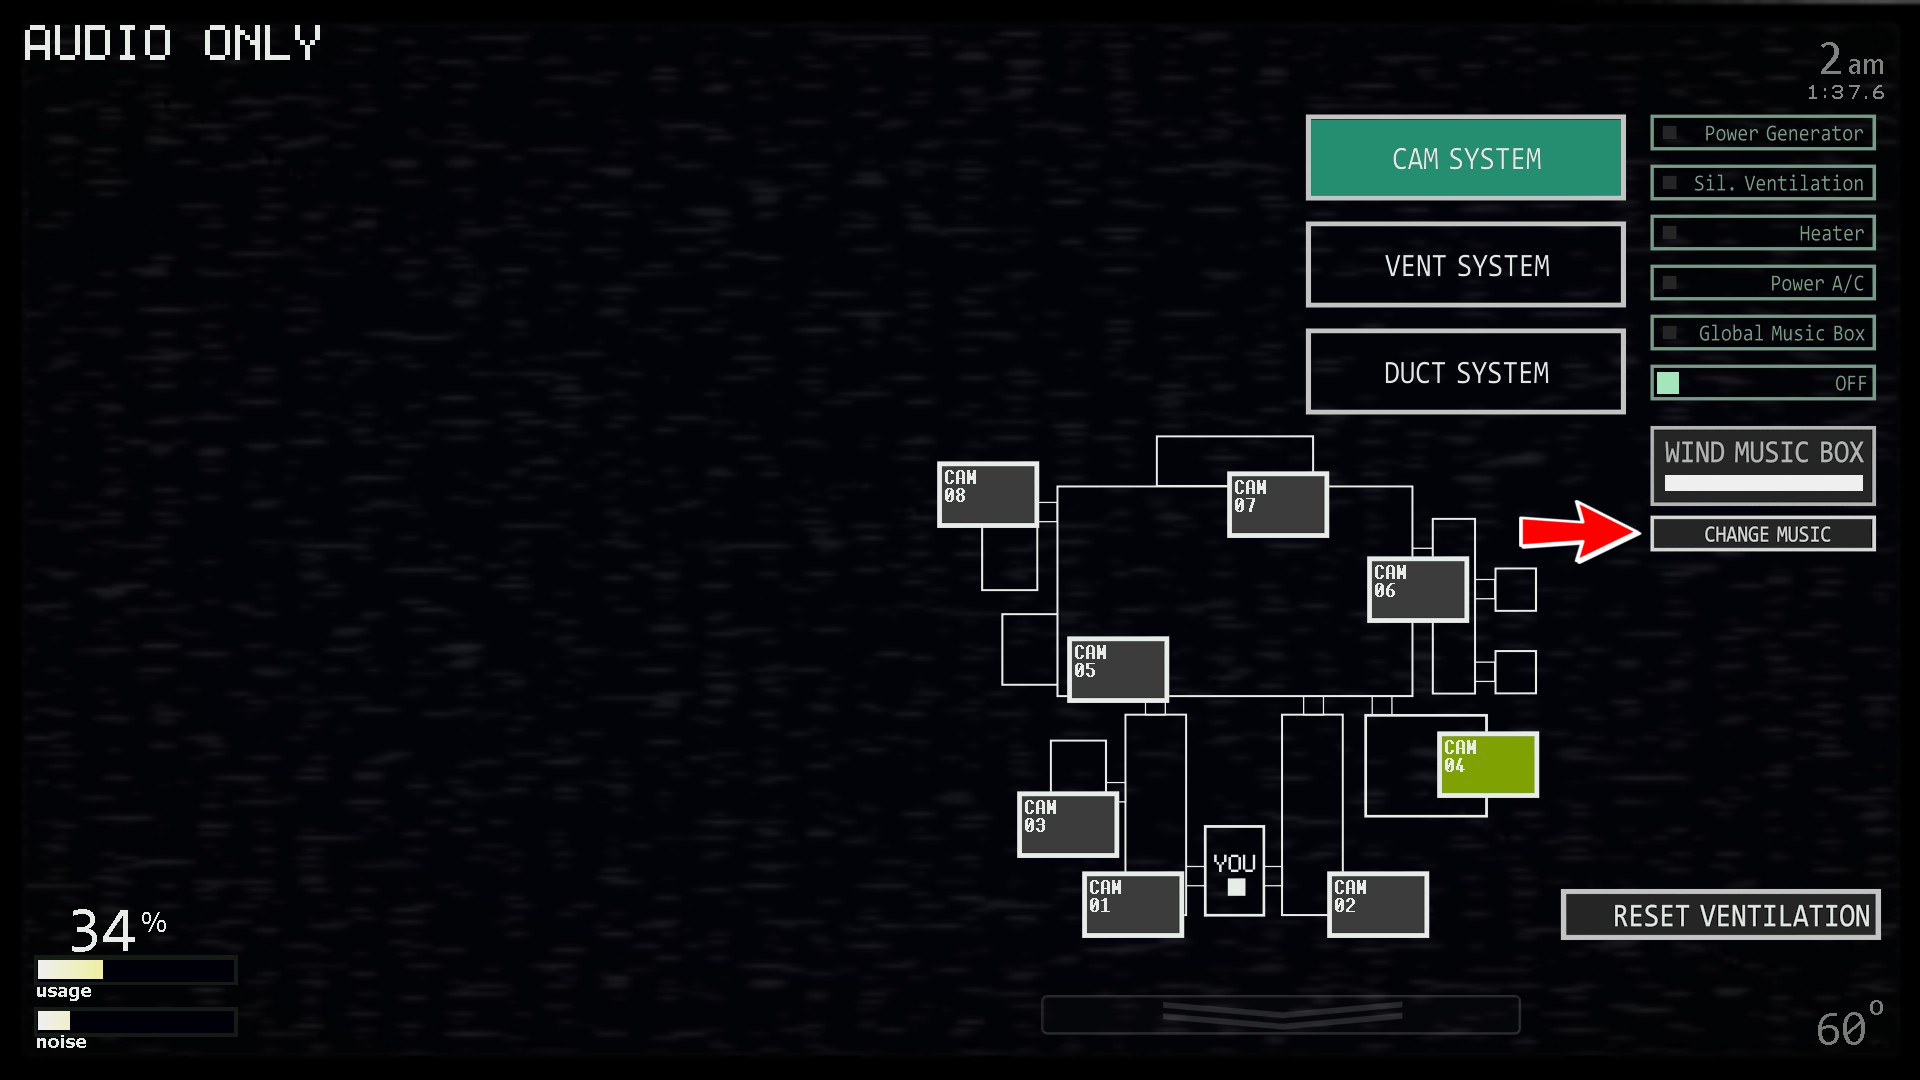
These are the things that will assist you in the Night. Only 1 can be activated at a time.
1- Power Generator: Contrary to the name, the power generator does NOT generate power, it only slows down power drainage. Activating it will cause your noise meter to raise a little bit.
2- Silent Ventilation: This will cause you to get hotter slower. Activating it will cause more power to drain.
3- Heater: This heats up the room quickly. Activating it wiill cause power to drain a little quicker and your noise meter to rise.
4- Power AC: Think of this like a reverse heater. It cools down the room quickly. Similar to the heater, activating it wiill cause power to drain a little quicker and your noise meter to rise.
5- Global Music Box (GMB): This will calm down certain animatronics. Activating causes power to drain quicker.
6- All Off: Turns everything off.
The Fan: Turn it off with the “space” button. It will drain power and raise the noise meter, but also cool you down. You can have it on with another utiltiy.
Ventilation- This will need to be reset about every 30 seconds. Otherwise your screen will black out. (Note: Even if the screen is blacked out you still can click the “Reset Ventilation” button)
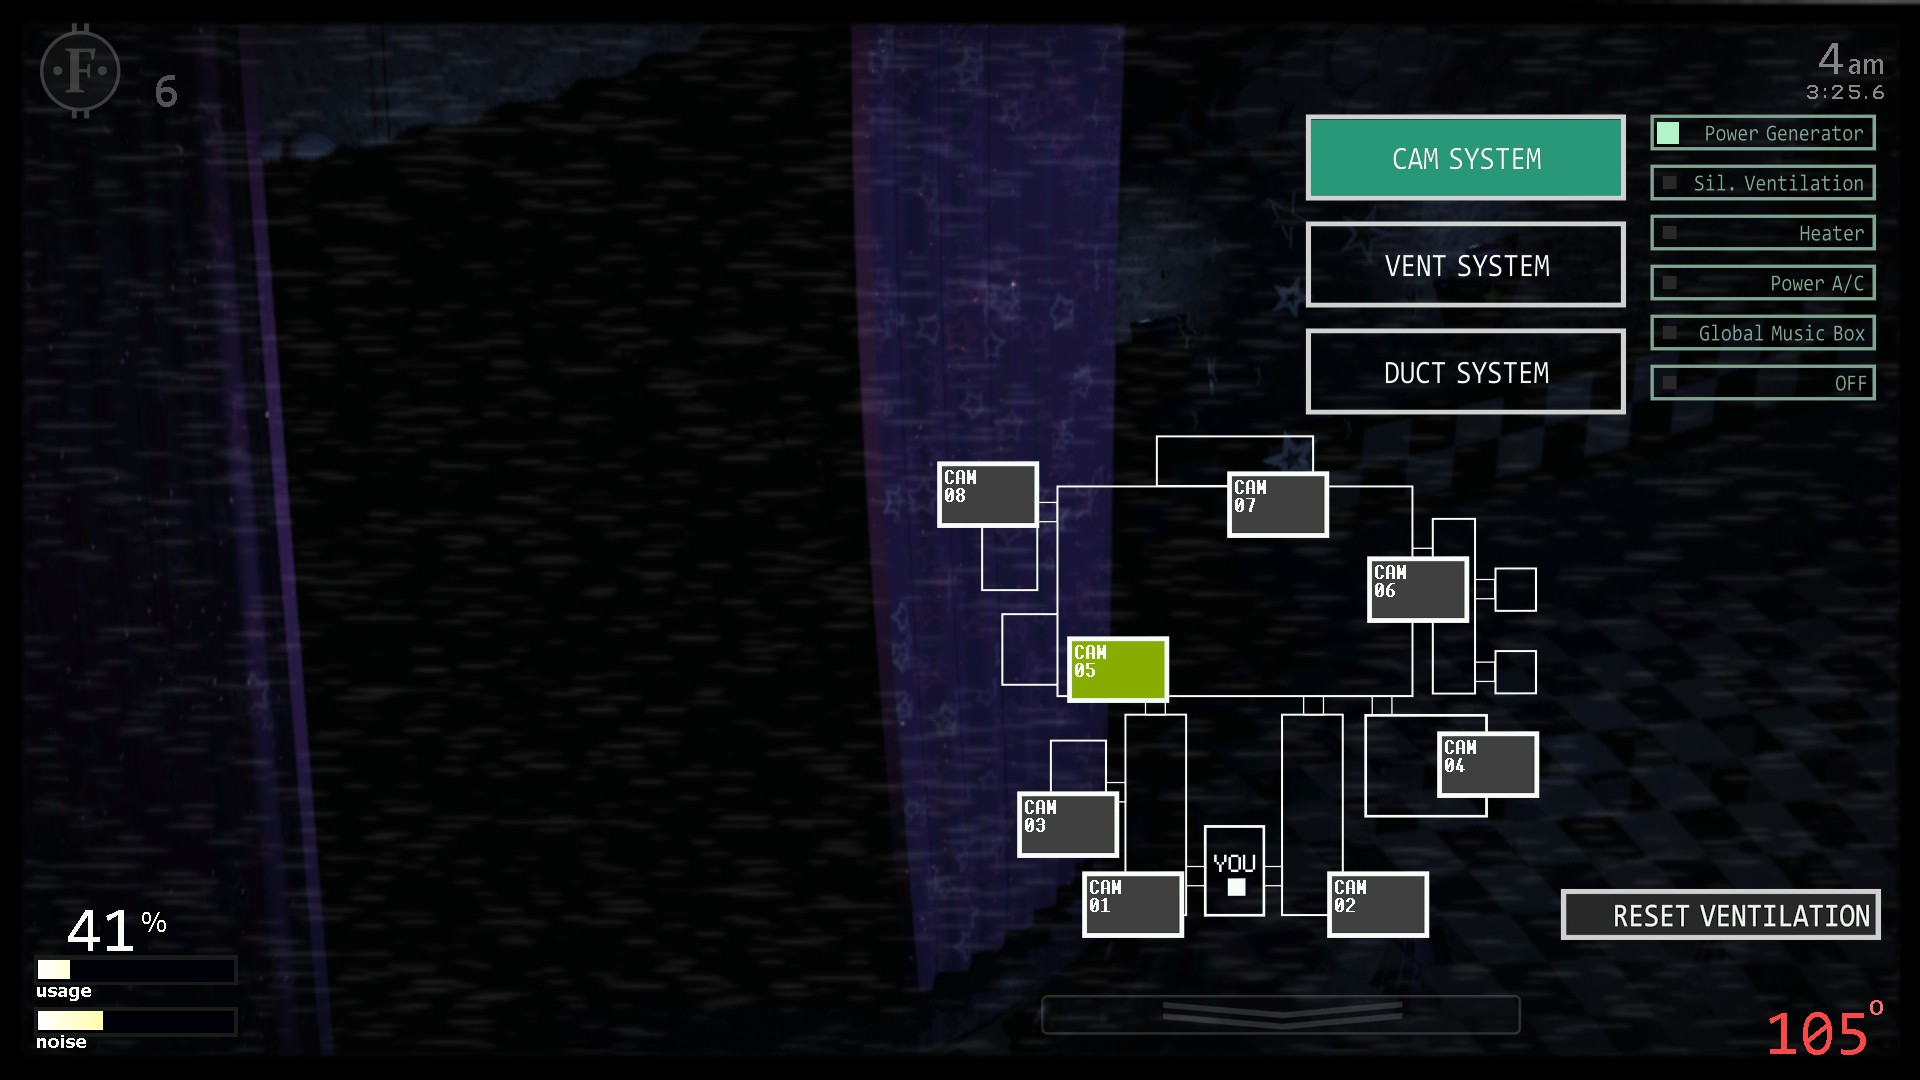
Ventilation will need to be reset more often if your office reaches 100+ degrees.
And that’s basically all you need to know. Now, on to the characters!
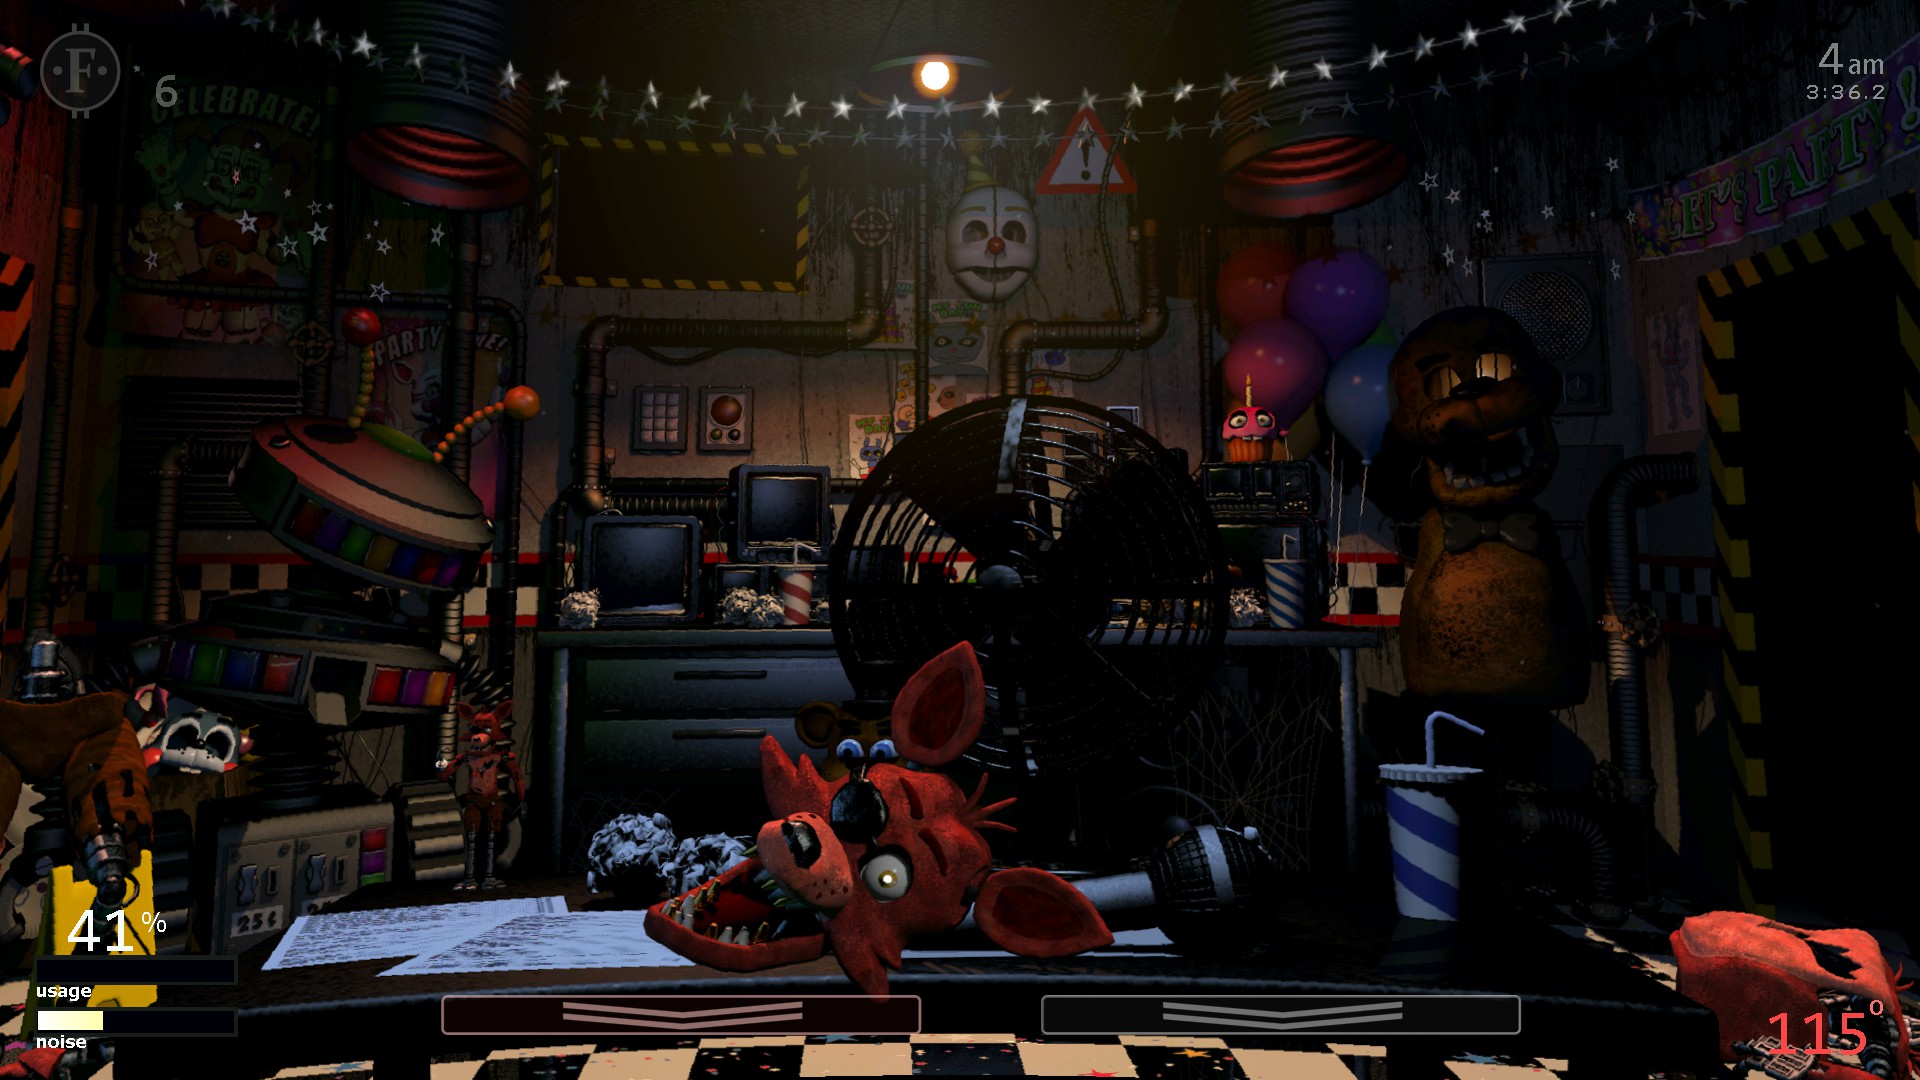
Freddy Fazbear
Freddy Fazbear: He approaches from the left hall, emerging from the darkness and progressing in stages toward your door. Keep track of him on the monitor and shut the door when he is standing in the doorway to turn him away. He moves faster as the building gets warmer, so try to keep him at a cool 60 degrees whenever possible.

A.I.
The higher Freddy’s A.I. is, the quicker he moves.
Tips:
Freddy has 4 stages:
Stage 1: Nothing to worry about.
Stage 2: Still nothing to worry about.
Stage 3: Keep a close eye on him

Stage 4: Shut the left door NOW!

Jumpscare:

Bonnie
Bonnie: Poor Bonnie has been forced to share a cramped stage with another animatronic, Foxy, and he’s pretty upset about it. These two will take turns looking out from the curtain, but whereas Foxy will hide himself when viewed on camera, Bonnie will do the opposite, and become more agitated. If Bonnie is looking out from the curtain when you view Pirate’s Cove, he will take the opportunity to flash his blinding eyes and scramble the cameras, all of them, for a significant amount of time. Needless to say, losing the ability to use your cameras for this long will most likely be a death sentence. The only way to tell who is actively looking out from Pirate’s Cove is to observe a tiny figurine on your desk. This figurine will change from Foxy to Bonnie depending on who is active in Pirate’s Cove. Not paying attention to this detail and thereby looking (or not looking) at Pirate’s Cove at the wrong time can cost you your run.

A.I.
The higher Bonnie’s A.I. is, the longer he scrambles the cameras.
Tips:
Always check the figurine on your desk to see who if it is. If it’s Bonnie don’t check.
Bonnie can ruin you from shutting the doors in Five Nights With Mr. Hugs and from buying items. So avoid him at all costs.

Chica
Chica: She hangs out in the kitchen, being generally clumsy and knocking over lots of pots and pans. In Custom Night, the kitchen is also where the music box happens to be, and while Chica doesn’t care if the music box is wound up or not, she can grow tired of the music selection playing. As long as you hear the pots and pans, Chica is content. If she stops making noise, however, then she has grown tired of the song, and you only have a short amount of time to change it. Don’t get too eager to change music selections though, because if you change the music while Chica is happy, then she will leave the kitchen to come get you. Once she leaves the kitchen, there is no way to make her go back.

A.I.
The higher Chica’s A.I. is, the less tolerant she gets of music.
Tips:
It is recommended to check on Chica every 20-30 seconds.
Wait 4-5 seconds for banging before switching music.
The Global Music Box can be used to keep Chica content.
Jumpscare:

Foxy
Foxy: He inhabits Pirate’s Cove along with Bonnie, and while you shouldn’t view Pirate’s Cove when Bonnie is active, it’s a necessity when Foxy is. Foxy will gradually make his exit if you don’t check on him regularly, and once he’s out, there’s no way to make him go back. He also has a new trick up his sleeve to get into your office: he gets in piece by piece. He will find any vulnerability in your office and slip in chunks of himself (arms, legs, head, torso) through any open vent or open door, until all of his fragments are inside. Once there, he will wait for you to pull up your monitor before putting himself back together and jumpscaring you.

A.I.
The higher Foxy’s A.I. is, the faster he will exit Pirate’s Cove.
Tips:
Always check the figurine on your desk. If it is Foxy, check Pirate’s Cove.
Foxy has 4 stages:

Stage 1: Nothing to worry about.
Stage 2: You need to regularly check on him now.

Stage 3: Foxy is getting ready to attack. Check on him every 5-10 seconds.

Stage 4: It’s basically Game Over at this point. Check him every 3-5 seconds.
If you see this then Foxy has left Pirate’s Cove.
Foxy will begin to put parts in your office. Once they are all in there, it’s Game Over. There is nothing you can do to prevent this.
Jumpscare:

Toy Freddy
Toy Freddy: Relax, Toy Freddy is retired. He sits in the Parts and Service room playing video games on his big-screen TV. What game is his playing? Five Nights With Mr. Hugs, of course. The problem is that Toy Freddy has never been very good at video games, and if he loses his game, he will probably blame you for it. Check the Parts and Service cam to see how he’s doing. In Five Nights With Mr. Hugs, there are three ways into the office and only one door can be closed at a time. Click the cams on Toy Freddy’s monitor, then be sure that the appropriate door is closed to prevent Mr. Hugs from getting into his office. If you check on Toy Freddy and see GAME OVER on his screen, that means that Mr. Hugs has already jumpscared him, and now Toy Freddy is on his way to jumpscare you. Once Toy Freddy has been jumpscared, there will be no way to calm him down, and no way to save yourself.

A.I.
The higher Toy Freddy’s A.I. is, the more frequently Mr. Hugs will switch cameras.
Tips:
Mr. Hugs tends to move about every hour
After you find Mr. Hugs and shut the door, I recommend switching cams on Five Nights With Mr. Hugs.
Mr. Hugs will never go to the same door twice in a row.
Mr. Hugs at the Front Door:
Mr. Hugs at the Left Door:
Mr. Hugs at the Right Door:


Toy Freddy has the chance to NEVER jumpscare you.
Jumpscare:

Toy Bonnie, Toy Chica, and Withered Bonnie
Toy Bonnie: He sneaks in through a trapdoor to your right. There is no way to prevent him from entering your office. Your only defense is to put on your Freddy Fazbear mask to fool him. Looking directly at him will increase the effectiveness of the mask, causing him to leave a little faster.

Toy Chica: She sneaks in through a trapdoor to your left, and just like Toy Bonnie, there is no way to prevent her from getting into the room. Your only defense is to put on your Freddy Fazbear mask to fool her. Toy Chica is faster than Toy Bonnie and will invade your office more often, however she is easier to fool with the mask, especially when looking directly at her.

Withered Bonnie: He slips in through the trapdoor while you are viewing your monitor. You’ll know he’s there by the audio and visual distortions he causes just by standing there ominously. You only have a short amount of time to put on the mask to ward him off, otherwise a jumpscare is all you’ll have to look forward to.

A.I.
The higher Toy Bonnie, Toy Chica, and Withered Bonnie’s A.I.s are, the more frequently they appear.
Tips:
Toy Bonnie always appears on the right.
Toy Chica always appears on the left.
Withered Bonnie always appears in the middle.
When the lights start flickering, that means you need to put on the Freddy Mask.
Before putting on the mask, quickly glance left and right to see if it is Toy Bonnie, Toy Chica, or Withered Bonnie.
Remember to always stare at the animatronics affected by the Freddy Mask when you have it on.


Jumpscares:


Mangle, Withered Chica, Springtrap, Ennard, Molten Freddy (The Vent Crawlers)
Mangle: Mangle makes his way through the vent system, but unlike the other animatronics in the vents, once he reaches the vent to your office he will never leave, and will enter your office the moment the vent door opens. The only way to stop her is to use the vent snare, which can only be active in one place at a time, forcing you to keep track of Mangle’s location in the vent’s to ensure that the correct vent snare is active. Once in your office, Mangle will hang from the ceiling creating audio disturbances before eventually dropping down to jumpscare you.

Withered Chica: Withered Chica can be blocked by the vent snare as well as the vent door. Unlike Ennard and the others, she gives no audio cue when she is at the door, meaning you need to track her position using the vent radar. If she reaches the vent door, she will become stuck in it, preventing you from closing it for the rest of the night. While her girth prevents Ennard, Molten Freddy, and Springtrap from passing, Mangle can still get through. While this may seem like a strategic advantage, keep in mind that Withered Chica may eventually wiggle free and jumpscare you.

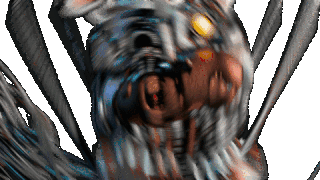
Springtrap: He climbs around in the vent system, making his way toward the vent opening embedded in the wall in front of you. Track him by watching the vent monitor. He moves silently, so don’t bother listening for him, but when he is poised to attack you will see his face looking back at you from the vent. Close the vent door on him to send him away.

Ennard: He also climbs in the vent system, but unlike the other animatronics in the vents, he is difficult to track, appearing only briefly here and there when moving. He can’t be seen in the vent opening, but gives himself away by making a squeaking sound before attacking. Close the vent door on him to send him away.

Molten Freddy: He also climbs in the vent system, but is much faster than the other animatronics when it comes to maneuvering his way toward you. You can track him on the vent monitor, and can hear his laugh when he is poised to attack. Close the vent door on him to send him away.

A.I.
The higher the Vent Crawler’s A.I.s are, the quicker they move.
The higher Mangle’s A.I. is, the quicker she jumpscares you when he makes it to the office.
The higher Withered Chica’s A.I. is, the quicker she gets unstuck.
Tips:
Mangle doesn’t seem to have a path she favors. He tends to go to just about any entrance, so be wary.
Mangle will hang around the office after getting in the vents. Use this to your advantage, so if it’s 10 seconds until 6 AM you don’t have to worry about Mangle.
Withered Chica seems to favor this path. If you don’t like checking the vents and you have her on, I’d recommend putting the vent snare here.
Withered Chica’s… “girth” can be used to block all vent crawlers (minus Mangle). The higher her difficulty, the quicker it takes her to get unstuck.
This is what Springtrap looks like when he is ready to attack.
Ennard makes this[fnaf-sister-location.wikia.com] sound when he is ready to attack Molten Freddy makes this[freddy-fazbears-pizzeria-simulator.wikia.com]sound when he is ready to attack.


Jumpscares:


BB & JJ
BB: He will try to sneak in through the side vent. Close the side vent and wait until you hear a thud indicating he is gone. If BB slips in, he will temporarily make a nuisance of himself, disabling your flashlight until he leaves.

JJ: She will also try to sneak in through the side vent. Close the side vent and wait until you hear a thud indicating she is gone. If JJ slips in, she will disable all door controls until she leaves.

A.I.
The higher BB & JJ’s A.I.s are, the more frequently they appear.
Tips:
Always check if BB or JJ is in the vents.
If BB is already in the office, JJ will take an extra 2 camera flips to enter the office, and vice versa.


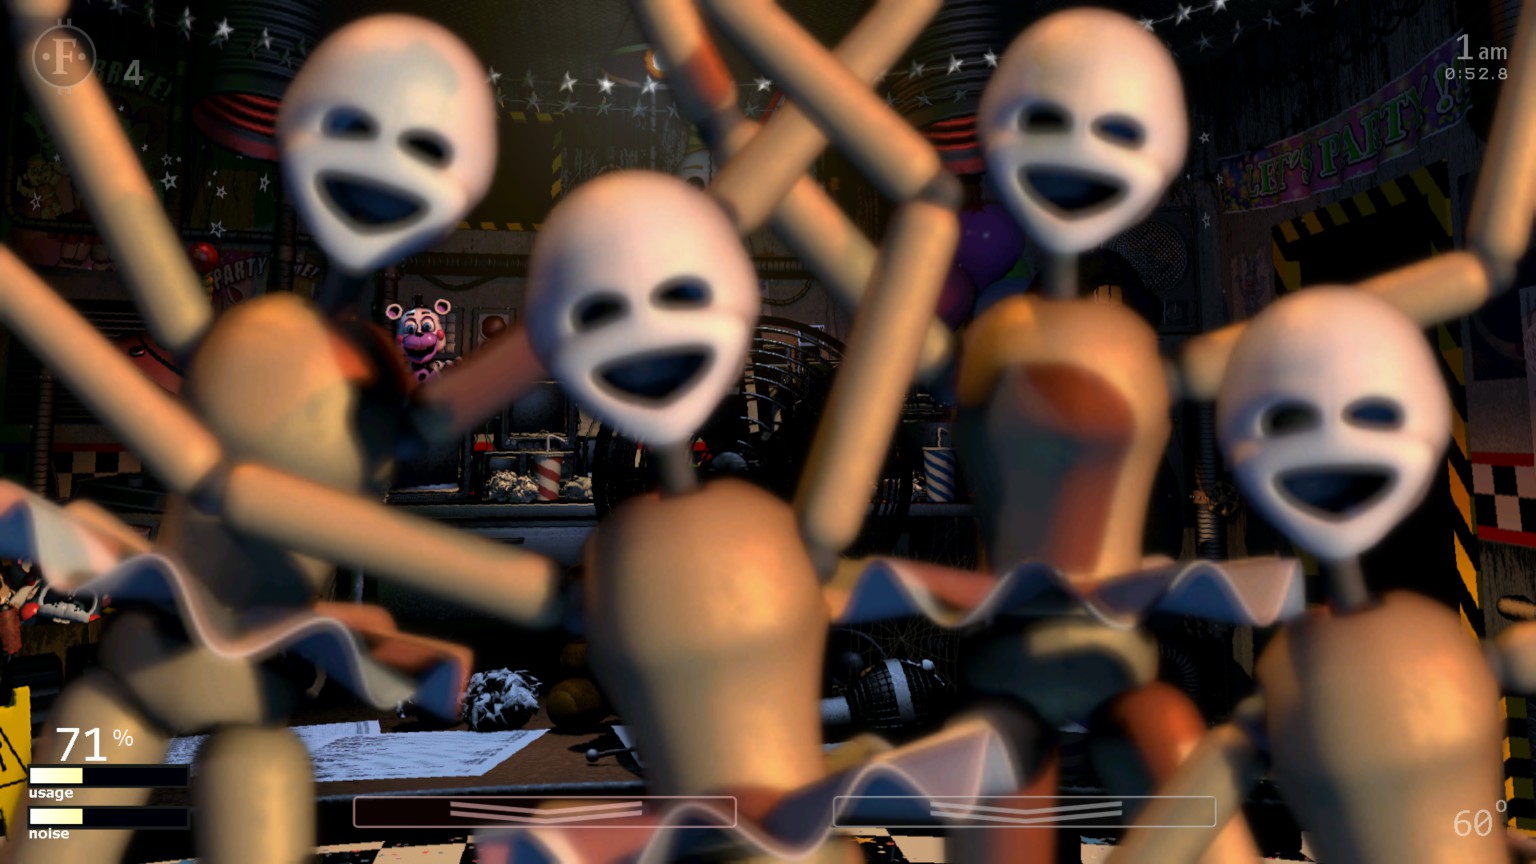
Marionette/Puppet
The Marionette: If you neglect its music box then it will break free of its prison. Once out, it can’t be put back inside, and it will jumpscare you.

A.I.
The higher the Marionette’s A.I. is, the faster the Music Box winds down.
Tips:
If you have Vent or Duct animatronics activated, it is recommended to go to the Kitchen CAM and then go to the vents or ducts. This will allow you to wind up the music box while also dealing with duct or vent animatronics.
On 20 difficulty, the Marionette’s Music Box takes about 17 seconds to stop playing music.
The Global Music Box works on the Marionette as well.

Jumpscare:

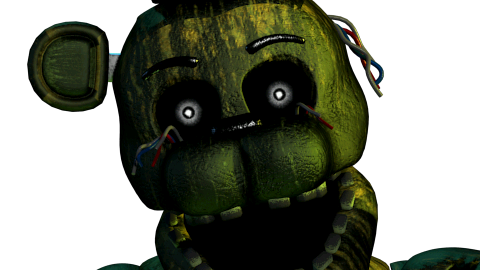
(Withered) Golden Freddy
Golden Freddy: When he appears after lowering your tablet, pull it back up quickly to get rid of him! Staring at him for too long will end your run with an unpleasant surprise!

A.I.
The higher Golden Freddy’s A.I. is, the more frequently he appears.
Tips:
The Freddy Mask also works on Golden Freddy.
Always put on your Freddy Mask for a second after flipping down the camera to get rid of Golden Freddy.

Jumpscare:

Phantom Mangle & Phantom BB (Distractions on the Cameras)
Phantom Mangle: Will appear at random in your viewing monitor. Close the monitor or switch viewing modes to make it disappear. If left on screen for too long, Phantom Mangle will invade your office temporarily, causing audio distractions and increasing your noise meter, which can attract even more problems.

Phantom BB: He will appear on your viewing monitor at random. Quickly change cameras or close the monitor to avoid his jumpscare. Getting jumpscared by Phantom BB will cause you to black-out temporarily.

Phantom Mangle and BB on the CAMs

A.I.
The higher Phantom Mangle and Phantom BB’s A.I.s are, the more frequently they appear.
Tips:
Switching systems (ducts and vents) will get rid of Phantom Mangle and Phantom BB
Phantom Mangle usally will not disappear when you switch cameras.
Jumpscare:


Phantom Freddy, Nightmare Freddy, and Nightmare BB (Flashlight Animatronics)
Phantom Freddy: He will slowly materialize in your office, fading-in from nothing. Shining your flashlight at him is the only way to make him disappear again. If he fully materializes, he will jumpscare you and cause you to black-out temporarily.

Nightmare Freddy: While you aren’t looking, mini-Freddies (Freddles) will accumulate on your desk and around the office. Shine your flashlight to scare them away. If you let too many of them gather together then Nightmare Freddy will be summoned, ending your run with a jumpscare.

Nightmare BB: He sits in your office throughout the night, usually slouched over. When slouched, be careful not to shine your light on him. If he is standing, however, shine your light to return him to his sitting position, otherwise he will attack when you turn away.

A.I.
The higher Phantom Freddy’s A.I. is, the quicker he materializes in the office.
The higher Nightmare Freddy’s A.I. is, the quicker his Freddles appear.
The higher Nightmare BB’s A.I. is, the more likely he needs to be flashed.
Tips:

Always check on Nightmare BB before flipping up the monitor.
Remember: BB can disable your flashlight, so keep an eye on him.

Jumpscares:


Nightmare Bonnie, Nightmare Mangle, and Circus Baby (The Salesman Trio)
Circus Baby, Nightmare Bonnie, and Nightmare Mangle: They will all approach from the right hall, but each of them will only attack once per night, and they change their order of attack each night so that you won’t know who to expect first. There are two ways to defend against them. One is to shut the right door and leave it shut for the duration of the night (which is obviously impractical as it will drain your power). The other is to purchase their plush toy from the Prize Corner. The Prize Corner has only three plush toys available to buy: Bonnie, Mangle, and Baby, and your funds will be very limited, so it’s important to buy the characters in the order that they appear in the hall. You must use Faz-Coins to purchase the plush toys, and there are two ways to accumulate them throughout the night. One way is to block the attacks of other animatronics. Each successful block earns one Faz-Coin. The other way to earn coins is to find them on the cams and scan your mouse cursor over them to collect them. Increasing the difficulty of these characters will increase the price of their plush toys.


A.I.
Depending on the A.I, the plushies will vary in price.
1-9 10 Faz-Coins
10-15 15 Faz-Coins
20 20 Faz-Coins
Tips:
Remember to check the Right Hall before buying a plush.
Rockstar Foxy can give you 10 Faz-Coins, which can help you get a plushie.
Nightmare Bonnie in the Right Hall.
Nightmare Mangle in the Right Hall.
Circus Baby in the Right Hall.
If you are on CAM 2 when one of them appears, and don’t leave the CAM until they are gone, they will NEVER kill you.


Jumpscares:


Nightmare Fredbear & Nightmare
Nightmare Fredbear & Nightmare: This tag-team duo are invisible to the cameras and can only be seen when they reach your doorways (Fredbear takes left, Nightmare takes right), and even then only their eyes are visible. Close the doors on their faces to send them back into the darkness!


A.I.
The higher Nightmare Fredbear and Nightmare’s A.I.s are, the more frequently they appear.
Tips:
Nightmare’s laugh sounds different than Nightmare Fredbear’s, so if you are unsure who is laughing, listen for the sound of their laugh.
Depending on who’s laughing, you’ll hear them through your left or right ear. Use this to your advantage.
Remember you can see Nightmare and Nightmare Fredbear’s eyes when they are at the door.
Nightmare and Nightmare Fredbear will not attack you unless you flip the monitor up. Use this to your advantage.


Jumpscares:


Jack-O-Chica
Jack-O-Chica: She appears at both your left and right doors at the same time. Closing either door by itself will have no effect on her. She will slowly materialize at both doors. If too much time passes while she is fully materialized, she’ll jumpscare you. Shut both doors to make her disappear. Keeping your office cool will prevent her from appearing. Jack-O-Chica only begins to appear when your office overheats. If the office if over 100 degree then closing the doors will have no effect.

A.I.
The higher Jack-O-Chica’s A.I. is, the quicker she materializes.
Tips:
When your temperature hits 100 degrees, turn the fan or AC on so doors can still effect Jack-O-Chica.
Unlike most door characters, Jack-O-Chica will not make a thud to indicate her disappearance.
Check on Jack-O-Chica when the temperature gets too high.


Jumpscare:

Nightmarionne
Nightmarionne: His presence moves randomly to different locations in your office as you play, and begins to reappear when your mouse cursor moves over him. Be quick to avoid the area of the office that he occupies, or your run will end with a jumpscare!

A.I.
The higher Nightmarionne’s A.I. is, the more likely he will appear and the quicker he will materialize.
Tips:
Nightmarionne can’t appear in the top right or bottom left corners, so it’s recommended to move your mouse in one of those corners.
Don’t linger in the same spot for too long.
Jumpscare:

Old Man Consequences, El Chip, and Phone Guy
Old Man Consequences: Use the C button when his minigame appears, otherwise he will lock your monitor for a short time.

El Chip: El Chip is just a cameo mascot when he appears at Freddy Fazbear’s Pizza. His real passion lies in authentic Mexican cuisine. He isn’t here to jumpscare you, but he may interrupt your night with some jarringly colorful advertisements for El Chip’s Fiesta Buffet. Click “Skip” or press ENTER to get rid of the invasive advertisements before you lose control of what’s going on in your office!

Phone Guy: He will call at random into your office, and you will only have a brief amount of time to mute his call. If you fail to mute the call then you will be forced to listen to the whole thing, which will aggravate you as well as any animatronic that is sensitive to the noise level. Also, the mute button will appear in unpredictable locations.

A.I.
The higher Old Man Consequences, El Chip, and Phone Guy’s A.I.s are, the more frequently they appear.
Tips:
You can press the C button even when the fish isn’t on the +, so feel free to spam the C button.
It is recommended to click the “Skip” button rather than press ENTER, as it is on the opposite side of the keyboard.
You have about 3 seconds to mute the call.
Phone Guy’s calls last depending on what random call was chosen, but they have a chance to cut off early.
All of Phone Guy’s calls are from FNaF 1, 2, and 3.


OMC Minigame:

Ads:
“Let’s Dance!”
“Let’s Play!”
“Let’s Eat!”


Mute Button:

Ballora
Ballora: She will approach from either the left or right hall, disabling all of your camera feeds as she approaches. You’ll have to rely on the sound of her music to determine which side she’s approaching from, and close the correct door before she reaches you. Close the door in time and she will retreat into the darkness.

A.I.
The higher Ballora’s A.I. is, the more frequently she appears.
Tips:
Ballora will cause static on all the cameras even before her music starts. Use this to prepare for her appearance.
Shut the door immediatly when you hear her music.

Jumpscare:

Funtime Foxy
Funtime Foxy: He hides behind his curtain waiting for the show to begin. Check his stage and read the sign to see when the showtime is; it will always be on the hour, but the hour will be random. For instance, showtime may be 1 am, 2 am, 3 am, etc.. Remember that time, because “showtime” is the exact moment that you get jumpscared. There is only one way to prevent showtime, and that’s by viewing his stage the moment the hour changes. If you are watching him on camera when showtime arrives, then the show will be delayed by several hours (and the sign will change as well). Each hour in-game lasts exactly 45 seconds, and there is a timer visible while you play; use this to calculate exactly when you need to be viewing Funtime Foxy’s curtain to ensure that showtime never happens.

A.I.
Changing Funtime Foxy’s A.I. has no known effect. Funtime Foxy acts the same no matter the A.I level. If you have any evidence that suggests otherwise, please let us know in the comments.
Tips:
Checking what time showtime is should be one of your top priorities.
Get on Funtime Cove 5 seconds before showtime so you don’t miss it!
If showtime is at 6 AM, you are not in the clear and have to watch showtime at 6 AM.
If showtime is 7 AM or higher, you’re in the clear and Funtime Foxy is no longer a threat for the rest of the night.


Jumpscare:

Trash and the Gang (Minus Pan Stan and Mr. Hugs) and Funtime Chica
Trash and the Gang: #1 Crate and Bucket Bob will ocassionaly get in your face and cause a bass boost. Mr. Can-do will appear on CAMs, blocking your view of them.
Funtime Chica: She isn’t here to ruin your day, she just wants her moment in the spotlight. She will occasionally appear on your screen as though posing for the red carpet, accompanied by camera flashes which may cause some disorientation. You’ll need to learn to maneuver around your office despite these disorienting effects, otherwise someone else may take advantage of your confusion and crash the party.


A.I.
The higher Trash and the Gang’s A.I. are, the more frequently #1 Crate, Mr. Can-do, and Bucket Bob appear.
The higher Funtime Chica’s A.I. is, the more frequently she appear.
Tips:
#1 Crate will appear before they bass boost you.
Get Mr. Can-do off the CAM by flipping the monitor down and up again.
Putting Visual Effects off will cause Funtime Chica to be easier to deal with, as her camera flashes won’t make you loopy.


Jumpscares:


Helpy
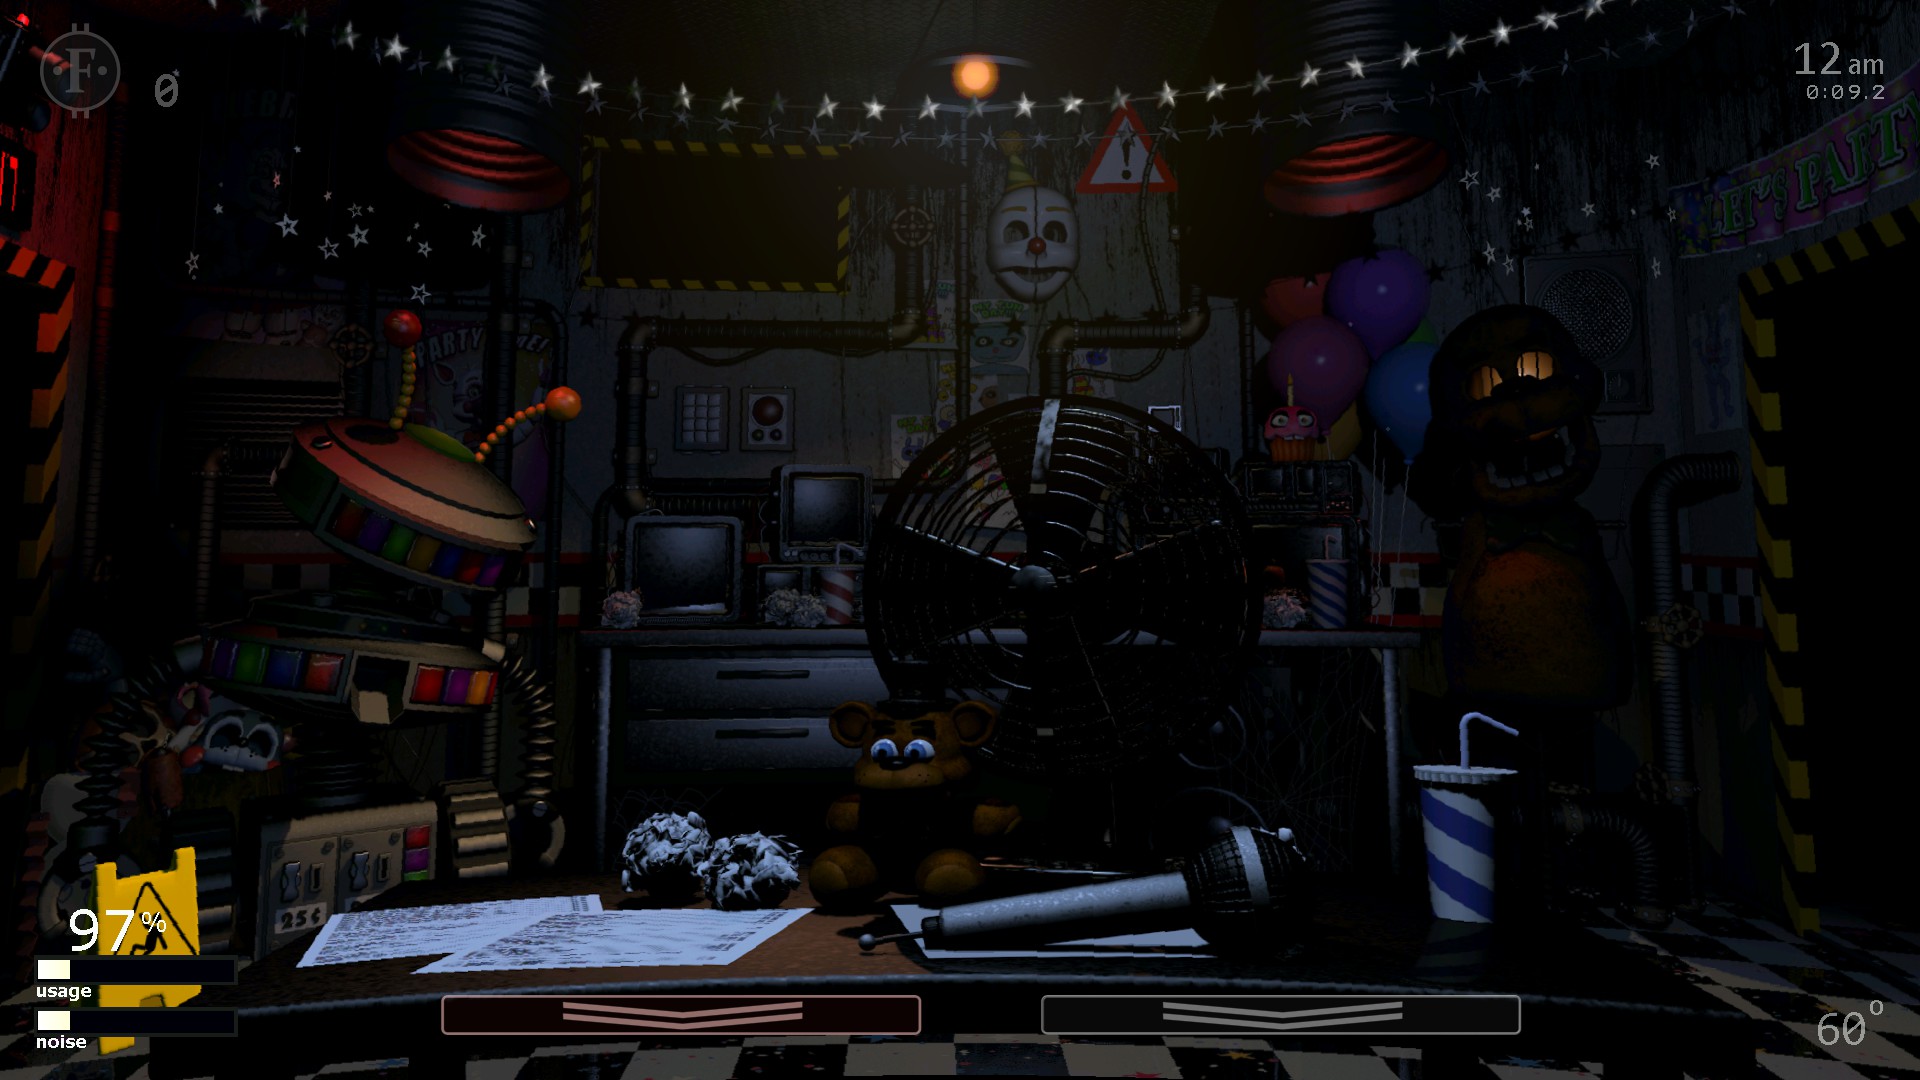
Helpy: He will appear on your desk at random when closing your tablet. Get rid of him quick or he’ll get up-close and personal with an airhorn!

A.I.
The higher Helpy’s A.I. is, the more frequently he spawns.
Tips:
Remember to always check if Helpy is in your office when you flip the monitor down.


Jumpscare:

Happy Frog, Mr. Hippo, Pigpatch, Nedd Bear, Orville Elephant (The Duct Dwellers)
Happy Frog: She climbs around in the overhead duct system making her way toward the hoses that drop into your office. Use the audio lure to hold her in place. She is fooled 100% of the time by the audio lure, but is immune to the effects of the heater.

Mr. Hippo: He climbs around in the overhead duct system making his way toward the hoses that drop into your office. Use the heater to repel him, or the audio lure to hold him in place. He is fooled 100% of the time by the audio lure. He is slightly faster than Happy Frog.

Pigpatch: He climbs around in the overhead duct system making his way toward the hoses that drop into your office. Use the heater to repel him, or the audio lure to hold him in place. He is fooled 100% of the time by the audio lure. He is slightly faster than Mr. Hippo.

Nedd Bear: He climbs around in the overhead duct system making his way toward the hoses that drop into your office. Use the heater to repel him, or the audio lure to hold him in place. He is fooled 50% of the time by the audio lure. He is slightly faster than Pigpatch.

Orville Elephant: He climbs around in the overhead duct system making his way toward the hoses that drop into your office. Use the heater to repel him, or the audio lure to hold him in place. He is fooled 10% of the time by the audio lure. He is slightly faster than Nedd Bear.

A.I.
The higher the Mediocre Meloides’s A.I.s are, the faster they move.
Tips:
This is the recommended spot to put the audio lure. This makes it so the only member of the Mediocre Melodies that can easily get you is Orville, who can simply be pushed back with the heater.

Jumpscares:


Rockstar Freddy
Rockstar Freddy: He will stand in your office the entire night, and on occasion will activate, demanding a payment of five Faz-Coins. If you pay him, he will return to sleep-mode. Fail to pay him in a timely fashion, however, and your run will end with an angry Rockstar Freddy in your face. The problem is that Faz-Coins might be scarce, especially if you have other Faz-Coin demanding animatronics in the halls. Thankfully, there is another option at your disposal. If you’re running short on Faz-Coins, or just prefer not to spend them here, just crank up the heat for a few seconds. This will cause Rockstar Freddy to malfunction and eventually think that payment has been made.

A.I.
The higher Rockstar Freddy’s A.I. is, the more frequently he demands Faz-Coins.
Tips:
Everytime you use the heater on him, it’ll take him slightly longer the next time you use it.
Rockstar Freddy only activates when you flip up the monitor. Use this to your advantage.


Jumpscare:

Rockstar Bonnie
Rockstar Bonnie: He will occasionally appear in your office and is conspicuously missing his guitar. In fact, the only way to appease him is to locate his guitar on the camera system and double click on it. Fail to do this in a timely fashion and you’ll lower your monitor only to be greeted with a jumpscare.

A.I.
The higher Rockstar Bonnie’s A.I. is, the quicker you need to find his guitar.
Tips:
Rockstar Bonnie’s guitar appears in 4 location:
The Left Hall
Funtime Cove
The Right Hall
The Computer Room
The cameras will flicker when Rockstar Bonnie appears in your office.
Rockstar Bonnie only appears when you flip up your monitor, so use this to your advantage.


Jumpscare:

Rockstar Chica
Rockstar Chica: She stands outside your office waiting for her chance to jumpscare you (she can approach from either side.) Closing the doors will not cause her to leave. To make her leave, double-click the “wet floor” sign to place it in front of the door that she is standing at. This will discourage her from entering (she will be afraid of slipping), and make her go away.

A.I.
The higher Rockstar Chica’s A.I. is, the more frequently she will appear, and the less time you will have to move the Wet Floor Sign.
Tips:
Rockstar Chica will always appear on the opposite side of the wet floor sign’s location. For example, if the sign is on the left, she’ll always appear on the right. Moving the Wet Floor Sign to the opposite doorway after scaring Rockstar Chica is a recommended strategy.


Jumpscare:

Rockstar Foxy
Rockstar Foxy: His parrot will occasionally fly through your office, and if you’re able to click on it before it gets away then Rockstar Foxy will appear in your office. While the other Foxies are here only to torment you, Rockstar Foxy isn’t quite as hostile. In fact, he will probably offer a few interesting boosts to help you get through the night, such as increasing your power meter by 1%, restoring the temperature to a cool 60°, soundproofing your office for five seconds, or giving you 10 Faz-Coins. However, choosing to summon Rockstar Foxy isn’t without risk. If you catch him in a bad mood, he may just greet you with a jumpscare and end your run.

A.I.
The higher Rockstar Foxy’s A.I. is, the more likely he will be in a bad mood, and the less often his parrot will spawn.
Tips:
It’s recommended to only use Rockstar Foxy if it isn’t too risky, like if it’s early in the night or you might die if you don’t.
+1% Power: Recommended if your power is 20% or lower, or you don’t need any of the other options. Otherwise it isn’t very useful.
60°: Recommended if you’ve been at 120 degrees for 10 seconds or more and have Jack-O-Chica and/or Lefty activated.
Soundproof: Recommended if Music Man or Lefty is getting too angry.
+10 Faz-Coins: Recommended if you have the Plushie Demanding Animatronics on, Rockstar Freddy, or if you want a Death Coin.
Rockstar Foxy will stay in your office until you choose a task, so you can use him whenever you feel like it.


Jumpscare:

Music Man
Music Man: He is behind you, always, and he is sound activated. If you continue to make a lot of noise, he will slowly become more active, crashing his cymbals together faster and faster, finally ending your run with a startling face-to-face jumpscare.

A.I.
The higher Music Man’s A.I. is, the more sensitive he is to noise.
Tips:
Music Man has an invisible meter. (Which we’ll call the “Music Man Meter” for simplicity) The Music Man Meter increases depending on the level of noise being made. If the Noise Meter is filled up a bunch and blinking, that means the Music Man Meter is increasing rapidly. Decreasing the noise meter will decrease the Music Man Meter. Once the Music Man Meter is full, Music Man will jumpscare you. Certain sounds that don’t trigger the noise meter to be raised (like Helpy’s Air Horn) will still anger Music Man and fill up his Music Man Meter.
Jumpscare:

Scrap Baby
Scrap Baby: Once per night, she will appear on the other side of your desk, slouched over and appearing to be decommissioned. There will be a shock panel sitting next to her. You can shock her at any time by clicking on this button, but it will drain 1% of your power each time you do so, and it will have no effect until she is poised to attack. You must refrain from pushing the button until you notice that she has moved. Shocking her at this stage will cause her to leave your office and not return. If you fail to notice that she has moved and bring up your monitor again, you’ll have nothing but a jumpscare to look forward to.

A.I.
Changing Scrap Baby’s A.I. has some sort of effect on how she acts, we just can’t figure out what it changes. If you have any evidence suggesting what it may be, please let us know in the comments.
Tips:
Always check if Scrap Baby is ready to attack before flipping up the monitor.
Helpy can be difficult to see if Scrap Baby is on, as she is right in front of him. If you move to the left you can see him.

Jumpscare:

William Afton (Scraptrap)
William Afton (AKA Scraptrap): Afton has the distinction of having the simplest mechanic in the game, but also possibly the scariest. He will only attack once per night, and there will be no way of knowing in advance when this attack will happen, or if it will happen at all. He will always attack from the vent on the right wall, and when he does, there will be a violent clamoring sound in the vent and the lights will flicker. When this happens, you will have only a fraction of a second to close the vent door or your run will end with Afton screaming in your face.

A.I.
The higher Afton’s A.I. is, the more likely he will attack, and the less time you will have to block him
Tips:
Not only will Scraptrap make a ruckus in the vents, he also will darken the screen. In fact, the screen will darken even before he makes noise, so use this to your advantage.

Jumpscare:

Lefty (LEFTE)
Lefty: He sits in the closet off of the left hallway. He becomes more and more agitated if the office becomes too noisy or too hot. This state of agitation increases slowly, and will eventually end with Lefty jumpscaring you. Lowering the noise won’t reverse the effects, nor will reducing the temperature, and doors won’t prevent Lefty from getting to you. The only way to ease his temperament is to switch on the Global Music Box (which soothes all music box animatronics at the expense of extra power being drained).

A.I.
The higher Lefty’s A.I. is, the more sensitive he is to heat and noise.
Tips:
Lefty has 5 stages.
Stage 1: Nothing to worry about.
Stage 2: Nothing to worry about.
Stage 3: Lower either your heat or noise. Only use the GMB if you can afford it.
Stage 4: Use the GMB now.
Stage 5: You are basically screwed at this point. Turn your fan on and put the GMB on and hope Lefty spares you.


Jumpscare:

Dee Dee (DD) and XOR (Grayscale Dee Dee, Shadow Dee, etc.)

Dee Dee: She appears at random and can add a new animatronic to your game. The animatronic added will not be announced, so you will have to quickly look at your cameras and other systems to find out who it was! Dee Dee also has the potential to add one of six characters not listed on the character select screen.
Tips:
The quickest way to check who Dee Dee possibly spawned is by checking the ducts, vents, Computer Room, Funtime Cove, and Pirate Cove.
It’s better to let the animatronic Dee Dee spawns come to you, rather than waste too much time searching for it.
XOR: She will appear at random and add all of her secret animatronics to your game. The order they are added will not be announced, so you will have to quickly look to see which one was added. Her appearance is guaranteed if you are playing 50/20 mode.
Tips:
Pray to Pan Stan, because you’re screwed.
Activating DD Repel on 50/20 has no effect. XOR will appear no matter what.

RXQ/RWQFSFASXC (Shadow Bonnie)
RXQ aka Shadow Bonnie: He will cause your office to become pitch black for about ten seconds. There is no way to avoid him.

Tips:

Shadow Bonnie can block out Springtrap’s face in the vents, so always shut the front vent when flipping the monitor up while Shadow Bonnie is active.
Plushtrap
Plushtrap: He will appear on a specific screen and sit in his chair. If you don’t scare him out of his chair fast enough, he will jumpscare you. To scare him out of his chair, watch Funtime Cove until he disappears (In about 3-5 seconds).

Tips:
It’s recommended to quickly check Funtime Cove if Dee Dee spawns someone in, because you want to get rid of Plushtrap as soon as possible.

Jumpscare:

Nightmare Chica
Nightmare Chica: Nightmare Chica will attempt to devour you. When Dee Dee summons her, you’ll see her jaws start to close on you. Turn on the A/C quickly to fend her off. Once her jaws close on you completely, she’ll jumpscare you.

Tips:
Get rid of Nightmare Chica as soon as possible, otherwise she may jumpscare you if you’re preoccupied.

Jumpscare:

Bonnet
Bonnet: Bonnet will streak through your room at random after you close your monitor. Click on her nose before she leaves the screen.

Tips:
Nightmarrione can cause a problem when trying to deactivate Bonnet. Be careful.

Jumpscare:

Minireenas (2)
Minireenas: These Minireenas will appear at random and block your view in the office. They will eventually disappear.

Tips:
Minireenas can block your view of animatronics like Nightmarrione and Bonnet. Be extra careful.
Lolbit
Lolbit: Lolbit will appear, block the center of the screen, and fill up half of your audio meter. Type L-O-L to deactivate Lolbit.

Tips:
Lolbit will block the CAMs and Office, so get rid of him quickly. She also can get Music Man and Lefty angry.


Bears Attack 1

Congratulations, you’re doing your first challenge! While at first glance, this challenge might look hard due to there being quite a few animatronics, it really isn’t!
- Immediately Turn the Generator On to Save Power
- Keep the Camera on the Left Hall for Freddy
- Don’t bother looking for N. Fredbear or Nightmare, just listen for them.
- For the Duct System, Nedd-Bear usually goes for the right duct. Keep the right duct closed, and place the audio lure here.
- Leave the fan on so Lefty doesn’t become active.
- Try Paying Off R. Freddy as much as possible, and only use the Heater if you have 0 FazCoins.
Congratulations, you just beat your first challenge! But don’t celebrate just yet, there’s still 15 more to go.
Bears Attack 2

Welcome to Bears Attack 2! This one is practically the same as the last one, except now these bears are gonna move faster, and you gotta deal with a new bear: Toy Freddy.
- Switch the camera between Left Hall and Parts/Service
- Keep a closer eye on Nedd Bear, but use the same strat: Close Right Duct, and place the audio lure here.
- Just listen for the Nightmares.
- Only use the flashlight on P. Freddy when he’s about to jumpscare you to save power.
- Use the Death Coin on Lefty.
- Check on Toy Freddy everytime you reset the ventilation (remember to switch back to the left hall afterwards.)
Phew, you got it? Great job, sport! But now, ya gotta face the final ambush from the bears…
Bears Attack 3

Welcome to Bears Attack 3, the last of the Bear Challenges! This one is pretty much the exact same as the last one, except now everyone is faster!
- Exact Same Strategies as Bears Attack 2
Not much else to say.
Pay Attention 1
Welcome to Pay Attention 1, the easiest challenge in the game!

- Turn the fan off and the Power Generator on immediately once you start the night.
- Leave the Power Generator on for 10 seconds, then leave the GMB on for 10 seconds. Repeat this the whole night.
- Make sure to mute Phone Guy, because you don’t want Music Man getting angry.
- Check Funtime Cove for showtime.
- Buy a Death Coin and use it on Funtime Foxy.
- Now, simply prepare for Afton (If he hasn’t came already) and check Nightmare BB everytime you go to wind up the Marionette.
Now, time to pay EVEN MORE attention!
Pay Attention 2
Welcome to Pay Attention 2! This one is basically the same as the first one, just everyone is more difficult.

- Same exact strategy as last time.
Congratulations on being able to pay attention! Now onto the Ladies Nights…
Ladies Night 1

Welcome to the Ladies Nights!!!
These are probably some of the easiest challenges, but if you’re still having trouble, here’s some help!
- Put the camera on Kitchen, then go to the Vent or Duct Systems, you can still change the music from there.
- Place the audio lure here and put the vent snare on the left. You can always move the snare if they aren’t going torwards it.
- Every now and then, check the halls for Rockstar Chica or Circus Baby
- Collect 10 Coins
- Keep the power generator on all night
See? Easy!
Ladies Night 2

Welcome to Ladies Night 2! This one is relatively easy.
- Keep the camera on the Kitchen, and constantly check the vent system.
- Keep the Right Duct closed, and put the audio lure before the Left Duct to keep Happy Frog out.
- Constantly check the Left Hall and Right Hall for Plush Animatronics or Rockstar Chica.
- Get as many FazCoins as possible.
- Keep the Power Generator on all night no matter what!.
Good luck, and get ready for the last Lady Night!
Ladies Night 3
Welcome to Ladies Night 3! The last of the Ladies Nights. In this one, everyone is faster and a new character is added: Funtime Foxy.

- Same Strategy as Ladies Night 2.
- Use the Death Coin on Funtime Foxy.
Congrats on beating the Ladies Nights! Now onto some less friendly looking animatronics
Creepy Crawlies 1
Welcome to Creepy Crawlies 1! This challenge is recommended for those who want to familairize themselves with the Vent Crawlers and Duct Dwellers.

- Turn the fan off and the Power Generator on immediately.
- Remember to turn the Power Generator off when you hear cymbols.
- Place the audio lure here.
- Place the vent snare on the left. You can always move it later, but this is the best place to put it first.
- Quickly get 10 Fazcoins (I recommmend using the “3 Coins” powerup) and buy the Death Coin. Use it on the Marionette.
- Always shut the front vent when you are about to flip up the monitor.
- Check on the Vent Crawleres and Duct Dwellers everytime you reset the ventialtion.
Great job! But they only get creepier from here…
Creepy Crawlies 2
Welcome to Creepy Crawlies 2! It’s the same as Creepy Crawlies 1, but everyone is faster. Also another animatronic is here: Afton.

- Same strategy as last time, but with a few more tips.
- Be ready in case Afton attacks
- If you didn’t use the heater for Creepy Crawlies 1, you’re going to have to for this one.
Now onto some even sPoOkIeR aniamatronics…
Nightmares Attack
Welcome to Nightmares Attack! This one is pretty easy. Only can 4 animatronics can easily kill you.

- Turn the Power Generator on and the Fan off immediately. Only turn off the Power Generator when Music Man starts making noise. When you hit 90 degrees turn the fan back on until you hit 60 degrees.
- Get 10 Fazcoins ASAP so you use the Death Coin on Lefty.
- After using the Death Coin on Lefty, only stay on CAM 2.
Now onto a much easier challenge…
Springtrapped
Welcome to Springtrapped! The challenge that literally only has 2 (possibly 3) Springlock suits.

- Turn the Power Generator on and the Fan off immediately.
- Always shut the right vent when using the monitor. Leave it shut until you flip the monitor down.
- Get 10 Fazcoins ASAP to Death Coin Lefty
- Keep your mouse in the top right or bottom left corner to evade Nightmarrione.
Congratulations on not getting Springlocked! Now time to meet some Old Friends…
Old Friends

Welcome to Old Friends, what many consider to be one of the hardest UCN challenges, and while at first it can be pretty hard, it can become one of the easiest if you get the strategy down.
- Immediately turn on the Power Generator.
- Turn on the Global Music Box about every ten seconds for ten seconds to deal with Marionette.
- Close the left door before opening your monitor to deal with Freddy, just like the original strategy for 4/20 mode.
- Keep the camera on Toy Freddy, and only switch to Foxy when the Foxy figure is on the desk.
- Check the vent system about every 15 seconds to make sure Mangle doesn’t get in.
- Turn the fan off to save power.
- It’s pretty easy to harvest FazCoins in this challenge thanks to Balloon Boy. Check the right hall about every 30 seconds for Circus Baby.
Have fun, and good luck!
Chaos 1

Hello, and welcome to one of your last challenges! You are now in the final three chaotic messes. Thankfully, the first chaos really isn’t too bad.
- Turn the Power Generator on IMMEDIATELY.
- Keep the Right Duct closed and put the audio lure here.
- Keep the camera on Toy Freddy the whole night.
- Keep the fan on so you don’t have to deal with Jack-O-Chica.
- Turn on the Global Music Box about every 15 seconds for ten seconds to deal with Marionette.
- Try paying off Rockstar Freddy as much as possible.
Have fun!
Chaos 2
Welcome to Chaos 2! This challenge may look scary, but isn’t too bad.

- Turn the Power Generator on and the Fan off immediately. Turn off the Power Generator when Music Man gets angry.
- Switch the Wet Floor Sign to the right side.
- Put the audio lure by the left path.
- Get 10 Fazcoins ASAP to use the Death Coin on Marionette.
- After using the Death Coin, stay on CAM 2 the whole night.
- Shut the left door and front vent anytime you are flipping the monitor up. You can open them once you get on the CAMs.
Great Job! Now on to REAL chaos…
Chaos 3
Welcome to Chaos 3! One of the most (if not) diffcult challenges. Putting on all Power Ups helps. This is gonna require a lot of luck, so good luck!

- Turn the Power Generator on and the Fan off immediately. When Music Man gets angry, turn the Power Generator off and the GMB on.
- Switch the Wet Floor Sign to the right side.
- Always keep your mouse in the bottom left or top right corner. Use Enter to get rid of El Chip Ads.
- Put the audio lure here and the vent snare on the left. You can always move the snare later.
- Get 10 Fazcoins so you can use the Death Coin on Foxy.
- Stay on CAM 2 after using the Death Coin. Only leave it until after Nightmare Bonnie leaves.
Wow! If you’ve been going in order, you’ve beaten all the challenges! Congrats~
Offices
So you want those cool looking offices? Of course you do! Here’s how you get them…

Points Required: 0
Helpy and Freddles Location:


Points Required: 2000
Reccomended Roster:

Strategy: Put on Dee Dee Repellent, then literally AFK it. You don’t even have to reset the ventilation…
Helpy and Freddles Location:

Points Required: 5000
Reccomended Roster:

Strategy:
- Use Dee Dee Repellent.
- Turn Fan off and Power Generator on immeditaly.
- Go to CAM 2. Never switch CAMs.
- Flash Phantom Freddy occasionly.
- Put on the Freddy Mask whenever you hear a Toy Animatronic.
- Whenever you go to reset the ventilation, always shut the left door and middle vent. Open them when you put the monitor up.
- Repeat the 4th, 5th, and 6th steps until you win.
Helpy and Freddles Location:


Points Required: 8000
Reccommended Roster:

Strategy:
- Use Dee Dee Repellent.
- Turn Fan off and Power Generator on immeditaly.
- Never let the office get above 90 degrees, always turn the Fan on before then.
- Go to Ducts and put the audio lure in the usual spot.
- Go to CAM 2. Never switch CAMs.
- Always put on the Freddy Mask when lowering the monitor
- Flash Phantom Freddy occasionly.
- Put on the Freddy Mask whenever you hear a Toy Animatronic.
- Whenever you go to reset the ventilation, always shut the left door, middle vent, and right vent. Open them when you put the monitor up.
- Repeat steps 6-9 you win.
Helpy and Freddles Location:

Congrats! You’ve unlocked all the offices!
Trophies

Secrets and Easter Eggs
Tangle

Bouncepot

White Rabbit

These characters can appear randomly when flipping down your monitor. They will stay on your office until you flip the monitor up again.
To get this minigame, you must set OMC on 1 and catch a fish.
You then can walk to OMC, who will talk to you.
You then can also wade in the lake by walking towards it while spamming “A” and “D”. Doing so long enough will crash your game.
This minigame is very similar to an ending in FNaF World. What’s fascinating is completing this minigame will actually unlock the ending in FNaF World.
That gives this line a lot more meaning, ey?


Similar to the OMC Minigame, to get this you must set Golden Freddy to 1.
After starting the game, get 10 Fazcoins by searching the CAMs, then buy the Death Coin.
Doing this will spawn Fredbear/Golden Freddy’s hat on your desk.
Keep flipping the monitor up and down until Golden Freddy spawns. Then use the Death Coin.
Doing this will grant you a Fredbear jumpscare.


THOYSHK is a character that can appear on the Game Over Screen, the front vent, and when flipping down the monitor (No way I’m getting a screenshot of that last one).


They are also mentioned in a couple voice lines:
Originally posted by Mangle:He’s here and always watching, the one you shouldn’t have killed.
Originally posted by Withered Chica:I have seen him, the one you shouldn’t have killed.
Originally posted by Nightmare Freddy:I am remade, but not by you. By the one you should not have killed.
Originally posted by Jack-O-Chica:Greetings from the fire and from the one you should not have killed.
There are also other voice lines that have whispering during them. These are presumed to be TOYSHK manuplating them somehow.
Originally posted by Happy Frog:We’ve only just begun. I’ll never let you leave, I’ll never let you rest.
Originally posted by Nedd Bear:This is how it feels, and you get to experience it over, and over, and over again, forever. I will never let you leave.
Originally posted by Orville Elephant:He tried to release you, he tried to release us. But I’m not gonna let that happen. I will hold you here, I will keep you here, no matter how many times they burn us.
If you’ve found any other Easter Eggs or Secrets, feel free to share them in the comments.
Special Thanks
Thanks to:
Glaiceraircraft, lkenos, JMaster, Jentrap, Onemario1234, and The Earthdragonninja for providing some of the screenshots.
Onemario1234 for helping me figure out what adjusting some of the A.I. of certain animatronics does.
The True Old Sport for helping create most of the strategies in the challenges section.
Thanks to my editors: ₣Ù𝕞ᎯŃ𝕔ℌ𝕖Ꮤℤ, The True Old Sport, and Spark.
Plushie Salesman: Knϕx
And….
Scott Cawthon for creating this game!
Cutscenes
Change Log
This will include any changes that are made to the guide.
BB’s Icon was removed oddly… It’s in now.
“Plushie Demanding” is now the “Salesman Trio” (Thanks to Knϕx)
Added Knϕx to the Special Thanks.
Fixed a couple grammatical errors.
Added how to wade in the lake, as someone was asking about that and I wanted to clear confusion for future visitors as well.
Major Update #1: Every character (minus a select few) has a “Jumpscare” section now. You should be able to guess what’s in it.
Added Marionette’s jumpscare.
I accidentally called Pigpatch Porkpatch in the Basics section. It is fixed now.
Fixed a typo in the Nightmares Attack section.
Major Update #2: Funtime Chica has (I think) all of her poses. XOR got a new picture. Strategies to unlock the offices has been added, along with other information related to them. Placeholders for upcoming sections have been added as well.
Got rid of vent snare for Chaos 2. Not sure why it was there to begin with honestly…
Updated Jack-O-Chica’s article to be more accurate, as Scott’s description before the game released, the description we used, was not entirely accurate.
Updated Phone Guy’s tips to be more accurate, and added a new tip, acting as more of a fun fact.
Updated Rockstar Chica’s tips to be more accurate.
Fixed a typo in Rockstar Foxy’s hints.
Updated Scrap Baby’s “A.I.” info to be more accurate to what we’ve noticed during testing.
Added a new tip for XOR.
Updated the A.I. info for Funtime Foxy and Scrap Baby.
Added a new tip for Funtime Foxy.
Adjusted one of Ballora’s tips to be more accurate and helpful.
Again, Scott’s info of Rockstar Foxy’s behavior was not entirely accurate to the final game, so that was modified to be more accurate, mentioning the 10 Faz-Coins. The A.I. section was reworded as well. In Rockstar Foxy’s tips, renamed “Fazcoins” to “Faz-Coins”. Replaced “60 degrees” in both mention sections with “60°” instead.
In the Salesman Trio info, changed all instances of “Fazcoins” to “Faz-Coins.”
Removed the link to Nightmare’s and Nightmare Fredbear’s laughs, as the link referenced Nightmare’s laugh being lower pitched, which was not true, as the link led to a fanmade video. Nightmare’s laugh is, in fact, not lower pitched than Nightmare Fredbear’s.
Updated the basic guide information section to acknowledge that this is the #1 rated UCN guide!!! Thank you so much for all your support! Additional wording of some section was also altered. A revamp of the guide and a potential completition(?) is being considered.