Overview
A solution (hopefully only temporary until the devs patch this) to fixing a very common problem people are having with their Xbox 360 and other xinput controllers.
The Intro and the Ingredients! (What you will need)
Introduction
This is a temporary solution for those who have been having trouble with certain controllers for Dead or Alive 5. I have ran into these issues myself, but managed to fix them with this solution. I noticed a lot of similar issues being discussed in the forums, so I figured I’d make this quick guide to help others.
The common issue you may be experiencing is your controller triggers are not working, yet the back/select and start buttons actually performing attacks instead of pausing the game, and so on. Another issue also includes not being able to pass the ‘autosave notification‘ screen because of a keyboard/controller conflict.
This is due to the game not recognising x-input controllers correctly, and assumes the controller being used is direct-input, and thus resulting in some input issues.
But enough chatter; let’s start.
————————————————————–
Here are the things you will need to get started;
– The program; Xpadder*
– Your x-input controller
– A keyboard
– Dead or Alive 5: Last Round
*I know some of you prefer to use JoytoKey instead of Xpadder, and perhaps you can use that instead, but for this guide I’m going to be using Xpadder so you’ll have to follow along. For those who can’t get hold of Xpadder or JoytoKey, an alternative suggested by a helpful user in the comments is to use AntiMicro[github.com]. Apparently AntiMicro reduces any input lag that Xpadder would otherwise cause. I’ve yet to test this out myself, but I’ll take their word for it.
This guide will be focused on using Xpadder, so if you’re using a different program, this may not be as easy to follow, but it should all have the same result.
In order to obtain Xpadder, you can buy it at a reasonably cheap price here[xpadder.com], or obtain it “another way”.
The Xpadder Part
Now then, once you’ve somehow obtained Xpadder (whichever way that may have been), extract it. It should look something a little like this…

Once opened, you’ll get a notification of nonsense about your rights, thanks for purchasing, etc. Anyway, once opened you should eventually come to this screen;

Now then, first off you’ll need to make sure you have your controller plugged into your computer. Depending on your operating system, the drivers should automatically be installed once you insert your controller (for example for this guide, I am using a PDP Afterglow Xbox 360 controller).
Once your drivers have been installed, you will need to click on the little controller in the top left corner of the Xpadder program (as pictured) and click ‘new…‘.

Another screen will pop up with a purple background.

Here is where you need to add all your buttons, triggers and analog sticks. It’s simple enough; just click down each tab at the side and tick the ‘enabled’ boxes and follow what the pop-ups say.

When you get to the ‘Buttons‘ tab, make sure you press every button possible on your controller. This includes clicking down on your left and right analog sticks, and the back/start buttons. Once you’re done adding all the buttons, triggers, etc, it should look something like this;

You can always add a little image if you really want to, but it’s not necessary. Anyway, once you’re done, just click the ‘Okay‘ button and it will take you back to the previous window.
You will now notice the buttons have been added, but haven’t yet been assigned to any keys, which we’ll talk about in the next section…
The Key Assignments
Now because I’m super kind, I’ll save you time having to test out the keys ingame, and just tell you the default Xbox 360 controls and which key to assign them to. You can always make your alterations from there.
You’ll notice that when you press a button on your controller, a key will flash in Xpadder. That’s the button you’ll need to change with each key. To do that, you just simply click on that button and select the key you wish to assign.
Here’s a list to help you out.
—————————————-
Xbox 360 Button -> Keyboard
—————————————
(A) -> M
(B) -> L
(X) -> J
(Y) -> K
(RS*) -> P
(LB) -> U
(RB) -> I
(Left Trigger) -> N
(Right Trigger) -> O
(Start) -> Enter
(Back) -> Space
*Click down on stick.
D-pad:
Up -> Arrow Up
Left -> Arrow Left
Right -> Arrow Right
Down -> Arrow Down
Left Analog Stick
Up -> W
Left -> A
Right -> D
Down -> S
Right Analog Stick:
Up -> T
Left -> F
Right -> H
Down -> G
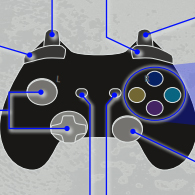
And that just about does it. Here’s an example of my finished controller layout.
Side note: Someone alerted me that the d-pad input should actually be assigned to the ‘arrow keys’ on your keyboard, so the screenshot below does not accurately reflect that. I would suggest assigning the dpad to your arrow keys

Now that’s done, you may want to save your layout and profile for future use. Just click the controller icon again and ‘save as’ for the layout, and click the little notepad icon and ‘save as‘ for the button/key profile.
Now To Get That Game Working!
Right then, now that we’ve got the hard part out of the way, here (hopefully) comes the part where you can finally play the game!
First of all, make sure Xpadder is open with your layout and profile open and set.
Now these next steps you must do in order to stop Dead or Alive overriding Xpadder and reverting back to the broken xinput mappings.
Step 1: Unplug your controller.
Step 2: Launch the game.
Step 3: Keep pressing either the ‘M’ key, or the spacebar until you reach the main menu; the screen where you can select ‘Story’, etc.
Step 4: Plug your controller back in.
Hopefully you should be able to use your controller like normal, and the triggers along with the back/start buttons should also be working.
Better yet, the game doesn’t show commands as keys, but as ‘Punch’, ‘Kick’, etc, so you won’t have to worry about being confused by which button is which key.
Just make sure you follow those steps every time you want to use your controller on this game. I know it may seem like a hassle, but it’s just a temporary solution until this issue is hopefully addressed.
Fight Away!
Thanks for reading, and I hope this guide will help those who’ve been having problems with the Xbox 360 controllers and such. If you’re still having issues, or if there’s something you’re unsure about in my guide, please be sure to leave a message and I’ll try to respond the best I can.
Thanks again, and enjoy the game!