Overview
This is a full guide written by TeoXD, a tester and veteran of this game. In hopes to help new players understand the game, this guide will be jam packed full of information. Organized in a way that is easily approachable, neat, and nice to the eyes. However, understand the information included may change over the course of the games lifespan as it continues its update.
Guide Updated for Vers. 1.7.1
Timber and Stone: The Game
“Timber and Stone” is a project Robert Reed started in March of 2012. The start of it was from the contribution of supporters from Kickstarter fundraising program.
Timber and stone is a voxel-based sandbox city building game with a heavy emphasis on combat, fortifications, and siege warfare. While you build a village to a castle town, you are hit with waves of monsters that are either working together or fighting amongst each other, or even hit with famine while morale is causing your village population to dwindle on a line.
What will ‘Fate’ have in store for your city?
We can’t wait to hear your stories of demise or glory.
______________________________________________________________________________
◌ Link to the Games Official Website: [link]
◌ Developer email: [link]
______________________________________________________________________________
Timber and Stone: Game Features
Game Difficulty and Learning Curve
______________________________________________________________________________
Game Difficulty Vanilla Setting:
Medium to Hard
Reason: Because it was intended for the game to be challenging for players. There are no difficulty settings currently.
______________________________________________________________________________
Learning Curve:
Medium
Reason: There is a lot of information to digest at first, but it gets easier upon every mistake. However, due to negligence of the new playres to not properly learn from the tutorial, new players tend to fail and become frustrated. It is not reccommended for new players immediately dive into the game without properly learning the basics of the game, especially the basic controls.
______________________________________________________________________________
Default Game Controls & Shortcut Keys:
____________________________________________________________________________
◌ Settler’s Shortcut Key:
[/tr]
◌ Camera Controls:
____________________________________________________________________________
◌ Camera Control Views:
– Right click on the map, and a window will show up. Under Camera, there are two types of camera views: Fixed RTS and Full Control.

– Fixed RTS:
Description: The normal controls and view.
– Full Control:
Description: Allows you to move around freely through the map using the regular controls.
____________________________________________________________________________
◌ Construction Controls:
◌ How To Delete Designations:
____________________________________________________________________________
Starting a New Game:
User Interface (UI): Design (Designation) Menu
Menu Bar:
____________________________________________________________________________


◌ Design Menu:
- Chop Mature – Cuts down trees, but leaves the stump behind to regrow.
- Clear Cut – Cut the whole tree down, including the stump.
- To deselect/cancel the designated areas for Dig, Construction blueprints, Remove Trees, and Roads, you must go to the corresponding designation box, Left-click the area you want to erase, hold shift+alt while dragging the yellow box over the designated area.
- For farms, left click the plot of land and remove.
- For Patrol Routes, Left-click any of the blue square markers, and click edit route. Then Right-click the blue square, and click “Cancel This Route”.
- Halls cannot be deleted, only replaced.
____________________________________________________________________________
User Interface (UI): Queue Menu
______________________________________________________________________________
◌ Queue:
- Description: A queue menu for the user to use to prioritize the crafting order of items. “Currently in Queue” Option only.
◌ How to use:
- Right-click items in the Queue List to change the order of crafted items, crafting priority order list.
- After Right-clicking the item, a window with four options will pop up: “Move Up”, “Move Down”, “Move to Top”, “Select”, and “Remove”.
- “Select” Option will bring up a window of the item from the resource menu.
◌ How to add items ot Queue List:
The “Currently in queue” option in the resource window is the only way to add items in to the Queue list. This is so that players can prioritize the order in which items are crafted. Items in this list will always be prioritized first over the “Maintain in Storage” option.
____________________________________________________________________________
User Interface (UI): Resources Menu
______________________________________________________________________________
◌ Resources Menu:
- Seeds: Displays the amount of Seeds in storage.
- Raw Materials: Displays the amount of Raw Materials in the storage.
- Processed Materials: Crafting recipes for Processed Materials used in Construction, Objects, Tools, Weapons, and Armor.
- Hand tools: Crafting Recipe for Hand tools such as Pickaxes, Axes, Hoes, and Fishing Rods.
- Weapons: Crafting recipe for Weapons.
- Armor set and Shields: Crafting recipe for armor sets and shields.
____________________________________________________________________________
◌ Resources Item Window:


- Use this option to autonomously craft an amount of items to keep in storage. Your workers will automatically craft the items when there are no items for them to craft in the Queue Menu.
- The Settlers will not prioritized “maintain in storage” items first. To prioritize the item, the player must add the item to “Currently in queue” and proceed to the queue bar to set priority.
- Crafters will go down the resource list from top to bottom for “Maintain in Storage.” However they will switch to crafting Hand Tools first when a settler needs it.
- The player can Left-click any of the items in the Resources option and set them to “Track.” This is so that they can always keep track of the amount of resources they have in storage on the Right side of the screen.
- A tracking list will appear on the Right side of the screen when tracked.
____________________________________________________________________________
User Interface (UI): Storage (Current Storage Capacity)

Description: This menu will display the current amount of storage space the player has, in unit weight.
The Numbers on the left is: Amount of items you have in that storage Type.
The Number on the right is: Max Storage Space (Can be increased by building more storage buildings).
◌ Storage Menu:
____________________________________________________________________________
◌ Storage Menu Color Changes:
Description: The storage menu bar will change color from White to Yellow to Red.

Description: Lots of space to fill up.

Description: Warns the player that it is close to full.

Description: Warns the player that their storage is full.
____________________________________________________________________________
User Interface (UI): Notification Window (Bottom Left Corner)
______________________________________________________________________________
◌ Notification Window:

Description: At the bottom left corner is a scroll bar for notficantion window. It will display important information that the player may have miss: Game Pause, save, monster spotted, etc.
- Notifications could be set through the Settler’s Preference WIndow.
______________________________________________________________________________
Settler’s Unit WIndow: Settler’s Information Window
Settler’s Unit Window: Settler’s Profession Window
Settler’s Unit Window: Settler’s Equipment Window
Settler’s Unit WIndow: Settler’s Preference Window
{ To be finished: TeoXD needs sleep, or is busy)
For now, go to my site for the full information while I am updating the Steam guide: TeoXD’s Full Guide, Game Manual, and More![timberandstone.wordpress.com]

Settler’s Unit Information: Setter’s Unit List (U)
______________________________________________________________________________

◌ Settler’s Unit List Window (U):
Description: This window will give the player with an overview of their settlers’ professions, profession level, and what their current job is; allows the player to manage their settlers.
To access this unit list, press the U key.
The window gives an overview of the current units in the settlement. The player can change their settlers’ professions, see professions levels, unit count total, and jump to settlers.
If the player Right-clicks on the profession name, the list will automatically organized from highest to lowest level of that profession. If the profession name is click once more, the list will display the levels from lowest to highest.
______________________________________________________________________________
Traits List
A list of current traits in the game.
____________________________________________________________________________
____________________________________________________________________________
Professions: Military – Archers
Professions: Blacksmiths
Professions: Builders
Professions: Carpenters
Professions: Engineers
Professions: Herders
Professions: Famers
Professions: Fishermen
Professions: Foragers
Professions: Military – Infantries
Professions: Miners
Professions: Stonemasons
Professions: Tailors
Professions: Traders
Professions: Woodchoppers
Creatures: Wild Faunas – Boars

◌ Description: Boars are rugged, burly animals that can be foraged or herded.
◌ Base Health: 1 Hp
◌ Base Damage: 0
◌ Item Drop: Animal Fur, Fat, Aniaml Hide, and food.
◌ Spawn rate: Depends on the percentage given in the map generator when selecting a piece of land to start on.
◌ How to Hunt:
If the player does not have a knife, he/she can equip foragers with a bow and a few arrows, or a bow
and wooden club.
◌ When Domesticate:
– Information: Boars will offer the town with a renewable source of Animal Hair.
* To gather the materials with a herder, equip him with a shear to harvest animal hair.
* When a herder slaughters a domesticated boar with a knife, it will give: Fat, Animal Hide, Animal Hair, and food.
◌ What do Domesticated Boars eat:
* Wheat
* Wheat can be obtained from Wild Wheat, wheat farms, merchants, and incoming settlers.
* Domesticated Boars requires a stone trough with wheat to eat; if not, they die.
* It will take 2 hours and 5 minutes (Real Time) from the last time it ate before animal starves to death.
◌ Animal Hair will refresh/grow in:
Real Time: – 2 hours, 46.6 minutes
Creatures: Wild Faunas – Chickens
Chickens:

◌ Description: Chicken are the cutest and delectable animal to forage and eat. They can be herded for greater use and effectiveness, but that’s up to you and how hungry your men are for food.
◌ Base Health: 1 Hp
◌ Base Damage: 0
◌ Item Drop: Fat, Feather, and Eggs (Food).
◌ Spawn rate: Depends on the percentage given in the map generator when selecting a piece of land to start on.
◌ How to Hunt:
If the player does not have a knife, he/she can equip foragers with a bow and a few arrows, or a bow
and wooden club.
◌ When Domesticate:
– Information: Chickens will offer the town with a renewable source of Feathers and Food.
* Does not need any tools to gather feathers.
* Does not need any tools to gather Eggs(food) from chickens.
* When a herder slaughters a domesticated chicken with a knife, it will provide: Fat, Feathers, and Eggs(food).
◌ What does a Domesticated Chicken eat:
* Wheat
* Wheat can be obtained from Wild Wheat, wheat farms, merchants, and incoming settlers.
* Domesticated Chickens requires a stone trough with wheat to eat; if not, they die.
* It will take 2 hours and 5 minutes (Real Time) from the last time it ate before animal starves to death.
◌ Feathers will refresh/grow in:
Real Time: – 2 hours, 46.6 Minutes
◌ Eggs(Food) will refresh/laid in:
Real Time: – 16.6 Minutes
Creatures: Wild Faunas – Fish
Fish:

◌ Description: Fishes are abundant and can only be found near rivers and coastal areas.Fish are friends, not food. -kek.
◌ Base Health: ??
◌ Damage: 0
◌ Item Drop: Fish(food).
◌ Spawn rate: Spawns only on maps with water. 100% spawn rate.
◌ How to Fish:
* Equip a Fishingrod to a Fisherman.
* The Fish will spawn in random water blocks around the map. Not all water blocks have fish spawns in them.
* The amount of food obtained from fishing is random, but will also be highly influenced by the level of the fisherman and their tools.
Creatures: Wild Faunas – Sheep
Sheep:

◌ Description: Sheep are cute, fluffy, and full of life.
◌ Base Health: 1 Hp
◌ Base Damage: 0
◌ Item Drop: Fat, Wool, Animal hide, and Mutton(food).
◌ Spawn rate: Depends on the percentage given in the map generator when selecting a piece of land to start on.
◌ How to Hunt:
If the player does not have a knife, he/she can equip foragers with a bow and a few arrows, or a bow
and wooden club.
◌ When Domesticate:
– Information: The Sheep will offer the town with a renewable source of Wool.
* To gather the Wool with a herder, equip him with a shear to harvest Feathers.
* When a herder slaughters a domesticated sheep with a knife, it will provide: Animal Hide, Fat, Wool, and Mutton(food).
◌ What does a Domesticated Sheep eat:
* Wheat
* Wheat can be obtained from Wild Wheat, wheat farms, merchants, and incoming Migrants.
* Domesticated Sheep requires a stone trough with wheat to eat; if not, they will die from starvation.
* It will take 2 hours and 5 minutes (Real Time) from the last time it ate before an animal starves to death.
◌ Wool will refresh/grow in:
Real Time: – 5 Hours and 33 Minutes
Creatures: Wild Fauna – Wolves
______________________________________________________________________________
Wolves:

◌ Description: Aggressive wild animals that cannot be tamed. It scours the land for food. Its favorite type of food are ones domesticated by humans.
Stats:
◌ Base Health: 35
◌ Base Damage: 15 – 25
◌ Base Defence: 0
◌ Base Line of Sight(LoS): 6 block radius (During the day), 4 Blocks Radius (During the night)
◌ Base Courage: 6
◌ Energy: 100; will sleep when energy hits 0
◌ Base Movement Speed: 60% During the Day and Night.
◌ Base Block Chance: 0%
◌ Base Hp Regen: 0
◌ Critical Damage Chance: 1.5%
Invasion Spawns:
- Spawns 0 to 4 as the days go by.
- Wolves will group up.
- Will search for and attack Domesticated Animals.
Item Drop: Animal Fur, Fat, and Animal Hide.
Enemy: Goblins, Spiders, Undead, Humans, Migrants, Merchants, and Domesticated Animals.
Allies: Wild Animals
______________________________________________________________________________
Player Unit: Humans – Settlers
______________________________________________________________________________

◌ Description: A person who settles in an area, typically one with no or few earlier inhabitants.
Stats:
◌ Base Health: 120
◌ Base Damage: 5 – 15
◌ Base Defence: 0
◌ Base Line of Sight(LoS): 6 Block Radius (During the day), 4 Block Radius(During the night)
◌ Base Courage: 5
◌ Base Movement Speed: 85% on land; 50% in water
◌ Base Block Chance: 0%
◌ Critical Damage Chance: 0%
◌ Hunger: 1 Full bar of Hunger is equal to 40 Food (Overeater adds more)
Can be obtained from: Migrant Spawns
Population:
- Player starts off with 8 settlers.
- Max Population is 50.
Item Drop: Scrap Metal(Weapon,Armor, Tools), and other resources in inventory.
Enemy: Undead, Wolves, Spiders, and Goblins.
Allies: Wild and Domesticated Animals, Merchants, and Migrants
______________________________________________________________________________
Creatures: Monsters – Goblins
______________________________________________________________________________
Goblins:

◌ Description: Goblins are ugly, dim-witted demi-humans who would wander throughout the land picking fights with anyone who would test their patience, and strength. In search of riches and women, they raid unguarded villages and towns. Goblins are weak alone, but in a group, they are strong.
Stats:
◌ Base Health: 80
◌ Base Damage: 5 – 15
◌ Base Defence: 0
◌ Base Line of Sight(LoS): 6 Block Radius (During the day), 4 Block Radius(During the night)
◌ Base Courage: 5
◌ Base Movement Speed: 50% on land and water
◌ Base Block Chance: 0%
◌ Base Hp Regen: 0
◌ Critical Damage Chance: 0%
Invasion Spawns: 8 to 13 as the days go by; will group up with other goblins on the map.
Invasion Spawns: Spawns at level 1; Max Level: 20.
Item Drop: Coins, Food, and Scrap Metal
Enemy: Undead, Wolves, Spiders, Humans, Migrants, Merchants, and Domesticated Animals.
Allies: Wild Animals
____________________________________________________________________________
- +10 Damage
- +0.02% Crit Chance
- +20 Damage
- +0.02% Crit Chance
- +25 Damage
- +0.1% Crit Chance
___________________________________________________________________________
Creatures: Monsters – Skeletons
______________________________________________________________________________

◌ Description: Captive spirits from the Necromancers army. These skeletons roamed the earth in search of life to fill up the gaps in their hearts. However, when life is found, a necromancer will later follow suit.
Stats:
◌ Base Health: 80
◌ Base Damage: 12-24
◌ Base Defence: 0
◌ Base Line of Sight(LoS): 5 Block Radius (During the day), 6.5 Block Radius (During the night)
◌ Base Courage: 9
◌ Base Movement Speed: 30% during the day, and 35% during the night.
◌ Base Block Chance: 0%
◌ Base Hp Regen: 0
◌ Critical Damage Chance: 0%
Invasion Spawns:
- Spawns 6 to 13 as the days go by.
- Skeletons will group up with other skeletons and necromancers on the map.
- When Spawned, Skeletons will move towards and in search of the Human Settlers’ Town Hall.
Invasion Spawns: Spawns at level 1; Max Level: 20.
Item Drop: Scrap Metal
Enemy: Goblins, Wolves, Spiders, Humans, Migrants, Merchants, and Domesticated Animals.
Allies: Wild Animals
____________________________________________________________________________
- +25 Damage
- +0.02% Crit Chance
- +45 Damage
- +0.1% Crit Chance
___________________________________________________________________________
Creatures: Monsters – Spiders
______________________________________________________________________________

◌ Description: Small Spiders that traverse the land in search of areas to live and spread their presence.
Stats:
◌ Base Health: 15
◌ Base Damage: 5 – 10
◌ Base Defence: 0
◌ Base Line of Sight(LoS): 6 block radius (During the day), 4 Blocks Radius (During the night)
◌ Base Courage: 5
◌ Base Movement Speed: 50% During the Day and Night.
◌ Base Block Chance: 0%
◌ Base Hp Regen: 0
◌ Critical Damage Chance: 0%
Invasion Spawns:
- Spawns 0 to 5 as the days go by.
- Spiders will group up.
Item Drop: Spider Silk
Enemy: Goblins, Wolves, Undead, Humans, Migrants, Merchants, and Domesticated Animals.
Allies: Wild Animals
______________________________________________________________________________
Creatures: Boss Monsters – Necromancer
____________________________________________________________________________
Necromancer:

◌ Description: Necromancer, the lord of the undead, the ones who burn down villages when it pleases. In search of corpses to increase Nephthys army, she roams the land using her skeletons to search for new prey. Hide behind your walls for darkness is coming to haze your town with a wave of fire. Not even the high can save you from the brutality, they will bring.
Stats:
◌ Base Health: 250
◌ Base Damage: 0
◌ Spells: Ball O’ Fire – Shoots devastating fireballs (+80 Damage)
◌ Base Defence: 0
◌ Base Line of Sight(LoS): 5 block radius (During the day), 6.5 Blocks Radius (During the night)
◌ Base Courage: 12
◌ Base Movement Speed: 50% During the Day and Night.
◌ Base Block Chance: 0%
◌ Base Hp Regen: 0
◌ Critical Damage Chance: 0
Invasion Spawns:
- Spawns 1 max at a time. It is possible that one spawn one day, while another spawns on another day after. When spawned, other monsters will not spawn with it until the next spawn time.
- Always spawns at least once in the beginning on Day: 9, 10, or 11.
- Will search for the town hall while shooting fireballs to burn down flammable objects.
Item Drop: Nothing
Enemy: Goblins, Spiders, Undead, Wolves, Humans, Migrants, Merchants, and Domesticated Animals.
Allies: Wild Animals
______________________________________________________________________________
Construction Block Window
Construction Blocks – Terrain, Walls, Flooring, Roofing, & Utlility Blocks
Item List: Equipment – Armor Set and Shields
Item List: Equipment – Hand Tools
Item List: Equipment – Weapons, Arrows, & Ballista Bolts
Item List: Seeds

- Can start with one on a new map.
- Can be bought from the Merchant.

- Can start with one on a new map.
- Can be bought from the Merchant.

- Can start with one on a new map.
- Can be bought from the Merchant.

- Can start with one on a new map.
- Can be bought from the Merchant.

- Can start with one on a new map.
- Can be bought from the Merchant.

- Can start with one on a new map.
- Can be bought from the Merchant.

- Can start with one on a new map.
- Can be bought from the Merchant.

- Can start with one on a new map.
- Can be bought from the Merchant.
- Can be foraged from Wild Wheat with a Forager.
- Dependent on the Farmer’s Level – Amount Gain: 0-3
- Dependent on the Forager’s Level – Amount gain: (0 – 1)
Item List: Raw Materials
____________________________________________________________________________
All Items on this list could be boguht from Merchants.

- Farmer: Turnips, Pumpkins, Corn, Carrots, and Potatoes. Amount: (0 – 4)
- Forager Hunting/herder slaughtered: Sheep, Boars, and Chickens(1 – 5).
- Herding: Chickens Eggs – Amount: (1 – 5)
- Forager Gathering: Berry Bushes – Amount: ( 2 – 4).

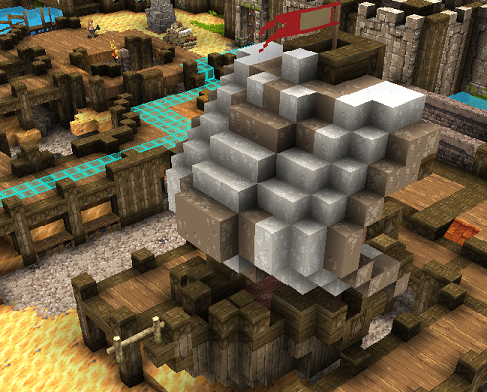
- Requires a level 1 Miner; Can be found on Depth 5 and higher.

- Requires a level 1 Miner; Can be found on any Depth.

- Cutting down trees,

- Requires a level 1 Miner; Can be found on coastal maps from Depth 5 to 1.


- When Herded: 6 – 10 Feathers
- When hunted/slaughtered: 3 Feathers

- Forager looting dead spiders: 0 -5 spider silk.

- Requires a level 5 Miner; Can be found on any Depth.

- Can be looted from dead Wolves: 2 – 4 Animal hide
- Can be obtained from hunting/slaughtering Boars(1) and Sheep(1).

- Can be looted from dead Wolves: 4 – 6 Animal Fur
- Can be obtained from hunting/slaughtering Boars(0 – 5).

- Can be looted from dead Wolves: 0 – 3 Fat
- Can be obtained from hunting/slaughtering Boars(2), Chickens(2), and Sheep(2).

- Can be gathered by Foragers – Amount: (0 – 1)
- Can be Farmed by using Wheat seed – Amount: (0-3)

- Can only be farmed by using Flax Seed

- Can only be farmed by using Cotton Seed

- Can only be hunted for 5 wool, or Herded for 8 – 11 Wool.

- Can be obtained from Berry Bushes and trees.

- Can be only be obtained from looting Skeletons, Goblins, and dead settlers/migrants.

- Requires a level 6 Miner; Can be found on any Depth.

- Requires a level 3 Miner; Can be found on any Depth.

- Requires a level 8 Miner; Can be found on any Depth.

- Requires a level 8 Miner; Can be found on any Depth.

- Requires a level 10 Miner; Can be found on Depth 5 to 1.

- Requires a level 10 Miner; Can be found on Depth 5 to 1.
____________________________________________________________________________
Item List: Processed Materials
Item List: Buildable Objects – Decorations
Item List: Buildable Objects – Doors
Item List: Buildable Objects – Furnitures
Item List: Buildable Objects – Lighting
Item List: Buildable Objects – Military Training
Item List: Buildable Objects – Siege Craft
Item List: Buildable Objects – Storage Buildings
Item List: Buildable Objects – Workshops
Game Mechanics: Flammable Blocks
Game Mechanics: How to – Farm
Game Mechanics: Game Mechanics: How to – Herding & Livestocks
Game Mechanics: Arrivals of the Migrants
______________________________________________________________________________

How to get more units? Well you offer them gold and they say okay! – Yeah right. To gain more settlers, you need to have high food levels and roads connected to at least one of the four edges of the map to a hall. This doesn’t mean you will gain settlers instantly. This is due to the Migrant spawn mechanics of the game.
◌ Migrant spawn mechanics:
- Will need food to feed population. 40 food per settler (over-eater traits changes this)
- Will need a town hall that connects to at least one of the four edges of the map.
- The Chances of the players getting settlers is by chance of spawning during morning to midday.
- Each edge connected to a hall with a road gives +24.99% chance to get a migrant.
Explanation: If one wants settlers to arrive at the town hall, the player will need 40 more than total food needed to sustain the population. For example, 8 settlers x 40 food = 320 + 40 = 360~. You need about 400 food in total to start seeing this mechanic in action. Over-eaters will affect the total amount of food needed.
Quote from Ethrel: There is a minimum food needed for migrants. You need to feed the ones you have as well as the migrant for at least a day in order for a migrant to even spawn.
settlers go through something like 40 food a day (I don’t have the exact number in front of me).
______________________________________________________________________________
Game Mechanics: Arrival of the Merchants
____________________________________________________________________________
Merchant Spawn Requirements:

- You will need roads connecting from the hall to at least one of edges of the map. Each road connected to a four side of the map to a hall will increase the spanw rate by 24.99%. Max: 99%
- Wealth points will also help in spawning more Merchants.
____________________________________________________________________________
Requirements to trade with a merchant:
- A Trader (Charismatic will give a trader free +5 levels to the profession)
- The old coins to buy items, and materials and resources to sell.
- Halls and roads connected: Cannot be removed at the moment, but can be replaced by designating another area.
Roads can be removed by clicking on design->roads, left click the area, hold shift + alt, and a yellow box will appear. Select the area to be deleted and left click again.
____________________________________________________________________________

____________________________________________________________________________
When ticked to buy: This means the player wants to buy the item, telling the trader to trade items/gold for that item.

When ticked to sell: This means the player wants to sell item to the merchants.
When the merchant arrives, a trade window will pop up. They will either buy or sell items that the player ticked.
If the pop-up window doesn’t come up, that means the trade had failed because of these reasons:
- You can’t buy or sell more than the current stoarage space allowed. Your storage is full.
- The merchant doesn’t want to buy your items
- He doesn’t have what you want.
- You have no gold for your trader to buy items off the merchant
***If the problem is lack of coins for purchasing or the merchant not having or wanting goods, a bubble will alert you to that and the system will move on.
____________________________________________________________________________
Ethrel Quote:
“The amounts are randomized based on the amount of product you are giving the merchant — either goods in the case of selling or coin in the case of buying. More goods usually equals larger trades. The only exception is that the merchant will never ever give you more than you can store, be it coins or otherwise.
You control how much you get by manipulating those variables. If you want more stuff, get more coin. If you want to sell more stuff, make more of whatever it is you are selling. Make sure you have the stockpile space to support trades in the goods you are trading.”
The importance of traders is that they can trade with merchant’s to get seeds that you do not have. You want to aim to get at least 1 seed of every type before you start buying random items.”
____________________________________________________________________________
Game Mechanics: Left-clicking options (Must know!)
-If you left click objects, you can choose to deconstruct.
-If you left click a bed, you can set ownership.
-If you left click a (n) enemy, you can choose to charge the enemy. If enemy is dead, you can dispose corpse or even gather its resources.
-You can left click animals to either domesticate them or slaughter them.
-You can left click trees and bushes, to either cut them down fully through stump or harvest its materials.